Final Project
WHALE CRIB MOBILE

Have you answered these questions?
Made your slide> 1920 x 1080 pixels with your name, project name, Fab Lab name, a photo/render/sketch of your project, a brief description of what your project is/does✅
Made a ~1 minute (25MB/1080p) video of you explaining your project✅
Made a separate Final Project page that summarises/documents your project✅
Included the BOM (Bill of Materials) for your project✅
Linked from this page to any weeks that you worked on your final project✅
Documented how you implemented system integration in your final project✅
Linked to your presentation.png and presentation.mp4; make sure they are located to the root of your website✅
Included all of your original design files in the archive (2D & 3D, board files & code). No external hosting of final project files - discuss file sizes with your instructor✅
Included the license you chose✅
Acknowledged work done by others✅
About the crib mobile: Dreamy Whale
What does it do?
This interactive crib mobile is specially designed for babies. It features a smart sound sensor that automatically activates NeoPixel lights and a servo motor when it detects crying. The activation lasts for 5 minutes, a duration that is short enough to avoid overstimulation while still helping to soothe the baby.
The light emitted is soft and diffused through a 4 mm thick white PLA shell, and the brightness level is calibrated to remain around 30 lux at a distance of 60 cm—within safe limits for awake infants. With its soft materials and gentle, safe design, it is ideal for daily use in the crib.
Simultaneously, a NeoPixel LED array is activated, producing randomized color changes that emit a low-intensity, eye-safe illumination. This creates a soothing visual environment conducive to relaxation. The system’s hardware and software integration ensures seamless synchronization between auditory input and motor/lighting response.
Beyond its immediate function as a crib mobile, Dreamy Whale features an adaptable design that allows it to serve as a decorative object beyond the infant stage, maintaining aesthetic appeal and functional relevance as the child develops.
Who's done what beforehand?
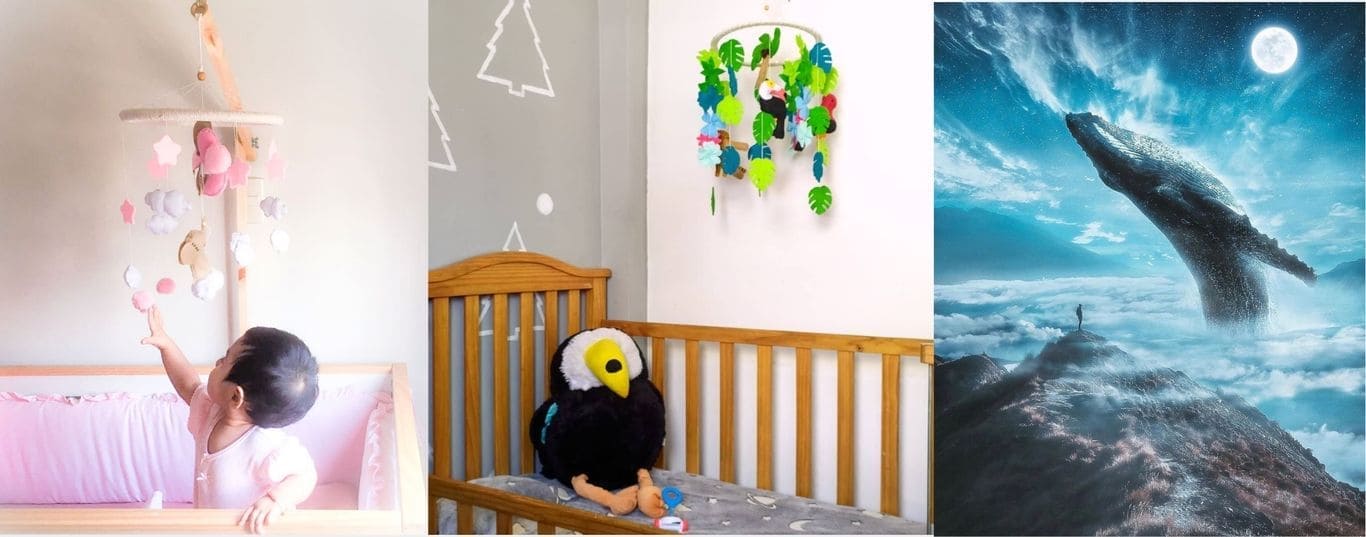
During my research, I did not find any project specifically related to an interactive crib mobile in the Fab Academy archive. However, I came across an artisanal kinetic sculpture of a whale, made of wood and mounted on a base with rod mechanisms that allow it to move when a lever is activated. You can view it at the following link: Pinterest. I couldn’t identify the designer with certainty, but the style is reminiscent of the work of artists like Kazuaki Harada, Dug North, or Keith Newstead, who are known for their wooden mechanical automata.
On the other hand, I found a very interesting project by J. Carlos Cano, who designed a smart crib with web control and an integrated camera. This project combines technology and functionality to enable remote monitoring and control of the crib, providing greater safety and convenience for parents.
Additionally, I found another relevant project outside of Fab Academy: the “Interactive Mobile with Sound Sensors and Bluetooth Control,” designed by Kattni Rembor for Adafruit. This mobile uses sound sensors to detect the baby's crying and responds with interactive lights and sounds controlled via Bluetooth, creating an enriching sensory experience for the baby.
That last project is the closest to what I am thinking of doing.
Both projects demonstrate how technology can be integrated into baby products to improve their well-being and make parents’ lives easier.
What did you design?
Structure
- Whale body: 2D and 3D design process, manufactured using 3D printing technology.
- Mechanism: 2D and 3D design process, fabricated with laser cutting technology.
- Crib mobile support structure: 2D and 3D design process, using both CNC Router and laser cutting technologies.
Electronics
- PCB: Designed to control the system’s input and output devices.
Programming
- Code: Developed using the Arduino IDE to operate the Xiao ESP32-C3 microcontroller.
What sources did you use?
For this project, I did not use any specific sources. I had previously designed the idea based on handmade crib mobiles, like the ones I usually create and that can be seen on my page Grullas Design. I also researched some projects online that use integrated electronic systems, but I didn’t find anything similar; the closest was the work of Kattni Rembor. However, I had the idea for the project in mind since I started the course at Academy.
What materials and components were used?
Where did they come from?
How much did they cost?
Materials Table
| Material |
Description / Use |
Source |
Unit Cost (USD) |
Quantity |
Total Cost (USD) |
| PLA Filament |
3D printed whale body |
Garage Lab (outsourced) |
2.6875 |
8 |
21.50 |
| Plywood (15mm) |
Crib mobile support structure |
Recycled from Fab Lab iFurniture |
3.27 |
1 |
3.27 |
| Acrylic (3mm) |
Detail part of the support |
Personal reuse (leftovers) |
8.17 |
1 |
8.17 |
| Steel Cable |
Hanging mechanism |
Common lamp wire |
1.635 |
2 |
3.27 |
| Xiao ESP32-C3 |
Main microcontroller |
Reused (Fab Academy - Cristian) |
19.05 |
1 |
19.05 |
| KY-038 Sound Sensor |
Detects baby’s cry |
Bora Electronics |
1.22 |
1 |
1.22 |
| G90 Servo Motor |
Movement mechanism |
Bora Electronics |
2.45 |
1 |
2.45 |
| NeoPixel LED Strip |
Lighting effects |
Fab Lab iFurniture |
|
30 leds |
11,50 |
| USB-C Cable |
Power and programming |
Street vendor |
|
1 |
4.08 |
| Jump wires |
Connections on PCB |
Bora Electronics |
|
9 |
1.09 |
| Total Project Cost (USD): |
75.60 |
What parts and systems were made?
The whale's structure was manufactured using 3D printing. Inside, a support column made of acrylic was integrated, fabricated using laser cutting technology. Automation plays a key role in this design: a servo motor generates a controlled mechanical movement that simulates a gentle “tick-tock” rocking motion.
This movement is carefully programmed to be slow and smooth, avoiding sudden jolts and contributing to a calm and harmonious sensory experience for the baby.
The crib mobile’s support was made from phenolic pine plywood, using a CNC router. The electronic board (PCB) was designed by me during the Fab Academy process; I chose a custom-made, smaller version that fits neatly inside the whale. Additionally, the structural rivets were also 3D printed, maintaining consistency in the use of digital fabrication technologies.
What processes were used?
Project Processes
- Concept and Design
- Computer-Controlled Cutting
- 3D Printing
- Electronics Design
- Electronics Production
- Embedded Programming
- Computer-Controlled Machining
- Input Devices
- Output Devices
- System Integration
- Final Testing and Documentation
What questions were answered?
- How will the system detect when the baby is crying?
Using a KY-038 sound sensor, which detects sound peaks and sends a signal to the microcontroller.
- How will the whale's movement be triggered?
The whale’s movement is automatically activated by a sound sensor connected to a microcontroller. When the ambient sound—such as the baby crying—exceeds a predefined threshold (for example, an analog reading above 800), the system interprets that the baby is awake or restless. In response, the microcontroller activates an SG90 servo motor.
This servo motor is connected to an internal structure shaped like an articulated spine, made of acrylic using laser cutting. The spine consists of two segments, one of which is connected by an eccentric joint that allows it to move independently in response to the servo motor’s motion. This setup produces a smooth, controlled “tick-tock” oscillating movement along the whale, designed to soothe the baby without startling them.
The entire system is programmed to operate for 5 minutes per cycle, preventing overstimulation and promoting a calm sensory environment inside the crib.
- How will the structure be safely mounted on the crib?
The support is made of recycled phenolic wood and acrylic, using secure joints and steel cable commonly used in hanging lamps for stability.
- What are the main safety considerations for a baby product?
Avoiding detachable small parts, using non-toxic materials such as PLA, ensuring structural stability, and enclosing all electronics to keep them out of reach.
- How will the electronic components be powered?
Via a USB-C cable connected to a wall adapter or portable battery.
- Can the NeoPixel LED strip be dynamically controlled?
Yes, the Xiao ESP32-C3 microcontroller can manage lighting effects in response to sound or pre-programmed animations.
- How will the system be programmed and tested?
The code will be written and uploaded using the Arduino IDE. Testing includes verifying the sound sensor input and motor/LED outputs.
- What materials or components have been reused or recycled?
Recycled phenolic wood from the Fab Lab, leftover acrylic from previous projects, a reused Xiao ESP32-C3 from a past Fab Academy project, and other components from the Fab Lab iFurniture.
- Will a custom PCB be fabricated?
Yes, a custom PCB will be designed and manufactured using screen printing techniques to keep the layout compact and organized.
- How will all components be integrated into a single functional system?
Through a custom PCB and embedded programming, with all components securely installed in or on the physical structure of the project.
What worked? What didn't?
The entire system functioned correctly; the electronic components worked exactly as programmed, operating reliably and as expected.
However, the movement of the whale did not turn out as clearly noticeable as I intended. After reviewing the design, I realized that one additional segment was needed to improve articulation and achieve smoother, more visible motion.
Currently, the whale is divided into four main body segments. Each of these was split in half to allow for the integration of internal mechanisms and installation of electronic components, resulting in a total of eight 3D-printed parts.
Ideally, the whale should have been divided into five main segments, also split in half, for a total of ten 3D-printed parts. This would have improved the structural articulation and made the movement more natural and visually effective.
How was it evaluated?
The project was evaluated through a thorough review of the design, functionality, and quality of the materials used. It was verified that all electronic components worked correctly as programmed, and the movement and physical structure of the mobile were analyzed to ensure they met the intended objectives. Additionally, the aesthetics and safety of the final product were considered.
What are the implications?
The implications of this project include the development of skills in digital design and manufacturing, especially in 3D printing, laser cutting, and CNC router use. Additionally, it contributes to learning how to integrate electronic systems into physical objects, which can be applied to future creations and more complex projects. It also highlights the importance of planning and iteration to improve a product’s design and functionality.
Functionality: Does it fulfill its purpose?
The WHALE CRIB MOBILE is an interactive electronic mobile designed for babies. Its main purpose is to provide sensory stimulation through soft lights and harmonious movement, automatically activating when it detects the baby's crying. This approach aims to create a soothing environment that supports the infant's sensory development. The integration of electronic components within the design optimizes both form and mechanical efficiency.
Environment: Is it sustainable and made from recyclable materials?
The project uses materials such as acrylic and phenolic plywood, both of which are recyclable. These were reused from leftover pieces available at the Fab Lab iFurniture, promoting circular economy practices and reducing waste. Although PLA was also used for 3D printing, this material is not recyclable in most contexts, which represents a consideration for future improvements in sustainability. Nevertheless, the project supports reuse and resource efficiency overall.
Social Impact: Who benefits, and does it address a need?
The main beneficiary of this project is the baby, as it provides a tool that stimulates the senses during a crucial stage of development. By incorporating technology that activates automatically in response to crying, the device also supports caregivers by offering a practical, automated calming solution. It addresses a real need in childcare, combining emotional well-being with technological innovation.
Aesthetics: What does it convey, and does it have symbolic value?
The design, inspired by the figure of a whale, conveys calmness and a connection to nature. The whale, a symbol of serenity and protection, adds symbolic value that enriches the emotional experience of the object. In addition to its functionality, the mobile stands out for its aesthetic appeal, allowing it to be kept as a decorative or sentimental object even after its initial purpose has been fulfilled.
Conclusion
The WHALE CRIB MOBILE is a project that successfully integrates functionality, design, technology, and social impact. By using recyclable and reused materials, it promotes environmental awareness. Although some components are not yet recyclable, the overall approach reflects an innovative and responsible solution in the field of early childhood development.
Concept
Dreamy Whale was born from a very personal inspiration. I’ve been creating crib mobiles by hand for some time now, and it’s something I truly enjoy. While browsing online, I came across a beautiful automaton whale that completely captivated me. Its smooth, fluid movement inspired me to design a crib mobile shaped like a whale.
I love whales—their form, their rhythm, and the sense of peace their movement conveys. That’s when I thought: why not bring this harmonious motion into a baby’s space? I decided to combine my passion for handmade creations with digital tools to create a sensory experience designed to comfort babies.
The main goal of this design is to transmit calm and comfort by gently responding to the baby’s needs. A sound sensor detects when the baby cries and activates an SG90 servo motor, which produces a soft “tick-tock” rocking motion. At the same time, NeoPixel LEDs emit a soft, randomized glow that is safe for the baby’s eyes and creates a magical, relaxing atmosphere.
The whale is 3D printed in 4 mm thick opaque white PLA, which diffuses the light gently without being harsh. Inside, there is an articulated spine-like structure made from laser-cut acrylic that allows the motion to flow naturally. One of the segments uses an eccentric pivot point that allows it to move independently, without needing a second motor—adding efficiency and elegance to the mechanism.
Dreamy Whale is more than just a smart crib mobile; it’s a meaningful piece that blends emotion, technology, and thoughtful design. Its charming aesthetics allow it to remain in the child’s room even after the crib stage—as a decorative element or a sentimental keepsake.
A whisper, a gentle sway, a soft light... and the dreamy little whale watches over the baby’s sleep.
Project Phases
| Phase |
Start Date |
End Date |
Progress |
| 1. Concept and Design |
Jan 30 |
May 15 |
100% |
| 2. Computer-Controlled Cutting |
May 16 |
May 16 |
100% |
| 3. 3D Printing |
May 1 |
May 20 |
100% |
| 4. Electronics Design |
Feb 25 |
Feb 28 |
100% |
| 5. Electronics Production |
Mar 14 |
Apr 15 |
100% |
| 6. Embedded Programming |
Feb 15 |
May 8 |
100% |
| 7. Computer-Controlled Machining |
May 16 |
May 21 |
100% |
| 8. Input Devices |
Mar 22 |
Apr 30 |
100% |
| 9. Output Devices |
Mar 29 |
Apr 5 |
100% |
| 10. System Integration |
May 10 |
May 30 |
100% |
| 11. Final Testing and Documentation |
May 20 |
Jun 04 |
100% |
Legend:
- Completed (100%)
- In Progress / Not Completed (<100%)
Design Process and Manufacturing
1. Concept and Design
My final project stems from curiosity and the desire to create something truly meaningful. At Grullas Design, I specialize in crafting both handmade and digitally fabricated objects, with the goal of bringing products to life that connect with people. One of the items I am most passionate about creating is crib mobiles for babies. Among the animals I love the most are whales, whose elegance and majesty have always inspired me.
From there, the idea for my final project was born: to create an electronic toy that goes beyond just being a simple crib mobile. I want it to be an interactive object that stimulates the baby through their visual sense, combining light and movement in an attractive and relaxing way.
The idea is for this toy to have a smooth and harmonious movement, like a whale swimming in water, but instead of moving freely, it will be suspended from a fixed point, such as the ceiling or a stand. What makes this toy exciting is that when it detects a baby's cry, it will automatically activate: it will begin to move slowly and a soft light will turn on, ensuring that it does not harm the baby’s vision.
My primary user for this project is babies. I want this toy not only to provide visual stimulation but also to create a calming atmosphere, helping them enjoy a sense of calm as they watch the movement and light, contributing to their sensory development.
Sketches and Tentative schedule
Here I present some sketches of the project idea. Initially, I designed whales that would be suspended by pulleys. However, after some feedback from my instructor Cristian and Roberto, we concluded that it would be better to integrate all the electronic components inside the whale, making it the central object that holds the "soul" of the project.
I have created a tentative schedule to organize myself and make progress with the final project, while I continue learning to use the tools provided by the Fab Academy program.
In week 02, I worked with Blender to explore how the crib mobile concept would look. This was an important step in the project process, as it allowed me to visualize the initial idea and consider the overall design.
Later, in week 15, I focused on refining the design, exploring the mechanism in detail, and completing the final structure of the crib mobile.
During my research, I did not find any project specifically related to an interactive crib pendant at Fab Academy. However, I did discover a very interesting project by J. Carlos Cano, who designed a smart crib equipped with web control and a camera. This project integrates technology to remotely monitor and control the crib, providing enhanced safety and convenience.
Additionally, I found another relevant project outside of Fab Academy: the “Interactive Mobile with Sound Sensors and Bluetooth Control,” designed by Kattni Rembor for Adafruit. This mobile uses sound sensors to detect the baby's crying and responds with interactive lights and sounds controlled via Bluetooth, creating an enriching sensory experience for the baby.
That last project is the closest to what I am thinking of doing.
Both projects demonstrate how technology can be integrated into baby products to improve their well-being and make parents’ lives easier.
2. Computer-Controlled Cutting
For the laser work, I designed the mechanism that will go inside the whale as part of the crib mobile. This mechanism will be made using laser cutting and will be fabricated in acrylic material.
For the whale's internal mechanism, I chose to use translucent acrylic. In this process, I applied the knowledge I had acquired about laser cutting.
I liked how it looks; aesthetically, it closely matches what I had envisioned.
As part of the design process, I had to redesign the internal structure to achieve better support and stability for the components. This new structure was also made from acrylic, maintaining material consistency throughout the project.
This technology was implemented during Week 3, where I had the opportunity to apply and put into practice the knowledge I had acquired up to that point.
3. 3D Printing
As part of the progress toward printing the figure, I started with modeling in Rhinoceros. From there, I created the 3D molds for the casting process, which allowed me to obtain the final pendant figure.
The topic of 3D printing was covered in Week 5, and it served as a foundation for me to start envisioning what the project would look like. From there, I was able to better visualize the parts, their shapes, and how they could be assembled.
The 3D-printed parts include the main whale figure.
the rivets, and some internal supports specifically designed to facilitate assembly and secure the electronic components.
After the modeling, I proceeded with the 3D printing of 8 pieces, which, when assembled, formed the shape of the whale. I performed the 3D printing using FDM technology.
You can see the full process in the link for Week 15.
4.Electronics Design
During Week 6, I learned how to design an electronic board. It took time and effort, but I was able to successfully complete it.
The process was challenging but also very rewarding, as it allowed me to apply everything I’ve learned so far.The board I designed will be an important component of my final project, so this progress marks a key step in its development.
🔗 You can see more details here: Week 6 – Electronics Design
5. Electronics Production
During Week 8, we were assigned the task of fabricating an electronic board, applying the knowledge we had previously gained in PCB design and the use of tools like design software and milling machines.
The process included preparing the design file, setting up the milling parameters, and using the mini milling machine to physically produce the board.
I successfully fabricated my own board, which was a very rewarding experience and helped me better understand the electronic production process.
🔗 You can see more details here: Week 8 – Electronics Production
6. Embedded Programming
During Week 4 of the Fab Academy, I researched two microcontrollers. One of them was the XIAO RP2040, which I initially planned to use for my final project. However, as the development progressed, I found that the XIAO ESP32-C3 was a better fit for my needs, since its configuration in the Arduino IDE was less complicated compared to the RP2040. For this reason, I ultimately chose to use the ESP32-C3 microcontroller.
7. Computer-Controlled Machining
The technology I’m using is machine-controlled, as I am designing a hanging arm or support for a crib. Through this arm, the cable that connects the object (a decorative whale) to the power outlet will run, allowing it to be safely and aesthetically powered.
You can see the development process in Week 7
I created a design using Rhinoceros software, taking into account the standard dimensions required for a crib mobile support. To better visualize the design and perform the internal pocketing of the support structure, it was necessary to position the whale in its final location. This allowed me to precisely determine the routing of the cables that would connect the different components.
I then moved on to the CNC router process. In the photograph, you can see the internal pocketing done on the piece.
Next, I sanded the piece and applied a coat of lacquer diluted with a bit of thinner. This step helped seal the wood's pores, preparing the surface for direct spray paint application.
Next, I inserted the cables into the grooves in the wood to conceal them and keep them out of sight.
Subsequently, I joined the two pieces with glue and waited 12 hours for it to dry.
Once the pieces were assembled, I covered the whale with paper to prevent it from getting stained and started the painting process.
8. Input Devices
For the input component, I initially considered using a touch sensor, but along the way I decided to switch to the KY-038 sound sensor. With the sound of the baby crying, this sensor would activate the mechanism, turning on both the servo motor and the LEDs.
9. Output Devices
The output device will be activated by the KY-038 sound sensor, which will turn on the SG90 servomotor and the neopixel. This will cause the whale to light up like a lamp, but with a soft, diffused light that is not invasive for the baby. The idea is to create a calming atmosphere, while the whale's movement serves as a visual distraction, helping to soothe or entertain the baby.
10. Electronic Programming
#include <ESP32Servo.h>
#include <Adafruit_NeoPixel.h>

// Pins
#define SERVO_PIN 2
#define LED_PIN 5
#define SOUND_SENSOR_PIN 4

// Configuration
#define NUM_LEDS 39
#define SOUND_THRESHOLD 800

Servo myServo;
Adafruit_NeoPixel strip(NUM_LEDS, LED_PIN, NEO_GRB + NEO_KHZ800);

// States
bool isRunning = false;
unsigned long startTime = 0;
const unsigned long activationDuration = 5UL * 60UL * 1000UL; // 5 minutes

// Servo "tick-tock" control
unsigned long lastServoMove = 0;
const unsigned long tickTockInterval = 800;  // 0.8-second pause
bool moveUp = true;

// NeoPixel
unsigned long lastNeoPixelUpdate = 0;
const unsigned long neoPixelInterval = 1000; // every 1 second

void setup() {
  Serial.begin(115200);

  // Initialize servo
  myServo.attach(SERVO_PIN);
  myServo.write(0);

  // Initialize NeoPixel
  strip.begin();
  strip.setBrightness(100);
  strip.show();

  // Sensor
  pinMode(SOUND_SENSOR_PIN, INPUT);
}

void loop() {
  unsigned long currentTime = millis();

  if (!isRunning) {
    int sound = analogRead(SOUND_SENSOR_PIN);
    Serial.println(sound);

    if (sound > SOUND_THRESHOLD) {
      isRunning = true;
      startTime = currentTime;
      lastServoMove = currentTime;
      lastNeoPixelUpdate = currentTime;
    }
  } else {
    if (currentTime - startTime < activationDuration) {

      // Tick-tock movement: 0° ↔ 10° with pause
      if (currentTime - lastServoMove >= tickTockInterval) {
        if (moveUp) {
          myServo.write(10);
        } else {
          myServo.write(0);
        }
        moveUp = !moveUp;
        lastServoMove = currentTime;
      }

      // Change NeoPixel colors randomly
      if (currentTime - lastNeoPixelUpdate >= neoPixelInterval) {
        turnOnRandomNeoPixels();
        lastNeoPixelUpdate = currentTime;
      }

    } else {
      turnEverythingOff();
      isRunning = false;
    }
  }
}

void turnOnRandomNeoPixels() {
  for (int i = 0; i < NUM_LEDS; i++) {
    int r = random(0, 256);
    int g = random(0, 256);
    int b = random(0, 256);
    strip.setPixelColor(i, strip.Color(r, g, b));
  }
  strip.show();
}

void turnEverythingOff() {
  strip.clear();
  strip.show();
  myServo.write(0);
  Serial.println("5 minutes finished, turning everything off.");
}
To develop the electronic programming, I generated a prompt in ChatGPT with the following request:
"I need a program for ESP32-C3 that uses a KY-038 sound sensor to detect a baby's cry. When the sound level exceeds a threshold (e.g., 800), the system should activate for 5 minutes. While active, a servo motor should oscillate between 0° and 8° every 500 milliseconds, and a NeoPixel strip with 58 LEDs should change color randomly every 200 milliseconds. After 5 minutes, the system should automatically shut down, stopping the servo and turning off the LEDs."
Week 04
During implementation, I tested various sound thresholds (10, 100, 200, and 800). Eventually, the value of 800 worked properly.
I encountered some challenges. Initially, the servo motor didn’t operate correctly due to coding issues. Later, the NeoPixels would light up but wouldn’t change colors randomly. The issue turned out to be hardware-related—a partially broken wire. I resolved it by trimming and resoldering the connection, after which the system worked as intended.
The final result matched exactly what I had planned.
11. System Integration
I'm now approaching the final stage of the project, and the whale will serve as the container for my system. I had to design the internal mechanism and plan how the electronic system would be integrated inside the object, ensuring that everything fits both functionally and aesthetically.
You can see the full process in the link for Week 15.
The system integration will be visible internally, as shown in the photograph.
I installed the appropriate components, and the programming worked perfectly!
Now the proper electronic operation of the system can be observed.
I had to organize the cables and tie some of them to keep everything neat. Now you can see how the assembly looks.
Externally, it will appear neat and clean.
Then I started assembling the parts, fitting the whale together with the internal components. Now the whale is fully loaded!
12. Final Testing and Documentation
As part of the testing process, I 3D-printed a small sample to check that the components fit correctly and had the right dimensions. Everything seemed to align as expected, so I will confidently continue with the development.
As part of the testing, I checked the components to make sure they were working properly.
Once assembled, I couldn’t test it with babies since my children are older, but I conducted a test by securing it to a table. The photo shows the scale of the complete assembly.
Of course, the photo with the special model couldn’t be missing.
And now, a gentle view of the object in the dark, showcasing how its soft, warm light creates a cozy and calming atmosphere.
What did I learn?
I really liked the result because it’s not just a crib mobile, but also serves as an object of contemplation and calm. The white colors convey peace, and when the whale lights up, it adds a playful and tender touch thanks to the random colors of the NeoPixel.
What did I learn?
To be honest, I learned a lot. Before taking the course, I thought it might not be necessary for me since I already had some knowledge of digital fabrication. But once I decided to take it and went through the process, I learned much more than I expected and I don’t regret the decision. Every week I discovered something new—completely different knowledge from what I knew in my field. I loved learning electronics; although I still have much to learn, what I did learn fascinated me and helped me a lot to bring the idea I had in mind to life.
The original idea for the final project didn’t change in essence since I started, but there were improvements in the design because every week I learned something new and new ideas came to me to implement. I even learned how to model curved shapes in 3D, since I’m not familiar with parametric modeling, and that took me some time to figure out how it would work. The mechanical part also took time to think through, but each week new solutions came to mind that I was able to solve. At the beginning, I was afraid it wouldn’t turn out well, but now I feel very happy because the result was satisfying. Honestly, at first, I thought it would be something more basic, but I managed to do it.
Access to files
remache.gcode
finalmecanis
portacolgante.dxf
whale
NeoPixel_Servo_sound.ino
week06.kicad_pcb
week06.kicad_pro
week06.kicad_sch