
This third week as a FabAcademy student has been a truly enriching experience, developing design skills with specialized software for digital manufacturing and the latest technologies that connect this science.
Group Assignment:
- Do your lab’s safety training
- Characterize your lasercutter’s focus, power, speed, rate, kerf, joint clearance and types.
- Document your work to the group work page and reflect on your individual page what you learned.
Individual Assignment:
- Design, lasercut, and document a parametric construction kit, accounting for the lasercutter kerf, which can be assembled in multiple ways.
- Cut something on the vinyl cutter.
Have you answered these questions?
- Linked to the group assignment page ✅
- Explained how you created your parametric design. ✅
- Documented how you made your press-fit construction kit. ✅
- Documented how you made something with the vinyl cutter. ✅
- Included your original design files. ✅
- Included hero shots of your results. ✅
Group Assignment
- Do your lab’s safety training
- Characterize your lasercutter’s focus, power, speed, rate, kerf, joint clearance and types.
- Do your lab’s safety training
- Document your work to the group work page and reflect on your individual page what you learned.
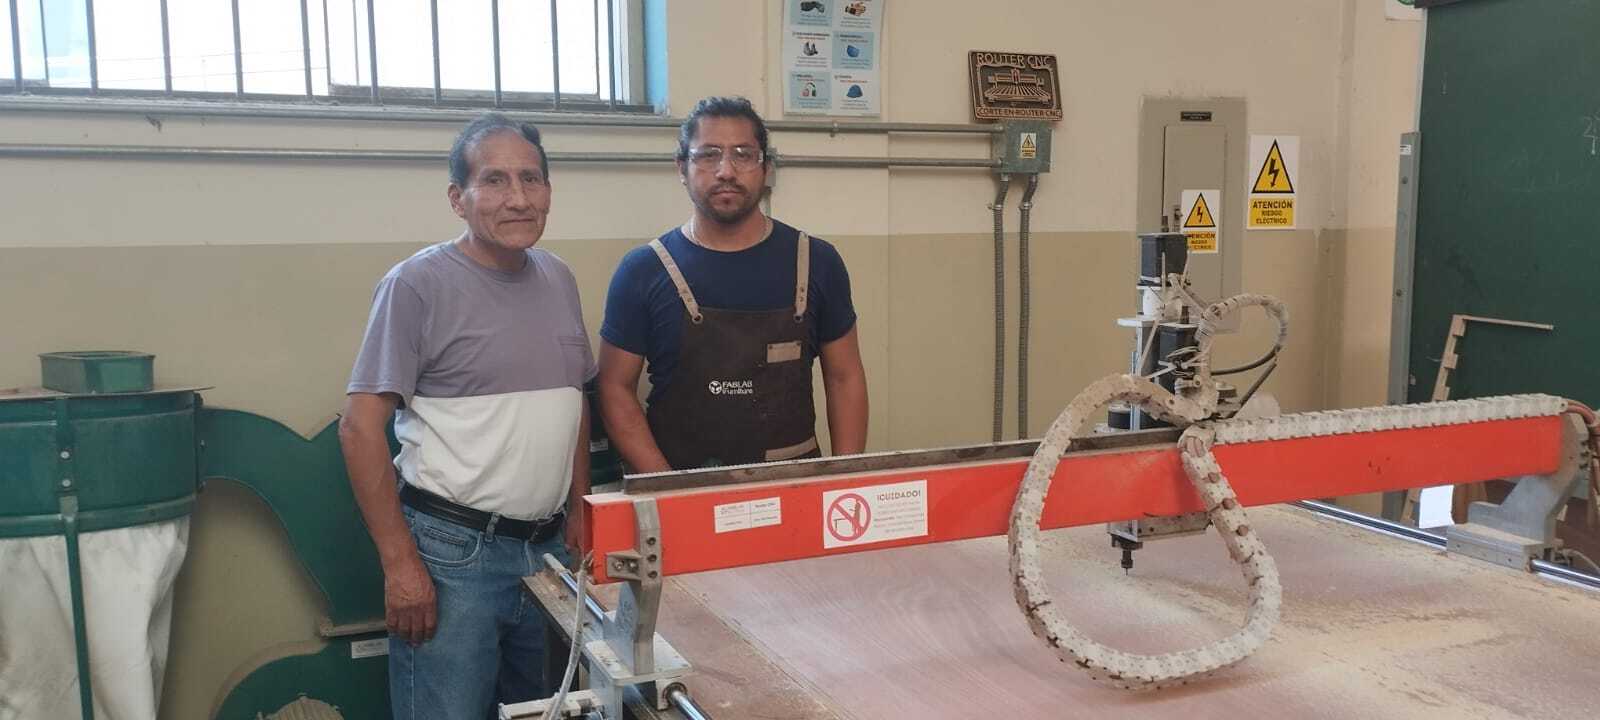
On this occasion, I visited the iFurniture Fab Lab, located in Lima. I'm currently in Huancayo. Thanks to the visit, I met my colleagues Evelin Cuadrado and Cristian Loayza. Once near the iFurniture Fab Lab, Evelin explained the safety measures required in the lab. For more details, click the button above.
It was a very pleasant experience to be able to carry out this task at FabLab iFurniture, especially for the opportunity they gave me to share knowledge and at the same time become familiar with the equipment and machines in the digital manufacturing laboratory. I am grateful for the opportunity to participate in this unique experience and the lessons learned, which will undoubtedly enrich our future projects in the Fab Lab. I also had the opportunity to visit the Continental University FabLab to further develop this task.
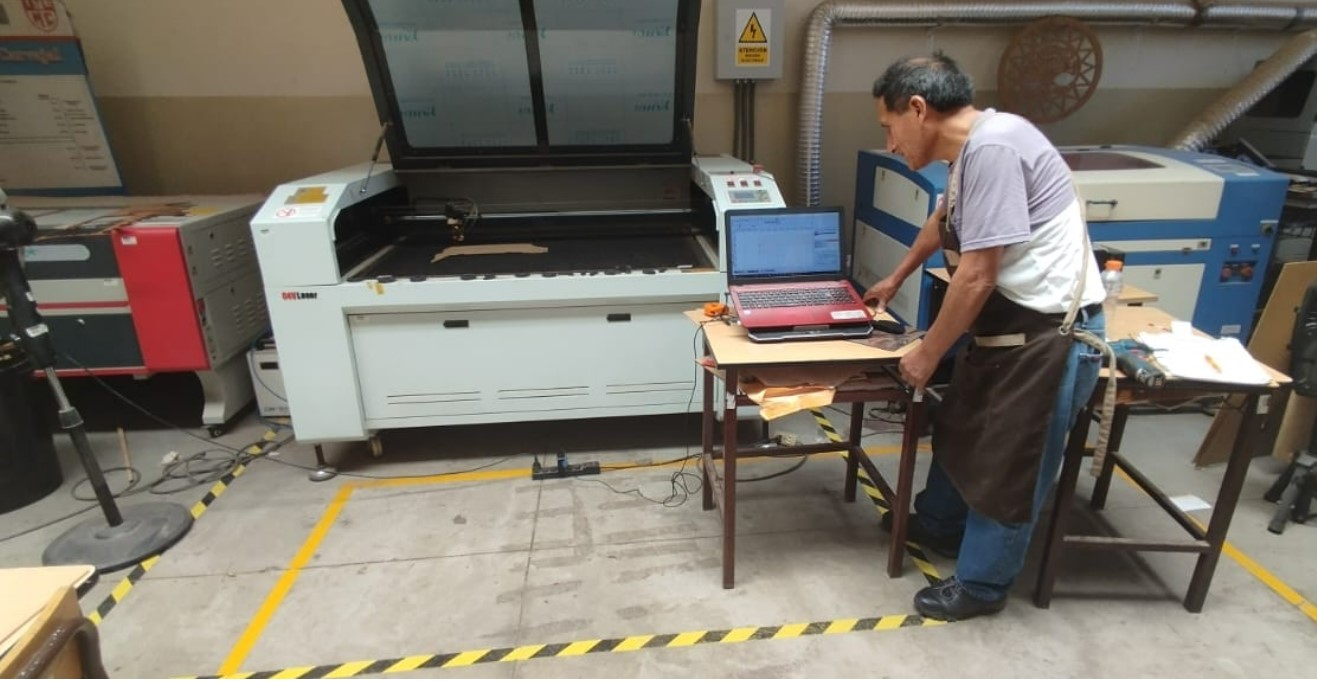
Describing the Laser machine
The purpose is to provide detailed instructions, taking into account the technical specifications of the GCC MG380 hybrid laser machine, with the aim of performing computer-controlled cuts, taking into account cutting parameters such as speed and power, as well as the calibration of the laser head with respect to 3 mm MDF material.
Previous requirements
Before you begin, you should consider the following requirements:
- Power Supply
- Ventilation / Exhaust System
- Install the required GCC software
- Power, Speed, Frequency Settings: For cutting 3mm MDF(usually between 40W and 100W)
Procedure
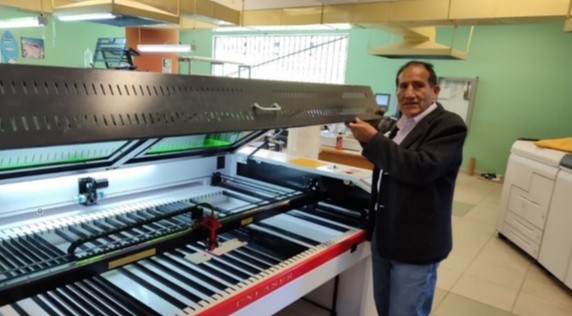
Laser Head Height Calibration
- Before making any adjustments the machine must be turned off
- Place the material (3mm MDF) on the workbed.
- Place the focusing tool between the head and the material.
- Adjust the head height (Z-axis) manually until it lightly touches the tool.
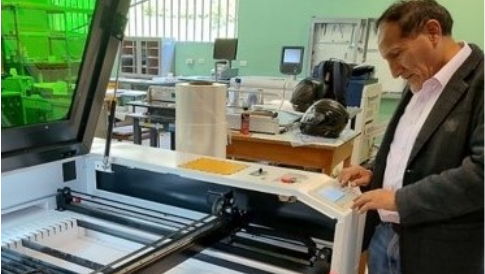
Identification of Cutting Parameters
- Turn on the laser machine and make sure it is connected to the computer with the control software open.
- Use the designed die to make cuts in the MDF material, with speed parameters from 10 mm/s to 100 mm/s and powers from 10% to 70% respectively.
.jpeg)
.jpeg)
This was the result of the first test carried out with the GCC MG380 hybrid laser machine.
.jpeg)
.jpeg)
Reflexiones
- Safety in the use of CNC machines is neither optional nor secondary. It is a fundamental pillar that protects lives, optimizes processes, and strengthens professional ethics. Promoting a culture of prevention is the responsibility of every technician, engineer, or student who interacts with this technology.
- For this reason, workplace safety is important before operating any machine, especially the CNC laser, which is a precise and powerful machine. Proper training and the use of personal protective equipment (PPE) are crucial to prevent accidents.
- Before using it, check the machine. For example, the C4V 1390 laser machine has specific requirements that require precise power and speed settings, depending on the material being worked. Adjustment and testing process: It is important to perform power tests, which are specified within the permitted parameters, to perform safe and high-quality work, optimize results, and ensure cutting precision.
Individual task
- Design, lasercut, and document a parametric construction kit, accounting for the lasercutter kerf, which can be assembled in multiple ways.
- Cut something on the vinyl cutter.
Kit Parametric
1.-Parametric Module Design
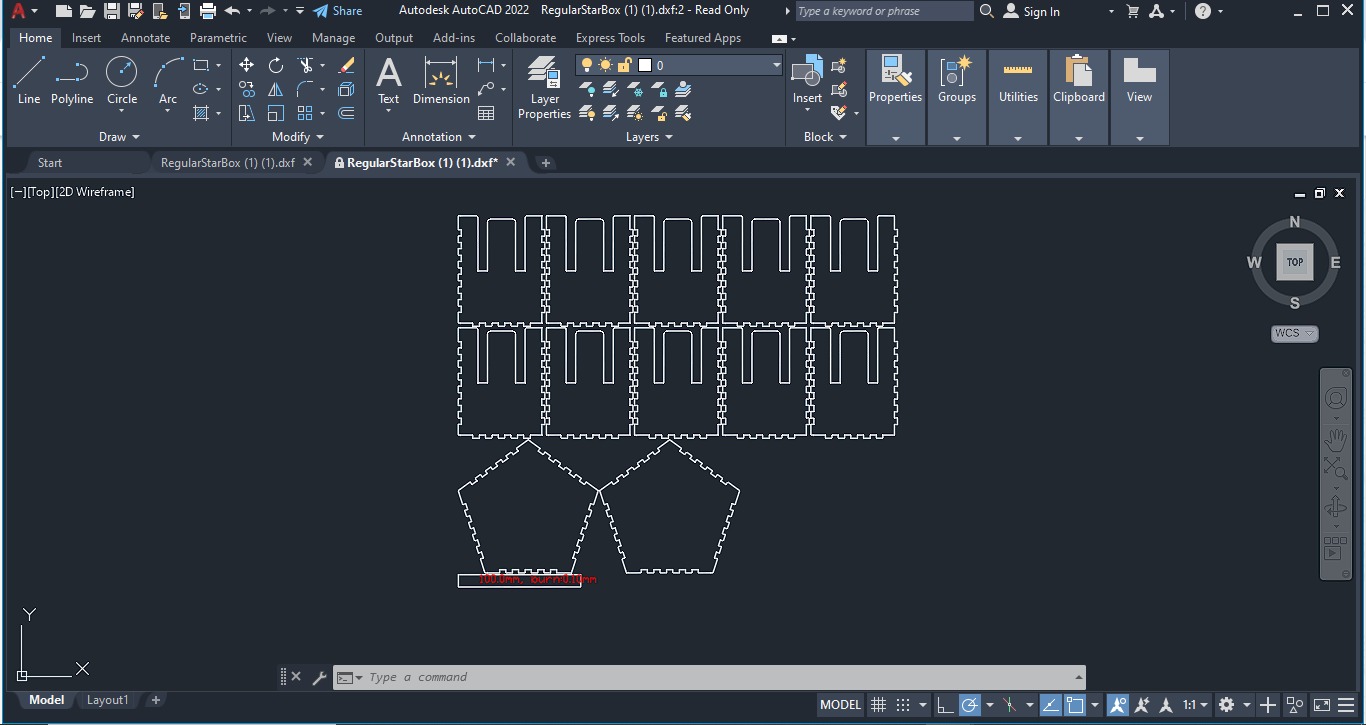
For the parametric kit design, I chose to design a cube house. I created this design using AutoCAD software, in which I applied finger-joint parametric modeling. The finished design was then imported into LightBurn, a design, editing, and control software for the laser cutter. To download it, click the link below.lighburn
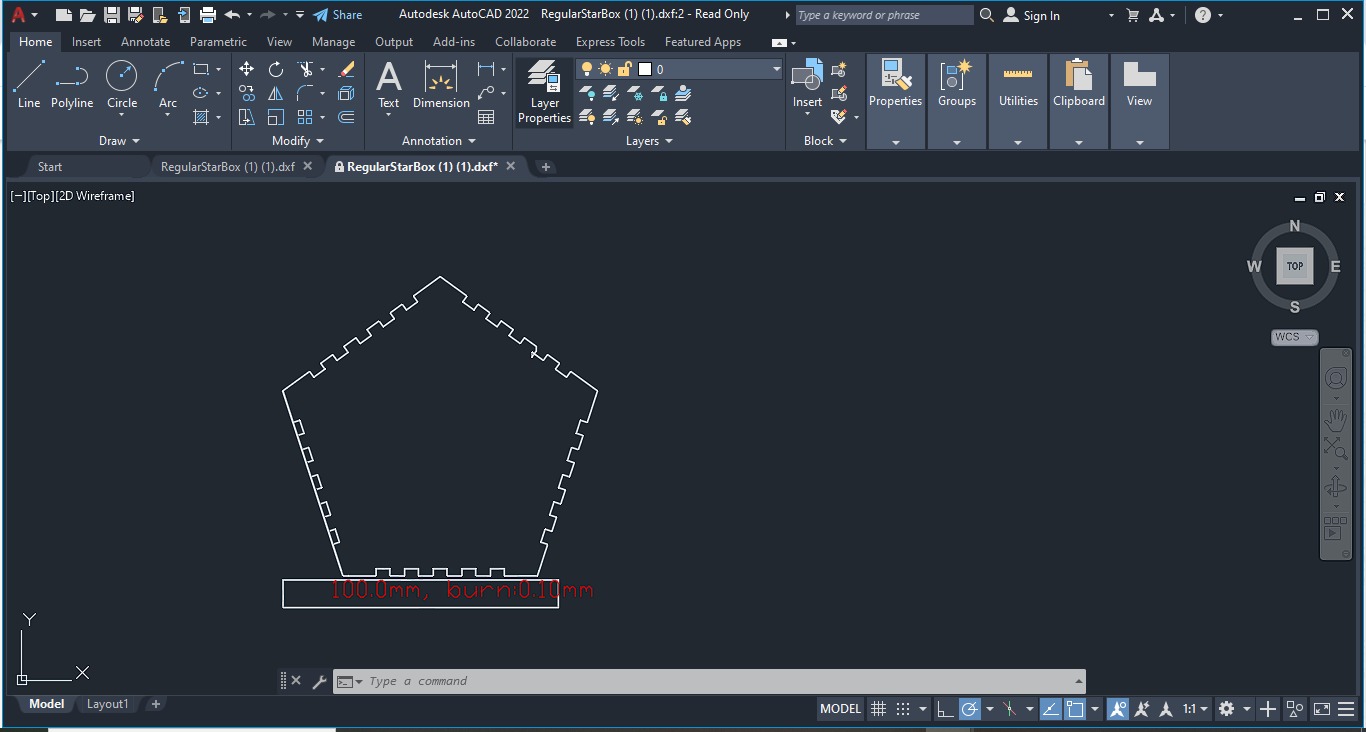
first pentagon piece:
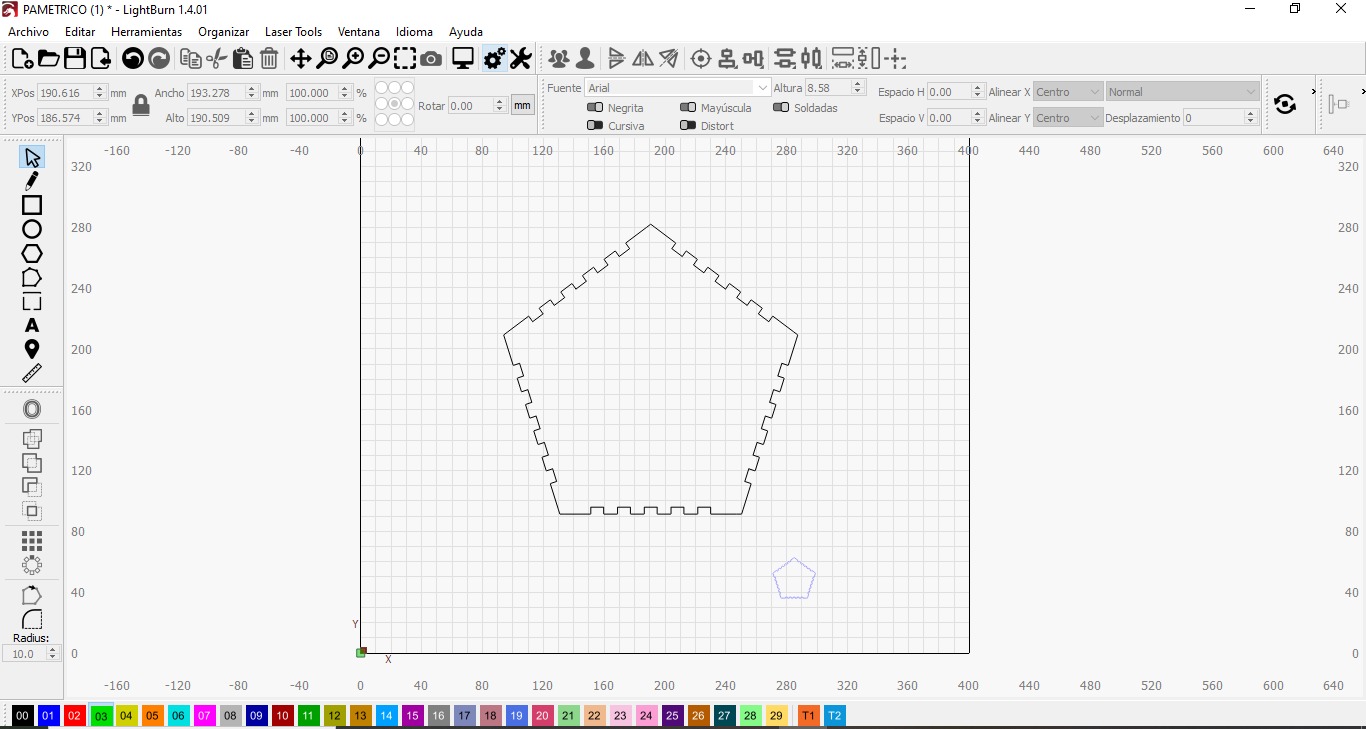
We use the polygon tool to create the first piece. This creates a regular pentagon. To apply geometric constraints, we go to the Parametric tab and select Geometry. This will make the sides equal, as well as the vertices connected, thus manipulating their dimensions and properties.
.jpeg)
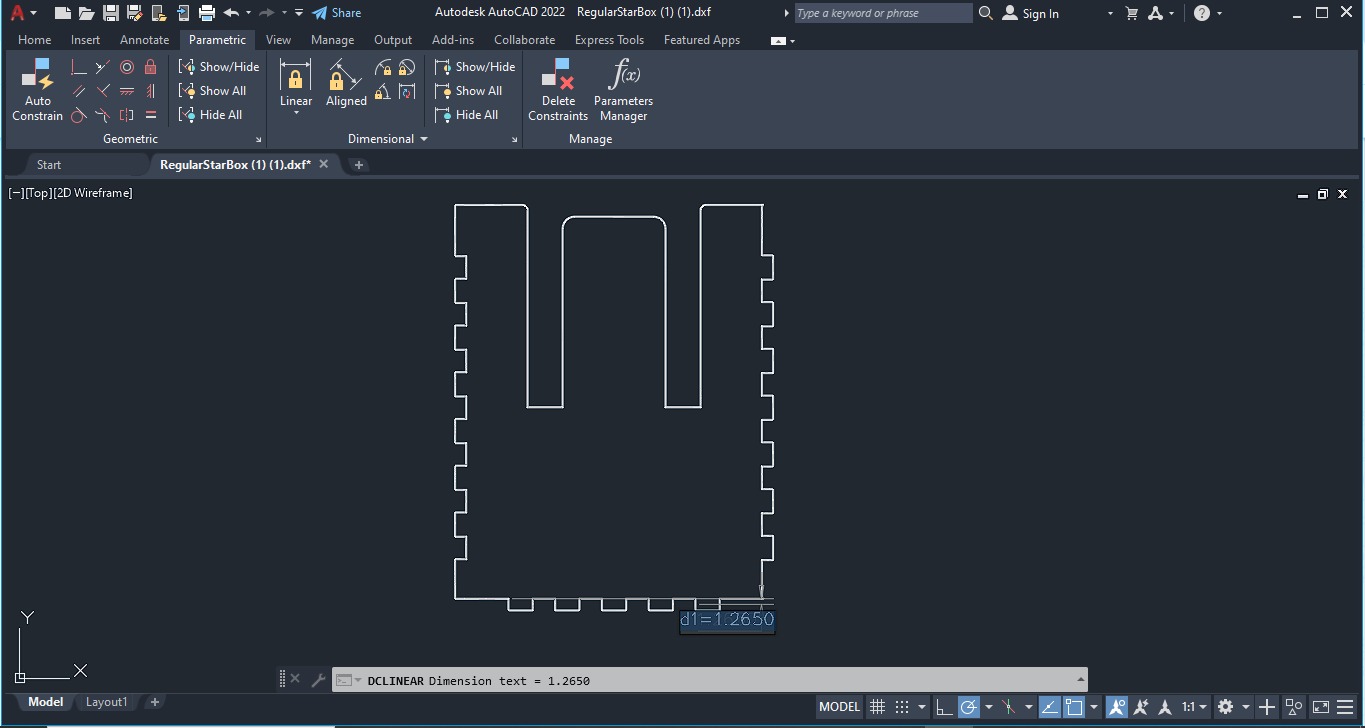
finger joints for laser cutting
Sidewall with Finger Joints for the Pentagon
The sidewall is designed as a rectangular piece whose base length matches the length of one side of the pentagon. It features finger joints that mirror those on the pentagon, creating a precise male-female fit.
This inverted pattern ensures that the teeth of the wall interlock perfectly with those on the pentagon, providing structural stability without the need for glue or screws. The number and width of the fingers are controlled parametrically, adapting automatically to any changes in side length or material thickness.
.jpeg)
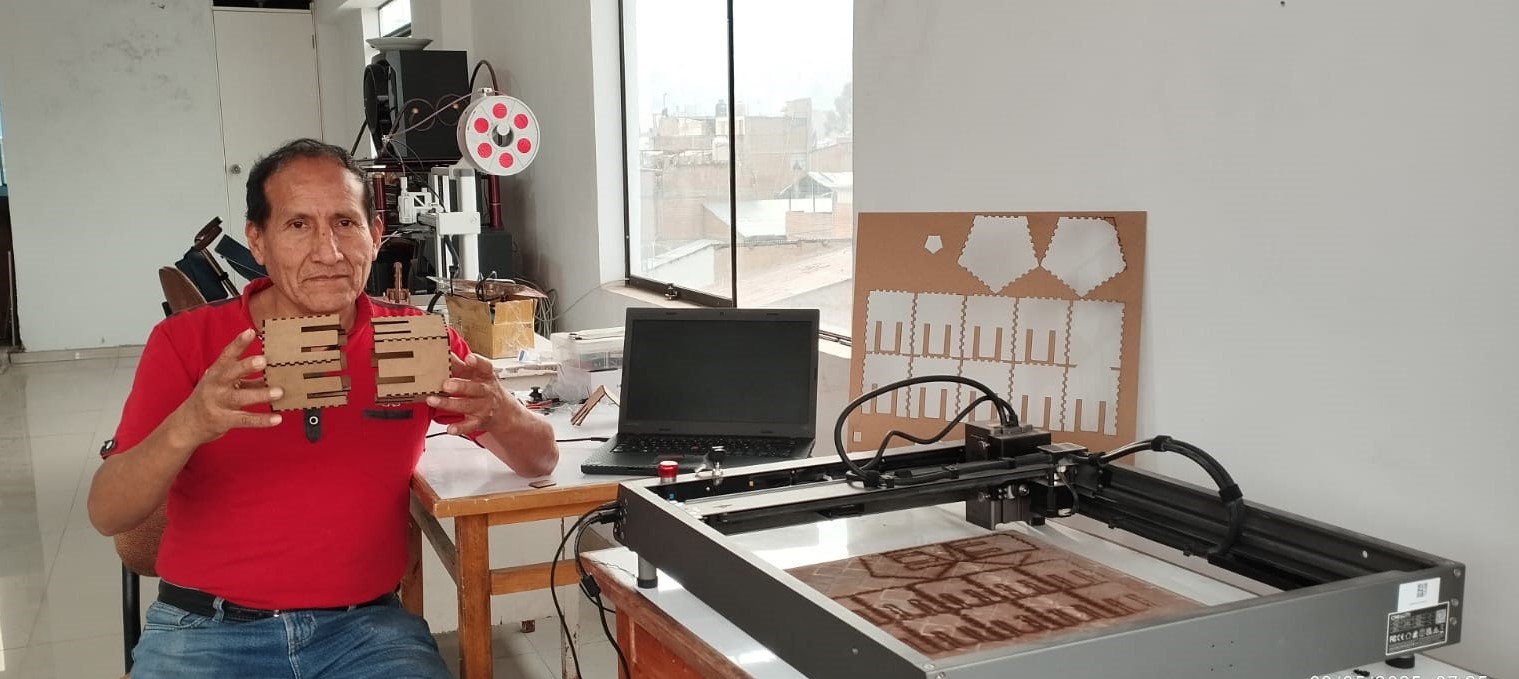
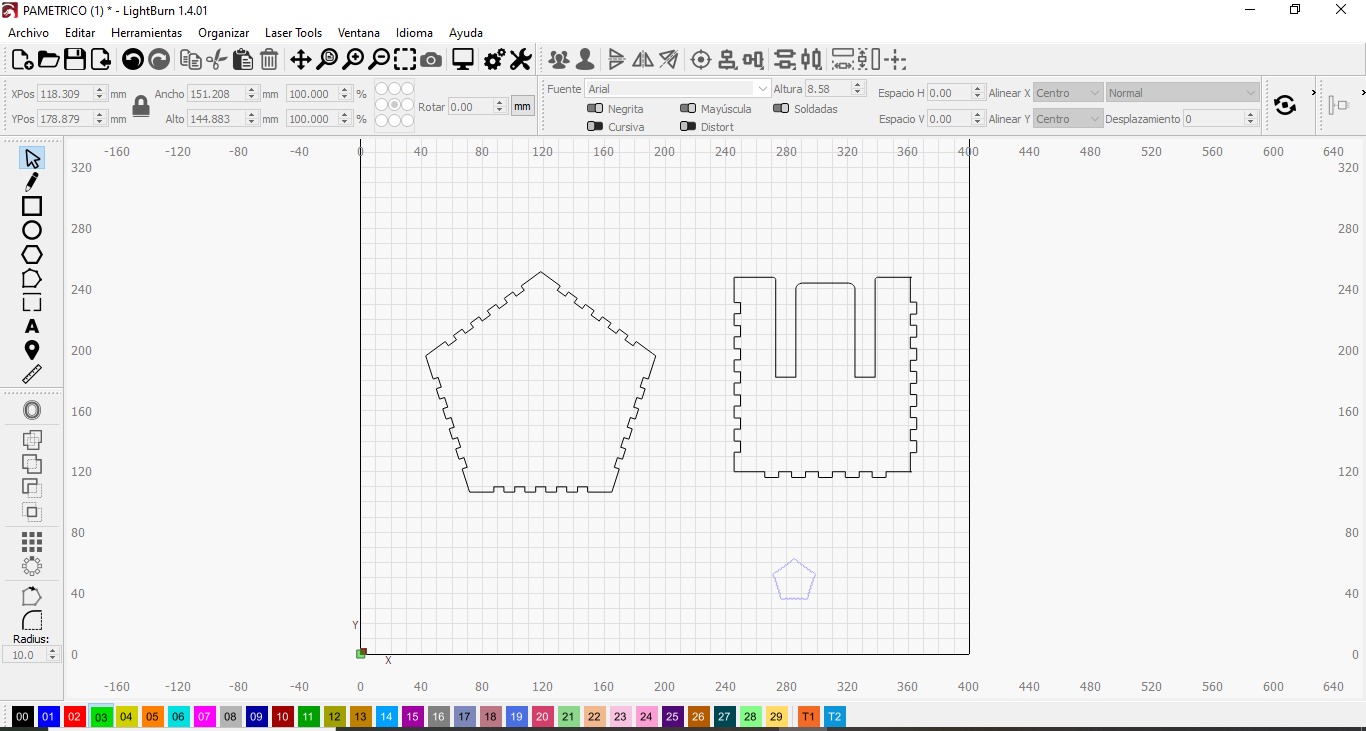
Once the parametric design with the finger joints is complete, it is successfully exported for use on a laser cutting machine.
.jpeg)
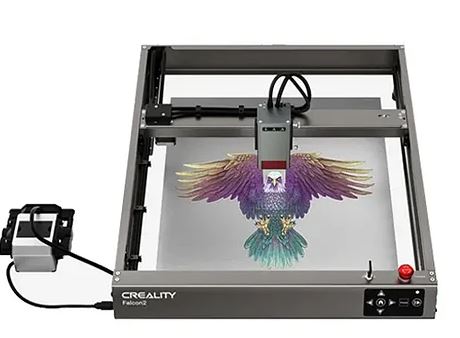
Cutting process with Creality Falcon2 laser machine
Characteristics
- Model: Creality Falcon2 (22W)
- Engraving area: 40x41.5cm
- Optical power: 22W
- Engraving speed: 25000mm/min
- Dot size: 0.1mm
- Support materials: Cardboard, leather, fabrics, wood, rubber, bamboo, acrylic, plastic, metal
- Wavelength: 455±5nm
- Focusing method: Fixed focus laser
For the cutting process, I used LightBurn software to preprocess the images to be cut with the Falcon 2 machine. I configured the parameters according to my needs. In this case, I set a cutting speed of 600 mm/s and a laser power of 1.00%, ideal for cutting 3 mm thick cardboard. These specific settings ensure a clean and precise cut, optimizing the production process and guaranteeing high-quality results
Cutting settings
.jpeg)
.jpeg)
The cutting process is simple and straightforward. You just need to configure the cutting parameters according to your needs. Next, select the starting point for the cut, choose the workpiece you want to cut, and click the "Start" button. The laser will then begin cutting automatically and precisely.
.jpeg)
.jpeg)
Once we have the pieces cut, the next step is to assemble the pentagons and side walls, as well as the couplings to form the complete figure. This assembly process is essential to joining all the pieces correctly and achieving the desired final result.
.jpeg)
.jpeg)
.jpeg)
.jpeg)
.jpeg)
.jpeg)
.jpeg)
.jpeg)
.jpeg)
.jpeg)
.jpeg)
.jpeg)
.jpeg)
.jpeg)
.jpeg)
.jpeg)