week7. Computer-Controlled Machining
Assignment
Group assignment
- do your lab’s safety training
- test runout, alignment, fixturing, speeds, feeds, materials, and toolpaths for your machine
Individual assignment
- make (design+mill+assemble) something big (~meter-scale)
- extra credit: don’t use fasteners or glue
- extra credit: include curved surfaces
Group assignment
For more information about group projects, please see the group project page on the FabLab Kannai website.
Group assignment page is here
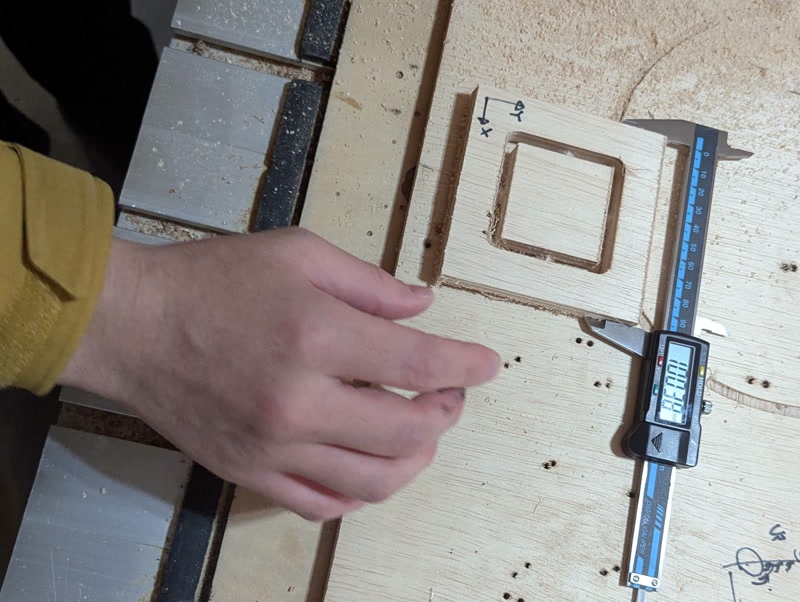
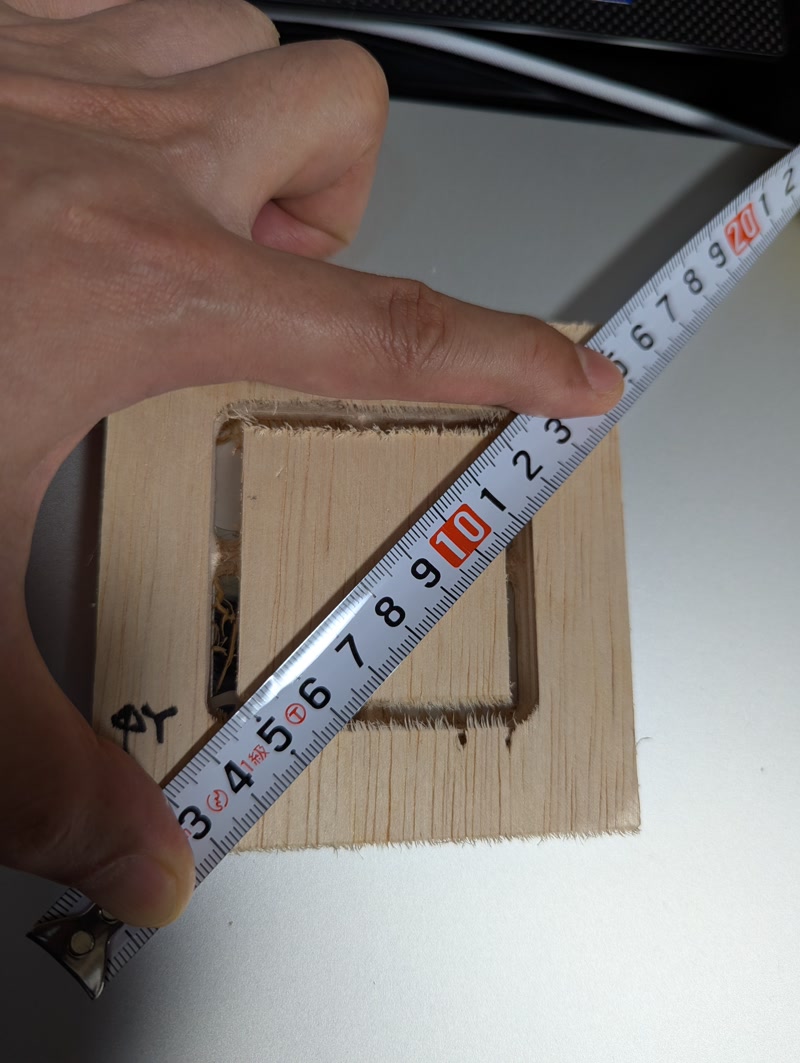
Test Cut
TIP
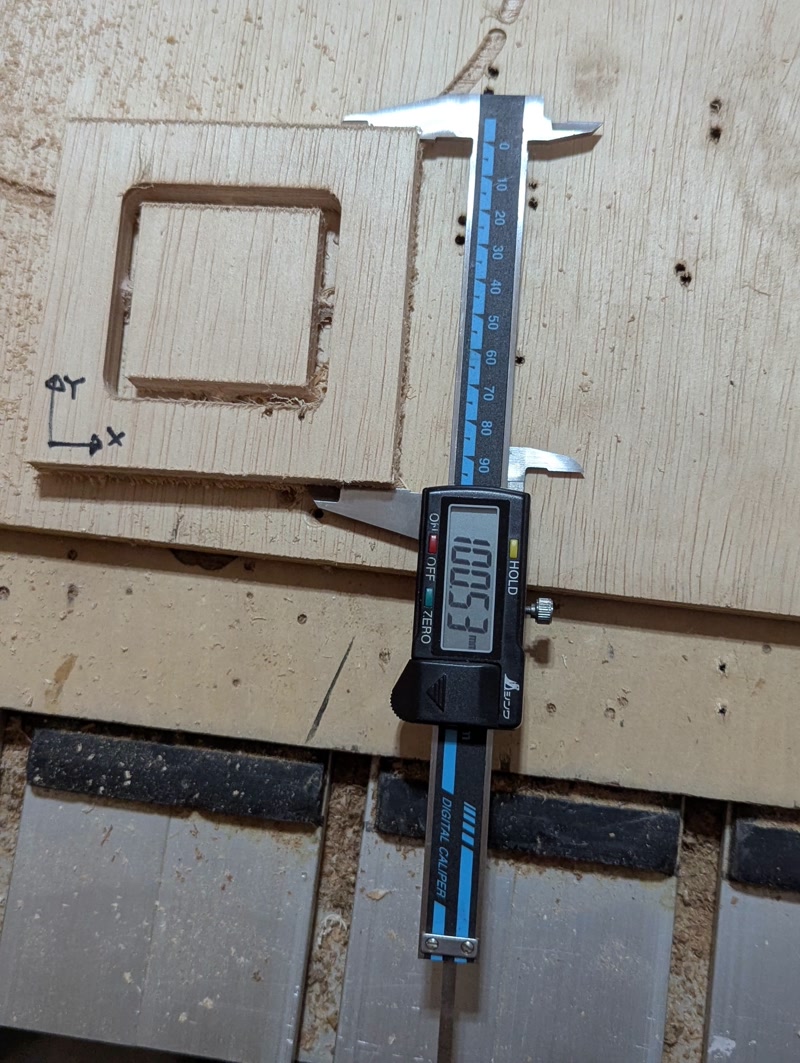
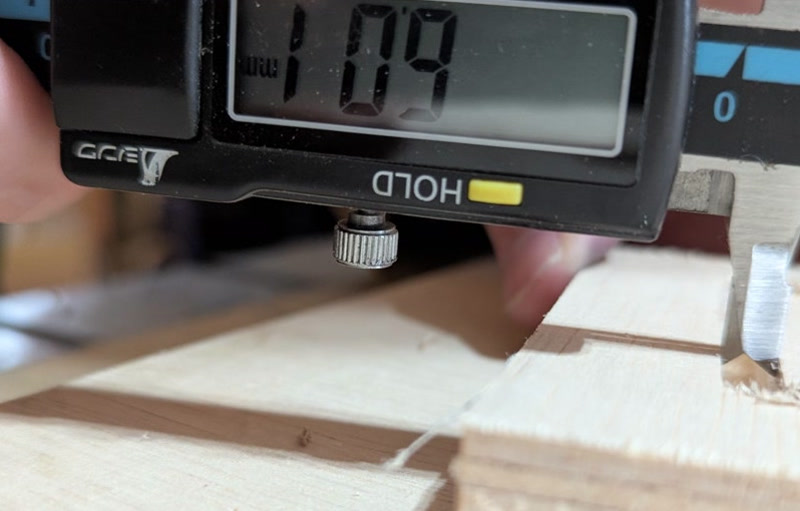
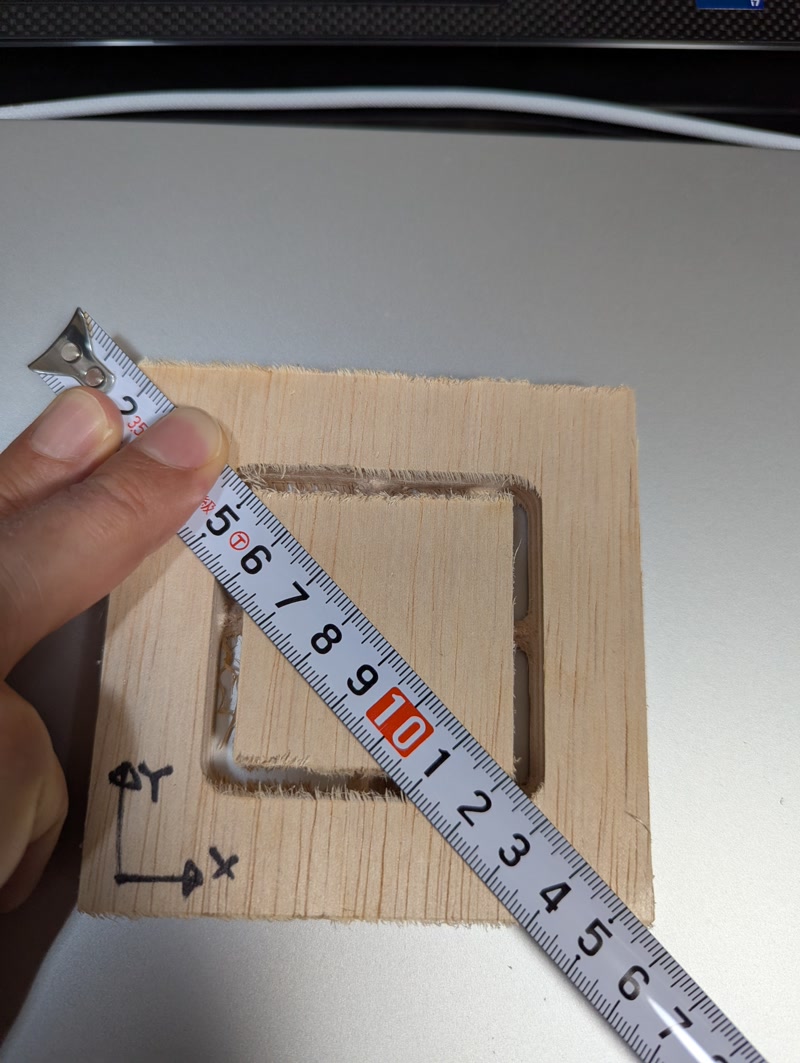
We measured the dimensions of the cut section using calipers. The x-coordinate and y-coordinate of the 100mm × 100mm square are +0.38 and +0.53, respectively. The kerf around the inner square was 6.01mm, which is 0.01mm larger than the diameter of the end mill used (6mm). This indicates that the kerf (cut width) was wider than intended due to the end mill's runout (axis deviation). By cutting the inner square, measuring its dimensions, and comparing them to the theoretical values, we were able to verify the effects of the kerf and runout.
Also, if the XY axes of the machine are not at 90 degrees, square designs will not be processed into perfect squares. Measure whether the test piece is square. If the diagonals of the square are equal, the XY axes are at 90 degrees.
The length of the diagonal of a square can be found using the Pythagorean theorem (the theorem of three squares).
If the length of one side is “50 mm,” then the length of the diagonal = √(50² + 50²) = √(250 + 250)
= √500 = √(250 × 2) = 50 × √2 = 50 × approx. 1.4142 = approx. 70.71 mm
The measured result is approximately 70.71 mm, which is close to the theoretical value, indicating that the test piece is square and the XY axes of the machine are at 90 degrees.
Safety Training
For safety reasons, we were given safety clothing in the lab. The safety clothing is as follows.
- Eye protection
- Gloves
- Nose cover
- Ear cover
Before we started, the instructor gave us some safety tips to prevent accidents and injuries. Some of them are as follows.
WARNING
- Keep the work area clean: Tripping over scattered tools or parts can cause accidents. Also, if a moving router accidentally touches a tool, there is a risk of damage to the blade or injury to the operator.
- Do not use gloves while working: There is a risk of the gloves getting caught in the rotating parts.
- Securely fasten blades and tools: Check that the router bit is correctly attached.
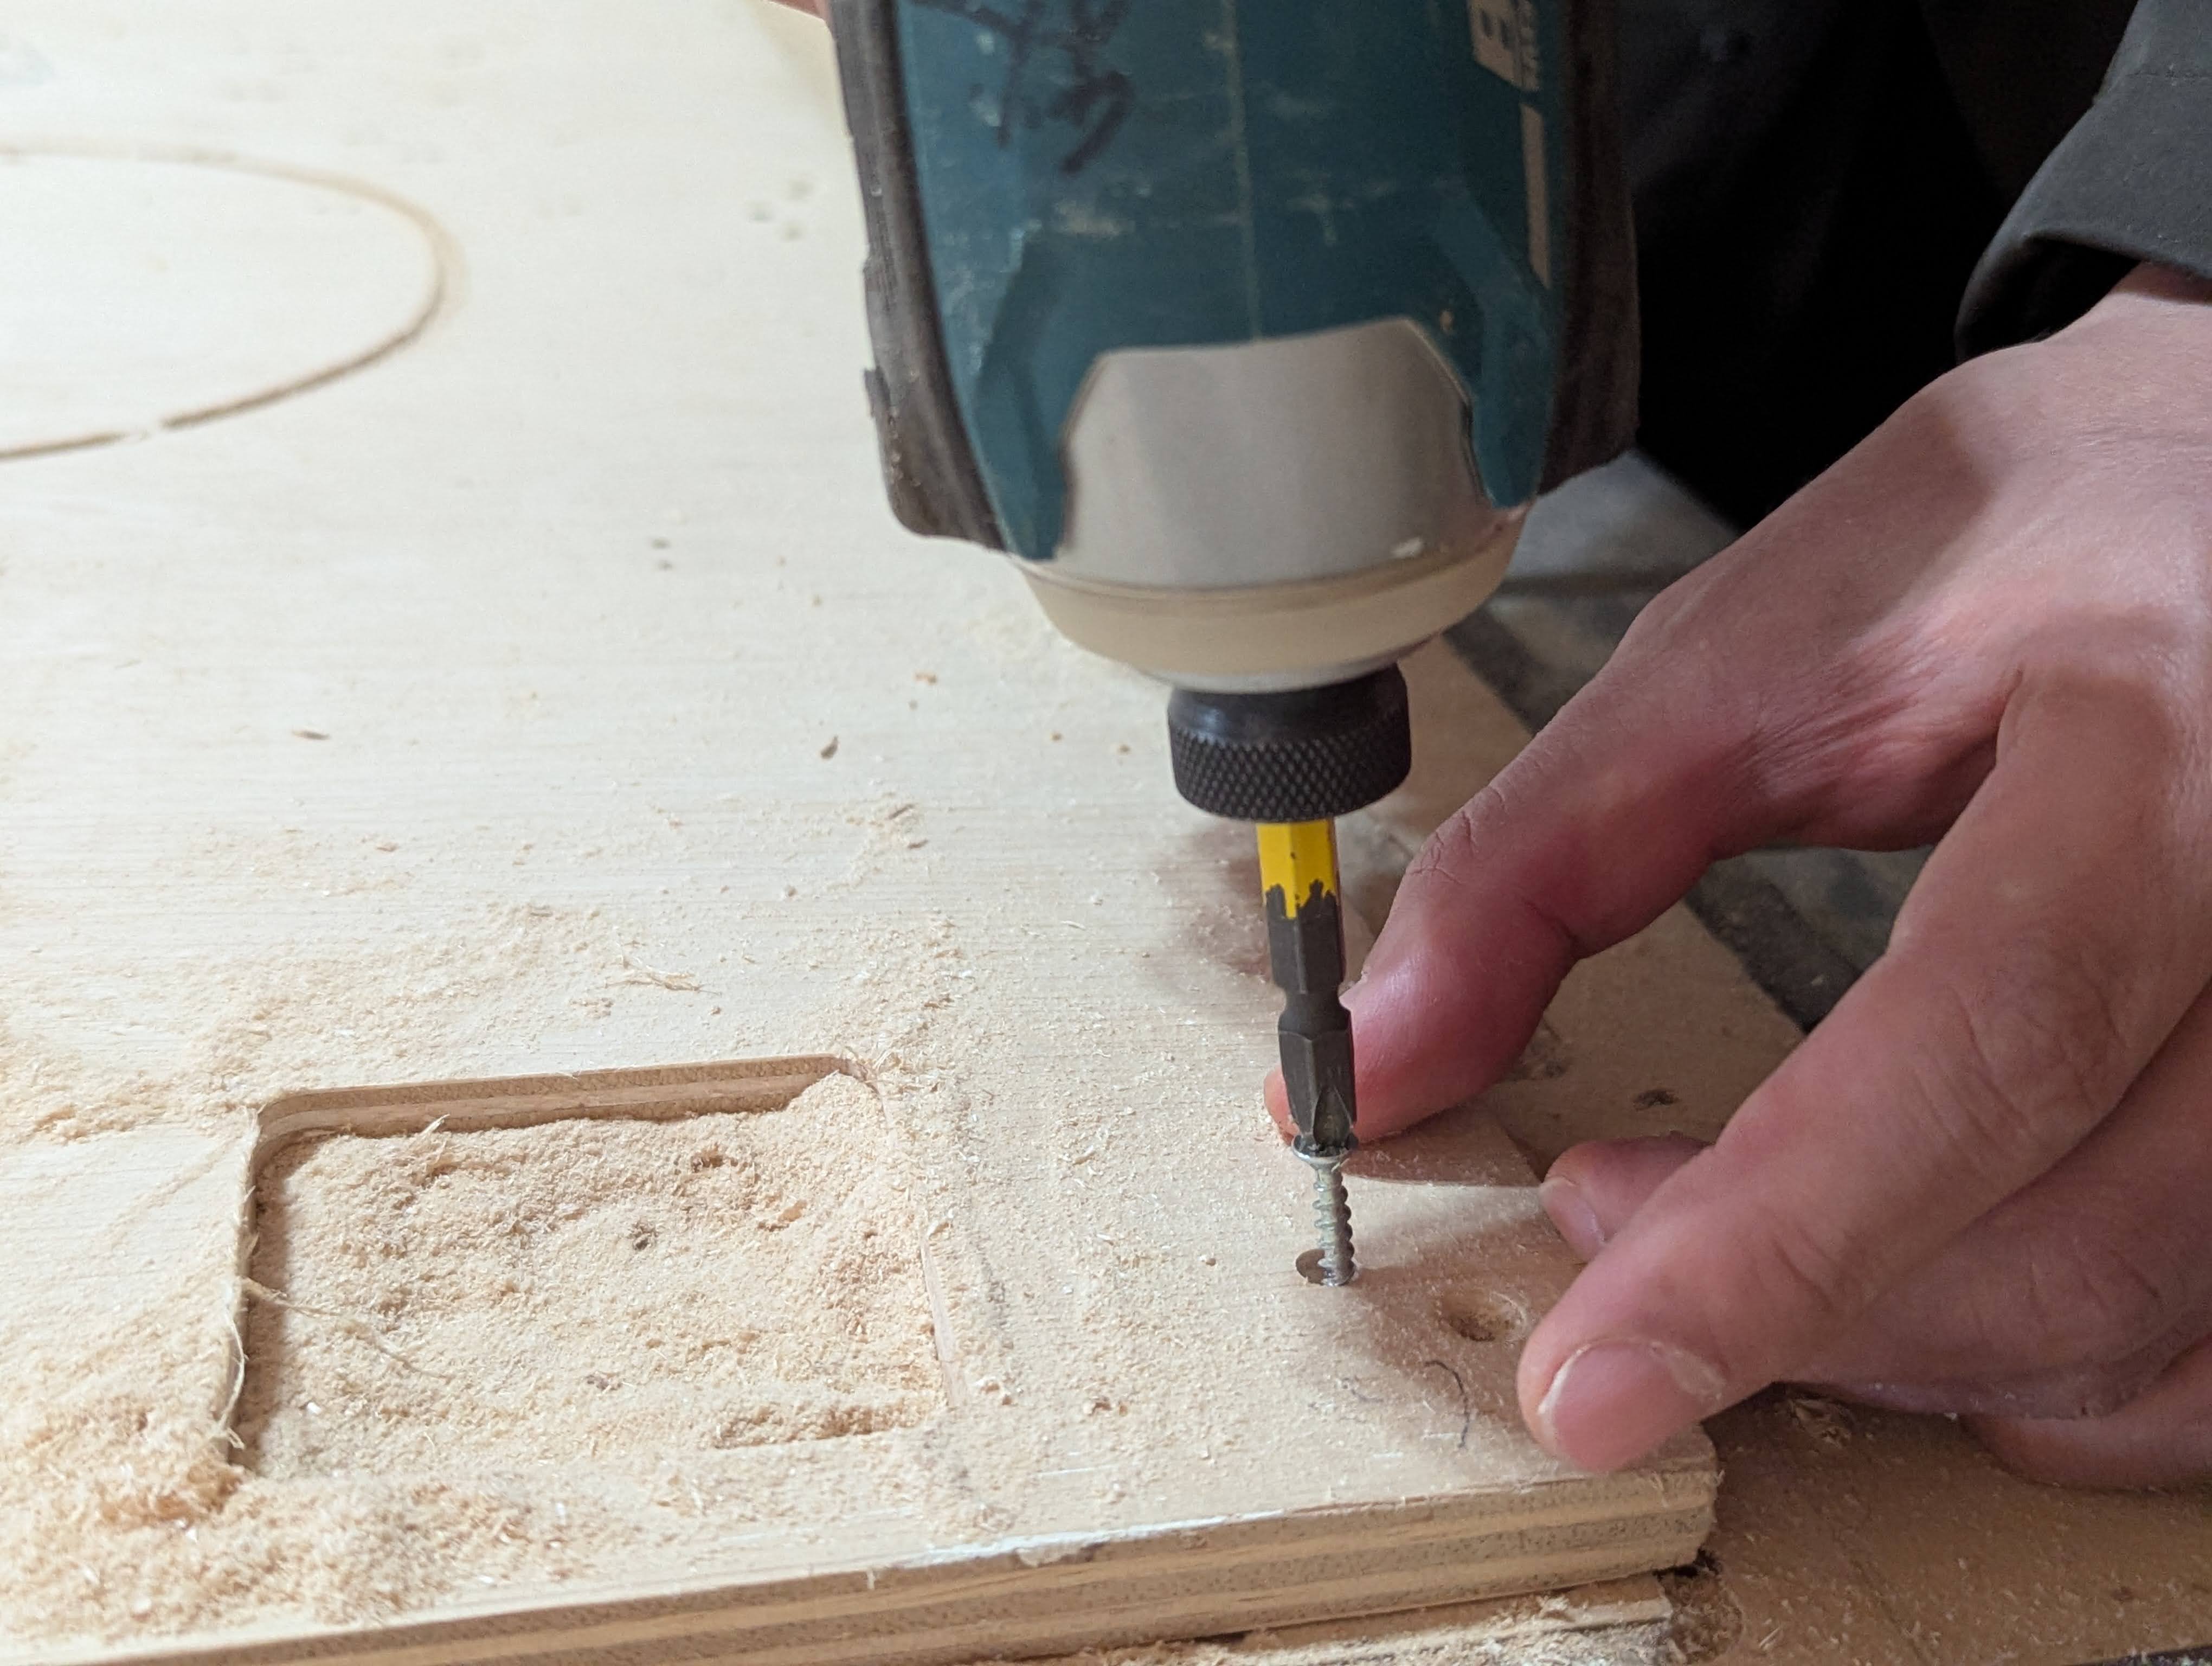
- Securely fasten the workpiece: Use screws or other means to prevent it from moving.
- Path interference: Normally, screws are drilled into the workpiece to secure it in place. These guide holes need to be positioned as close to the workpiece as possible, but the tool path for profile cutting must not interfere with these screws. If there is interference, the router bit will be damaged by the screws.
- Know the location of the emergency stop button: Check the location before starting work so that you can stop immediately
- Stay focused while working: Keep an eye on the CNC router during processing, and stop immediately if anything goes wrong.
- Check the settings: Check that the rotation speed and feed speed of the router bit are suitable for the material and processing content. If the rotation speed or feed speed is too high, there is a risk of the router bit breaking or catching fire due to heating.
- Prevention of fire and equipment damage: If wood shavings or cutting debris are left around, they may catch fire due to the friction heat of the router bit.
Individual assignment
Preconditions
We, the Kannai members, visited FabLab Hamamatsu(Take-Space), a lab run by Takemura-san in Hamamatsu City, Shizuoka Prefecture, about two hours from Tokyo. We would like to express our sincere gratitude to Takemura-san for allowing us to use his large CNC router, woodworking tools, and other equipment late into the night!
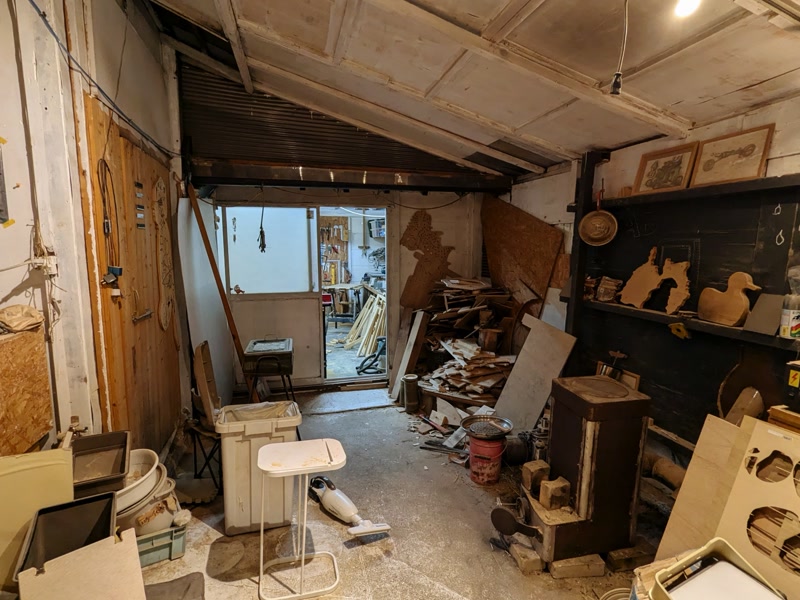
Details of the CNC machines and software used at FabLab Hamamatsu are as follows.
Machine: CNC Router ZN1325
End Mill: Straight 6mm
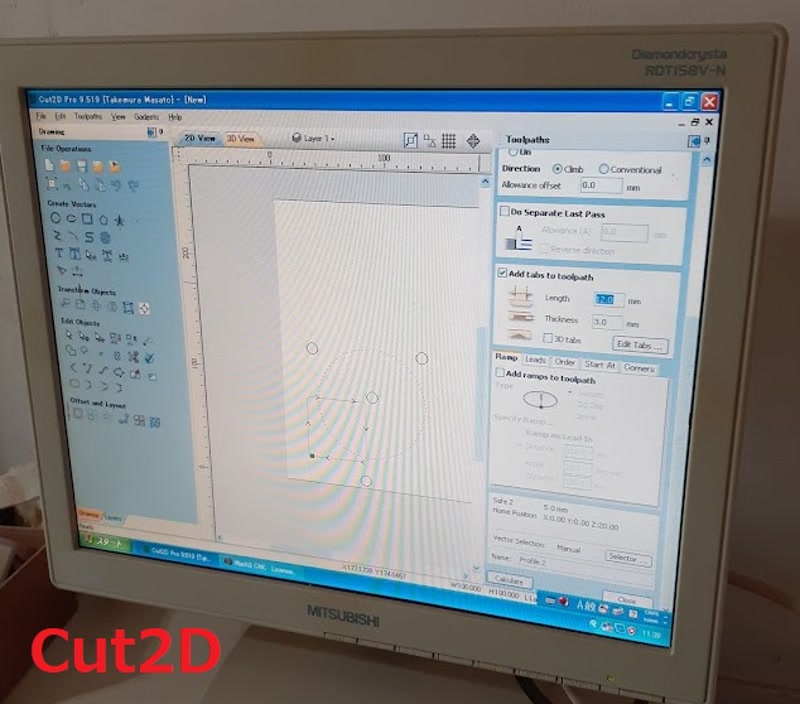
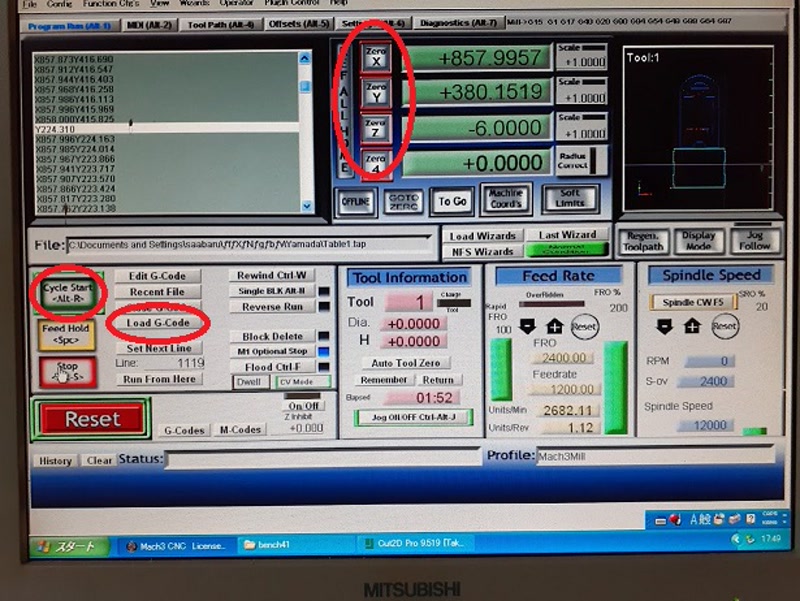
Software: CUT2D (for making G-code) / Mach3 (for controlling CNC)
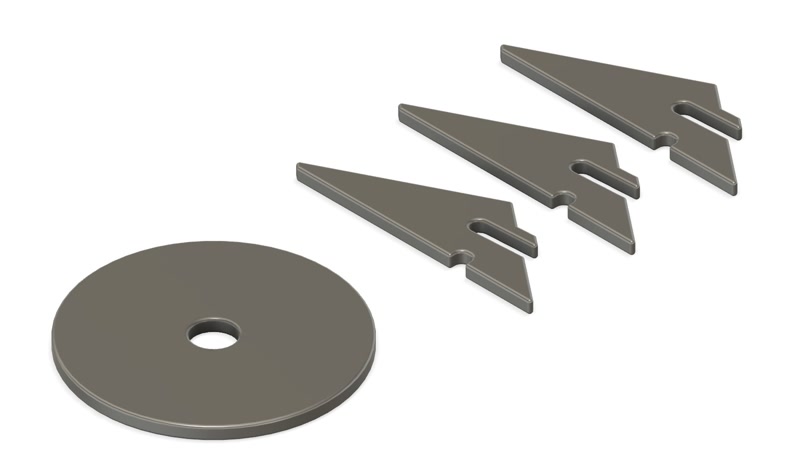
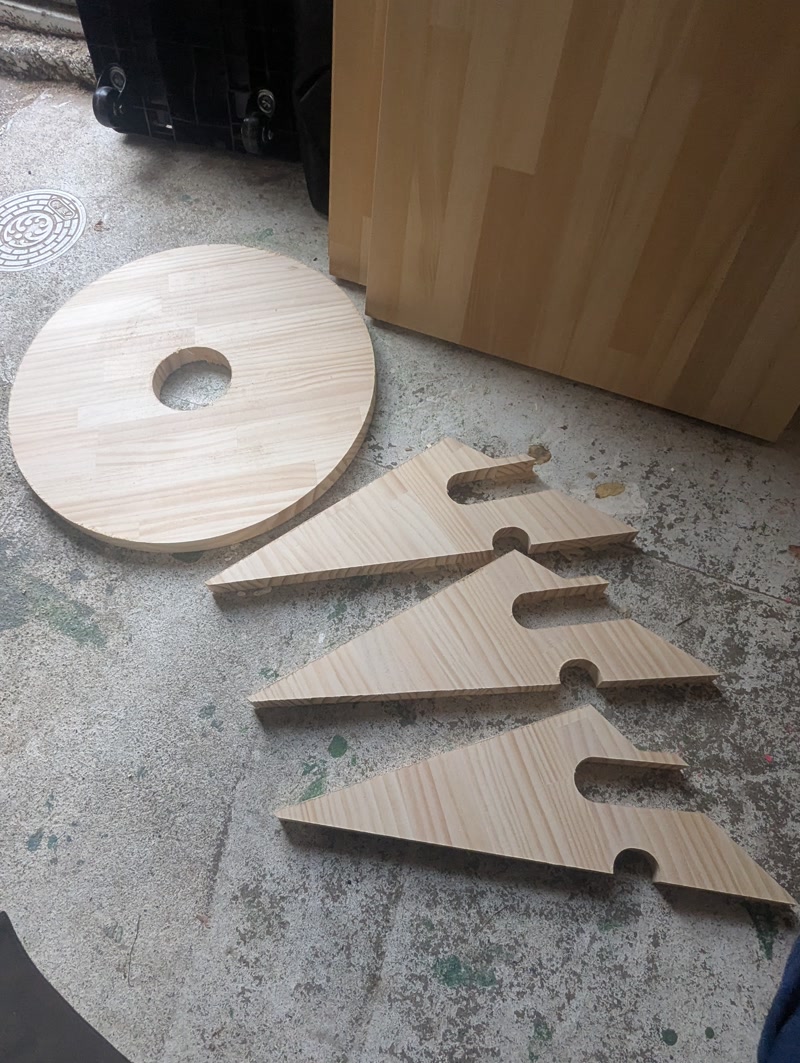
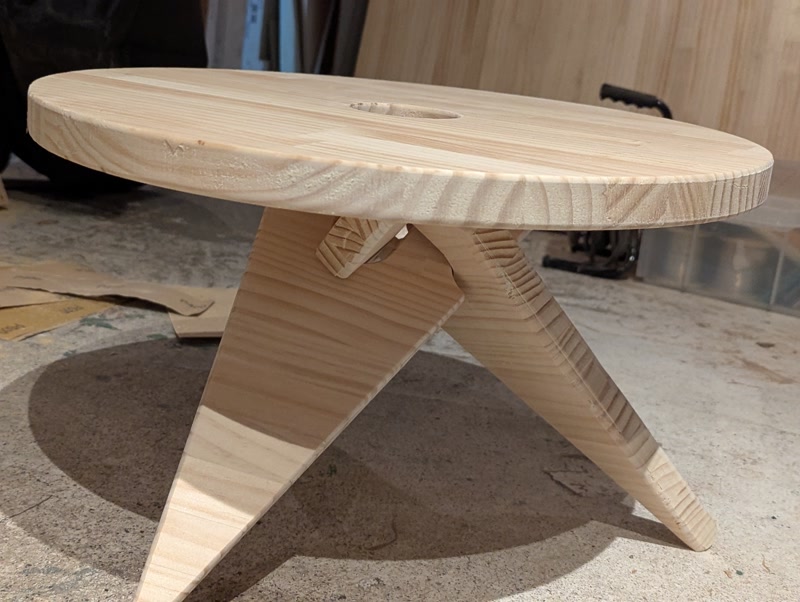
Products I Manufacture
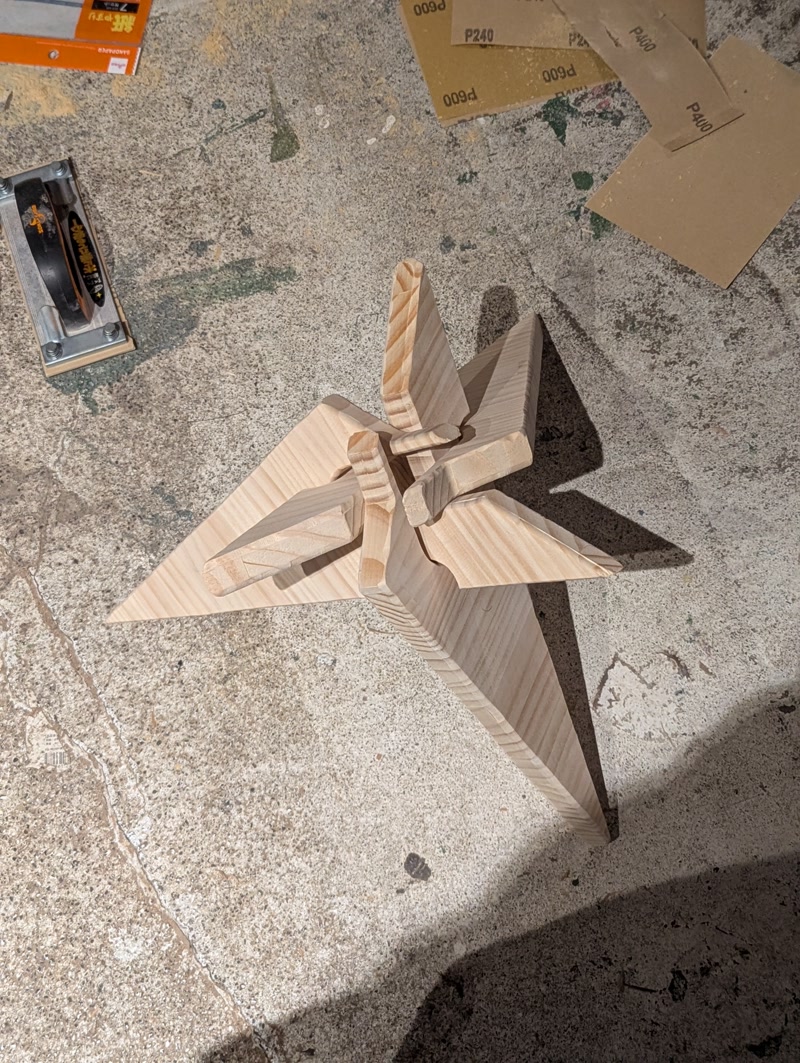
The products I manufacture are inspired by Ben Huggins' design, The Little Star Table. Featuring geometric star-shaped legs, the design combines simplicity and structural beauty. Using a CNC router, I will replicate the same form in wood, striving for structural balance and aesthetic appeal.
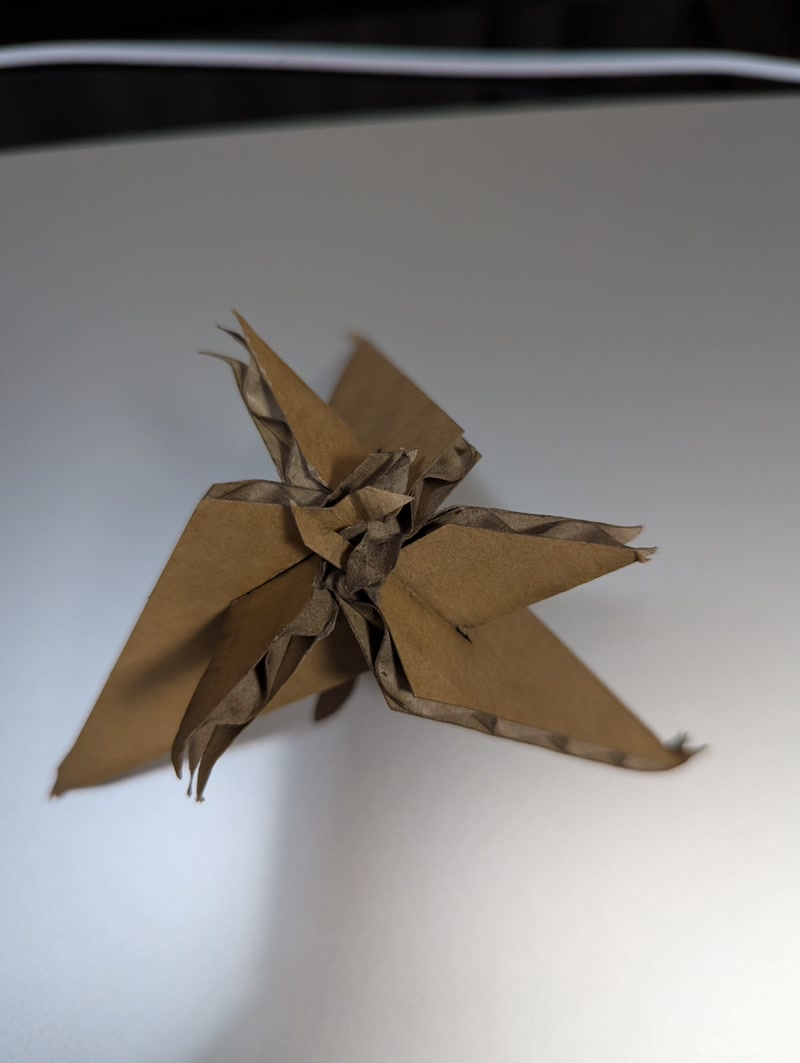
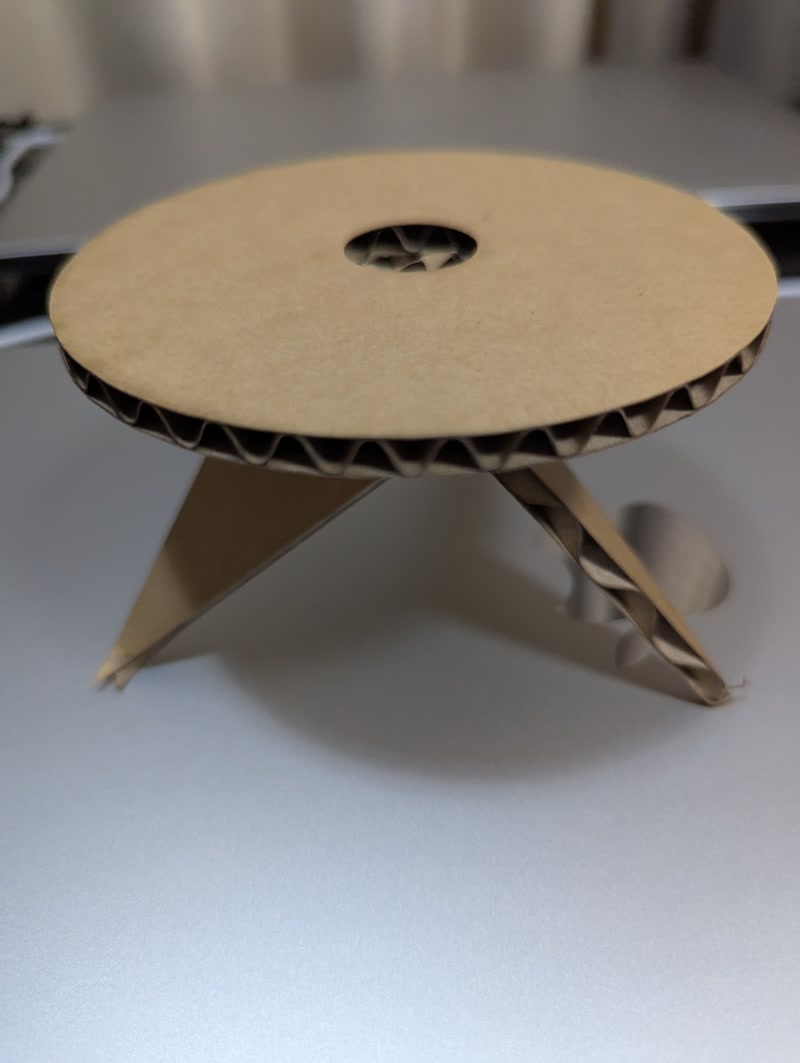
cardboard model of a table
Designing with Fusion
Creating Table Legs
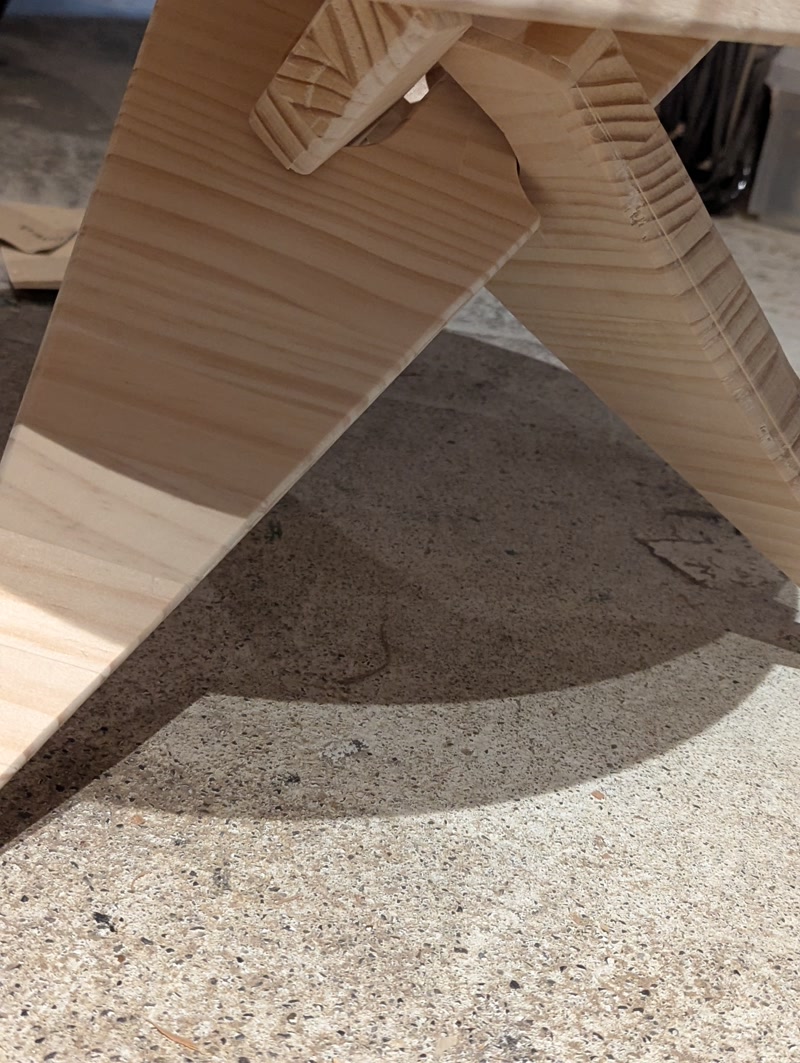
Start sketching from the origin and select the “XY plane” as the sketch plane. First, use the Line tool to draw the outer frame of the triangular structure. Then, create protrusions that will come into contact with the table top and recesses that will be used to assemble the legs when connecting them to the other two legs. Once the basic shape is complete, set parametric dimensions for all lines to ensure that the shape remains intact even if the size changes.
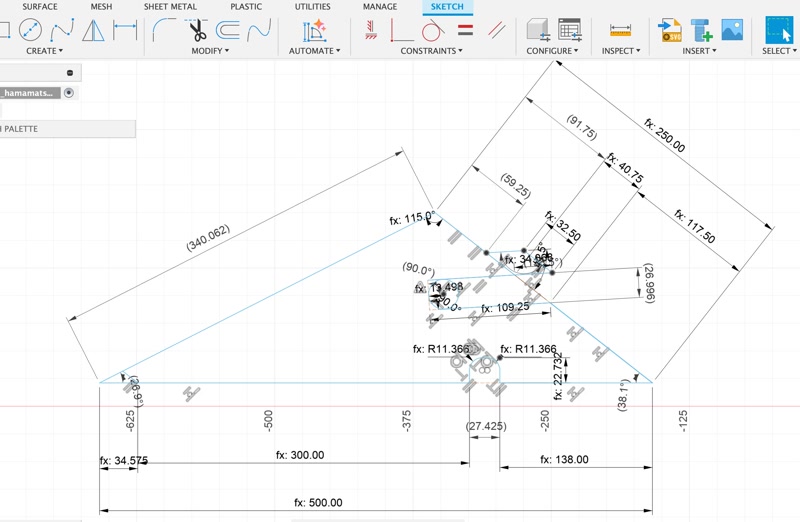
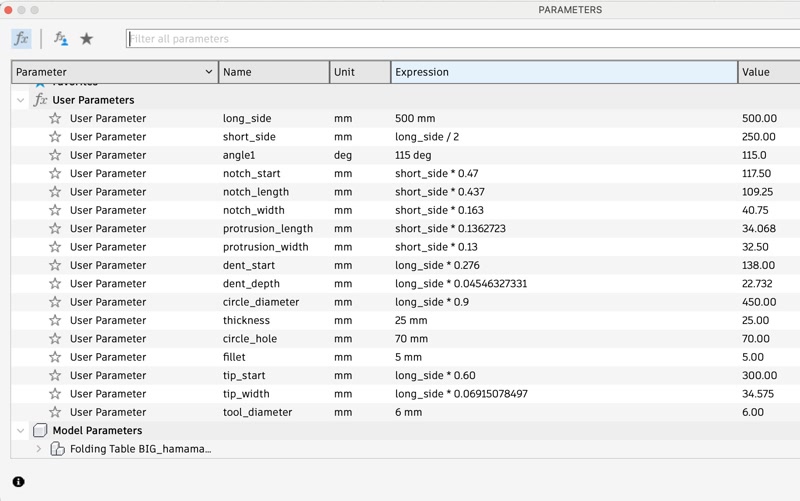
Add thickness using the extrude command. Extrude using the thickness of the plywood purchased this time, which is 25 mm.
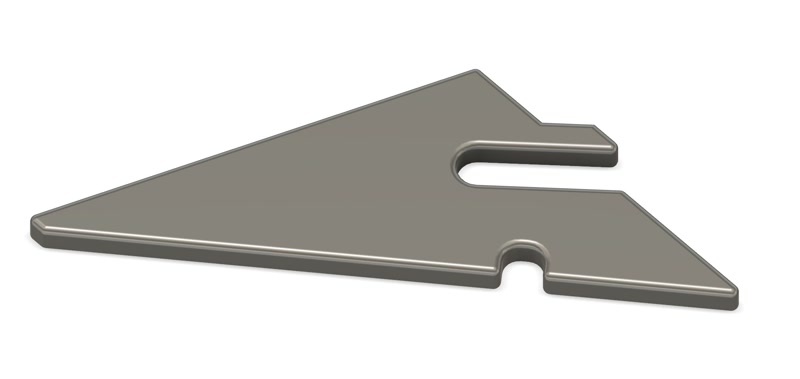
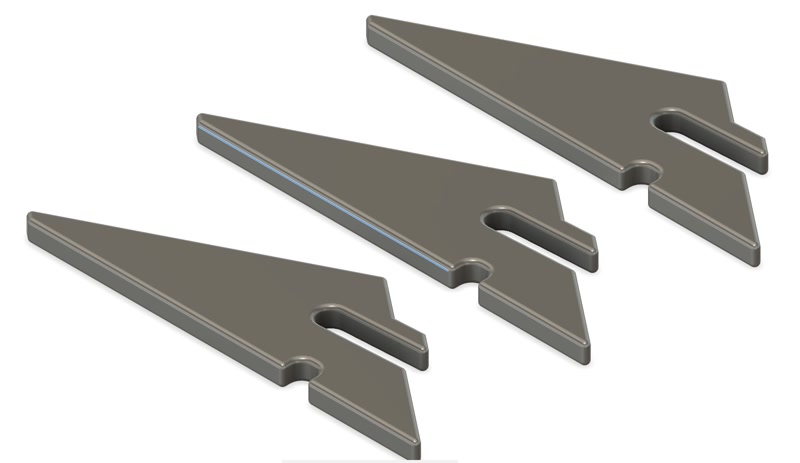
Duplicate the table legs you created to make three legs.
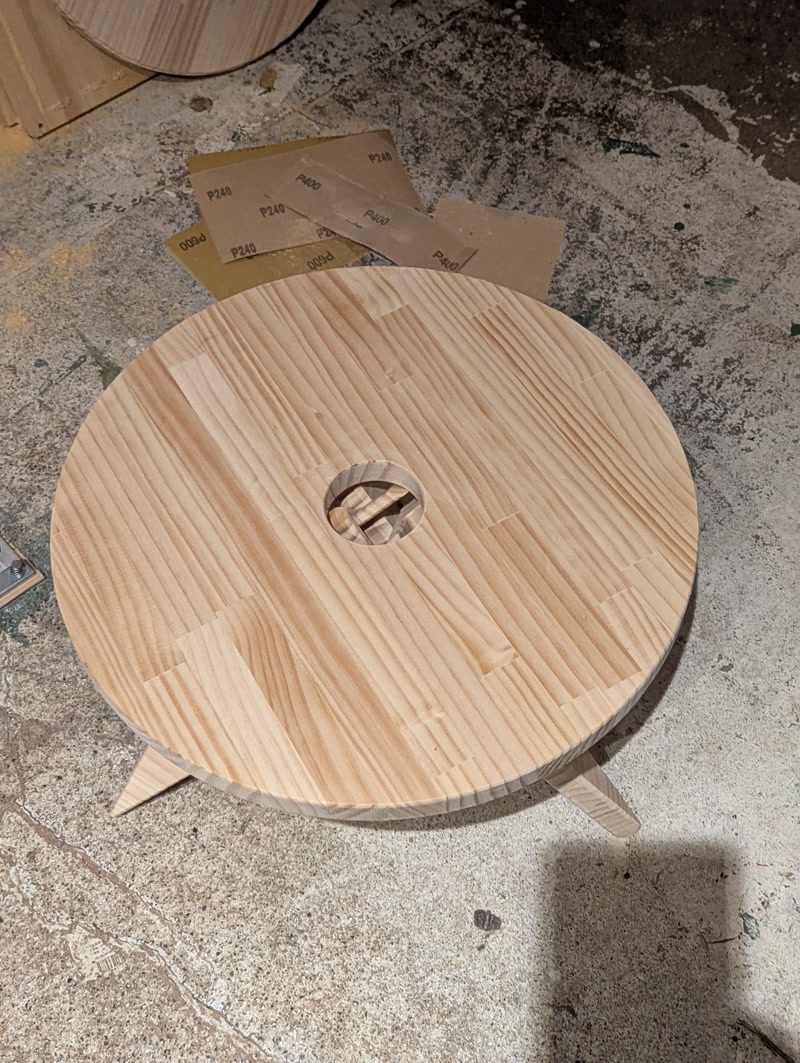
Creating the table top
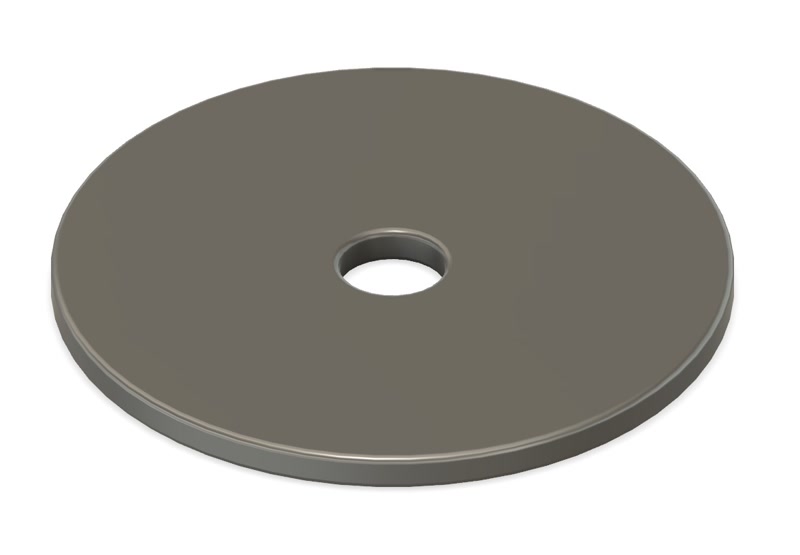
Start sketching with the origin as the reference point, and select the “XY plane” as the sketch plane. Draw a circle from the center point of the sketch to create the outer circle (table top). Draw another circle from the same center point to create the hole in the center. Once the two circles are drawn, set parametric dimensions for all lines so that the shape remains unchanged even if the size changes.
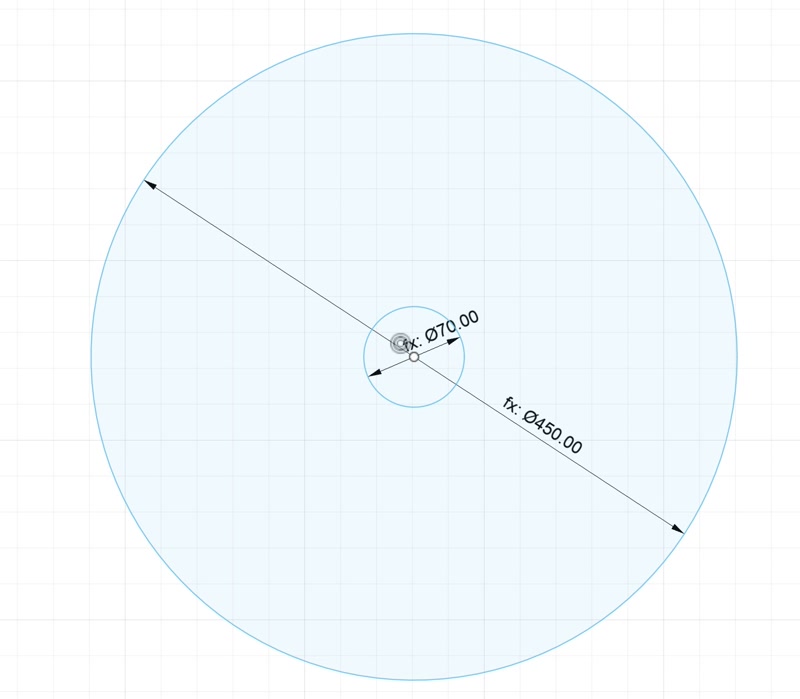
Add thickness using the extrude command. Extrude using the thickness of the plywood purchased this time, which is 25 mm.
Woodworking
Data Preparation
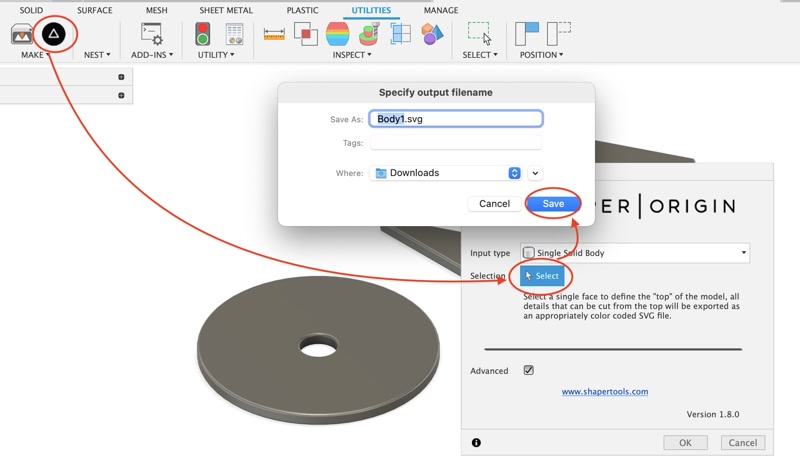
- Use the Shaper Utilities add-in to export your sketch in SVG format.
- Make sure that the exported SVG file size is accurate.
- Example: A 100x100mm design in Fusion may be displayed as 2.822x2.822mm in Cut2D.
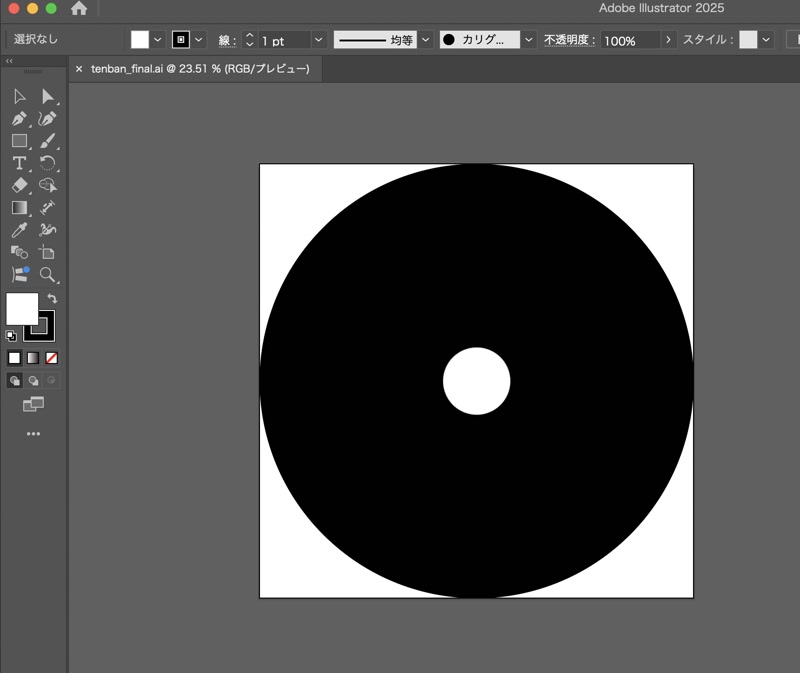
- Import the SVG file into Illustrator and save it in CS version.
- When importing the SVG file into Cut2D, the CAD data outlines may appear different from the original size. Therefore, it is necessary to convert the SVG file to an AI file.

Board setup
For Cut2D CAM settings, please refer to the Group assignment webpage(I was in charge of this week) for details. While it is not particularly important for cutting small parts, when setting a 910mm × 1,820mm board on a CNC router, it is essential to be mindful of board deflection. When securing with screws, it is important to ensure the sheet remains level so that the end mill can cut accurately. Screws should be positioned as close as possible to the tool path. A useful tip is to not only create the tool path for cutting but also draw a circle with the same diameter as the end mill and drill holes before cutting the part.
Cutting
The workflow from CAD data preparation to CNC milling at FabLab Hamamatsu is shown in the following diagram. After preparing 2D data in an AI file, we defined the tool path using CAM software “Cut2D” and performed CNC machining using a router “Mach3.”
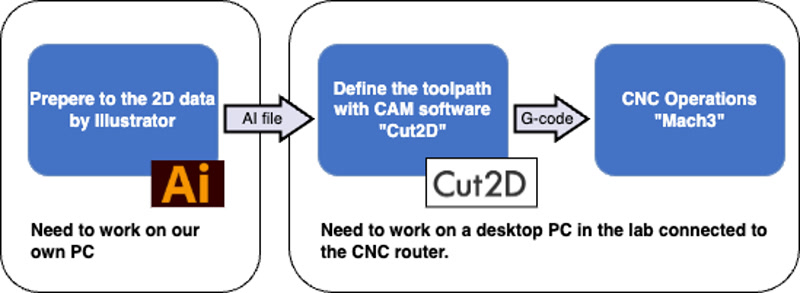 When saving 2D data as an AI file, please save it in the CS version.
For details on Cut2D CAM settings, please refer to the Group assignment Web page.
The cutting process using the CNC router “Mach3” is also posted on the Group assignment webpage.
Feeds and Speeds
- Spindle speed: 7,000 RPM
- Feed rate (XY): 80%
- Cut depth per pass: 24 mm
- Tool: 6mm flat end mill
The design of my components was very simple, so the tool paths were relatively short and it didn't take much time to cut out all the components.

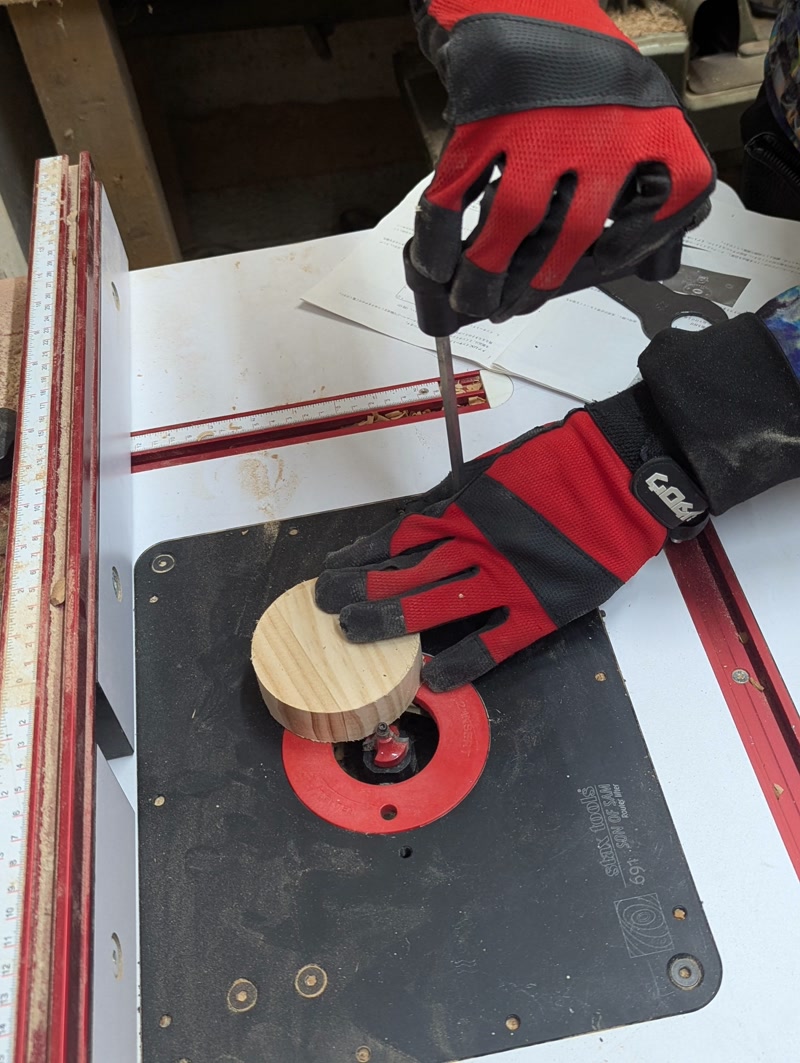
Sanding
Sanding is the process of smoothing the surface and edges of parts. Face masks, gloves, and eye shields must be worn.
Assembly
Combine the three legs to form a star shape, then place the tabletop on top to complete the table!
files
The following is the f3d file for The Little Star Table that I created this time.
Afterthoughts
Large-scale woodworking is enjoyable from the planning stage, so I spent a lot of time on it.Actually, I'm currently painting it with lacquer at home.
Be careful not to leave it unattended, as the friction heat from the router bit could cause a fire! It's best to use the restroom beforehand!
Take Space Fab Lab Hamamatsu was a wonderful place, like a secret hideout! Thank you again, Takemura-san!