Week_10 Assignments
- Group assignment:
- Individual assignment
Our group assignment was to calculate the power consumption of some output devices.
Is to add an output device to a designed microcontroller board and program it to do something.
Group assignment
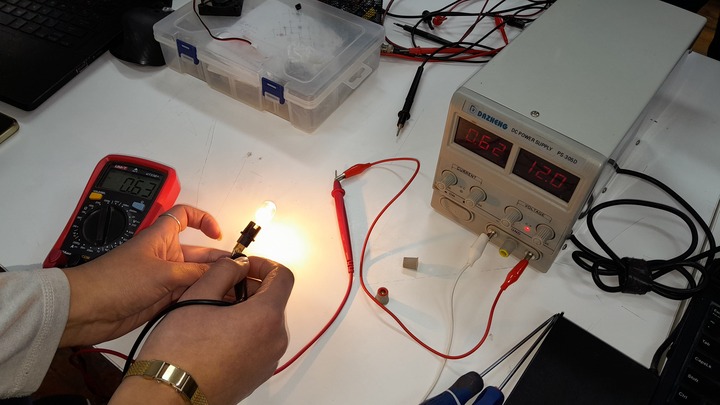
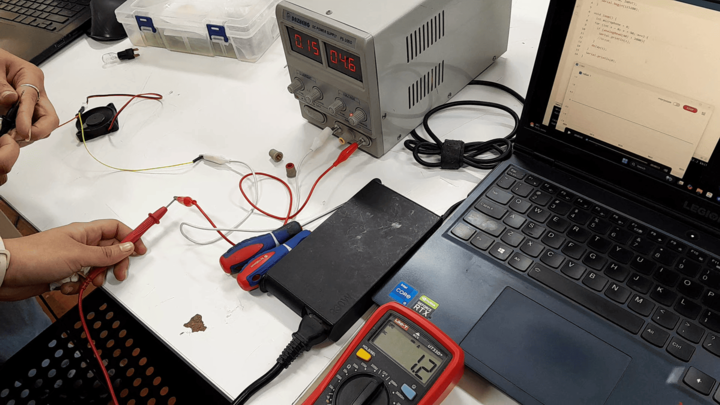
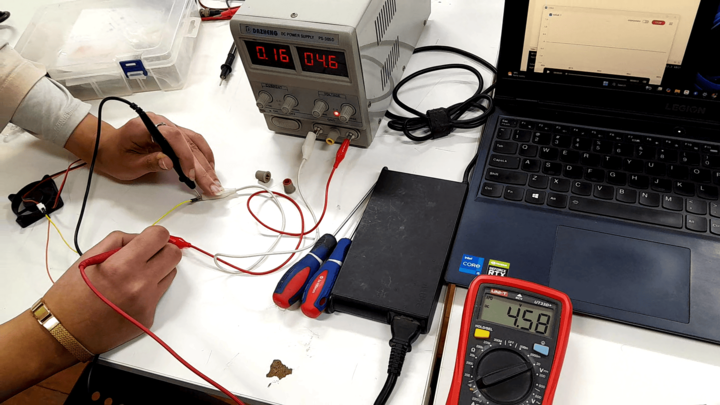
In our group assignment we calculated the power consumption of a light bulb and a 5V fan. As we know the electrical power is calculated by know the operating voltage of the device and how much current it draws as Electrical power 'P' equails to the product of the voltage across the device 'V' and the current intensity 'I'.
We used a power supply that we can adjust the voltage withe fine and coarse which means small steps and big steps.
For the Lamp we found the the power is around 7.44 Watts (0.62A and 12V) and for the fan the power was around 0.552 Watt (0.12A and 4.6V).
A part of our group exercise we learned about mosfest and how they work and how to connect then to control a component that could draw much current and needs much voltage than an MCU can provide.
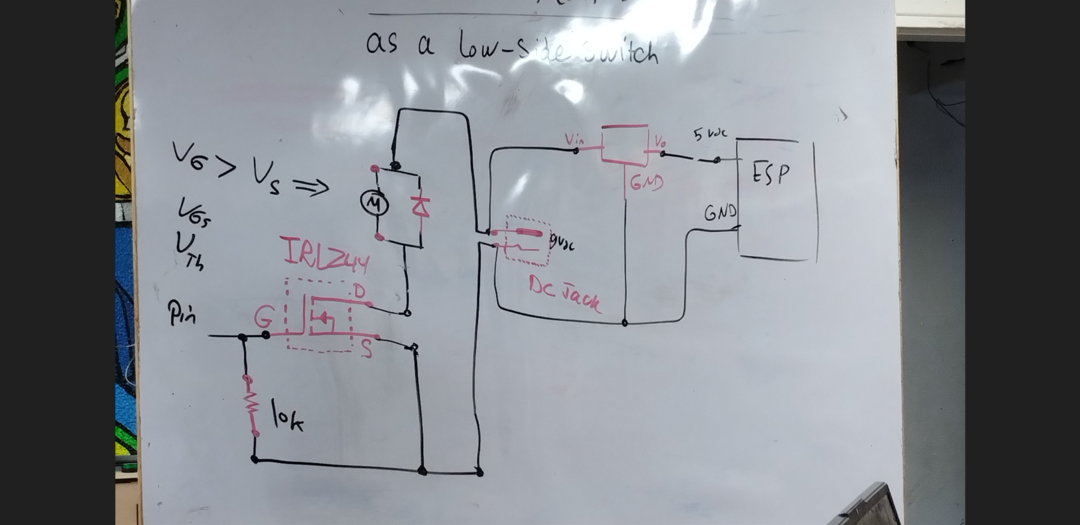
I used IRFZ44N mosfet and a L7805cv voltage regulator with 12v power supply. Form the drawn schematic we can see that the signal pin should be connected to the gate, the source with the ground (all grounds) and the drain is connected to the motor and the diode positive side as athe diode is implememnted to desipate the back EMF effect. As for the voltage regulator the input pin is connected to the positive terminal of the power supply and the grounf is connected to all grounds and finally which is optional the output pin should be connected to the Vin pin in the ESP Xiao if you want to power it using a power supply not the PC through the usb cable.
Individual assignment
For individual assignment I tried using DC motor, Servo motor and LCD with I2C module.
DC motor:
When I designed my boatrd in week 6 and fabricated it inweek 8. I designed a MOSFET and a terminal headers to connect a DC motor.
A MOSFET is like a switch that has three terminals (Gate, Drain and Source) and is controlled with a signal send by the controller to the gate (Electrically this signal is a voltage signal and according to the voltage sent the amount of current that flows through drain source circiut.).


I used SI2302/A2SHB SMD module MOSFET and it works great ^^ although it was a pain to solder. Here are its Specifications:
| SI2302 (A2SHB) N-Channel MOSFET Specifications | |
|---|---|
| Type | N-Channel MOSFET |
| Package | SOT-23 (SMD) |
| Drain-Source Voltage (VDS) | 20V |
| Continuous Drain Current (ID) | 2.5A @ 25°C |
| Power Dissipation (PD) | 0.9W |
| RDS(on) |
40 mΩ @ VGS = 4.5V, ID = 2.5A 85 mΩ @ VGS = 2.5V, ID = 2A |
| Gate Threshold Voltage (VGS(th)) | 0.7V – 1.4V (typ. ~1V) |
| Input Capacitance (Ciss) | ~245 pF |
| Logic Level | Yes (works with 2.5V–5V logic) |
| Applications | Low-voltage switching, load control, embedded systems |
Here is a video showing the testing of the mosfet with the following blink code.
    int motorpin = D0;

    void setup()
    {
      pinMode(motorpin, OUTPUT);
    }

    void loop ()
    {
      digitalWrite(D0, HIGH);
      delay(1000);
      digitalWrite(D0, LOW);
      delay(1000);
    }
Servo motor:
For the servo motor it is much easier as it connected to my board directly as it operates on 5V and needs a signal from the controllers. Also I had on my board a power jack that is connected to a voltage regulator to provide 5V and the needed Amphere if I needed more juice for a motor connected more than a servo motor as if you had more than one they could draw more current than the controller can handle.
For codign the Servo motor using a Xiao Esp32 C3 I downloaded the library ESP32Servo as the ordinally Servo library doesn't support ESP32 controllers.
  #include <ESP32Servo.h>  // Include esp32 servo library


    Servo mymotor;    //define mymotor object

    int servopin = D2;   // the pin attached to the servo

    void setup() {
      Serial.begin(115200);
      mymotor.attach(servopin);  //setting up the servo pin
      // put your setup code here, to run once:
    }

    void loop() {

      //a for loop to move 1 degree to 179 degrees increments by 1 each 10 ms.
      for(int x = 1; x<=179; x++)
      {
        mymotor.write(x);
        delay(10);
      }
      //a for loop to move 179 degree to 0 degrees decrements by 1 each 10 ms.
      for(int x = 179; x>=1; x--)
      {
        mymotor.write(x);
        delay(10);
      }

      // put your main code here, to run repeatedly:

    }
LCD with I2C module:
For the LCD I2C display I used this I2C module to make the communication, wiring and using the LCD much easier and I made a set of pins just for the I2C protocol. When I first tested using a code to check for the I2C address fro the LCD.
I found the it didn't show any devices the I found that there was a mistake in the soldering process. so I ended up with desoldering the Xiao-Esp32-C3 and cleaning the pads the desoldering the headers the cleaning up the pads the solder everything back as it was thanks for my instructor Ahmad Saeed helped me with desoldering the Xiao-Esp32-C3.
I uploaded the testing code again then I found that the address is 0x27.
    //I2C Address Scanner Code

    #include <Wire.h>

      void setup() {
        Wire.begin();

        Serial.begin(9600);
        while (!Serial); // Leonardo: wait for serial monitor
        Serial.println("\nI2C Scanner");
      }

      void loop() {
        int nDevices = 0;

        Serial.println("Scanning...");

        for (byte address = 1; address < 127; ++address) {
          // The i2c_scanner uses the return value of
          // the Write.endTransmisstion to see if
          // a device did acknowledge to the address.
          Wire.beginTransmission(address);
          byte error = Wire.endTransmission();

          if (error == 0) {
            Serial.print("I2C device found at address 0x");
            if (address < 16) {
              Serial.print("0");
            }
            Serial.print(address, HEX);
            Serial.println("  !");

            ++nDevices;
          } else if (error == 4) {
            Serial.print("Unknown error at address 0x");
            if (address < 16) {
              Serial.print("0");
            }
            Serial.println(address, HEX);
          }
        }
        if (nDevices == 0) {
          Serial.println("No I2C devices found\n");
        } else {
          Serial.println("done\n");
        }
        delay(5000); // Wait 5 seconds for next scan
      }
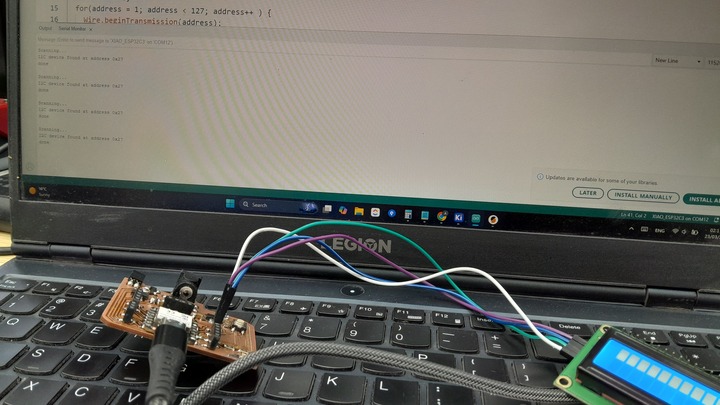
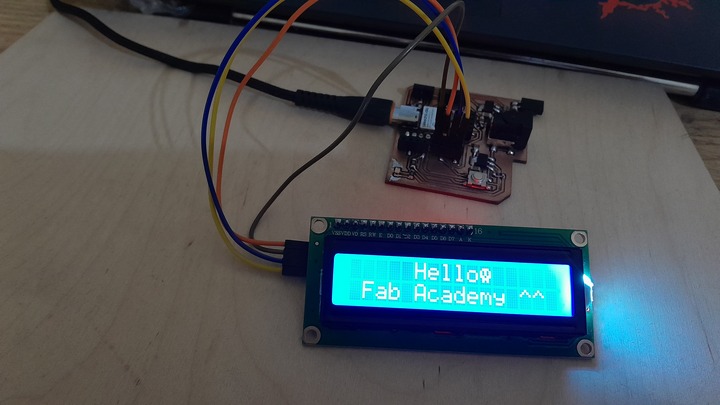
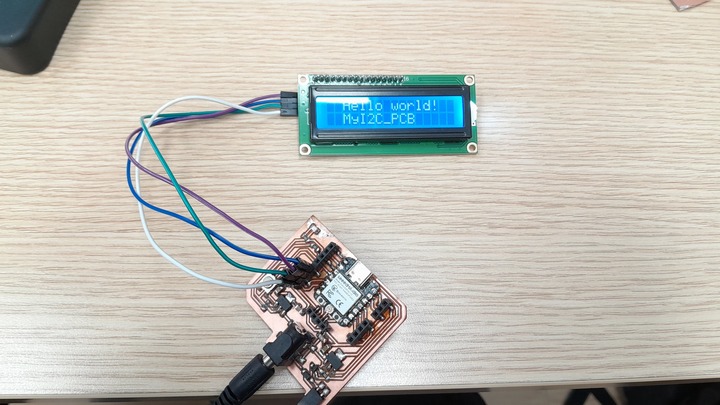
Then uploaded the first words ^^.
To make things fun I followed this tutorial to make characters and emojis using createChar() function.
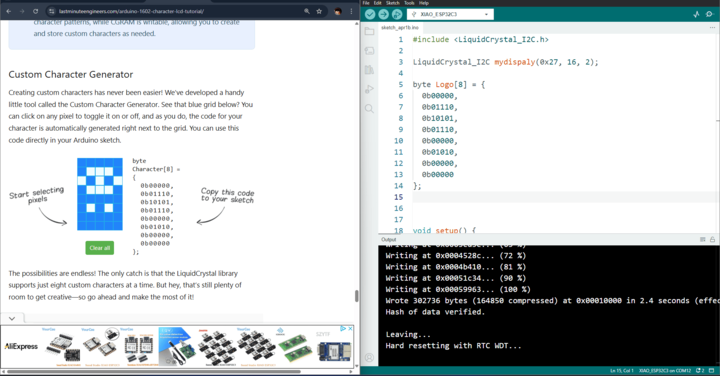
They have a built-in feature to draw the character or the symbol and a corresponding array will appear ready to be copied and pasted into your code.
    #include <LiquidCrystal_I2C.h>

      LiquidCrystal_I2C mydispaly(0x27, 16, 2);

      byte Logo1[8] = {
        0b00000,
        0b01110,
        0b10101,
        0b01110,
        0b00000,
        0b01010,
        0b00000,
        0b00000
      };
      byte Logo2[8] = {
        0b00000,
        0b01110,
        0b10101,
        0b10101,
        0b11011,
        0b01110,
        0b01010,
        0b00000
      };


      void setup() {
        mydispaly.init();
        mydispaly.backlight();
        mydispaly.clear();

        mydispaly.createChar(0, Logo1);
        mydispaly.createChar(1, Logo2);

        // put your setup code here, to run once:
      }

      void loop() {
        mydispaly.setCursor(5, 0);
        mydispaly.print("Hello");
        mydispaly.write(byte(1));
        mydispaly.setCursor(1, 1);
        mydispaly.print("Fab Academy ^^");
        // put your main code here, to run repeatedly:
      }
