
Table of Contents
Design and document the system integration for your final project
This week was system integration week and I have been able to make some good progress with Sir Rico and my local instructor Sir Anith helping me.
GANTT Chart
I started off this week by creating a Gantt chart for my final project which is a project management tool that visually represents a project's schedule using horizontal bars. Each bar corresponds to a task, showing its start and end dates, duration, and dependencies.
You can access my GANTT Chart here
Enclosure
This week was system integration week and I have been able to make some good progress with Sir Rico and my local instructor Sir Anith helping me.
Then I uploaded the model to Sketchfab because uploading a model from Meshy AI to Sketchfab allows you to view and interact with the model in a browser, embed it on your website, and easily share it with others. Sketchfab supports formats like GLB, OBJ, and STL, making it easy to upload and showcase your 3D models. It also provides cloud storage and access to a wider community, enhancing exposure and offering an interactive experience for users.
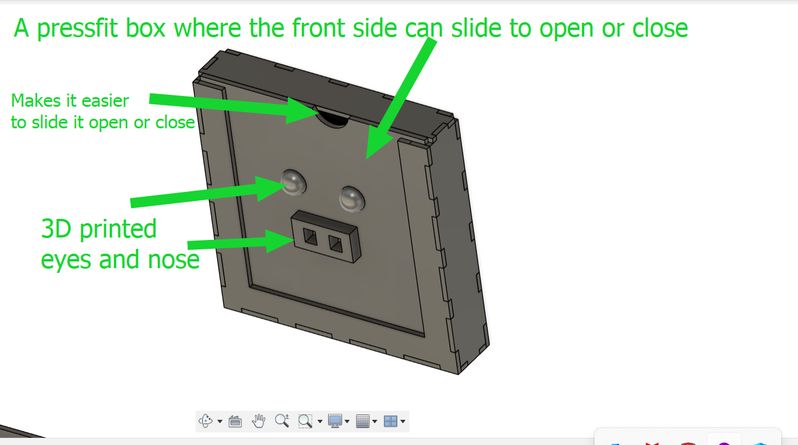
I had already decided and explained my vision for the design of my project in the precious weeks which you can see here I planned on making my design modular and it is mainly divided into 3 parts: the electronics enclosure, the plant holder and the water reservoir.
Electronics Enclosure-1st Module

Plant Holder
Water Reservoir
While printing the water reservoir, I modified the base design, increasing its thickness to 8mm to increase its strength. I also changed the print settings as:
- Used the tallest layer height of 0.28mm for faster printing.
- Increased the perimeter walls to 3 for added durability.
- Set the infill density to 15% to balance strength and material usage.
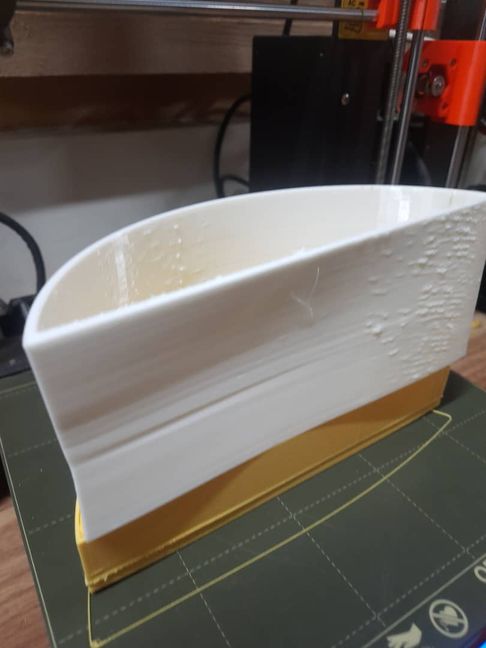
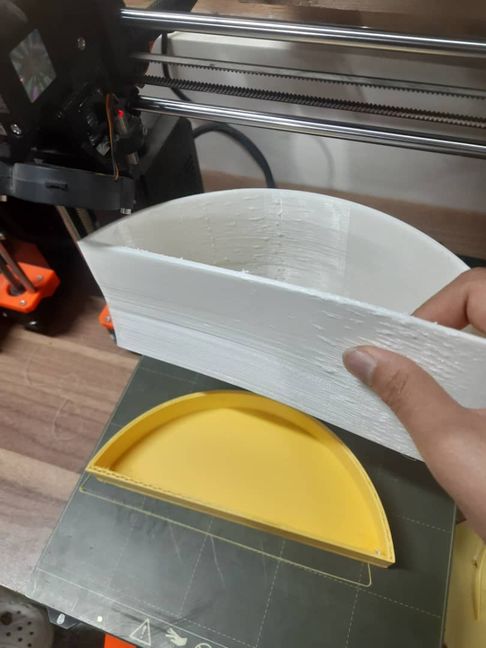
However, midway through printing, the filament ran out. We tried to find the same type but couldn’t, so we switched to a white filament. Unfortunately, it turned out to be TPU which was different from PLA(the yellow filament we used earlier), which caused issues:
- The print quality was affected due to material differences.
- The joint design failed, resulting in separate pieces instead of a cohesive structure.
Waiting for 14 hours for such undesired results was truly a memorable experience but I learned that all filaments werent of the same type and that PLA (Polylactic Acid) and TPU (Thermoplastic Polyurethane) have vastly different properties. PLA is rigid, easy to print, and great for structural parts, while TPU is flexible, elastic, and requires specialized settings for printing.
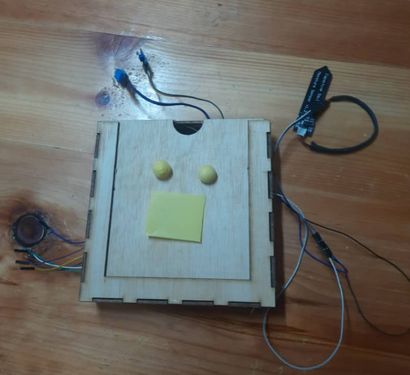
HEROSHOT
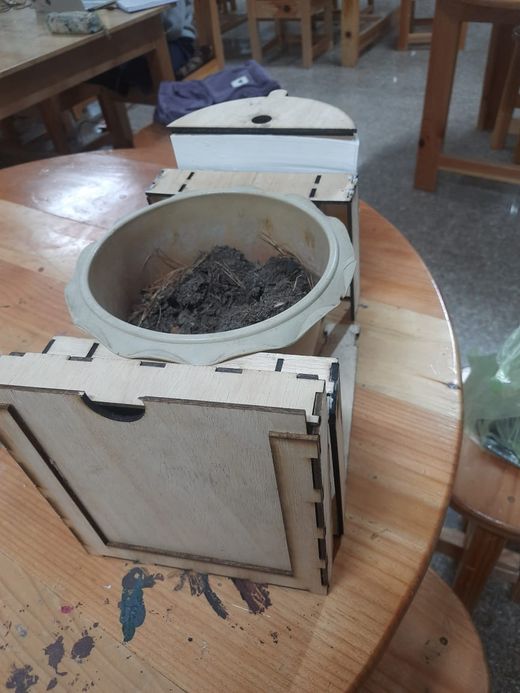
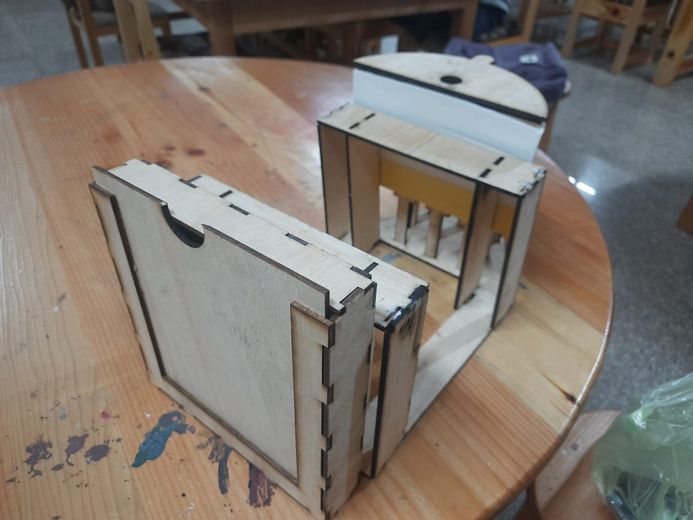
Laser cutting and 3d printing took a lot of time(14 hours for my water reservoir). Though laser cutting took fairly less time as compared however once the pressfit were together, they did not hold up as tightly as I would have liked, so I had to glue it but now I plan on 3d printing corner connectors to connect them instead. And i also plan on using CNC for the middle module to increase it stability.
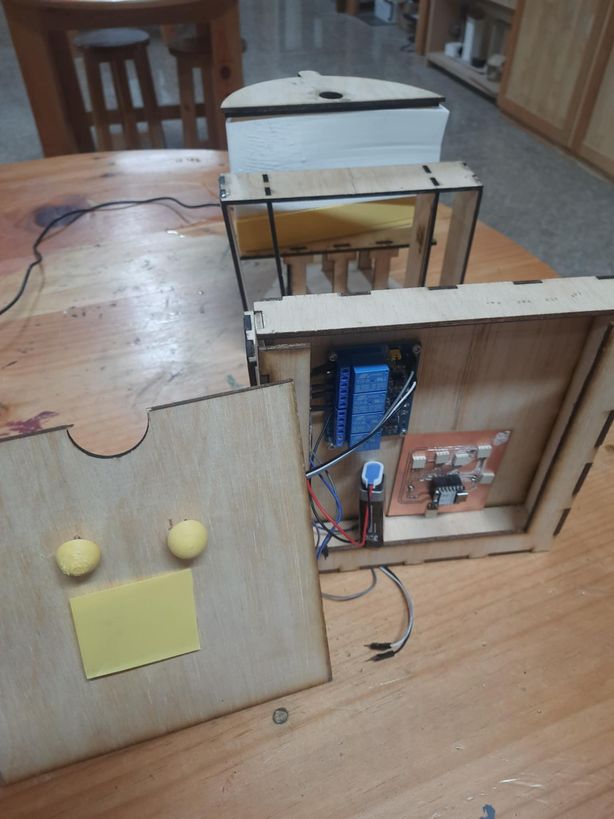
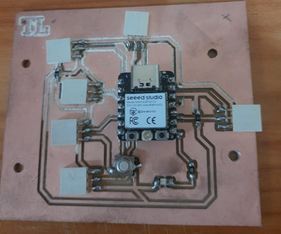
Afterwards I 3d printed the eyes with holes in them to screw it. Then I did component placement for the relay and my MCU board and then I decided to drill it. I also realized I had to create holes for wiring and connecting my Xiao with a computer from the sides of the pressfit. I also had to consider the wires that will be connected to the sensors and the motors.
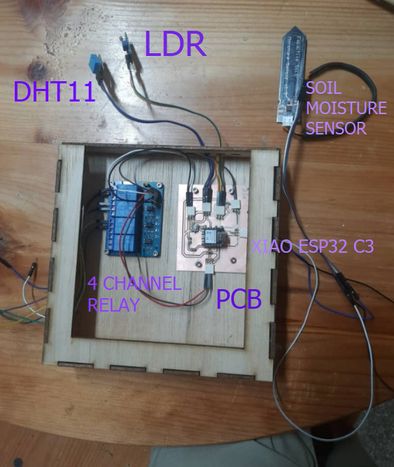
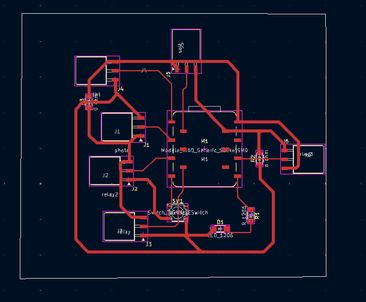
Electronics


Files
You can access the files here
System integration PCB
f3d files of the CAD