File Compression
The Fab Academy course consists of a total of 20 weeks, including a final project. The maximum storage available for the site is 500MB, which allows for approximately 20MB usage per week.
However, since the later assignments and the final project will require more video and images, I aim to limit my usage to approximately 5MB per week during the initial phase.
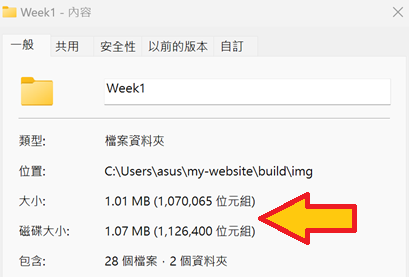
The multimedia storage I used in the week1 assignment is about 1MB, not bad!

We can also keep checking the sizes we used in the fabcloud site:
Compressing multimedia files is essential for optimizing web pages, improving loading times, and enhancing user experience. Here are several effective methods to reduce the size of multimedia content on your website.
Image Compression
Save as .jpg than .png
Details
For example, both of the pictures below are captured from the screen for explaination in last part, both of them are same and save from the same raw file, just save in different format.
.jpg format and the right one is saved in .png format. By Comparing the size, we can see that the size in .jpg format is smaller.

Online tool - Squoosh
Squoosh is an online image compression tool developed designed to help users easily compress and optimize image files.
Example
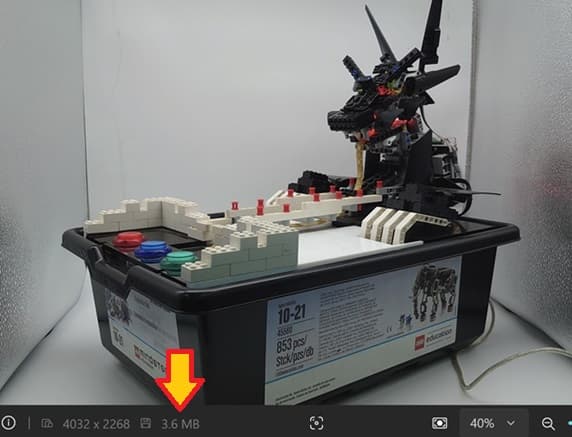
Here is a picture I want to use in the draft of the final project. The raw size of the picture is about 3.6MB.
- Adjust the size of the image in the right section
- Compare the raw image and the final result in real time by adjust the bar in the middle
- The final size of the image will show in the right corner immediately
The result image:

The size is drop from 3.6MB to 24.8kB!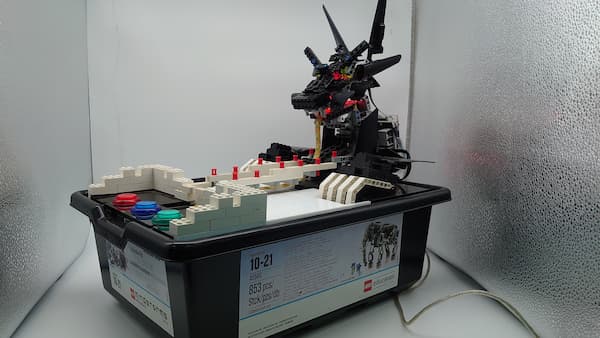
Video Compression
Offline tool - FFmpeg
FFmpeg is a powerful open-source multimedia framework that enables users to process audio and video files. It is widely used for tasks such as format conversion, streaming, and video compression.
Download the FFmpeg
Details
We can go to the FFmpeg to download it: https://www.ffmpeg.org/download.html
- Download the version match with your computer's operating system. In my case it's Windows.
- Then choose
Windows builds from gyan.dev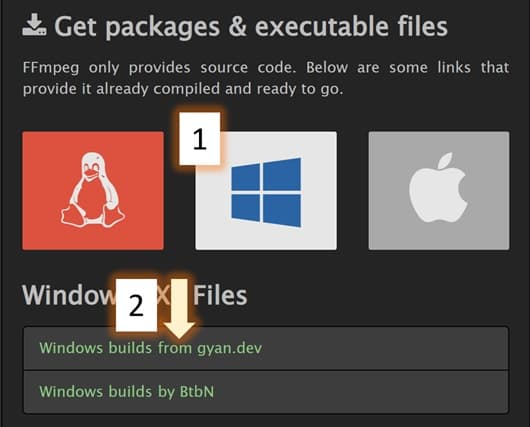
- choose
ffmpeg-git-essentials.7z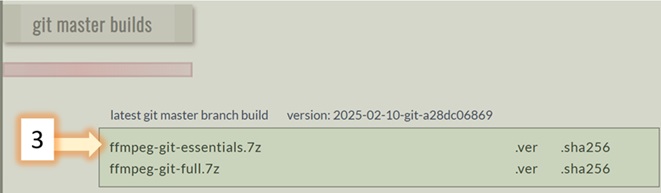
- Extract files to C drive, and rename the folder to
ffmpeg. - Edit the Environment Variable (which can be search in the control panel), find path and add a new path:
C:\ffmpeg\bin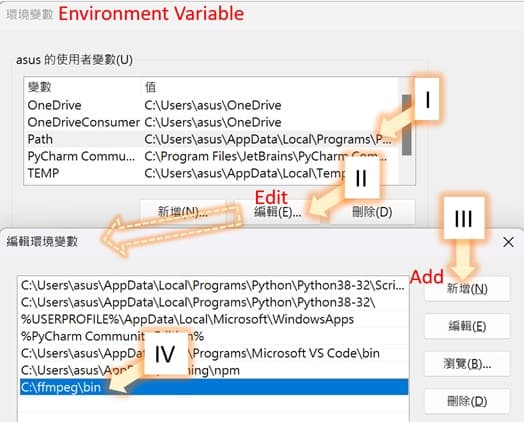
- We can use the code
ffmpeg -versionto test the setting is ready or not. If it show the configuration like this, the installion is finished.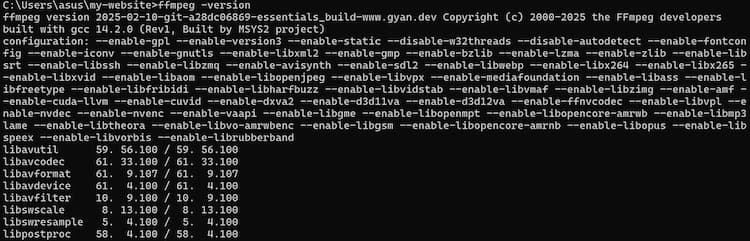
Compress the video
Example
In my case, input.mp4 is input file, output.mp4 is output file.
Try scale = 640 and scale =320
Now we can try to compress a video.
For example, I have a raw video name RGBGame.mp4(About 40MB) in the folder my-website\static\img\Week2\02_compress.
- Perpare the command used to compress the video:
ffmpeg -i RGBGame.mp4 -vf "scale=640:-1" -c:v libx264 -crf 23 -preset fast RGBGame_w640.mp4
-i RGBGame.mp4: Specifies the input file nameRGBGame.mp4-vf "scale=640:-1": Sets the width of the video to 640 pixels. The height set to -1 means calculated automatically as the original ratio.-c:v libx264: Uses the libx264 encoder, a highly efficient H.264 video codec-crf 23: Sets the Constant Rate Factor (CRF), where 23 is a balance point that offers a reasonable trade-off between quality andfile size. Adjusting this value can lead to higher quality or smaller file sizes-preset fast: This option controls the trade-off between encoding speed and compression efficiency. fast provides a faster encoding speed. Depending on your needs, you can choose from ultrafast, superfast, veryfast, faster, medium (the default), slow, slower, or veryslow.RGBGame_w640.mp4: The new video will be generated to the same file with nameRGBGame_w640.mp4
-
Type the command in command prompt. Ensure the localation of the video. For example, my video is in the folder "
my-website\static\img\Week2\02_compress, so the command should be execute with at there:After finished, there will be a new
RGBGame_w640.mp4. -
I want the compare the quality of the video with width 640 and 320, so I generate another video with the command below:
ffmpeg -i RGBGame.mp4 -vf "scale=320:-1" -c:v libx264 -crf 23 -preset fast RGBGame_w320.mp4
The final size of the video is here:
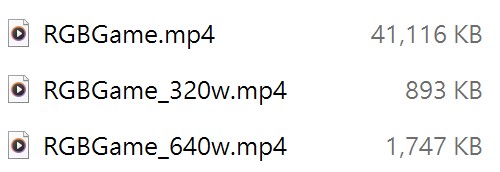
So I will use the 640 width version. Here is the result: