3D design
Design with Fusion360
In addition to introducing the ability to draw fixed-size and more regular workpieces in the previous chapter on 2D, Fusion 360's Form mode also allows for the design of irregular shapes, such as portraits or pumpkins, using a "sculpting" approach.
I want to include some character models in my final project, so I'm trying to use Form mode to create a 3D character model.
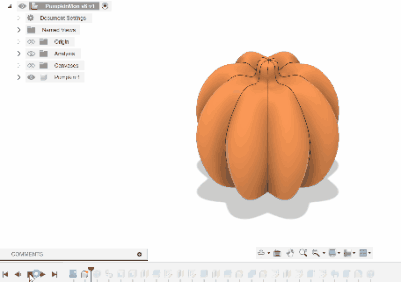
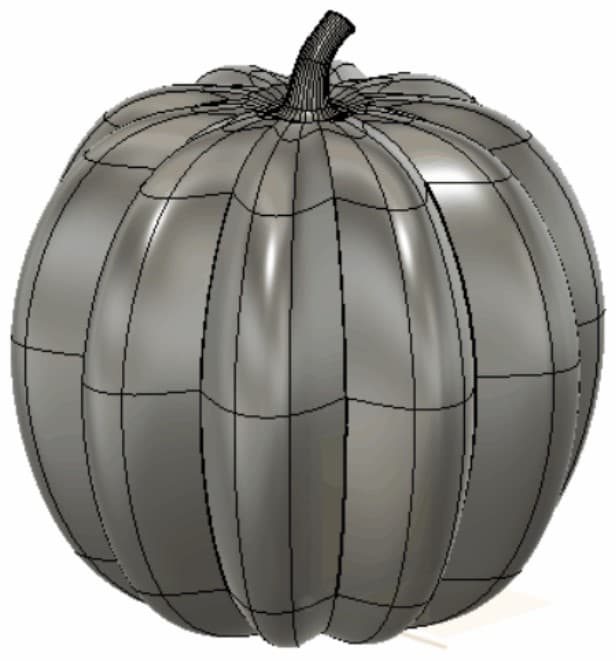
Creating a pumpkin lantern
First, create a sketch to draw the outer edge of one side of the pumpkin's cross-section. You can use a reference image to help guide your drawing.
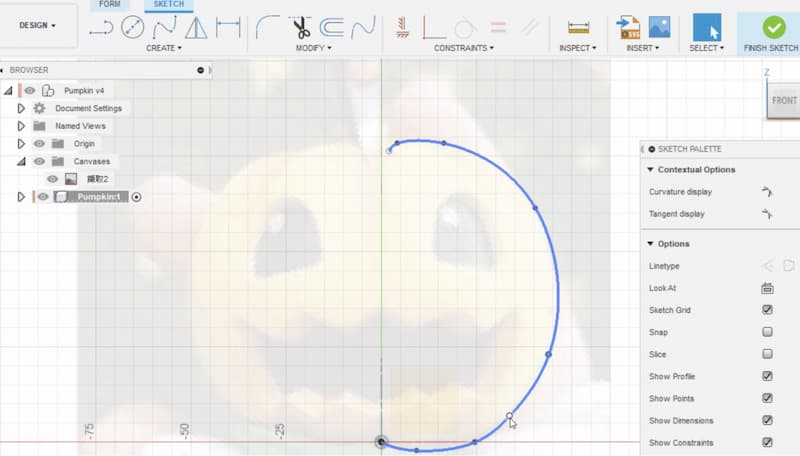
Revolve command to rotate the outer outline into a 3D shape.
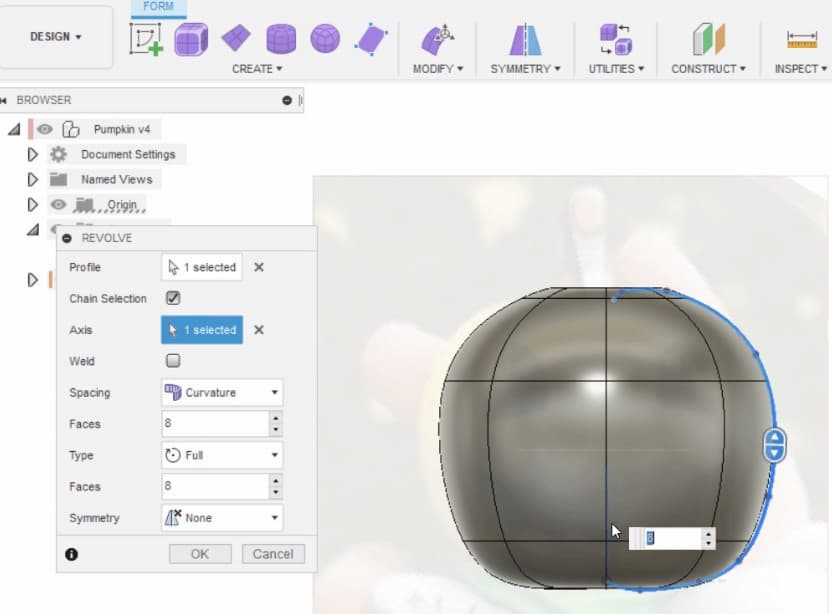
Since the pumpkin is rotationally symmetric, you can set the model to be rotationally symmetric in the
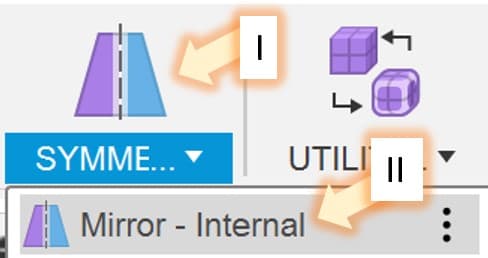
Symmetry - Mirror-Internal. So, by changing just one part, you can simultaneously modify the entire model.
Use
Edit form to adjust one of the outer edge, create the shape of the pumpkin.
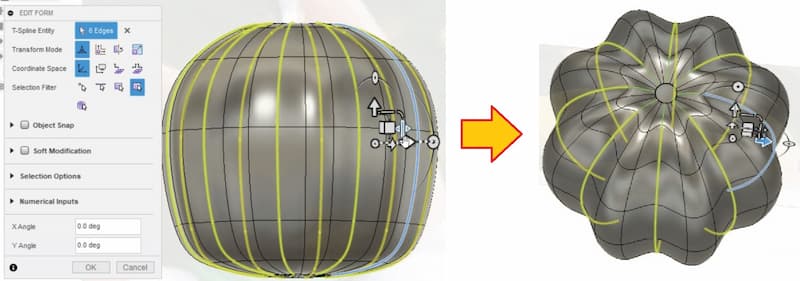
The top part can also be deformed using the
Edit Form feature, but you need to hold the Alt key and pull upward to create the "stem".Holding the
Alt key while using Edit Form allows you to add more content based on the original shape.
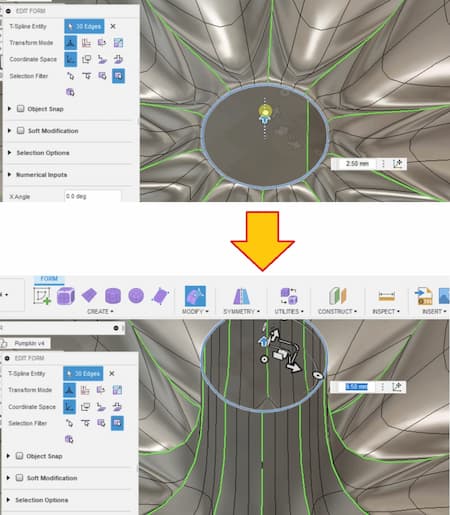
Below is the prototype model completed through Form mode. You can click
Finish Form in the upper right corner to exit Form mode.
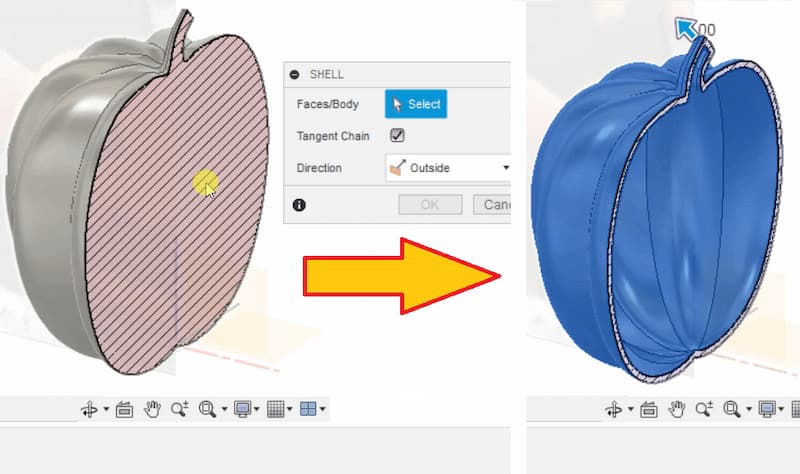
Shell command to convert the model from solid to hollow.
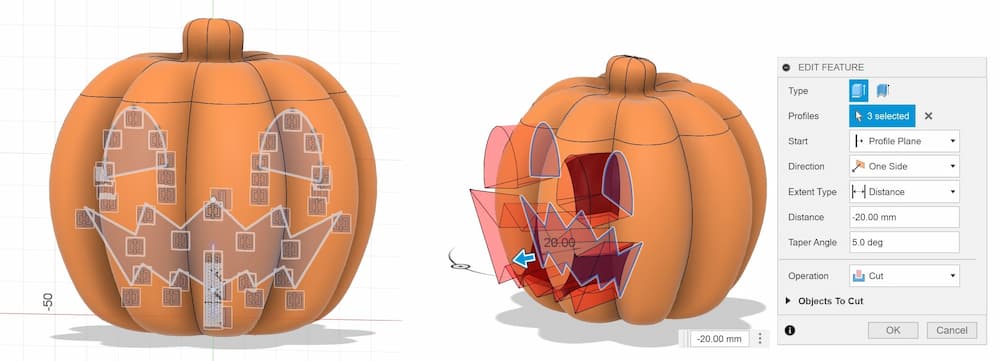
Create sketch, and use the Extrude command to cut the face from the pumpkin.
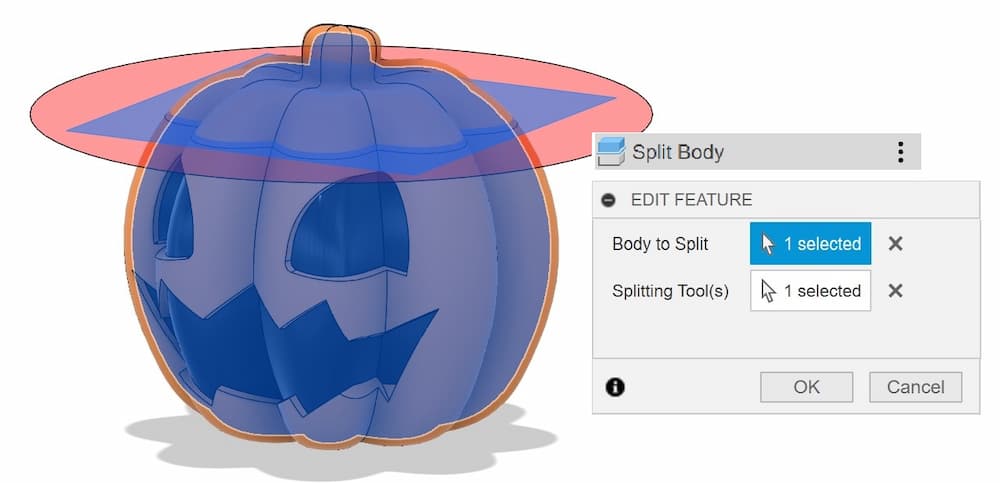
Split body command to split the model.
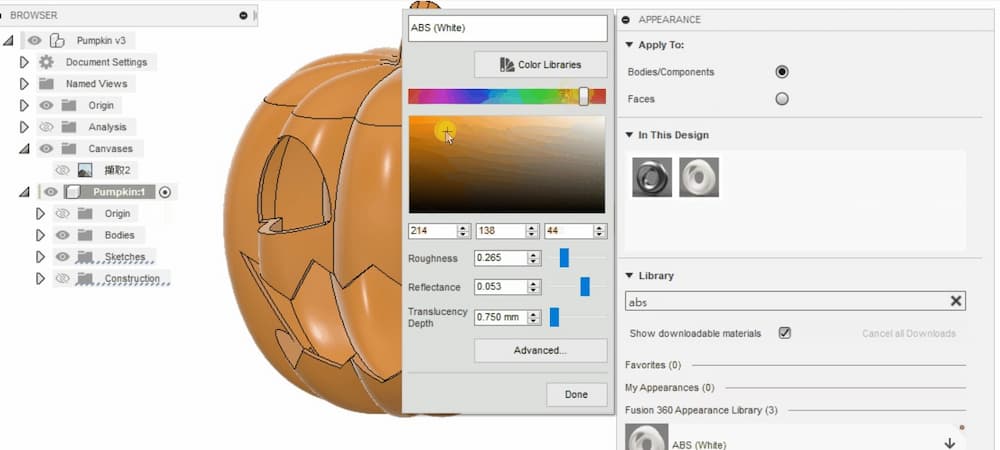
Use the Appearance command to change the material of the model.
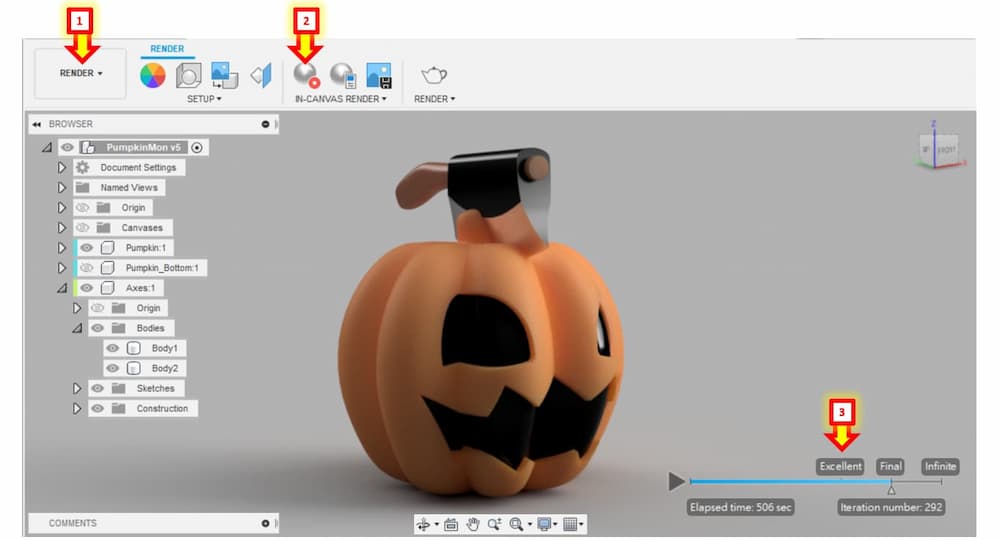
Render mode can make the model look more realistic.
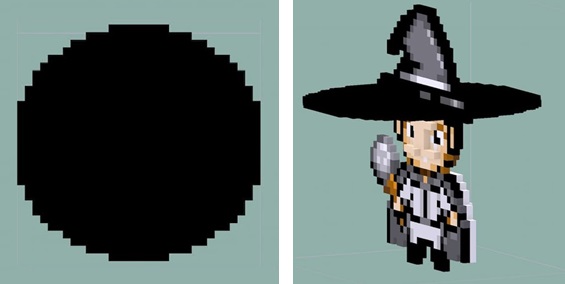
Design with MagicaVoxel
MagicaVoxel is a free voxel modeling tool designed for creating 3D models and animations using a grid of cubes (voxels). It is particularly popular among indie game developers and artists for its simplicity and versatility.
Also, you can import bitmap images into MagicaVoxel to create voxel models based on the pixel data of the image.
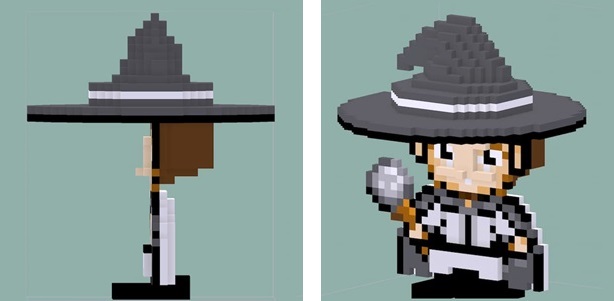
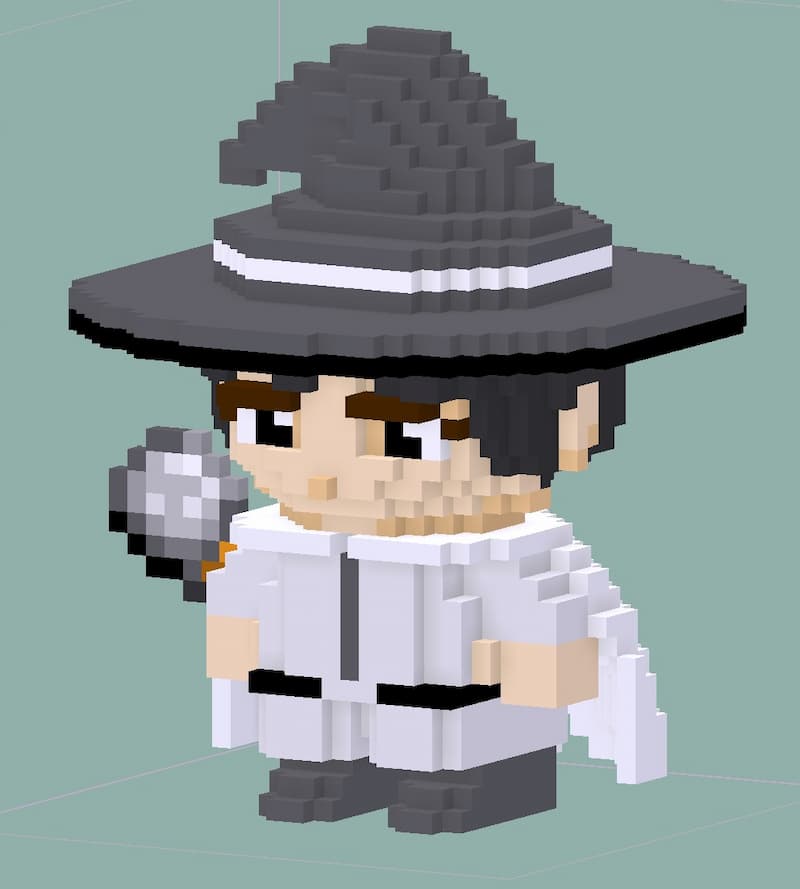
I want a wizard character model for the final project base on the 2D design, which is build in 2D with Mircosoft Paint to import to MagicaVoxel.
Process
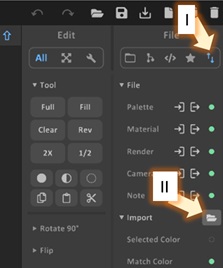
The import botton is here:
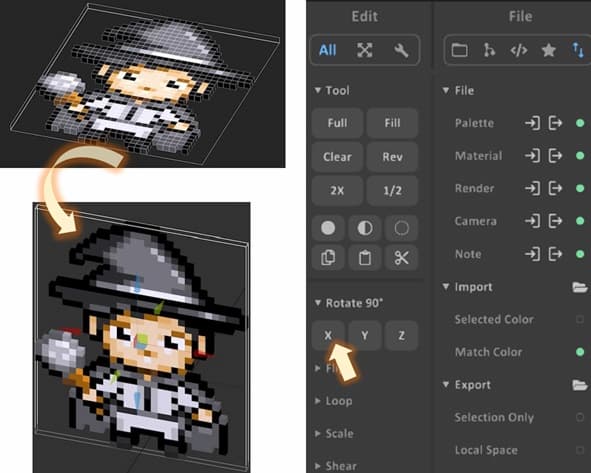
If you want to create a symmetrical model, you can click below to mirror it along the X, Y, or Z axis For example, I choose to build symmetriical model in X axis. (The yellow part)