Week12 - Mechanical & Machine Design
Task of this week
Mechanical Design
- Design a machine that includes mechanism+actuation+automation+application
- Build the mechanical parts and operate it manually
- Document the group project and your individual contribution
Machine Design
- Actuate and automate your machine
- Document the group project and your individual contribution
We have designed a writing machine in group. Here's the group works:
3D Modeling by my classmate LONG WAI CHAN.
Firmware of machine (Individual Contribution)
File Sharing
- MQTT-text-Gcode-GRBL in Github
Open Source Used
Firmware of our machine
Refer to tutorial of howtomechatronics.com, GRBL will be applied as firmware of machine.
GRBL: A popular open-source firmware for controlling CNC machines with Arduino. It interprets G-code commands and controls the stepper motors accordingly.
The stepper motors are controlled by a microcontroller. Arduino development board is applied and GRBL firmware is uploaded to the development board.
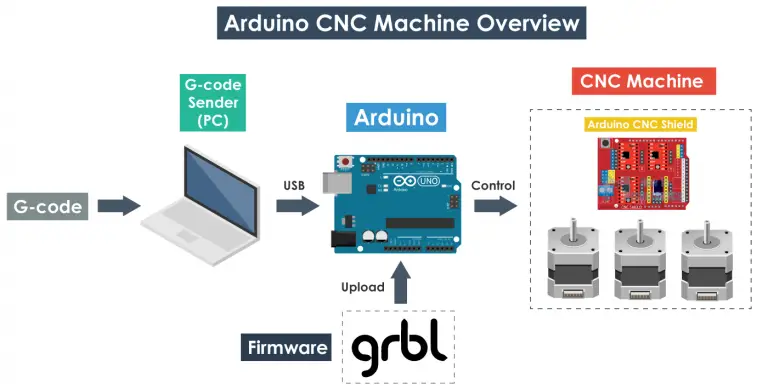
From the diagram we can see where the GRBL take place in the “big picture” of the working principle of a CNC machine. It’s a firmware that we need to install or upload to the Arduino so it can control the stepper motors of the CNC machine.
Required Hardware for controlling the machine
- Arudino In our case, Arduino nano is applied.
- Stepper Motors To provide the motion of the machine. NMEA 17 steppers are choosen in this assignment.
- Drivers
For driving the stepper motors we need drivers. A4988 driver is a common driver to driving NMEA 17 stepper motors.
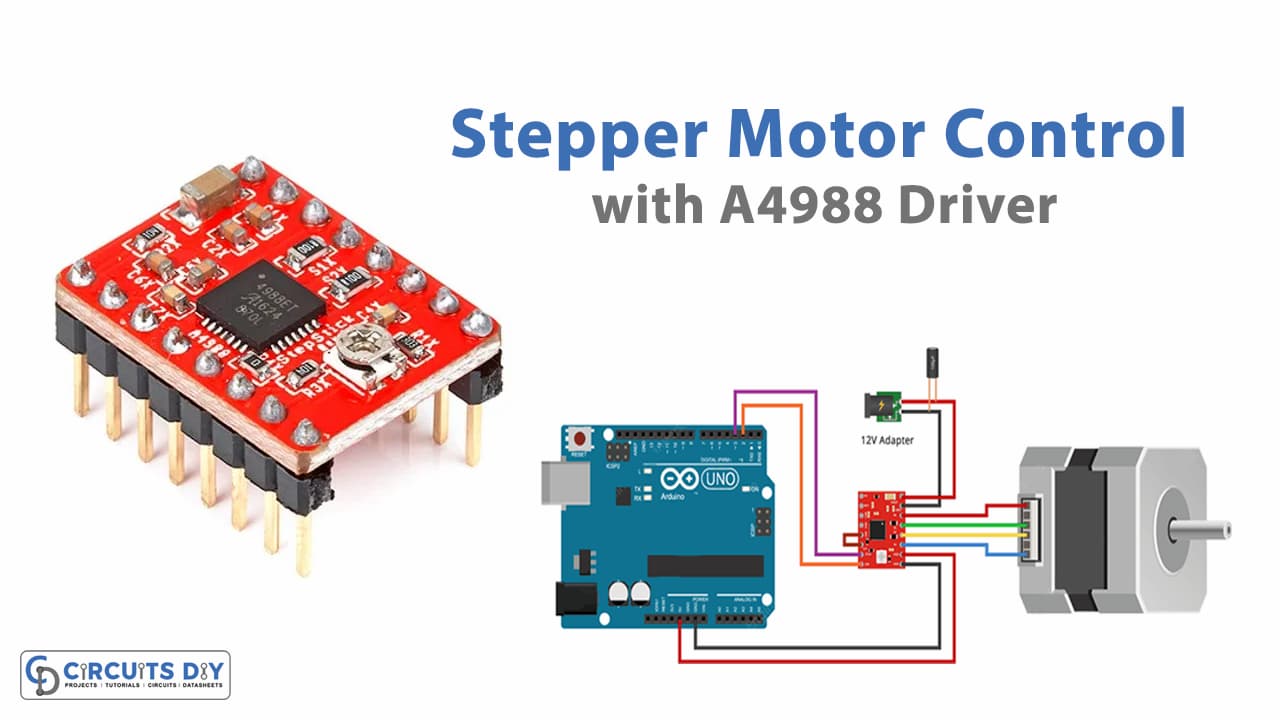
- Arduino CNC Shield or connecting the stepper drivers to the Arduino, the easiest way is to use an Arduino CNC Shield. It utilizes all Arduino pins and provides an easy way to connect everything, the stepper motors, the spindle/ laser, the limit switches, cooling fan etc.
Upload GRBL Firmware
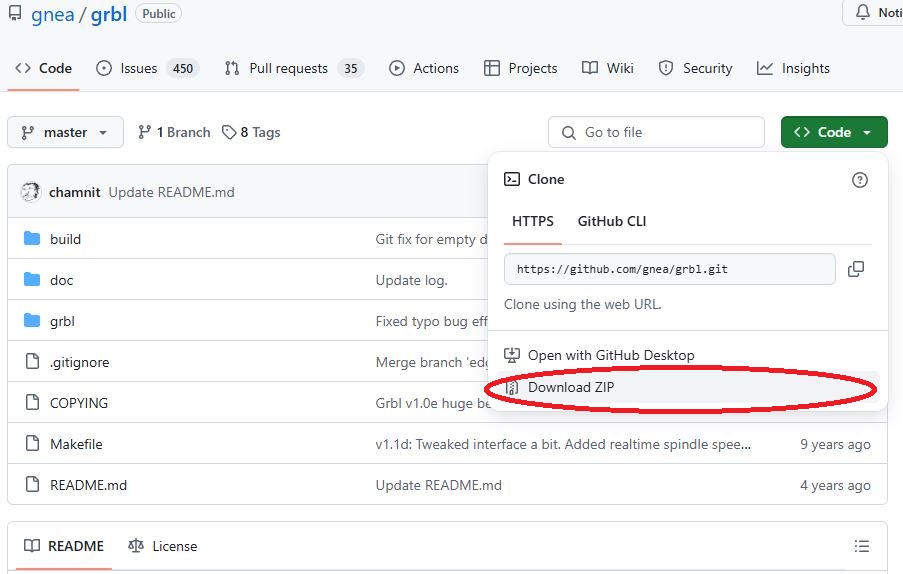
Refer to github of grbl. There's some steps to upload the GRBL firmware to the arduino development board.
- Step1: Download the GRBL fireware from github.com.
- Step2: Add library to Arduino IDE.
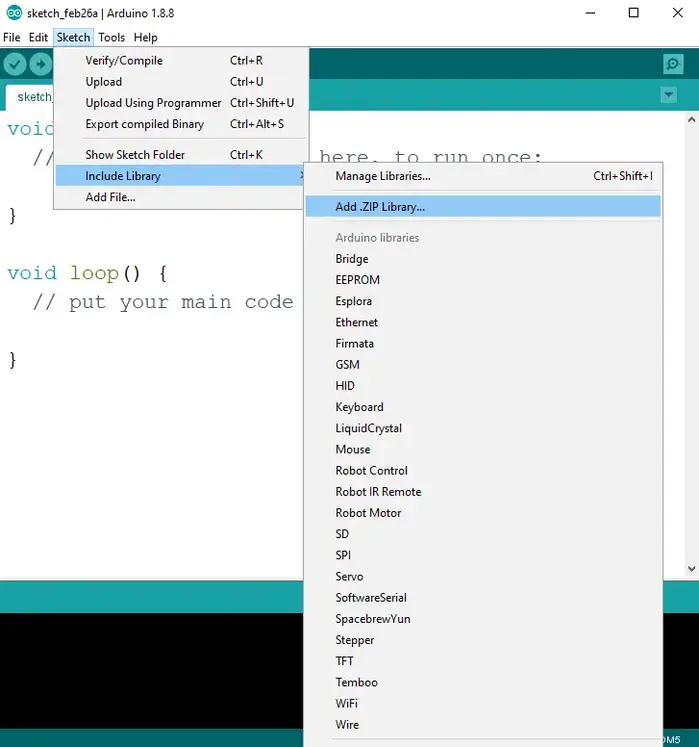
Navigate to the extracted folder “grbl-master”, in there select the “grbl” folder and click the open file. Now we have to GRBL as an Arduino Library.
Next, navigate to File > Examples > grbl > grblUpload. A new sketch will open and we need to upload it to the Arduino board.
Connecting CNC shield
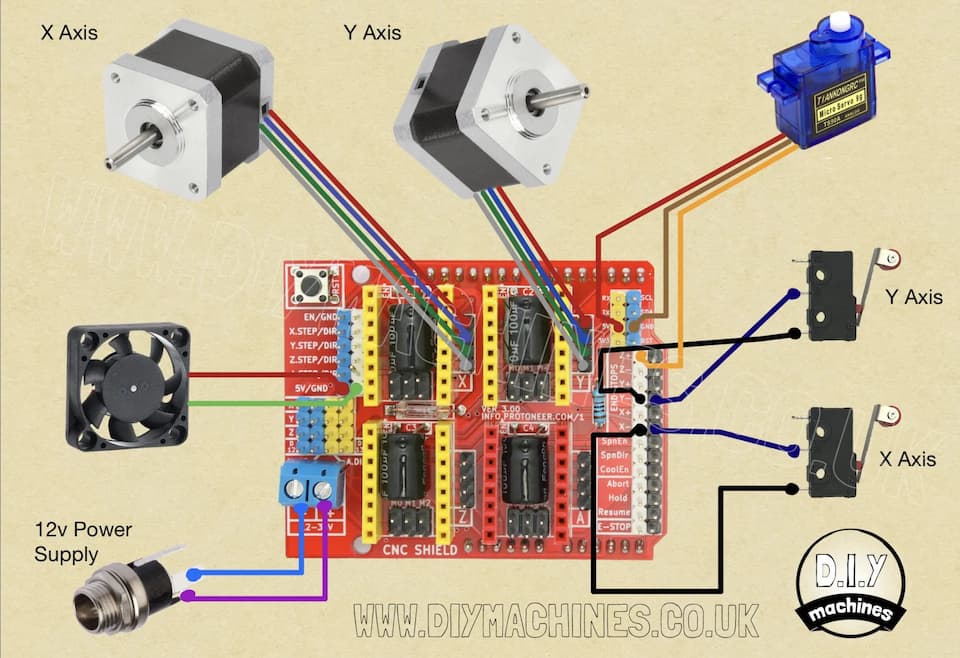
According the diagram, we connect the stepper motors, servo, limit switches to the CNC shield.
Then, connect the 12V power to the CNC shield to drive the stepper motors.
Controlling the machine and testing
In this assignment, Universal G-Code Sender is applied for testing our machine.
Universal G-Code Sender, more commonly known as UGS, is free CNC controller software. It uses the term “Universal” because it’s compatible with several different firmware options like GRBL, TinyG, Smoothieware, and G2core.
To download UGS, go to the UGS GitHub page and select the version and your preferred OS. Windows, Linux, and MacOS are supported. This will download a .zip file. Unzip it and open the executable file from the folder ugsplatform-win\bin\ugsplatform64.exe.
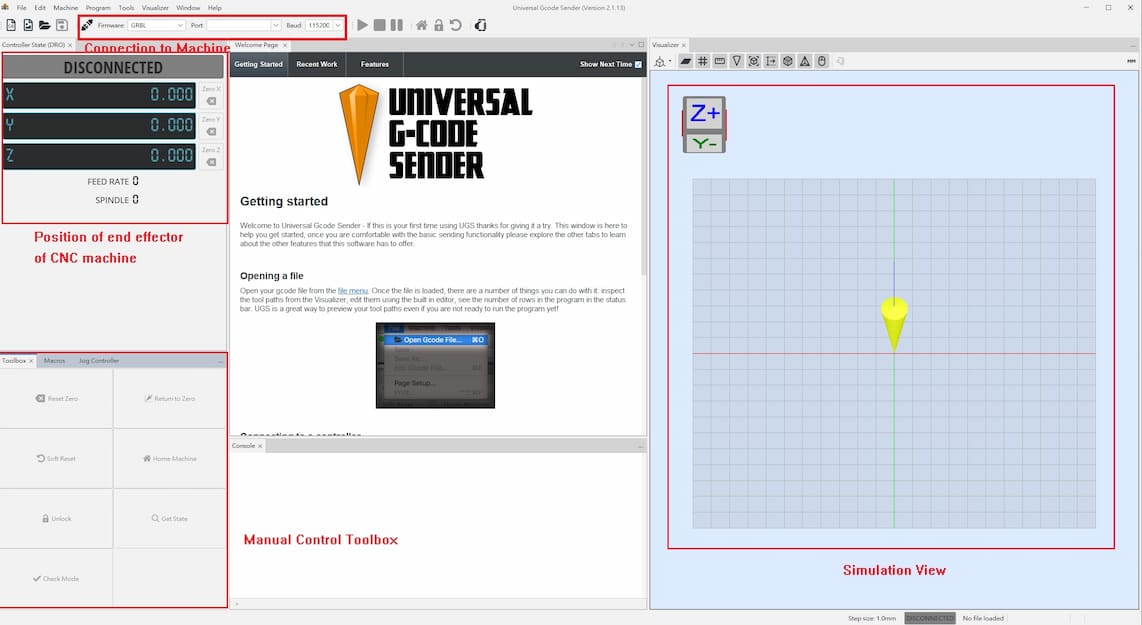
The machine can be connected via choosing the correct COM port and press the connect button. After connecting the machine, we can control the machine manually or running the G-code. We can also change the moving resolution in joy controller.

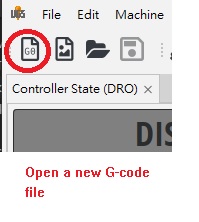
Let us testing the machine. First, add a new g-code file.
After adding a new g-code file, some default code exists.
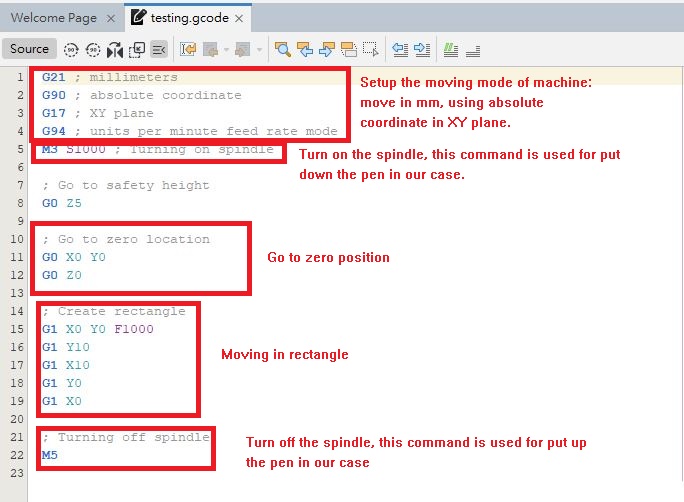
There's some of G-code we should know:
- G00 Rapid Positing (Usually used in origin point)
- G01 Linear interpolation (feeding)
- G21 metric system
- G28 return to reference point
- M03 turn on the spindle in clockwise direction (in the assignment it's used for put down the pen)
- M05 turn off the spindle (in the assignment it's used for take up the pen)
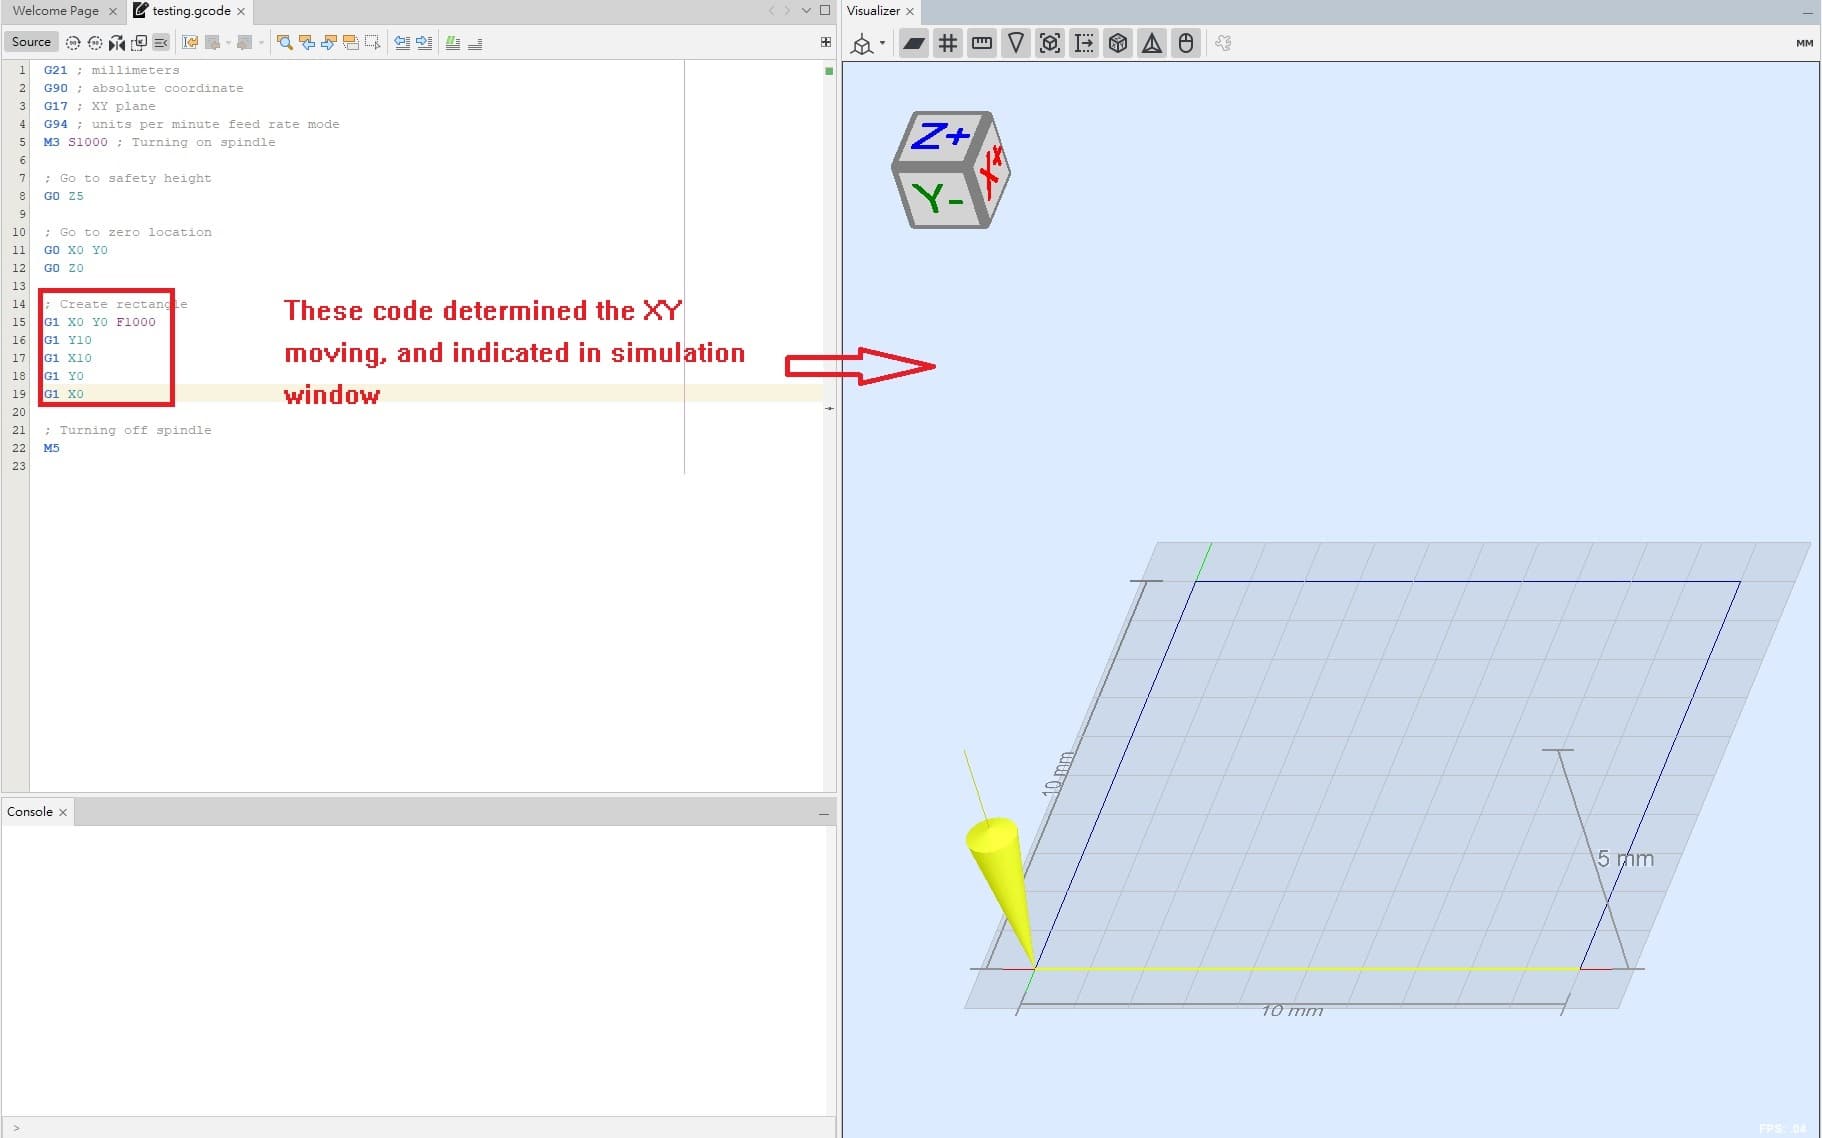
This is a sample code for cutting a 10mm*10mm rectangle, which is shown in the following diagram.
We will generate the other route to draw the image. We need to transfer the vector of image to G-code.
Transfer a image to gcode
Refer to tutorial of Chronic Mechatronic in Youtube, there's a extension software called GcodePlot. It's a extension which is used for transfer the image vector to gcode.
First, download the GcodePlot in github page in zip file.
And also download the xaml2svg and copy to the inkscape folder share\inkscape\extensions.
Then, extract and copy the GcodePlot files to share\inkscape\extensions\xaml2svg folder.
Now, we can save the image file to gcode!!
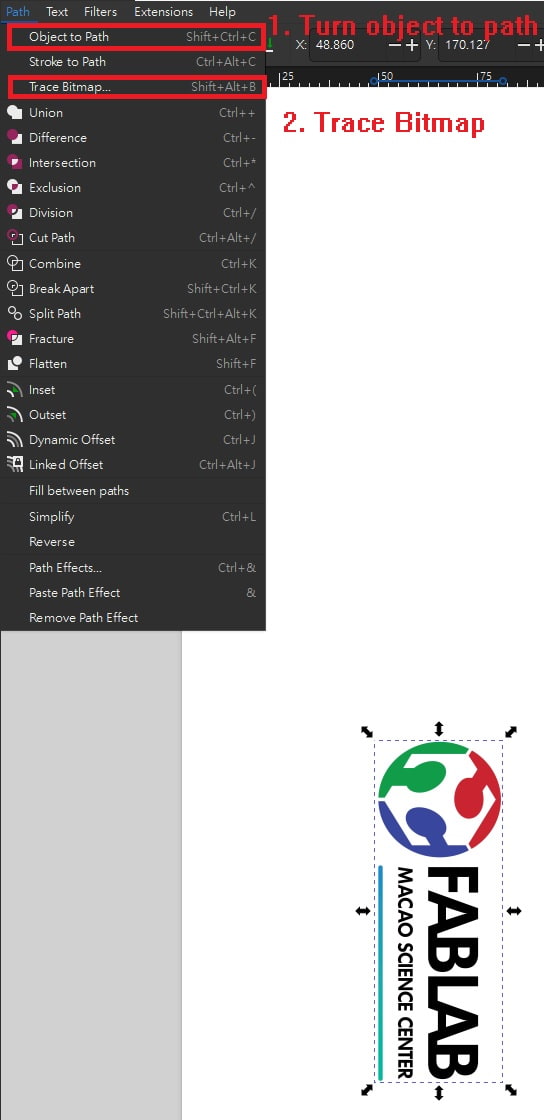
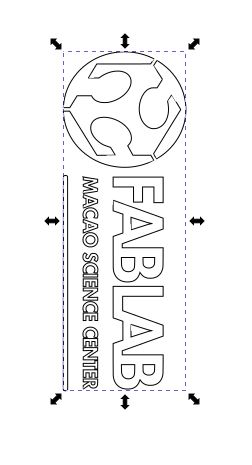
Insert a image to inkscape and turn the image to path. Then, choose "Trace the bitmap".
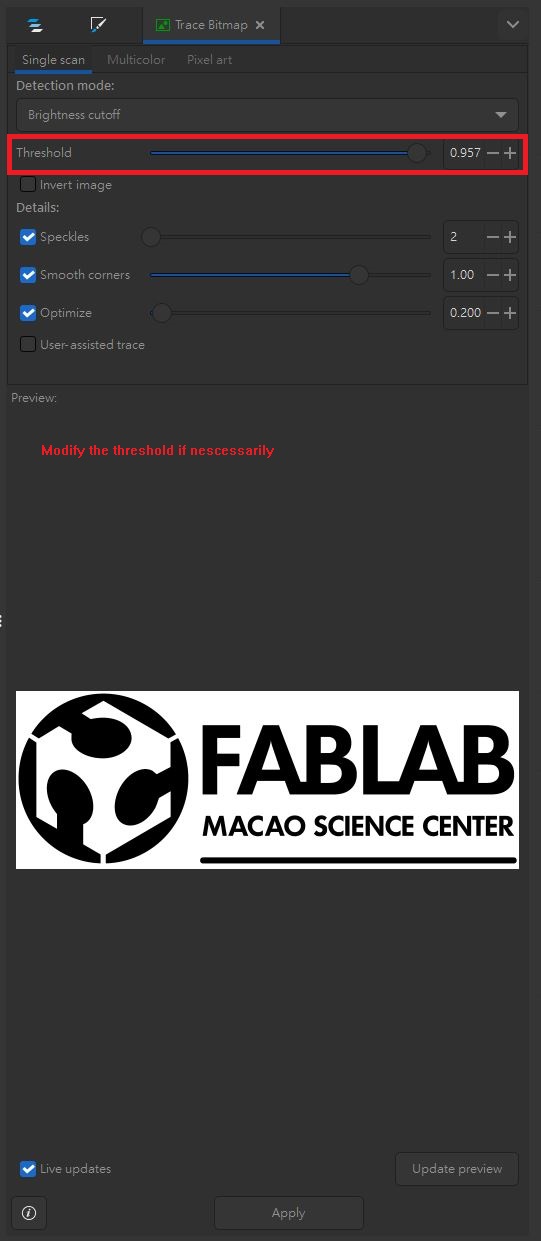
Then, modify the threshold in trace bitmap function at right hand side.
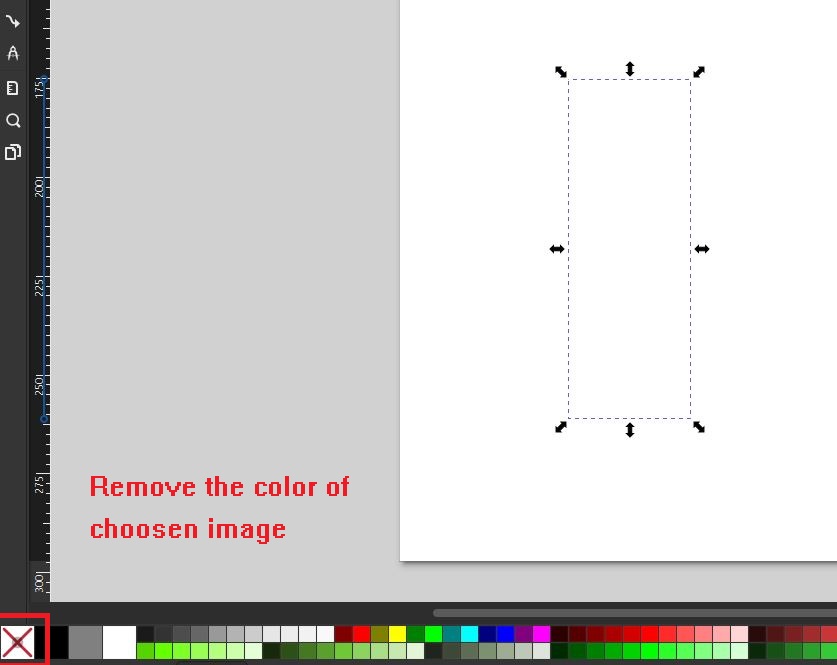
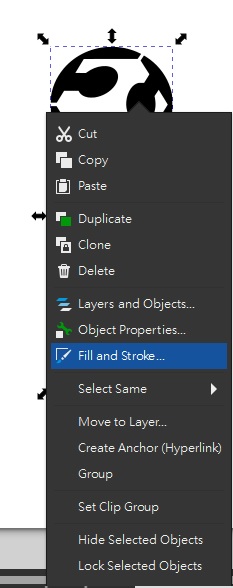
Remove the color of image and right click the picture and choose "Fill and Stroke".
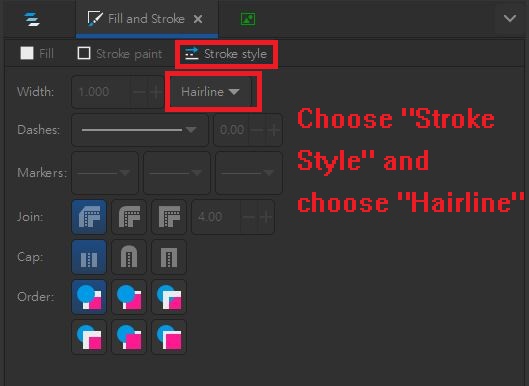
Modify the thickness of outline as "hairline".
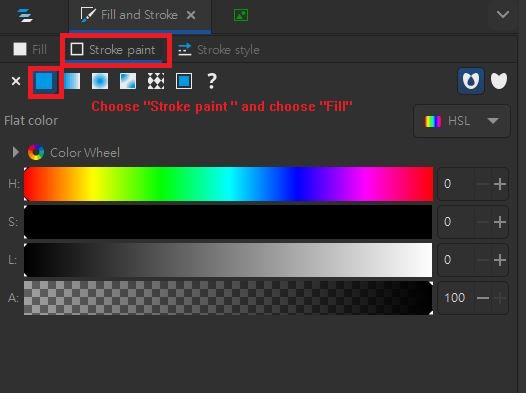
Then, go to "Stroke paint" and choose "Fill", the outline of the image is modified!!
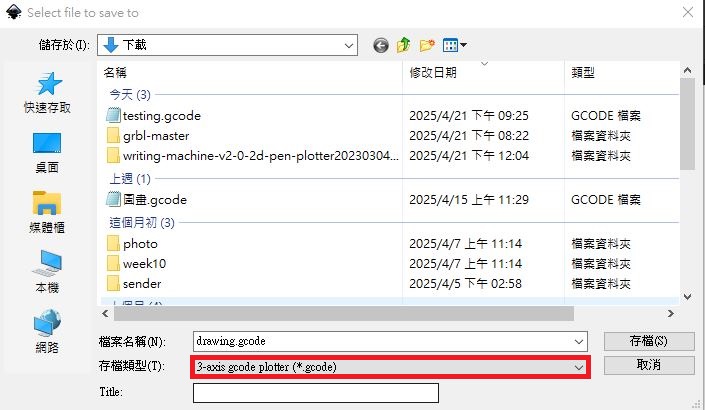
Save the image as "3 axis gcode plotter".
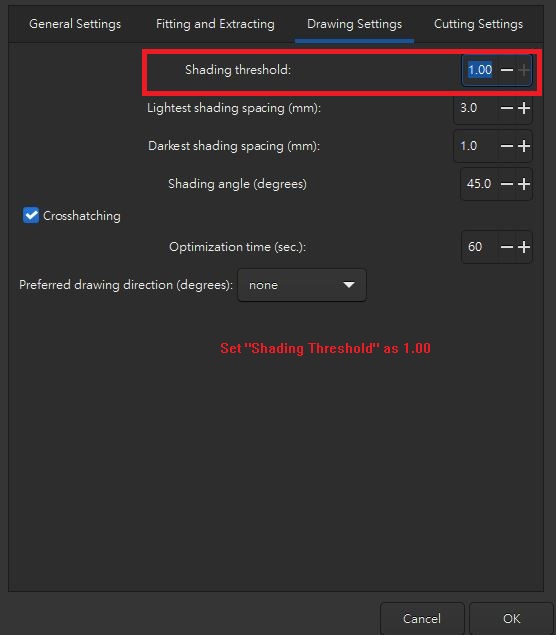
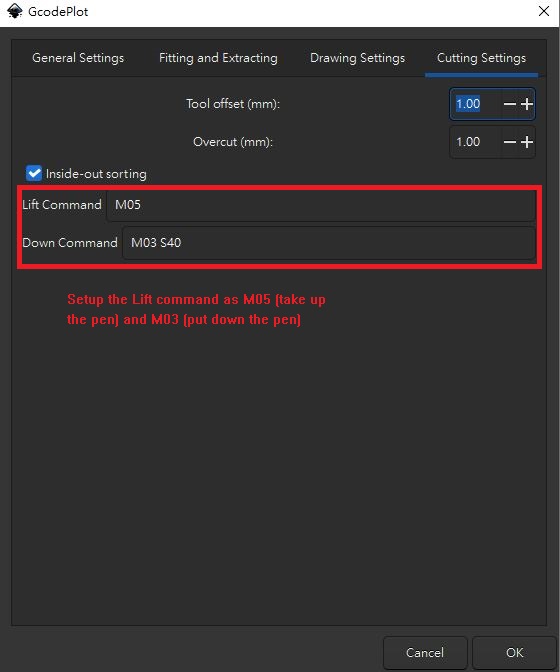
Then, modify the parameters as following:

It's finish to transfer the image to gcode.
Open the saved Gcode file by notepad and copy the gcode. The initial part is not necessarily.
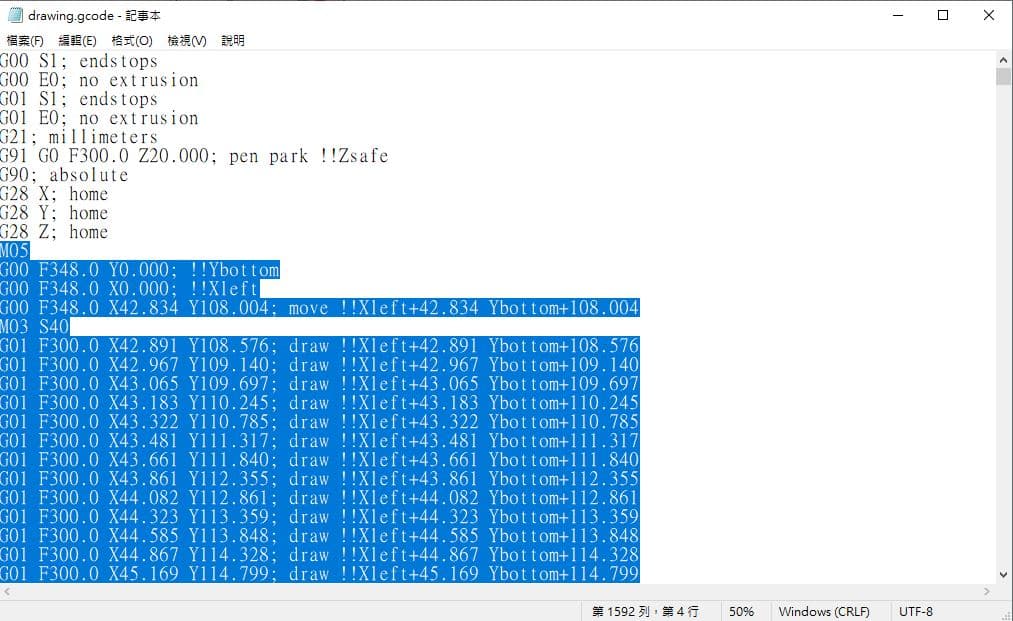
And paste to the gcode file in Univeral G-code Sender. Save the file, the simulation view will be updated.
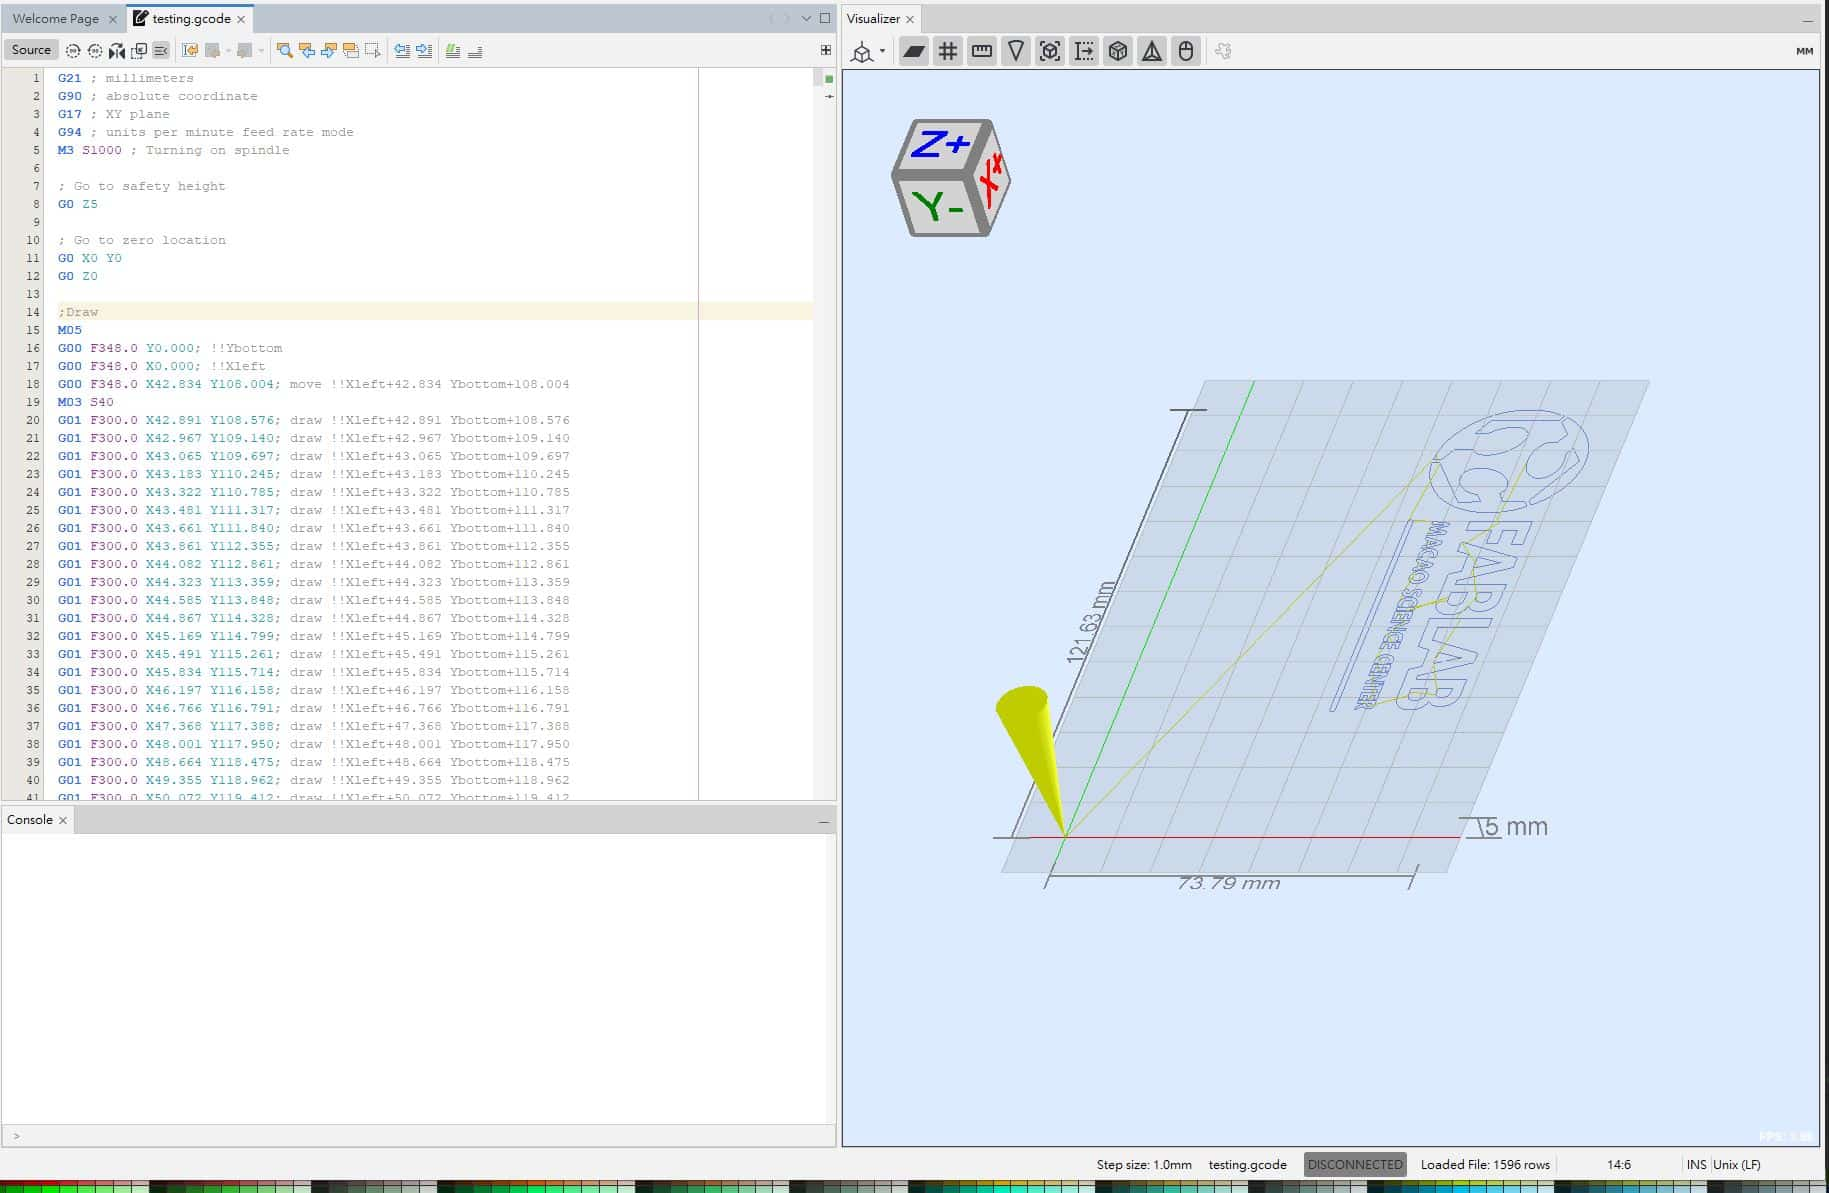
Finally, connect the machine and press "Start" button, the drawing process will be started.
![]()
During the drawing process, a yellow arrow is mark as current position in simulation view.

The final result of the drawing: