Principles and Practices, Project Management
This weeks assignment:
- Plan and sketch a potential final project
- Read, sign the student agreement and commit it to your repo
- Work through a git tutorial
- Build a personal website describing you and your final project. Refer to the lecture material for examples
Setting up GitLab
GitLab basics
Originally developed in 2005 by Linus Torvalds, Git is an open source, distributed version control system designed to handle all types of projects quickly and efficiently. It can be used to organize your own code versions, changes to documents and other information,
or to manage software development, etc. within a development team. Because GitLab is somewhat counterintuitive, you should familiarize yourself with the basic structure of it. I can recommend the following YouTube video for this: How Git Works: Explained in 4 Minutes.
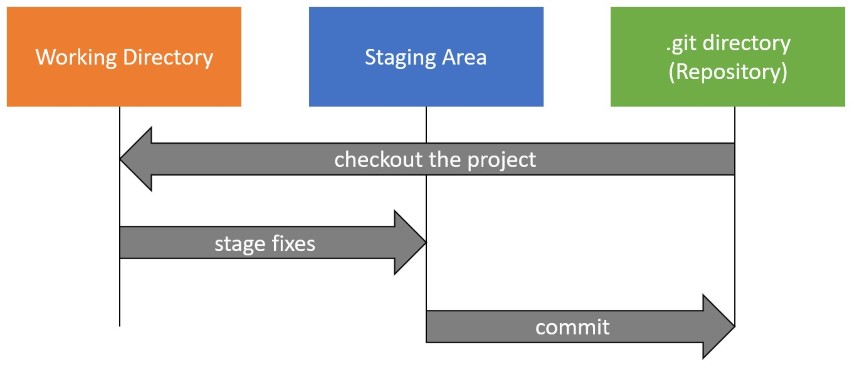
At GitLab we work with a local directory, the check-out of a project version in which we add, remove or change files. At the end of the chain is our repository, which in this case is the storage location on the server provided by FabAcademy. The staging area in GitLab lies between these two instances.
The staging area or index is a file that shows which changes should be included in the next commit - i.e. the next update of the repository - because perhaps not all changes should go directly into the repository.
pushing changes with GitGUI
The part that explains how to set up GitLab is below, so if you still need to do that, maybe check that out first. Here I already have the working directory, which was originally cloned from the FabAcademy server and where the connection to the repository is created in Git.
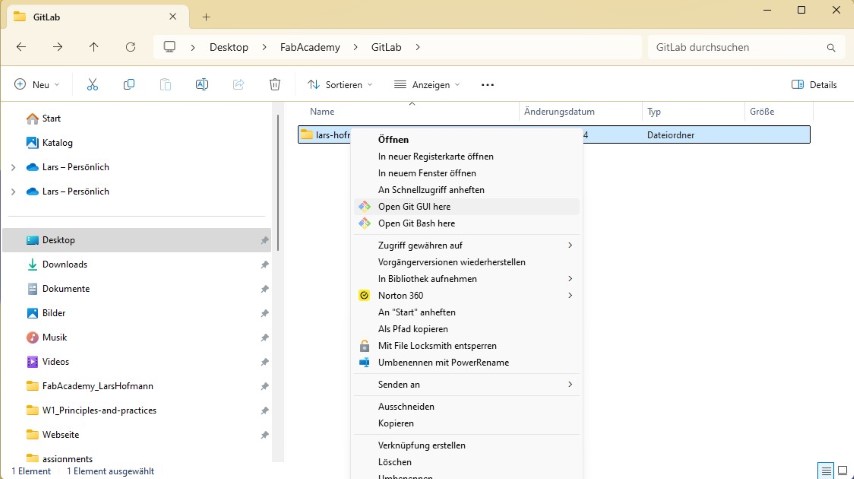
I right-click on this folder and then select “show more options”. Afterwards it should look similar to the screenshot below.
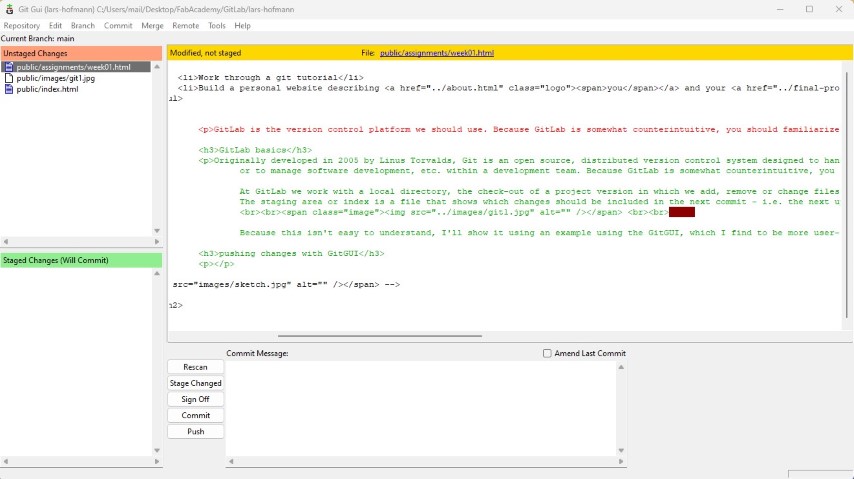
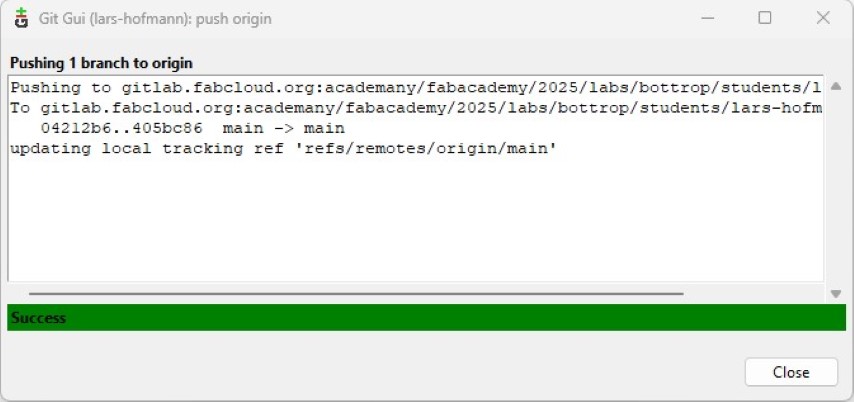
The next step is to press the commit button, where you should write a commit message - a kind of comment on the new version of the overall project. This means that everything we have committed disappears from the "Staged Changes" part, so you would think it was already gone. In reality, we then have to finally trigger the change with “Push”. A window will then open again in which we don't have to change anything, just confirm with "Push" again.

setting up GitLab
Are you sure you want this? First of all, a huge thank you to our instructor and former graduate with the phenomenal first name, without his help the whole fun would have been much more complicated.
Let's start with the most pleasant part: download and install GitLab.
Next, create a new folder that you want to use as the location for your working directory. As you can see in the screenshot above to open the GitGUI of my file structure, I created the “GitLab” folder for myself. The next step is to initially clone the repository into the folder. This goes in two ways.
On the one hand, it is possible via the command prompt. The second option is to open the folder I called "GitLab" with GitBash, analogous to the above, instead of with the Git GUI. If you have chosen the command prompt, you have to use the command cd (change directory) to jump into the folder that you
would otherwise open with GitBash. From then on the path is the same for both variants, you execute the following commands one after the other:
cd "your repository"
git config user.name "Your Name"
git config user.email "you@example.org"
git config --global user.name "Your Name"
git config --global user.email "you@example.org"
in my case:
cd lars-hofmann
git config user.name "Lars Hofmann"
git config user.email "l.hofmann**@gmail.com"
git config --global user.name "Lars Hofmann"
git config --global user.email "l.hofmann**@gmail.com"
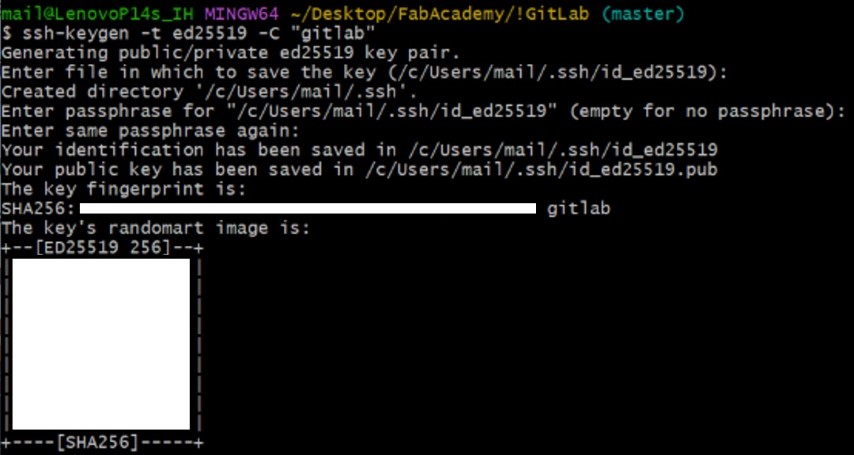
ssh -keygen -t ed25519 -C "gitlab"
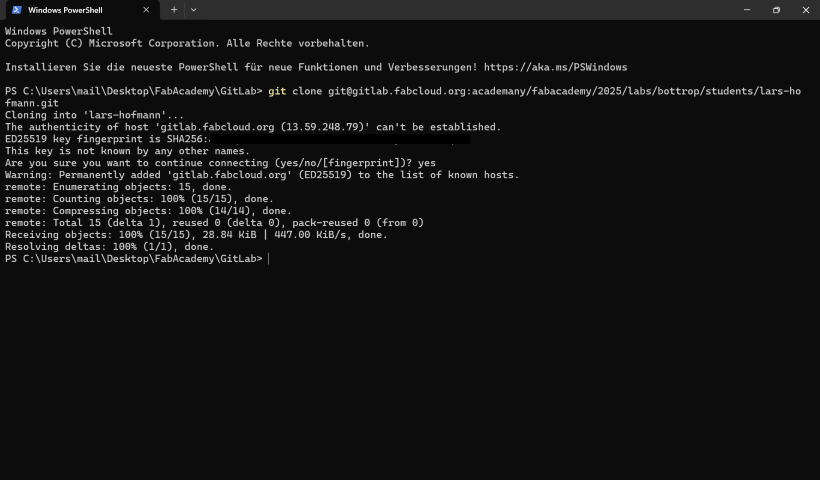
As promised, the final instructions follow here. Now we can clone our repository to our local folder. The command for this is the following:
git clone git@gitlab.fabcloud.org:your/project/path.git
in my case: git clone git@gitlab.fabcloud.org:academany/fabacademy/2025/labs/bottrop/students/lars-hofmann.git
Setting up this website
basic structure
Before I was confronted with programming a website here, I had never had any contact with it. But I would like to use this website to learn html, because I believe that this can become a valuable skill for various ideas in the future. That's why I started by looking at tutorials, and I can really recommend the following two for all German speakers: Lerne HTML in 20 Minuten, CSS Kurs in 40 Minuten. (learn html in 20 minutes, css course in 40 minutes)
Because you can lose a lot of time in design with css, I used this template available under a Creative Commons license, which you can find and download here. This was my starting point for building this website.
Whenever I didn't understand individual commands, I looked them up here. This page helped me a lot so i highly recomment taking a look at it.
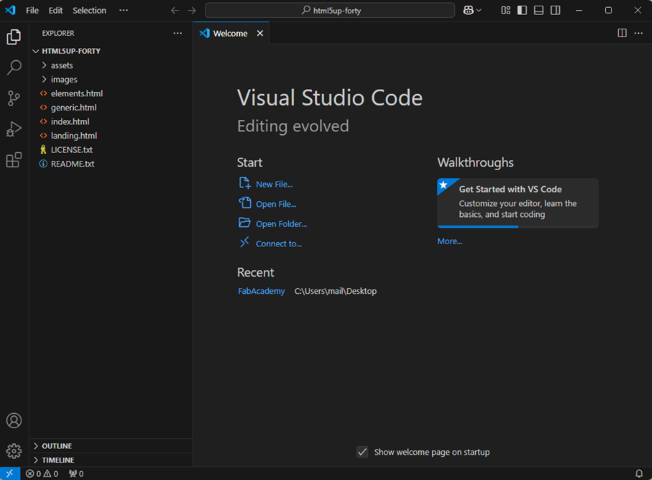
I downloaded the template and extracted the folder after the download. Since I work with Visual Studio Code on recommendation, I opened the folder there afterwards.
I then had to confirm that I wanted to trust the author of these documents. Of course I did that, but at the same time it should not be your standard to do the same. Let's hope it goes well :D
After opening it, the entire contents of the folder with all the files are displayed in the top left of the file explorer in Visual Studio Code. With a double click you can now open all the files and edit the code or view all the images that have already been inserted as an example.
The next step is to see what the html code looks like in the end as a web page. I decided to build my landing page on the index.html, so I opened it with a double click and then opened Debugging at the top via Run > Start Debugging. The program suggests various web browsers for this purpose, in my case I use Google Chrome for debugging. After you have chosen a web browser, the website opens in it. I displayed both windows side by side for the further process. In the first step it looks like this.
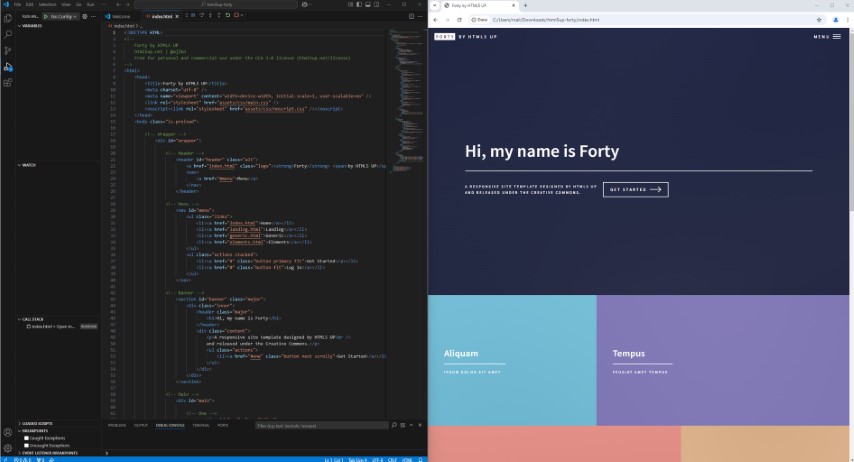
Since I can't go into everything in the html code, I'll talk about the general structure here, try to provide some examples and cover the things that might be a little tricky when copying.
some html basics
As already mentioned, html is primarily about the content of our website, the appearance and other functionalities of our elements, such as the buttons that interact when hovering, are defined in css.
The website ends at the top with a header, where you will also find the menu, for example. The part that your eyes are currently looking at is the body of the HTML document, where all the content is usually found. In my case there is also a footer within the body.
This is the part that follows below the thin dividing line at the bottom.
In the html structure, the whole thing would look like this, indented:
<!DOCTYPE HTML>

<html>

	<head>
		<title>FabAcademy Lars Hofmann</title>
		...
	<head>

	<body>
		<header>
			<nav> specifications of the menu </nav>
		</header>

		<div> <!-- comments work like this (crazy) -->

		... the whole content goes here
		<h2> headlines go here </h2>
		<p> text goes inside the p <br> the next line comes here </p>

		<span class="image fit"><img src="images/aboutme.jpg" alt="" /></span>
		<!-- this was a picture that works at least in this example -->

		</div>

		<footer>
		... reference to the template, maybe a fancy button
		</footer>
	</body>

</html>
By the way, I hope I'm not the only one who finds the HTML commenting style absolutely strange.
a few impassables
adding images
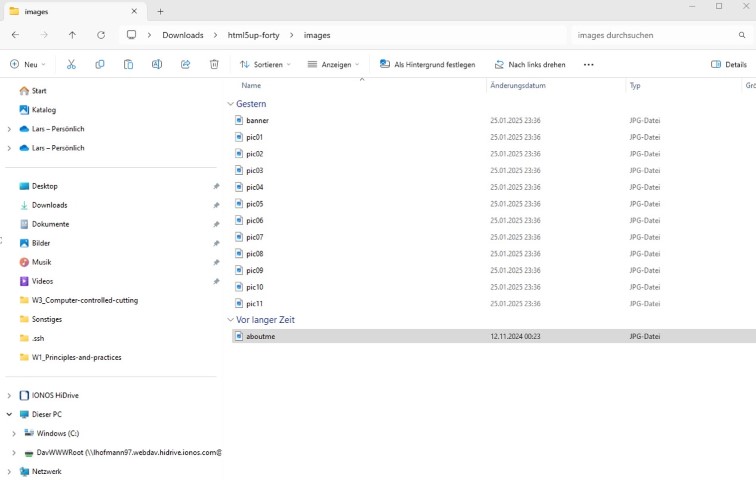
If you want to add images to your project or website, you can simply add the images to the images folder, then they will immediately appear in Visual Studio Code and you can reference them as sources in the HTML code as shown above. The example here is the aboutme.jpg. Maybe think about what resolution you need for your images. On the one hand, high-resolution images require more space on the server, and on the other hand, they have to be loaded by everyone who views the website and therefore may use up a lot of energy unnecessarily.
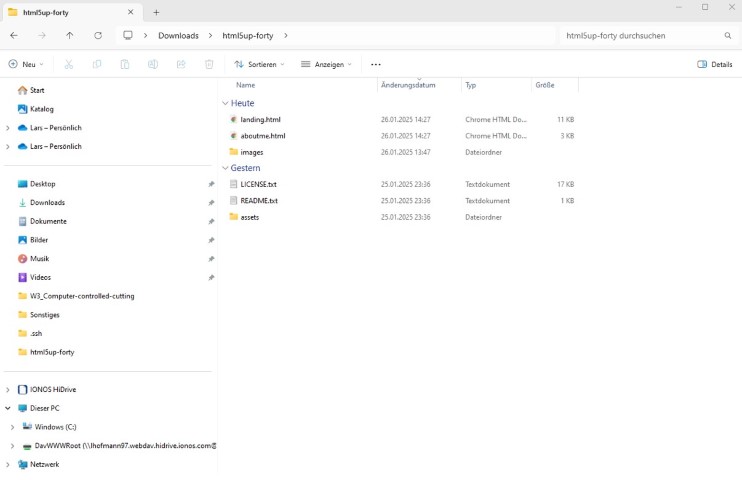
adding another html-file
At the moment I'm working on bringing my documentation from Microsoft Word to this website, my website already consists of five different html files. Building the pages was obviously more fun than documenting them, who could have imagined that? I only used two documents from the original download; I had no use for the elements.html and the landing.html. I built my landing page from the index.html and the weekly pages, the page for the final project, the about me page and the student agreement are based on the generic.html. But none of this matters if you don't work with the same template as I did. Nevertheless, for other projects you will need new html files just as quickly to set up different subpages. On paper, as with the pictures, the whole thing is very simple. You simply go to the folder, it is important to go to the place where the other html files are stored. There you create a new text document by right clicking > new > text document. Now give the document a name that will be easy to identify later on many subpages and give it the ending .html! This is the way I created the wonderful sounding document week01.html.txt. With the ending .txt the file is unusable for our purposes. I got the ending because my settings were wrong. To fix this, I had to click on the three dots above the files, then deselect "options" and then "hide extensions for known file types" and confirm this with "adopt". You should then see the file types and endings for all files, as is the case with me in the screenshot. Now you can create a file with the ending .html and thus an html file without the ending being automatically overwritten. As soon as you have created the file, you will immediately find it in Visual Studio Code and can open it and program it there. As a basis, I always copied the code from another file, but of course you don't have to do that if you know HTML.