Embedded Programming
Ready?...
Group assignment
The group's tasks: browse through the data sheet for your microcontroller and compare the performance and development workflows for other architectures fablab website.
General Objective
The idea is to make an ESP32 based system, specifically the ESP32 with camera, to monitor my room from Telegram. The ESP32 will connect to my home wifi, while with a bot created in the Telegram app, we can order the ESP to take photos and send them to the bot.
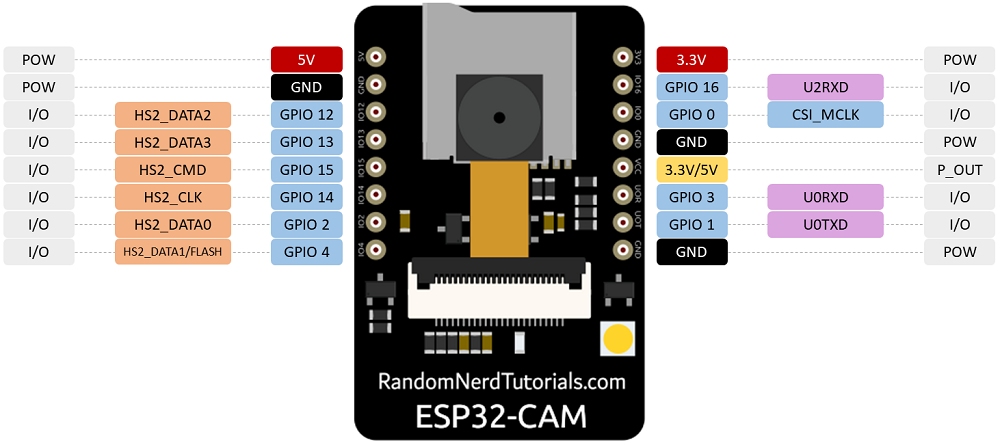
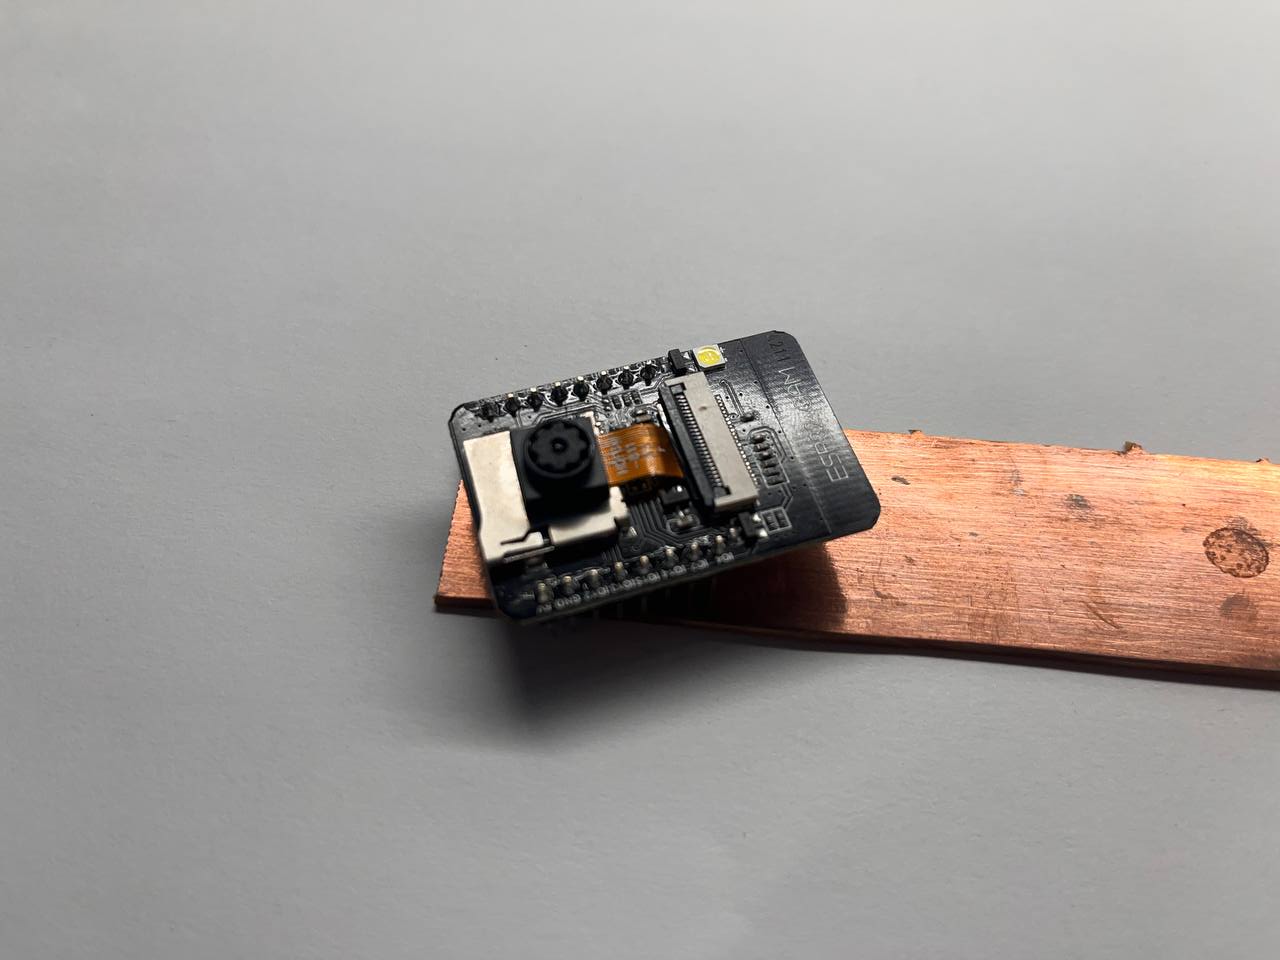
We will use the ESP32 camera module, a very powerful processor that, for an affordable price, integrates wifi, bluetooth, camera and many other things in a very small size. It also has a large community on the internet, so it is quite easy to work with.
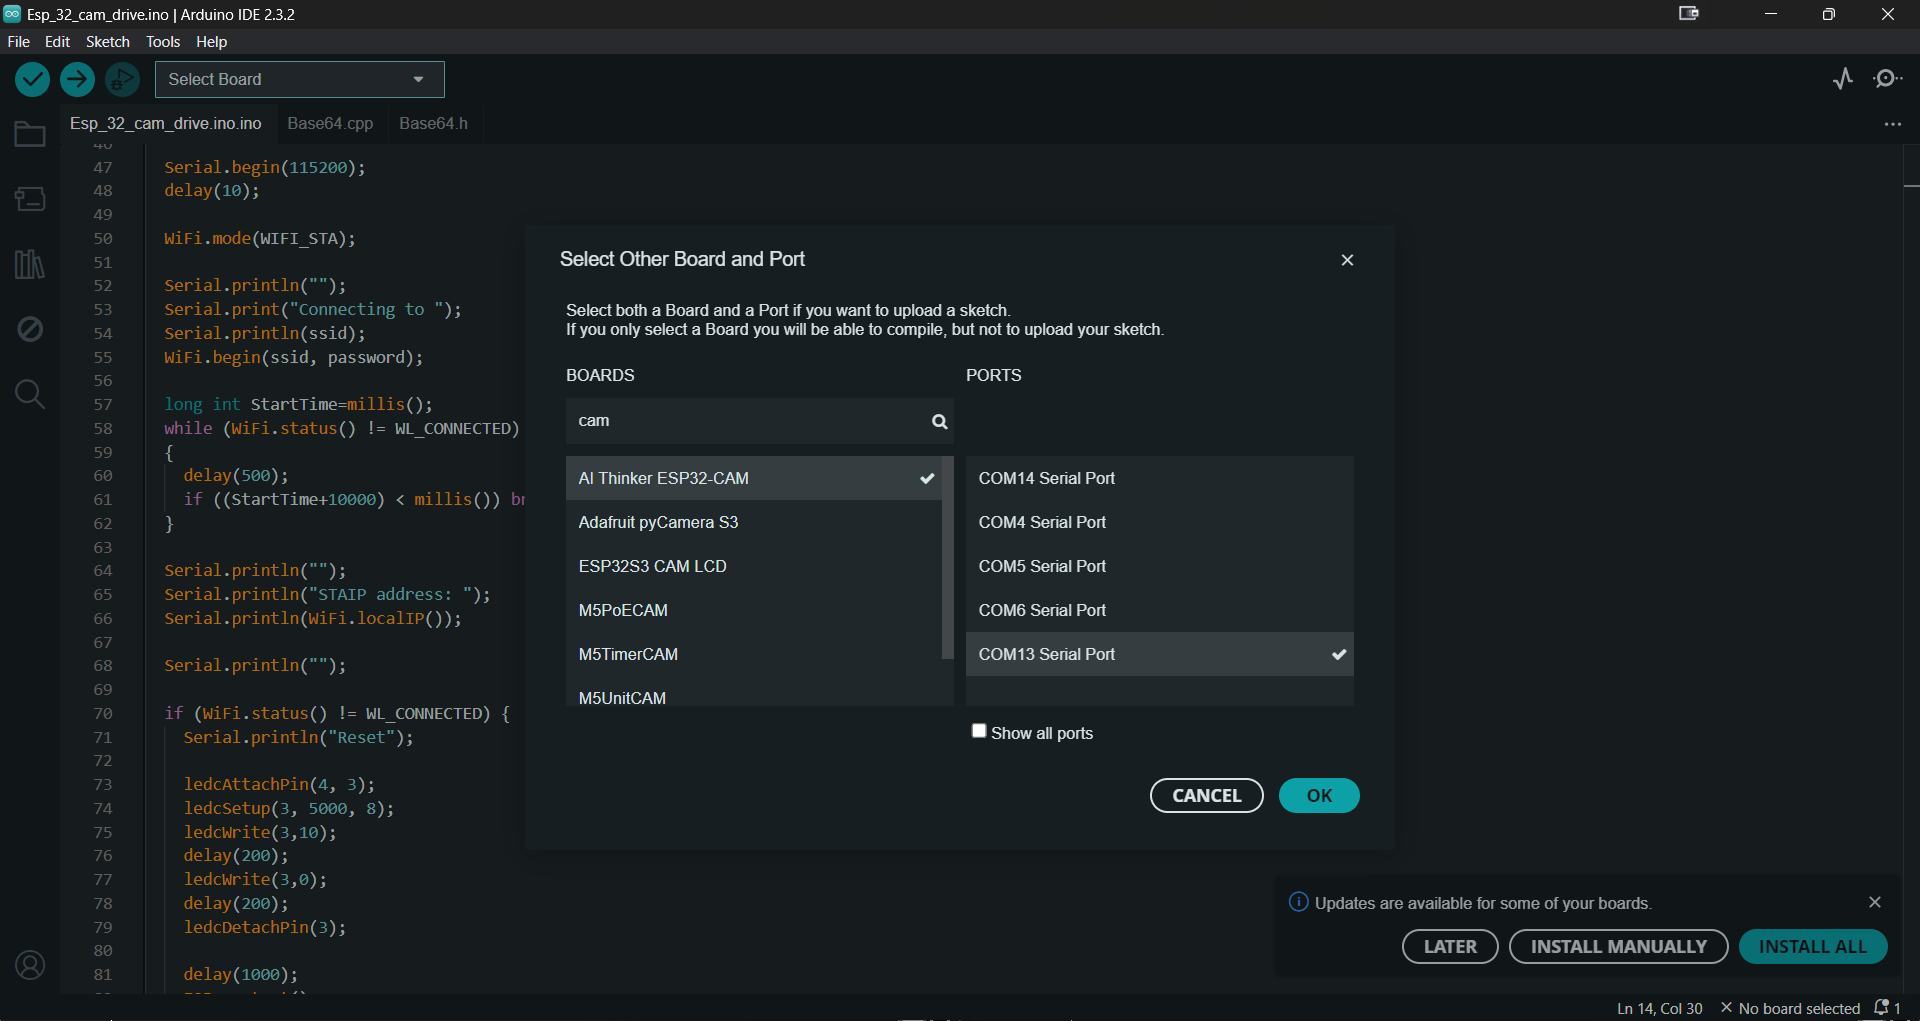
To use the ESP32 camera with the Arduino IDE 2.0, it is not necessary to install any additional board, since it is already included by default in this version of the program. We simply have to go to the board manager and select “Al Thinker ESP32-CAM”. But if an older version of the IDE is used, you must go to the preferences section and paste this line there to be able to install the board:
https://dl.espressif.com/dl/package_esp32_index.json
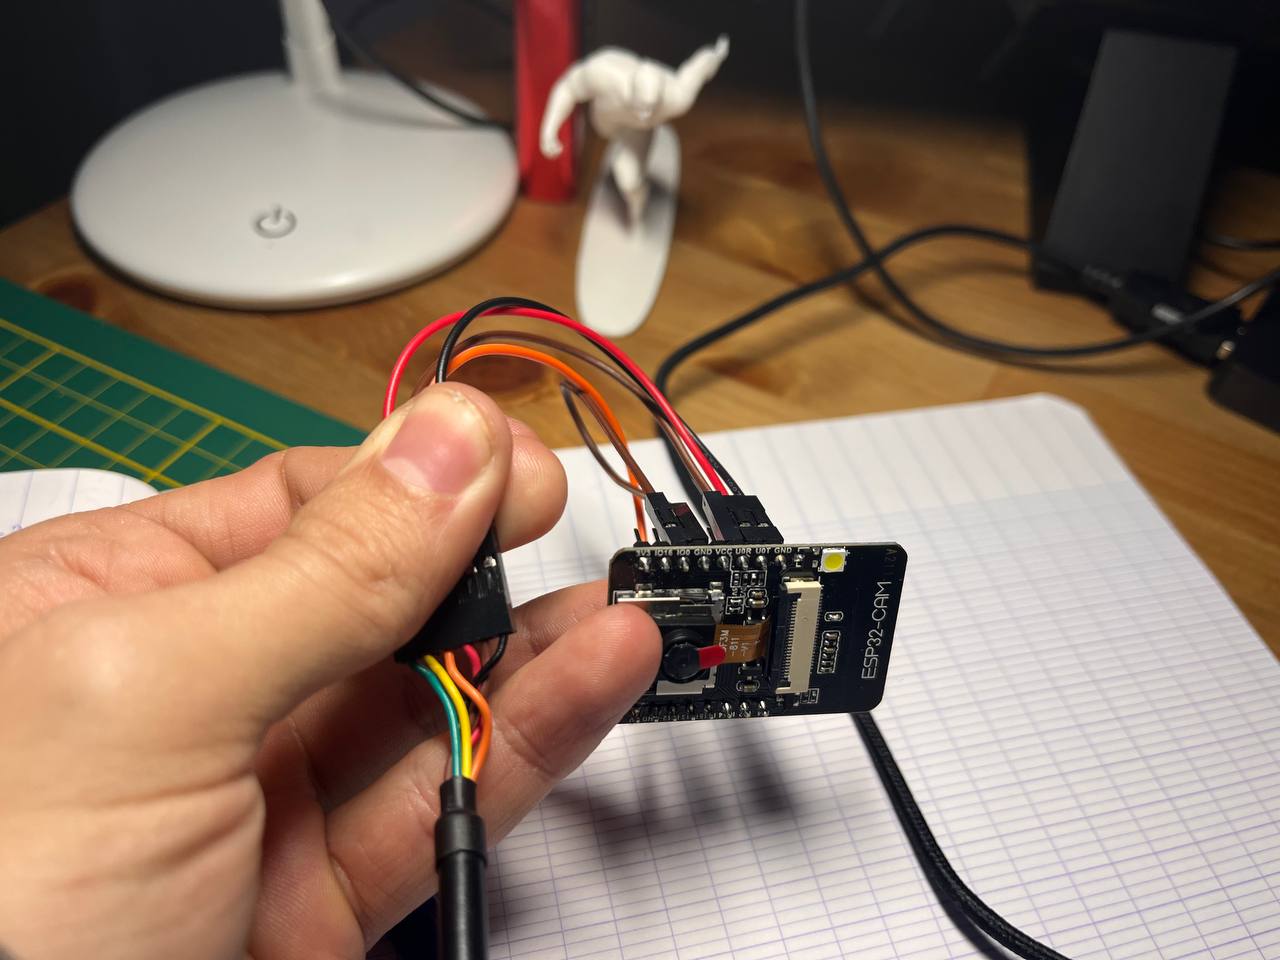
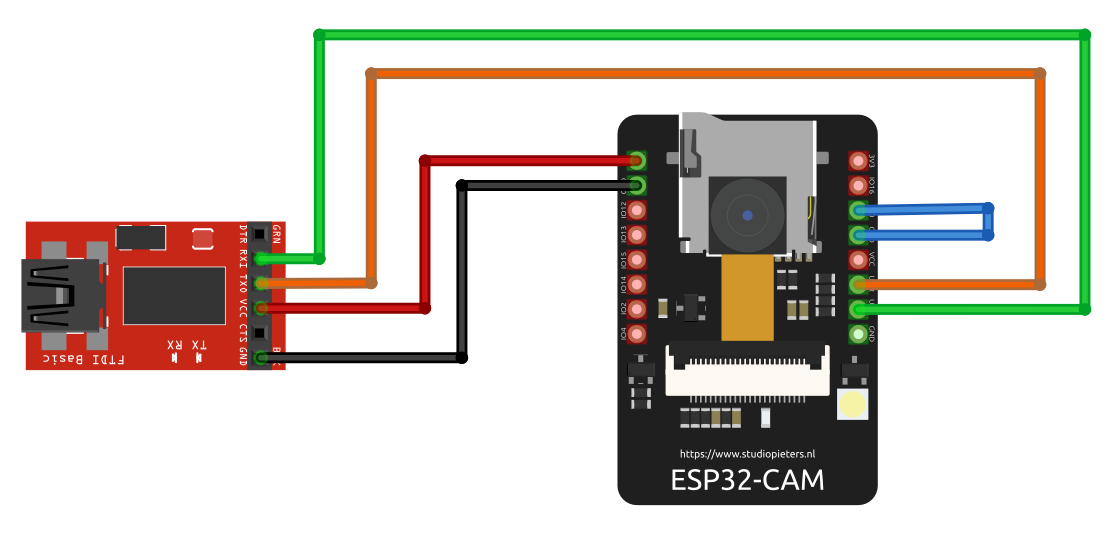
With the board selected, we are going to upload an example of "Blink" to make sure that we are able to program it. Unlike other development platforms, the ESP32 CAM does not have a USB port, so we must use an adapter to program it.
The first time I tried to upload the code I couldn't, the connection with the USB adapter was not well made, it is very important to make sure of this, otherwise it will be a cause of deep frustration. This image from profetolocka the correct way to connect.
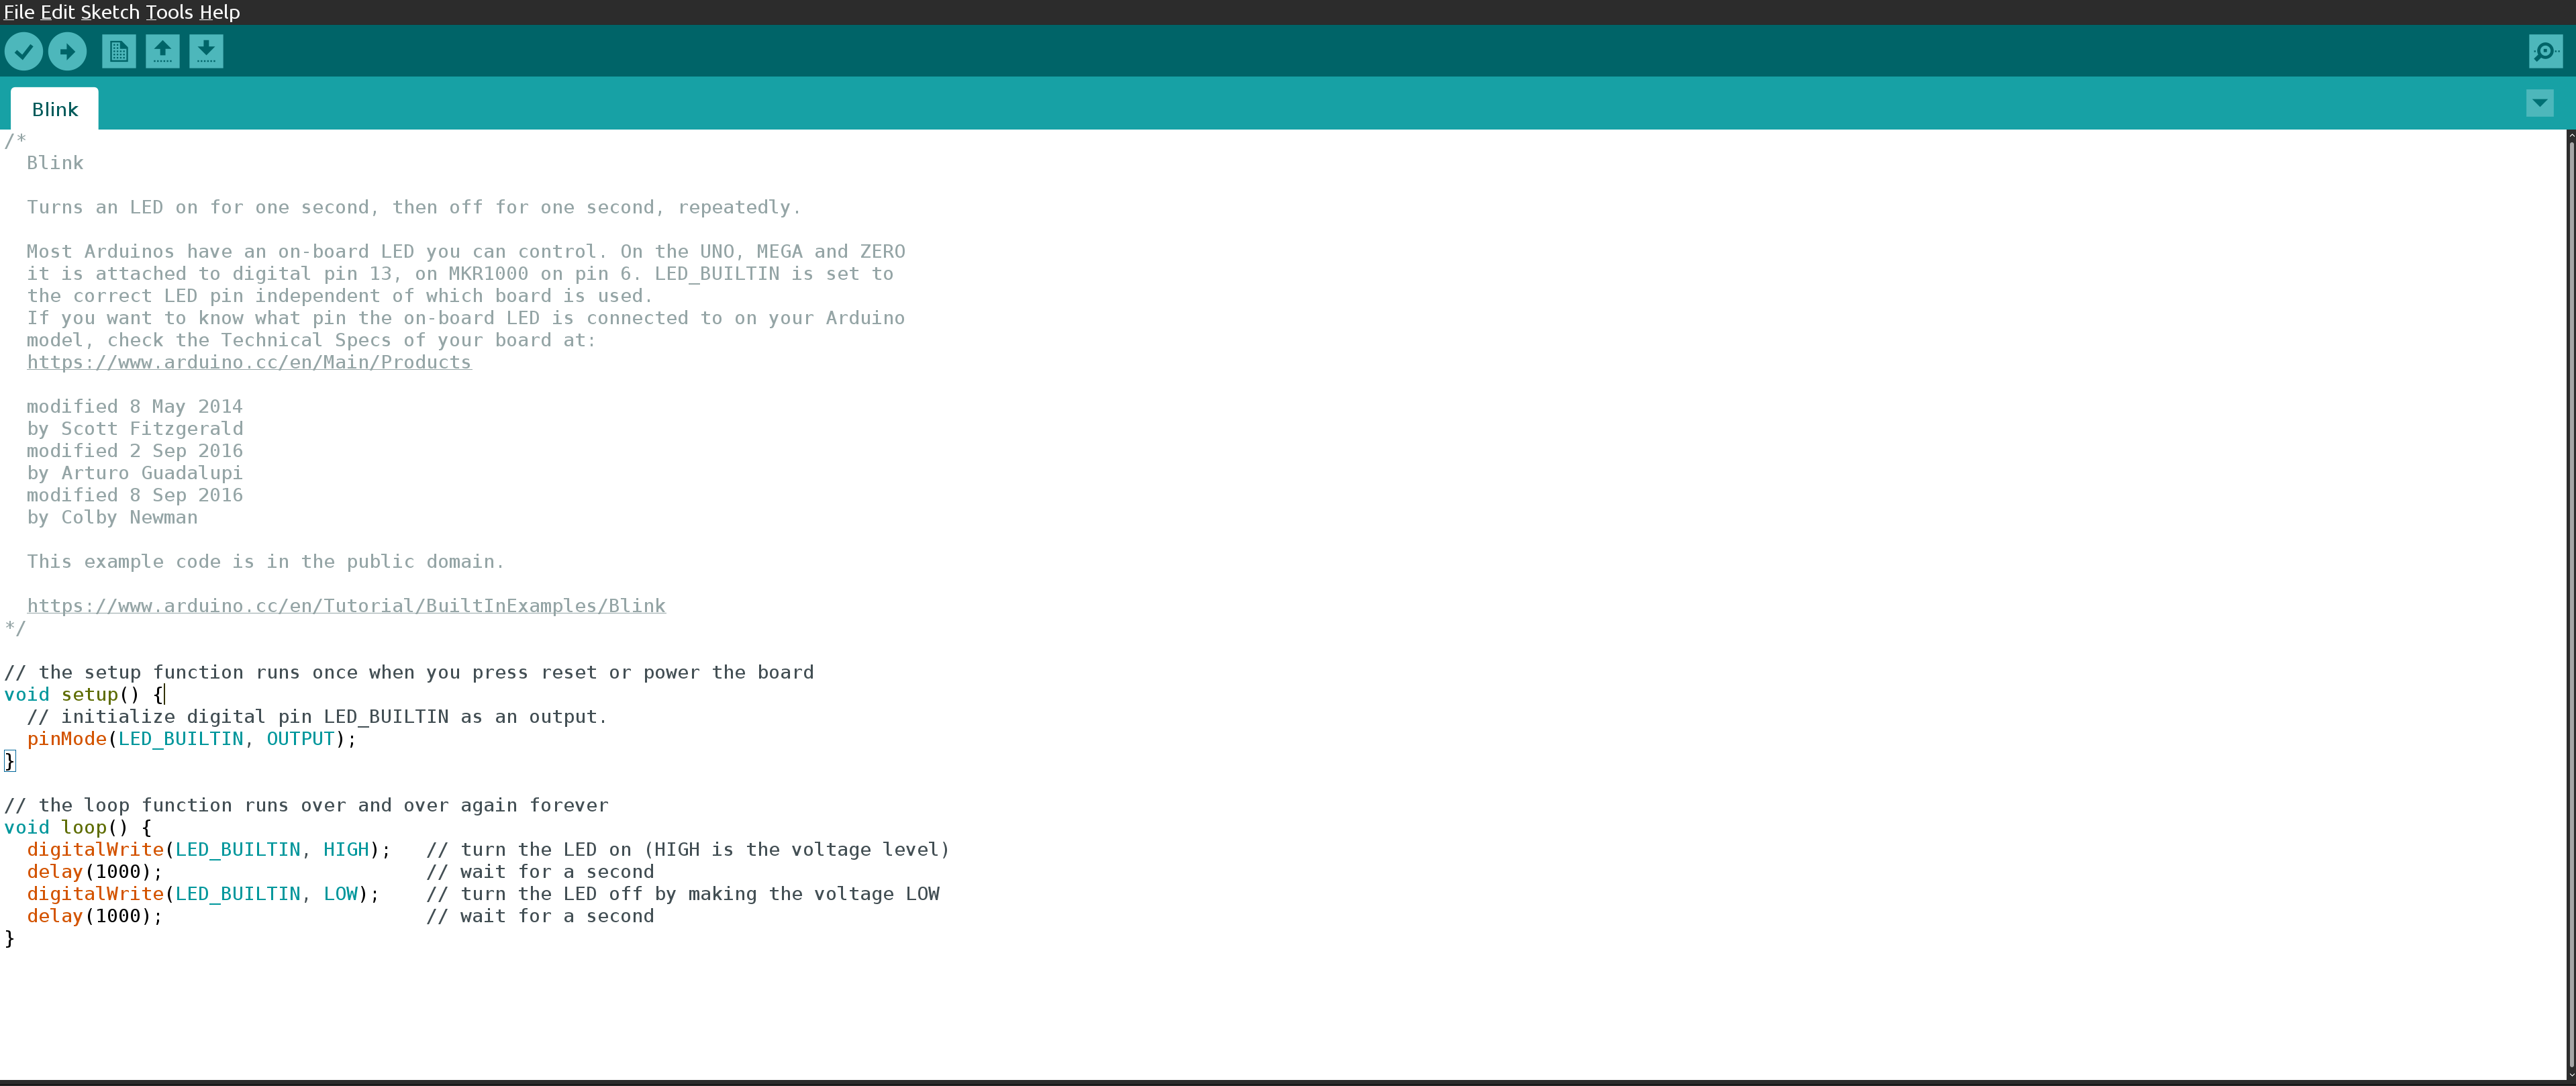
Using this example we can check if we are able to program the board, and we also have a second approach to programming on the Arduino (the first was in week 4, when we also programmed this example). The functions used in this example are the basis of programming on the Arduino and are:
pinMode(pin, function );--> this command enables a pin for use, specifically the pin indicated, and enables them as input or output depending on the function indicated.
digitalWrite(pin, state);--> this command puts a logical "0" or a logical "1" depending on the state indicated to the pin indicated
digitalRead(pin);--> this command reads the logical state of the pin indicated

We already know that we can program the microcontroller, now, before making the program it is necessary to make the telegram bot, which will be our communication with the microcontroller. It is convenient to make the bot first because later when making the program we will need data that the bot will give us when it is created.
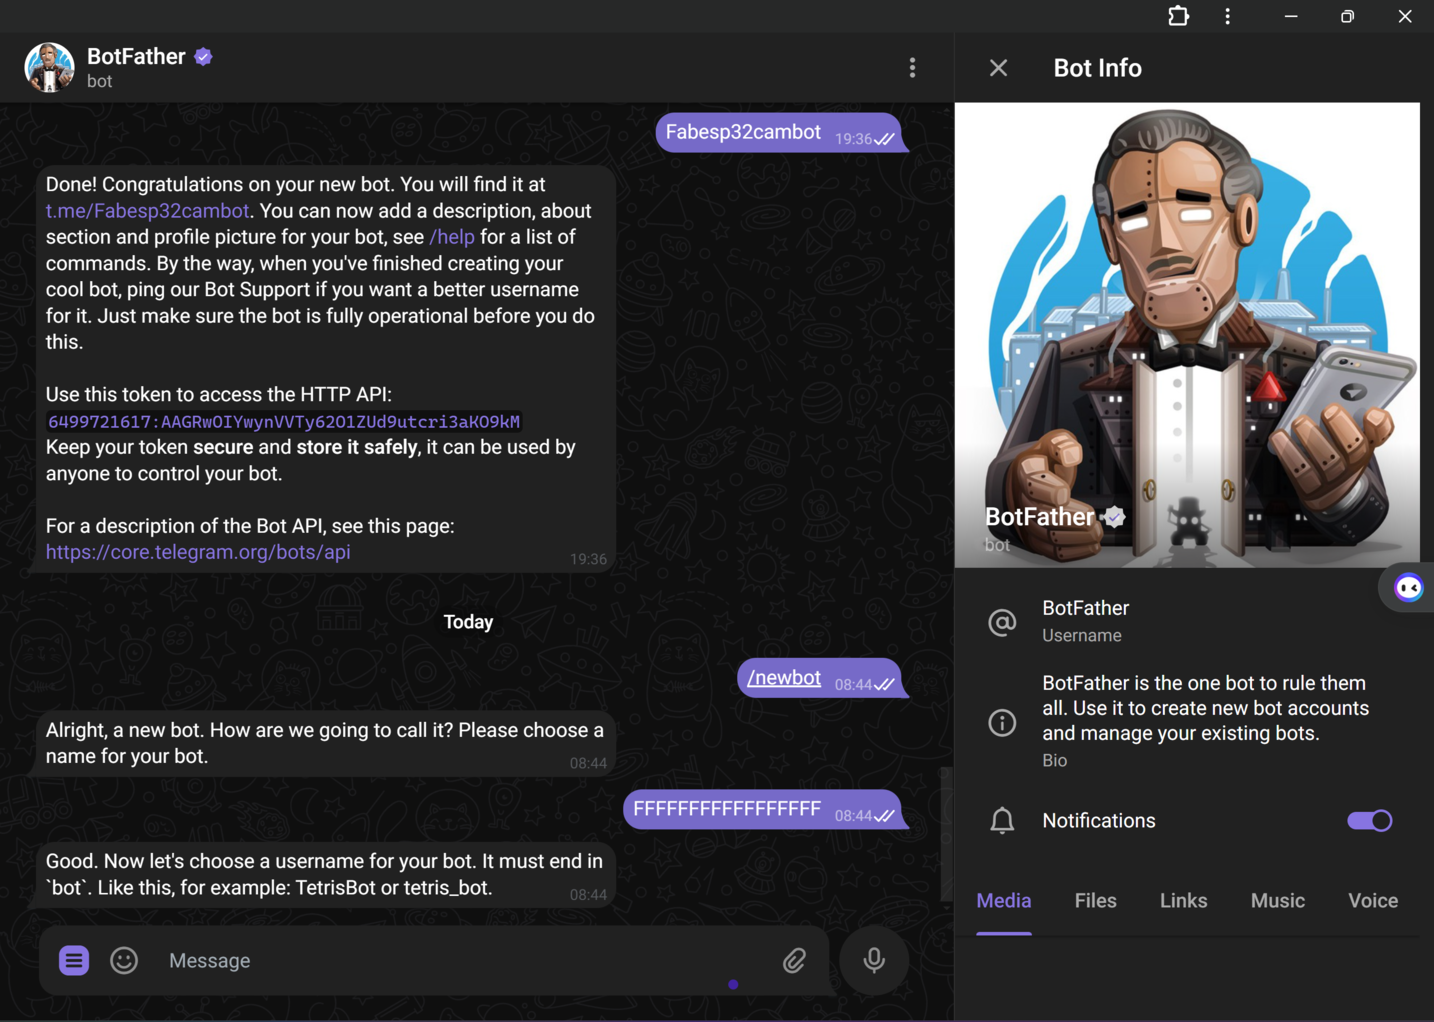
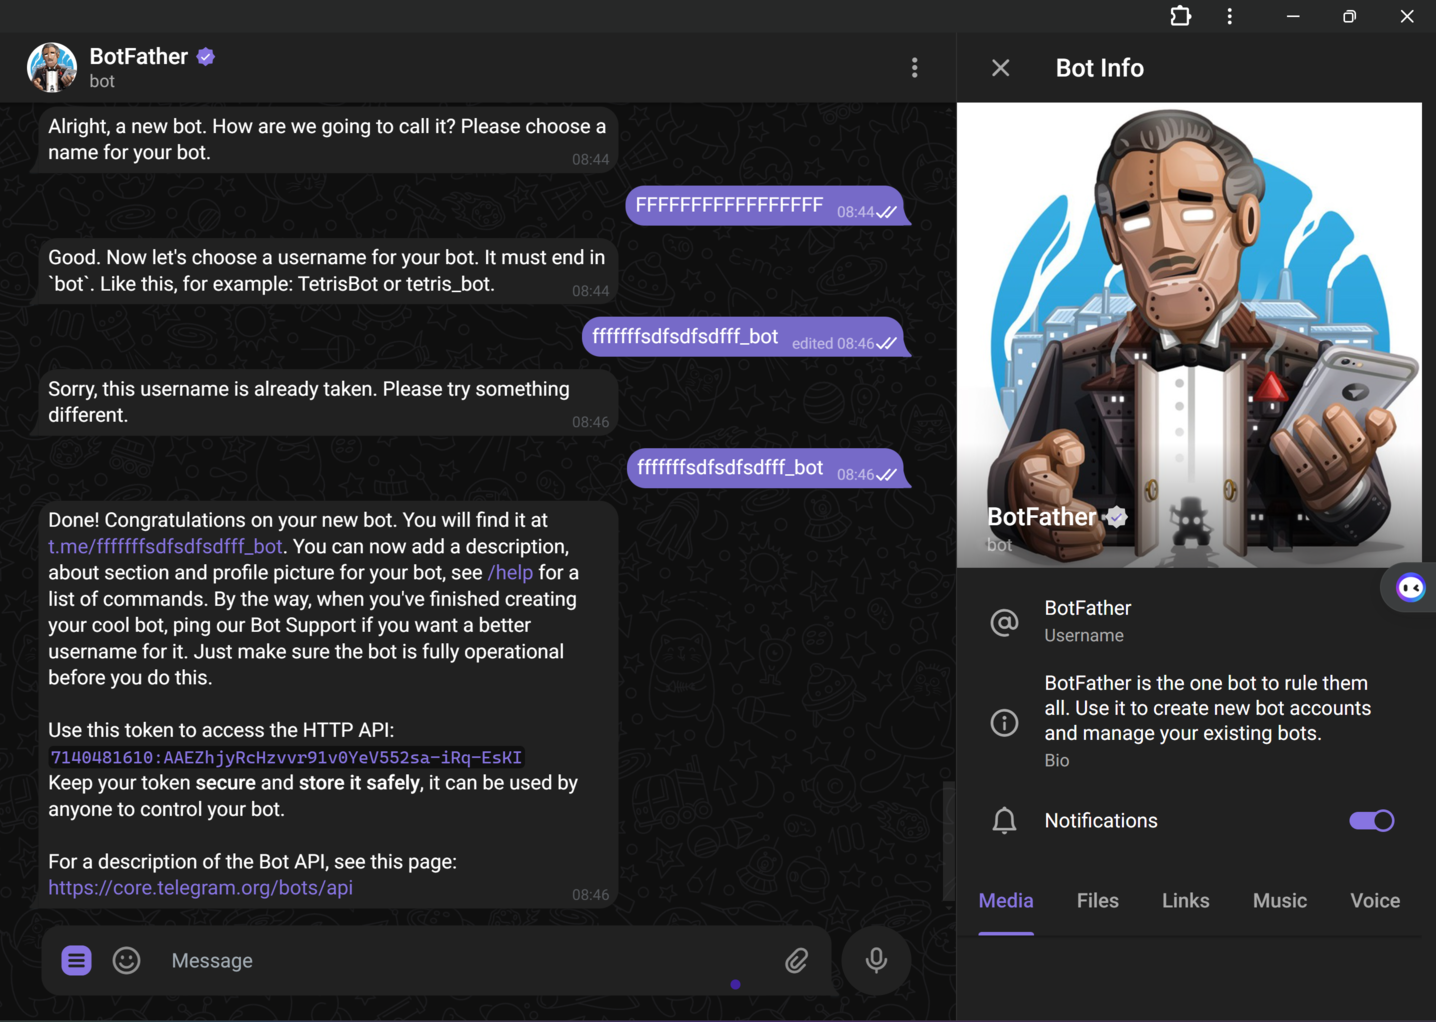
Now, before starting to make the program, it is important to have the Telegram bot ready, as it will provide us with the information necessary to carry out the program. To create the Telegram bot we will search for BotFather in the application's search bar and follow the steps below.
The first parameter to enter in the BotFather is the name of the Bot that we want to create and then it will ask you for the username of your bot, which is how it can be searched in the search bar and must end in bot. Once this is done, the new bot will automatically be created and a TOKEN will be assigned to it (that is what we must copy to use later in our code)
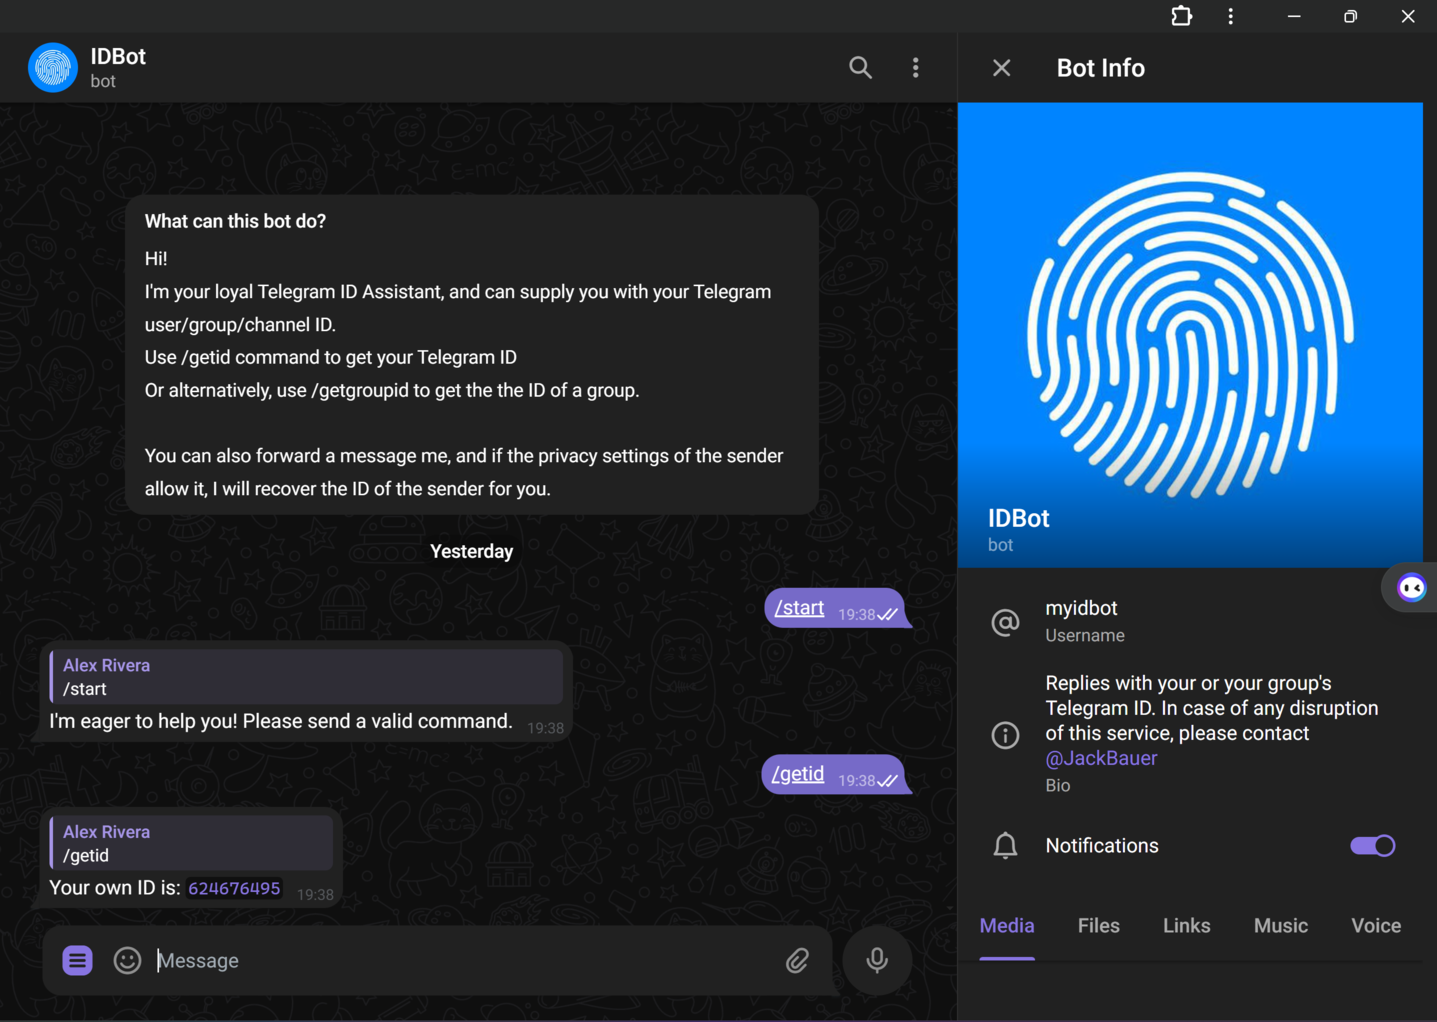
Once this is done, then you have to search for the IDBot in the search bar and after starting, we select the "/getid" option. This ID is the other information we need in our ESP code to be able to link it to the Telegram bot.
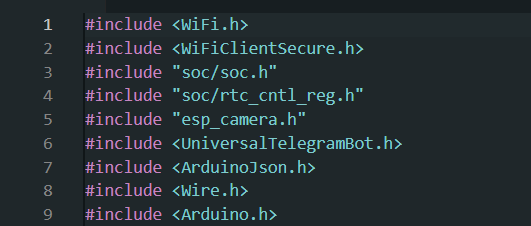
With the bot ready, it's time to start coding the ESP, for this it is necessary to include the libraries that appear in the photo. The first 4 are to easily manage the WIFI connection and the ESP capabilities, the fifth is to facilitate the use of the camera. All these libraries are native to Arduino except UniversalTelegramBot, and this is the link to its documentation. All of these libraries are native to Arduino except UniversalTelegramBot, and this is the link to their documentation.

The code can be downloaded at this link, it is commented but still, we are going to explain some of the most important parts. With the libraries ready, the next step is to declare the name and password of your Wi-Fi, so that the ESP can connect. Then in idChat and token, we paste the information that we saved a while ago from Telegram.
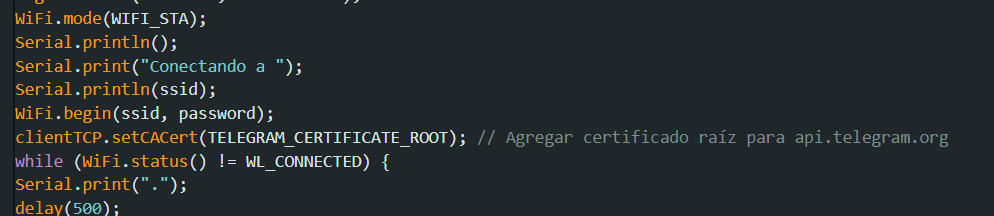
In this fragment we are indicating to the ESP the data of the Wi-Fi to which it must connect and the Telegram bot with which it must be linked.
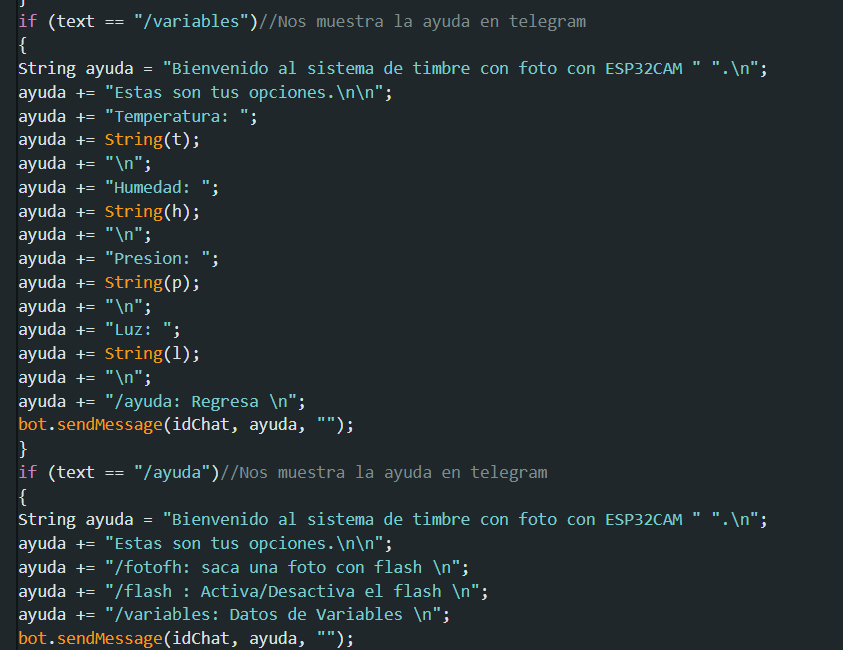
Finally we created the bot menu, where as you can see, in addition to taking a photo, you can also ask the bot for variables such as temperature and humidity, these are random values that I generate with the "random()" function, it seemed to me good idea to put them to incorporate these readings in the future.
To check what we have done, we look for the Bot on Telegram and take the first photo. The truth is that the quality is not very good but I imagine that with a little more light the quality will improve.
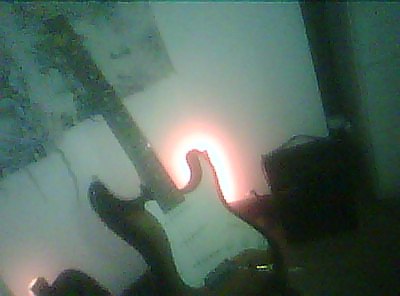
Result
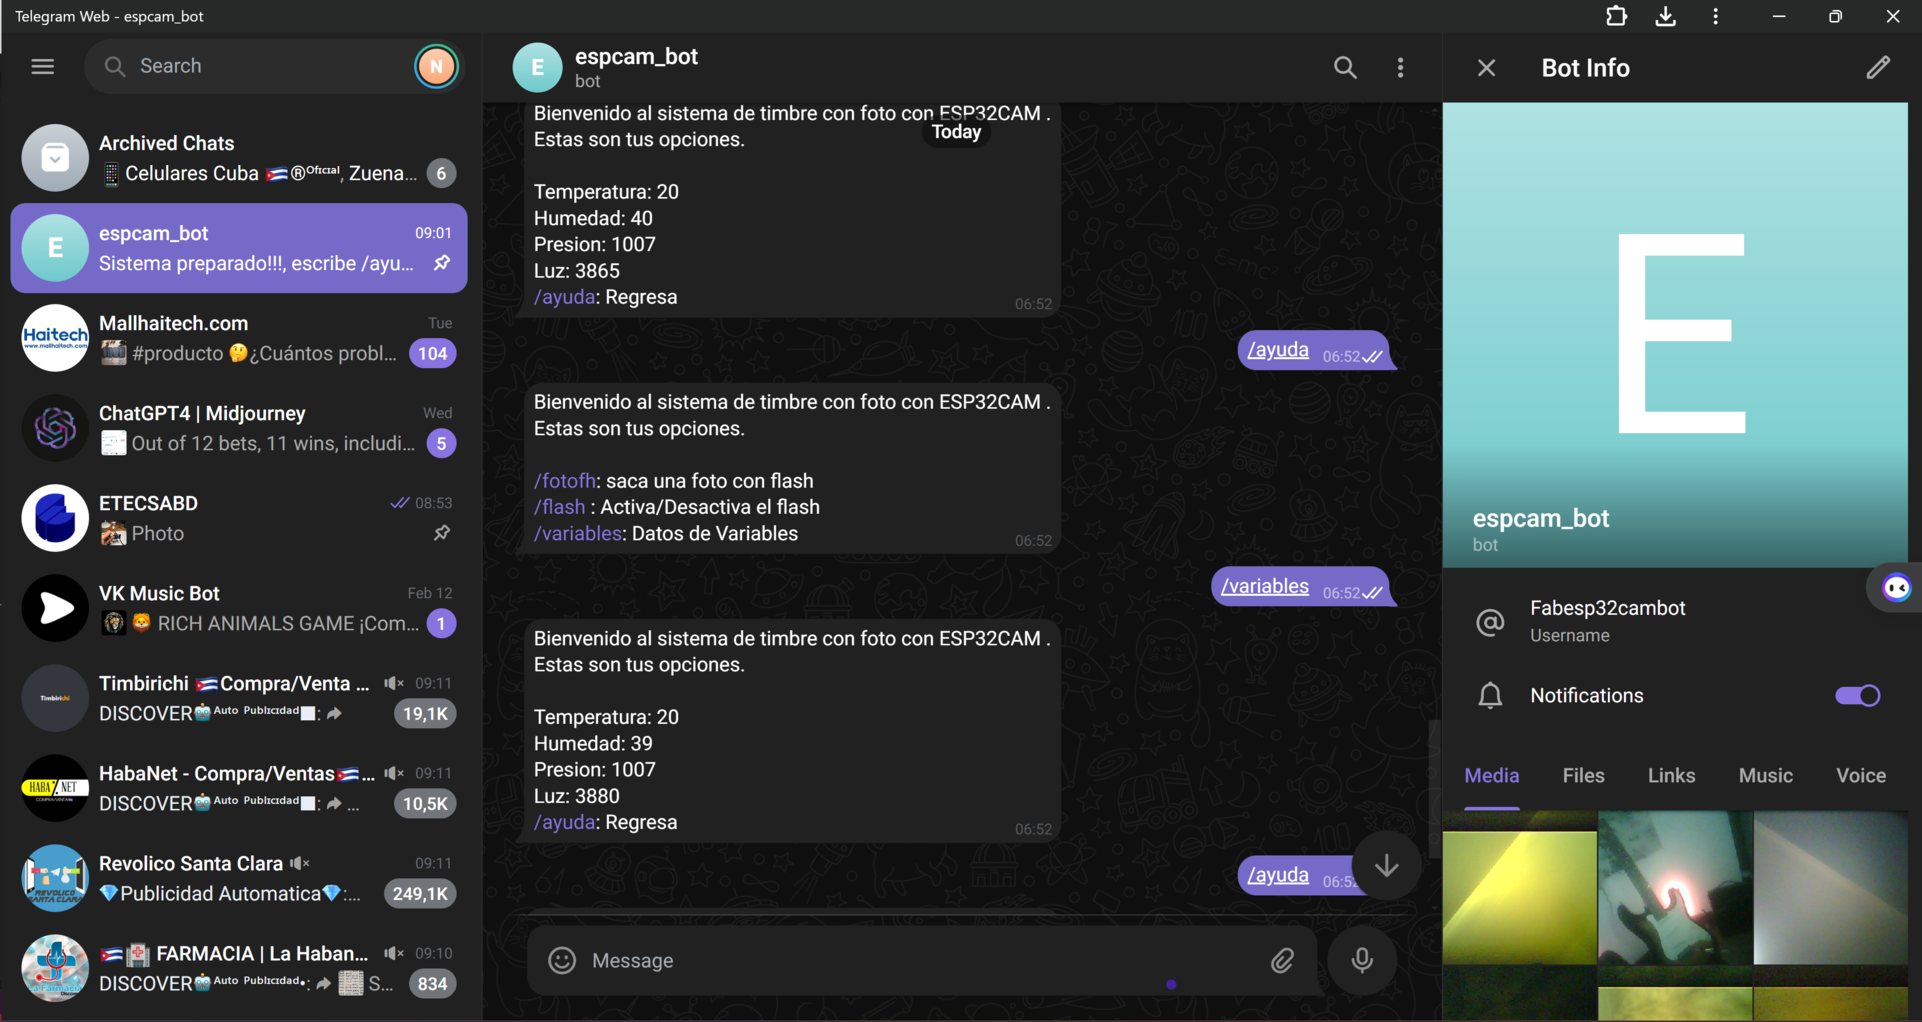
The photo shows the bot's work. We can see in the received files the photo of the guitar that I posted before, and we can also see how when requesting the data of the variables the system responds with random data, but it does respond.
A little more than a photo
With the project finished, I felt that it was missing a PCB, but it is a bit of an exaggeration to make a PCB for a single microcontroller, without anything to connect. So I decided to project on the PCB the improvements that I would like to make in the future, while at the same time making a PCB that allows for several communication protocols between several microcontrollers.
.jpg )
The system requirements would then be:
-> be able to measure temperature, humidity, pressure and light (since these are the variables that the ESP is randomly generating) and have at least 2 more microcontrollers.
With these agreed elements, I concluded that the PCB would have:
-> 1 DHT sensor for temperature and humidity.
-> 1 LDR sensor for light
-> 1 Arduino nano BLE to request pressure and be part of the test communication system and 1 Raspberry Pi Pico 2040, also to be part of the communication system.
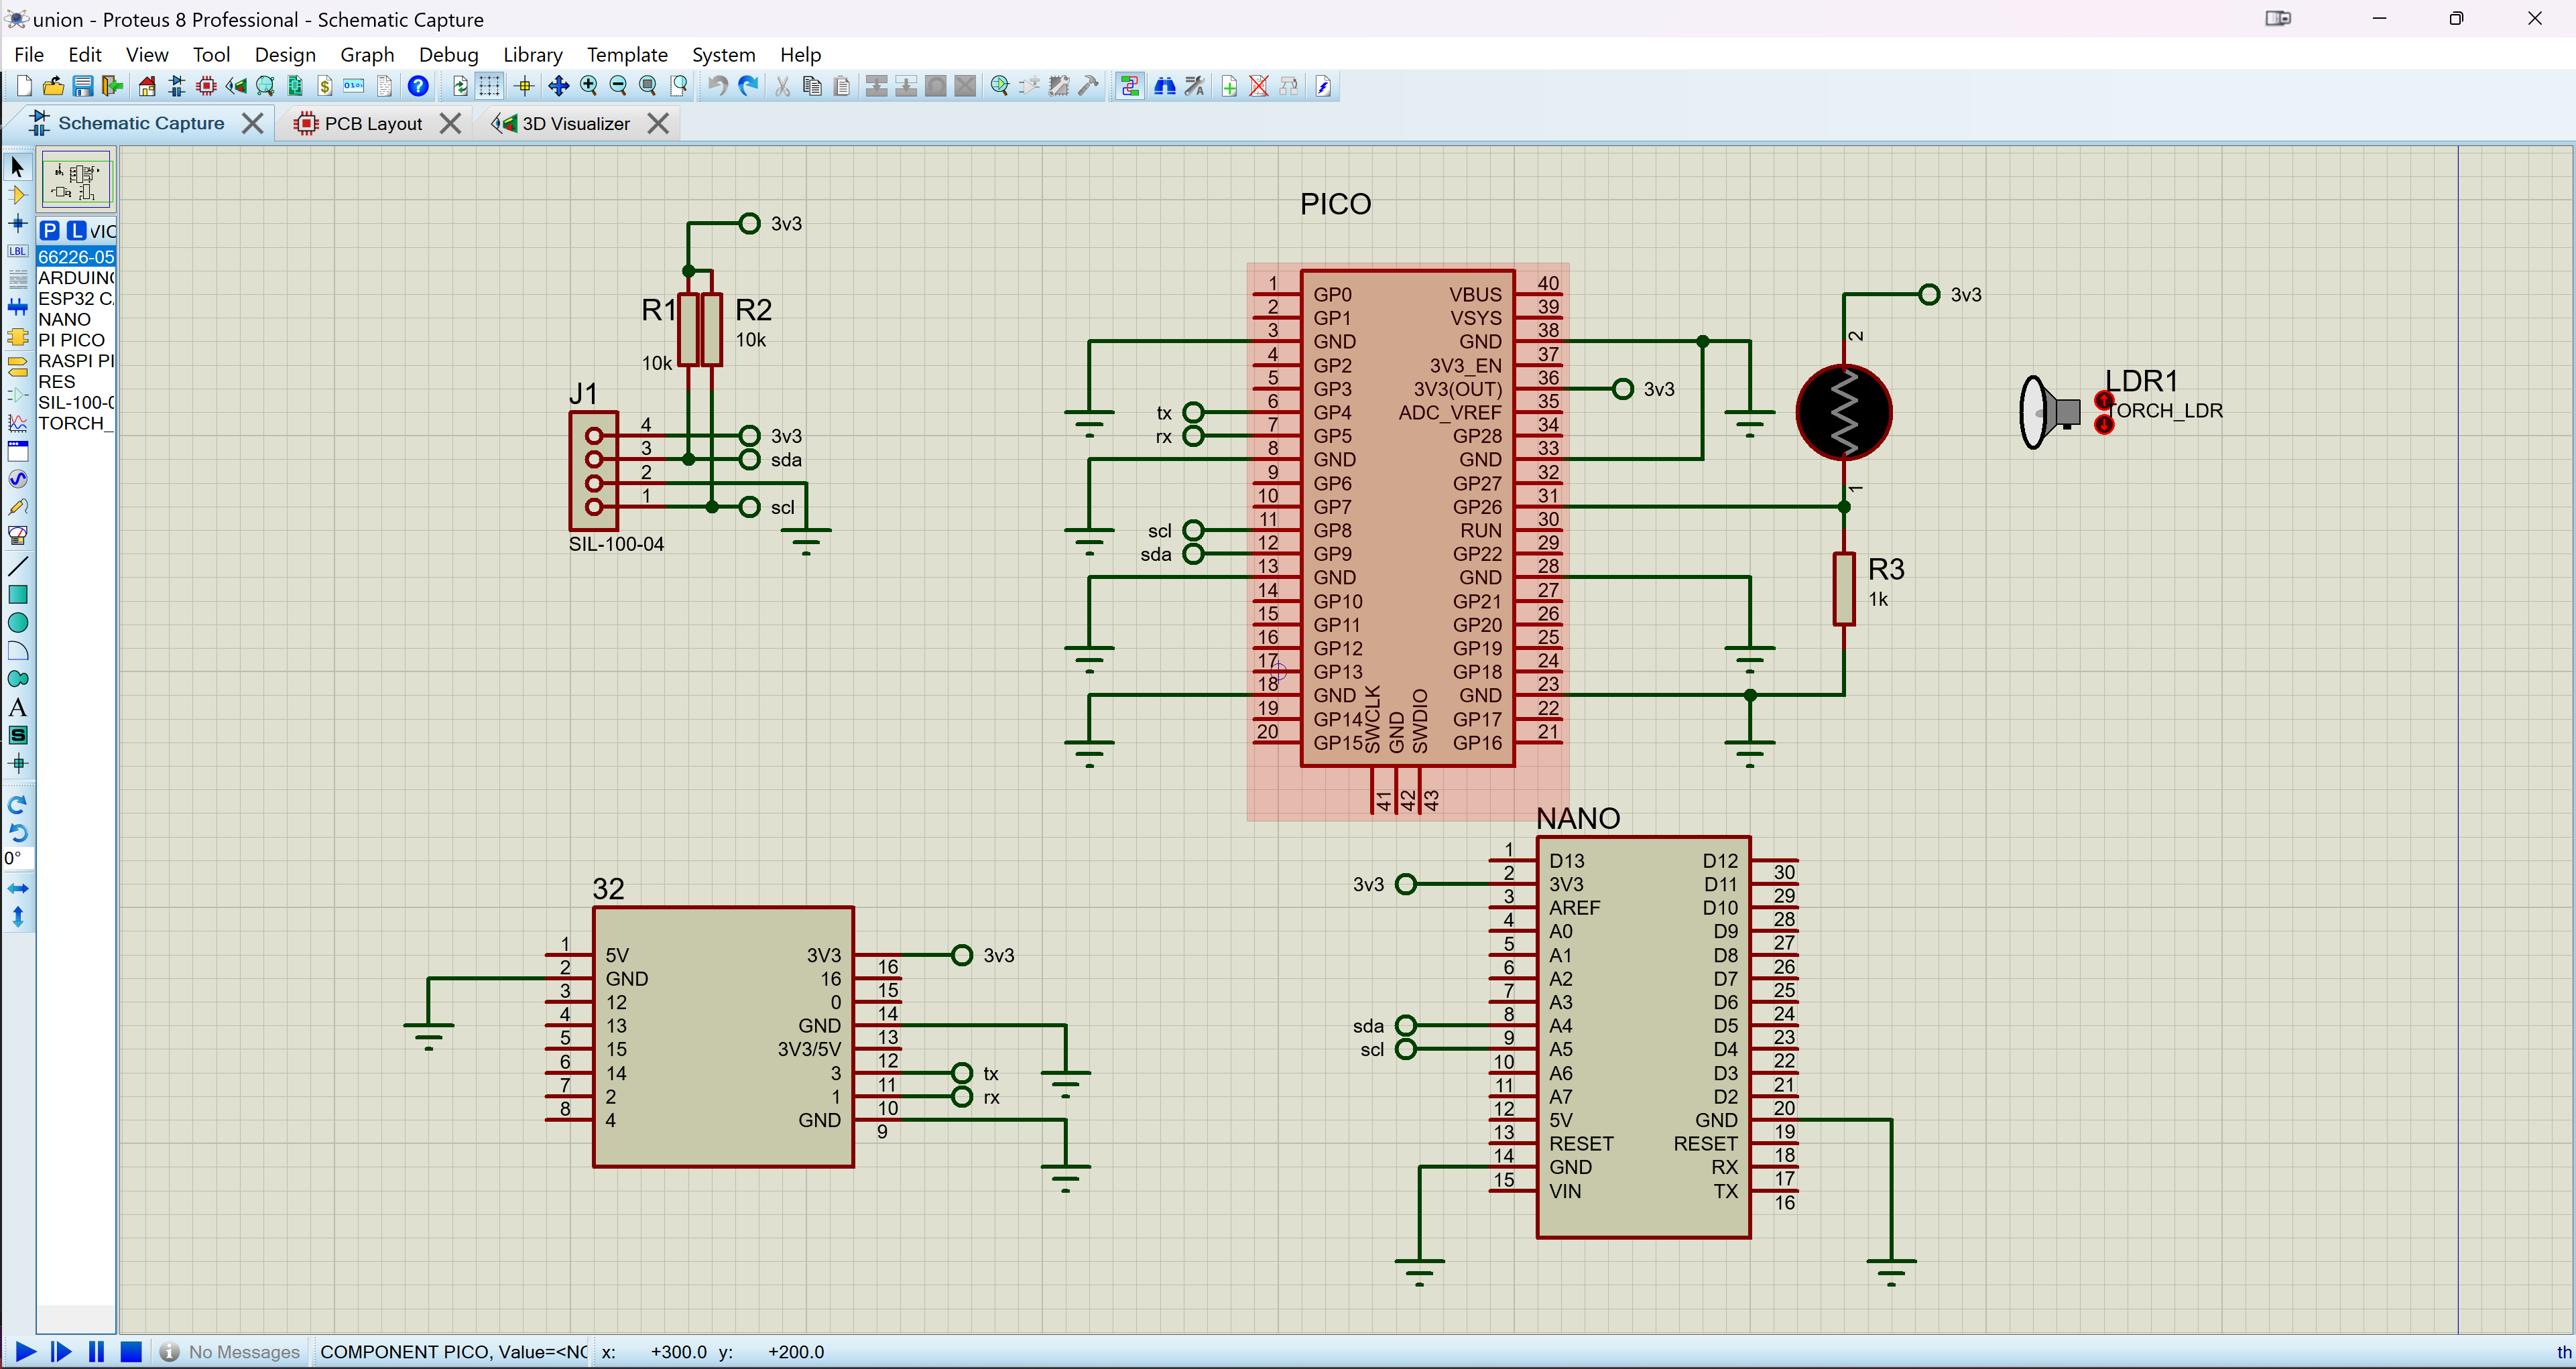
With the selected elements I proceed to make the design. There will be 3 micros, the raspi should be the master, through I2C, read the values of temperature, humidity and pressure from the DHT and the arduino respectively, then, it reads the value of the LDH analogically to determine the intensity of the light, and finally, through UART protocol, send the read data to the ESP32. Once the data reaches the ESP, it would be sent to the bot instead of the fictitious ones I have today.
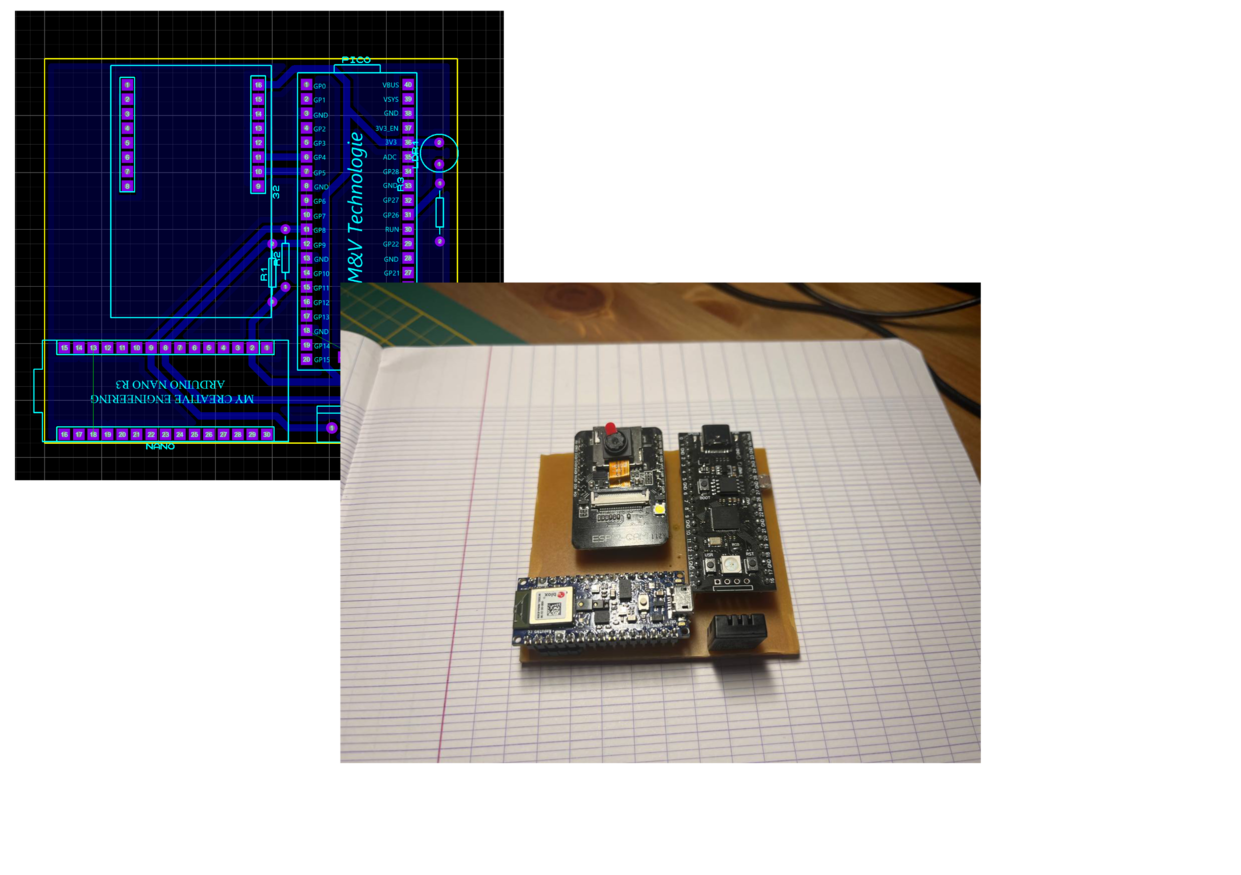
Finally, we have created a board that will be very useful in the future to test the UART and I2C communication protocols. Additionally, we have laid the foundations to improve the project on another occasion and we managed to make a PCB for the ESP32.. It will surely be useful in the coming weeks.In this link is the PCB design.