Subtractive vs Additive Vrocesses
uff...so nerves!!
Group assignment
The group's tasks: test the design rules for your 3D printer(s) can be found on our fablab website.
Starting production
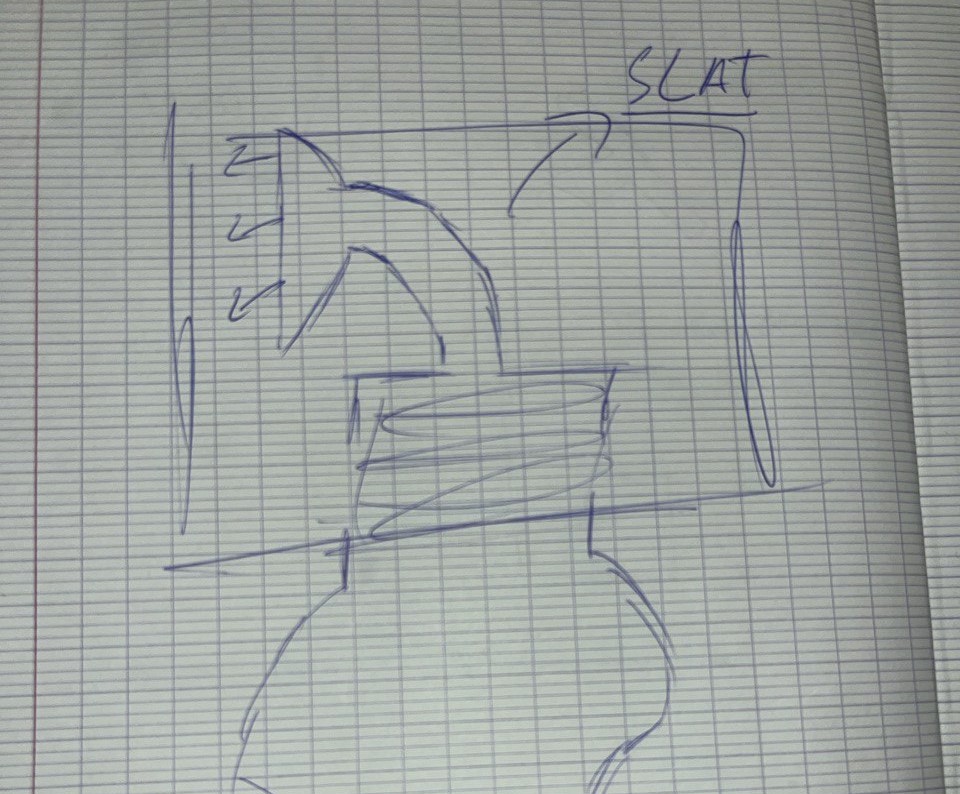
This week's goal was to conceive a piece that, due to its geometric complexity, could not be replicated using the traditional milling process. After creating a simple sketch, the solution came in the form of a nozzle to water the plants.
Using the techniques acquired in week 2, we will design the piece in question. This process will not only be based on theoretical knowledge, but also on the practical application of innovative design strategies.
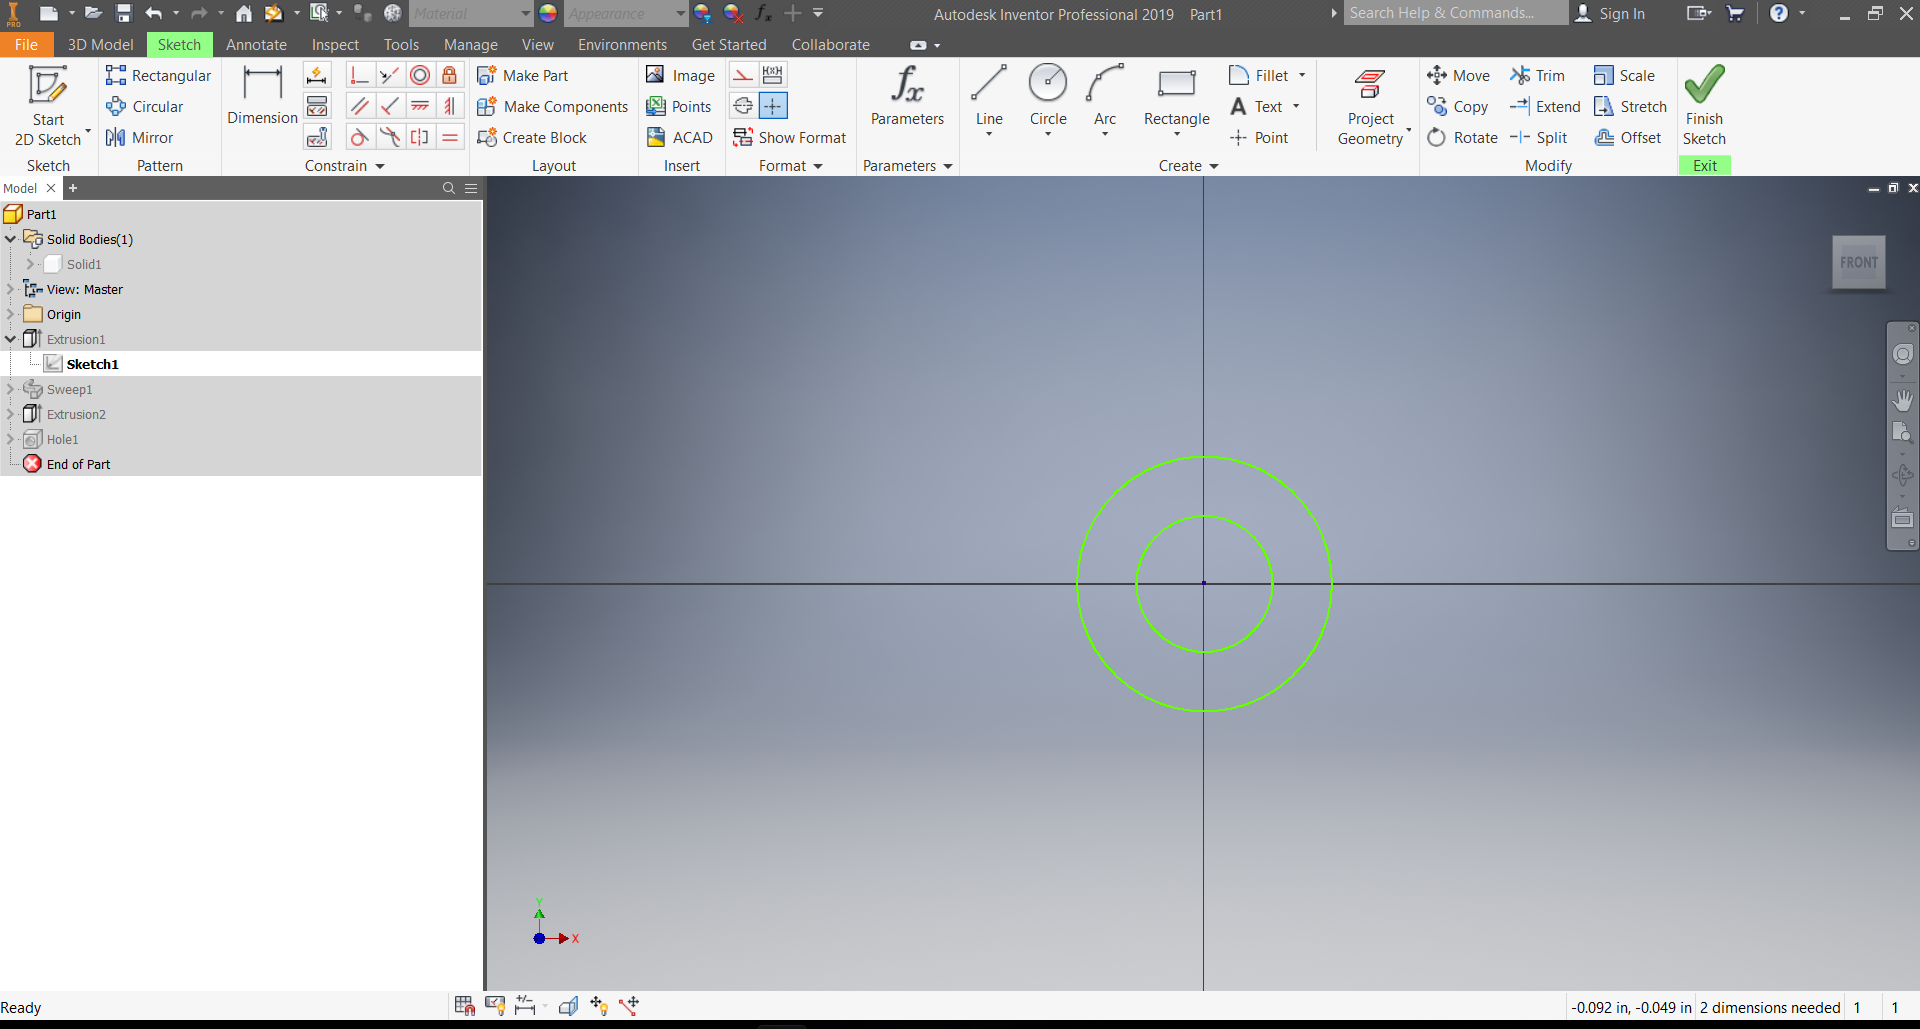
To begin, create 2 circles, which will be the base of the nozzle, there will be 2 since one will be the body, while the other will have the function of acting as a barrier to limit the thread, it will be clearer later.
Then with the Sweep tool we will make the curve, in the image are the parameters that you used but you can vary it according to your taste and objectives.

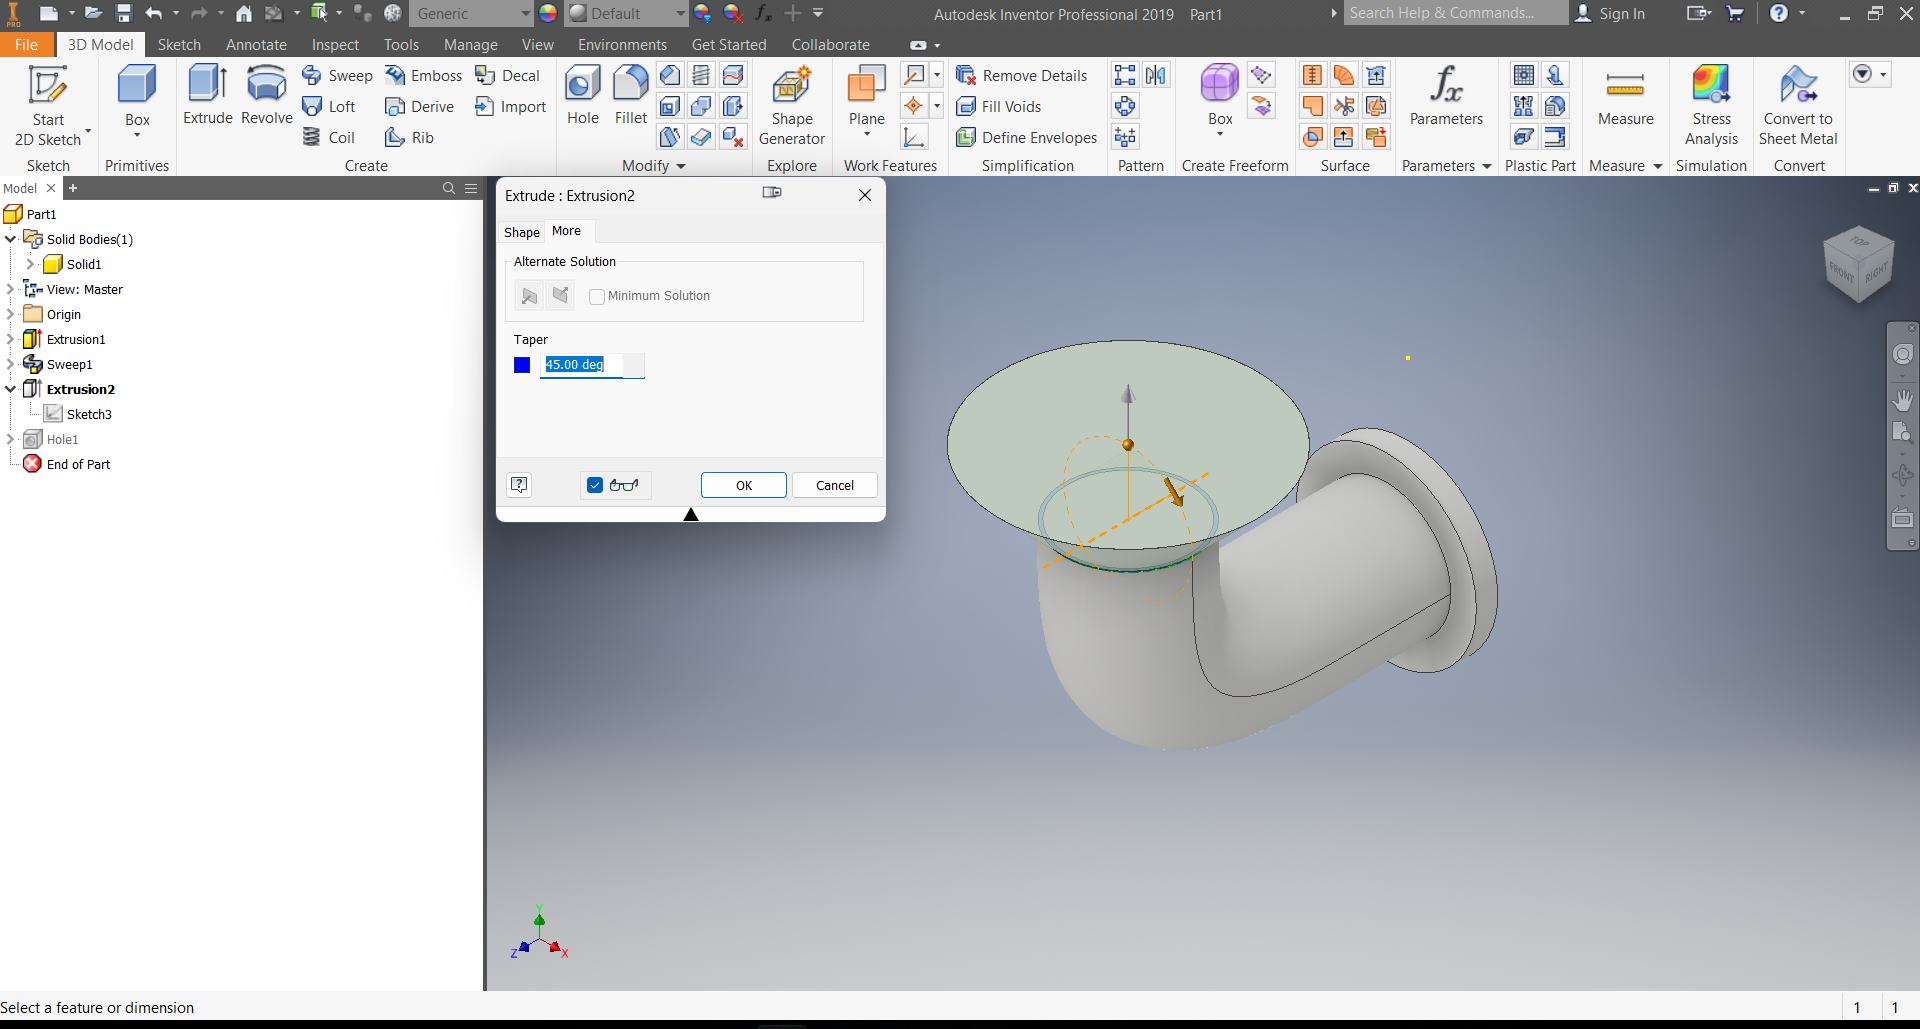
At the end of the curve, we make an extrusion to achieve the garden watering can effect, for which we modify the angle of the extrusion, with this we manage to close the hole in the center at the same time that we enlarge the upper edge.
Before opening the holes, as it is necessary to mark them, with the rectangular pattern tool create a matrix of 90 points in the plane where the exit holes will go.
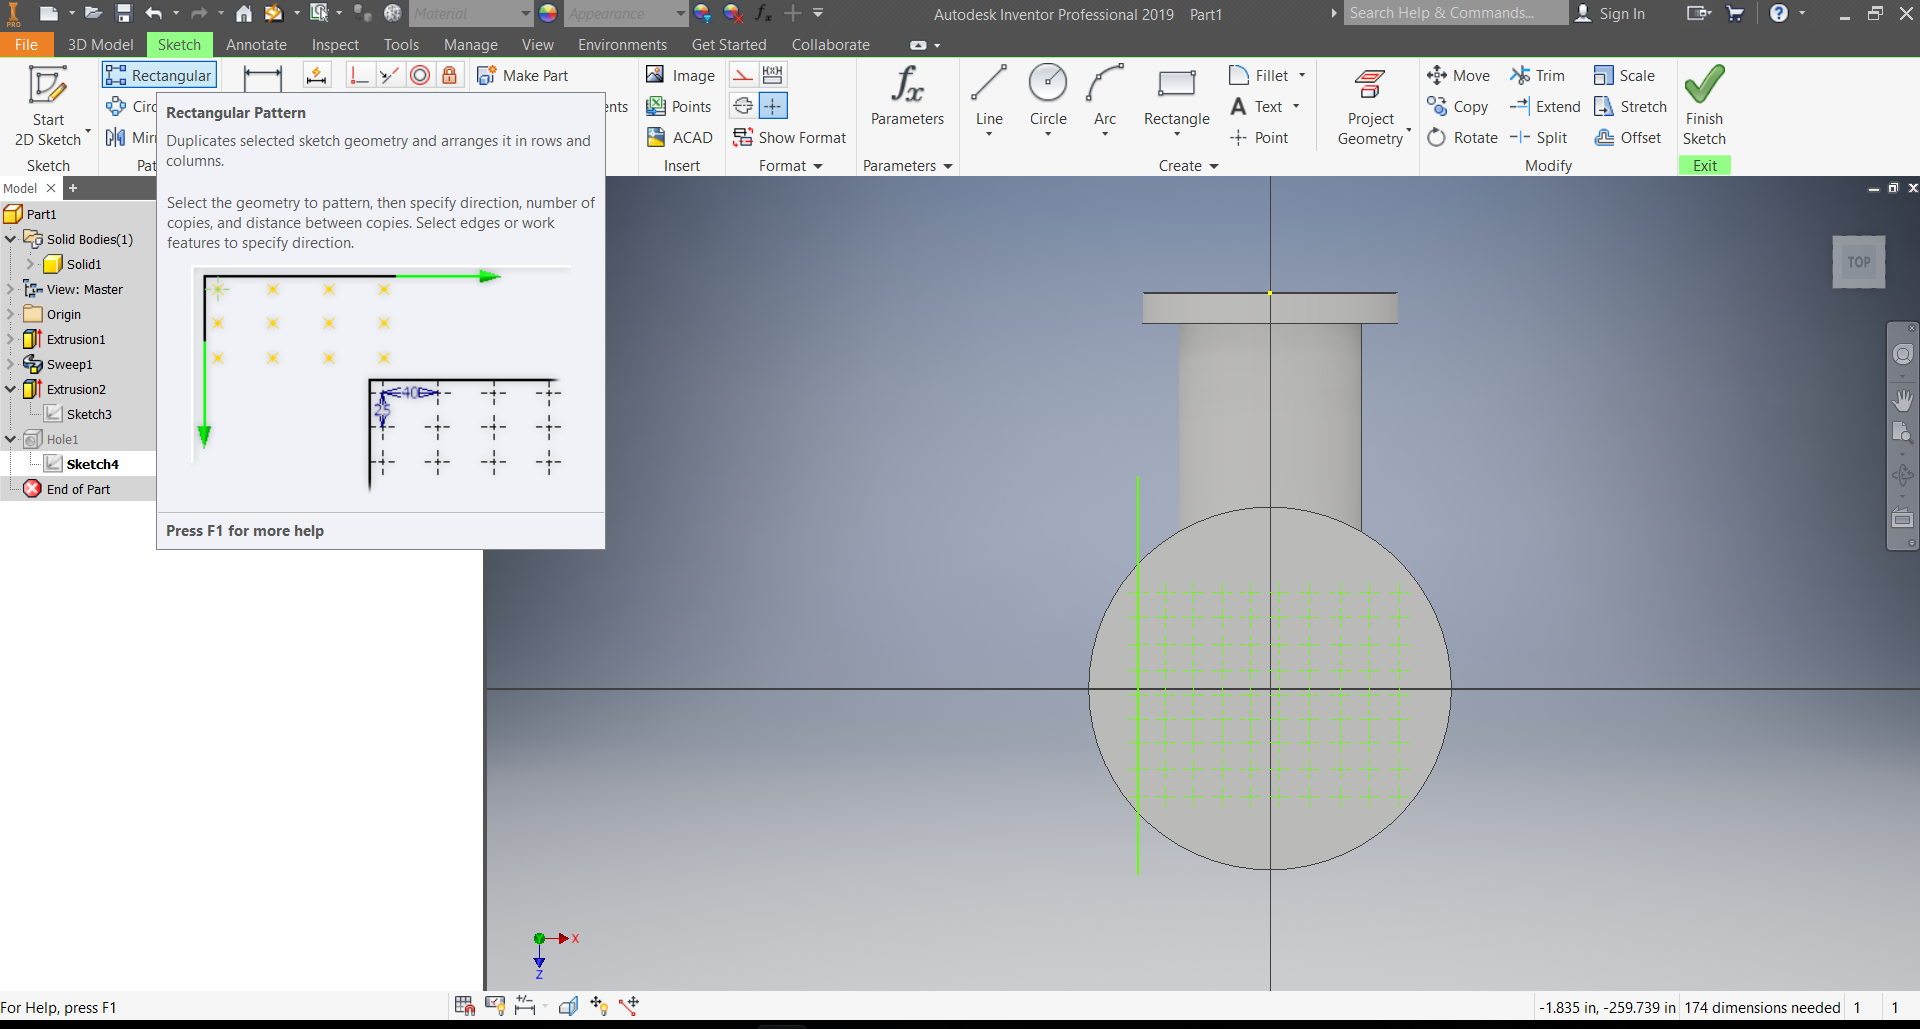

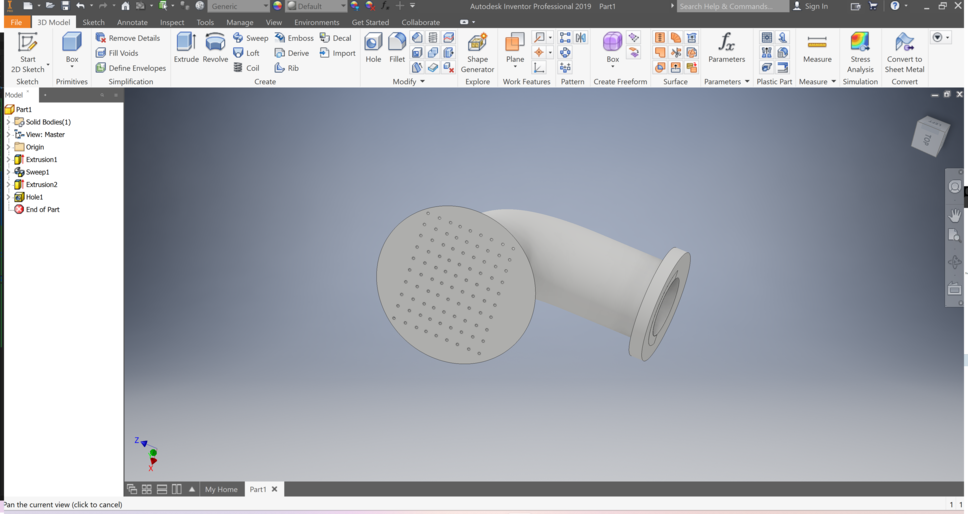
To finish this piece, with the "Hole" tool I will open the holes for the water to come out, for this I will use the 90 points previously created.
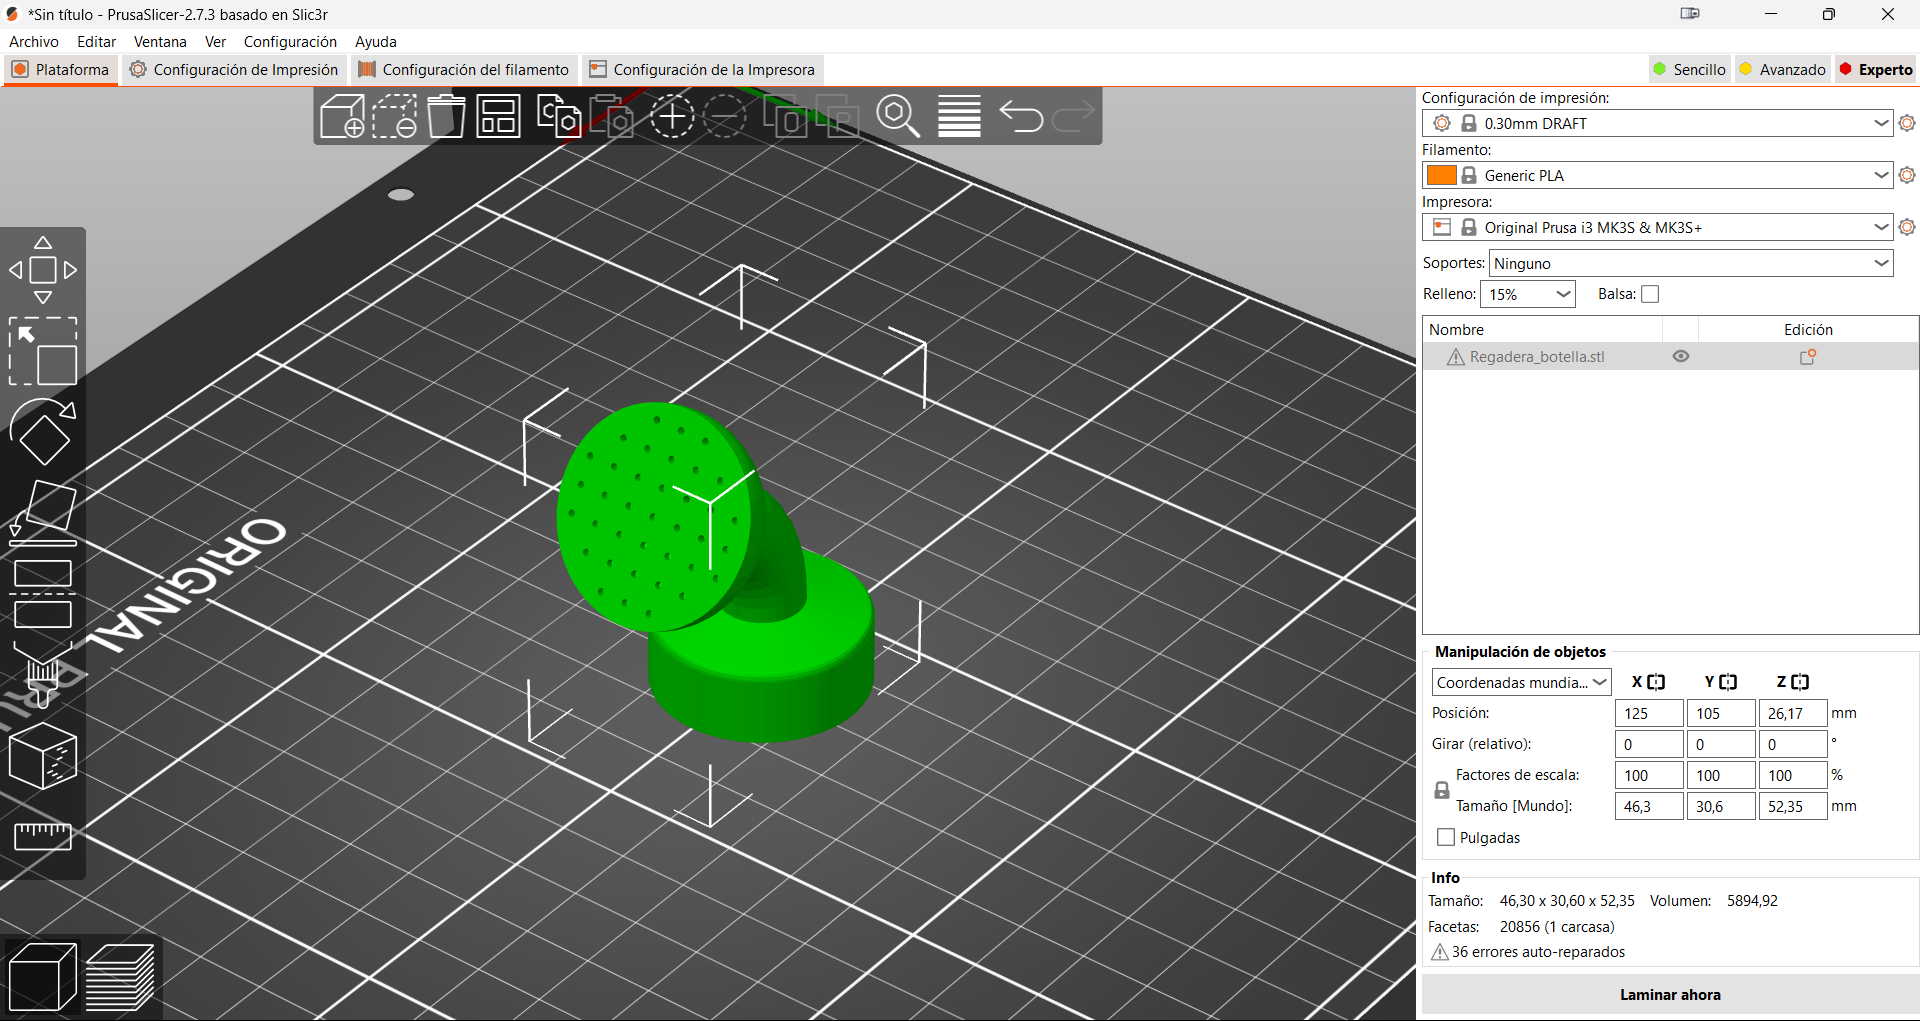
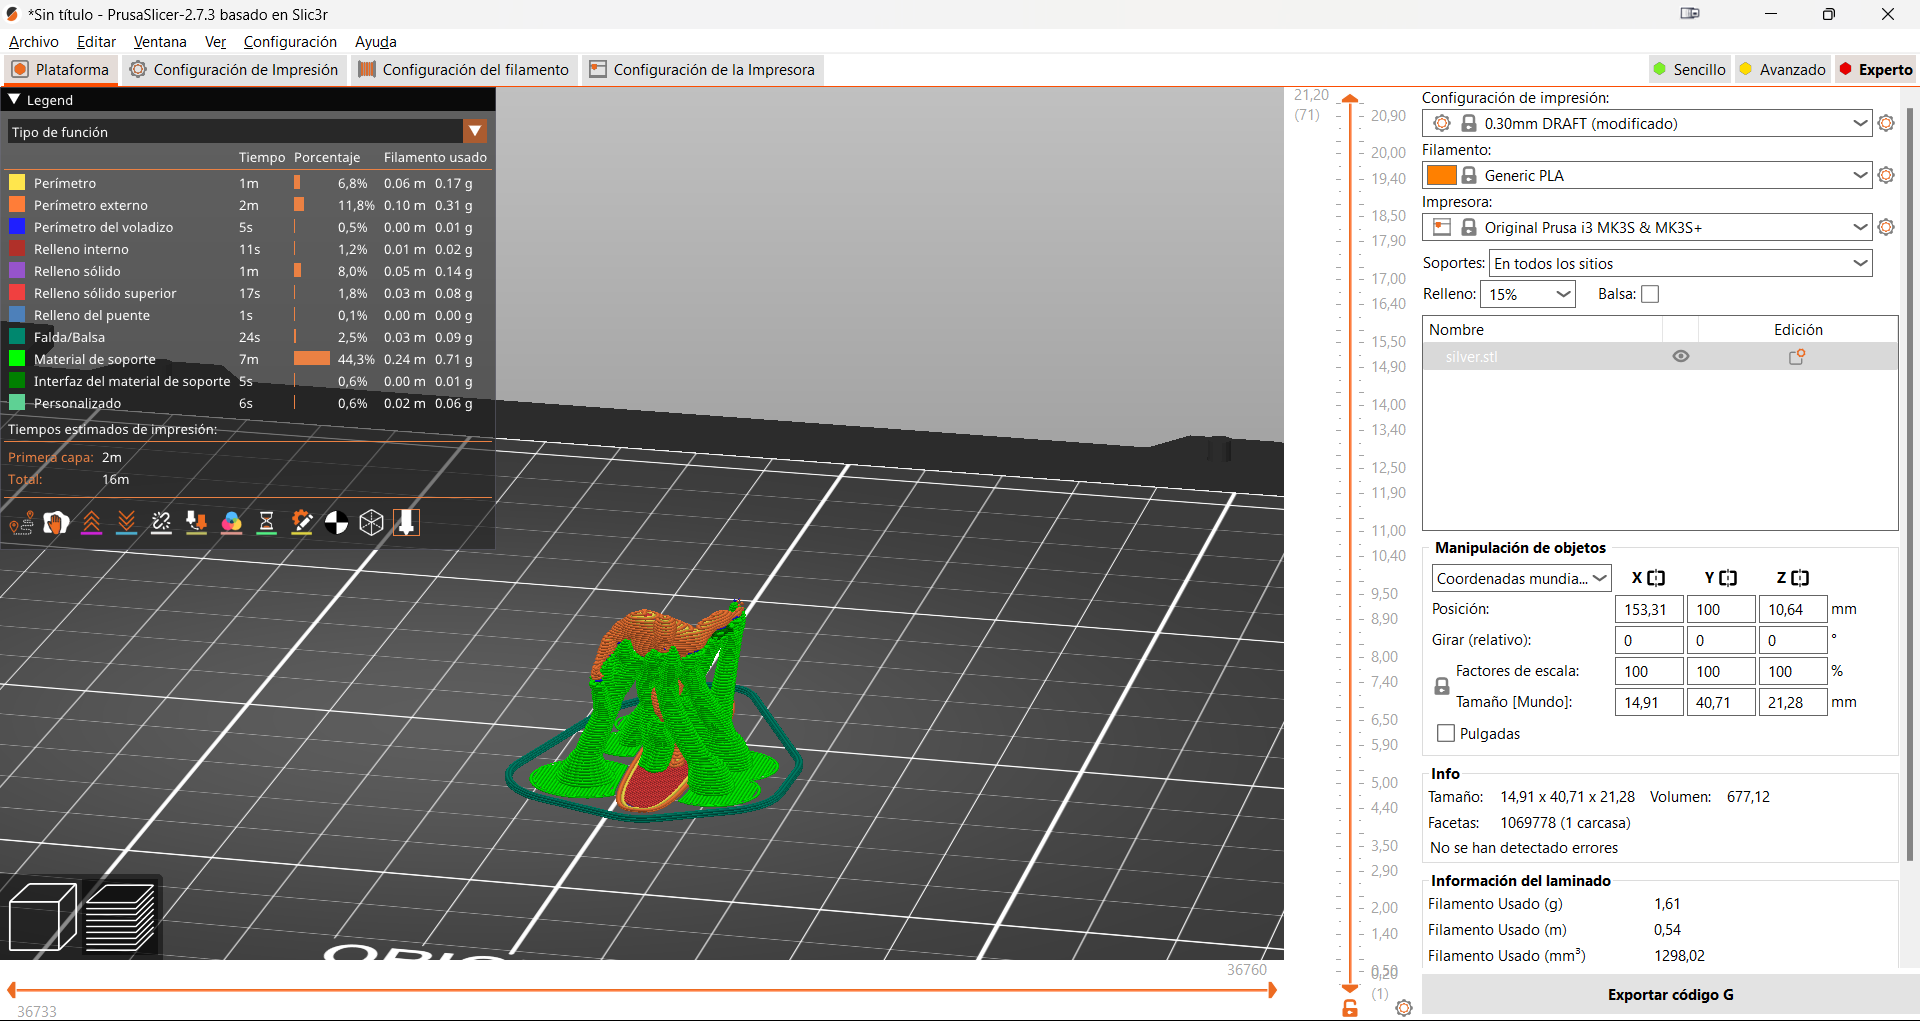
Once the design is completed, which is available in the following link, the next step is to take it to the physical world through 3D printing. To do this you have to use the PrusaSlicer laminator and make small configurations.
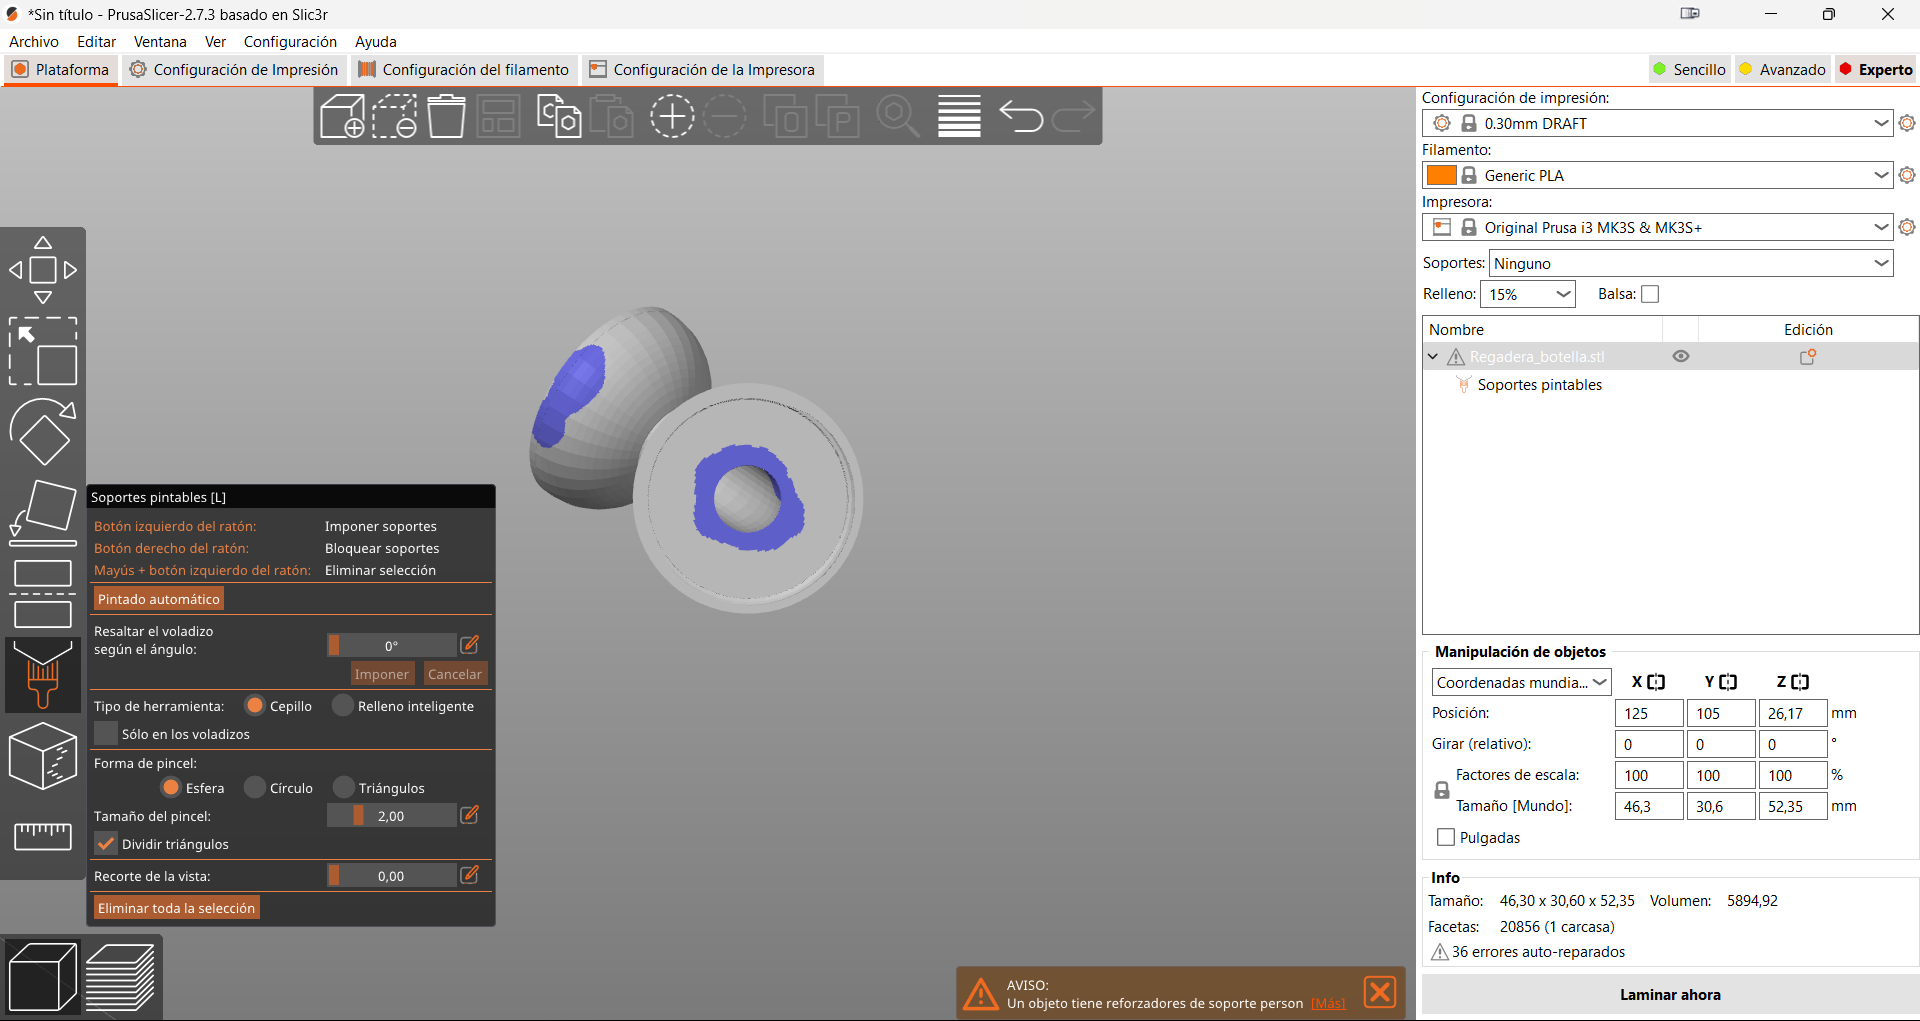
With the paint supports tool, we will give a small brushstroke to the base of the piece and the bottom part of the mouth, that will be enough
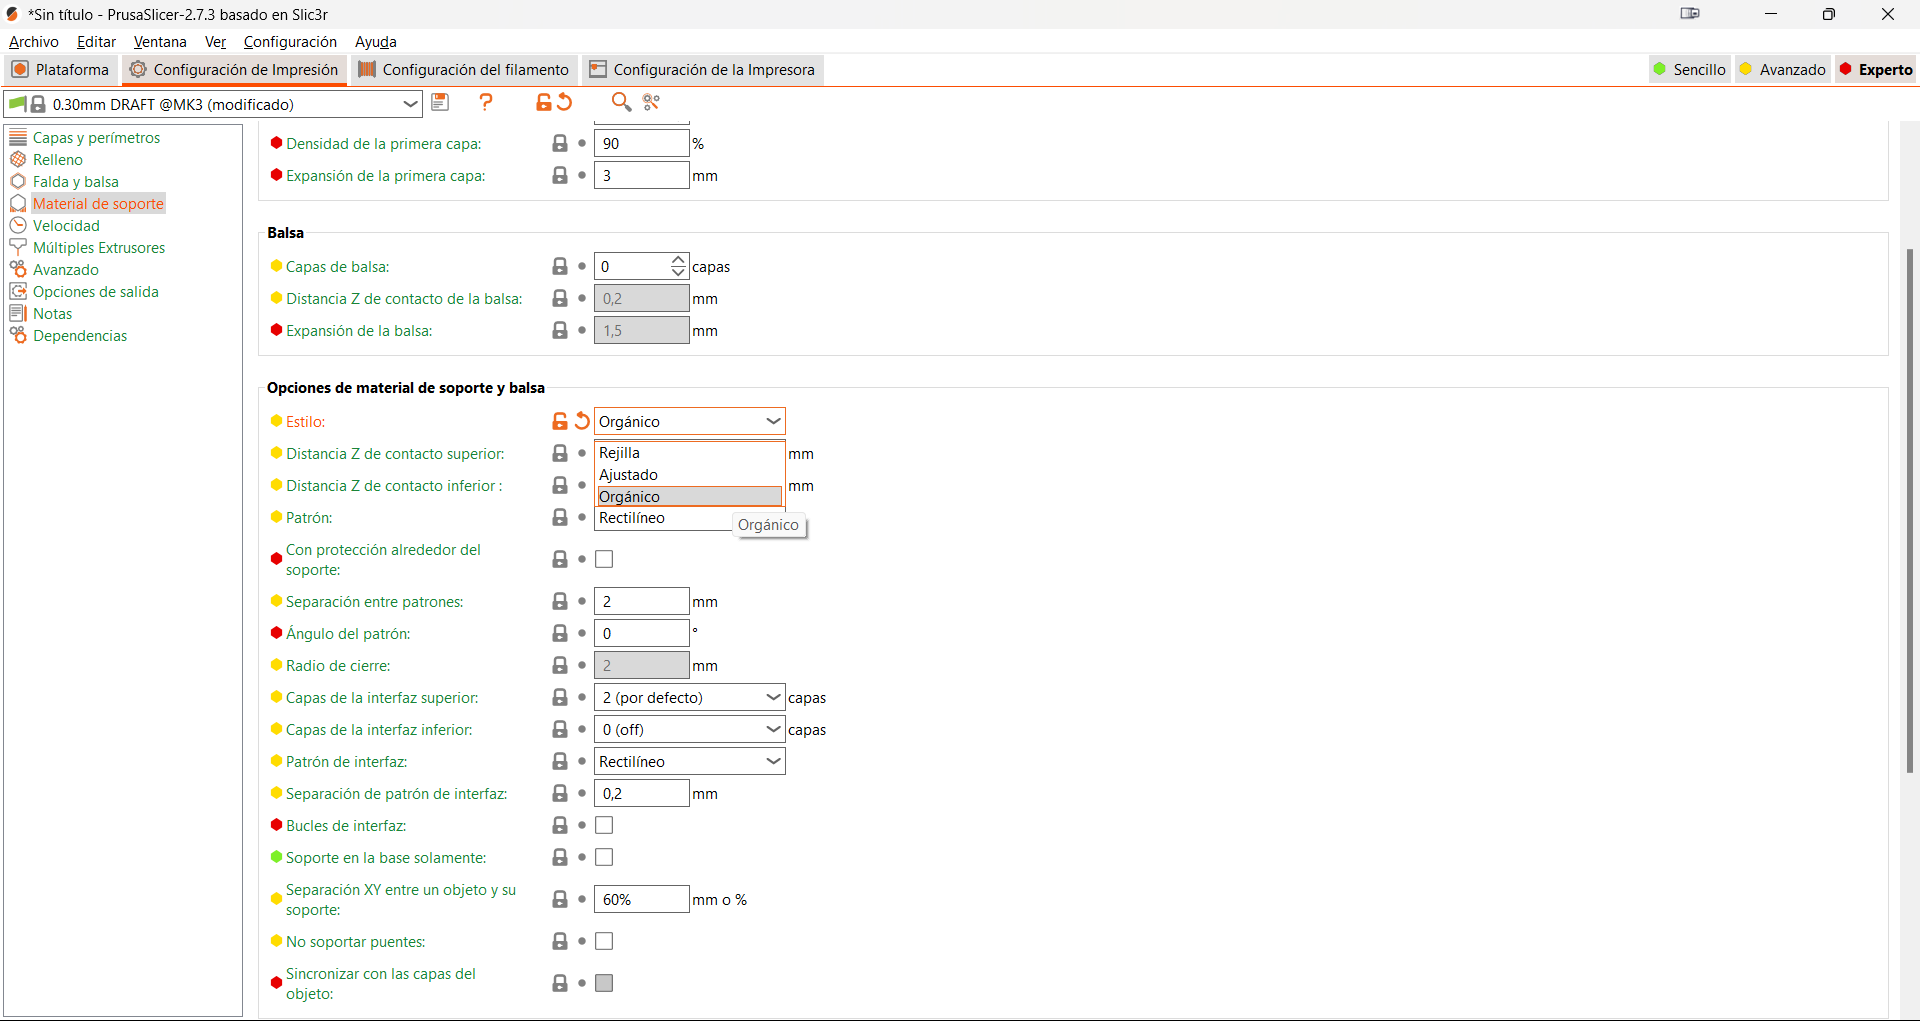
Before laminating we go to the support settings section and select organic, which I like much better.
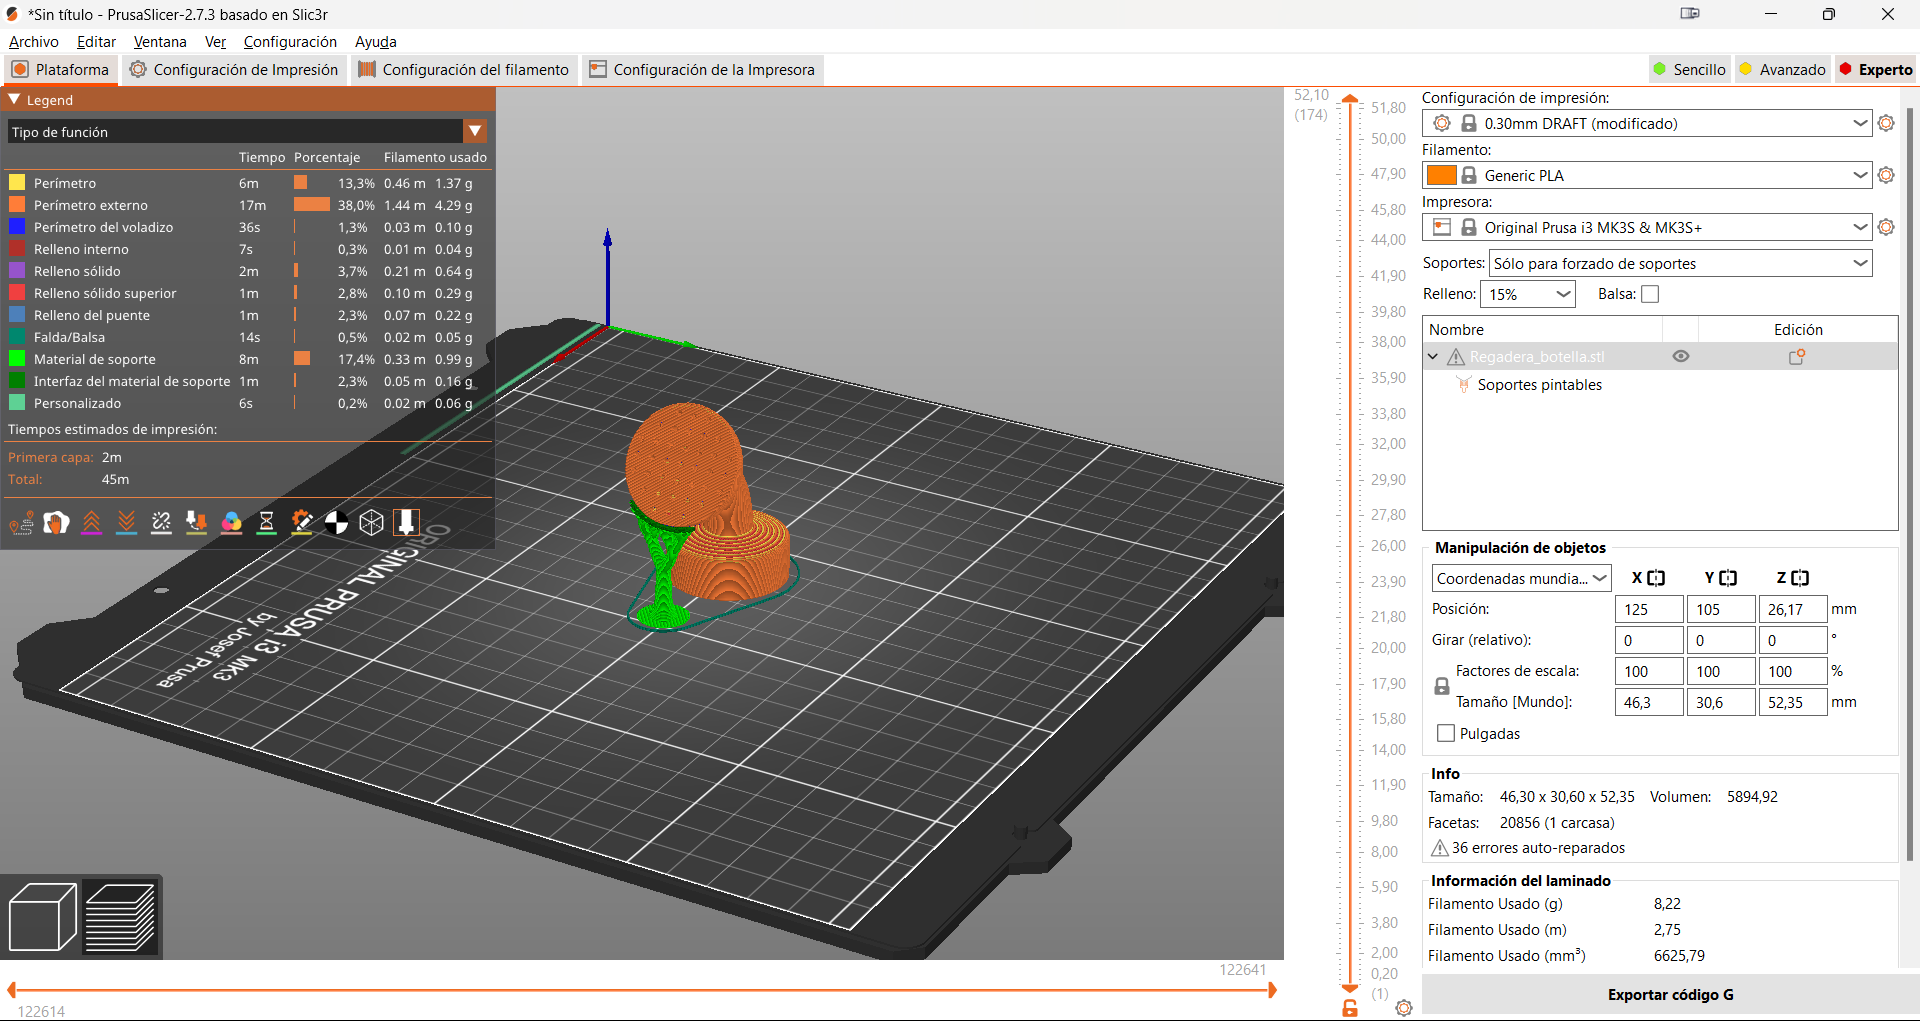
Finally we laminate with the rest of the default parameters of the PrusaSlicer.
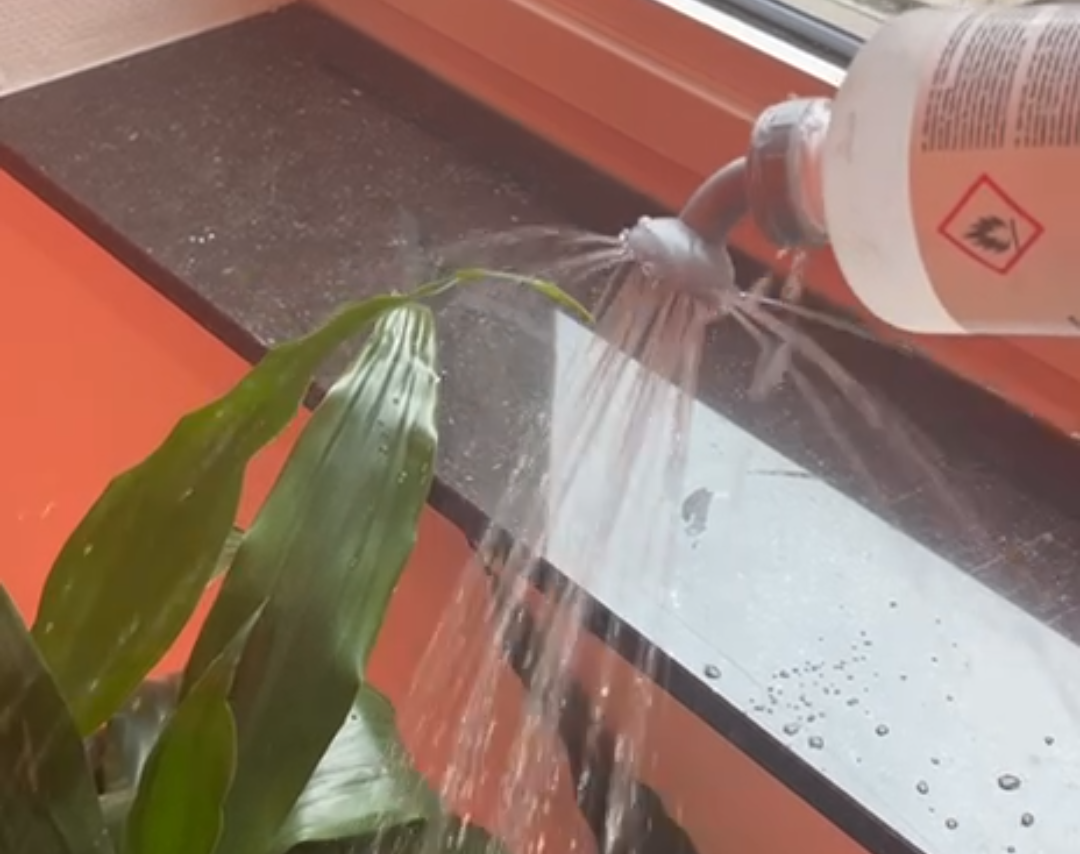
The piece I have designed not only fulfills its function impeccably, but also represents a significant advance in our sustainability practices. By allowing us to recycle a common plastic bottle and turn it into an efficient watering can, we are reducing unnecessary consumption and promoting the reuse of materials.
A bit of scanning too
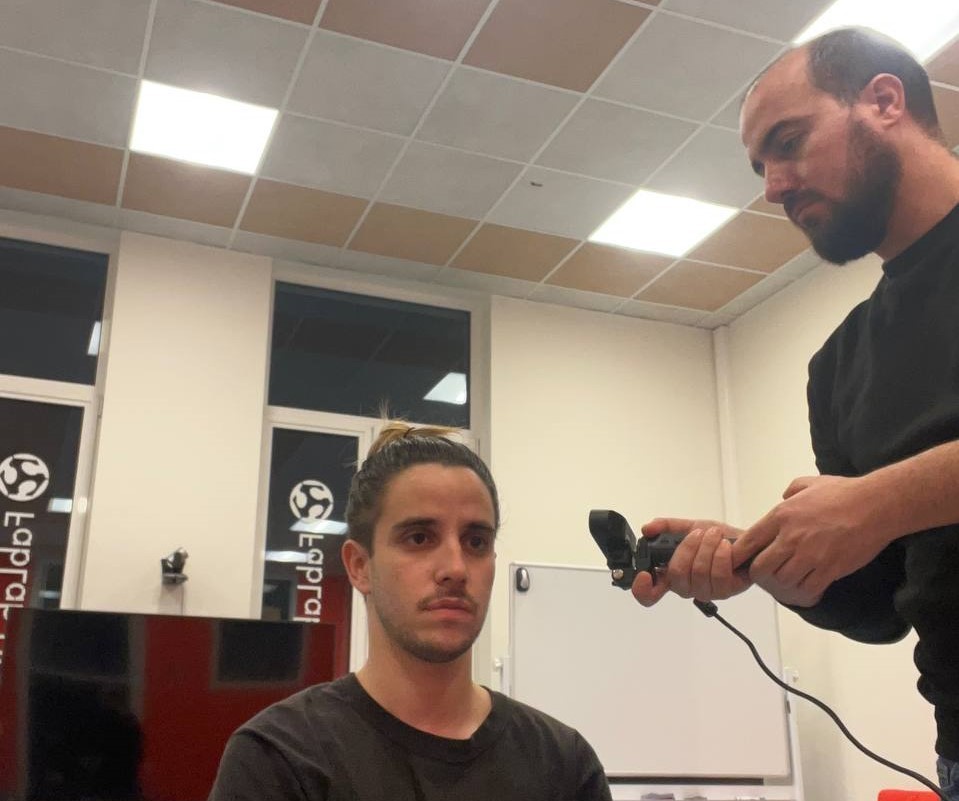
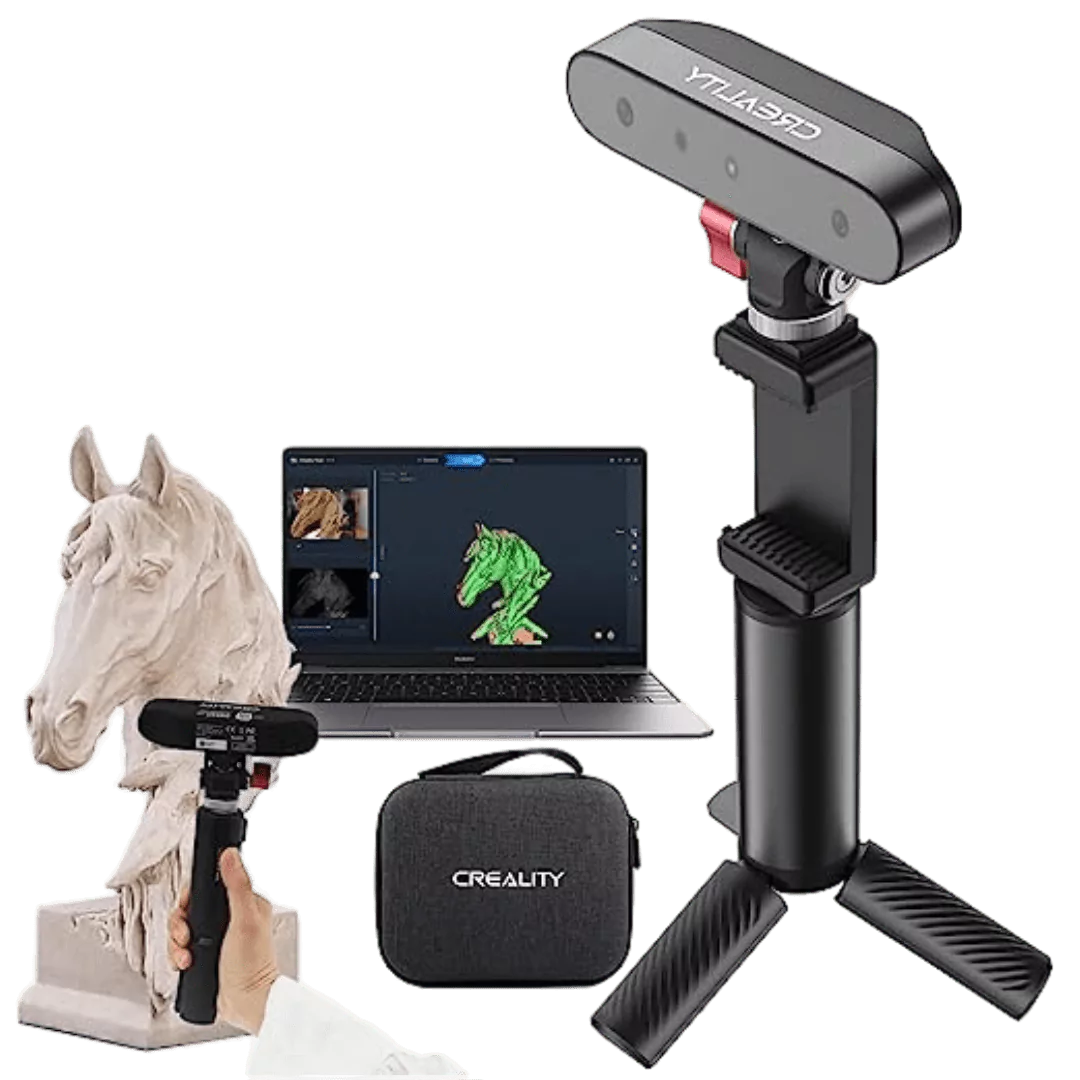
The process of immortalizing our own image in the digital world is a fascinating adventure, and I have decided that the object of the 3D scan will be 'my face'. With the help of my colleague Luis, we will transform my face into a digital version. This digital portrait will not simply be a static copy; It will be the first step to give life to a unique character in the realm of fiction.
To perform this scan, use the Creality Ferret Pro, this is a low-cost, low-power portable device that allows you to perform very high-quality scans using your phone.
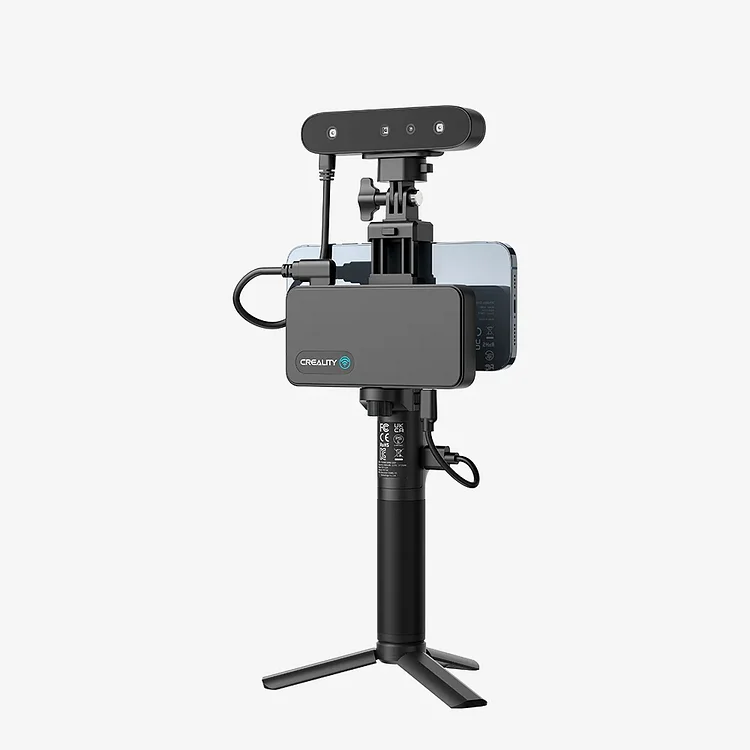
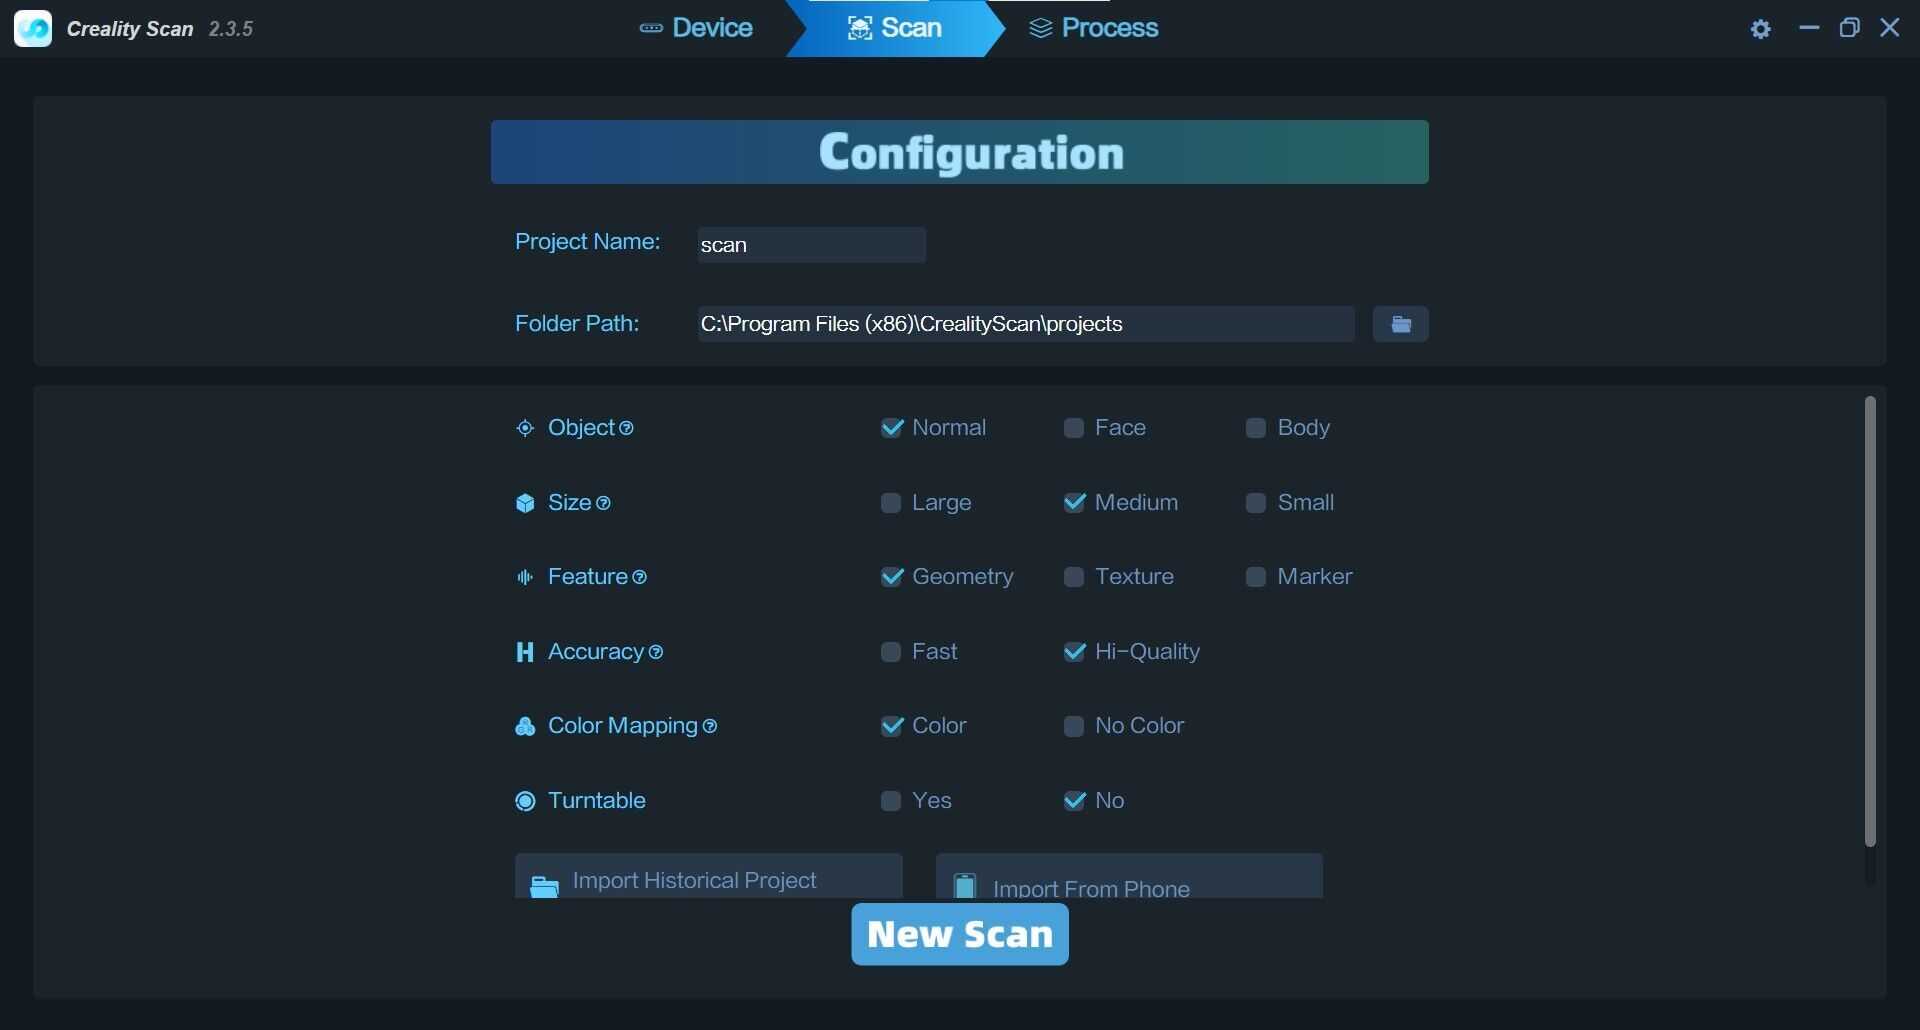
The scanner is used through the Creality Scan program, which is very simple and intuitive, it is possible to choose different configurations depending on the type of object you want to scan and the characteristics of the object, that is, if it has a complex geometry such as a body or a flatter surface but with patterns, etc. Another option is the "rotating" option, which allows you to choose whether the object rotates or if the camera moves around it.
The trick is to move the scanner around the object to be scanned in a spaced manner, pausing until you wait for confirmation from the program to continue. This confidence is given by a color change in the image of the piece, which becomes green when the The program has already recognized all the points in an area.
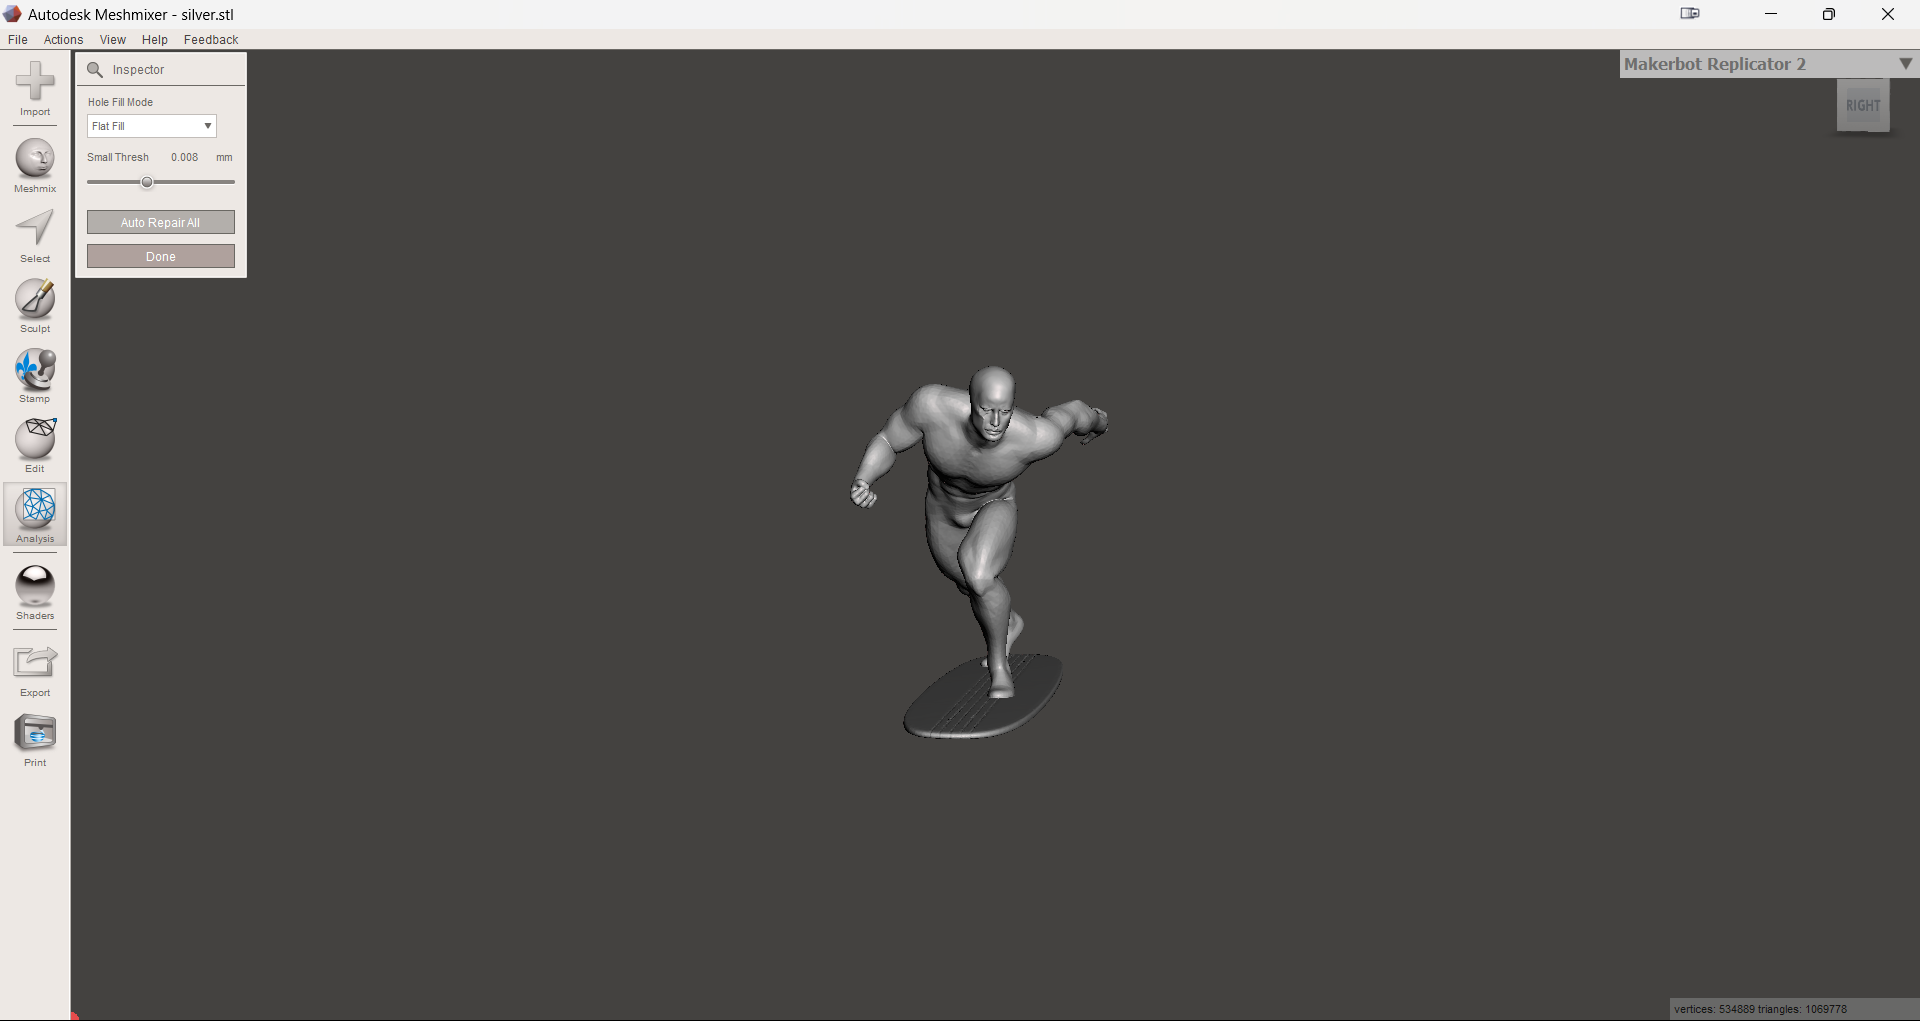
Once we have successfully captured the 3D scan of my face, the next step is to refine the resulting mesh using Meshmixer. This software is a powerful tool that allows us to clean, smooth and optimize the mesh to ensure that the final model is of the highest quality. With Meshmixer, we can remove any imperfections or errors that have arisen during the scanning process, such as loose meshes or poorly detailed areas.
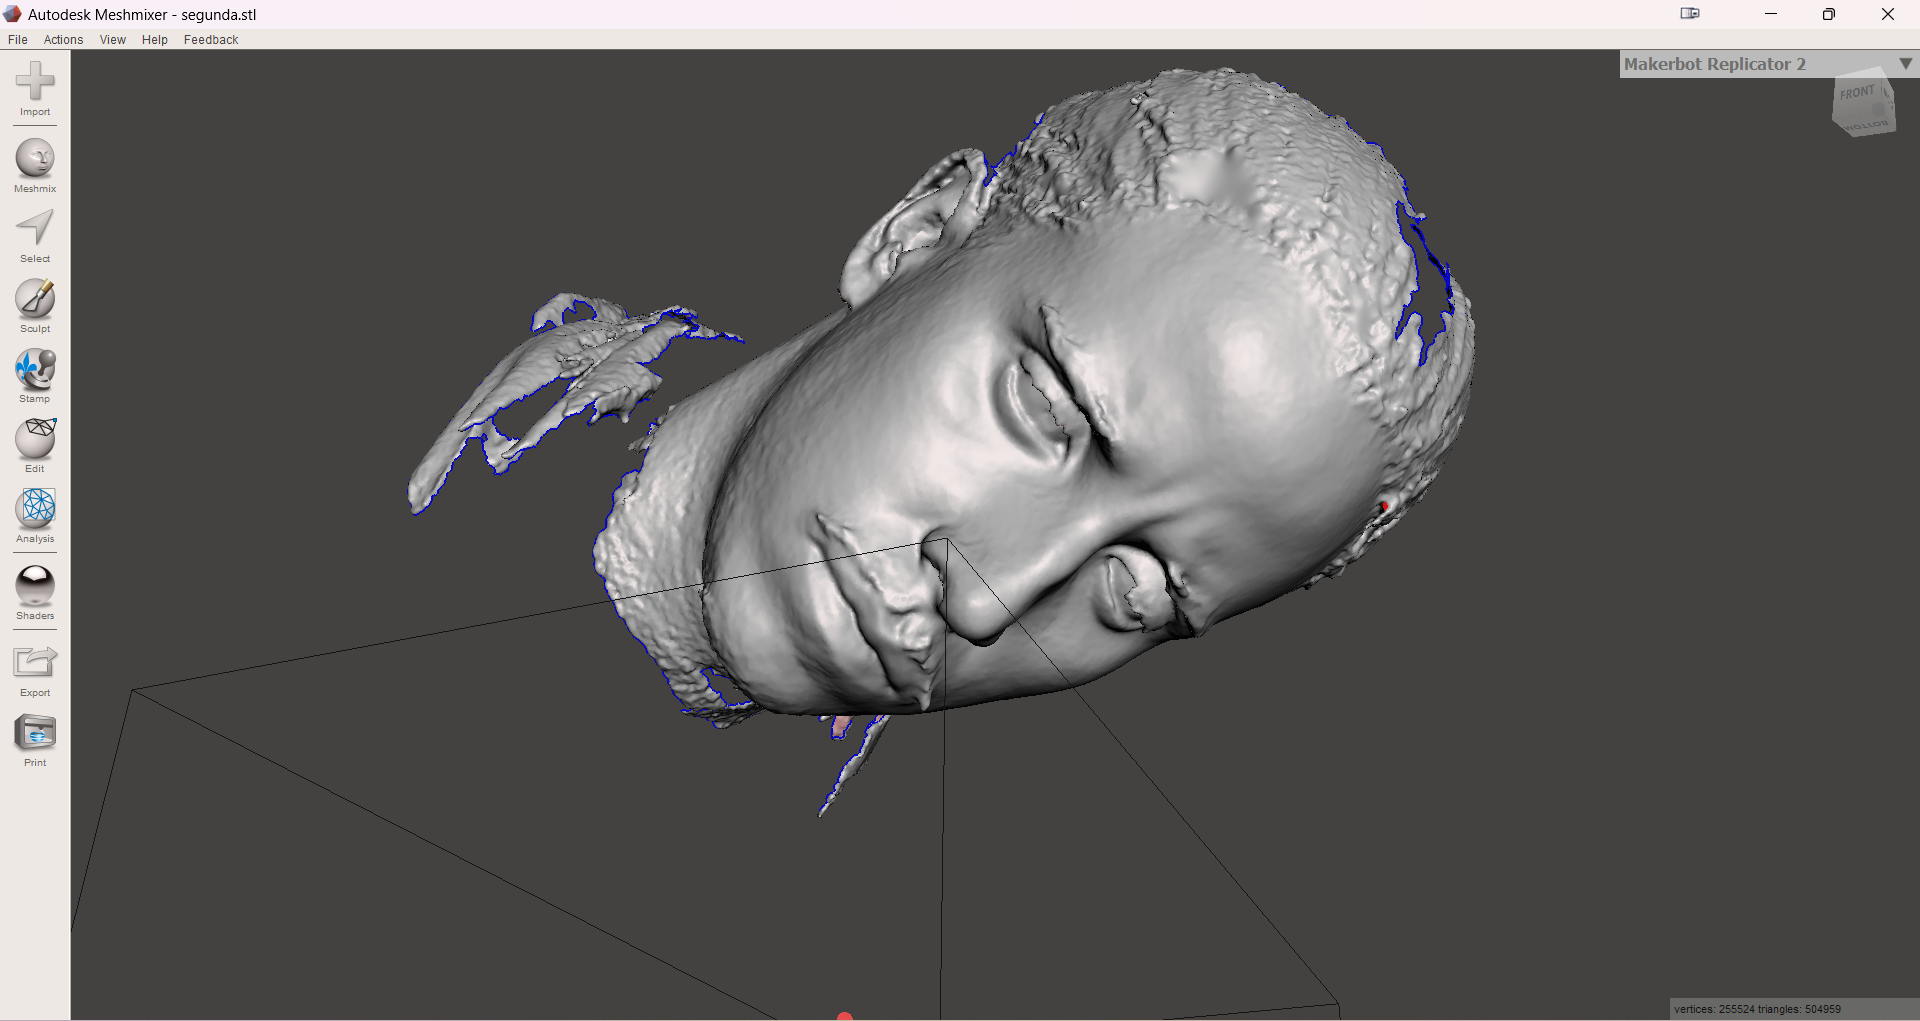
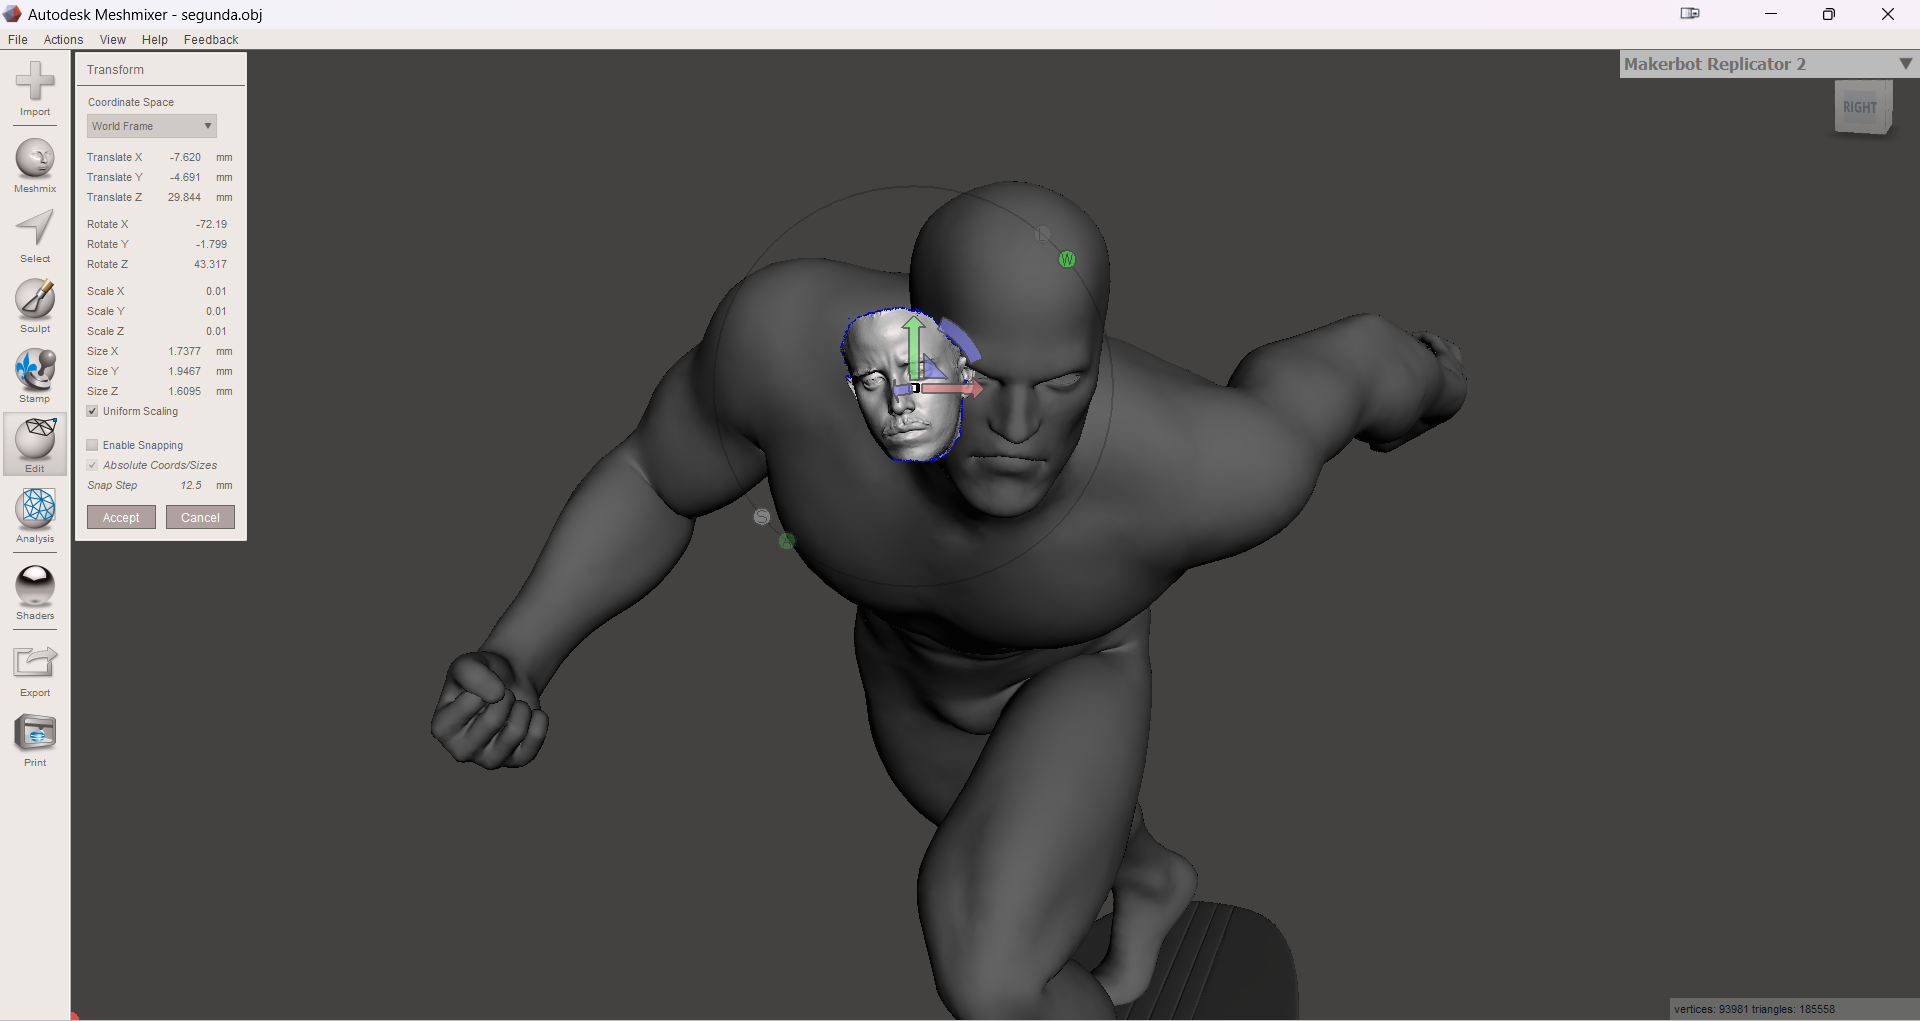
I am not an expert in Meshmixer and I do not pretend to be, therefore the only thing we will do is cut out all the excess material from my scan until leaving only my face, and then with a lot of patience we will move it by hand until my face fits well with the downloaded figure of the silver surfer. (surely there is a more professional method but I don't know it)
Finally, to finish with the analysis tool, we select inspect, and once inside we select Auto-Repair, with that we manage to close and repair all the open meshes in the process of joining the two pieces. With that we are ready to export it as STL.
Keeping the same settings that I used to print the silver surfer watering can, the only difference is that instead of using drawn support, I will configure it in all places.
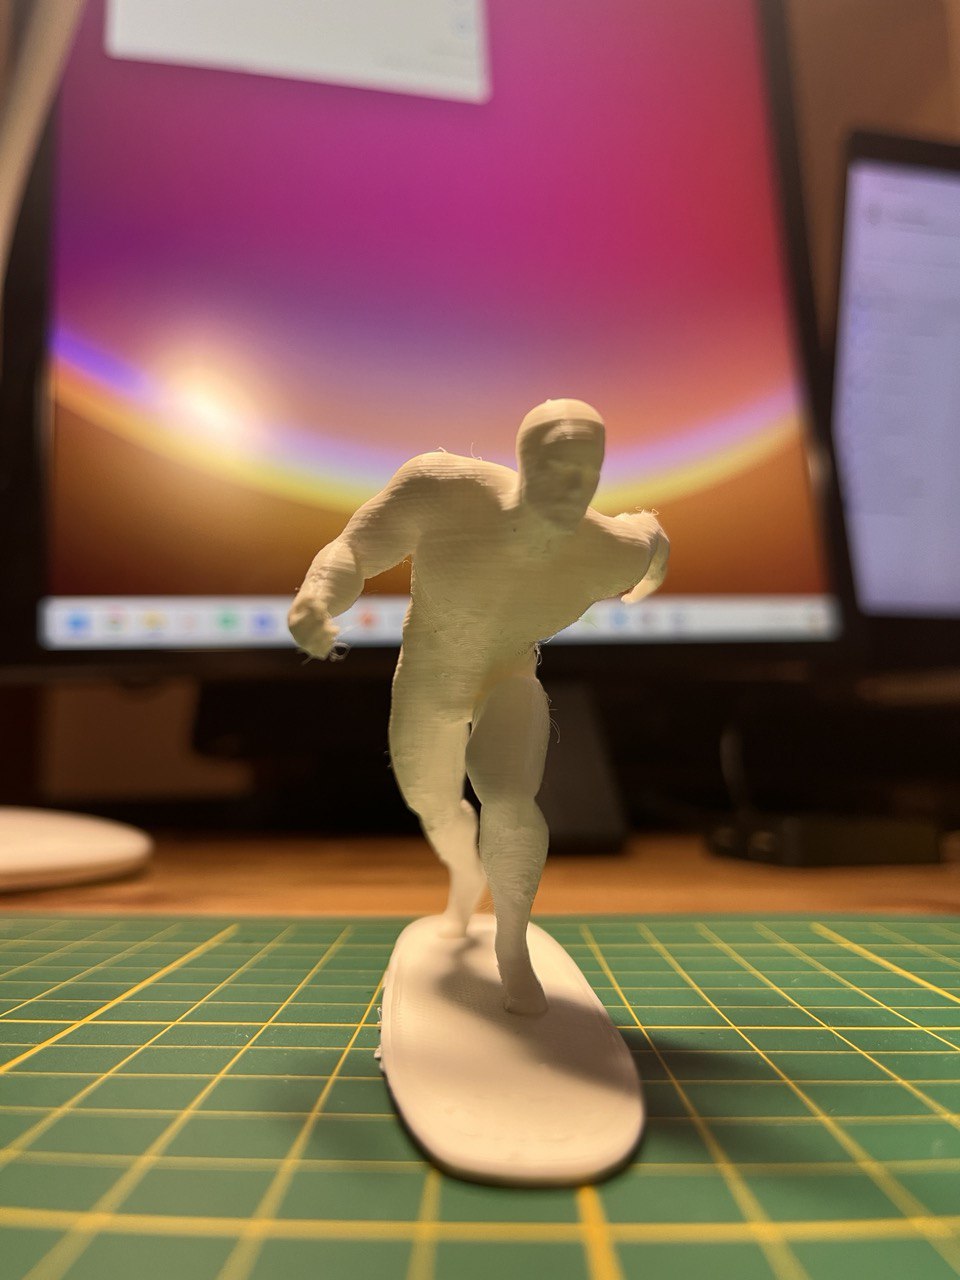
To finish this tour, I place the bust in my setup as a trophy symbol, a tangible reminder of the skill and knowledge we have acquired this last month.This is the link to access the piece.