Week 15
Interface and Application Programming
Our task for this week is:
Group assignment:
- Compare as many tool options as possible.
- Document your work on the group work page and reflect on your individual page what you learned.
Individual assignment:
- Write an application that interfaces a user with an input and/or output device(s) on a board that you made.
Group Assignment
The group assigment link is available here on the fabalab page.
What does interfacing and application programming entail?
In simpler terms, interfacing in IoT allows devices like sensors, actuators, and controllers to communicate with each other and with the central IoT platform or network. This communication is crucial for collecting data from sensors, sending commands to actuators, analyzing information, and making informed decisions based on the data received from connected devices.
For example, in a smart home IoT system, interfacing enables devices such as thermostats, lights, security cameras, and smart appliances to communicate with each other and with the central home automation hub. This communication allows users to remotely control and monitor various aspects of their home environment through a smartphone app or web interface.
Overall, interfacing plays a vital role in ensuring seamless connectivity, data exchange, and functionality in IoT systems, enabling them to operate efficiently and deliver valuable insights and automation capabilities.
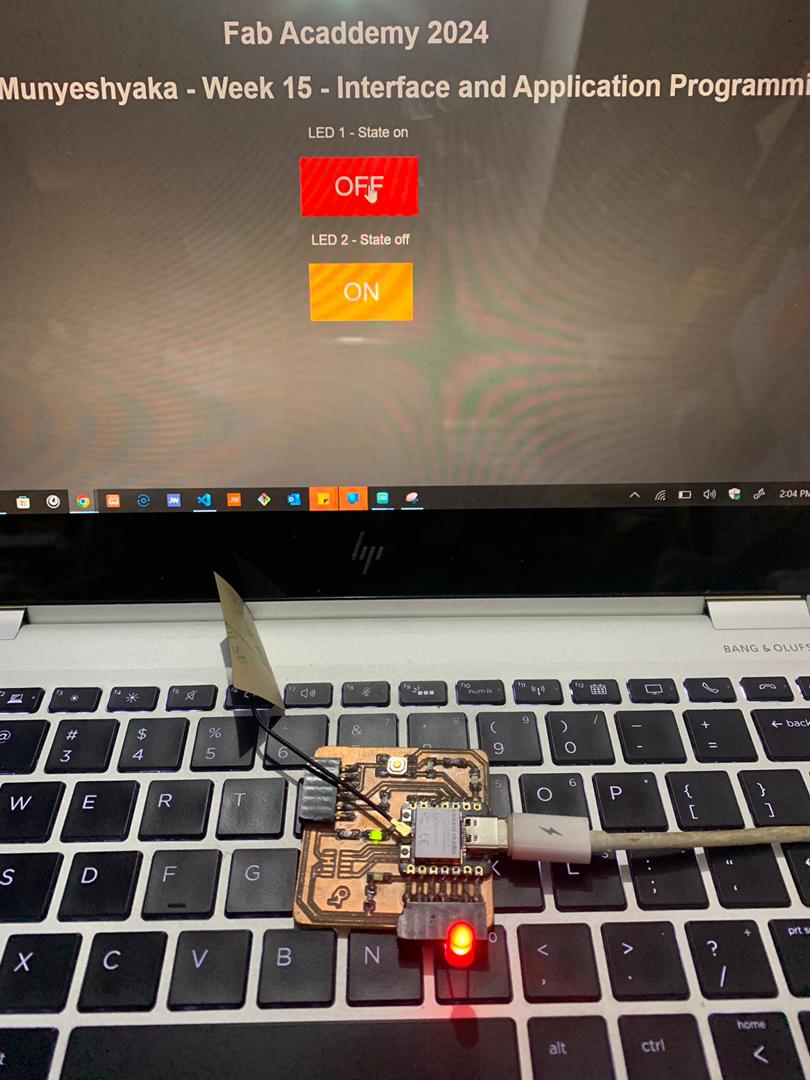
To complete my tasks this week, I utilized the ESP32 to send data to a web server application, enabling me to interact with the ESP32 by controlling LEDs for both the On and Off states. Additionally, I integrated an LCD display (1604) to show and send strings. Let's begin and see how I achieved this.
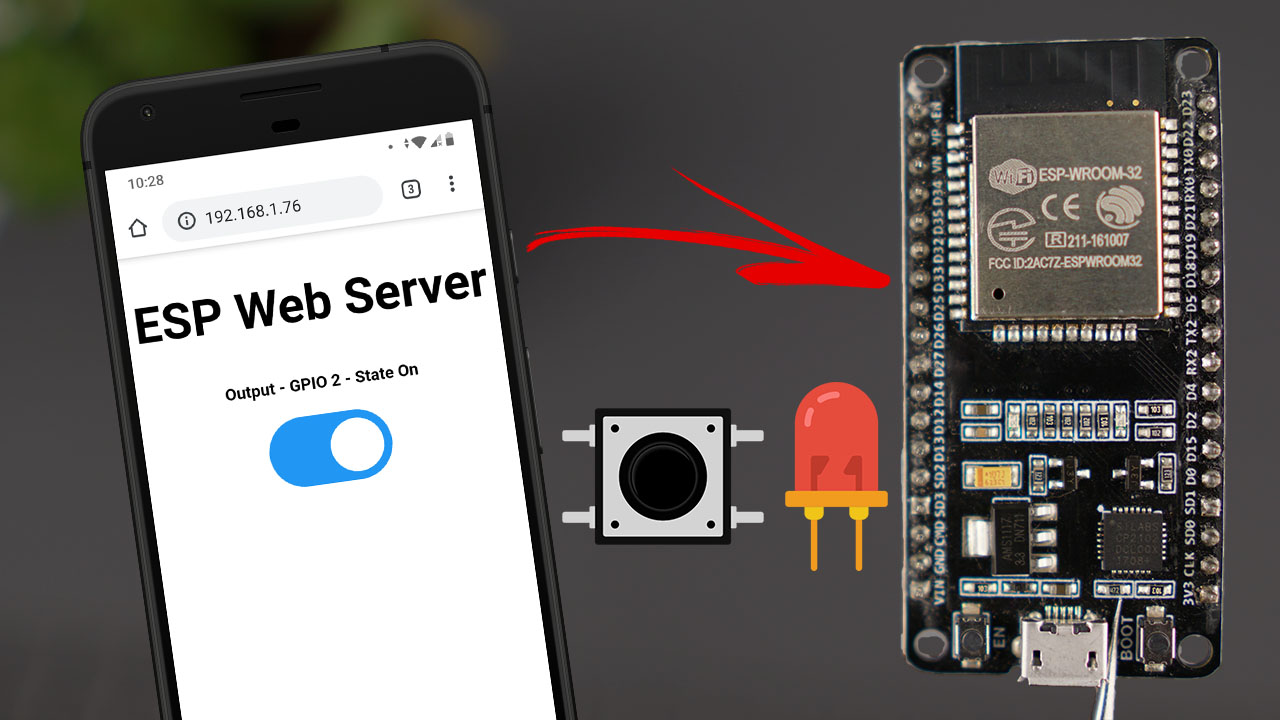
What is ESP32 web server
A web server is a software application that serves web pages to users. When a user requests a web page, the web server processes the request and sends the requested page back to the user’s browser. This forms the backbone of data communication on the World Wide Web.
The ESP32, a low-cost microcontroller with integrated Wi-Fi and Bluetooth capabilities, has become a popular choice for IoT applications due to its power and affordability. One intriguing application is the creation of a web server.
To learn more about the ESP32 web server and how to set it up on your ESP32 board, click here.
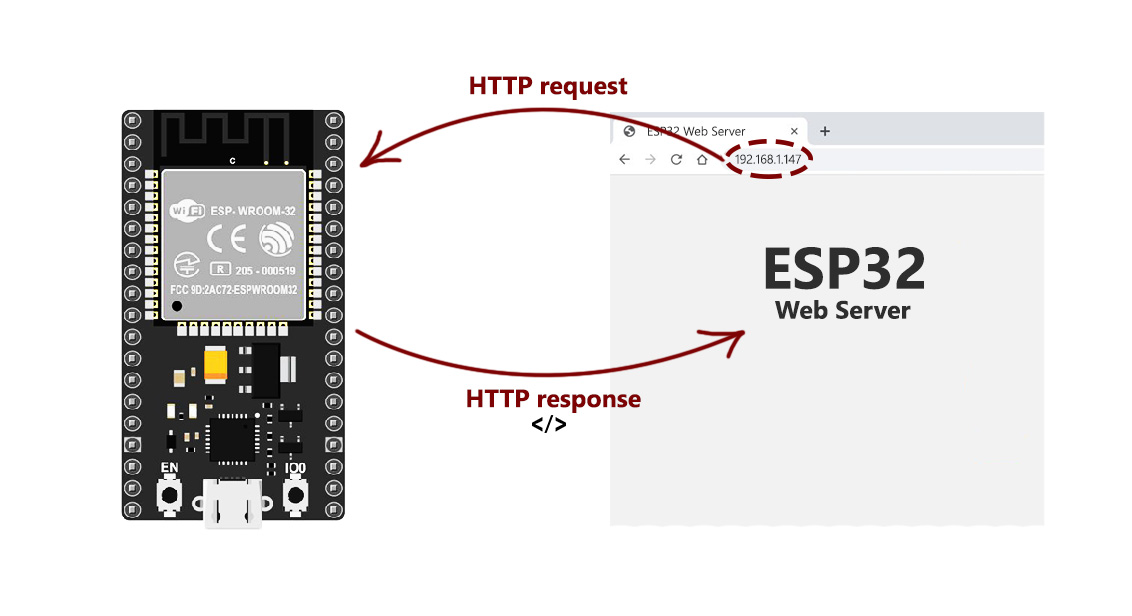
How ESP32 web server works?
The web server is a place to send and receive information, process the information and store it. The web server can also display this information on a web page.
The server communicates with the user through a protocol called the Hypertext Transfer Protocol (HTTP)
When a request is sent to this server (for example, its address is searched in the browser), the server returns a code as a response (for example, code 200, which means the connection is established correctly, or code 404, which indicates that the address is not correct). You can find the full list of these codes hereWhen a request is sent to this server (for example, its address is searched in the browser), the server returns a code as a response (for example, code 200, which means the connection is established correctly, or code 404, which indicates that the address is not correct). You can find the full list of these codes here
Let's start with Controlling LEDs
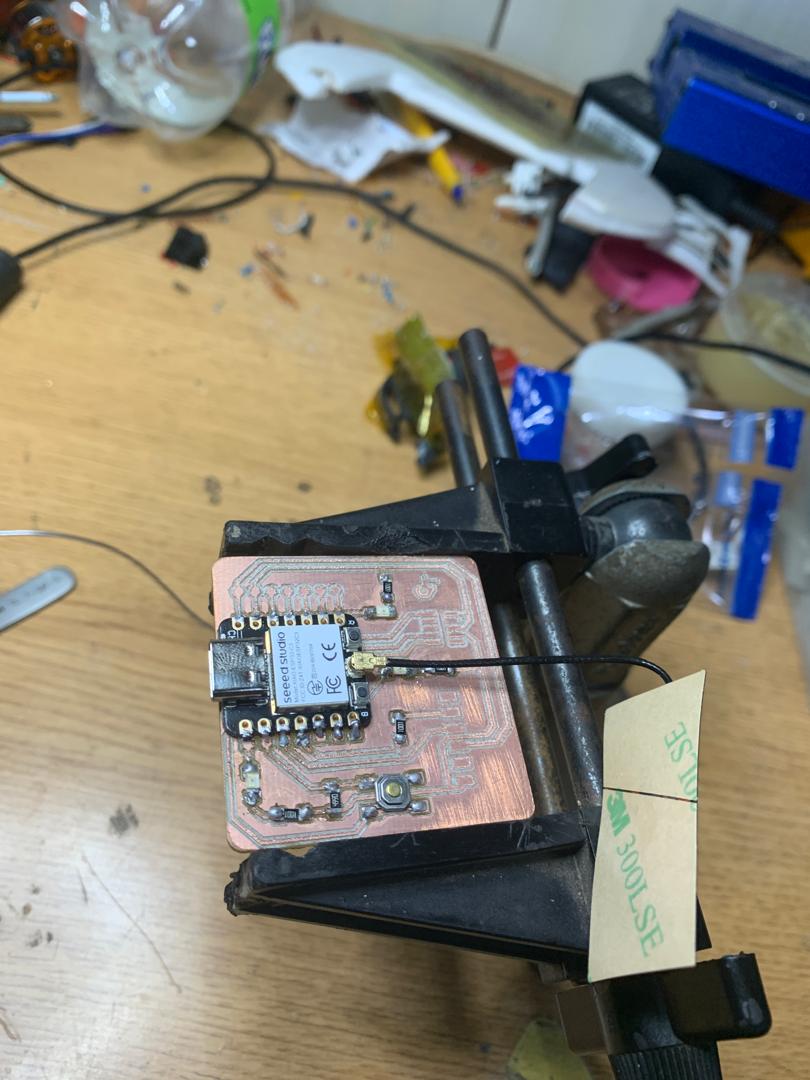
I utilized the electronic production board of the week to achieve this task, controlling the LEDs connected to the board. Additionally, I incorporated other LEDs using pins to enhance control capabilities.
Code for XIAO ESP32C3
#include "WiFi.h"
                      // Replace with your network credentials
const char* ssid = "Lee";
const char* password = "nyerekatech4";
// Set web server port number to 80
WiFiServer server(80);
// Variable to store the HTTP request
String header;
// Auxiliar variables to store the current output state
String output26State = "off";
String output27State = "off";
// Assign output variables to GPIO pins
const int output26 = 26;
const int output27 = 27;
// Current time
unsigned long currentTime = millis();
// Previous time
unsigned long previousTime = 0;
// Define timeout time in milliseconds (example: 2000ms = 2s)
const long timeoutTime = 2000;
void setup() {
Serial.begin(115200);
// Initialize the output variables as outputs
pinMode(output26, OUTPUT);
pinMode(output27, OUTPUT);
// Set outputs to LOW
digitalWrite(output26, LOW);
digitalWrite(output27, LOW);
// Connect to Wi-Fi network with SSID and password
Serial.print("Connecting to ");
Serial.println(ssid);
WiFi.begin(ssid, password);
while (WiFi.status() != WL_CONNECTED) {
delay(500);
Serial.print(".");
}
// Print local IP address and start web server
Serial.println("");
Serial.println("WiFi connected.");
Serial.println("IP address: ");
Serial.println(WiFi.localIP());
server.begin();
}
void loop(){
WiFiClient client = server.available(); // Listen for incoming clients
if (client) { // If a new client connects,
currentTime = millis();
previousTime = currentTime;
Serial.println("New Client."); // print a message out in the serial port
String currentLine = ""; // make a String to hold incoming data from the client
while (client.connected() && currentTime - previousTime <= timeoutTime) { // loop while the client's connected
currentTime = millis();
if (client.available()) { // if there's bytes to read from the client,
char c = client.read(); // read a byte, then
Serial.write(c); // print it out the serial monitor
header += c;
if (c == '\n') { // if the byte is a newline character
// if the current line is blank, you got two newline characters in a row.
// that's the end of the client HTTP request, so send a response:
if (currentLine.length() == 0) {
// HTTP headers always start with a response code (e.g. HTTP/1.1 200 OK)
// and a content-type so the client knows what's coming, then a blank line:
client.println("HTTP/1.1 200 OK");
client.println("Content-type:text/html");
client.println("Connection: close");
client.println();
// turns the GPIOs on and off
if (header.indexOf("GET /26/on") >= 0) {
Serial.println("GPIO 26 on");
output26State = "on";
digitalWrite(output26, HIGH);
} else if (header.indexOf("GET /26/off") >= 0) {
Serial.println("GPIO 26 off");
output26State = "off";
digitalWrite(output26, LOW);
} else if (header.indexOf("GET /27/on") >= 0) {
Serial.println("GPIO 27 on");
output27State = "on";
digitalWrite(output27, HIGH);
} else if (header.indexOf("GET /27/off") >= 0) {
Serial.println("GPIO 27 off");
output27State = "off";
digitalWrite(output27, LOW);
}
// Display the HTML web page
client.println("");
client.println("");
client.println("");
// CSS to style the on/off buttons
// Feel free to change the background-color and font-size attributes to fit your preferences
client.println("");
// Web Page Heading
client.println("Fab Acaddemy 2024
");
client.println("Shadrach Munyeshyaka - Week 15 - Interface and Application Programming
");
// Display current state, and ON/OFF buttons for GPIO 26
client.println("LED2 - State " + output26State + "
");
// If the output26State is off, it displays the ON button
if (output26State=="off") {
client.println("");
} else {
client.println("");
}
// Display current state, and ON/OFF buttons for GPIO 27
client.println("LED1 - State " + output27State + "
");
// If the output27State is off, it displays the ON button
if (output27State=="off") {
client.println("");
} else {
client.println("");
}
client.println("");
// The HTTP response ends with another blank line
client.println();
// Break out of the while loop
break;
} else { // if you got a newline, then clear currentLine
currentLine = "";
}
} else if (c != '\r') { // if you got anything else but a carriage return character,
currentLine += c; // add it to the end of the currentLine
}
}
}
// Clear the header variable
header = "";
// Close the connection
client.stop();
Serial.println("Client disconnected.");
Serial.println("");
}
}
Code explanation
I had to modify the following lines with my network credentials: SSID and password. The code is well commented on where I should make the changes.
// Replace with your network credentials
const char* ssid = "Lee";
const char* password = "nyerekatech4";
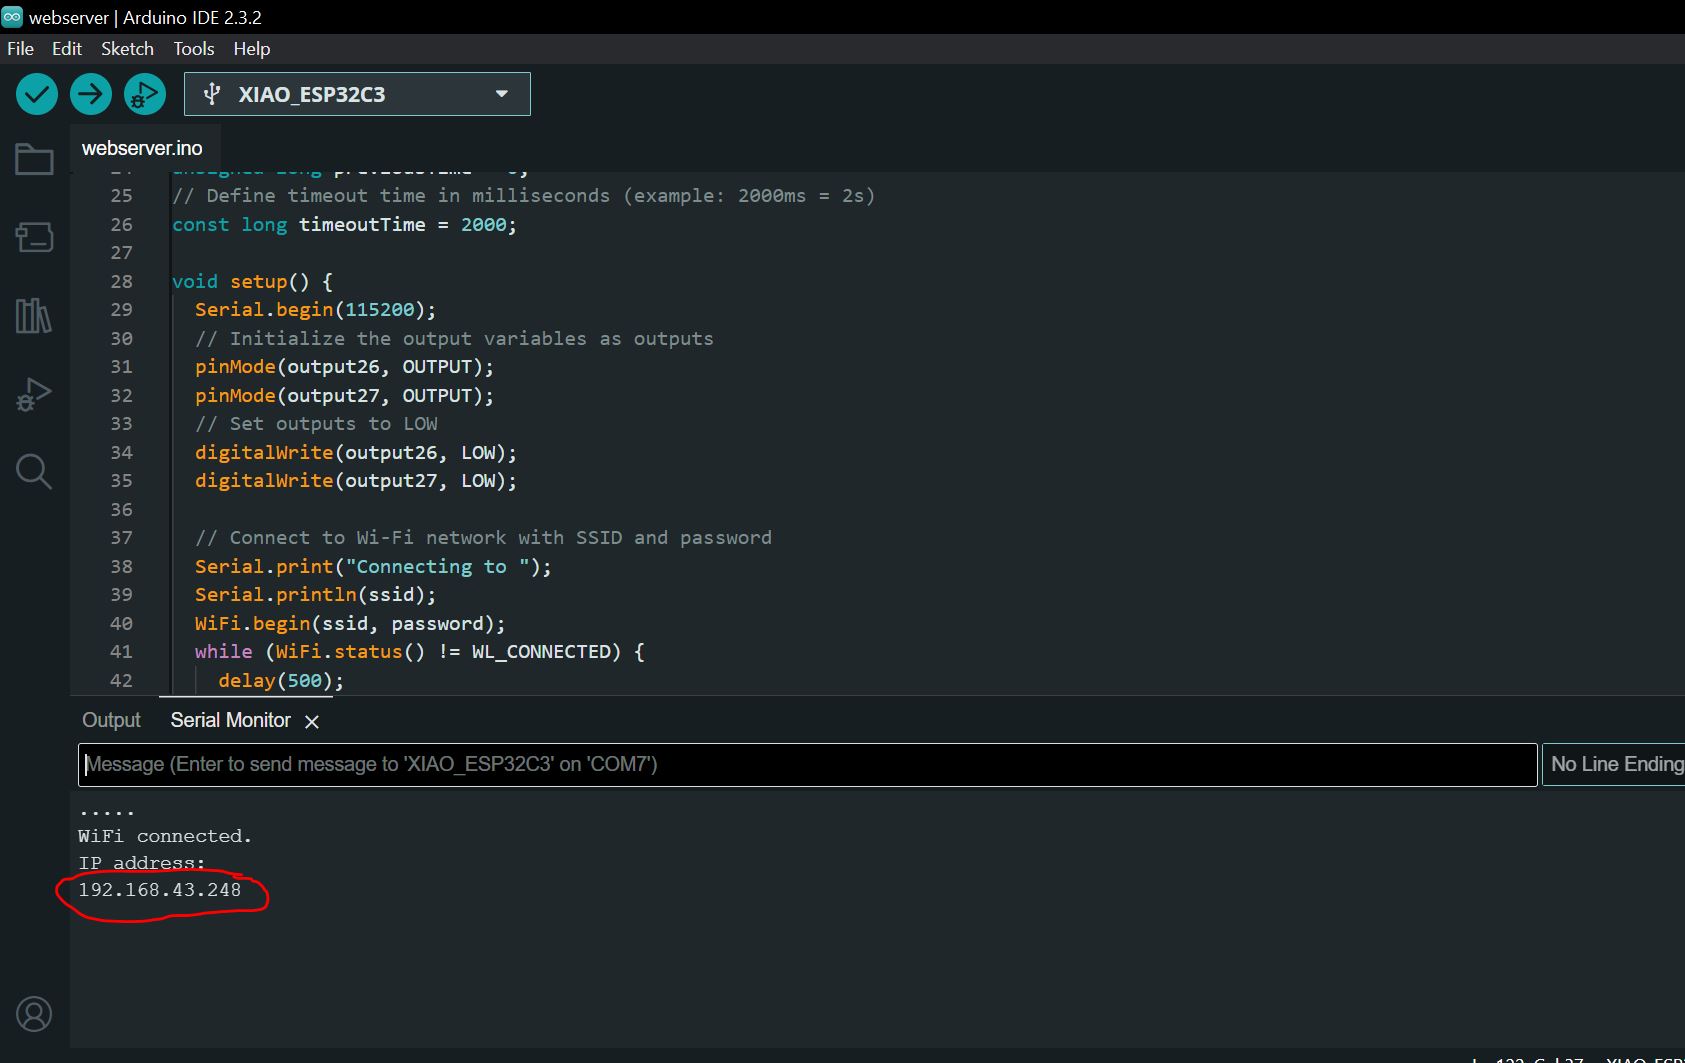
Uploading the Code in the board
Now, I can upload the code and and the web server will work straight away. Follow the next steps to upload code to the XIAO ESP32C3:
- Plug your ESP32 board in my laptop
- In the Arduino IDE select your board in Tools > Board (in my case I am using the XIAO ESP32C3);
- Select the COM port in Tools > Port
- Press the Upload button in the Arduino IDE and wait a few seconds while the code compiles and uploads to my board
After to upload the code in ESP32C3 cope the IP address as it shown in red cicle.
Display on the web browser