Computer Controlled Fabric Cutting Machine is also known as CNC cutting machine. Computer numerical control (CNC) is a manufacturing method that automates the control, movement and precision of machine tools through the use of preprogrammed computer software.
Assignments
Group assignment this week is:
Characterize your lasercutter’s focus, power, speed, rate, kerf, joint clearance and types.Document your work to the group work page and reflect on your individual page what you learned.
Individual assignments this week is:
Design, lasercut, and document a parametric construction kit, accounting for the lasercutter kerf, which can be assembled in multiple ways.Cut something on the vinyl cutter.
Group Assignment
The group assigment link is available here on the fabalab page.
What VINYL CUTTER? A vinyl cutter is an entry level machine for making signs. Computer designed vector files with patterns and letters are directly cut on the roll of vinyl which is mounted and fed into the vinyl cutter through USB or serial cable. Vinyl cutters are mainly used to make signs, banners and advertisements.
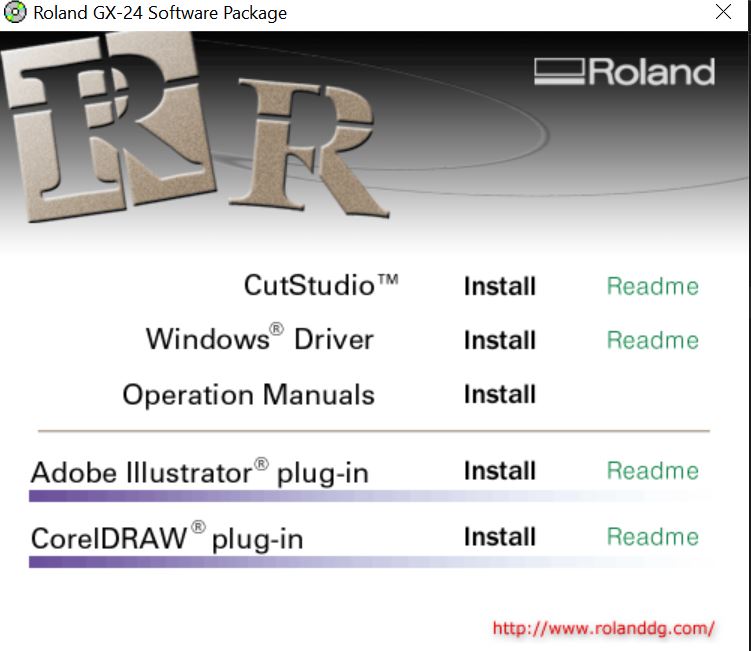
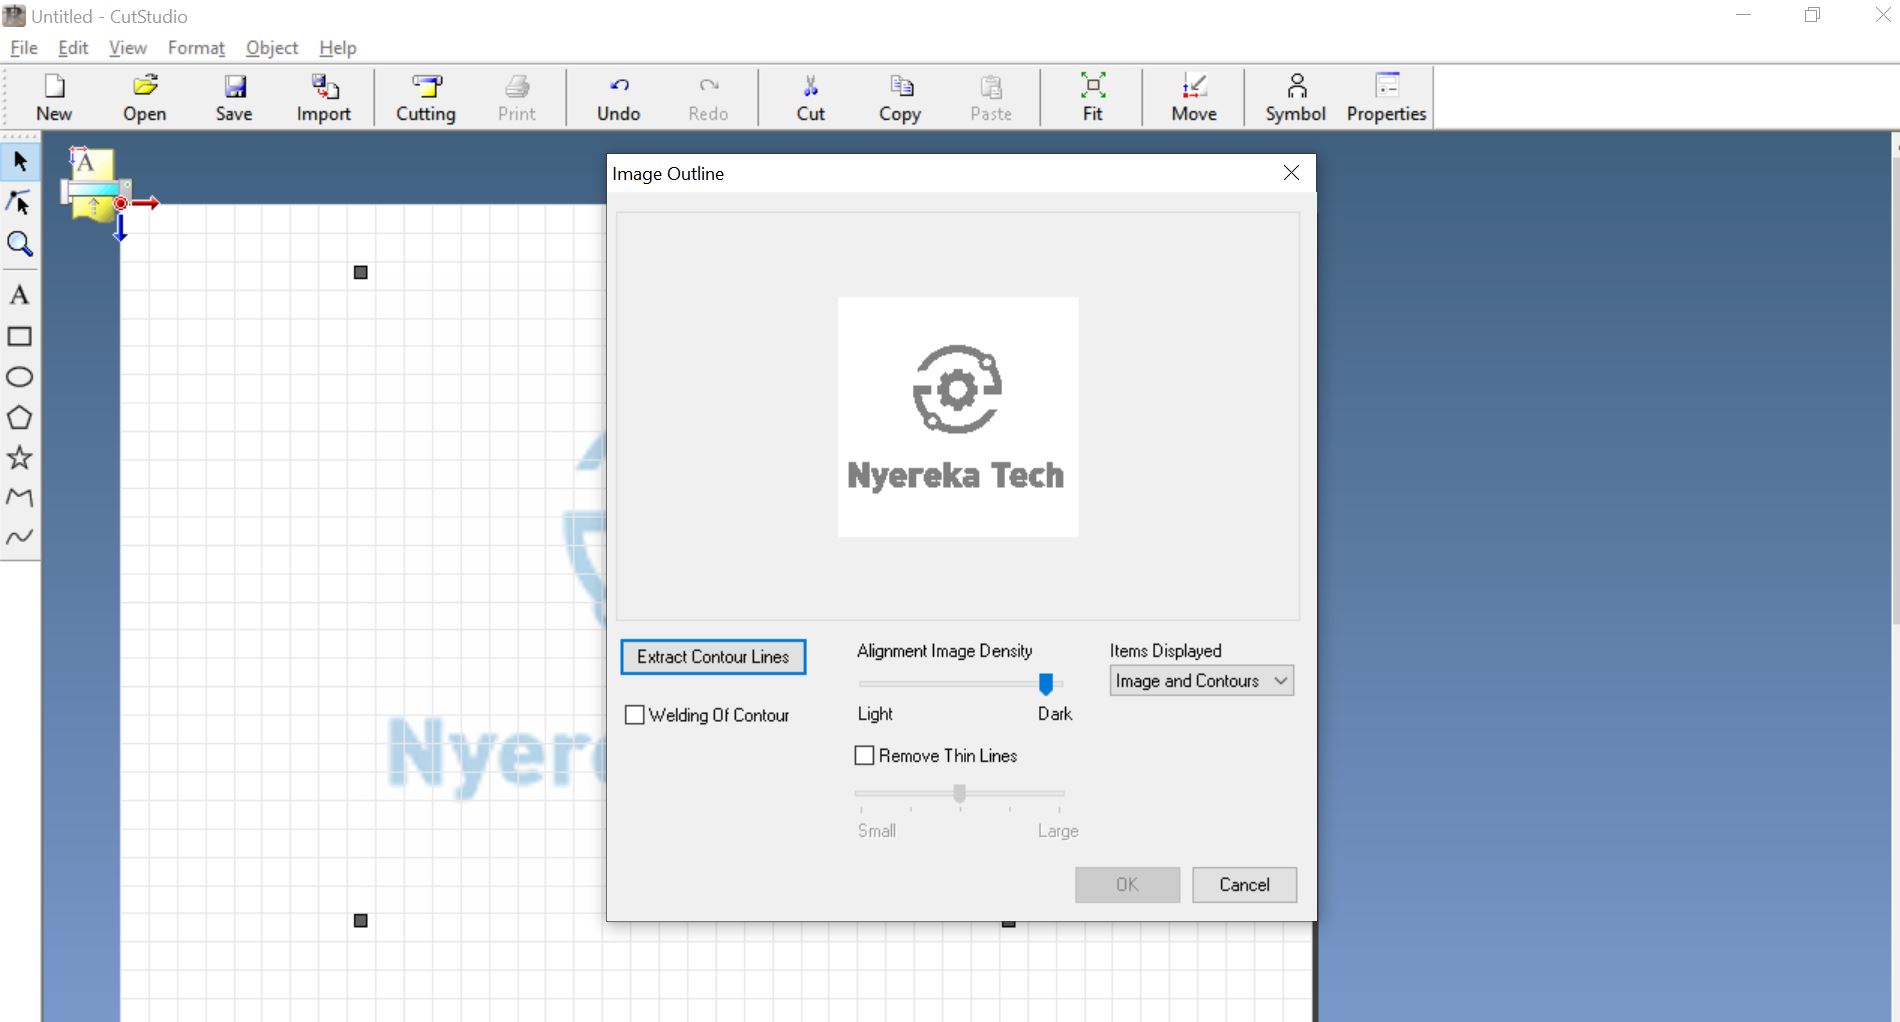
In order to utilize the vinyl cutter effectively, it is essential to have software known as CutStudio. This software enables me to design the models that I intend to print using the vinyl cutter.
First, I began by obtaining the software and installing the setup on my computer.
After downloading the setup, I installed CutStudio and the Windows drivers. These tools will assist me in printing out the model that we will be discussing with the cutter at FabLab Rwanda.
Print Something
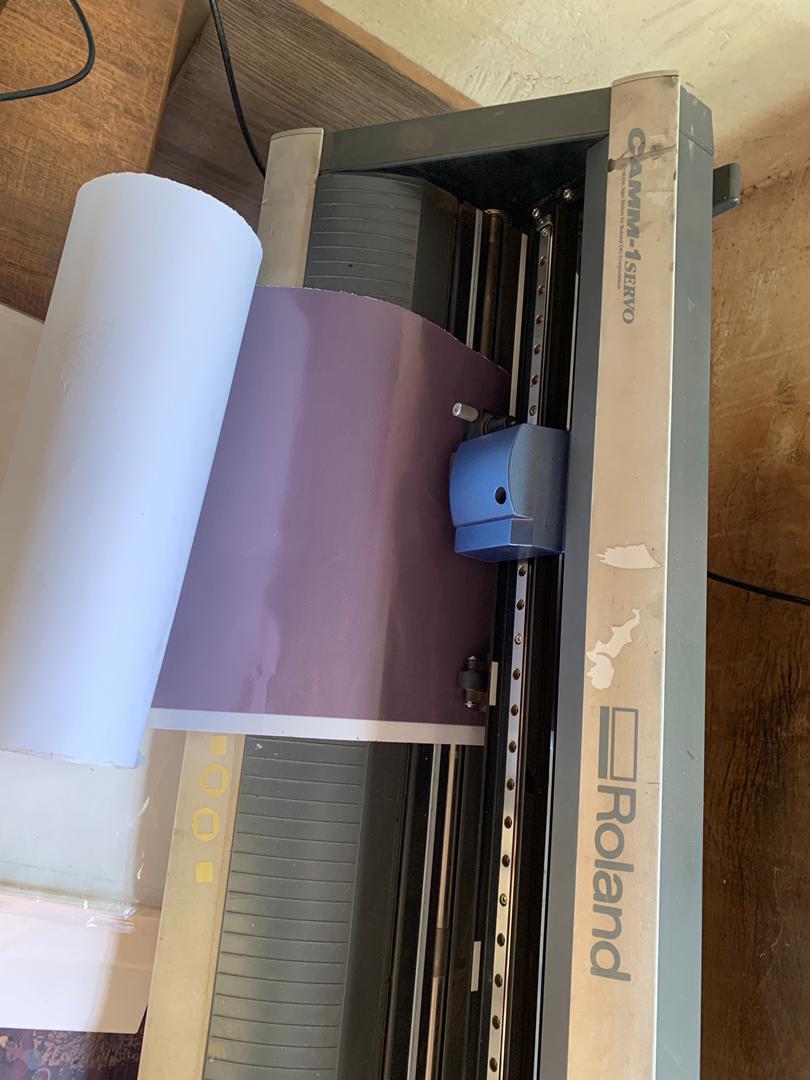
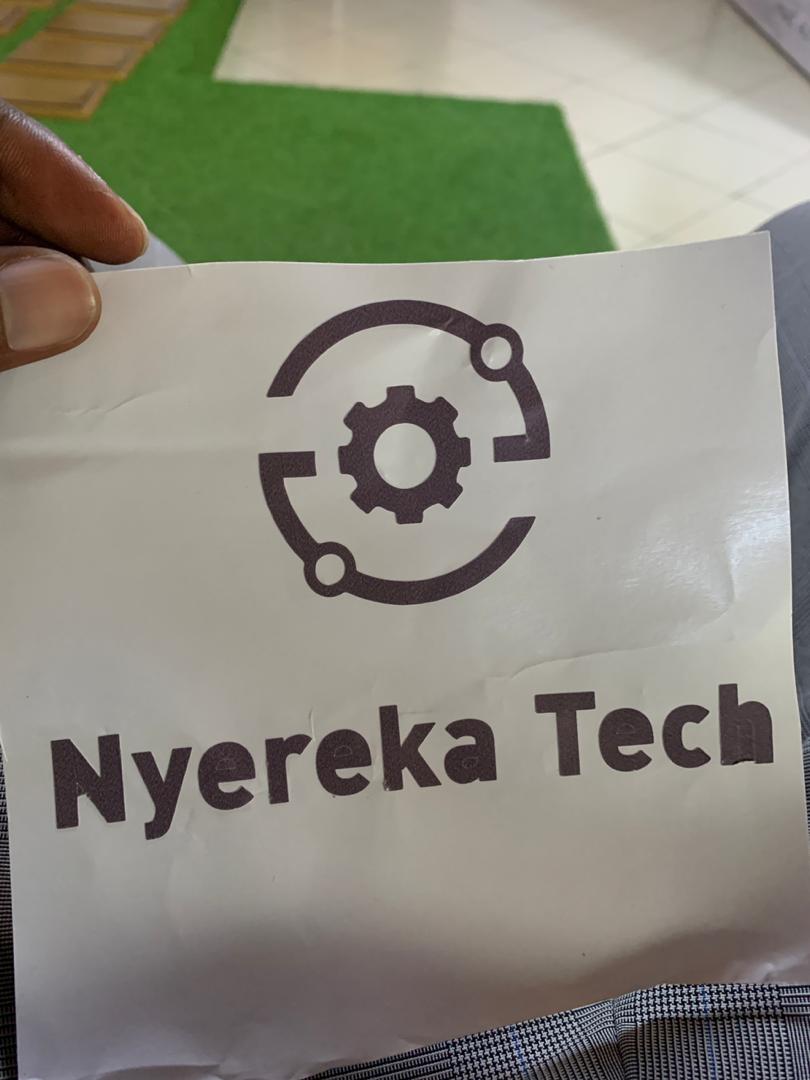
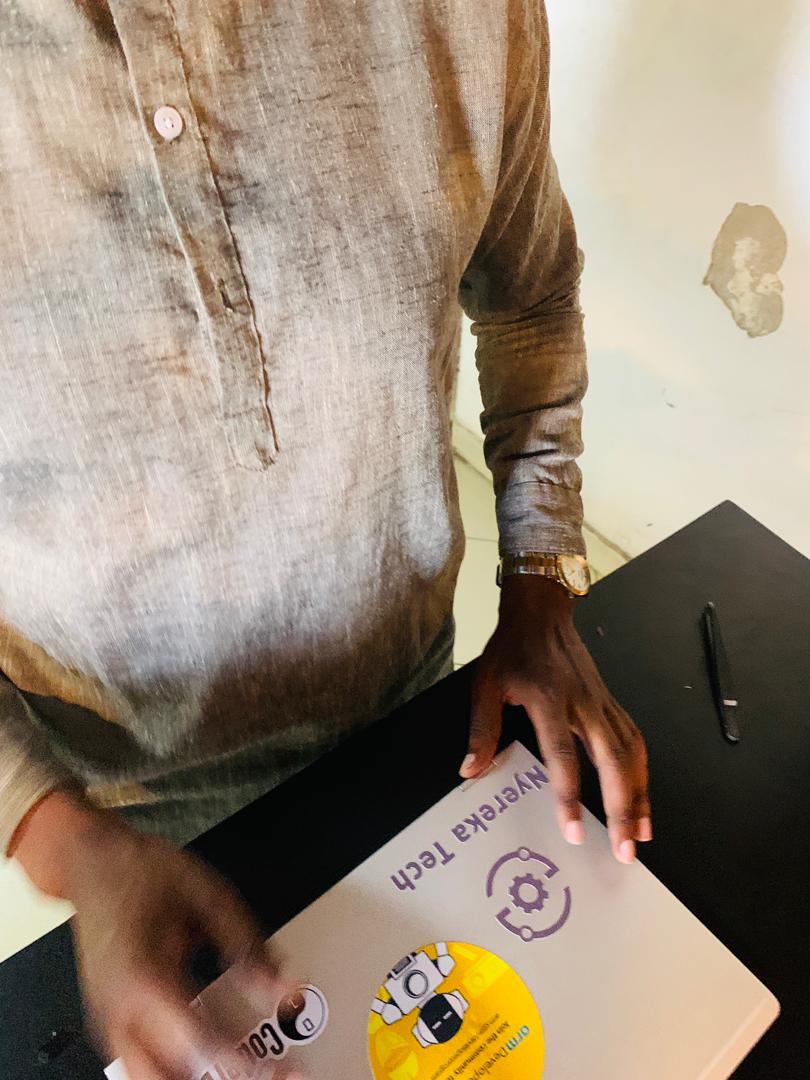
Once the laser cutter was assembled and its specifications were verified, it was prepared to commence vinyl cutting. Utilizing the logo of my company, Nyereka Tech, I proceeded to print stickers.
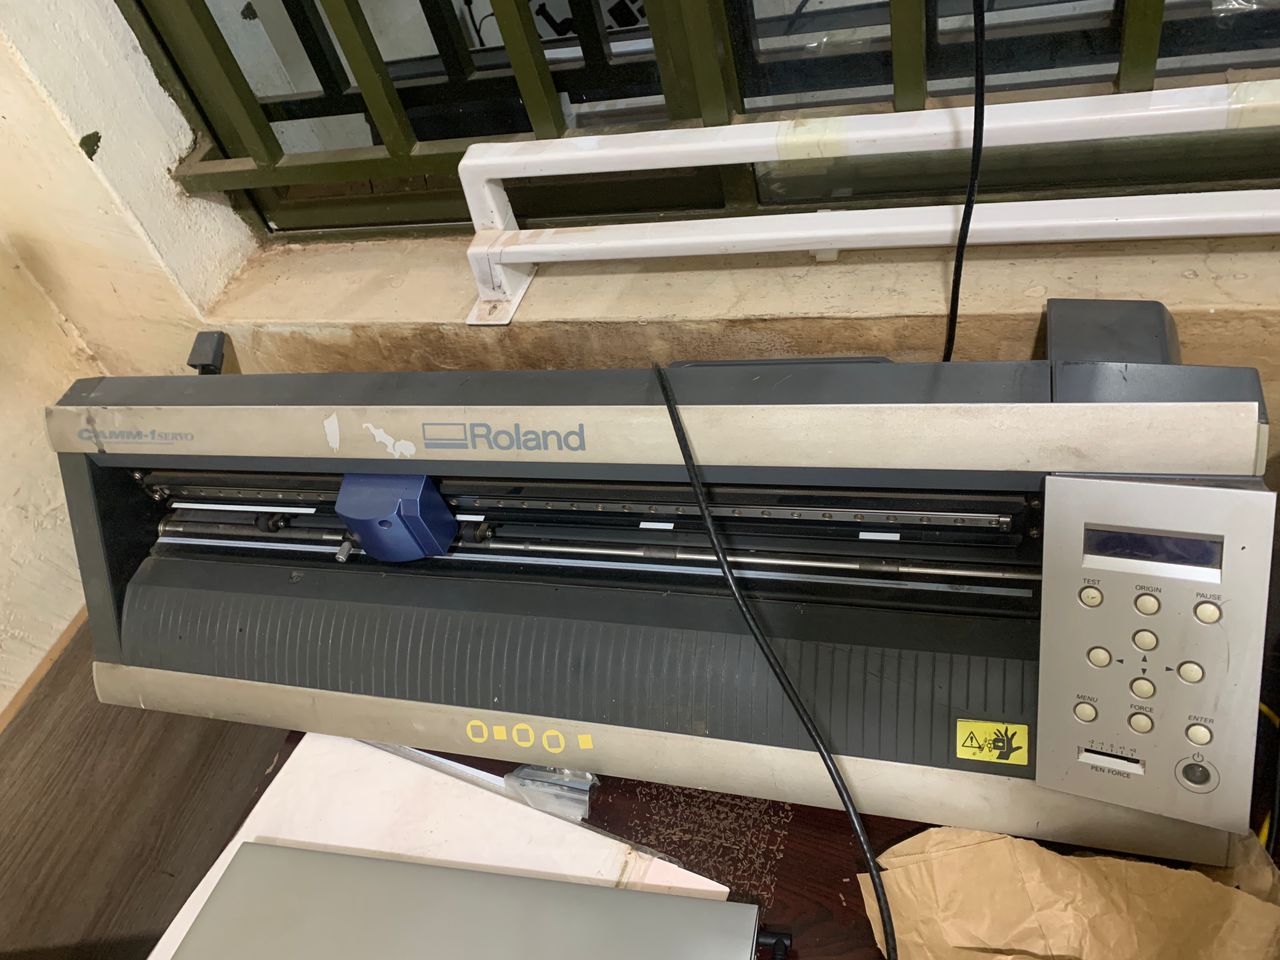
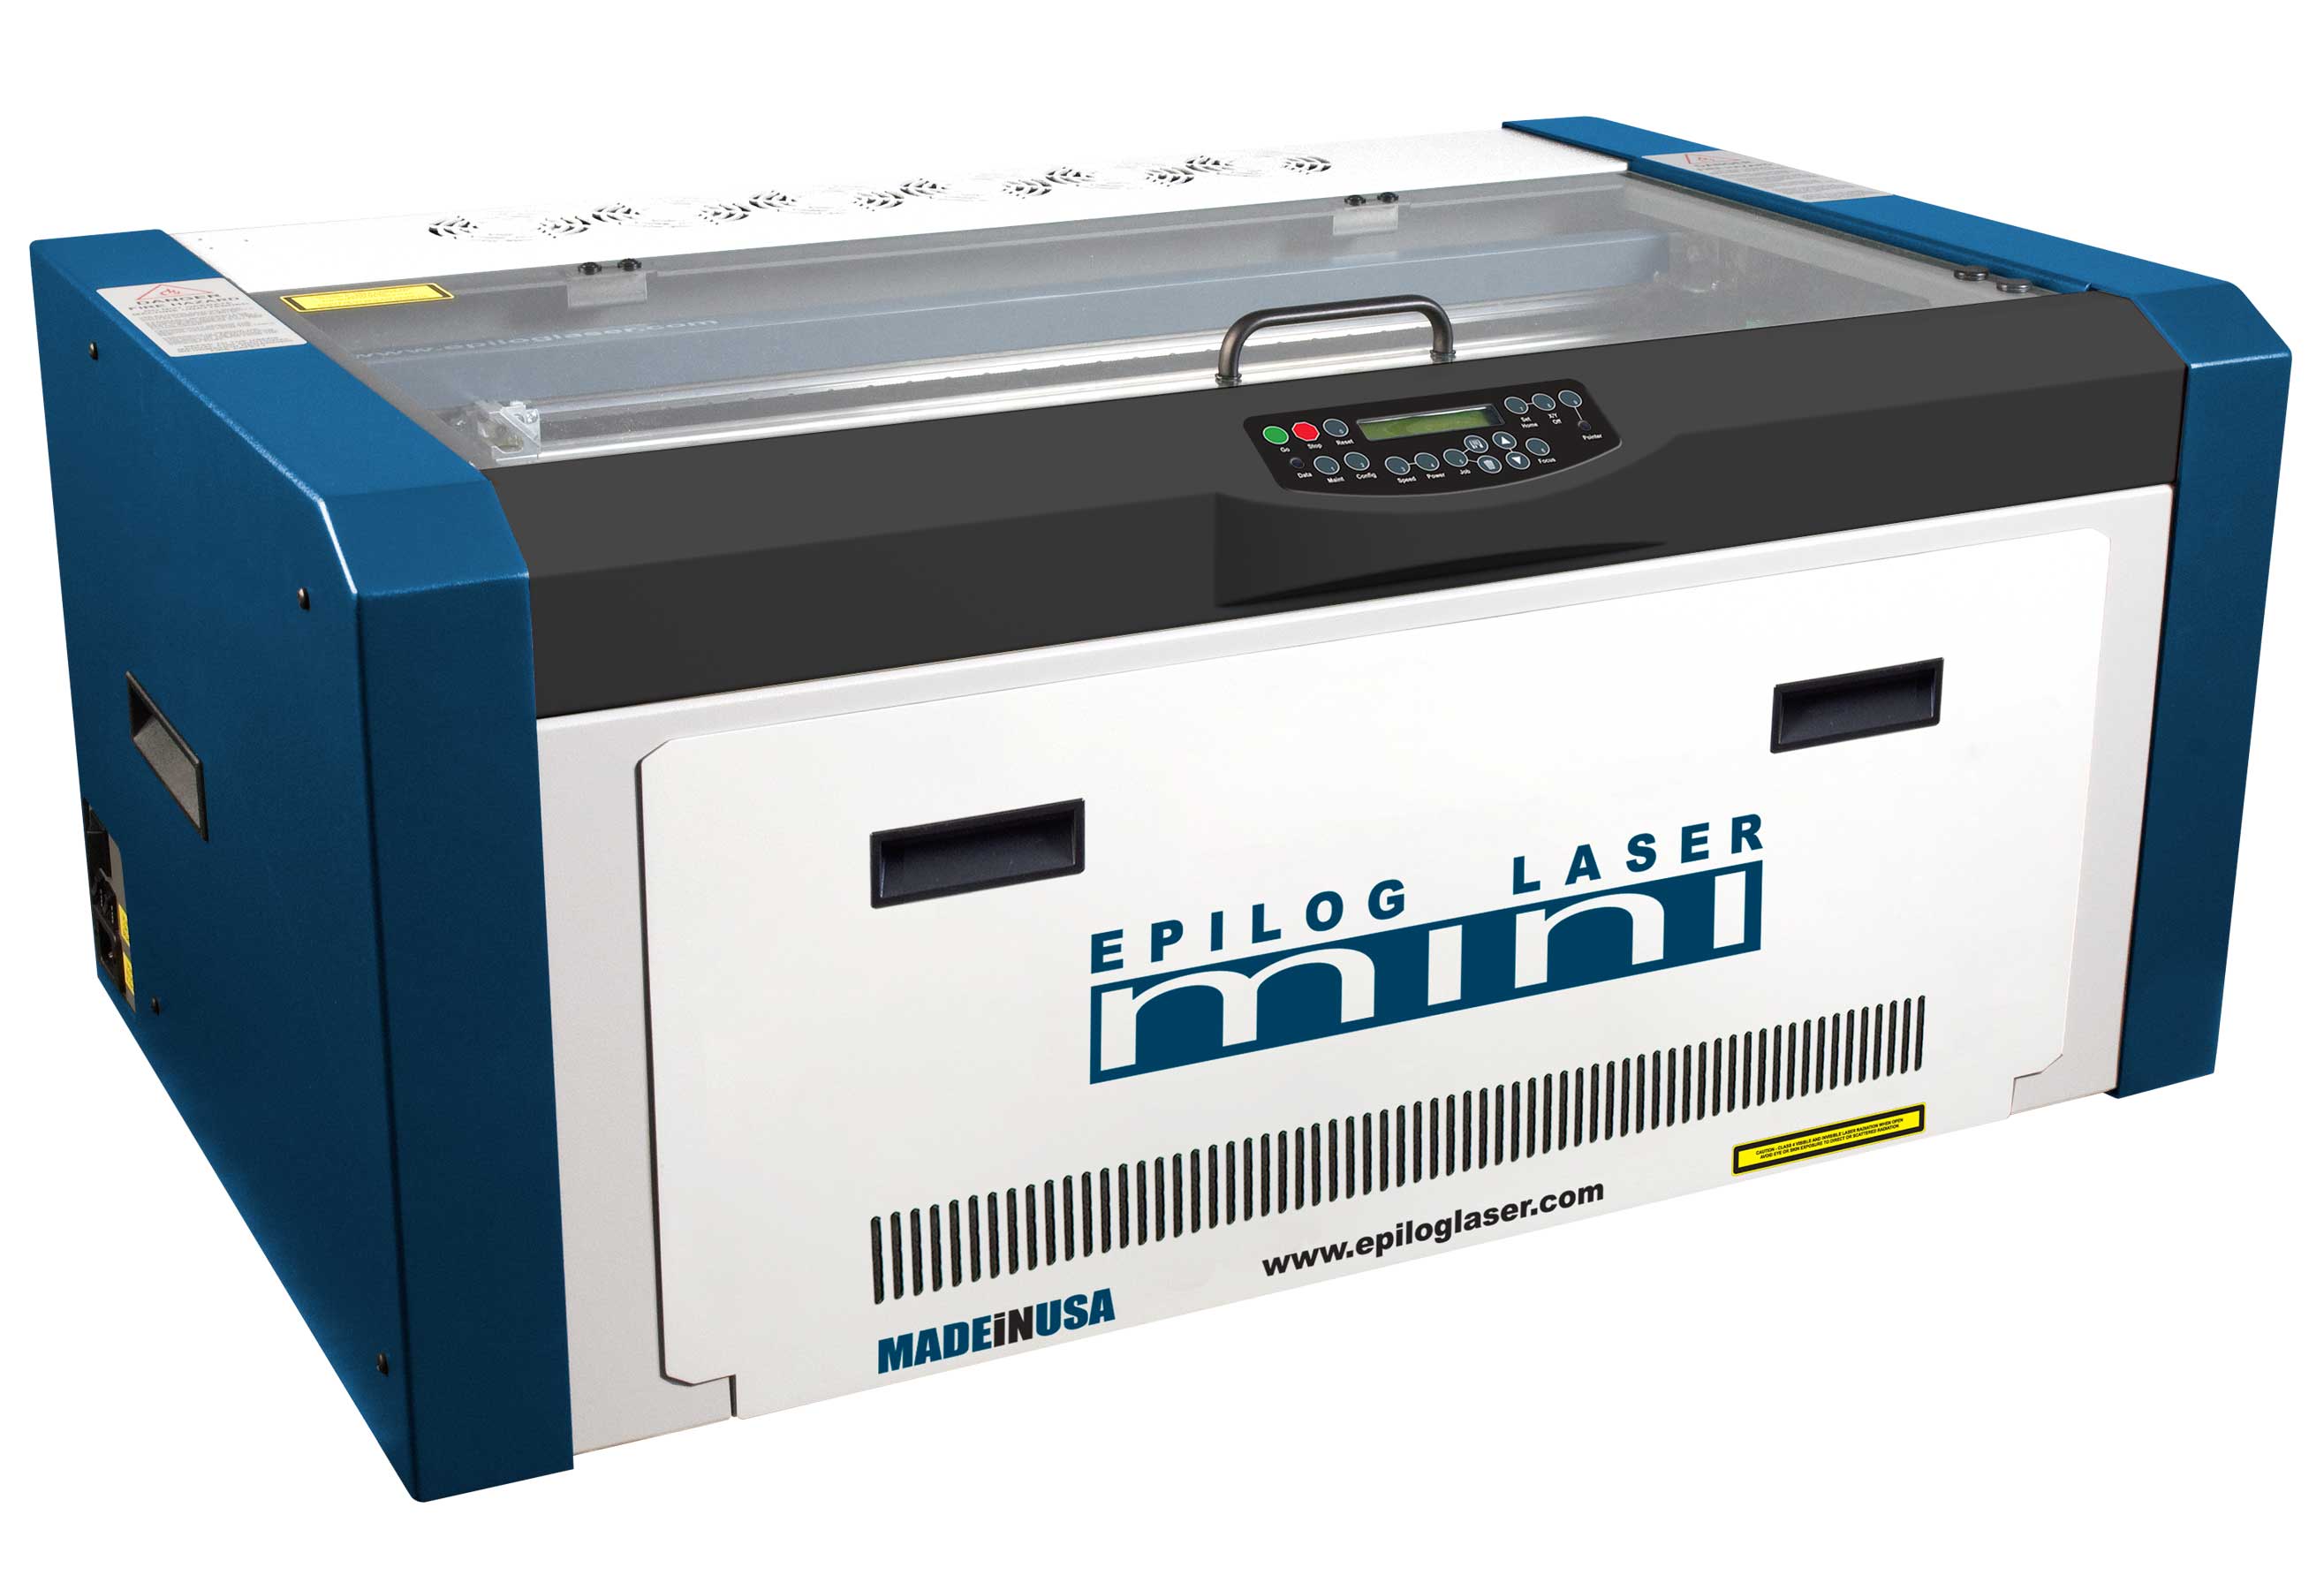
The vinyl cutter available at FabLab Rwanda is the Roland DG CAMM-1 GS-24.
Renowned for its precision and efficiency, the Roland DG CAMM-1 GS-24 desktop cutter epitomizes cutting-edge technology in the realm of digital fabrication. Boasting a completely redesigned cutting carriage and blade holder, the GS-24 ensures
unparalleled stability, enabling users to achieve intricate cuts with utmost accuracy.
One of its standout features is its capability for up to 10x overlap cutting,
allowing for seamless and precise cutting even on challenging materials. Moreover,
with an impressive downforce of up to 350 grams, the GS-24 effortlessly tackles thick
and dense substrates, expanding the realm of possibilities for creative projects.
Whether you're working with vinyl, cardstock, or even heavier materials,
the GS-24 rises to the occasion with unmatched performance.
Roland DG has truly outdone itself with the GS-24, which stands as their
pinnacle desktop cutter to date. Its blend of cutting-edge technology, stability,
and versatility makes it an indispensable tool for professionals and hobbyists
alike in the realm of digital fabrication and design. At FabLab Rwanda, this
state-of-the-art vinyl
cutter empowers makers to bring their creative visions to life with precision and ease.
Install Roland driver in my computer
After connecting my Roland DG CAMM-1 GS-24 to my computer, the next step was to
initiate the installation process for the Windows Driver. This crucial link ensures
seamless communication between the cutter
and the computer system, enabling users to unleash the full potential of the device.
By clicking on the Windows Driver Install link, users gain access to a s
treamlined installation procedure tailored specifically for Windows operating systems.
This step is essential for ensuring compatibility and optimal performance.
The installation process typically guides users through a series of prompts, allowing them to
configure settings and finalize the setup according to their preferences.
Once the Windows Driver is successfully installed, users can leverage the full
capabilities of the GS-24 cutter, harnessing its precision and efficiency to bring
their creative projects to fruition. Whether cutting intricate designs, signage, or decals,
the Windows Driver serves as the bridge that facilitates seamless communication between the
Roland DG CAMM-1 GS-24 and the computer, unlocking a world of possibilities for
digital fabrication enthusiasts and professionals alike.
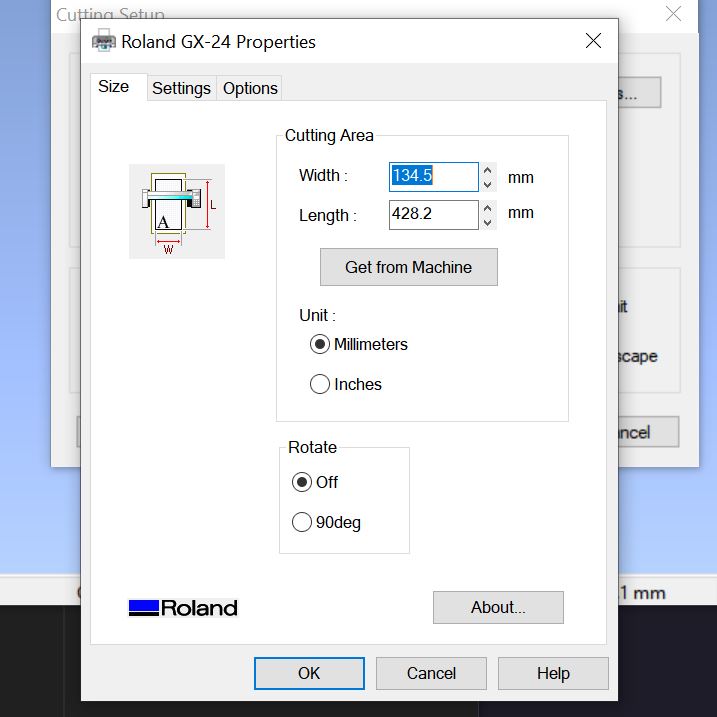
Setting the roland machine
After installing the Roland drivers on my computer, the Roland DG CAMM-1 GS-24 appears as a printer in the setup options. This integration allows for easy
management and customization of cutting tasks directly from my computer's interface.
In the setup options, I can configure various settings tailored
to my specific project needs. One of the key settings is the ability to adjust the size of the sticker pieces. This flexibility ensures that my designs fit perfectly on the chosen material,
whether I'm working with small decals or larger signage.
Once the size and other parameters are set, I can seamlessly initiate the cutting process.
The Roland DG CAMM-1 GS-24 takes over, leveraging its advanced capabilities to cut my designs
with remarkable precision and efficiency. This streamlined workflow, from setup to execution,
makes the GS-24 an invaluable tool for both professional and creative applications. Whether I'm
producing custom stickers, intricate decals, or detailed graphics, the Roland DG CAMM-1 GS-24,
managed through the setup options on my computer, ensures exceptional results every time.
Cutting
Once the size and other parameters are set, I can seamlessly initiate the cutting process.
The Roland DG CAMM-1 GS-24 takes over, leveraging its advanced capabilities to cut my designs with remarkable precision and efficiency. This streamlined workflow, from setup to execution,
makes the GS-24 an invaluable tool for both professional and creative applications.
With everything set up, I can now start cutting my design to make a custom sticker for my laptop.
Using the software, I send my design to the cutter, ensuring that the dimensions and details are perfectly configured for my laptop sticker. The GS-24's precision ensures that every cut is clean and accurate,
resulting in a high-quality sticker that reflects my personal style.
Watch the Video
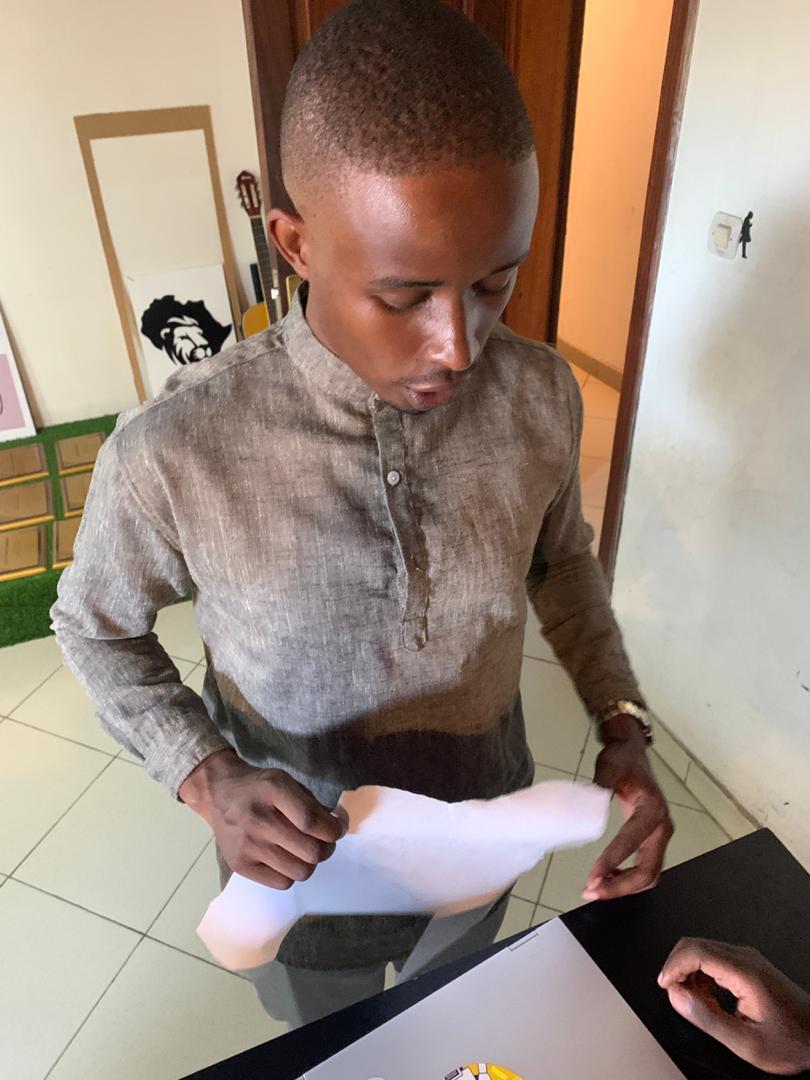
My sticker
Finally, I got the sticker that I can stick on my laptop, as you can see in the image above. The process was straightforward and efficient.
After designing my custom sticker and configuring the settings in the setup options,
the cutting process was smooth and precise. The GS-24's ability to handle detailed cuts
and various material thicknesses ensured that my design was perfectly executed. The final
result is a high-quality,
professional-looking sticker that adds a personal touch to my laptop.
With my new laptop sticker, I can showcase my creativity and individuality. The entire process,
from design to final application, was seamless, highlighting the capabilities of the Roland DG
CAMM-1 GS-24. Whether for personal use or professional projects, this vinyl cutter delivers
exceptional results,
making it a must-have tool for any digital fabrication enthusiast.
Laser cutting
Our lab is equipped with Epilog Fusion CO2 laser 40watts with a bed size of 24″ x 12″ (610 x 305 mm), For power and speed, the Computer or
manually control speed and power in 1% increments to 100%.
Vector color mapping links speed, power and focus to any RGB color with a user controlled from 75 to 1200 dpi.
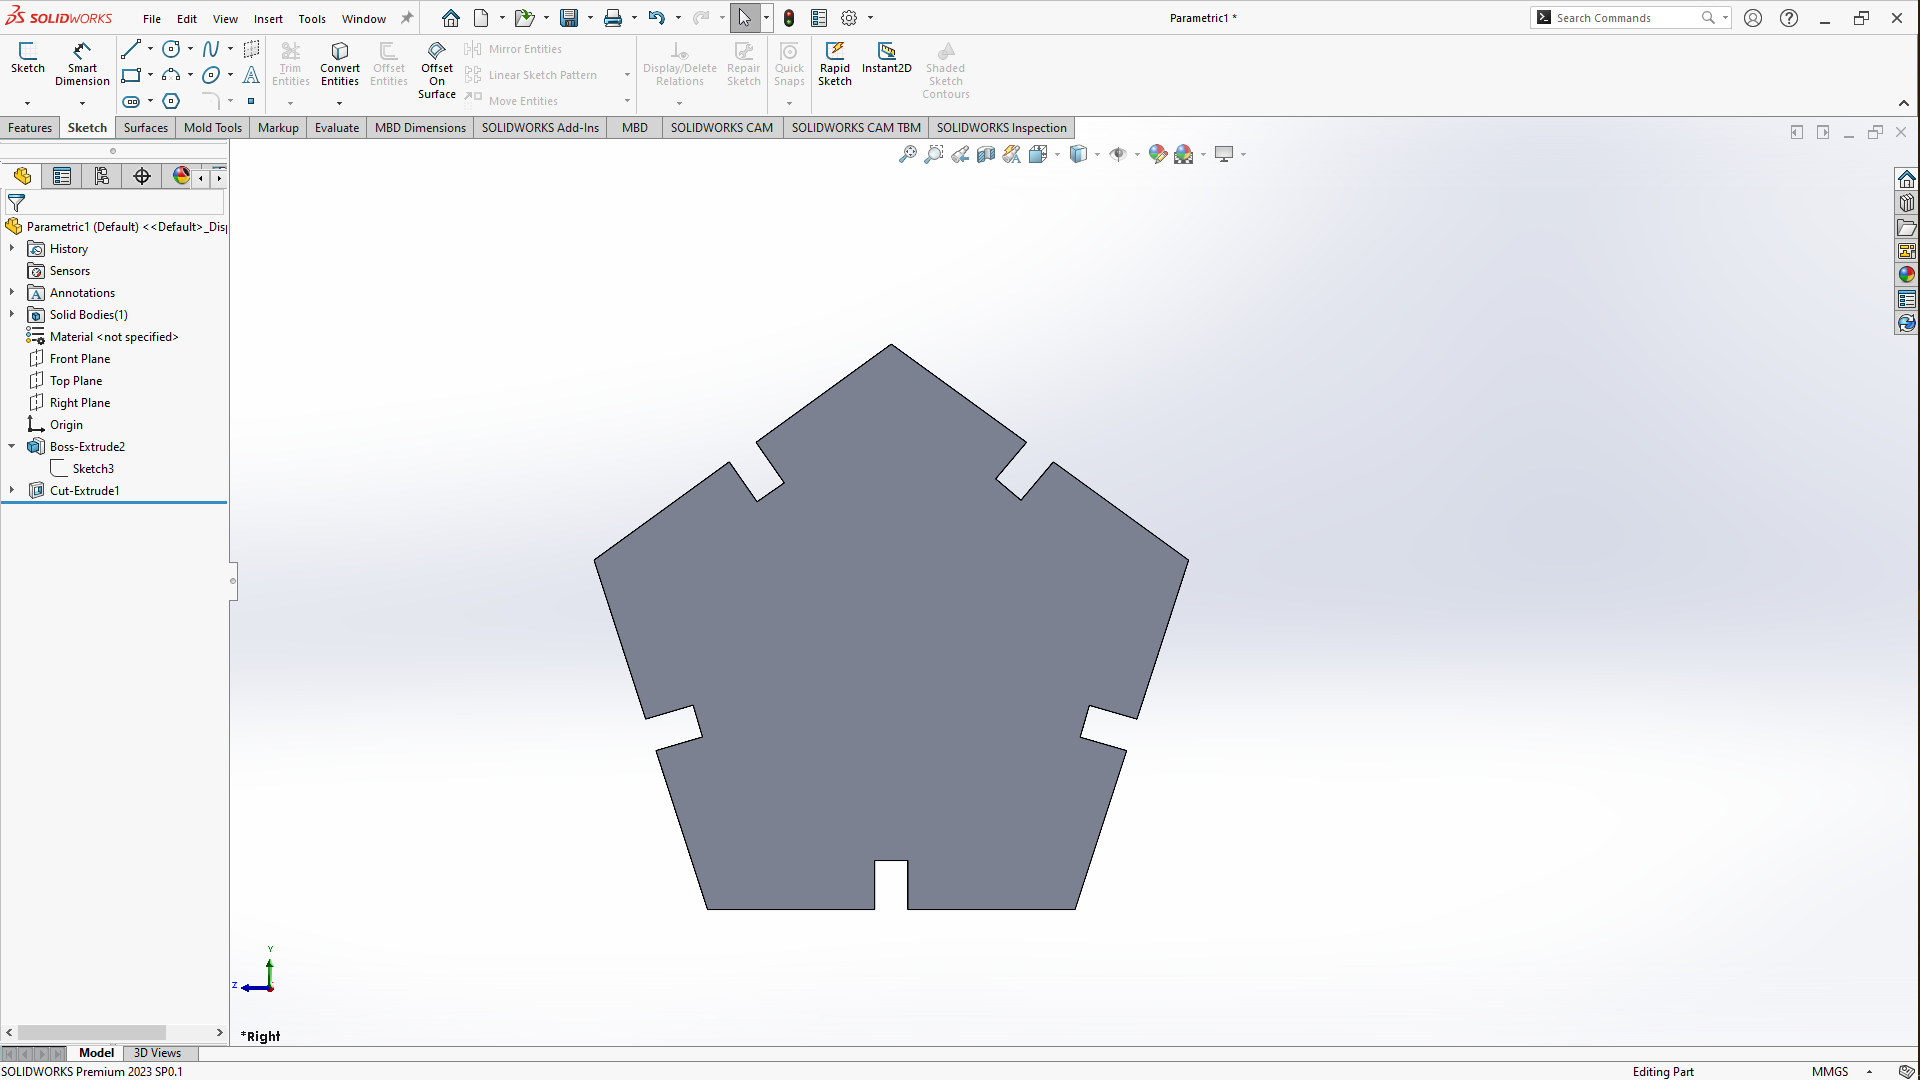
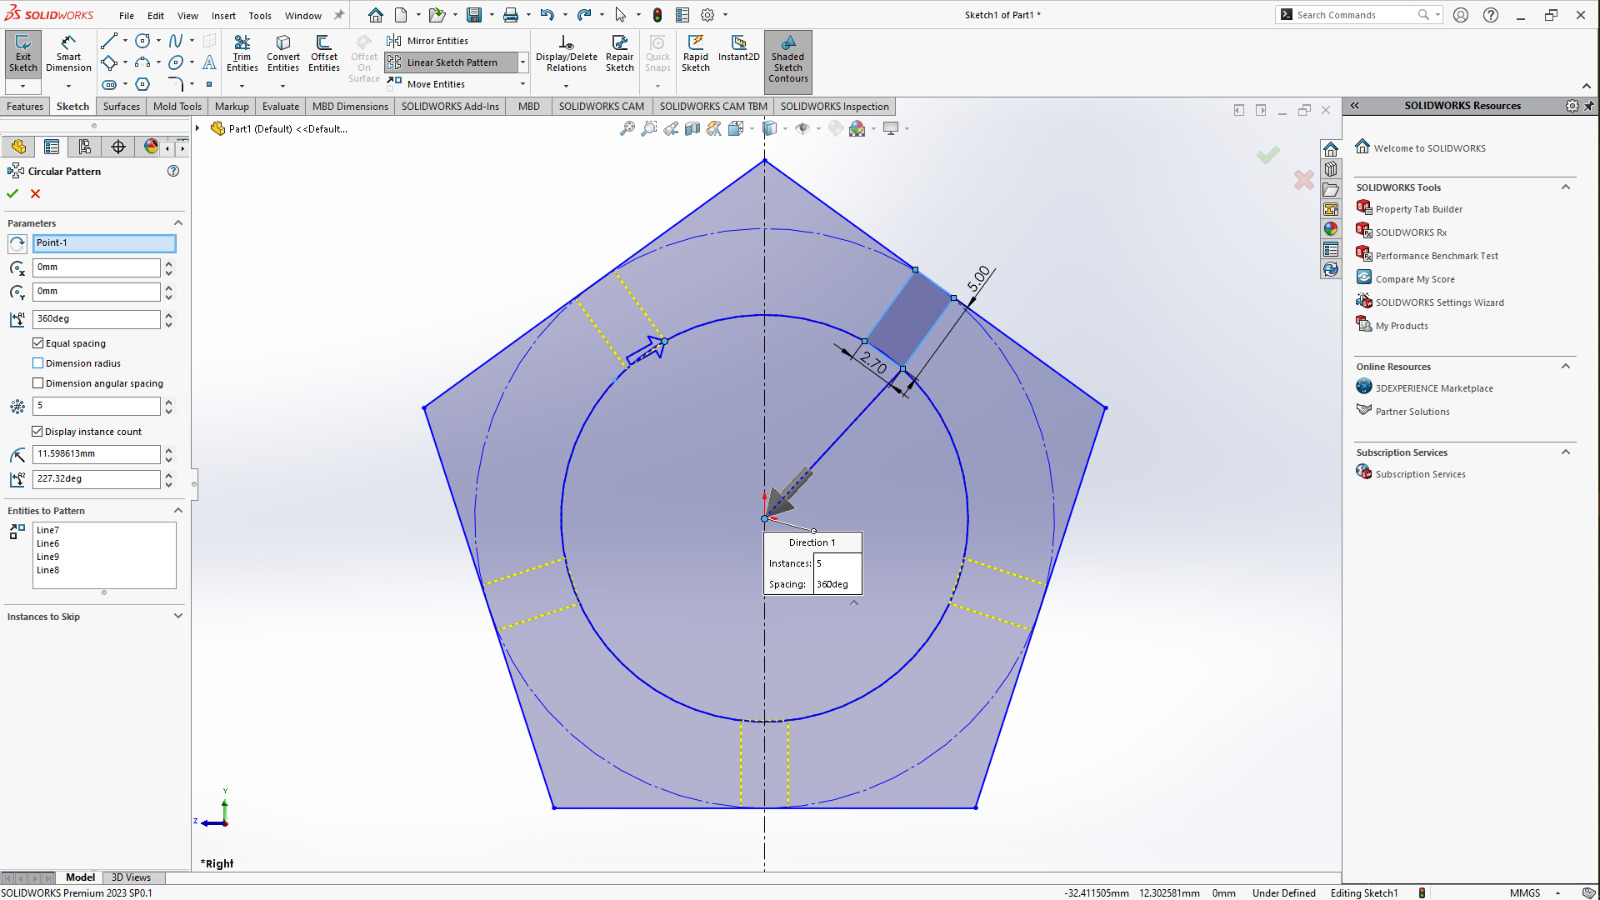
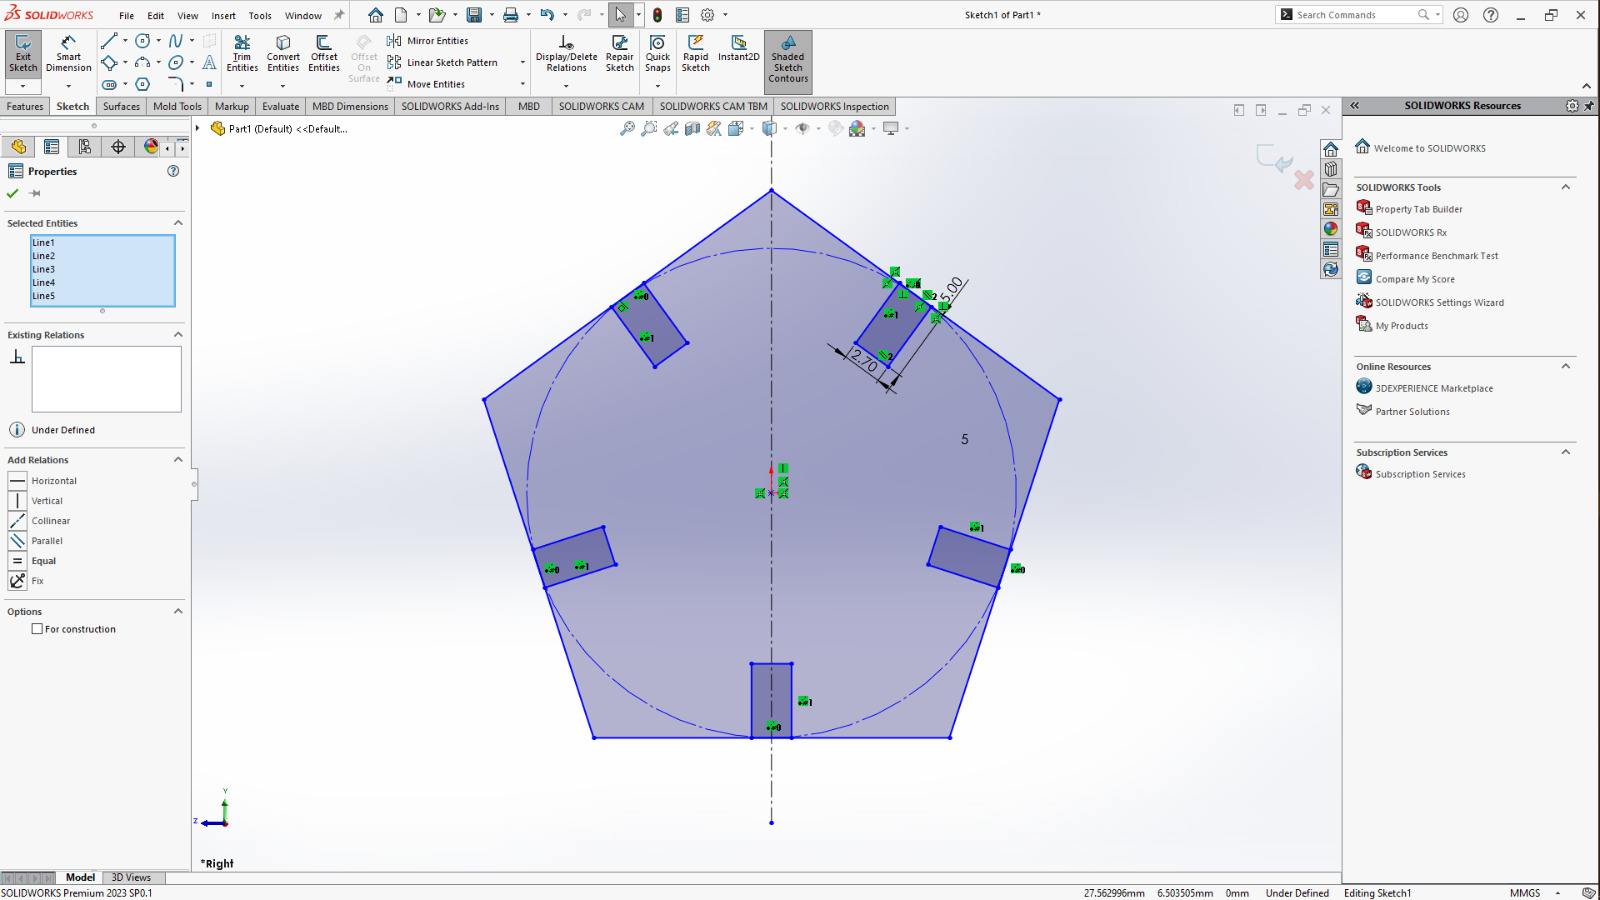
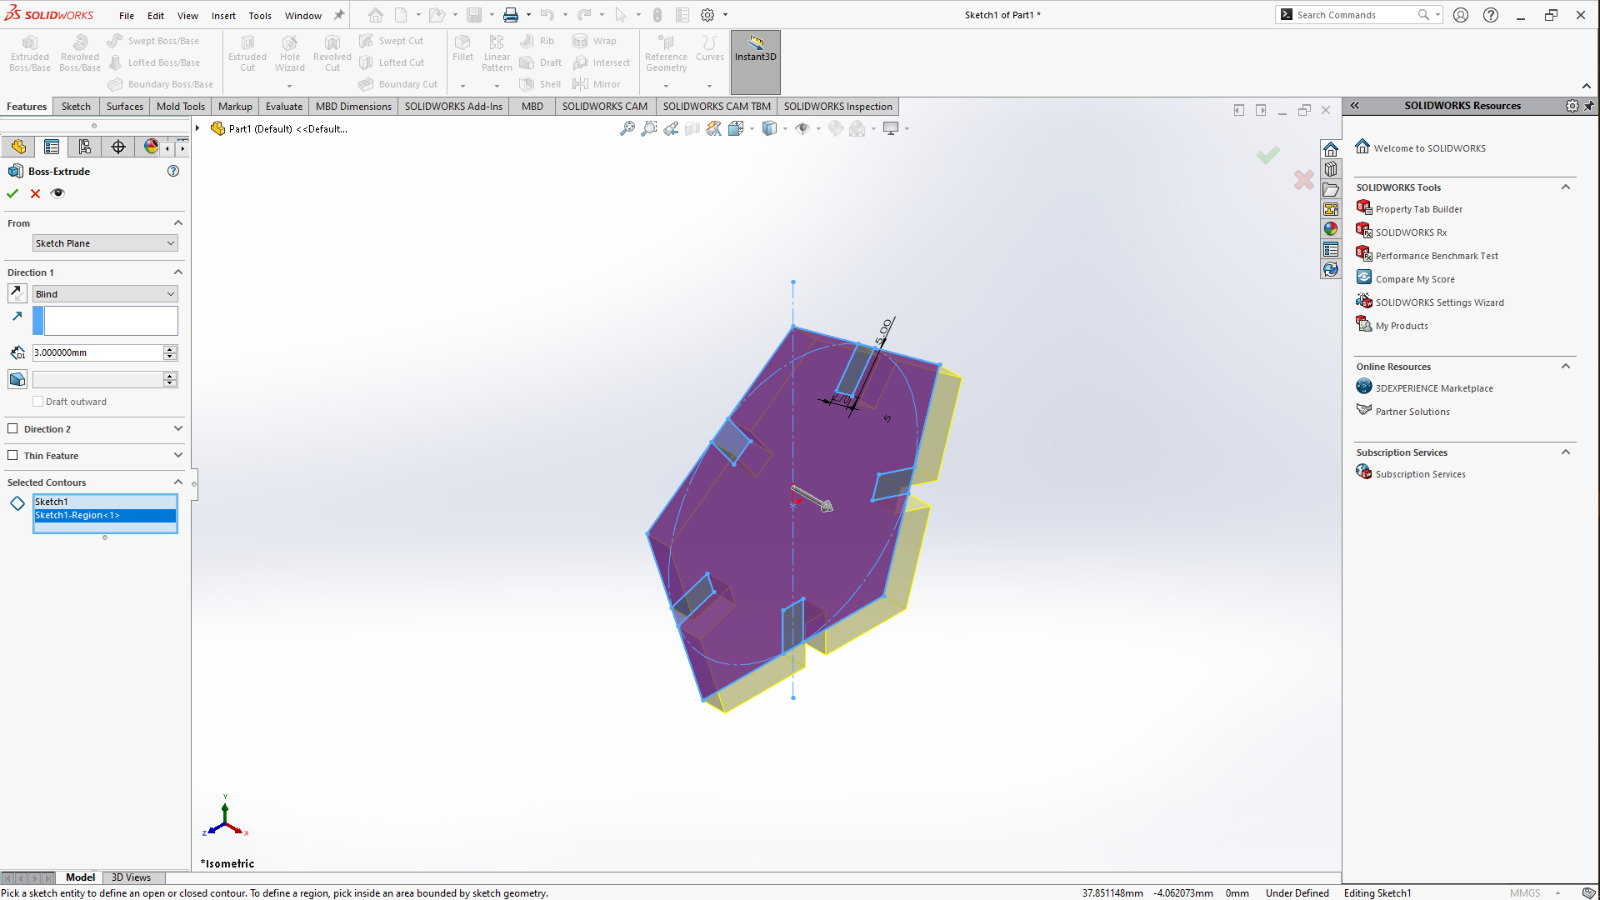
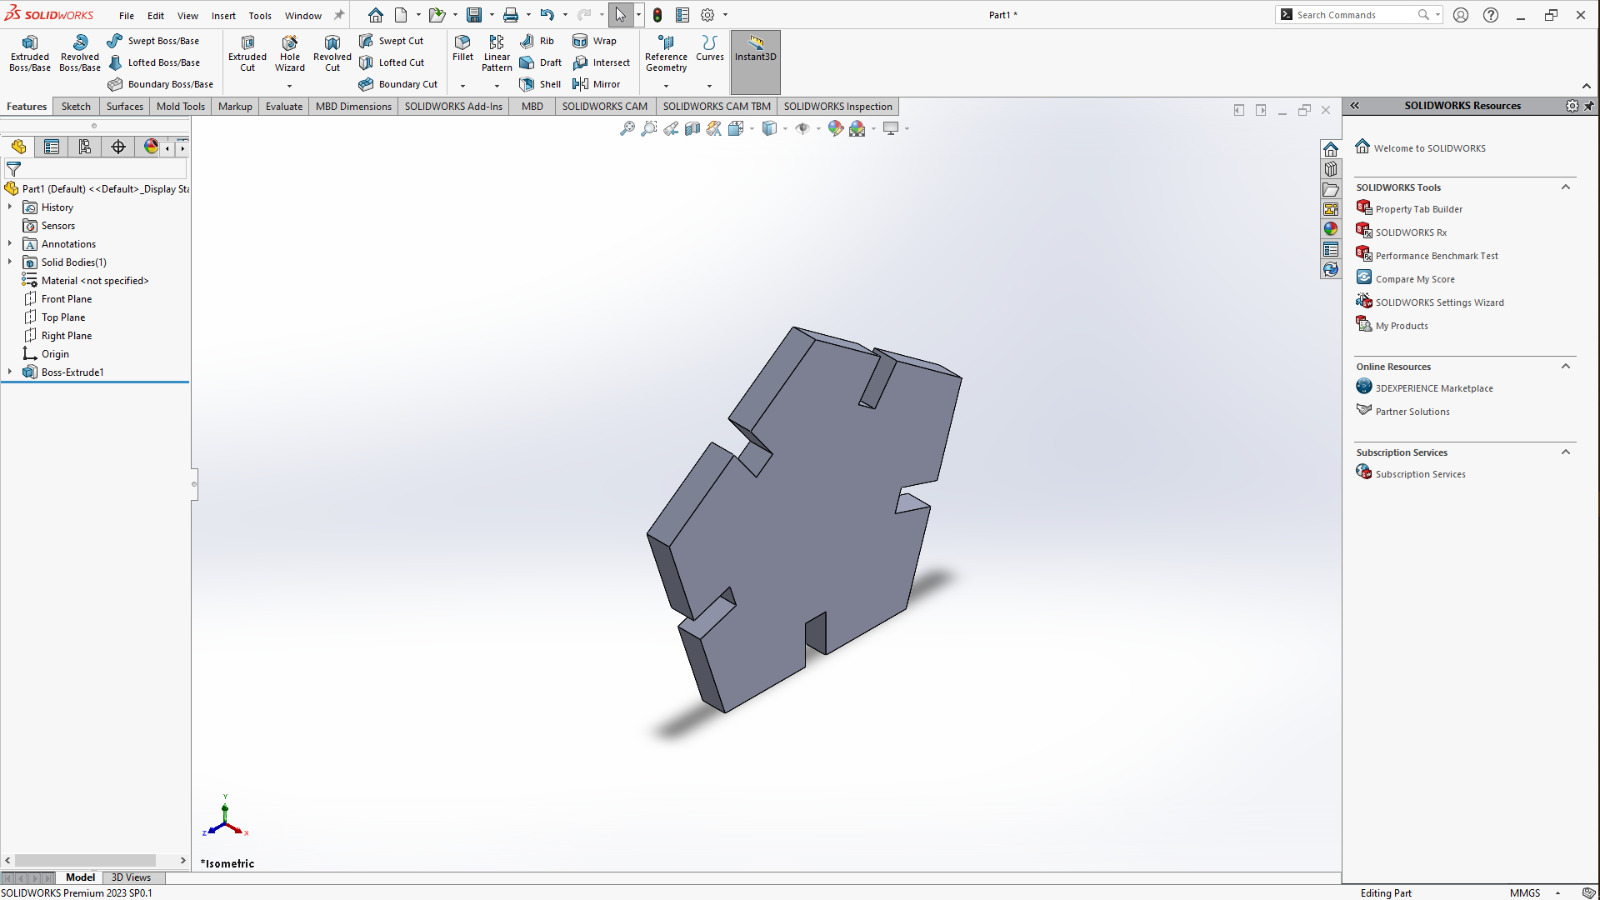
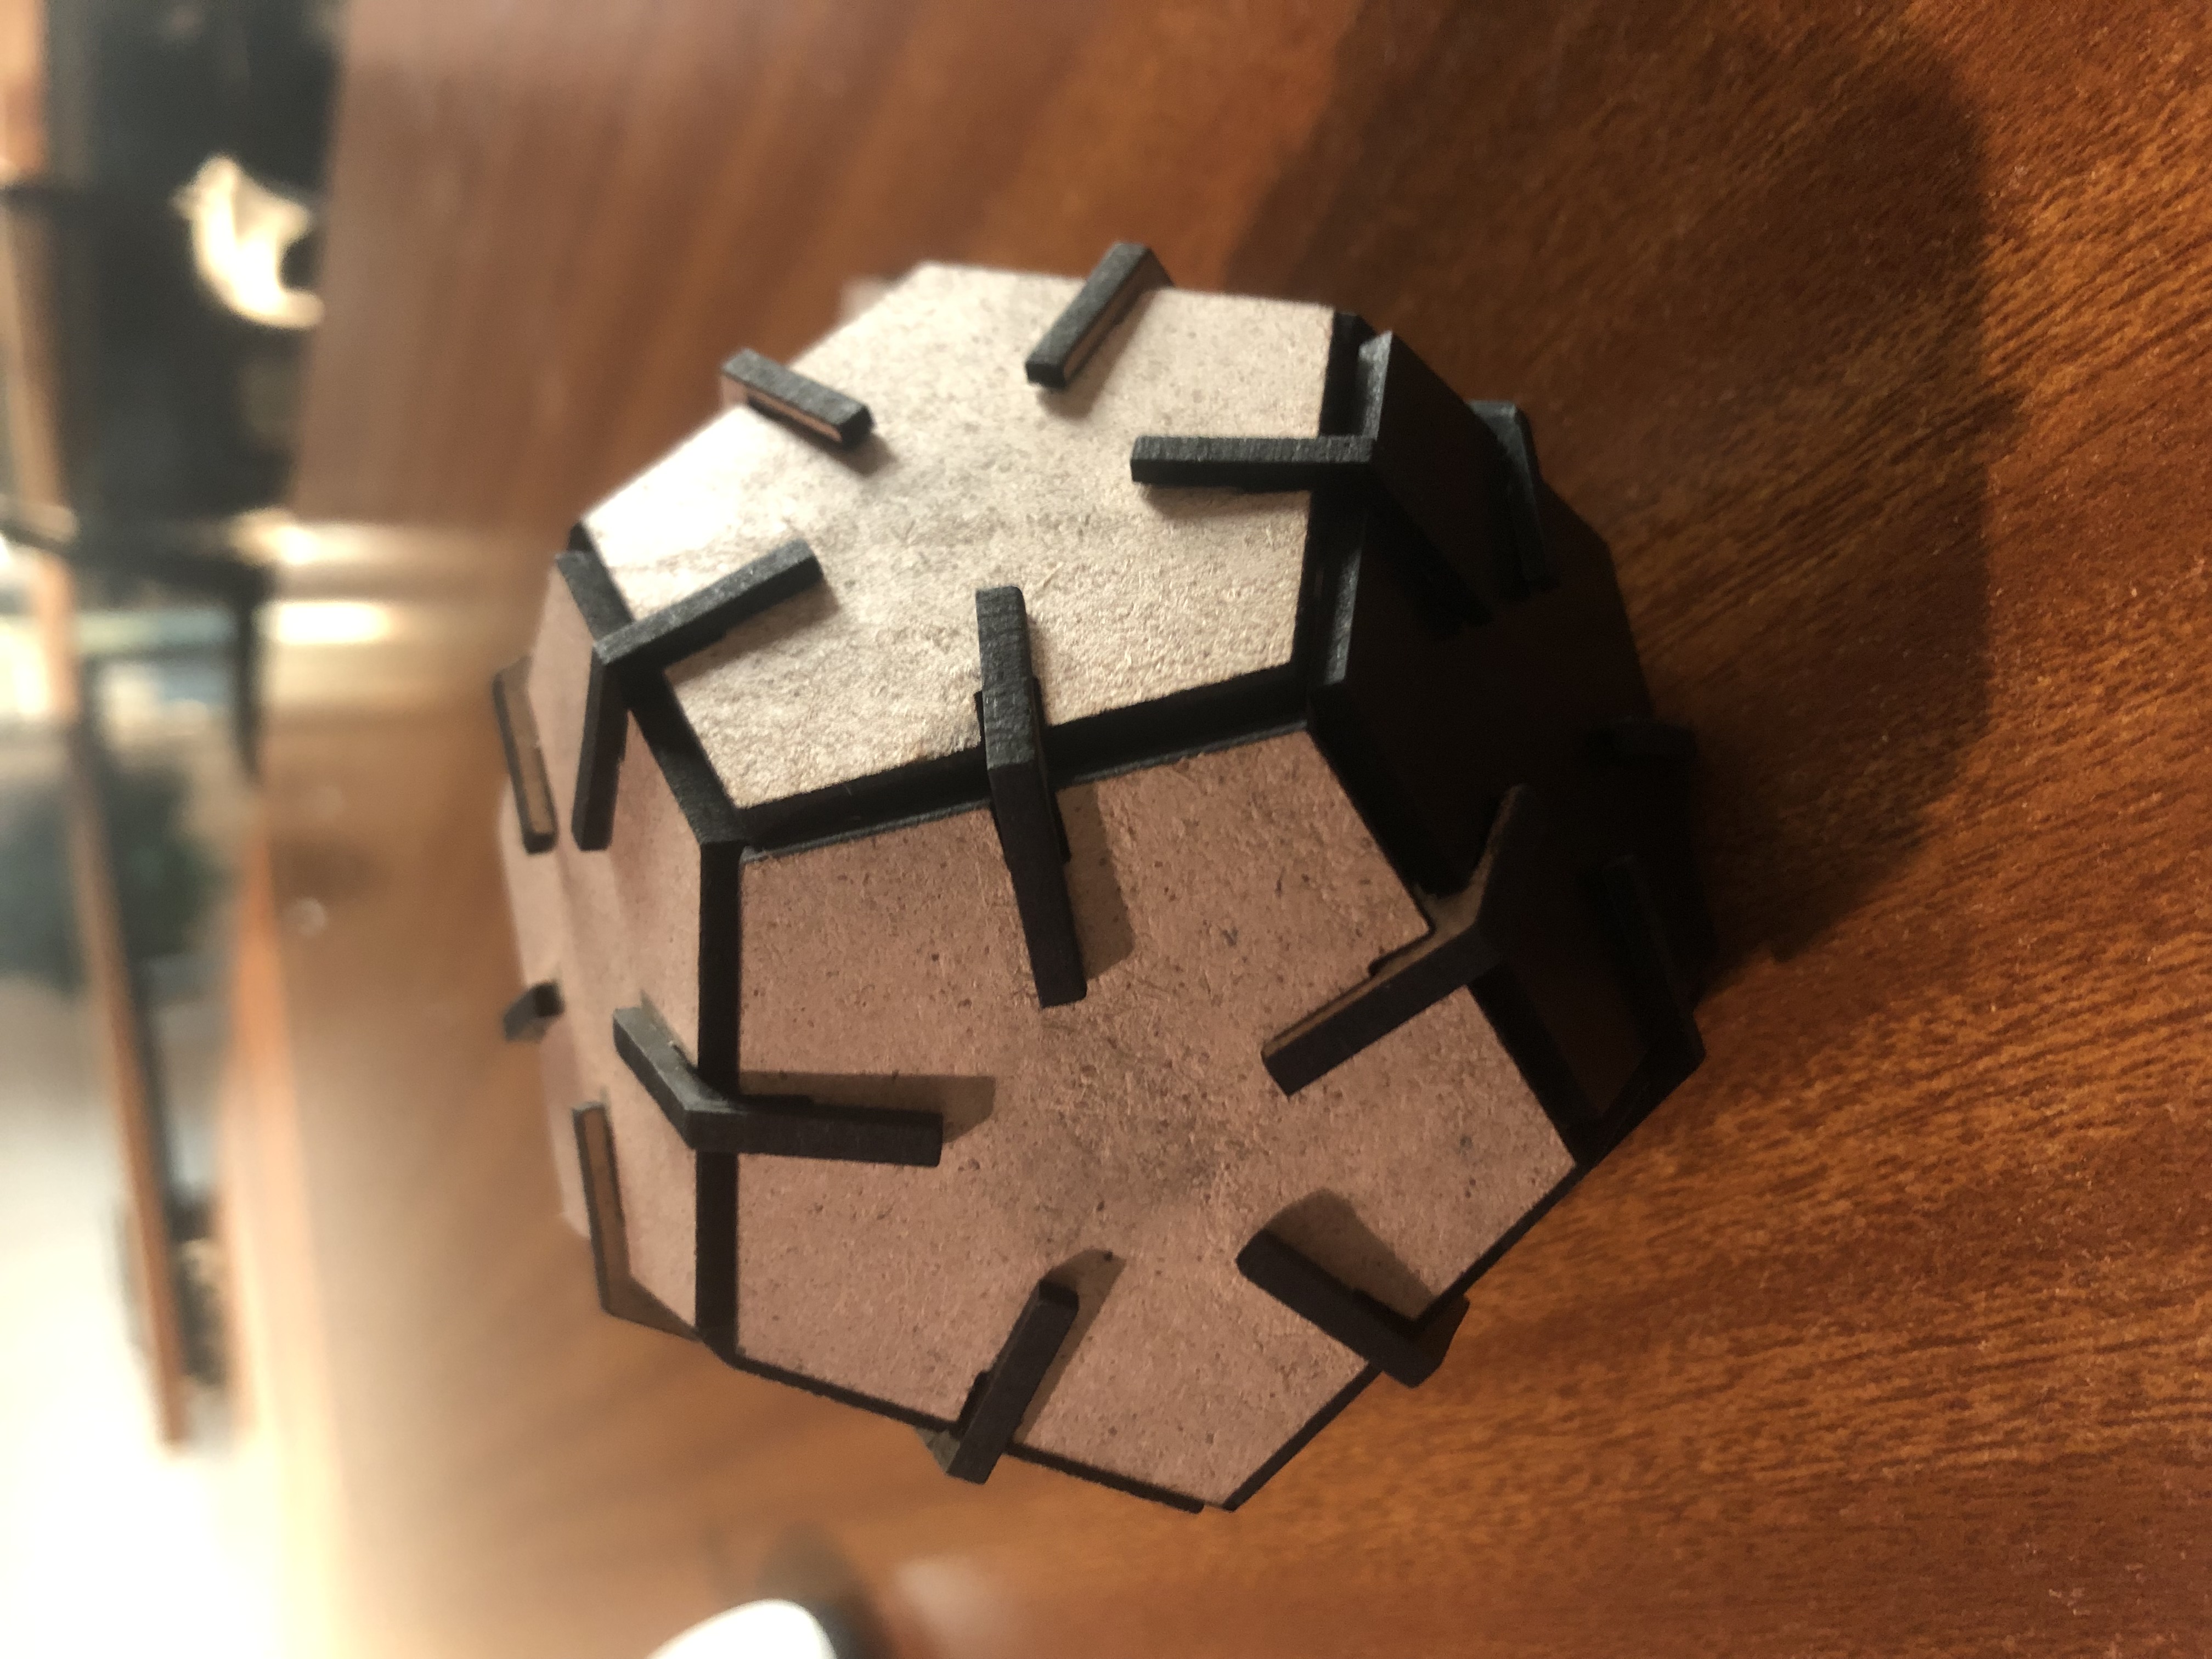
I started by drawing a simple pentagon of 30mm using a Polygon feature in solidworks by selecting the Front plane then the polygon then i drew a a 3point
rectangle on that surface then i clicked on circular pattern then selected the rectangle added 5 copies then i clicked ok to confirm the parameters then i
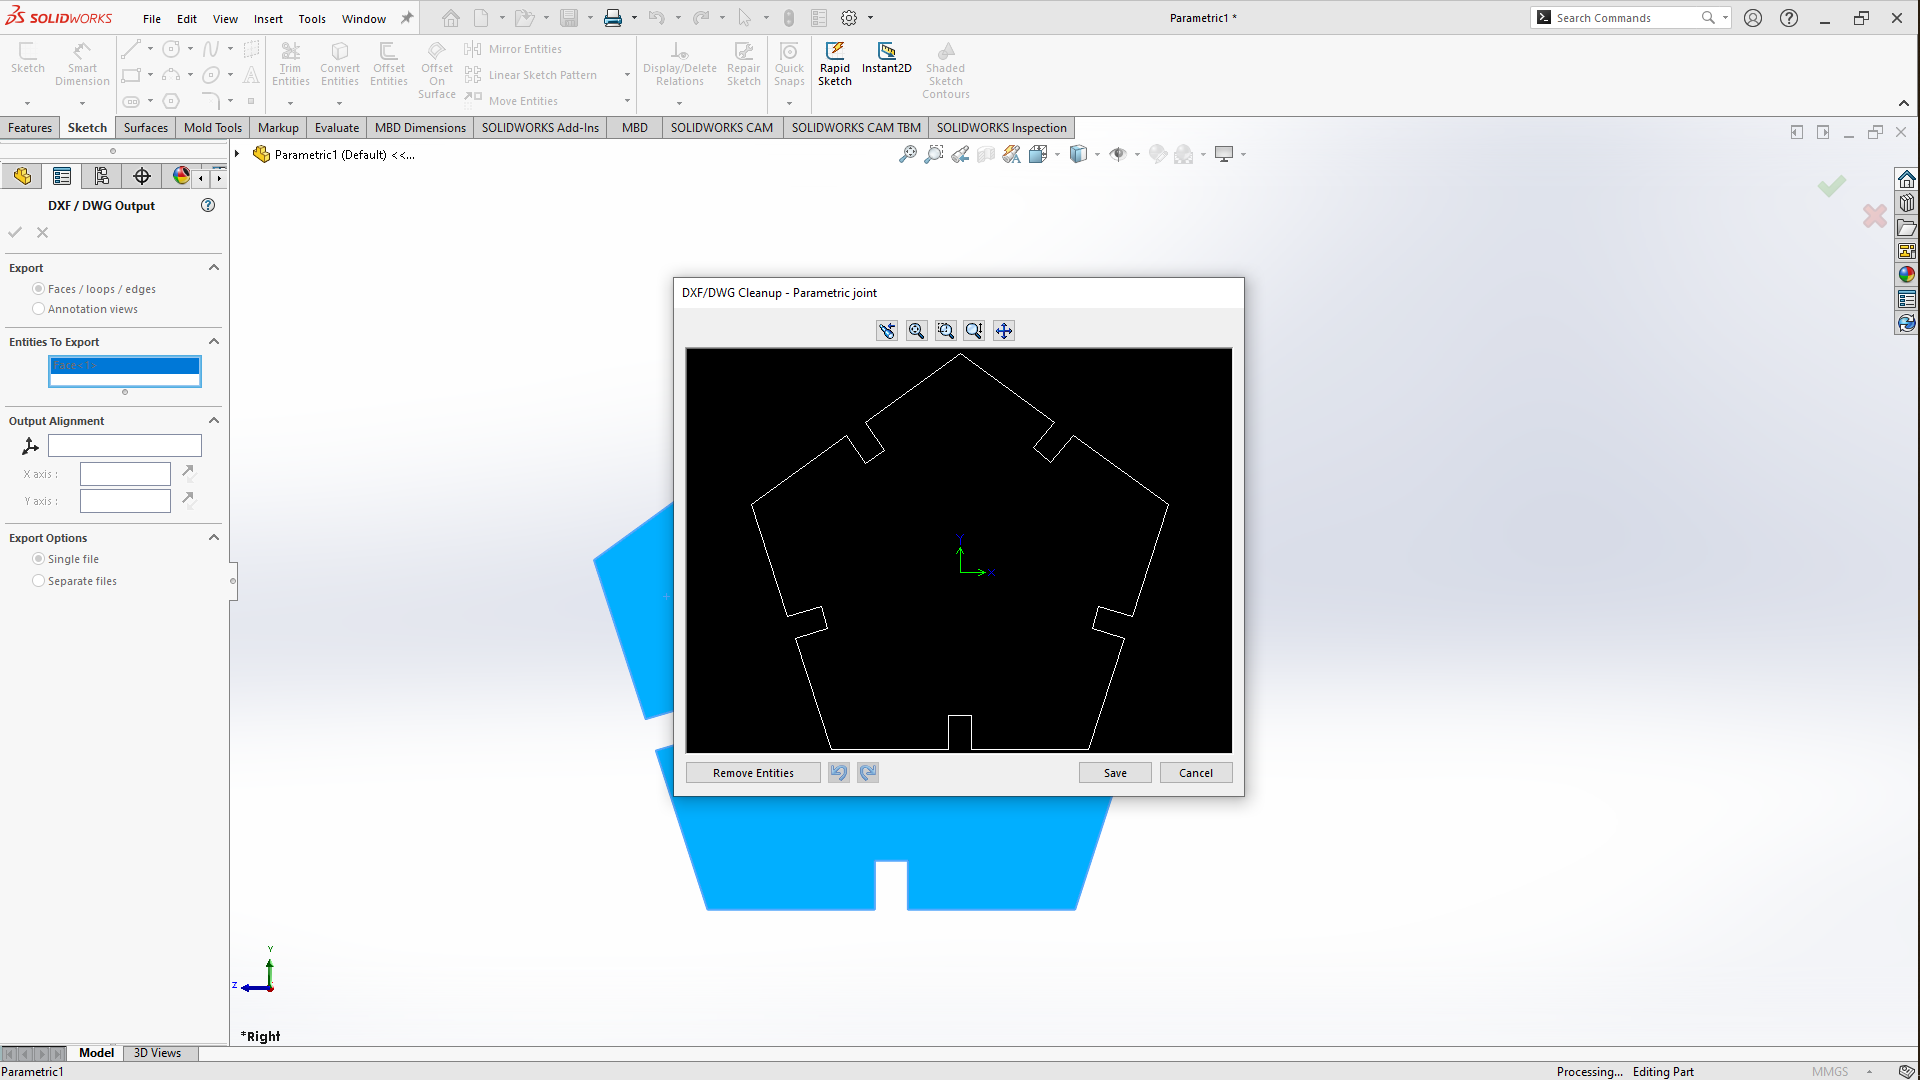
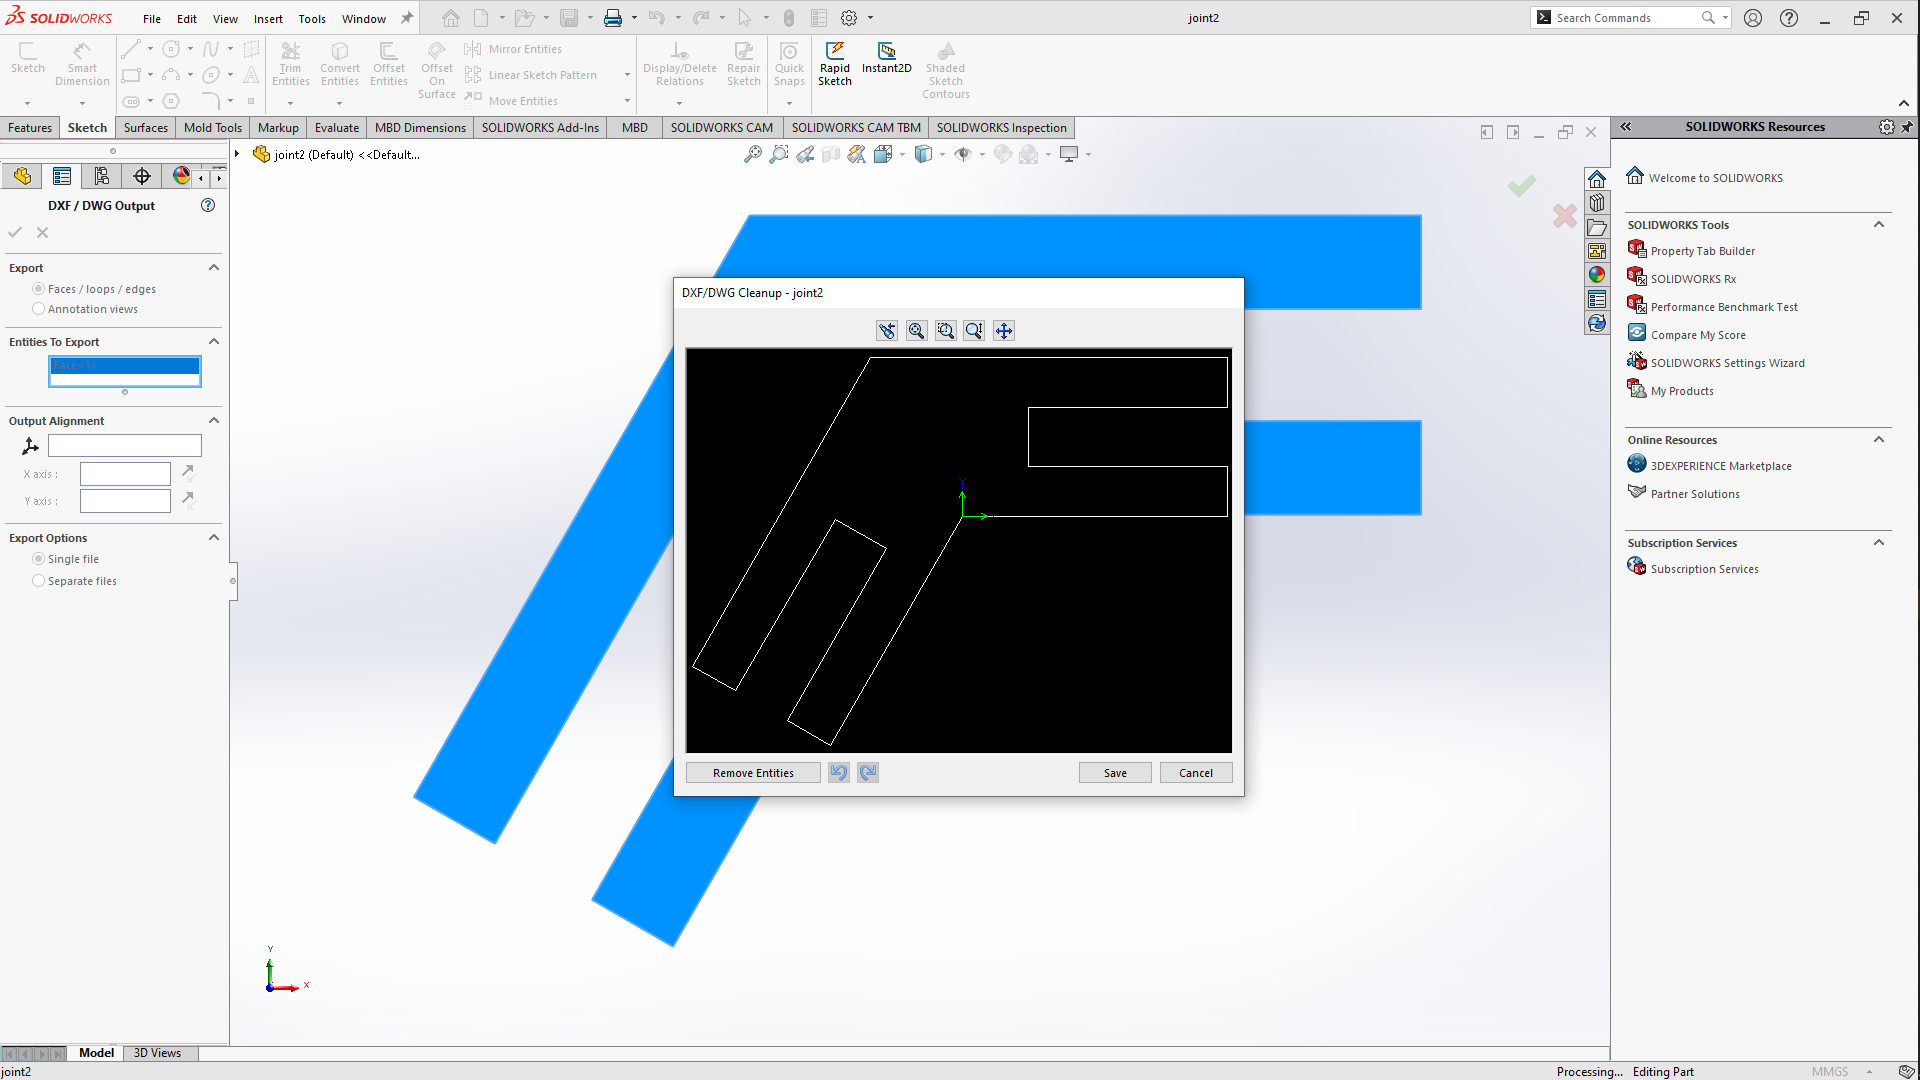
extruded the polygon to 3MM which the standard thickness size for the MDF piece that i ahd planned to use, then i saved the file as a DXF which brings you back to solidworks
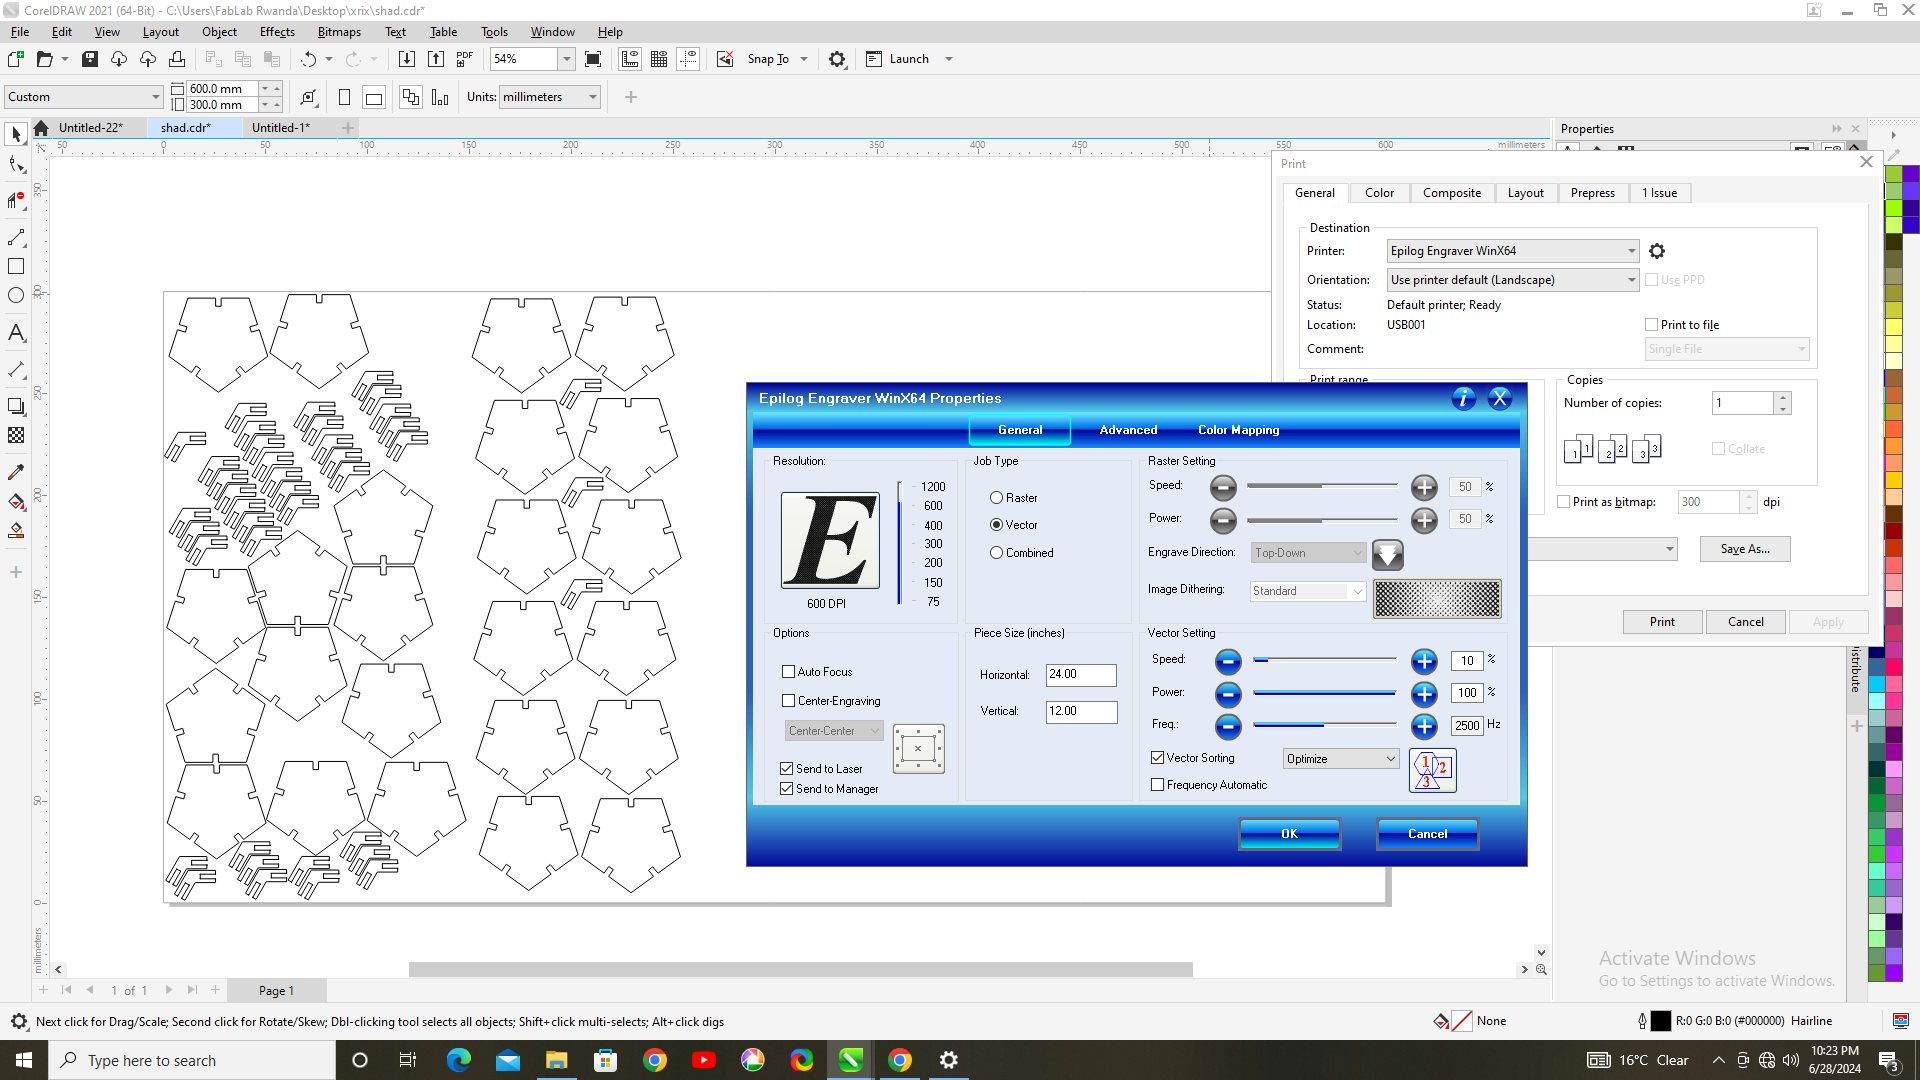
here you'll select the Faces/Loops/Edges then you click ok to a save a DXF file to use with coreldraw while cutting the pieces.
Below are the pictures of the process:
Parameters
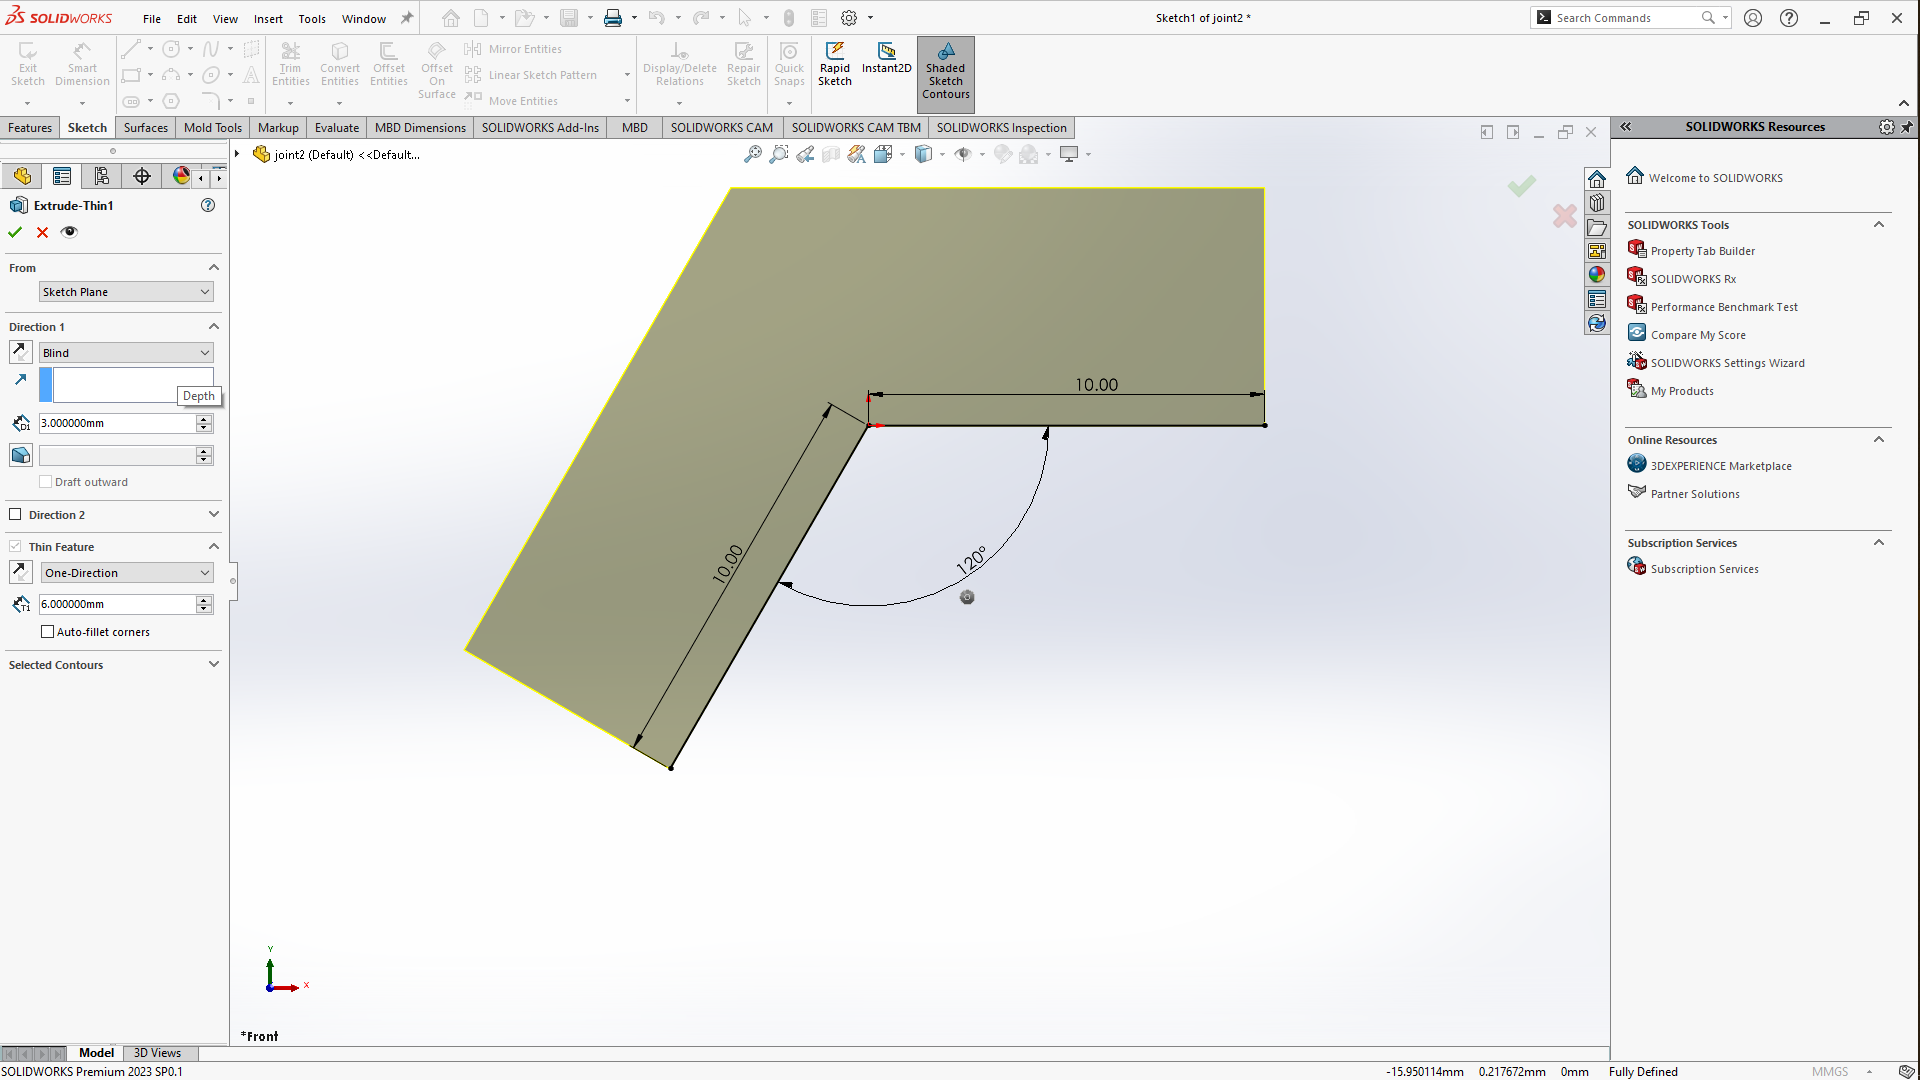
As the experience I got from the group work and advice from the local instractor, the Kerf here I used is 0.3MM as the part the machine lose while is cutting something
Cutting and assembling
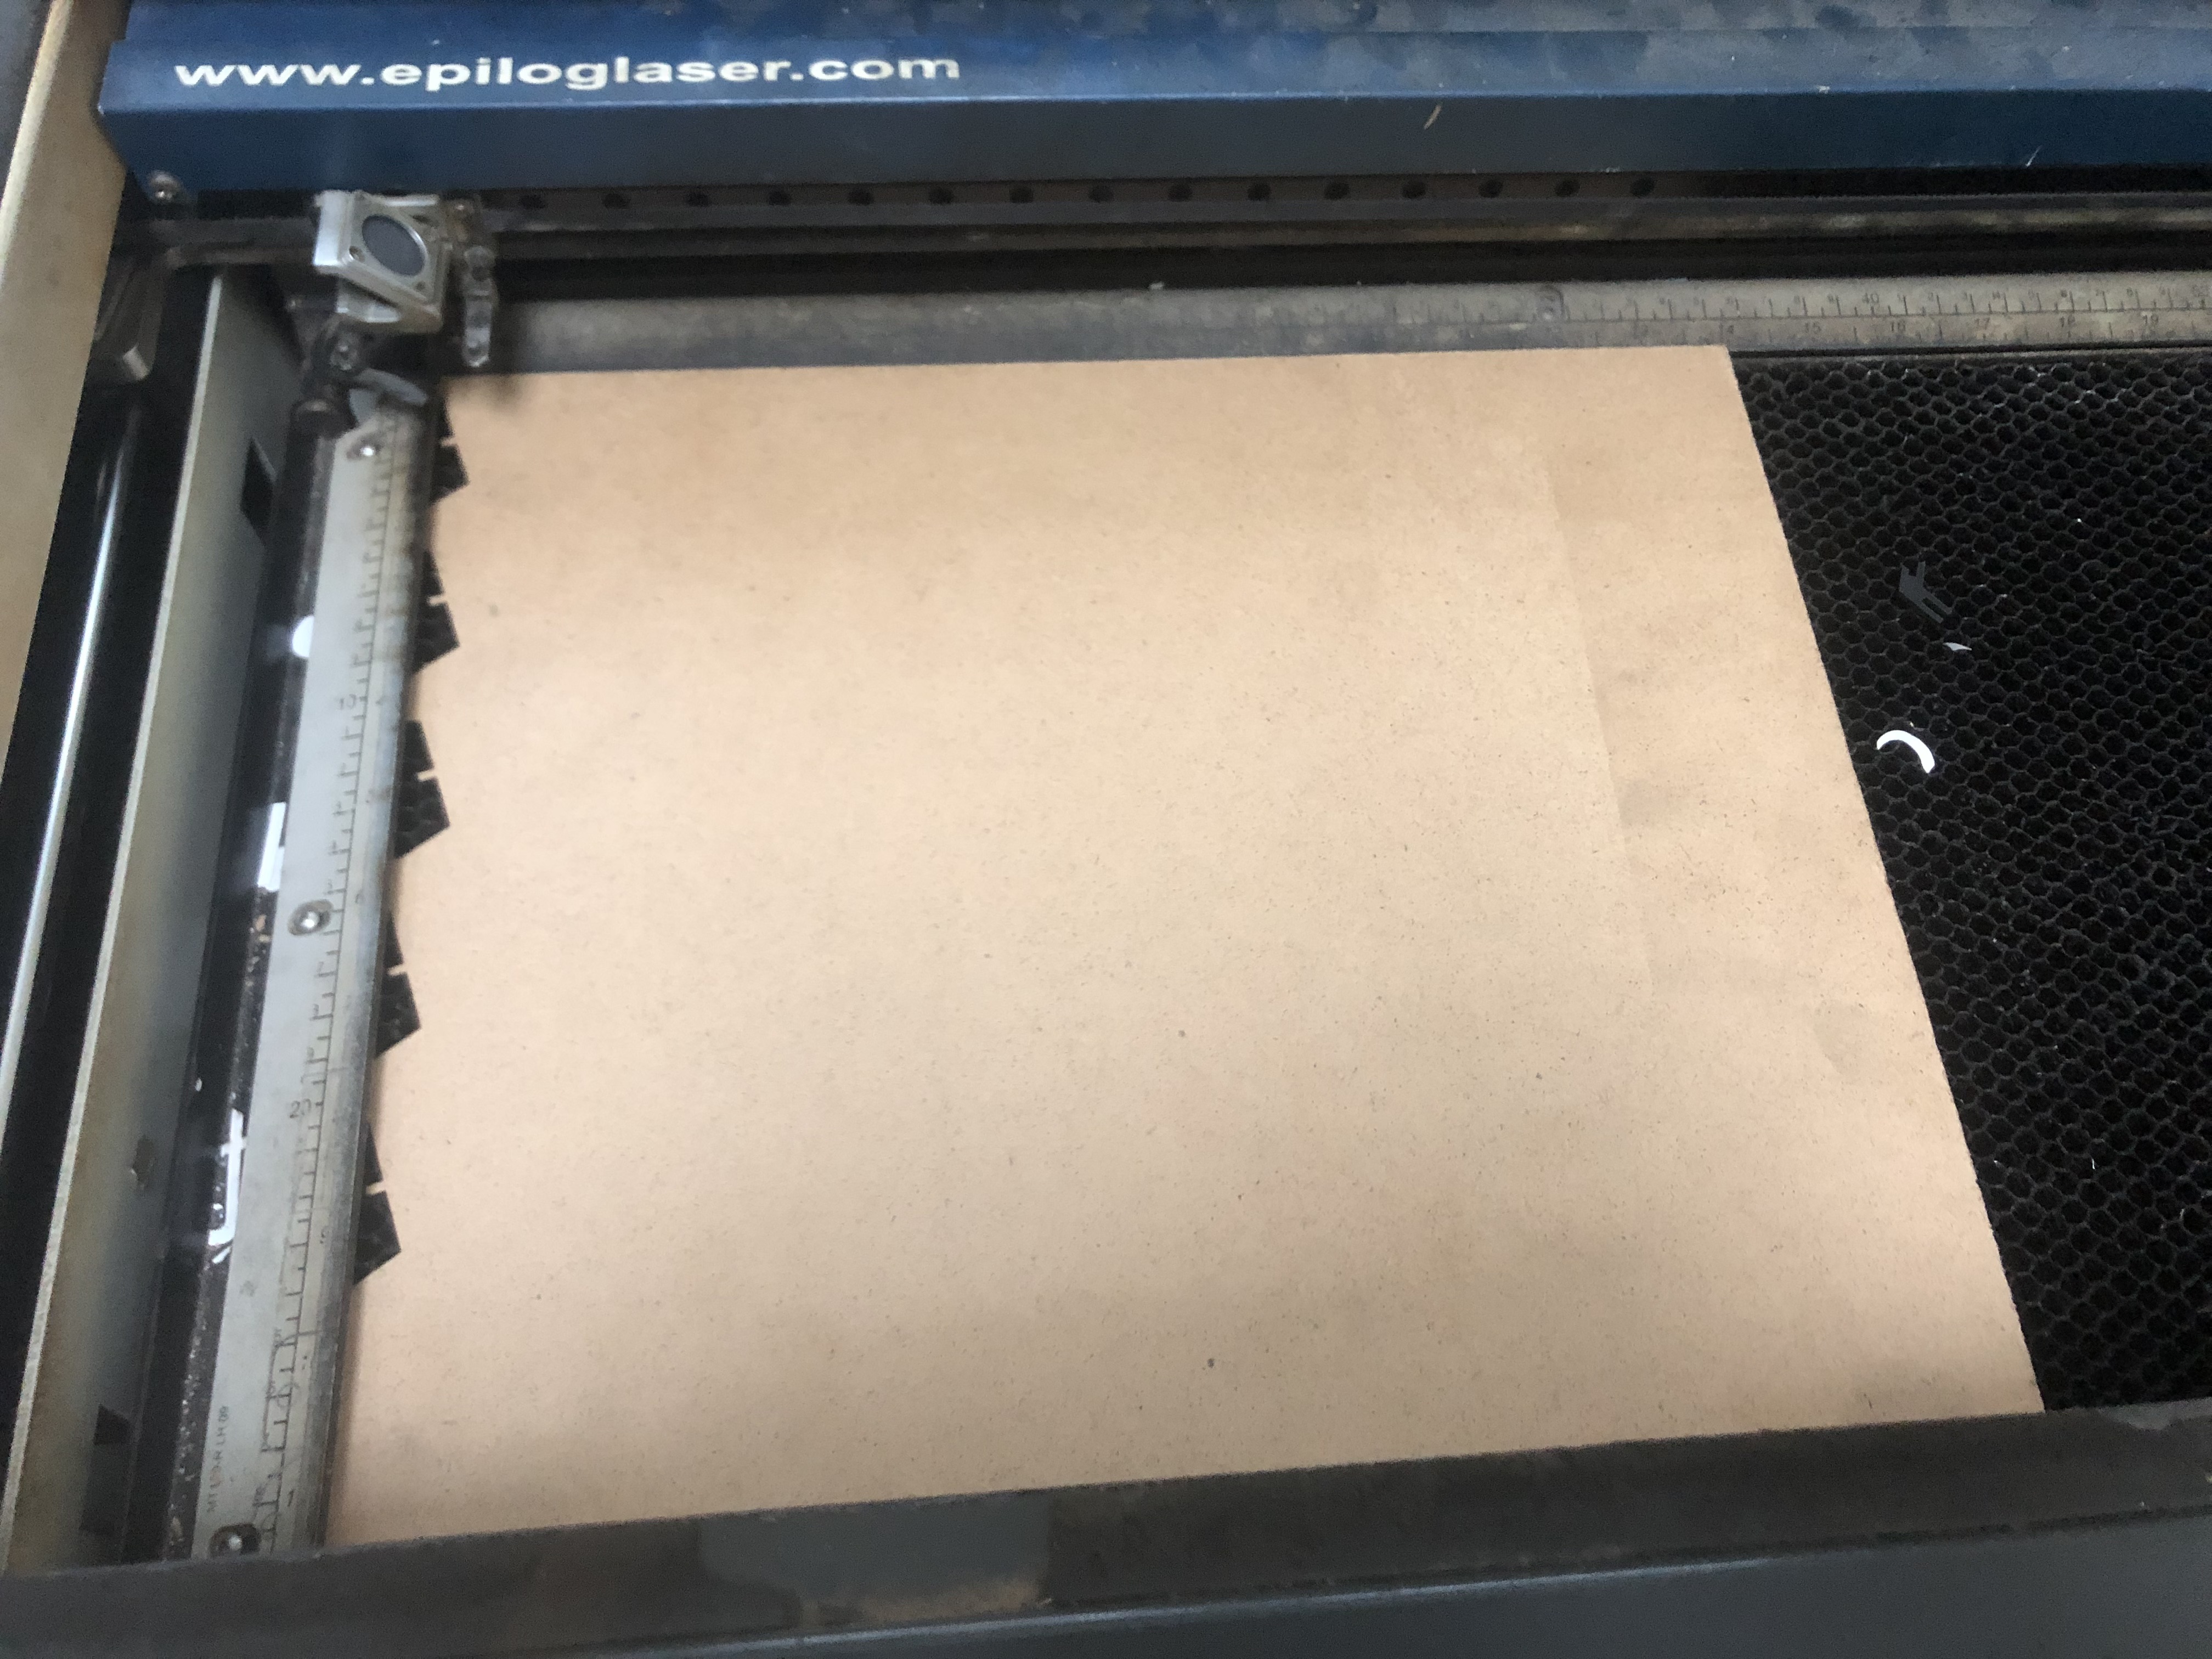
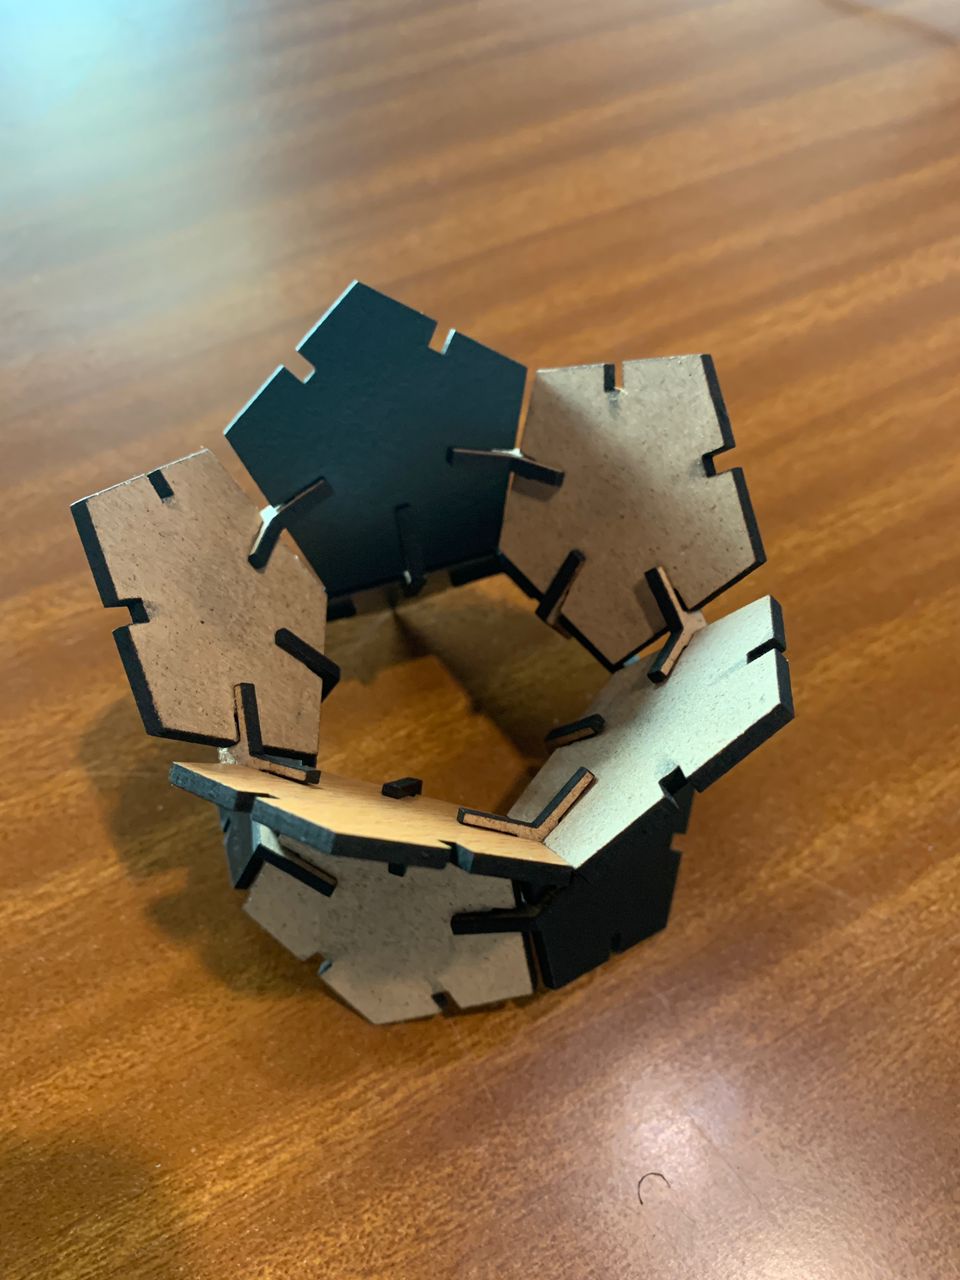
I placed the material to be cut which in this case is 3MM plywood sheet in the laser.
I multiplied and aligned pieces i had designed to be cut according to the piece of material i had, Set the power and speed, set focus
on the material using this piece of metal that sets the distance between the nozzle and the material. so below are the
pictures of the process of placing and after cutting the material in the laser.
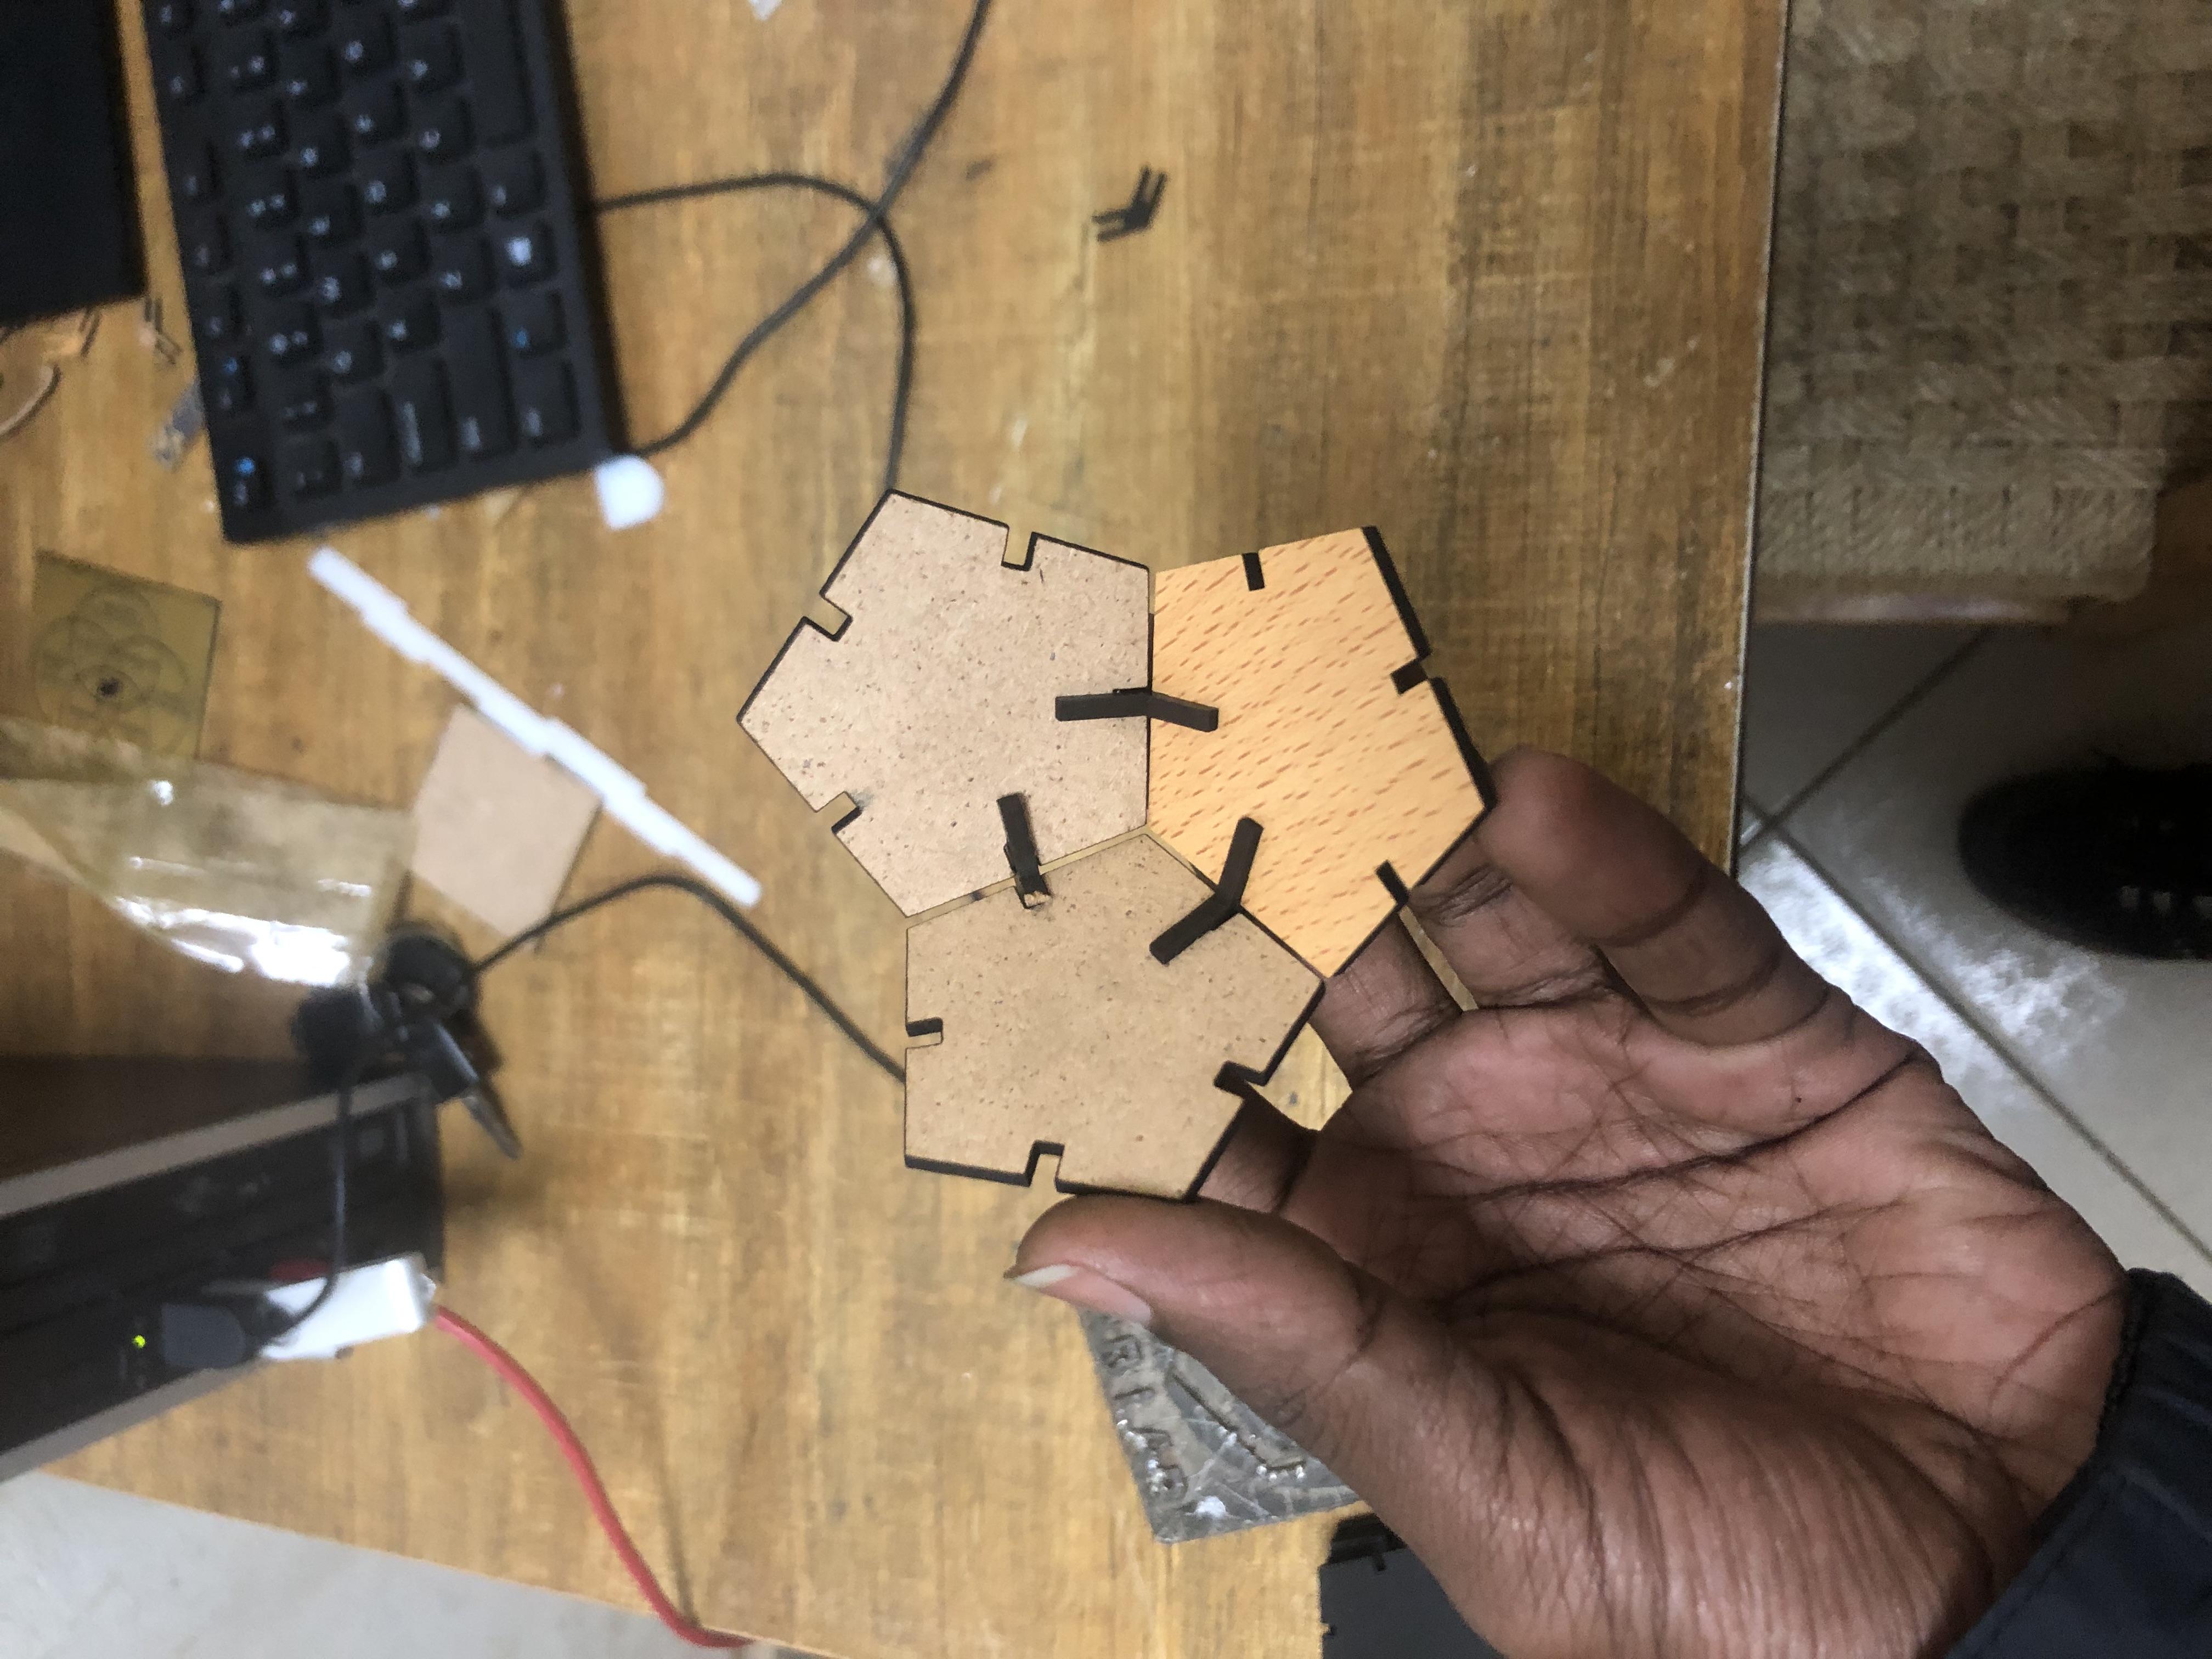
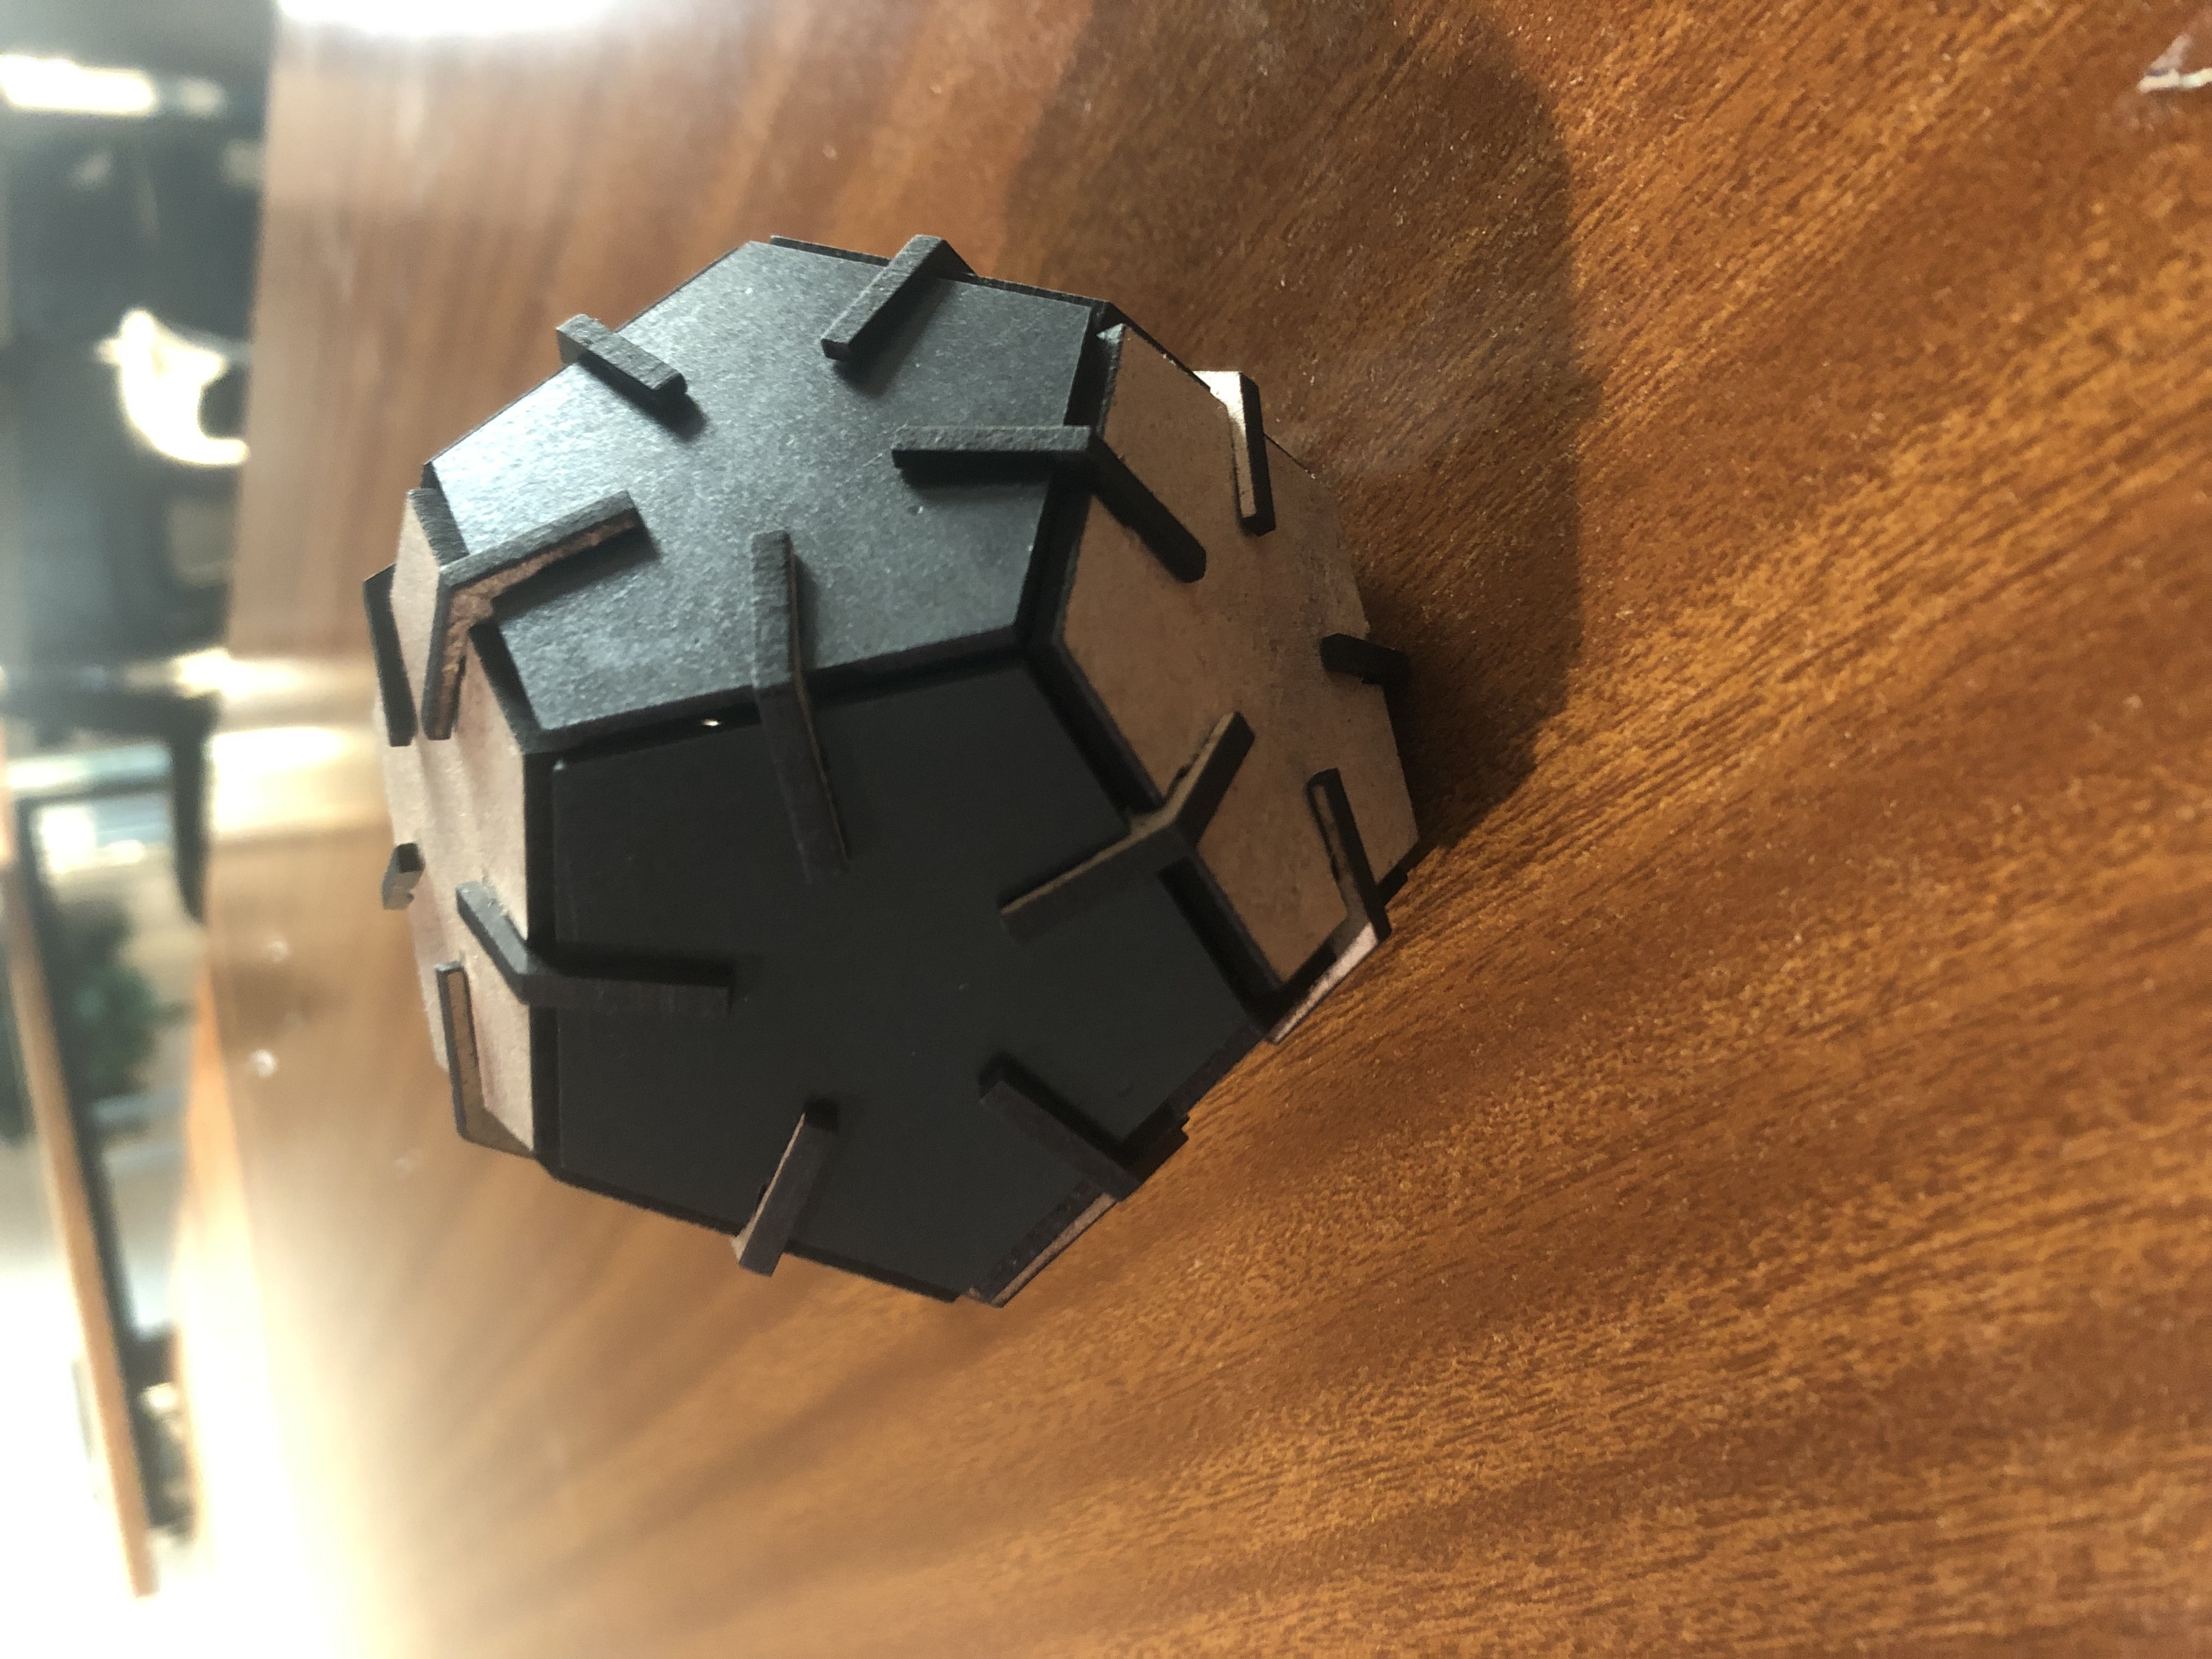
Assembling
i assembled my pieces while putting together the joints
Then later i assembled these pieces while putting together the joints with pieces laying inclined to one anotheR.


.png)