Week 3
Computer Controlled Cutting
Group Assignment
- Do your lab's safety safety training
- Characterize your lasercutter's focus, power, speed, rate, kerf, joint clearance and types
Safety Training
Before using the laser cutter all users undergo basic safety training.
The most important part of the safety training is understanding that there is always a fire hazard so keeping an eye on the machine at all times is crucial.
- Do not leave the machine while it is running, always keep an eye on the machine
- Make sure the exhaust is turned on
- Do not use the machine if you are tired
- Do not use the machine if you are alone in the lab
During the training the users also learn how to use the machine:
- How to turn on and off the machine
- How to set up the machine
- How to use the software
- How to clean the machine
- How to maintain the machine
Characterize your lasercutter
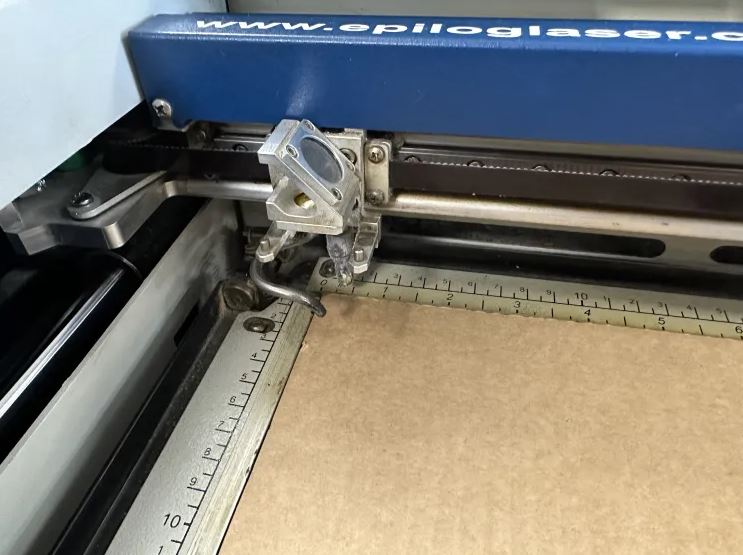
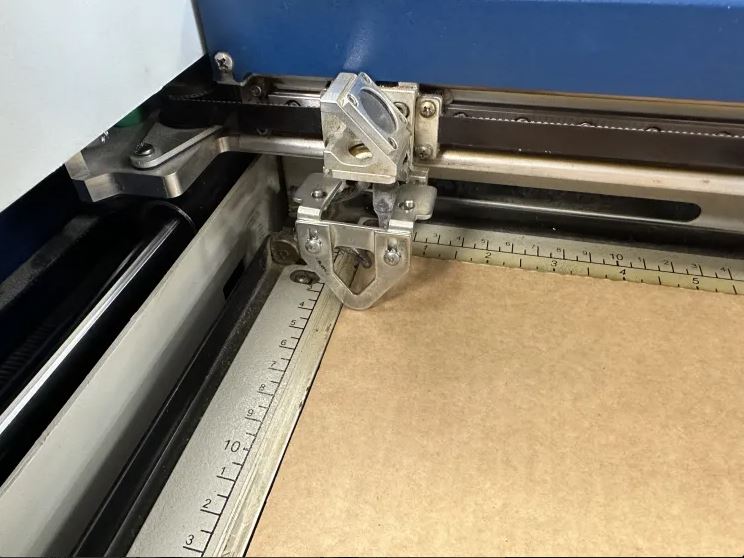
Focus
We manually adjust the bed height of the Epilog laser to align with the small focusing tool, setting the focus.
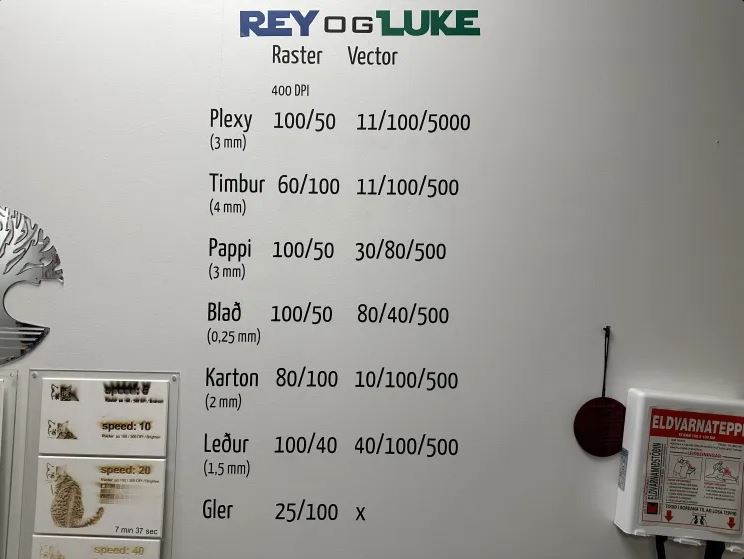
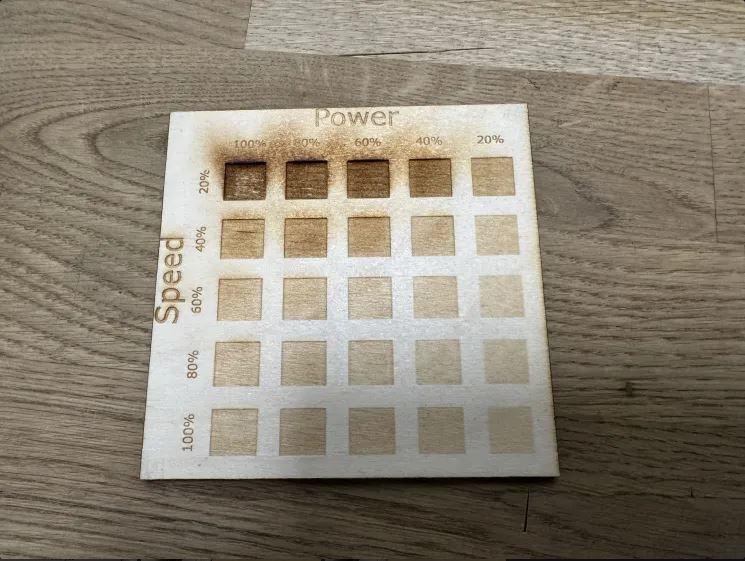
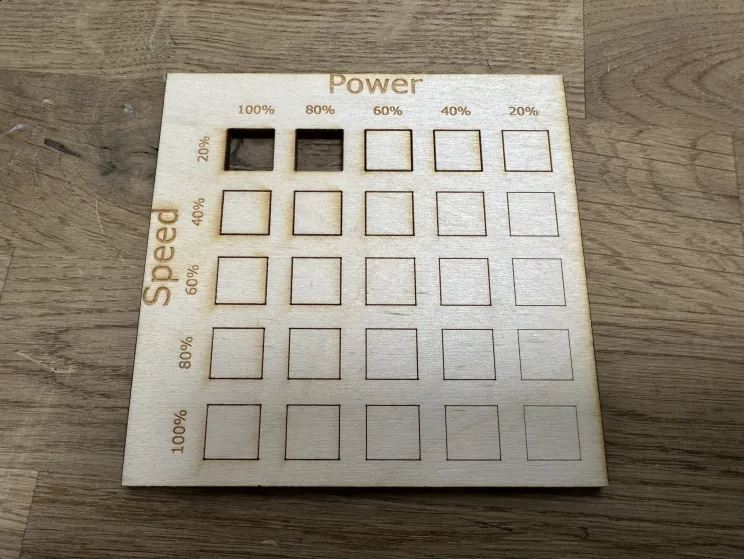
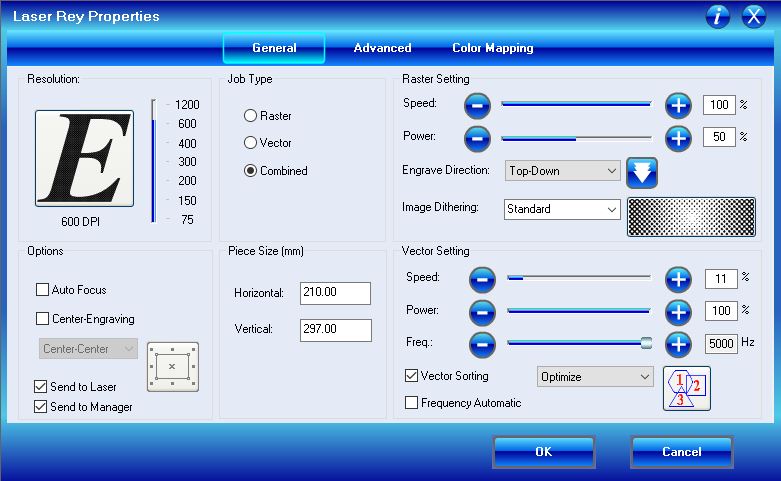
Power - Speed - Frequency
The power, speed, and frequency settings vary for different materials, and the configurations for the most commonly used materials are displayed on the wall in the laser cutter room. Additionally, we display examples that illustrate the outcomes achieved with various settings.
Kerf
The kerf of a laser cutter and the diameter of the laser beam are related but not exactly the same. The kerf refers to the amount of material that is removed by the laser beam as it cuts through the material. It represents the width of the cut itself.
The laser beam diameter, on the other hand, is the thickness of the laser beam itself as it exits the laser cutter's focusing lens. This diameter can influence the kerf, but the actual kerf can be slightly larger than the beam diameter due to the heat effects of the laser, which might cause additional material to be burned or melted away around the path of the beam.
Thus, while the laser beam diameter sets the minimum possible width of the kerf, the actual kerf observed in materials can be slightly wider depending on various factors like the type of material, the speed of the cut, and the specific settings of the laser (e.g., power and focus).
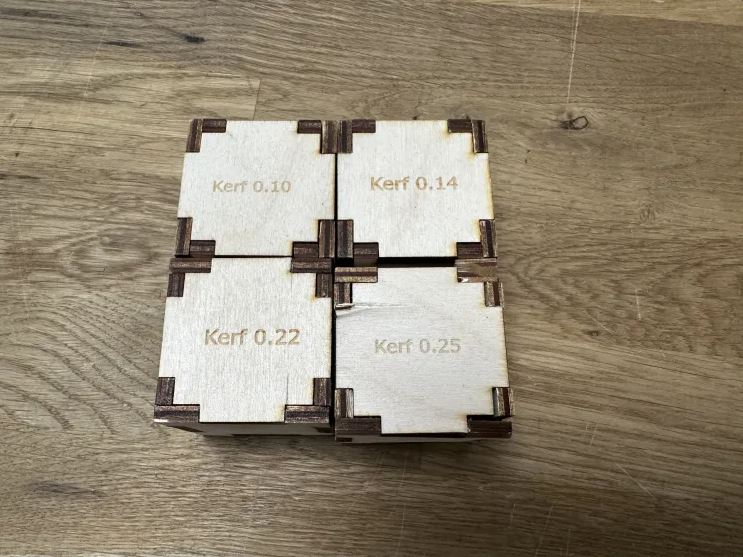
Here are some examples of kerf tests we have done. In Ondsel there is a value in the laser cutting workbench that accounts for the laser diameter.
Joint clearance
We adjust the kerf settings or laser diameter to accommodate joint clearance. It's advisable to conduct tests with various materials and settings to determine the optimal fit for joints.

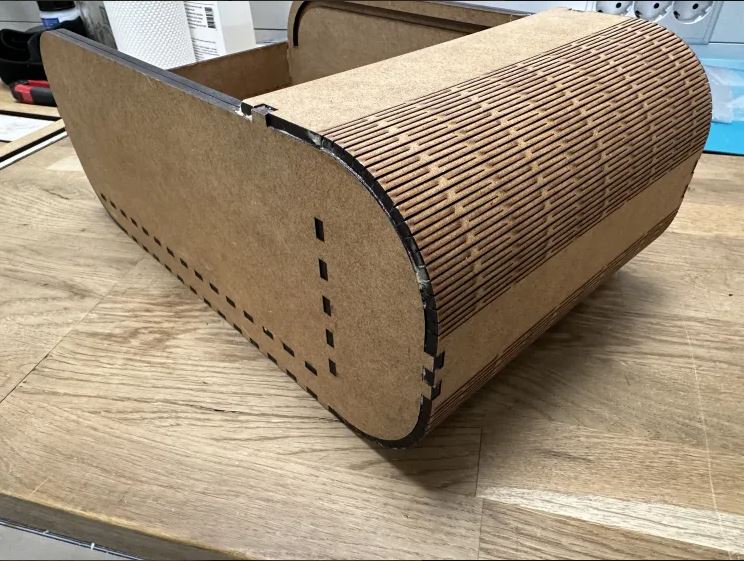
Joint types
There are several types of joints that can be created using a laser cutter but the most common joints made using a laser cutter are finger joints and tab and slot joints, due to their strength and ease of assembly. However, living hinges, while less common, offer interesting and flexible design possibilities that can add a fun and creative element to projects. The following example show use of finger joints, tab/slot joints and a living hinge.