My Final Project
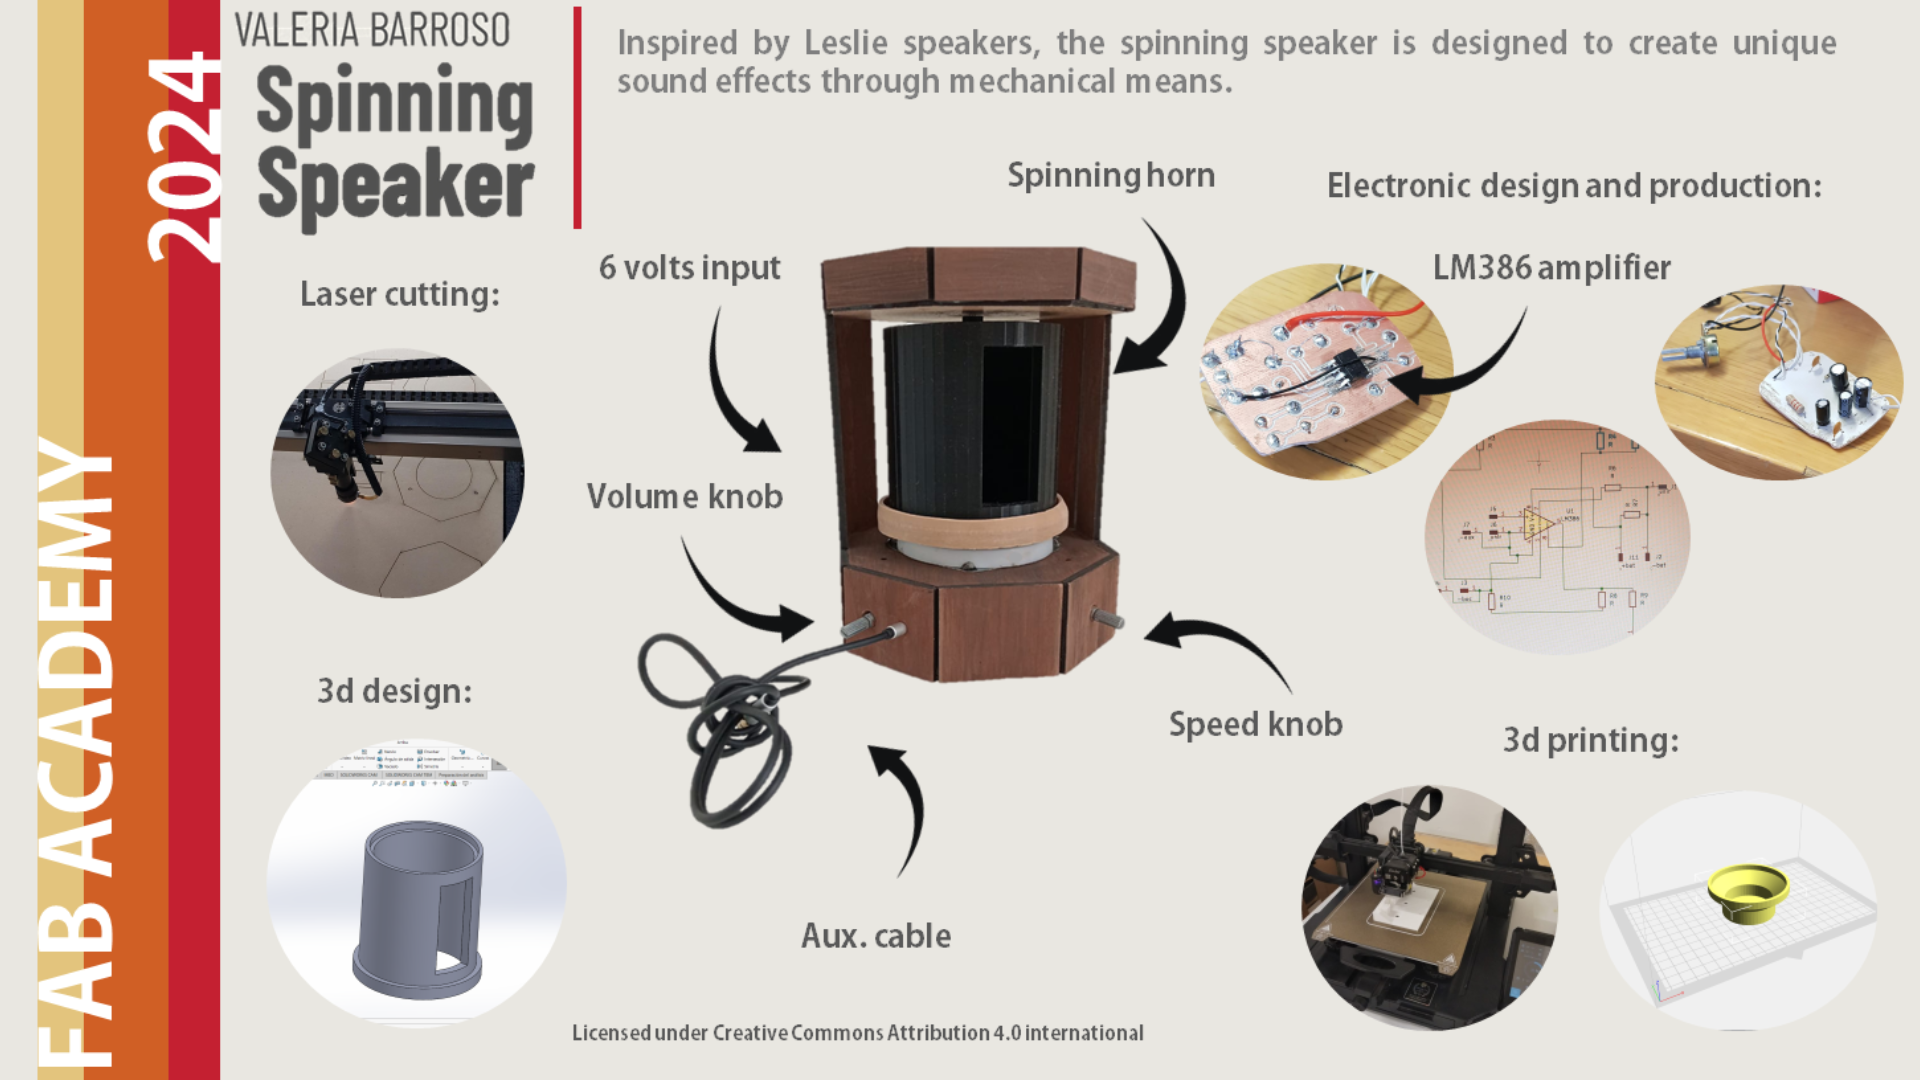
I am thinking of making a speaker capable of creating rotation effects in the sound.
Musicians from a variety of genres could use this speaker to modify and enhance their sounds.
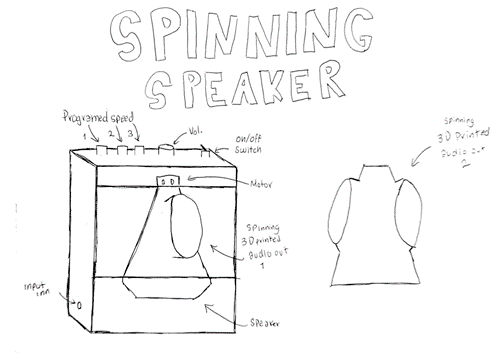
My sketched
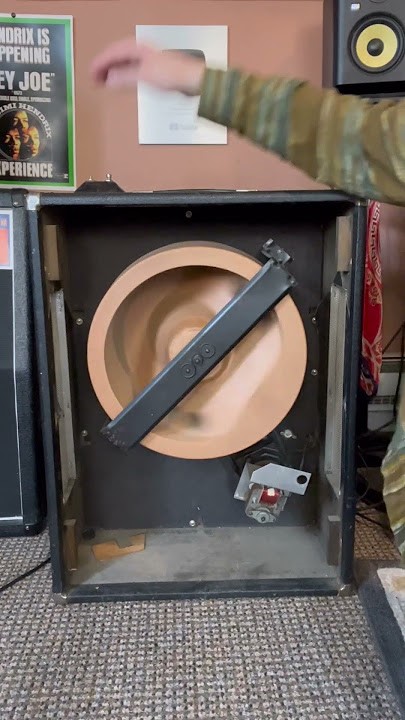
Inspiration
I am referring to Leslie speakers, which are specialized sound devices commonly used with musical organs,
keyboards, and guitars, producing a rotating modulation effect. These speakers are known for their distinctive
sound, often associated with musical genres such as jazz and rock.
1969 leslie speaker
Motor
I started with the internal part of the speaker. In the first drawing of the speaker, I had considered placing three buttons with three different
pre-programmed speeds, but once I got into the project, I decided it would be better to use a knob to control the motor speed. With this
concept, I designed a board with a Xiao RP2040 and code to achieve this. You can find more information in week 12.
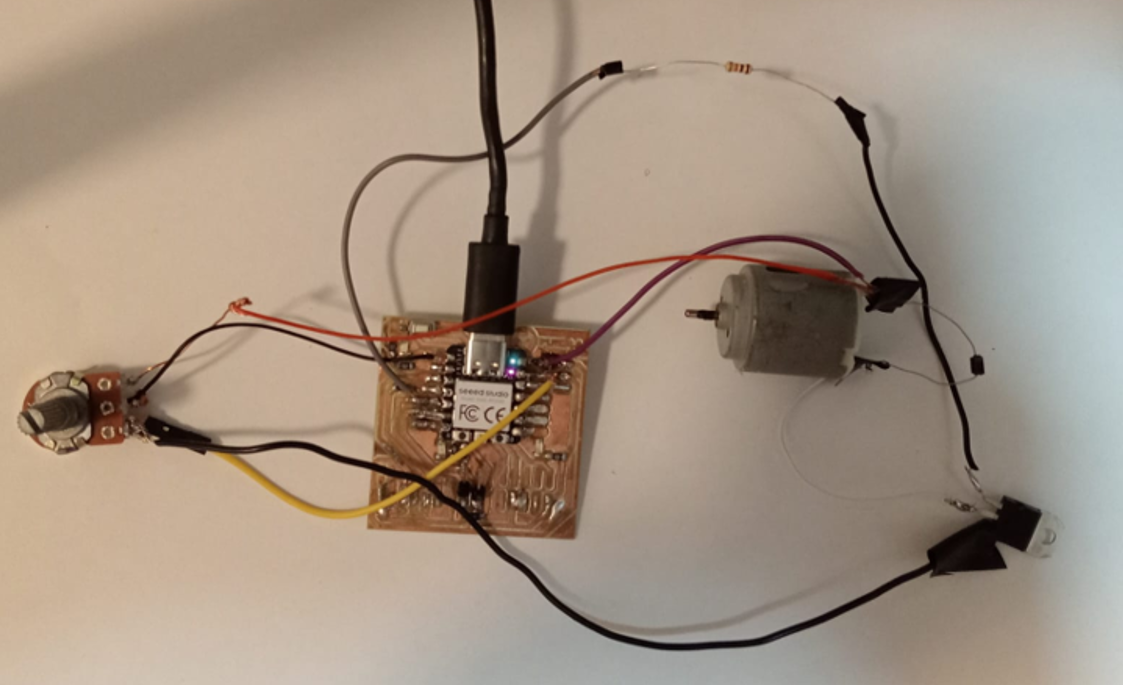
My idea is to rotate the rotor with friction, and I made some tests with very simple prototypes to see if it could work.
Speaker
For the audio, I will use an LM386 audio amplifier, a 220uF 16V electrolytic capacitor, a 10k potentiometer,
a 5mm female mini jack, and a speaker of one watt or higher.
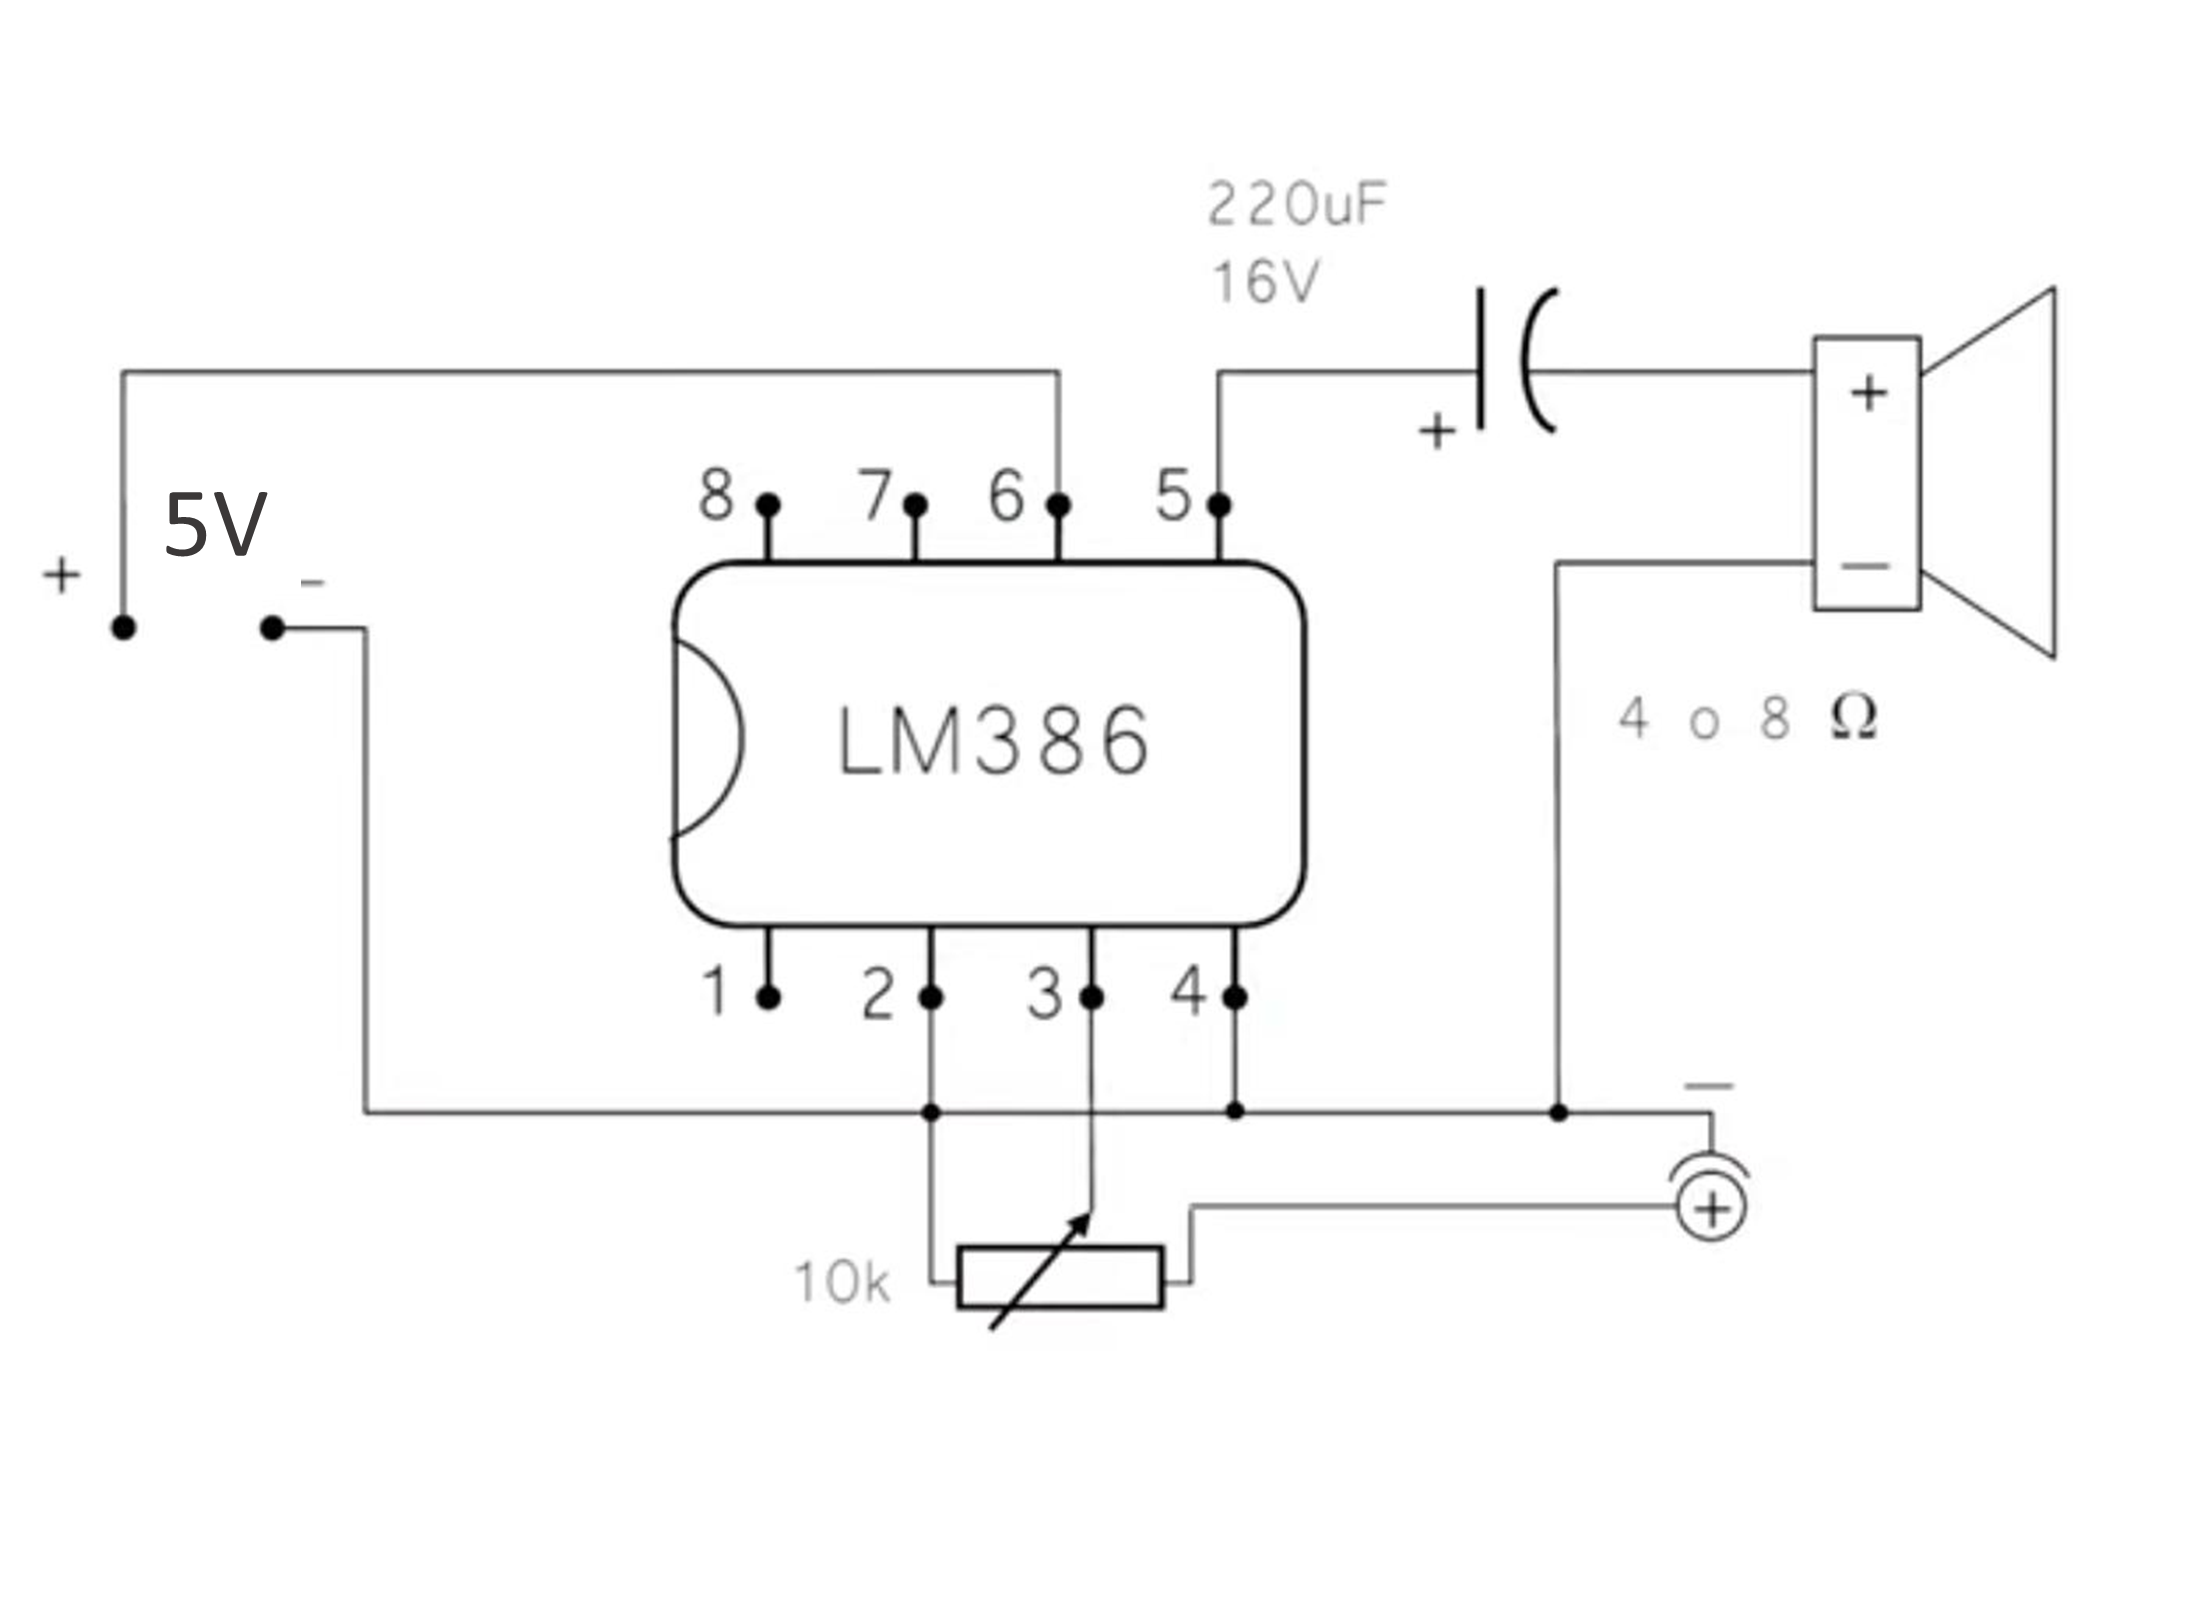
I tested the circuit and the audio is really bad; the speaker makes a lot of noise and the sound is barely distinguishable :( I will make changes to the circuit.
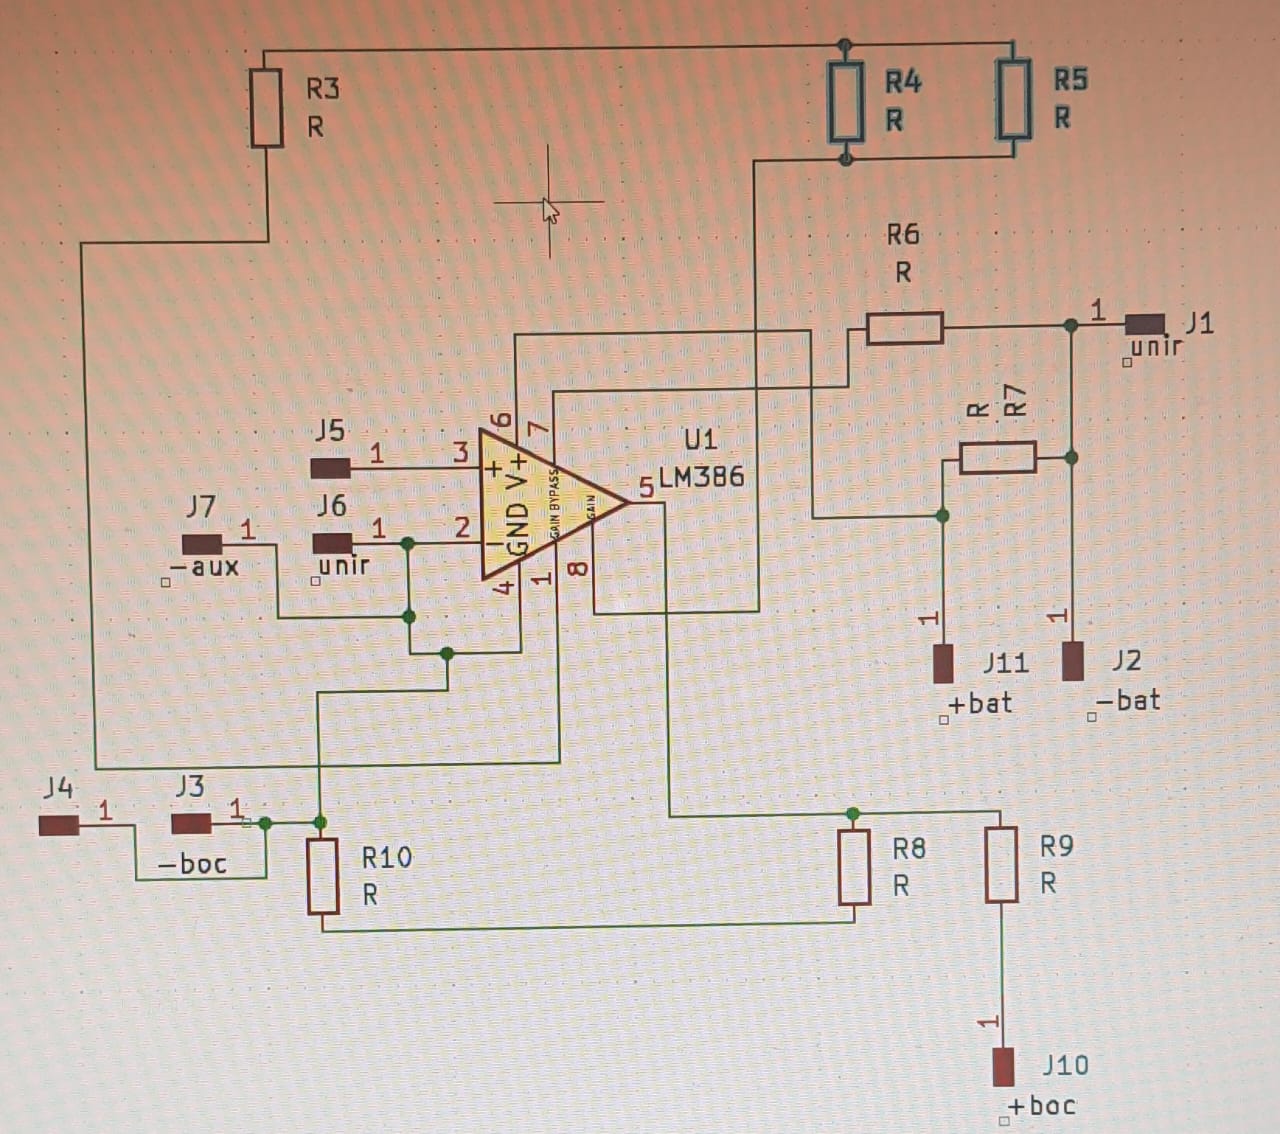
I used a new circuit with the following components: the LM386 audio amplifier, a 10Ω resistor, two 0.1μF capacitors, a 220μF capacitor, a 2.2kΩ resistor, two 10μF capacitors, a 470μF capacitor,
a 10kΩ potentiometer, a speaker, and a 9V power supply, and it worked :)
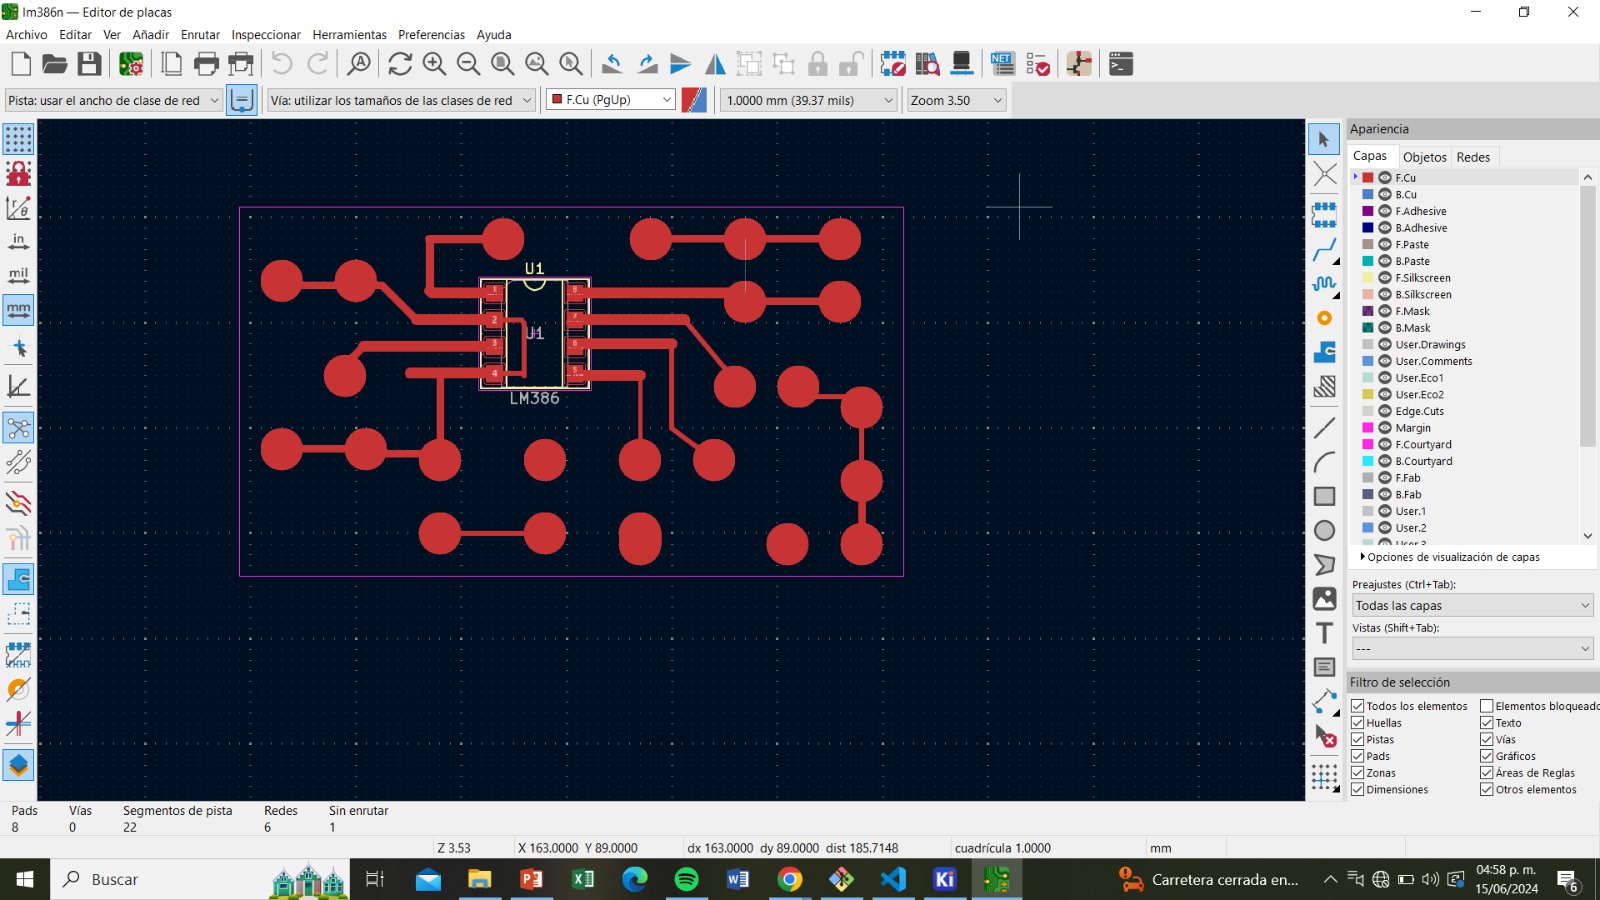
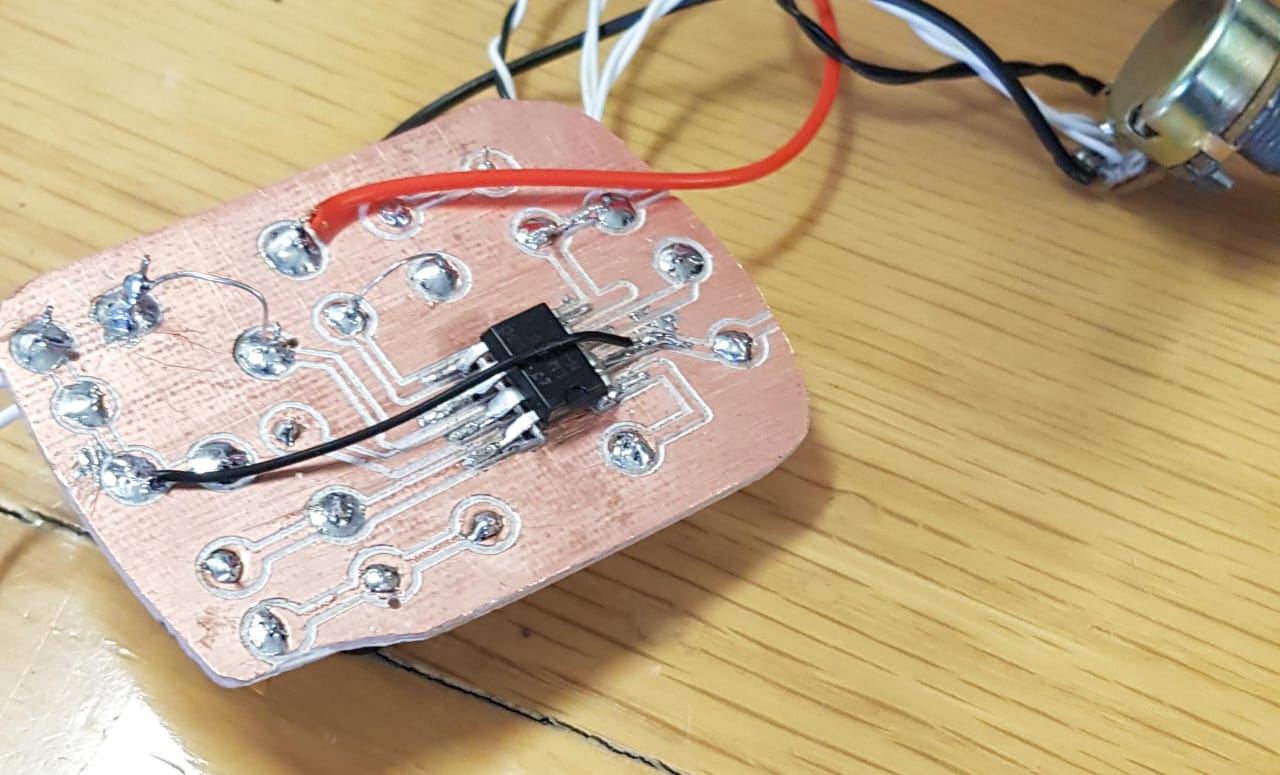
For practical reasons, I decided not to follow the footprints of the components and instead create larger spaces to drill holes to pass through the components
as shown in the board's image.
Afterward, I soldered the components and tested the speaker.

2D and 3D Computer-aided design
Now that I have the motor running with the potentiometer, the amplifier board, and the speaker,
I can now take measurements to make the casing and the horn.
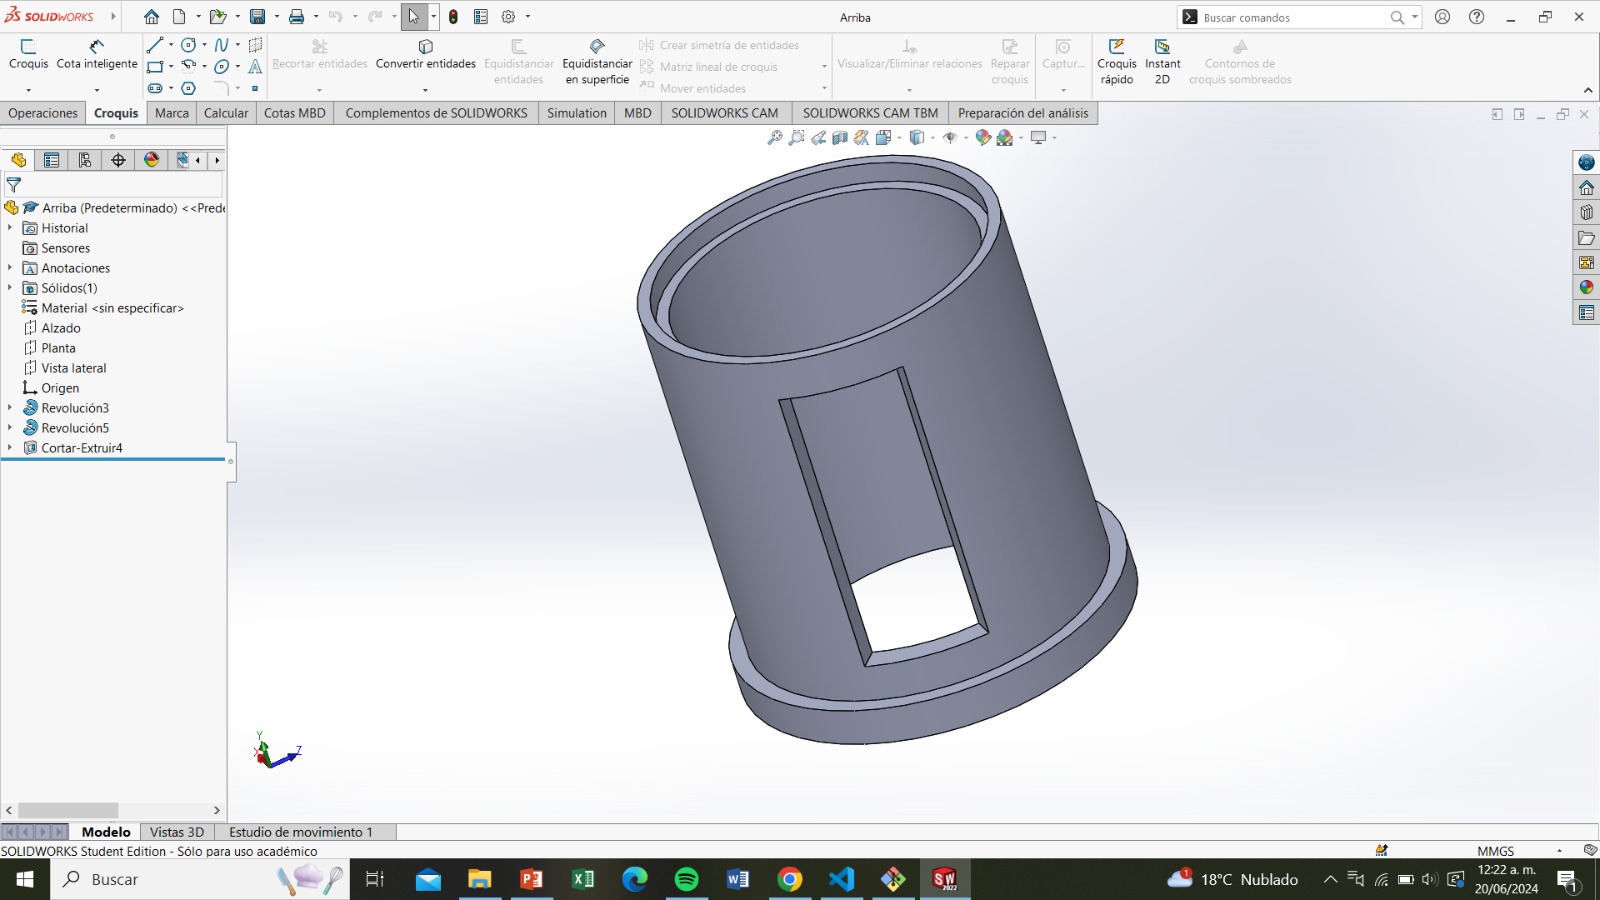
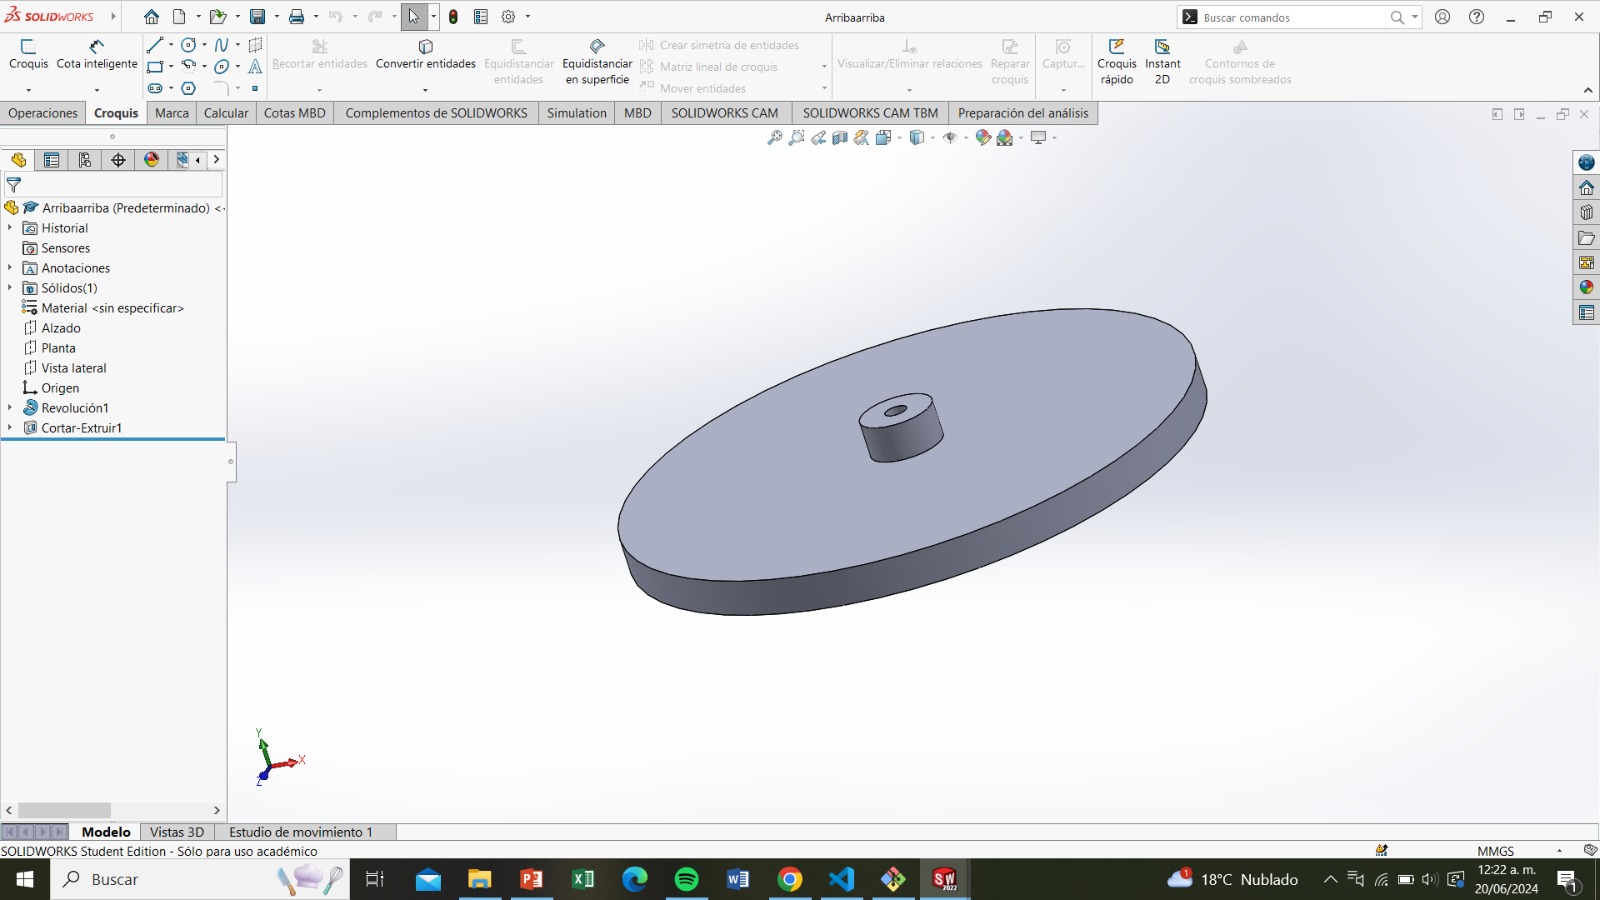
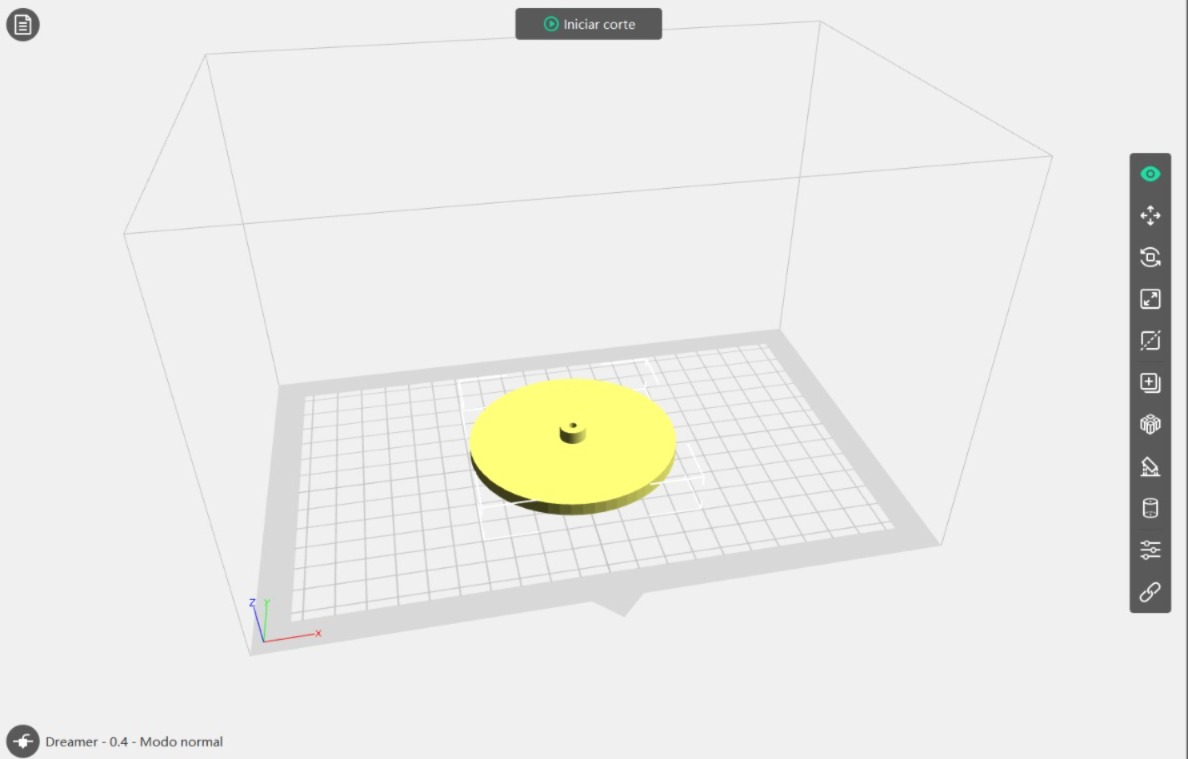
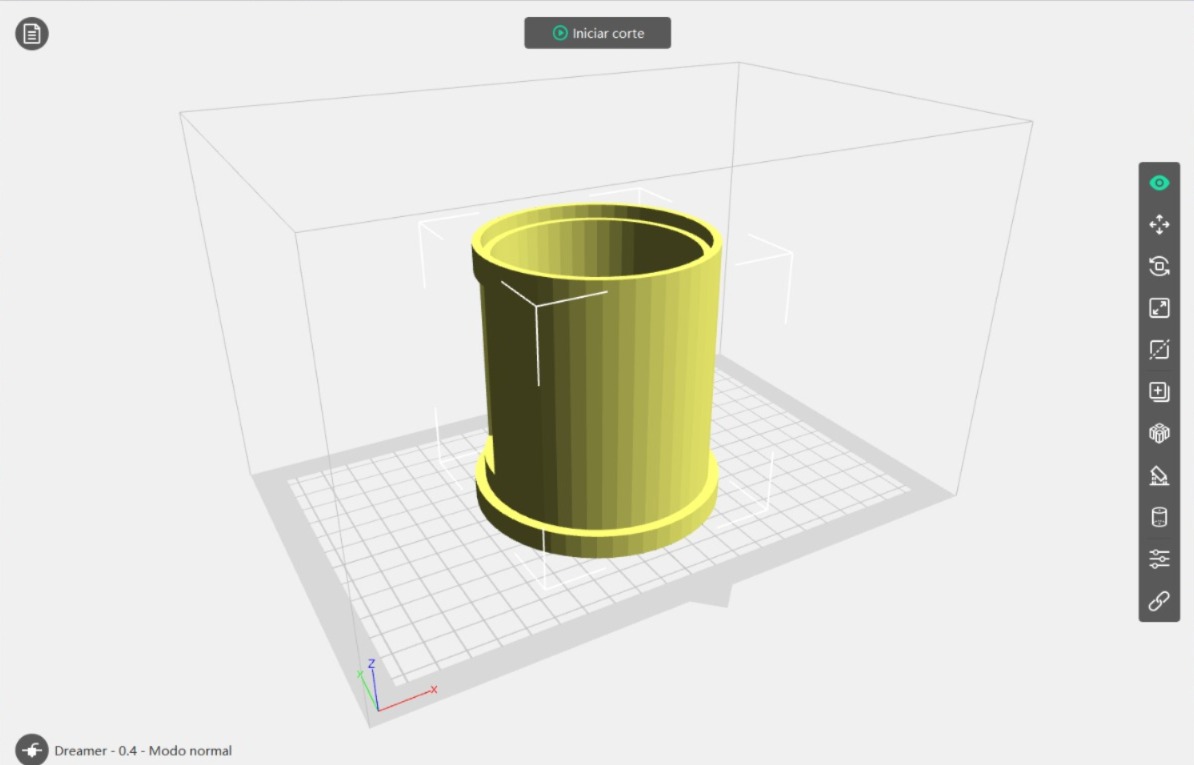
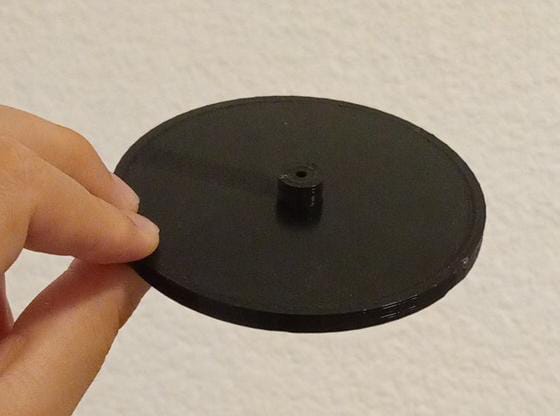
First, I will design the horn using SolidWorks. This piece is divided into two parts to reduce the need for supports during printing.
The top part was designed to allow a metal nail to pass through so it can rotate and hang without making contact with the bottom surface.
The bottom part is a cylinder with a hole that functions as an audio output. The top part fits snugly into the bottom part to avoid the need for glue.
I designed this other piece so that when the motor contacts the horn, it doesn't move as much. This goes on top of the speaker and inside the horn.

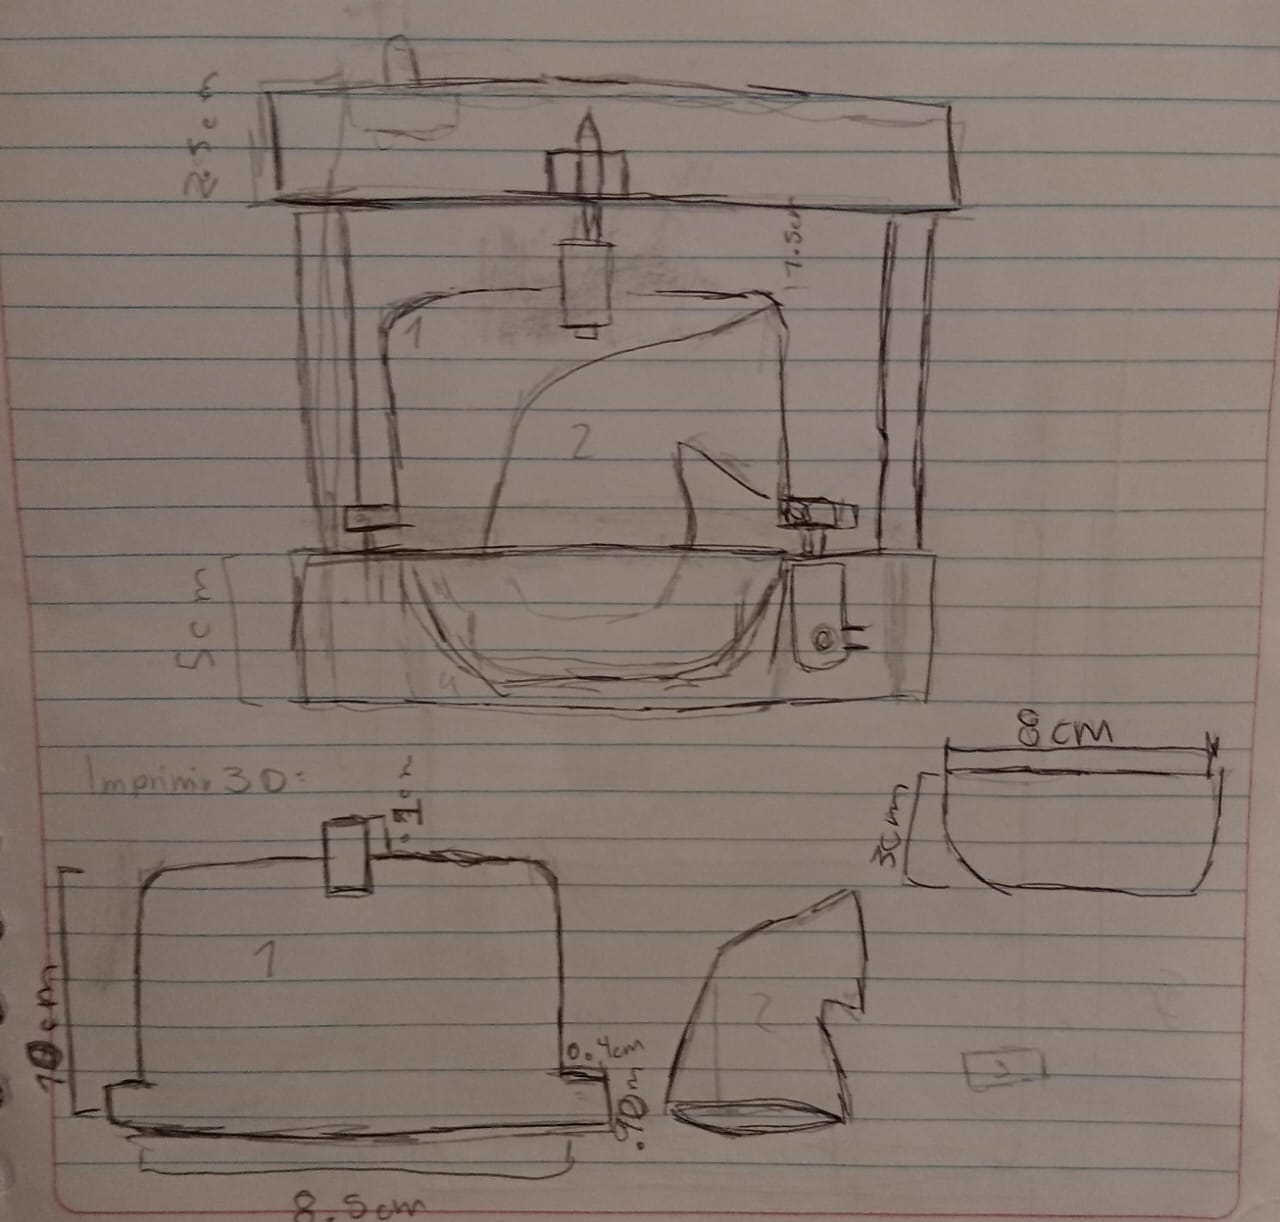
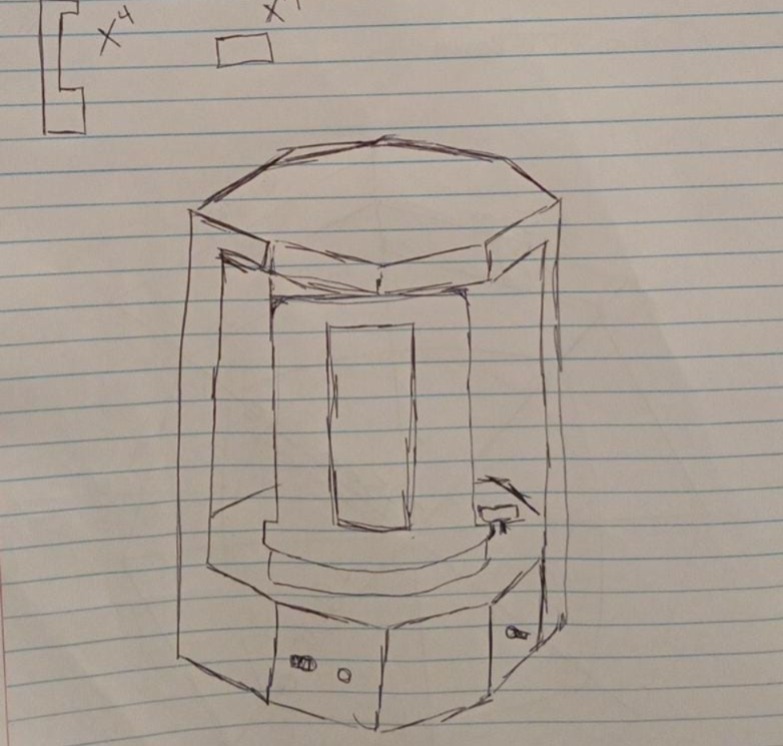
Before continuing with the computer-aided design, here are some ugly sketches of the design ideas I had ;)
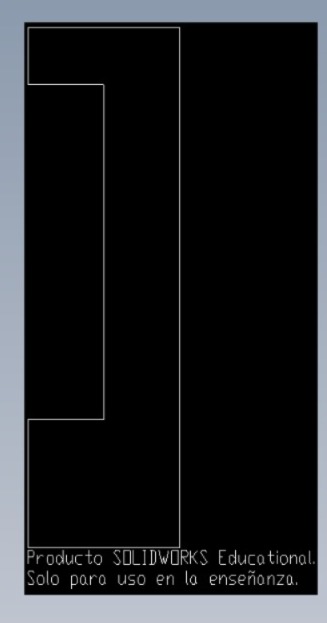
Also in week 2, I made a 2D drawing of what the speaker would look like.
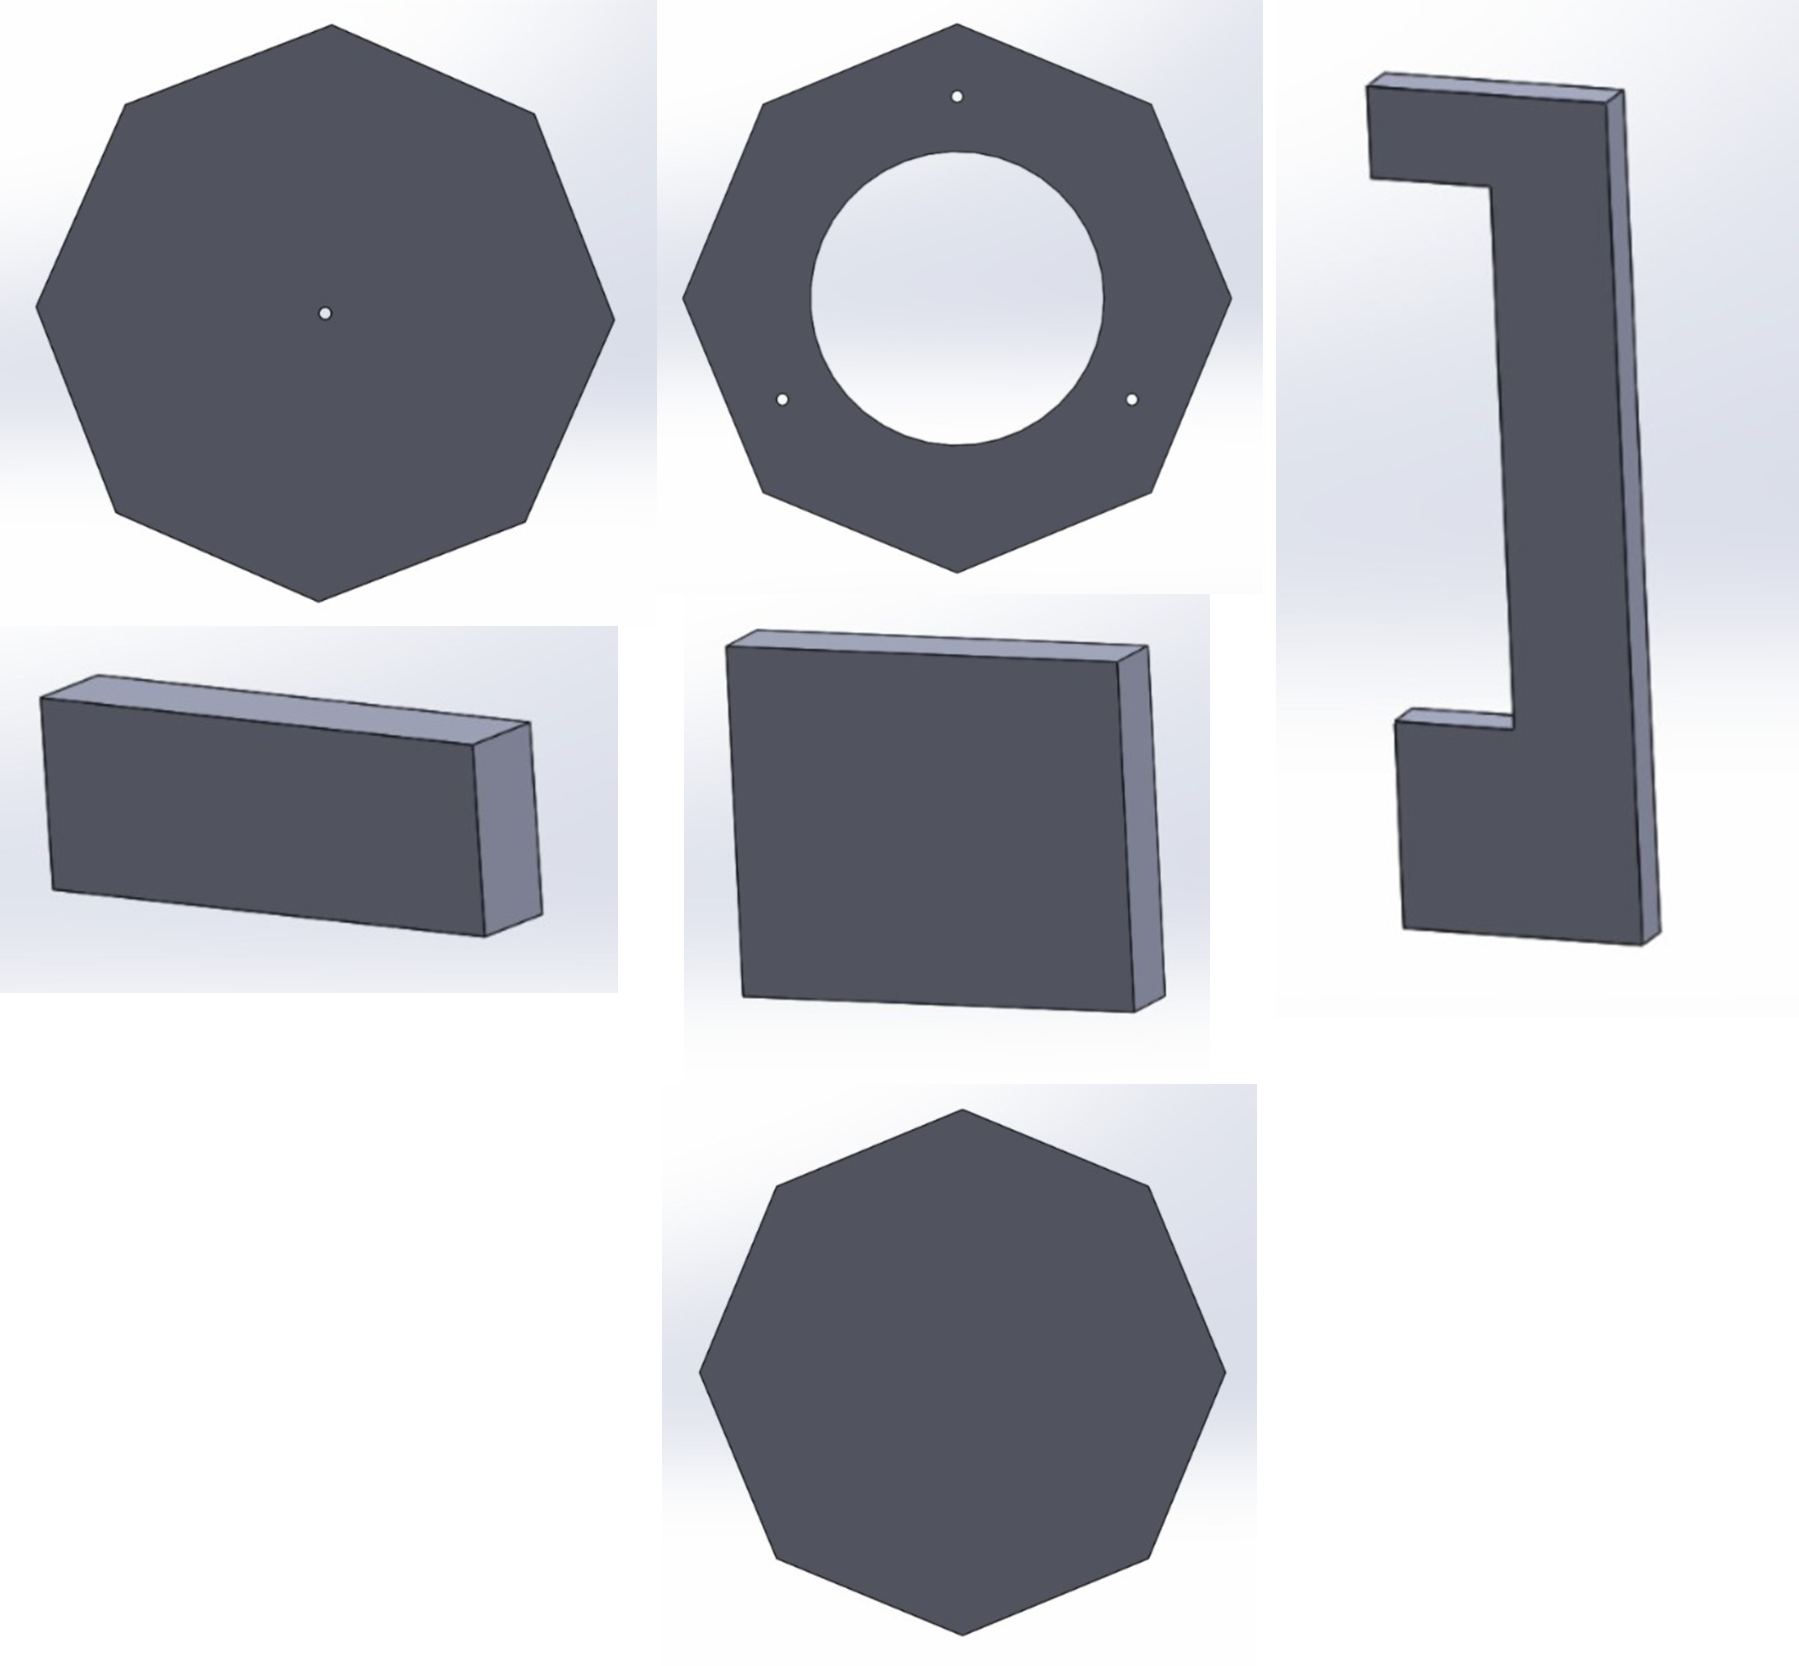
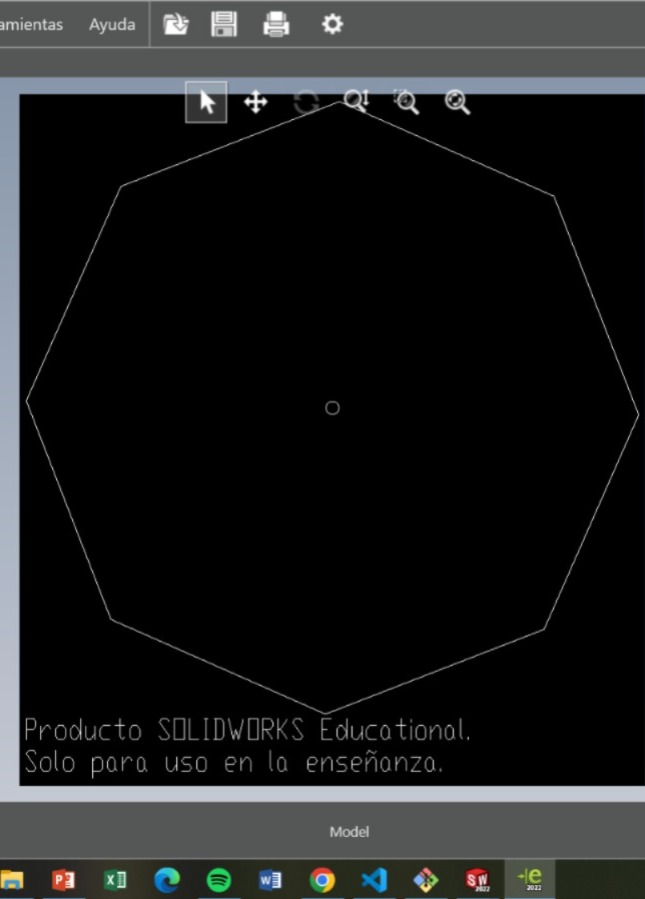
Let's continue! Now that i have the measurements of the horn, i can proceed with designing the casing, i will also be using SolidWorks.
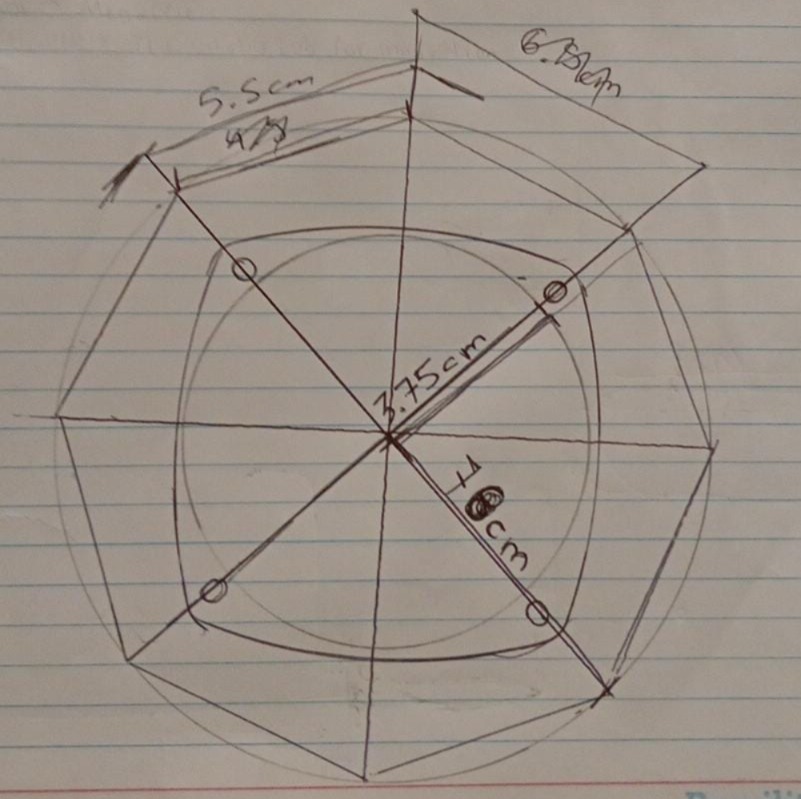
I decided to create a two-story octagonal structure. On the lower level, all the electronic components will be housed,
including the speaker with the amplifier and the motor with the potentiometer. Similarly, the auxiliary input and power
input will be located there. On the upper part, it's practically empty; there's only the structure that holds the metal
nail which drives the horn. For this, I designed 6 pieces.
3D Printing
I saved the pieces to be 3D printed in STL format and printed them in PLA.
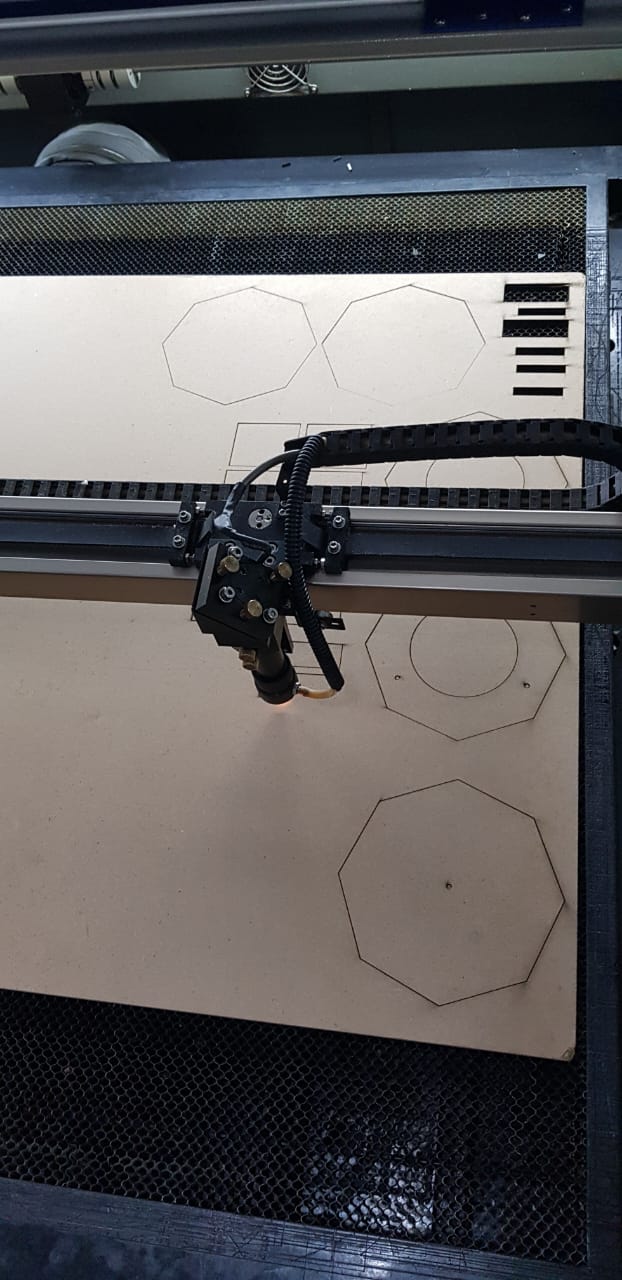
Laser cutting.
I saved the 2D drawings in DXF format and cut them in 4mm MDF.
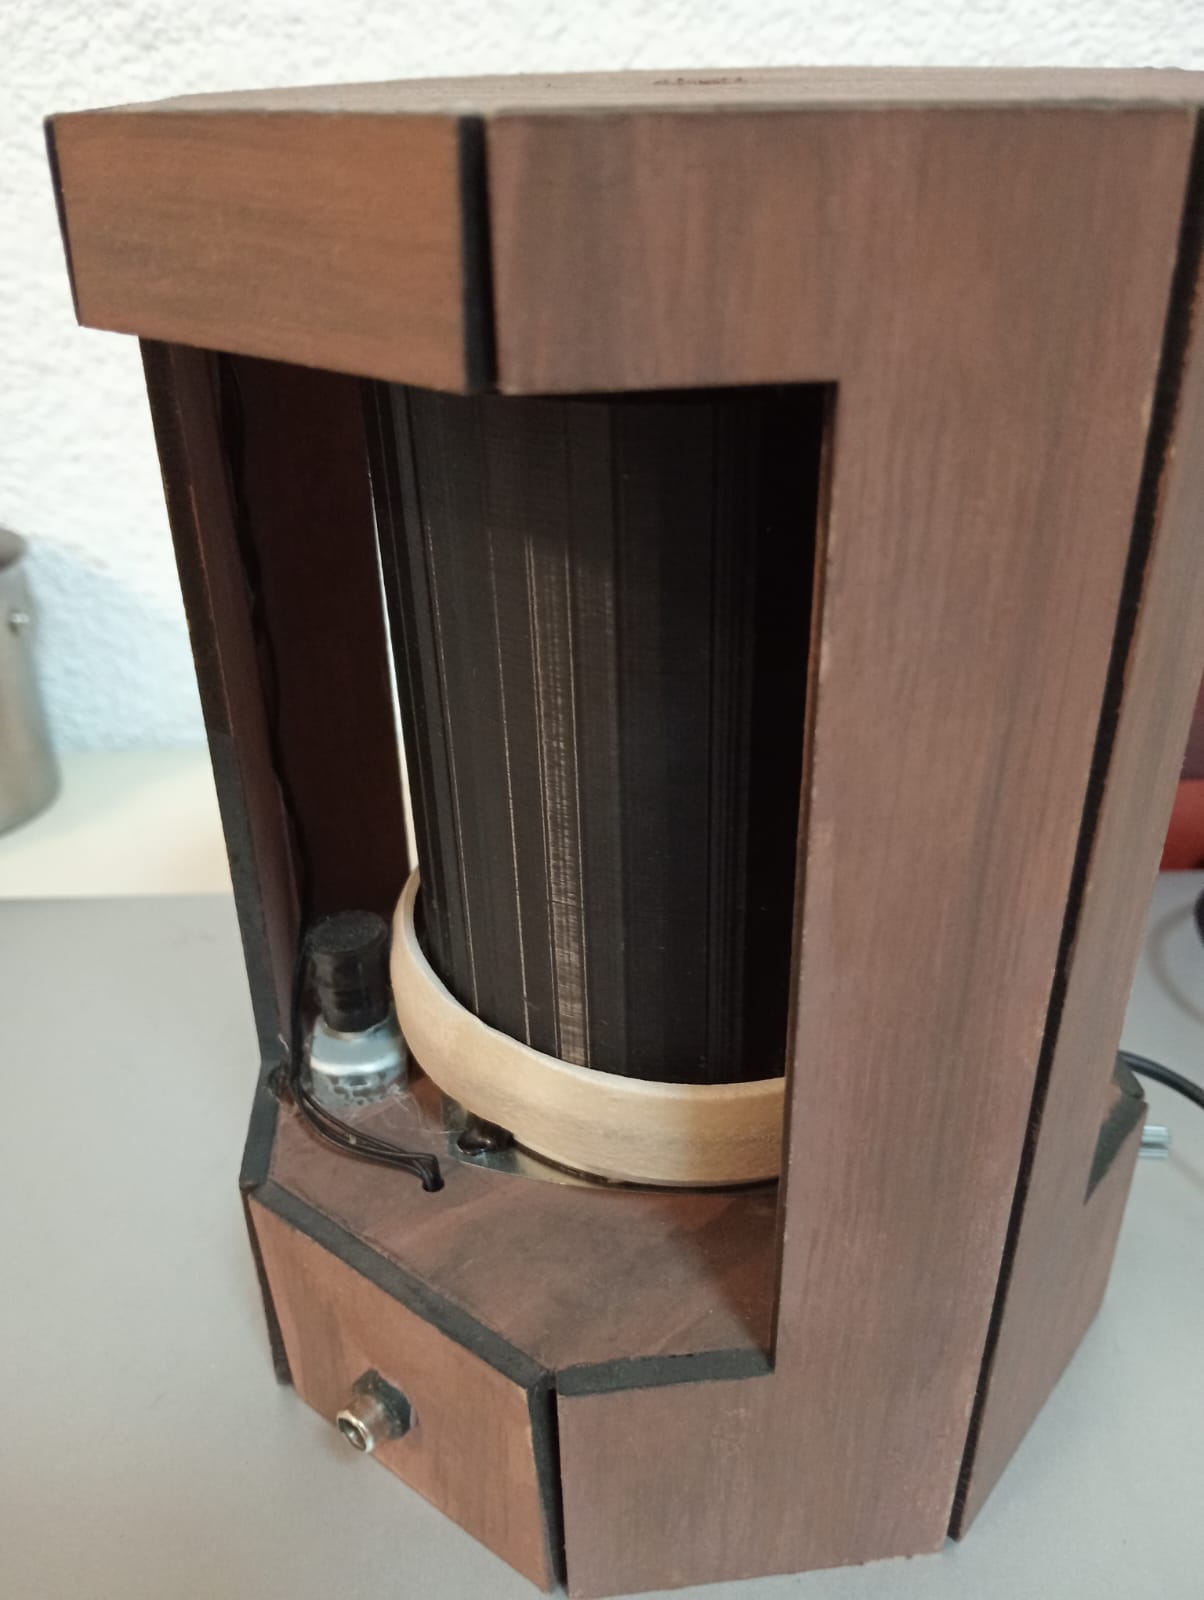
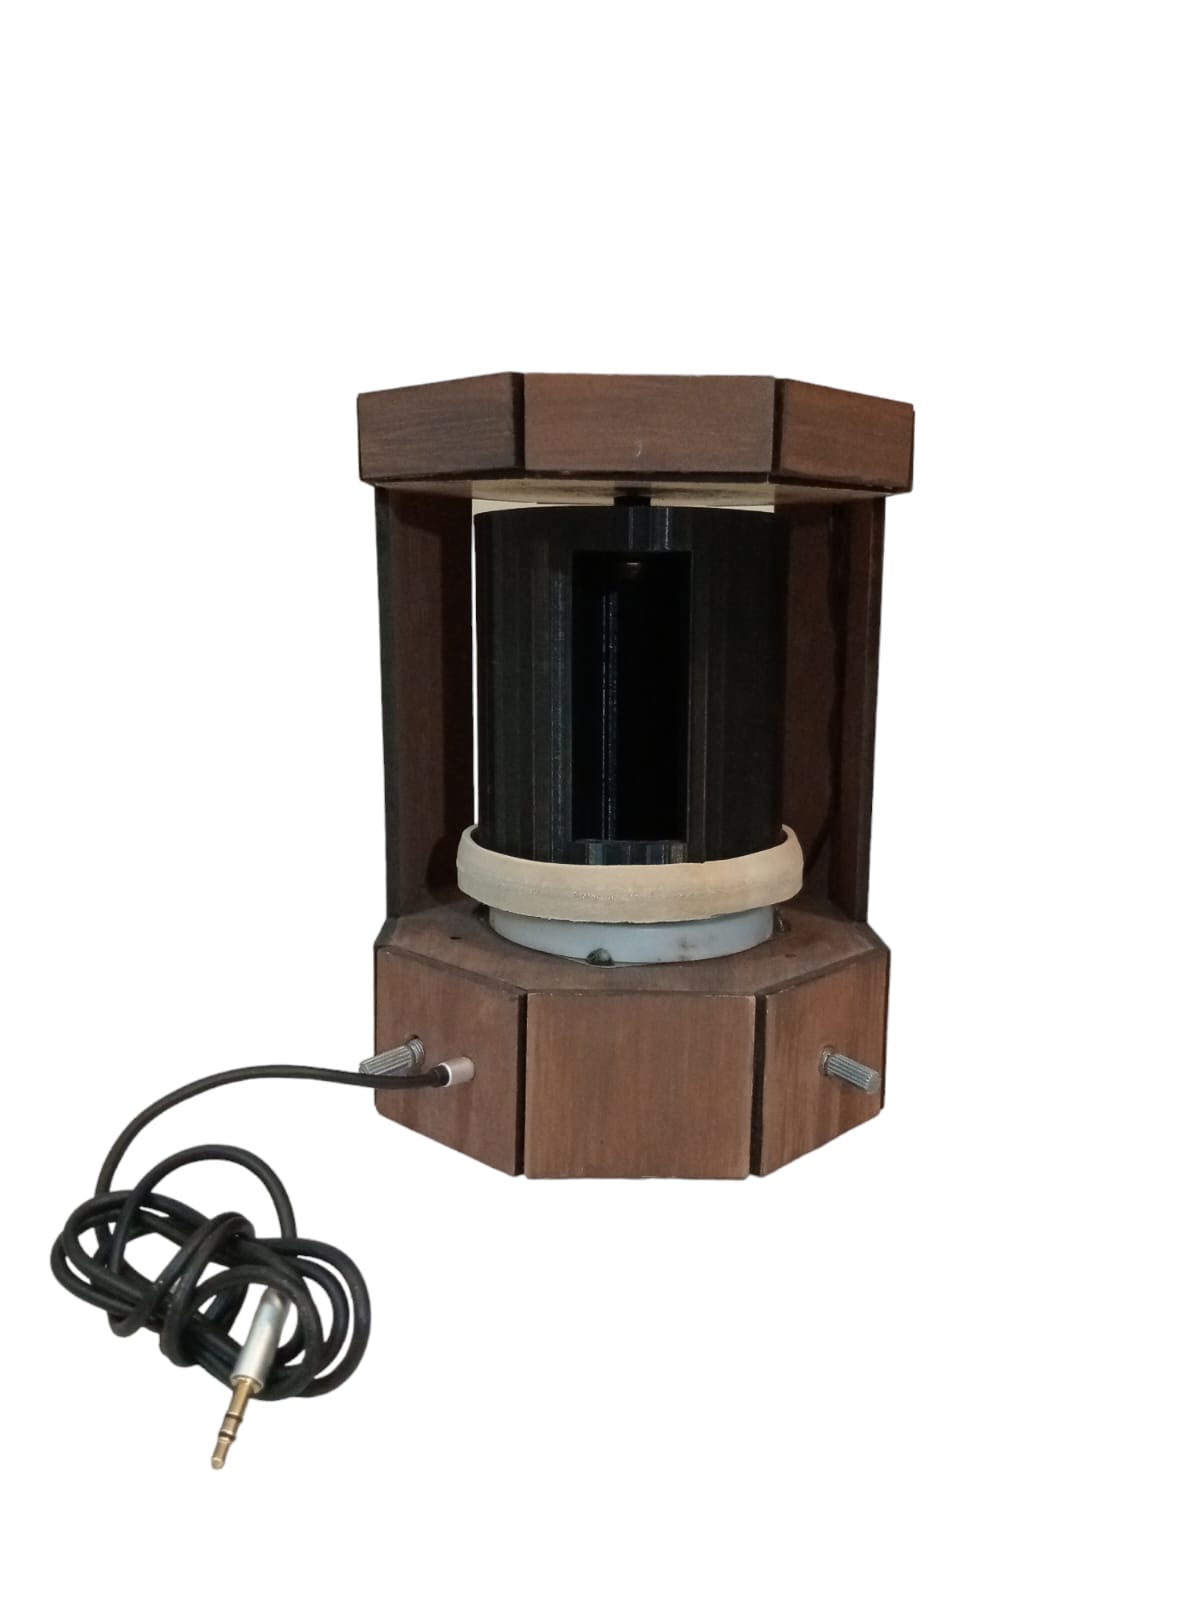
Assembling
The first thing I assembled was the bottom part to make sure the components fit. This
part includes the speaker, the amplifier, and the motor with the potentiometers.
Similarly, for the top part where I placed the Xiao RP2040 board, I arranged everything,
making sure to leave space for where the hole to hold the horn would be. Once everything
was in place, I glued it all together.


I also painted it to make it look like wood instead of MDF. As you can see in the picture, some cables run from the top to the bottom part.
I threaded these cables through holes and tried to hide them in the corners of the speaker. After painting it, they aren't as noticeable
anymore. and there you go, it's done :)
Materials
| Component |
Number of components |
| LM386 audio amplifier |
1 |
| XIAO RP 2040 |
1 |
| 10Ω resistor |
1 |
| 0.1μF capacitors |
2 |
| 220μF capacitor |
1 |
| 2.2kΩ resistor |
1 |
| 10μF capacitors |
2 |
| 470μF capacitor |
1 |
| 10kΩ potentiometer |
2 |
| 10w 80hm speaker |
1 |
| dc motor |
1 |
| 6V power supply |
1 |
| Aux. cable |
1 |
| MDF casing |
The necessary pieces |
| 3D-printed horn |
1 |
Conclusion
During the project, I made many changes, for example I decided to change the design of my initial sketch to one that is
a bit more realistic, both for the horn and the casing.
Also in the electronic part, initially I thought about using 3 buttons for three different speeds, but I decided it was
better to use a potentiometer. Similarly for the motor electronics, I had already designed a board with an xiao rp2040 in
week 12.
Files: