MY GORGEOUS INPUT DEVICE🎀🧸✨
Hey there guuuuurl, welcome to this week's assignment where we're diving into the world of input devices omg yaaaas iknow...
For this week’s assignment I decided to program my XIAO week 4 board with a print which shows me the distance an object is between my cute ultrasonic sensor and it. Also I practiced with the ESP 12-F board I made at output design week connecting my ESP with an humidity sensor at the board and printing it online at my cute IP (If you wanna take a deeper dive into the communications go to networking and com week sweetie).
I USED MY XIAO 🎀BOARD🎀👆🏽 DONE IN WEEK 4, IF YOU WANNA KNOW ALL ABOUT IT ALWAYS CLICK THIS LINK BELOW.
BECAUSE WHAT ITS DONE WELL ONCE ITS DONE WELL FOREVER...
SO HONEY WHAT IS AN INPUT DEVICE I DON´T GET IT!!!
An input device is a super cute tool that lets you tell your computer or microcontroller what to do. It’s how we give our lovely gadgets information and commands. Think of it as chatting with your tech bestie lol!
Some Glamorous Examples
Like typing out your secrets to your diary.
Moving your fairy cursor around the screen.
They can measure things like temperature or distance (just like our ultrasonic sensor project!).
Perfect for singing karaoke and giving voice commands.
Like the screen on your phone, letting you tap and swipe to your heart's content.
Why Are They Fabulous?
ayooooo girl! 🌸 so this setup will measure how far an object is from the sensor and display it on a cute web page using a serial monitor. Here’s the fab way to do it:
COMPONENTS NEEDED FROM MY BOARD
XIAO RP2040 The smart heart of our project.
HC-SR04 Ultrasonic Sensor: Our distance-detecting diva.

Breadboard and Jumper Wires For a neat and stylish connection.
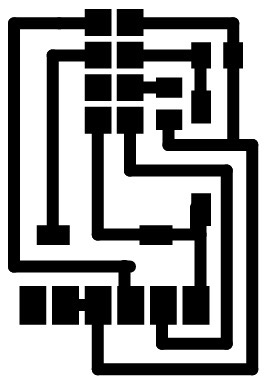
THE CIRCUIT DESIGN
VCC🌬️ HC-SR04 to 5V.
GND🌬️ HC-SR04 to ground.
TRIG🌬️ HC-SR04 to pin 7 on XIAO RP2040.
ECHO🌬️ HC-SR04 to pin 6 on XIAO RP2040.
THE CHEAT SHEET
My cute XIAO RP2040 sets up the pins and starts the serial monitor, ready to show off its smarts THEN👉🏼✨ the ultrasonic sensor sends out a high-pitched sound wave (you can’t hear it, but it’s there!). It then waits for the echo to bounce back from an object AFTER 👉🏼✨ the XIAO RP2040 calculates how long it took for the sound to come back and converts that into a distance FINALLY 👉🏼✨he distance is shown on the serial monitor, so you always know how far away things are.
For my code I searched how to get this done in Arduino and found out some inspiring codes that got me started, I noticed that they all had something in common : declaring the pins, printing the results and delaying the results some seconds so it had a better outcome. I mixed up the codes and added a touch of myself to make this one work out.
This were the code references I used to take inspiration, omg I watched like 5 different videos to get into a result but it was totally worth it yaaaas.
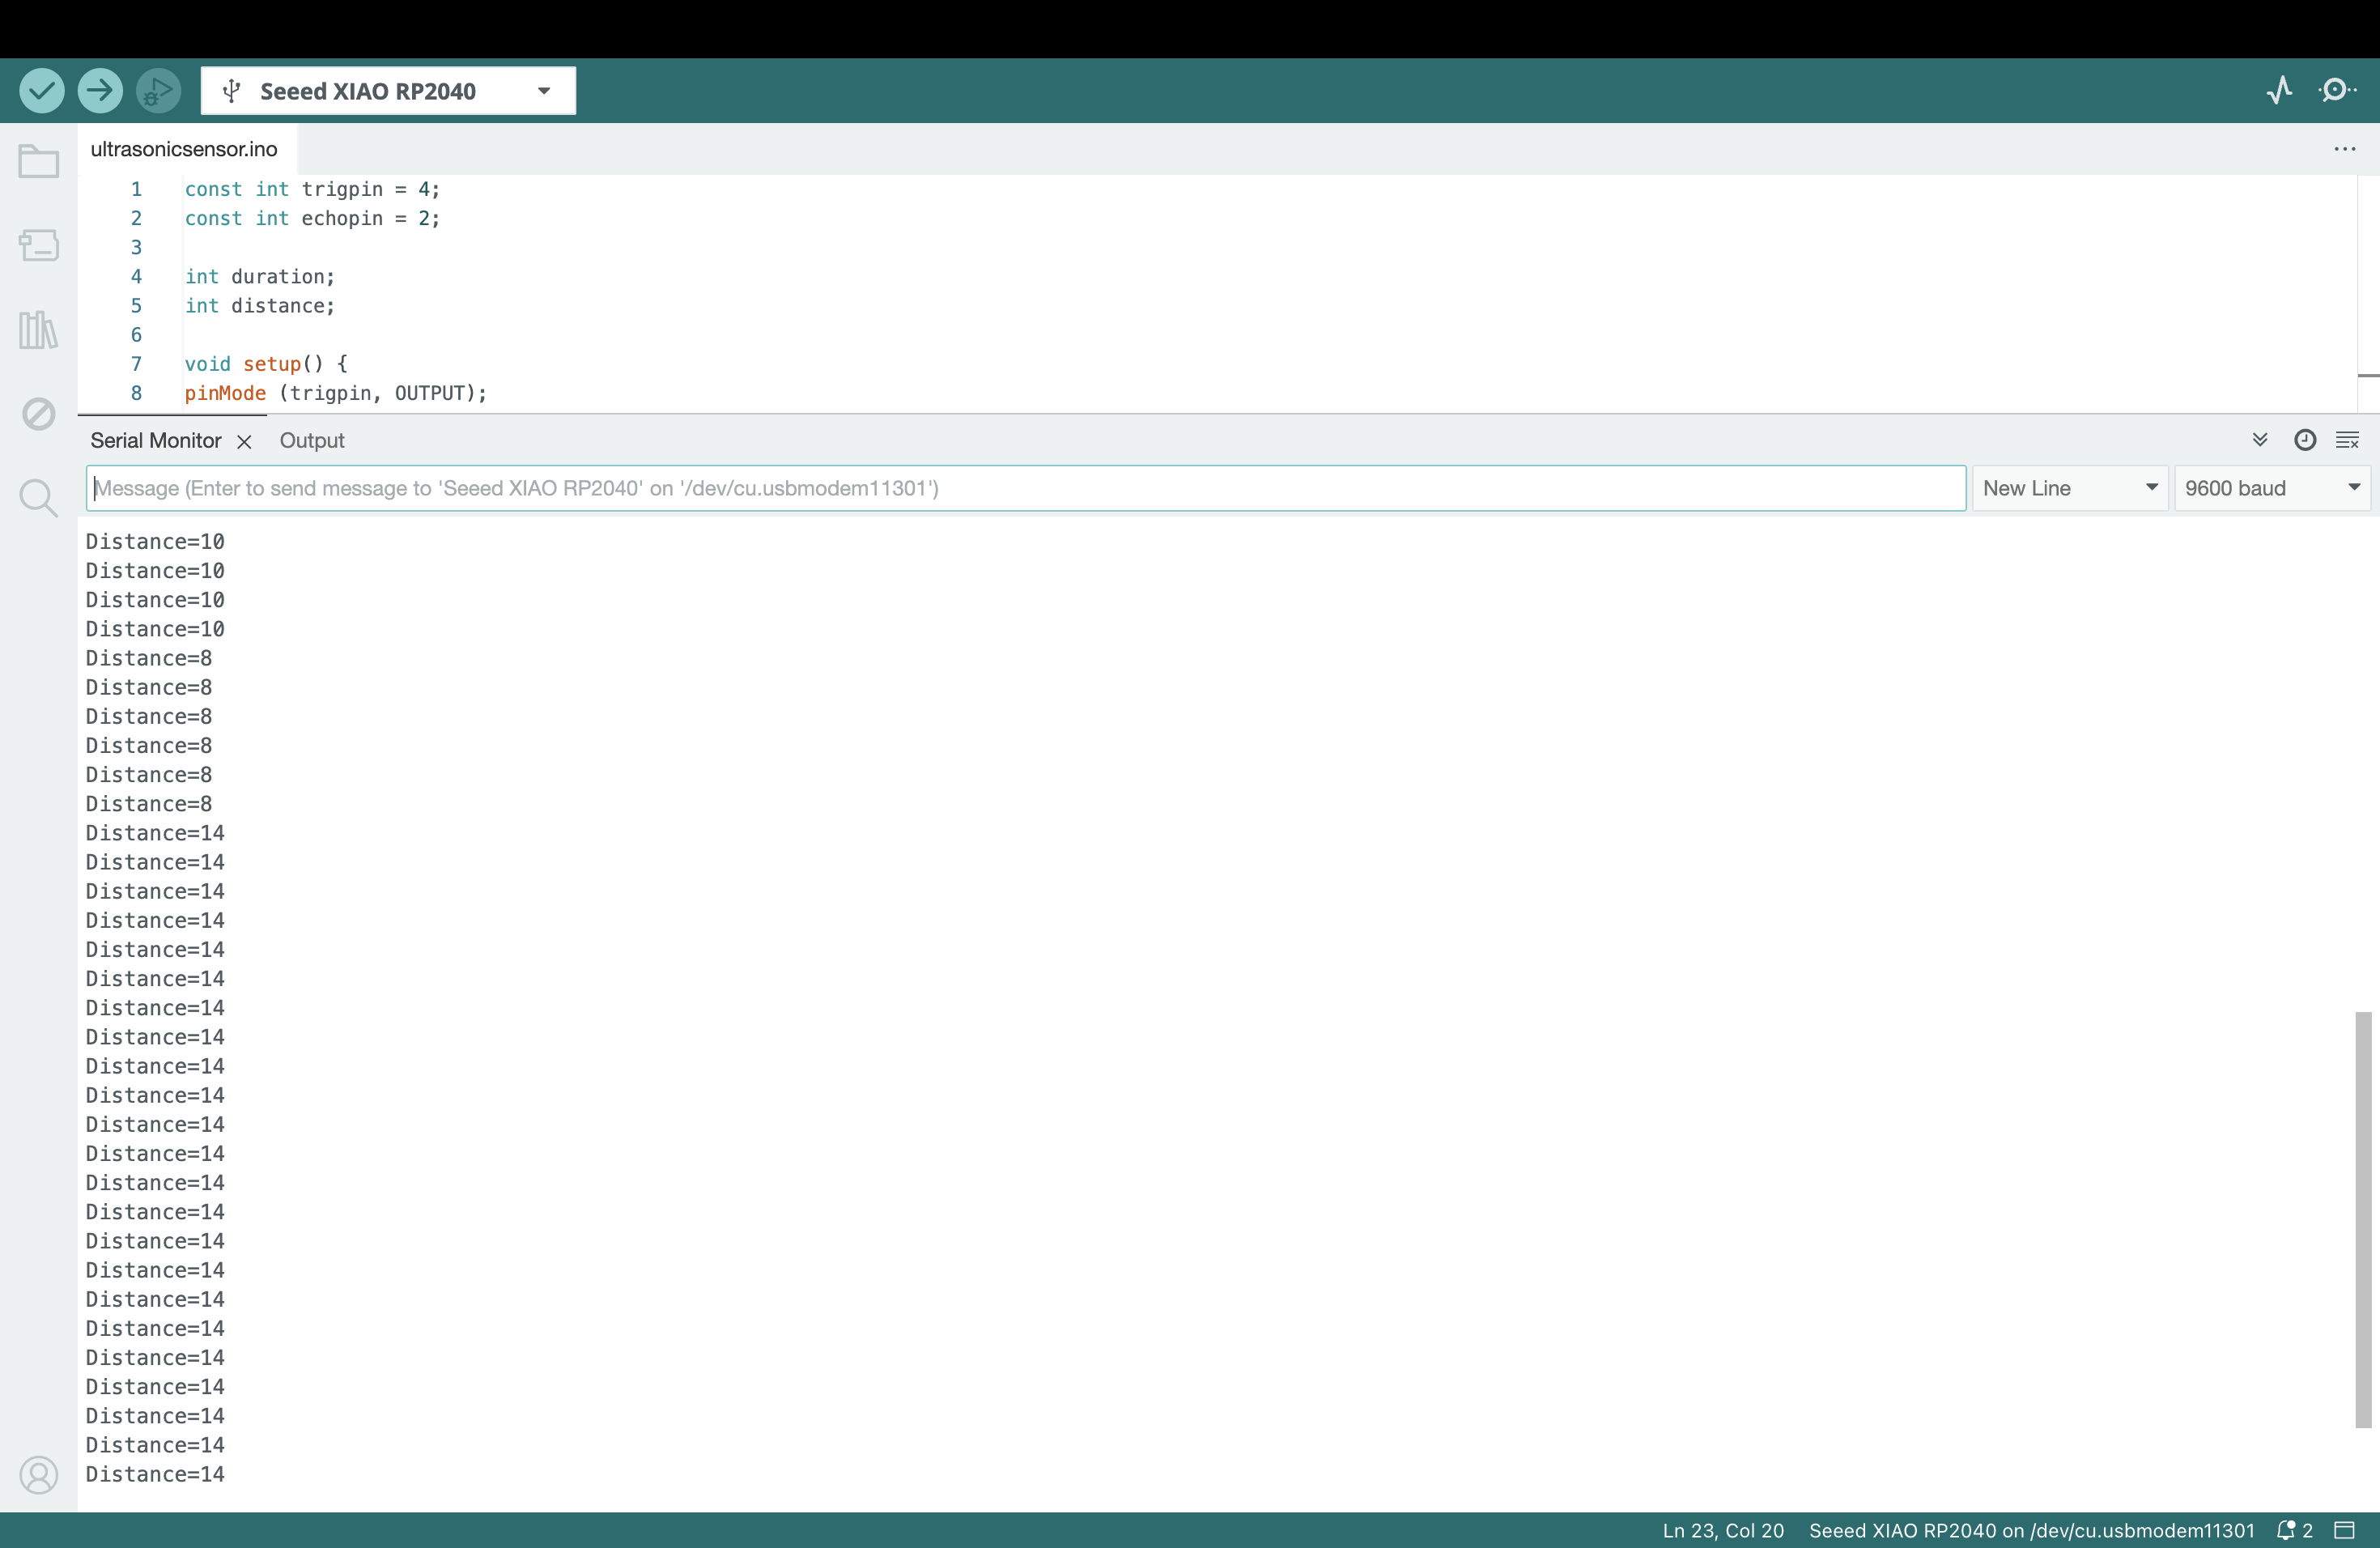
And so it did! It worked out and everytime an object was close to it immediately the results changed.
For all of this super knowledge and incredible lessons this is the Fab lab´s Puebla weekly task, feel free to take a look so you can undertsand it much better
⬇️
Our group weekly task ---->
So I decided to try out my XIAO board (For the design information click the link below, everything is at my week 4 assigment bae), cus, why not gurl? I did everything good so it could work out so to try this out I started by hooking up an ultrasonic sensor to it. Now get some popcorn and a soda, here's how I programmed it to print out distances.
First things first, I 🔥 up my Arduino app, 'cause that's where the magic happens. Then, I grabbed my ultrasonic sensor and soldered it to my XIAO board. It's like connecting the dots, for starters. Always be careful to solder it nicely and smooth, remember that it needs to look bright and shiny with any lumps in it.
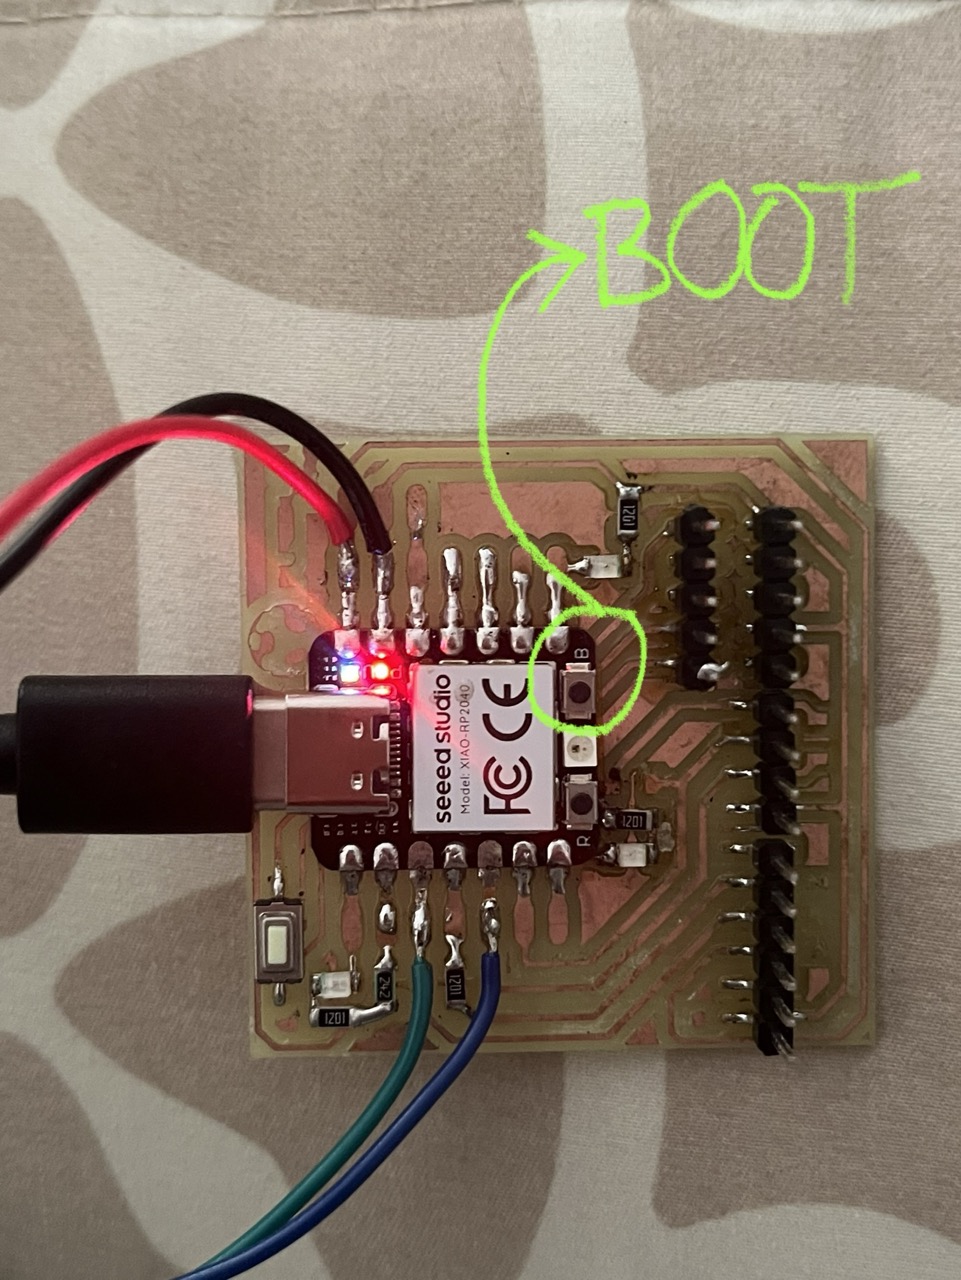
For the reconfiguration of the xiao always remember to hit BOOT button so every code that was previosly uploaded in it goes away. Always always always import your libraries before using them.
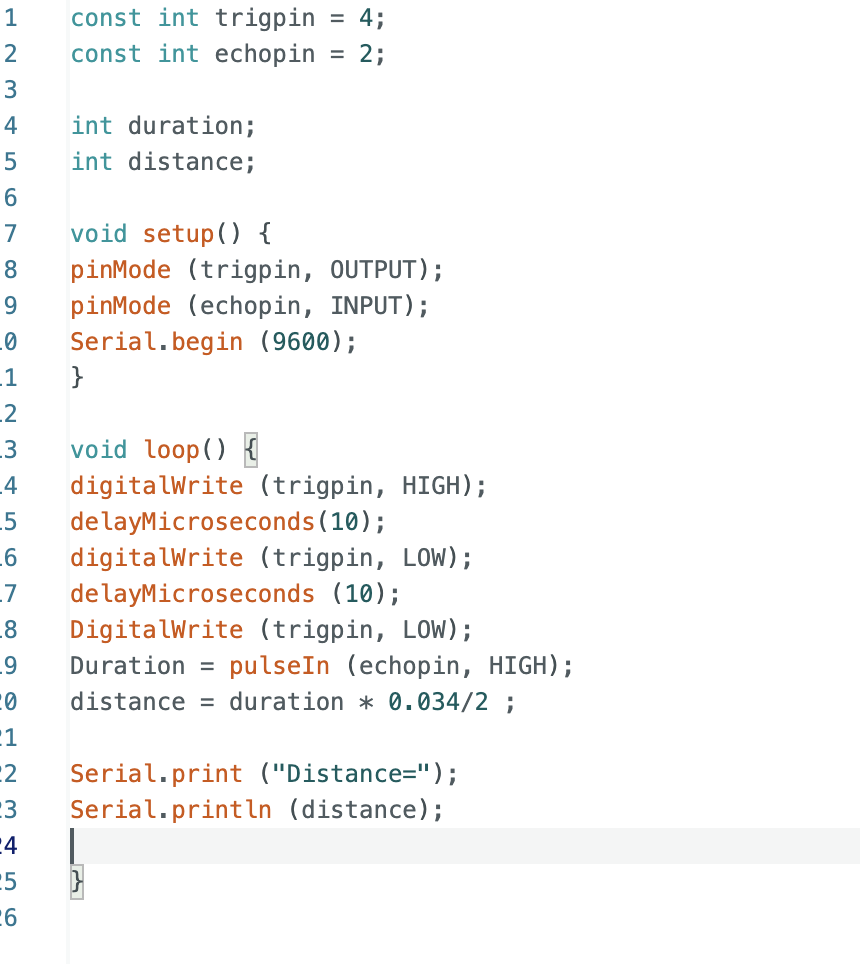
Next up, I dove into the code. I wrote this neat little script that goes something like this:
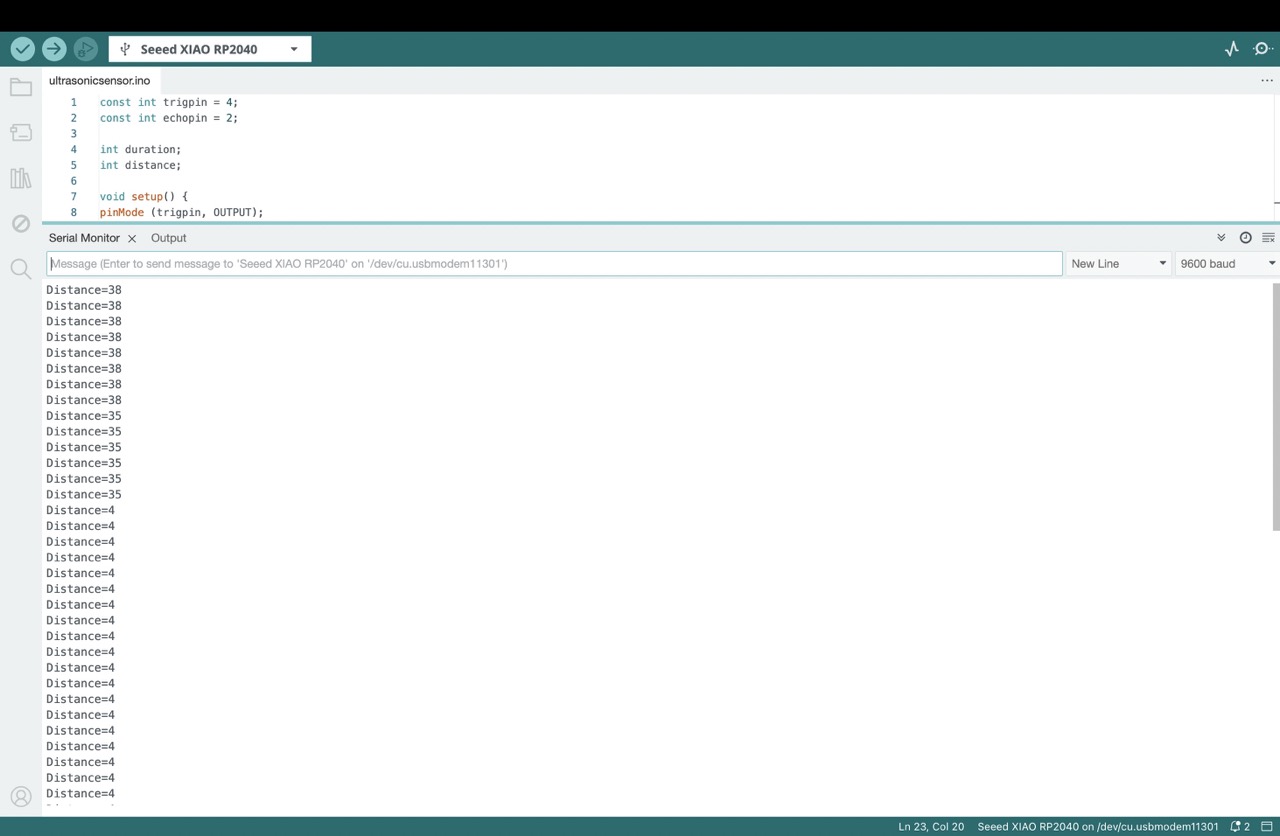
Alright that’s done and now for the software section… I set up the pins for the ultrasonic sensor in the setup() function. Then, in the loop() function, we do this little dance where we send out ultrasonic pulses, measure the time it takes for them to bounce back, and then calculate the distance based on that time. And then I printed out those distances to the serial monitor. It's like our little device is chatting with us, telling us how far things are. That was super cute because my cute board was talking to me aww.
AND THERE YOU HAVE IT IT´S WORKING SO PERFECT!!
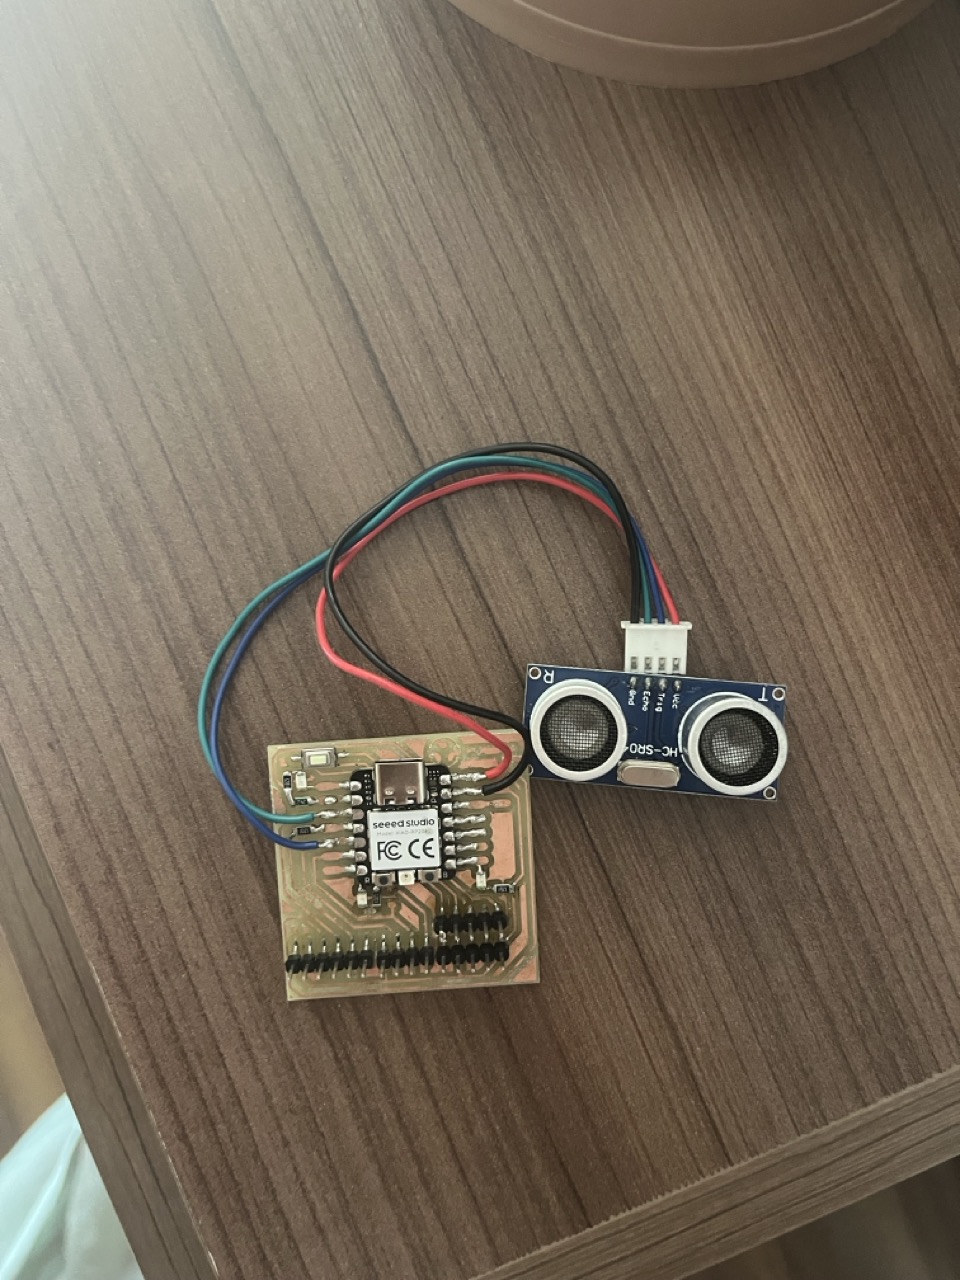
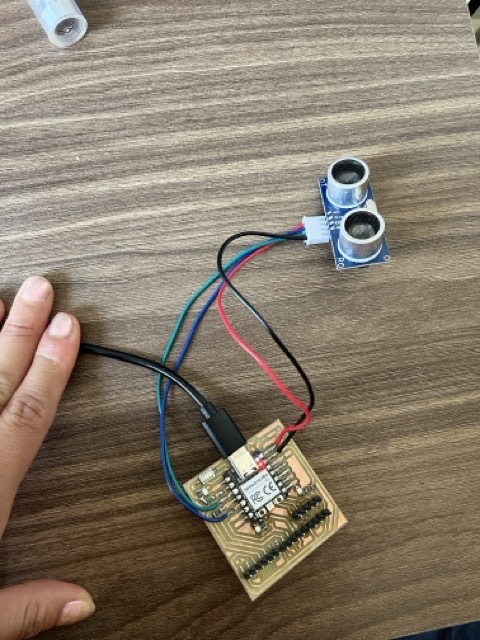
Now check out my pretty board construction
My hard work pics📸
❀✿REMEMBER THAT THIS IS A CAROUSEL CLICK THE ➤ TO SEE ALL THE PICS!!❀✿
SOOOO I DID ANOTHER INPUT DEVICE🎀🧸✨ FOR MY NETWORKING AND COMMUNICATIONS WEEK HUN IF YOU WANNA SEE ALL ABOUT IT ALWAYS CLICK HERE--->
SO WHAT I LEARNED HUN? TBH in this project, I learned to program and interface sensors with microcontrollers, specifically the XIAO RP2040 and ESP8266. I explored measuring distance using an ultrasonic sensor and tracking humidity with a DHT22 sensor. I gained nails on experience in circuit design, soldering, and ensuring smooth, shiny connections. Using the Arduino IDE, I wrote code to capture sensor data and display it on a web page via the ESP8266. This project also taught me about setting up a web server, creating a user-friendly interface, and understanding the fundamentals of networking and communications. It was a fabulous journey into smart home technology and practical electronics. Also I understood how relays worked and how diodes can be totally used as flyback diodes OMG THAT WAS THE BEST!! AND ALSO HOW Always always ALWAYS the data sheets really are super necesary for everything lol. Thankfully I didn´t had any problems at doing this assignment hun.