

11. Input Devices
For this weeks assignment, we are taking a look into the recieving information part of electronics. Input devices recieves data out of a set system and relays that information into our microprocessor. This way, we can take a physical input from the exterior and translate it into information for us to read
Extra information about probing digital and analog signals can be found at Input Devices Fab Ibero Puebla´s Page
Common examples of these are your keyboard, mouse, microphone, buttons, potentiometers, etc.
The most important sensor I will be using in my final project are a type of sensor called "Hall Effect Sensor". This type of sensors outputs a voltage proportional to a magnetic field across it. It just means that it will output a lineal analog signal depending on how close a magnetic field (a magnet) is close to it. These generally are very reliable, cheaps sensors that reads movement within fixed objects.
The cheapest, most simple sensor of this kind that I could find are the 49E transistor, I ordered them online and they were about 75 US cents each. They have the typical 5v input, ground and analog output.
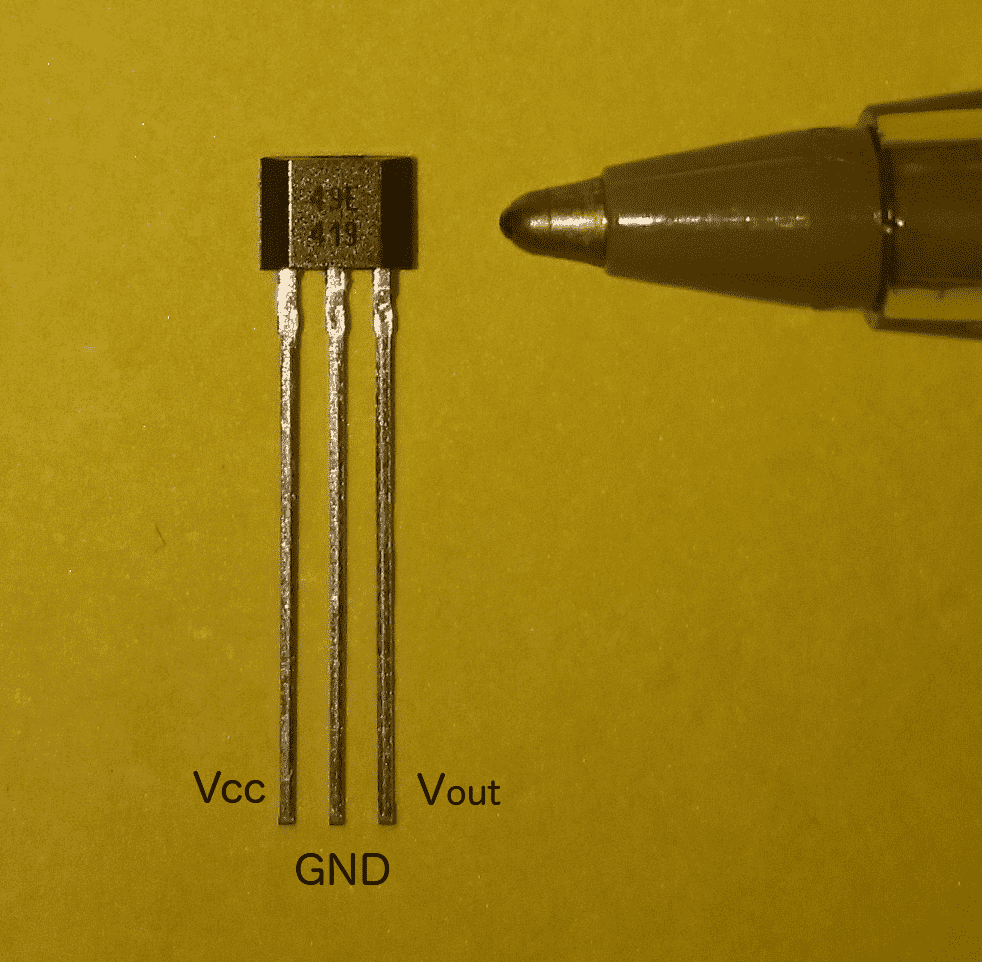
Note: There are also digital output Hall effect sensors, basically they act like an open switch until they get close to the magnet, then they close. I did not know that when I first bought Hall effect sensors, so to my surprise, they did not have an analog output and rather a digital 0 or 5 volts one, this doesn´t work for me because I need an analog output, not a digital one :( So I had to buy analog output Hall effect sensors on the internet.
This is the size comparison between the transistor and the XIAO PCB I did. Which is actually where I will test this sensor. Check how I made it on my Electronics Design Week
The way I will connect the sensor to the PCB is that I will solder female jumper wires to each leg of the transistor:
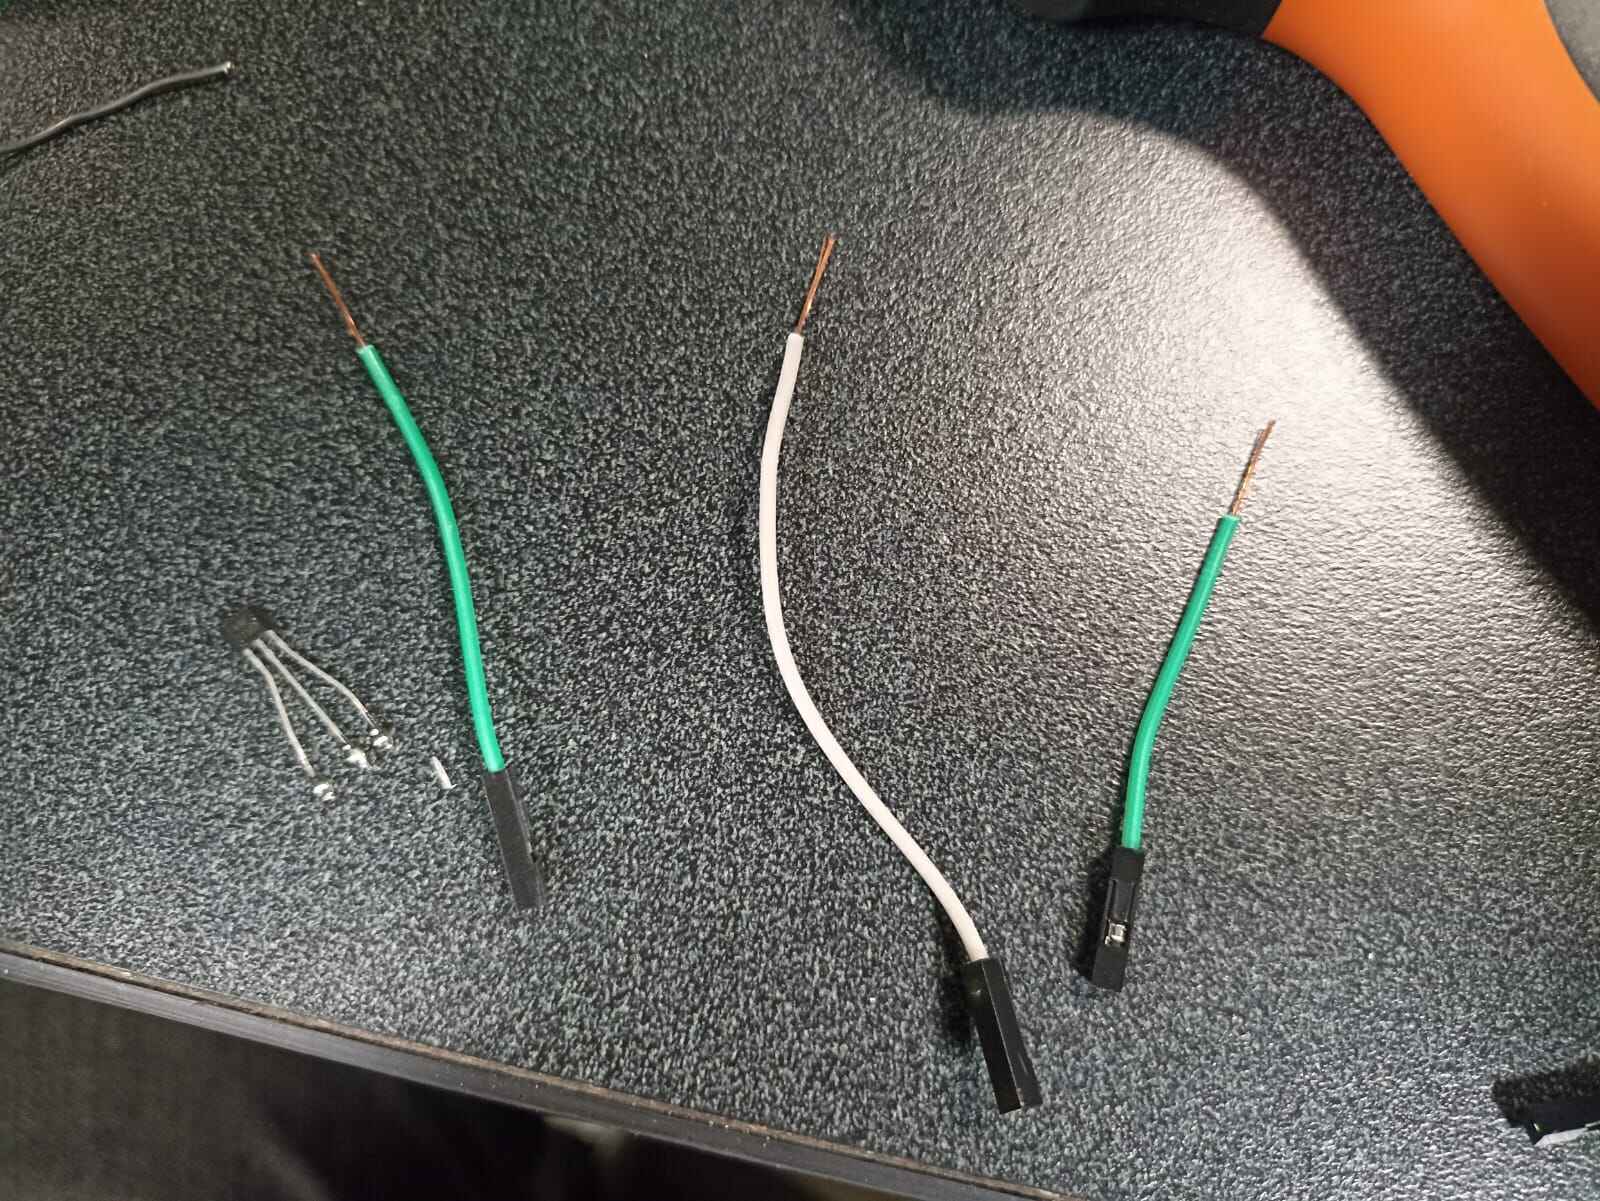
Once soldered, I connected each cable to the respective 5 volts, GND and analog input in the Pin 29

The magnet I will be using is just your average rectangle magnet, not sure of what material it´s made out of.
With all this, we need to upload a simple code to the XIAO using the Arduino IDE.
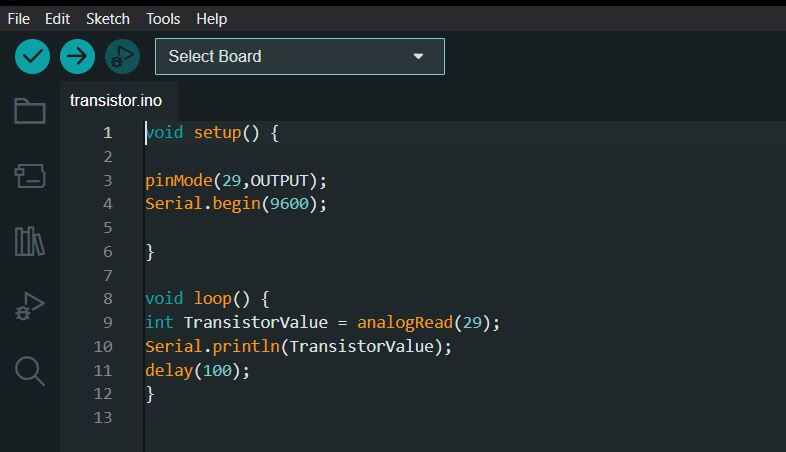
This just initializes the serial monitor at 9600 bauds, and reads the analog value on Pin 29 with a 100 millisecond delay. I will also be using the serial plotter option to show the data as it better shows the changes in value it recieves and also looks way cooler.
The default value with no magnet close is around 800, and as the magnet gets closer, it drops as low as 300, and it has an suprising amount of resolution and low noise levels. I didn´t record this but it also the value goes up to 1000 if I get the other side of the magnet gets close.
Conclusions:
These sensors are far more accurate that I expected. I thought they would have more noise input and the signal would be unrealiable. I did however had to get very close to the sensor for it to actually change in value. This probably could be solved using a stronger magnet, and that maybe could also improve the resolution. But as far as how close the measurement where to the physical value, I think it was pretty much exact.