Week 9
Input Devices
- Probe an input device's analog levels and digital signals
Input Devices
For this week we were asked to probe an analog and digital input. We decided on two biomedical devices to test this.
- Sparkfun AD8232 Heart Rate Monitor as the anlog input to probe
- MAX30102Blood Oxygen Sensor Pulse for the digital
Heart Monitor
For this analog sensor we need to do two types of wiring from the sensor, the first one is to our probe where we will follow the next image
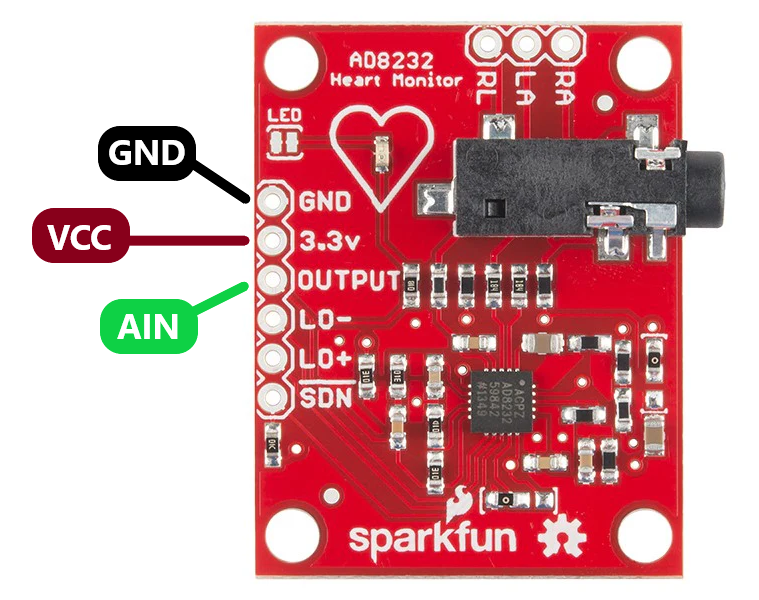
Where we will connect both VCC and GND to a 3.3V power supply, and AIN and GND to our oscilloscope probe.
For our second wiring we need to connect the sensor to a person whom we will monitor its heart rate, as it's an electrocardiogram sensor there's very specific places to place the sensor. This are given by the einthoven triangle. As seen in the following image taken from wikipedia. This positioning is dependant which type of heart signal we are measuring.
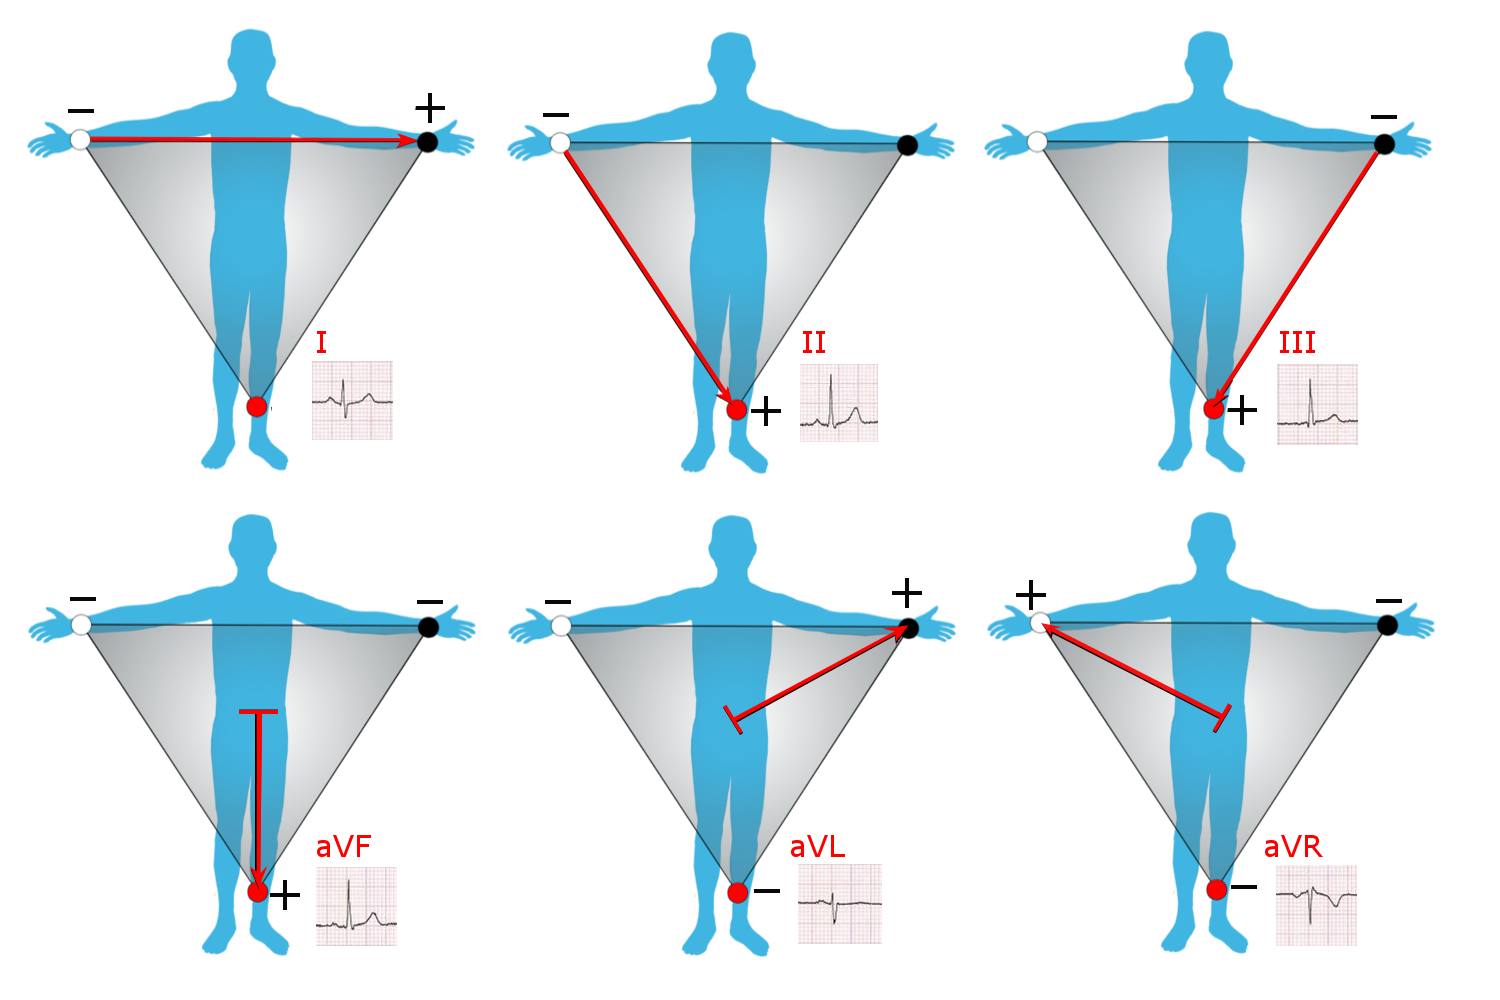
We are measuring Lead II, so we wired the cables to the wrists and ankle of our "patient"
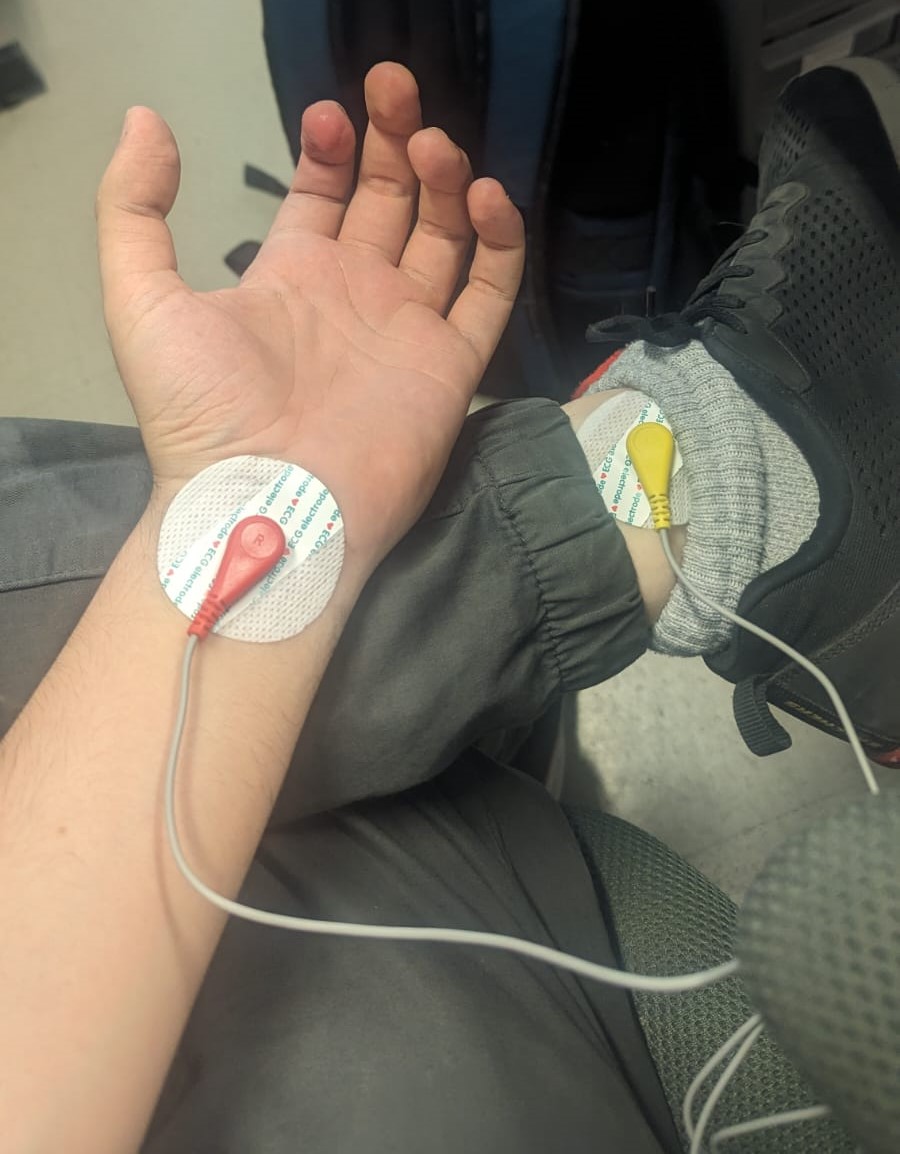
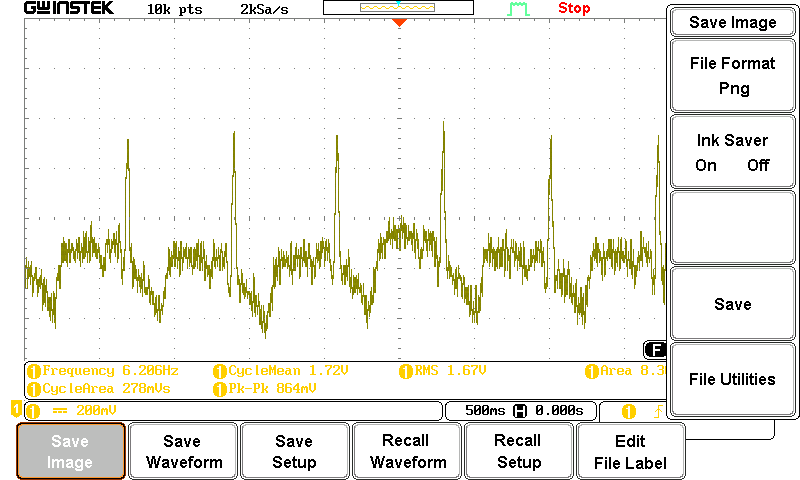
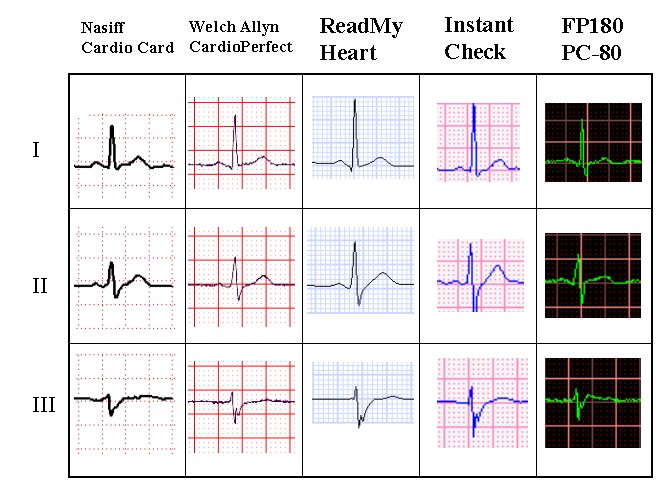
From there we used our oscilloscope to se the signal. Which looks like a noisy version of the examples we took from this article to comapre
Blood Oxygen
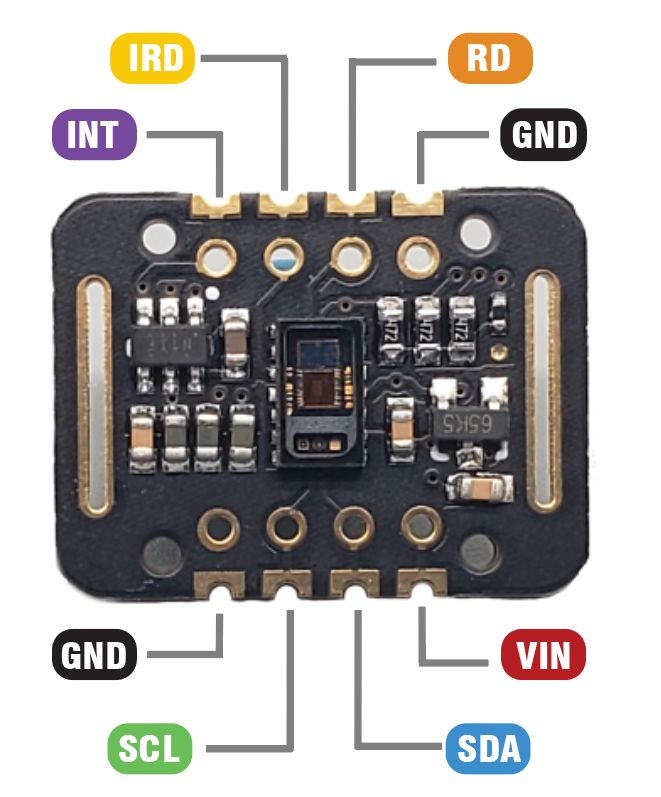
For our digital input, our sensor uses I2C protocol to send the data so in this case we need a microcontroller to make it work. Therefore we use the following wiring. Where we will connect GND to GND, Vin to 3.3V, SCL to SCL and SDA to SDA
We will use a XIAO RP2040 and we will upload the following code to obtain a few data with the following code:
                        #include
                        #include "MAX30105.h"
                        #include "spo2_algorithm.h"

                        MAX30105 particleSensor;

                        #define MAX_BRIGHTNESS 255

                        #if defined(__AVR_ATmega328P__) || defined(__AVR_ATmega168__)
                        uint16_t irBuffer[100];
                        uint16_t redBuffer[100];
                        #else
                        uint32_t irBuffer[100];
                        uint32_t redBuffer[100];
                        #endif

                        int32_t bufferLength;
                        int32_t spo2;
                        int8_t validSPO2;
                        int32_t heartRate;
                        int8_t validHeartRate;

                        byte pulseLED = 11;
                        byte readLED = 13;

                        void setup()
                        {
                            Serial.begin(115200);
                            pinMode(pulseLED, OUTPUT);
                            pinMode(readLED, OUTPUT);
                            if (!particleSensor.begin(Wire, I2C_SPEED_FAST))
                            {
                                Serial.println(F("MAX30105 was not found. Please check wiring/power."));
                                while (1);
                            }
                            byte ledBrightness = 60;
                            byte sampleAverage = 4;
                            byte ledMode = 2;
                            byte sampleRate = 100;
                            int pulseWidth = 411;
                            int adcRange = 4096;
                            particleSensor.setup(ledBrightness, sampleAverage, ledMode, sampleRate, pulseWidth, adcRange); //Configure sensor with these settings
                        }
                        void loop()
                        {
                            bufferLength = 100;
                            for (byte i = 0 ; i < bufferLength ; i++)
                            {
                                while (particleSensor.available() == false)
                                particleSensor.check();

                                redBuffer[i] = particleSensor.getRed();
                                irBuffer[i] = particleSensor.getIR();
                                particleSensor.nextSample();
                            }
                            maxim_heart_rate_and_oxygen_saturation(irBuffer, bufferLength, redBuffer, &spo2, &validSPO2, &heartRate, &validHeartRate);
                            while (1)
                            {
                                for (byte i = 25; i < 100; i++)
                                {
                                    redBuffer[i - 25] = redBuffer[i];
                                    irBuffer[i - 25] = irBuffer[i];
                                }

                                for (byte i = 75; i < 100; i++)
                                {
                                    while (particleSensor.available() == false)
                                    particleSensor.check();
                                    digitalWrite(readLED, !digitalRead(readLED));
                                    redBuffer[i] = particleSensor.getRed();
                                    irBuffer[i] = particleSensor.getIR();
                                    particleSensor.nextSample();
                                    Serial.print(F(", SPO2="));
                                    Serial.print(spo2, DEC);
                                }
                                //After gathering 25 new samples recalculate HR and SP02
                                maxim_heart_rate_and_oxygen_saturation(irBuffer, bufferLength, redBuffer, &spo2, &validSPO2, &heartRate, &validHeartRate);
                            }
                        }
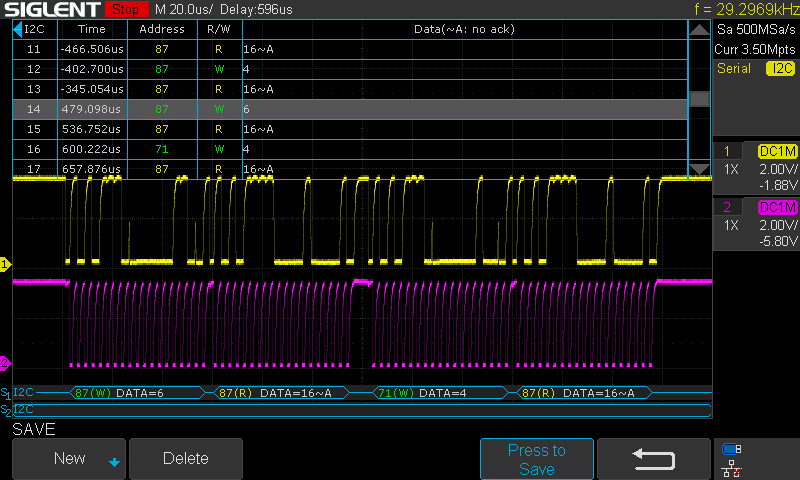
Here we can see in pink the SCL signal which is the clock and in yellow the SDA which is the data being send, we also can see the decode function which can tell me which value is being passed, and the acknowledge or more precisely No acks which means the data being send is bigger than 8bits and therefore when the message being send finishes.