Output devices
In this week's assignemt we just had to add an output device to the microcontroller board we design on week 8 and program it to do something.
Fortunately, the way I designed the microcontroller board last week allows me to connect different output devices like speakers, motors and servomotors or displays, the last two are the ones I chosed.
Display OLED
 The Organic Light-Emitting Diode, or simply OLED, is an alternative for LCD display. Unlike a LCD display, OLEDs does not require a
backlight beacuse it generates its own light. The absence of a backlight reduces power consumption using about 20mA
on average and it opreates at 1.65V to 3.3V.
The Organic Light-Emitting Diode, or simply OLED, is an alternative for LCD display. Unlike a LCD display, OLEDs does not require a
backlight beacuse it generates its own light. The absence of a backlight reduces power consumption using about 20mA
on average and it opreates at 1.65V to 3.3V.
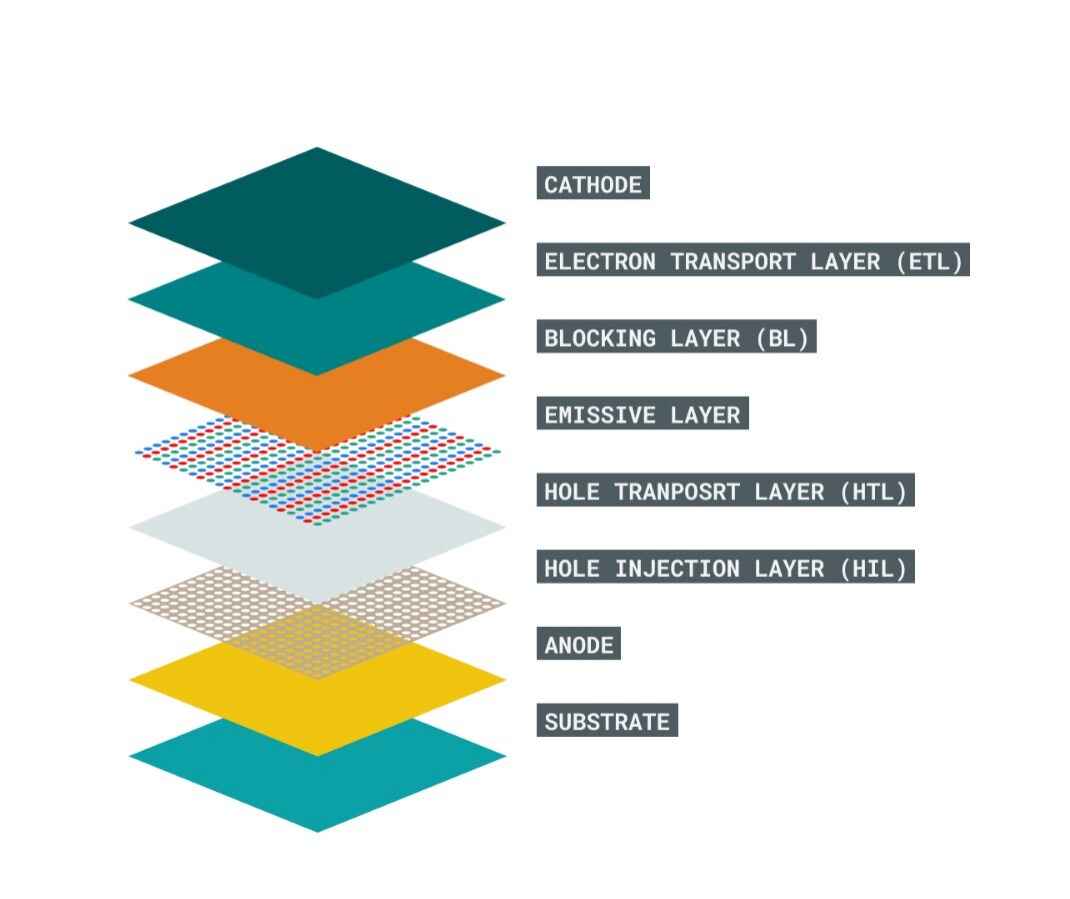
The OLED consist of several layers that are placed between an anode and a cathode layer, and because it uses no backlight, each individual pixel needs to be turned on.
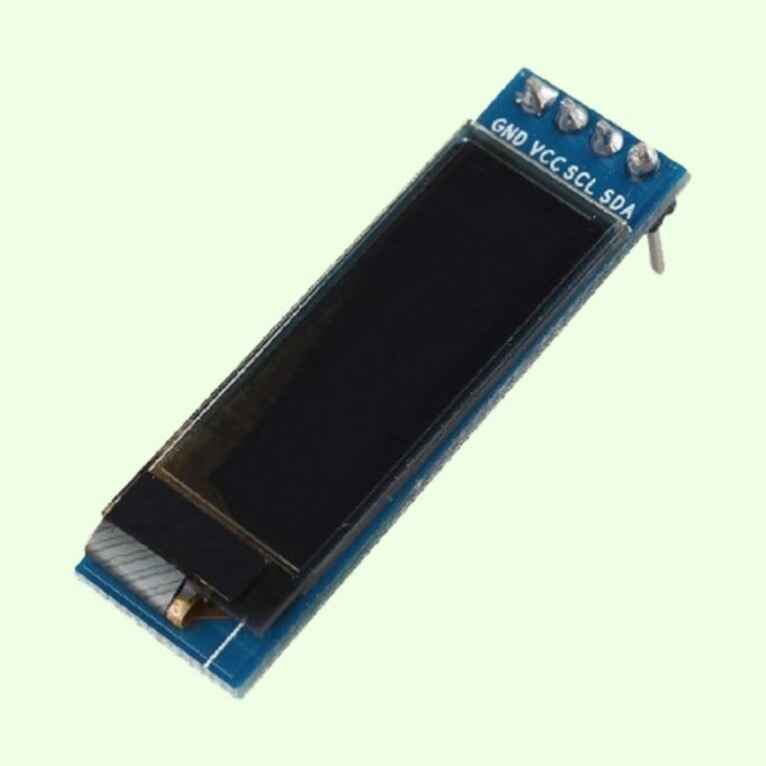
The OLED 0.91 inch is a monochrome graphic display with a resolution of 128x32 pixels. This displays dont need back light and it has a lower power consumptions making them better than a traditional LCD display.
Pins
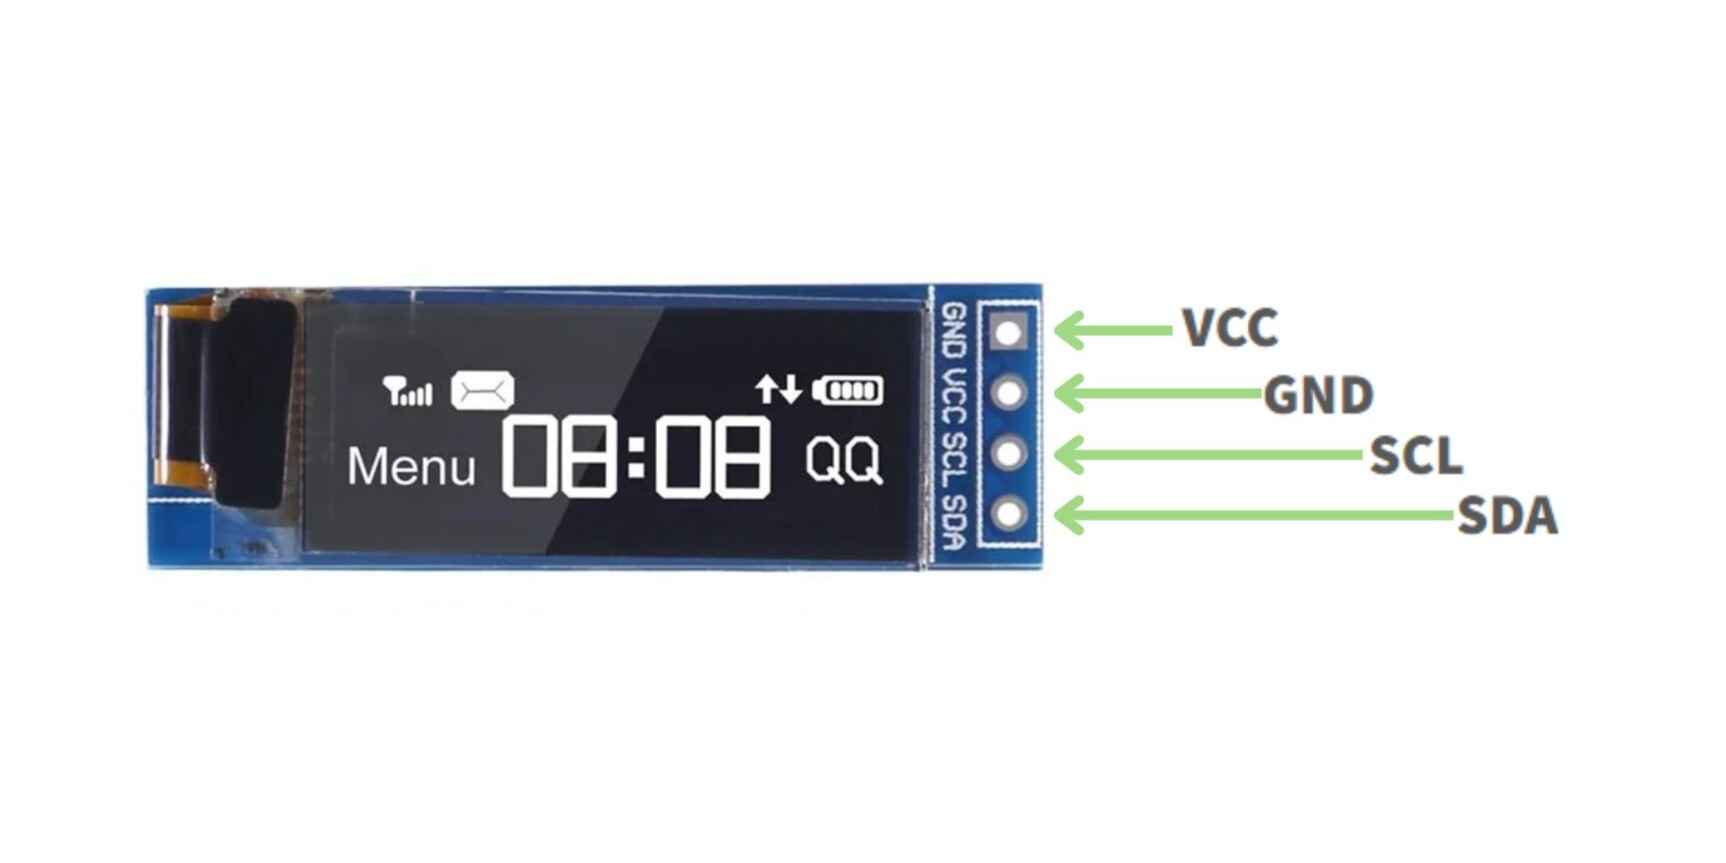
The display OLED only has four pins to allow the display management. It is power by a microcontroller, in this case, the attiny 45.
VCC: Power Pin.
GND: Connect to microcontroller's ground.
SCL: I2C communication clock.
SDA: I2C Data line.
I2C is a two-wire serial communication protocol using a serial data line (SDA) and a serial clock line (SCL). The protocol supports multiple target devices on a communication bus and can also support multiple controllers that send and receive commands and data.
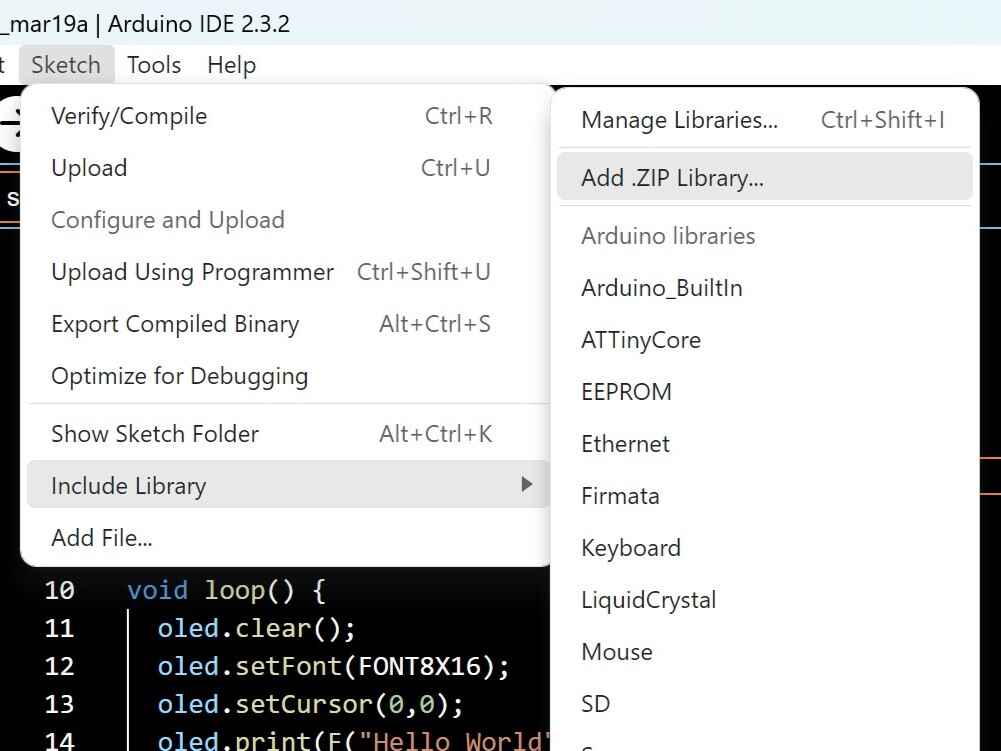
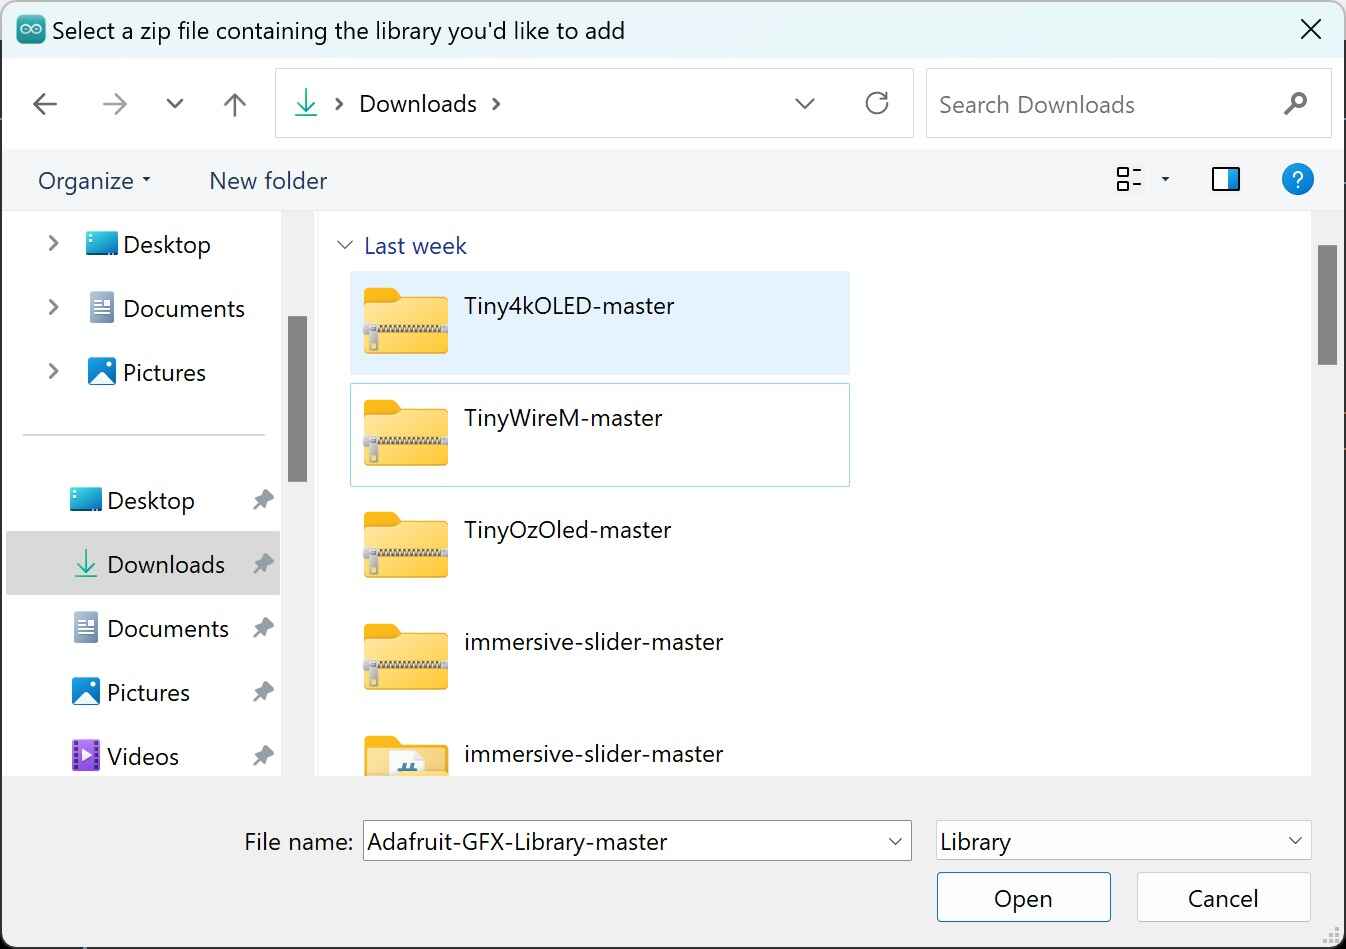
Libraries
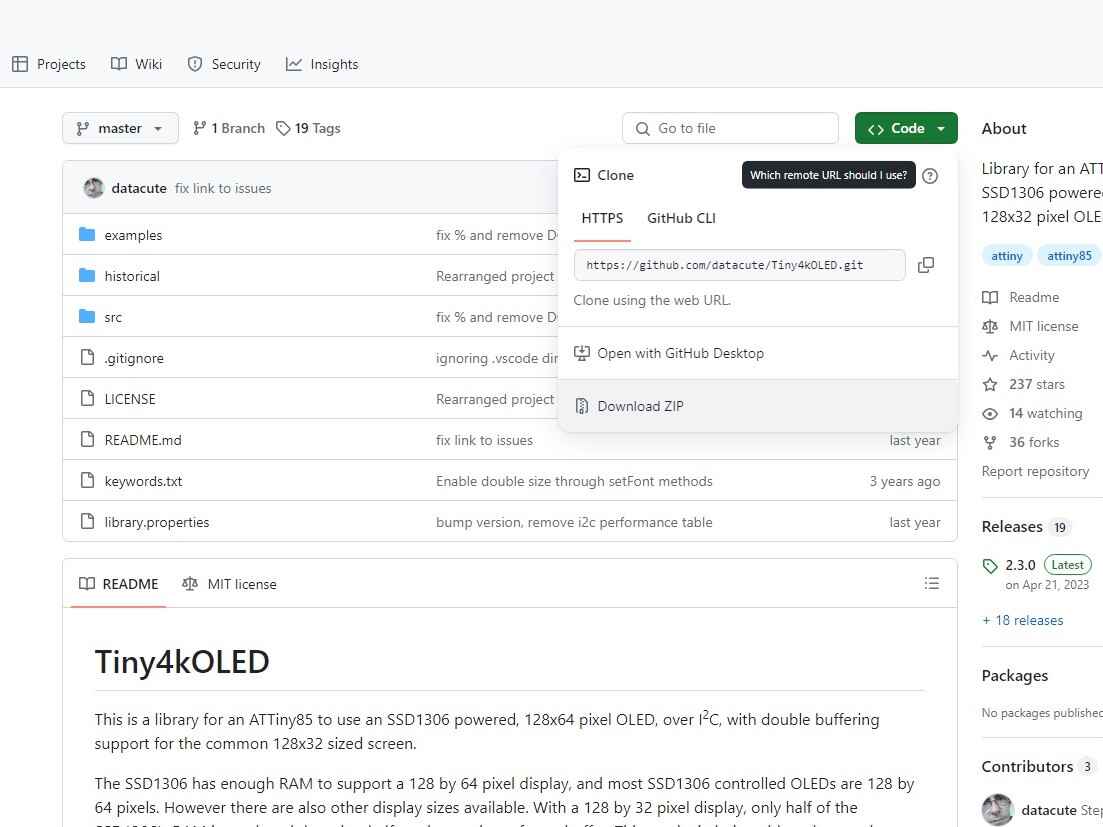
There are a bunch of libraries for the display OLED like the TinyOzOLED.h that has basic funtions or Adafruit_GFX.h and Adafruit_SSD1306.h which contains a lot of functions and animations but the one I chosed was Tiny4OLED.
The reason I am going to use this libray is beacuse the Attiny 45 has limited Flash and SRAN memory and this library contains funtions that reduce the amount of RAM that is consumed. To get this library working we also need a prerequisite library called TinyWireM.h.
Functions
Here are some functions that the library contains:
	oled.begin();			//Send the initialization sequence to the oled. This leaves the display turned off
	oled.clear();			//Clear the memory before turning on the display
	oled.on();			//Turn on the display
	oled.switchRenderFrame();	// Switch the half of RAM that we are writing to be the half that is non
					currently displayed
	oled.setFont();			//Set the font of the text
	oled.setCursor();		//Position the cusror (X IN PIXELS, Y IN ROWS OF 8 PIXELS STARTING WITH 0)
	oled.print(F(""));		//Write the text to oled RAM (which is not currently being displayed)
					// Wrap strings in F() to save RAM!
	oled.switchFrame();		//Swap which half of RAM is being written to, and which half is being displayed
Coding
A friend of mine, Santi, also tested his display with and attiny45. What he was trying to do was an animation I believe and unluckily he burned the microcontroller, that's why I'm going to make a simplier test.
To test the display I made the following code, which only display two text "Fab Academy :)".
	#include "Tiny4kOLED.h"		 //Library for the display

	void setup() {
	  oled.begin();			//Initialization of the oled
	  oled.clear();			//Clear the display
	  oled.on();			//Turn on the display
	  oled.switchRenderFrame();	//Switch RAM
	}

	void loop() {
	  oled.clear();			//Clear the display
	  oled.setFont(FONT8X16);	//Set the font of the text
	  oled.setCursor(10,10);	//Position of the cursor
	  oled.print(F("FAB ACADEMY :)"));	//Write the text
	  oled.switchFrame();		//Swap RAM
	  delay(3000);			//Delay of 3 seconds
	}
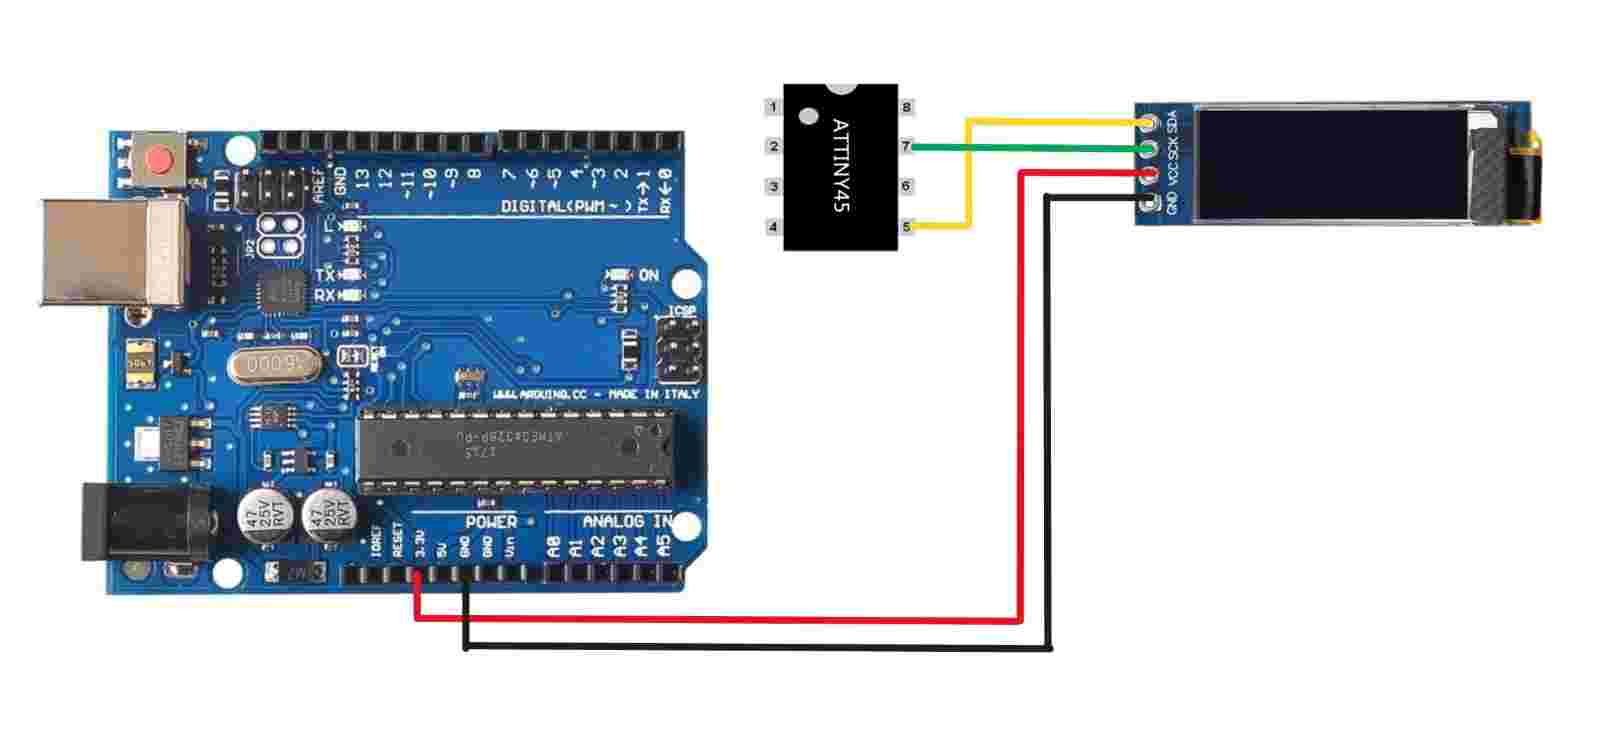
Schematic
Heres is how I connected the OLED to the attiny and the arduino uno.
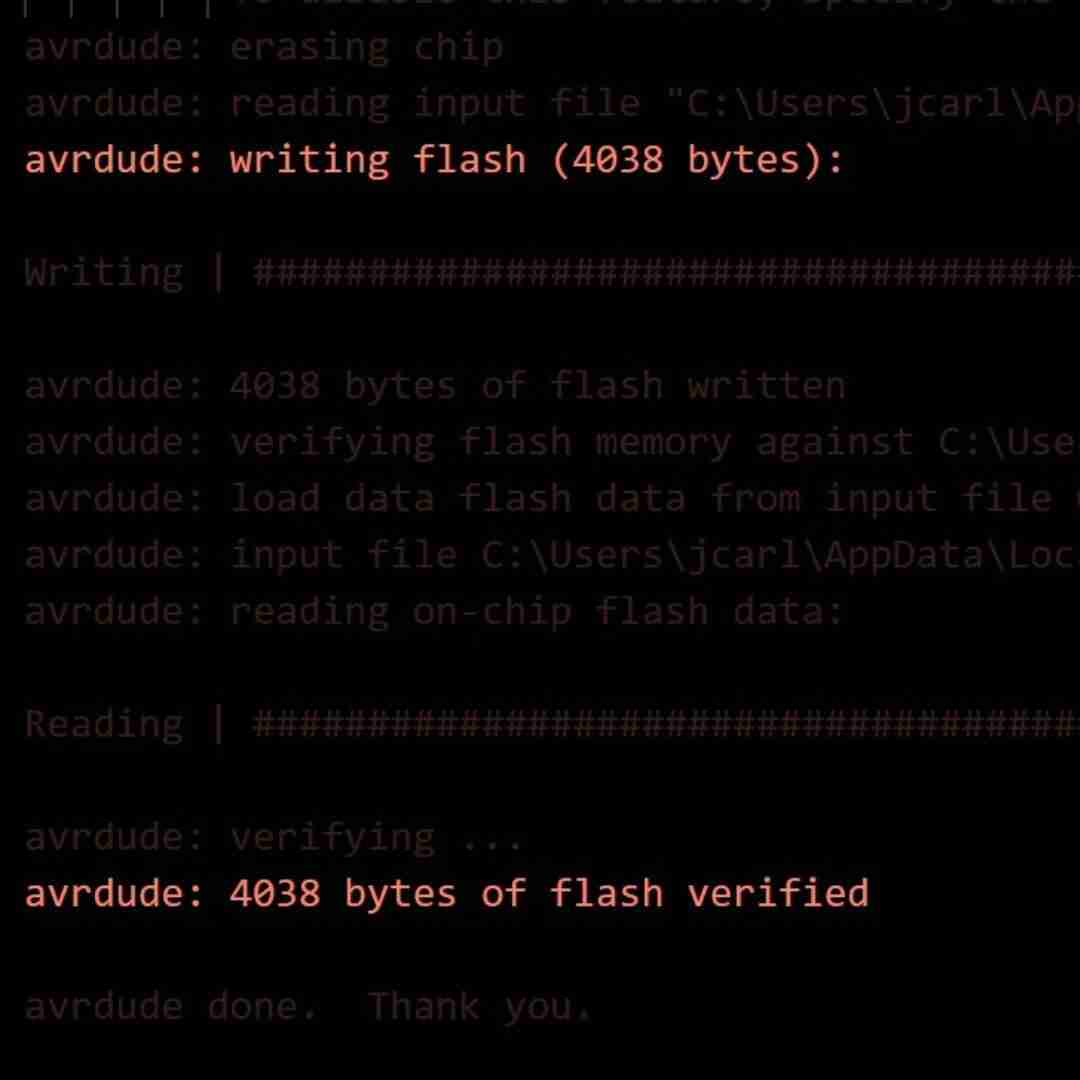
Result
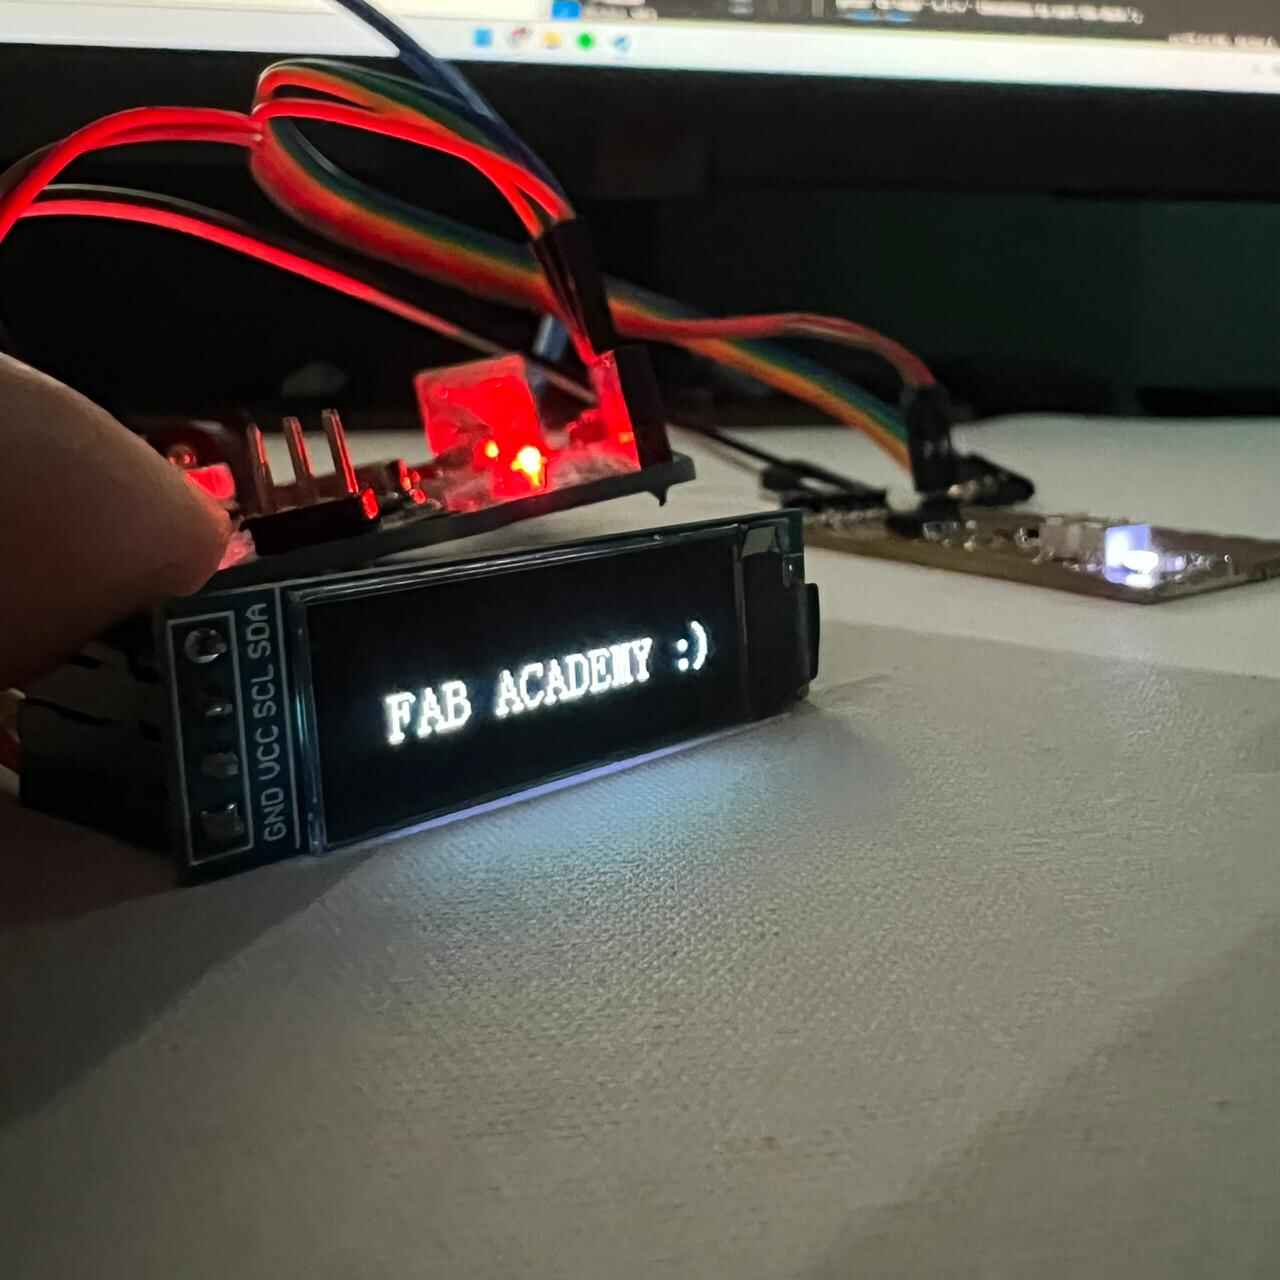
I tried adding another text underneath but beacuse of the limitations of the RAM I couldn't. The attiny45 only provides 4k bytes of InSystem Programmable Flash and the last code uses 4038 bytes.
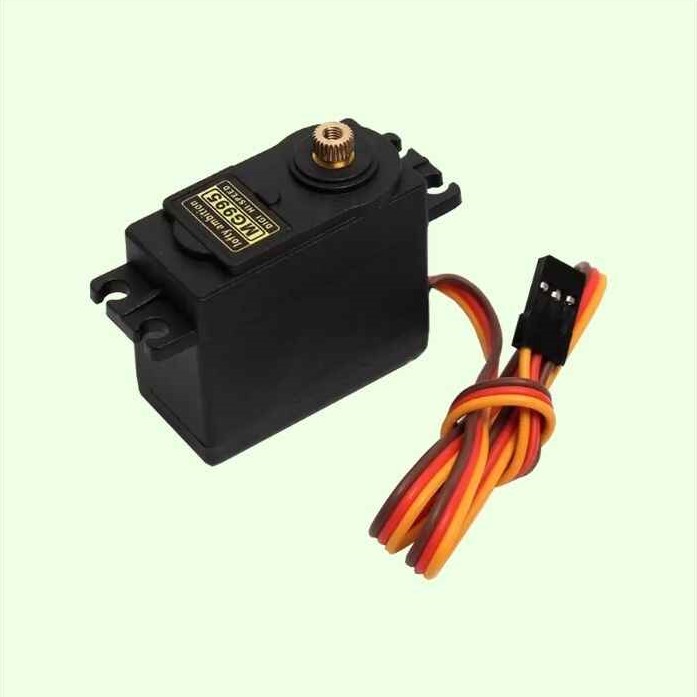
Servomotor
A servomotor is a rotary or linear actuator that allows for precise control of angular or linear position, velocity, and acceleration in a mechanical system. A servo motor can usually only turn 90° in either direction for a total of 180° movement. The servo operates off of a 4.0V to 7.2V power supply and it can draw as much as 0.5A.
Servos are controlled by sending an electrical pulse of variable width, or pulse width modulation (PWM), through the control wire. the PWM sent to the motor determines the position of the shaft, and based on the duration of the pulse sent via the control wire, the rotor will turn to the desired position. The servo motor expects to see a pulse every 20 milliseconds (ms), and the length of the pulse determines how far the motor turns.
Pins
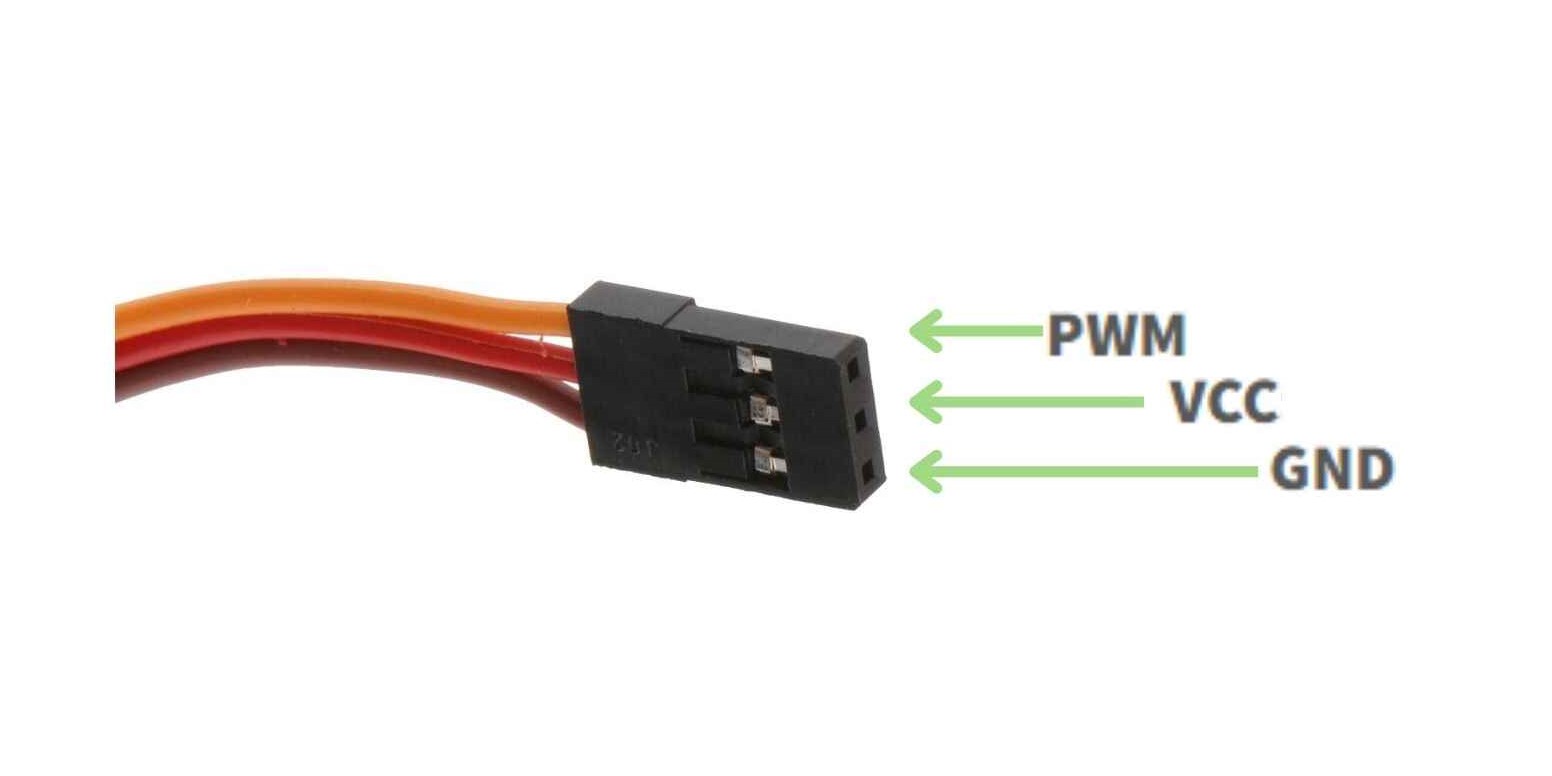
The servomotors only have 3 pins.
VCC: Power Pin.
GND: Connect to microcontroller's ground.
PWM: Connect to any digital pin capable to generate a PWM signal.
Pulse width modulation (PWM) provides a way of controlling certain analog quantities, by varying the pulse width of a fixed frequency rectangular waveform. Servo motors are controlled by via a pulse width modulated (PWM) signal.
Libraries
The library I am going to use is the servo_attinycore, a ibrary that comes with the AttinyCore and is compatible with the attint 45.
Functions
Some functions that the library contains are:
	Servo myservo;  		// create servo object to control a servo
	myservo.attach();  		// attaches the servo on a pin to the servo object
	myservo.write(pos);             // tell servo to go to position in variable
Coding
To test the servomotor I used and example that comes with the library, this code makes the servo move from one position to other and vice versa. The sermotor I'm going to use is from one of my previous college projects.
#include "Servo_ATTinyCore.h"	//Library of the servomotor

Servo myservo;  // create servo object to control a servo

int pos = 0;    // variable to store the servo position

void setup() {
	myservo.attach(3);  // attaches the servo on pin 6 to the servo object
}

void loop() {
	for (pos = 0; pos <= 100; pos += 1) { // goes from 0 degrees to 100 degrees
					      // in steps of 1 degree
		myservo.write(pos);              // tell servo to go to position in variable 'pos'
		delay(15);                       // waits 15ms for the servo to reach the position
	}
	for (pos = 100; pos >= 0; pos -= 1) { // goes from 100 degrees to 0 degrees
		myservo.write(pos);              // tell servo to go to position in variable 'pos'
		delay(15);                       // waits 15ms for the servo to reach the position
	}
}
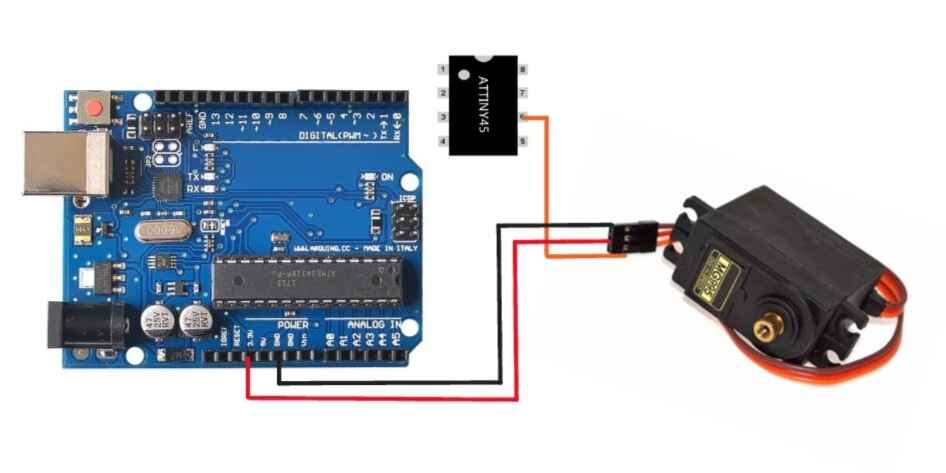
Schematic
Heres is how I connected the servomotor to the attiny and the arduino uno.