Computer-Controlled Machining
On this week assignment we had to design and cut something big usign a Computer-Controlled Machining, a task similar to the one we did on Week 3.
Safety equipment
On our group assignment we learn about the importance of having the right equipment to prevent any accident.
Safety glasses
To prevent debris from damaging your vision.Lab. Coat
In here you will select what type of mill you want to make.Safety boots
To protect your toes from falling heavy parts.Noise headset
In some cases noise can get up to 70dbA near the machine.Breathing mask
Operations can project fine dust.No hanging accesories
We also learned things like, how to use the fire extinguisher and were are they aside from wher the school nursing is and what to do in extreme medic cases.


Designing
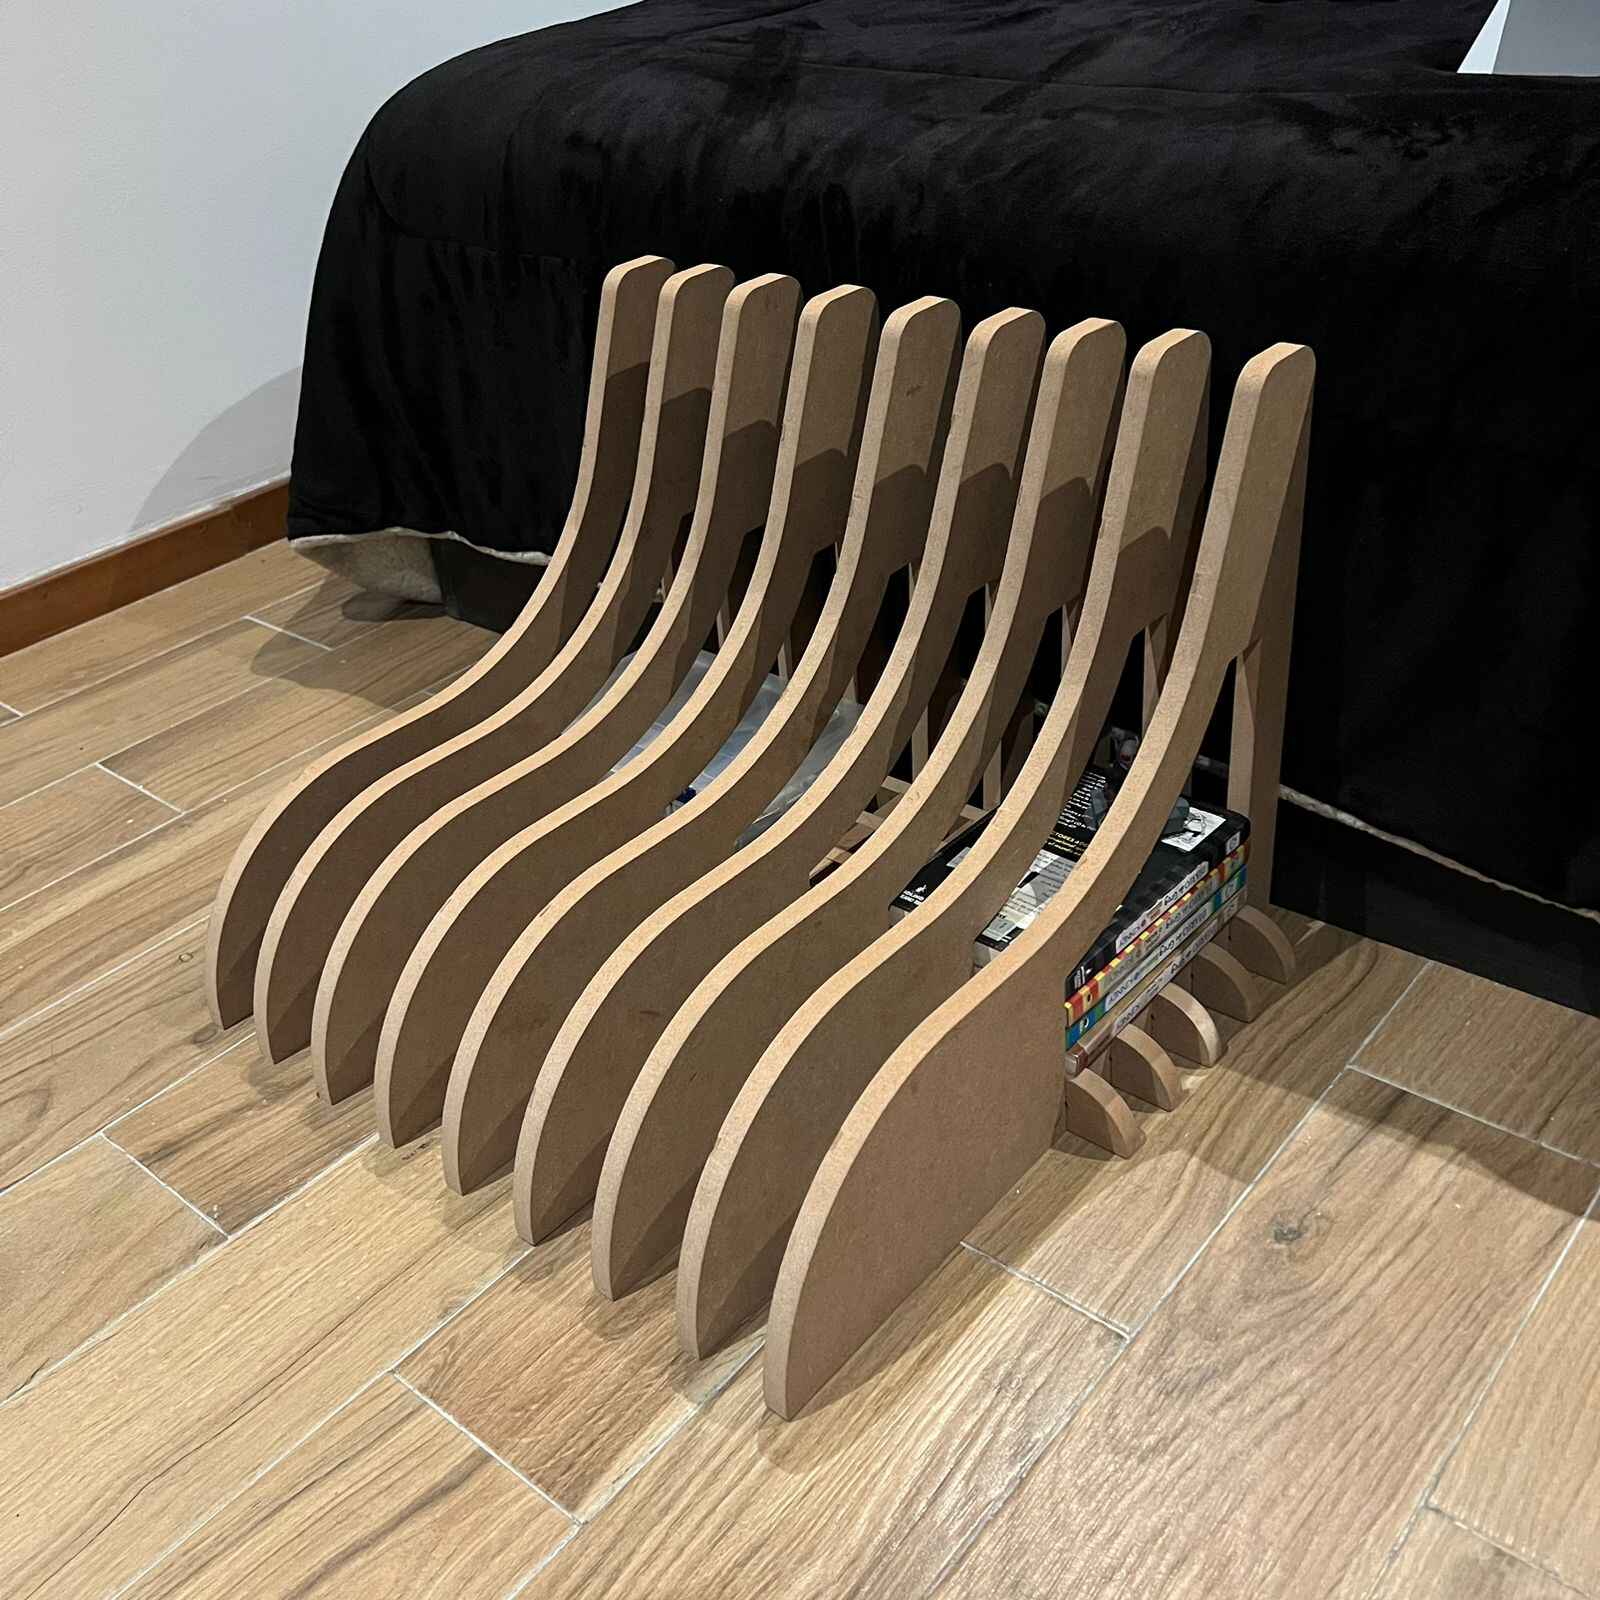
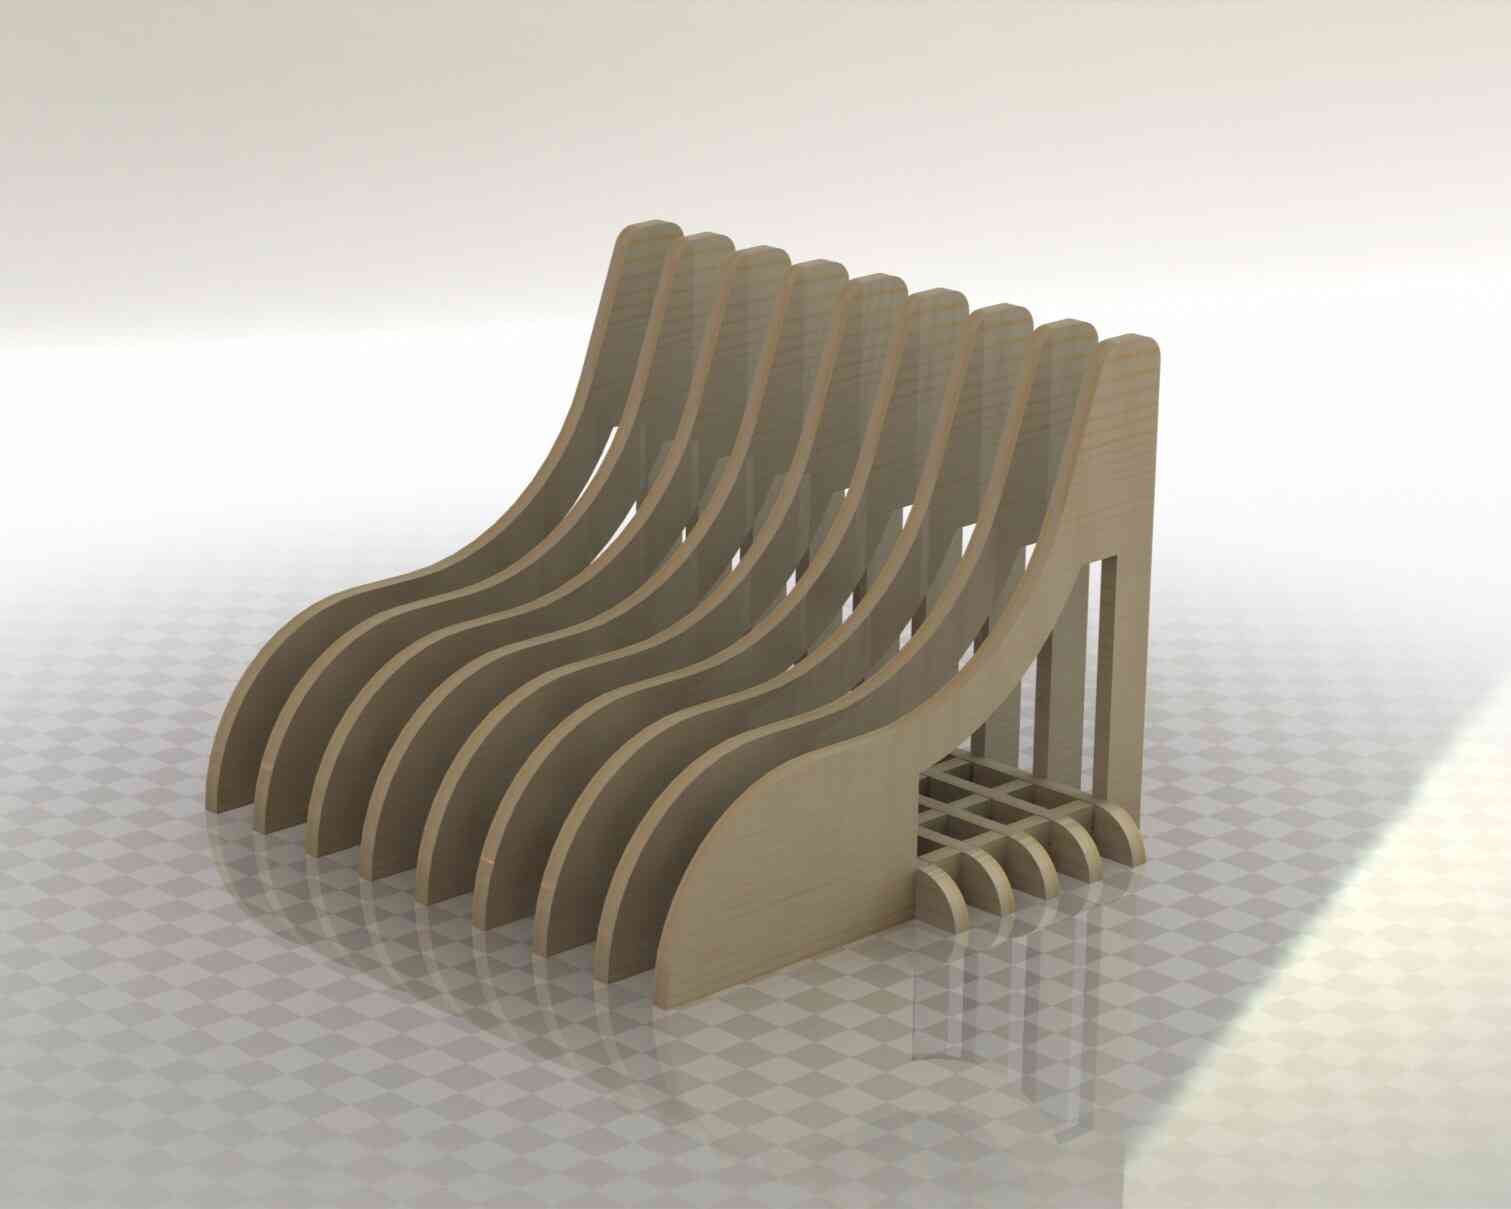
It was my first time designing something with big dimensions and this made me waste a lot of time cause I did not have an idea of the amount of material I was going to need (We had a 15mm MDF board, 2.4m x 1.22m). I spent some time searching for ideas in Pinterest and I ended up designing a little chair, similar to a puff, where I can also storage small things. It is a 2 pieces desing, where the first piece will be the whole body and the second piece will be the one who joins the structure.
The main idea of this design is to make it simple and intuitive so anyone can understand how to assemble it. Also the dimension are a bit small because I wantes to make it for kids.
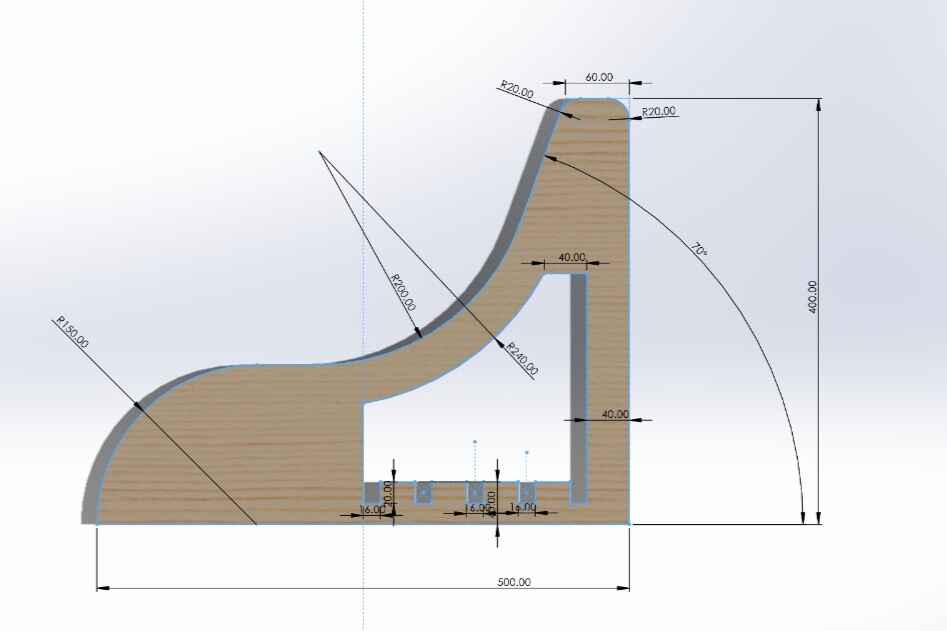
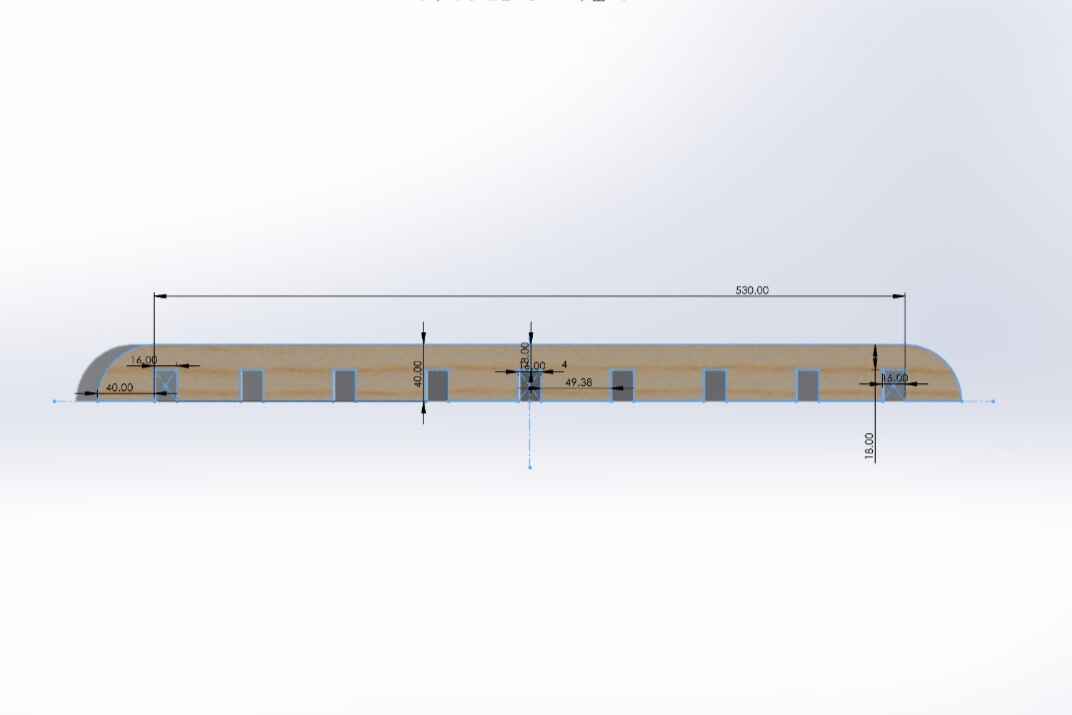
Piece 1
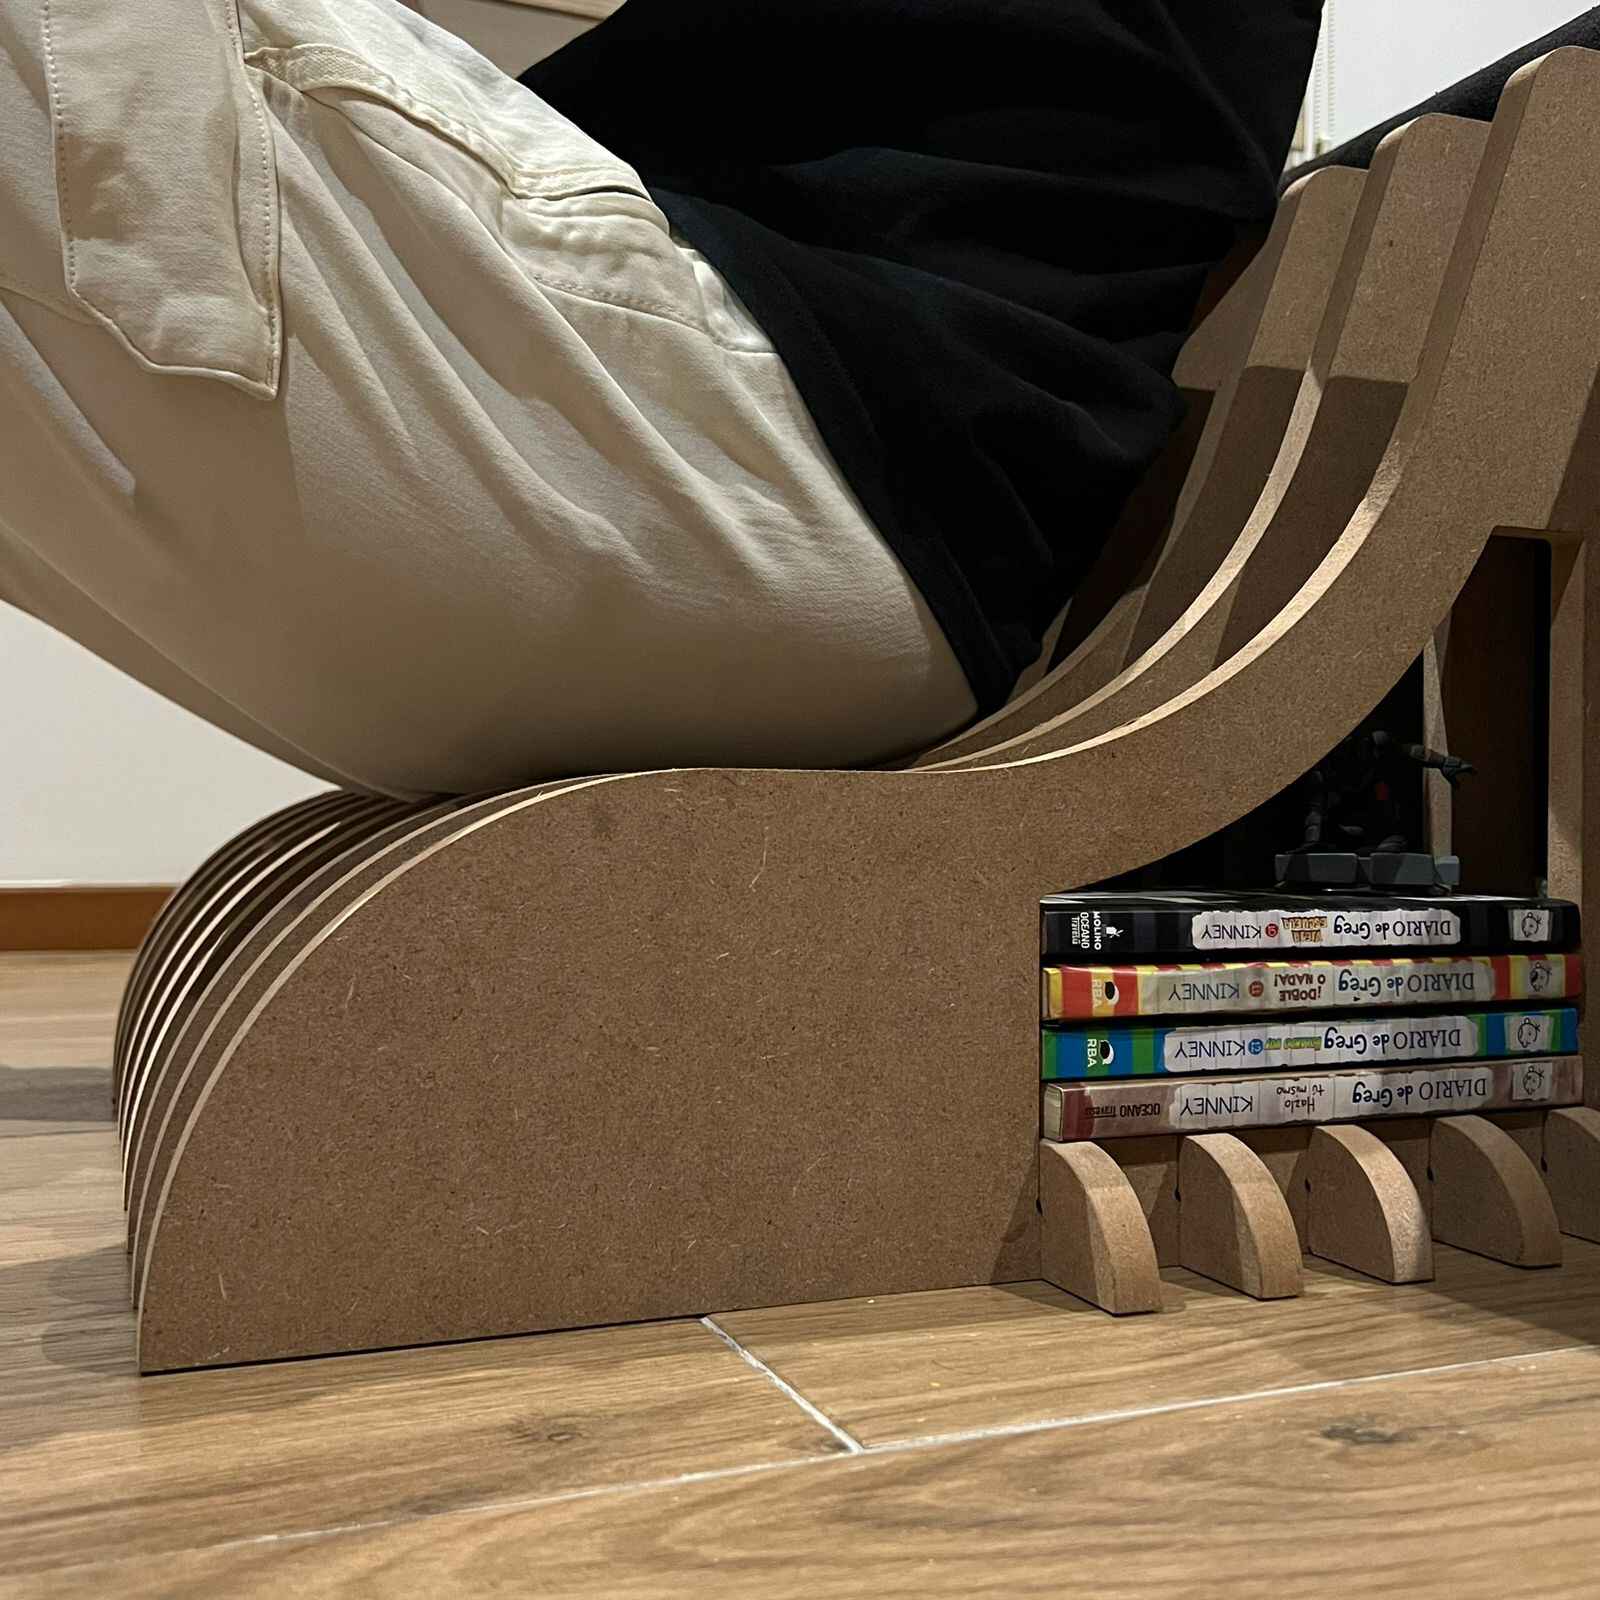
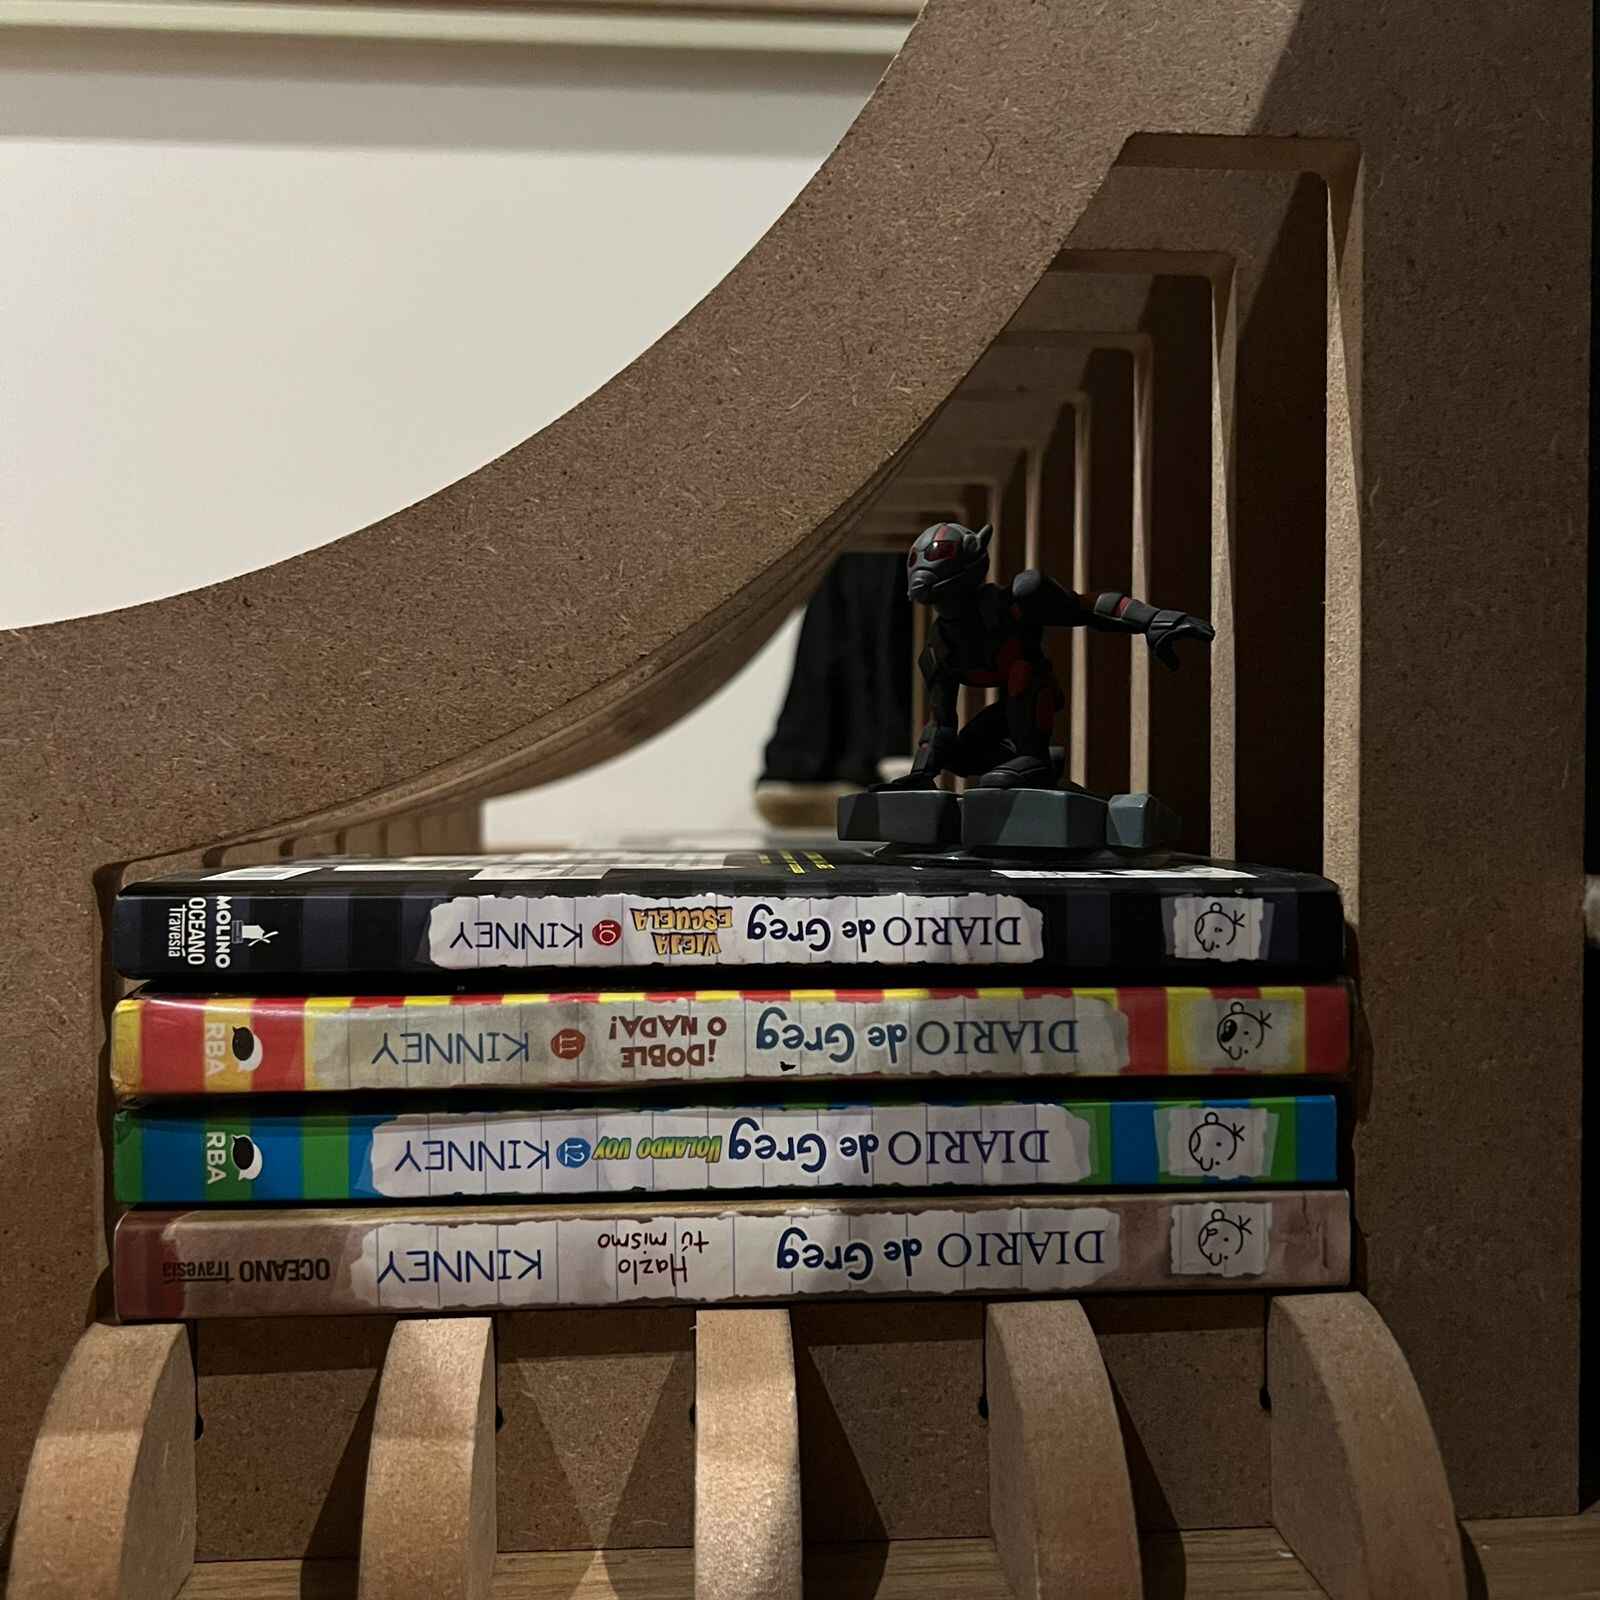
This first piece is like the body of chair, it is suppose to be small, similar to puffs, and it has a little space beneath the seat were you can store small things. The chair will contain 9 of this pieces.
Piece 2
The second piece is the one that will put together all the nine pieces, and there will be about four of these in order to make this chair well structure.
Assembly
Here is a render of how the chair will look like.
Toolpath and Cutting
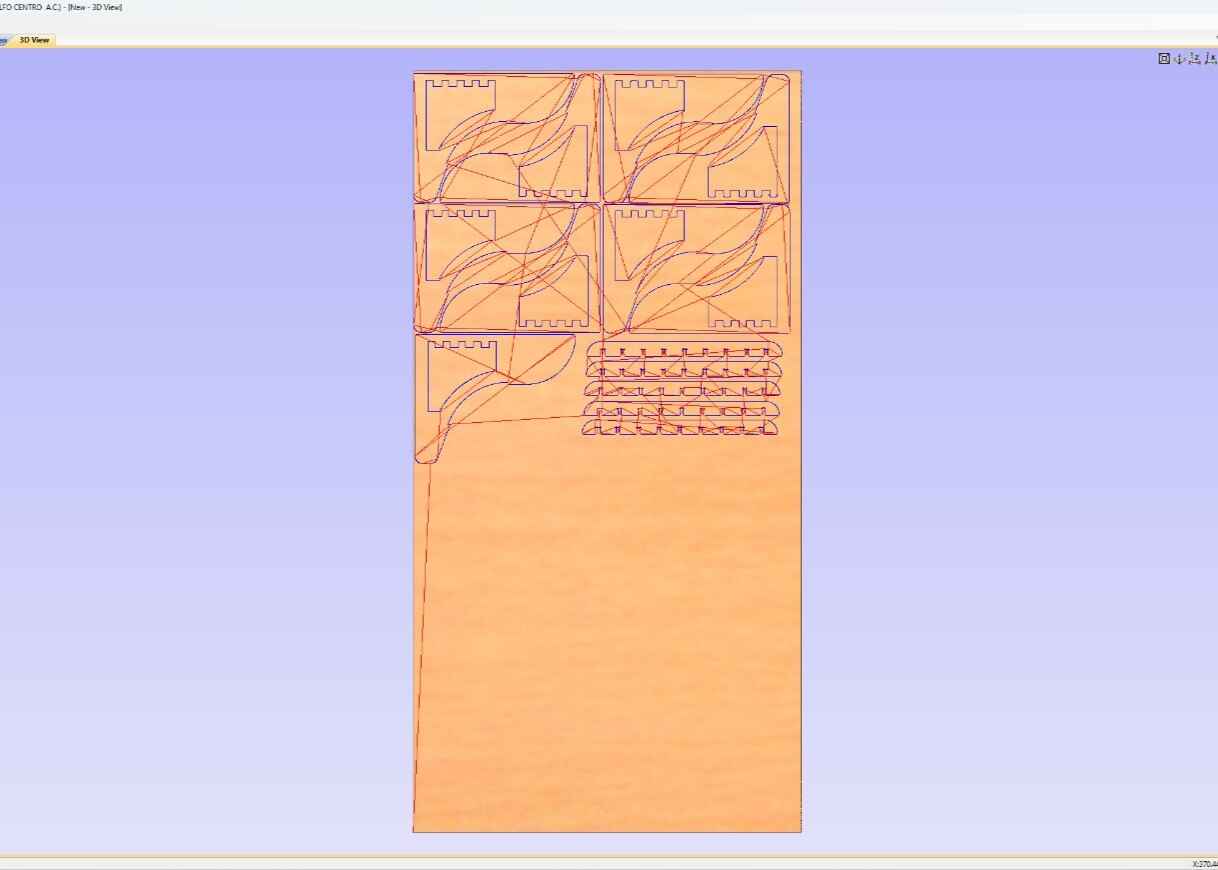
The software I used to create de G code was VCarve, I used this one because it generates you somethings called "Dog-bones". The tools of these kind of CNCs only create round holes when they cut making the edges rounded, that´s where the dog-bones come in to modify the edges to make assemblys tight and well asjusted.

Drawing
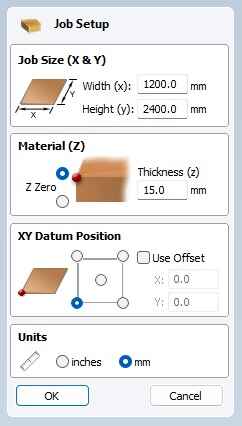
First of all we have to create a new file and set up the workplace. Im the Job Setup we configure the dimensions, thiclnes and material units, for me it was the following.
Width(x) and Height(y): 1200mm and 2400mm
Thickness(z): 15mmm
Units: mm
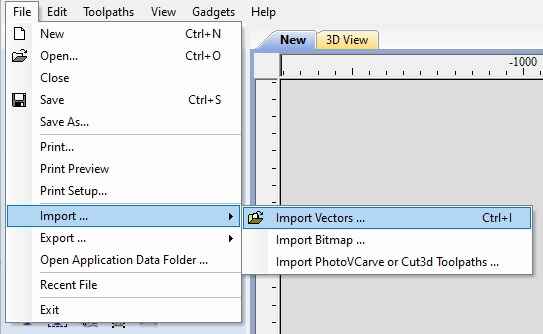
Next we have to import our dxf files of the chair, to do that we select File → Import → Import Vectors.
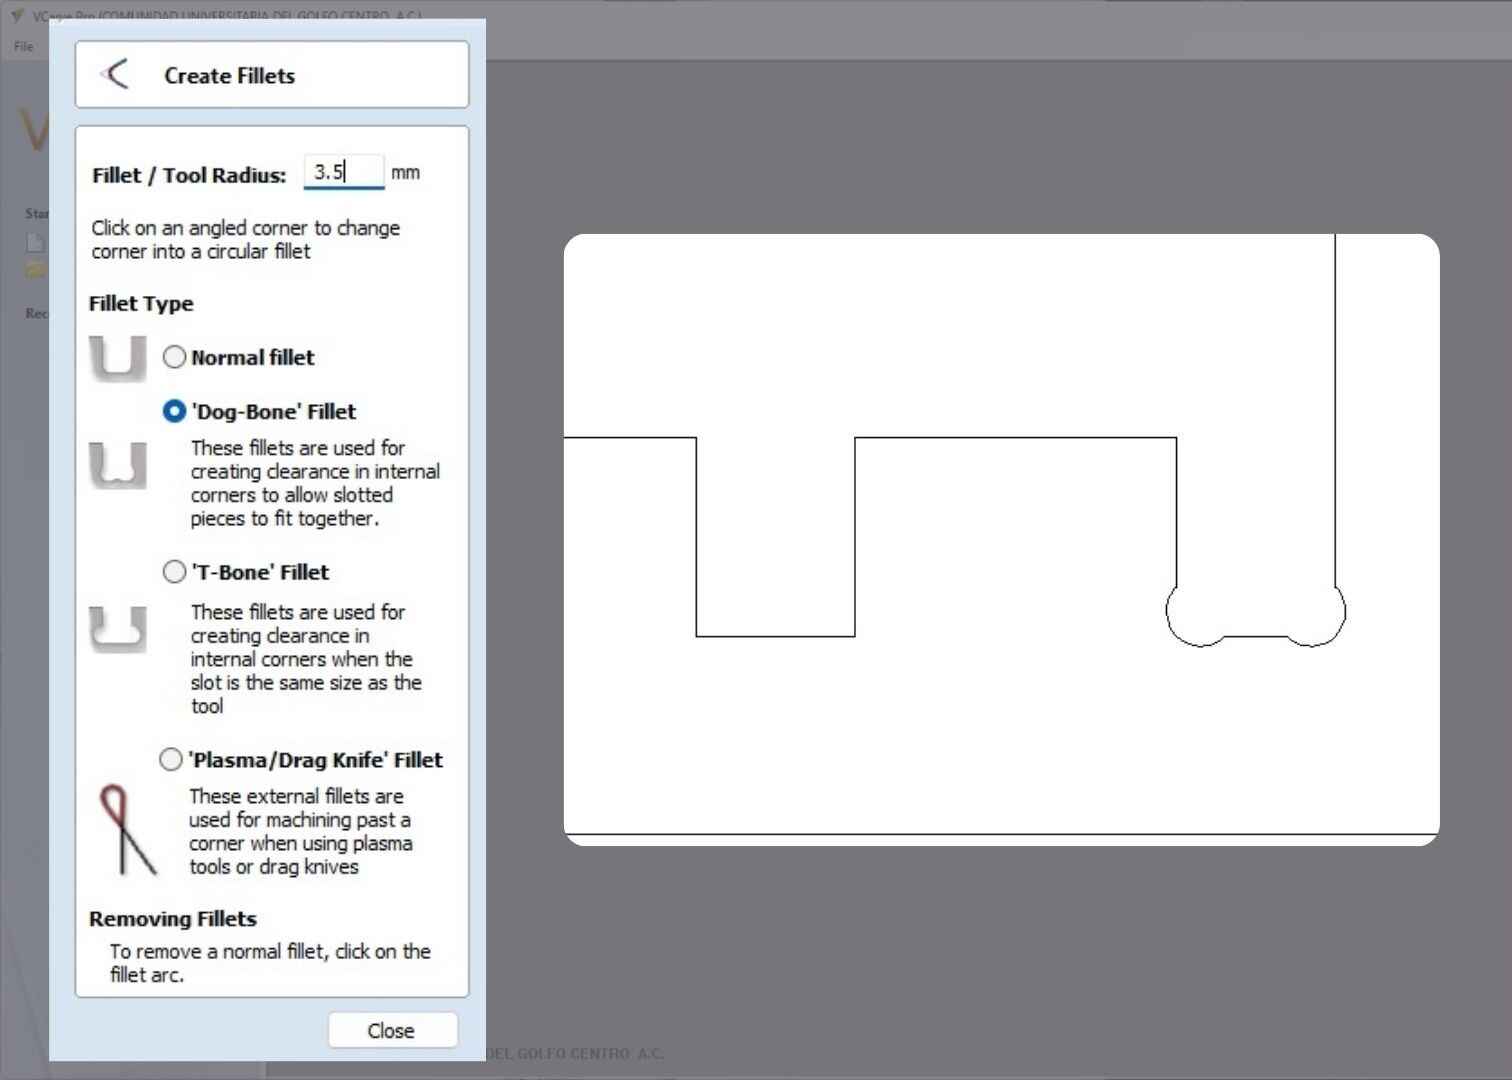
Once we have our file we have to create fillets, the reason of this is because the cilindrical form of our cutting tool cant make exact corners so this tool makes the outside corners "straight" and thanks to this we can assembly our chair. I used the "Dog-Bone" Fillet beacuse I though its shape would be the one taht best fits, also the dimension of the Tool Raius is 3.5mm.
Toolpathing
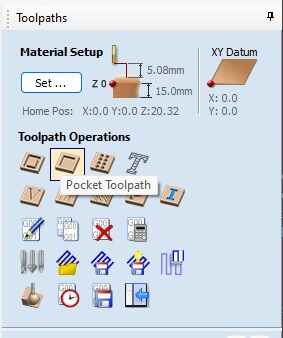
 Now that our drawing is done we have to generate the toolpath. A toolpath is a series of instructions that set the movemento of the cutting tool
on our CNC machine. The toolpath section on VCarve is located on the right side of the screen; the configuration of our toolpath is the following:
Now that our drawing is done we have to generate the toolpath. A toolpath is a series of instructions that set the movemento of the cutting tool
on our CNC machine. The toolpath section on VCarve is located on the right side of the screen; the configuration of our toolpath is the following:
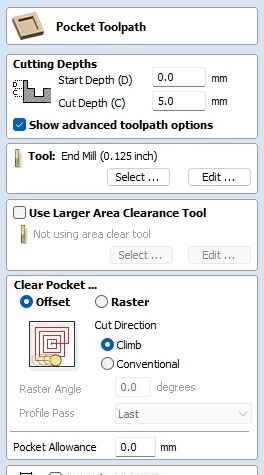
Start and Cut Depths: 0.0mm and 5.0mm
Clear Pocket: Offset and Climb
The reason I put a 5.0 mm cut depth is beacuse it is the half of the tool.
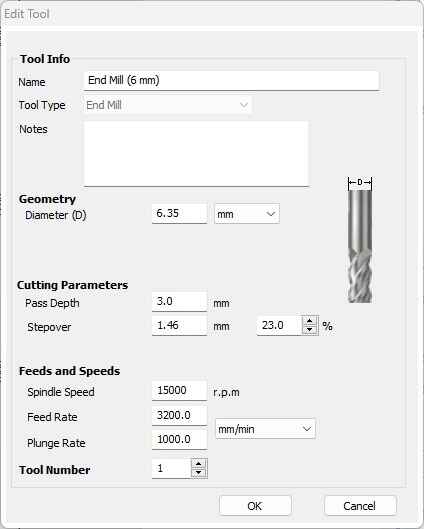 We also have to edit the tool info with placing the geometry and parameters of our tool, this paraemeters were selected according to the table on our
group assignment:
We also have to edit the tool info with placing the geometry and parameters of our tool, this paraemeters were selected according to the table on our
group assignment:
Name: End Mill (6 mm)
Diameter: 6.35mm
Pass Depth and Stepover: 3mm and 1.46mm - 23%
Spindle Speed: 15000 r.p.m
Feed and Plunge Rate: 3200 and 1000 mm/min
Once you have it all set, click in calculate to visualize that everything is in order.
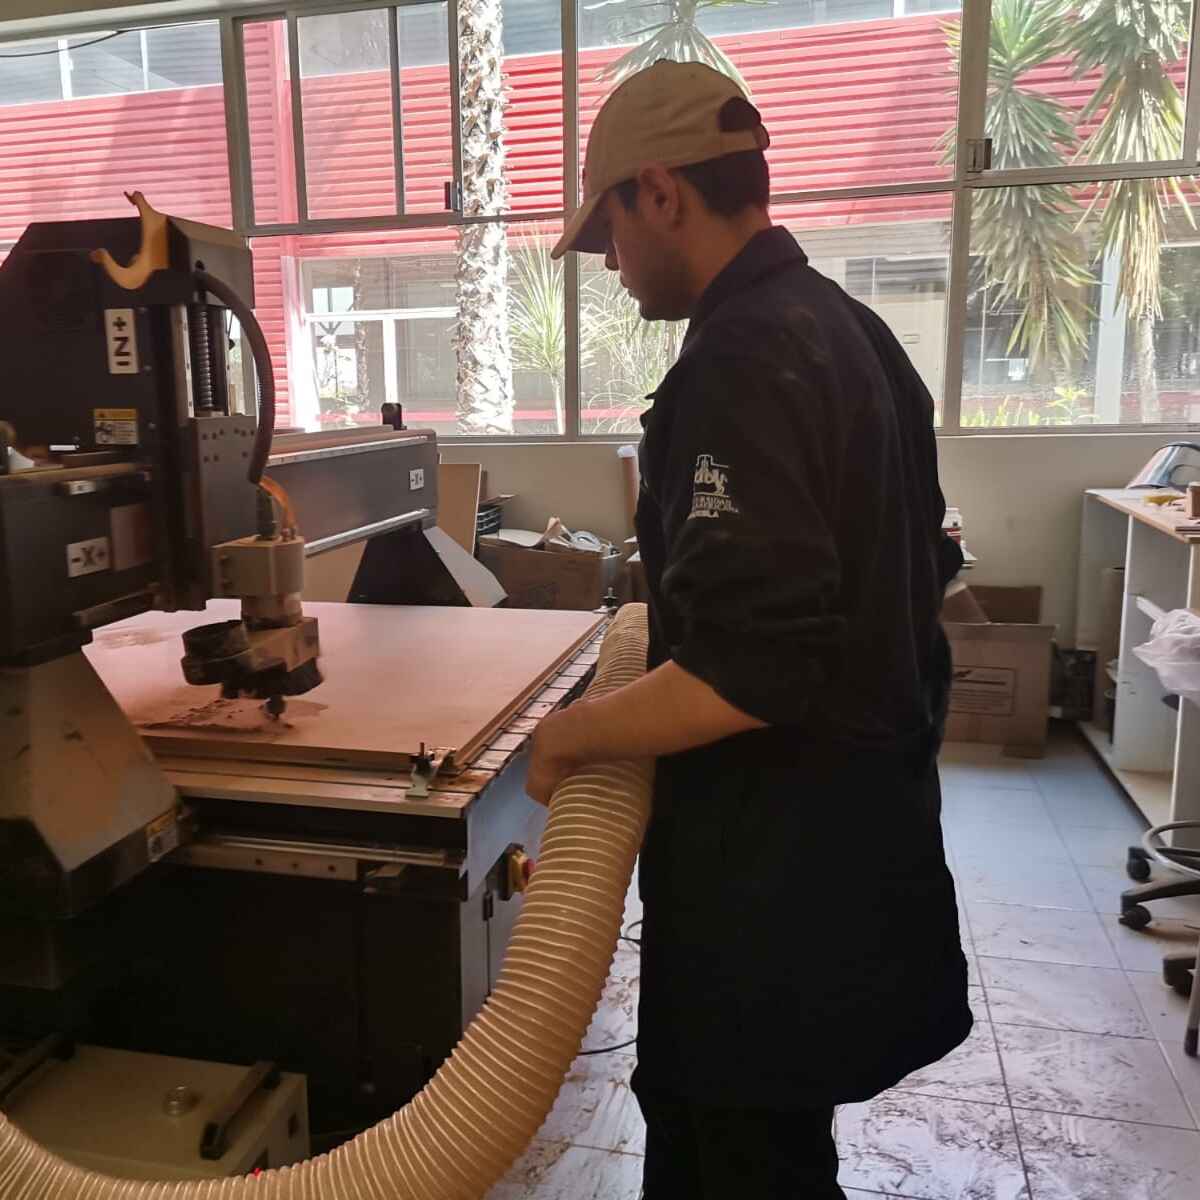
Cutting
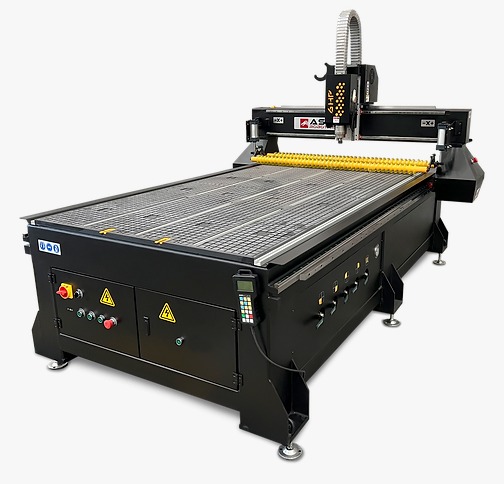
The CNC router that I used was the Asia Robtoica shop pro 1325, this CNC is 3x1.8x1.7mts and a motor power of 4HP at 24000 rpm's. With our .gcode file done it was time to cut. First of all we have to place the mdf on the table and secure it with some clamps.
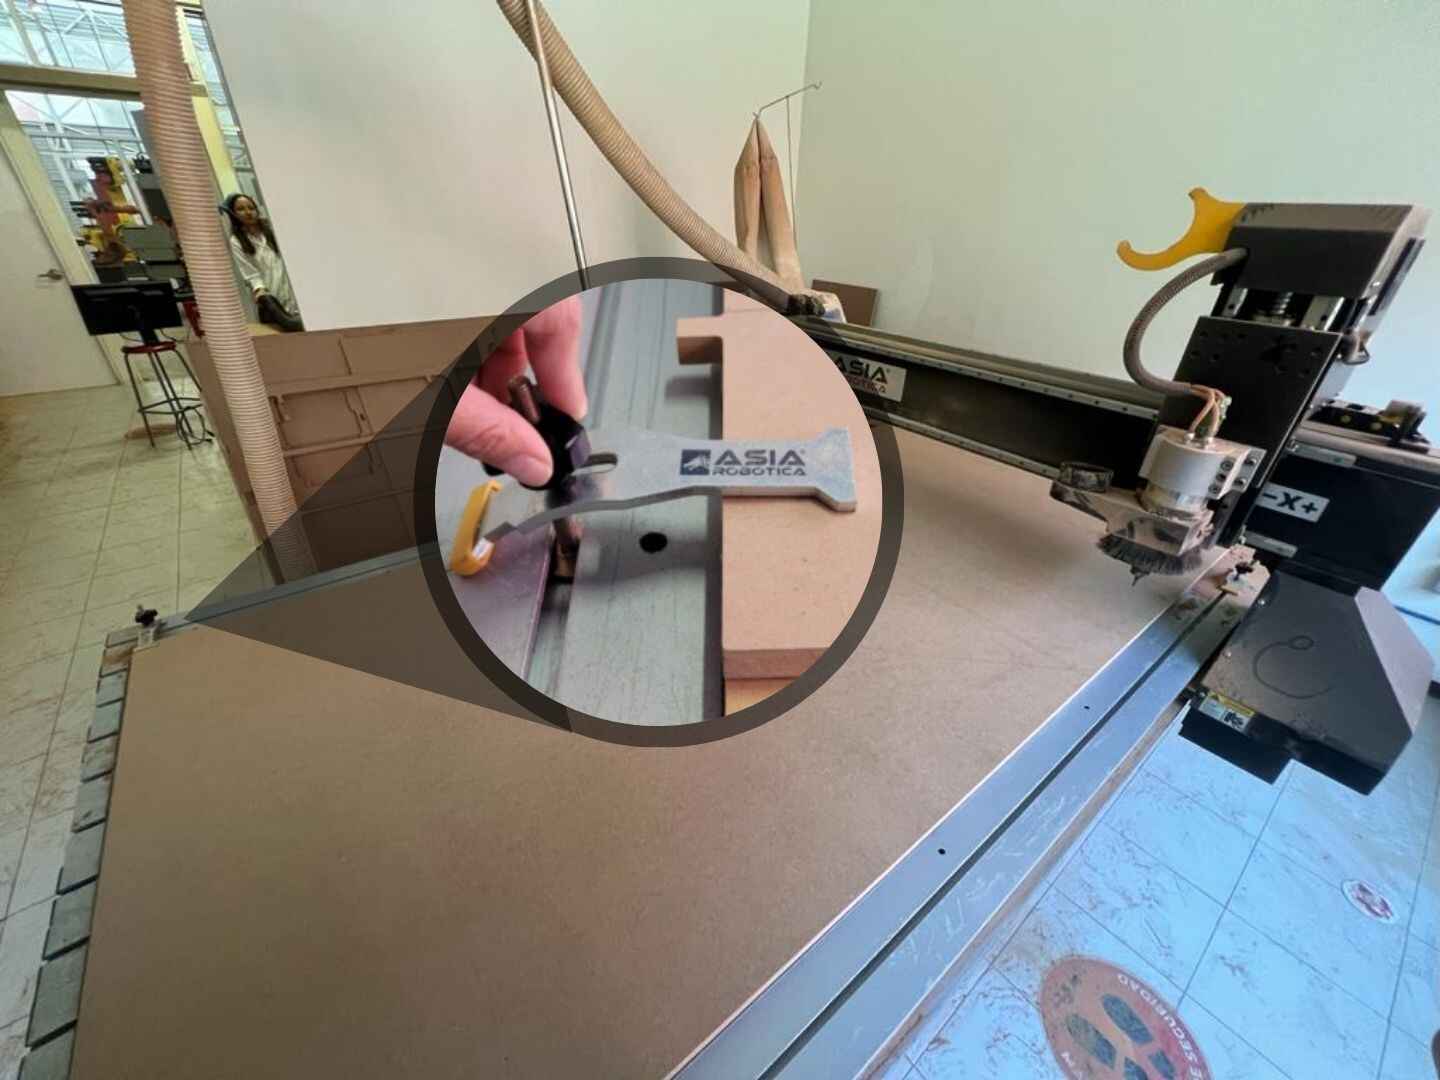
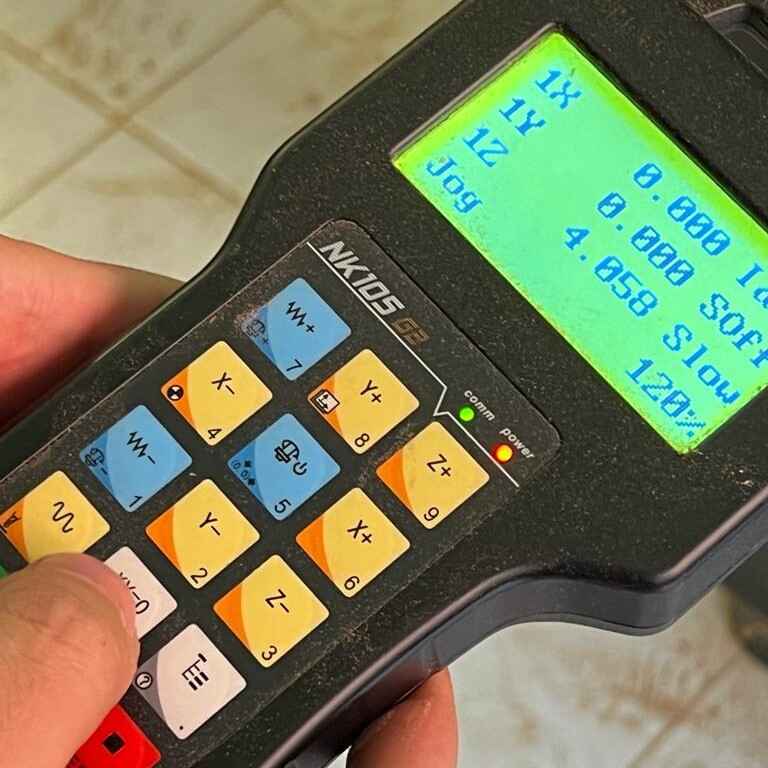
Then place your usb with your file and the controller select it. Finally we have to calibrate the x and y axis in order to place it the best way posible to avoid wasting extra material. To do this we use the yellow buttons to move our axis in the position where we want our origin to be and press the grey button with a "XY = 0" label. If you want to also want to save the Z axis you have to press shift + XY =0 button.
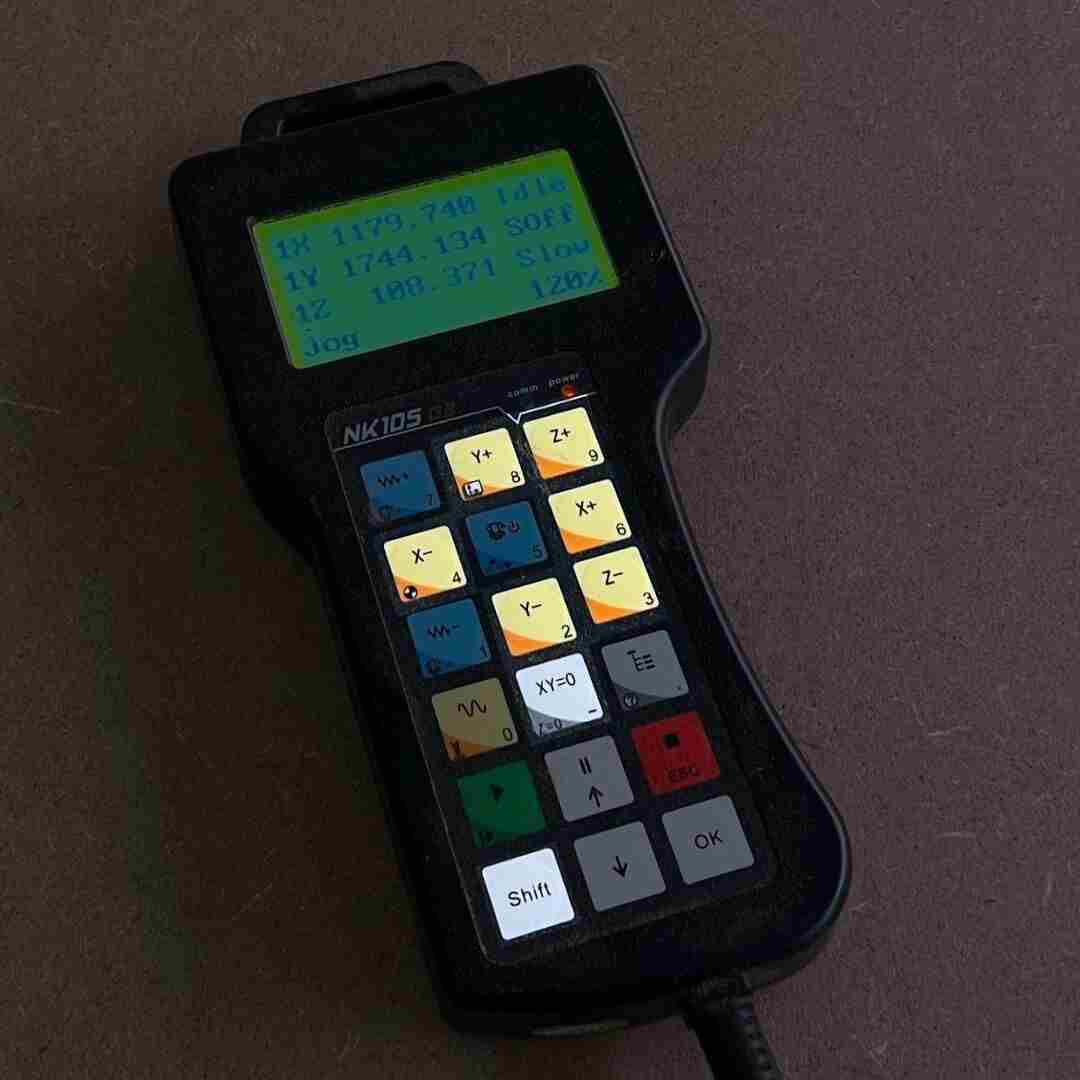
Remember to constantly use the filter to collect the litter.
Result
After a few minutes of putting the pieces together, my little chair was finally assembled.