11. Input devices
This week I wanted to test a VL53L0x sensor, this is a LiDar sensor used to meassure distance, it's very similar to those used in cell phone cameras and 3d scanners.
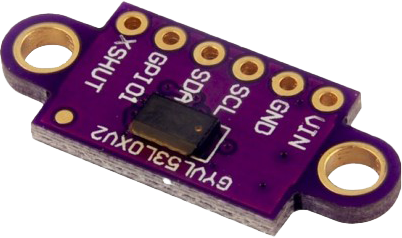
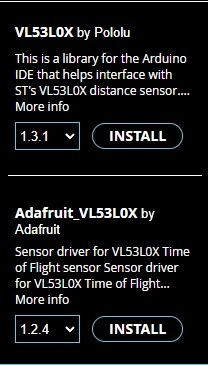
This sensor needs a library that can be installed in arduino, to install it just click on the left menu on the Library Manager and type VL53L0x, there are many libraries, but the ones that work the best are the ones by Adafruit and Pololu. It also uses a communication protocol called I2C this enables the clock on the board which the sensor uses to send pulses of infrarred beams, to use the I2C communication the code also needs the wire.h library this one is included in the arduino IDE so there is no need to download it.
First, I used one of the examples from the Pololu library, this one prints on the serial monitor the distance, it's very accurate but it ranges a little because the sensor I used wasn't from either Adafruit nor Pololu, I would say about 5-8 mm. You can access this code on the arduino IDE following this path: File>Examples>VL53L0x>Continous.
Then I made the code, I wanted to use a vibration motor but it wasn't possible, so I used one of the LEDs that were integrated into the board made on the electronics production week. This sensor has a maximum measuring distance of about 2000 mm or 2 m, and a minimum of 10-20 mm accurately. With that in mind I made a code that makes the LED brighter the further an object is detected by the sensor. To do this I used a pwm function that goes from minimum (0) to maximum (255). I also used an arduino function called map() that assigns a value from the distance parameters 0 - 2000 to the pwm paramters 0 - 255
Code
You can copy it or download by clicking here.
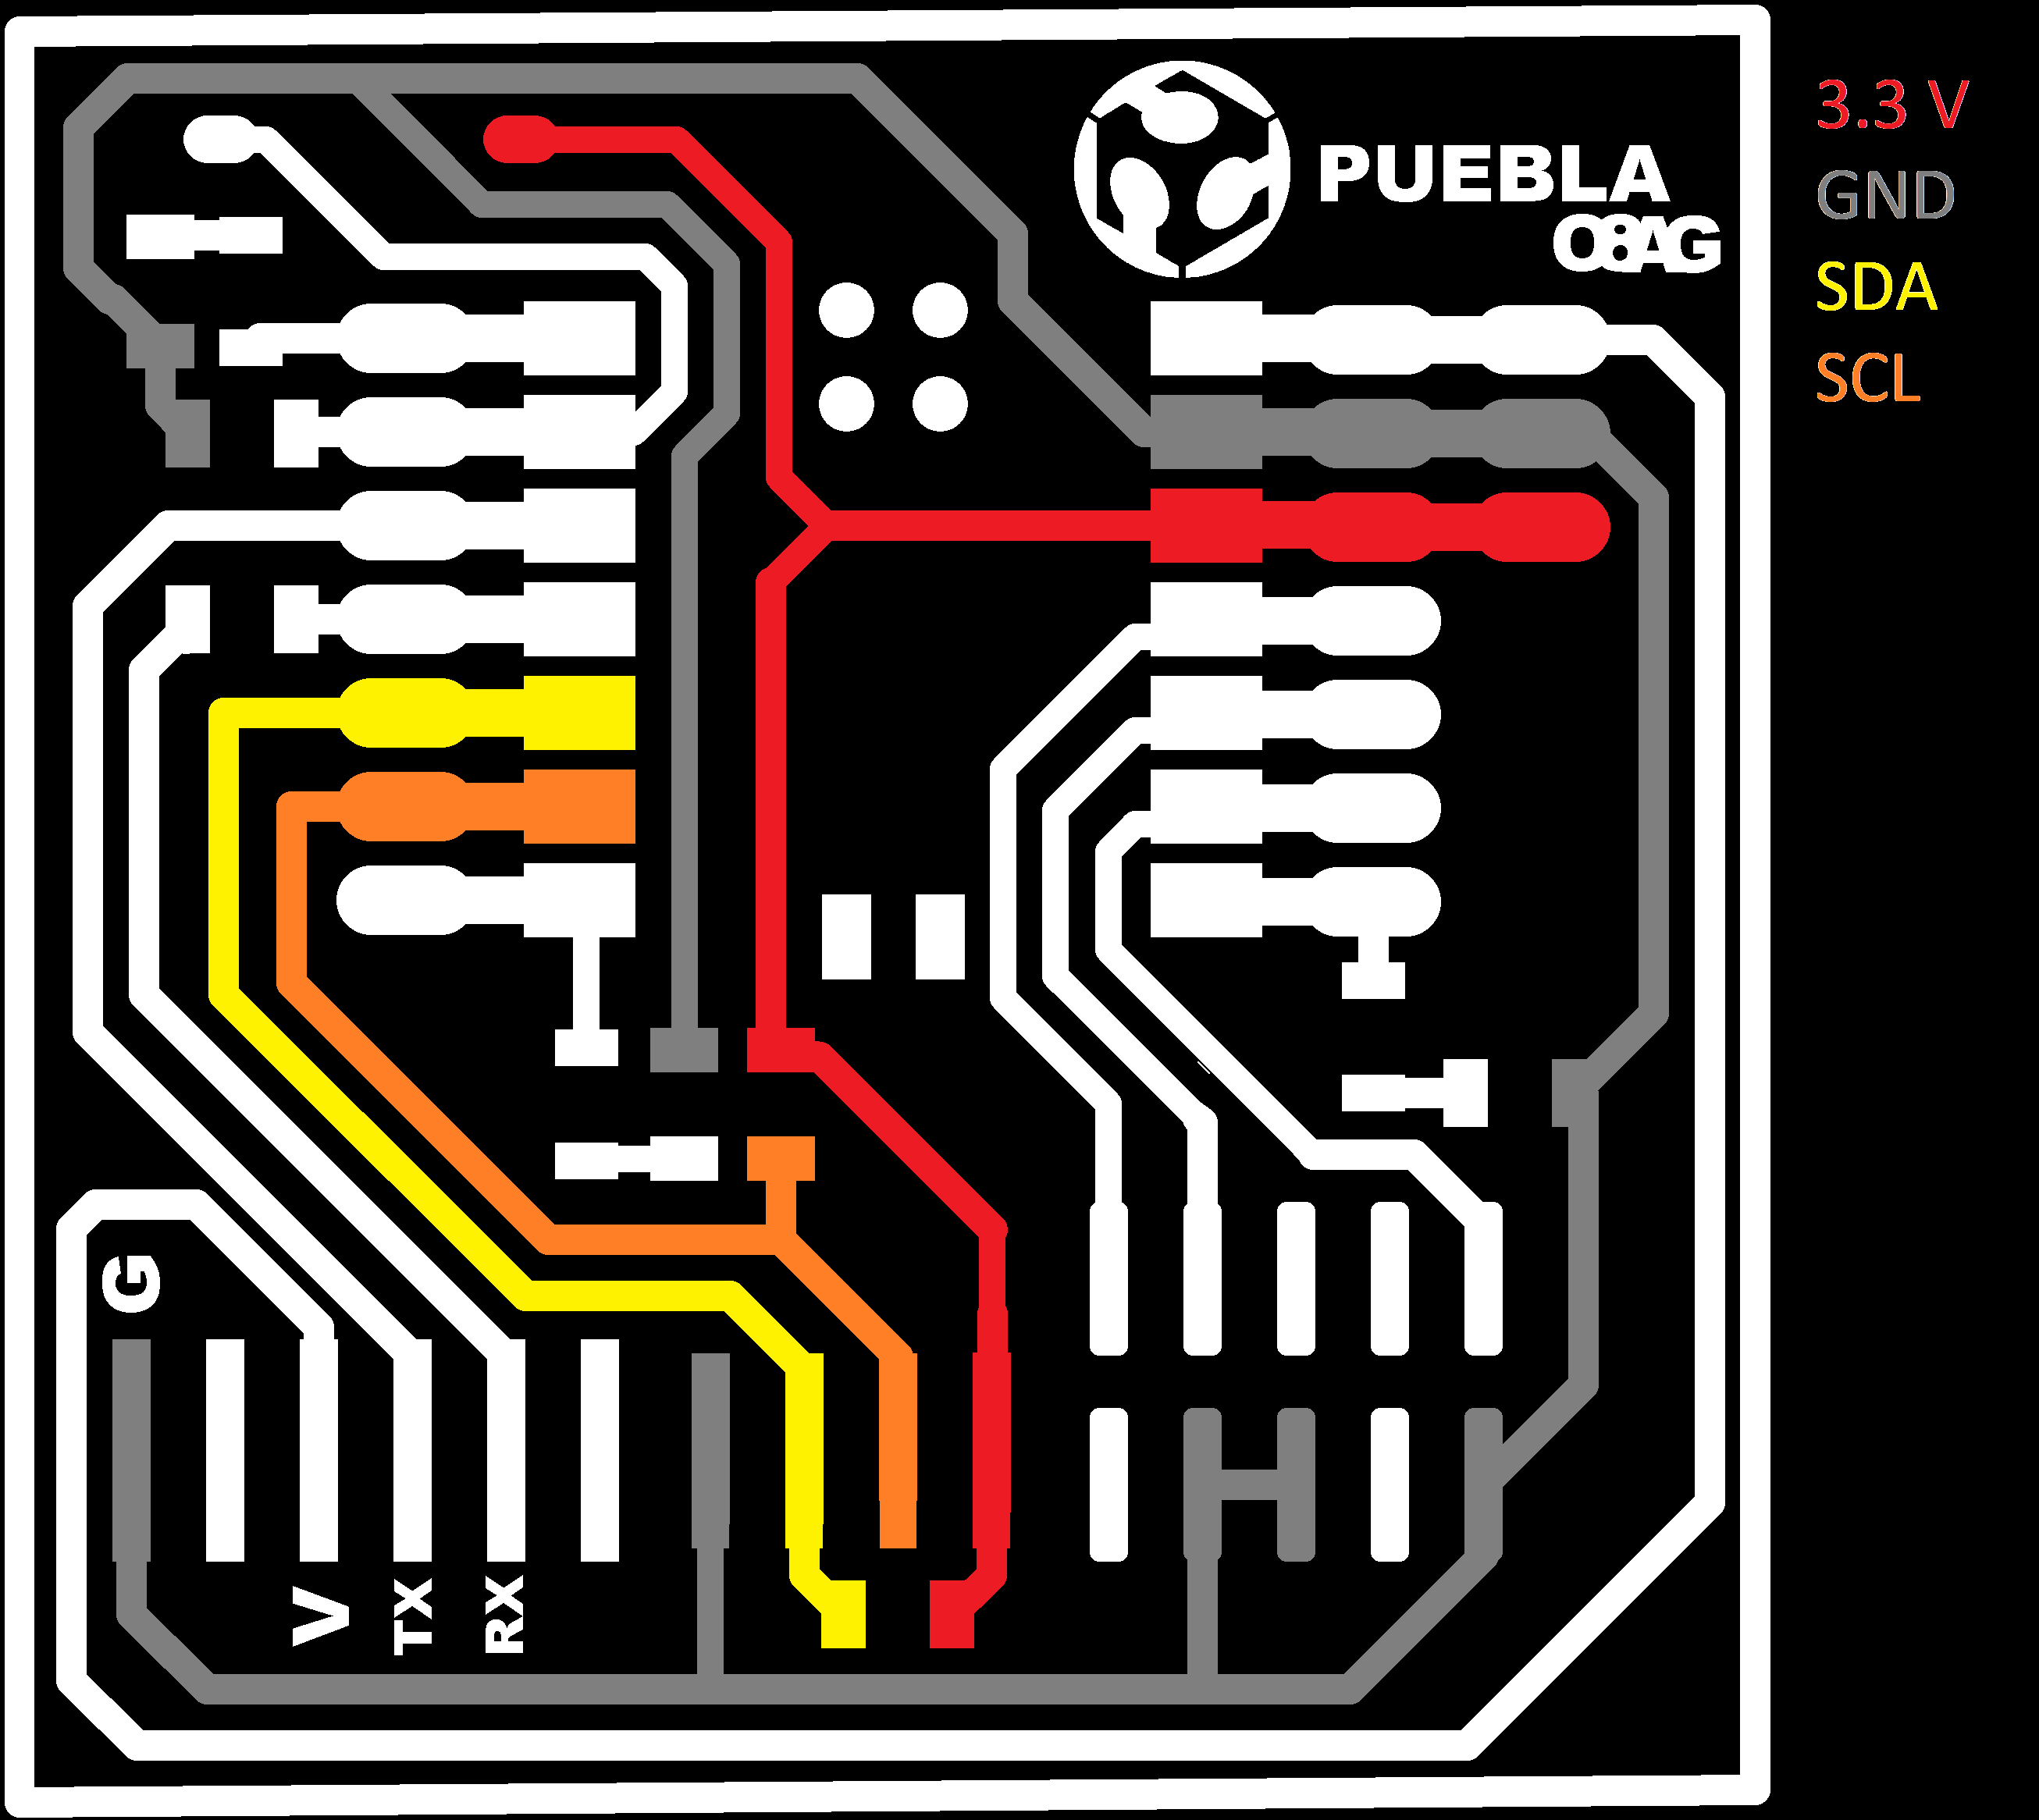
The wiring is very simple, the vin of the VL53L0X must be connected to the 3.3 v pin, and the gnd to the gnd on the board. For the SDA and SCL they must be connected to the A4 and A5 pins respectively
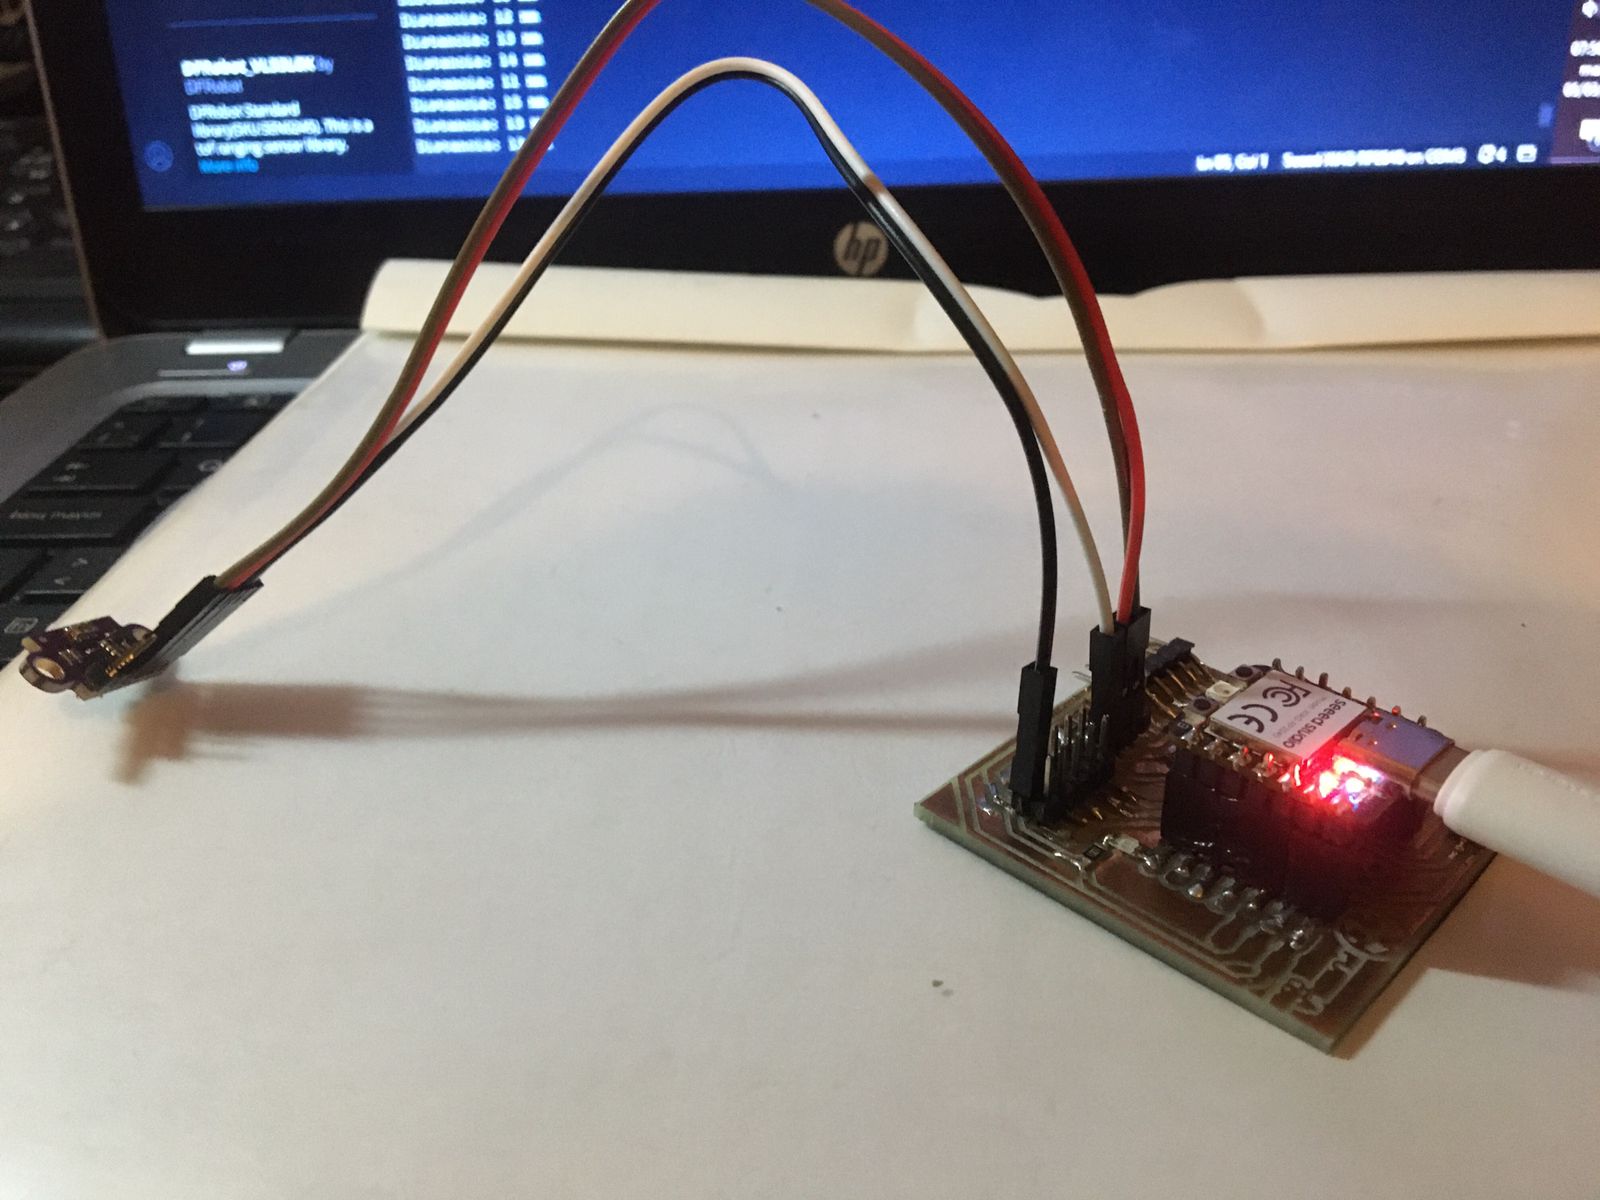
And this is a video of this simple aplication, you can see that when my hand gets further the LED shines brightly and when my hand gets closer the LED stops shinning.
I used plug to plug dupont cables for this project. You can see that the LED is off, that's because the distance of the sensor to the paper sheet is less than 10 mm.
After I was familiarized with the sensor I wanted to add more sensors, so i picked up other 3 and started testing, first I plugged everything on a protoboard, to understand the connections and test the codes, first I made this code that prints on the serial monitor the distance recorded by the four sensors, as you can see I had to add an extra pin for each sensor, this has to be done because when we use the I2C protocol every sensor must have a unique adress so the microcontroller knows what sensor is sending which signal, if we don't do this teh signals all merge into one, this is useful when all the sensors are pointing to the same place but for the planned application I needed separate readings, download by clicking here.
Afterwards I added pwm outputs and assigned them to LEDs the intent is to make the LED shine brighter when an object gets closer, for this a map function was used in it the was maximum pwm value was assigned (255) to the closest distance (0 mm), and to the longest distance (1000 mm) was assigned the lowest pwm value (0).

To make the connections this is the schematic I followed, the flexible board I developped on my electronics production page has this layout in mind for the placement of sensors or any I2C communication with four SCL and SDA pins to connect.
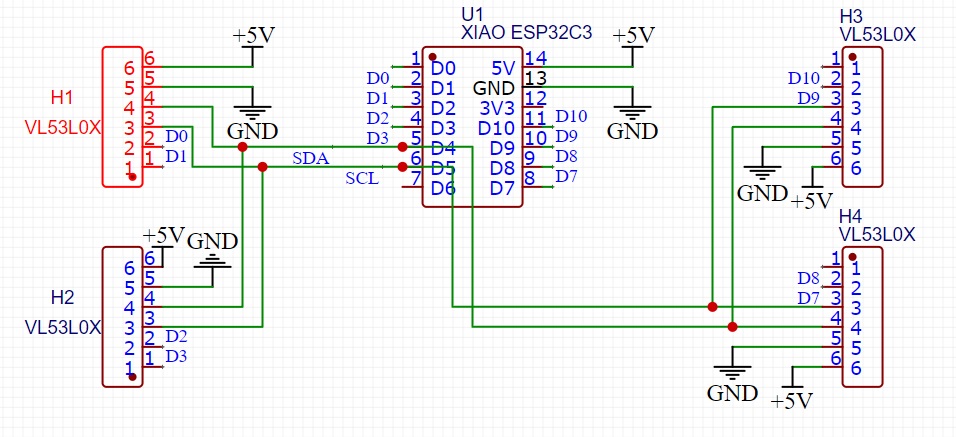
I have also developed this little board to host the VL53L0X sensors and vibration motors or LEDs to make a headband for visually impaired people.
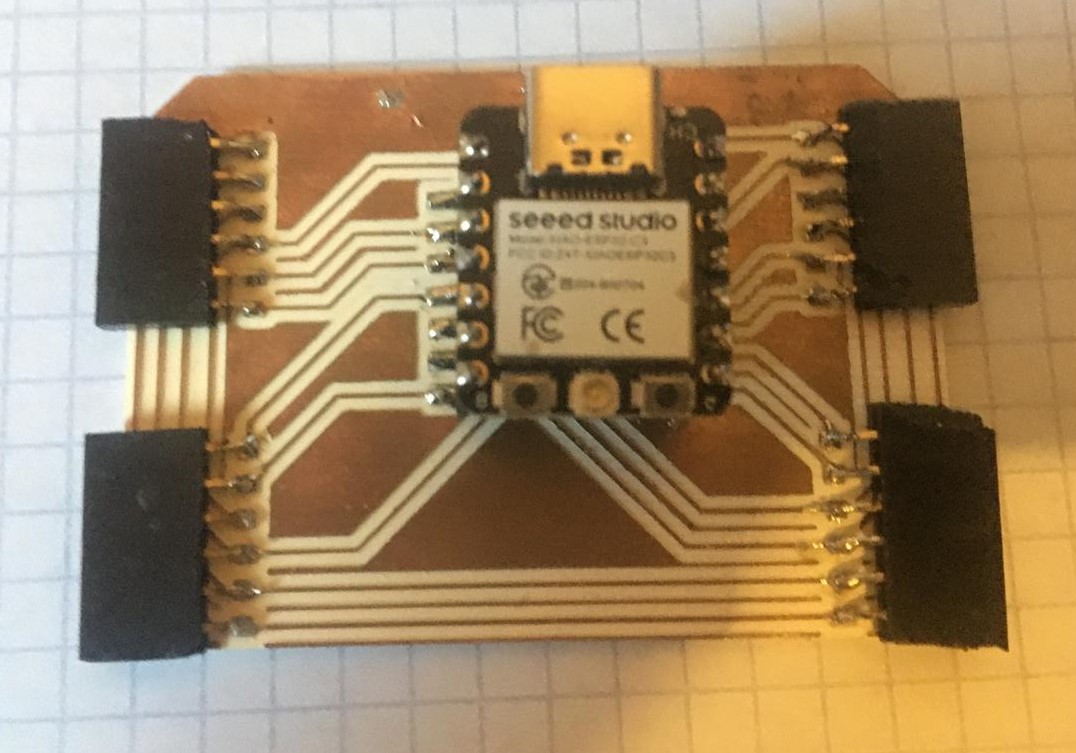
After cutting in the vinyl cutter I soldered the necessary components. For this project you will only need a 100 ohm resistor and a general pruposse transistor I used the 2222.

This is what the final assembly looked like, the motors didn't work but they can be replaced with LEDs:

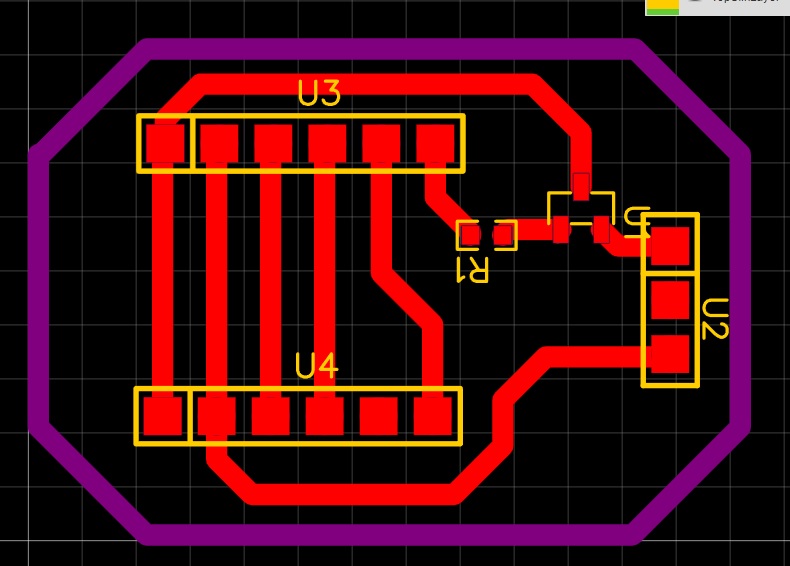
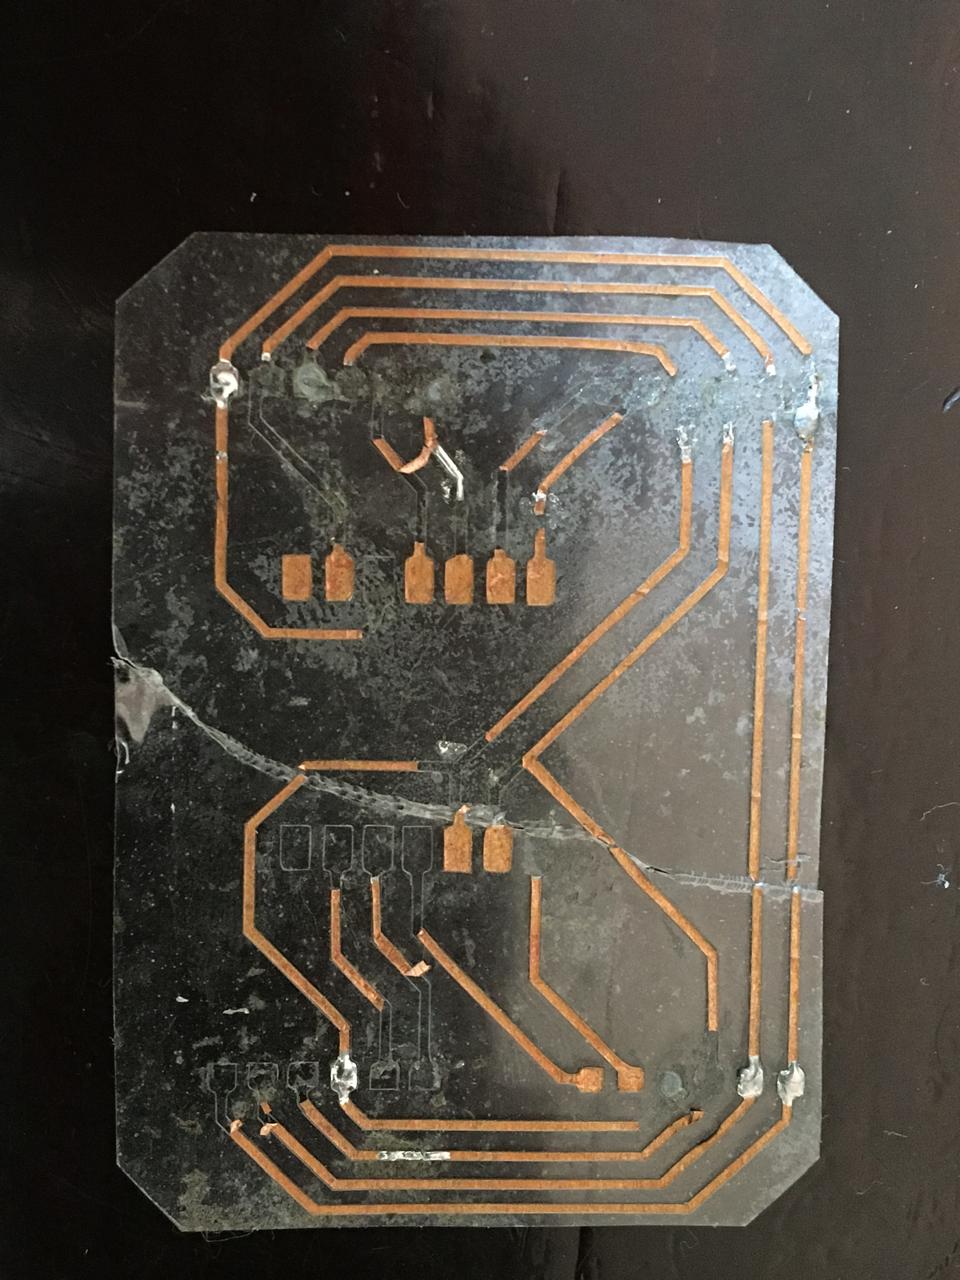
The flexible boards have bit of a problem, the traces don't hold up for long, so I fabricated a PCB of the same one design, also one of my sensors burned out so I just used 3 for this application.
I used the precission of the sensors to meassure distance, robots like roomba use this type of systems to map the spaces they work at.
Files
All the codes are contained in a single file, uncomment the part you are interested in testing.