WEEK 14
INTERFACE & APPLICATION PROGRAMMING
This week has a very particular challenge, and is that I want to work the interface of my final project, so that it is not only about the object, but there can be interaction with something else. At the beginning of this week we took locally a class on creating applications in Qt designer, to learn more about this and other tools in application development I invite you to visit this week's group assignment by clicking here.
What I realized with that introductory class, is that if something I wanted to take care is that my interface was friendly and easy to understand, so, at the beginning, although I wanted to add several things like the option to turn up or down the sound of the music I wanted to integrate in my final project, in the end I had to prioritize the soul of the project, but not for that I would sacrifice the aesthetics, that's how I decided to use FlutterFlow to develop my application.
Designing with FlutterFlow
FlutterFlow is a mobile or web application development platform, in a simple way like drop and drag components, customize them. In addition, as it works in the cloud, it facilitates integration with APIs and databases such as Firebase, which we will talk about later.
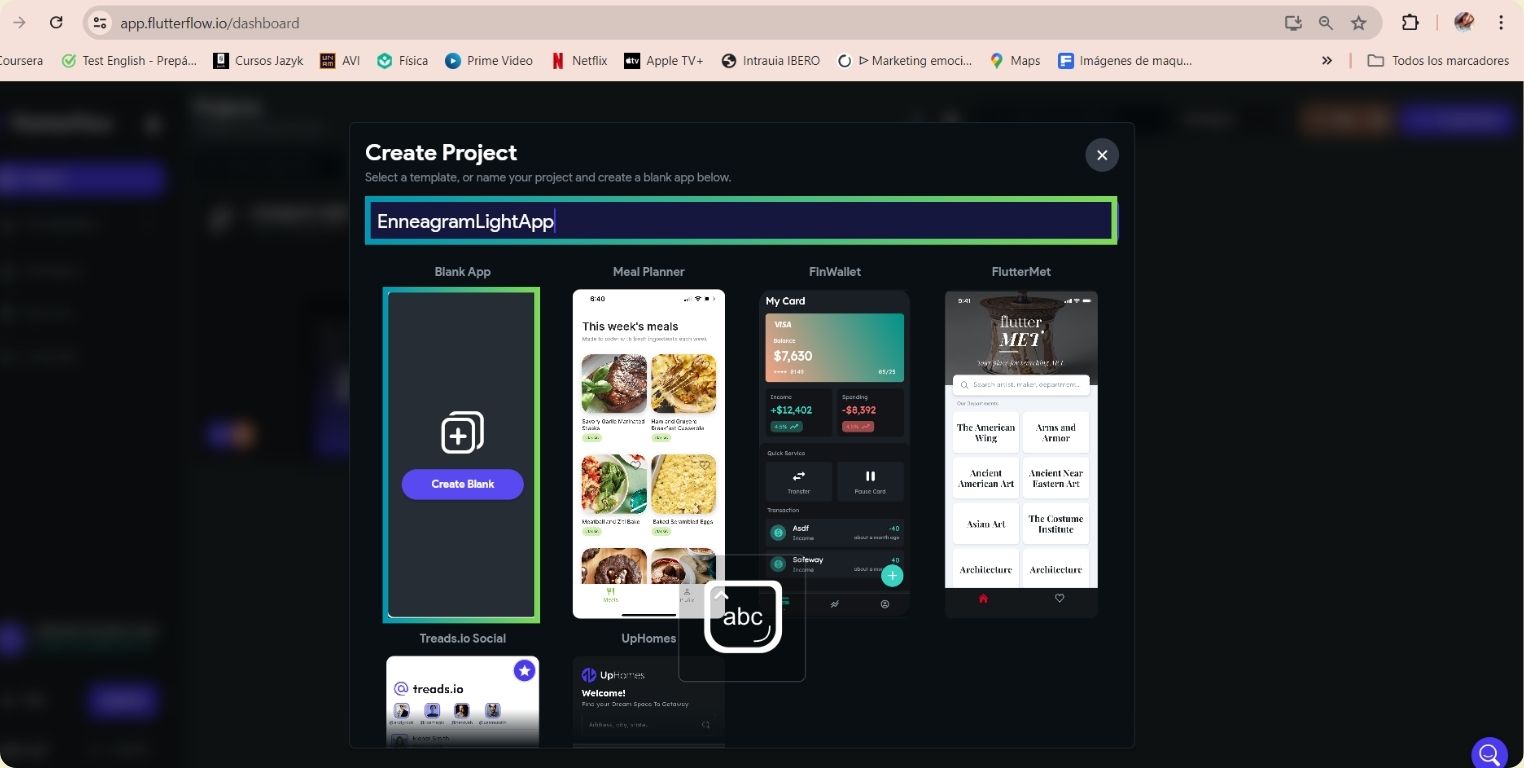
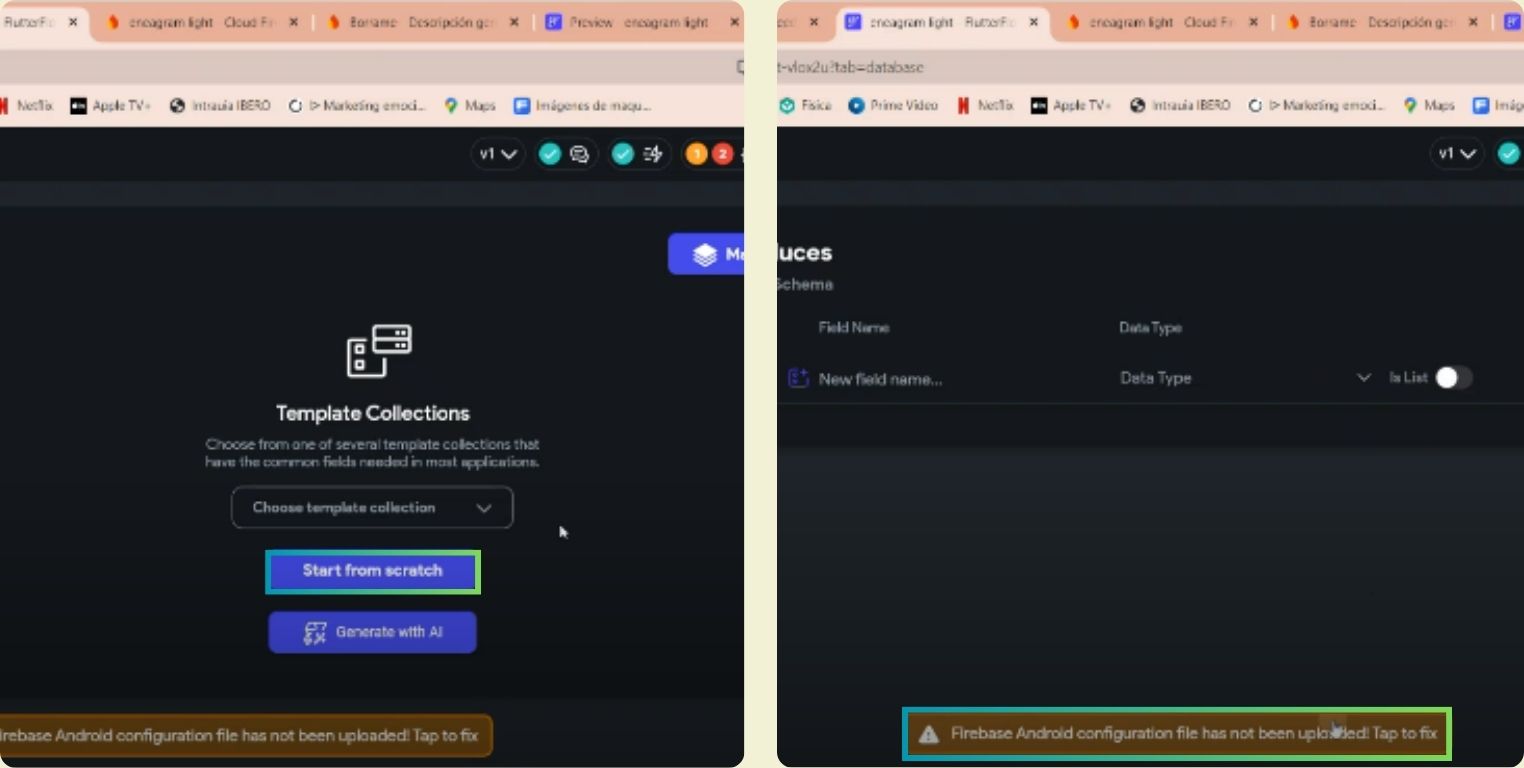
The first step was to create a new project.
When you create it, besides naming it, it also gives you the option to base it on a template, in my case I did it from scratch because I didn't plan to have many views.
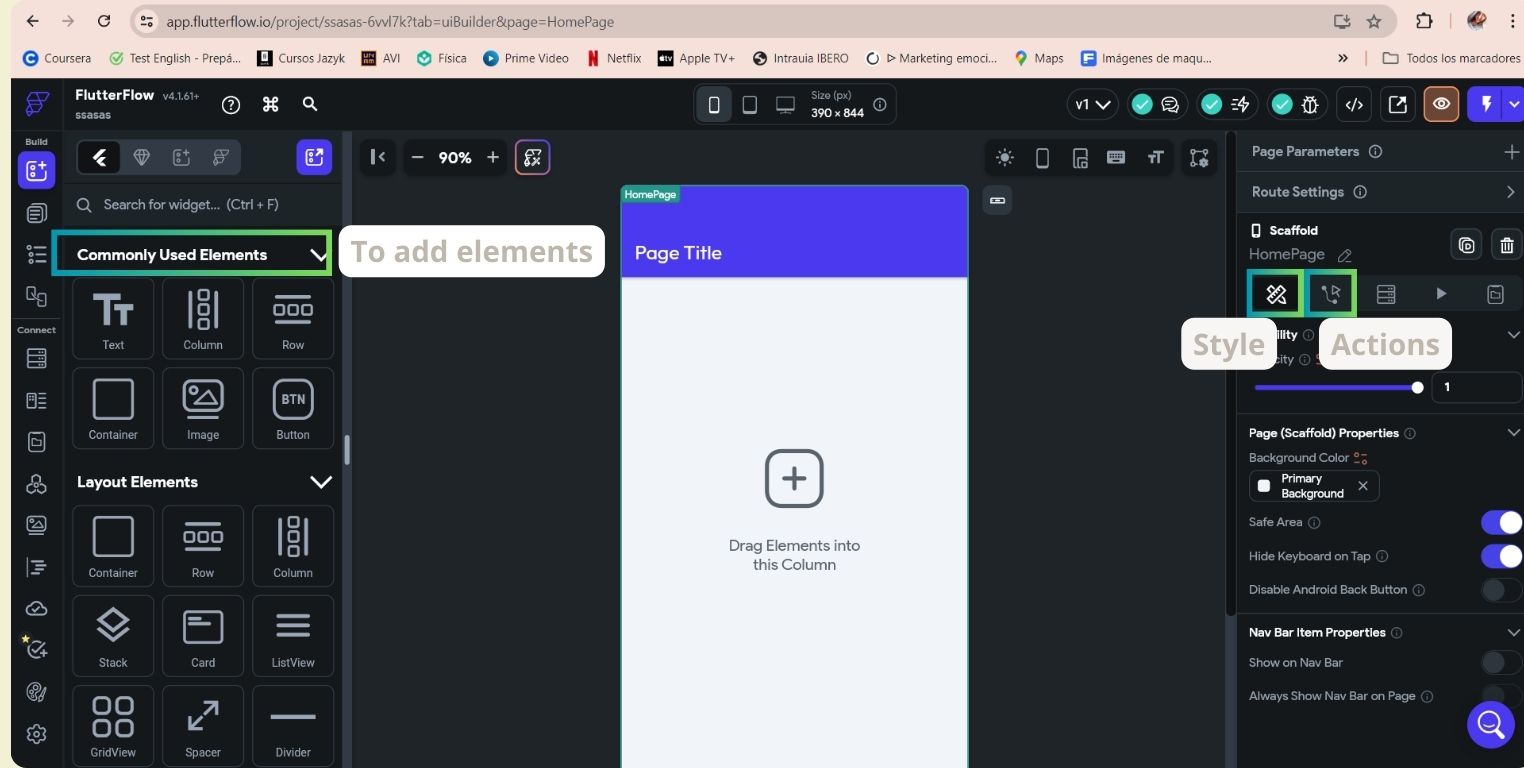
After watching some YouTube tutorials, I understood the basics to be able to work, on the left are all the elements that I might need, and on the right I can customize them, place them and also indicate the actions I want them to do, the basics to be able to change the screens.
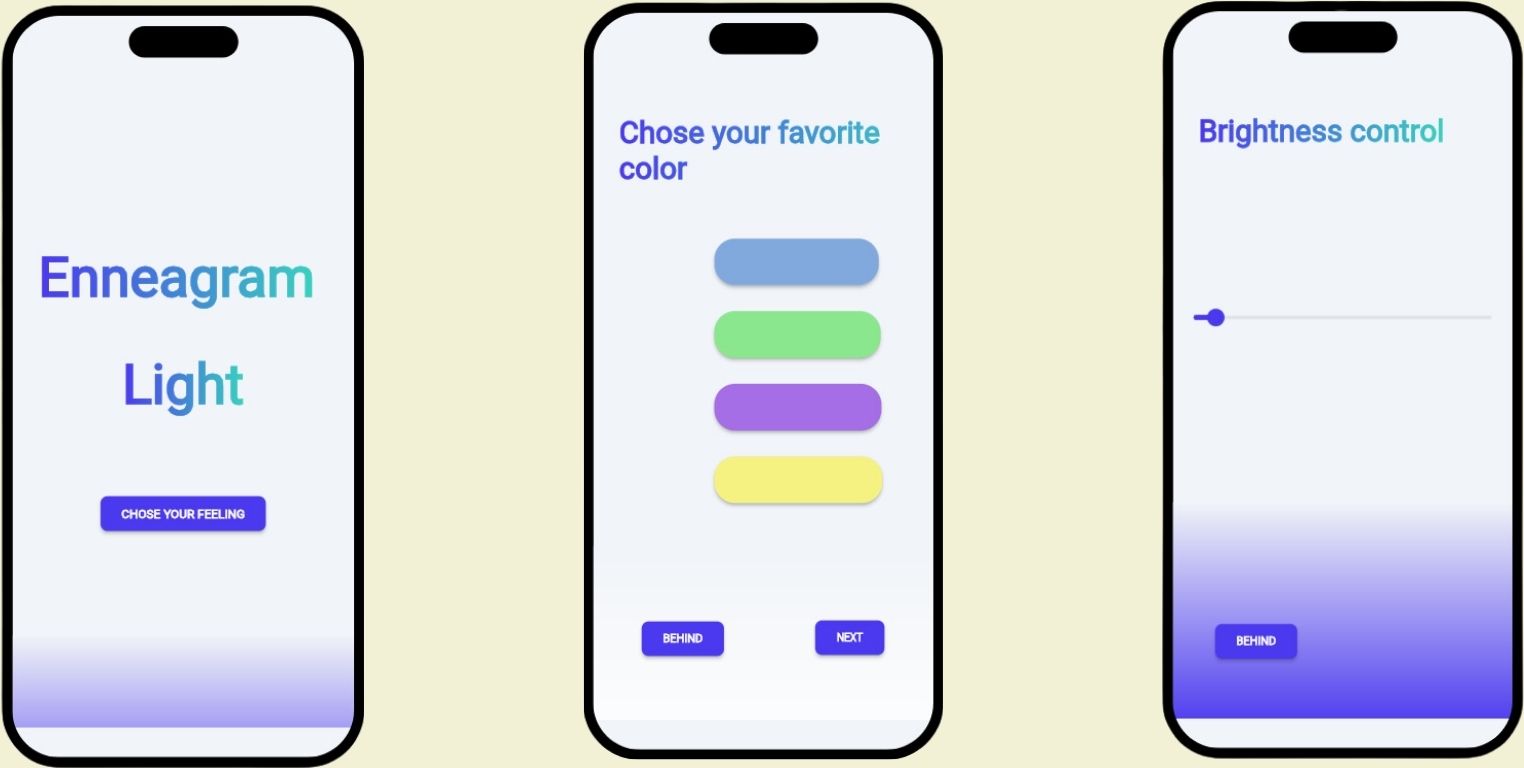
Due to time issues, I am satisfied with the application that I can interact with the colors and brightness. So some time later, the 3 pages of the application were like this, I wanted to maintain a visual balance between the text that I put and the components, because finally I wanted them to speak for themselves and be more intuitive than anything else.
Once I finished the visual part, I started to indicate the actions. For that you have to select the component and then indicate the type of action, in the case of my blue buttons, they were to navigate to the other pages.
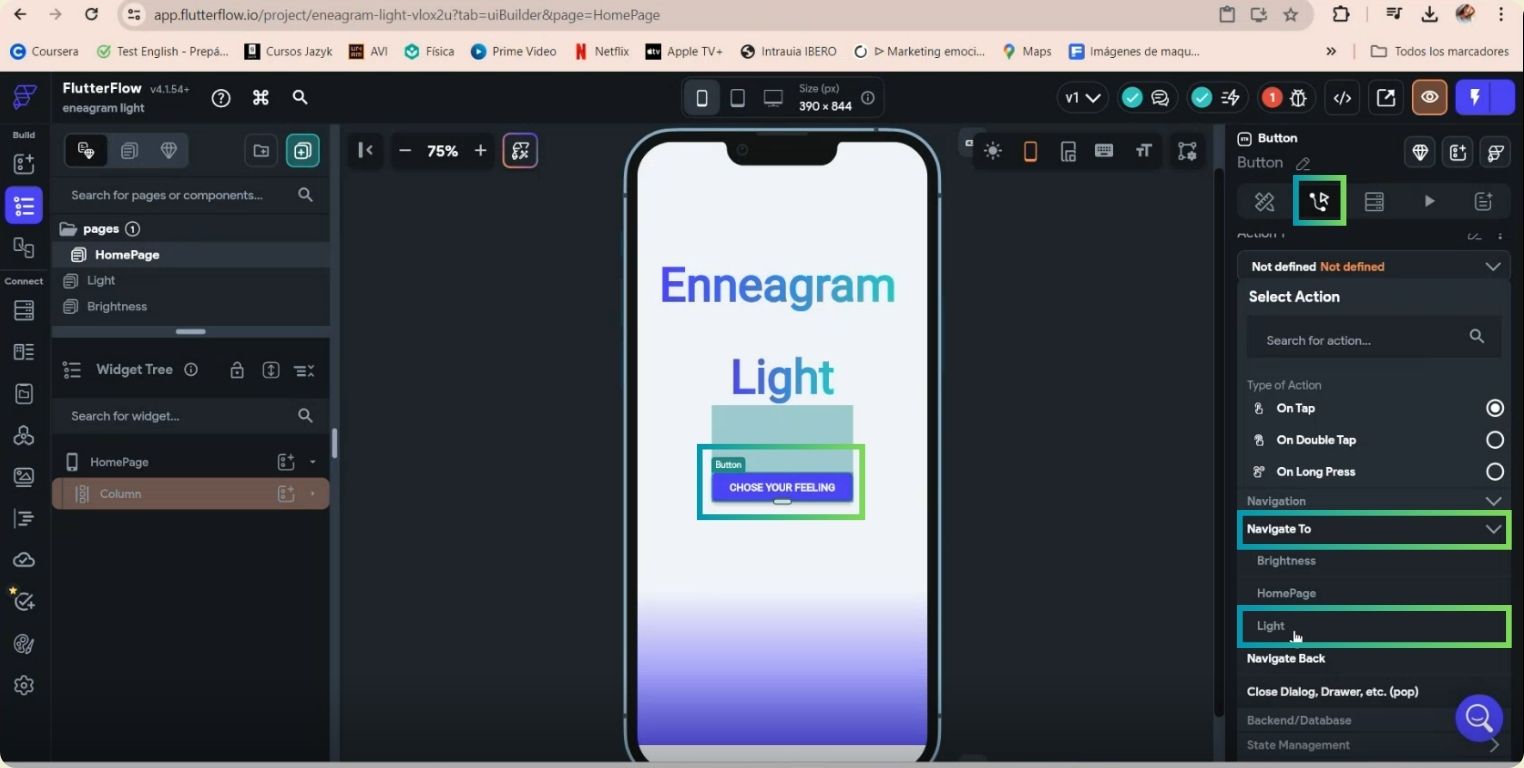
This is how they were connected.
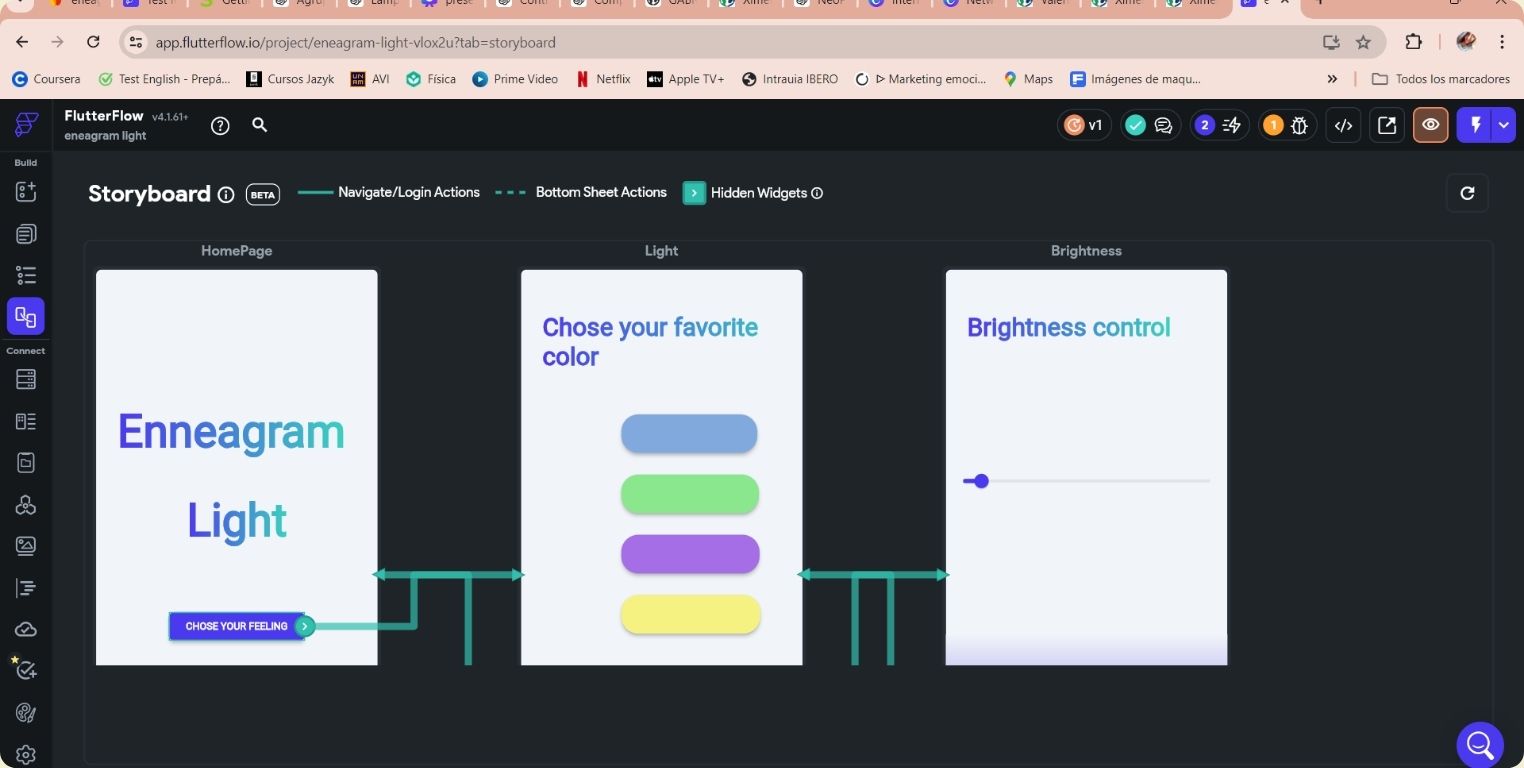
Something cool about FlutterFlow is that it allows you to see previews in real time of the updates that are made to the application. In that same space is where once the application is finished, you can interact with it, and this is how you would see it:
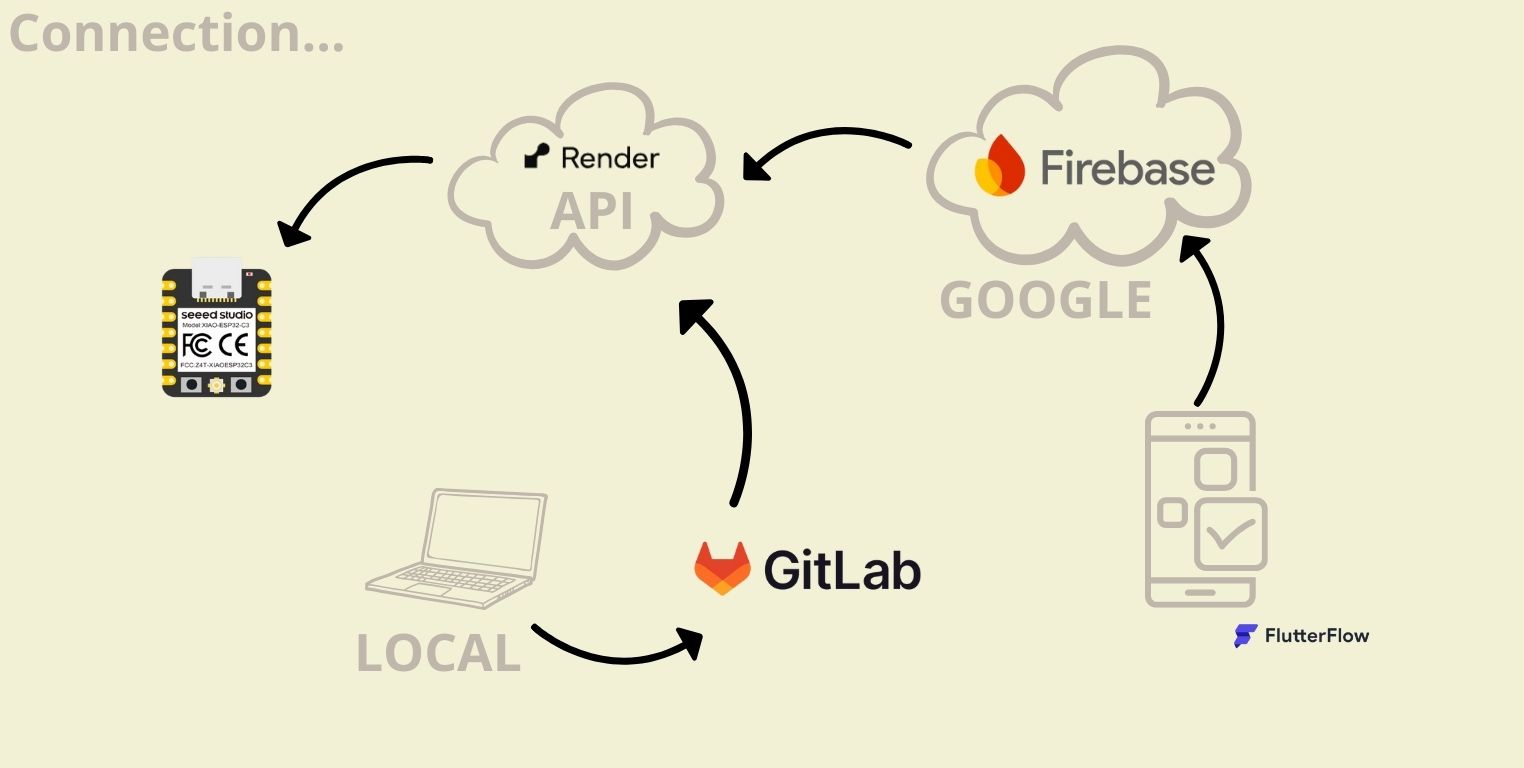
That was the creative part of the design, now I had to connect the application with my microcontroller, but to explain this in a simpler way, I made a diagram. Basically what I am looking for is that the application sends a signal to the microcontroller, and the microcontroller reacts accordingly. To do that you need Firebase to store the application data and send it via Render to the microcontroller, for the latter you need GitLab to keep the code updated, at first it is a bit confusing, but I hope the breakdown and the diagram help a little.
-
XIAO ESP32C3 receives data via HTTP requests from the API.
-
API processes HTTP requests from the application and the XIAO ESP32C3.
-
Firabase stores and sends data to the API.
-
RENDER receives the HTTP requests from the API sent to the XIAO ESP32C3 and provides the cloud hosting environment for the API.
-
GitLab stores the API source code and manages the collaborative development of the project.
-
FlutterFlow communicates with the API to send the stock data stored in Firebase.
CONNECTING FlutterFlow to Firebase
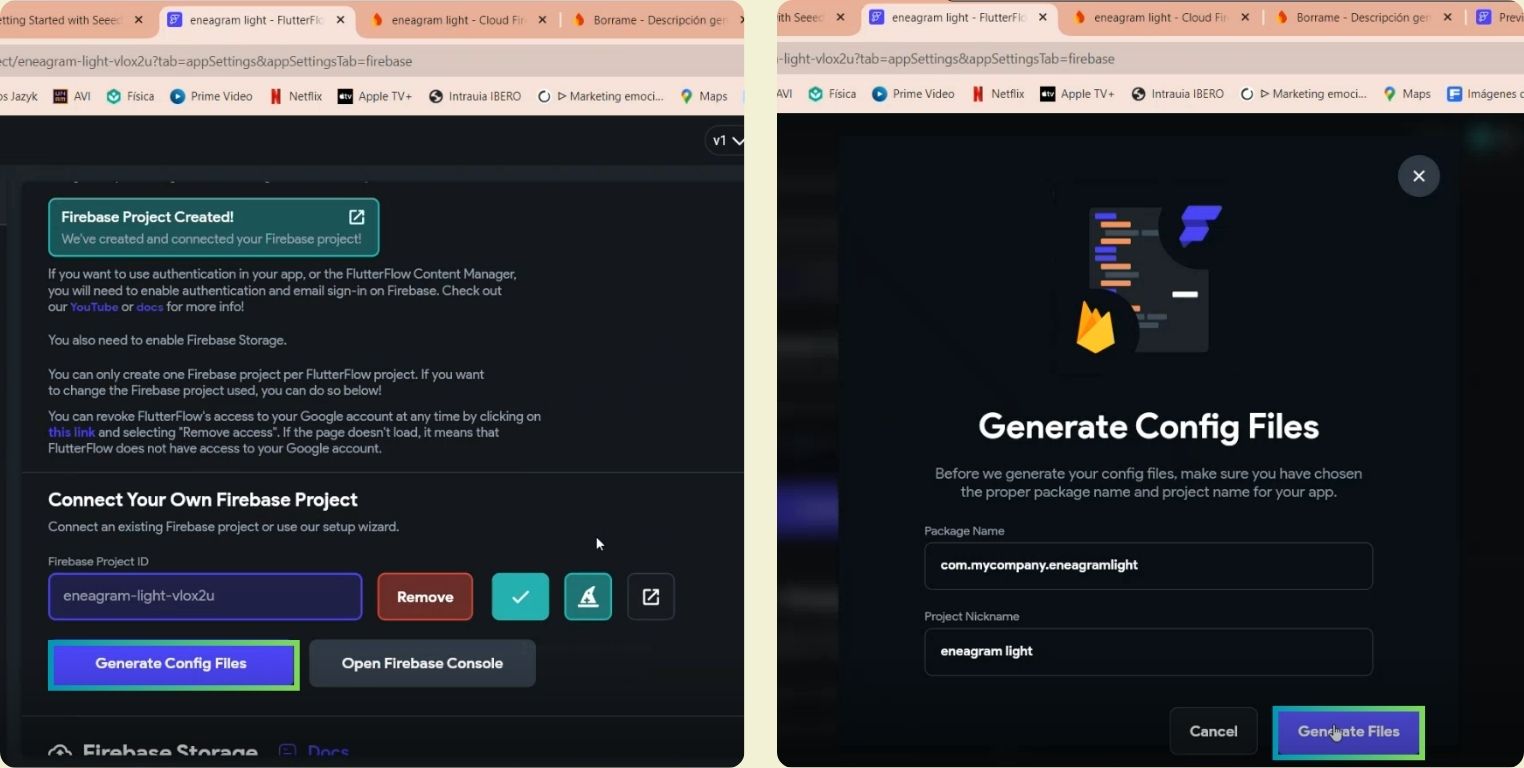
Inside the FlutterFlow configuration there is a section dedicated to Firebase, where I created a new project.
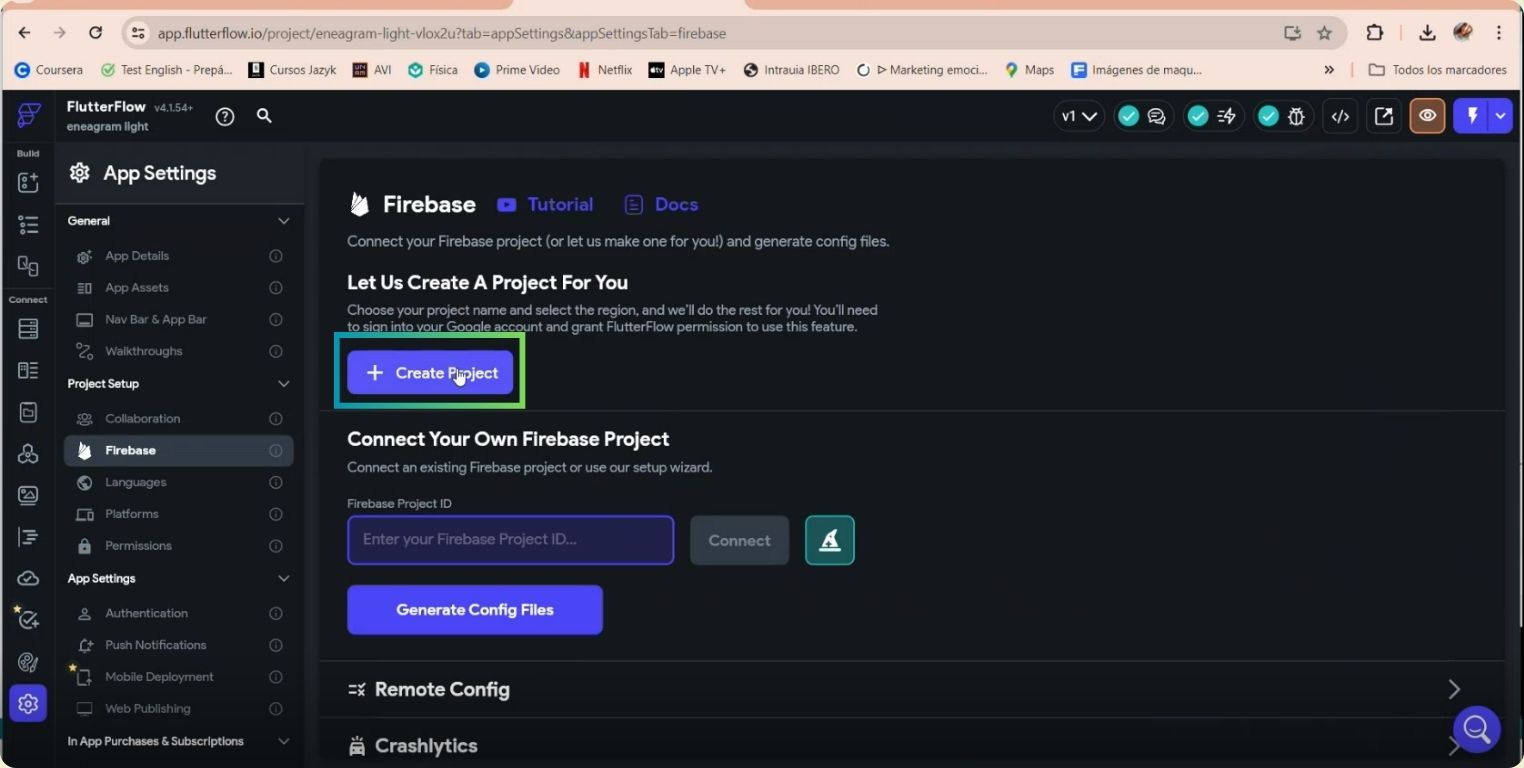
It asks you for the name of the project to connect, and also the nearest computer region, in my case it is the US nam5. Then I continued starting with Google and accessed all the services with FlutterFlow.
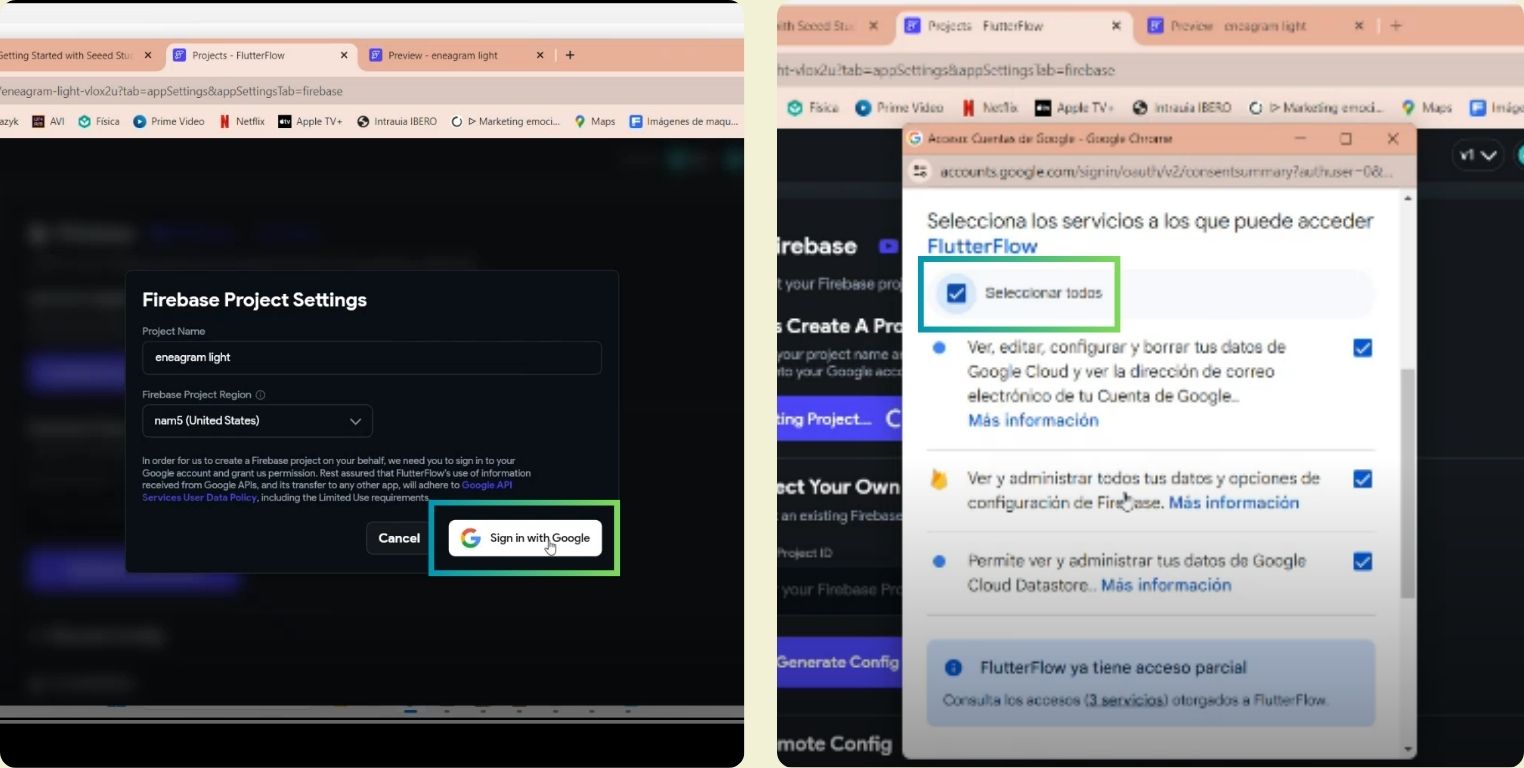
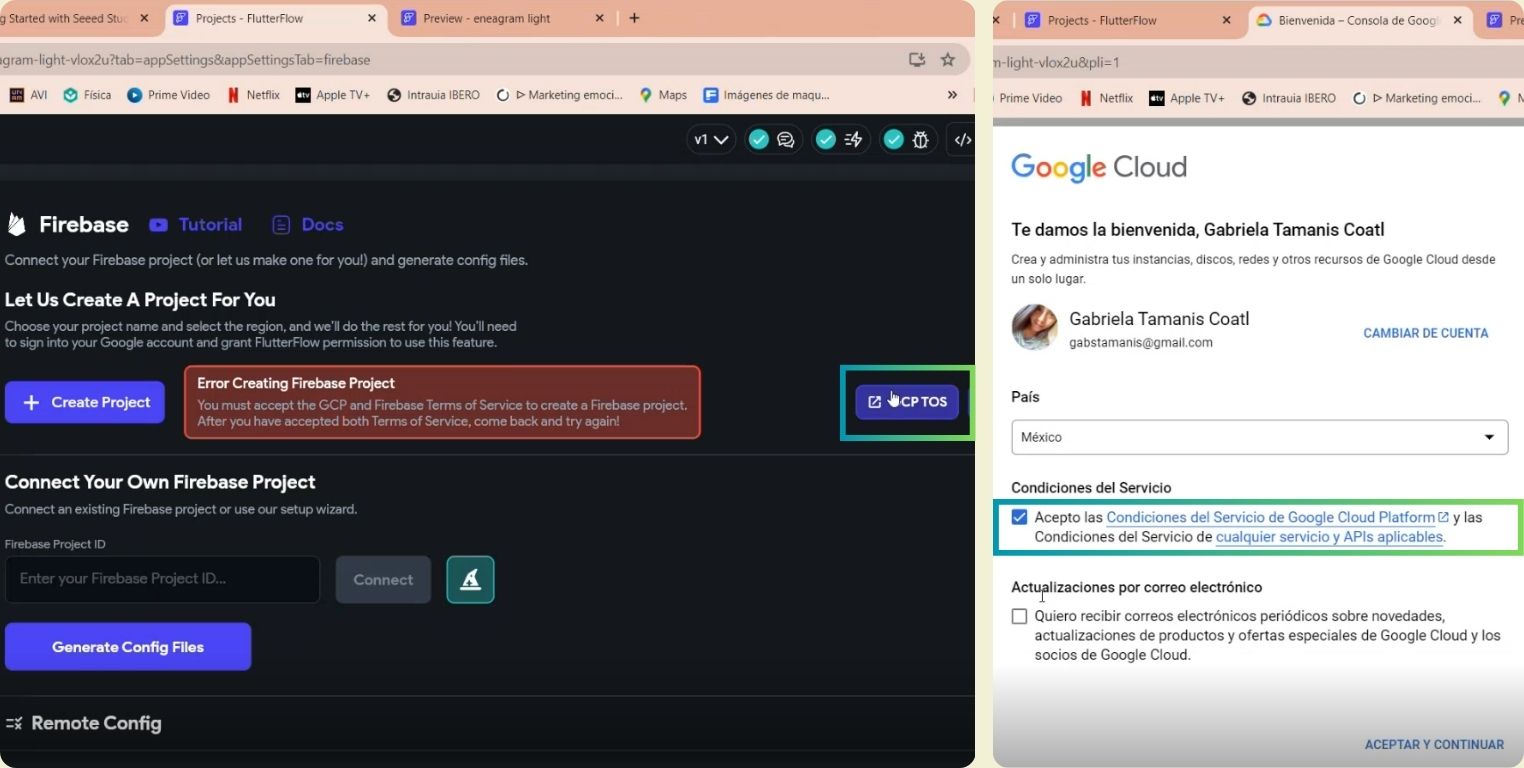
That is the quick and easy way to connect, however, I was getting an error because there was some permission I was not accessing, so I clicked on the blue box, it redirected me to a Google window, where I accessed the terms of service.
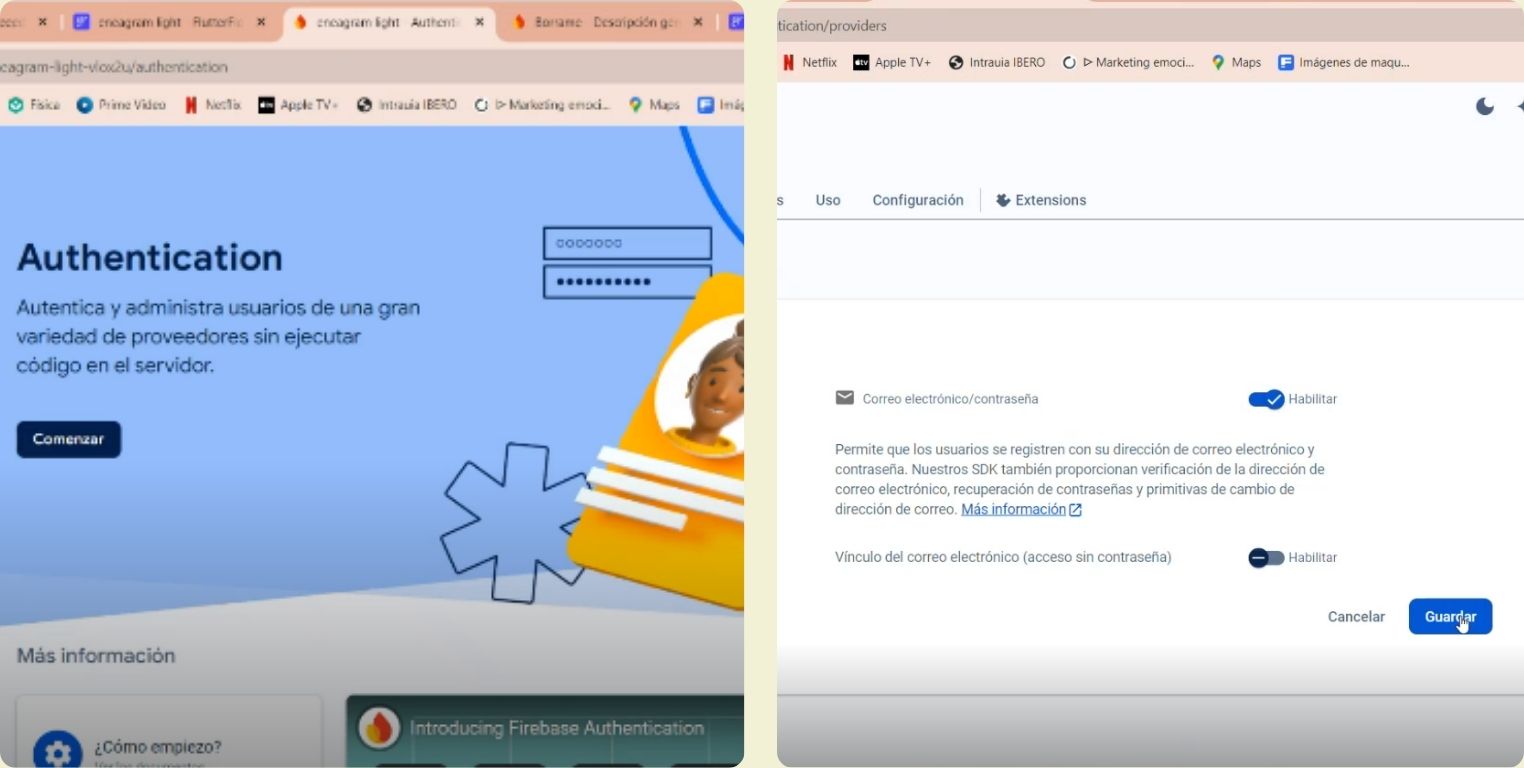
I clicked on Eneable Auth On Firebase.
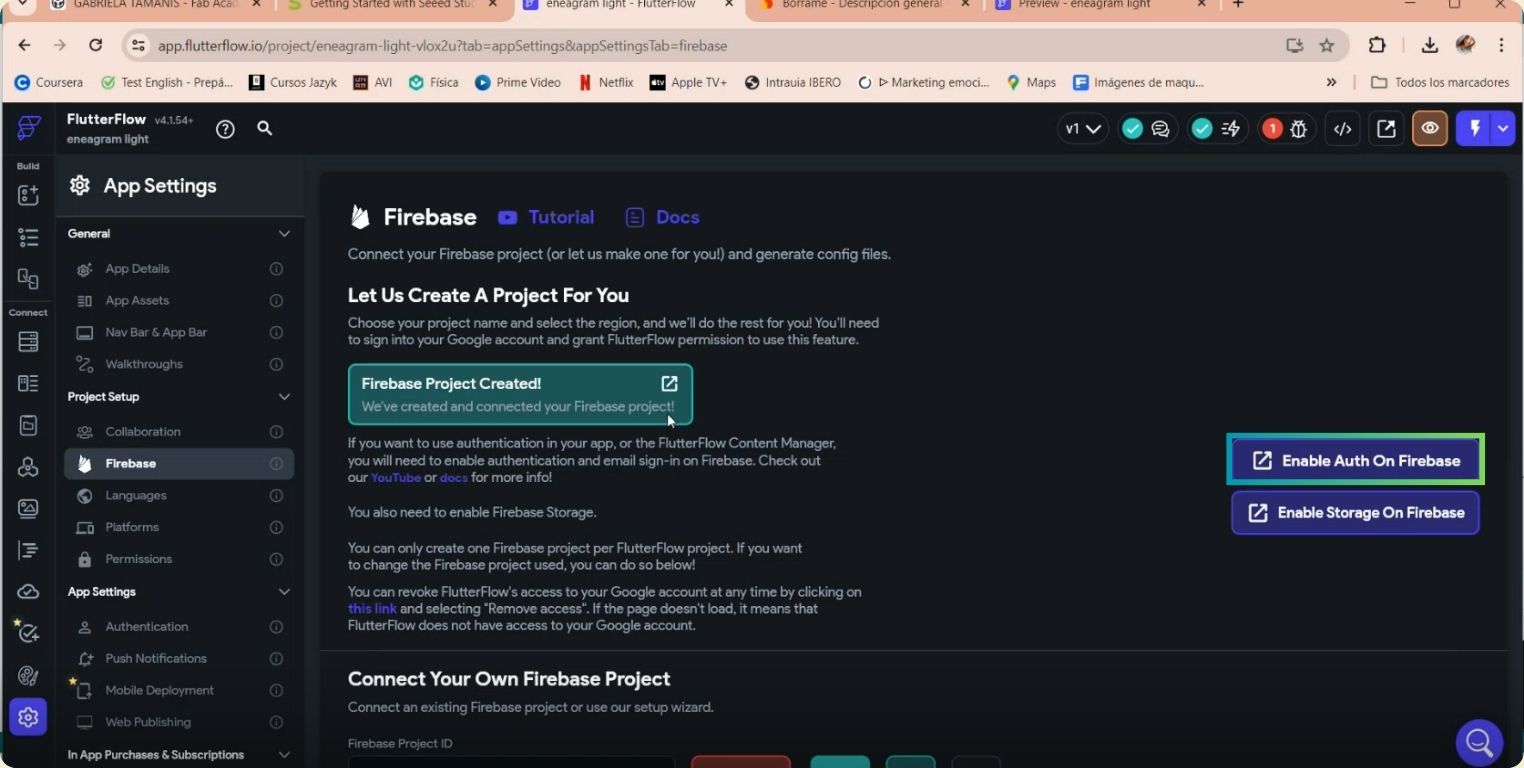
It redirected me to Firebase, and I enabled a function to log in, that although I don't have it for some projects it is indispensable, that's why I thought it was relevant to mention it.
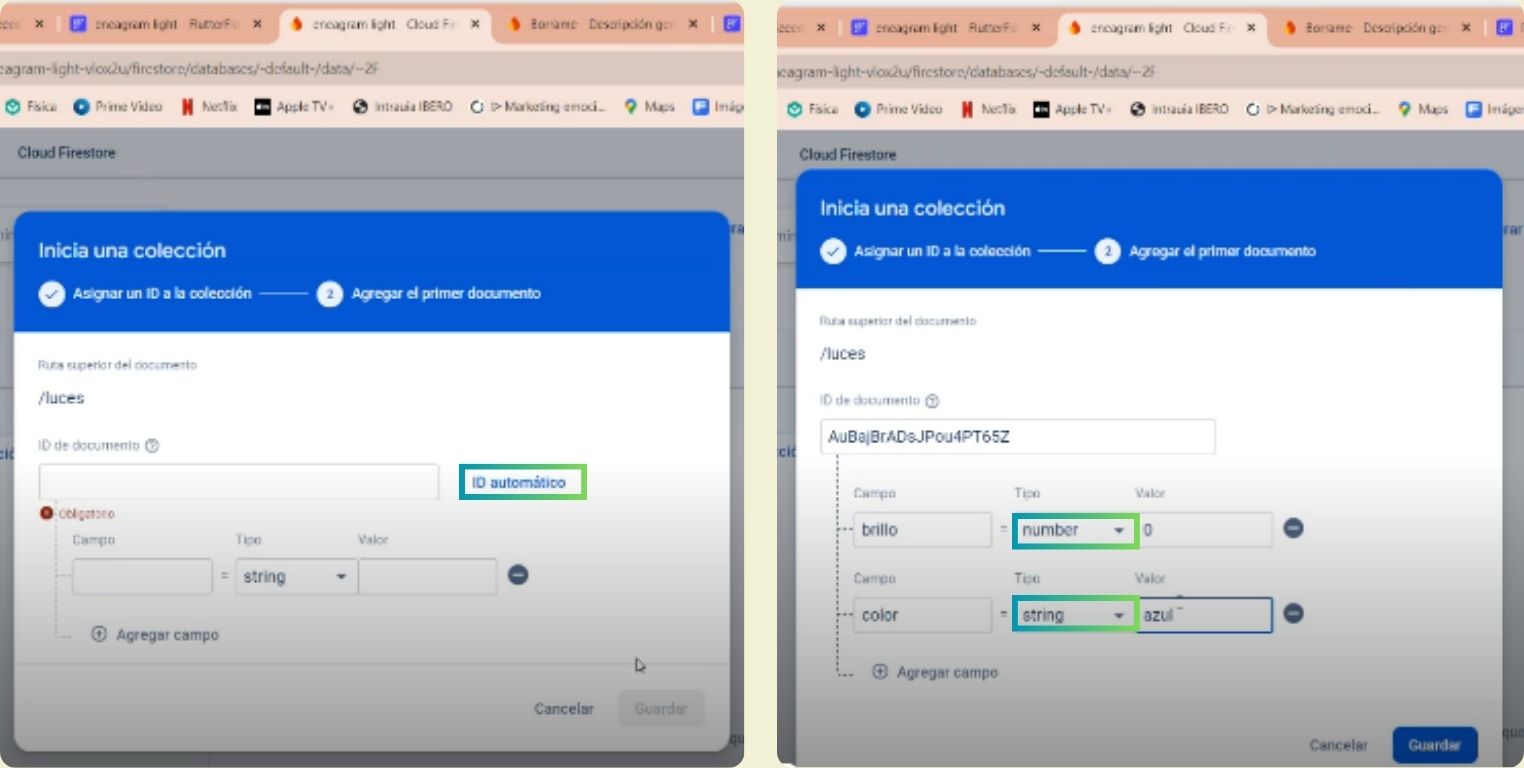
Back to what I was doing, inside Firestore Database I started a new collection called lights, if I had done the sound thing, here I would have to add that segment too.
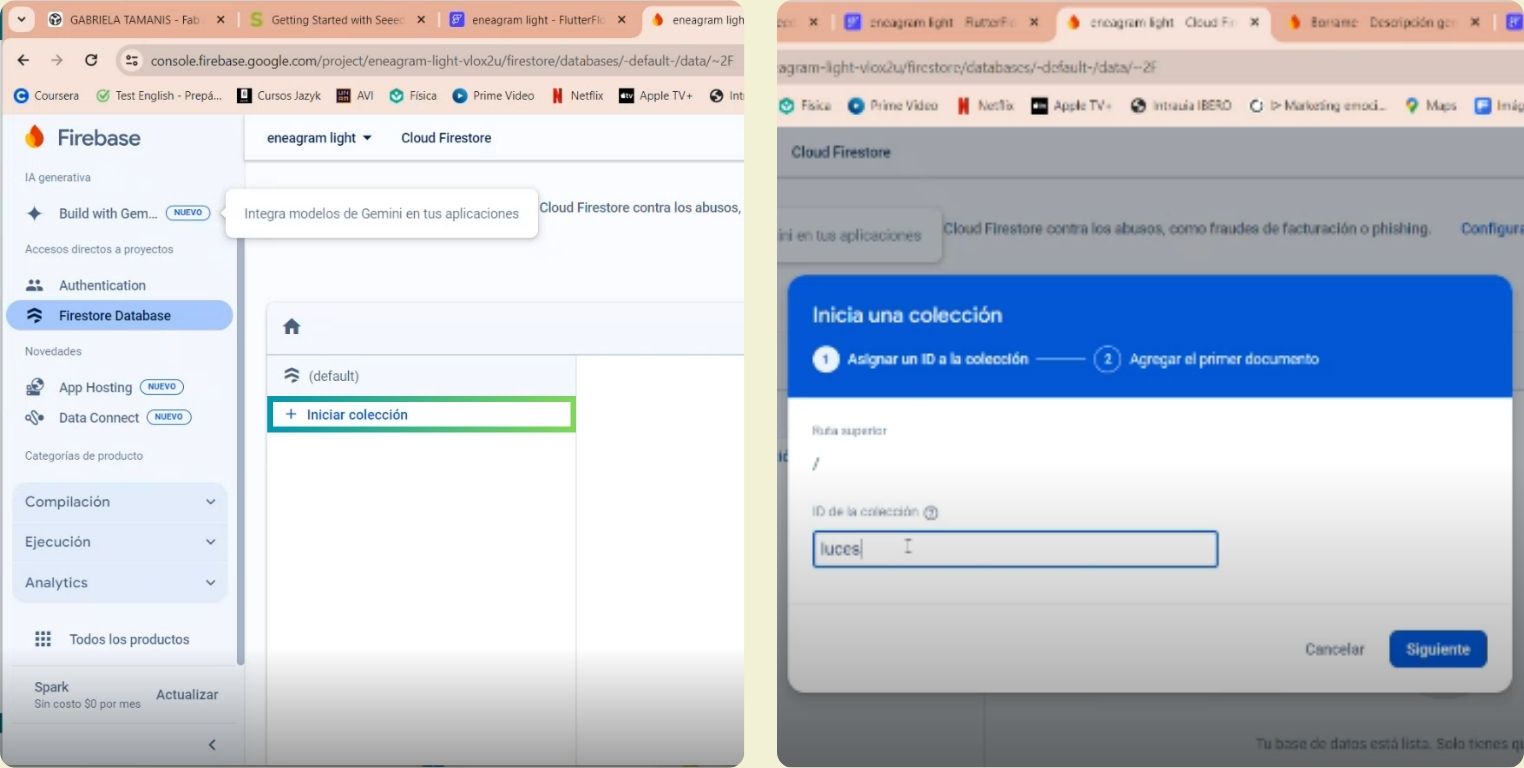
I clicked on Auto ID, and described the fields of the actions of my application, the brightness that is finally a number logic, and the color that inside the application I have it as options, so I left the string type. Finally, I gave them both a value.
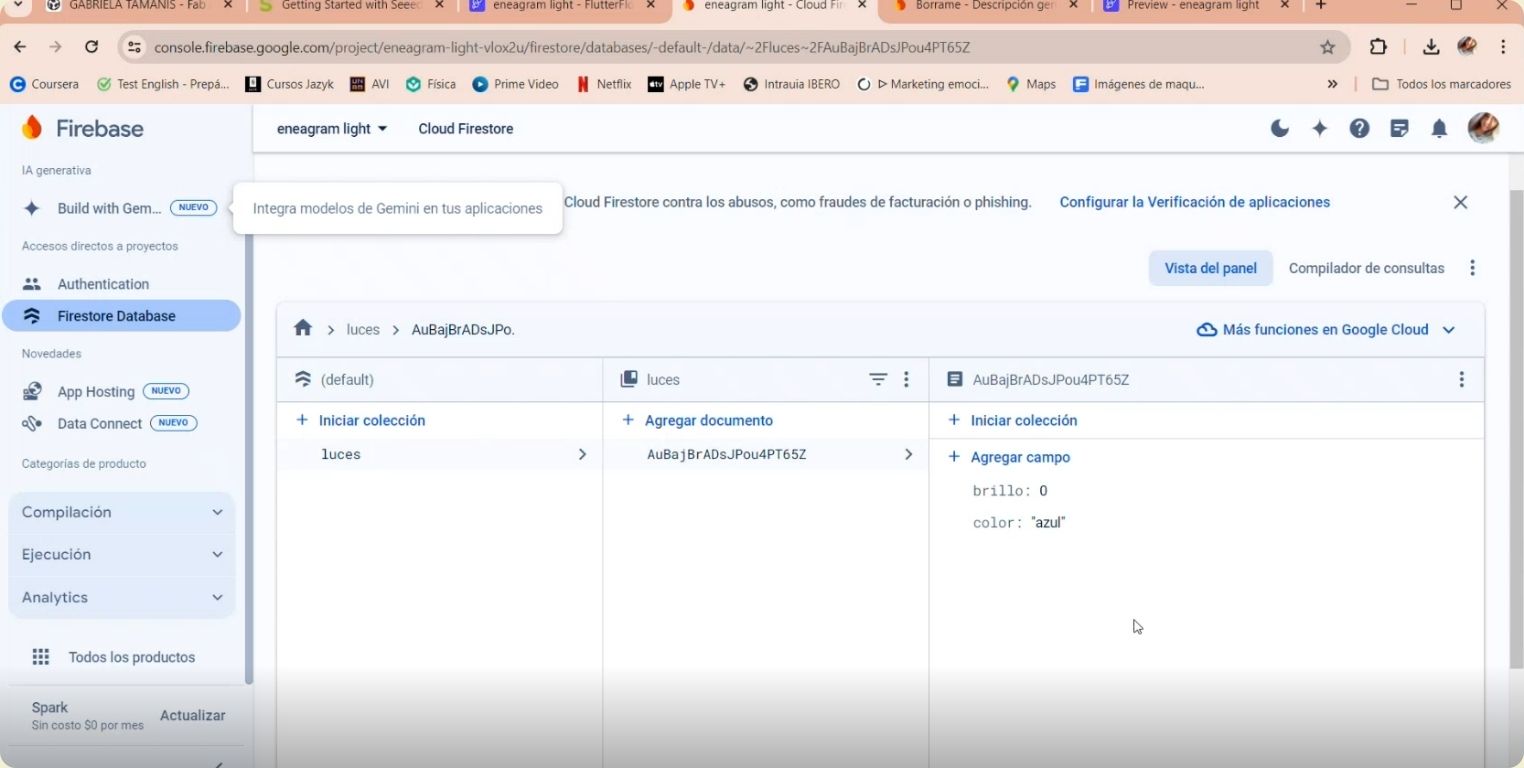
This is how the database looks in Firebase.
I went back to FlutterFlow to create a new database with Firestore.
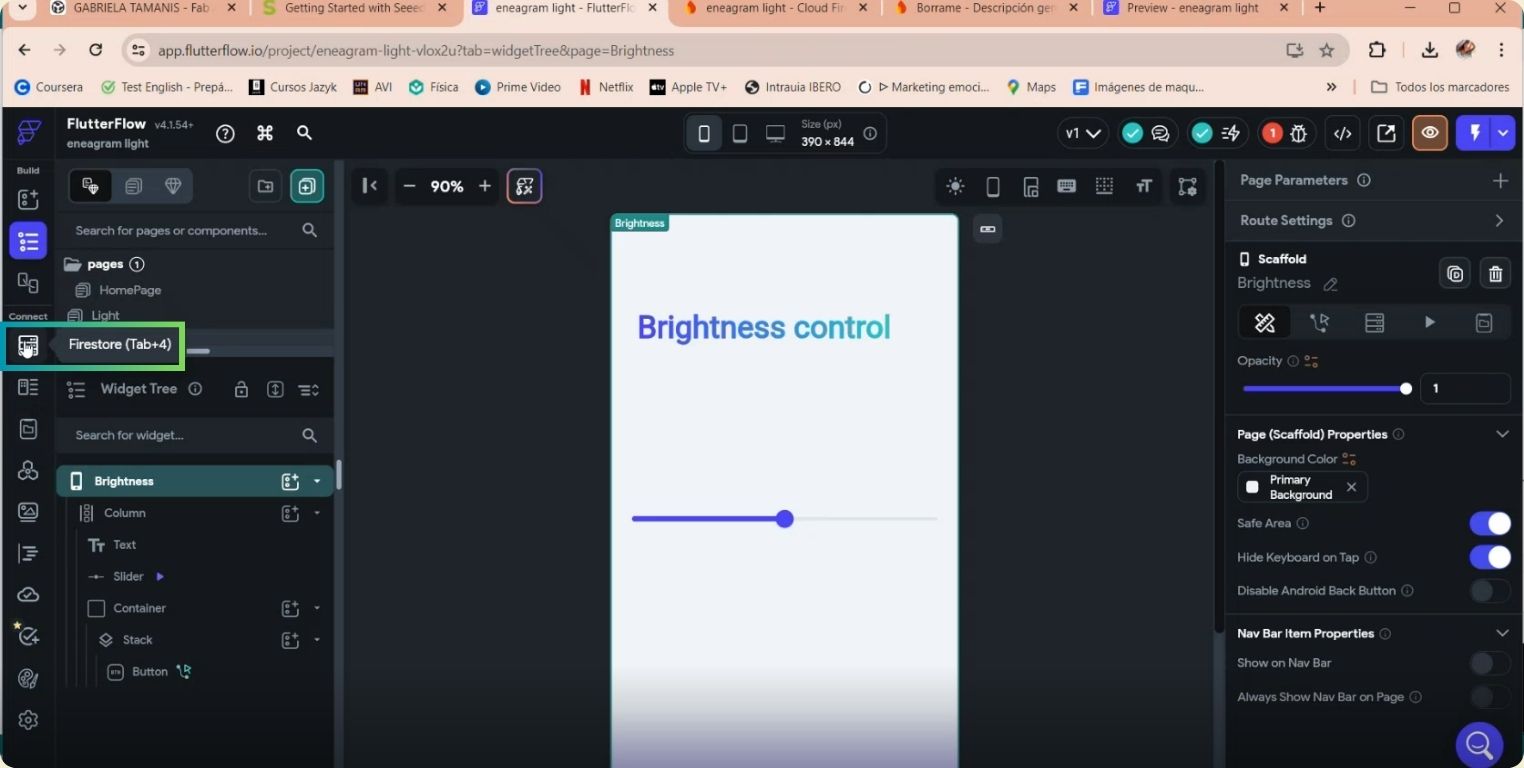
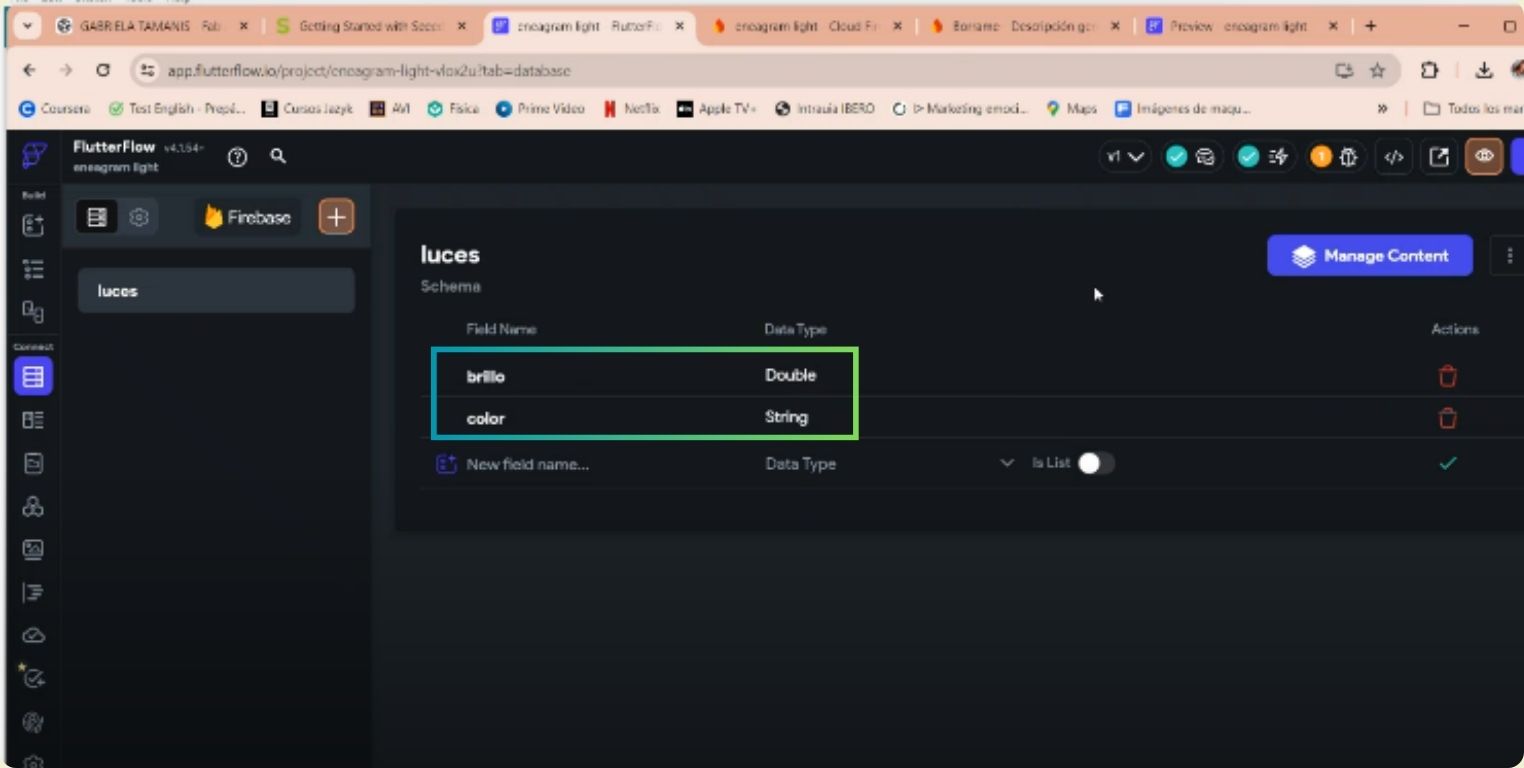
This is to have congruence what I did in Firebase with FlutterFlow, then to my collection I gave the name of lights.

I clicked start from scrach, but because of the warning message I could not advance.
It turns out that I had missed generating the configuration codes needed to properly connect the application to Firebase.
There again I added brightness as a double data and color as a dtring data.
Now begins the part of connecting the elements with the actions that will have repercussion in the microcontroller.
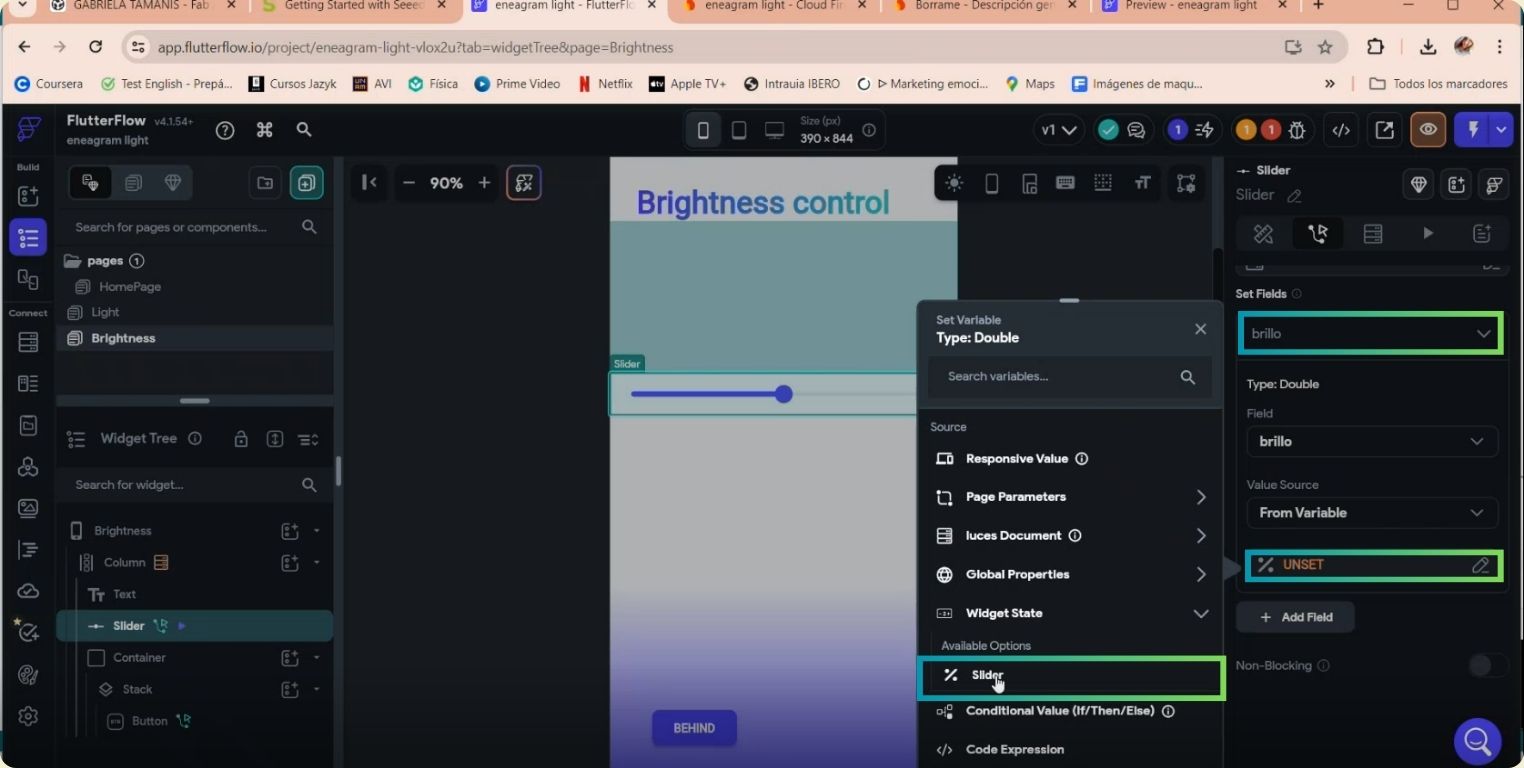
I started with the page of the brightness, the first thing was to click on the column to have the reference, then I clicked on Query, chose the collection of lights, and selected the single document option.
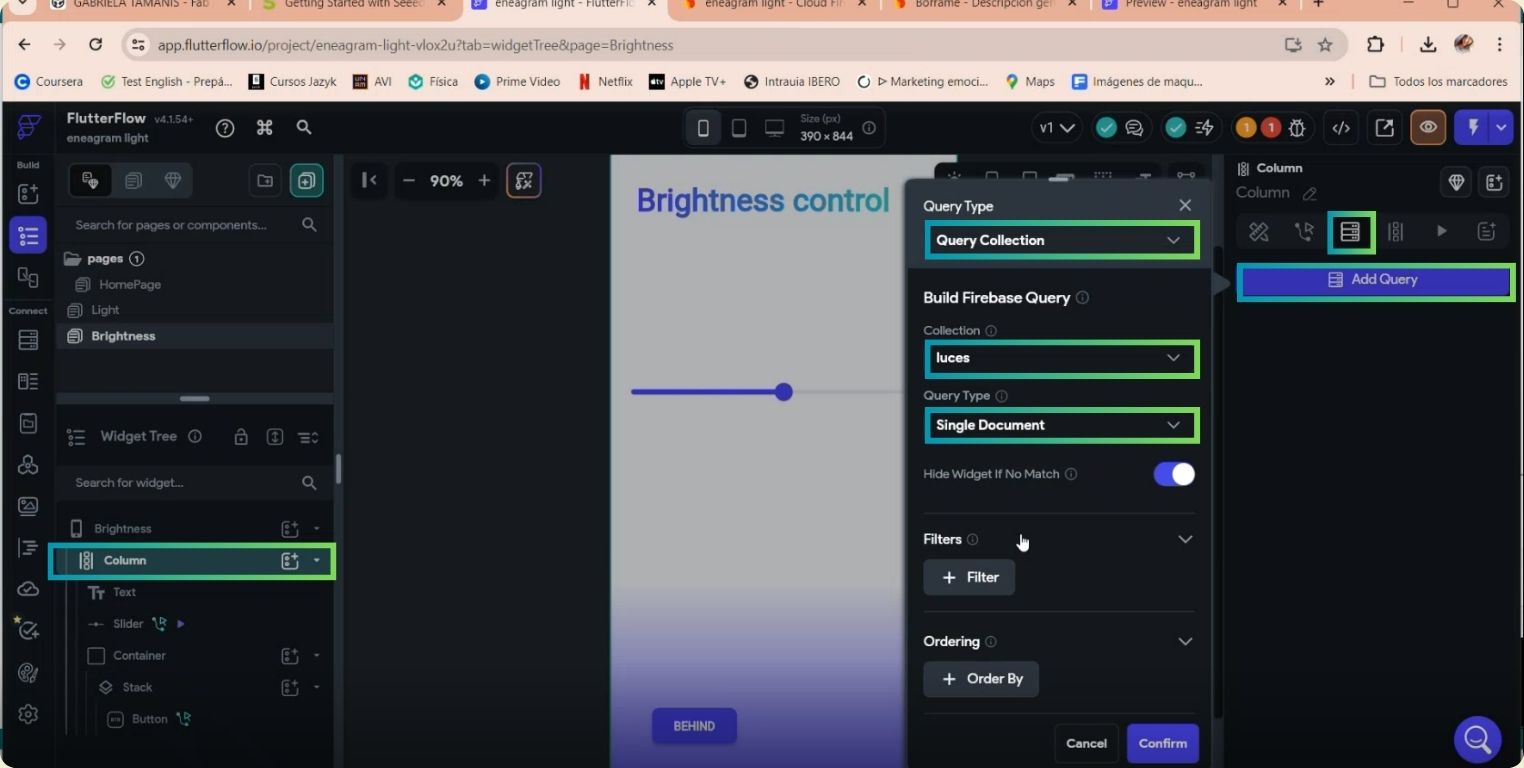
Then I selected as such the element that helps to lower or raise the brightness, and inside actions I selected update document, followed by that I put the reference of the document, in my case it is lights. That makes that it obtains the data as a whole of the reference brightness.
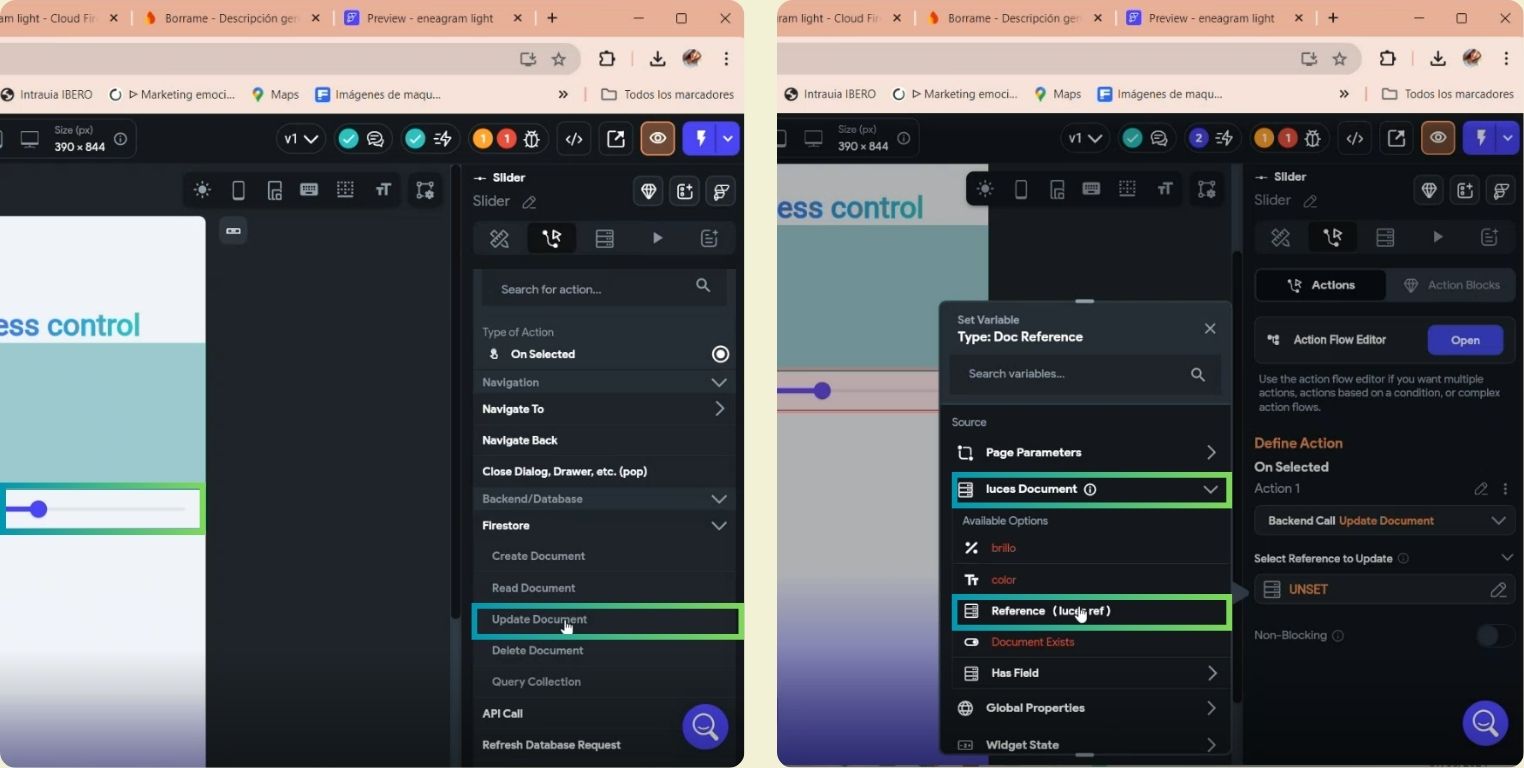
Finally, I selected the type of variable as slider.
Now to create the reference in color I followed the following steps:
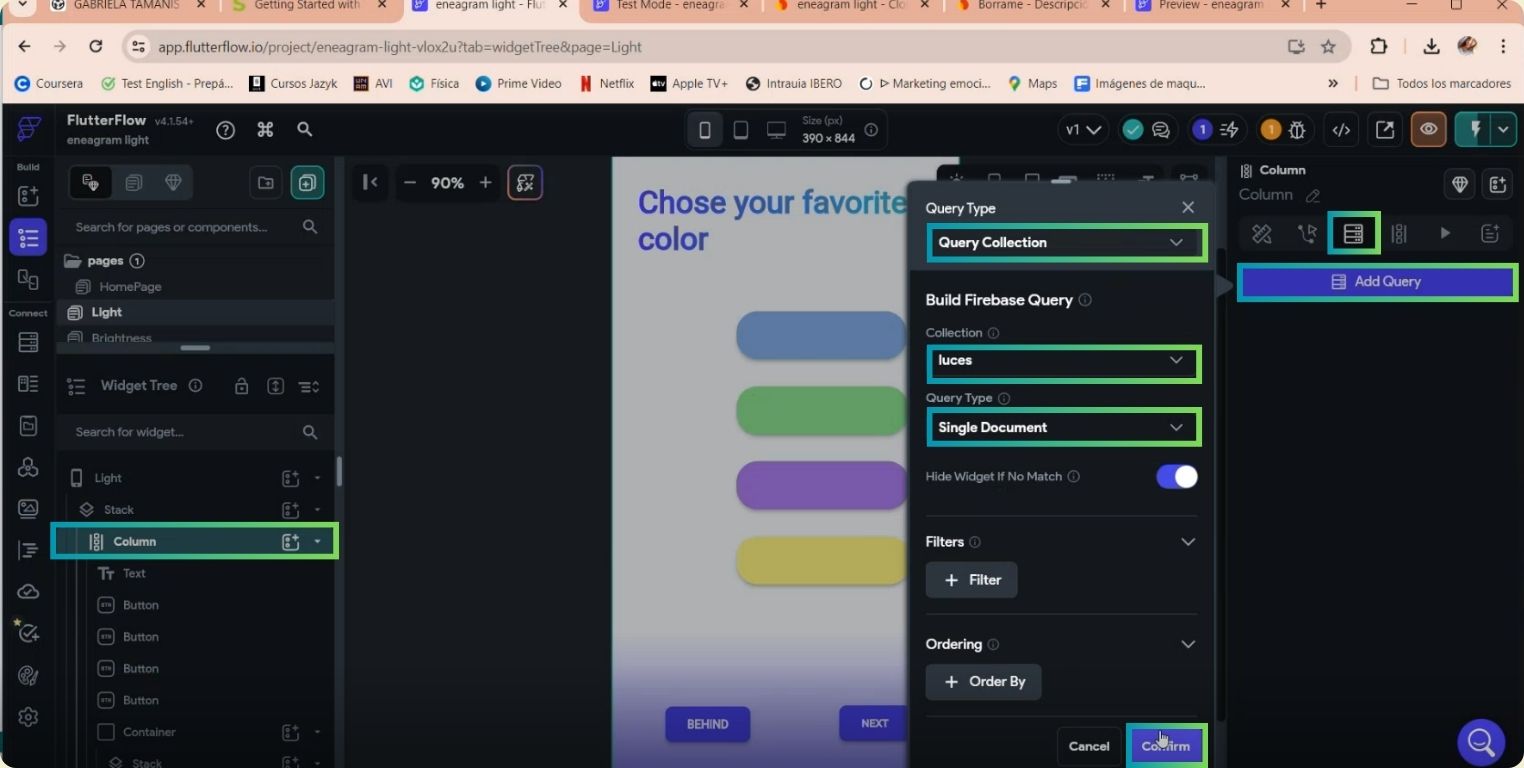
Again, I selected the page column to activate the reference, and in Query I selected the collection lights, of type single document.
And for each color I did the following, I clicked on the element and in actions I selected backed/database, followed by update document. Then I indicated that the reference was lights.
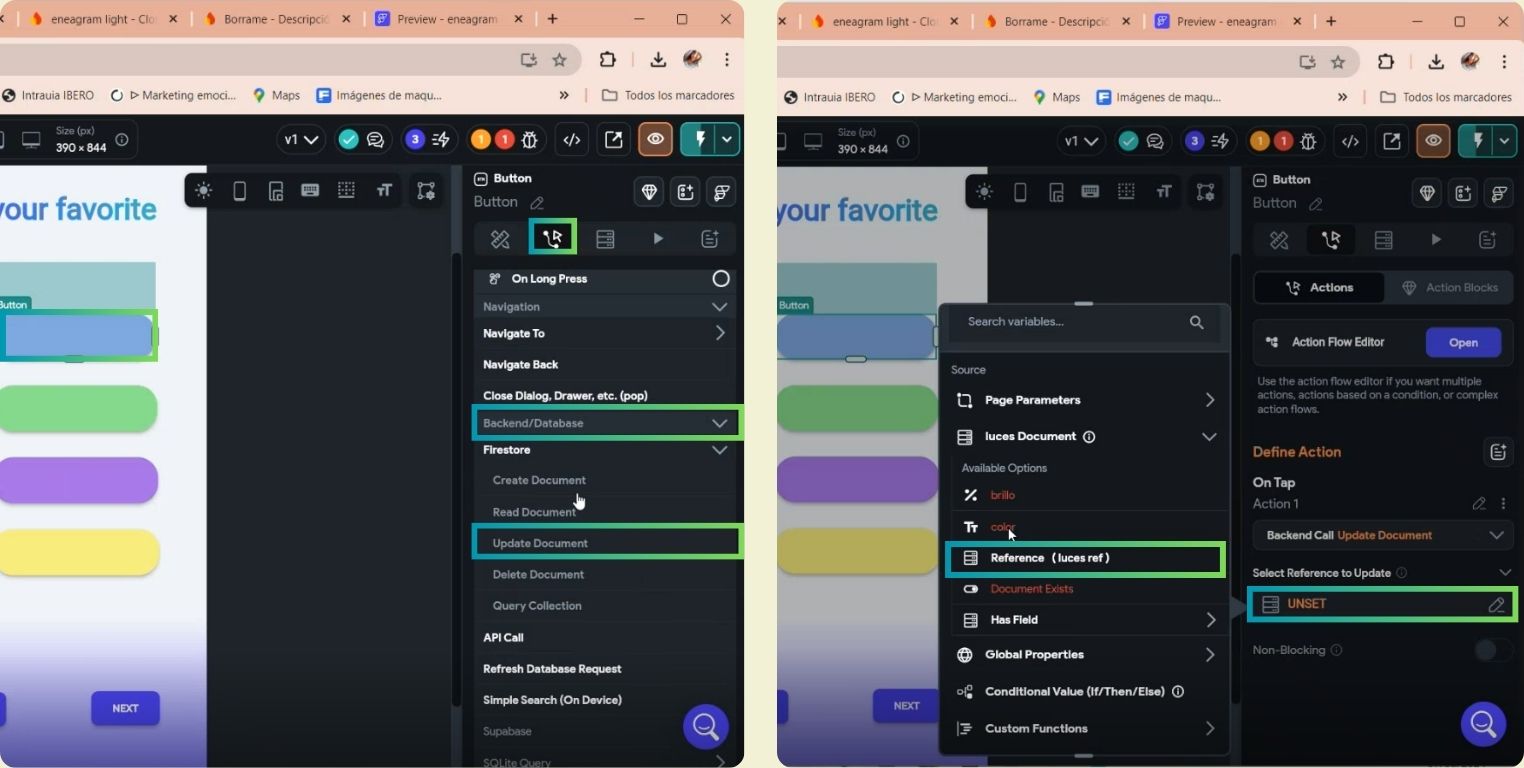
I clicked on add field to select the color parameters.
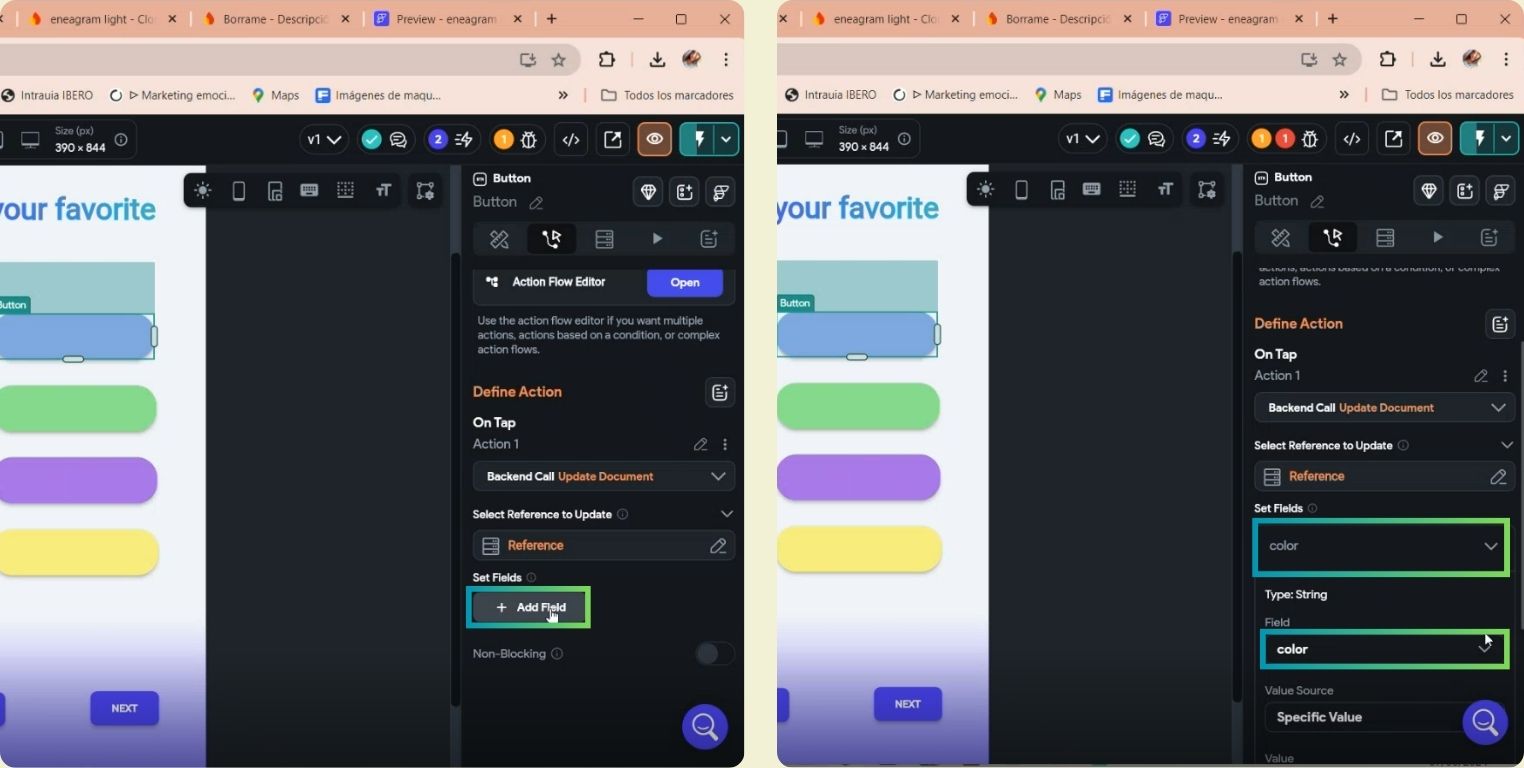
Then I indicated that it was a specific value named blue. I repeated this for each color option I have.

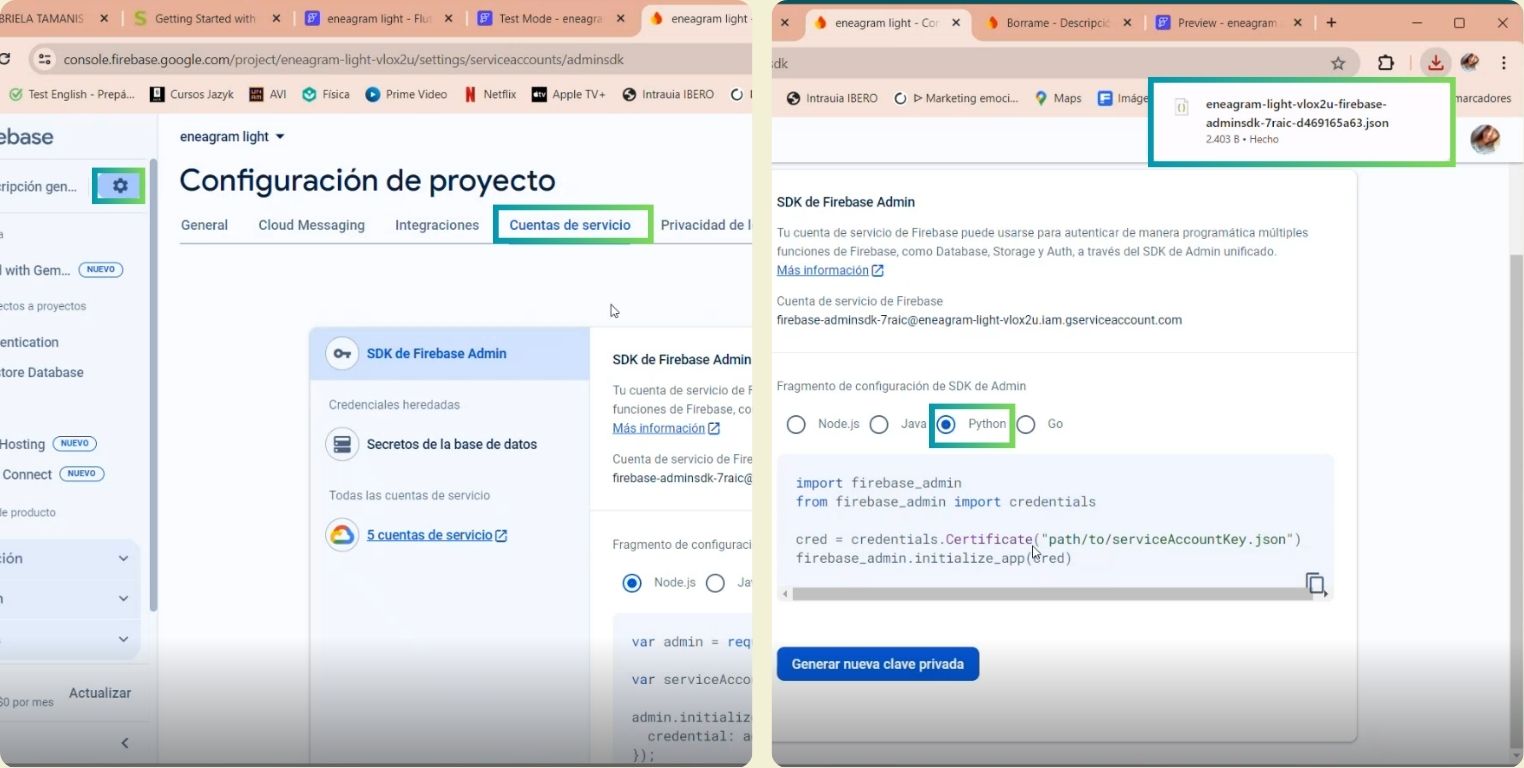
Once the application was ready to be congruent with Firebase, I went back to Firebase to download the file with all the configuration to be able to connect to Firebase.
Once the application was ready to have congruence with Firebase, I went back to Firebase to download the file with all the configuration to be able to connect them, it is a .json file that I downloaded in Python language.
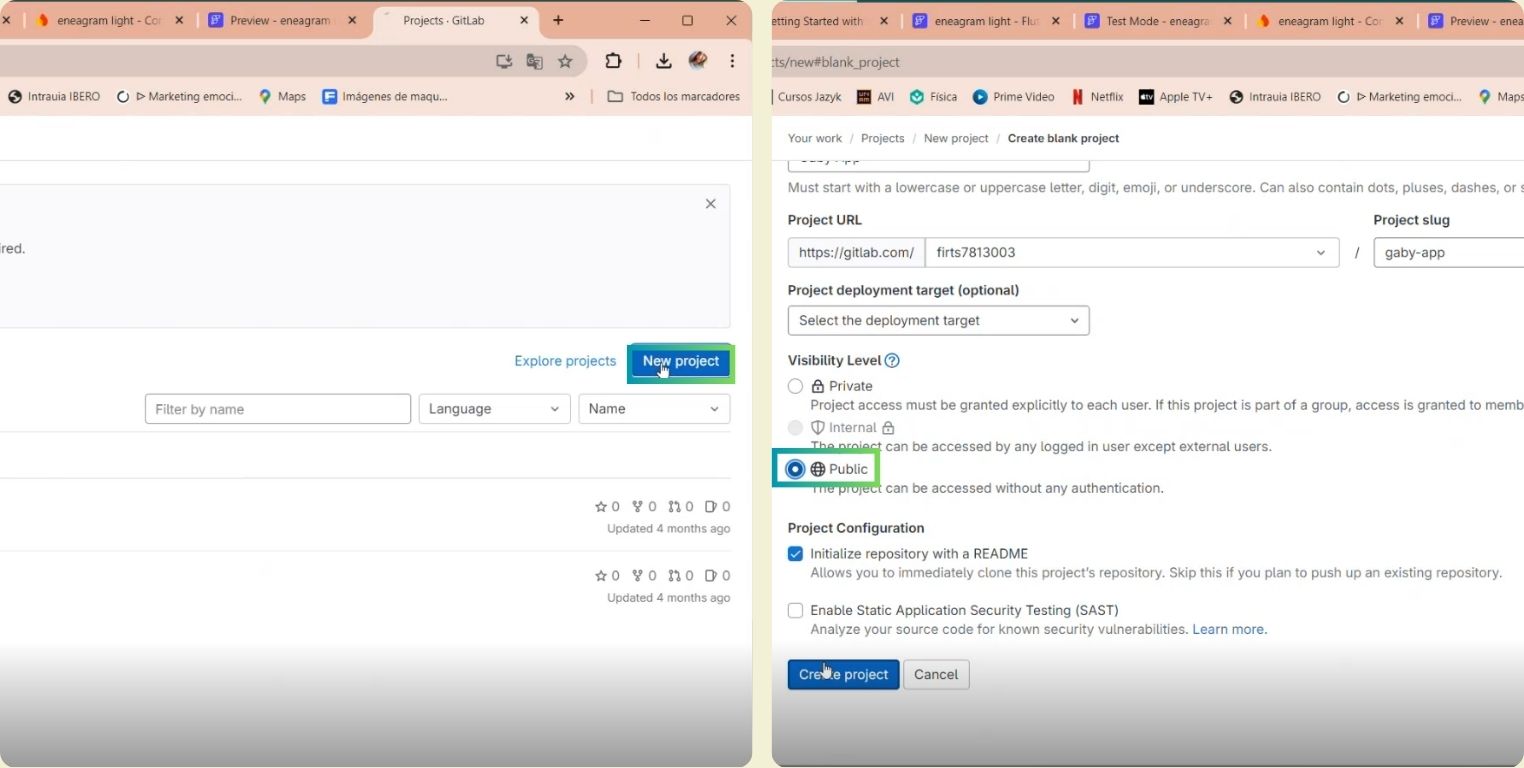
GitLab Time
Now it's time to move to GitLab and create a new project that will have the API code updated at all times. What I did was to create a new project, and given the circumstances of the project, I made it public.
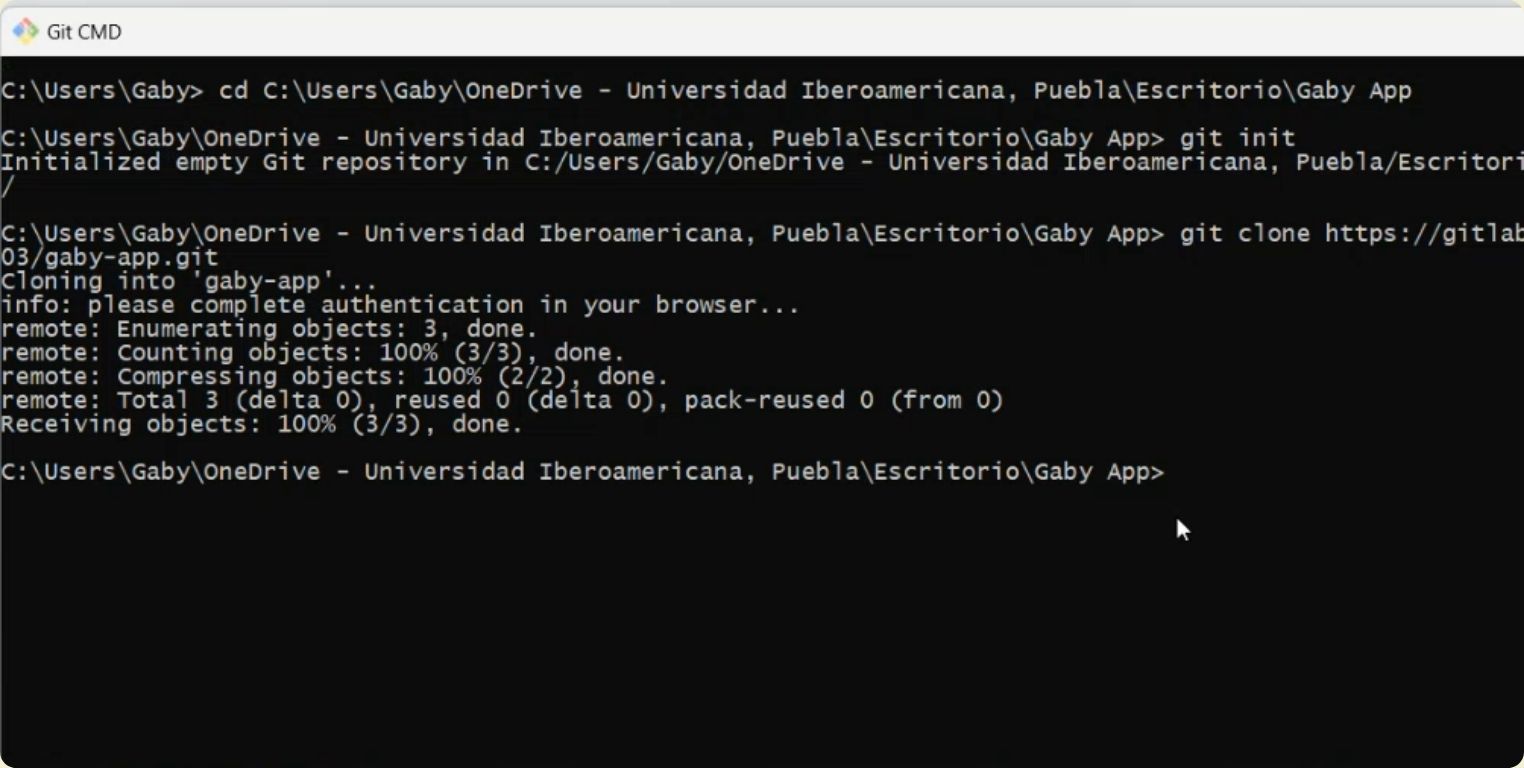
I then cloned this project locally with the git init command, followed by git clone and the URL in HTTPS, these steps I explain in more detail in my week 1.
I passed the "app" file that my instructor Rafael did me the favor of creating for this part of programming to work smoothly and I also added the .json file that I downloaded, then I renamed this file.
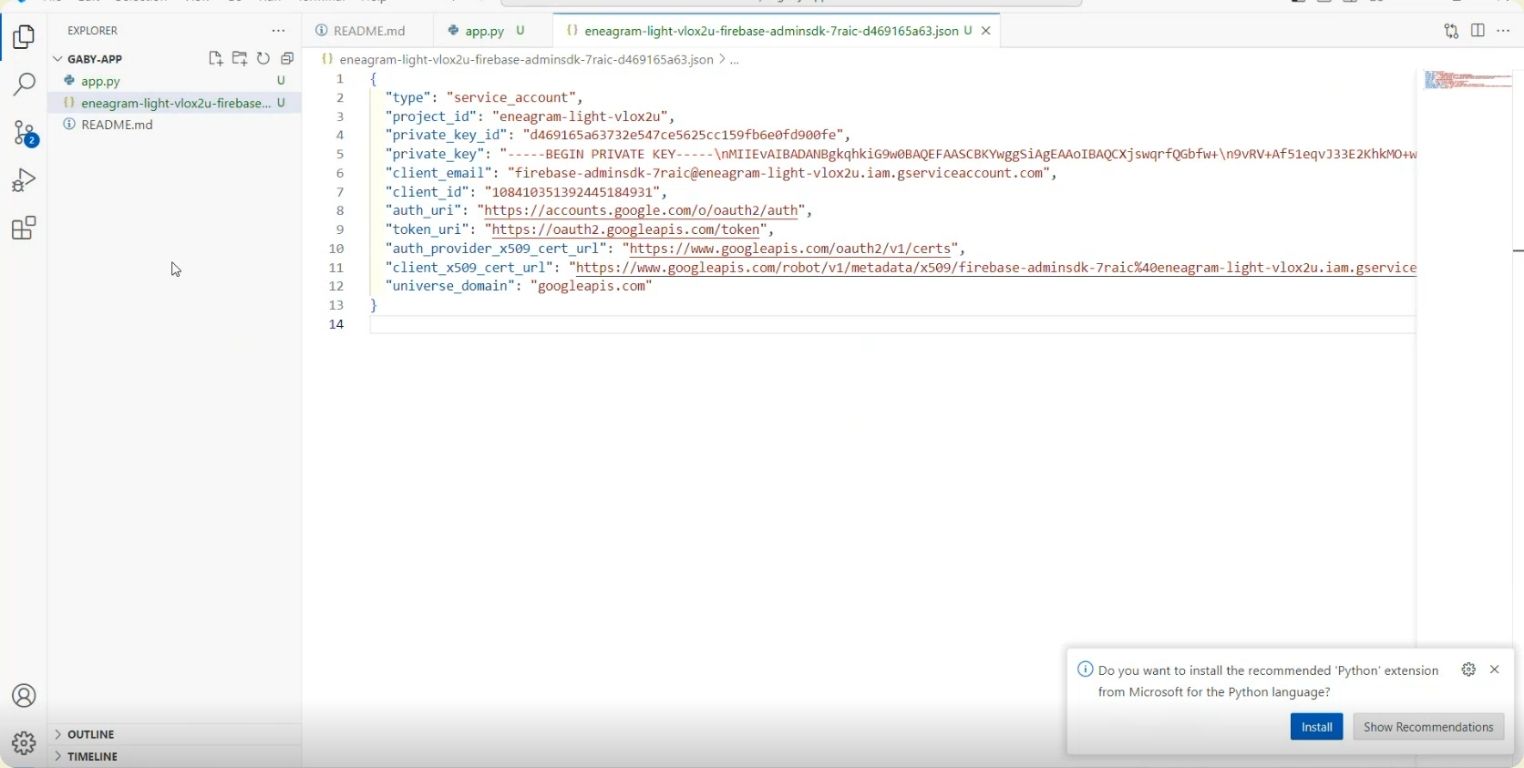
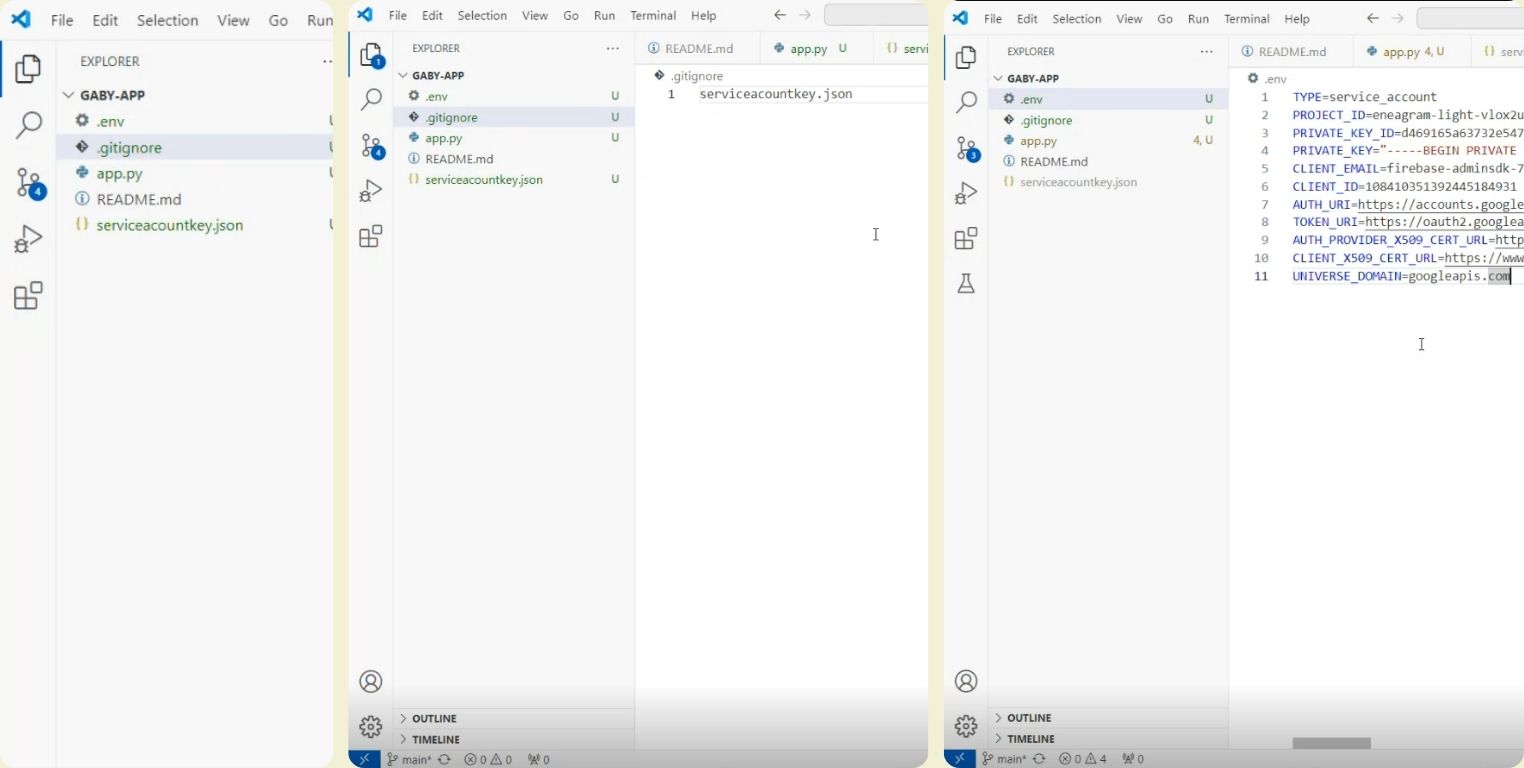
Next I created an .env folder to store the hidden files there, so that only visual studio can see them. I also created the .gitignore file which is basically for ignoring. And then I changed the name of the .json file to "serviceacountkey.json" and added the name to gitignore. While inside .env I put what went inside the .json file.
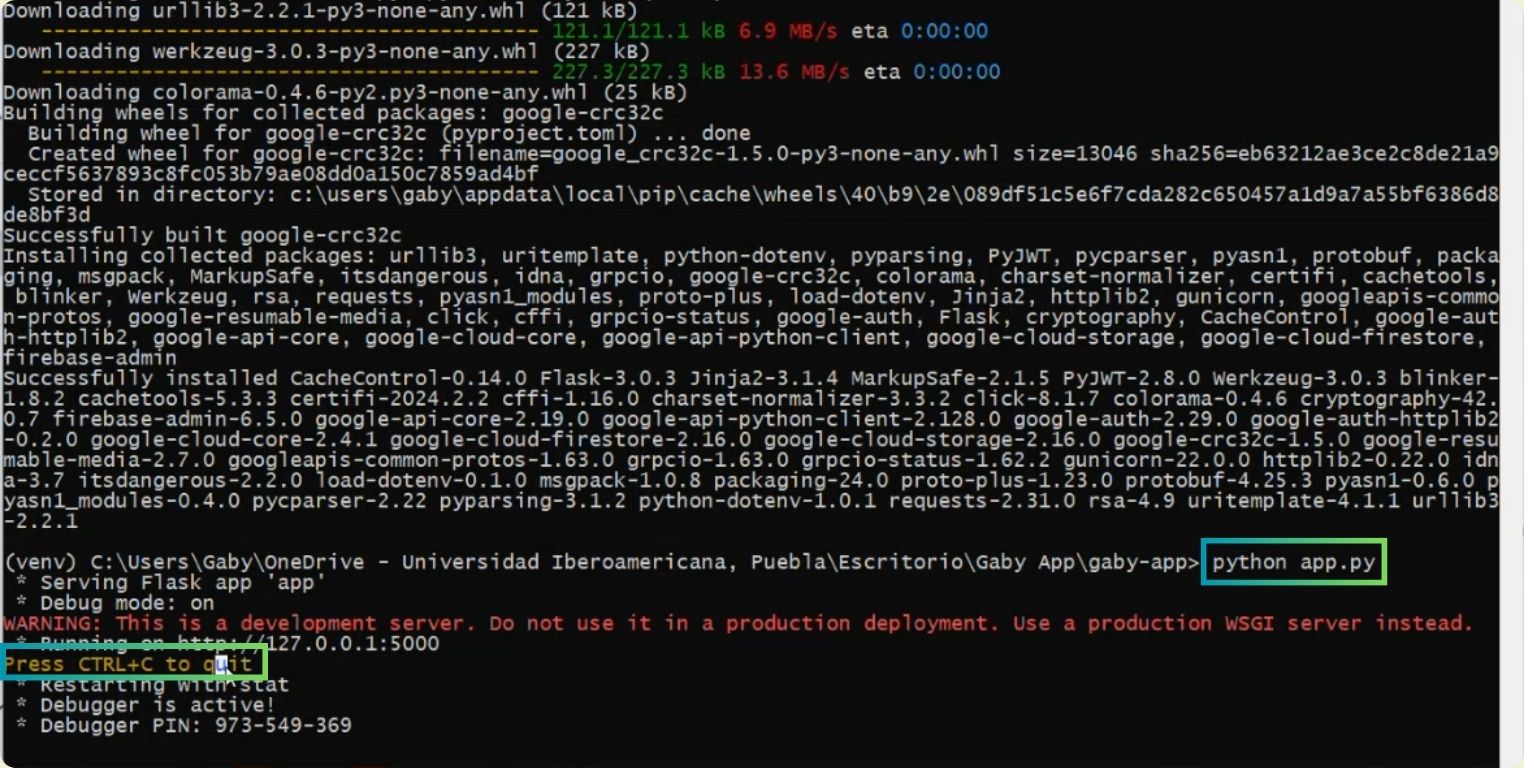
I went back to the terminal, where I created a virtual environment with "python -m venv venv", followed by the "venv" folder appeared which I was told, not to touch.
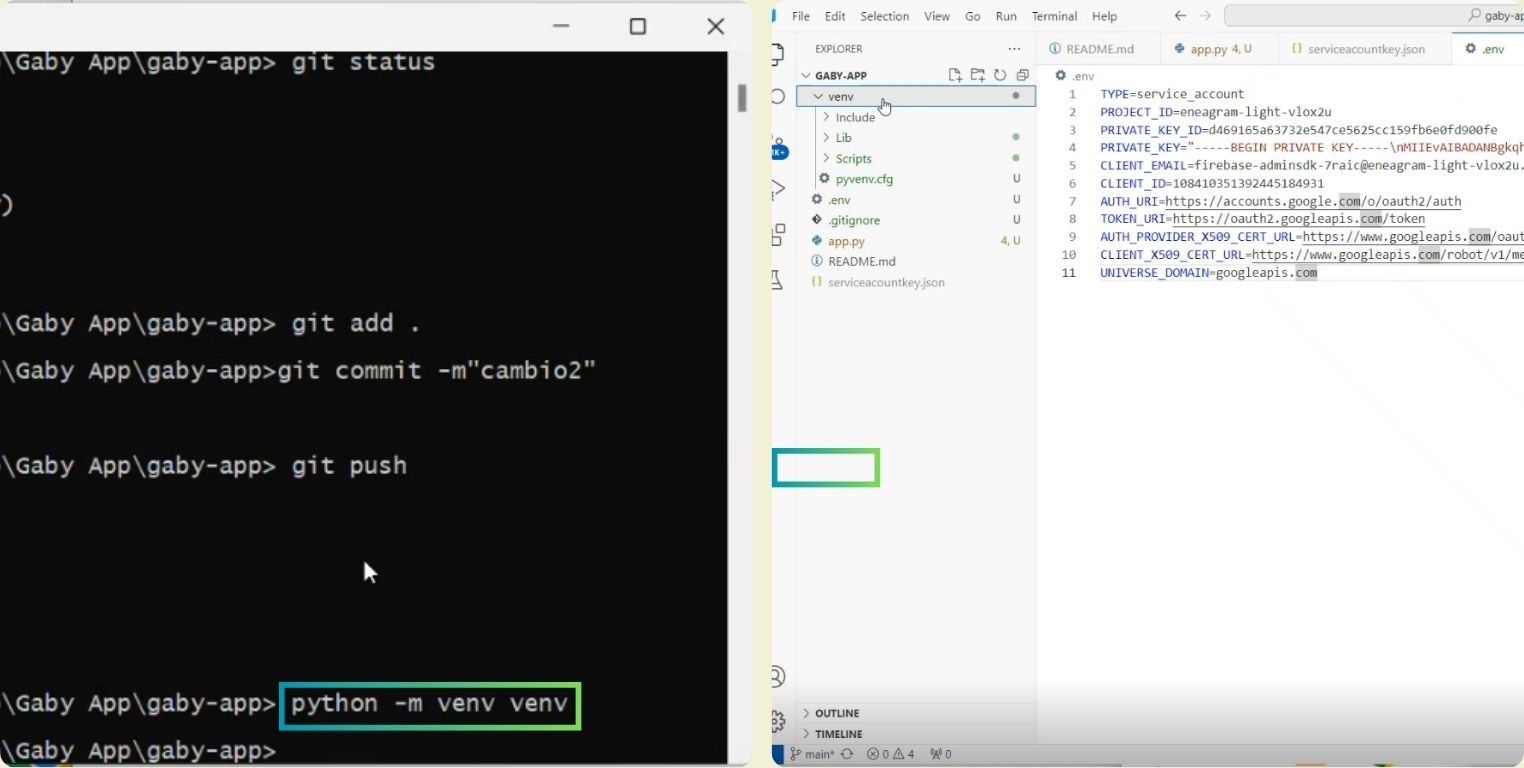
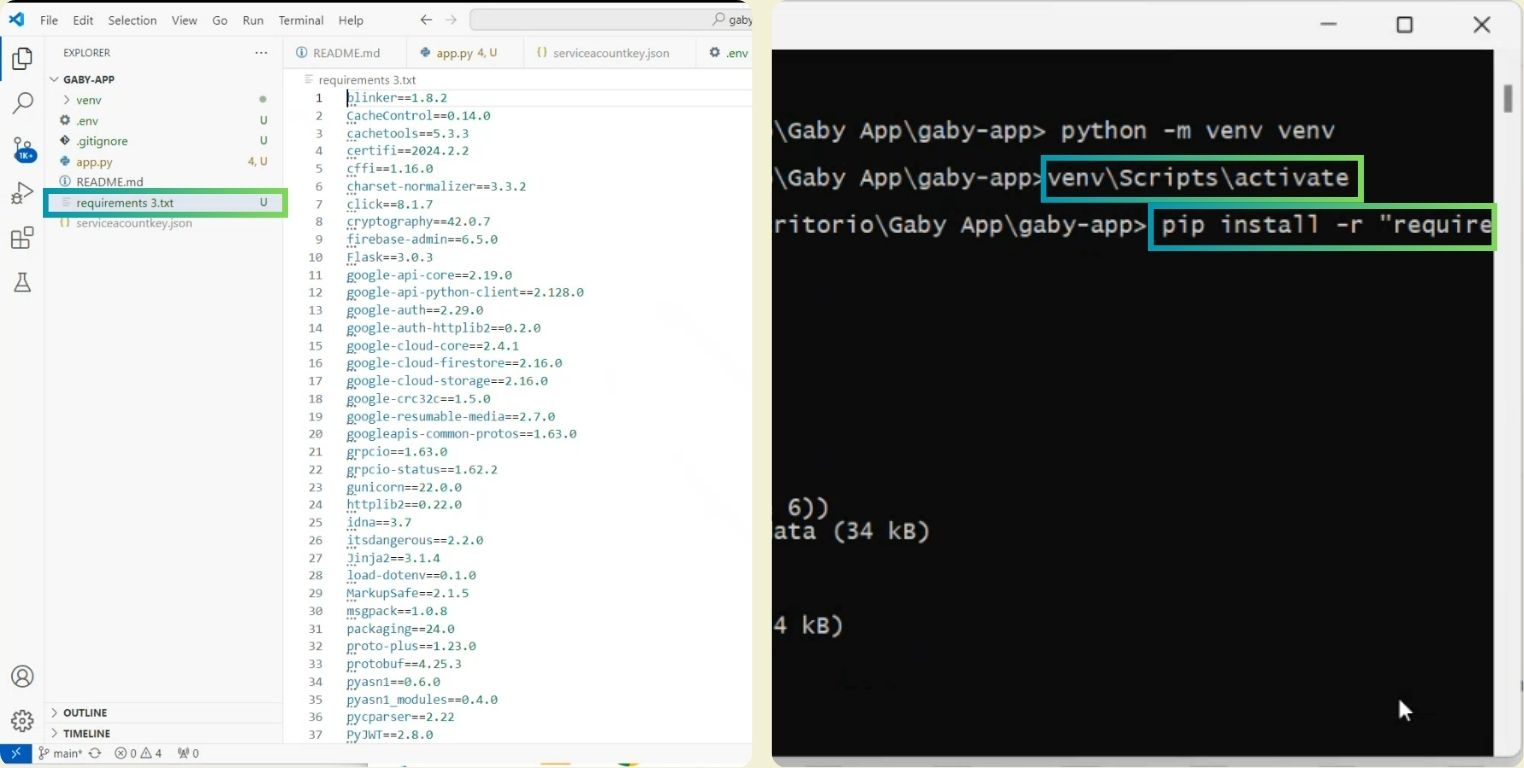
I passed a missing file to it, and started to activate the venv folder, then I installed the libraries from the "requeriments 3.txt" file.
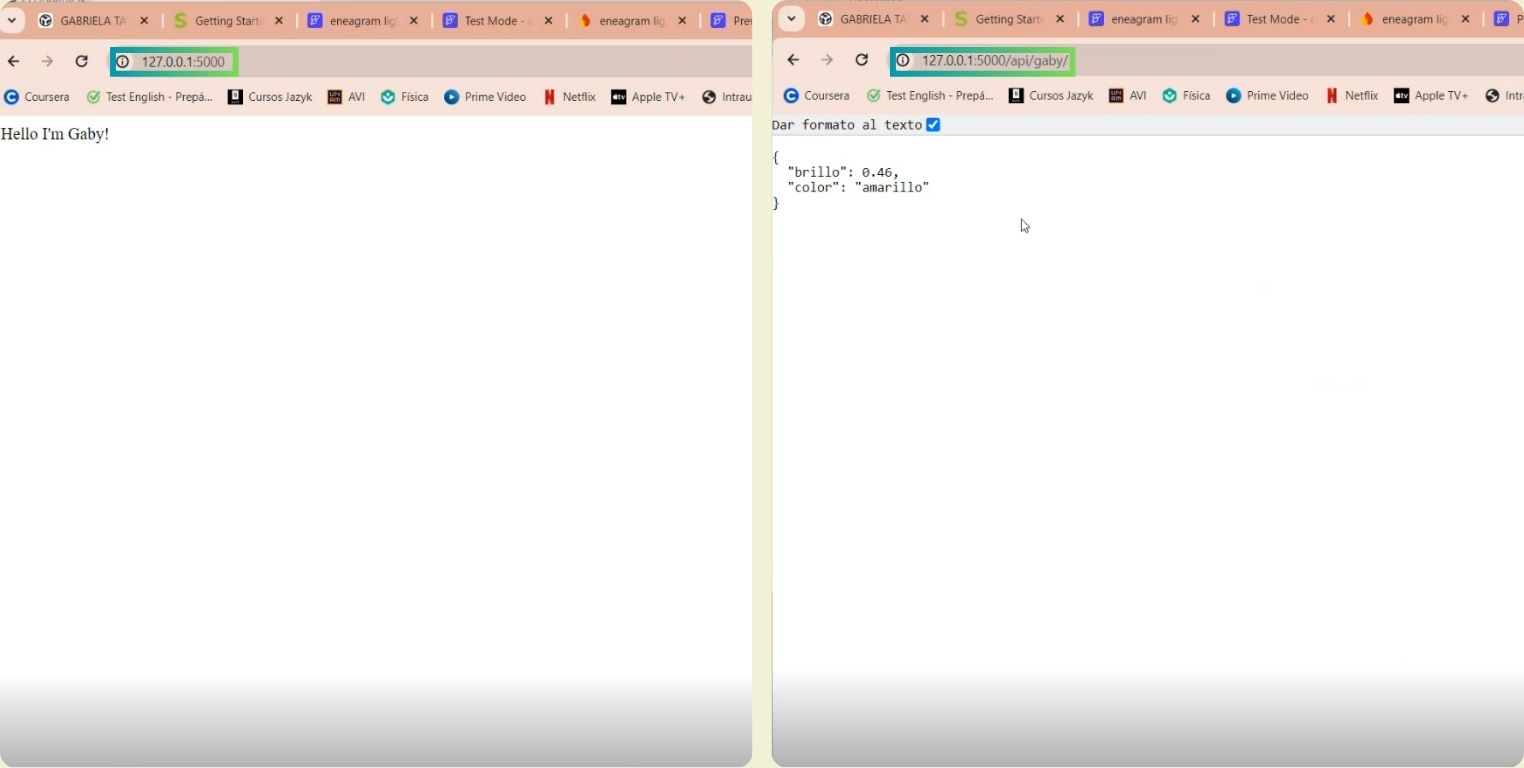
Once it finished, what I did was to enter the command "python app.py" and then open the URL that appeared.
It opened a page that greeted me, what I did was complete the URL with the API, and I could see locally what the URL would look like, now only locally.
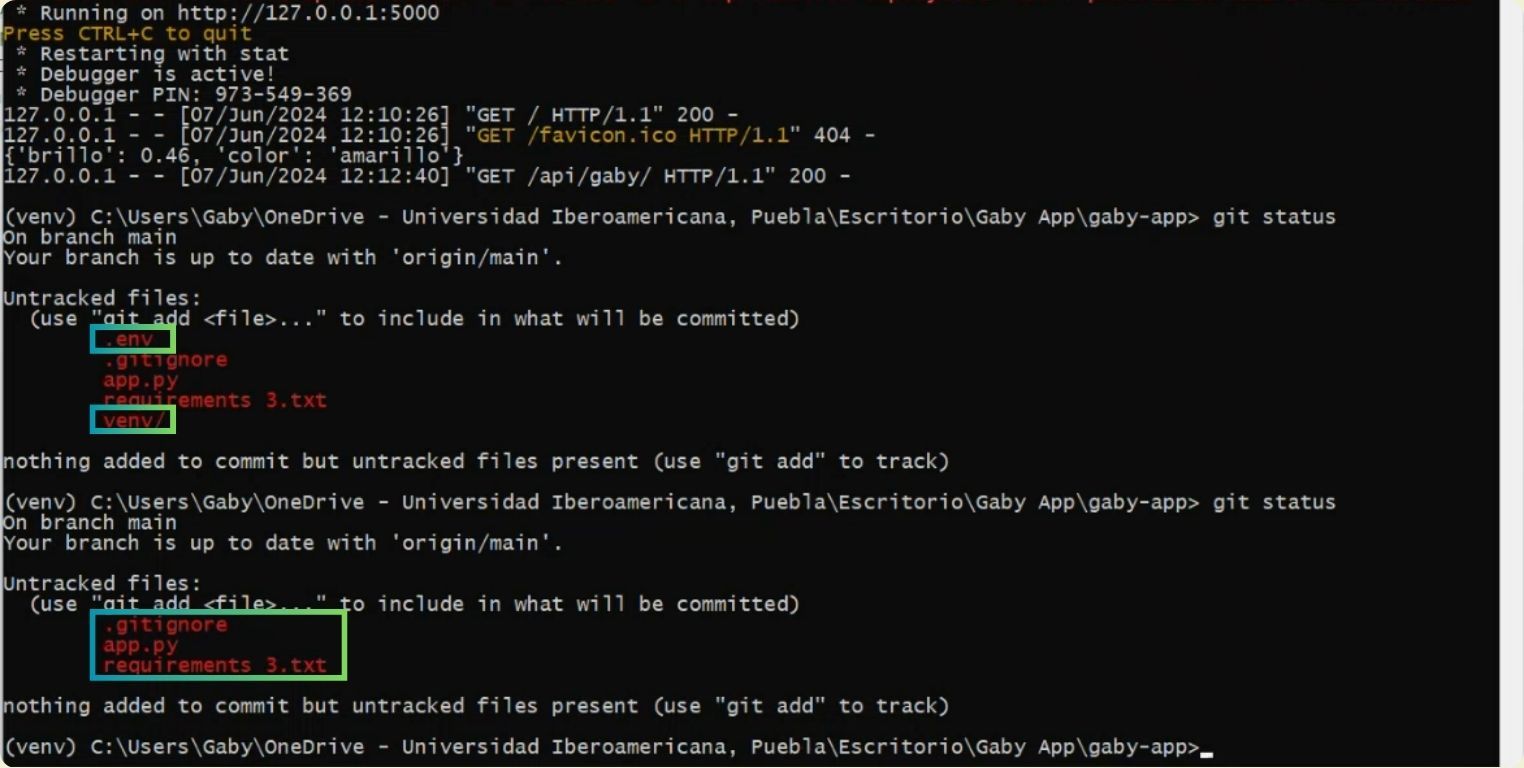
With git status I made sure of the files to be uploaded to the repository, but I just didn't want to upload the .env nor the venv, so I moved them to the gitignore folder before and it worked.
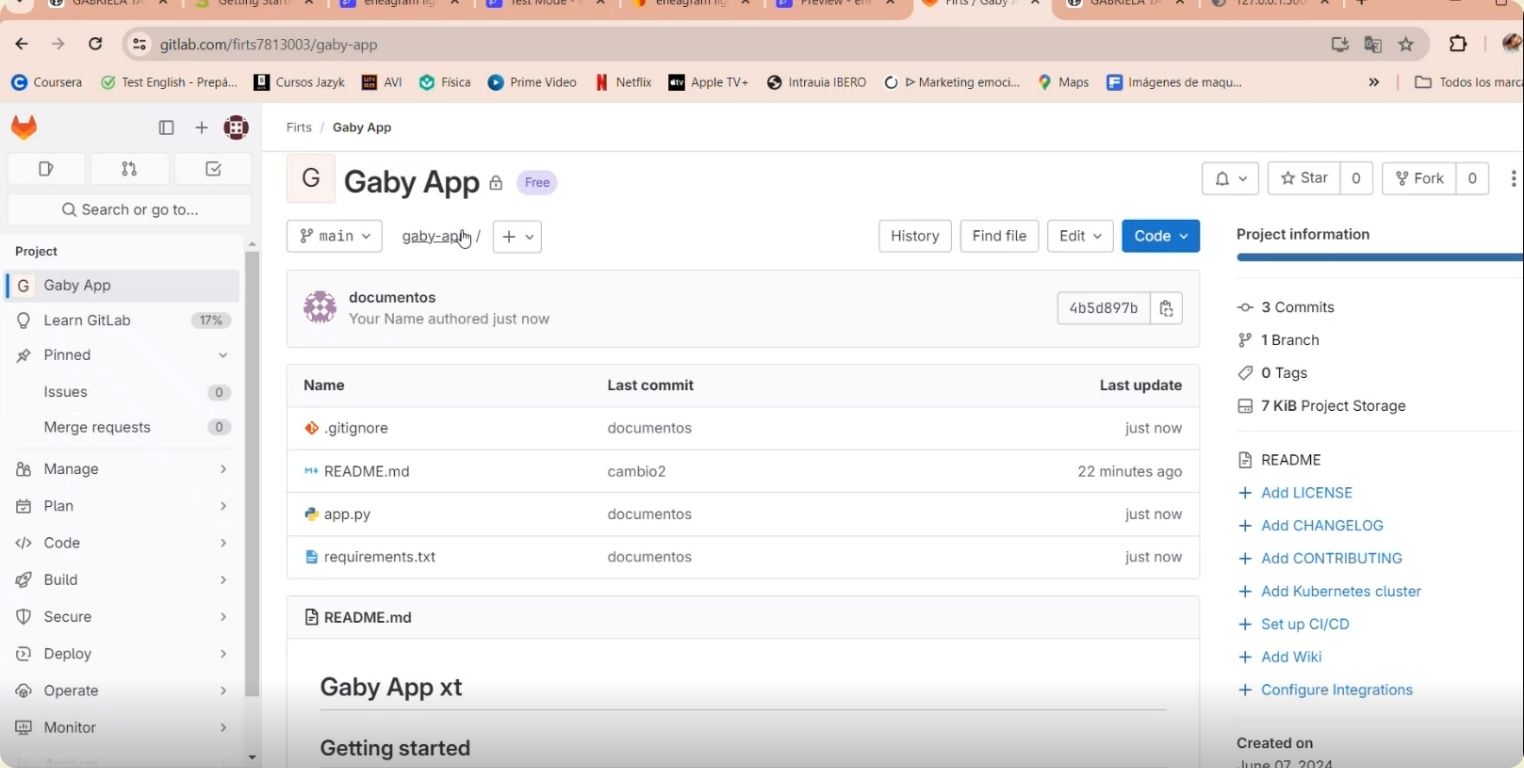
Attached evidence after uploading the documents to GitLab.
Render Time
As last step remains to activate the Render web server, and for that I created an account with GitLap, I selected Web Services.

I told it to connect to GitLab and chose the specific project.
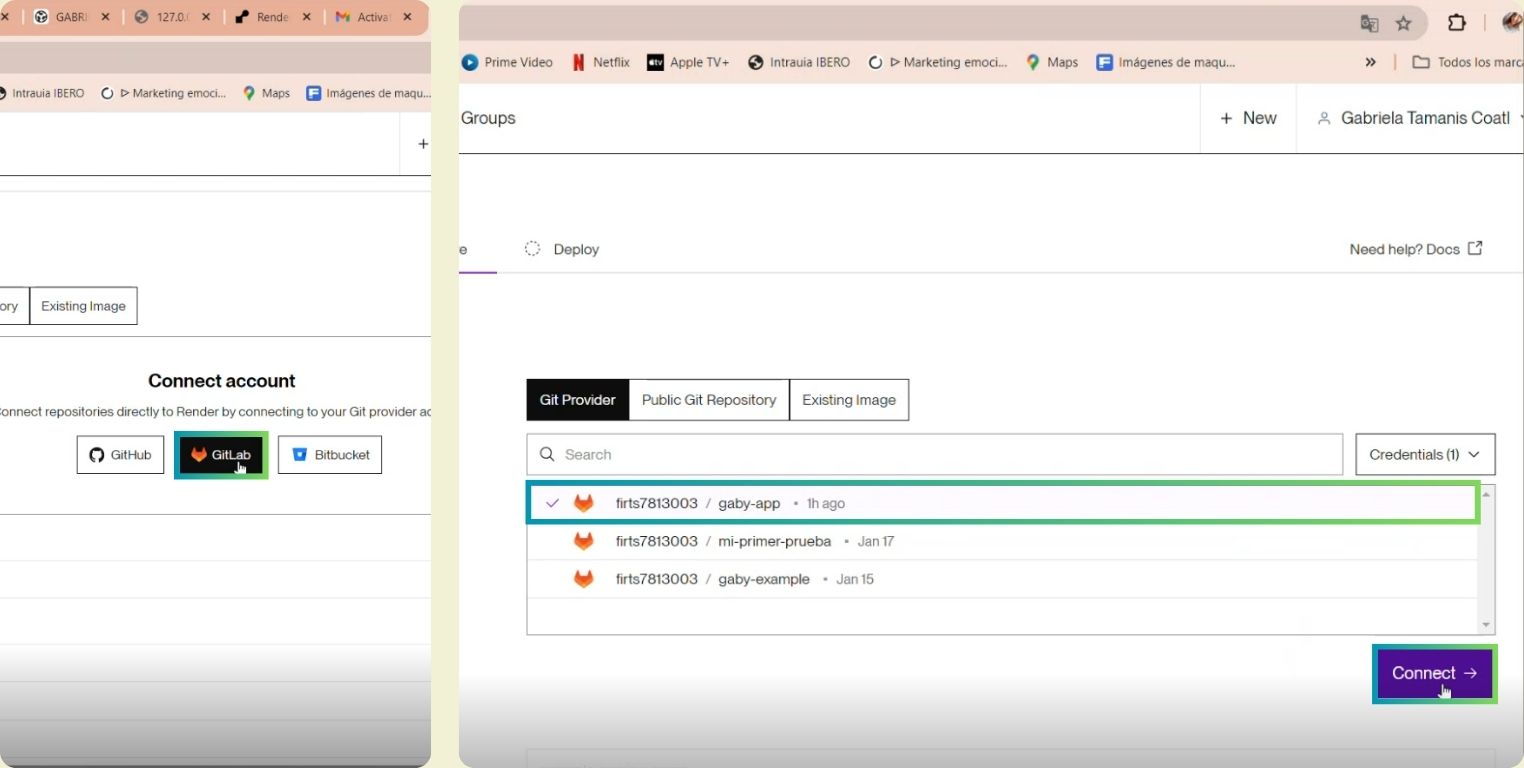
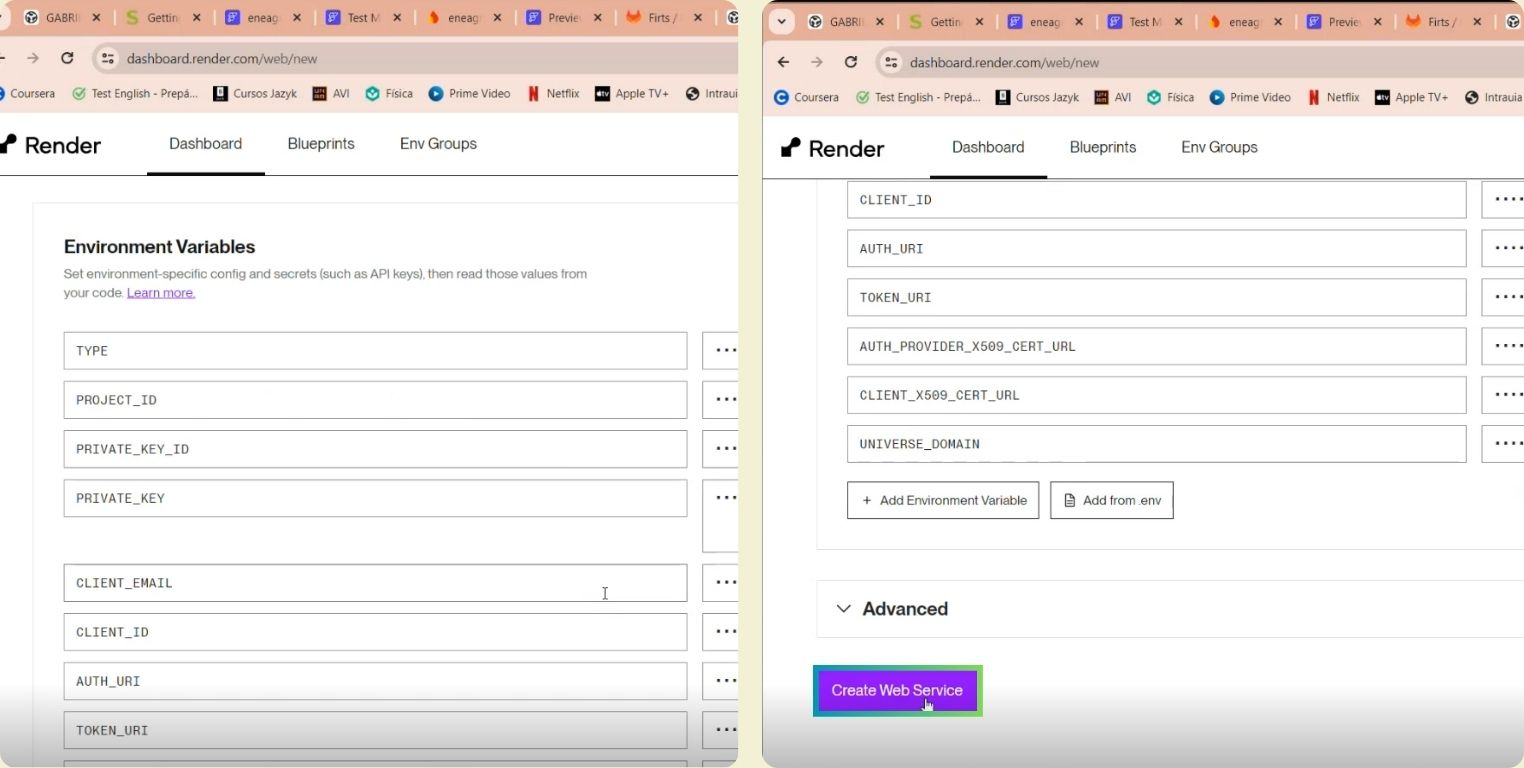
I selected the free option, and added the .env file for it to manage.
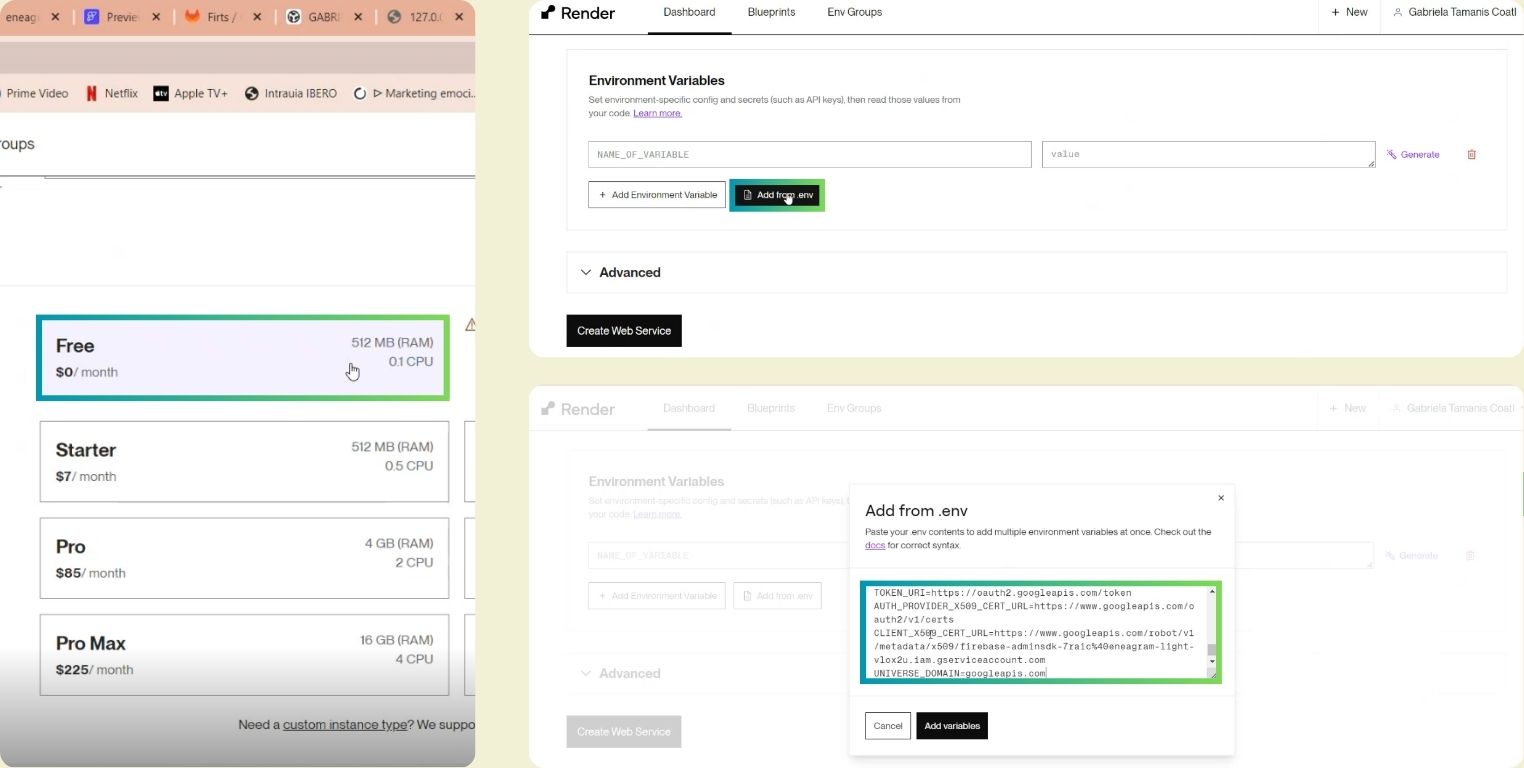
I clicked on Create Web Service.
To make it work, it worked for me to select the All logs option. After everything was ready, I clicked on the URL that appeared above.
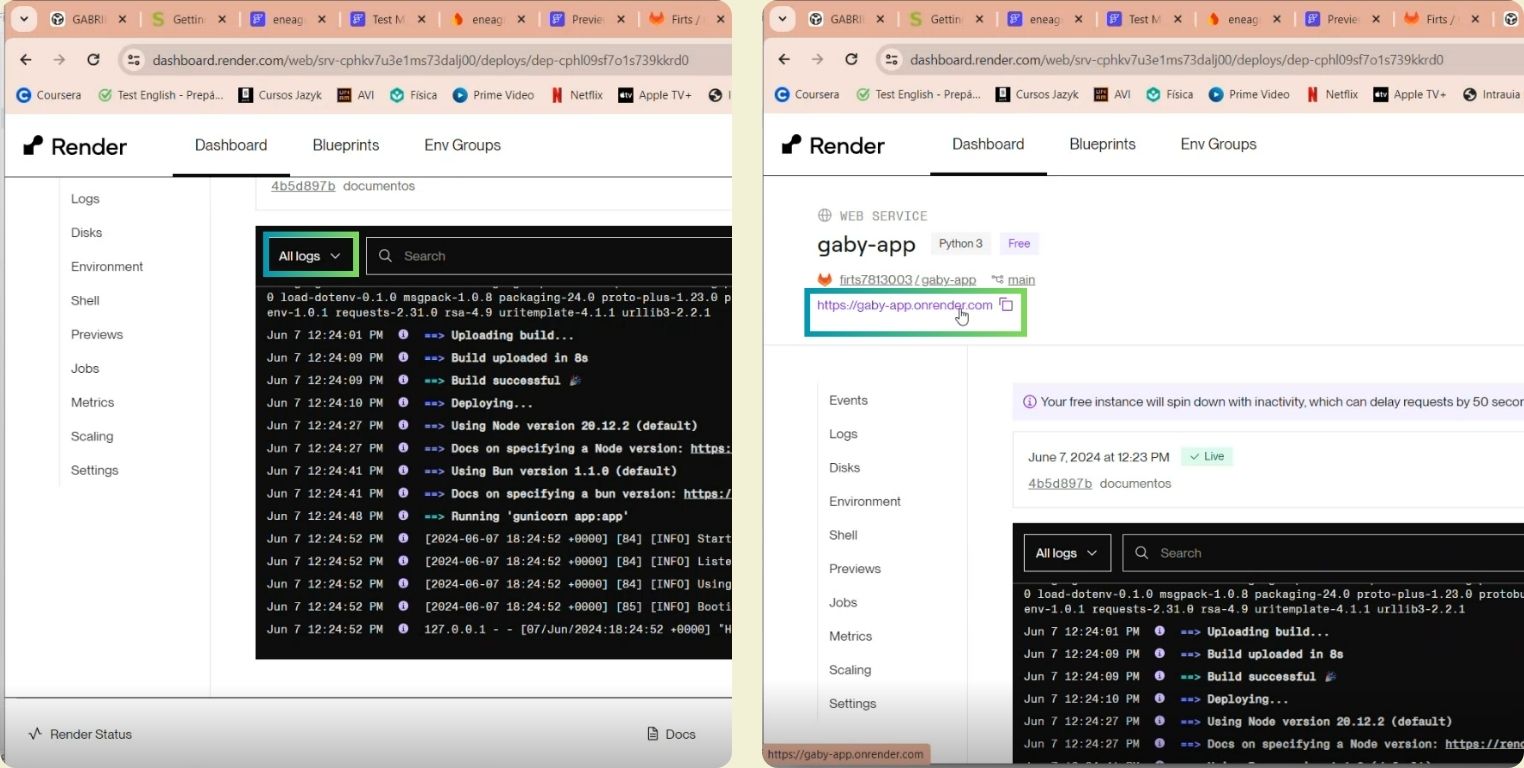
And here it is, the official and public URL to which the microcontroller will connect to read the data sent from the application through Firebase.
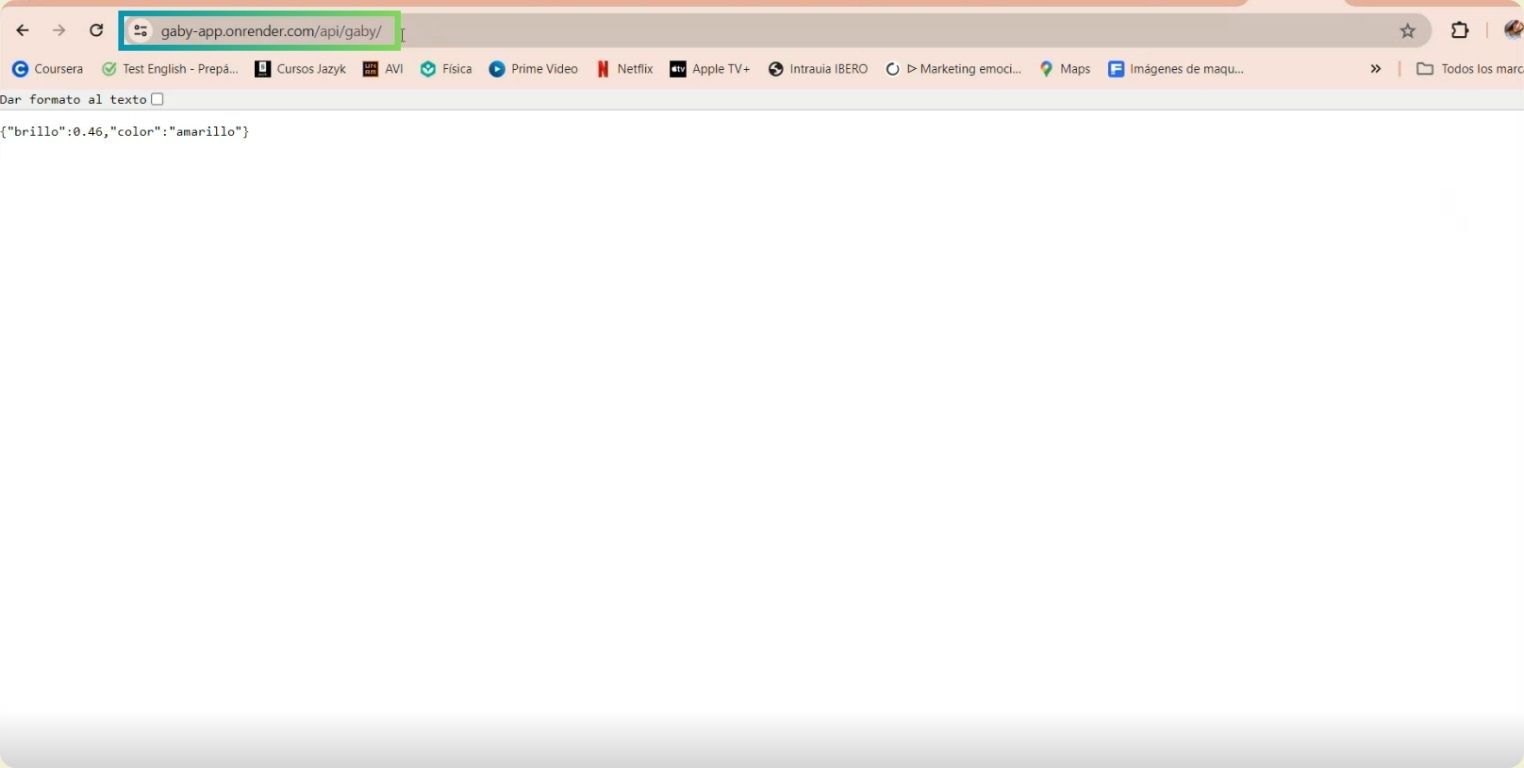
CONNECTING THE APP WITH THE MICROCONTROLLER
After many steps, I'm almost finished, I just need to verify that the microcontroller and the application are connected. I also think it is important to clarify that for this week I used the microcontroller of my final project, the XIAO ESP32C3, which brings integrated Bluetooth and WiFi functions, in this case the communication would be done by Wifi.
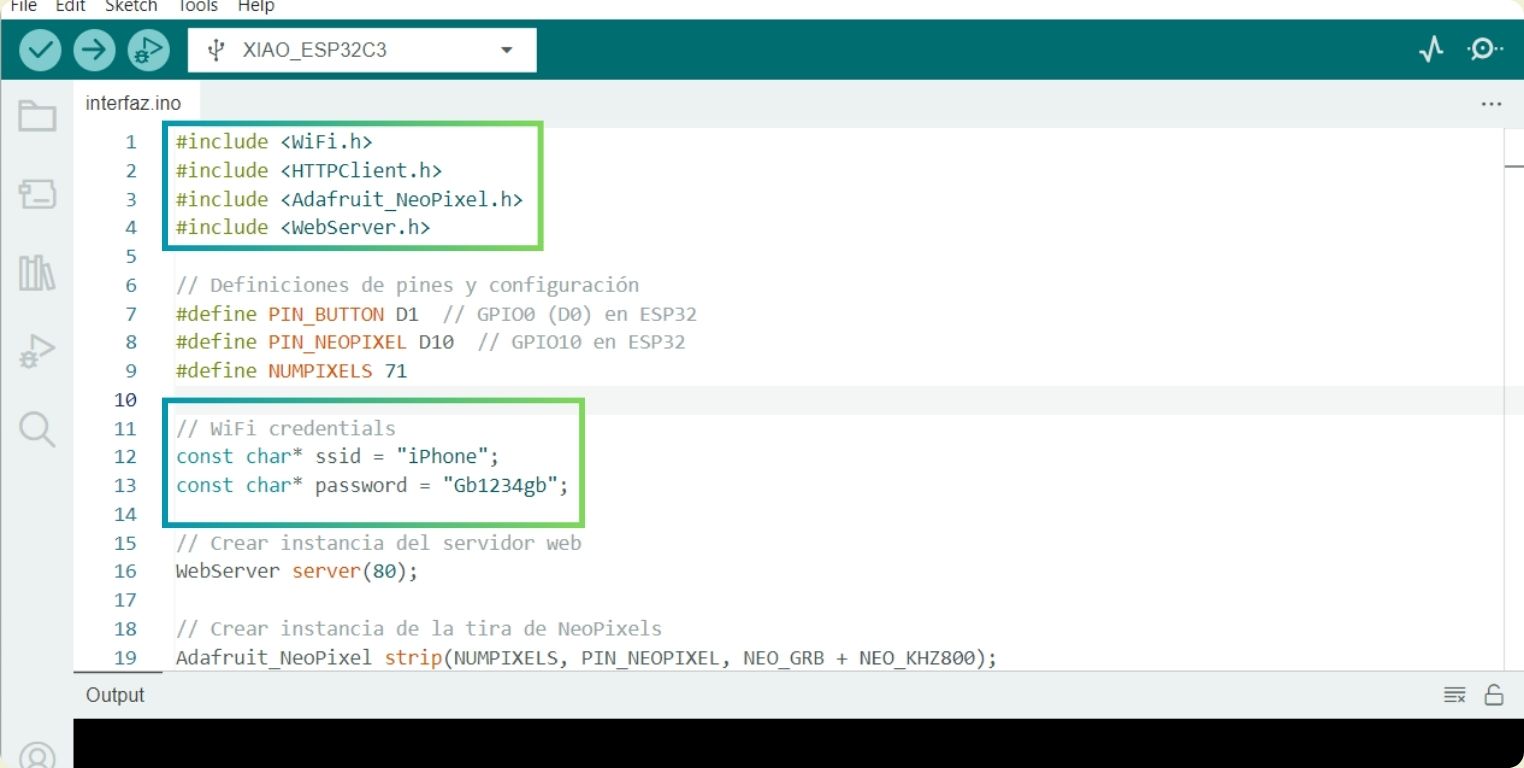
What is indispensable in the code are the libraries, I also added the neopixel library, and also the internet network, which in this case was my cell phone, and the password.
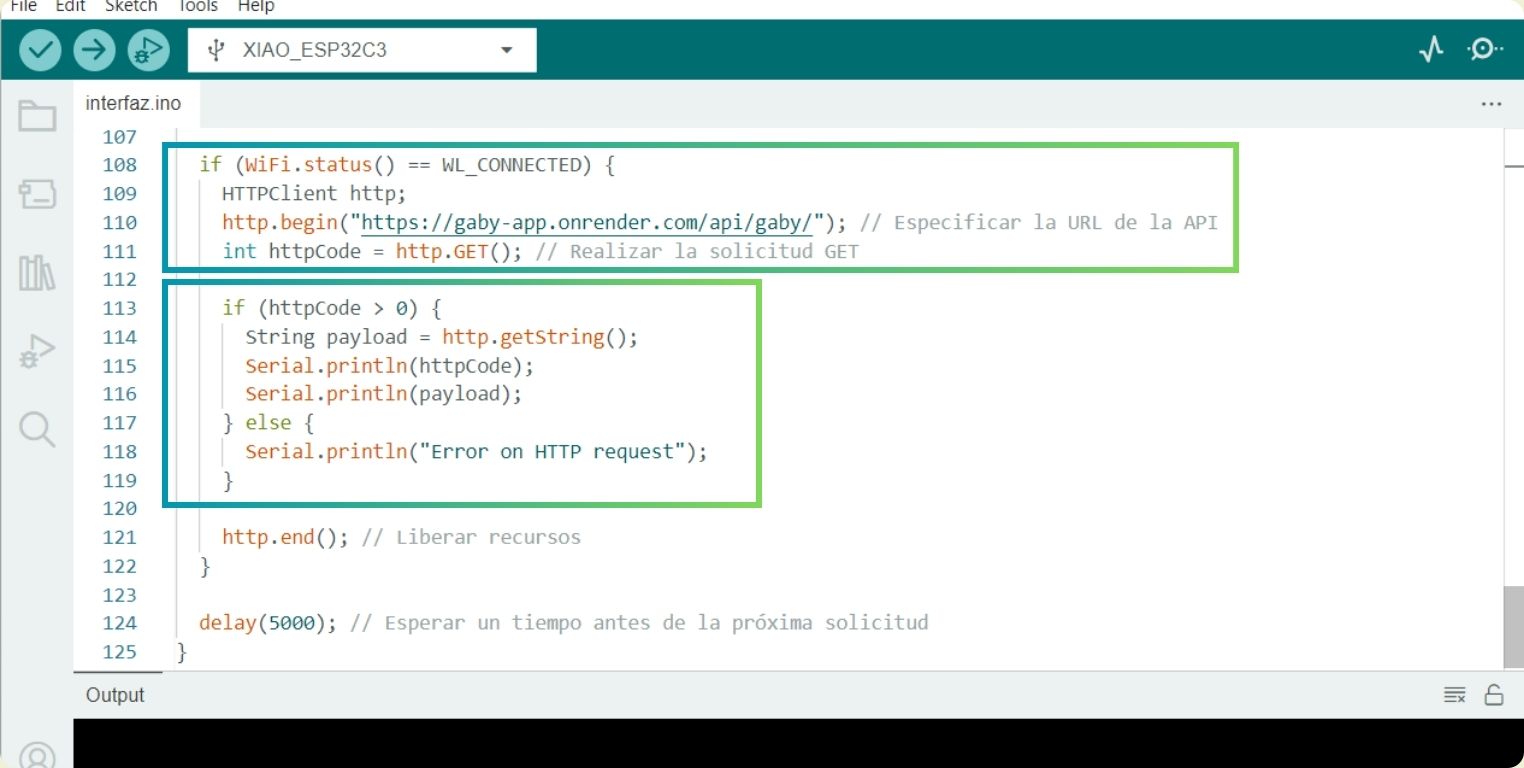
Also it is necessary to add the connection with the API, in which the URL is specified, and finally I added a condition so that in the serial board it appears to me if it is not being able to connect.
Conclusion
Thanks to the help and patience of my local instructor Rafa I can not say that it was complicated, however, if it was a long way and sometimes with a lot of information, I hope I have been able to rescue the most significant in this space. I think I definitely had the result I wanted and even more thanks to the advice I had for the realization of this week. Finally, I must say that it's going to remain a web app of sorts, since having an iOS device I can't download what I need to have the app on my cell phone, but if I get an Android device maybe I will.
Final Proyect Integration
Files
Interface___Code