WEEK 1
PROJECT MANAGEMENT
This week I worked on the design of my web page for the documentation of my process during the following weeks.
Let's make a website!
I used to think that making a website was very difficult, and now I still do, but the truth is that it can be quite easy if you use technology to your advantage. So, how did I do it?
Indispensable tools
 Gitlab
is an open source platform that allows you to have version control within a repository that you can
have locally so that you can go back to a previous version if you want to do it without having
visibly
in your computer the n number of versions, because you can simply go back steps with the one you are
updating. In addition, it also allows you to have access to your repository from anywhere else where
you have internet access. For me, it works as a kind of backup.
Gitlab
is an open source platform that allows you to have version control within a repository that you can
have locally so that you can go back to a previous version if you want to do it without having
visibly
in your computer the n number of versions, because you can simply go back steps with the one you are
updating. In addition, it also allows you to have access to your repository from anywhere else where
you have internet access. For me, it works as a kind of backup.
Useful Commands
| COMMAND | DESCRIPTION |
|---|---|
| git init | Create a local repository. |
| git clone | Copy oradd something specific clone a repository. |
| add "specific name" | Add something specific. |
| git status | Show the status for modification or update |
| git add . | Add all. |
| git commit -m "name" | Packaging. |
| git push | Send to the cloud. |
| cd "name" | Open folder |
| mkdir "name" | Create folder |
| dir | Show directory |
| . . | Backwards |
 Visual Studio
Code
is a very practical code editor and for those of us who have no experience is a great ally, because
it easily detects if there is any fault in your code.
Visual Studio
Code
is a very practical code editor and for those of us who have no experience is a great ally, because
it easily detects if there is any fault in your code.
Useful HTML Commands
| OPENNING COMMAND | CLOSING COMMAND | DESCRIPTION |
|---|---|---|
| < html> | < / html> | Create a website. |
| < title> | < / title> | Website's name. |
| < body> | < / body> | Code below the title. |
| < ! --> | < --> | Comment. |
| < p> | < / p> | Paragraph. |
| < ul> | < / ul> | Bullet list. |
| < lo> | < / lo> | Number list. |
| < li> | < / li> | List contents. |
So far I have learned about the HTML code that is used to structure a web page and its content, it can be easily understood as the body of the page. There is also the CSS style, which serves to give the page a friendly design just by reconfiguring the graphic part. And together, HTML and CSS form a page.
With this you can basically make a page from zero, however, as I do not consider myself an expert in this, but a design student who was not visually satisfied with her first test, I decided to take as a base the template that one of my local instructors: Rafael Perez, did us the favor of giving us.
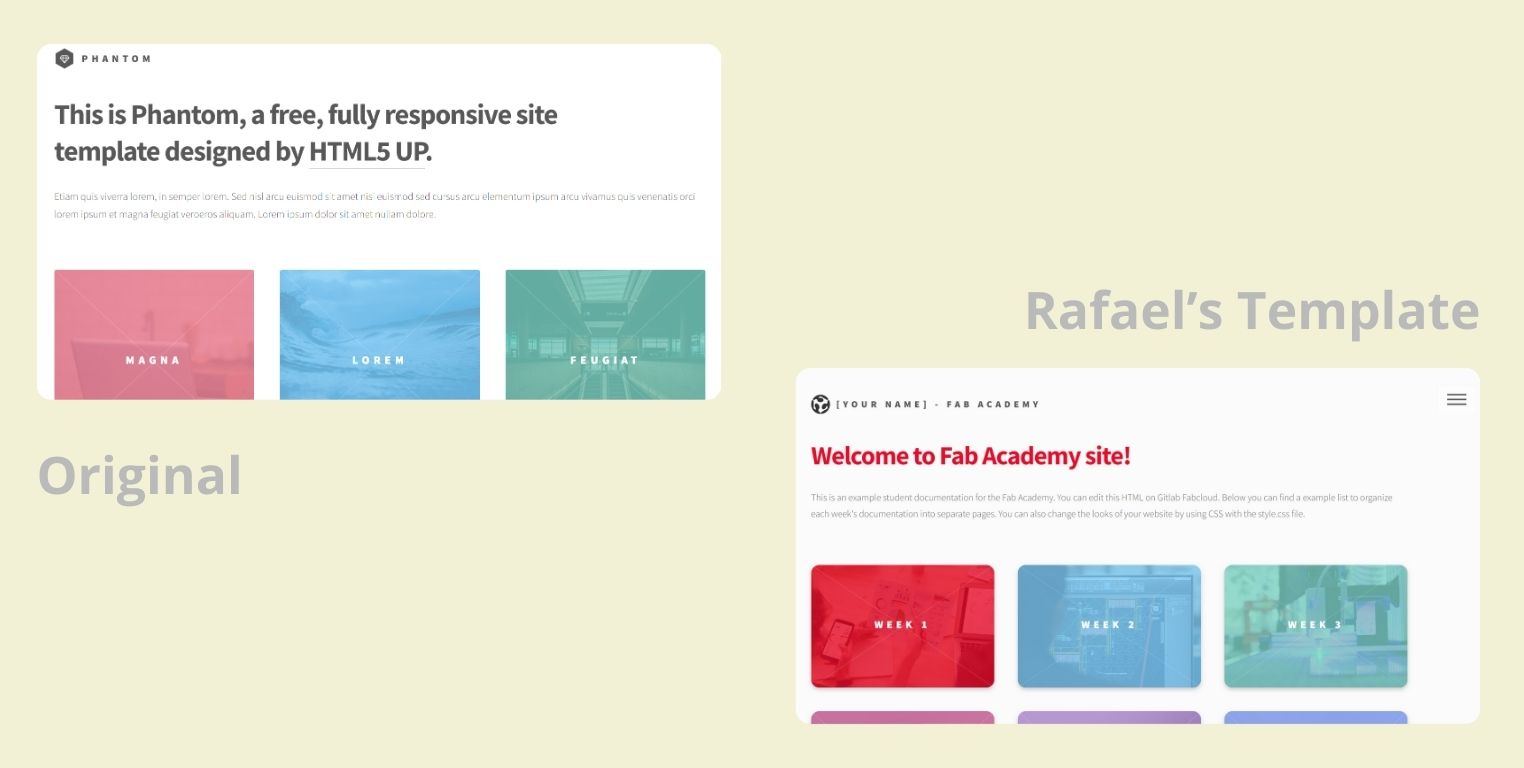
Where can you find a template to work with?, very simple. Among the recommended FabLap resources is HTML5 UP where there are a lot of free pages that you can use as a base so you don't have to start from nothing.
Let's start with the step by step
In order to work on my page, I had to go to GitLab and in my case, my laptop has two hard drives, so first I had to place myself on the hard drive I wanted to start working on, this is easily done by typing "C:" or "D:" as the case may be. (This is indispensable whenever I open GitLab).
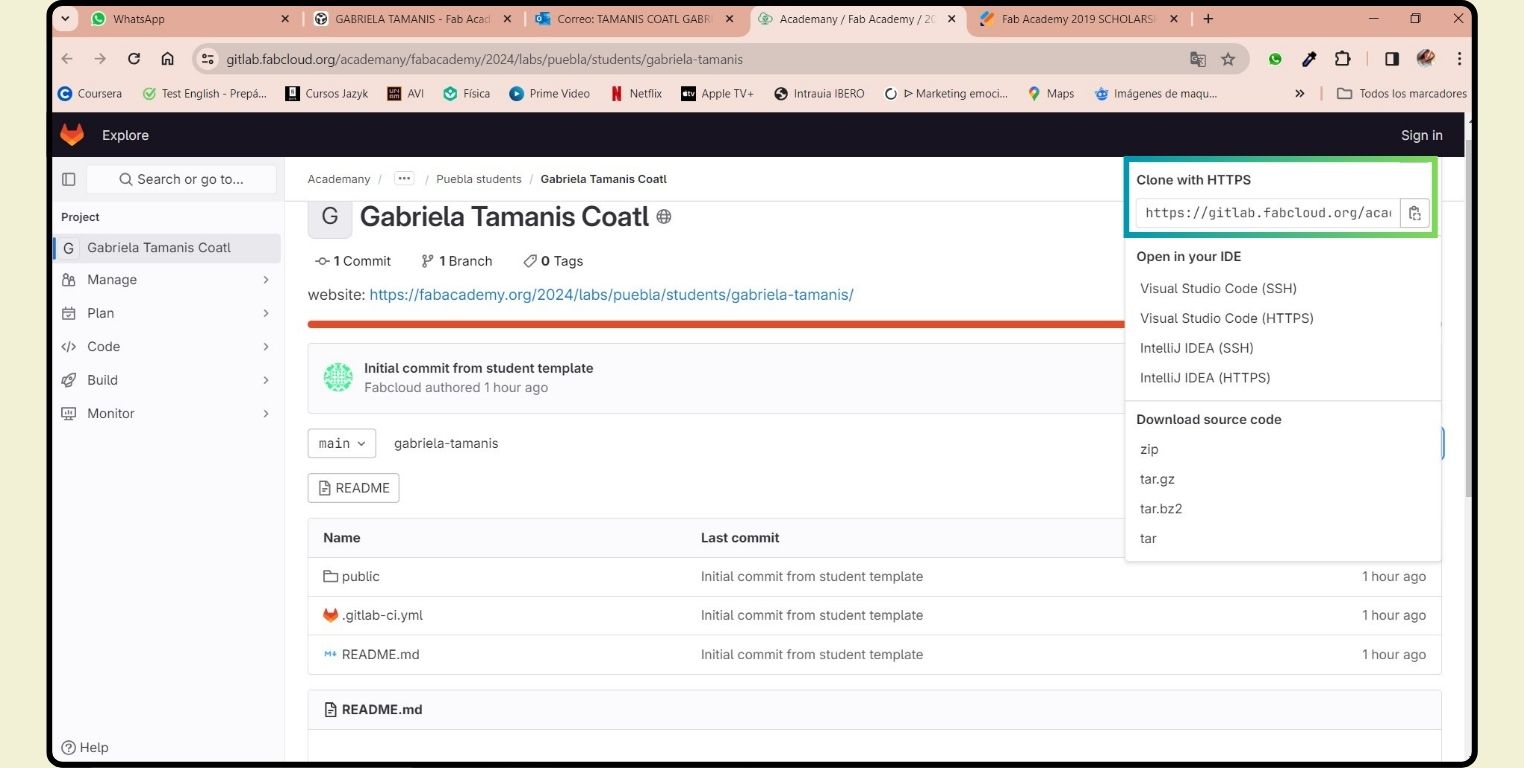
The next step was to clone the repository in GitLab Fab Cloud, and how did I do that?
-
I used my email and password provided by FabLap (via email) to access my GitLab session.
-
I cloned by clicking on the blue "Code" button, and copying the URL of "Clone with HTTPS".
-
Then, in Git I put the command "git clone", followed by the URL that was copied.
-
The next step was to open the cloned file to remove "license" and "readme", and stay with the template.
Although I worked with a template, I didn't keep everything that came with it. The basic format structure remains the same, but I wanted to give it some of my personality, and for that it was time to work in Visual Studio Code.
-
The first step was to open the folder I cloned earlier.
-
Once I made sure I was working in the correct folder, I opened the document I would be working on.
-
I visually changed the page in a general way in css language. (To learn more you can go to "CSS step by step")
-
In html language I made the necessary changes in text for my home page, about me, week one and final project. (To learn more you can go to "HTML step by step")
-
After these last two steps it was imperative to save the changes with "ctrl s".
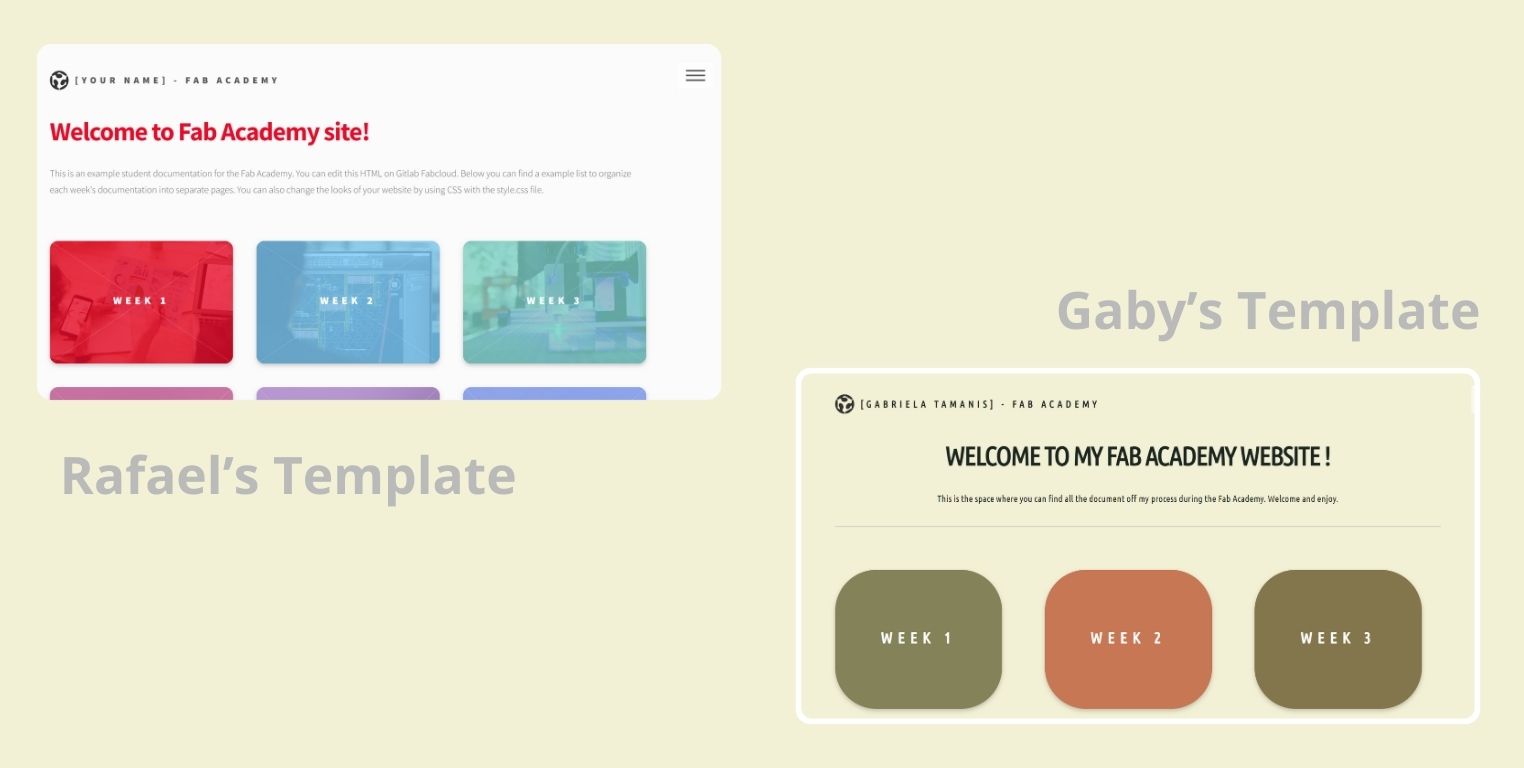
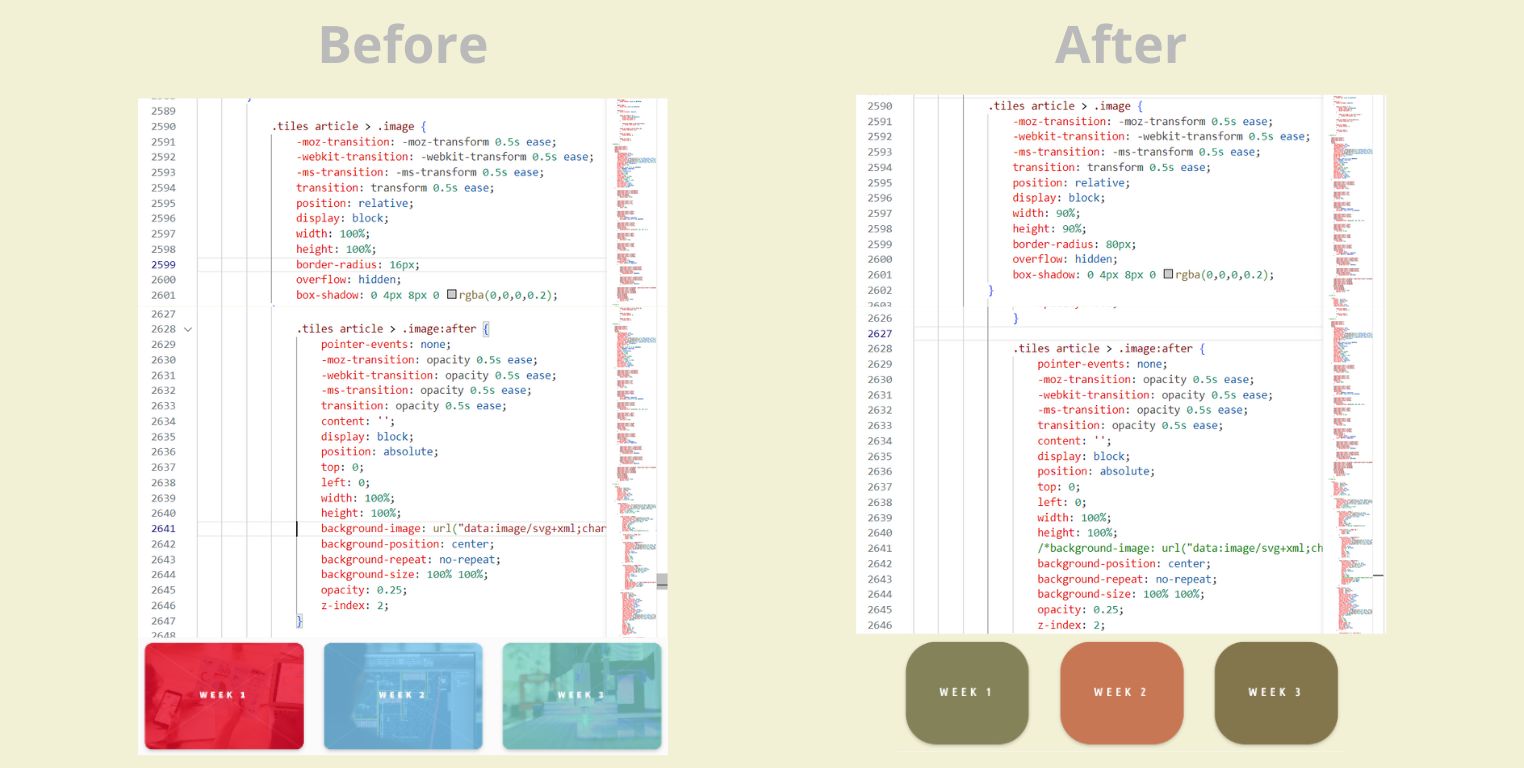
Here I show you a before and after of the website
Then it was time to go back to GitLab to finally upload my changes and information and you could be reading this now.
-
First of all: If you are new to GitLab, this is your reminder to follow the indispensable steps I explained above (I always forgot them, but like everything else, you learn and get used to it).
-
To verify the step I was in, I used the command "git status", it told me the changes I had made to the page
-
To attach all my changes I used the command "git add ."
-
And then I executed the command "git commit -m "(here I put what I wanted to call this change)".
-
Finally I executed the "git push" command to upload everything to the cloud.
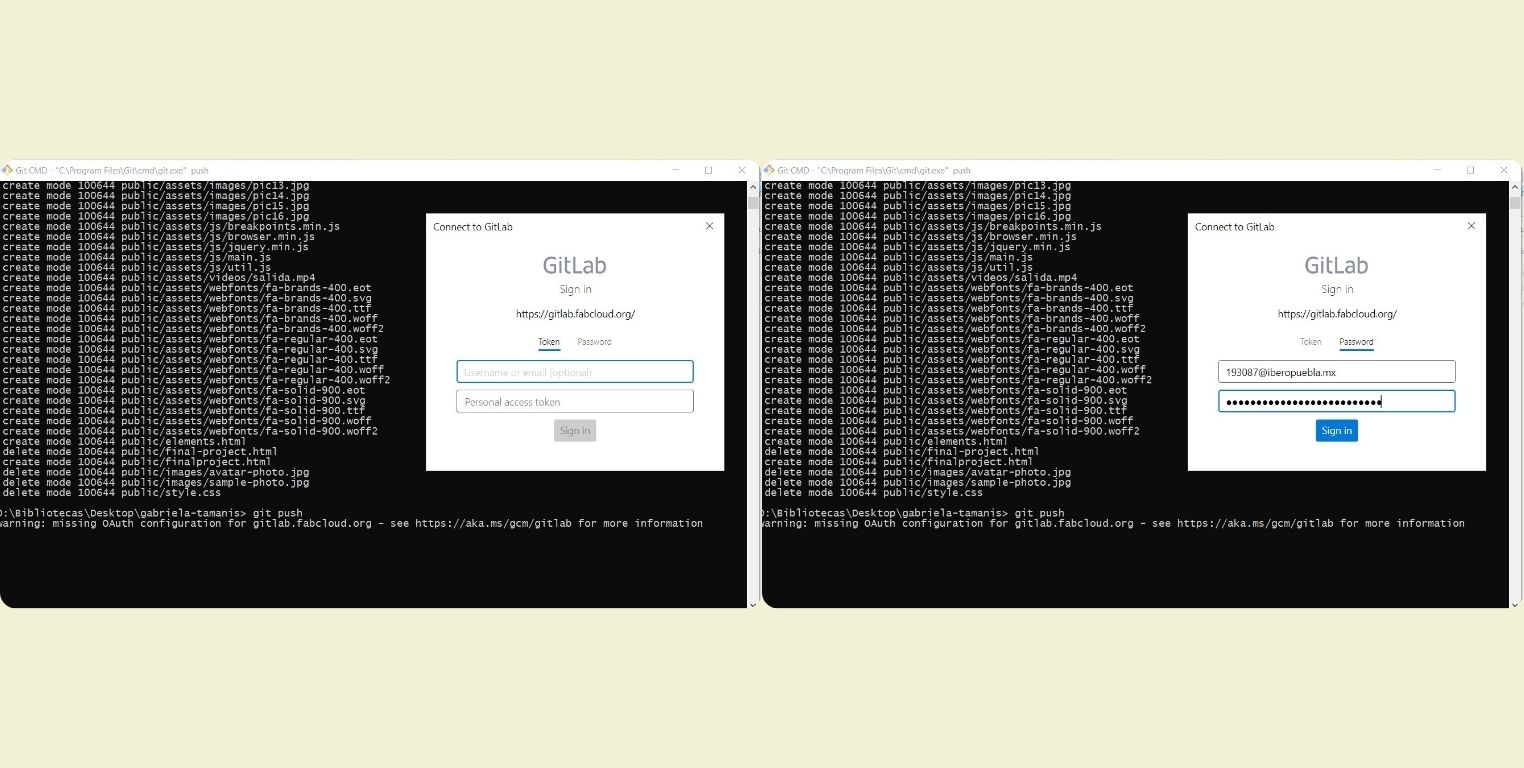
Something to know: The first time I did a "git commit" I got a message like the following image, and to continue with the "git push" I had to use the following commands "git config --global user.email "(user@emailaddress.com)"" and "git config --global user.name "(Your name)"". Here I put the account and passwords provided by the FabLap, but you can also easily make an account here: https://gitlab.com/users/sign_in
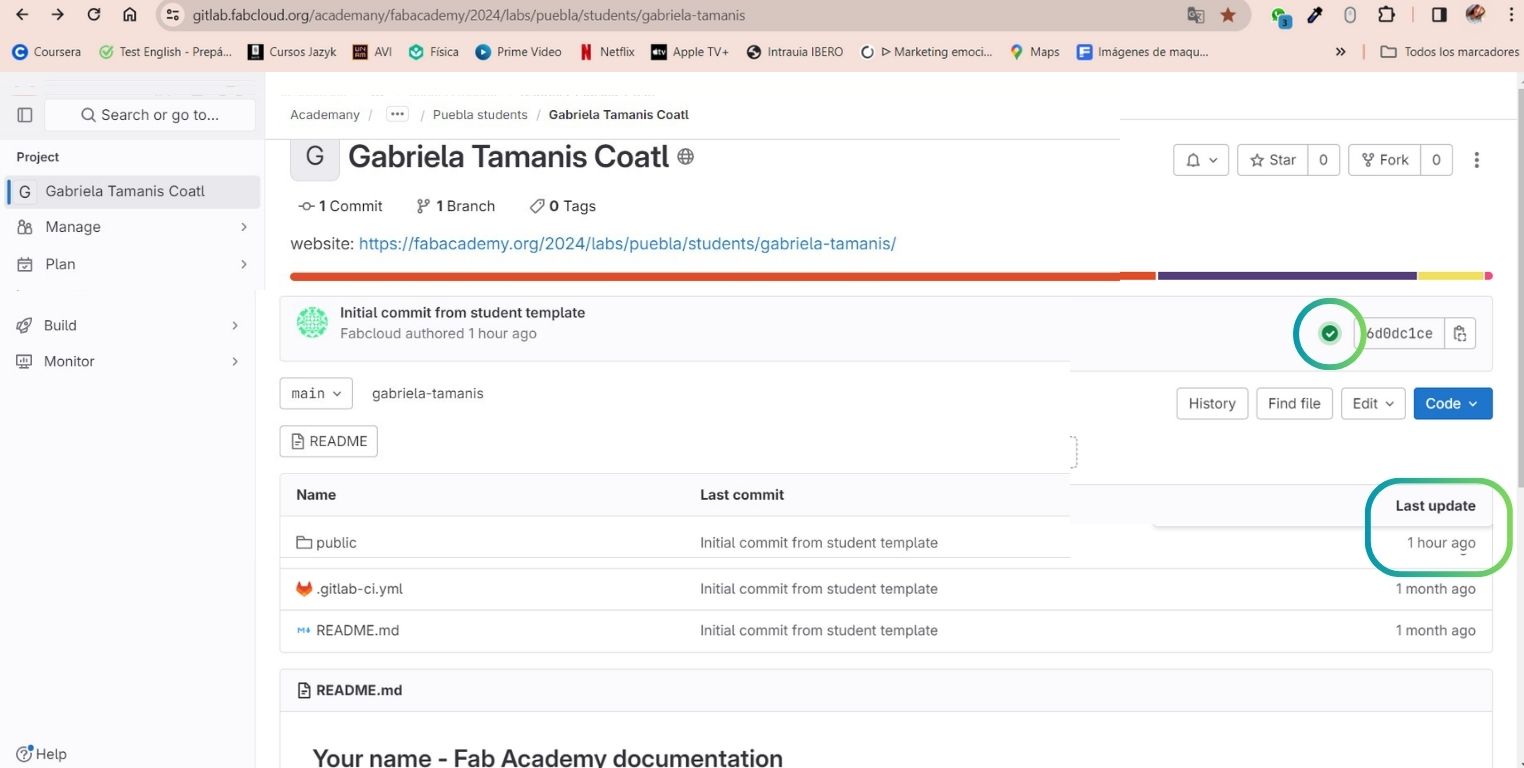
IMPORTANT : Thanks to a friend's experience, I learned that I should always make sure that the changes have been uploaded correctly, because no matter how much work you have done, it might look like you didn't do it, sometimes simply because of a bad internet connection.
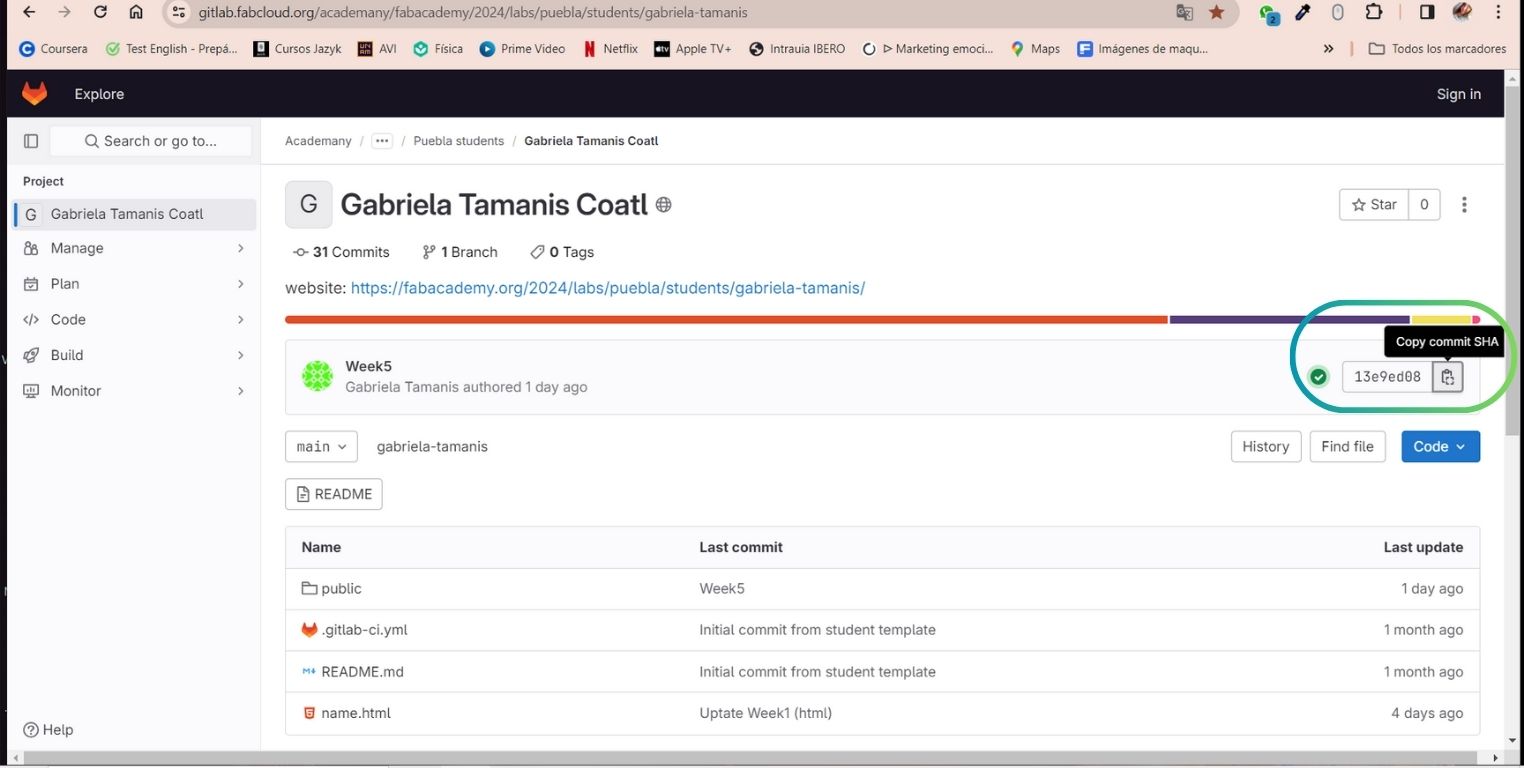
I recommend logging into your GitLab account so you can check the date of your last change. This will be the last time you did. "git commit".
HTML step by step
Before you start, I recommend you to see the table of commands at the beginning of this section.
-
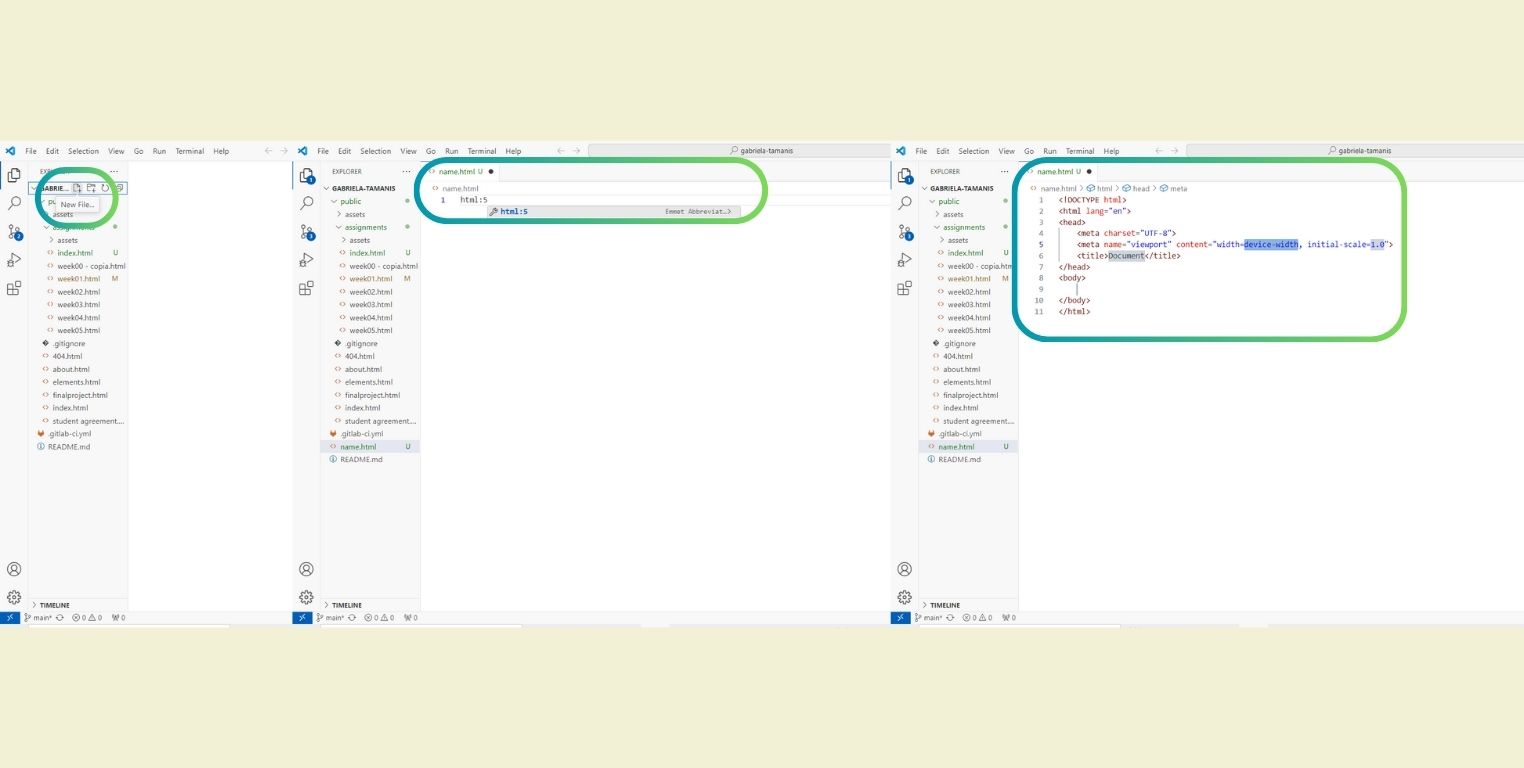
In Visual Studio Code you can create a new document "name.html". And type "html:5" to have a base structure to work on.
-
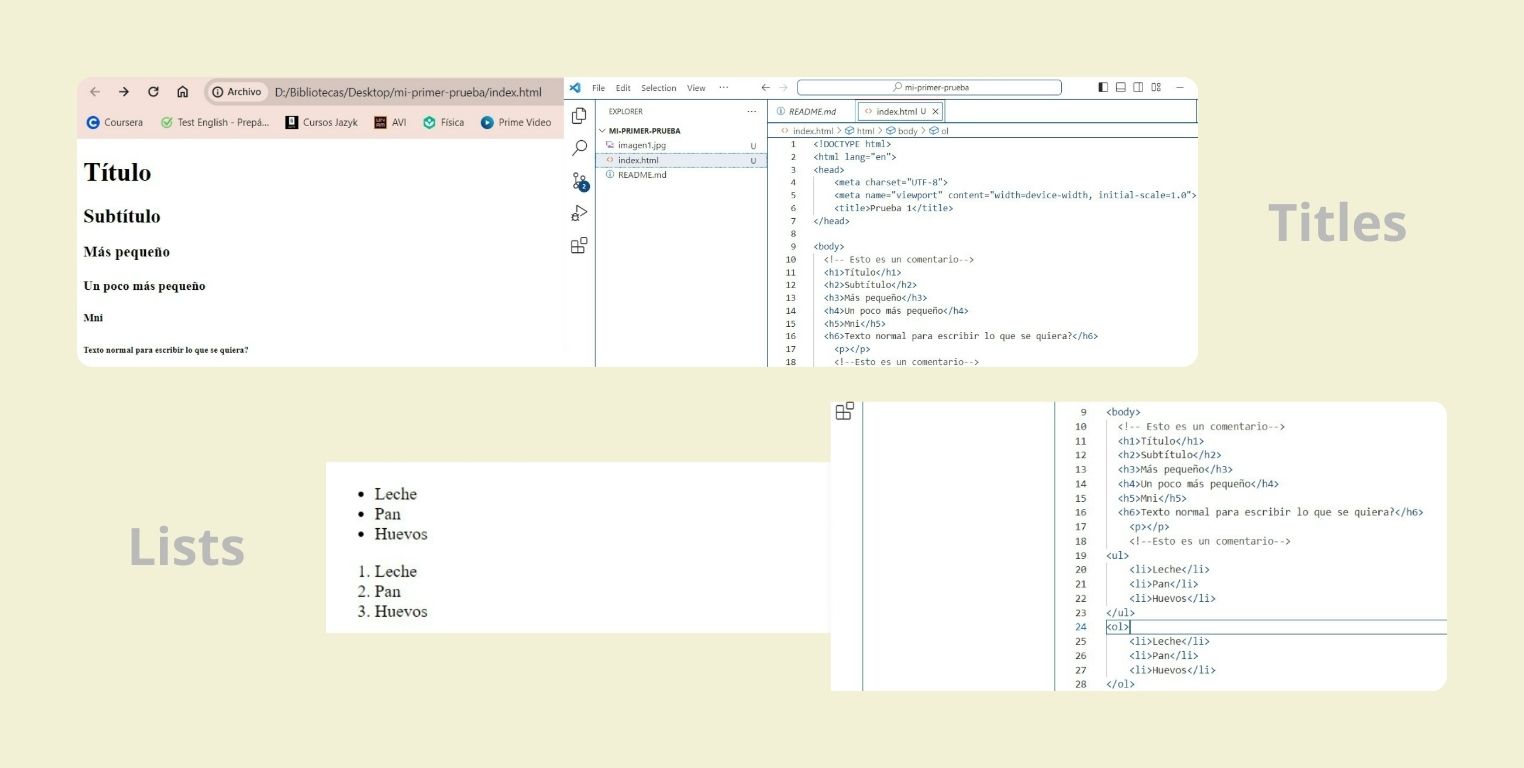
To achieve a visual effect of size in the title, with respect to subtitles and text, you can use the different commands from "h1" to "h6", the first being the largest. And with "p" you can easily add text.
-
To make a bulleted list you can use the command "ul", or also "ol" for a numbered list. Between the elements of the list you should use "li".
-
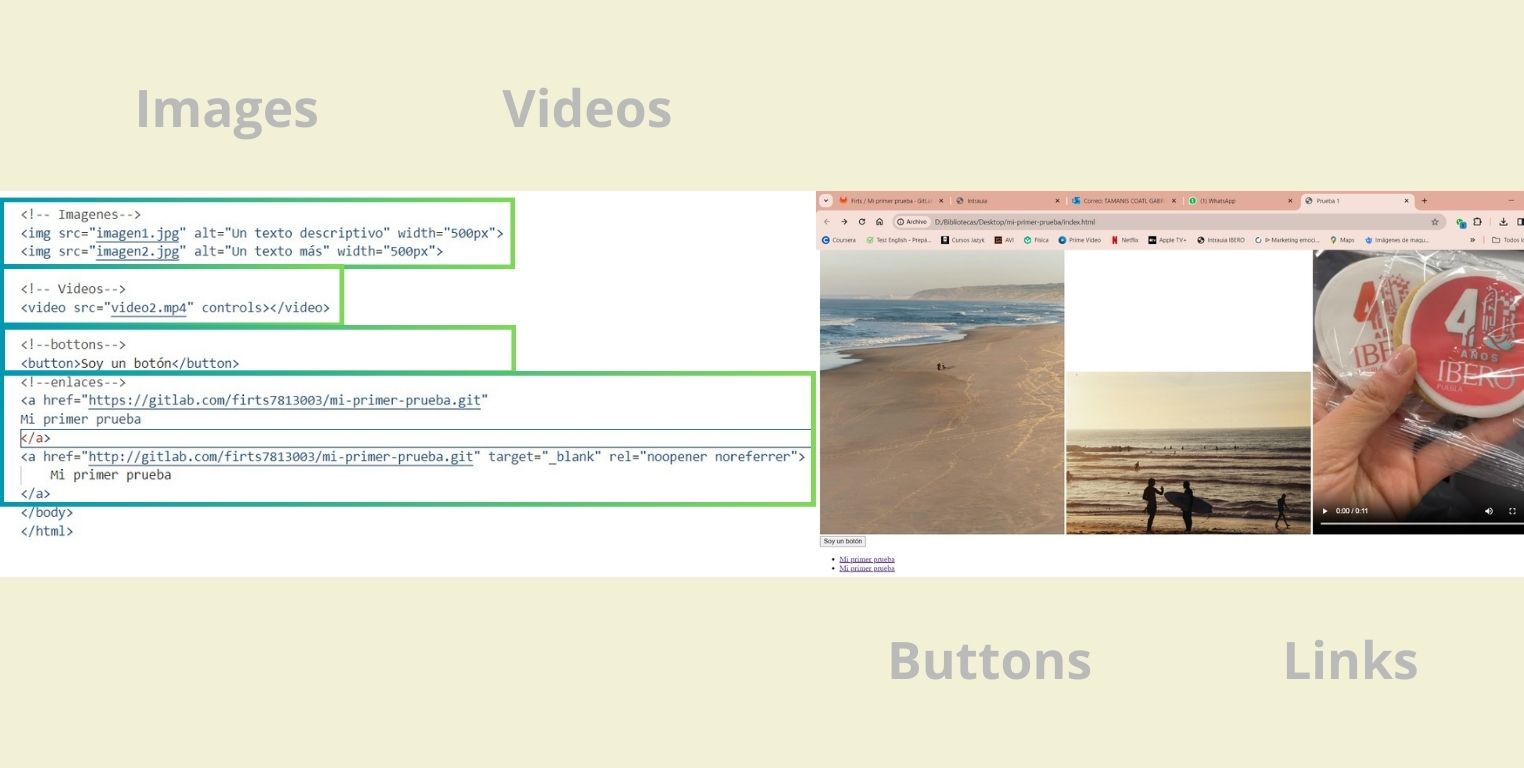
To add an image you must use the command "img", then "src" and inside the quotation marks put the name of the image. Then you can type "alt" to add a description as caption between quotes. You can also modify the pixel width with "width".
-
If you want to add a video then use the command "video", "src" to put the name of the video, and with the command "controls" you add the playback settings. And just like photos you can change the size with "width".
To add a button use the " button" command and name it.
- You can also include hyperlinks with the command "a" and then "href" to add the URL in quotes and finally the word or phrases where you want the hyperlink to be. To make it open in a new tab, you would have to add the following commands before the word or phrase "target="_blank"".
CSS step by step
Anything you can do in html is fine, but ultimately what makes a page visually appealing is the css code.
-
In Visual Studio Code you can create a new document "name.css".
-
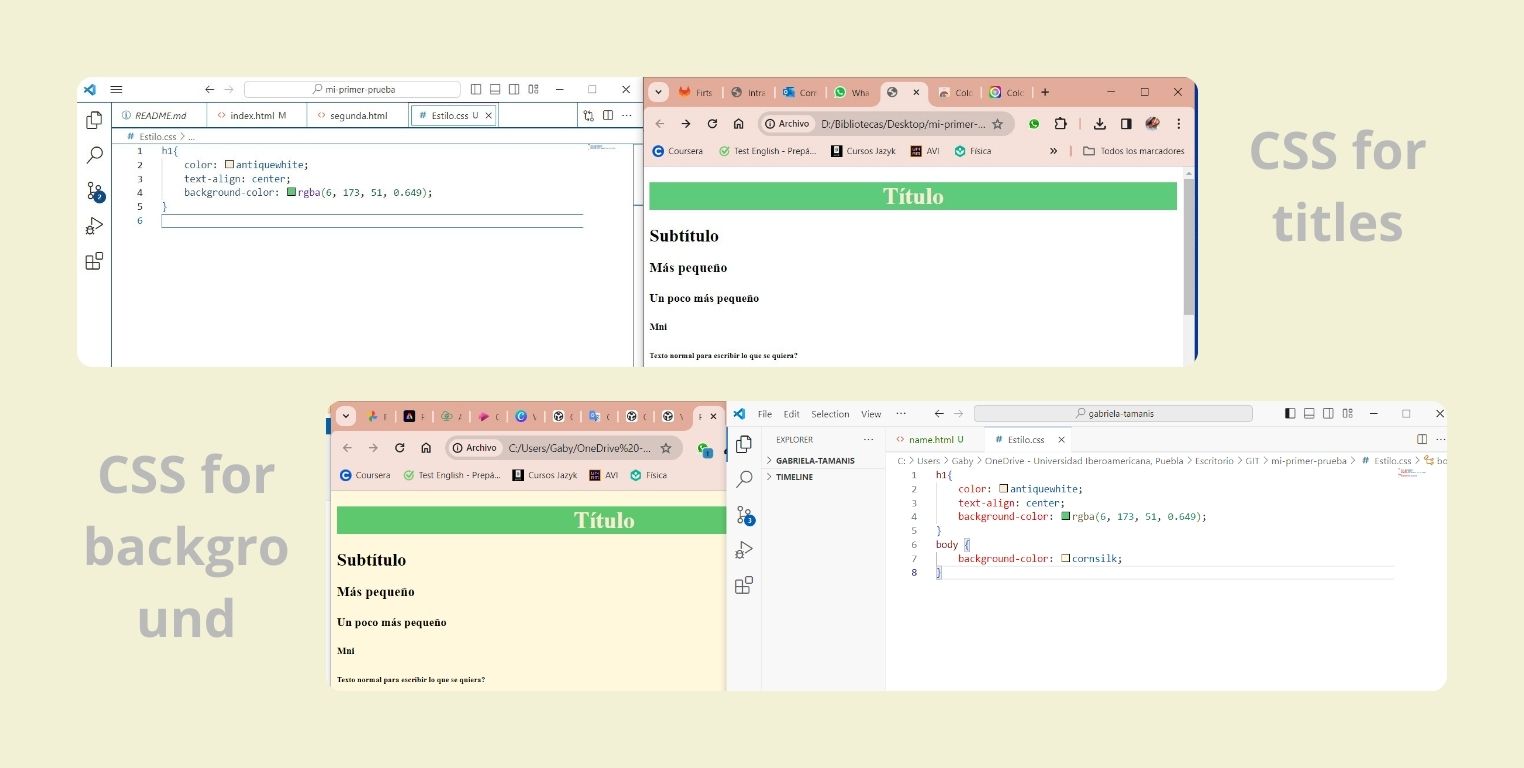
To add color to a text, just indicate the type of text, for example "h1", followed by a key and the command "color", then choose the color you want and close the key.
-
The text can be given a background color with the command "background-color".
-
If you want to center titles or text, "text-aling" followed by the orientation.
-
You can also give a background color to the page, and this is done by indicating that it will be to the body, "body", followed by a key, and the command "background-color", closes the key.
-
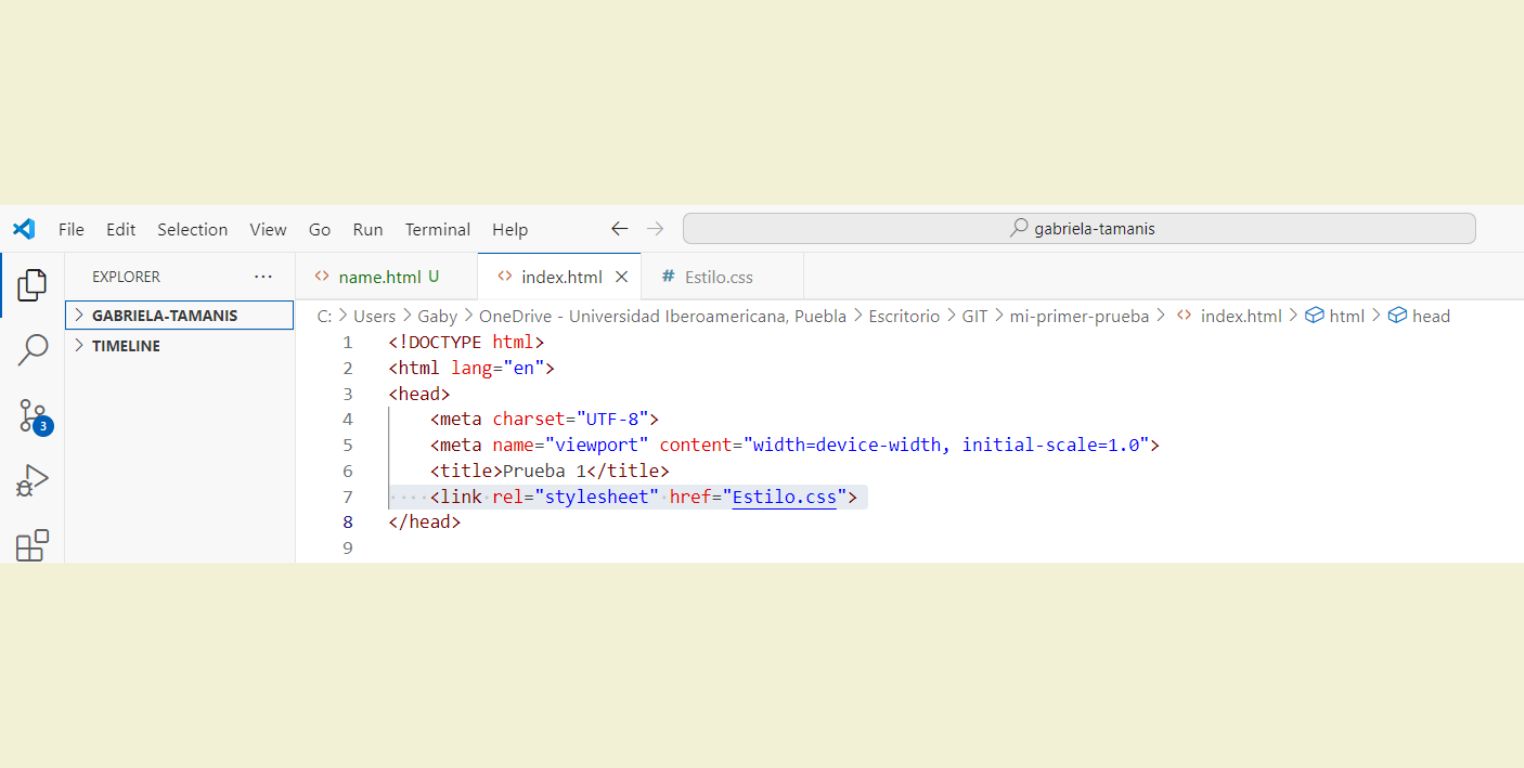
To make it look in the html body that was worked previously, the following steps in the html document are indispensable:
- Insert in the header the command "link", followed by "rel" for the relationship it will have with the page, in this case it is "stylesheet" and finally "href" to specify the document that is being linked.
-
Add "class= "name" " in the specific area where you want to apply the special style.
HOW DID I APPLY THIS?
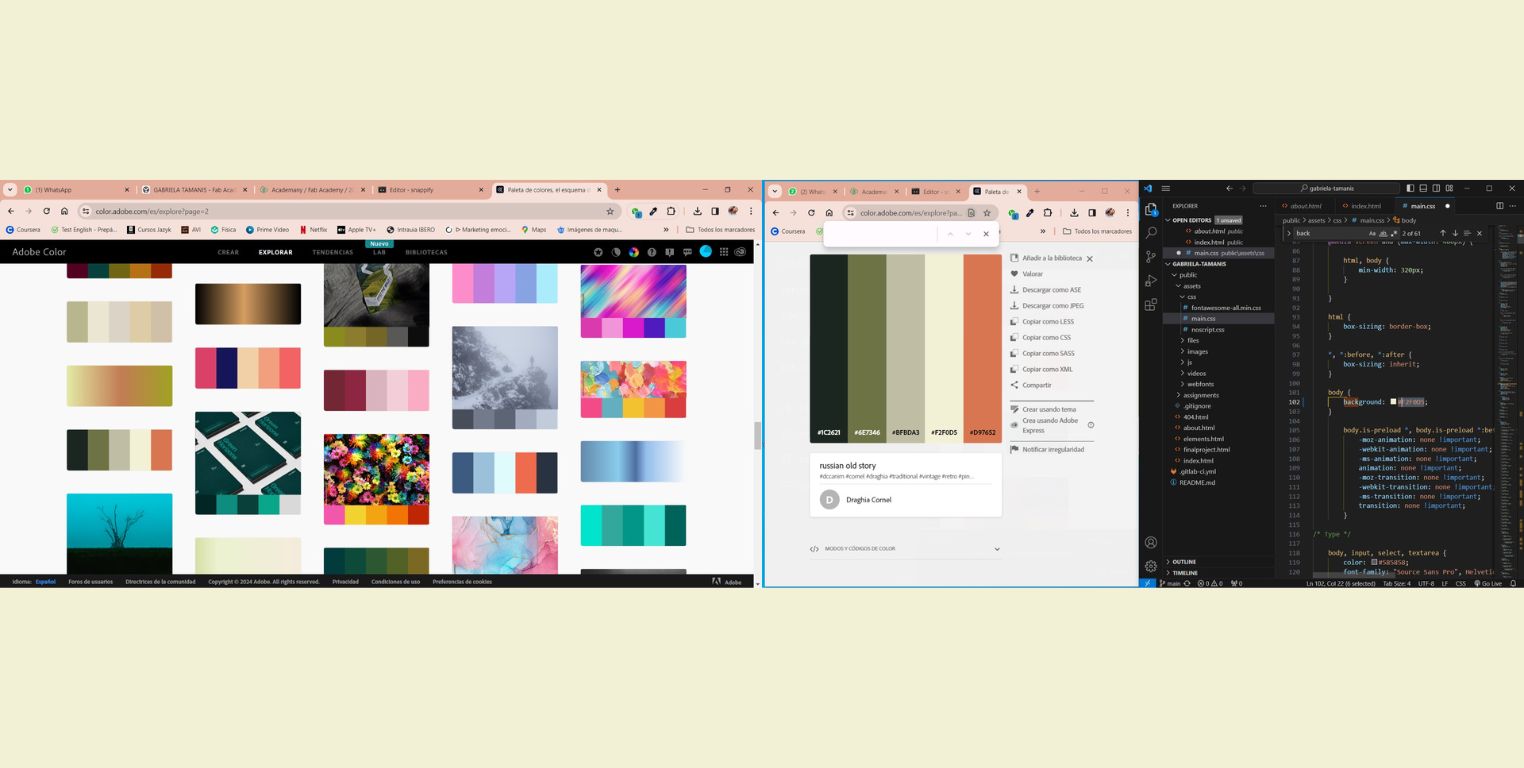
- The first thing was to change the background colors of the template, and to make sure they were in tune with each other I first looked for a color palette that I liked in ADOBE, and in the CSS I changed the previous colors for the palette I chose. It was a long process, but I like the result.
- Then another aspect that I changed was the rectangles on the page. I changed the size, the colors, I removed the X that they had on top and I changed the photo they had for a different one, based on the colors of the palette that I chose previously. All this was directly modified in the CSS.
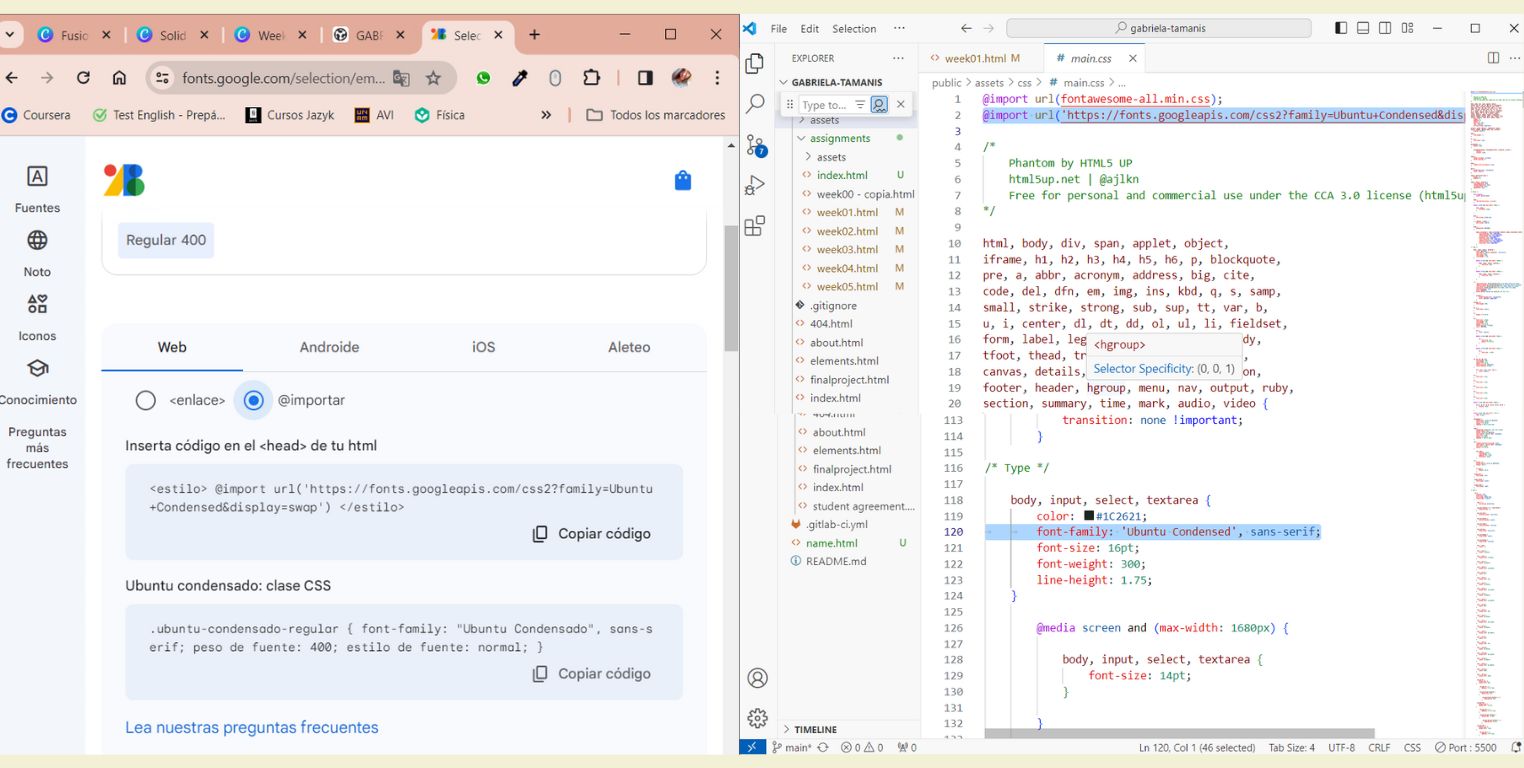
- I also changed the font to one that I liked in Google Fonts. I chose a font with an unobtrusive personality, as I wanted it to remain understandable after all. For this I got the embed code between "Style", and pasted it at the top of the CSS. I also copied the font family and pasted it into the "body" section of the CSS.
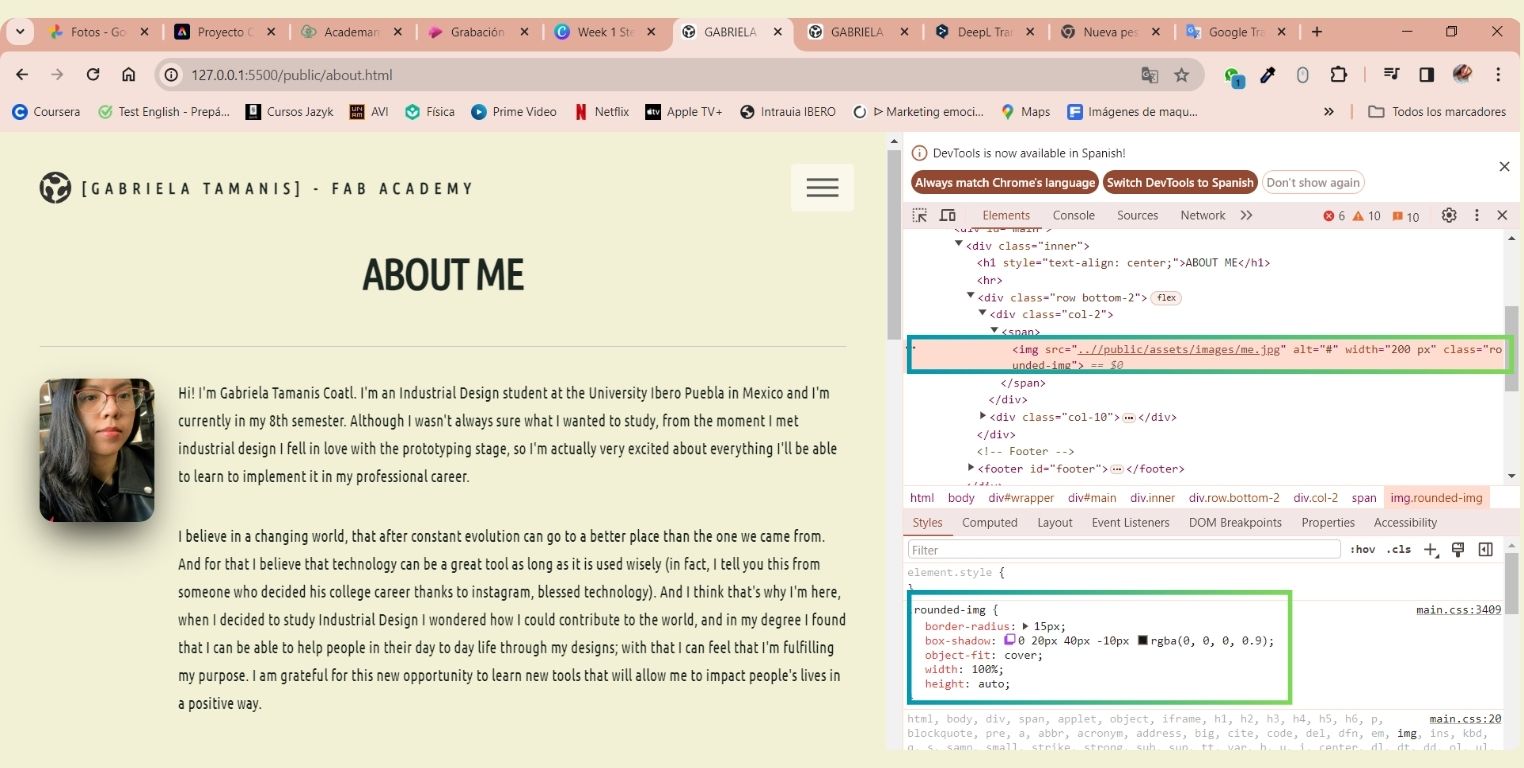
- For the first week I also modified the "About me" page, added my photo and added a background blur. I added the blur in the CSS and have kept it for all the photos.
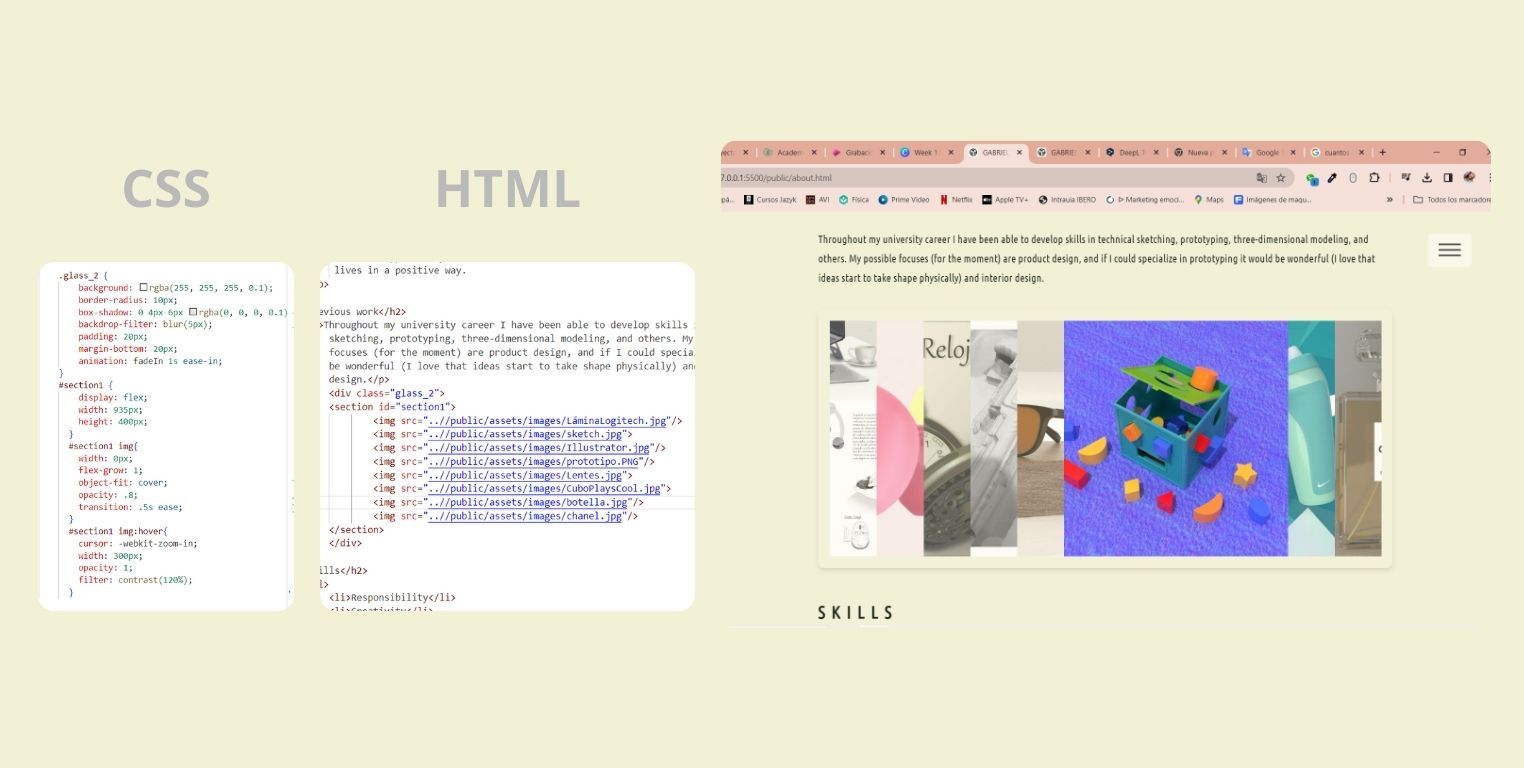
- I also added a frame with moving pictures to show my previous work. I did that following a tutorial I found on YouTube Reel's, it's very quick and easy. The only thing I modified were the values for the size of the photos, because I wanted it bigger due to the amount of photos I wanted to put.
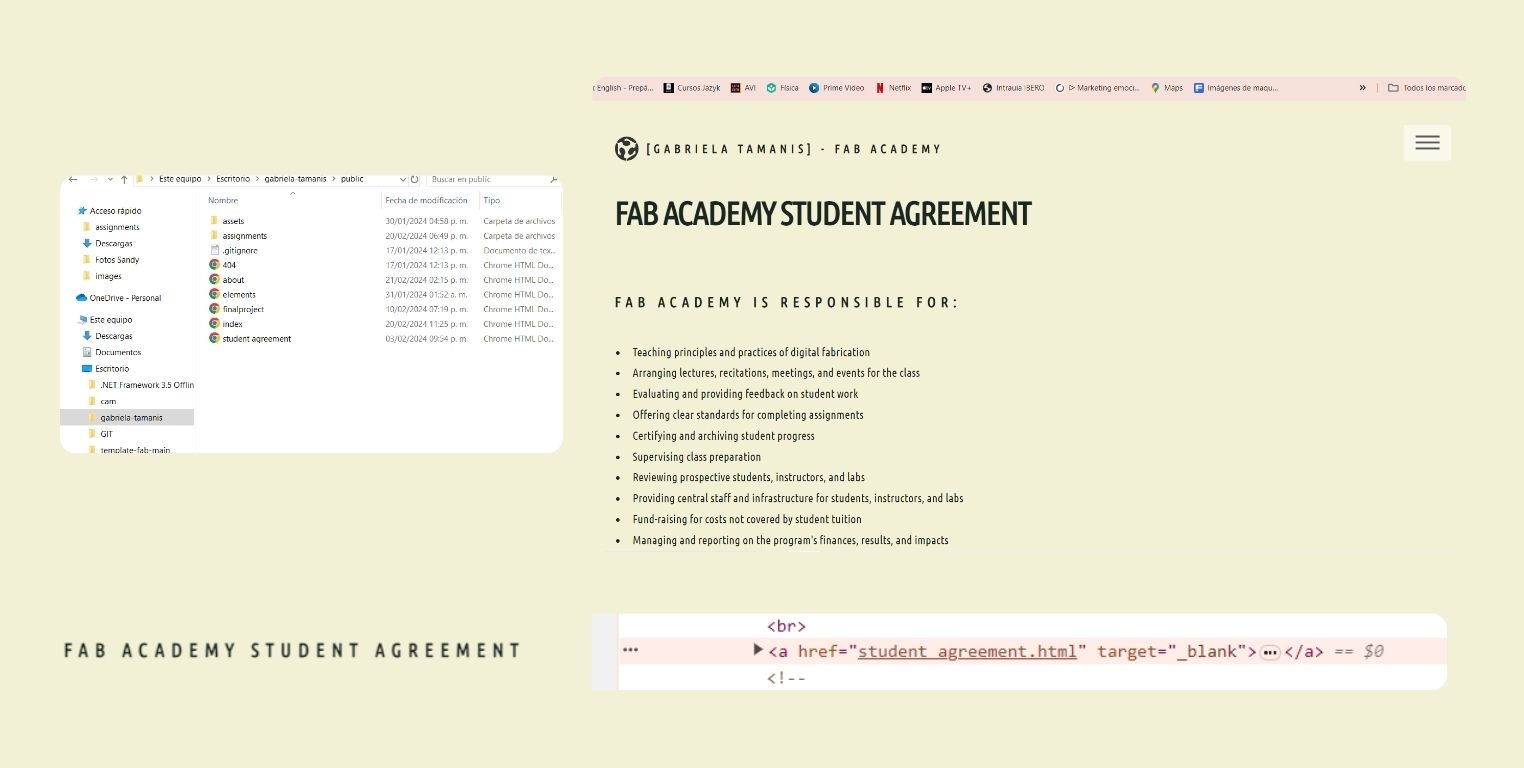
- Up to the end of the About page I inserted a hyperlink that takes you to another page (like the one I put above for the YouTube Reel), I made this page so that only the Student Agreement can be seen there. It's very easy actually, I just copied a page in the "Public" section in the archives, renamed it and modified the content. And in the About page I added the html reference of the page.
Conclusion
There is definitely an art to making a web page. It has been quite interesting to learn how to write the code and then see the work reflected in a web page. I had previously studied programming in high school, but this exercise definitely gave me a lot more practical experience than high school. Finally, I hope you can see this week's honest work reflected. If I learn more about web design, I hope to share it with you. See you next week!
Useful links
-
HTML5 UP : Website templates
-
GOOGLE FONTS : Fonts
-
ADOBE COLOR : Color palettes
-
ILOVEIMG : Basic for compressing images
-
Bootstrap : Code tips for the website
-
Chat GPT : To ask basically any question about the code or anything else
How do I revert to a previous version of my repository?
At the beginning of FabLab I was introduced to GitLab as a backup where I could go back in time. It sounded good, and this week by abusing the 10 MB we have per "push" I had to figure out how to go back to an earlier version, as I could no longer update anything on my page even though I had tried to delete the videos that were too heavy.
What happened? During week 6, I tried to upload some videos for my previous pages, however, I didn't realize that they weighed more than 10 MB (my mistake from the beginning), so my push was marked as an error. Then I tried to delete them in the version I have locally on my laptop, but again it gave me an error when I tried to push. As I couldn't update anything I looked for help, and Rafa, one of my instructors helped me to solve it with the "get reset" command. I list here what you have to do.
- Make a backup of your local repository where you made the changes that you can no longer upload. Also make sure you have removed what is necessary so that when you do a "push" again it does not go over 10 MB. In my case it was photos and videos and I had made changes in my weeks 5 and 1, then I moved the photos and videos to the download folder on my computer, and in a USB I copied my entire repository.
- In Git, inside your repository type the command "git reset" followed by the URL of your page with the last update that was made online.
- Next replace the pages or folders in which you have any changes. IMPORTANT: Never replace your entire repository, that would be a very serious mistake, also when you make these replacements you have to keep in mind that you have to do an update and give git push, so this should not weigh more than 10 MB.
- Finally with the git status command verify that the replacements you made are displayed as changes, proceed with git add to package them all together, give them a name with git commit -m "name" and finally try to do a git push. If everything went well, your push will be successful.
How do you know it was executed well?
Well try to open a page from your local repository, try with the last one you modified and could not update, it should appear without updates.