Danger! Dust!! Noise!!! What is going on?!?!?!?!?!
Introduction
This week, our focus shifted to the realm of computer-controlled machining, specifically the utilization of such machinery to precisely carve materials. In our case, the material in question was MDF, standing for Medium Density Fiberboard, a type of engineered wood product made by breaking down hardwood or softwood residuals into wood fibers, often in a defibrator, combining it with wax and a resin binder, and forming panels by applying high temperature and pressure. MDF is known for its uniformity, smoothness, and versatility, making it a popular choice for various woodworking projects.
When it comes to operating Computer Numerical Control (CNC) machines, safety is paramount due to the inherent risks posed by the equipment. These machines utilize high-speed rotating tools with sharp edges, operate under high voltage, and handle heavy parts, which can introduce several hazards. To mitigate these risks, adherence to specific safety protocols is mandatory.

Safety Training: Before operating a CNC machine, it's crucial to undergo comprehensive safety training. This training ensures that operators are familiar with the machine's functionality, the potential hazards, and the safety measures necessary to prevent accidents.
.png)
Using the proper attire:
- Impact-Proof Safety Goggles: Necessary to protect the eyes from flying chips generated during machining processes.
- Noise Protection Headset: Required due to the potential for noise levels to reach up to 70dBA close to the machine, which can harm hearing over time.
- 100% Cotton Lab Coat/Overalls: Provides protection against chips and keeps the operator's clothing from getting entangled in the machinery.
- Avoidance of Hanging Accessories: Jewelry or loose garments can get caught in the machine, posing significant risk.
- No Shorts: Full coverage of legs to protect from chips and heavy parts.
- Safety Boots/Shoes: Must include toe protection to guard against falling objects.
Operational Safety:
- Operators must stay alert and near the machine while it's running.
- Gloves should not be worn as they can get caught in the machine.
- The closet door must remain closed during operation.
- Only trained staff should operate the machine.
- Keep hands away from the cutting area while the machine is in operation.

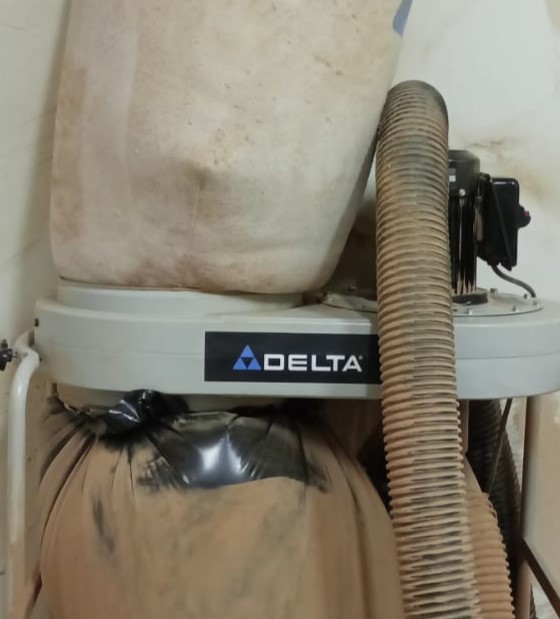
Preventing Dust Inhalation:
A vacuum extractor is utilized to collect dust and chips post-operation. It's important to avoid touching the green round button that disables the X-axis for the rotary add-on and to avoid grounded surfaces during vacuuming due to static electricity risks.
Machine Inspection:
- The floor is clean and free from materials that could cause slips or falls.
- A safe distance is maintained from the machine due to its potential for rapid movement.
- The emergency stop is readily accessible.
- Awareness of high-voltage components.
- The cutting tool is secure and centered.
- The material is properly fixed and free from obstacles in the cutting path.
Following these guidelines ensures the safe and effective operation of CNC machines, protecting both the operator and the machinery.
You can see more info in this week's Group Assignment.
The BIG CNC Router:
The custom CNC:
At our university's fabrication facility, we operate a custom-designed CNC machine that's truly a testament to the ingenuity of our engineering departments. This machine, boasting a 4Hp power at 24000 RPM, provides a substantial working area of 1220 by 2400 by 200mm, ensuring precision within a remarkable tolerance of +/- 0.15 mm. Designed to cater to a diverse range of materials, our CNC machine expertly handles everything from ABS and acrylic to the complexities of composite materials like ALUCOBOND/DIBOND®.
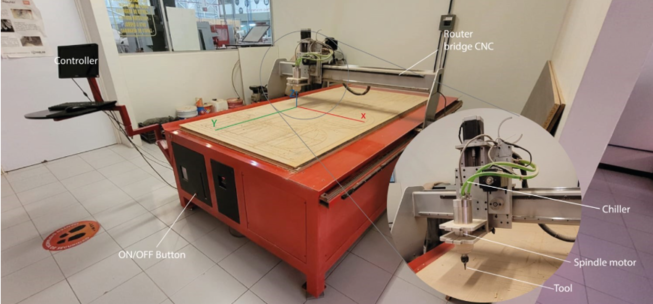
Furthermore, the machine's versatility extends to processing a spectrum of metals such as aluminum and copper, as well as a variety of wood, from softwoods to hardwoods and everything in between, including solid wood, MDF, and veneered or laminated options. It's equally proficient with an array of plastics, nylons, OSB, and other non-ferrous substances, alongside specialized materials like solid polycarbonate, polyethylenes, PVC, and phenolic resins. This machine is an integral part of our toolkit, enabling students and researchers to bring their innovative designs to life with precision and efficiency.
VCarve:
VCarve software is a cornerstone in the world of CNC machining, renowned for its user-friendly interface and robust capabilities that make it ideal for a range of projects from simple to complex. It's particularly favored in educational settings, where both students and professionals can navigate its intuitive controls to transform ideas into precise, tangible creations. The software's flexibility in design and toolpath options offers users the freedom to experiment and perfect their work, whether they're crafting intricate models or straightforward cuts.
Utilizing VCarve in conjunction with our CNC machine elevates the process of creating precise and interlocking components. The software skillfully assists in generating the detailed Dog Bone and T-bone cuts required for such joinery. These specific cut shapes are essential for fitting parts together seamlessly, especially when the toolpath involves internal corners that a round cutter cannot fully reach. Additionally, VCarve's adept handling of vector files, including the conversion of .dxf files into workable vectors, streamlines the workflow from design to production, ensuring that designs are accurately translated into physical pieces.
Design Rules:
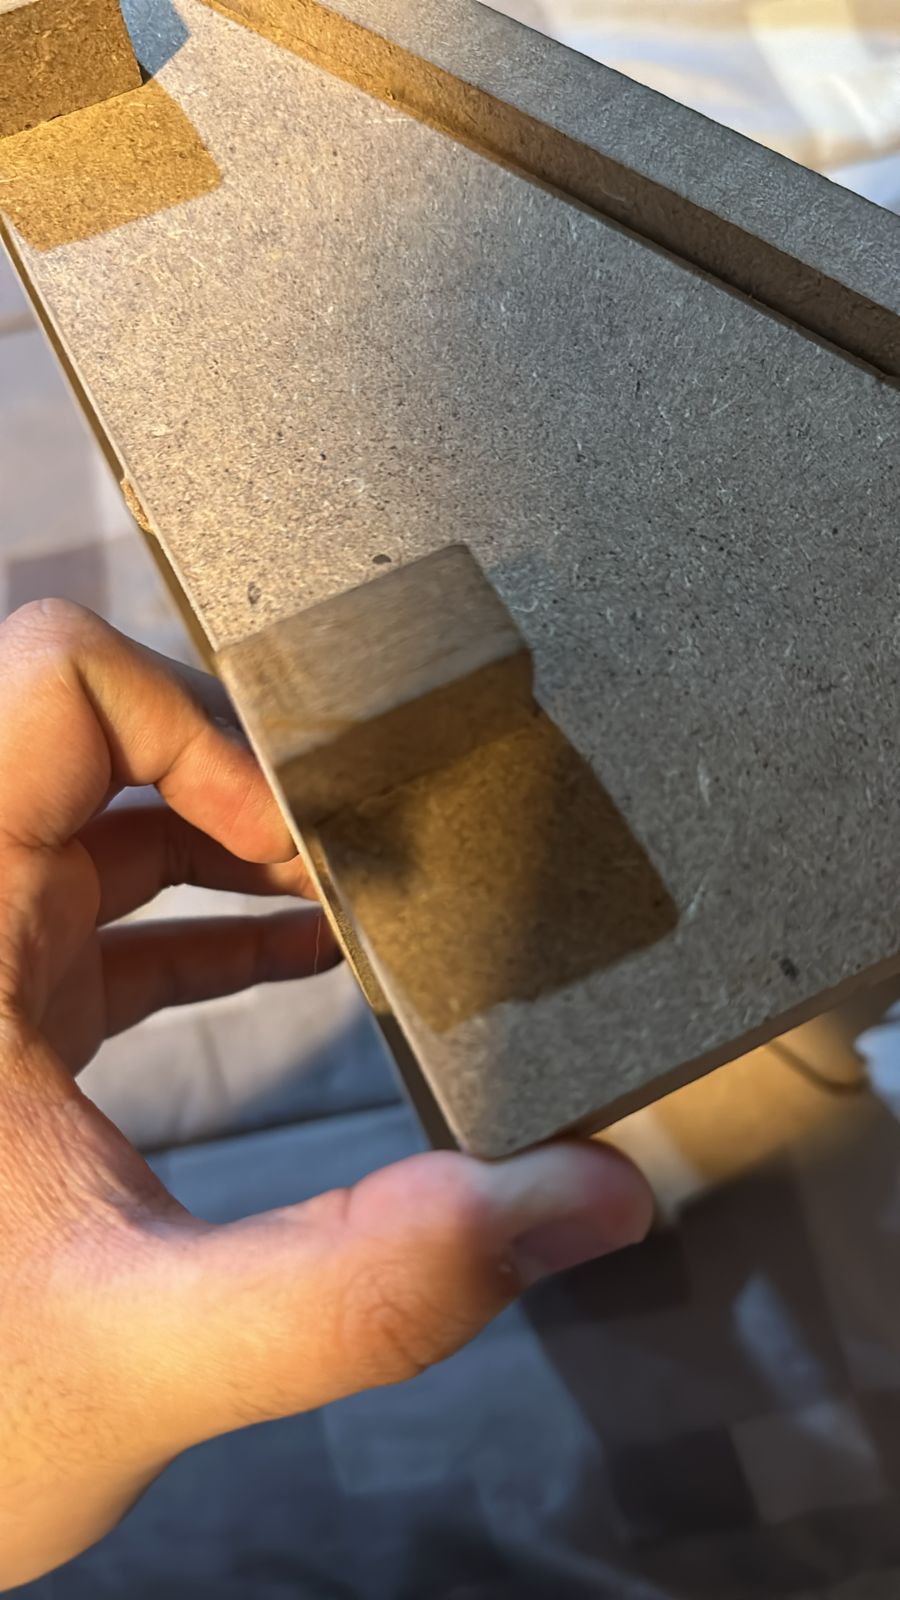
In the realm of CNC design, the principles of "Dog Bone" and "T-bone" cuts are essential for creating interlocking parts. These techniques allow for the clearance necessary to compensate for the radius of a tool bit, ensuring parts fit together seamlessly without unnecessary gaps or stress points. They are especially critical in the design of joints in materials like wood or acrylic, where precision is paramount for structural integrity and aesthetic finish.
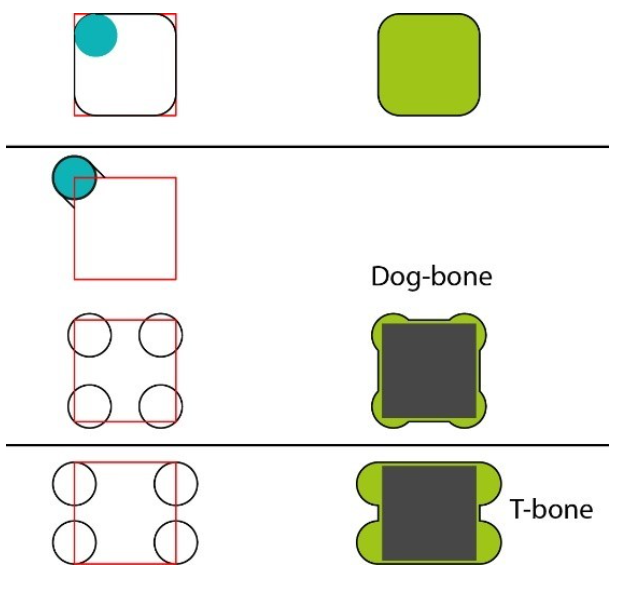
The Dog Bone cut, resembling its namesake's bone shape, allows the adjoining piece to slot in comfortably, with the 'bones' positioned at the corners to accommodate the cutter's curve. The T-Bone cut uses a similar approach but typically has a T shape that creates a tab and slot configuration for the interlocking parts.
Both methods are practical solutions to a common limitation in CNC machining: the inability to create perfectly sharp internal corners due to the round shape of the cutting tool. By incorporating these cuts into the design, CNC machinists can ensure a clean, tight fit while maintaining the structural integrity and visual appeal of the final assembled piece.
Creating something "BIG" (at least for me)
The creation:
Assignments that challenge students to "think big" can be an excellent opportunity to stretch their design skills. Large-scale projects require a deeper understanding of material properties and toolpath strategies, as they often involve complex assemblies or heavier materials. The scalability of design, from concept to creation, is put to the test, pushing the boundaries of what can be achieved within the constraints of the available tools and machinery.
Reflecting on the laptop stand I designed "accidentally" on Week 03, it was a formative experience that honed my understanding of ergonomic principles, structural stability, material selection, and aesthetic design. Every choice, from the curve of the stand that supports the wrists to the selection of material that balances durability with weight, was a lesson in creating functional art. It taught me the importance of user-centric design and has given me a solid foundation for approaching larger, more complex projects with confidence and a keen eye for detail. This project was not just about creating something useful; it was about mastering the orchestration of design, functionality, and beauty, a trinity that I strive to embed in every creation.
So I decided to use the same laptop stand for this assignment but now with a driven desire to improve it and fix all of the errors from the previous design.
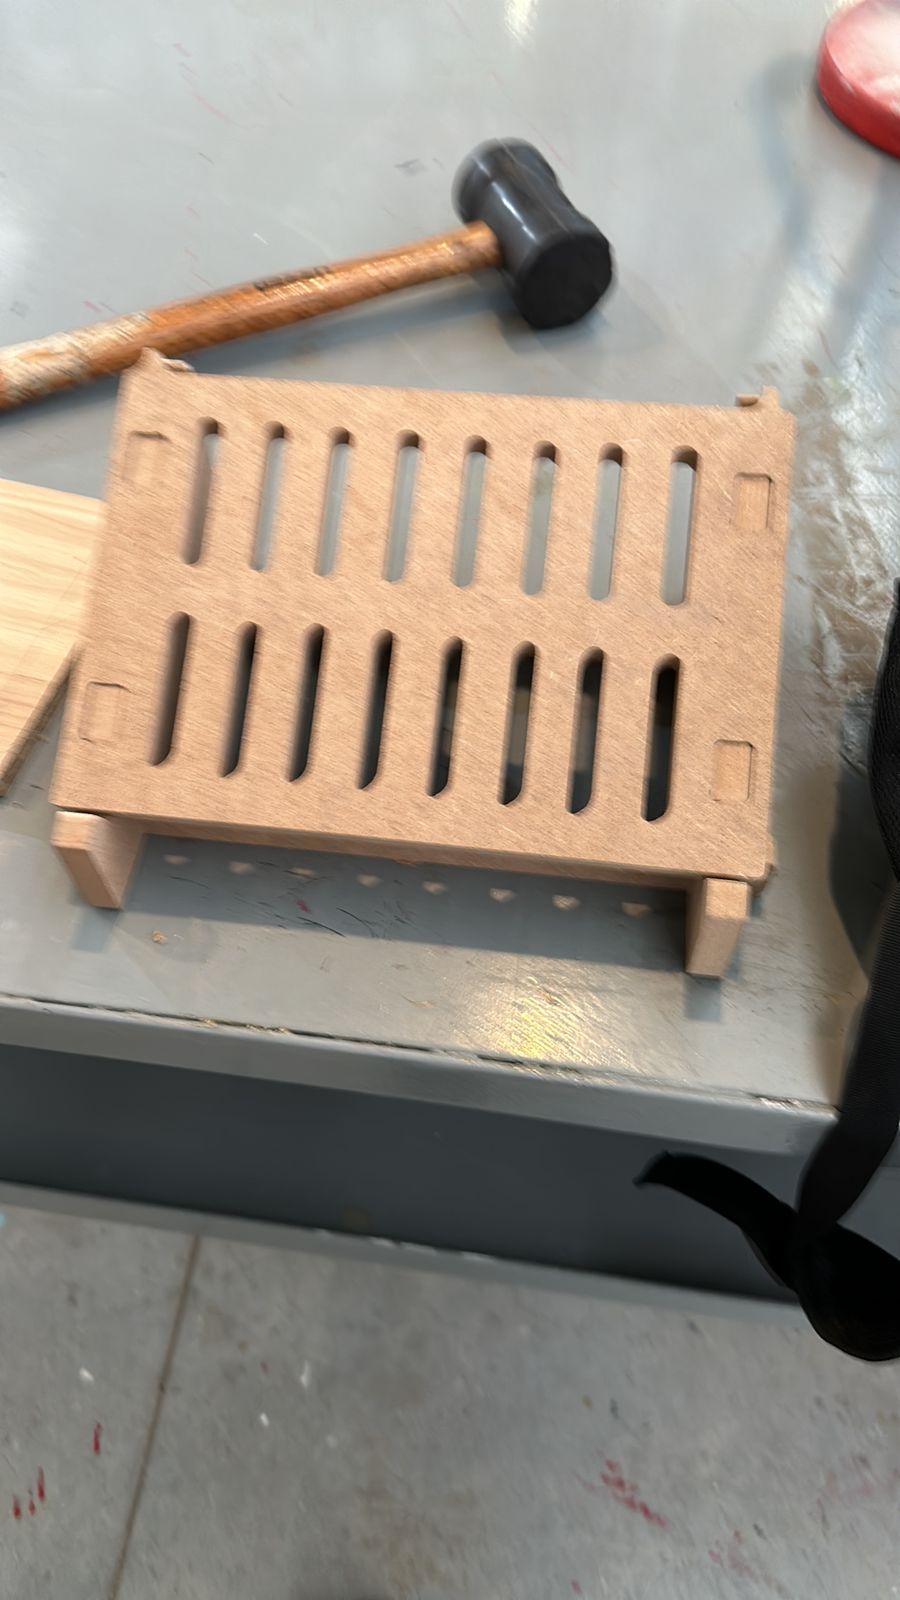
In improving my laptop stand design, I focused on enhancing ventilation to prevent overheating, a crucial aspect for electronic devices. I identified areas where airflow was restricted and modified the design to include additional spaces and pathways to facilitate better air circulation. I also corrected some errors from the original design, which were likely affecting both the stand's stability and aesthetic appeal. Additionally, I incorporated T-bone and Dog bone cuts to refine the joint mechanisms, ensuring a more seamless and secure assembly of the stand's parts. These changes not only improved the functionality of the stand but also gave me invaluable insights into the iterative nature of design, where each iteration brings you closer to both form and function excellence.
Here is the new model on Sketchfab:
The process of preparing my laptop stand design for the CNC Router involved transferring my work from Fusion360 into a .dxf file format, which is compatible with the CNC machine's software. This step is about ensuring that all the sketches and components are correctly laid out and ready for machining. I meticulously went over the sketches in Fusion360, double-checking each line and curve for precision, then exported the design as a .dxf file. This file then served as the blueprint for the CNC Router, guiding the cutting tools to follow the design exactly, bringing the laptop stand to life from the material chosen. It's a satisfying transition from the digital realm to tangible reality, where design decisions become physical components.
The routing:
After finalizing the laptop stand design and exporting it as a .dxf file from Fusion360, the next step was to import this file into VCarve. Within VCarve, I used the software’s specialized tools to add the Dog Bone and T-Bone cutouts, which are crucial for the assembly of the stand. VCarve makes this process relatively straightforward with its intuitive interface, allowing me to pinpoint where these joints were necessary and to integrate them into my design efficiently.
.jpeg)
 (Medium).jpeg)
.jpeg)
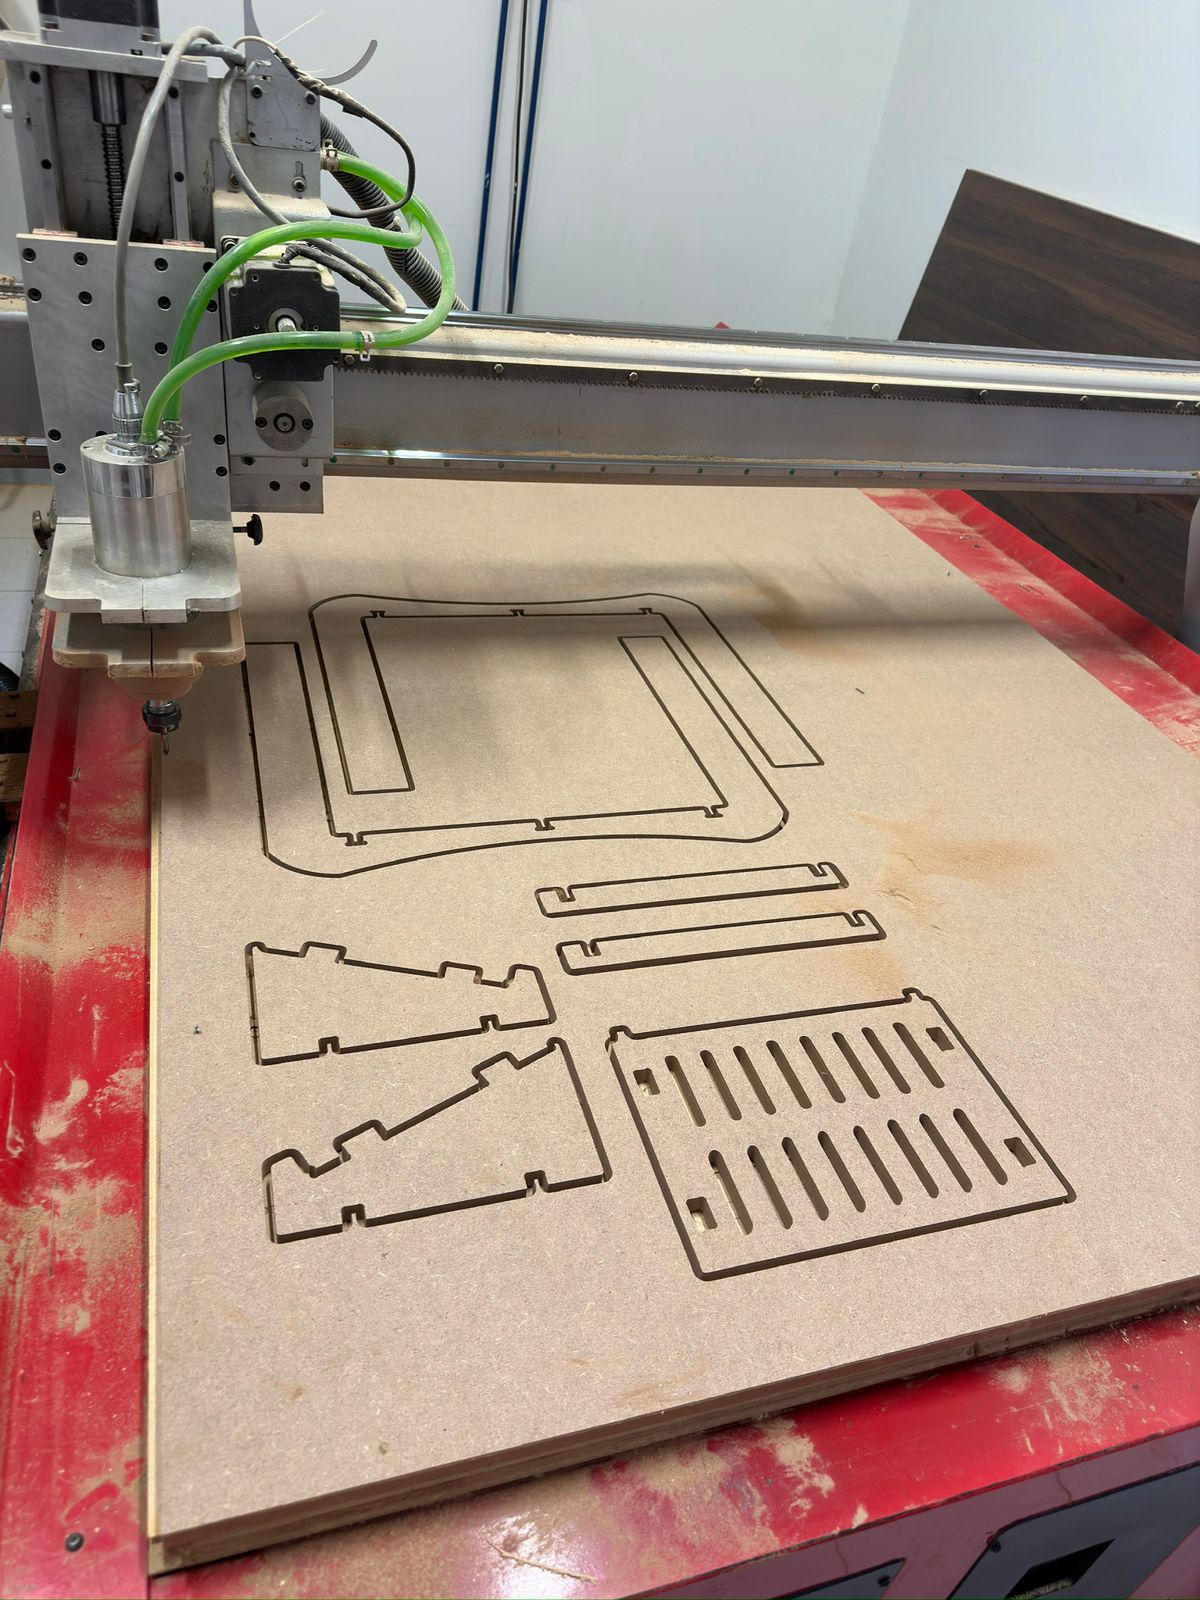
After integrating these cuts and finalizing the design within VCarve, I proceeded to generate the G-Code. This code is what instructs the CNC Router on the exact paths to follow during the cutting process. It translates the design into precise movements and operations, guiding the machine's cuts to produce the components of the laptop stand.
Here is a preview of how the CNC will cutout each part of my model:
.jpeg)
David vs The Router: Round 1!
After sending the G-Code to the CNC machine through the use of the AR2400 software, I meticulously prepared the workspace, ensuring the MDF sheet was securely fastened with nails (where I accidentally hurt myself with the hamemr lol). This was to avoid any movement during the intricate cutting process, an essential step for precision.
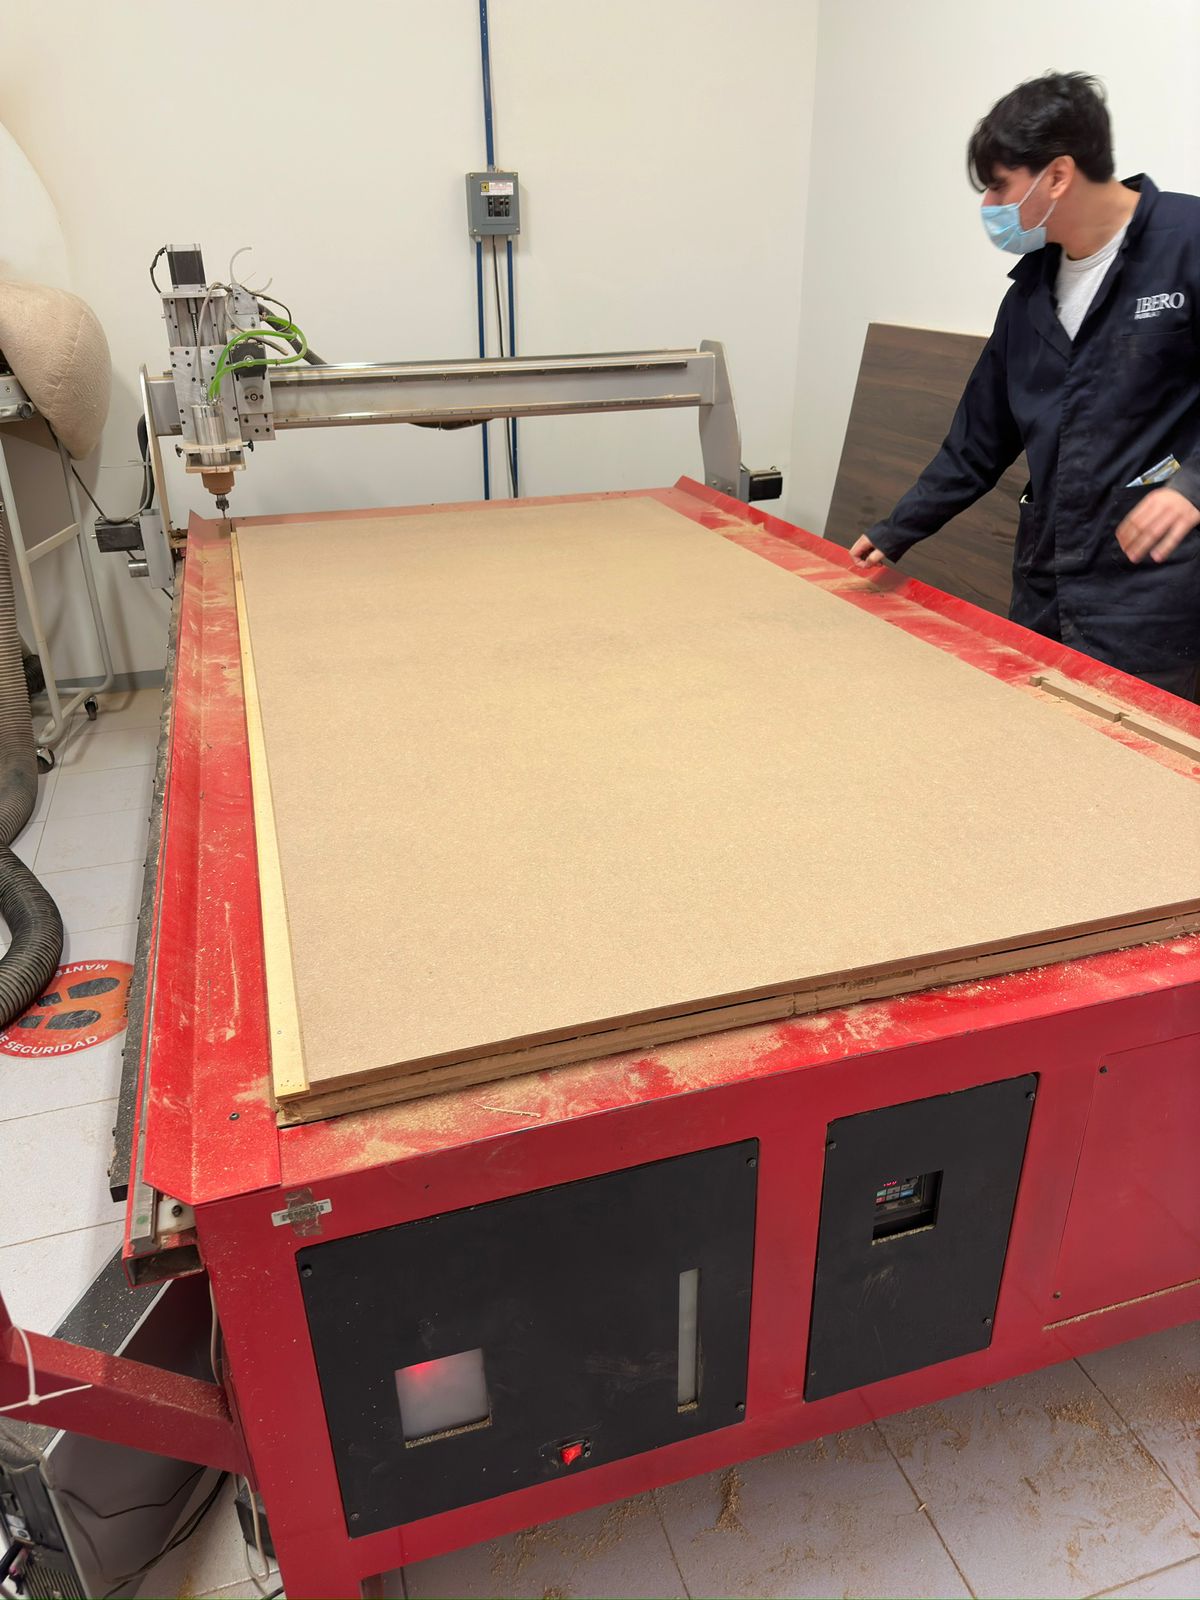
I then initialized the CNC at point 0. Setting this initial reference point with utmost accuracy was crucial for the successful execution of the design, marking the beginning of the actual cutting phase.
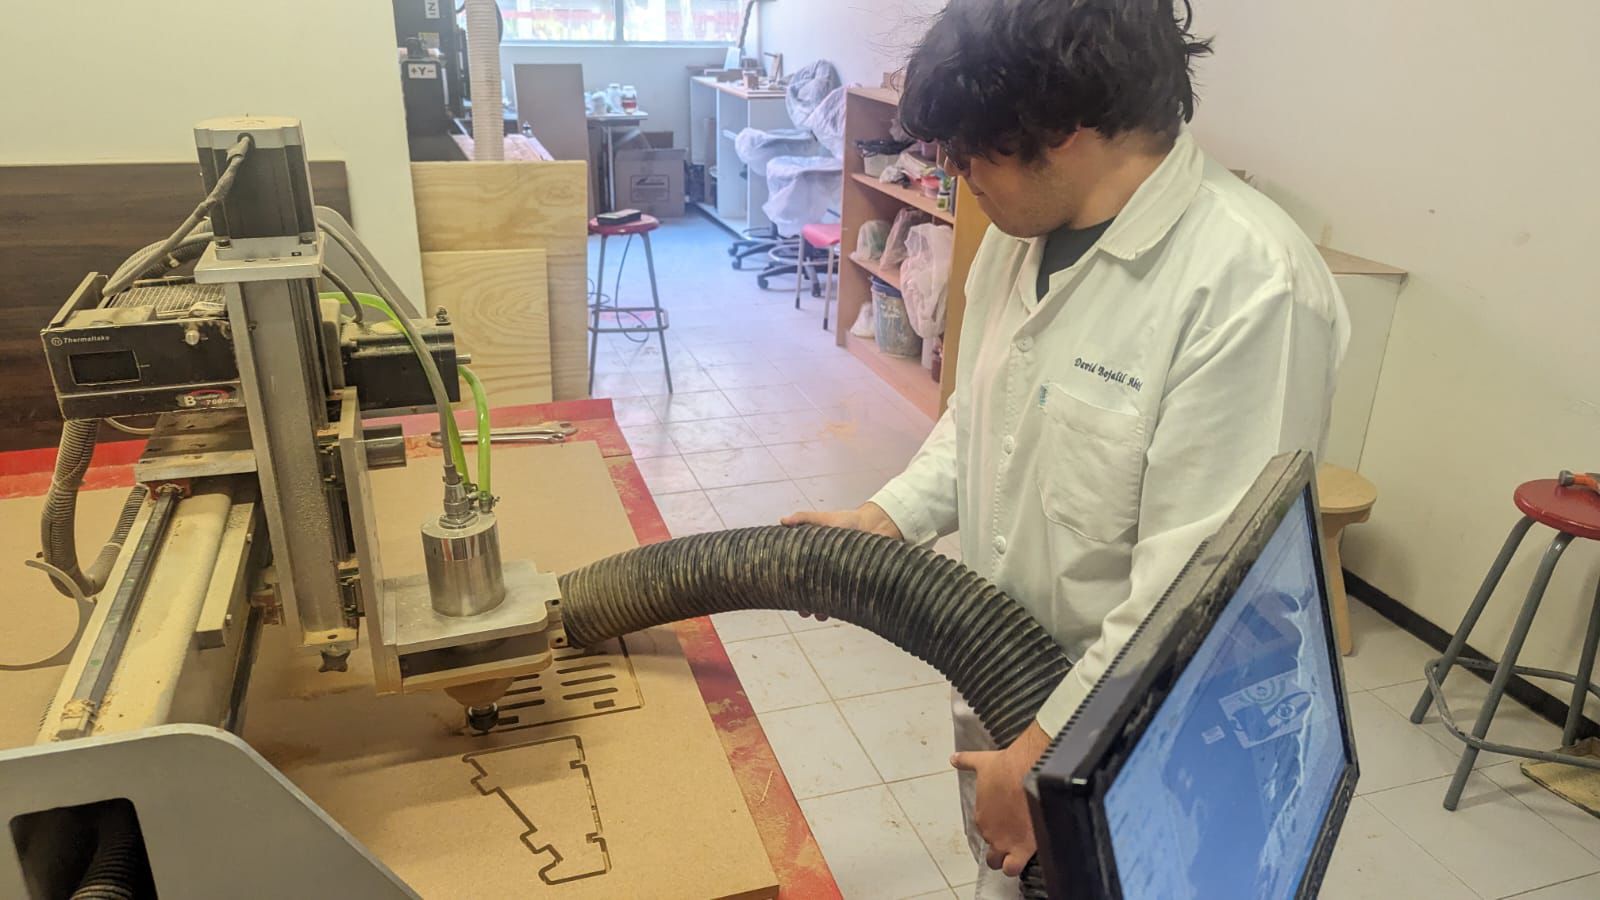
Working with the CNC machine can often feel like a battle, particularly when dealing with the dust extraction system. Ensuring that the dust vacuum is properly attached and functioning can be one of the biggest complications during the cutting process. The concerns are not just about cleanliness or machine maintenance; they’re also about safety and precision.
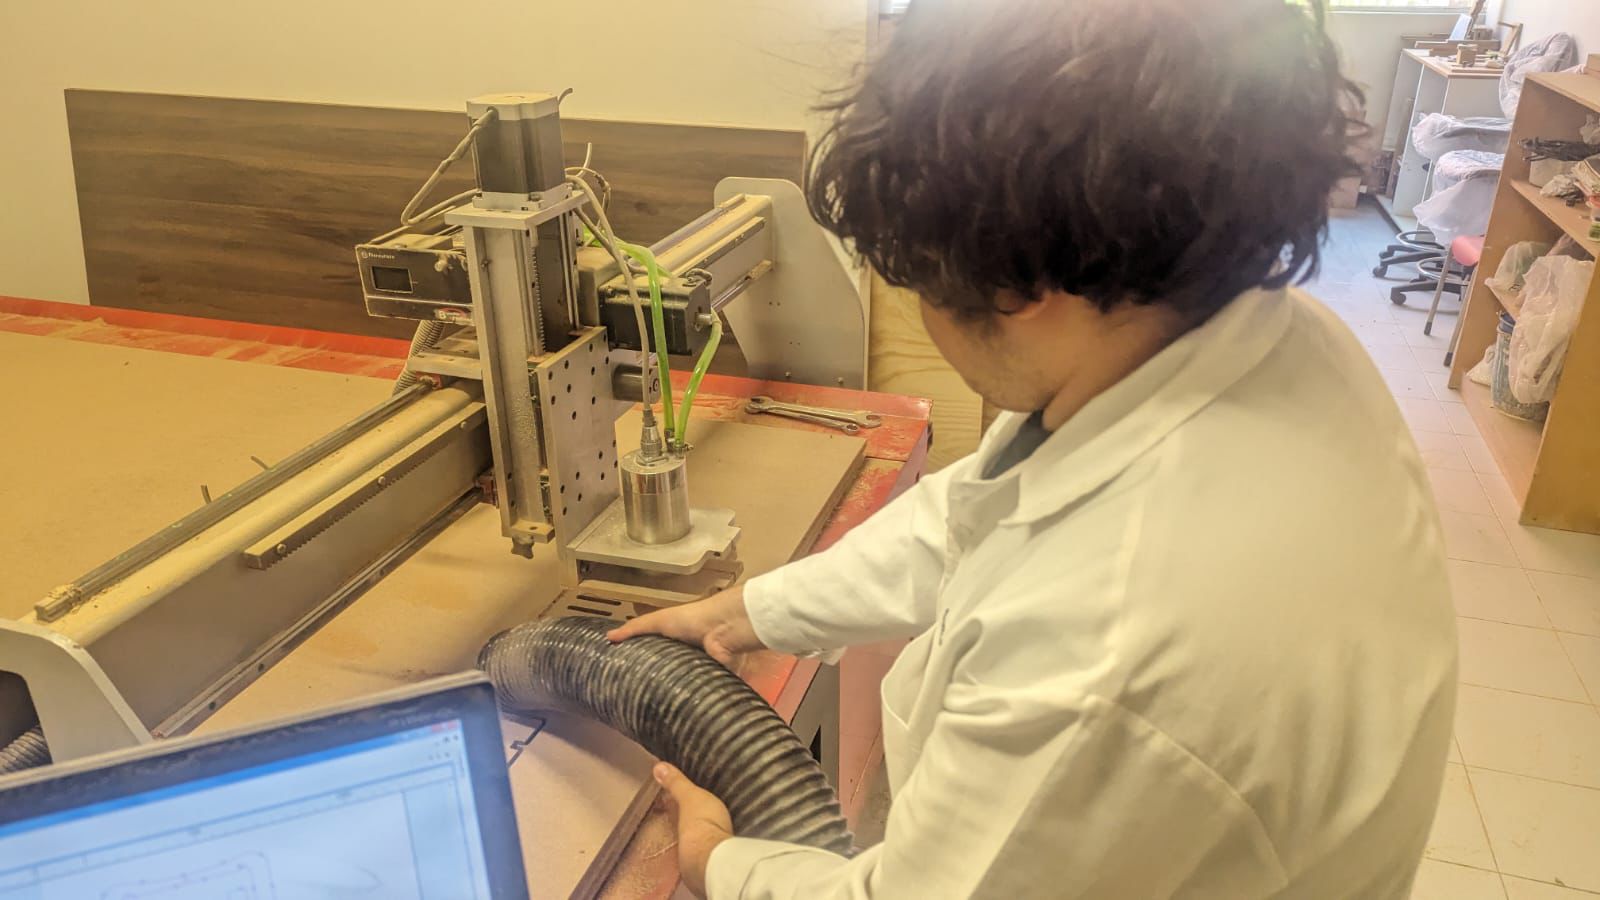
A poorly managed dust system can lead to visibility issues, inaccuracies in the cut, and potential damage to the machine or the piece I’m working on. Monitoring the dust vacuum becomes a crucial part of the process, requiring constant vigilance and quick responses to any signs of trouble. It’s a testament to the hands-on nature of working with such powerful machinery.
David Wins! Flawless Victory!!!
Now came the moment of truth and... IT WORKED!!!
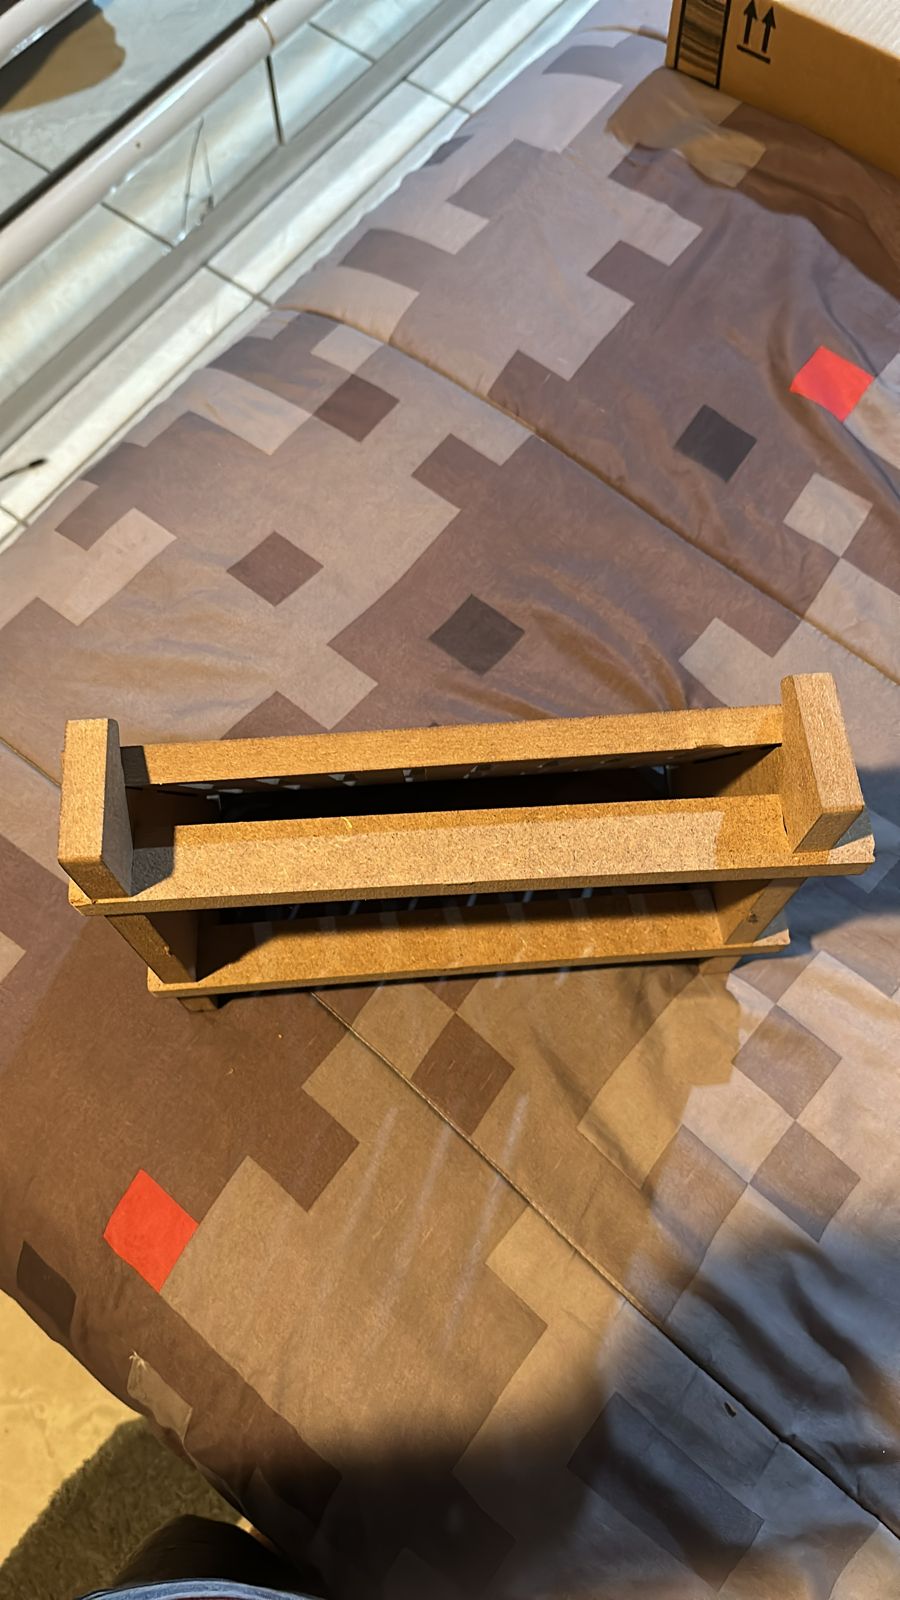
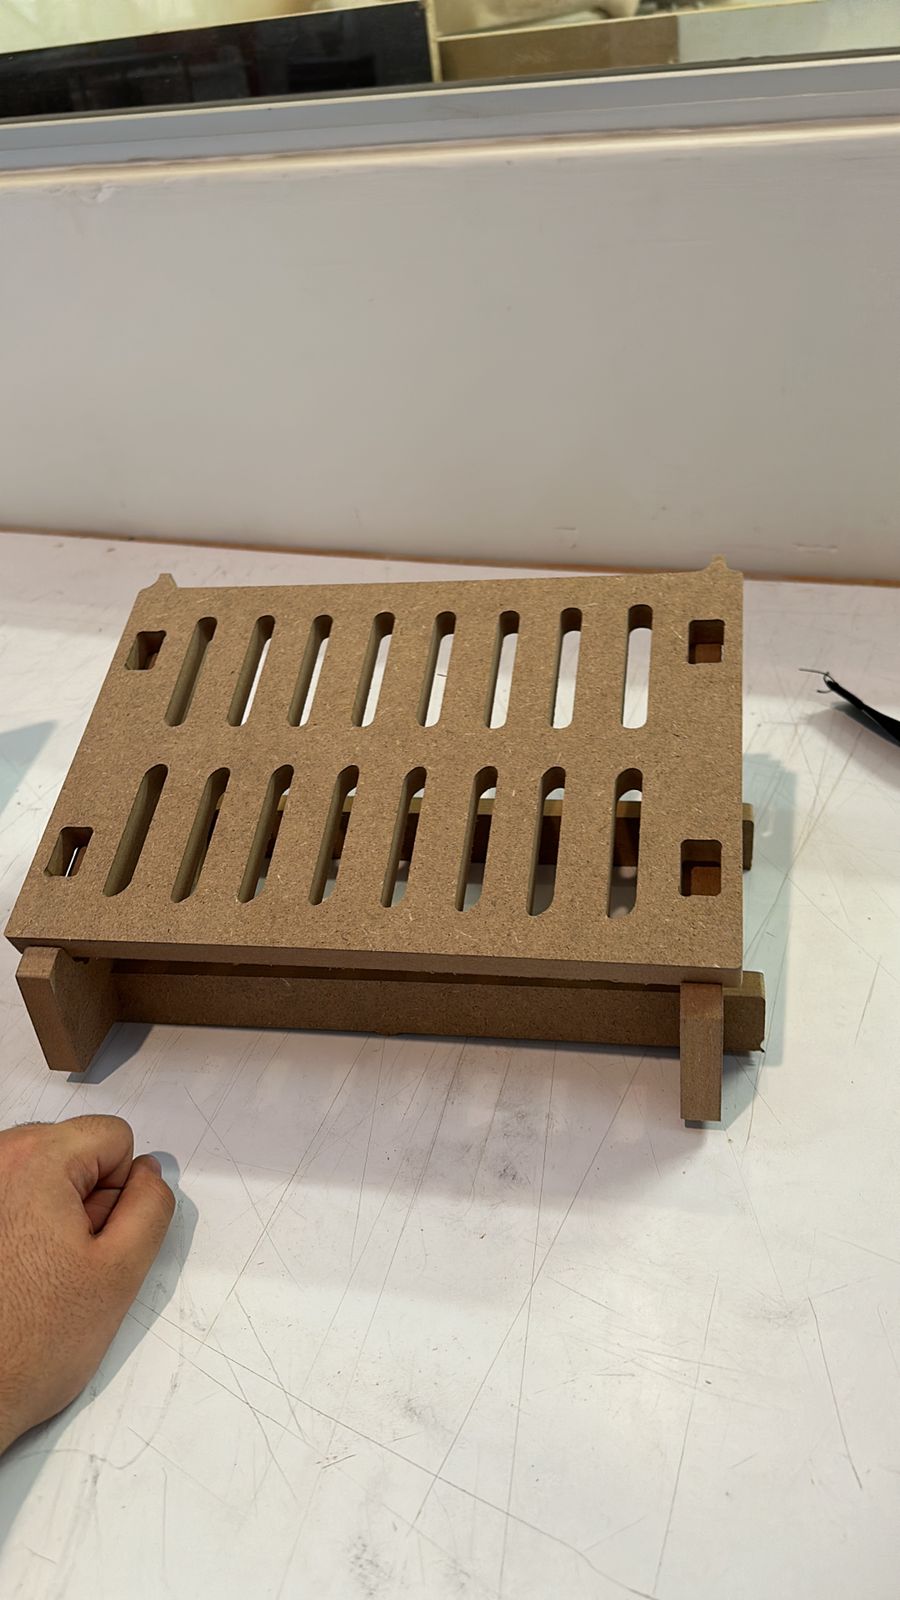
I was genuinely surprised and delighted to see how well the Dog Bone and T-Bone cuts worked out, enabling the laptop stand to be assembled seamlessly without the need for glue or nails. This success was a testament to careful design planning and the precision of the CNC machining process. The fact that I could create a functional, sturdy laptop stand that could be pieced together with just a bit of force and no additional fasteners was incredibly satisfying. It underscored the power of thoughtful design and the capabilities of modern manufacturing technologies.

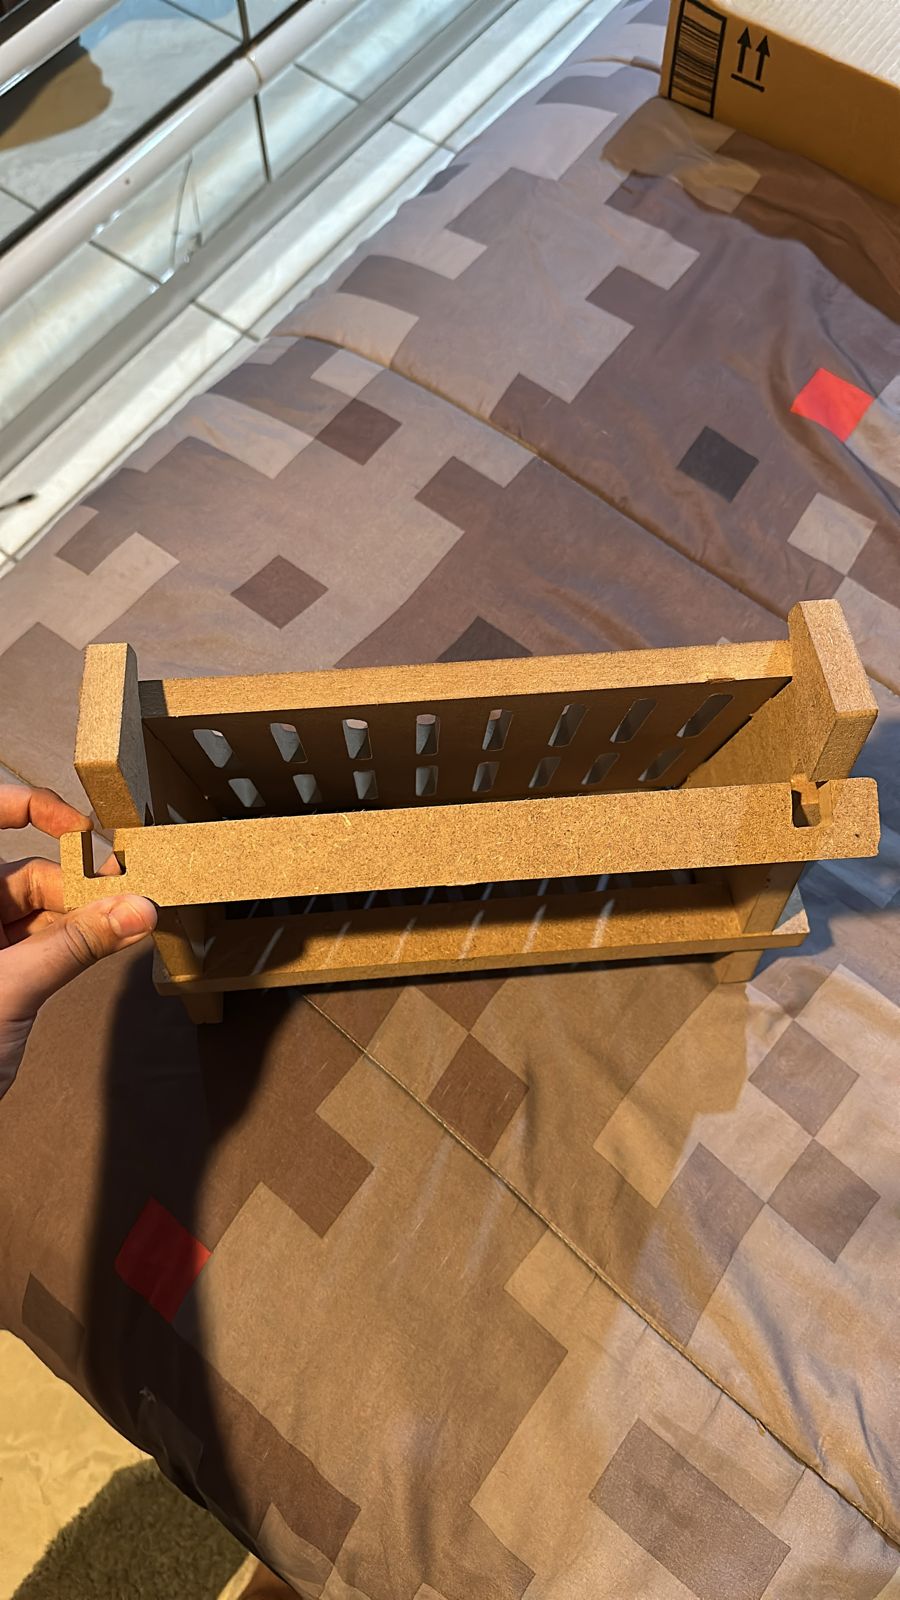
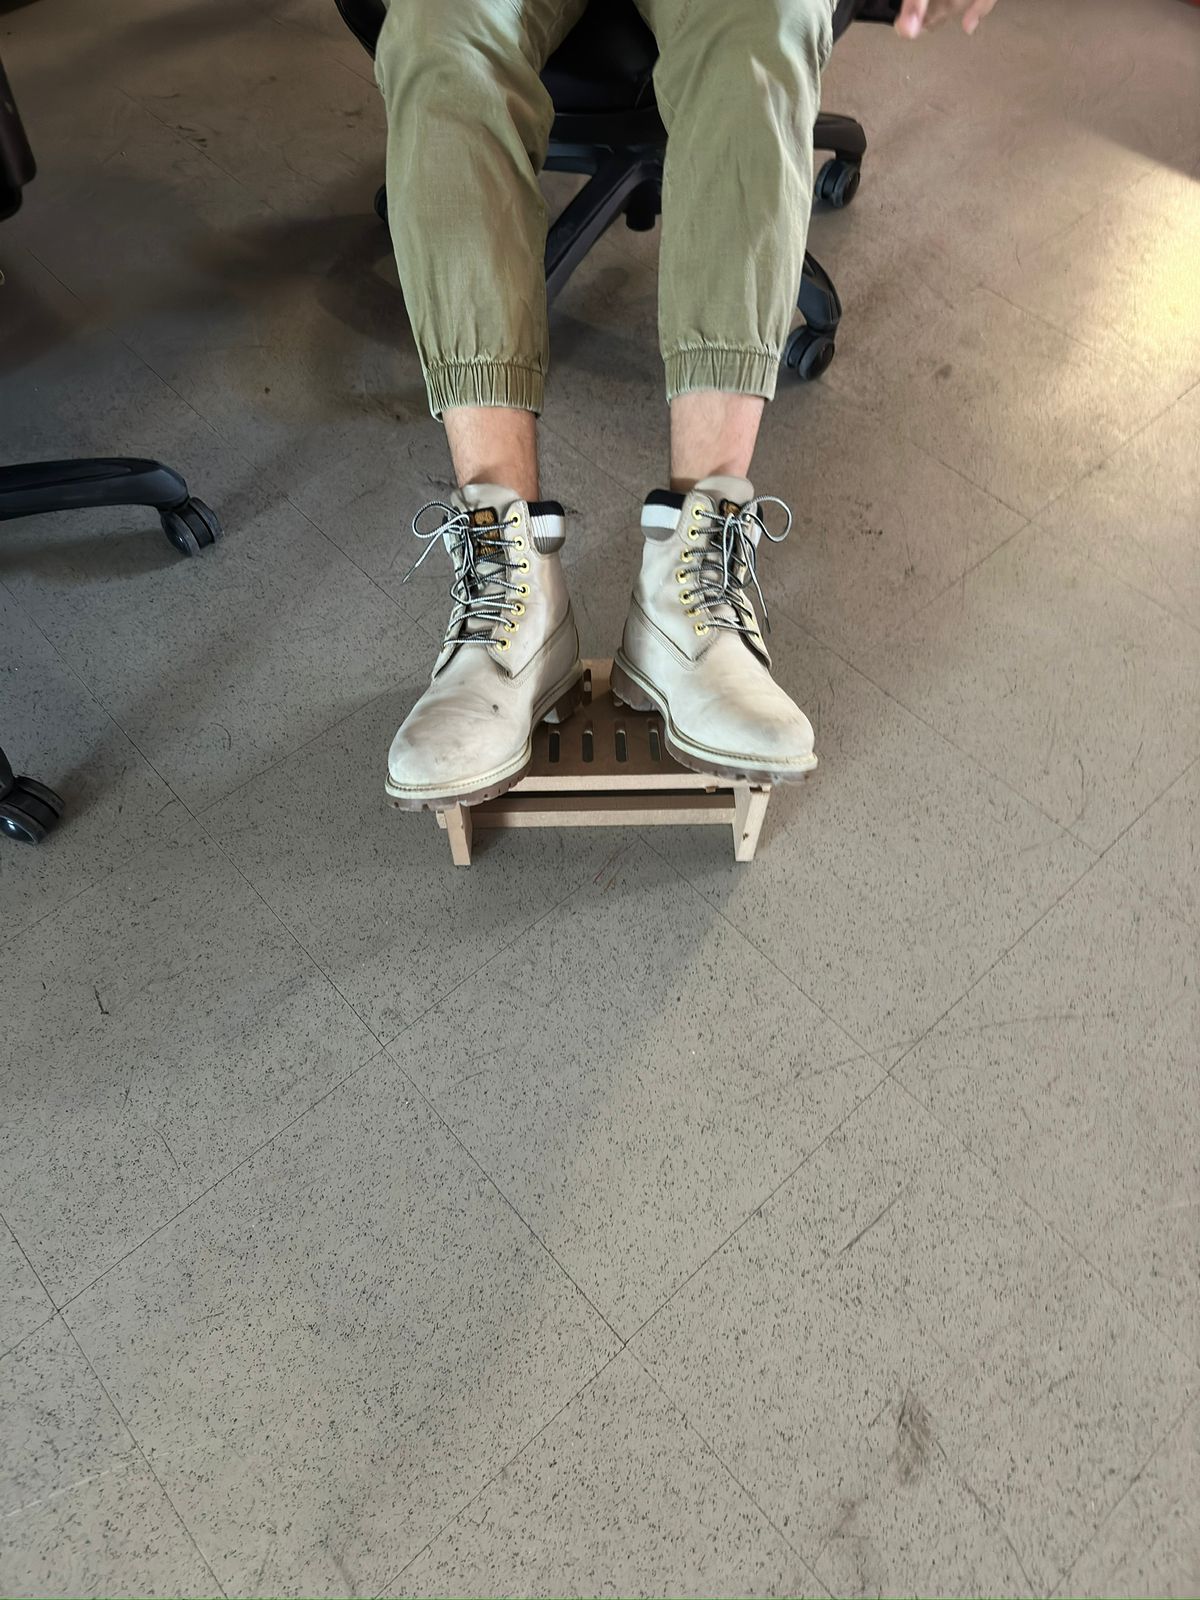
Bonus: Here is Juan Carlos Chávez Cortés helping me make the top part enter lol.
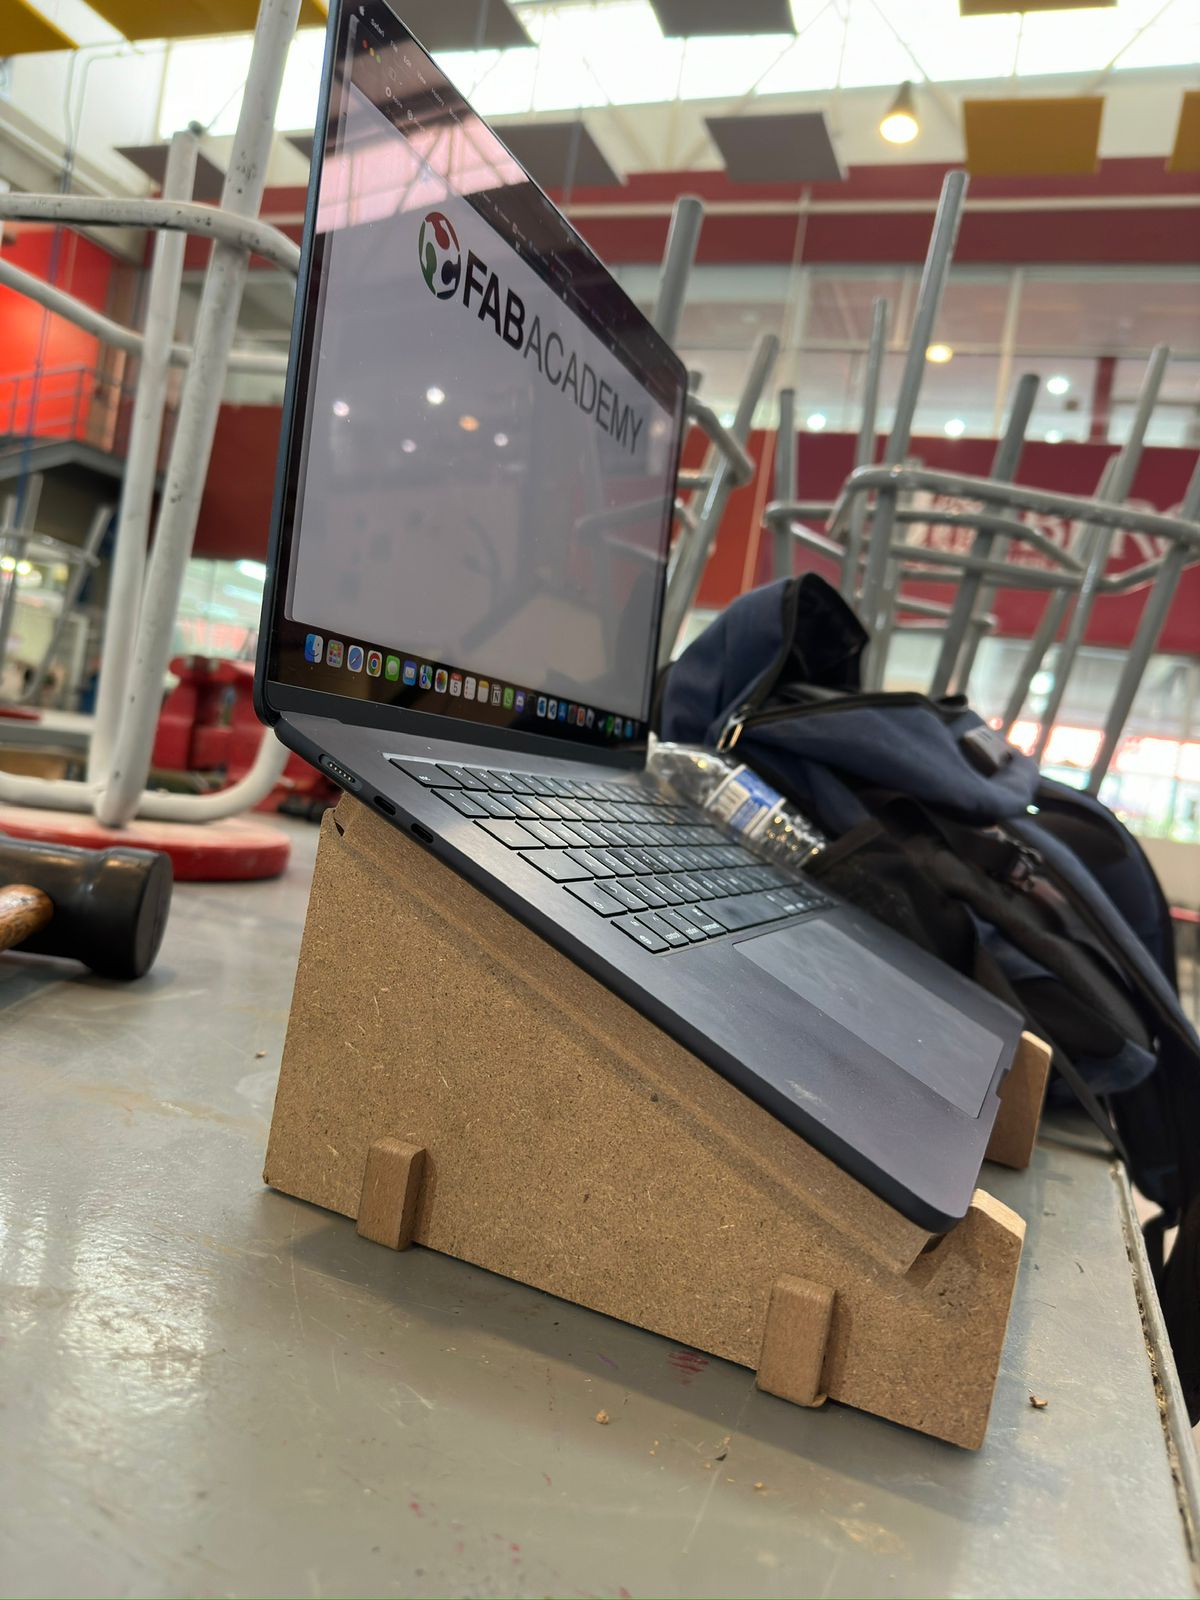
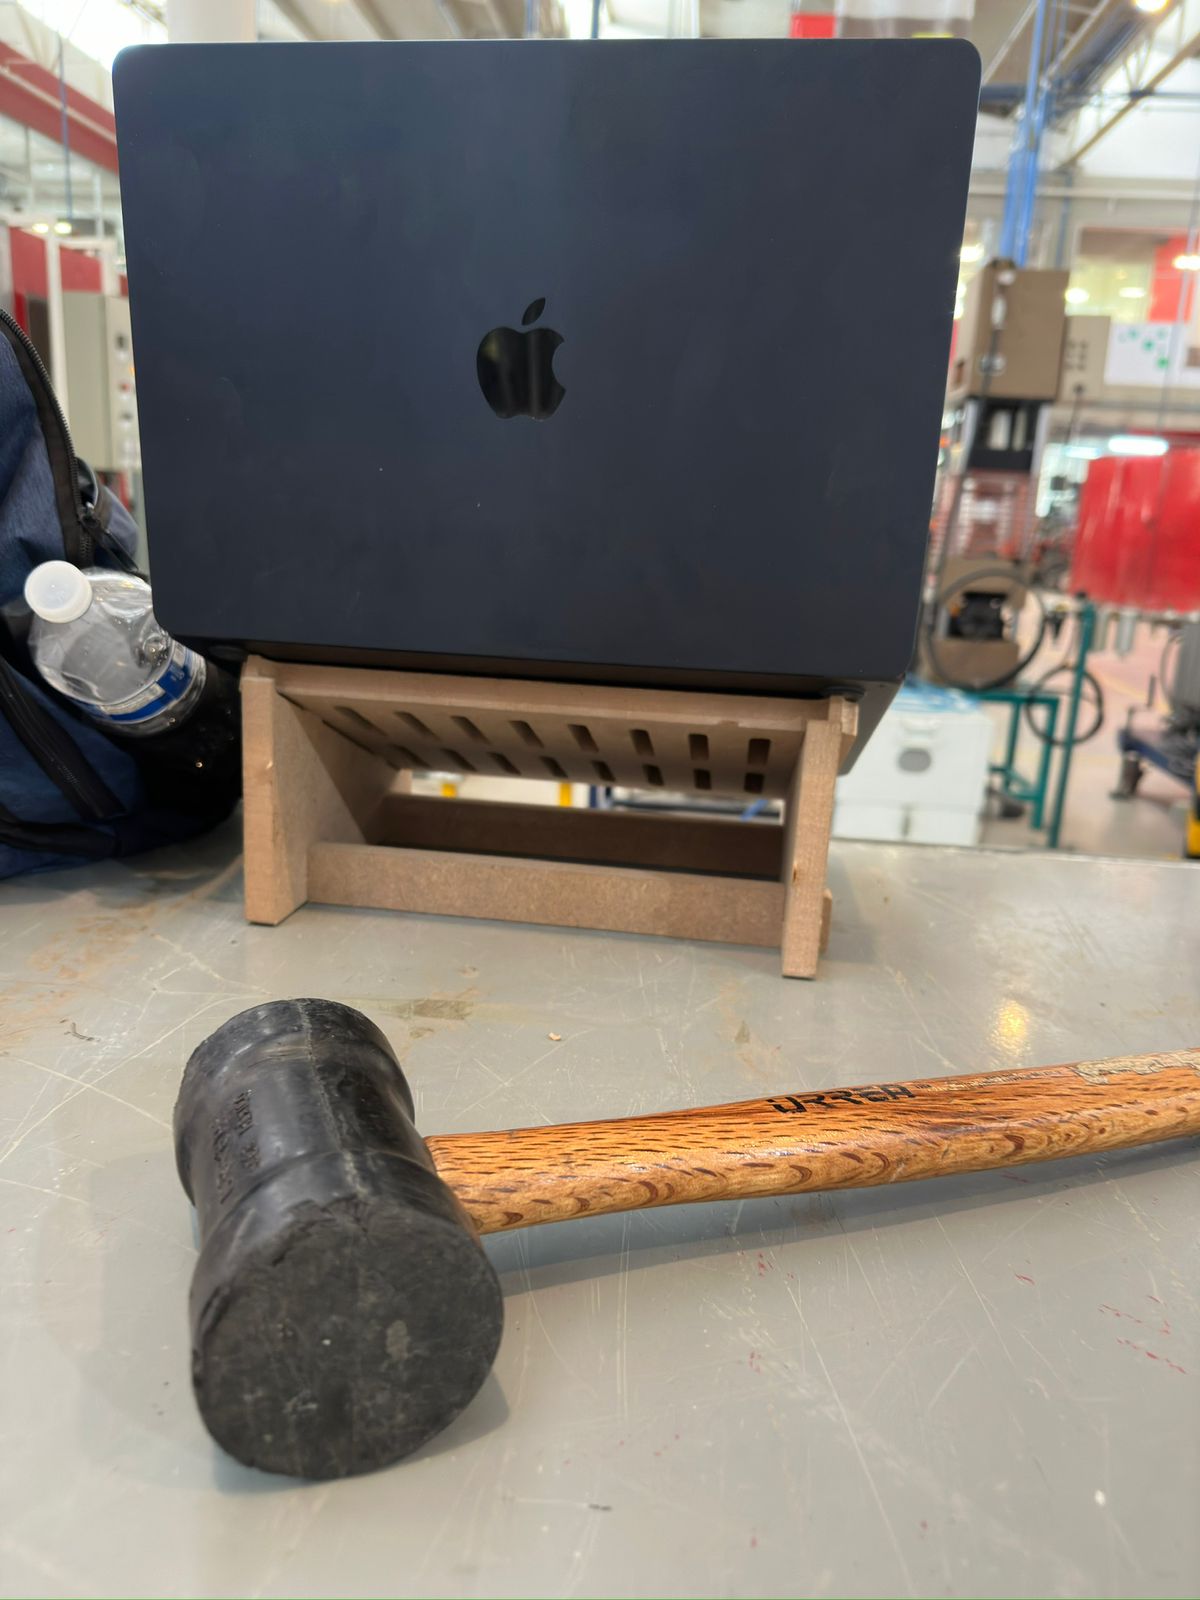
Testing the laptop stand with my MacBook Air was the final step, and it was a moment of true satisfaction. The stand was not only the perfect height, but it also provided a level of comfort that exceeded my expectations. It's a vivid demonstration of how precise engineering and thoughtful design can culminate in an everyday product that enhances user experience significantly.

Conclusion
Creating the laptop stand from concept to completion was a journey of discovery, precision, and innovation. The process involved meticulous design in Fusion360, translating sketches to .dxf files, and harnessing the power of VCarve and CNC machining to bring the design to life with Dog Bone and T-Bone cuts for seamless assembly. The successful integration of these elements, culminating in a product that perfectly suits the MacBook Air in height and comfort, showcases the potential of combining modern manufacturing techniques with thoughtful design to create functional, elegant solutions.
The Files:
Below you can find the download links for all of the files from this week.