Week 10: Output Devices
Overview
This week I focused on using output devices to give feedback from my microcontroller board. Instead of working with sensors like in Week 9, I flipped the system: the board would now respond and communicate with light. My main output device was a NeoPixel 16-LED ring, driven by my custom PCB with a XIAO RP2040 microcontroller.
For programming, I moved away from Arduino and used MicroPython with Thonny IDE, which was... a choice. This change introduced new challenges but also gave me a deeper understanding of lower-level control in embedded systems.
I developed three projects with the LED ring:
- Morse Code Blinker – Translates user input text into blinking Morse code on the ring.
- Button-Controlled Color Modes – Changes between LED patterns and animations with a single push button.
- Photon Pong – A single-button reflex game with difficulty levels and a dramatic boot animation.
Checklist
- ✅ Linked to the group assignment page
- ✅ Documented power consumption of the output device
- ✅ Documented what I learned from interfacing output devices
- ✅ Linked to the board I made previously
- ✅ Explained the programming process I used
- ✅ Explained problems I encountered and how I fixed them
- ✅ Included original source code and any new design files
- ✅ Included a ‘hero shot’ of my board
Group Assignment: Output Devices
Power Consumption Table
As part of the group work, we measured and calculated the power consumption of different output devices. The following table summarizes the devices and their power consumption:
| Test | Output Device | Max Power Consumption |
|---|---|---|
| Test 1 | DC6V GBMQ-GM12BY20 Geared Motor | 0.8 W |
| Test 2 | DS3218 High-Torque 20kg-cm Digital Servo Motor | idle: 0.048 W; moving: 3.33 W |
| Test 3 | NEMA 17 HS08-1004S Stepper Motor | idle: 1.68 W; moving: 2.16 W |
| Test 4 | TowerPro MG995 High-Speed Metal Gear Servo | idle: 0.042 W; moving: 1.98 W |
| Test 5 | Heating Jacket | 396 W |
| Test 6 | GC9A01A TFT LCD | single: 0.06557 W; two: 0.12081 W |
| Test 7 | NeoPixel Ring | 0.55 W |
Main Conclusions and Personal Decision
From the group assignment, we concluded that output devices vary significantly in terms of both power consumption and control complexity. Motors and heating elements require much higher power and careful external power management, while devices like displays and NeoPixels consume less and are more suited to compact embedded systems.
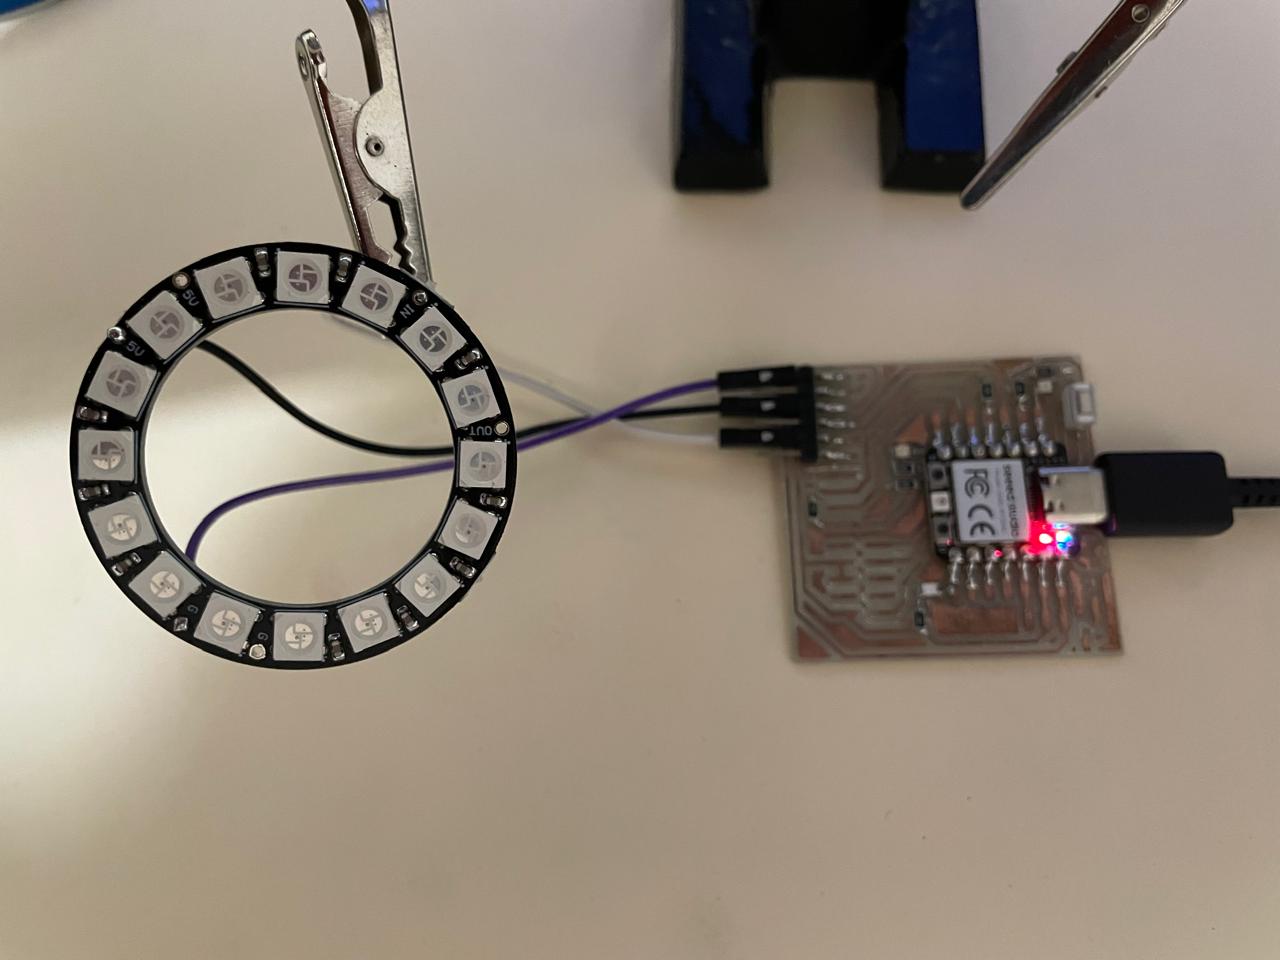
Based on these findings, I decided to focus on the NeoPixel ring for my individual assignment. I saw potential in its low power consumption, simplicity of wiring (only one data pin), and high visual impact for both playful and informative outputs. I had already explored NeoPixels briefly during Week 5 and Week 6 when I created a crystal light holder, so this was a natural continuation of that exploration.
My goal this week was not just to blink lights, but to use light as a meaningful, dynamic output. This led to the creation of Photon Pong, where timing, feedback, and difficulty are all communicated using nothing but color and animation.
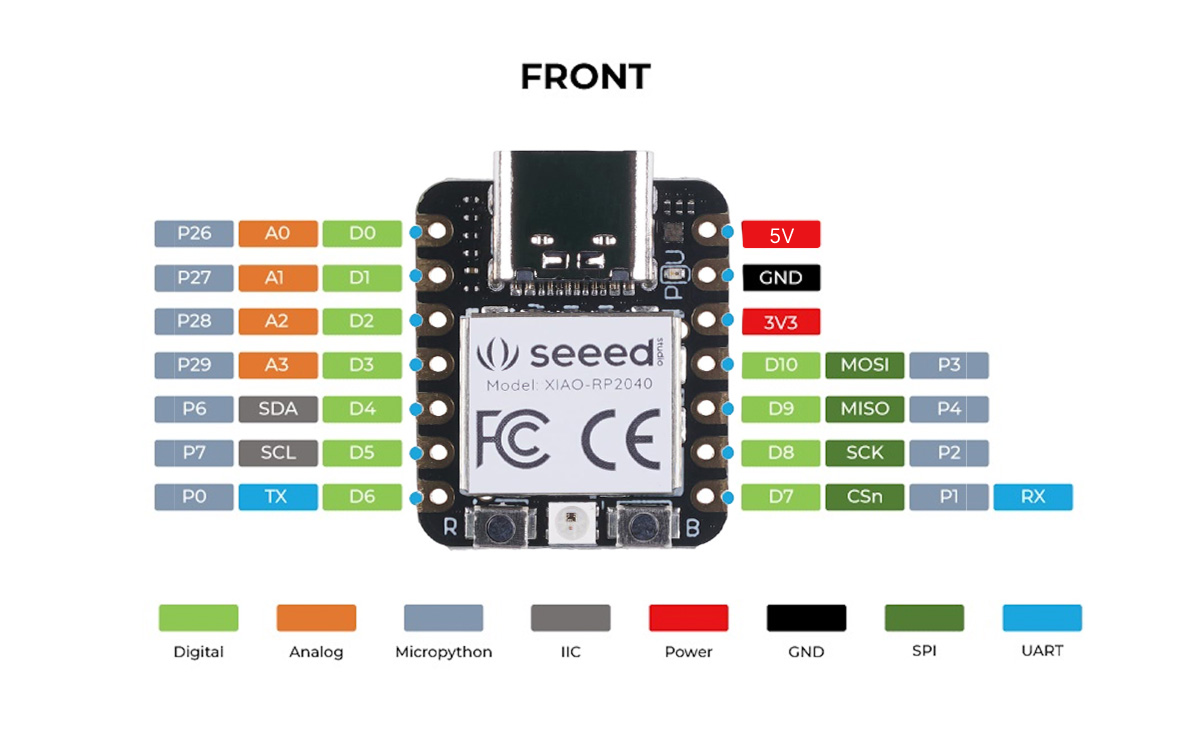
Xiao RP2040
The XIAO RP2040 is a compact microcontroller board based on the RP2040 chip. It features USB-C, 11 GPIOs, and supports multiple communication protocols, making it ideal for small embedded projects.
Technical reference and datasheet: Seeed Studio - Xiao RP2040
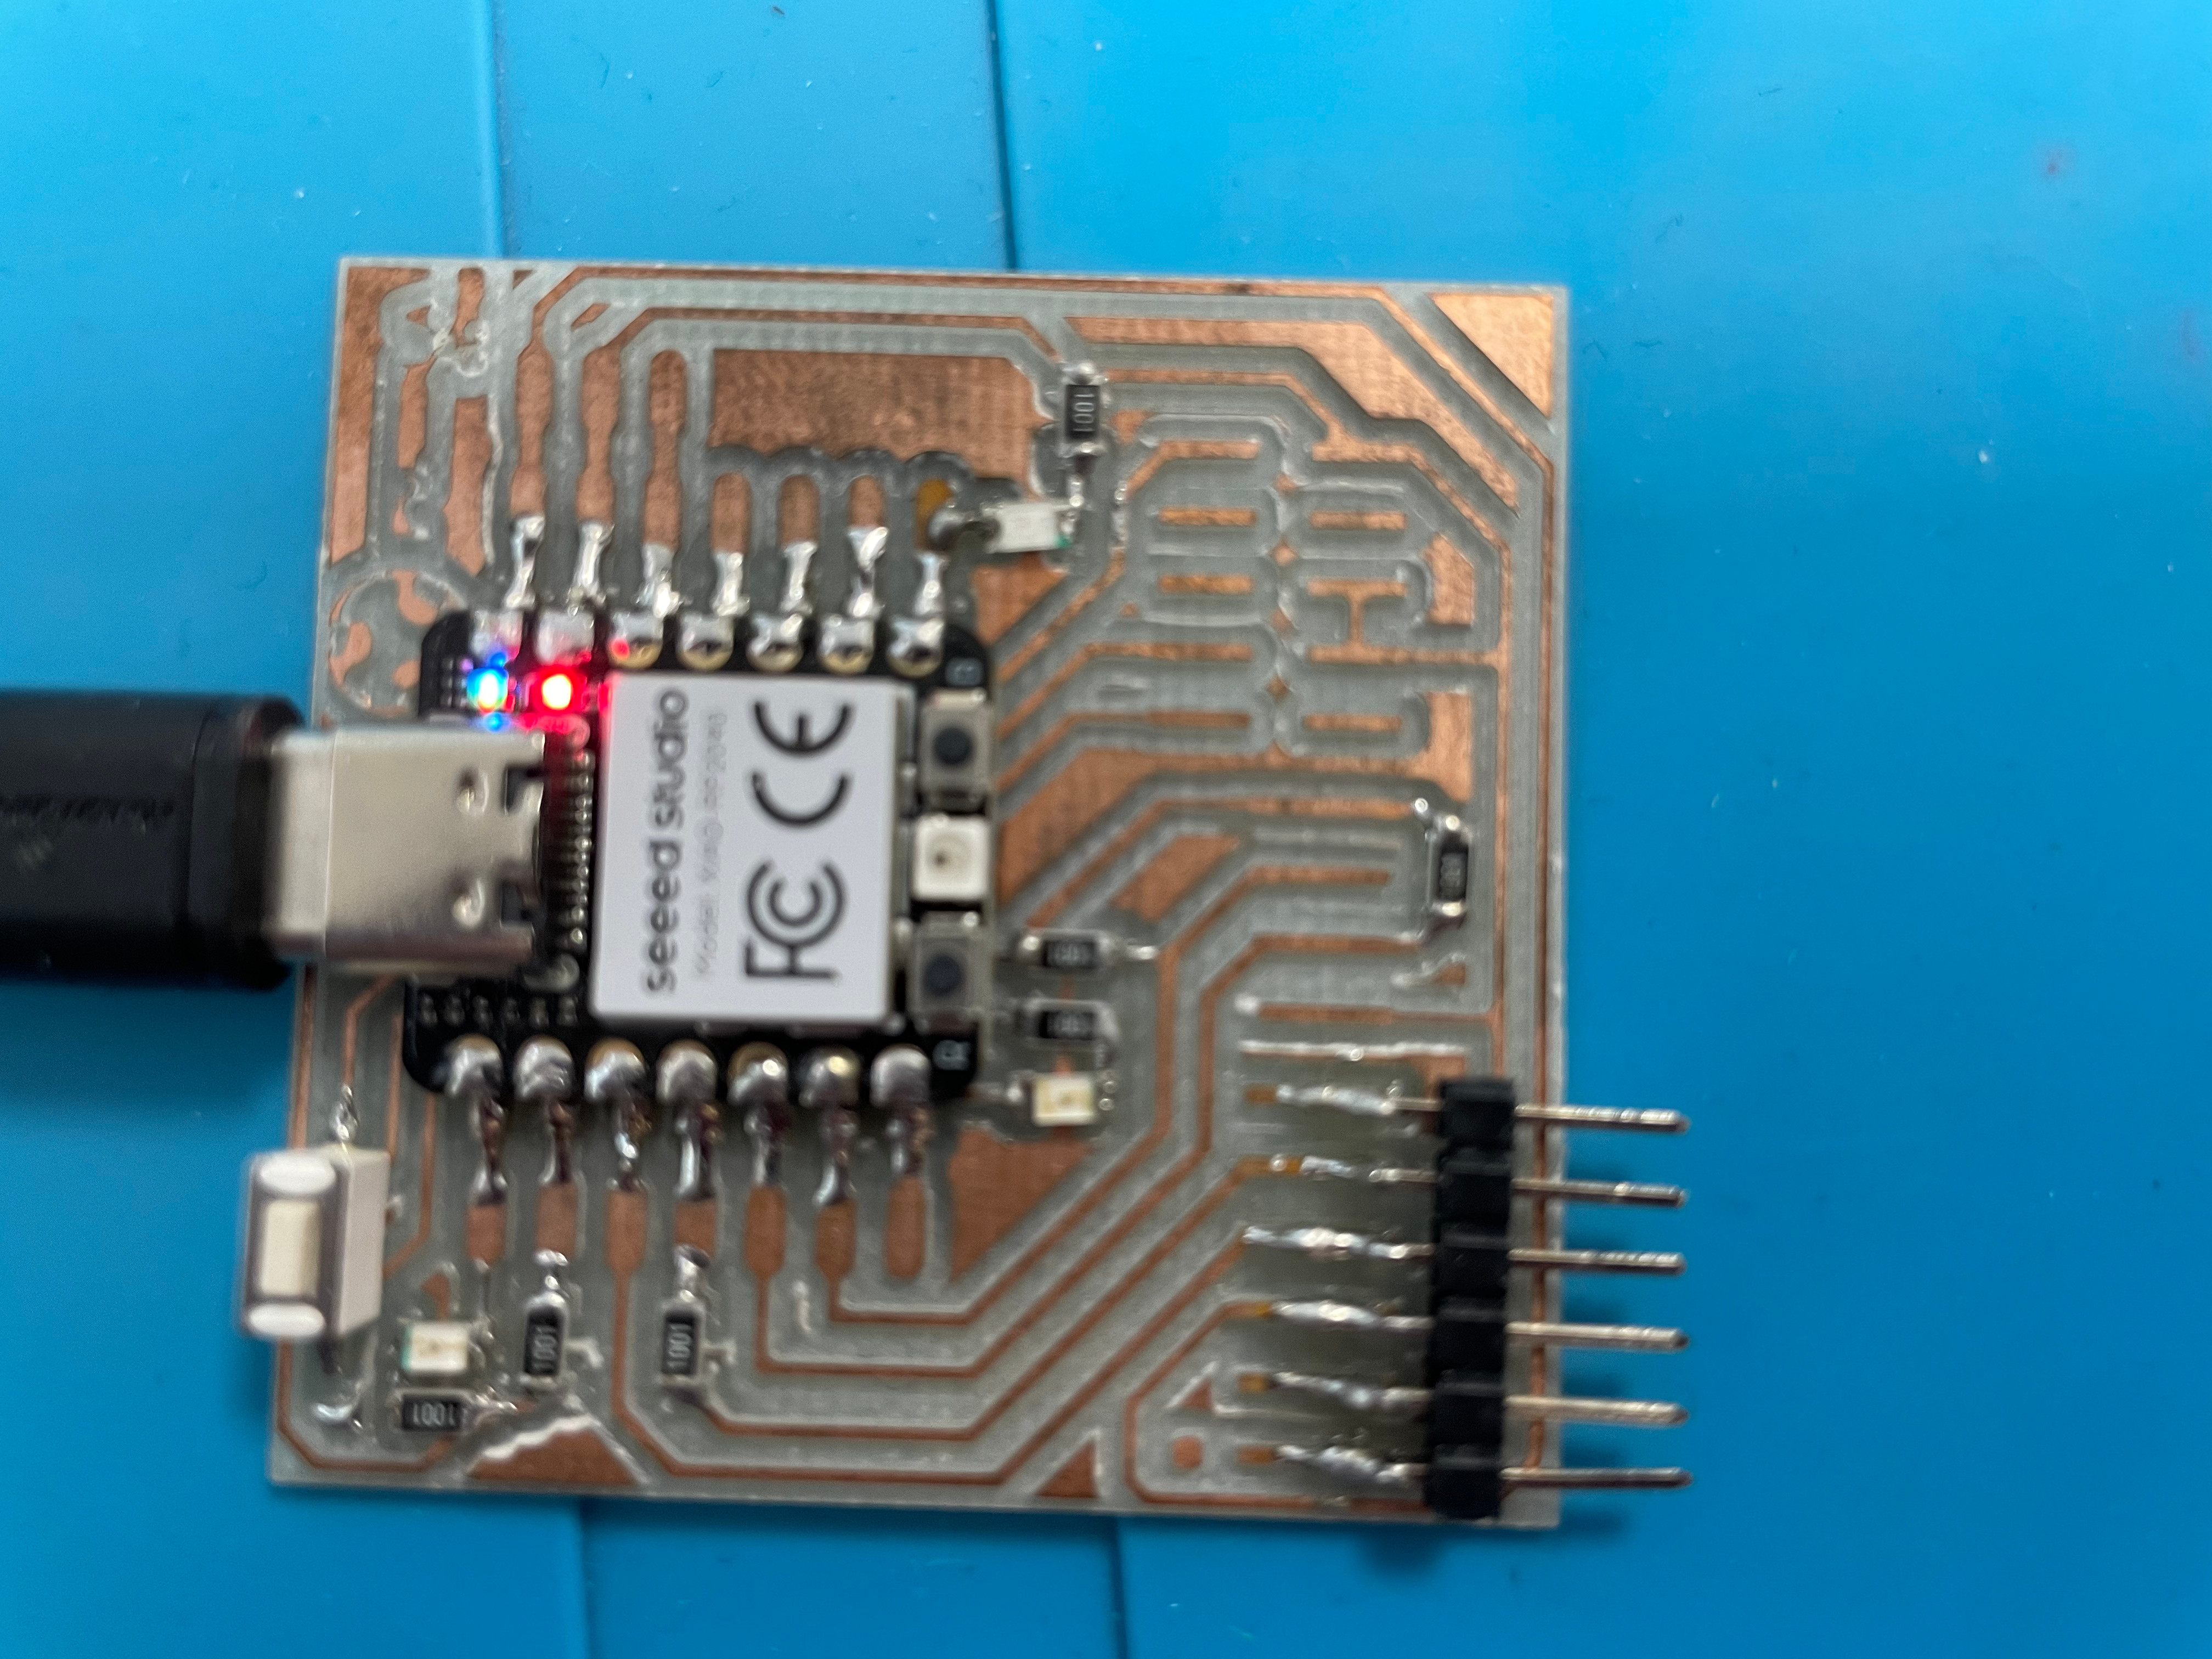
Custom Board with Xiao RP2040
I designed and milled a custom board in a previous assignment to serve as a base for testing sensors and output devices. The board includes labeled headers, a button, and three onboard LEDs for feedback.
Hero Shots
Some hero shots before the show
The actual board and the ring
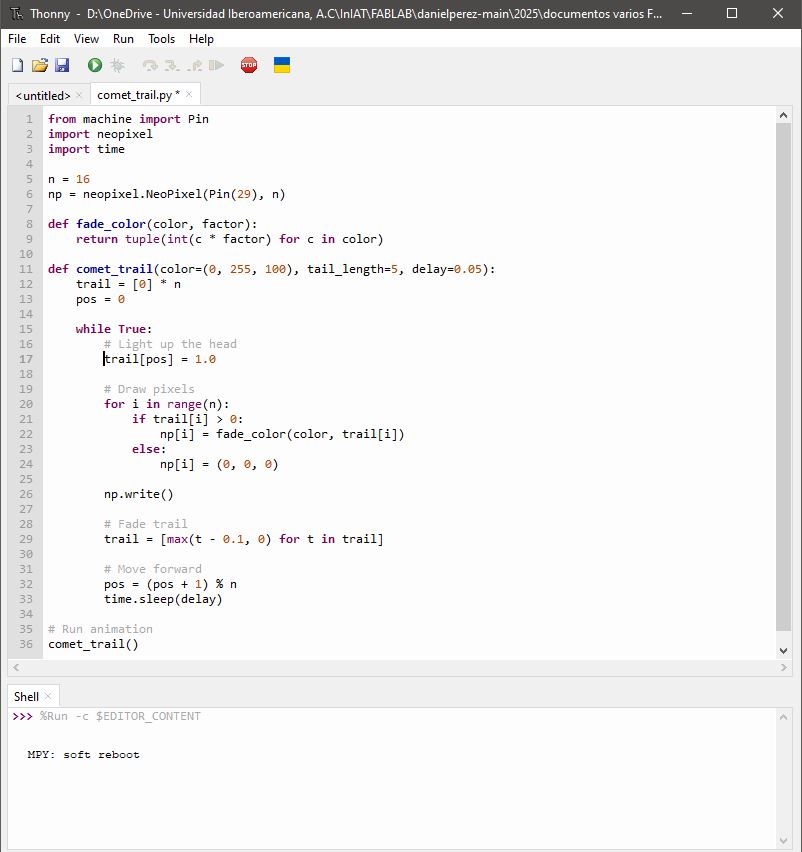
Just a led moving (move along)
Thonny + MicroPython: Friends or Frenemies?
Thonny is a lightweight Python IDE originally designed for teaching beginners — which is perfect because MicroPython is like Python’s cousin who moved into a microcontroller and forgot what a GUI looks like.
Installing MicroPython on a Board
Before using Thonny, you’ll need to flash the MicroPython firmware onto your board. For the Seeed XIAO RP2040, here's the deal:
- Download the MicroPython firmware (.uf2) from the official site: micropython.org/download/rp2-pico/
- Hold the BOOT button on the board and plug it into USB.
- Your computer will detect a USB drive — drop the .uf2 MicroPython file onto it.
- It reboots, and you’re ready to code (unless it isn’t, then we cry and reflash it).
Setting Up Thonny
Here’s the crash course:
- Install Thonny from thonny.org.
- Open it and go to Tools > Options > Interpreter.
- Set Interpreter to MicroPython (Raspberry Pi Pico) — yes, even if you’re using XIAO RP2040.
- Select the correct COM port (pray it shows up), hit OK.
- Click the “Stop/Restart” button — if you get a MicroPython prompt (
>>>), you’re in.
If your shell says something like “Device is busy” or “No MicroPython found,” congratulations, you're in the Thonny troubleshooting club. Reboot, reflash, and re-check that cable (some are charge-only, thanks capitalism).
Why MicroPython?
- Way more readable than Arduino/C++.
- Great for prototyping and quick testing.
- Built-in shell lets you try commands on the fly (and break stuff instantly).
- Perfect for LED nerd-outs, button mashers, and simple I/O — which is 80% of FabAcademy.
Things That Hurt
- No native threading or multitasking. You want blinking and reacting? Get clever with loops.
- Sometimes USB just dies. You’ll restart your board more than your thoughts.
- Pin numbers aren’t the same as Arduino (D2 = GPIO28 for example). Read the damn datasheet.

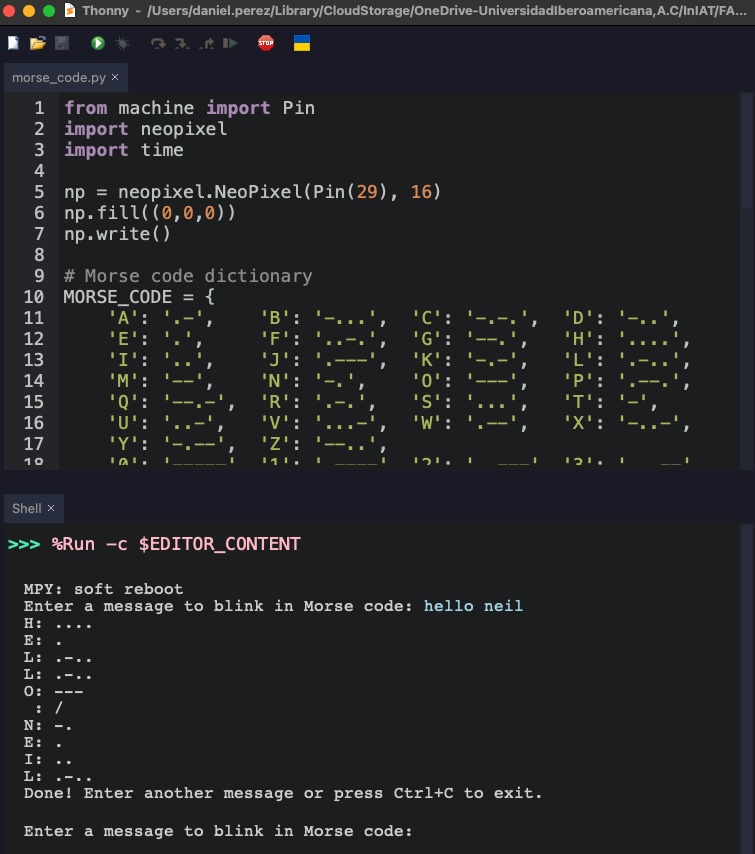
Morse Code LED Flasher
This program lets you enter a message in the terminal, which is then translated into Morse code and flashed on a NeoPixel ring. Each dot and dash becomes a green blink on the LEDs. It’s minimal hardware but full drama.
Code Explanation
Setup and Initialization:
    from machine import Pin
    import neopixel
    import time

    np = neopixel.NeoPixel(Pin(29), 16)
    np.fill((0,0,0))
    np.write()
- Imports the necessary modules for pin control, NeoPixel LED control, and timing.
- Initializes the NeoPixel ring connected to pin 29, with 16 LEDs.
- Immediately turns off all LEDs to start with a clean ring.
Morse Code Dictionary:
    MORSE_CODE = {
        'A': '.-',    'B': '-...',  'C': '-.-.',  'D': '-..',
        'E': '.',     'F': '..-.',  'G': '--.',   'H': '....',
        'I': '..',    'J': '.---',  'K': '-.-',   'L': '.-..',
        'M': '--',    'N': '-.',    'O': '---',   'P': '.--.',
        'Q': '--.-',  'R': '.-.',   'S': '...',   'T': '-',
        'U': '..-',   'V': '...-',  'W': '.--',   'X': '-..-',
        'Y': '-.--',  'Z': '--..',
        '0': '-----', '1': '.----', '2': '..---', '3': '...--',
        '4': '....-', '5': '.....', '6': '-....', '7': '--...',
        '8': '---..', '9': '----.',
        ' ': '/',     # word space
    }
- Defines a dictionary that maps each character to its Morse code representation.
- Includes letters, numbers, and a space character mapped to '/' to handle word gaps.
Timing Constants:
    DOT = 0.2
    DASH = DOT * 3
    GAP = DOT
    LETTER_GAP = DOT * 3
    WORD_GAP = DOT * 7
- Defines the duration of a dot, dash, and the spacing rules between symbols, letters, and words.
- All timings are based on the duration of a dot to keep things scalable.
Function: flash_ring()
    def flash_ring(duration, color=(0, 255, 50)):
        np.fill(color)
        np.write()
        time.sleep(duration)
        np.fill((0, 0, 0))
        np.write()
        time.sleep(GAP)
- Turns all LEDs on in a given color (default: greenish).
- Keeps them on for duration seconds.
- Turns off the LEDs and waits briefly before continuing.
- Used for both dots and dashes.
Function: morse_flash()
    def morse_flash(message):
        message = message.upper()
        for char in message:
            if char not in MORSE_CODE:
                continue
            code = MORSE_CODE[char]
            print(f"{char}: {code}")
            for symbol in code:
                if symbol == '.':
                    flash_ring(DOT)
                elif symbol == '-':
                    flash_ring(DASH)
                elif symbol == '/':
                    time.sleep(WORD_GAP)
            time.sleep(LETTER_GAP)
- Converts the input message to uppercase.
- Skips characters not in the Morse dictionary.
- For each valid character, it prints the Morse code to the terminal.
- Blinks a dot, dash, or waits if it's a word separator.
- Waits extra time between letters.
Main Loop:
    while True:
        user_input = input("Enter a message to blink in Morse code: ")
        morse_flash(user_input)
        print("Done! Enter another message or press Ctrl+C to exit.\\n")
        time.sleep(1)
- Keeps the program running in an infinite loop.
- Prompts the user for input and passes it to morse_flash().
- After the message is blinked, it waits a second and repeats.
- To exit, the user must press Ctrl+C.
Morse Code LED Flasher
Why settle for plain blinking when you can make your microcontroller speak secret messages in light? This script takes user input and flashes the corresponding Morse code on a NeoPixel ring. It's as dramatic as it is educational.
Code
    from machine import Pin
    import neopixel
    import time

    np = neopixel.NeoPixel(Pin(29), 16)
    np.fill((0,0,0))
    np.write()

    # Morse code dictionary
    MORSE_CODE = {
        'A': '.-',    'B': '-...',  'C': '-.-.',  'D': '-..',
        'E': '.',     'F': '..-.',  'G': '--.',   'H': '....',
        'I': '..',    'J': '.---',  'K': '-.-',   'L': '.-..',
        'M': '--',    'N': '-.',    'O': '---',   'P': '.--.',
        'Q': '--.-',  'R': '.-.',   'S': '...',   'T': '-',
        'U': '..-',   'V': '...-',  'W': '.--',   'X': '-..-',
        'Y': '-.--',  'Z': '--..',
        '0': '-----', '1': '.----', '2': '..---', '3': '...--',
        '4': '....-', '5': '.....', '6': '-....', '7': '--...',
        '8': '---..', '9': '----.',
        ' ': '/',     # word space
    }

    # Timing config
    DOT = 0.2
    DASH = DOT * 3
    GAP = DOT
    LETTER_GAP = DOT * 3
    WORD_GAP = DOT * 7

    def flash_ring(duration, color=(0, 255, 50)):
        np.fill(color)
        np.write()
        time.sleep(duration)
        np.fill((0, 0, 0))
        np.write()
        time.sleep(GAP)

    def morse_flash(message):
        message = message.upper()
        for char in message:
            if char not in MORSE_CODE:
                continue
            code = MORSE_CODE[char]
            print(f"{char}: {code}")
            for symbol in code:
                if symbol == '.':
                    flash_ring(DOT)
                elif symbol == '-':
                    flash_ring(DASH)
                elif symbol == '/':
                    time.sleep(WORD_GAP)
            time.sleep(LETTER_GAP)

    # Main loop
    while True:
        user_input = input("Enter a message to blink in Morse code: ")
        morse_flash(user_input)
        print("Done! Enter another message or press Ctrl+C to exit.\n")
        time.sleep(1)
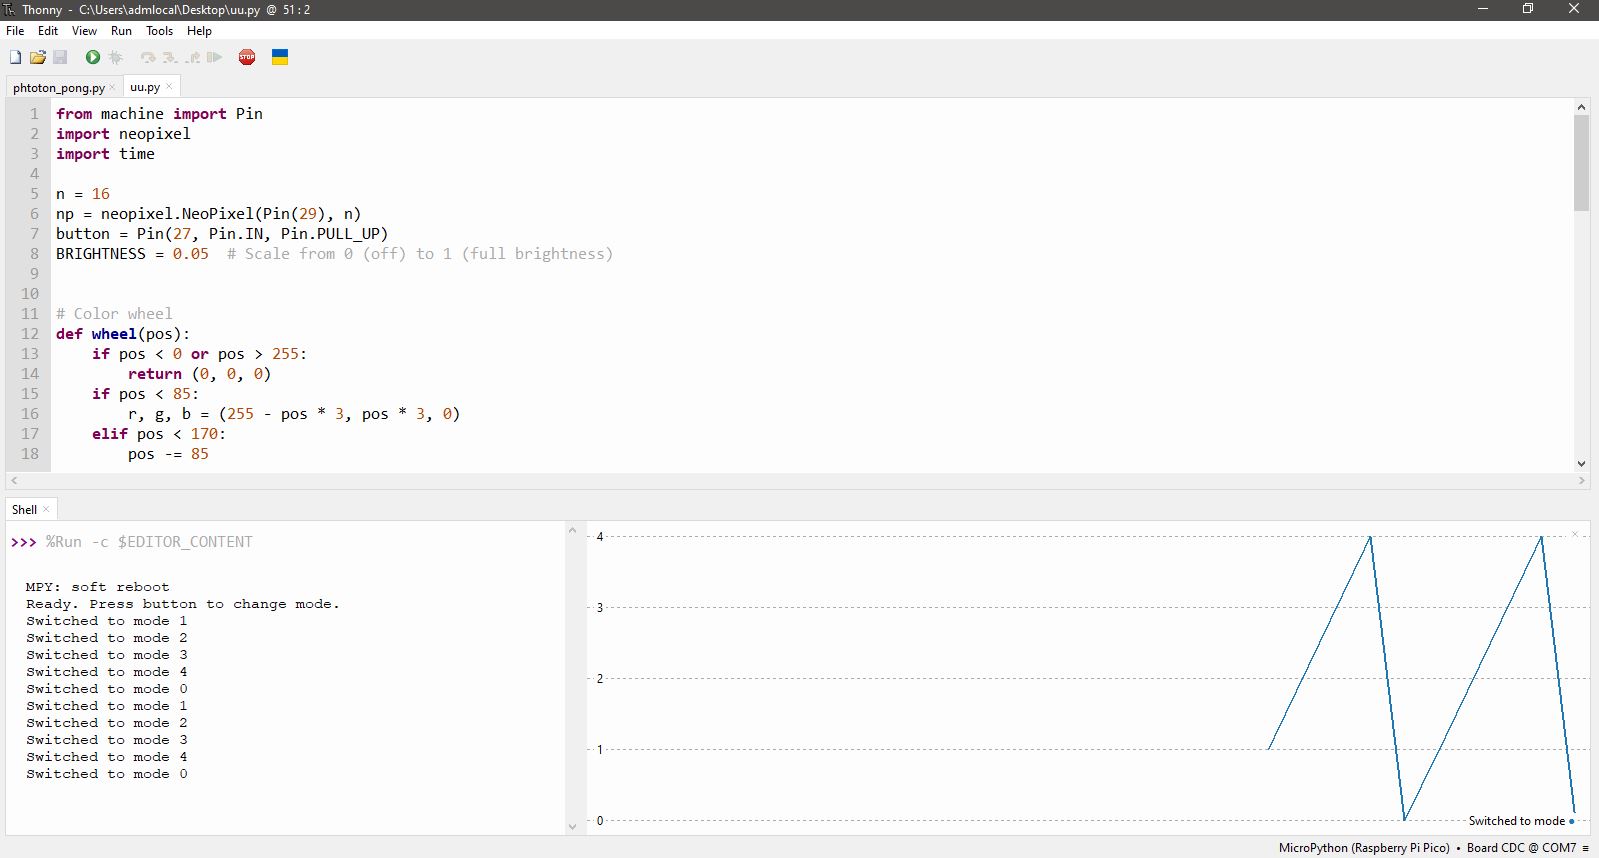
Button-Controlled LED Modes
This script lets a single pushbutton cycle through several lighting modes on the NeoPixel ring. Each press changes the mode: all LEDs off, solid green, solid blue, animated rainbow, and solid red. Simple idea, reasonably clean code, and enough room to get wild later.
Code Breakdown
Imports
      from machine import Pin
      import neopixel
      import time
MicroPython modules to talk to hardware. That’s it.
Variables and Setup
      n = 16
      np = neopixel.NeoPixel(Pin(29), n)
      button = Pin(27, Pin.IN, Pin.PULL_UP)
      BRIGHTNESS = 0.05
Number of LEDs, the output pin, the input button, and a low brightness level to avoid blinding yourself at 2 a.m.
Color Wheel Function
      def wheel(pos):
          if pos < 0 or pos > 255:
              return (0, 0, 0)
          if pos < 85:
              r, g, b = (255 - pos * 3, pos * 3, 0)
          elif pos < 170:
              pos -= 85
              r, g, b = (0, 255 - pos * 3, pos * 3)
          else:
              pos -= 170
              r, g, b = (pos * 3, 0, 255 - pos * 3)
          return (int(r * BRIGHTNESS), int(g * BRIGHTNESS), int(b * BRIGHTNESS))
Classic RGB wheel, dimmed by the BRIGHTNESS factor.
Solid Color Function
      def solid_color(r, g, b):
          r = int(r * BRIGHTNESS)
          g = int(g * BRIGHTNESS)
          b = int(b * BRIGHTNESS)
          np.fill((r, g, b))
          np.write()
Used to display basic solid colors, with brightness scaling applied to each channel.
Rainbow Animation Logic
      rainbow_pos = 0

      def update_rainbow():
          global rainbow_pos
          for i in range(n):
              idx = (i * 256 // n + rainbow_pos) & 255
              np[i] = wheel(idx)
          np.write()
          rainbow_pos = (rainbow_pos + 1) % 256
Creates a smooth moving rainbow by updating every LED using offset color positions.
Mode Definitions
      modes = [
          lambda: solid_color(0, 0, 0),
          lambda: solid_color(0, 255, 0),
          lambda: solid_color(0, 0, 255),
          update_rainbow,
          lambda: solid_color(255, 0, 0)
      ]
Every entry in this list is a lighting mode function. Indexed with mode_index, each button press rotates through the list.
Button State Tracking
      mode_index = 0
      last_button = 1
mode_index tracks which mode is active. last_button prevents multiple triggers on a single press.
Main Loop
      while True:
          current = button.value()
          if last_button == 1 and current == 0:
              mode_index = (mode_index + 1) % len(modes)
              print("Switched to mode", mode_index)
              if mode_index != 3:
                  modes[mode_index]()
              time.sleep(0.2)
          last_button = current

          if mode_index == 3:
              update_rainbow()
              time.sleep(0.01)
Checks for button presses and changes modes. Only the rainbow mode needs to animate constantly.
Image
Full Code
      from machine import Pin
      import neopixel
      import time

      n = 16
      np = neopixel.NeoPixel(Pin(29), n)
      button = Pin(27, Pin.IN, Pin.PULL_UP)
      BRIGHTNESS = 0.05  # Scale from 0 (off) to 1 (full brightness)

      def wheel(pos):
          if pos < 0 or pos > 255:
              return (0, 0, 0)
          if pos < 85:
              r, g, b = (255 - pos * 3, pos * 3, 0)
          elif pos < 170:
              pos -= 85
              r, g, b = (0, 255 - pos * 3, pos * 3)
          else:
              pos -= 170
              r, g, b = (pos * 3, 0, 255 - pos * 3)
          return (int(r * BRIGHTNESS), int(g * BRIGHTNESS), int(b * BRIGHTNESS))

      def solid_color(r, g, b):
          r = int(r * BRIGHTNESS)
          g = int(g * BRIGHTNESS)
          b = int(b * BRIGHTNESS)
          np.fill((r, g, b))
          np.write()

      rainbow_pos = 0

      def update_rainbow():
          global rainbow_pos
          for i in range(n):
              idx = (i * 256 // n + rainbow_pos) & 255
              np[i] = wheel(idx)
          np.write()
          rainbow_pos = (rainbow_pos + 1) % 256

      modes = [
          lambda: solid_color(0, 0, 0),
          lambda: solid_color(0, 255, 0),
          lambda: solid_color(0, 0, 255),
          update_rainbow,
          lambda: solid_color(255, 0, 0)
      ]

      mode_index = 0
      last_button = 1

      print("Ready. Press button to change mode.")

      while True:
          current = button.value()
          if last_button == 1 and current == 0:
              mode_index = (mode_index + 1) % len(modes)
              print("Switched to mode", mode_index)
              if mode_index != 3:
                  modes[mode_index]()
              time.sleep(0.2)
          last_button = current

          if mode_index == 3:
              update_rainbow()
              time.sleep(0.01)
Photon Pong
This is what we’re here for. Forget blinking LEDs just for the sake of blinking. Photon Pong takes a humble NeoPixel ring — the thing every tutorial uses to do sad rainbow loops — and turns it into an actual game. With levels. With scoring. With failure. It's fast, flashy, and way too hard on level 3. If you’ve ever wanted to be humiliated by a single button and some LEDs, welcome home.
Imports and Setup
    from machine import Pin
    import neopixel
    import time
We bring in MicroPython's usual suspects: Pin for GPIO, neopixel to light stuff up, and time to wait around dramatically.
Pin Configuration and Variables
    np = neopixel.NeoPixel(Pin(29), 16)
    button = Pin(27, Pin.IN, Pin.PULL_UP)

    led_blue = Pin(1, Pin.OUT)    # D0
    led_orange = Pin(0, Pin.OUT)  # D6
    led_red = Pin(26, Pin.OUT)    # D7
- 16 NeoPixels on pin 29 for the game action.
- Pushbutton on pin 27 for your heroic attempts.
- Three external LEDs that mock you with difficulty levels.
Game Constants and Color Scaling
    NUM_PIXELS = 16
    RACKET_POS = 0
    BRIGHTNESS_SCALE = 0.05

      def scale(color):
          return tuple(int(c * BRIGHTNESS_SCALE) for c in color)
Keep things safe for the human eye. Brightness scaled down because you don’t want to go blind failing at level 3.
Colors and Level Configuration
    BALL_COLOR = scale((255, 255, 255))
    RACKET_COLOR = scale((0, 255, 0))
    BOUNCE_COLOR = scale((255, 255, 0))
    MISS_COLOR = scale((255, 0, 0))

      LEVELS = [
          {"speed": 0.20, "led": led_blue},
          {"speed": 0.10, "led": led_orange},
          {"speed": 0.05, "led": led_red}
      ]
- White ball, green racket, yellow bounce flash, red shame flash.
- Level gets faster every 2 bounces. Your heart rate keeps up.
Game State
    ball_pos = 8
    direction = 1
    racket_active = False
    racket_activated_at = None
    score = 0
    button_prev = 1
    last_move = time.ticks_ms()
We track the ball's position, movement direction, racket status, score, and time. It’s like Pong, but with less screen and more panic.
Intro Animation
        def photon_pong_intro():
          print("Booting: PHOTON PONG")
          np.fill((0, 0, 0))
          np.write()
          time.sleep(0.5)
          for i in range(NUM_PIXELS):
              np[i] = (0, 0, 80)
              np.write()
              time.sleep(0.05)
          for i in range(NUM_PIXELS):
              np[i] = (120, 0, 120)
              np.write()
              time.sleep(0.04)
          for i in range(NUM_PIXELS):
              np[i] = (255, 100, 0)
              np.write()
              time.sleep(0.025)
          np.fill((255, 255, 255))
          np.write()
          time.sleep(0.5)
          for b in range(255, -1, -10):
              dim = scale((b, b, b))
              np.fill(dim)
              np.write()
              time.sleep(0.03)
          np.fill((0, 0, 0))
          np.write()
          time.sleep(0.5)
A flashy entrance. Because if you’re going to lose, at least it looks good before you do.
Core Game Functions
        def draw():
          np.fill((0, 0, 0))
          if racket_active:
              np[RACKET_POS] = RACKET_COLOR
          np[ball_pos] = BALL_COLOR
          np.write()
Draws the ball and the racket. Clean slate every frame.
        def game_over():
          print("Game over! Final score:", score)
          for _ in range(3):
              np.fill(MISS_COLOR)
              np.write()
              time.sleep(0.2)
              np.fill((0, 0, 0))
              np.write()
              time.sleep(0.2)
The humiliation sequence. Flashes red to let everyone know you failed.
        def update_level(score):
          level = min(score // 2, 2)
          for entry in LEVELS:
              entry["led"].off()
          LEVELS[level]["led"].on()
          return level
External LEDs switch on based on your score. The game judges you openly.
Main Loop
        photon_pong_intro()

        while True:
          now = time.ticks_ms()
          level = update_level(score)
          speed = LEVELS[level]["speed"]

          if racket_active and racket_activated_at:
              if time.ticks_diff(now, racket_activated_at) > 300:
                  racket_active = False
                  racket_activated_at = None

          if time.ticks_diff(now, last_move) >= int(speed * 1000):
              ball_pos = (ball_pos + direction) % NUM_PIXELS
              last_move = now

              if ball_pos == RACKET_POS:
                  if racket_active:
                      direction *= -1
                      score += 1
                      np[RACKET_POS] = BOUNCE_COLOR
                      np.write()
                      time.sleep(0.1)
                      racket_active = False
                      racket_activated_at = None
                  else:
                      game_over()
                      ball_pos = 8
                      direction = 1
                      score = 0
                      racket_active = False
                      racket_activated_at = None
                      time.sleep(1)

          button_current = button.value()
          if button_prev == 1 and button_current == 0:
              racket_active = True
              racket_activated_at = now
          button_prev = button_current

          draw()
          time.sleep(0.01)
The actual game loop. It handles the ball, the racket, the scoring, the button presses, the shame. All of it.
Entire Code
        from machine import Pin
        import neopixel
        import time

        # NeoPixel ring setup
        np = neopixel.NeoPixel(Pin(29), 16)
        button = Pin(27, Pin.IN, Pin.PULL_UP)

        # External difficulty LEDs
        led_blue = Pin(1, Pin.OUT)    # D0
        led_orange = Pin(0, Pin.OUT)  # D6
        led_red = Pin(26, Pin.OUT)    # D7

        # Config
        NUM_PIXELS = 16
        RACKET_POS = 0
        BRIGHTNESS_SCALE = 0.05

        def scale(color):
            return tuple(int(c * BRIGHTNESS_SCALE) for c in color)

        BALL_COLOR = scale((255, 255, 255))
        RACKET_COLOR = scale((0, 255, 0))
        BOUNCE_COLOR = scale((255, 255, 0))
        MISS_COLOR = scale((255, 0, 0))

        LEVELS = [
            {"speed": 0.20, "led": led_blue},
            {"speed": 0.10, "led": led_orange},
            {"speed": 0.05, "led": led_red}
        ]

        # Game state
        ball_pos = 8
        direction = 1
        racket_active = False
        racket_activated_at = None
        score = 0
        button_prev = 1
        last_move = time.ticks_ms()

        # --- Intro Animation ---
        def photon_pong_intro():
            print("Booting: PHOTON PONG")
            np.fill((0, 0, 0))
            np.write()
            time.sleep(0.5)
            for i in range(NUM_PIXELS):
                np[i] = (0, 0, 80)
                np.write()
                time.sleep(0.05)
            for i in range(NUM_PIXELS):
                np[i] = (120, 0, 120)
                np.write()
                time.sleep(0.04)
            for i in range(NUM_PIXELS):
                np[i] = (255, 100, 0)
                np.write()
                time.sleep(0.025)
            np.fill((255, 255, 255))
            np.write()
            time.sleep(0.5)
            for b in range(255, -1, -10):
                dim = scale((b, b, b))
                np.fill(dim)
                np.write()
                time.sleep(0.03)
            np.fill((0, 0, 0))
            np.write()
            time.sleep(0.5)

        # --- Draw LEDs ---
        def draw():
            np.fill((0, 0, 0))
            if racket_active:
                np[RACKET_POS] = RACKET_COLOR
            np[ball_pos] = BALL_COLOR
            np.write()

        # --- Game Over Flash ---
        def game_over():
            print("Game over! Final score:", score)
            for _ in range(3):
                np.fill(MISS_COLOR)
                np.write()
                time.sleep(0.2)
                np.fill((0, 0, 0))
                np.write()
                time.sleep(0.2)

        # --- Level LEDs ---
        def update_level(score):
            level = min(score // 2, 2)
            for entry in LEVELS:
                entry["led"].off()
            LEVELS[level]["led"].on()
            return level

        # --- Start Game ---
        photon_pong_intro()

        while True:
            now = time.ticks_ms()
            level = update_level(score)
            speed = LEVELS[level]["speed"]

            if racket_active and racket_activated_at:
                if time.ticks_diff(now, racket_activated_at) > 300:
                    racket_active = False
                    racket_activated_at = None

            if time.ticks_diff(now, last_move) >= int(speed * 1000):
                ball_pos = (ball_pos + direction) % NUM_PIXELS
                last_move = now

                if ball_pos == RACKET_POS:
                    if racket_active:
                        direction *= -1
                        score += 1
                        np[RACKET_POS] = BOUNCE_COLOR
                        np.write()
                        time.sleep(0.1)
                        racket_active = False
                        racket_activated_at = None
                    else:
                        game_over()
                        ball_pos = 8
                        direction = 1
                        score = 0
                        racket_active = False
                        racket_activated_at = None
                        time.sleep(1)

            button_current = button.value()
            if button_prev == 1 and button_current == 0:
                racket_active = True
                racket_activated_at = now
            button_prev = button_current

            draw()
            time.sleep(0.01)
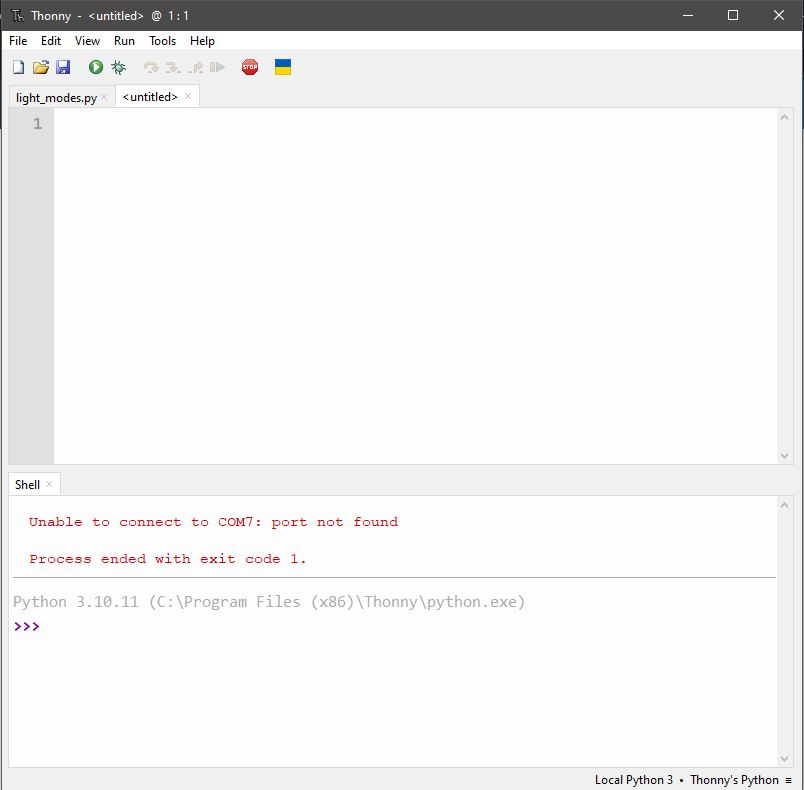
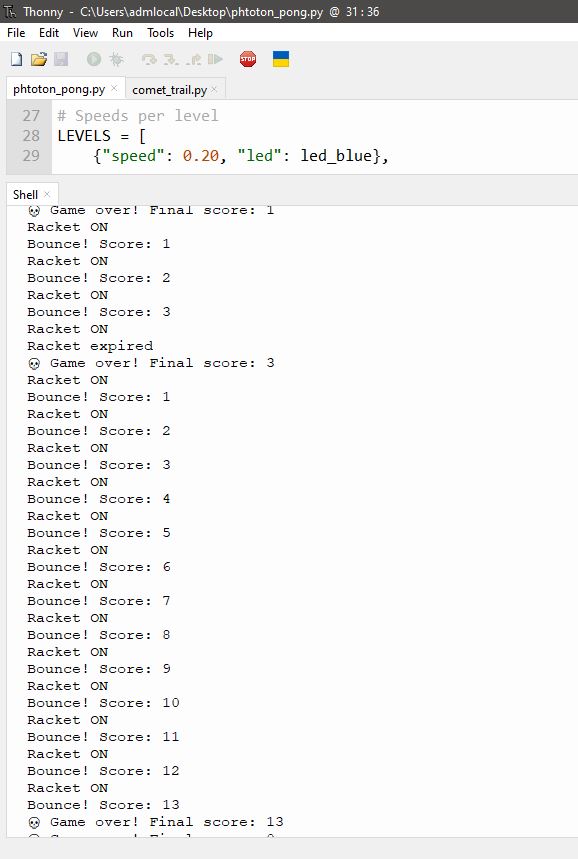
Intro & Game
Thonny UI with Photon Pong
What I Screwed Up (So You Don’t Have To)
Of course, not everything went smooth. Here are some mistakes that made me want to throw the board out the window:
- Didn’t hold the BOOT button when plugging the board in: Turns out you have to hold that little button down before connecting the USB, otherwise it won’t show up as a storage device and you’ll be staring at your computer like an idiot.
-
Dragged the wrong file:
No, you can’t just drop anything into the board’s fake USB drive. It needs to be a valid
.uf2file, downloaded from the actual MicroPython site. Yes, that one. Not whatever came up on Google first. -
Board not showing up in Thonny:
After flashing, I forgot to set the correct interpreter and port.
Go to Tools > Options > Interpreter and set it to “MicroPython (Raspberry Pi Pico)” even if it’s a XIAO RP2040. It works. Don’t ask why. -
Blinded by NeoPixels:
The first time I ran the code, my LEDs hit me with full brightness like a portable sun. Turns out NeoPixels default to full power — and MicroPython doesn’t have a built-in brightness control like Arduino. You have to manually scale the RGB values.
Like this:def scale(color): BRIGHTNESS = 0.05 # 5% of full brightness return tuple(int(c * BRIGHTNESS) for c in color)Forget this, and you'll burn your retinas trying to debug rainbow animations. Ask me how I know.