Week 5: 3D Scanning and Printing
Overview
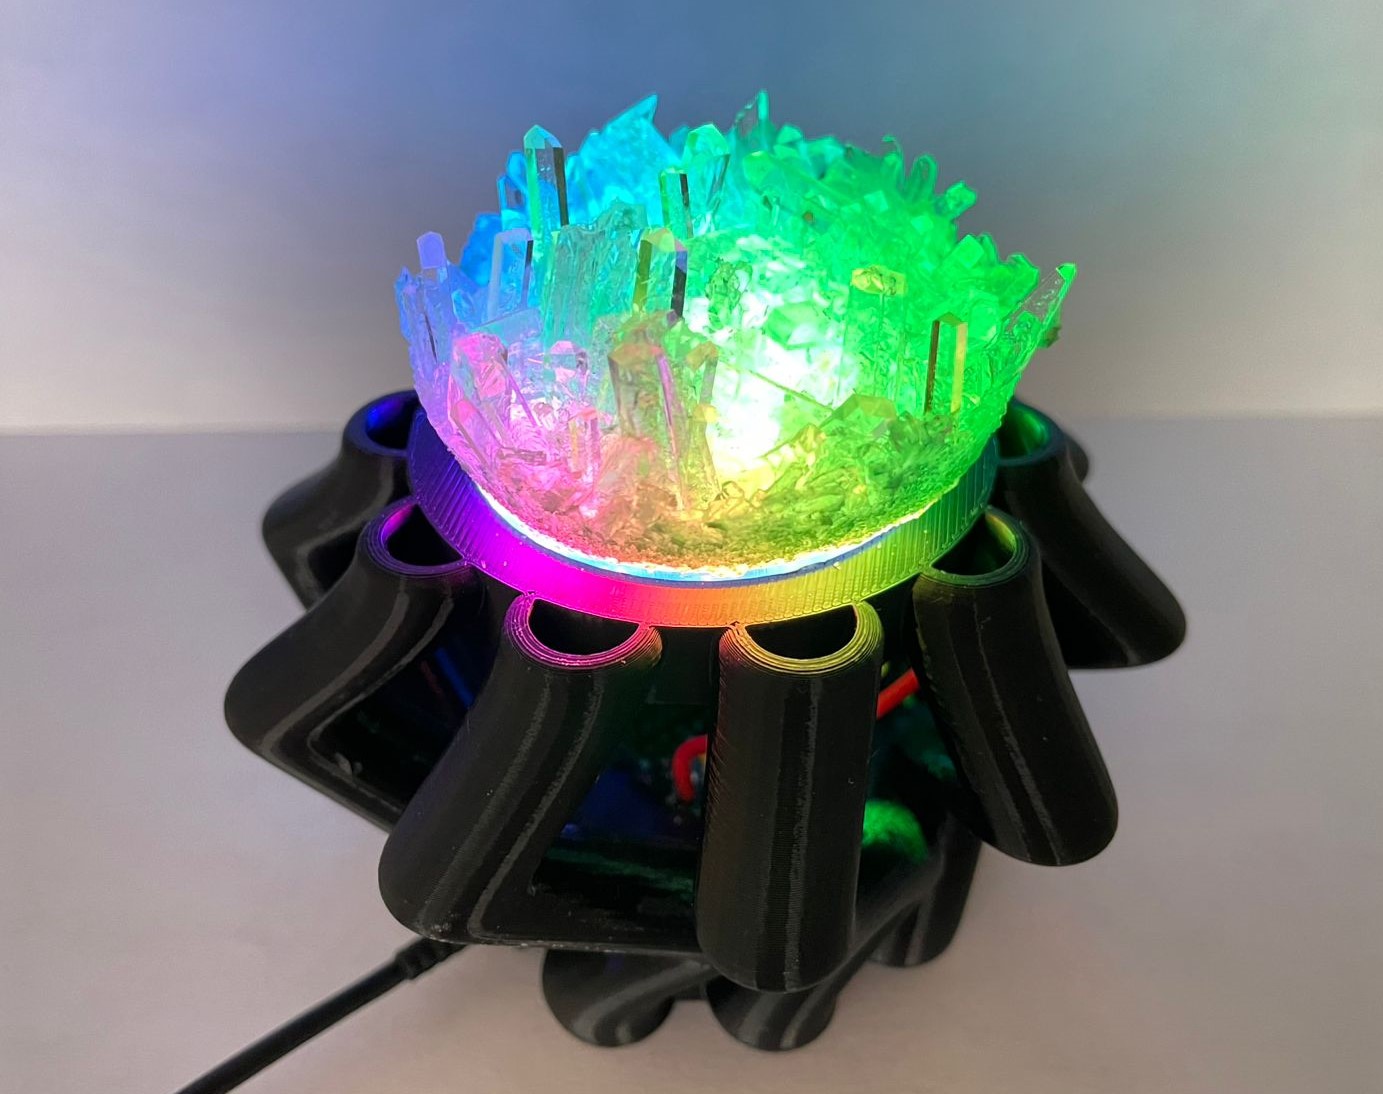
For this week’s assignment, I designed and 3D printed a crystal rock holder that illuminates the rock in a cool way. The goal was to create a design that could not be manufactured using traditional subtractive methods, making full use of the advantages of 3D printing.
Checklist
- ✅ Linked to the group assignment page
- ✅ Explained what I learned from testing the 3D printers
- ✅ Documented how I designed and 3D printed my object and why it could not be easily made subtractively
- ✅ Documented how I scanned an object
- ✅ Included my original 3D design files for 3D printing
- ✅ Included my hero shots of 3D print
Group Assignment: 3D Printer Design Rules
As a group, we focused on understanding the design rules for our 3D printers by testing various print parameters and limitations. Our goal was to evaluate how well our machines handled different challenges, including overhangs, bridging, layer adhesion, and dimensional accuracy.
Materials Explored
During our tests, we experimented with various 3D printing materials to observe their behaviors and properties:
- PLA (Polylactic Acid): A biodegradable thermoplastic derived from renewable resources like corn starch. It's known for its ease of printing and good surface finish, making it ideal for prototypes and models.
- ABS (Acrylonitrile Butadiene Styrene): A petroleum-based thermoplastic known for its toughness and impact resistance. It's suitable for functional parts but requires higher printing temperatures and proper ventilation due to emitted fumes.
- PETG (Polyethylene Terephthalate Glycol): A durable material combining ease of printing with strength. It's food-safe and has good layer adhesion, making it suitable for functional parts.
- TPU (Thermoplastic Polyurethane): A flexible, rubber-like material used for parts requiring elasticity, such as gaskets or wearable items.
My Material Choice
For my individual project, I selected black PLA filament. PLA's ease of use and excellent surface quality made it ideal for creating the intricate design of the crystal rock holder. The black color enhances the visual appeal, providing a sleek and modern aesthetic that complements the illuminated crystal.
Tests Conducted
- Overhangs: We printed test pieces with different overhang angles to determine the maximum unsupported angle our printers could handle.
- Bridging: We tested how well the printers could span horizontal gaps without supports.
- Layer Adhesion: We analyzed how well layers fused together under different temperature and speed settings.
- Dimensional Accuracy: We compared printed parts to their original CAD models to measure precision.
Findings
Through these tests, we established optimal printing parameters and identified potential challenges. This helped us improve our understanding of each printer’s strengths and weaknesses, enabling us to optimize our personal 3D printing projects.
Reference
Full documentation of our group work can be found on the FabLab Puebla Week 5 page .
3D Design Process in Fusion 360
The goal was to design a crystal rock holder that includes internal cable management, a space for a circuit board, and an aesthetic structure that enhances light diffusion. Below is a step-by-step breakdown of the design process in Fusion 360.
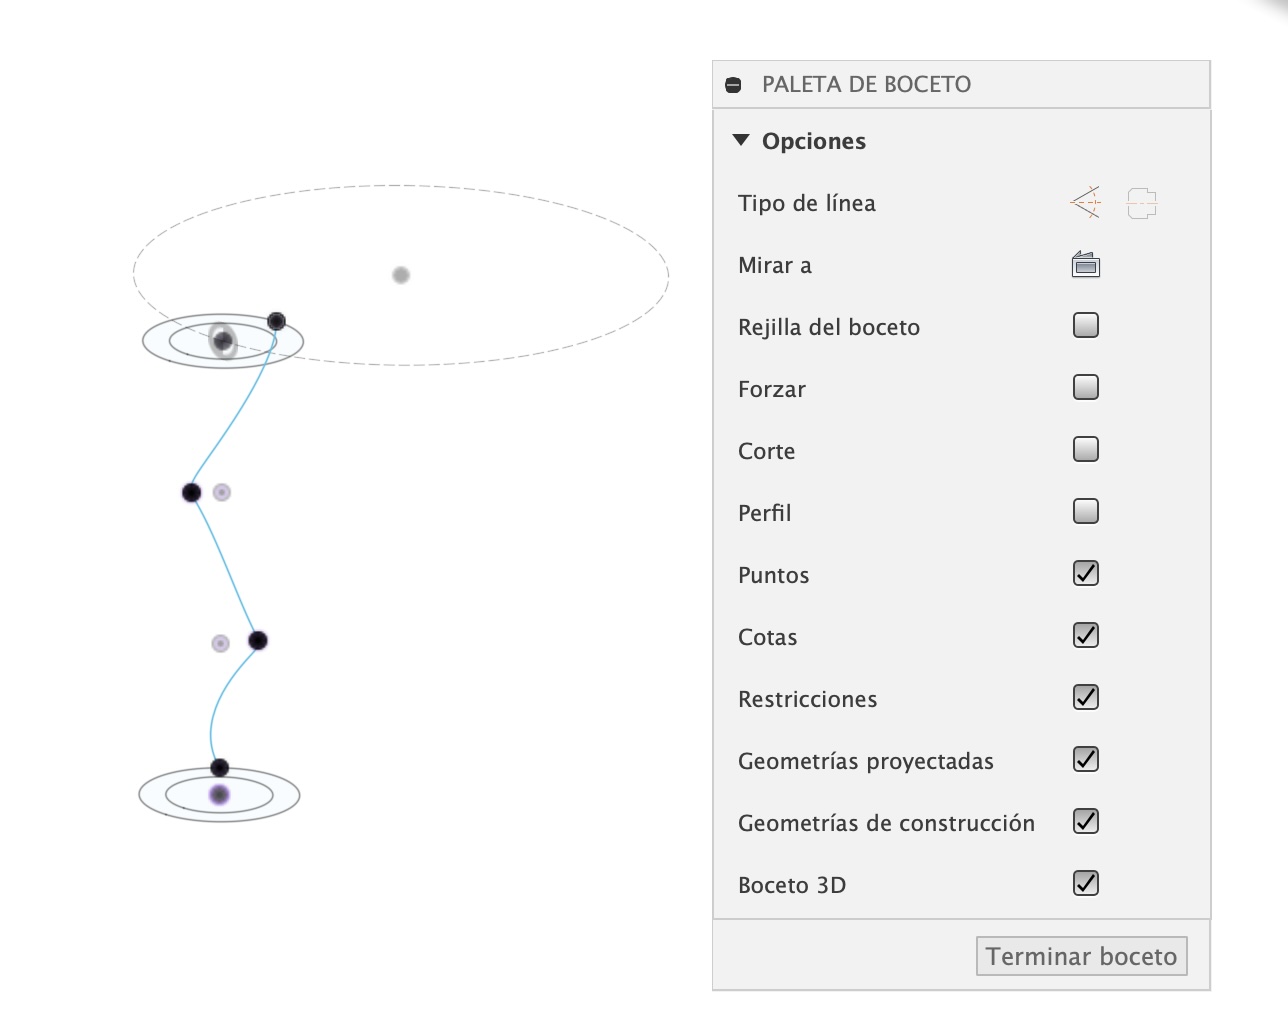
Step 1: Creating the 3D Sketch
To start, I used the bottom plane and created three additional planes at different heights. On each plane, I added a sketch:
- The bottom and top sketches had circular profiles.
- The two middle sketches contained only points, which were later used to guide the 3D sketch.
Since the sketch needed to exist in three-dimensional space, I enabled the 3D Sketch option in Fusion 360.
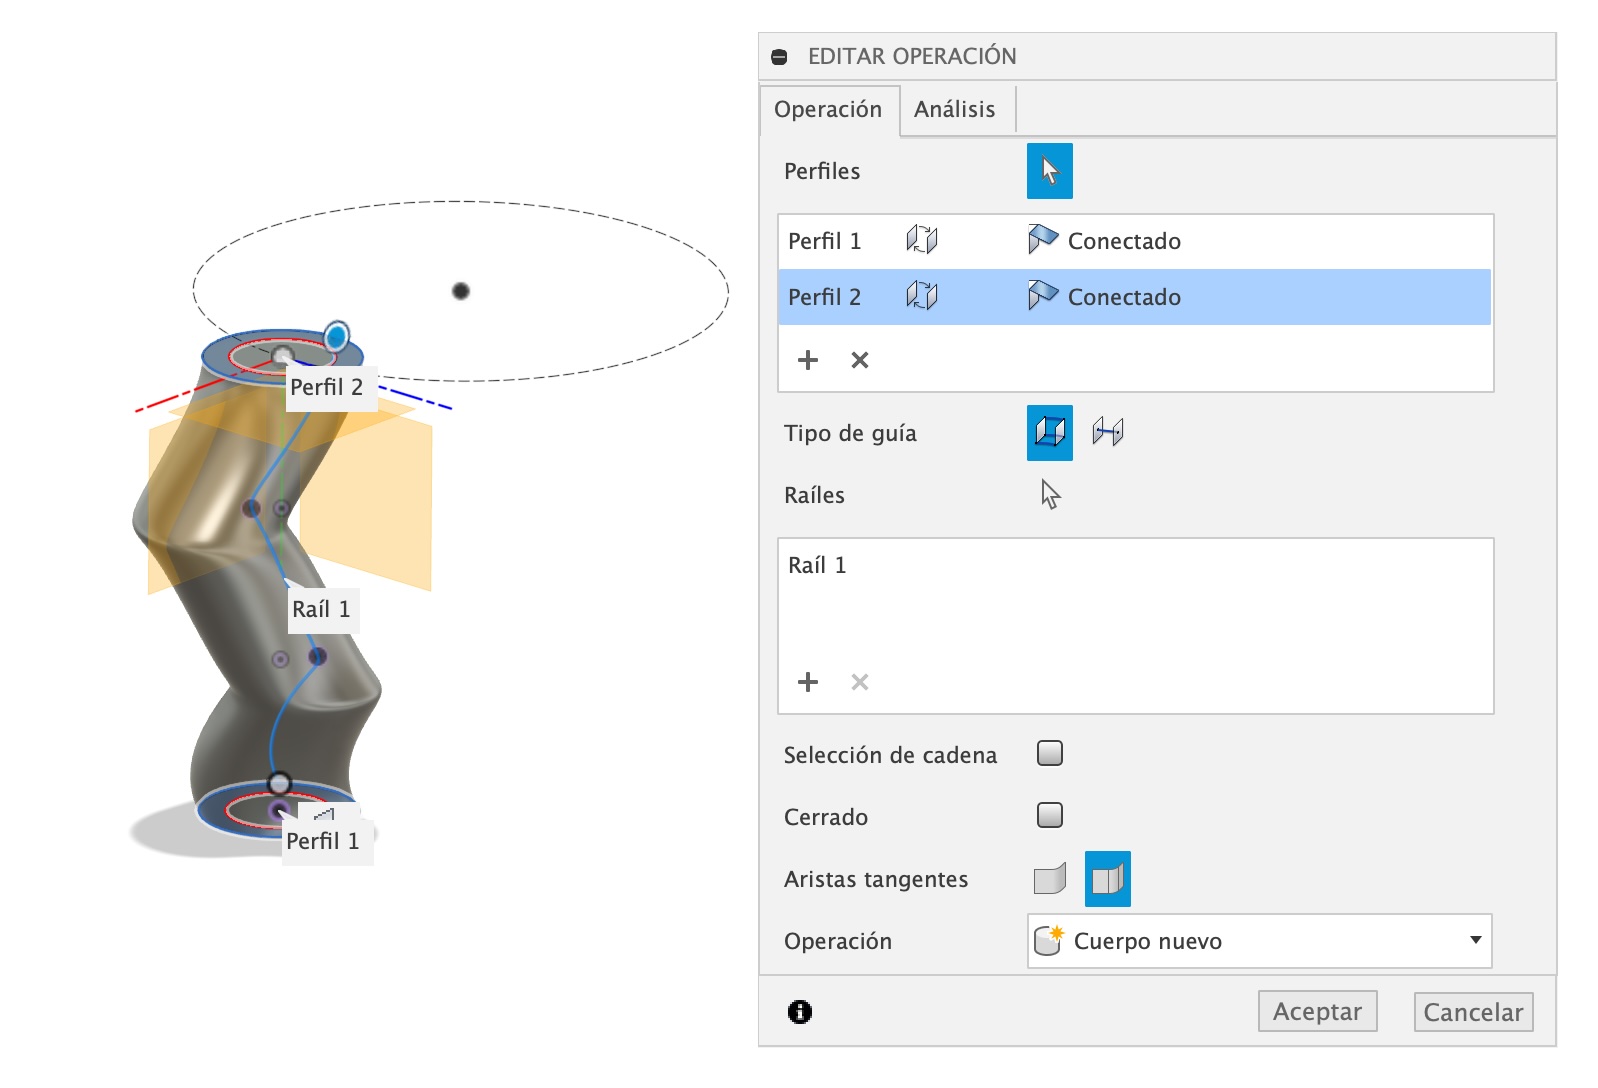
Step 2: Creating the Loft
With the 3D sketch as a guide, I used the Loft tool to connect the different sketch profiles, creating a smooth, organic shape. This formed the outer shell of the crystal holder.
Step 3: Hollowing Out the Model
To allow for cable management and light diffusion, I used the Shell tool to make the structure hollow. This ensures that cables can run inside without being visible externally.
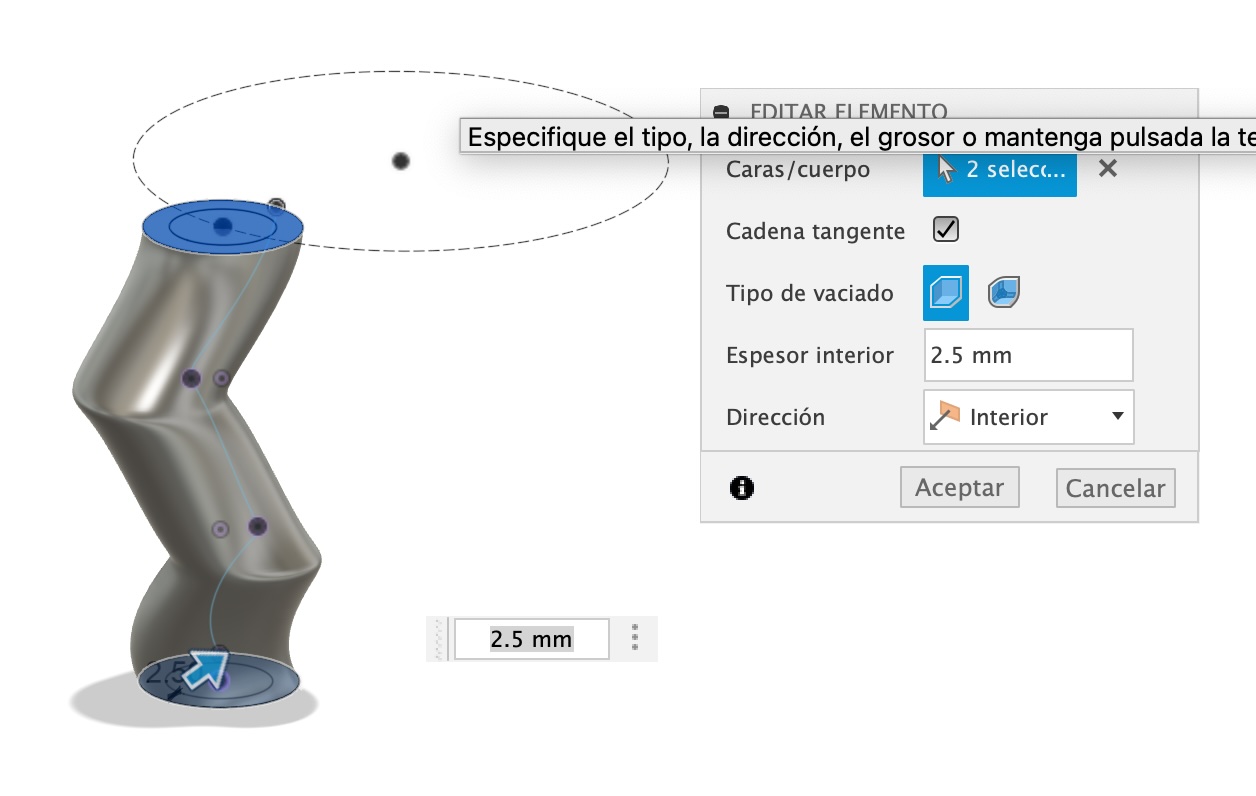
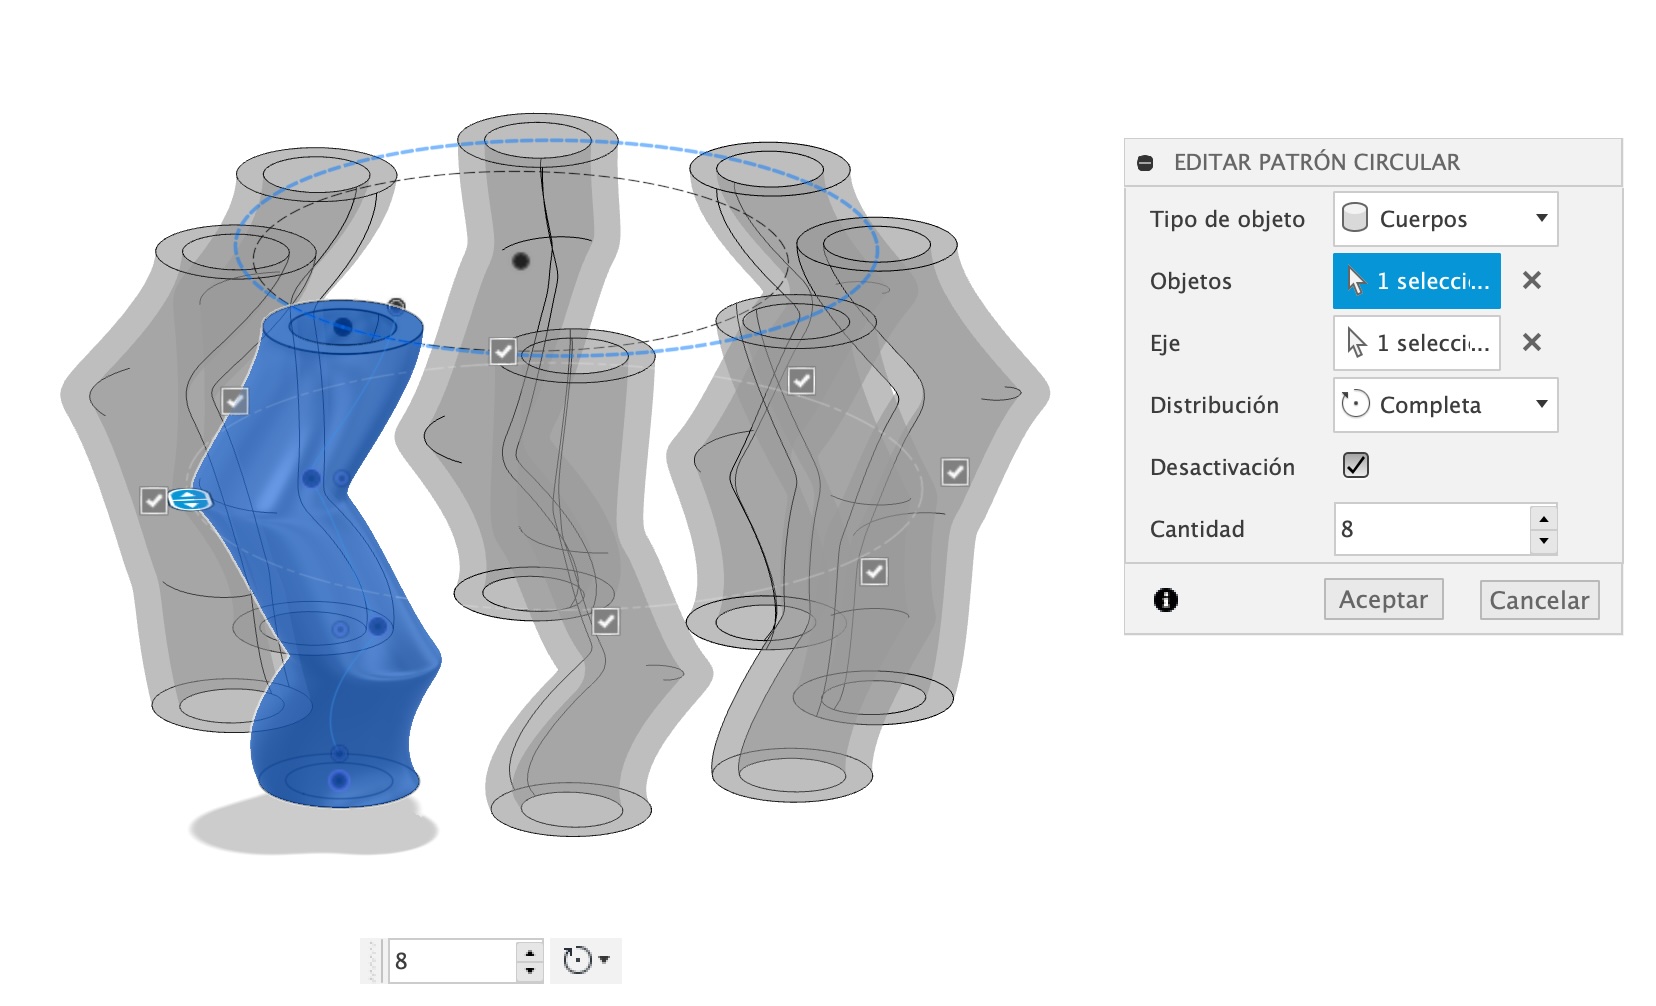
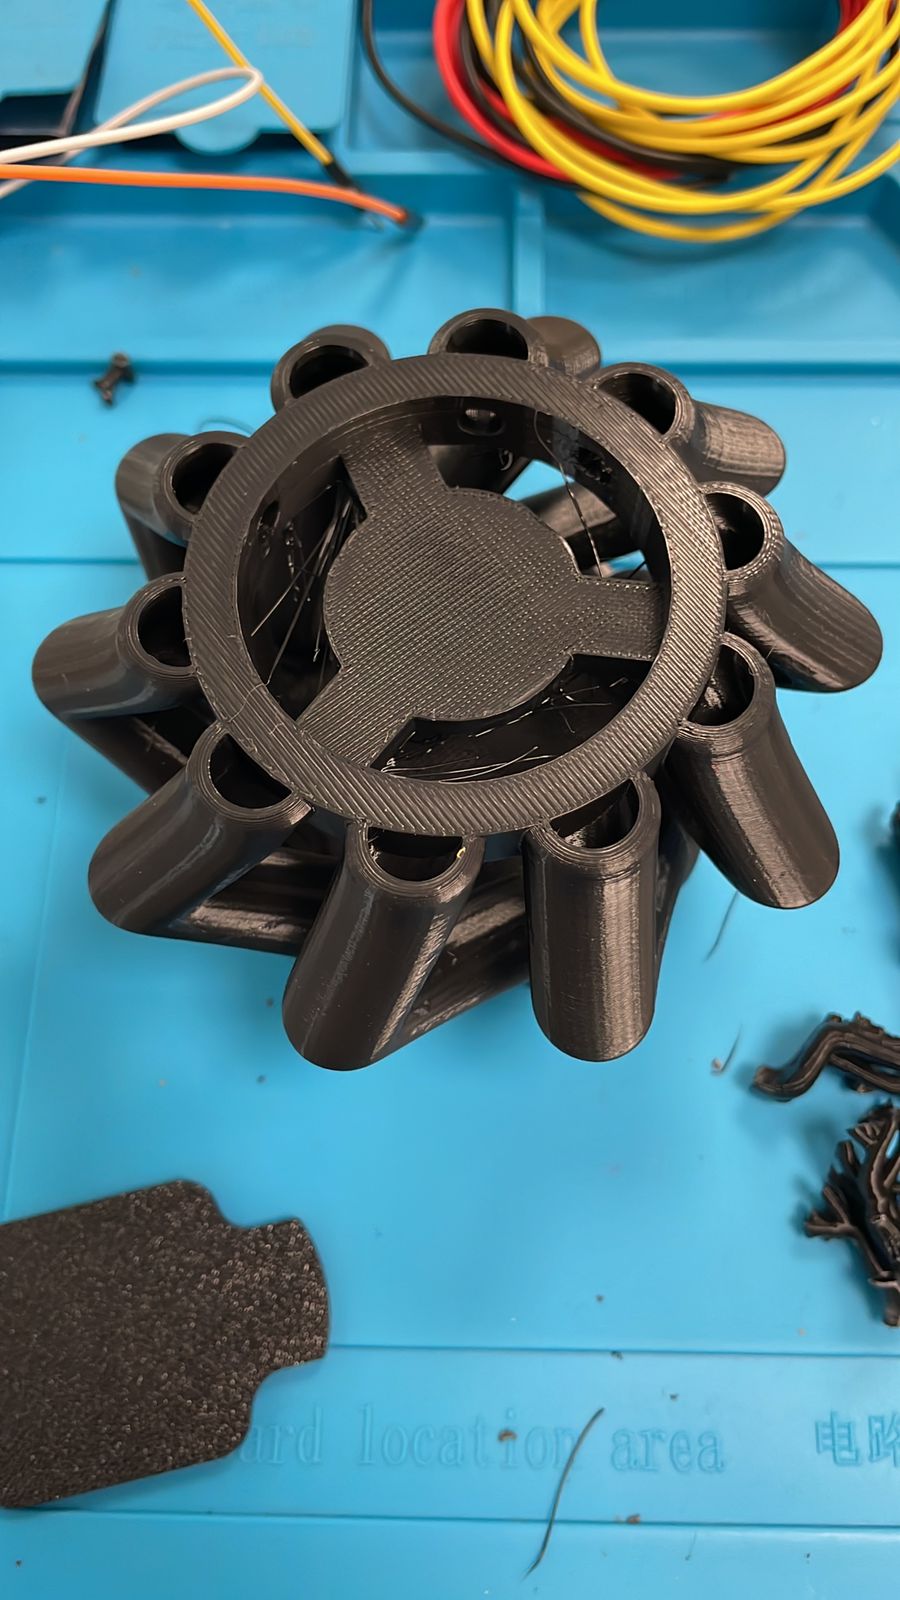
Step 4: Adding a Circular Pattern
To make the design more visually appealing, I applied a circular pattern of small openings. These also help with ventilation and light diffusion.
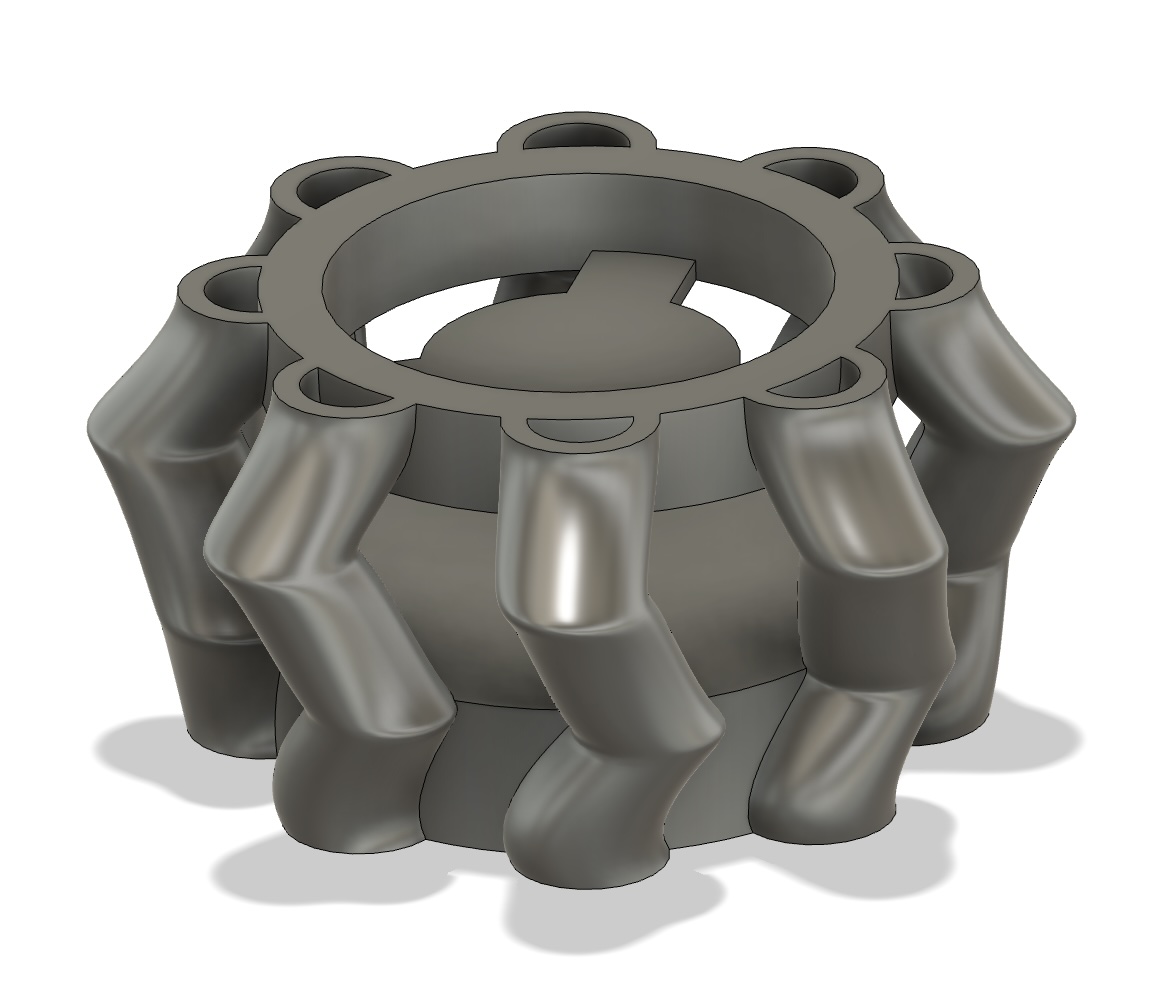
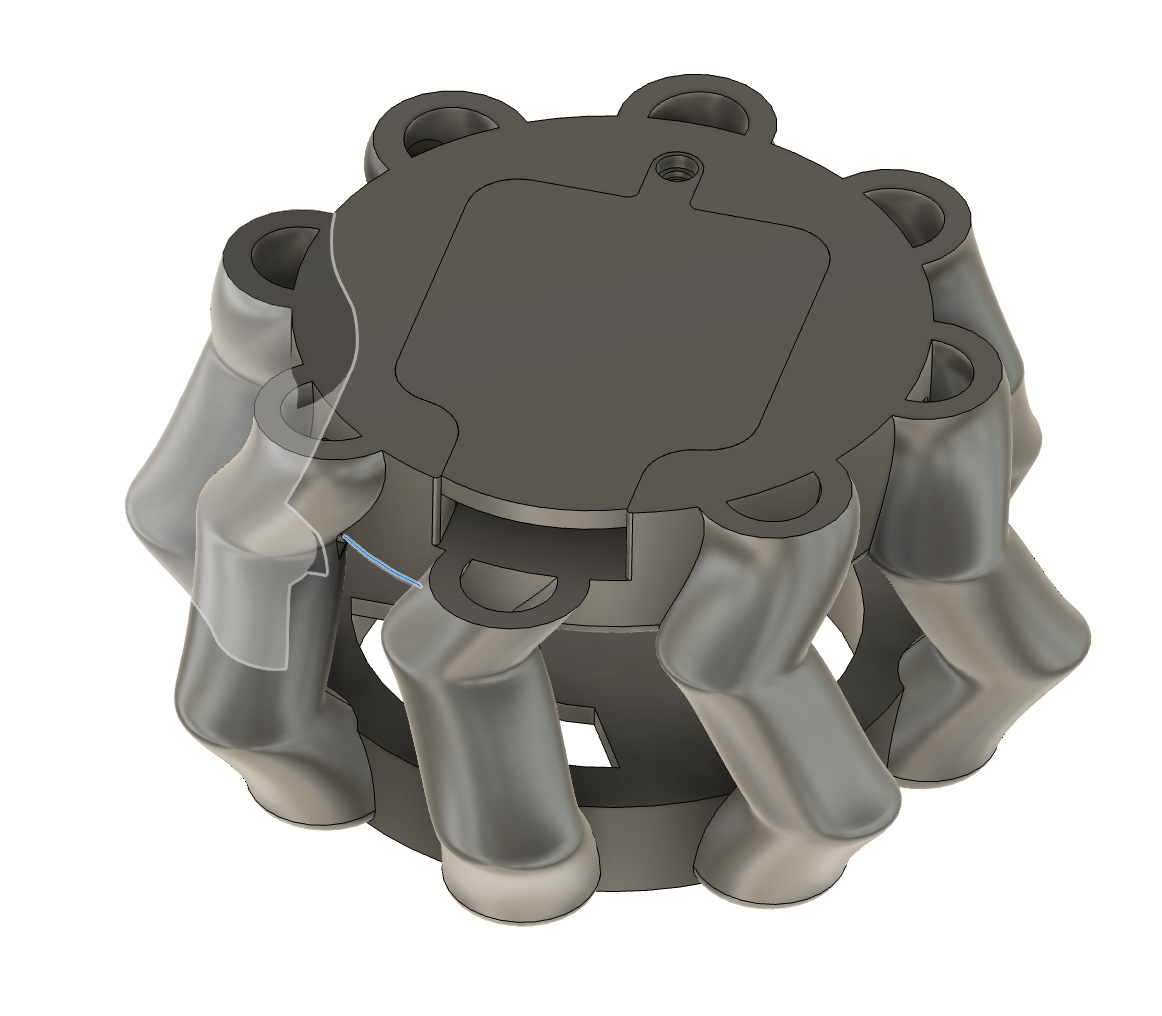
Step 5: Designing the Top and Bottom Sections
- The top section is designed to hold the crystal in place.
- The bottom section is designed to fit the circuit board and include a lid for easy access.
- I included internal channels to route the cables inside the structure, keeping them hidden while allowing easy connectivity.

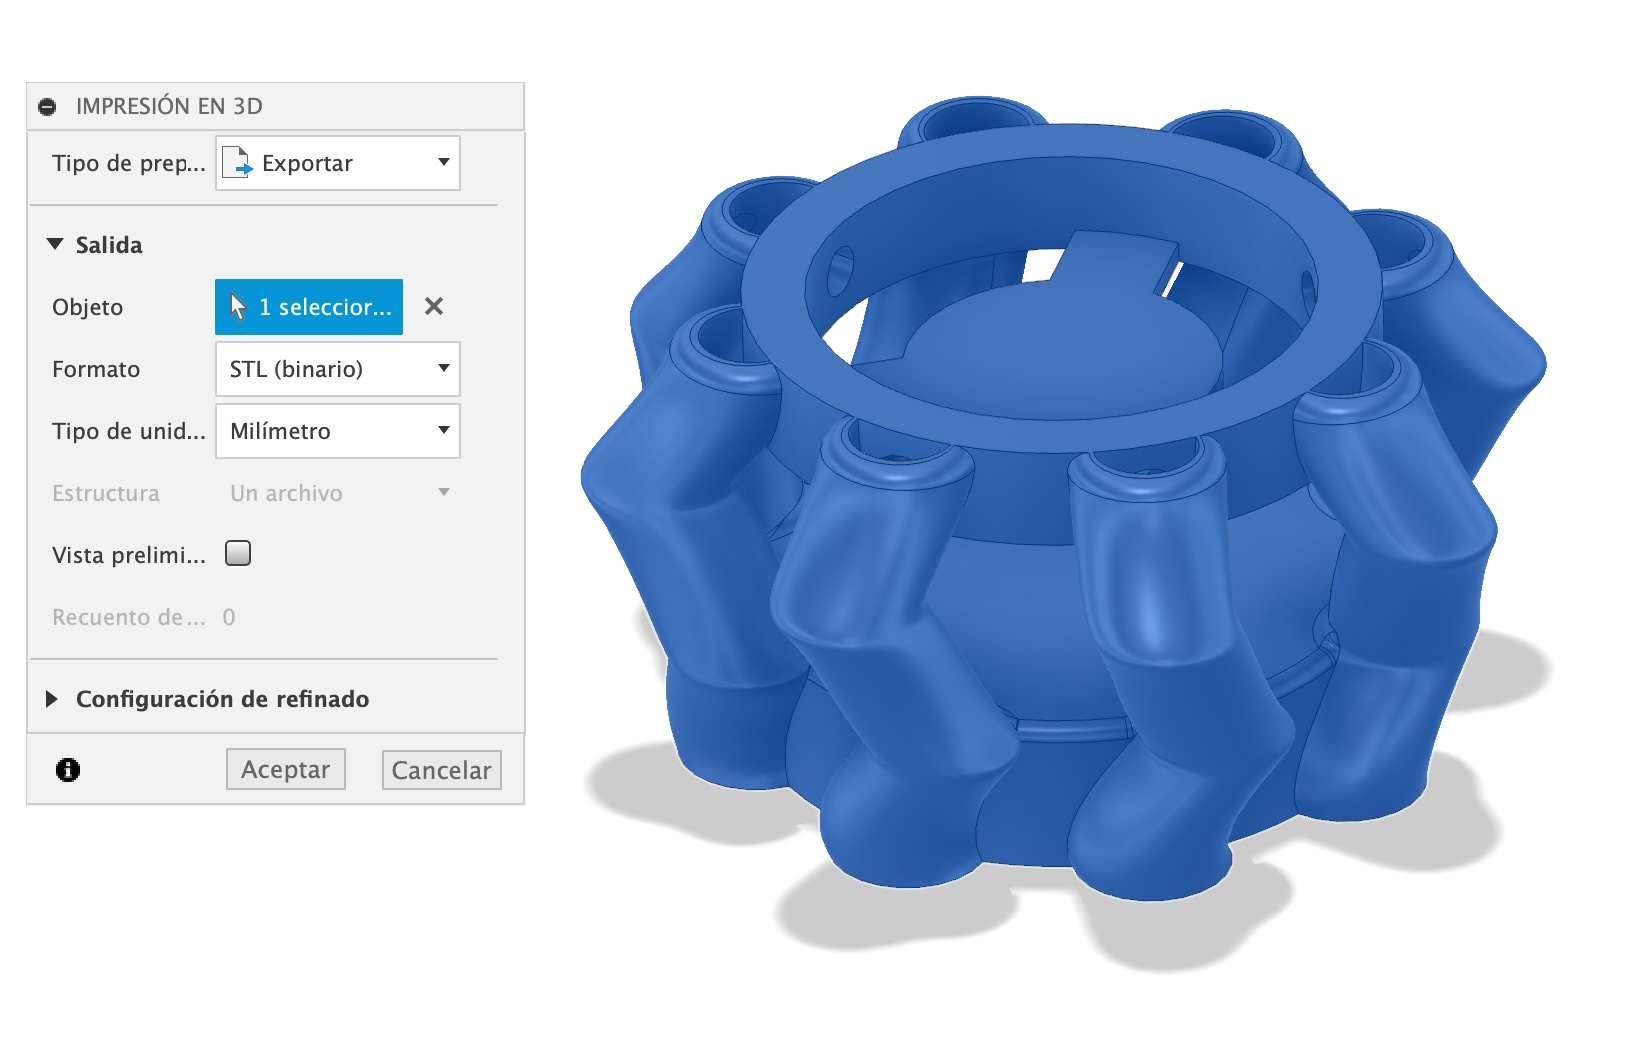
Step 7: Exporting the STL File
Once the design was finalized, I exported it as an STL file, ready for 3D printing.
3D Printing Process
After finalizing the 3D design, I exported the STL file and opened it in Bambu Studio, the slicing software for my Bambu Lab X1 printer. Below is the step-by-step breakdown of the printing process.
Step 1: Preparing the File in Bambu Studio
- Imported the STL file into Bambu Studio.
- Selected the appropriate filament for the print.
- Applied tree supports for better print stability.
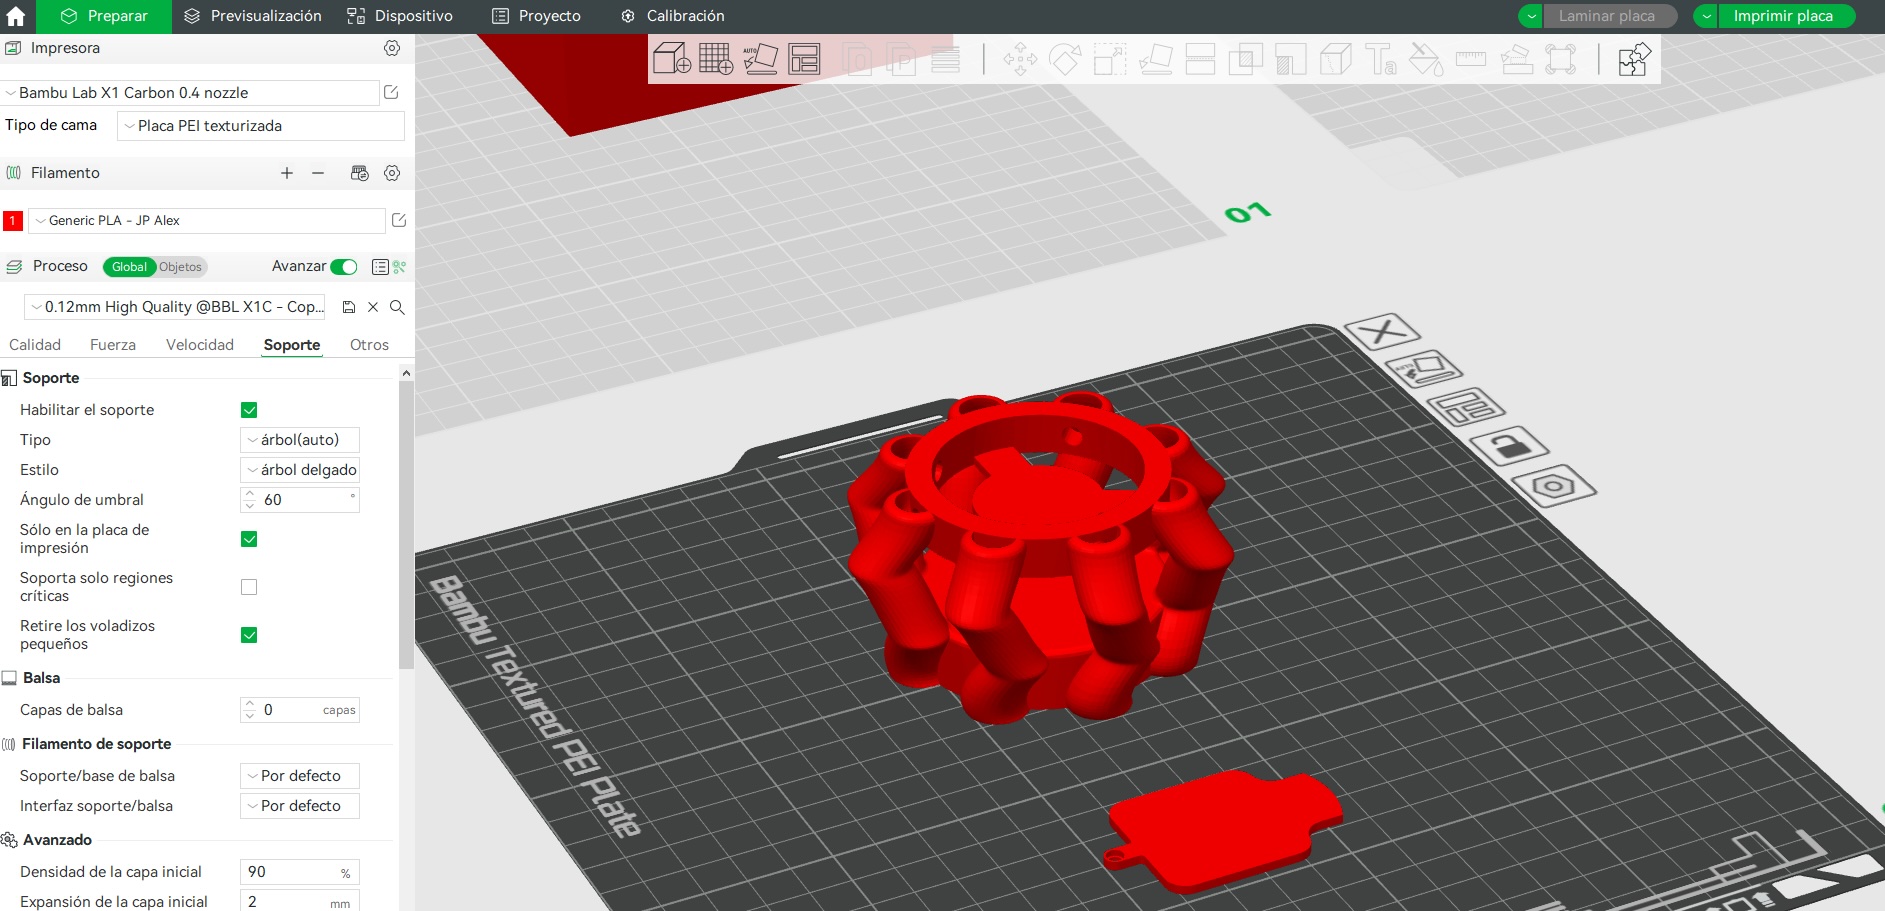
Step 2: Slicing the Model
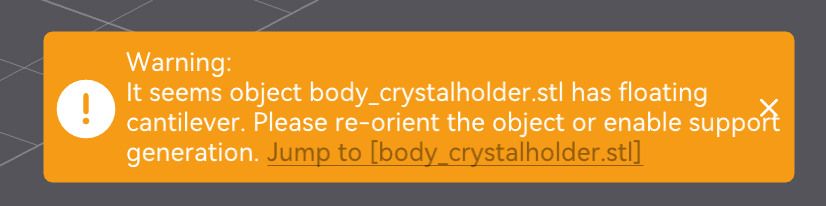
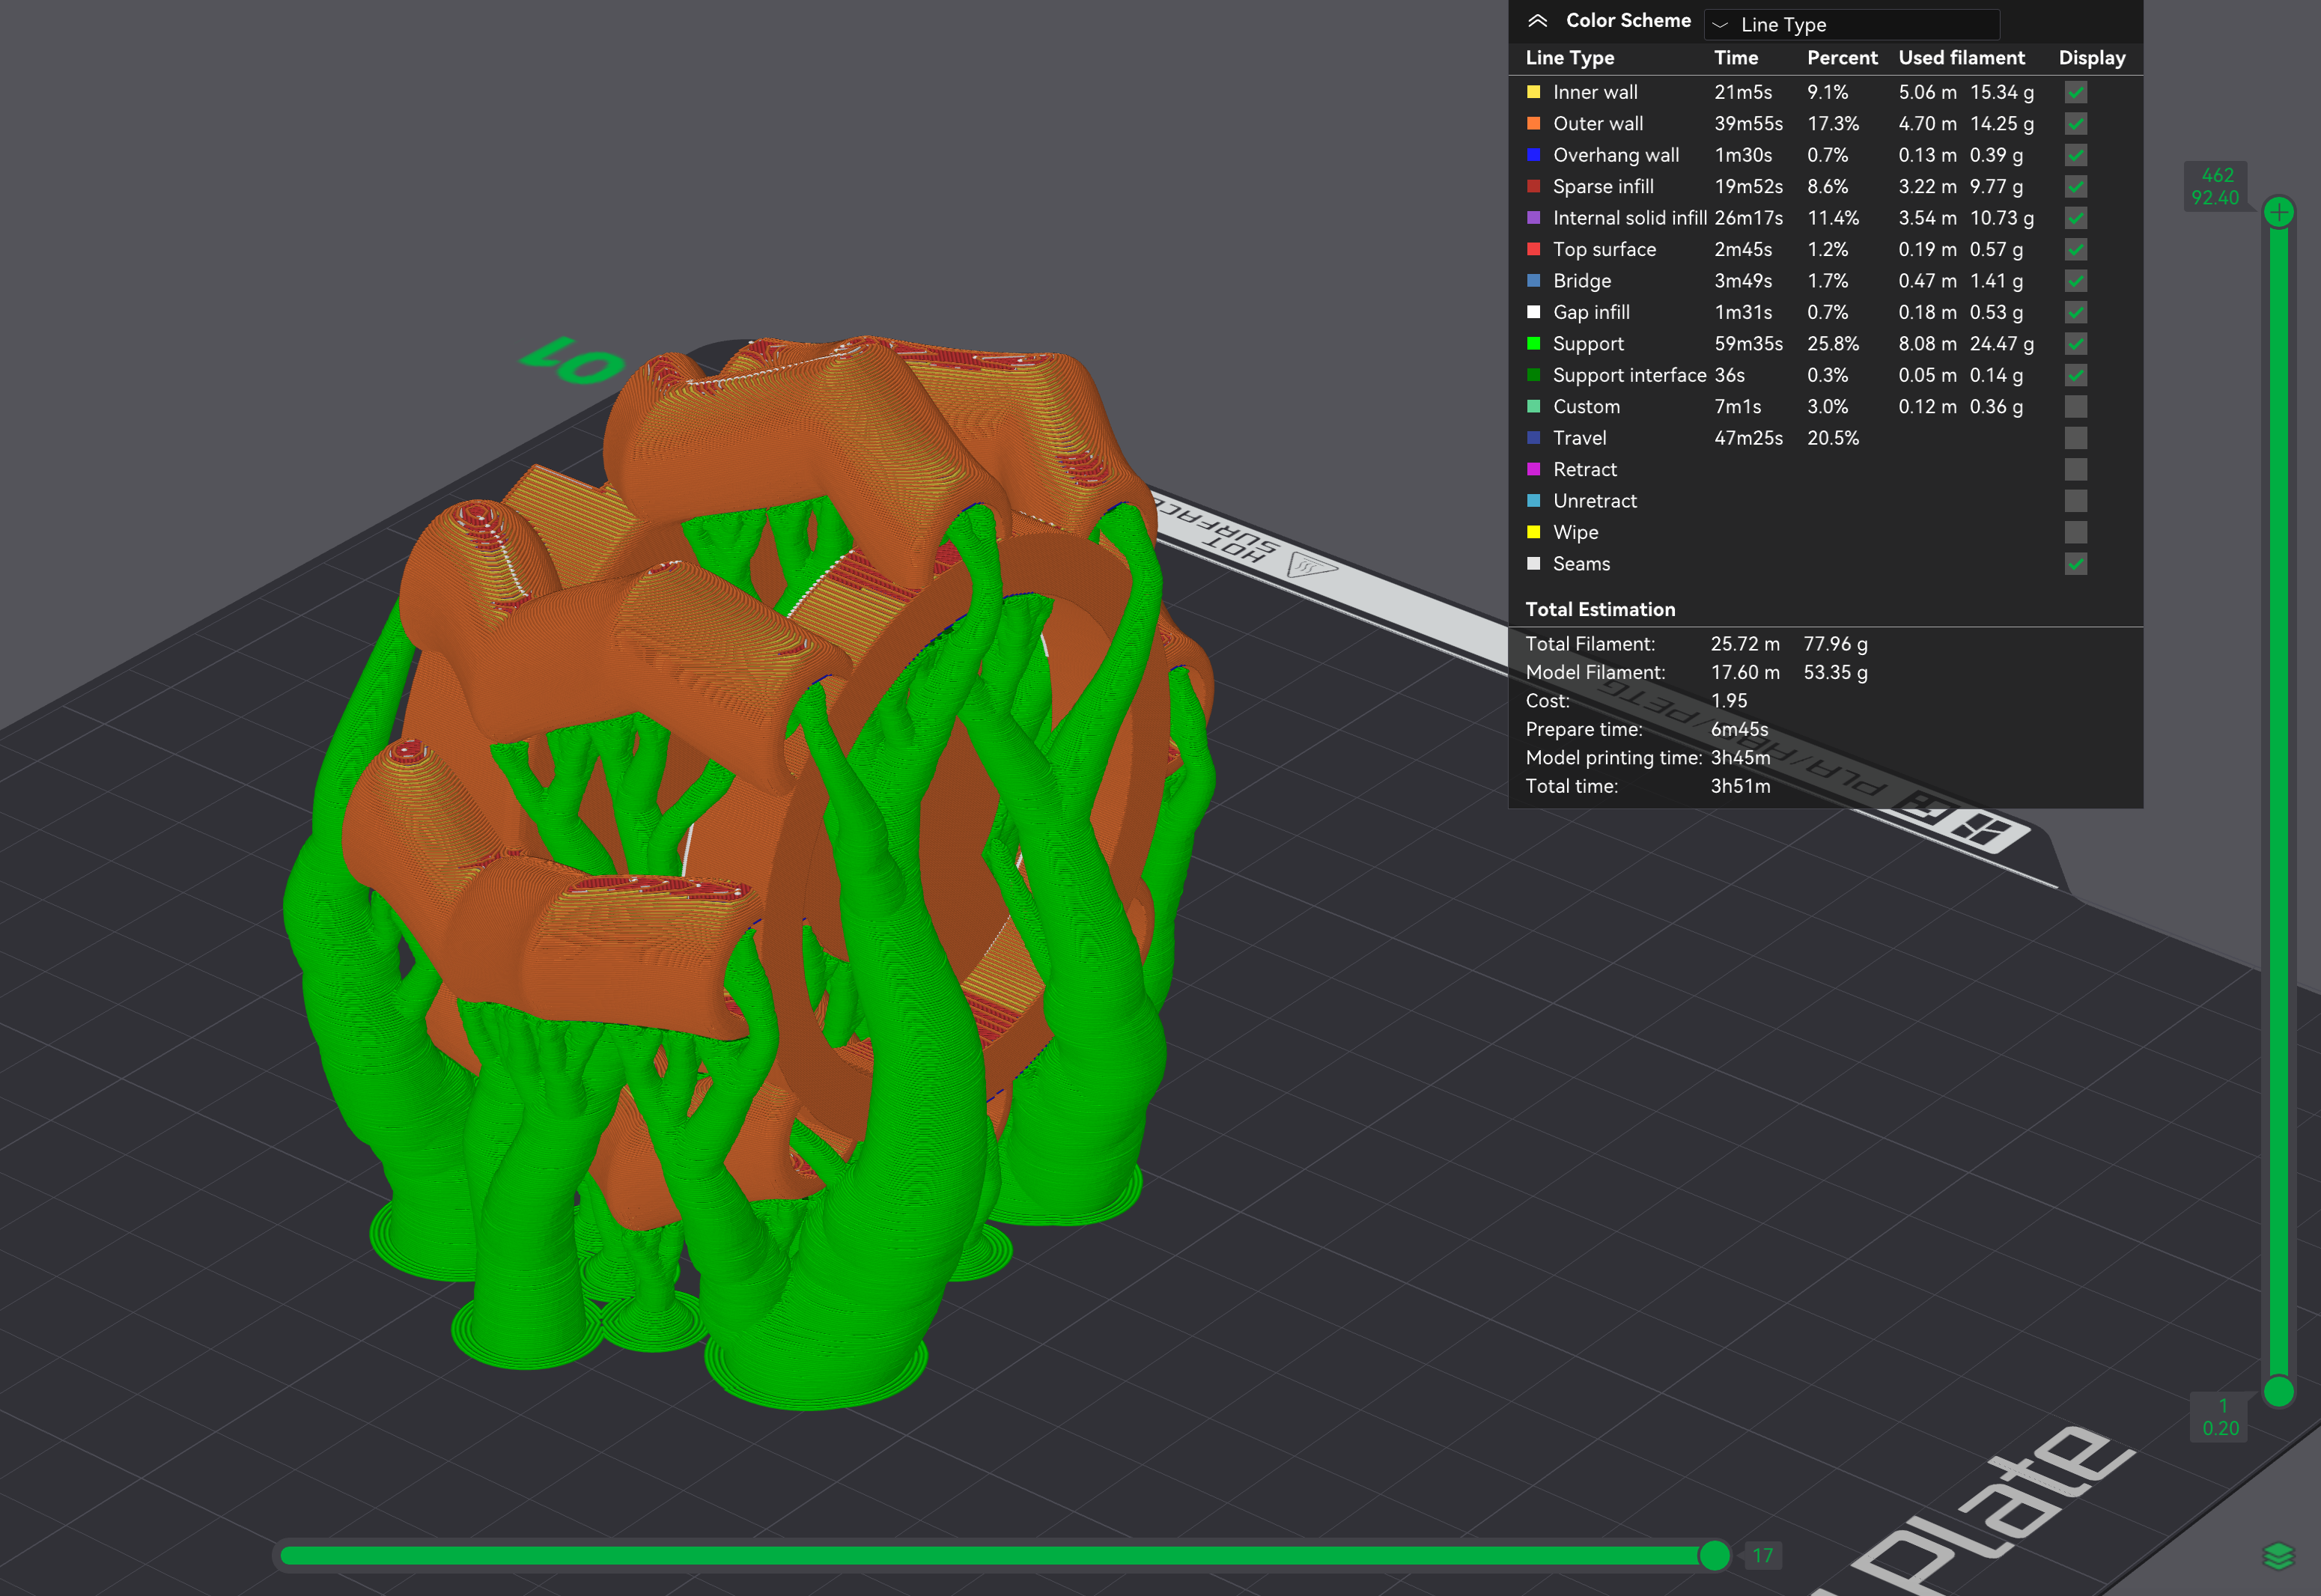
I used Bambu Studio for slicing with the following settings: 0.2 mm layer height, 15% infill, and tree supports enabled. The model includes critical horizontal elements with 90° overhangs that are completely unsupported if printed without assistance.
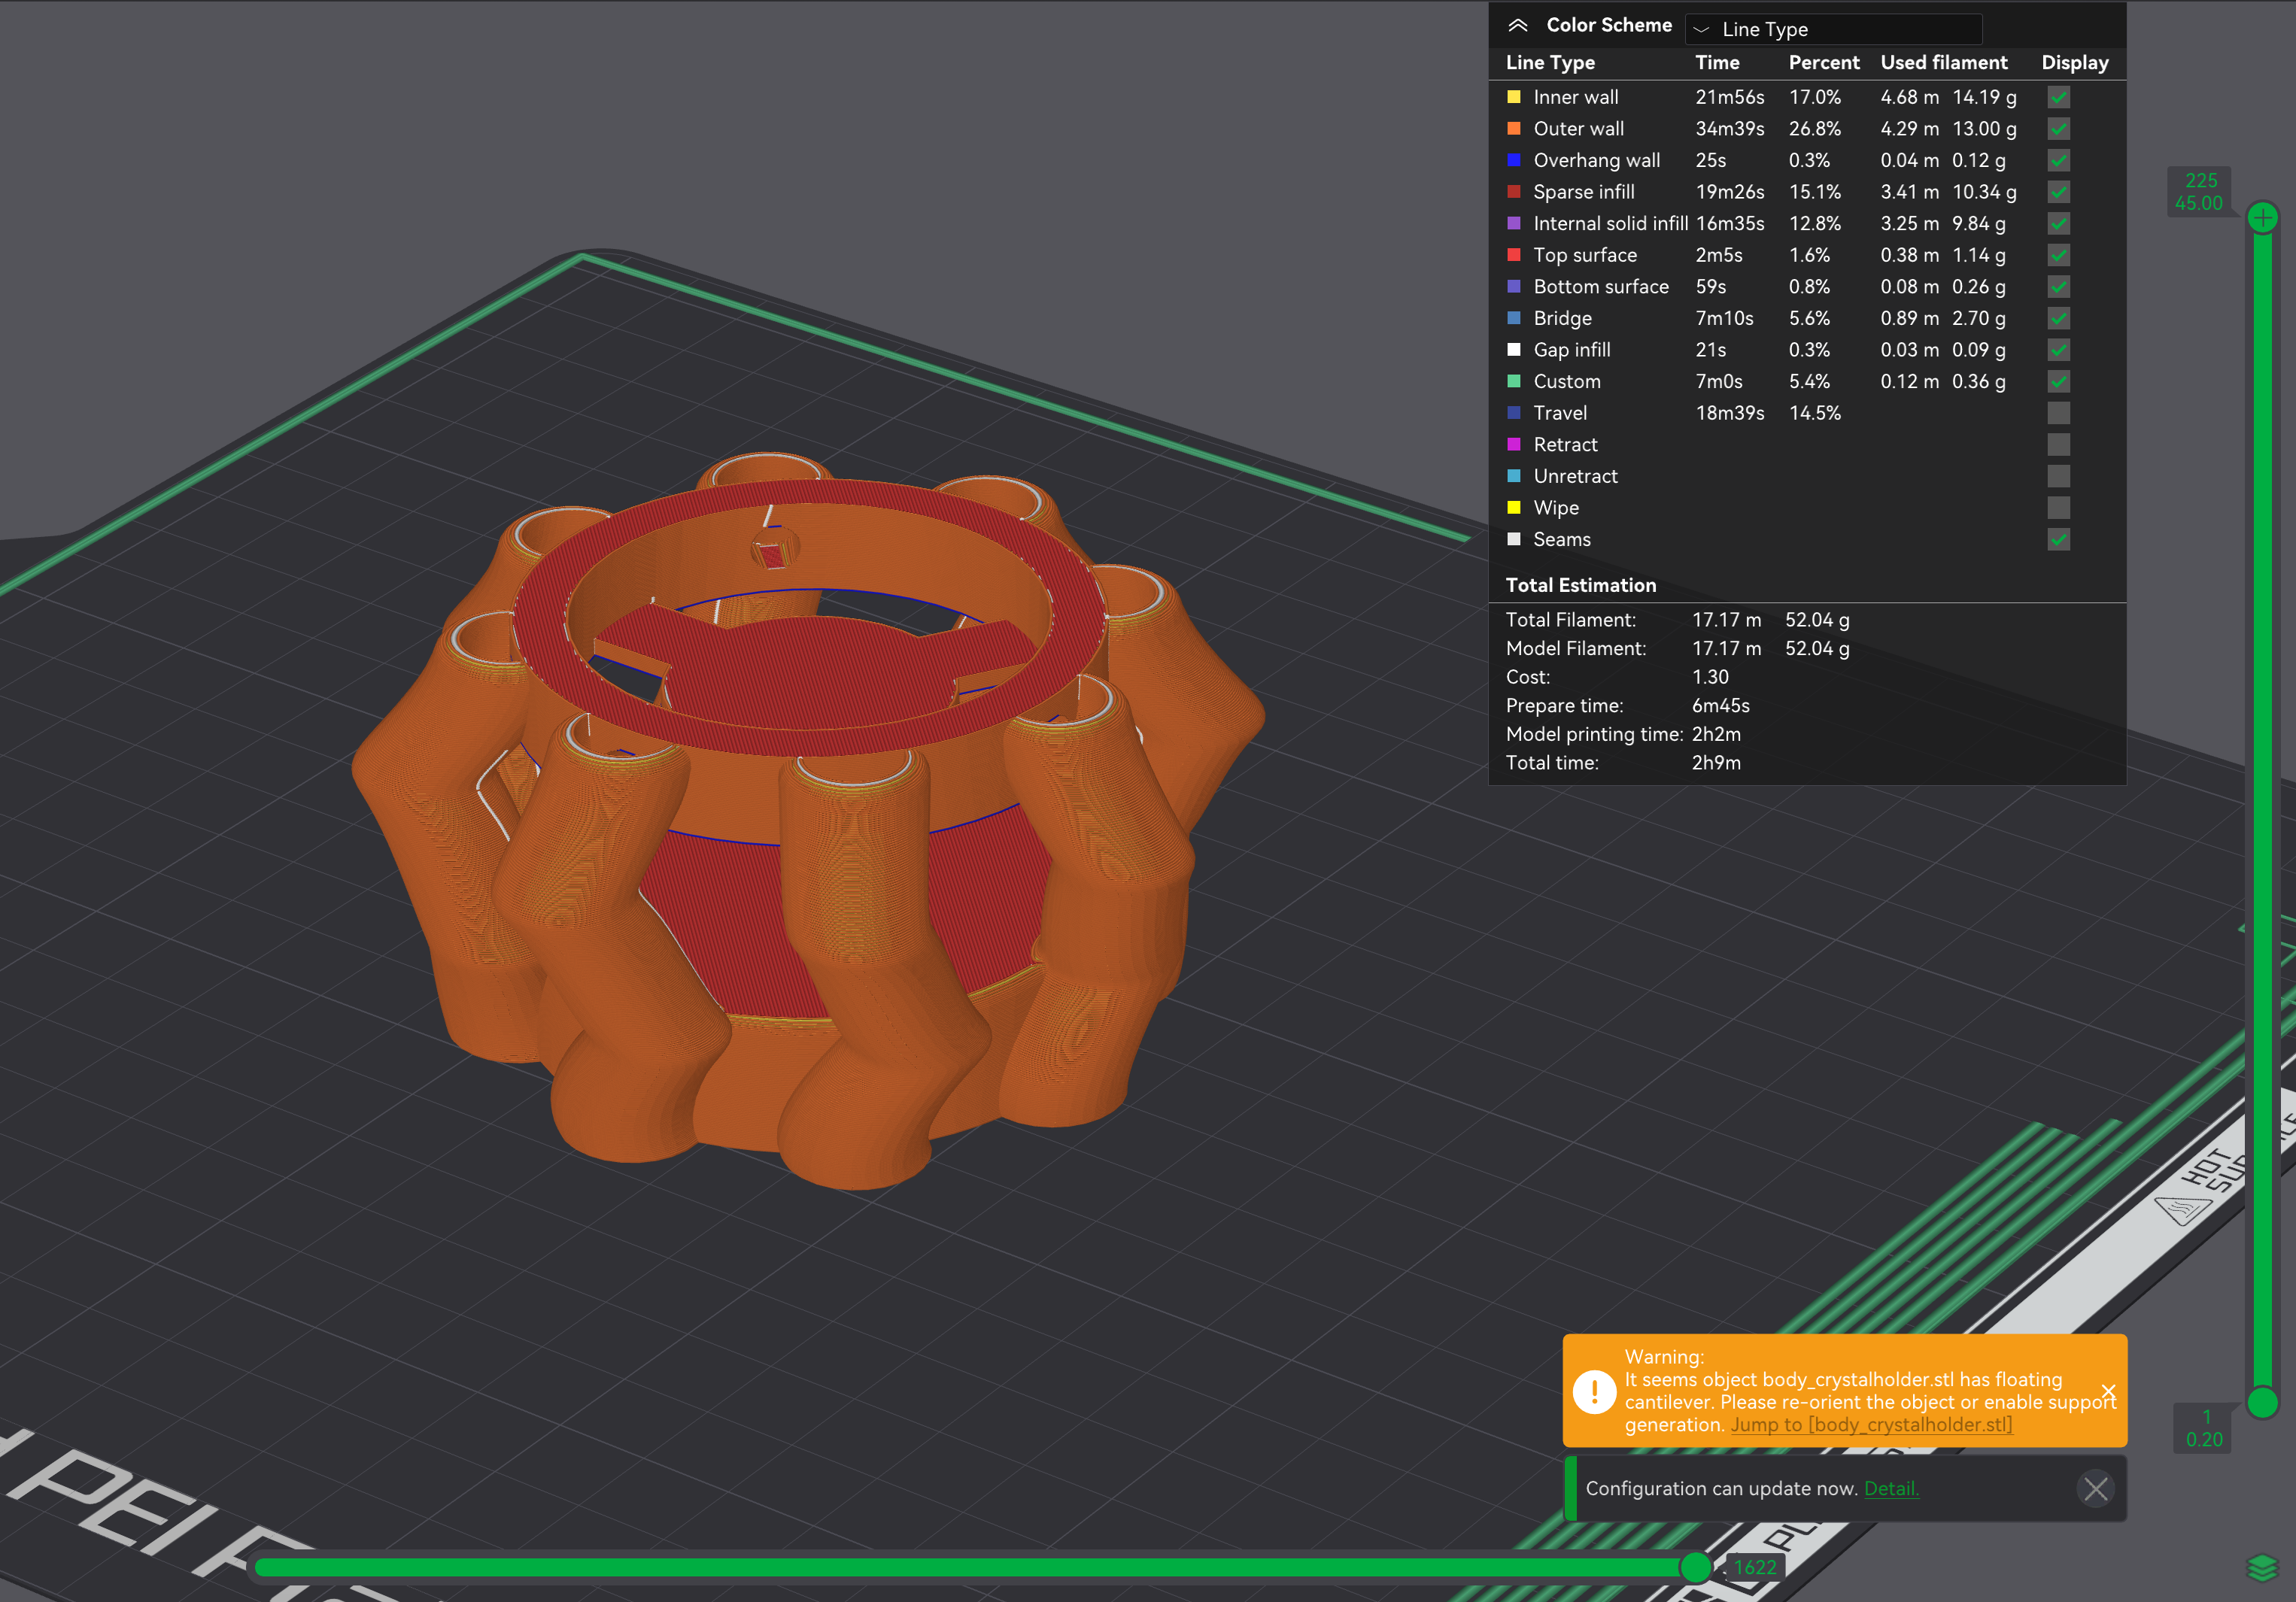
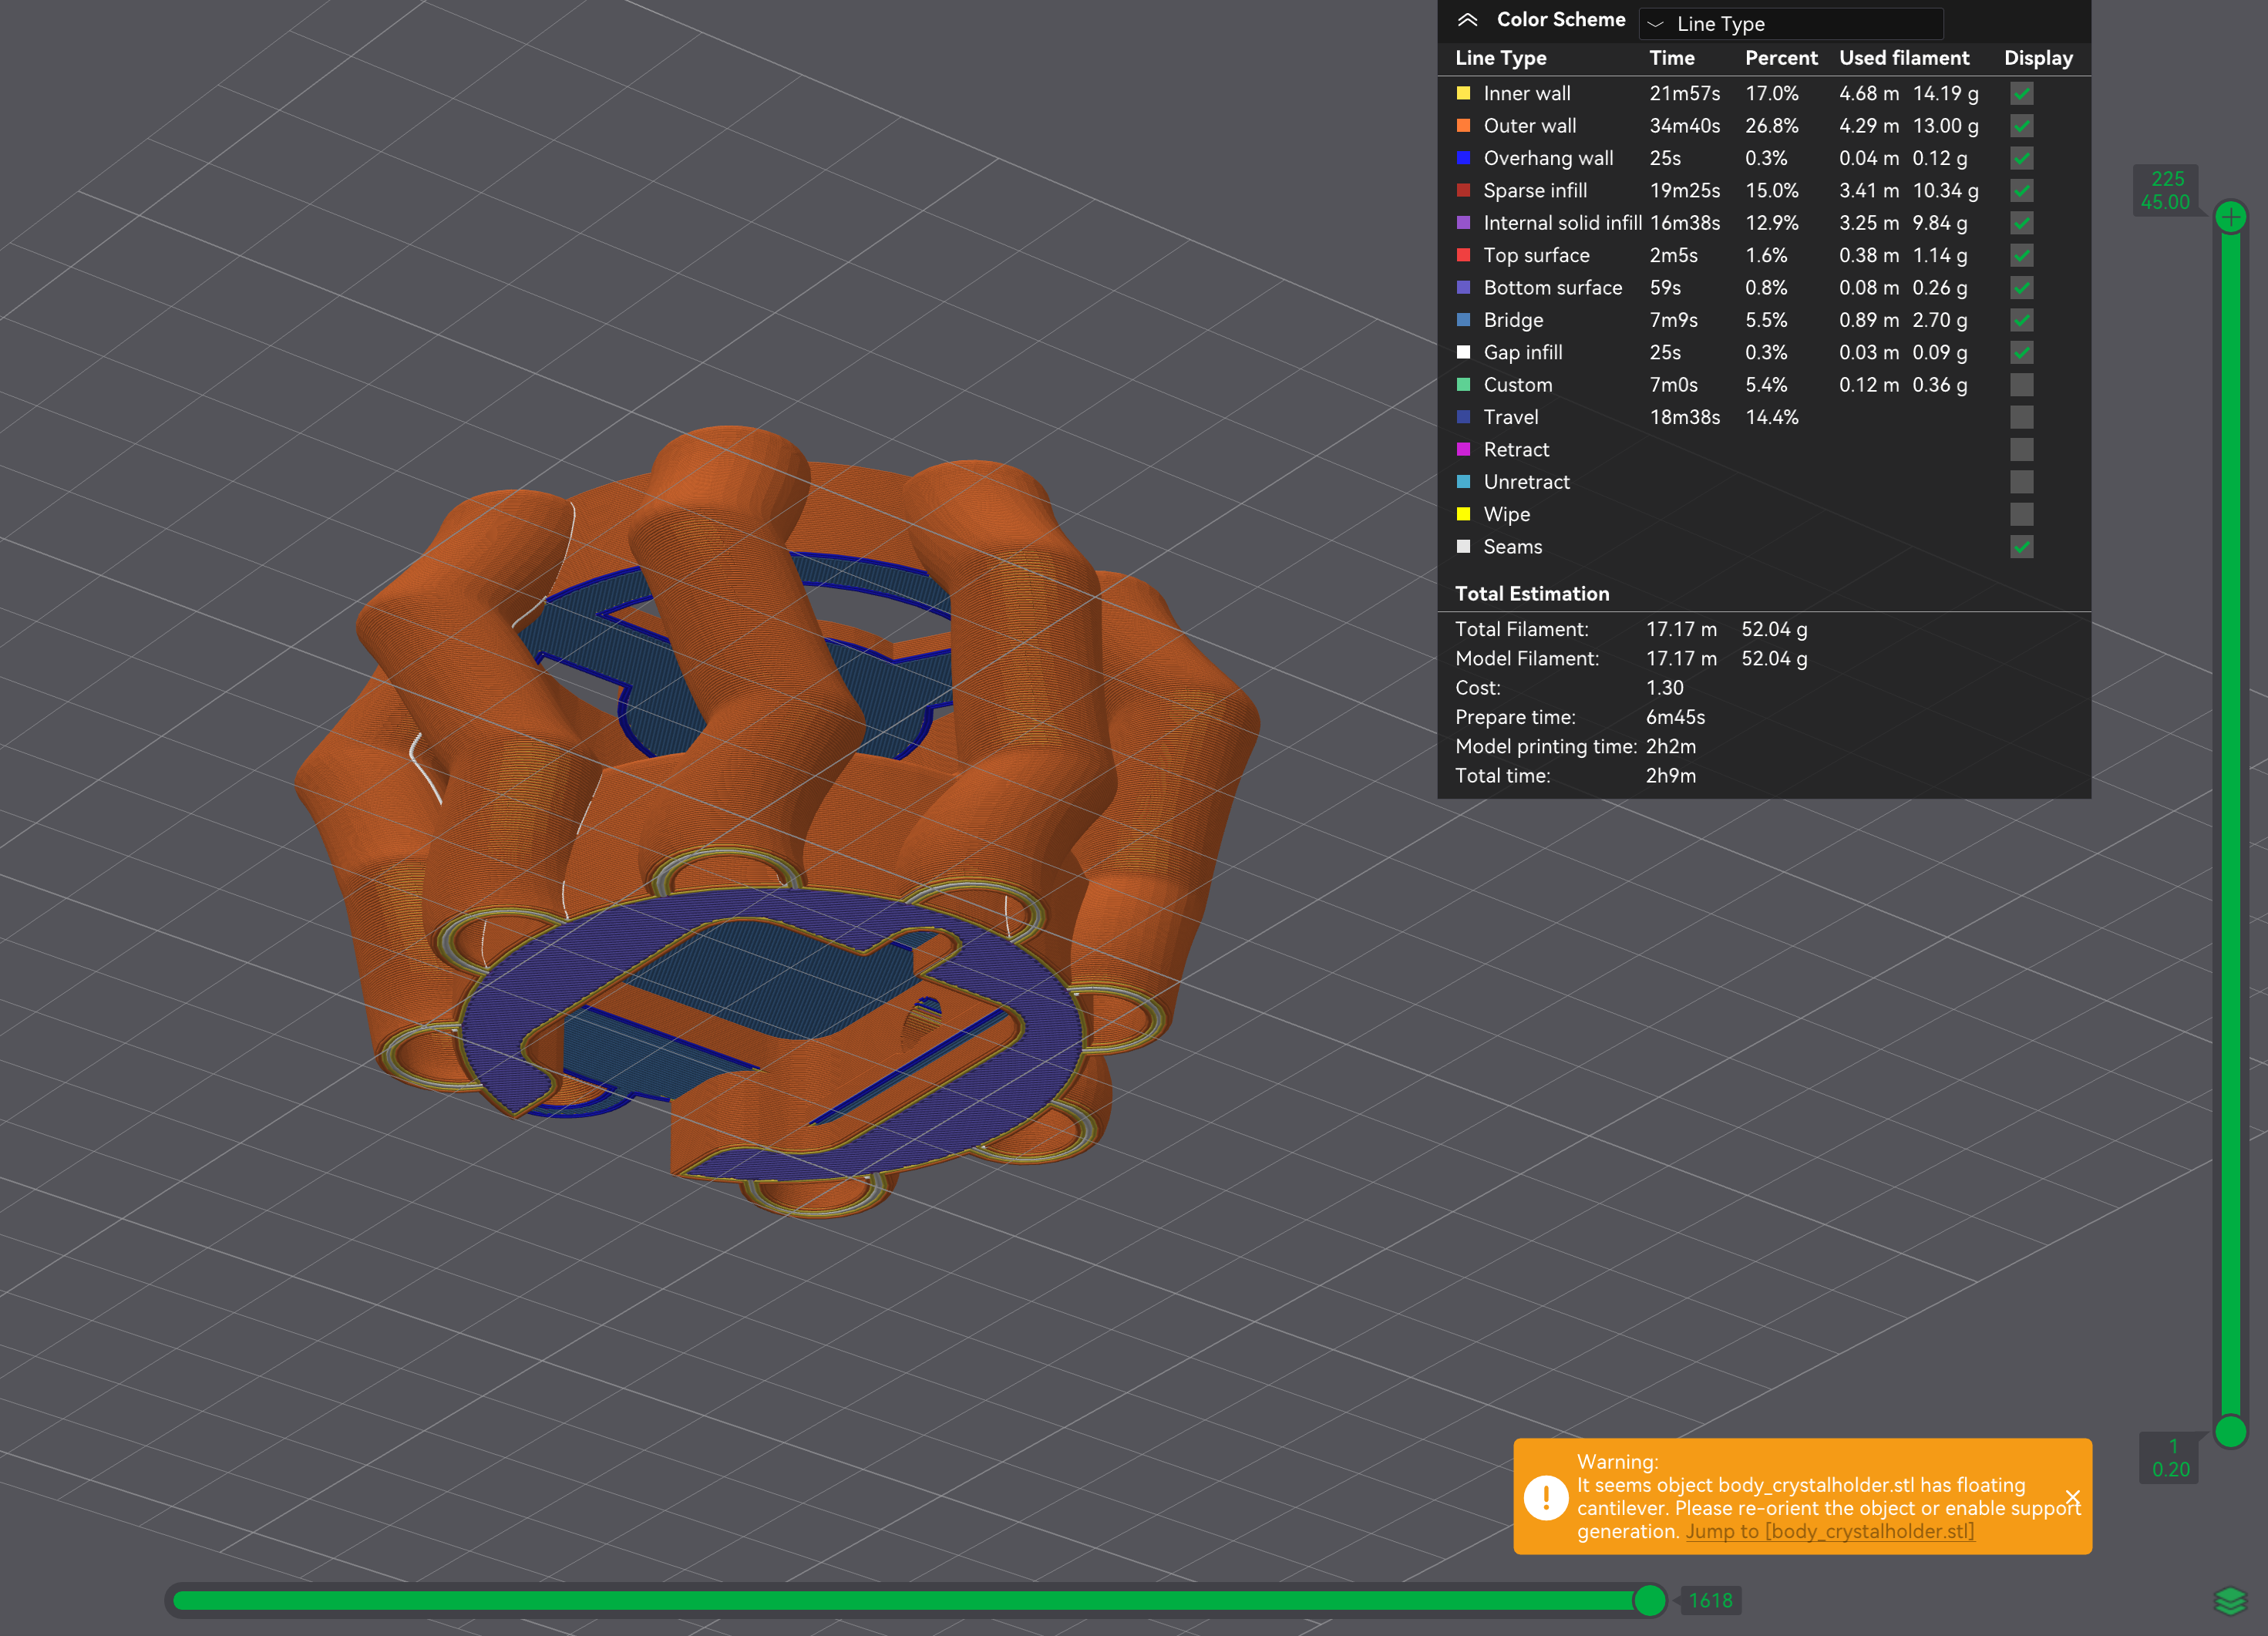
The slicer immediately flagged the model with a warning about floating regions, suggesting reorientation or enabling supports. I tried reorienting the model in different directions, but due to its geometry, none of the orientations eliminated the overhang problem. Here's the slicer warning that confirmed it:
I experimented with reorienting the model in different angles to see if supports could be minimized or avoided. However, due to the design's geometry, all reorientations still required supports. The worst-case scenario—rotated 90°—resulted in a print time of 3h51m.
Instead, I opted to print the model flat on the bed with tree supports, which reduced the printing time to 3h06m—almost an hour saved, with no compromise in print quality.
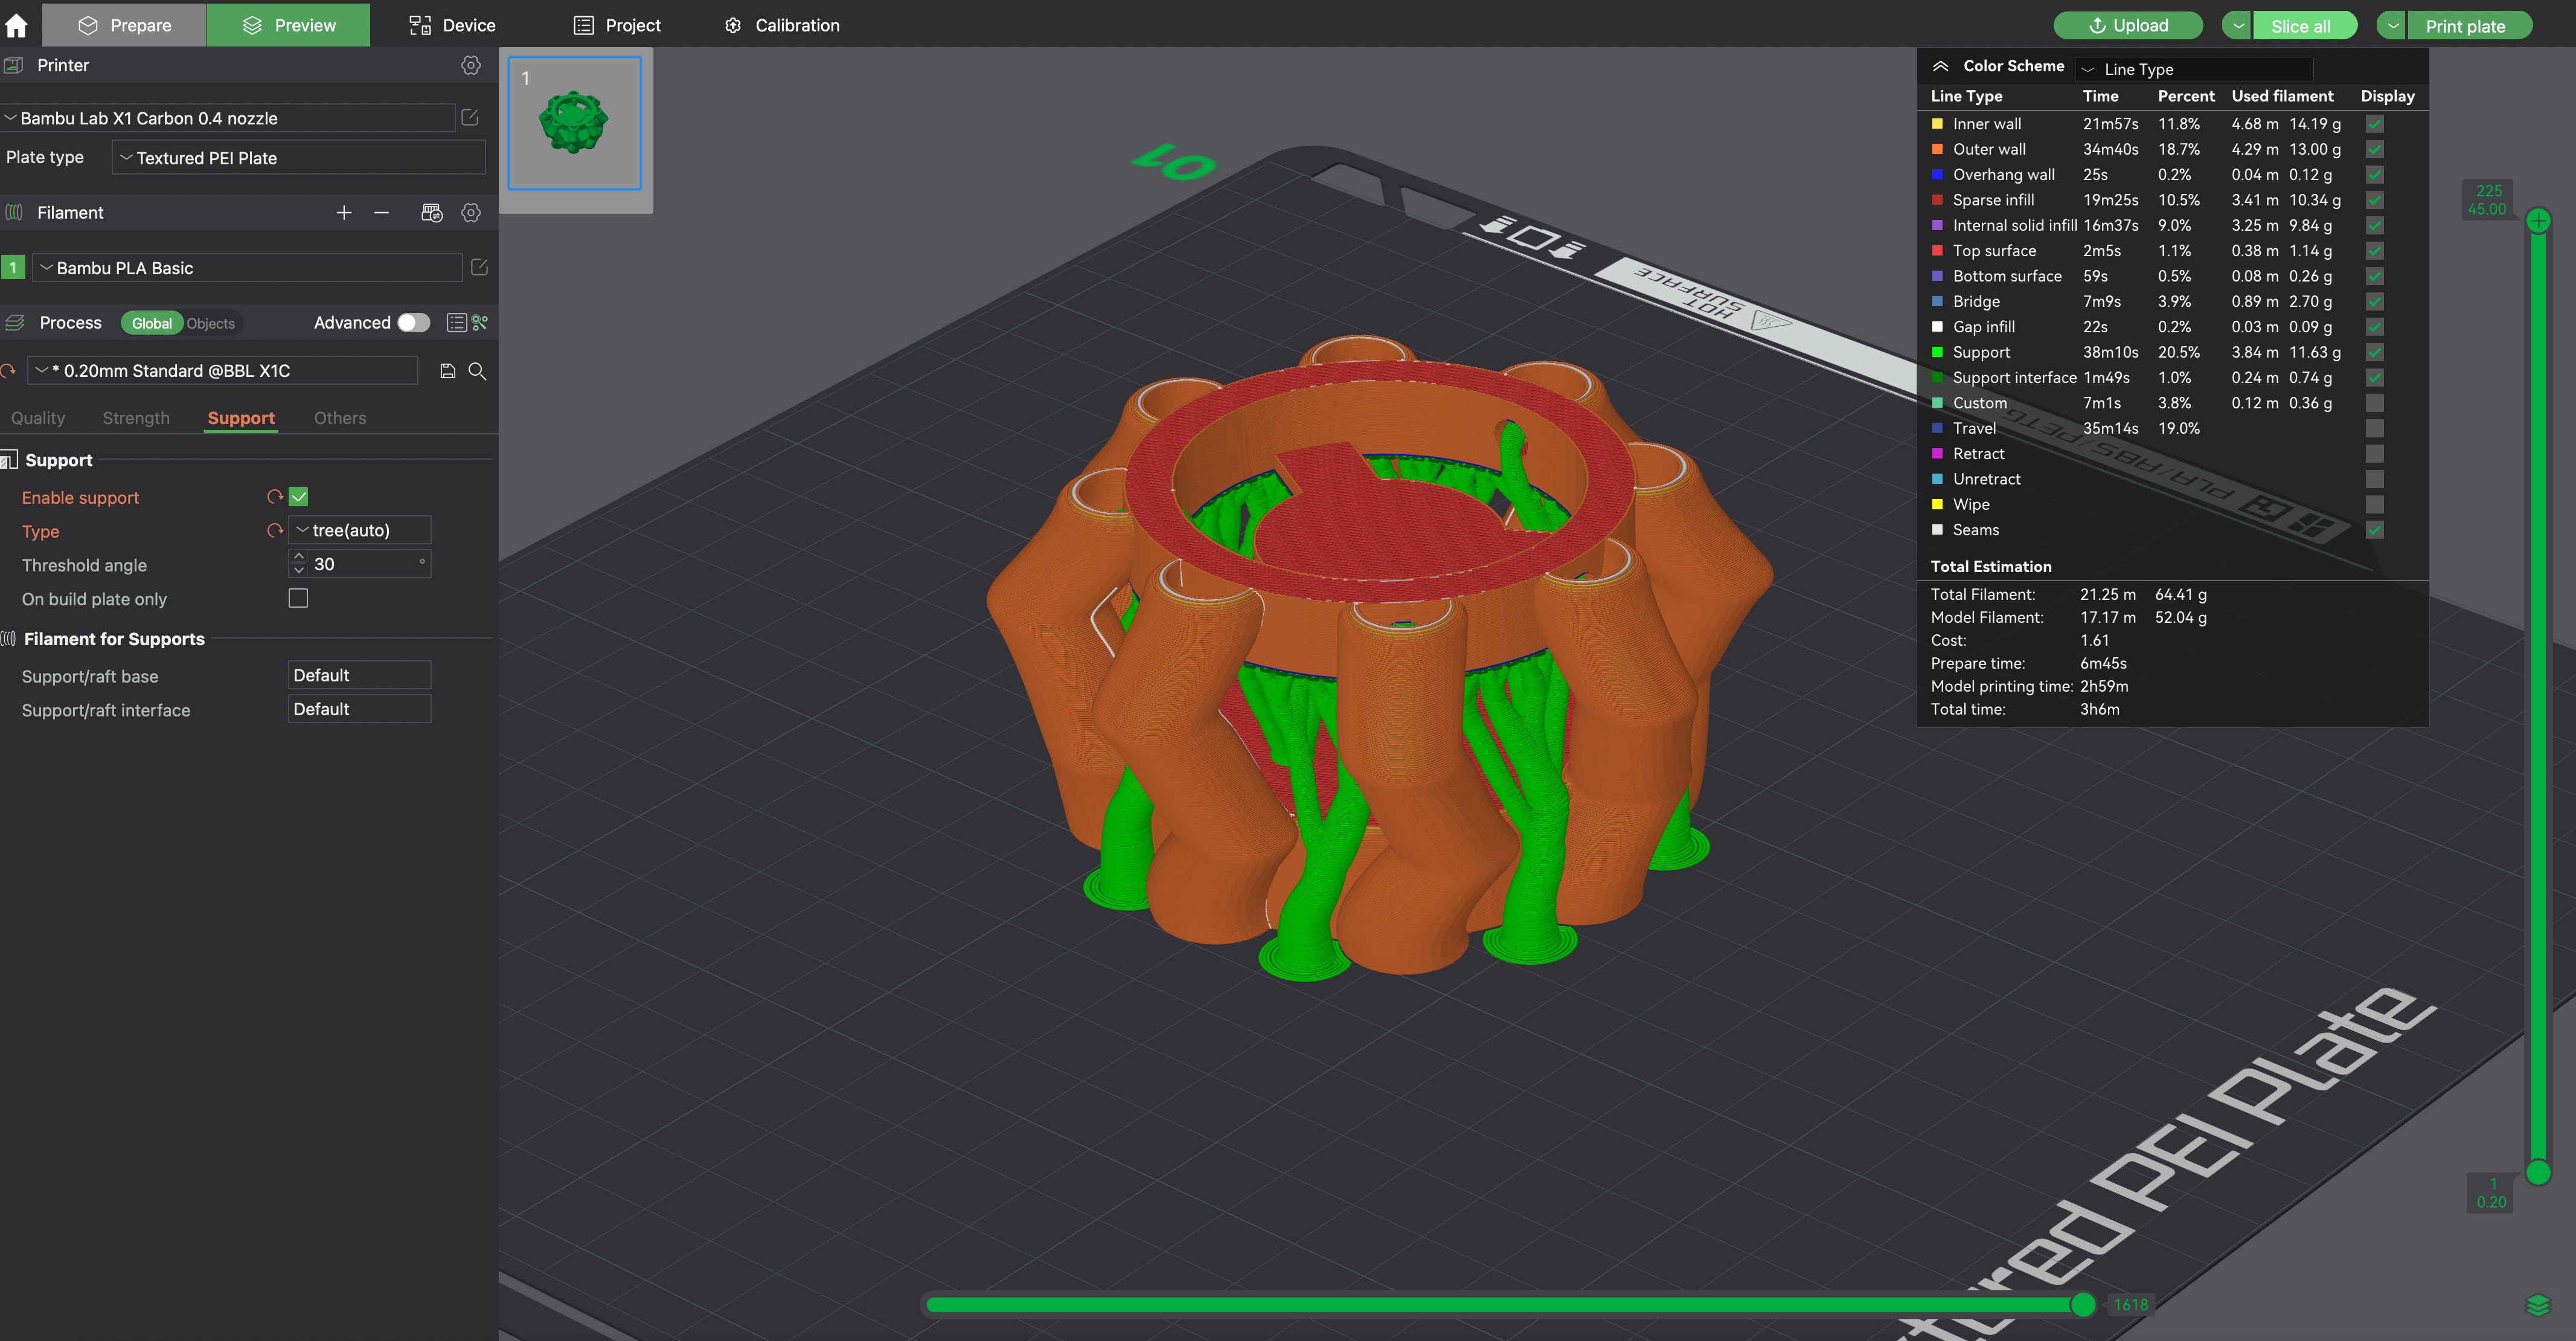
This final configuration offered the best trade-off between stability, print quality, and efficiency. Tree supports minimized filament waste and were easier to remove, making post-processing simple. So yes, supports were absolutely needed and printing flat was the smartest choice.
Step 3: Sending the Print to the Printer
- Sent the file to the Bambu Lab X1 printer.
- The printer began its calibration, heated the bed and extruder, and cleaned the nozzle.
- After the first layer, the built-in LiDAR sensor checked print adhesion before continuing.
- And then... the waiting game began! The print took around 5 hours.
Step 4: Iterations & Improvements
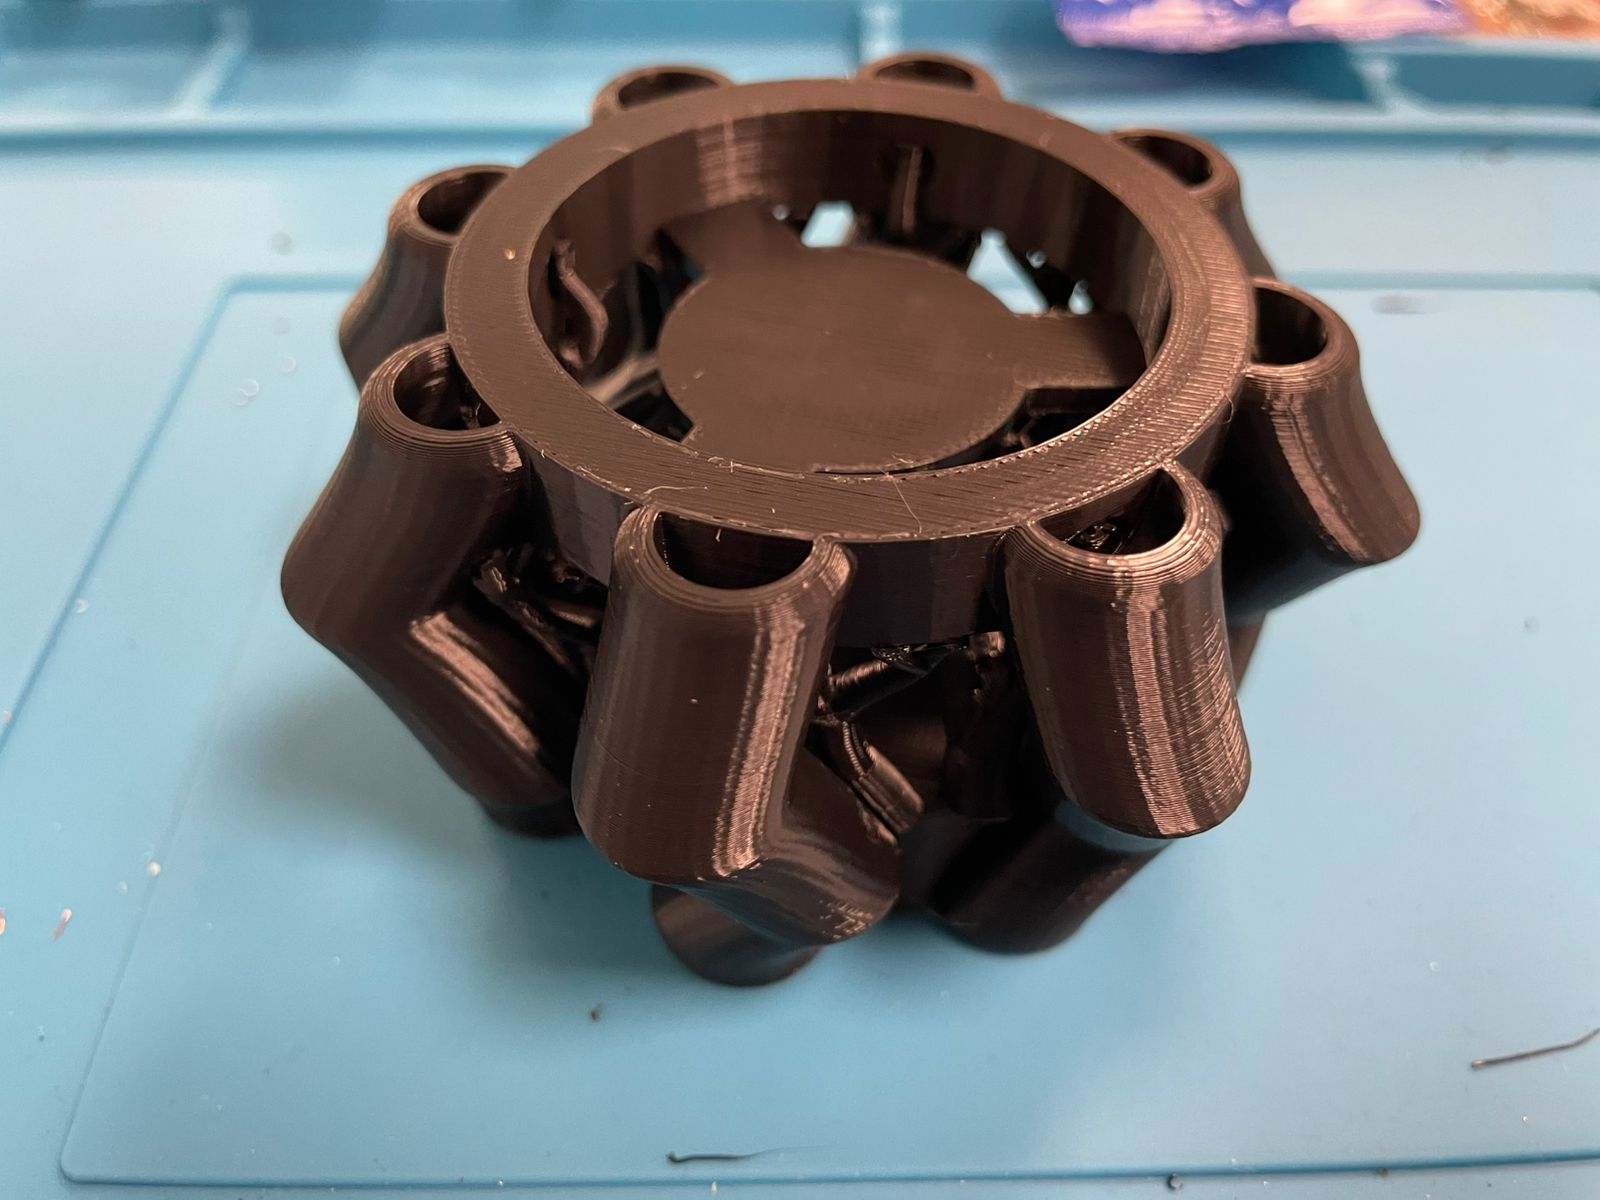
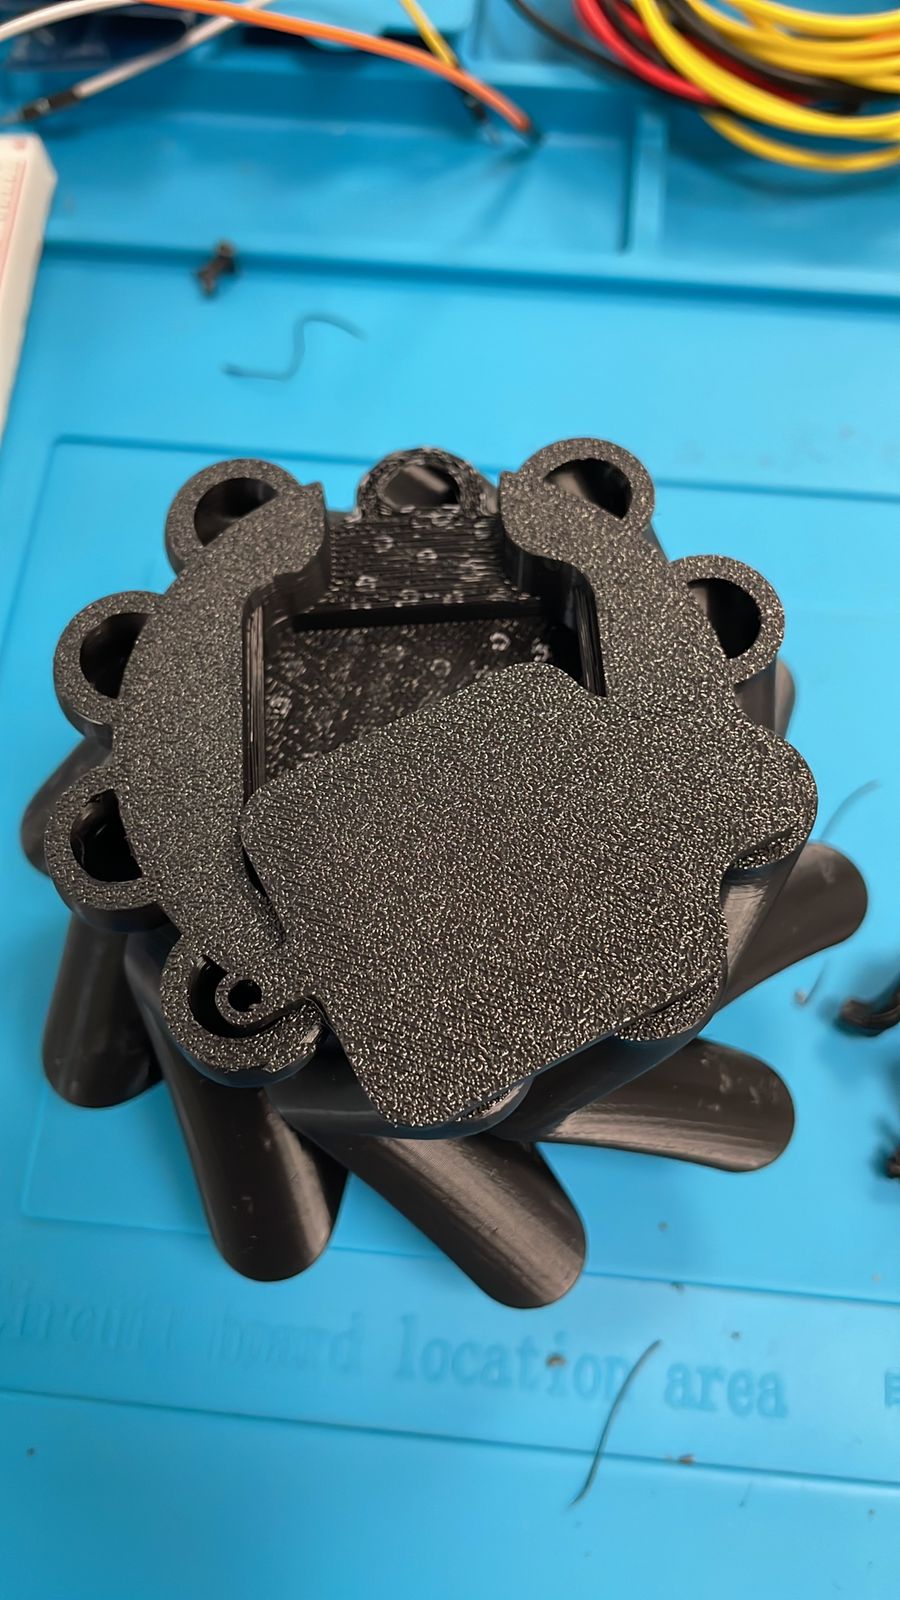
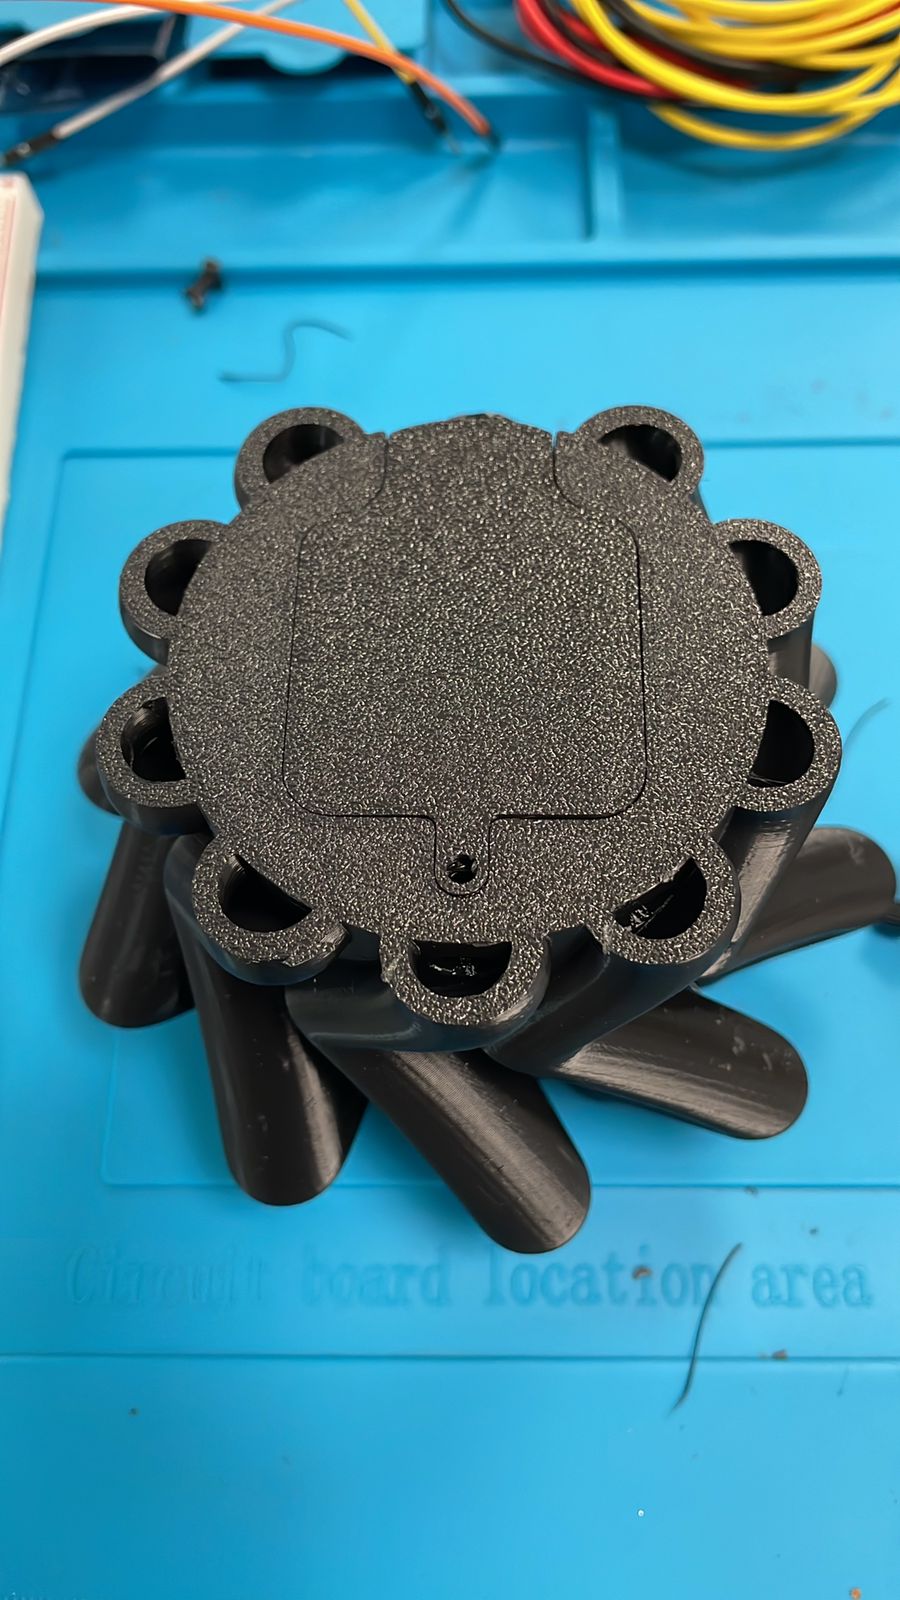
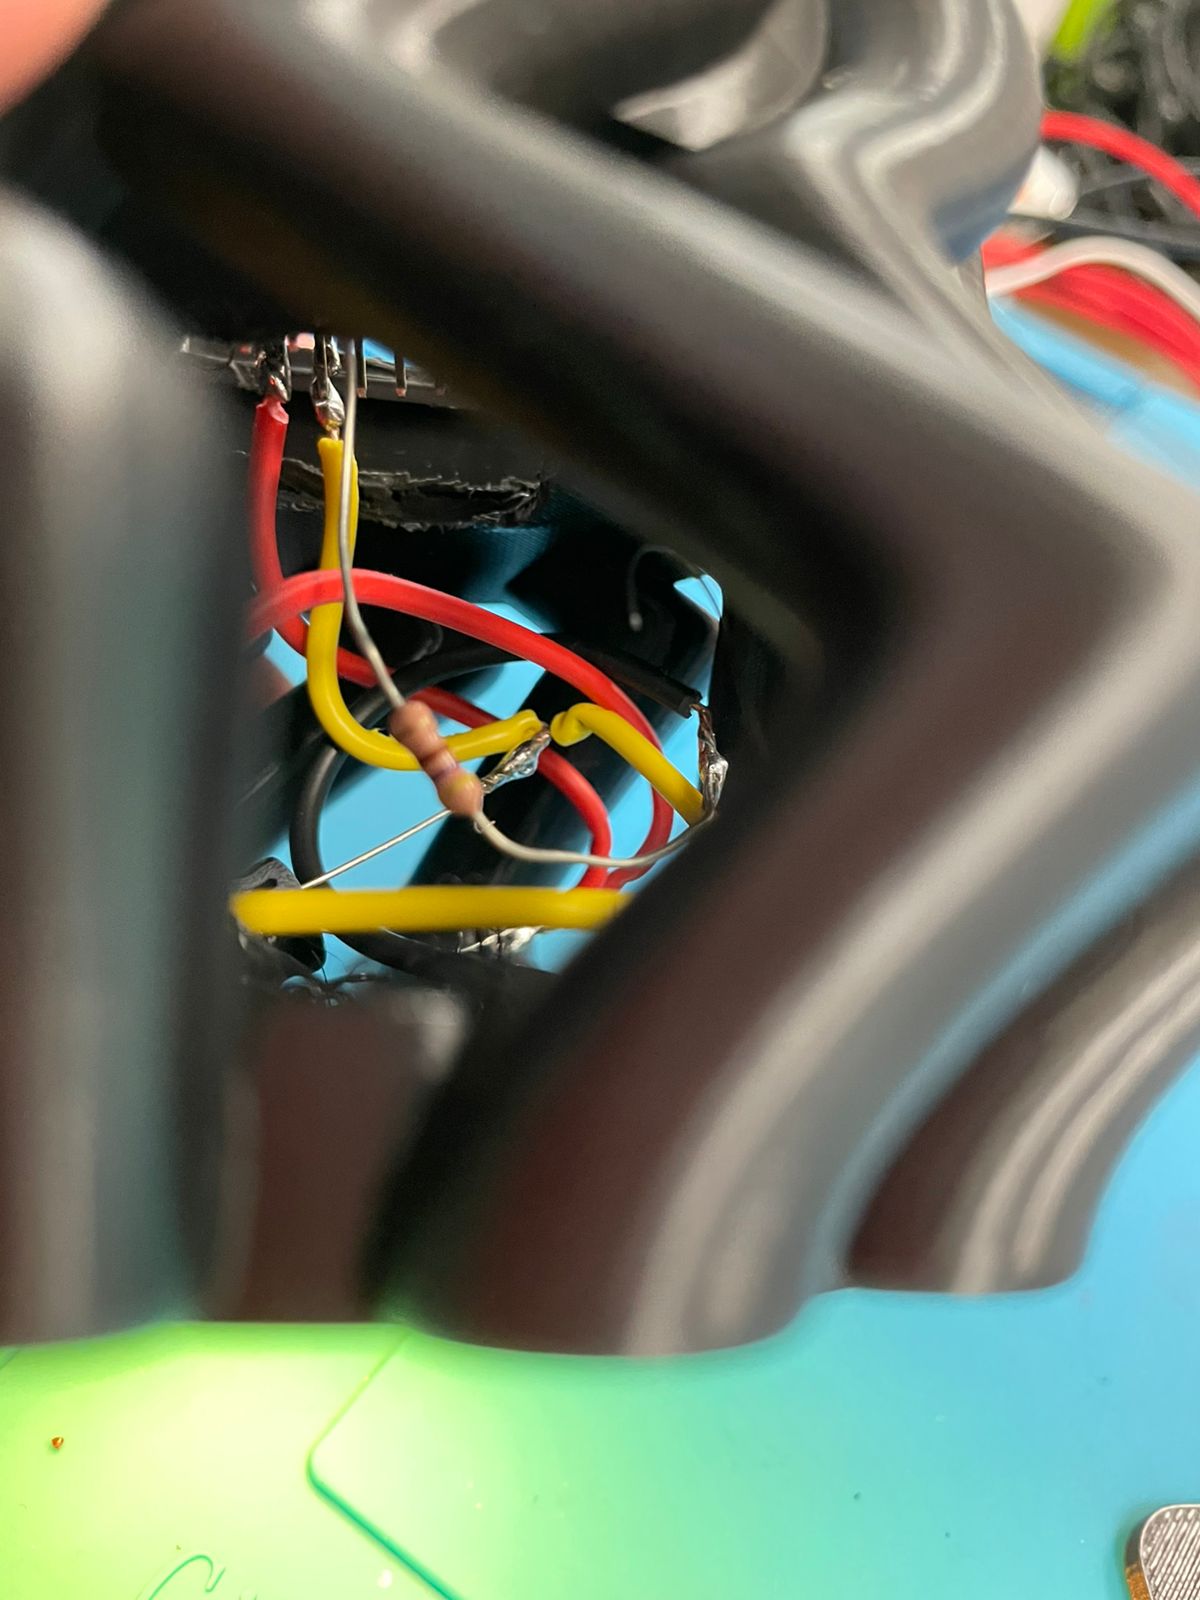
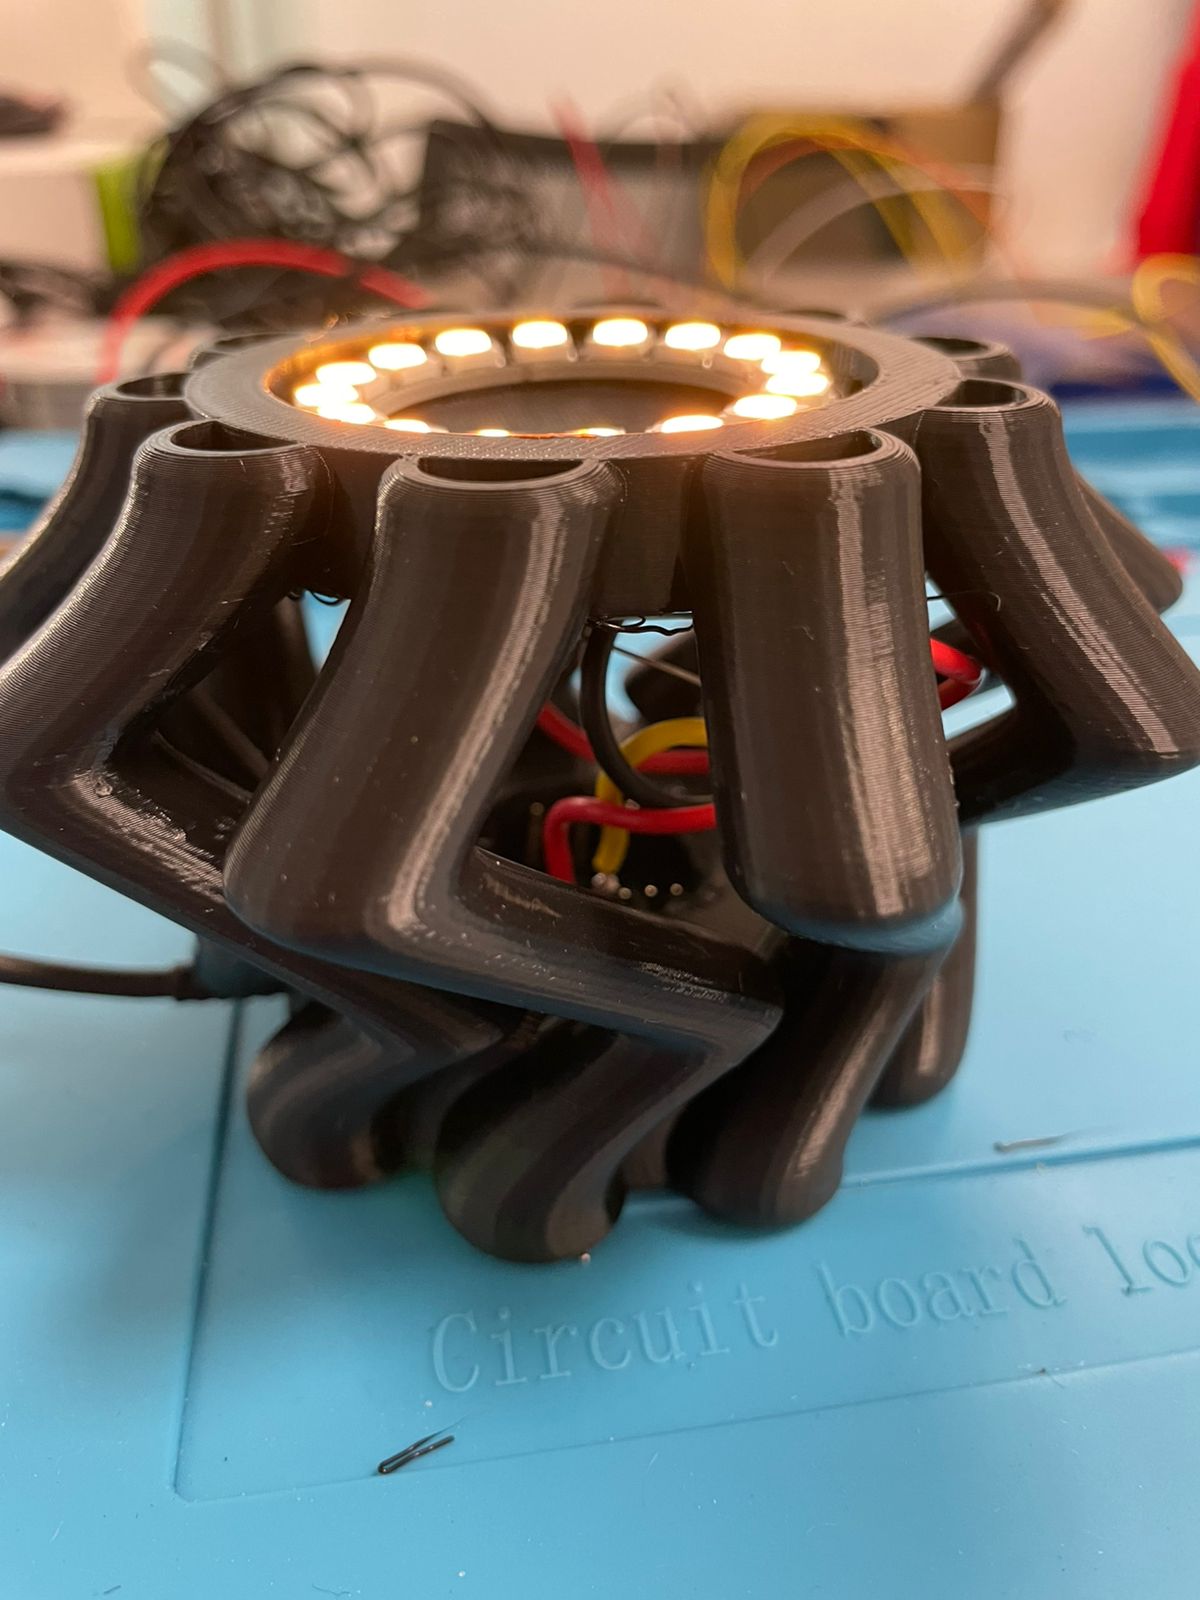
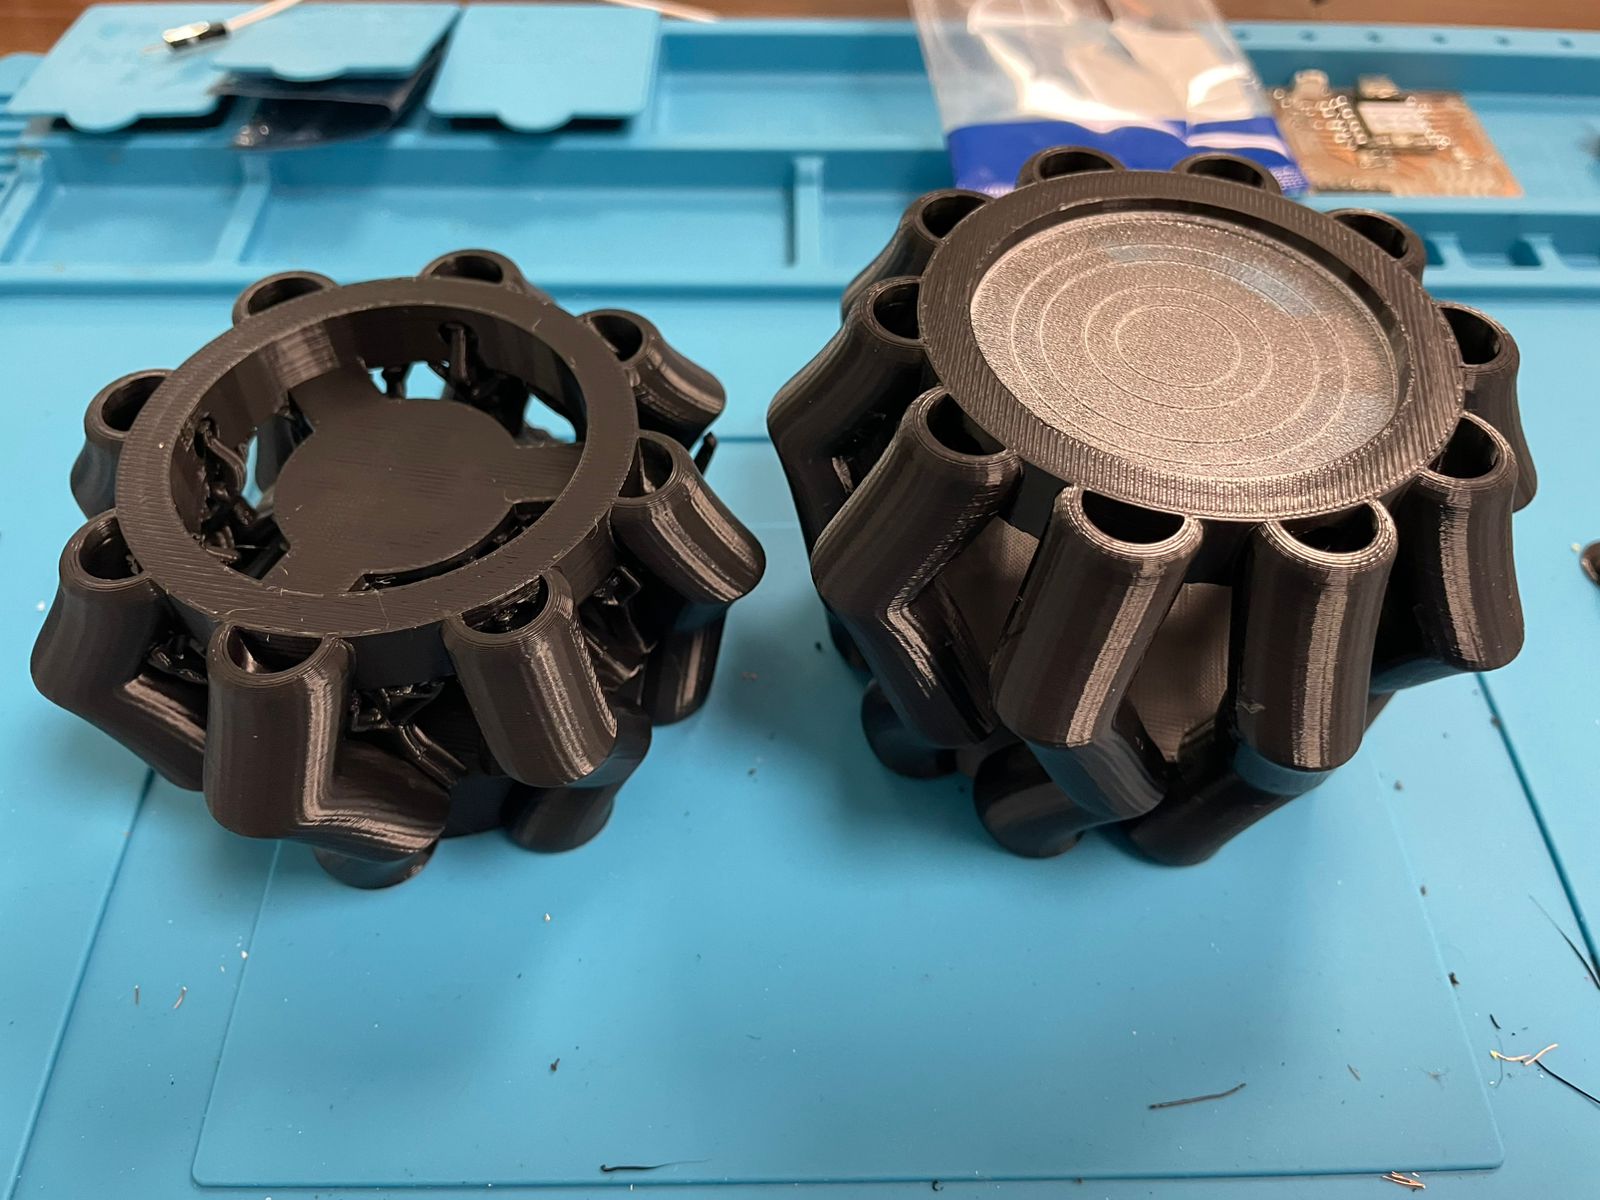
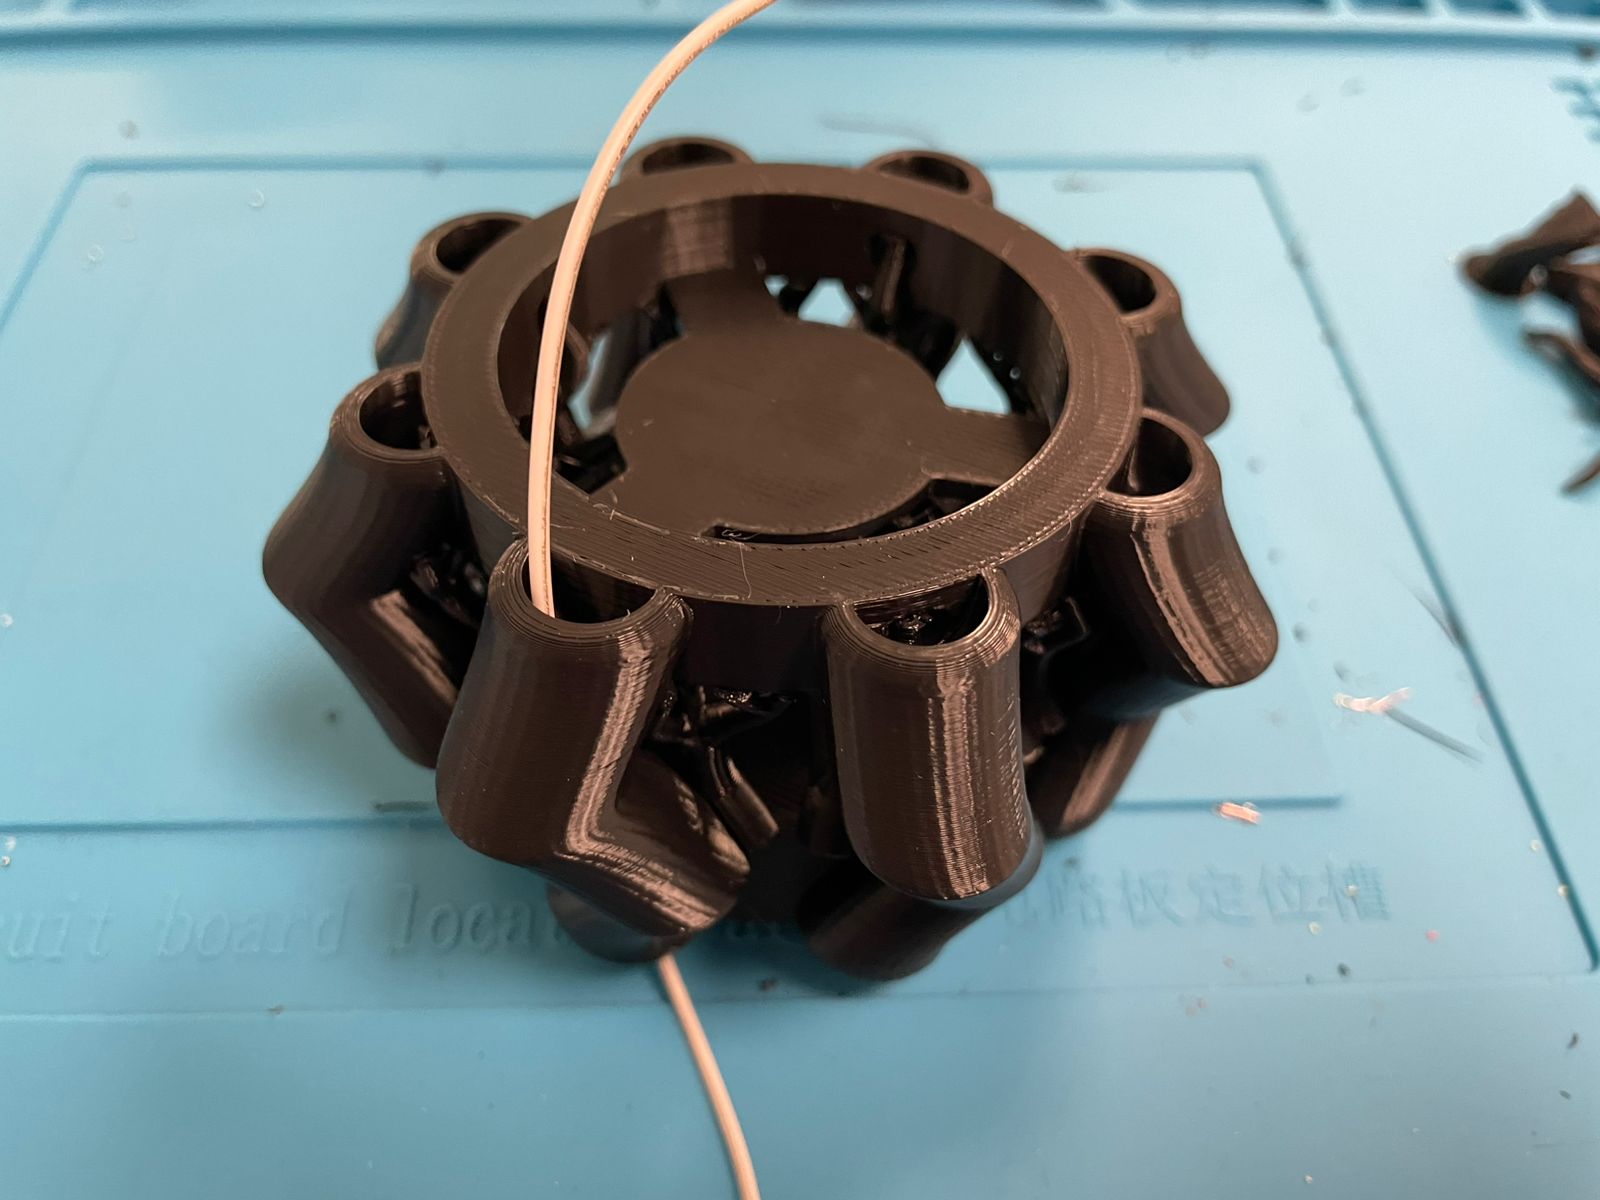
First Attempt: A total eyesore but technically functional. The cables were completely exposed, and the overall design looked messy. The tree supports worked, but they wasted way too much material. On the other hand, the central section lacked enough support, leading to a near-spaghetti mess in the middle.
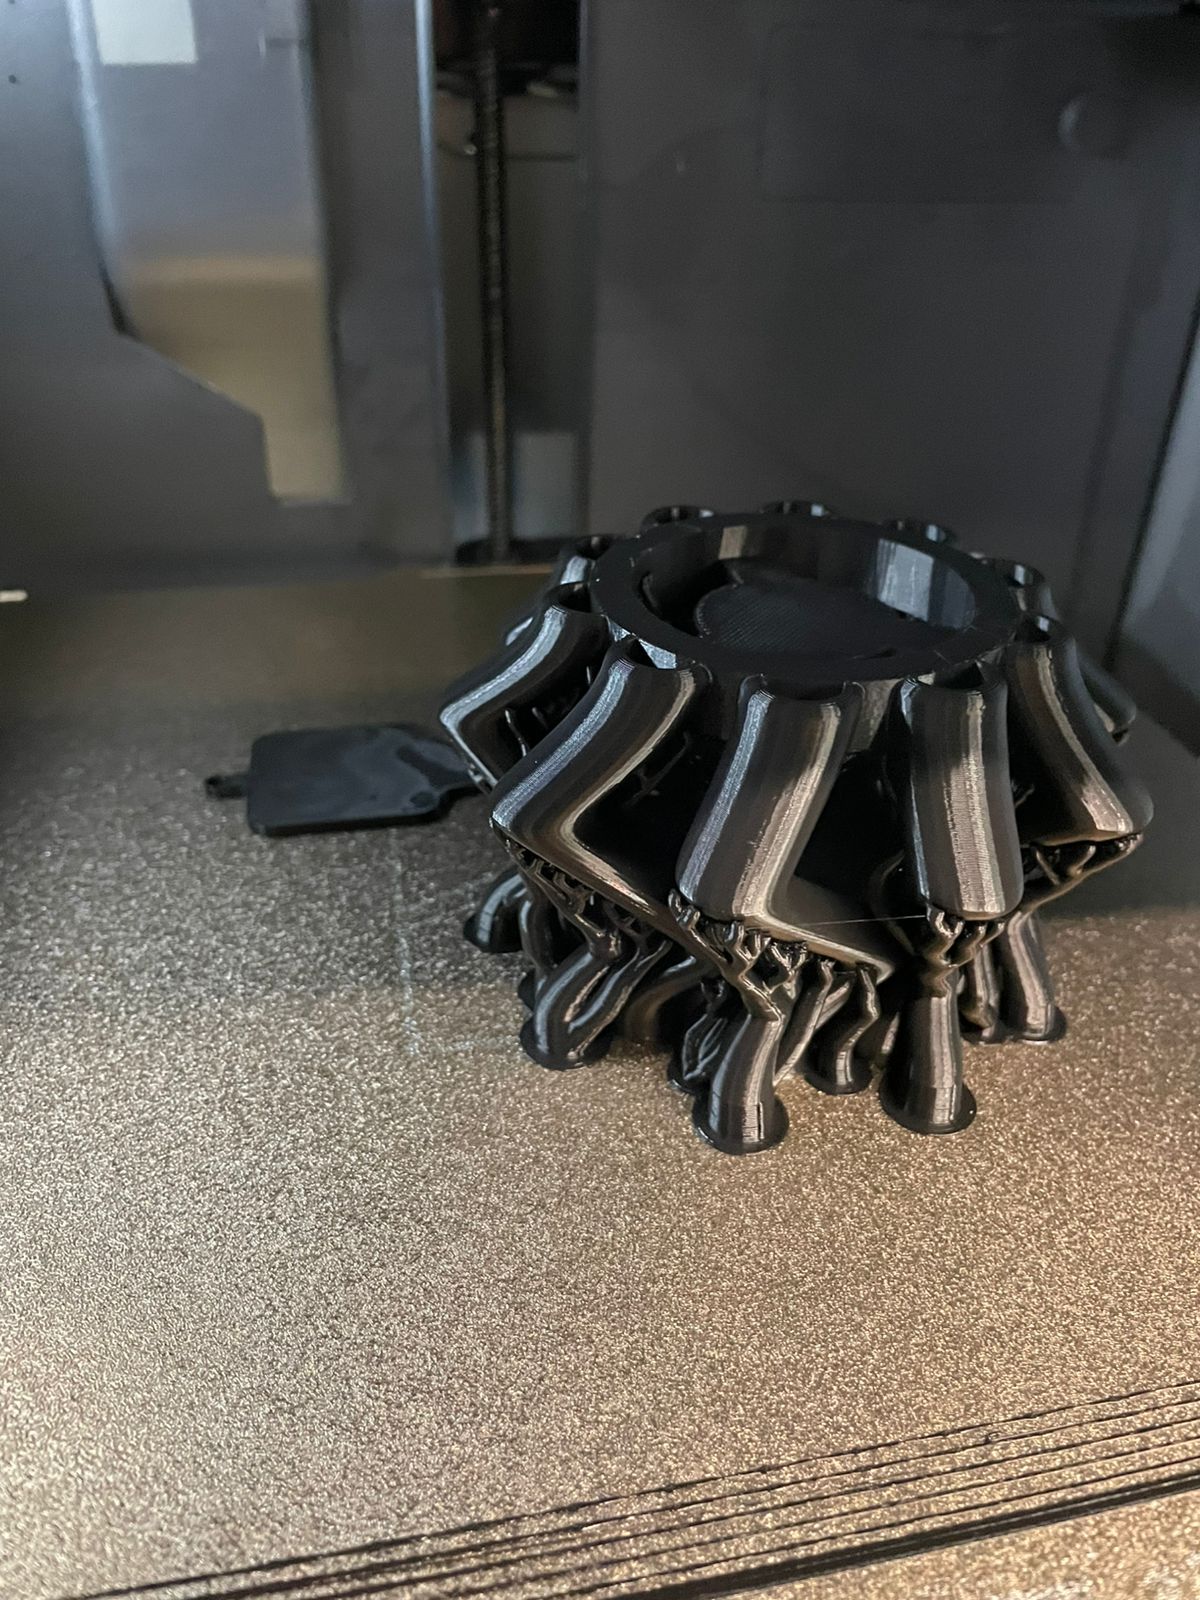
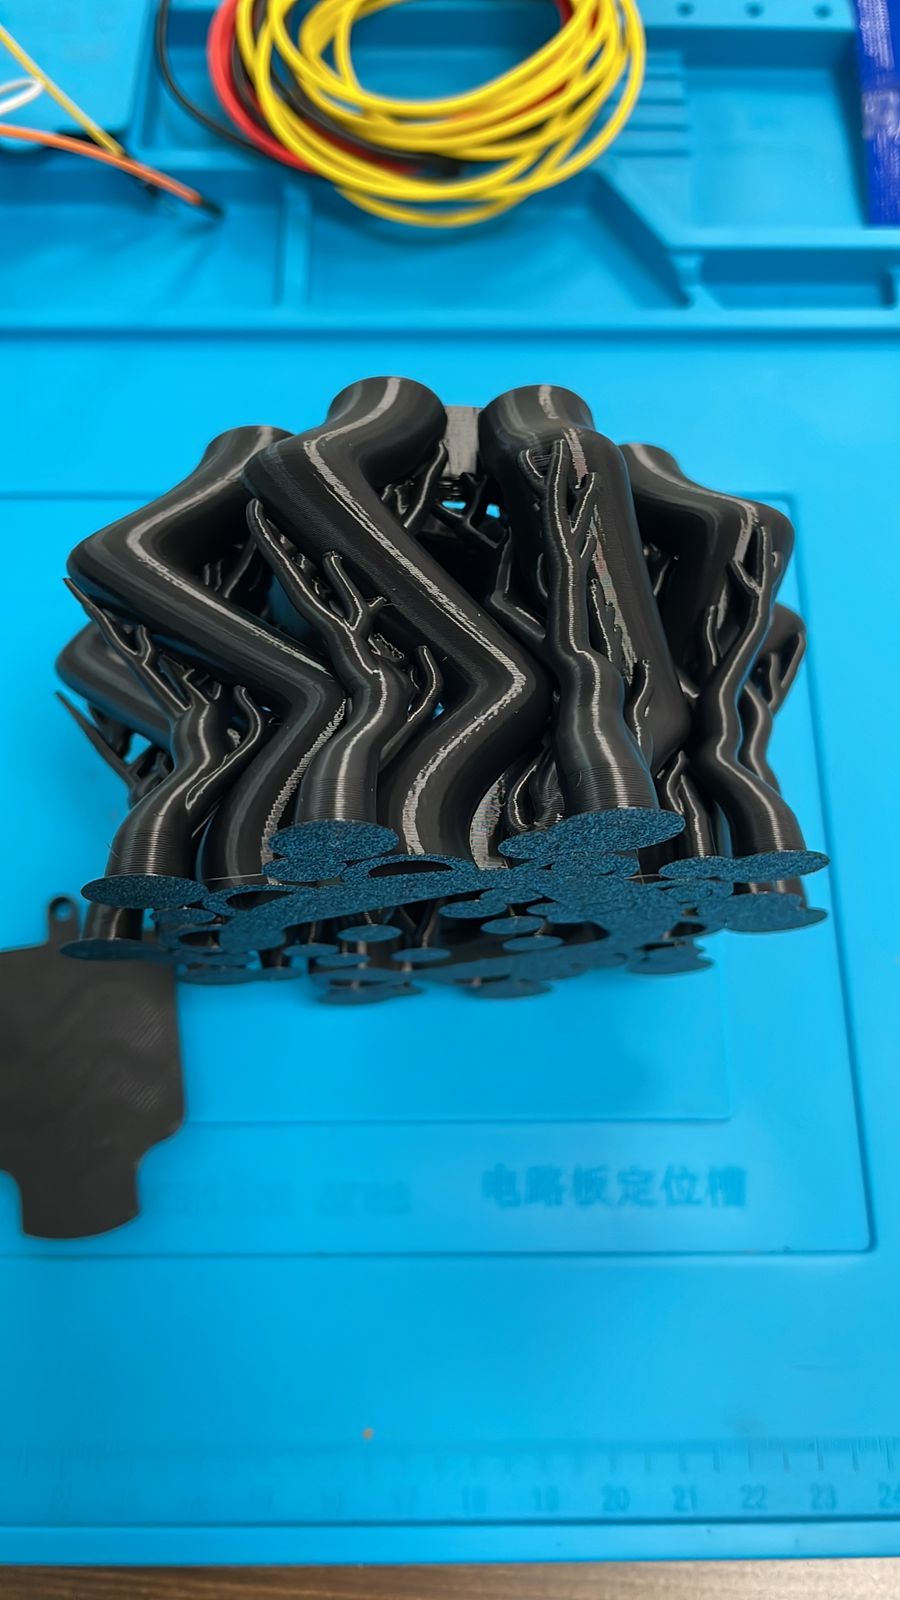
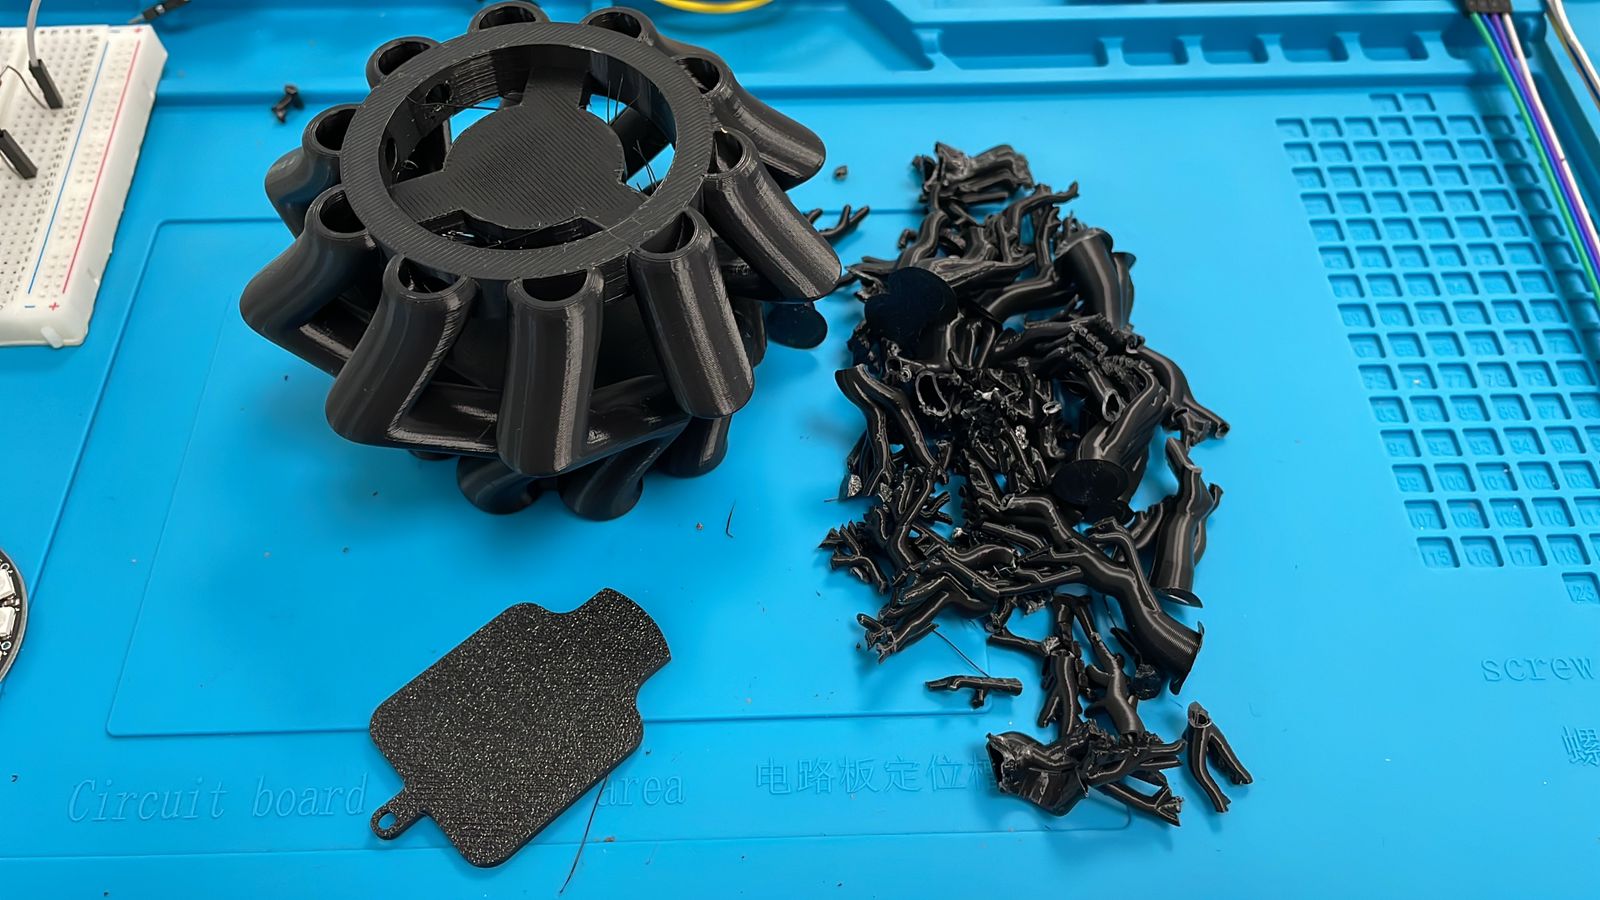
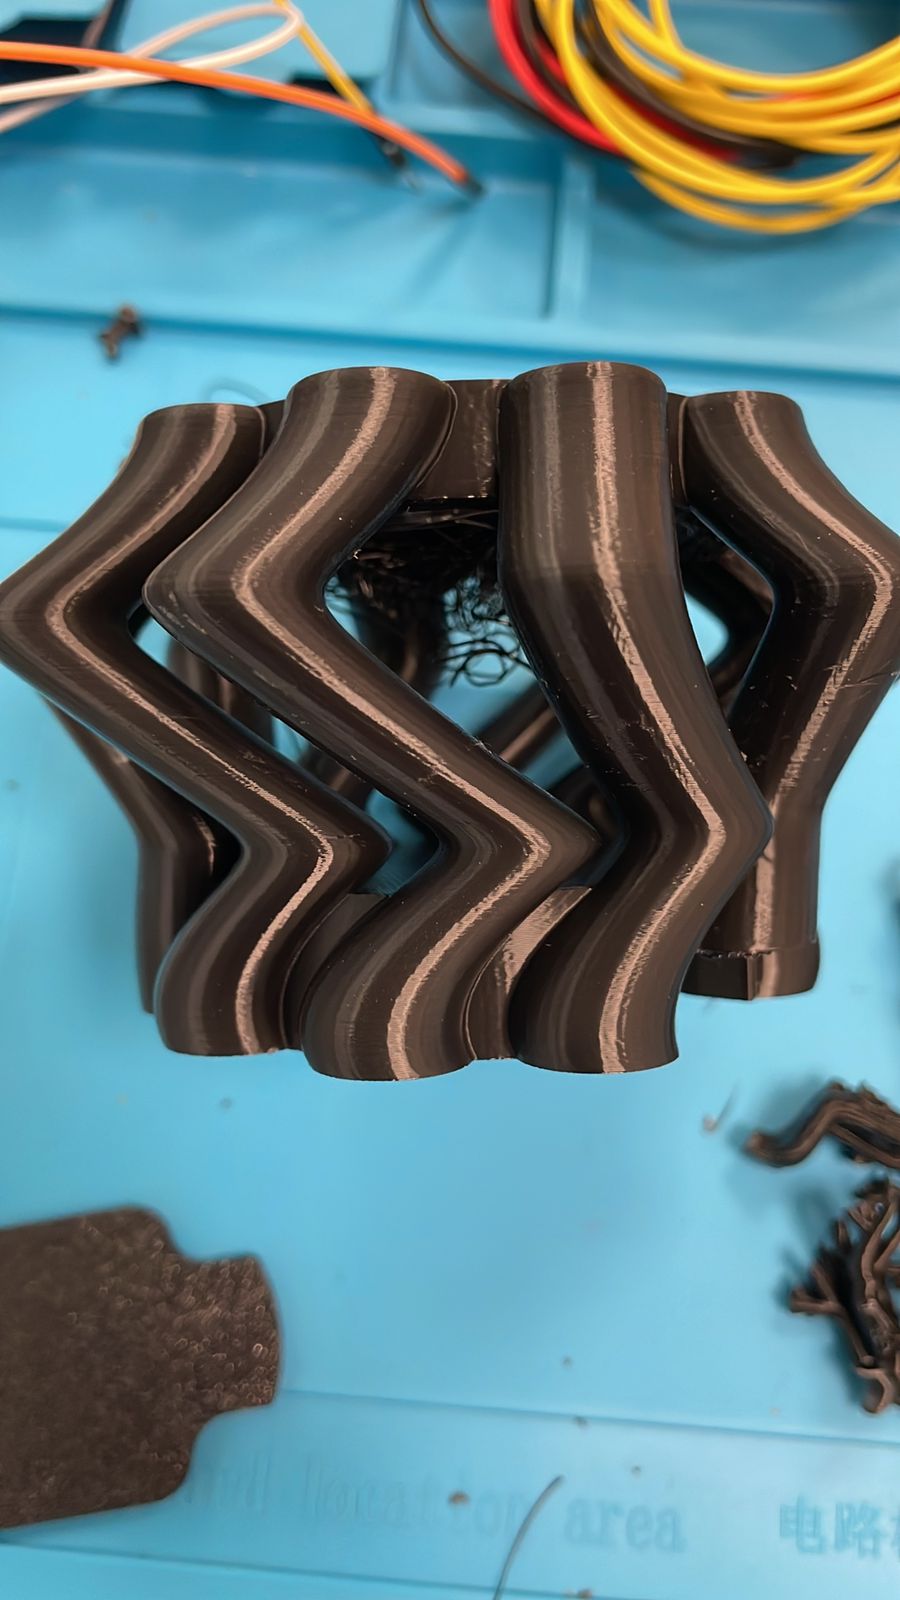
The top and bottom sections looked fine, but the interior was a disaster. Proper cable management was impossible since the internal space was obstructed. I had to manually cut a hole in the bottom just to fit the cables and the ESP32-C6.
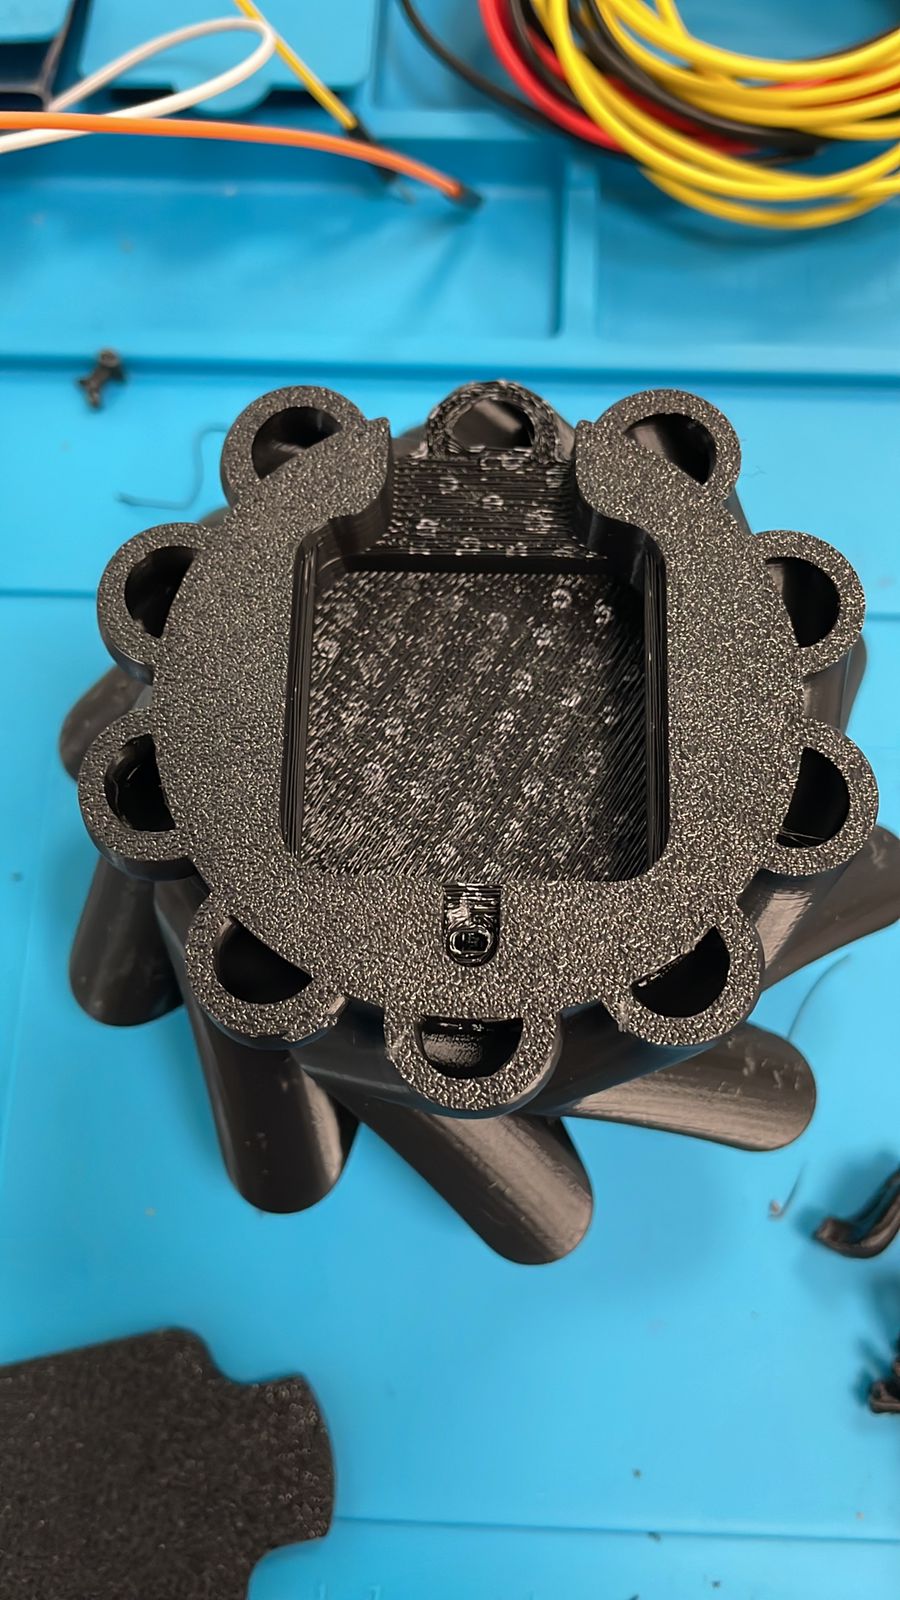
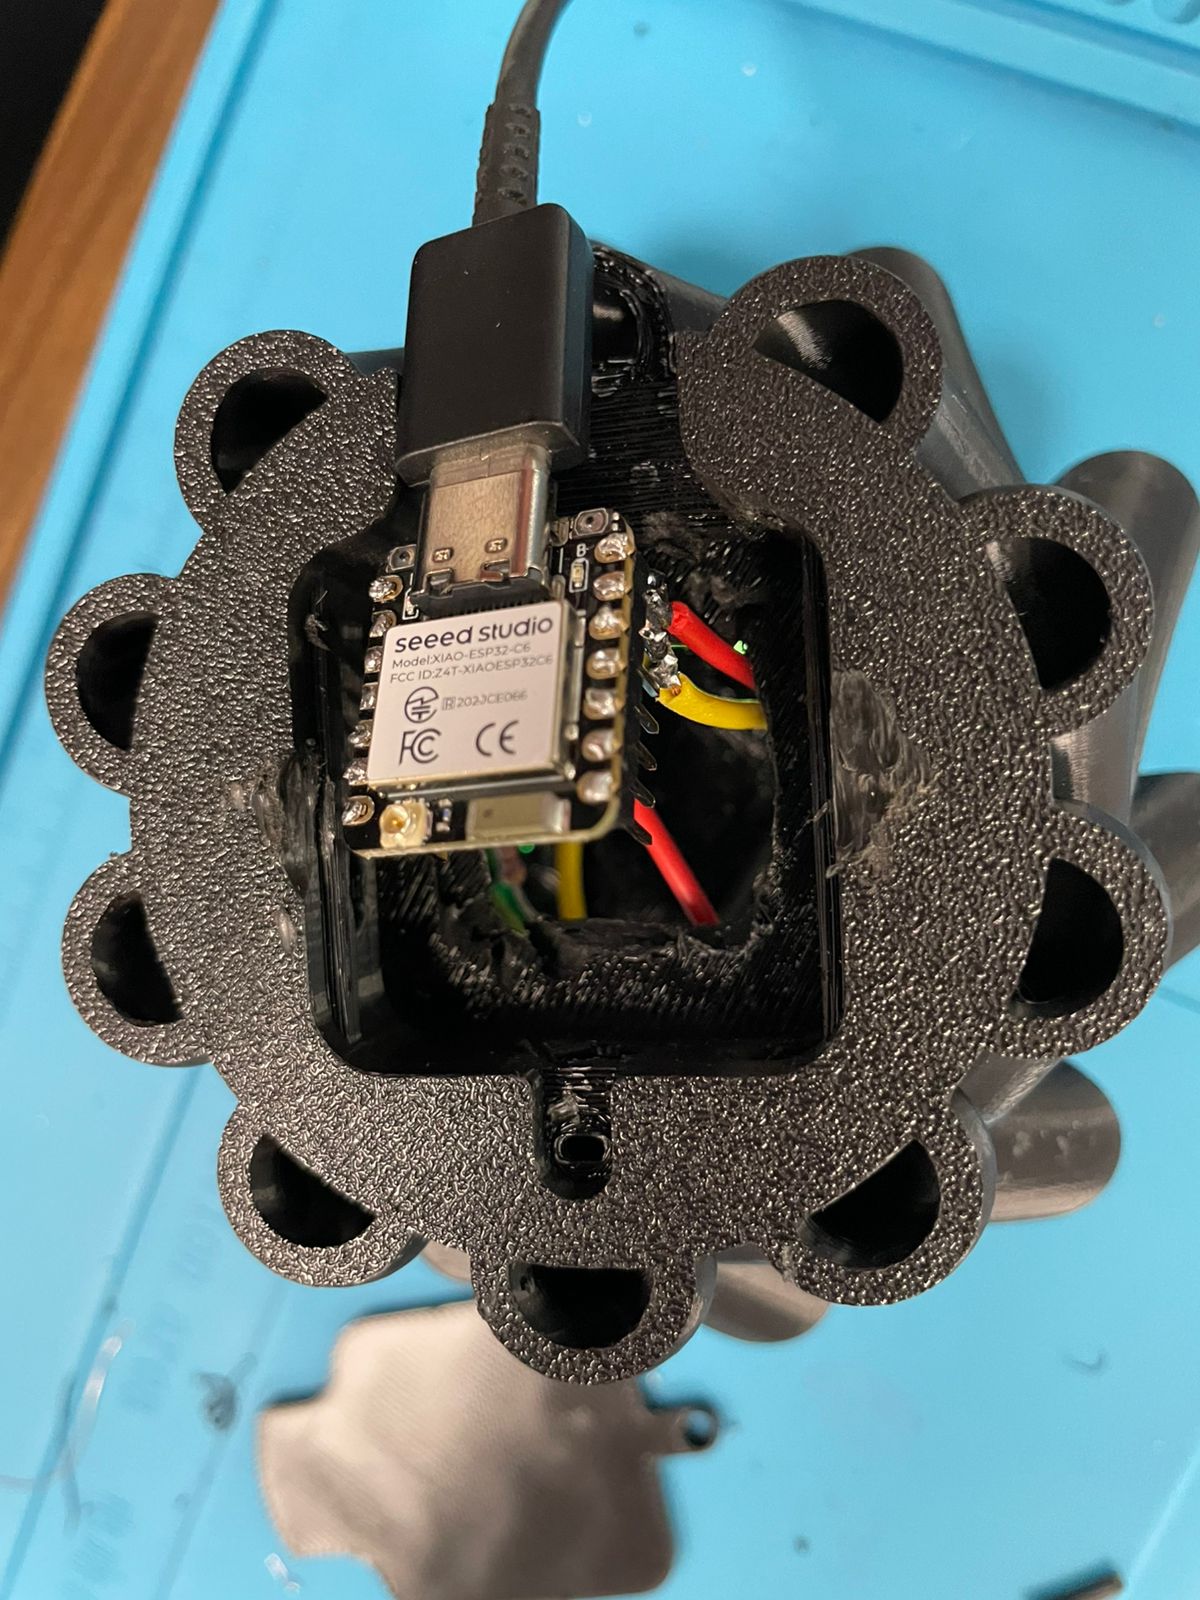
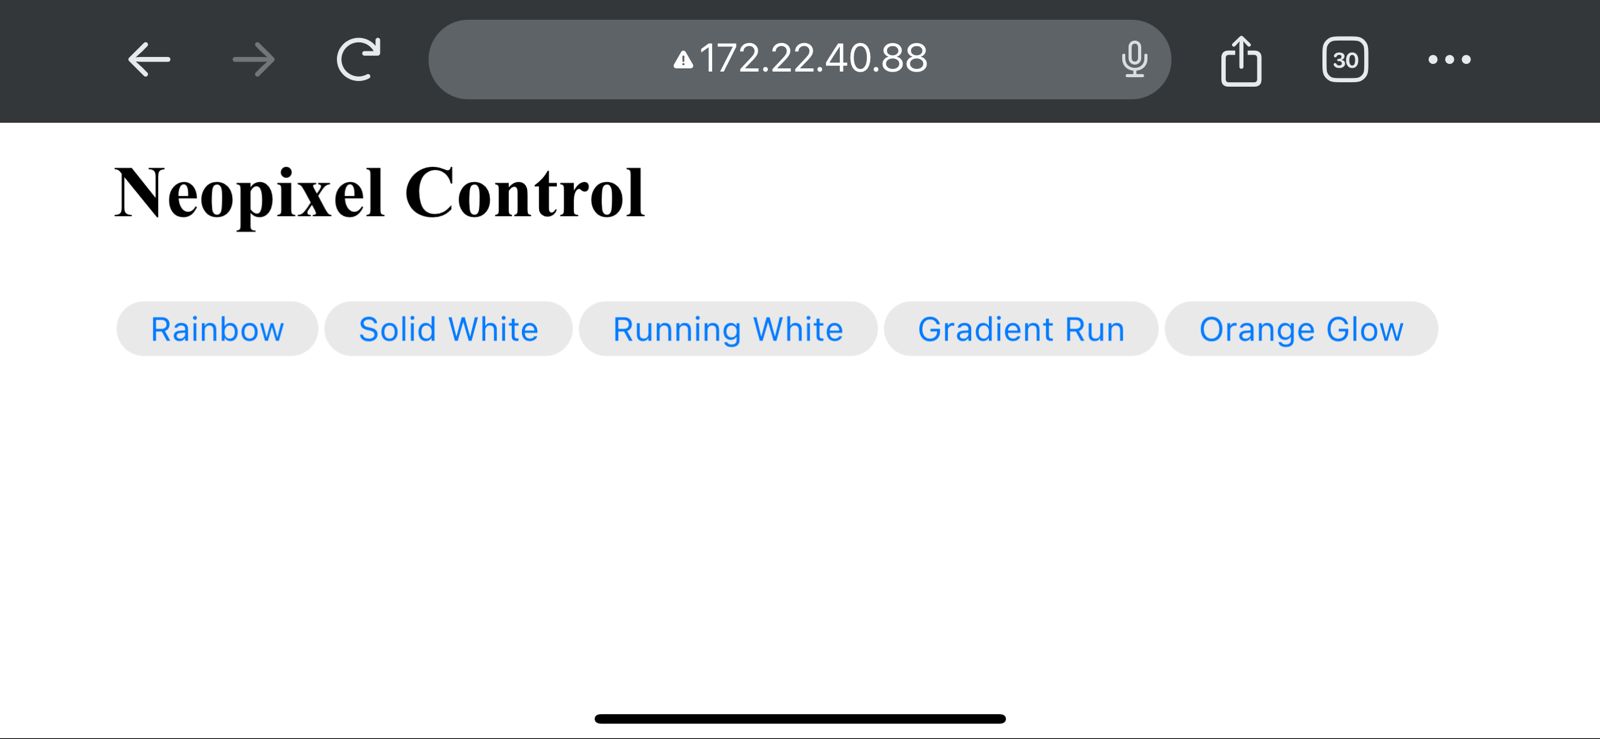
It might not win any beauty contests, but as a prototype, I love it! The first test was a success, and I even managed to create a simple web interface to control the light settings.

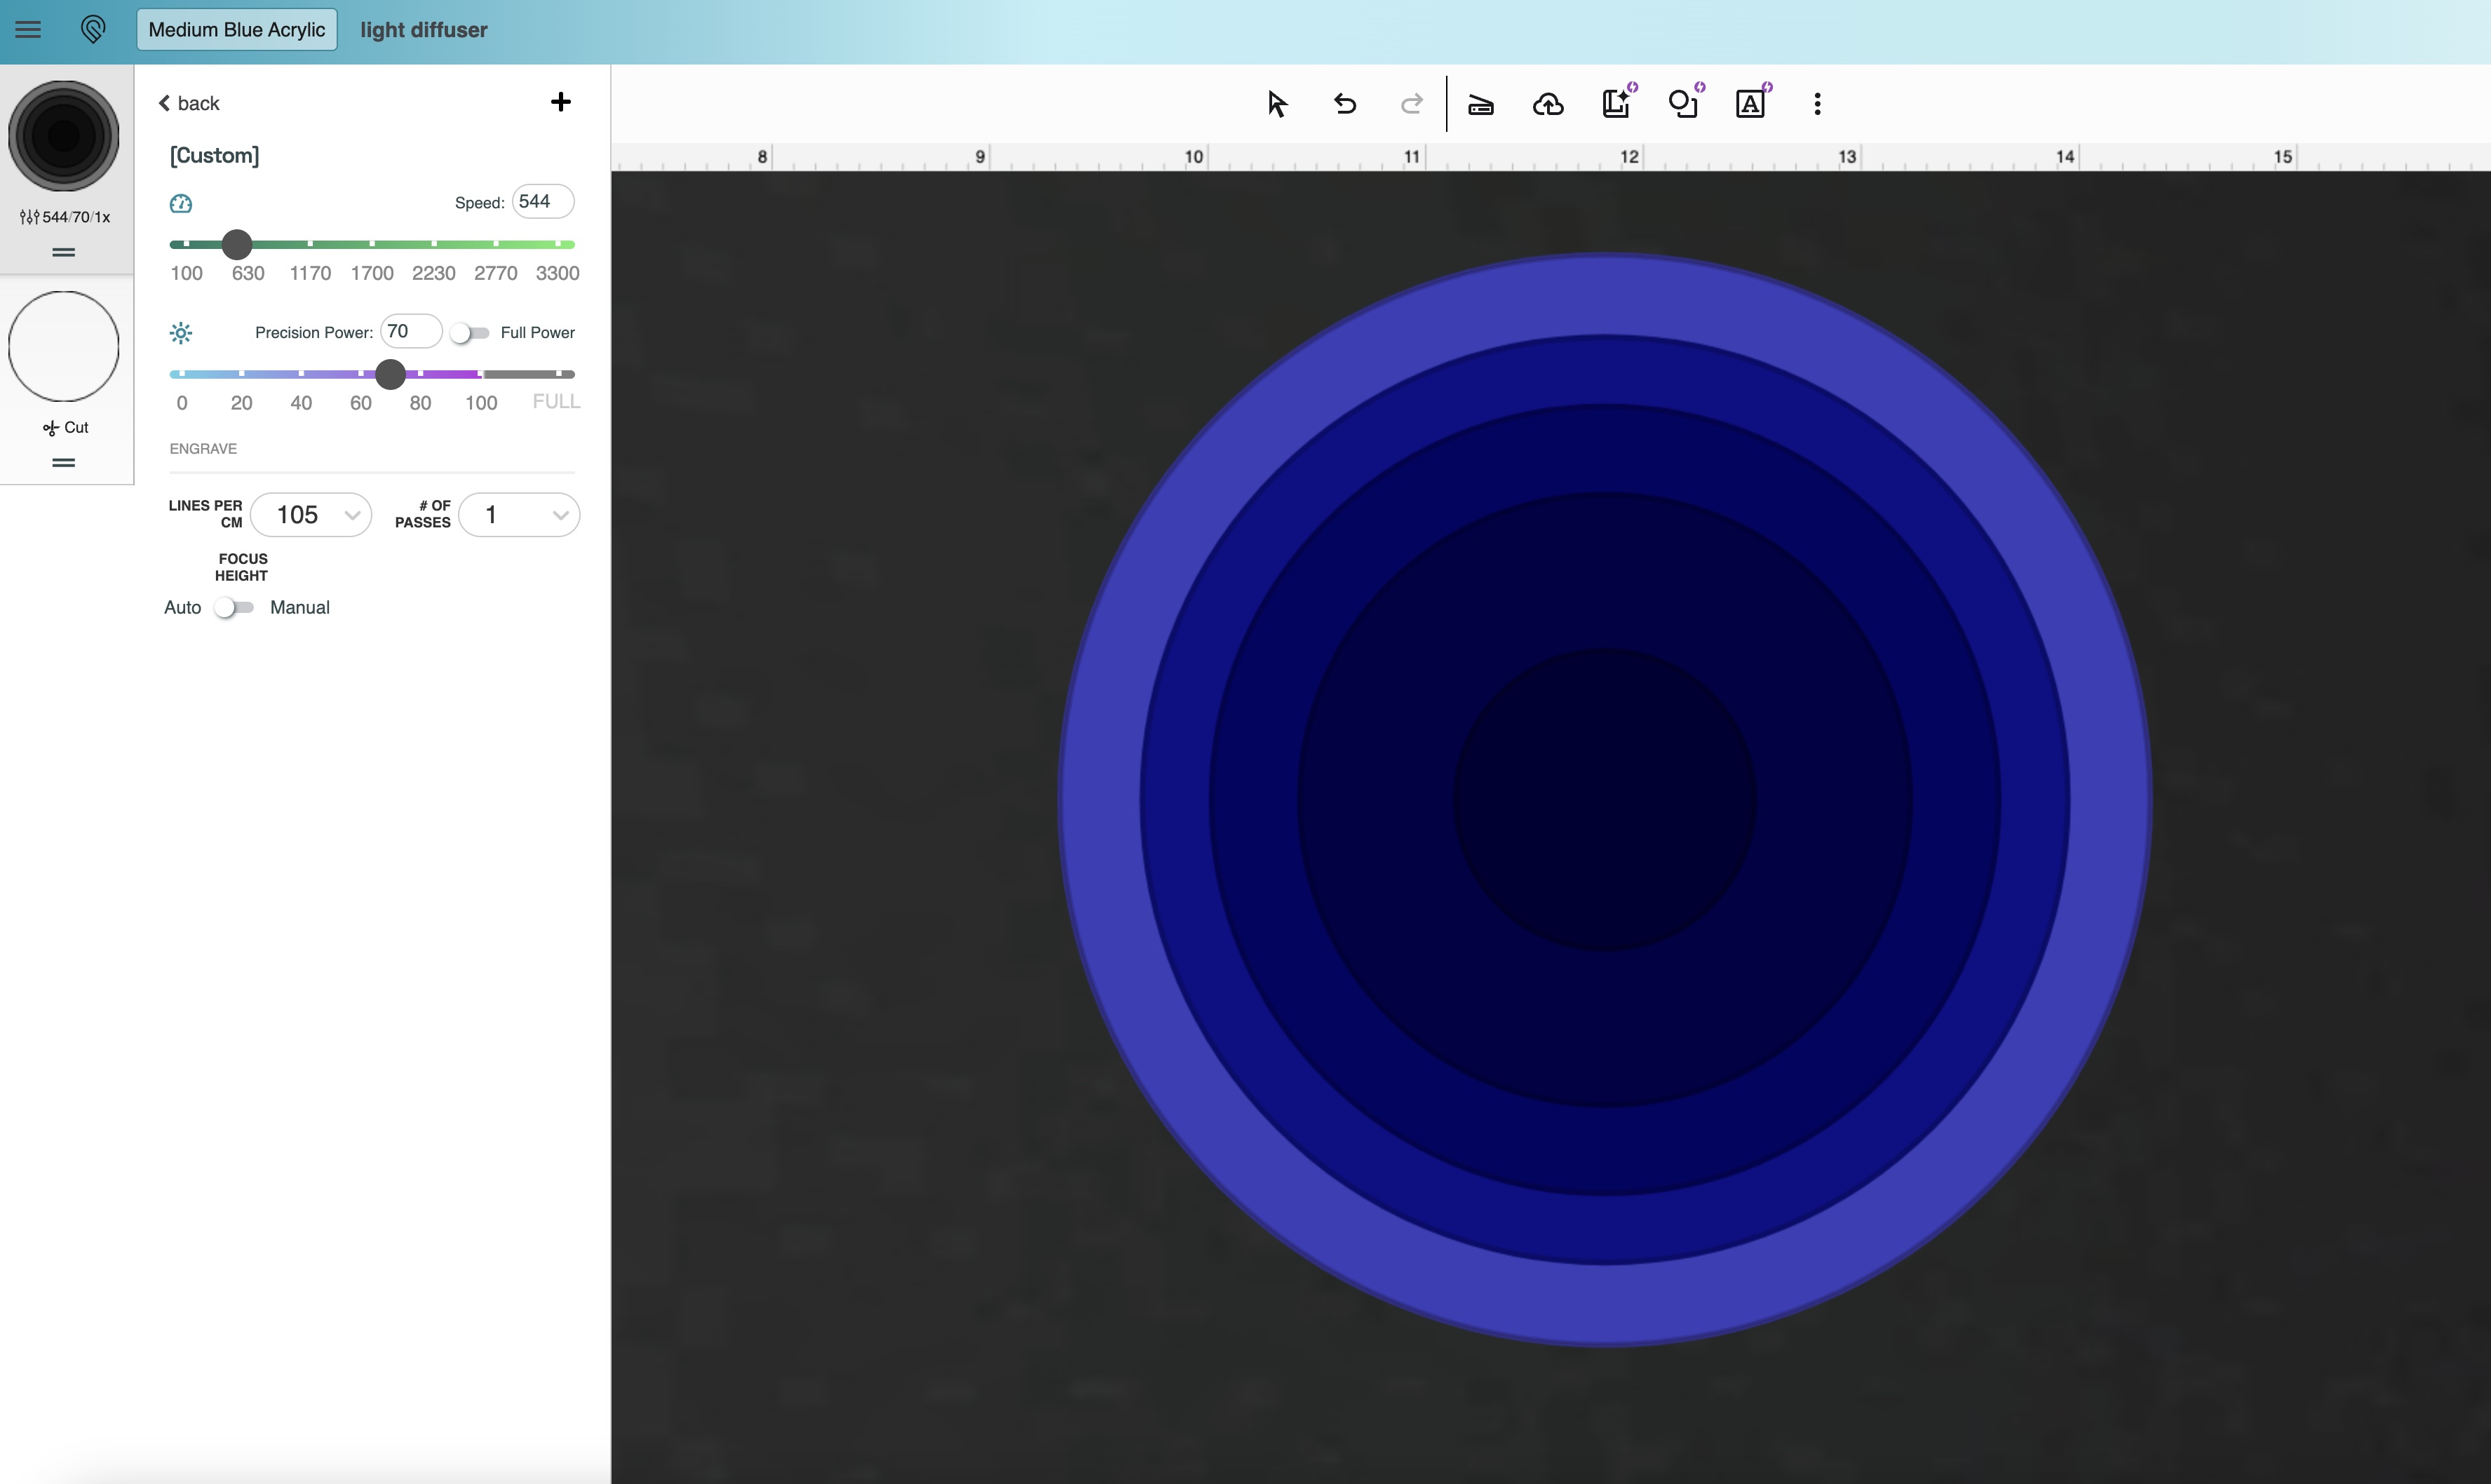
Second & Third Attempt: A huge improvement! Cable management was much better, though there was still room for refinement. The third version was more compact and used less support material, making it more efficient to print. I even added an acrylic light diffuser for a cleaner lighting effect. However, these latest versions will have to wait until I design a better circuit board to match the overall build.
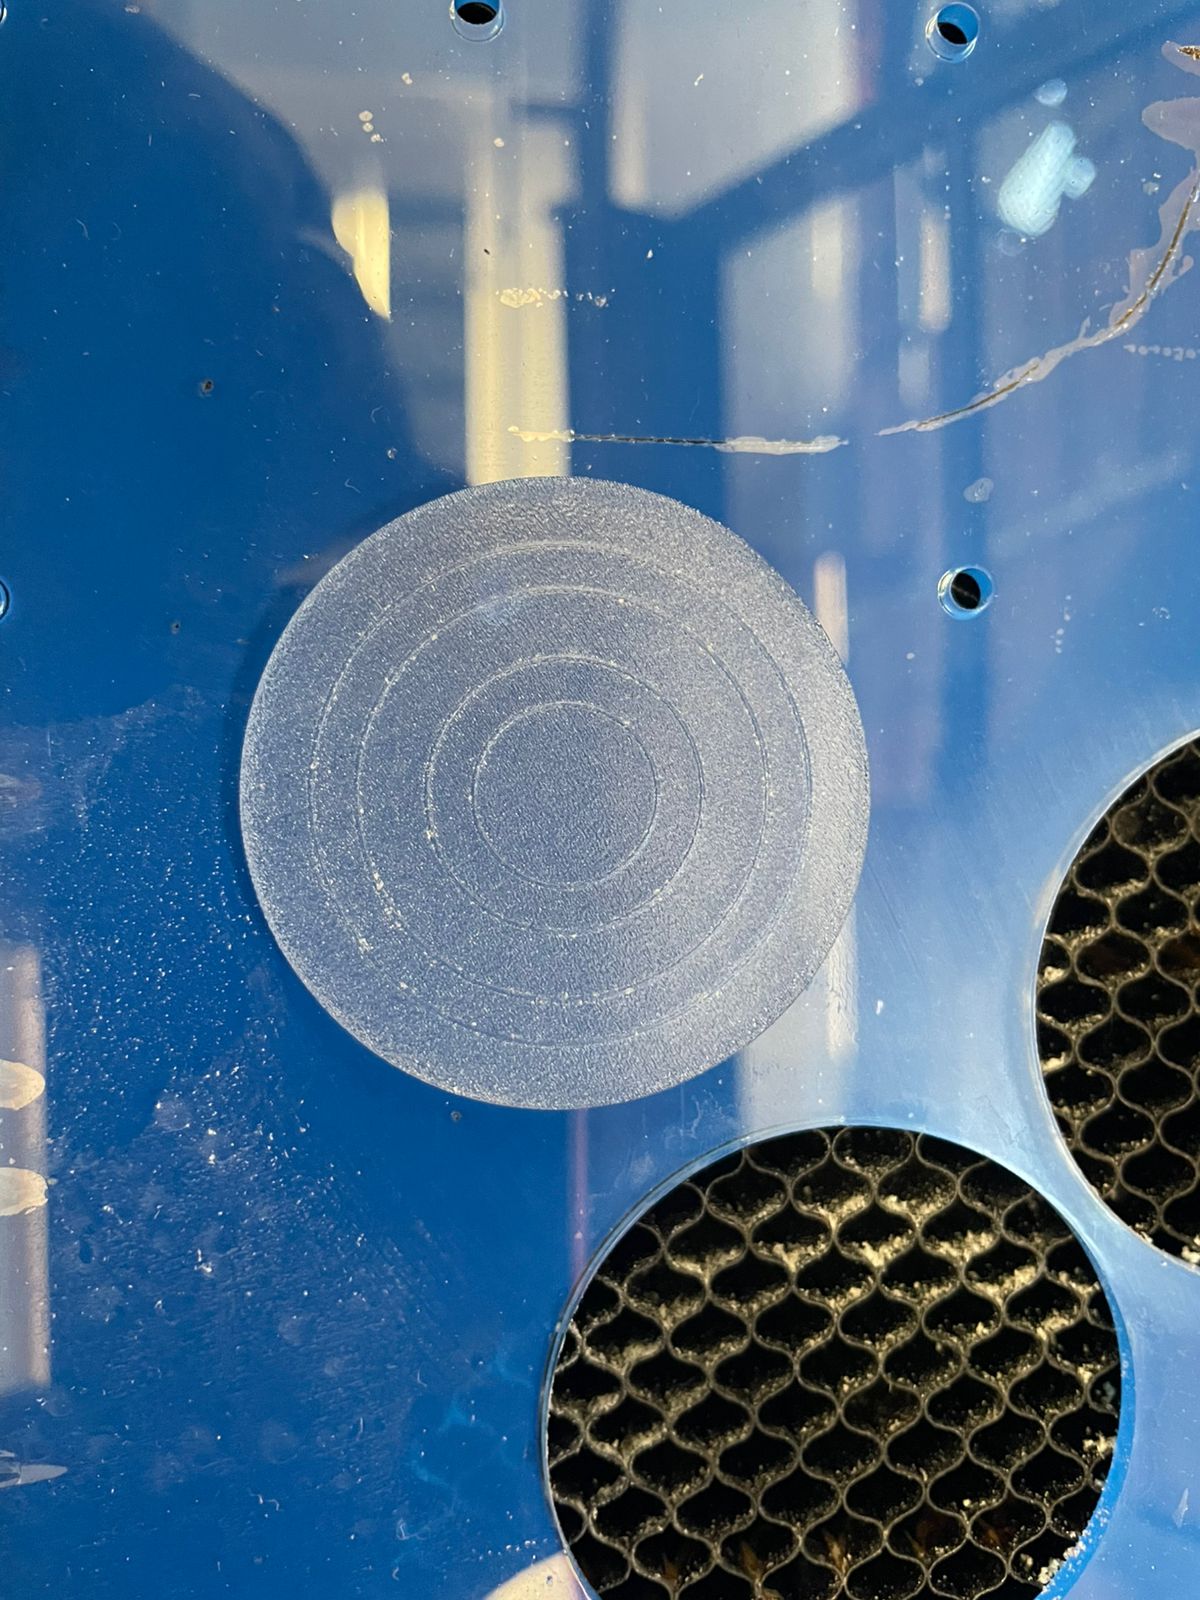
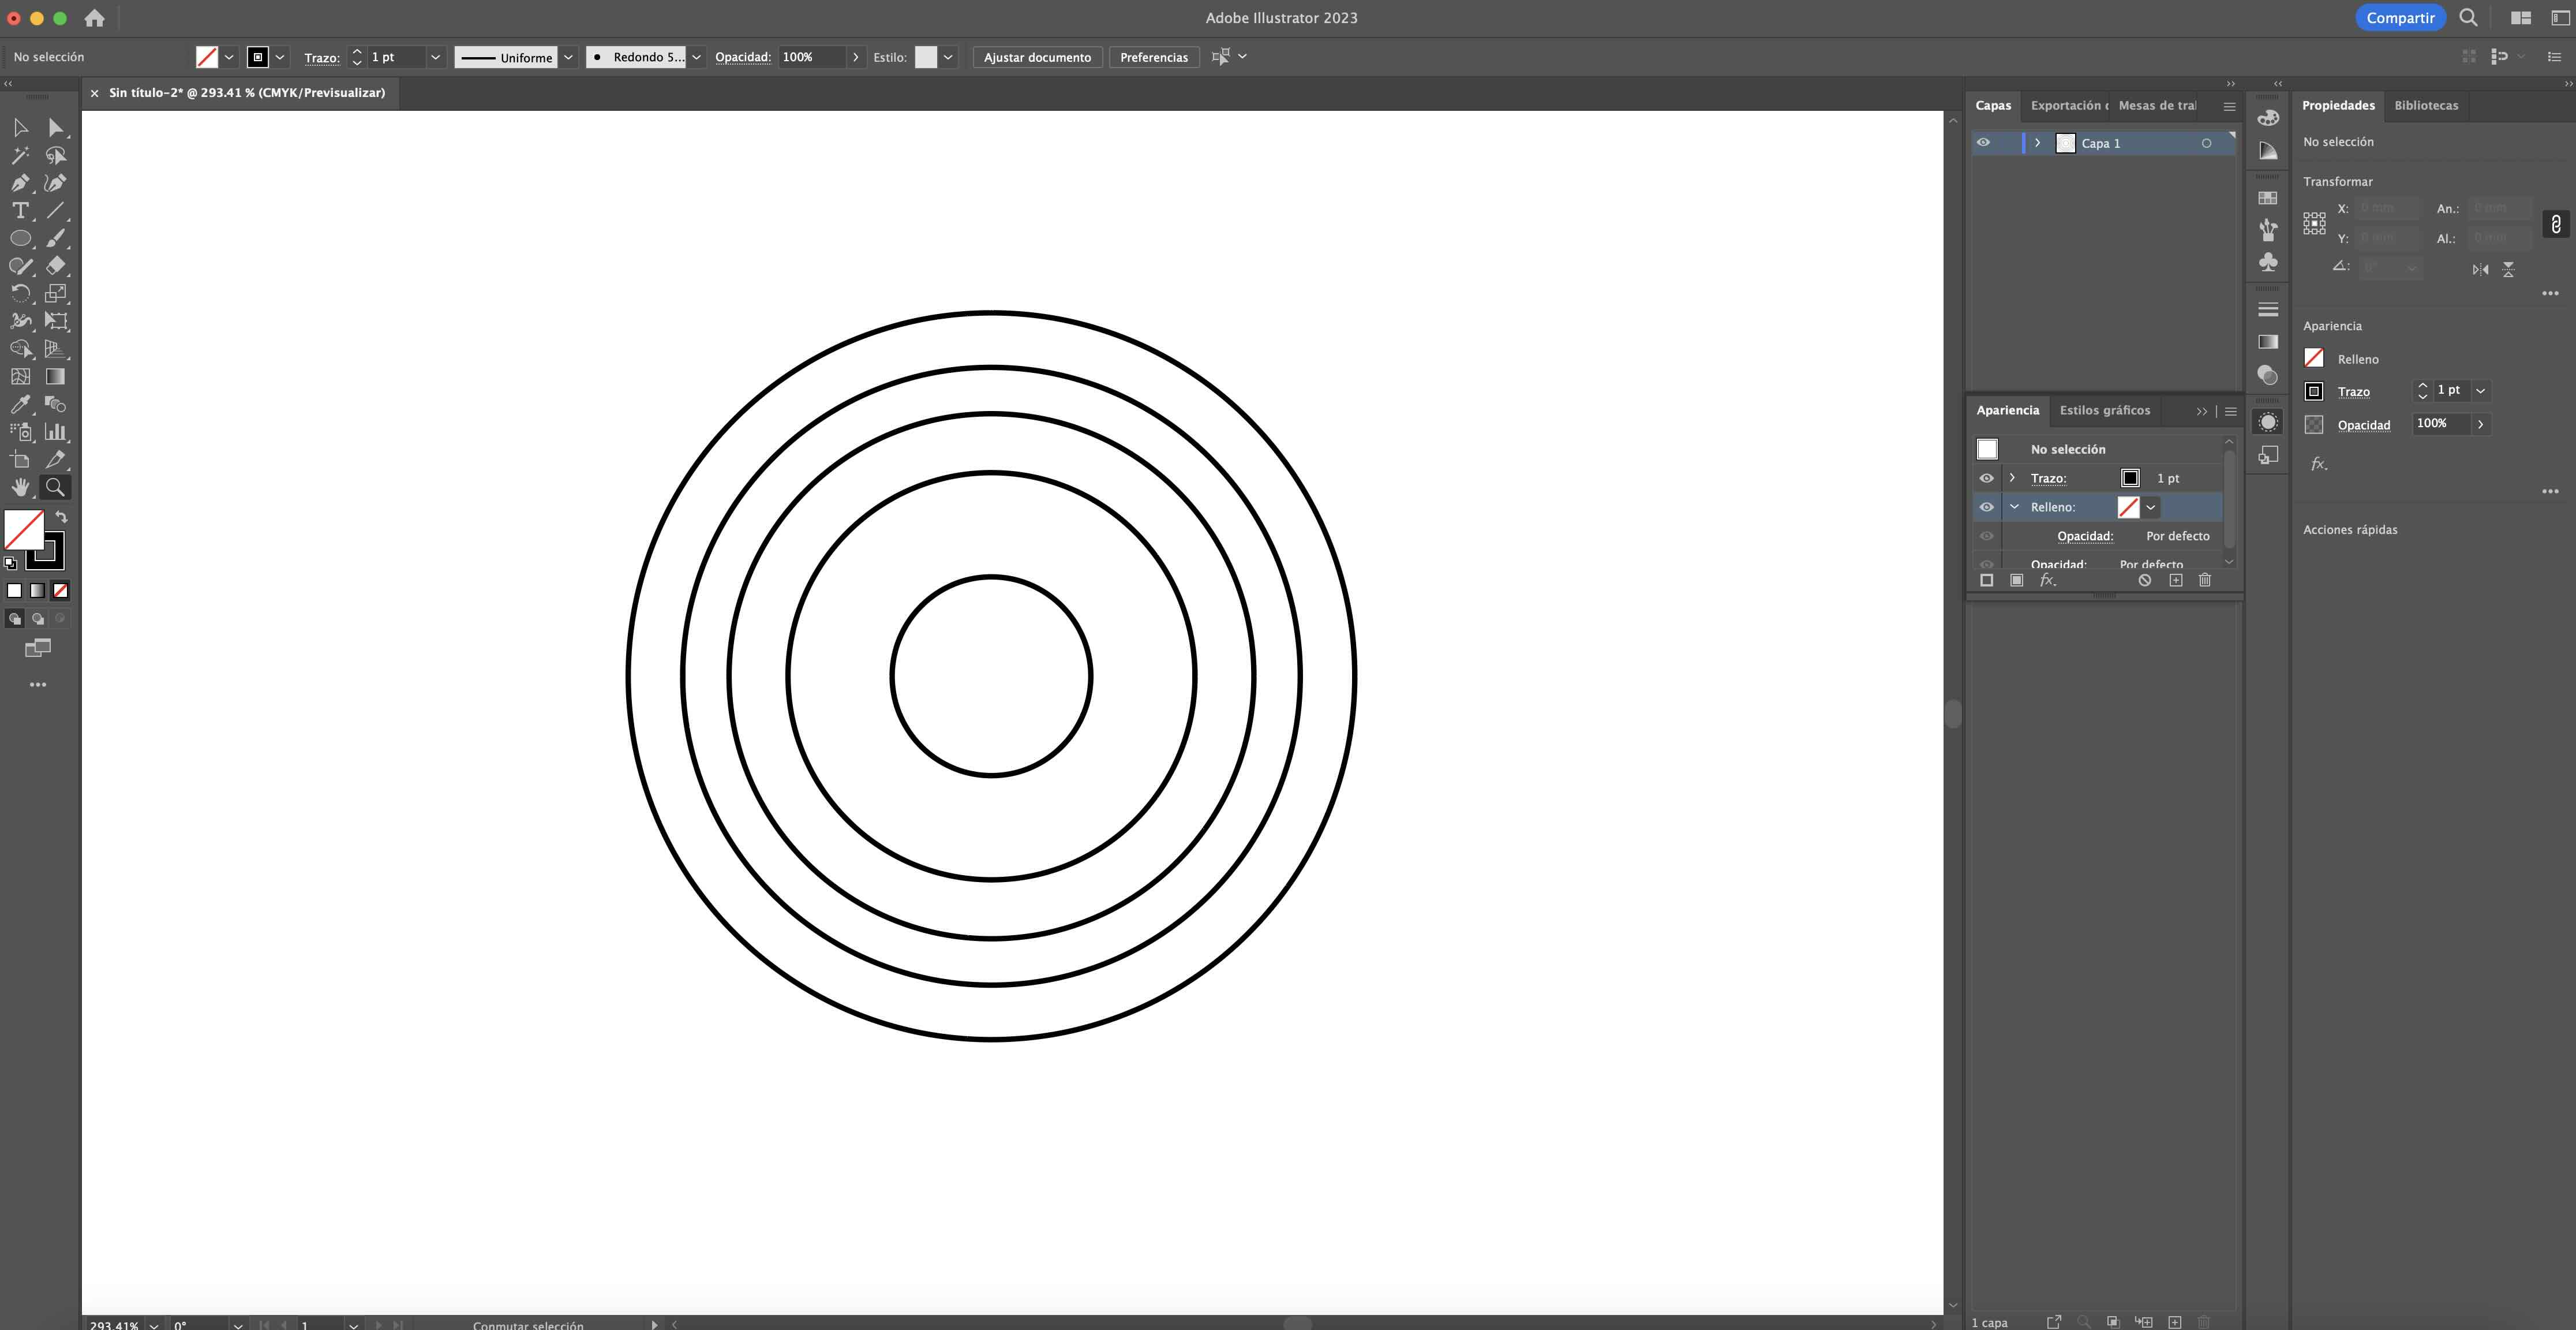
For this project, I made an acrylic light diffuser. I designed and cut the acrylic piece using the Glowforge laser cutter. If you want to see more details about how I worked with the Glowforge, you can check my documentation from Week 3, where I explain how the machine works and the process I followed.
Final Hero Shots
Here are some hero shots of the final result:
Future Integration
This mini-project is more than just a 3D printed object. It will integrate multiple areas of digital fabrication:
- Electronics Design
- Output Devices
- 3D Printing
- Embedded Networking
As it stands now, this is just a "sketch" of the final mini-project that will evolve over the next few weeks!
3D Scanning Comparison: Qlone vs Polycam
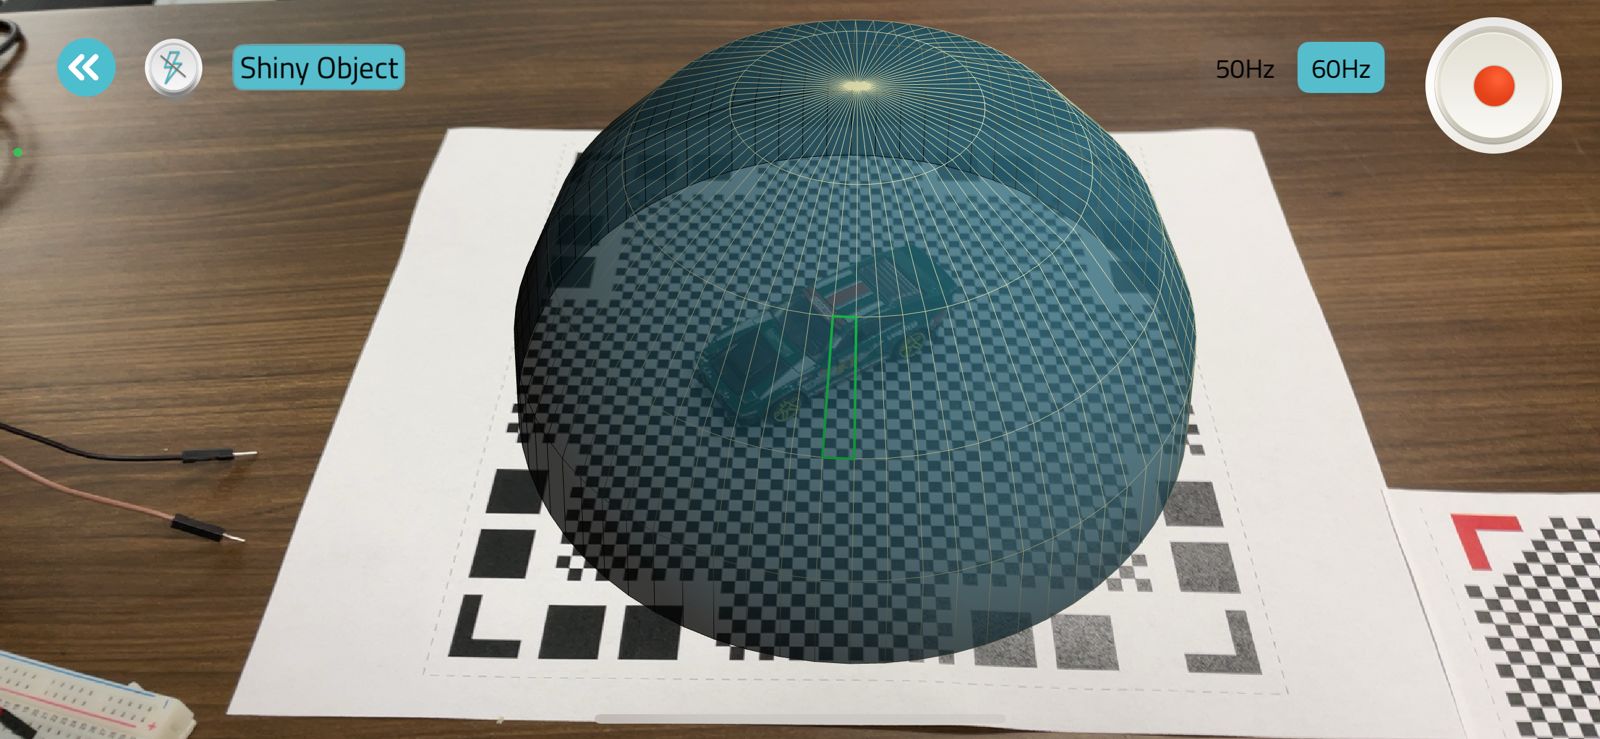
This week, I tested two iPhone apps for 3D scanning: Qlone and Polycam. The goal was to see which one was easier to use and produced the best results.
| Qlone | Polycam |
|---|---|
|
|
|
|
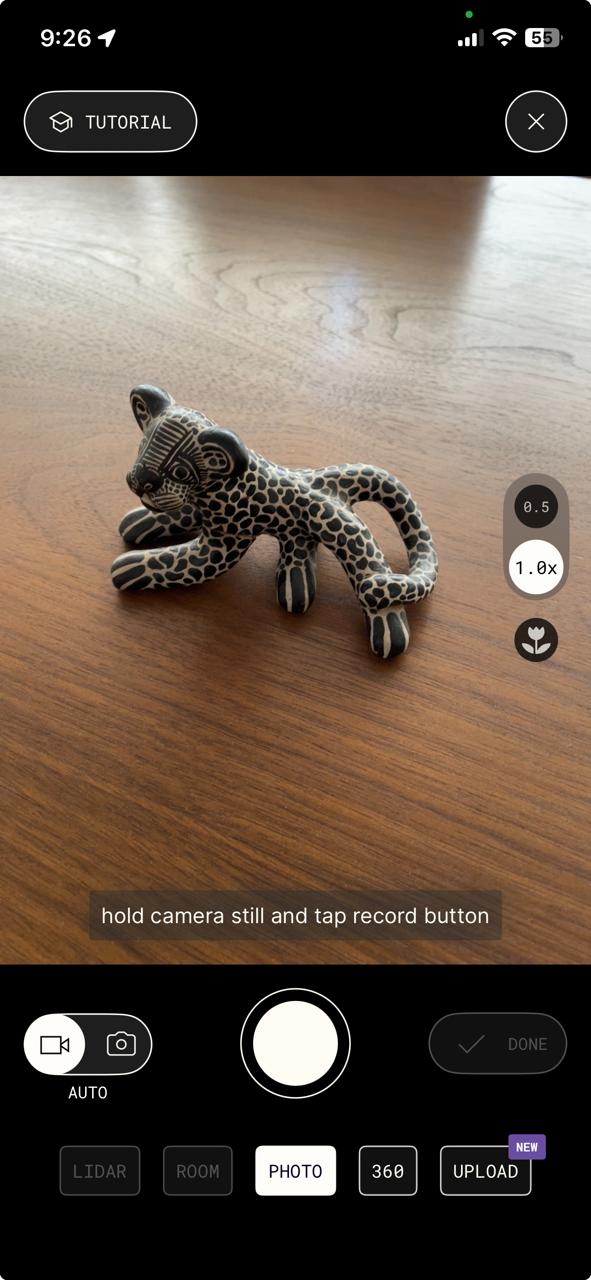
Qlone requires a printed mat for scanning, which helps capture depth and structure. It feels more professional but requires extra preparation. |
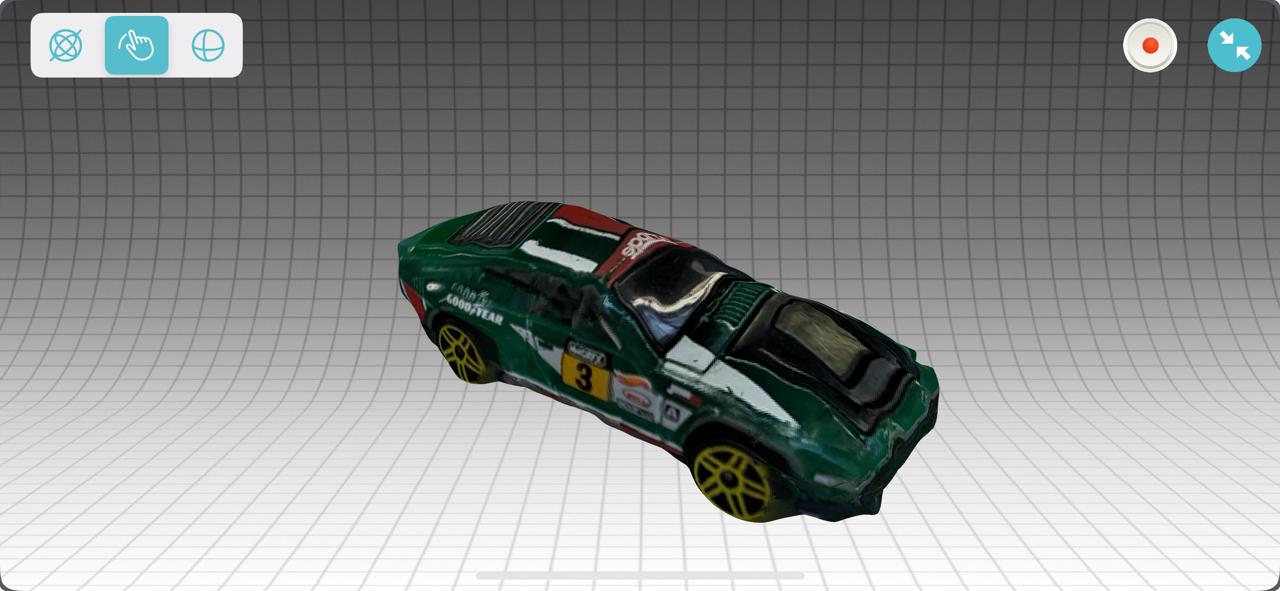
Polycam allows scanning by simply walking around an object and recording a video. It's quick, straightforward, and requires minimal setup. |
|
|
|
|
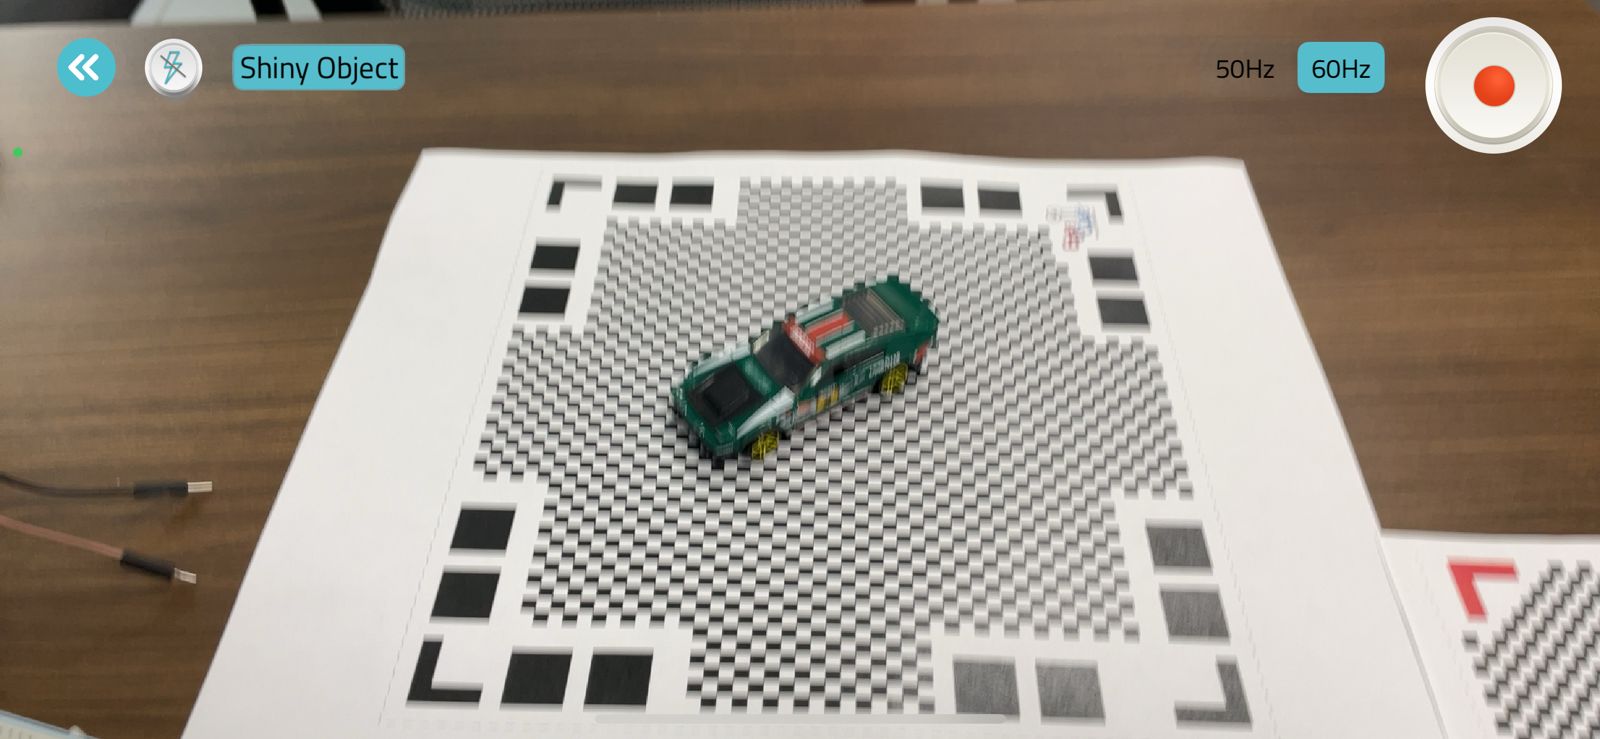
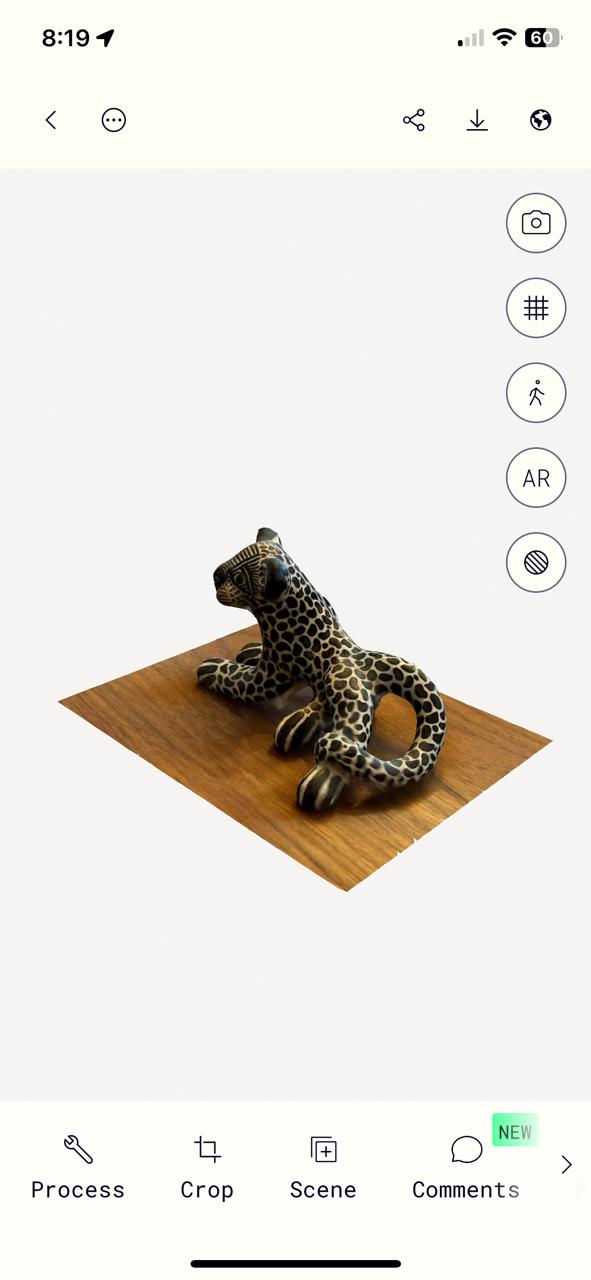
Toycar |
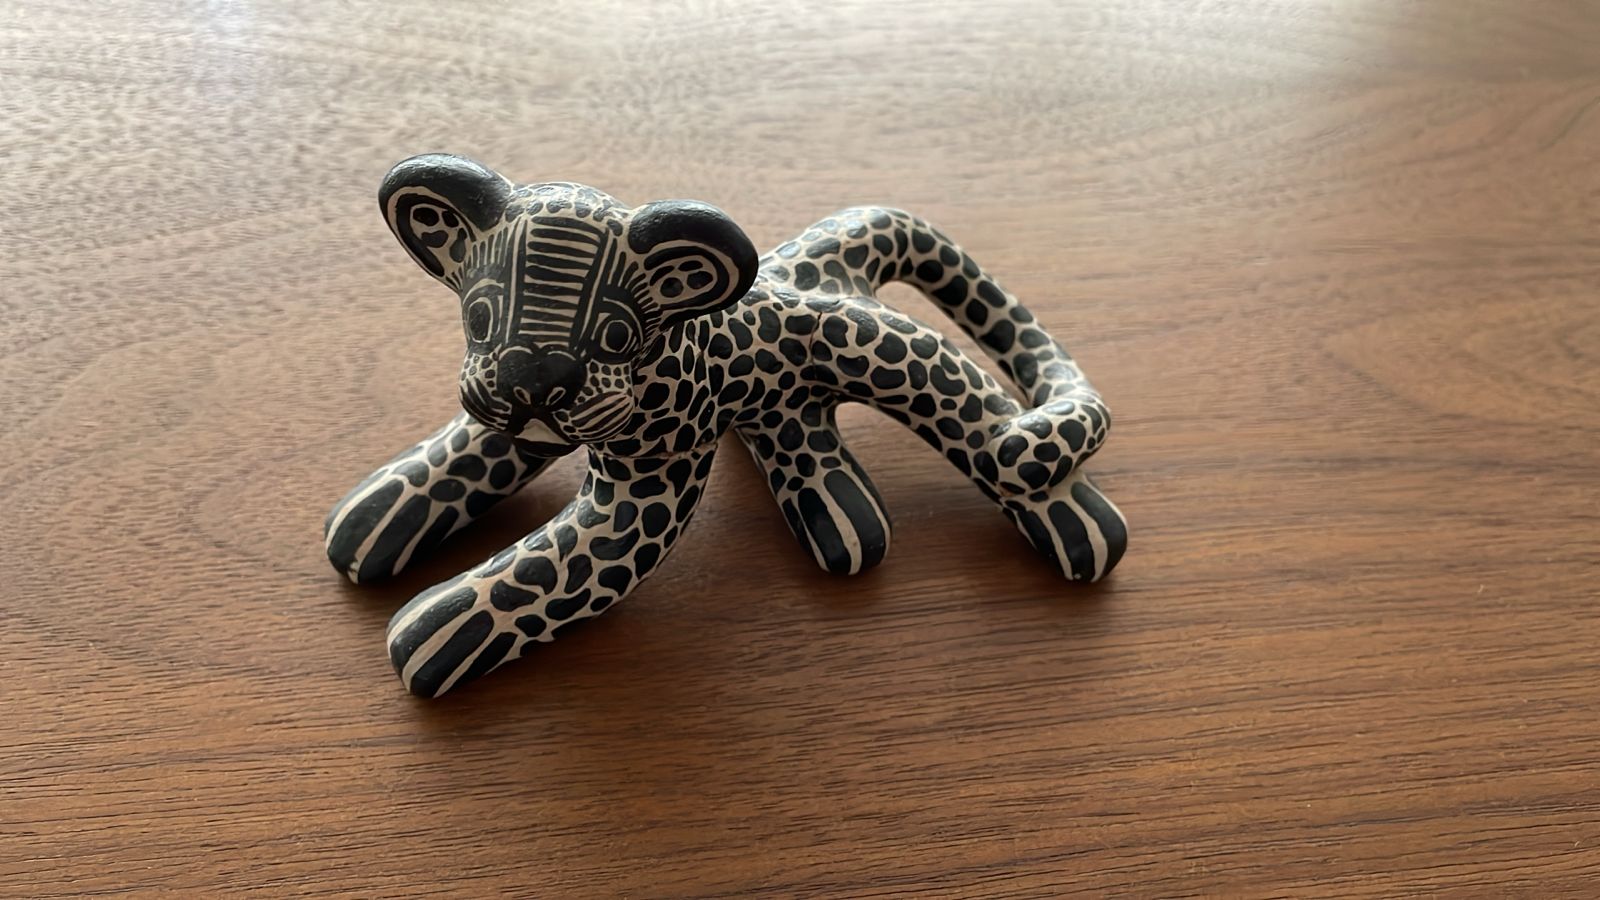
Jaguar |
The interface is structured but requires a printed mat. A bit more complicated compared to Polycam. |
The UI is intuitive. Just take a video and let the app process the scan. |
Qlone's scan was disappointing. The structure was rough, and the details were poor. |
Polycam's scan was impressive. The details were well preserved and accurate. |
Qlone only allows exporting in GIF, video, and image. No 3D file export in the free version. |
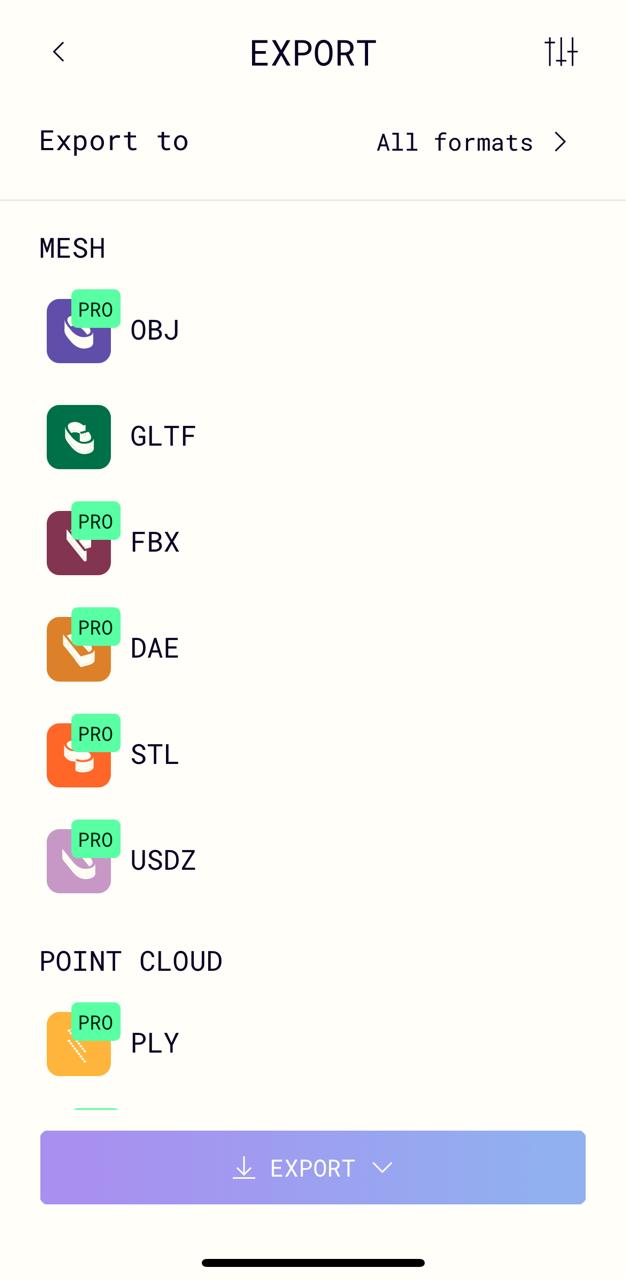
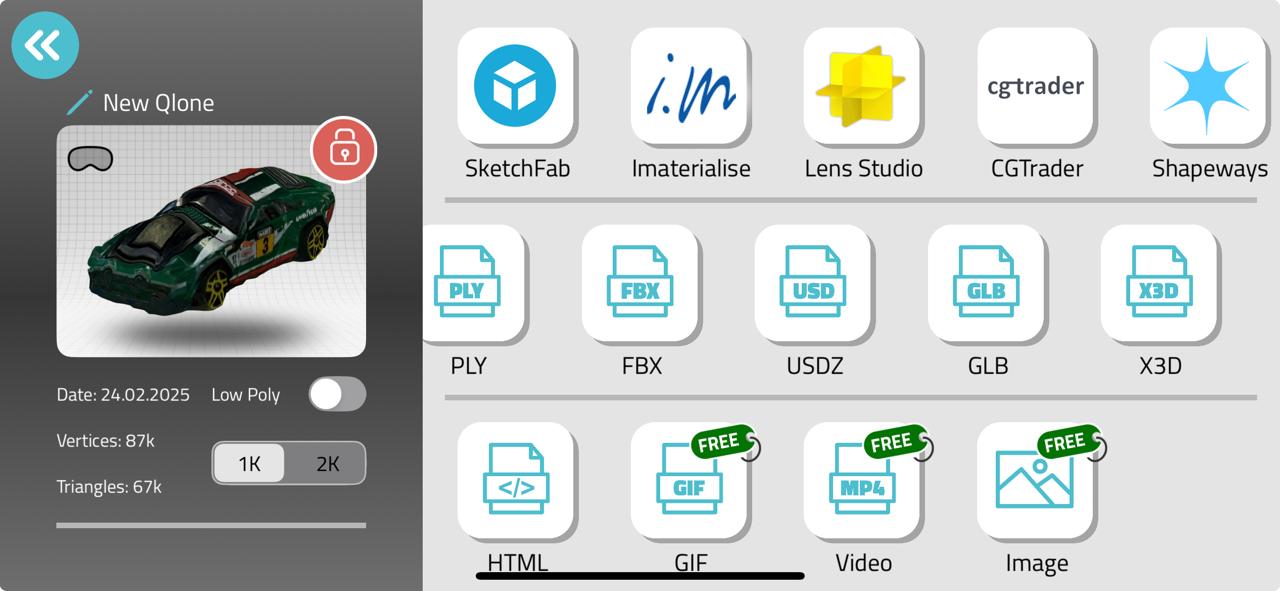
Polycam allows exporting in video, image, and GLTF. STL export requires a premium account. |
|
|
|
| Nothing to download ☹ | |
|
How Does Polycam Do Its Magic? Polycam achieves high-quality results, especially with textures, by using photogrammetry techniques. Instead of relying only on the phone's processing power, Polycam uploads the photos to powerful cloud servers where they are reconstructed into detailed 3D models. Key factors for getting good texture quality include capturing objects with rich surface details, using soft and even lighting to avoid harsh reflections or shadows, and taking many overlapping photos from all possible angles. This careful combination of image capture and cloud processing is what makes Polycam's textures stand out compared to other apps.

|
|
|
Final Thoughts: If I had to choose one, Polycam is the clear winner. It’s easy to use and produces great results with minimal effort. Qlone, while seemingly more "professional" with its mat system, delivered disappointing results. However, both apps respect privacy, which is a big plus. I'll be sticking with Polycam for quick and effective 3D scanning. For mor information visit: Qlone FAQ Polycam Photogrammetry |
|
3D Viewer
Instead of just showing a static image, I have embedded an interactive 3D model of the scanned Jaguar Figurine below. This allows for a detailed inspection of the scanned object from every angle.
Click and drag to rotate the model, use the scroll wheel to zoom in/out, and explore the scanned details up close. This provides a better way to evaluate the quality of the scan and see how well Polycam captured the shape and textures.