07 - Computer-Controlled Machining
Make Something Big
For this week, we are going big. It is most definitely the largest assignment that we have to complete, but not necessarily with regard to the workload but with regard to the dimensions. For this, we will be using a large scale CNC mill. In general, this is my first time ever using a CNC mill, except for the small mills for PCB production. I only have used a conventional/manual mill before but the processes differ greatly.
To get familiar with the CNC mill, we had to complete the following tasks for the assignment:
- Group Assignment
- Do your lab's safety training
- Test the runout, alignment, fixturing, speeds, feeds, materials, and toolpaths for your machine
- Individual Assignment
- Design, mill and assemble something big (one dimension > 1 m)
- For extra credit, don't use fasteners or glue
- For extra credit, include curved surfaces
Group Assignment
During the local lecture, we finished more or less the group assignment. Our local instructor was teaching us the safety first. Then he showed us how to mill anything on the CNC, including a quick design of a test piece, the computer-aided manufacturing (CAM) where the toolpaths are generated and finally also how to use the CNC, e.g. setting it up and controlling it. The detailed steps are described on our group assignment's web page here.
In total, this week was very exhausting for me as it was more or less completely new. However, it was a great experience and I am always grateful to learn new skills, CNC milling included!
Safety Aspects
There are many aspects regarding safety. However, I would like to quickly present the most important ones. These are:
- Use gloves to handle the wood.
- Only operate the machine if you had the according training.
- Do not operate the machine when you are alone.
- Supervise the machine (or let somebody else do it) while it operates.
- Stay out of the area marked with yellow-black striped tape while the machine operates.
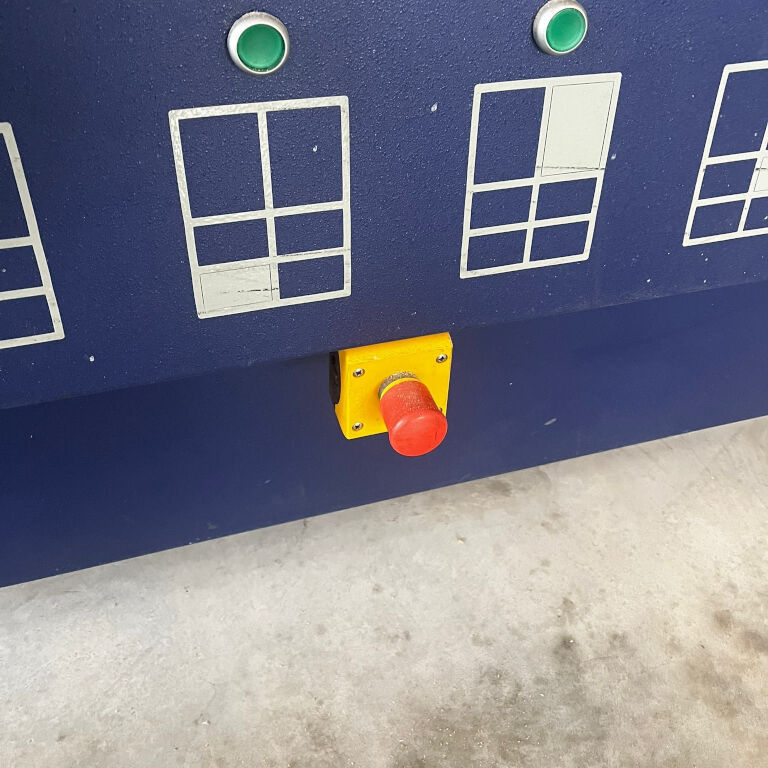
- Be conscious where emergency stops are located.
- Wear ear plugs and googles while the machine operates.
In addition to these, I highly recommend to switch on the brain and think of potential risks before using the machine.
CAM: Standard Tool and Toolpaths
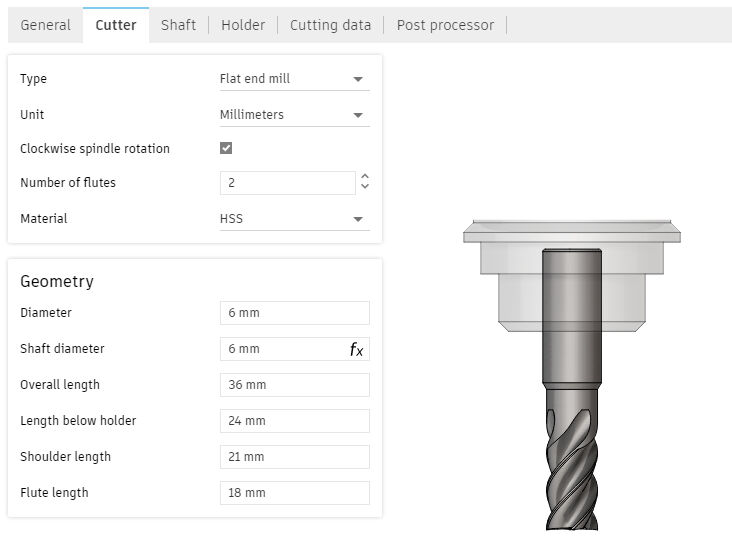
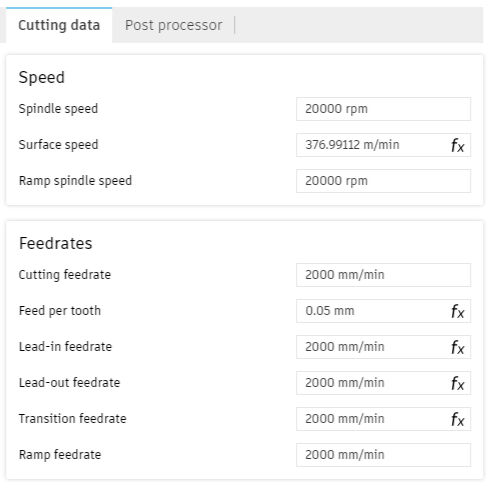
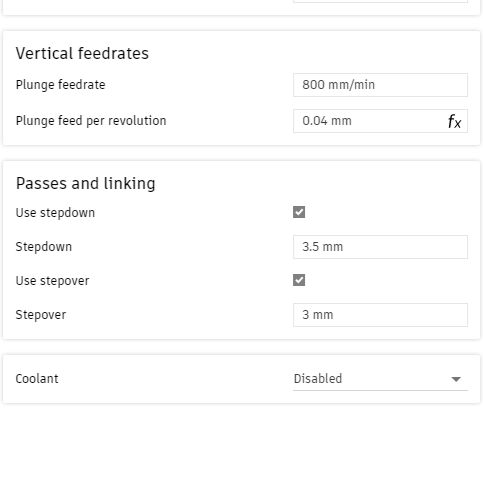
After designing a test piece in Fusion 360, we continued with CAM which can be done - to my surprise - also in Fusion. Here, the first part is the configuration of the stock, i.e. the dimensions and the placement of the parts within the stock. Next, the actual toolpaths can be generated. However, for this, it is necessary to add a tool that should be used for the job. Here, we added a 6 mm flat end milling bit to our local library. The settings can be seen below.
In addition to these, it is important to set the number of the tool in the last tab "Post processor". As this tool is the standard tool for milling, this tool is placed in the first slot of the machine and therefore gets the number one.
Then, we were able to generate toolpaths. For this, we selected special features that should be milled with a certain strategy. Here, we used "2D Pocket" and "2D Contour". Then, we used settings like tolerance, multiple depths and tabs. A detailed description is on the group assignment's webpage. However, I was surprised, that we had to select features and strategies for milling manually. As for printing, I expected it to be done automatically. Nevertheless, I assume this allows the user to choose between strategies and the order.
Testing Alignment, Runout and Tolerances
After the milling job was done, the test piece was tested regarding the alignment, runout and tolerances of the press-fit. For the first parameter, we used a machinist's square. It basically investigates whether the x-axis is orthogonal to the y-axis and vice versa. Here, we were not able to see a deviation from the optimum.
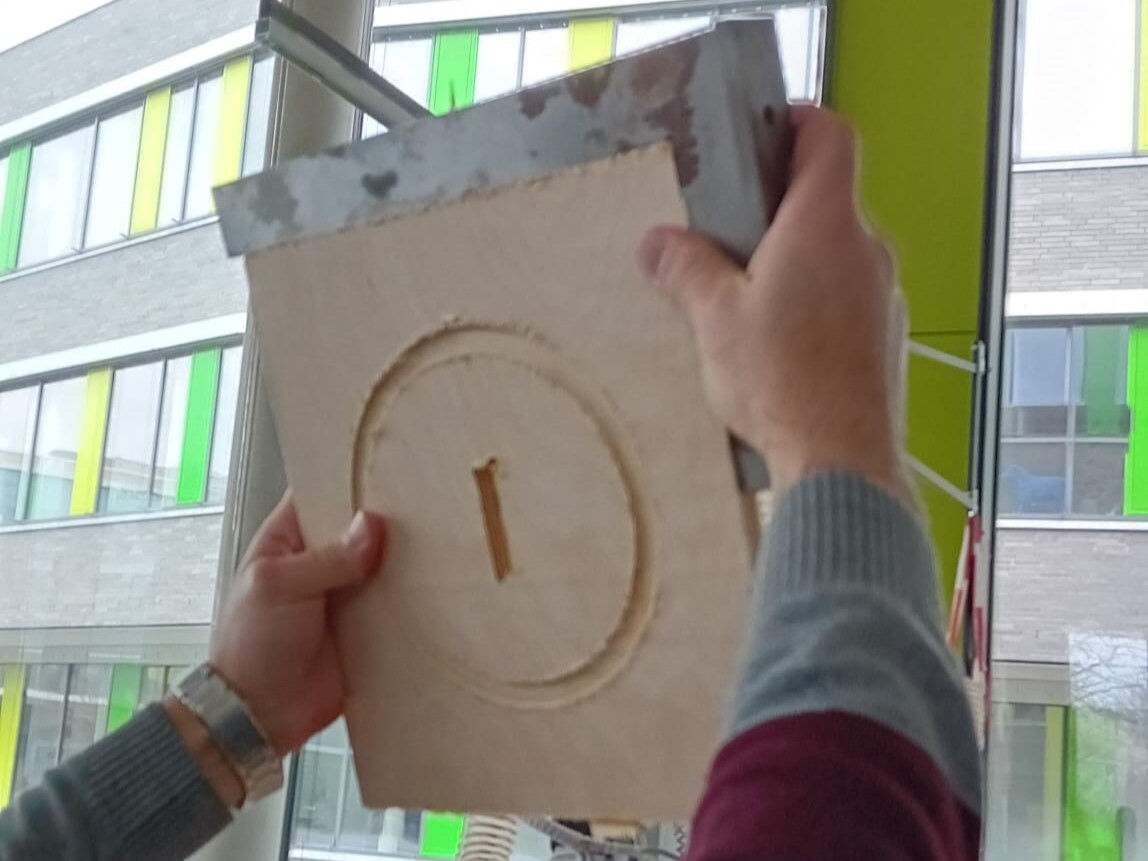
When testing the runout, it is investigated whether the actual cutting width deviates from the milling bit's diameter. This can e.g. show that the milling bit spirals slightly. For this, the test piece had a slot that was cut in a single pass. Its width did not deviate from the width of the milling bit or more precisely, we were not able to measure it as it must be less that the precision of the calliper we used.
Lastly, the tolerances were investigated. In the test piece, a press-fit finger joint was implemented and cut with a tolerance of 0.01 mm. As the joint was not too tight but also not too lose, we concluded that this tolerance yielded good joints.
Individual Assignment
For the individual assignment, I had to design, mill and assemble something bit, i.e. that is larger than one meter in at least one dimension. Deciding what to make was relatively easy for me this time. In previously assignments, the requirements for the assignments had excluded parts that I wanted to make for my final project. However, this week, I was finally able to make use of the assignment for my final project, i.e. to manufacture the frame.
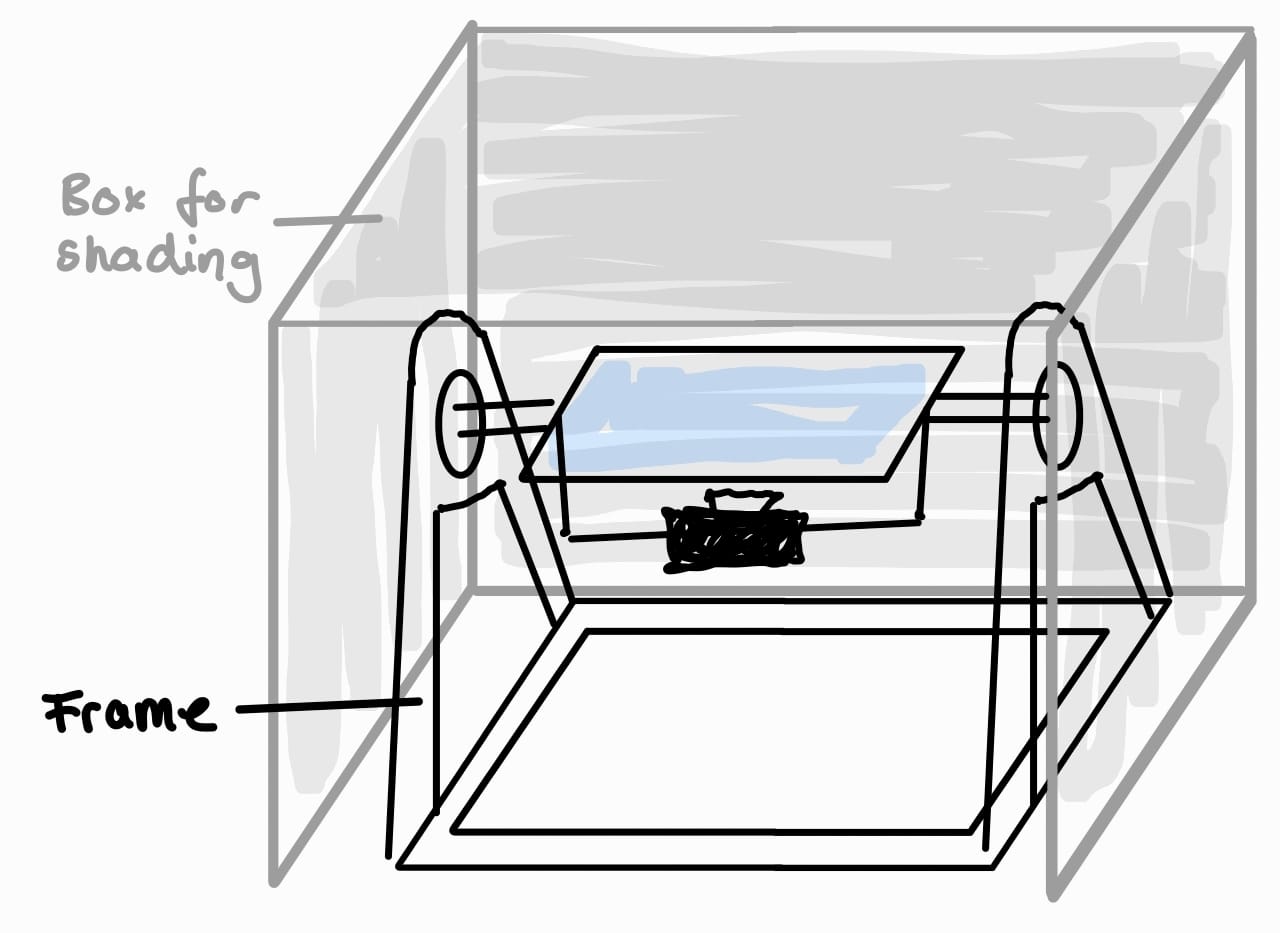
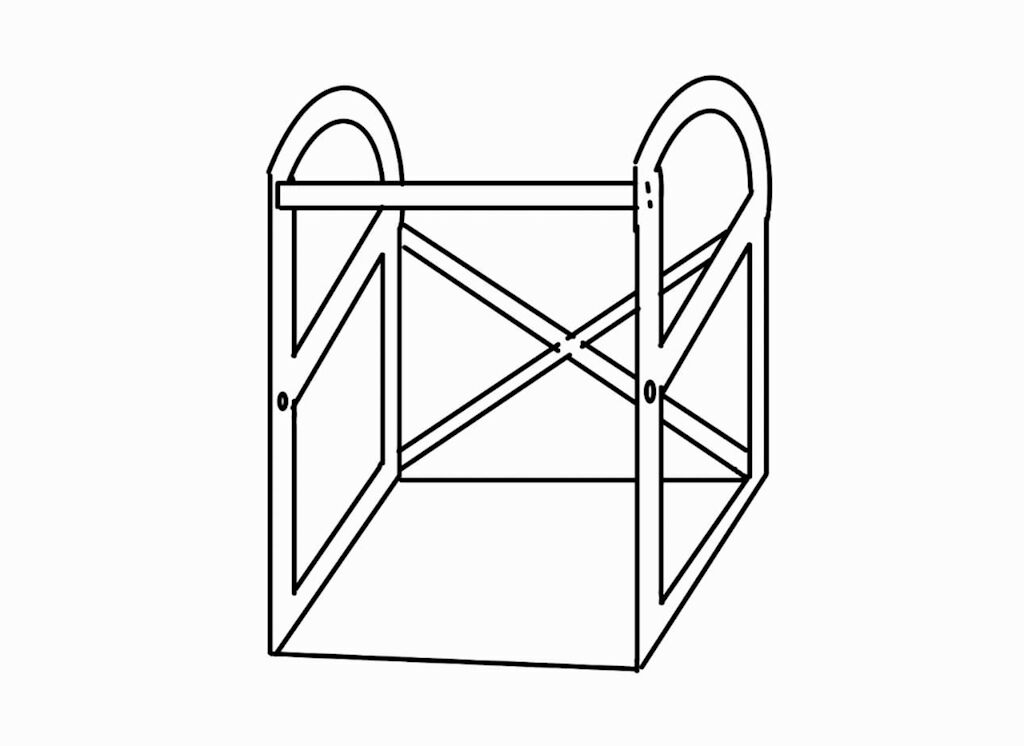
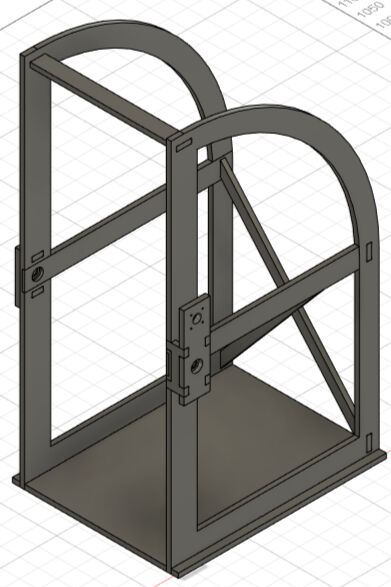
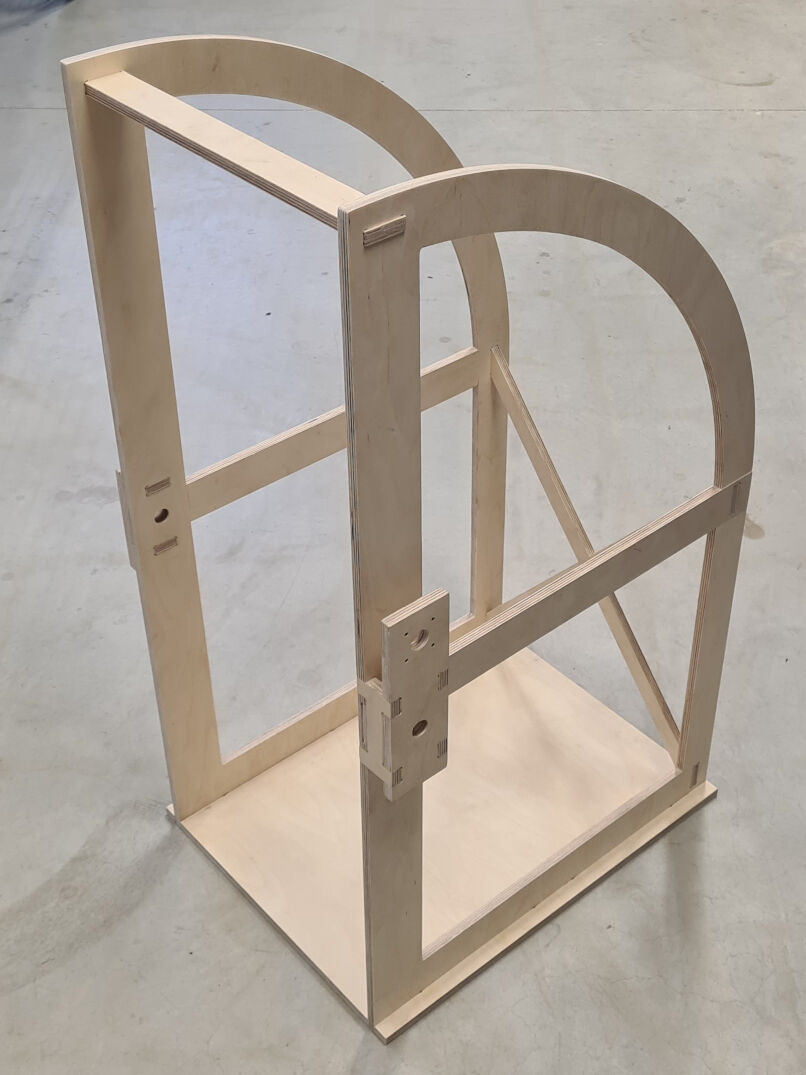
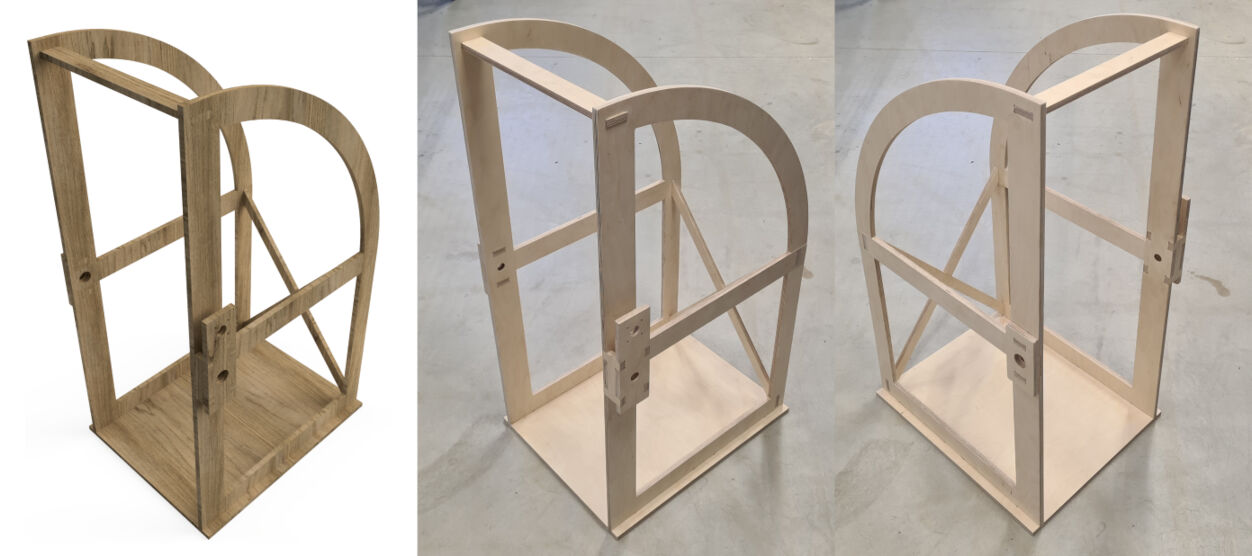
When I sketched my final project in the first week for project management, initially imagined the frame to only suspend the rotating shaft and to have a separate box for shading. However, as it now came to a more detailled design, I re-thought the part to be a shading box and frame in one. It should consist of two sides, that allow for suspending the rotating shaft by means of bearings. These should be stabilized by one crossbar in the top and an x-shaped crossbar in the back. This structure should then be mounted on a baseplate. To generate some shading, thick paper or other flexible but opaque material can be fixed to both sides and the curved backbone of the frame with e.g. nails, glue or sticky tape.
In addition to these parts, I also need to implement a mounting structure of the motor, which is not shown in the sketch.
Computer-Aided-Design
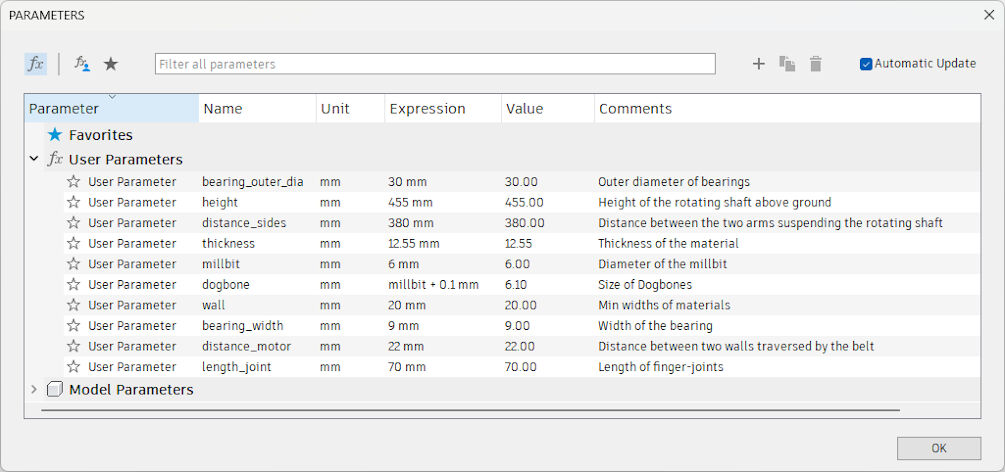
After generating a rough sketch of the frame, I continued with the detailed design with CAD. This was done with Fusion 360. Here, I defining some parameters to allow for a parametric design. Their names, values and descriptions are shown below.
Modelling the parts in 3D was done by drawing sketches on the same plane, i.e. in the XZ plane, for all the different parts and extruding the profiles. In total, I designed the following parts:
- Sides: Suspending the rotating shaft
- Top Crossbar: Stabilization by connecting the sides in the top
- X-Shaped Crossbar: Stabilization by connecting the sides in the back
- Baseplate: Bottom plate for mounting the frame
- Mounting Panels: Mounting the motor and the bearings on the sides.
Sides of the Frame
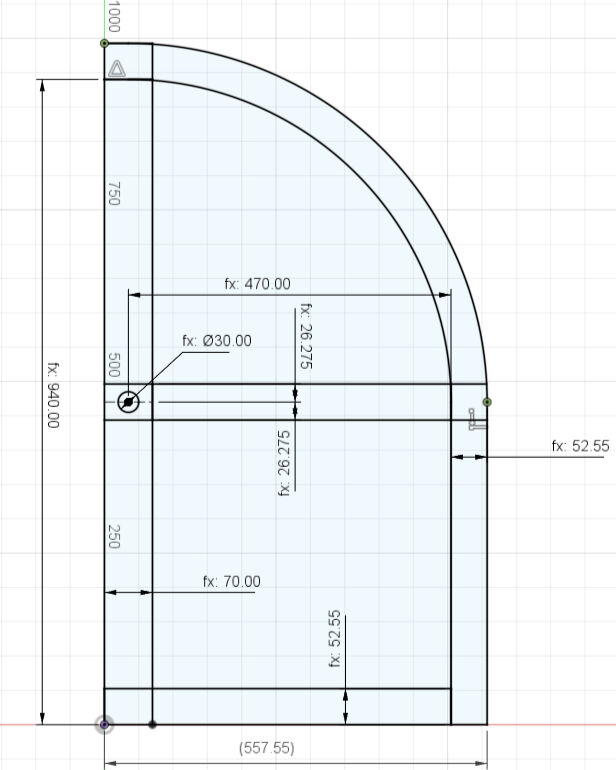
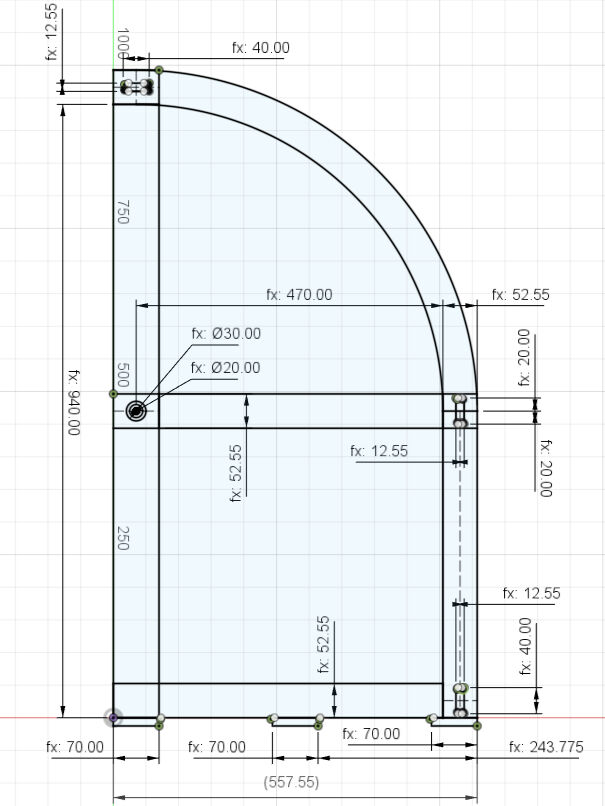
The first part I modelled was the side of the frame. For this, I drew a rectangle with its bottom left corner at the origin and a height of 940 mm, which is defined by the parameters "bearing_outer_dia" and two times the "height". In its middle, I placed a circle with the diameter of "bearing_outer_dia". By this, I created the front, vertical bar to suspend the rotating shaft on a bearing in a certain height. This height allows to create enough space to attach a camera to the glass plate on the rotating shaft.
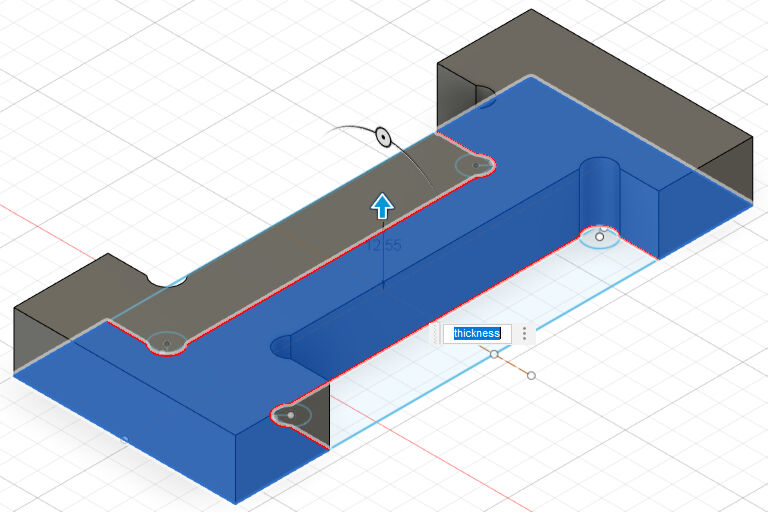
As the rotating shaft should also rotate, there also must be enough space between the shaft mount and the back of the part. Therefore, I created another rectangle around the circle for the bearing that extends horizontally towards the back with a distance of the parameter "height". On its right, I furthermore created a rectangle downwards to the base (the x-axis) and another one connecting the left and right rectangle in the bottom. Except from the first rectangle, the others had a width of two times the parameter "wall" and one time "thickness" summing up to 52.55 mm. In total, a "b"-shape was created consisting of four elongated rectangles.
For the shape of the sides, I lastly drew two arcs from the top to the back in a distance of the same parameters summing up to 52.55 mm.
As a last aspect, I had to create the joints to be able to connect this part to others. For the two crossbars, I created slots in which the parts can be placed with a press-fit. For this I drew an elongated rectangle each with a length of "wall" and a width of "thickness". These were placed horizontally in the very top for the top crossbar and vertically in the middle and bottom for one side of the x-shaped crossbar. The connection to the baseplate was established by three protruding rectangles in the very bottom with a width of the parameter "joint_length" and a height of "thickness".
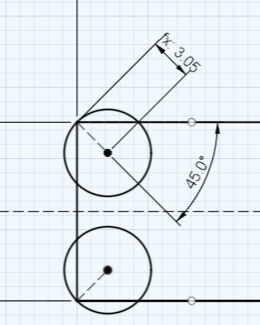
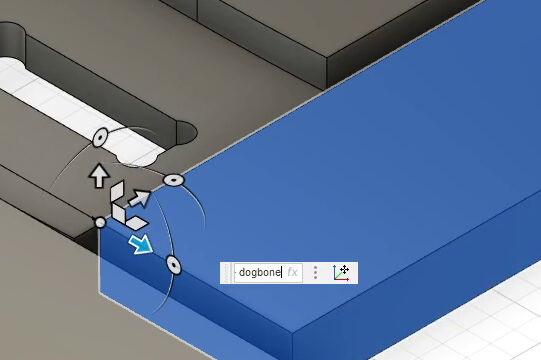
For all the inner corners, e.g. all four corners for the rectangular slots, I had to create so called "dogbones". As the milling bit is round, it cannot cut 90° corners impairing joining the pieces. To allow an opposing rectangular piece to fit in the slots, dogbones have to be added, circular cut-outs in the corner, which removes all material in the inner corner and some additional material around it to allow the milling bit to fit into it.
To create these, I drew a construction line in a 45° angle from the corner into the cut area with a length of half of the parameter "dogbone". Then, I placed a circle on the end of the line such that its line goes through the corner of the slot's rectangle. I repeated this for the remaining three corners or by mirroring the circle on the symmetry axes of the rectangular slot.
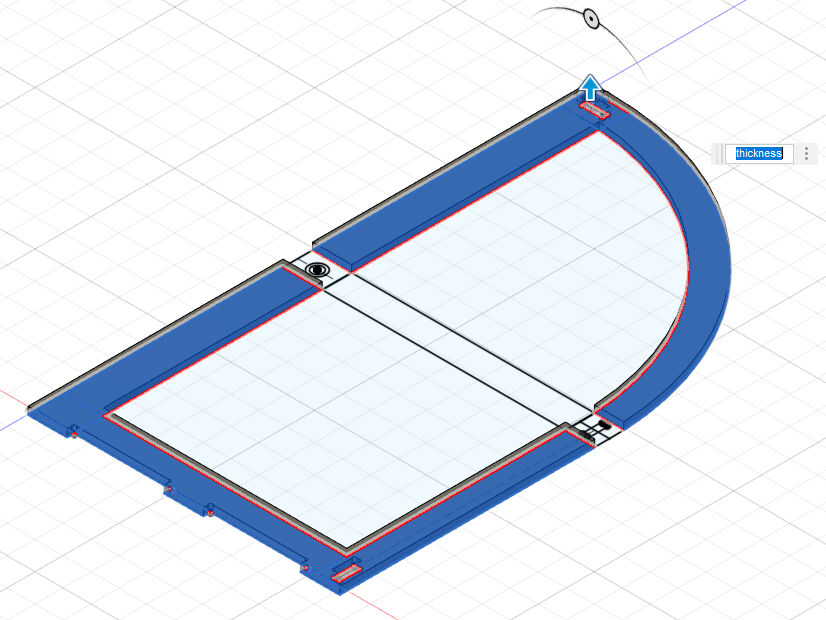
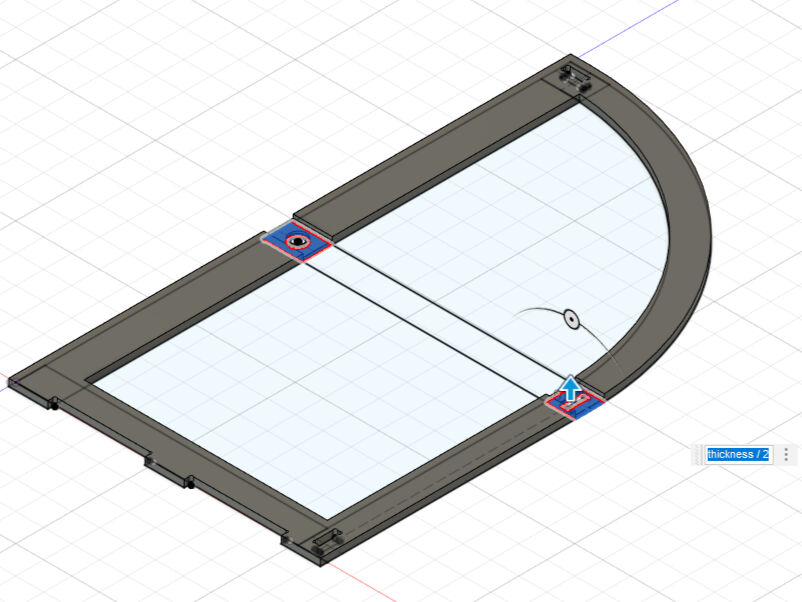
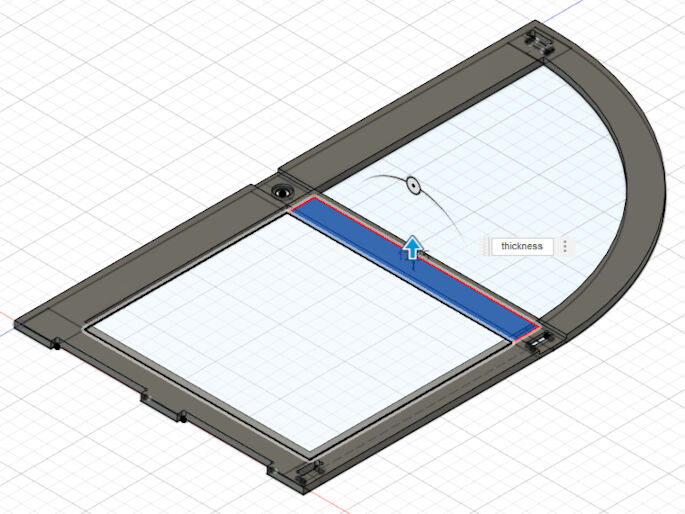
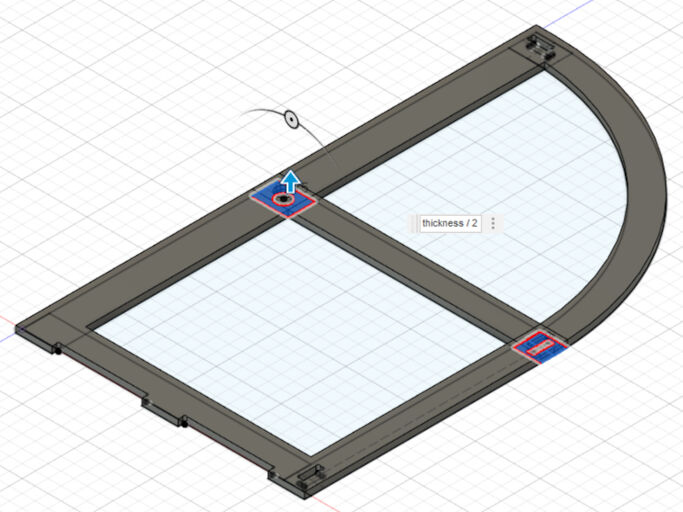
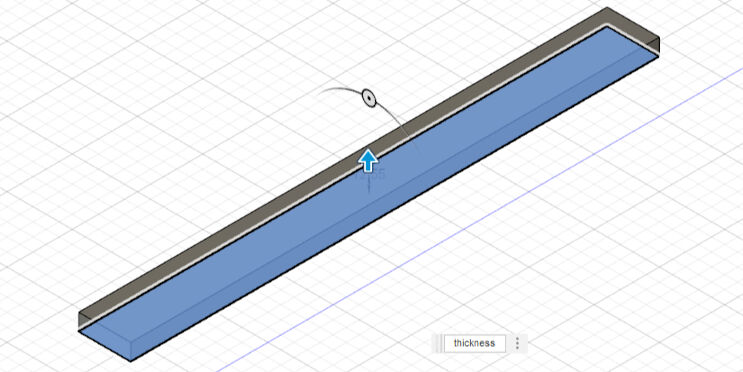
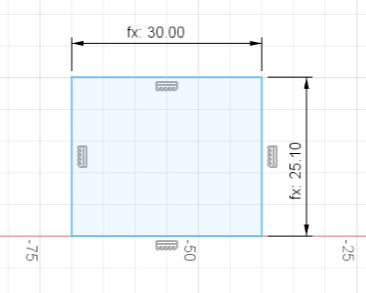
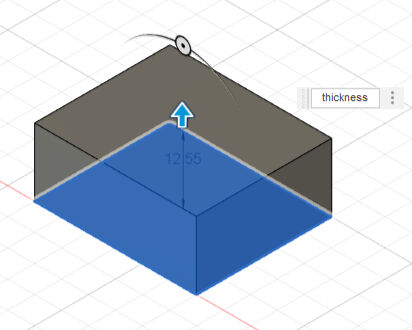
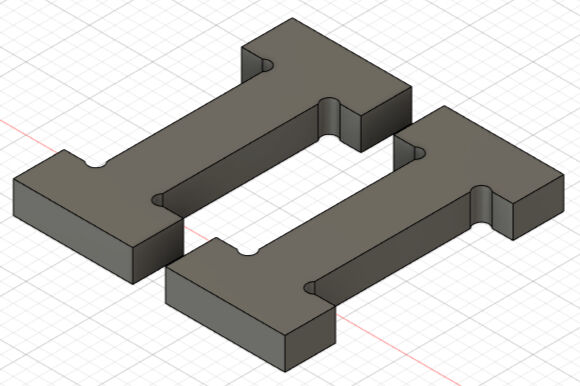
To generate a 3D part from the sketch, I extruded the profile. However, the current shape takes up a lot of material. Therefore, I decided to furthermore make the traversing horizontal bar in the middle a separate part that is joined with the remaining part with half lap joints, i.e. overlapping parts are only as thick as half of the thickness of the material. For this, I firstly extruded all profiles, except for the slots and dogbones, the circular cutout for the bearing and the traversing bar, by the thickness. Next, I extruded the overlapping areas of the outer part with the traversing bar by half of the thickness.
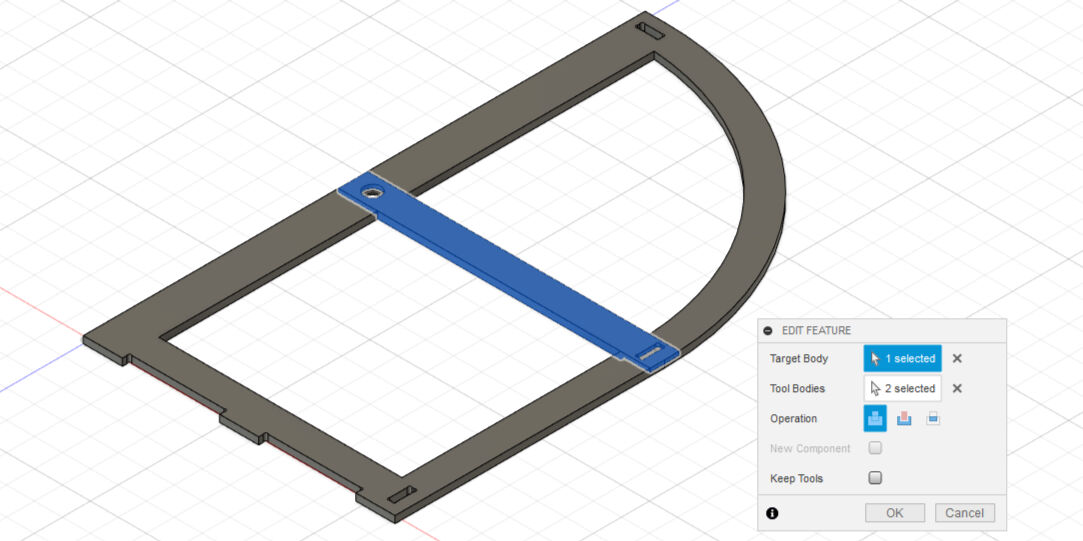
To create the traverse bar, I firstly extruded the profile of the bar except the overlap by the thickness of the material. This extrusion did however create a new body and did not join an existing one. Next, I also extruded the overlapping profiles by half of the thickness. However, this extrusion was placed with an offset of half of the thickness and it also created a new body.
Lastly, I joined the completely extruded profile and the half extruded profile of the traverse bar to create the complete traverse bar. This was done with the "Combine" tool in the "Modify" section of the toolbar.
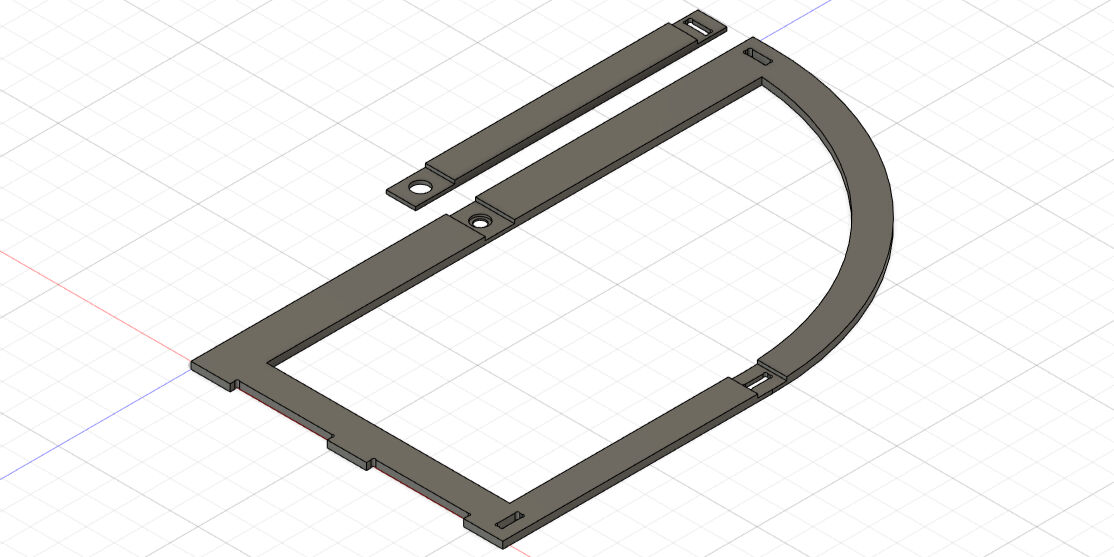
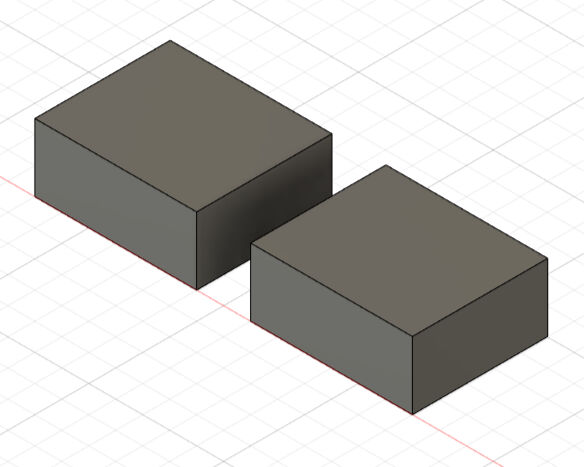
By this, I generated the two parts that can be joined with a half lap joint. These are shown below after moving the traversing bar to the side and rotating it such that it lays flat on its back on the same plane as the other part.
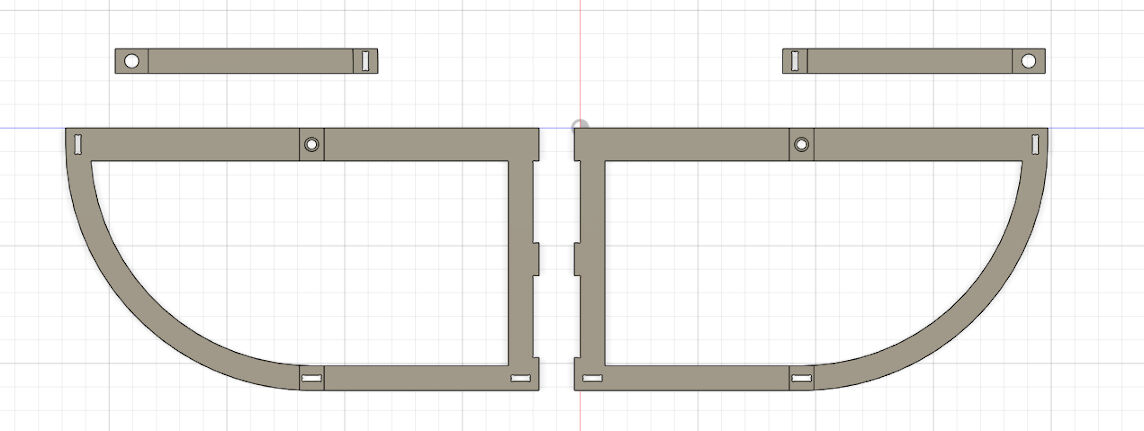
To also create the other side, I simply mirrored the two parts using the XY plane and moved it by 100 mm in negative z-direction.
Top Crossbar
The crossbar in the top was potentially the easiest to model as it only consisted of an extruded rectangle. For this, I drew a rectangle with a width of two times the parameter "wall", the same dimension as the slot height in the parts for the side of the frame. The length of the rectangle was defined by the parameters "distance_sides" and two times the "thickness". By this, the ends of the crossbar can be fully inserted into the sides placing the two sides in a distance of the value of the parameter "distance_sides".
Lastly, I extruded the rectangle by the thickness of the material. Hence, the cross section of the bar has now the same dimensions as the slots on both sides.
X-Shaped Crossbar
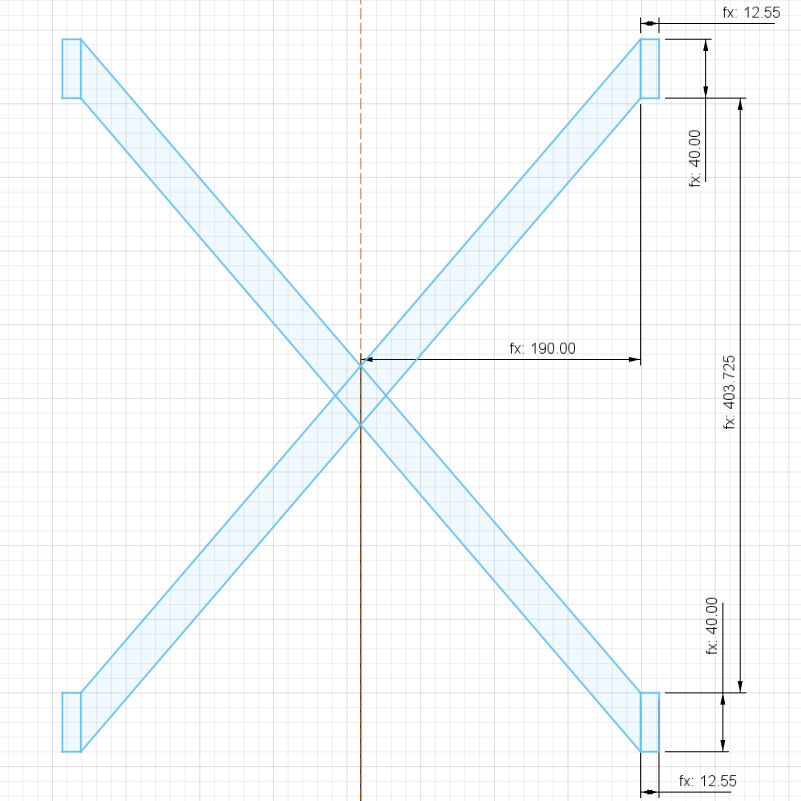
For the x-shaped crossbar, I drew another sketch. It firstly consisted of two rectangles below each other, both with a height of two times the parameter "wall" and a width of the material's thickness. They were placed in a vertical distance of 403.725 mm, which is the (projected) distance between the according slots on the part for the side of the frame.
Then, I placed a vertical construction line in a distance of half the parameter "distance_sides" on the left of these rectangles and mirrored the rectangles onto its other side. Lastly, I connected the top rectangle on one side to the bottom on the other sides with two lines. This created the desired x-shape of the crossbar.
As all inner corners cannot be correctly milled, I also had to add dogbones to the x-shaped crossbar. For this, I firstly created a driven dimension showing the angle of the inner corner. Then, I drew a construction line with a length of half the "dogbone" parameter from the corner into the cut area at an angle of half the measured angle. Lastly, I created a circle on the end of the line with a diameter of the parameter "dogbone".
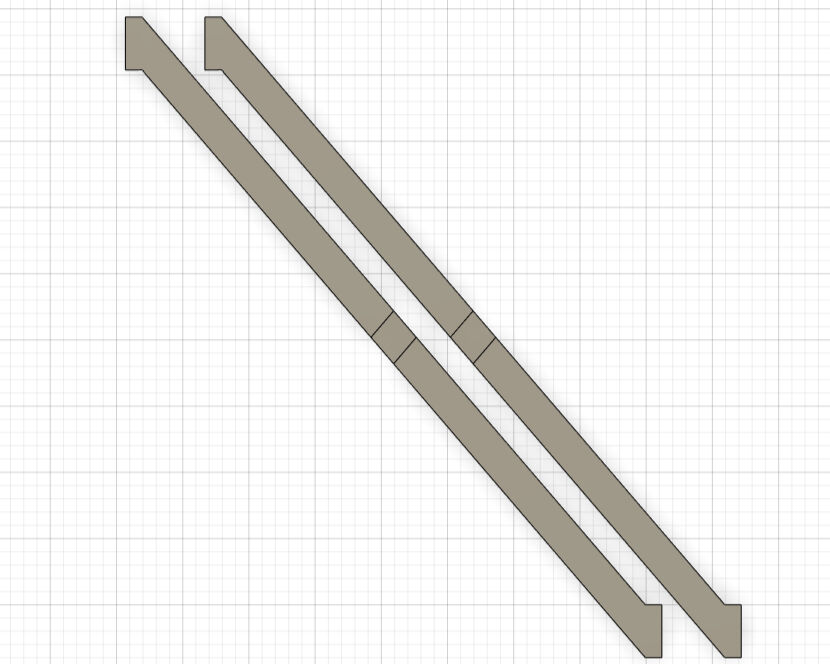
As for the sides of the frame, cutting the part like this does require quite a lot of material. Therefore, I again decided to split this part in two and join them by half lap joints on the overlap. This was again done by extruding the profile to the full thickness of the material but only half at the overlapping profiles.
As one side of diagonal of the "X"-shape is rotational symmetric to the other, I created the second diagonal by copying (and moving) the first diagonal.
Baseplate
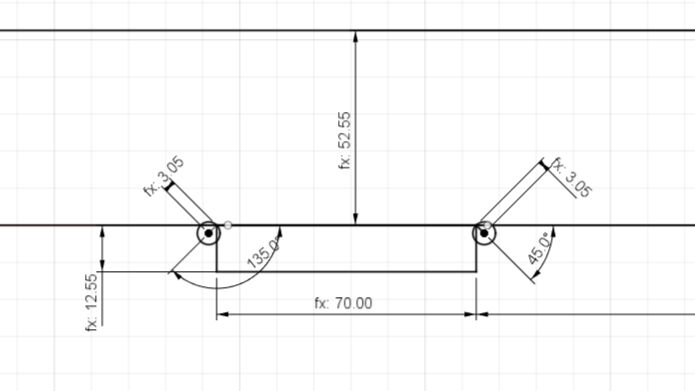
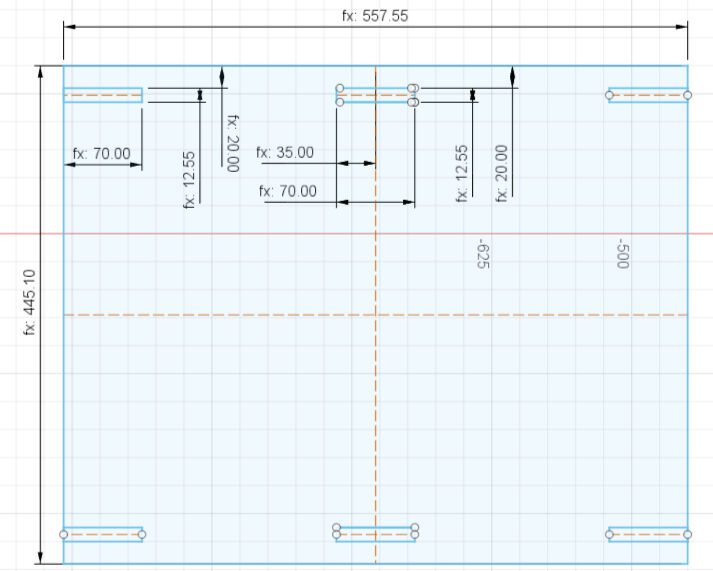
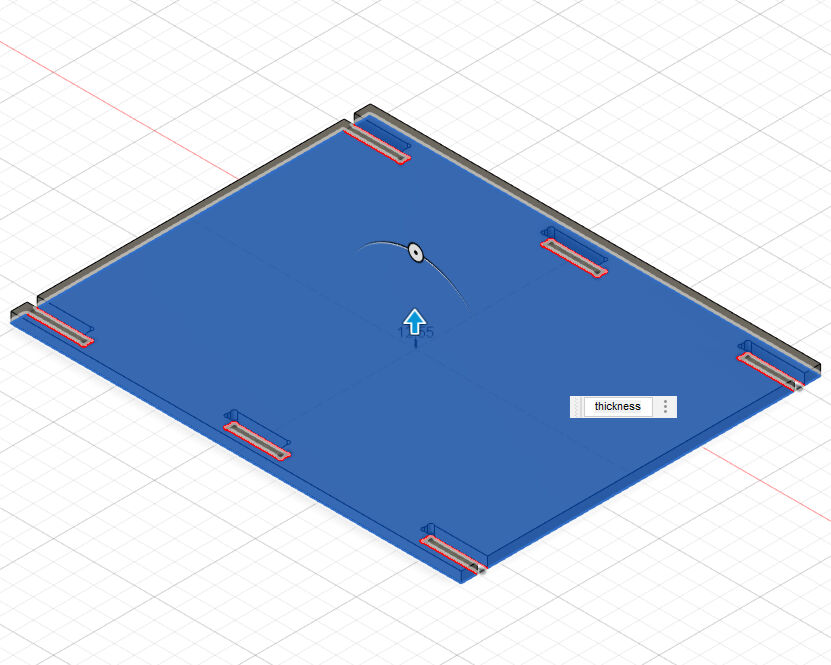
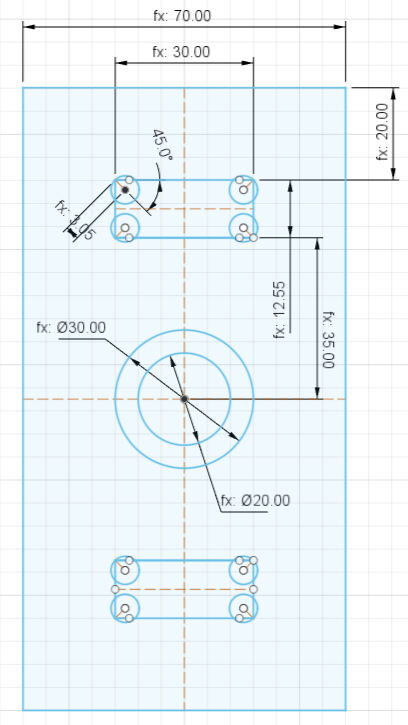
For the baseplate, I drew a rectangle with the same width as the sides of the frame and a height defined by the parameters "distance_sides", two times the thickness of the material for the slots of the frame's side and two times the parameter "wall" for some protruding material.
In addition, I created three rectangles with a width of 70 mm defined by the parameter "joint_length" and a height of the material's thickness onto the rectangle. All were placed in a distance of the parameter "wall" below the top horizontal line of the bigger rectangle, one was flush with the left side, one with the right side and one was positioned in the middle.
As these rectangles also imposed inner corners, I also added dogbones to them as described above for the sides. Here, two dogbones were needed for the outer rectangles, respectively, and four for the middle, one in each corner.
Lastly, I mirrored the three rectangles and the dogbones on the horizontal symmetry axes of the large rectangle and extruded the profile by the thickness of the material.
Additional Mounting Panels
Until now, I had not really described the additional mounting panels well because I did not care so much about the details. However, not it is time to illustrate their purpose and their implementation
On both sides of the rotating shaft, I want to use a bearing each. These are placed in the sides of the frame. However, as the glass plate and all its attachment might be relatively heavy, there are a lot of orthogonal forces on the shaft. Nevertheless, I do not want the shaft sag or to bend downwards. Therefore, I would like to use two bearings on each side.
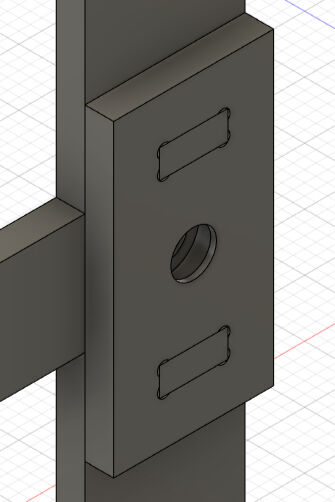
On one side, I simply want to attach a second panel at the height of the hole for the rotating shaft. For this, I created another sketch consisting of a rectangle with a circular hole with a diameter of the bearing as defined with the parameter "bearing_outer_dia". Above and below the circular hole, I added one small rectangle, respectively, with the same width as the circular hole for the bearing and a height of the thickness. They are placed in a distance of the value of the parameter "wall" to the circle and the upper or lower line of the outer rectangle.
Lastly, I created dogbones for the two smaller rectangles as described above. These will be slots for small pieces to connect this panel to the sides of the frame, which will also have these two slots (see below).
In addition for the circular hole for the bearing, I also added a smaller circle with a diameter 10 mm less than the bearing's outer diameter to avoid the bearing from protruding on the other side. In total, I extruded the profile by the thickness of the material. However, the ring between the two circles was only extruded by the thickness minus the width of the bearing minus 1 mm.
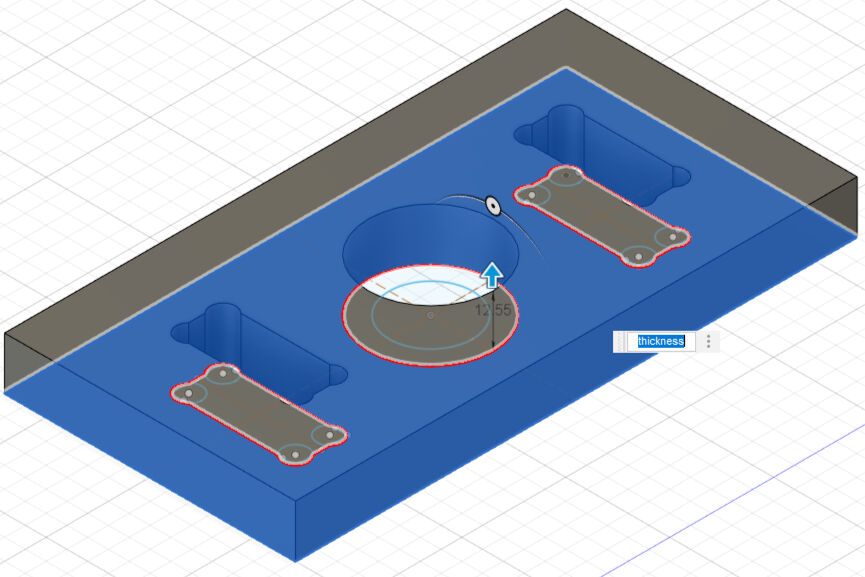
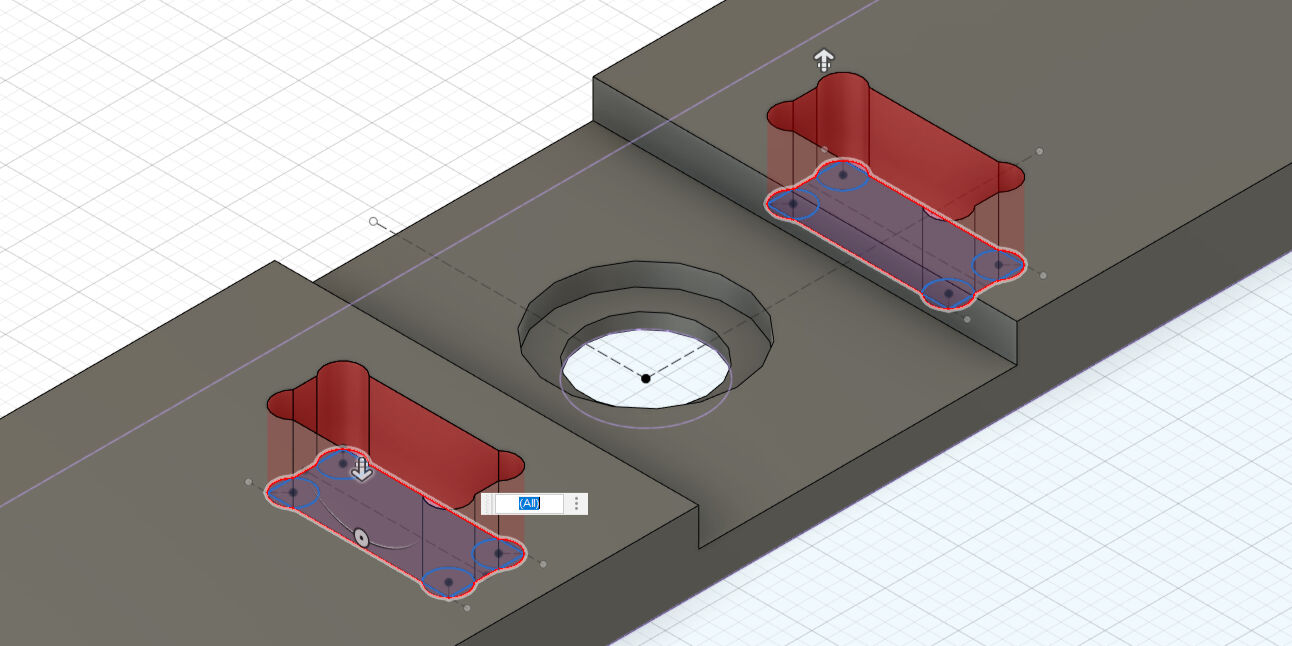
As already mentioned, I also added the slots on the side of the frame at the according position relative to the circular hole. This position is in accordance to the sketch above. I extruded these slots and their dogbones through the complete part with a "cut" operation to remove the material.
Lastly, I had to create the parts that slide into the slots. For this, I drew another rectangle with the same width as the width of the slots and a height of two times the material's thickness to traverse both panels, the additional panel and the side of the frame. Then, I extruded the profile by the material's thickness and copied it.
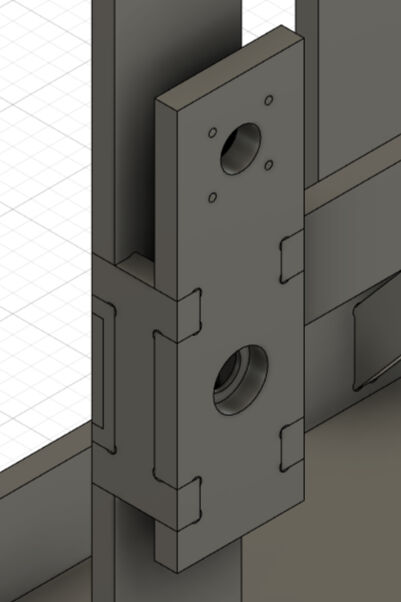
This panel however, will only be placed on one side. On the other side, I will need a panel that allows me to attach a motor to it. As I would like to cover most of the parts that are actuated by the motor for safety on this side, I will need a different structure. Here, I decided to go for "I"-shaped connectors between the two panels to offset the additional mounting panel by a bit. Between these parts, the actuated components can be placed, i.e. a belt drive.
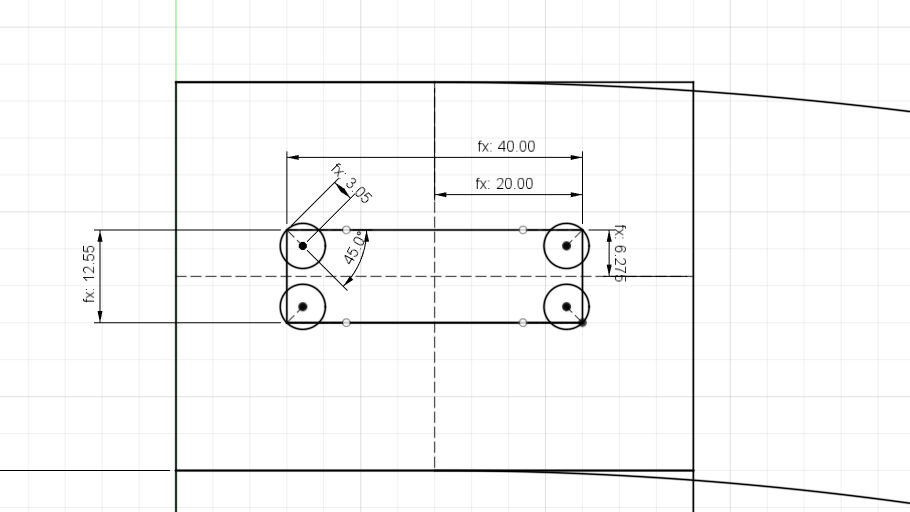
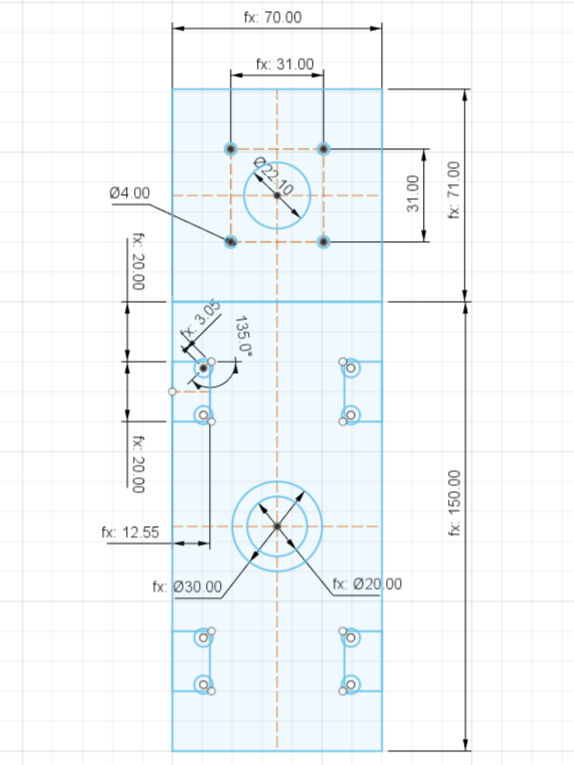
For the panel that allows for mounting the motor, I started the design with a sketch. Here, I drew a rectangle that had the same width as the bar for the bearing on the side of the frame, i.e. 70 mm, and has a circular hole in the middle for the bearing. The length of the rectangle was determined by multiple parameters, i.e. one time "bearing_outer_dia" and six times "wall". With this, I was able to place two slots with a width of the value of the parameter "wall" in a vertical distance of the parameter "wall" to the line of the rectangle and the line of the circle, above and below the circle, respectively. These slots were as wide as the material's thickness and placed to be flush with the left and right side of the outer rectangle. I furthermore added dogbones as described with the process above.
To mount the motor to this panel, I created another rectangle above the initial one with the same width. The height was determined by two times the parameter "wall" plus a distance of 31 mm, i.e. the distance between the screw holes on a NEMA 17 stepper motor. In the center of this motor, I placed a circle with a diameter of 22.1 mm, i.e. the diameter of the circular protrusion on a NEMA 17 motor with a tolerance of 0.1 mm.
Additionally, four screw holes were added in a square around the center with an edge length of 31 mm. The screw holes must fit for M3 screws but adding some tolerance, I decided to use a diameter of 4 mm for these holes.
In addition for the circular hole for the bearing, I also added a smaller circle with a diameter 10 mm less than the bearing's outer diameter to avoid the bearing from protruding on the other side. In total, I extruded the profile by the thickness of the material. However, the ring between the two circles was only extruded by the thickness minus the width of the bearing minus 1 mm.
As this motor mounting panel needs to be attached to the other side of the frame, I also added the slots to the other part of the side of the frame at the according position relative to the circular hole. This position is in accordance to the sketch above. I extruded these slots and their dogbones through the complete part with a "cut" operation to remove the material.
As a last part, I had to create the I-shaped connectors. For this, I created another sketch. I firstly drew another rectangle with a height of the bearing diameter plus four times the parameter "wall". This is the distance between the slots on each side, left or right, plus two times the heights of the slots. The width is determined by the parameter "distance_motor", i.e. the desired distance between the two panels for the belt drive, plus two times the material's thickness.
Next, I added two smaller rectangles within the first rectangle positioned flush to the right and left side, respectively, creating an I-shape. They both have a distance of the parameter "wall" to the top and bottom of the outer rectangle and are as wide as the value of the parameter "thickness".
Lastly, I added dogbones to all inner corners, extruded the created I-shape by the thickness of the material and copied the body.
Validation by Assembly
With all the parts being modelled, I wanted to check the design, i.e. whether they fit and do not overlap. This could show e.g. that I forgot to add any dogbones. This can be done by assembling the parts and inspecting the assembly for any overlap.
To prepare the assembly, components have to be created from the bodies. This is done by selecting all bodies, right-clicking and selecting "Create Components from Bodies".
I assembled the parts by using the "Joint" tool in the "Assemble" section of the toolbar. For each joint, the points that should touch each other must be selected as well as the correct orientation. I started the assembly by joining the sides with the baseplate. Next, I inserted the top crossbar and then the X-shaped crossbar between the sides. Then, I added the traversing horizontal bar from the side panels to the side panels. Lastly, I added the bearing and motor mounting panels and their connectors to the side panels.
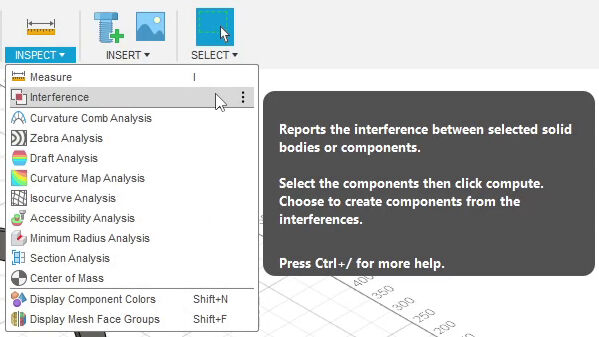
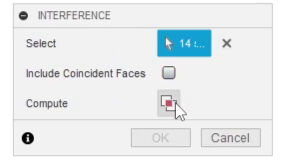
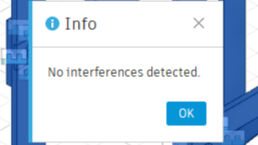
With the assembly being done, I was able to validate the design by checking for interferences. For this, I clicked on the dropdown of the "Inspect" tool in the toolbar and selected "Interference". This opened a dialog. After selecting the assembled components, I clicked on the icon on the right of "Compute". This opened an additional dialog on the selected components showing the information, that no interference was detected.
Computer-Aided Manufacturing & Post-Processing
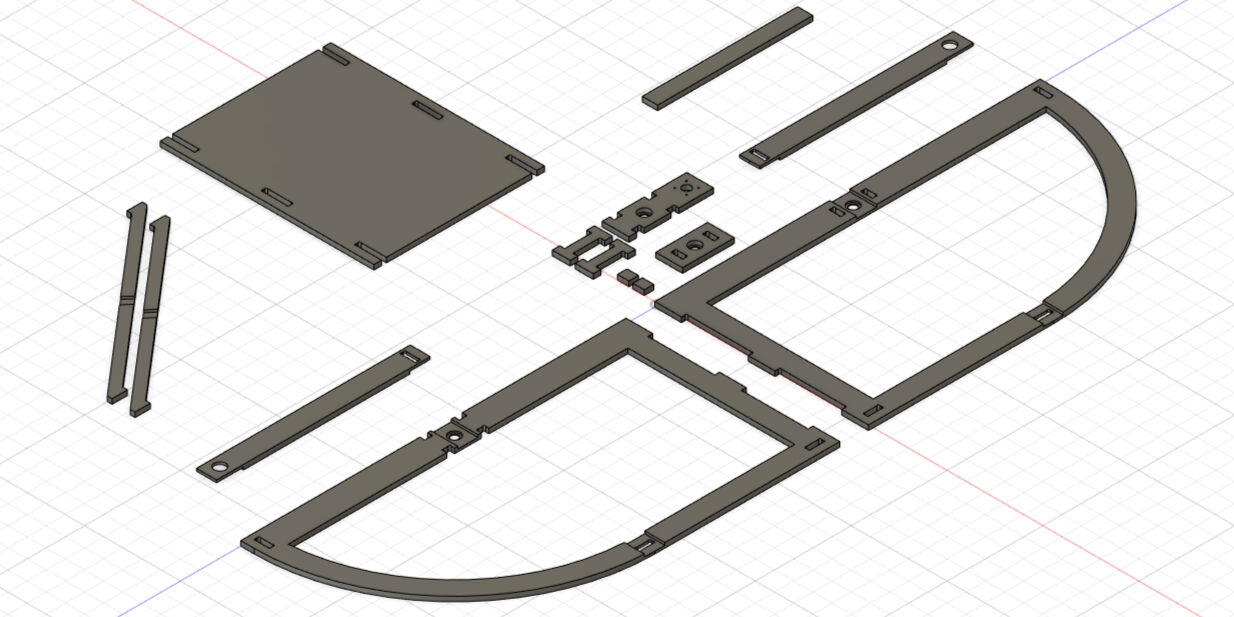
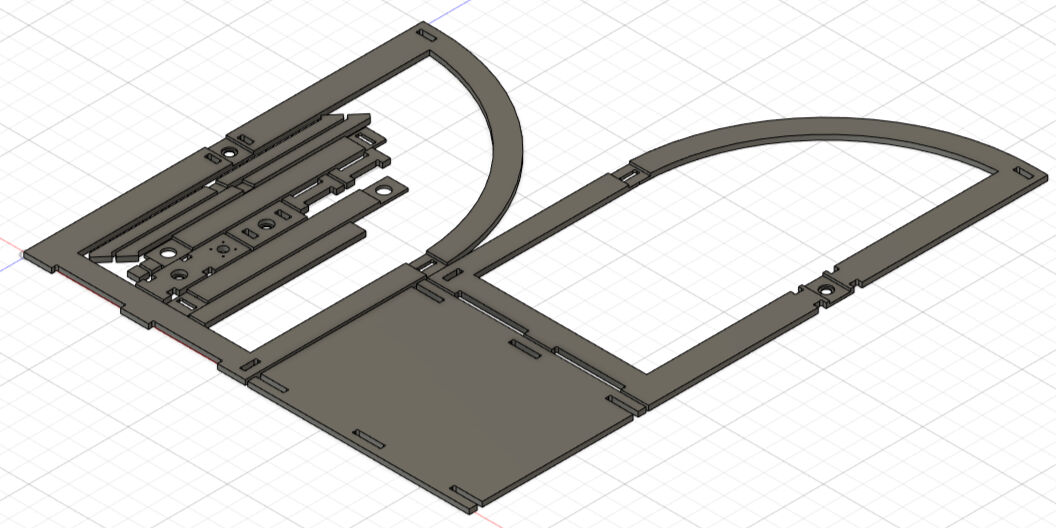
With the parts being modelled and the design being validated, the process for manufacturing them can be started. Here, the first step is nesting, i.e. the process of arranging multiple parts on a single sheet of material. This is an optimization problem as the waste should be minimized and the efficiency during machining maximized.
After nesting, the toolpaths can be generated. This process is called computer-aided manufacturing (CAM). Lastly, machine code is obatined with the toolpaths by using a post-processor.
Nesting: Preparing CAM
For nesting, it is important to place all parts as close as possible and as efficient as possible to not waste material and machining time. However, the milling bit must fit between the parts, otherwise the contours of parts cannot be cut. Additionally, a slight tolerance of 0.1 mm should be used.
Nesting was done in Fusion 360 simply by moving the parts. However, I firstly went back in time before the assembly was started by dragging the history marker in the time line in the bottom to the according place. By this, the parts are already placed flat on the XZ plane and I only have to complete nesting by moving the parts in x- or z-direction.
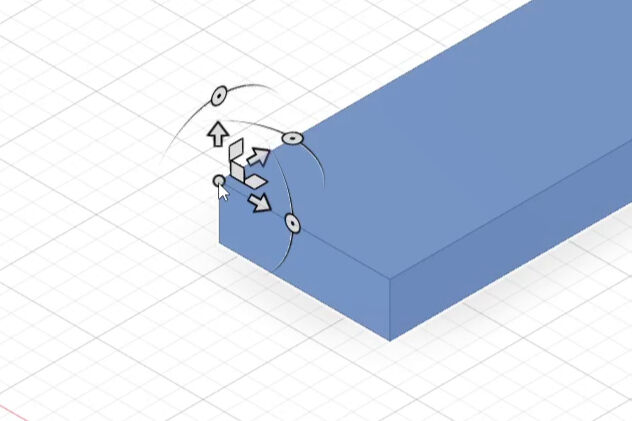
Moving a part is done by pressing the key "M" which opens another dialog. By this, the mouse now is able to select a pivot point. This must be placed on the corner of a part which should be nested. Next, the arrow for the desired direction must be dragged by a slight amount.
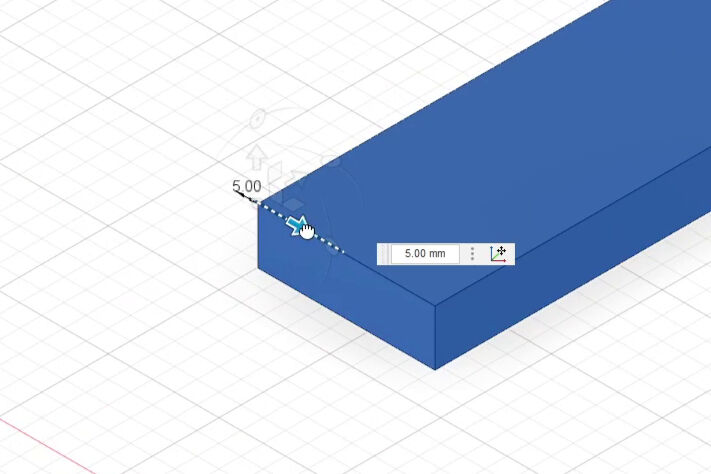
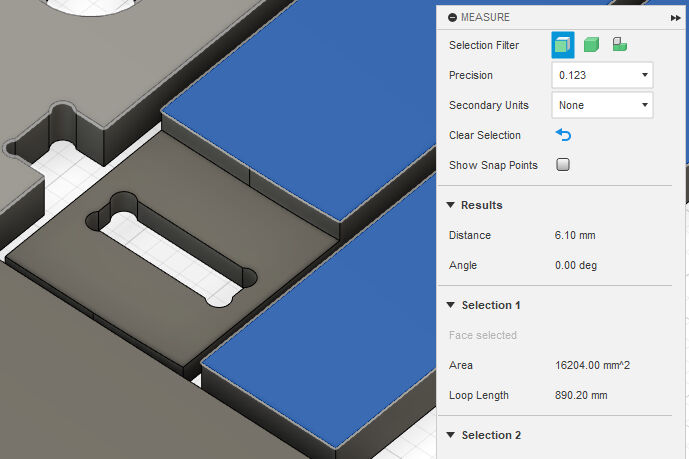
Dragging the part into the desired direction now allows to select a face up to which the part should be moved. Here, the pivot point is moved in the according direction. After selecting the face, it is important to offset the movement by the diameter of the millbit and a tolerance of 0.1 mm, i.e. the parameter "dogbone".
In addition to one direction, the orthogonal direction should be moved. This can be done either within the last move or by adding another movement to the part. In total, the part should be placed in a distance of at least the value of the "dogbone" parameter to every other part.
After positioning the parts, the nesting should be checked. This can be done by pressing the key "I" to "Inspect" or measure something. Then, surfaces of different parts or even bodies can be selected. In the dialog on the right in the "Results" section, the distance should be at least the value of the "dogbone" parameter and the angle should be "0.0 deg".
After having placed all components and checking it, nesting is complete and it can be proceeded with generating the toolpaths with CAM.
CAM: Generating Toolpaths
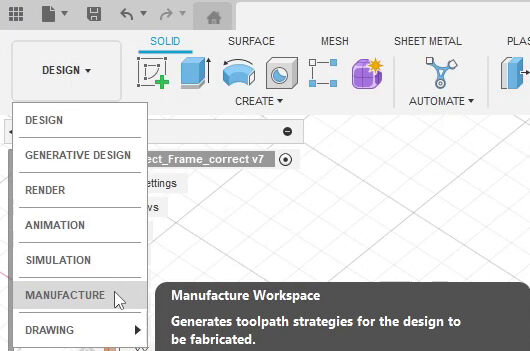
To start the CAM, the workspace has to be switched. Designing is done in the "Design" workspace and CAM is in the "Manufacture" one. After switching, multiple tabs should be visible for different manufacturing methods, e.g. milling, turning and additive. Here, I stayed in the milling tab.
The first step for generating the toolpaths is to add a setup to the workspace which is done by using the first tool in the toolbar called "Setup".
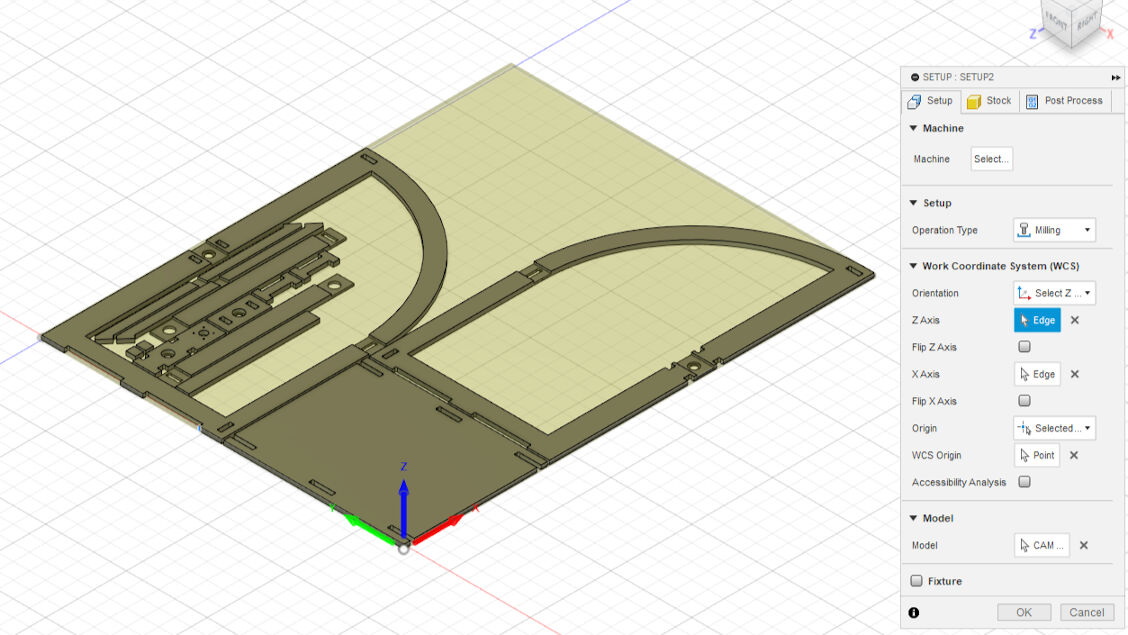
After clicking on "Setup", a dialog on the right is opened. In the first tab, the "Setup" is specified, i.e. the directions and origins of the axes are specified. In order to select these, I selected "Select Z axis/plane & X axis" as the orientation for the work coordinate system. Then, I clicked on two edges consecutively to specify the direction of first the z-axis and then the x-axis. Lastly, I set the origin of the coordinate system by "select point" on the outwards facing, bottom corner of the baseplate.
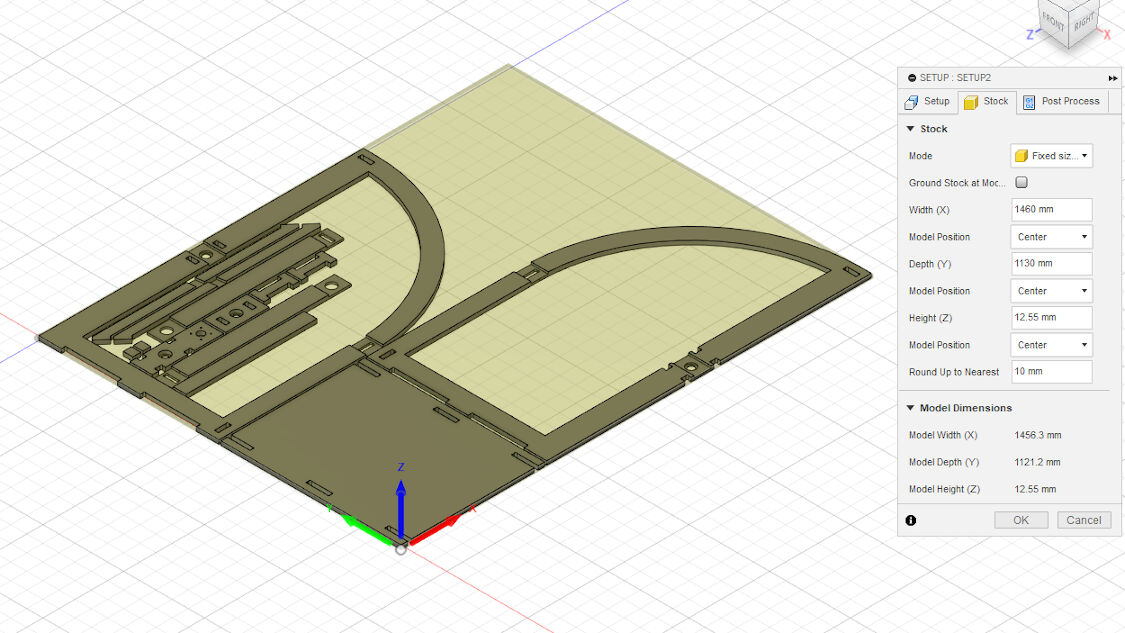
Next, in the tab "Stock", I specified the stock dimensions and its position. Here, I firstly selected the mode "Fixed Size" which automatically generated a box around all parts with rounding up to the nearest 10 mm and placing the parts in its center. However, I changed the height of the box to 12.55 mm, i.e. the thickness of the material.
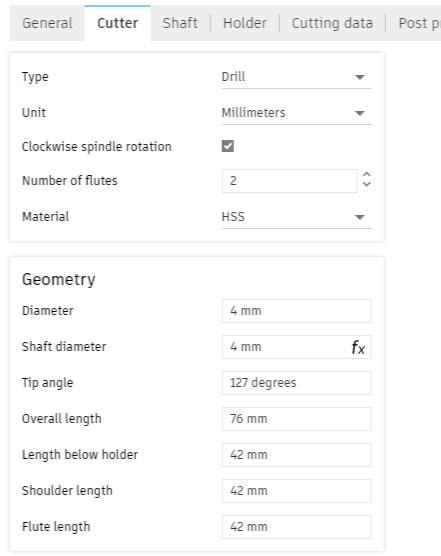
After completing the setup, the toolpaths can be added. Here, drilling should come first, then all inner parts and lastly the outside contours. Therefore, I started with the four drills on the motor mount panel. For this, I selected the "Drill" tool in the "Drilling" section of the toolbar. Here, I firstly have to select a tool for drilling. By clicking on "Select" next to "Tool", a library for tools opened. As I had only previously added the flat end mill bit with a diameter of 6 mm that we used in the group assignment, I had to add a drill bit. For this, I went to my local library and clicked on the "+" in the top left. Then, I selected to add a "Drill" in the "Hole Making" section.
In the "Cutter" tab of the window, I specified the dimensions of the cutter, e.g. the number of flutes of two, a diameter of 4 mm and a length below the folder of 42 mm. In the "Cutting Data", I furthermore edited the speeds of the spindle and the cutting. Here, I increased the spindle to the maximum 20 000 rpm and the plunge rate to 1500 mm/min. Fruthermore, I disabled the cooling. In the last tab "Post processor", I changed this to be the tool number three. Lastly, I pressed "Accept" and selected the new tool for drilling.
In the next tab of the "Drill" tool dialog, i.e. "Geometry" I selected the cylindrical faces of the drill holes to be drilled. Lastly, in the next tab "Heights", I used the default settings except for the bottom height, I used an offset of -0.1 mm and ticked the box for "Drill Tip Through Bottom" to make sure that the full diameter of the drill bit reaches through the complete material. With this, I completed the setting for the drill operation and proceeded with the next one.
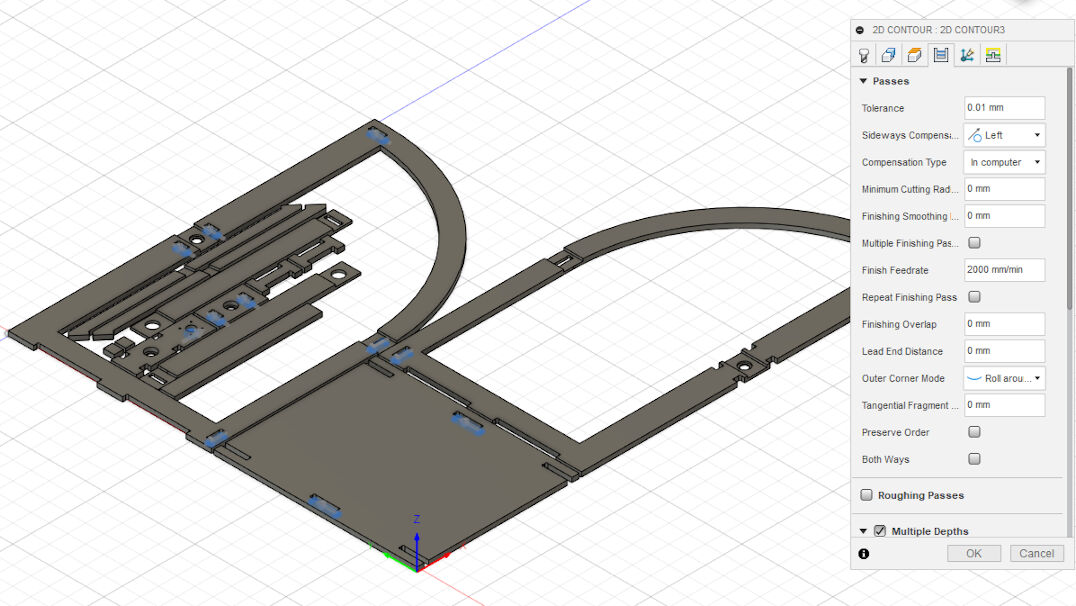
After drills, it is time for all inside cuts. These includes many things, e.g. some pockets or some 2D contours. However, I decided to start with same 2D contours reaching to the bottom that are placed inside of the pockets to save some time. For this, I clicked on "2D Contour" in the "2D" section of the toolbar. This opened another dialog, where I firstly selected the 6mm flat end mill bit that we added to the local library during our local lecture as shown in our group assignment.
Next, I selected all the contours of cuts through the material placed in a pocket in the "Geometry" tab. Then, I switched to the "Heights" tab and also set the offset of the bottom height to be -0.1 mm.
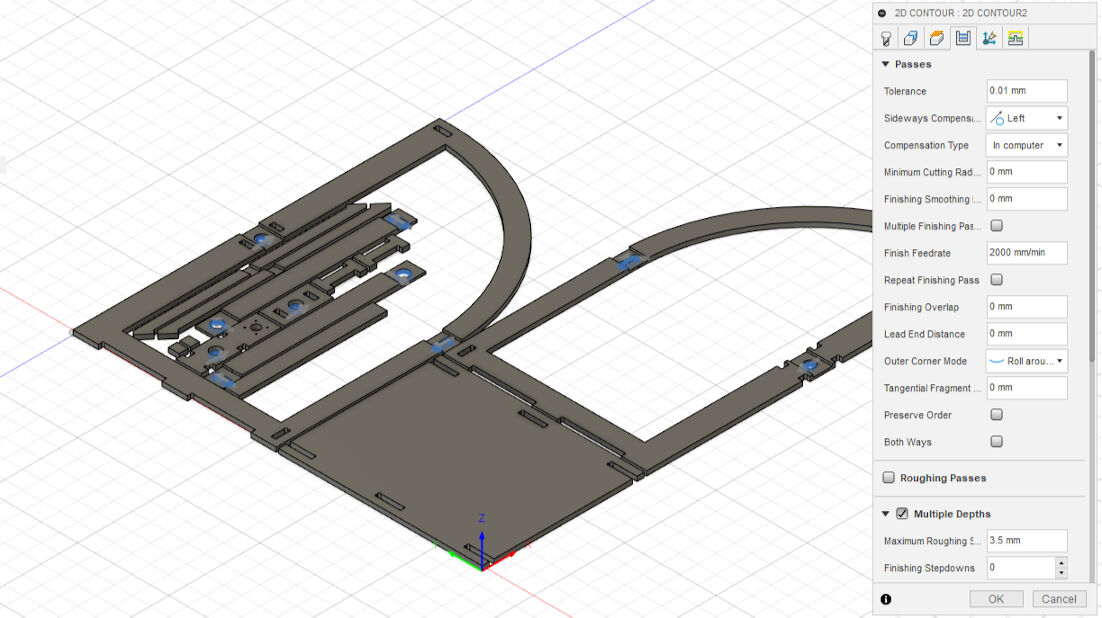
In the "Passes" tab, I selected the tolerance to be 0.01 mm which was a good fit for the test piece that we made during the group assignment. I furthermore ticked the box for "Multiple Depths" and un-ticked the box fro "Stock to Leave". By selecting the tool, certain parameters like the stepdown should be automatically changed according to the tool's settings. This is a good opportunity to check the settings. The remaining settings were the default settings.
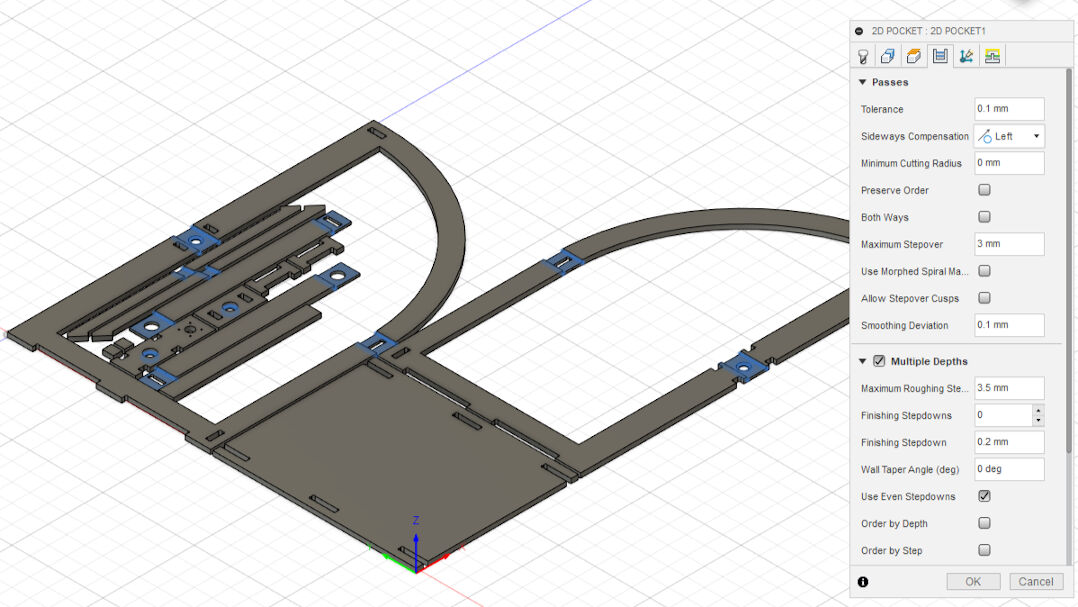
After the first 2D contour, I proceeded with generating the toolpaths for milling the pockets. For this, I selected the "2D pocket" tool in the dropdown of the "2D" section in the toolbar. For this operation, I used again the 6 mm flat end mill bit. After selecting the pockets in the "Geometry" tab, I went right away to the "Passes" tab and again selected "Multiple Depths" and un-selected "Stock to Leave". However, I set the tolerance to be 0.1 mm as I did not want this fit to be so tight. After again checking the settings, I finished this operation as well.
After the pockets, I selected the remaining cut-outs, i.e. slots, on the inside of the parts. For this, I again used the "2D Contours" tool with the same settings as described above.
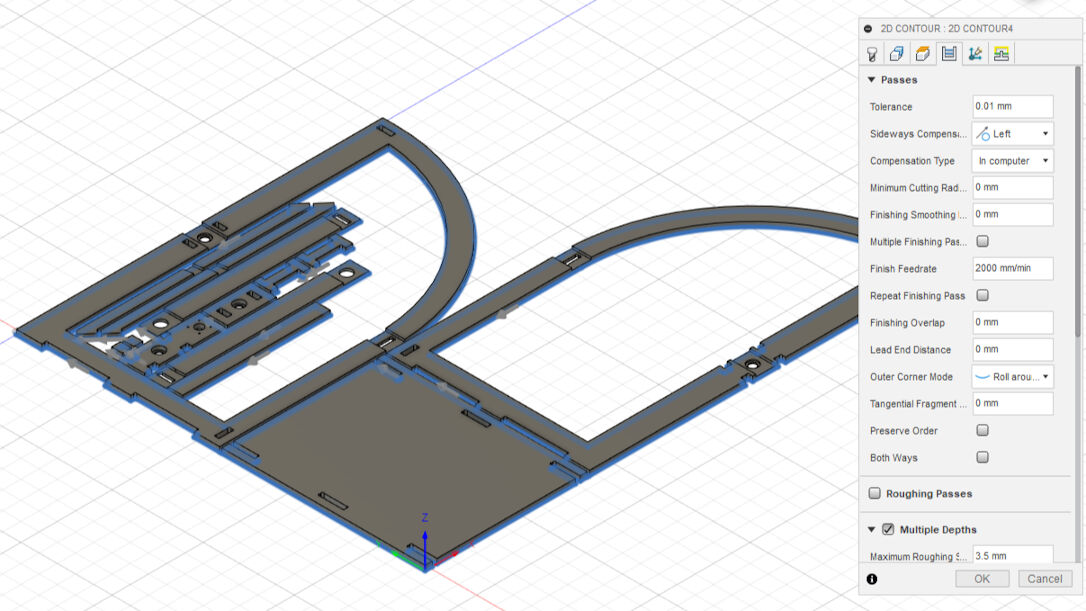
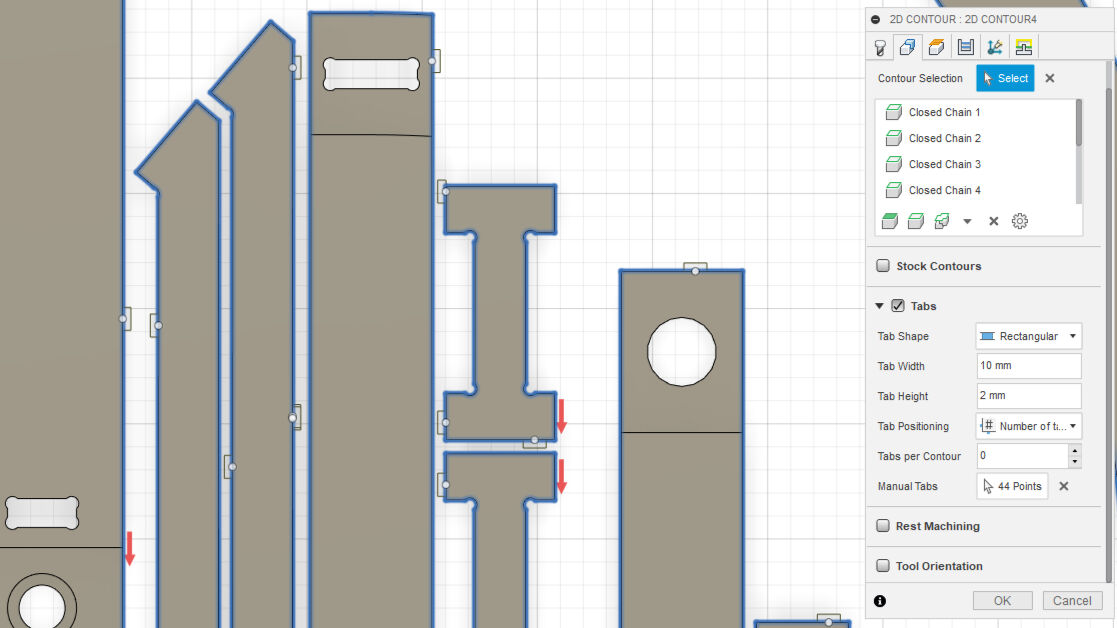
Last but not least, I added another 2D contour to also cut-out all the outside edges of the parts. In principle, I used the same settings as for the other 2D contours. However, there is one substantial difference, namely tabs.
Tabs are small bridges of material intentionally left behind to secure the position of the cut pieces. They can be added in the
"Geometry" tab in the "Tabs" section. Here, I selected a rectangular shape with a width of 10 mm and a height of 2mm. I positioned
them manually by selecting a number of zero tabs to be added and then clicking on "Select" next to "Manual tabs". With every
mouse click on the selected outside contours, I was then able to add tabs. Removal is done by holding down Ctrl and
clicking on a tab. Here, it is important not only to connect a part to the outer stock but also e.g. some inner cut-outs
or other pieces for more security.
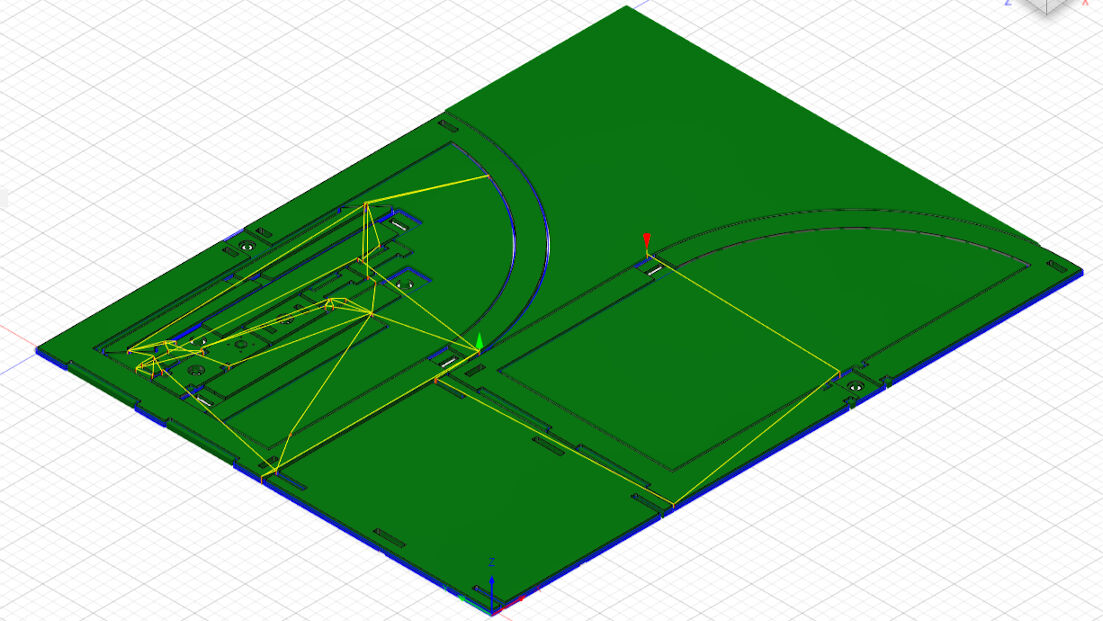
After completing the last 2D contour, generating the toolpaths is finished. However, it is always good practice to double check whether all features of the designed parts are milled. For this, I recommend to click on the very last operation that was added and look at the cut stock. Additionally, the whole process of milling can be visualized by a simulation. This can be done by right-clicking on the setup and selecting "Simulate".
Post-Processing: Generating Machine Code
Before starting the post-processor, I checked again the material thickness of the stock I will be using. It is good practice to measure the thickness multiple times (e.g. more than three times) and average the measurements. Here, I measured again 12.55 mm, the same thickness as the material of the group assignment. Therefore, I proceeded with exporting the toolpaths as machine code.
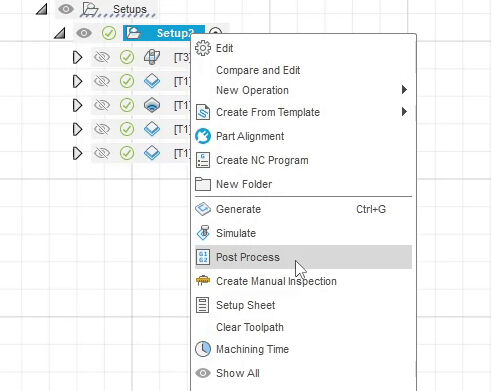
This can again be done in Fusion 360. However, a post processor is needed that is machine specific. Here, my local instructor was giving us the required file. Therefore, I could easily export the machine code, by right-clicking on the setup. This opened a dialog, where I had to add the "Post". I clicked on "Select from local library" which opened another dialog. In there, I imported the file of the post-processor and selected the newly added post-processor as the "Post". The remaining settings were left at their default. I only specified a name and location and was done with clicking on "Post" in the bottom right corner.
This can again be done in Fusion 360. However, a post processor is needed that is machine specific. Here, my local instructor was giving us the required file. Therefore, I could easily export the machine code, by right-clicking on the setup. This opened a dialog, where I had to add the "Post". I clicked on "Select from local library" which opened another dialog. In there, I imported the file of the post-processor and selected the newly added post-processor as the "Post". The remaining settings were left at their default. I only specified a name and location on an external drive and then completed the post-processing by clicking on "Post" in the bottom right corner. This exported the CNC job as a .cnc file.
Cutting on the CNC Mill
The .cnc file on the external drive can be plugged into the computer of the CNC, which is an Easy Worker MasterPro 2513 CNC mill. However, before starting the job, some safety aspects should be considered, the material must be fixed and the job must be prepared in the software before the cut can be made. The safety aspects are already presented in the in the group assignment.
Fixtures for Material
Before being able to cut, the material must be fixed to the bed and the sacrificial layer. Here, we placed a multiplex board 2500 mm x 1250 mm x 12.55 mm (L x B x H) on a sacrificial MDF board on the CNC bed with the dimensions 2600 mm x 1400 mm x 300mm (L x B x H). The CNC has a vacuum system for fixing the material on a bed that is strong enough to suck through the MDF pores. Therefore, I used the vacuum system. However, for security, I furthermore used two plastic clamps to increase fixturing strength. To maximize the working area on the wood, I placed them on the same corner.
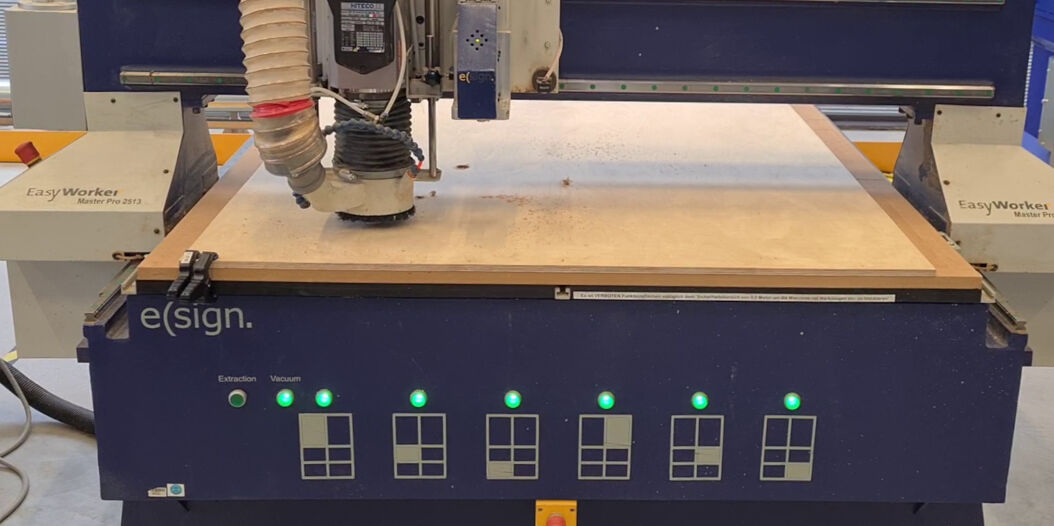
To enable the vacuum system, a high pressure valve has to be opened and the back of the machine. Furthermore, the areas of vacuuming must be chosen by pressing the push buttons switches in the bottom front of the machine (see image). To turn the vacuuming on, the button on their left with the text "Vacuum" must be pressed. Then, the push buttons also light up in green to show where vacuuming is applied. However, as the vacuuming can be relatively loud, I recommend to only switch it on right before starting the job. Ear plugs are recommended.
Starting the Machine
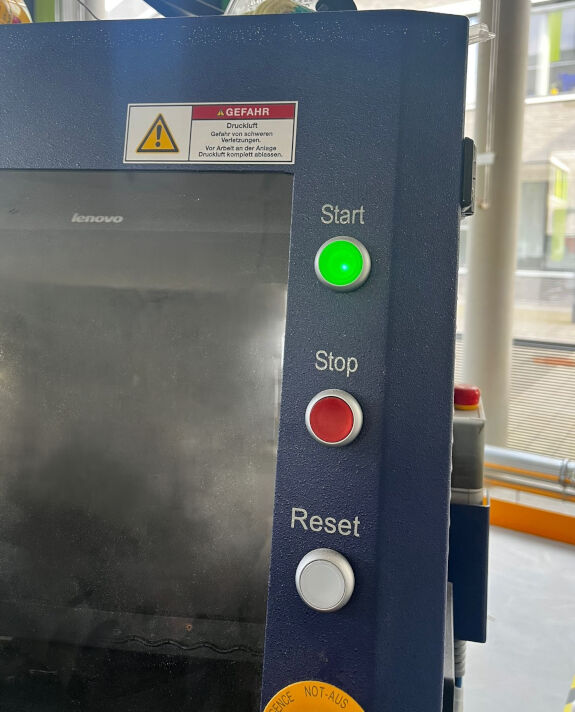
To power the machine, firstly the power switch on its back has to be enabled. Next, the "Restart" button and consecutively the "Start" button on the right of the screen have to be pressed. This should turn the light of the "Reset" button off and the light of the "Start" button on.
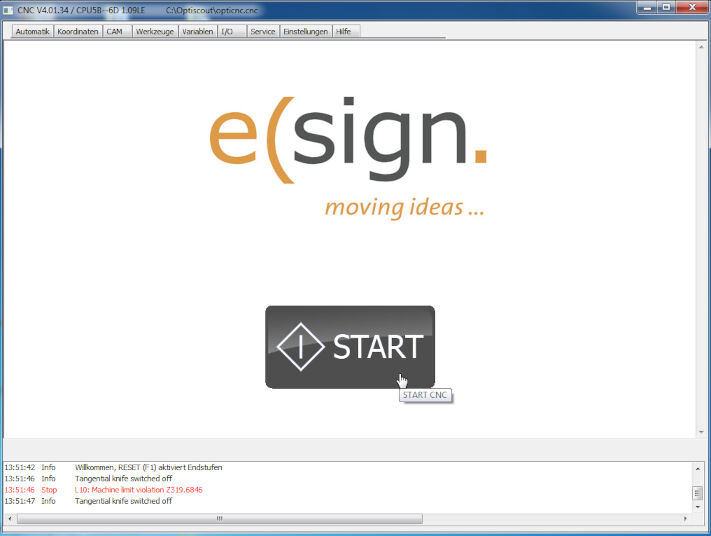
After that, the computer can be switched on and the software CNC 4.0 can be started. This opens a window with "e(sign" as the title. Below is a "START" button that must be pressed to open the window for controlling the machine.
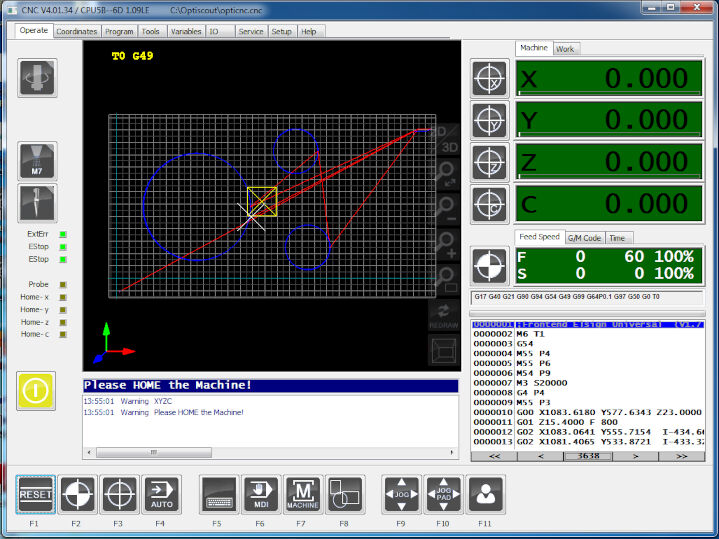
The new window consists of a menu in the bottom that shows multiple functions which can be accessed with these buttons or by pressing the according key. Right above it is the console and even further is the work range of the machine showing the paths the CNC head has traveled and where it will travel in case a job is loaded. In the top right, the current position is shown for the different axes, x, y, z and c (c is not connected). Below, homing can be done and eve further down, the executed G-code is shown.
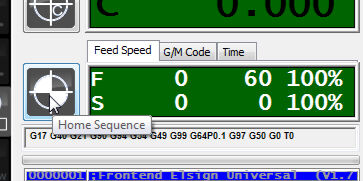
To be able to control the machine, I had to again press the "RESET" button in the bottom left corner of the window or by pressing the key "F1". Furthermore, the machine must be homed as shown in the console's title. By this, the CNC head is calibrated to calculate its position (x, y and z). Homing is done by pressing the "Home" button just below the display of the position. Caution: This will cause the machine to move! Wait, until the console on the computer's display shows the message "home complete". This should now also show the current position on a blue background.
Zeroing the Axes
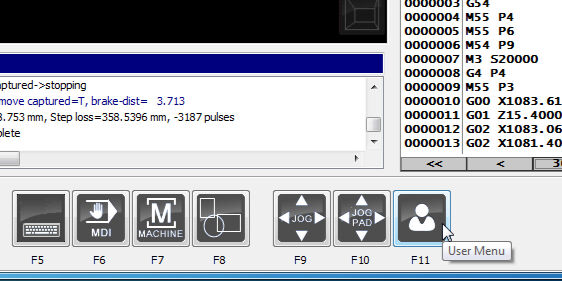
With the homing being done, the zero of the z-axis has to be set. For this, the (6 mm flat end) tool with which will be milled needs to be picked up. To do this, the user menu has to be toggled by pressing the key "F11". This enables different function in the bottom menu. To mount the tool, the button "GET TOOL" (F6) has to be pressed.
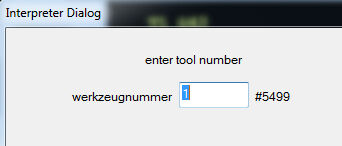
Pressing the "GET TOOL" button opens another window, where the number of the tool that should be picked up needs to be entered. In this case, the flat end tool bit is the tool in slot number one and therefore I typed in "1". After pressing "OK" in the bottom of this window, the machine moves to pick up the tool. Here it is important to watch the machine and the console. In the console it should say what you also intended to do. For example, in case it has a tool loaded it should say something like "dropping tool" and then "picking tool up".
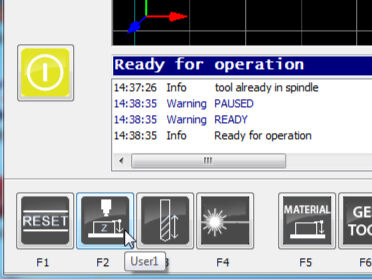
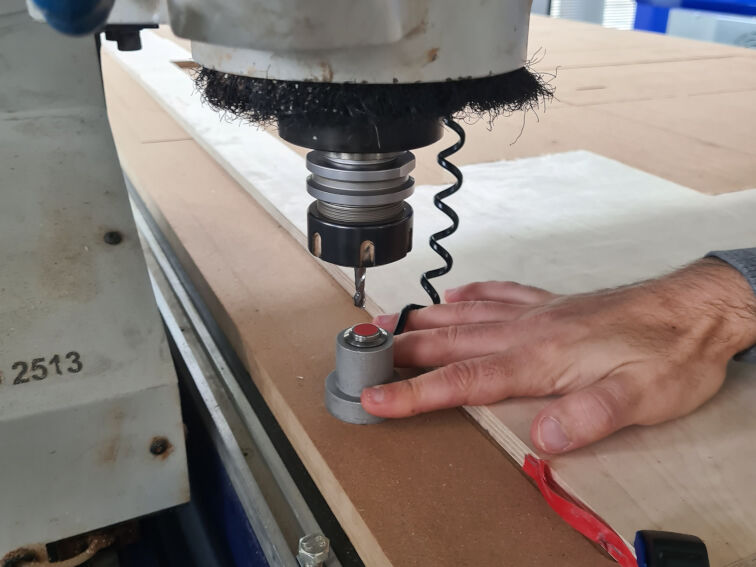
After the tool was picked up successfully, the console should print the message "tool change successful". Now, the zeroing can start. For this, the spindle should be moved with the arrows on the keyboard to the required x- and y-position. For example, if the origin was set at the bottom of the piece, the CNC head should be positioned above the sacrificial layer. In case it was placed on top of the stock, the CNC head should be moved over the stock. For me, the former was the case which is why I moved the head over the sacrificial layer. The next step is a two persons job. One person should place the sensor with a button on the top under the mill bit and hold it in place. Then, the other person can press "F2" or the according button. By this, the mill bit is slowly lowered until it slightly presses down the top of the sensor. By this, the tip's tool is sensed and its absolute position is calibrated.
However, during the group assignment, we also discovered, that this zeroing of the z-axis has a slight deviation of about 0.4 mm to 0.5 mm. Nevertheless, this method can be used for a rough estimate of the zero.
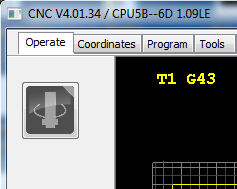
In order to precisely calibrate it, the spindle should be turned on by pressing the button in the top left corner in the window (after removing the sensor obviously and clearing the work area). Then, the rotating mill bit can be brought down by pressing the "Page Down" key until it is slightly above the sacrificial layer. Now, the button should only be pressed for a short amount of time to lower the mill bit by a small distance. This should be repeated until the mill bit cuts into the material. As soon as it does so, the precise zero of the z-axis is found. Therefore, the next step is to save this z-position as the zero.
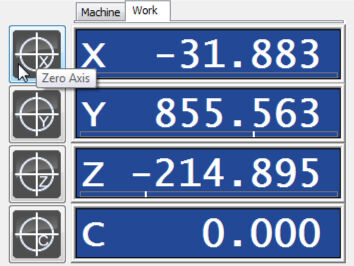
This can be done with the button on the left of the current z-position. By clicking this, the current position is saved as the zero.
Here, it can also be noted, that the display for the current position shows the relative coordinates. For the global coordinates, the tab "Machine" can be toggled.
After the zeroing of the z-axis, the x- and y- axis should be zeroed. For this, the arrow buttons can be used to move to the desired position on the stock but only after lifting up the mill bit by pressing the "Page Up" key.
Starting the Extraction System
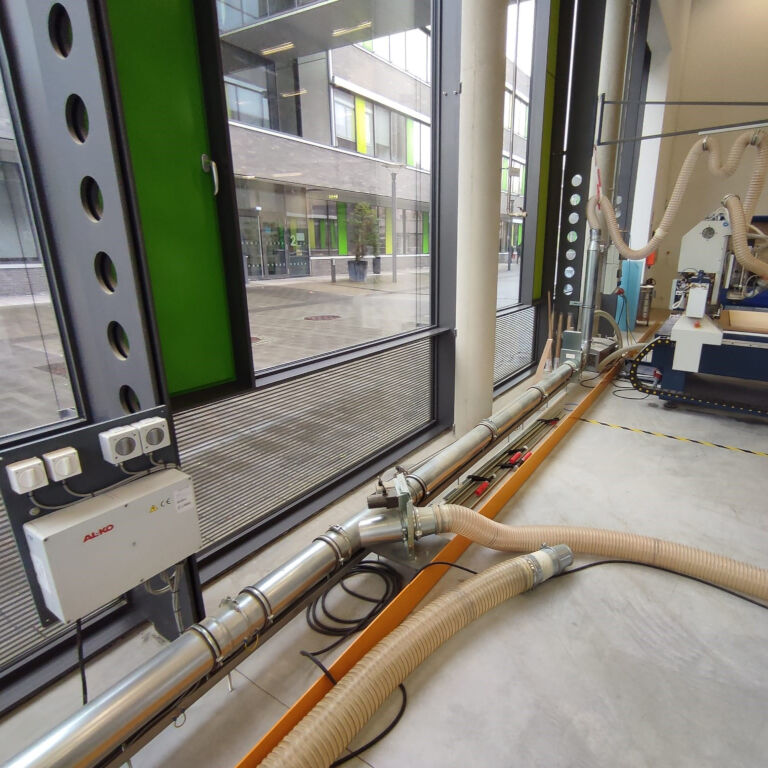
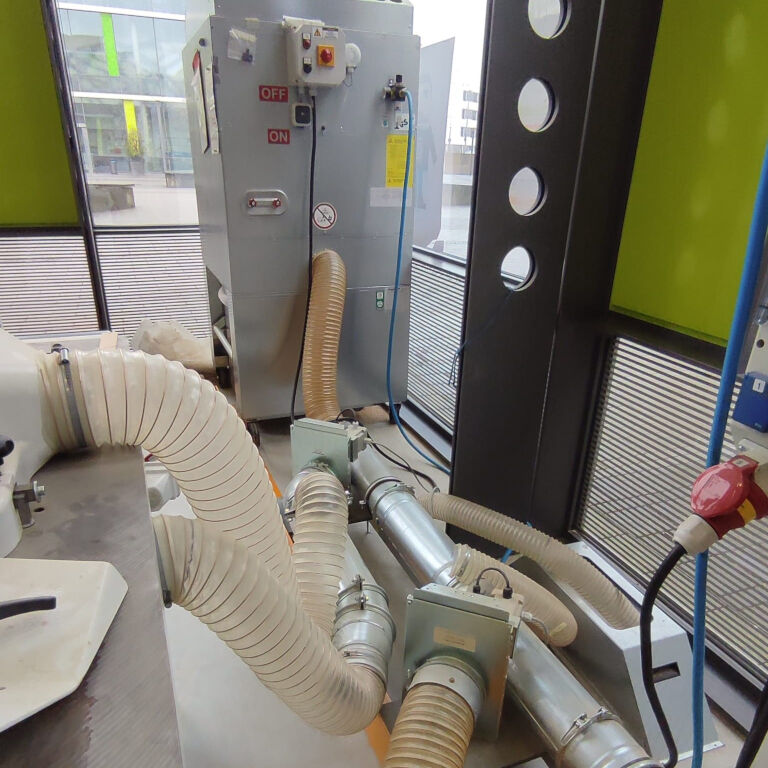
As a lot of dust is generated through the milling process, an extraction system is required. To set it up, the valves should be opened with the control switches and the extraction module should be turned on. There are four switches on the control panel. From left to right, the switches actuate the valves from left to right. Hence, the three left switches should be turned off in case no other machine is used and the right-most turned on. Additionally, the extraction module must be turned on. For this, the square switch with the red signs "OFF" and "ON" should be brought into the "ON" position.
However, as the extraction system is very noise, I only switched it on right before starting the milling job.
Starting the Milling Job
After the steps above were completed, the job can be started. However, there is a list that should be checked before the job is actually started. The following questions should be answered:
- Is the fixturing complete?
- Is the vacuum bed on?
- Is the extraction on?
- Is the valve of the extraction duct open?
- Are the axes correctly zeroed?
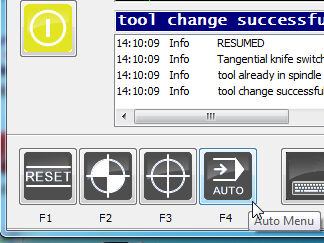
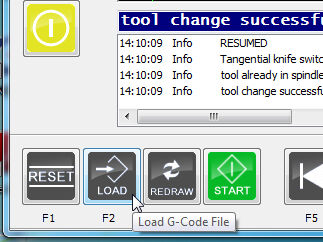
Only if all of these questions can be answered with "Yes", the job can be started. This is done in the main menu which can be reached by pressing "F12" to go back. Then, the "F4" button leads the user to the auto menu. Here, the "LOAD" button can be used to load a .cnc file containing the desired job. Lastly, the job can be started with the "START" button.
The Milling
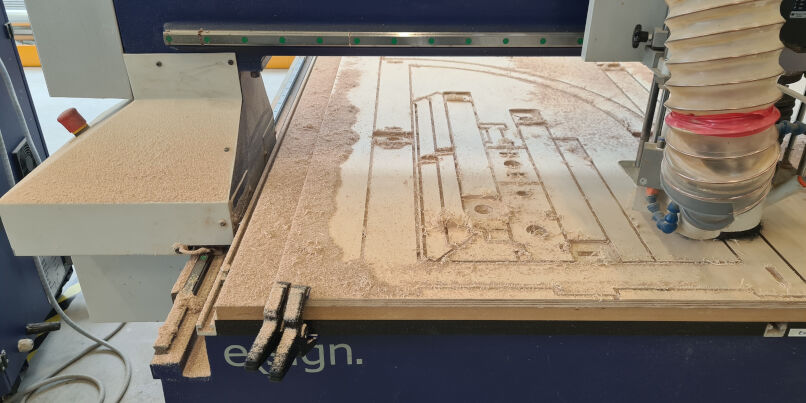
As expected, the CNC firstly picked up the drill bit in the third tool slot and drilled out the holes on the motor mounting panel. Then, it picked up the tool in slot one, the 6 mm flat end mill bit and milled out the slots, pockets and lastly the outside edges.
I was surprised that it actually took quite a long time to mill everything. After (only) one hour and ten minutes, the job was done. Halfway through the cut, the extraction system got clogged and I had to pause the job by pressing the key "F4" to unclog it and vacuum the wood chips.
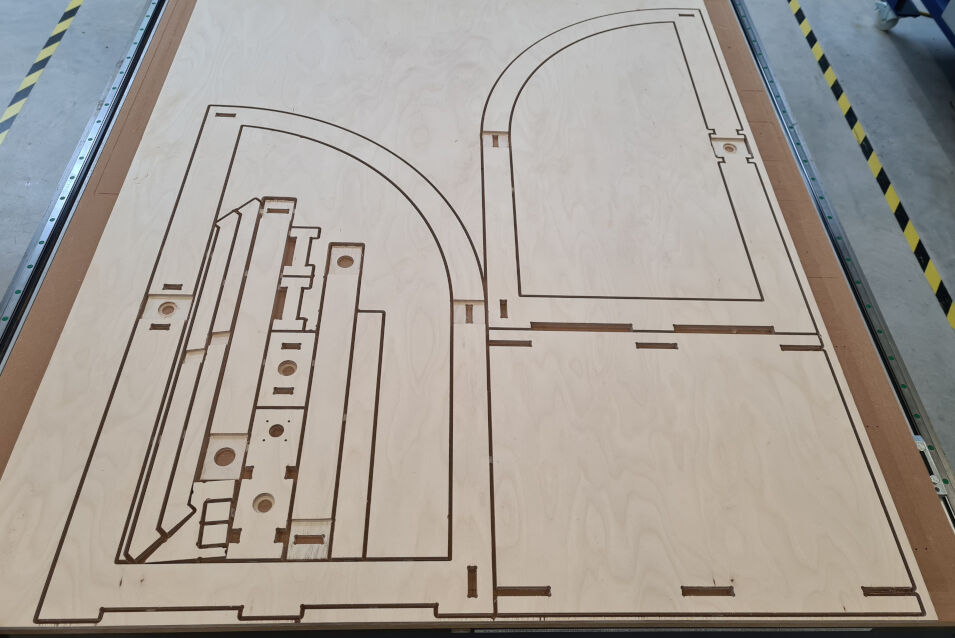
However, after continuing, the job was done without any problem. Have a look at the result! This is how it looks after vacuuming the remaining wood chips.
Post-Milling Processing & Assembly
After the job was done, the CNC automatically puts away the tool. Then, the vacuum and extraction system should be switched off. To shut down the CNC machine properly, the software should be closed first, then wait until this is done. Only then the "Stop" button next to the computer display can be pressed. Again wait a couple of seconds until turning off the machine on the back of the computer model. Lastly, lock the machine to prevent any unsupervised usage.
After having shut down the machine properly, I started with post-processing the milled pieces, i.e. tab removal and sanding. Lastly, I assembled the pieces.
Tab Removal & Sanding
While the pieces were still mounted on the CNC bed with the tabs fixing the milled pieces to the stock, I used an orbit sander with an 240 grid to sand the upper edges. As the mill bit was an upcutting tool, it left relatively rough edges on the top surface.
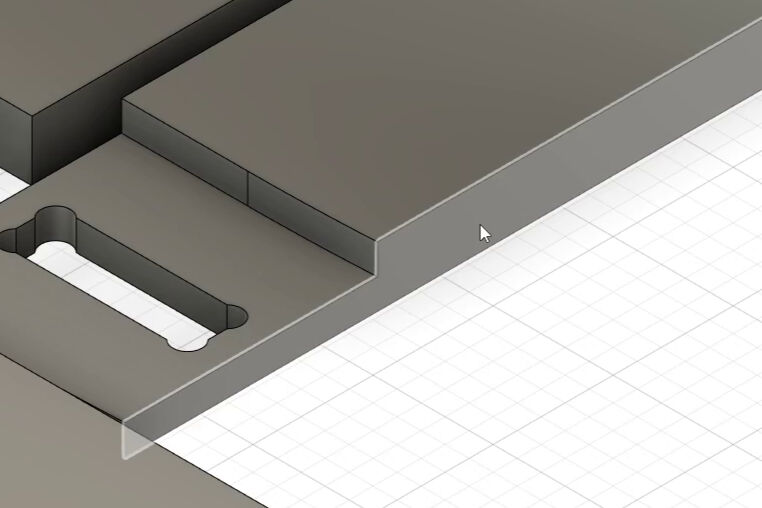
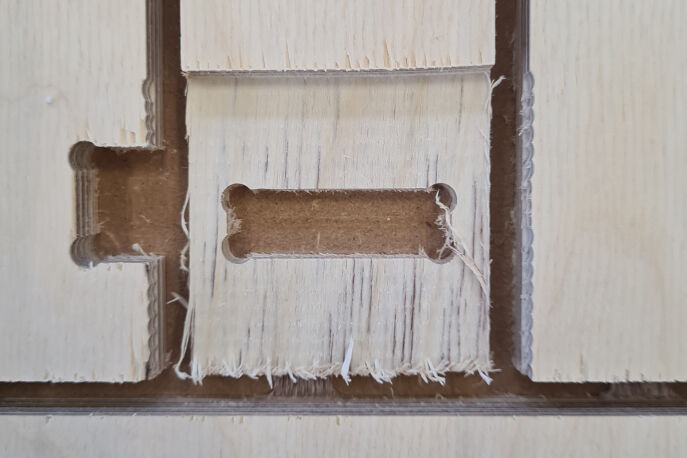
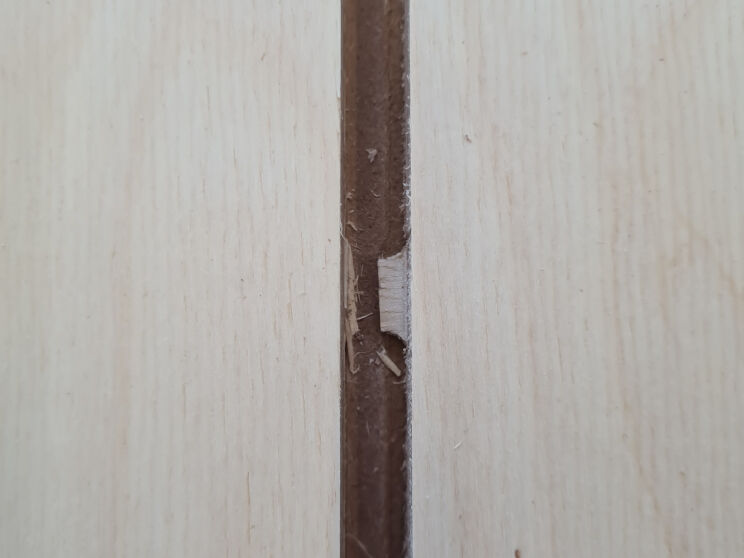
While doing this, I actually discovered, that the milling was not correctly done. This was the case for all pockets. Here, the CNC had milled into the parts immediately on the side as you can see in the image below. However, I did not really mind it and continued sanding the edges on the top surfaces. I assume this is a problem of the CAM processing as it was done for all pockets. I went back to the simulation of the toolpaths to check and in fact, it even shows these wrongly milled pockets in there.
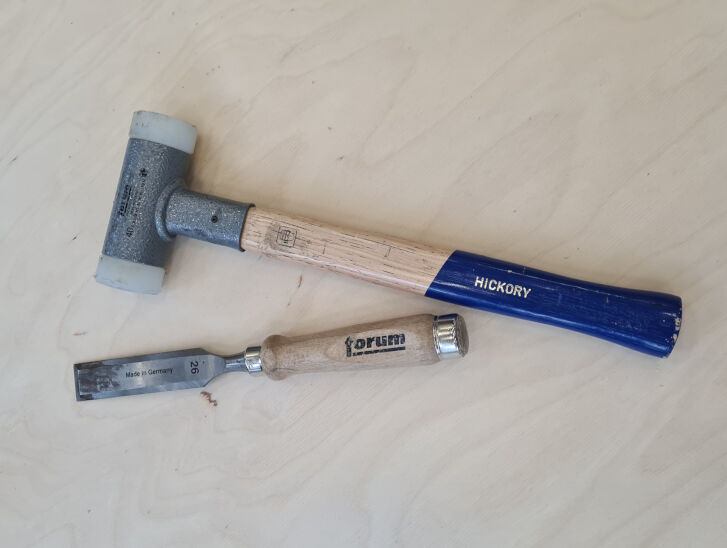
After having sanded all edges on the top, I continued with taking the parts of the CNC bed. For this, I had to remove the tabs first. Here, I used a chisel and a mallet. It was easy to break the tabs along the gran but relatively difficult to break them orthogonal to the grain. However, I eventually managed to break all of them.
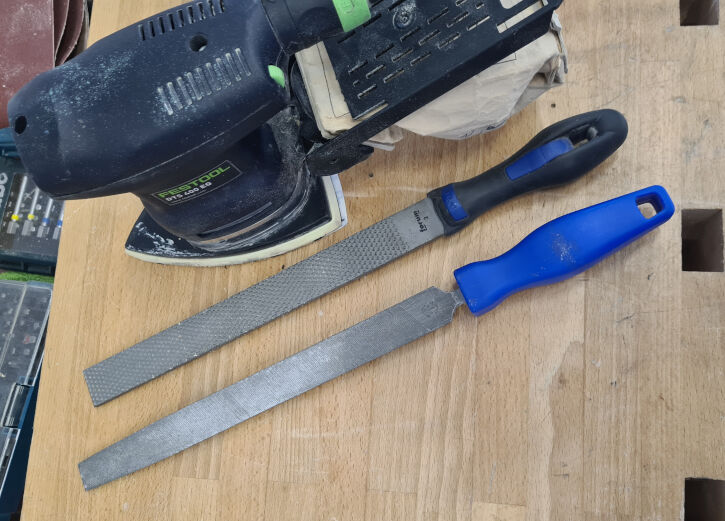
Removing the tabs was firstly done with a rough file for wood, then with a finer one and lastly with a detail sander. This worked really well and did not take a lot of effort.
As the bottom edges of the parts were not sanded, I also used the fine file and the detail sander for these edges and corners.
Lastly, to be able to assemble the parts, I sanded the finger joints and slots as well. After sanding one feature, I tried the fit with the other part of the joint. In case it was still too tight, I sanded it even more.
In total, I spend quite a significant amount of time on the sanding, approximately two hours. This was mainly due to the tight fit of the joint. A slightly increased tolerance in the CAM would maybe have been better, e.g. up to 0.05 mm.
Assembly
Last but not least, I assembled the pieces. For this, I used the mallet which I also used in combination with a chisel to break the tabs. Additionally, in order to not damage the parts, I used a sacrificial piece of wood between the actual part and the mallet.
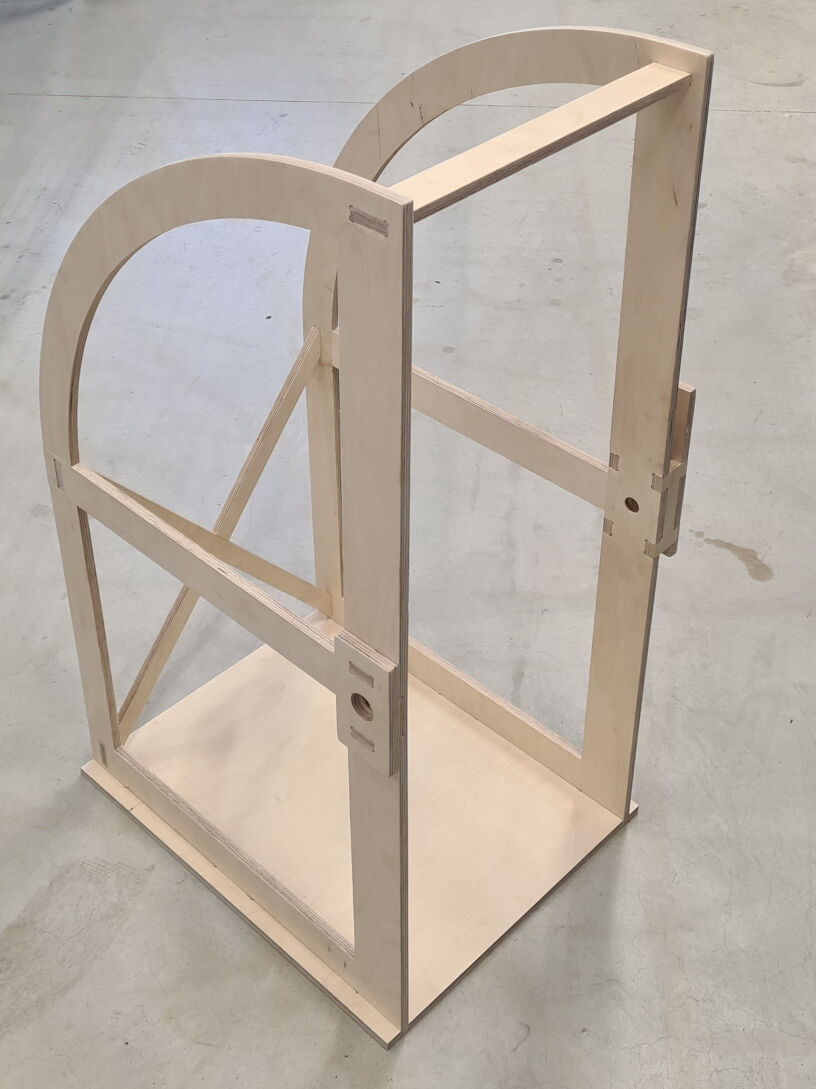
I firstly connected the traversing bars to both parts of the frame's side and the two parts of the x-shaped crossbar. Then, I connected the two sides with the crossbar in the top and the x-shaped crossbar. Furthermore, I attached them all to the baseplate.
After general frame was assembled, I also attached the mounting panels on both sides by firstly attaching the connectors to the panels and lastly the connectors with the panels to the frame.
Design Files for Download
- Frame CAD (.f3d): CAD and CAM of the frame for my final project
