week 3: computer controlled cutting
We were asked to learn how to use both the laser and the vinyl cutter. We were tasked with creating a design for the vinyl cutter and make a cool sticker out of it. For the laser cutter we were asked to create a parametric design and also create a parametric kit and create somthing! And also this the very first week that we get to create somthing, for that I am really hyped and excited!
Assignments
Individual assignments
Create a design for the vinyl cutter
Parametric 2D designing
Create a parametric construction kit and create somthing
Identify and explain the processes involved in both the laser cutter and vinyl cutter
Documentation should include
Design, laser cut and document a parametric construction kit, accounting for the laser cutter kerf, which can be assembled in various ways
Design and document all the processes involved in vinyl cutting. Document how you did it and also show the final outcome of printing
Group assignment (First one of the year!)
Characterize your laser cutter's focus, power, speed rate, kerf, joint clearance and type.
Document your work to the group work page and reflect on your contribution on the group assignment.
This week, for the group assignment I simply just helped with testing the power to speed ratio for the laser cutter. Obviously as the speed decreased, more of the cardboard was burned due to the laser having more time to burn the cardboard. Even the power had an effect but wasn't as noticeable as the speed.
Thats a lot of work to do for this week, seems like the fab academy is changing gears and is getting faster. For that I must improve and do my best as well!
Laser cutting
For laser cutting I am using the epilog fusionedge laser cutter. It is a type Co2 laser cutter and is increadibly accurate. Before I begin with designing the parametric design and start cutting it, let me offer a breif explaination on how it acutally works
Firstly we have where the laser actually is generated form and how it is led to the nozel through the use of multiple 45 degree mirrors.
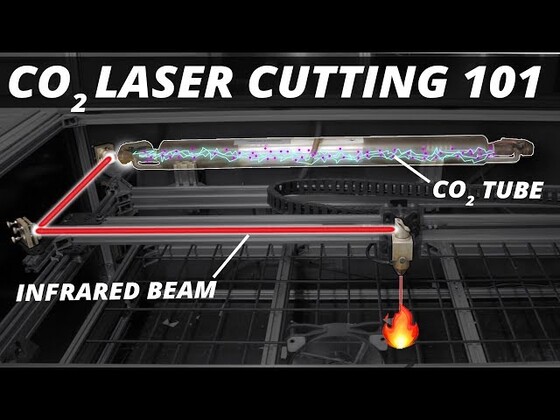
Then we have the actual nozel head where the laser is focused and is also where the laser is acutally directed to the bed where it starts cutting. The nozel is a very important part of the laser cutter as it is the part of the laser that determins the focal point of the laser and if not focused properly it could have very bad results on the cutting.

Designing
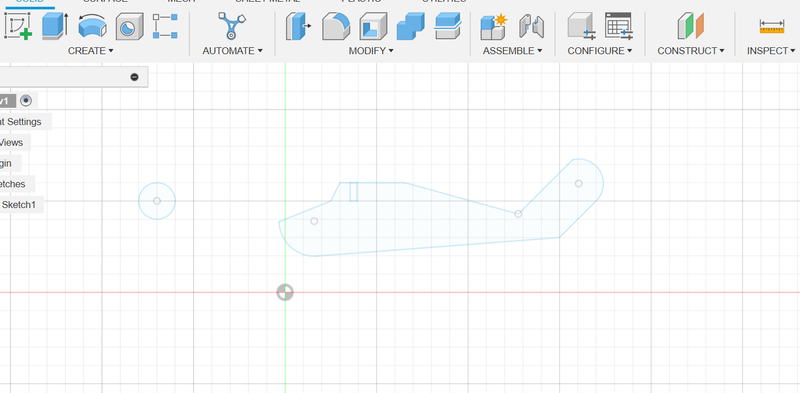
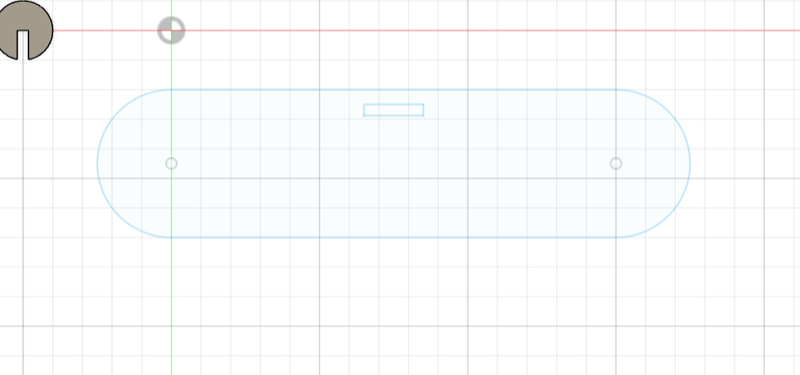
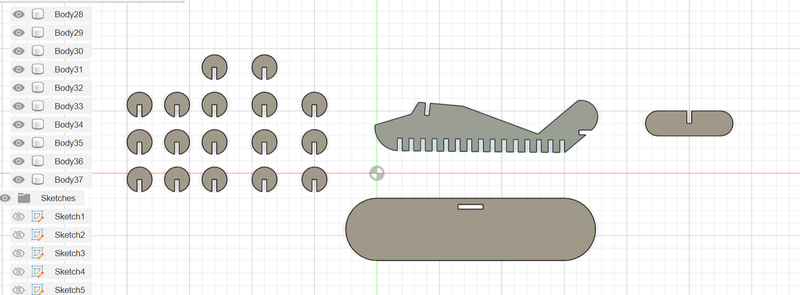
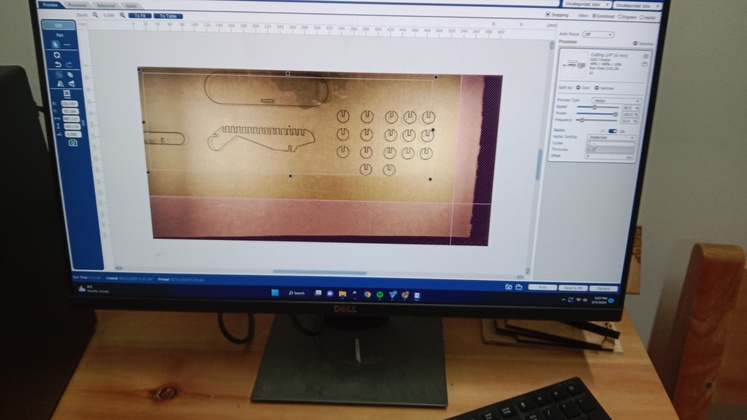
For the laser cutter I want to create a normal plane using the pressfit joint we were taught of to get a feel for and learn how to use the laser cutter. But before any of that we would first have to design our parametric kit.
For that i chose fusion to do so. Even though fusion is a 3D designing software, Its methods on creating parameters is increadibly simple and also its sketch feature gives a lot of freedom . Then without further a do, lets get right into designing our plane.
1 We would have to create parameters for the design, hence the name parametric design.
1 Then we will make a sketch of all the components with the help of the parameter we created
1 After that we just extrude the model to be the thickness of the actual design
Here is the way i did it using the pictures as a way to mark all that i have done

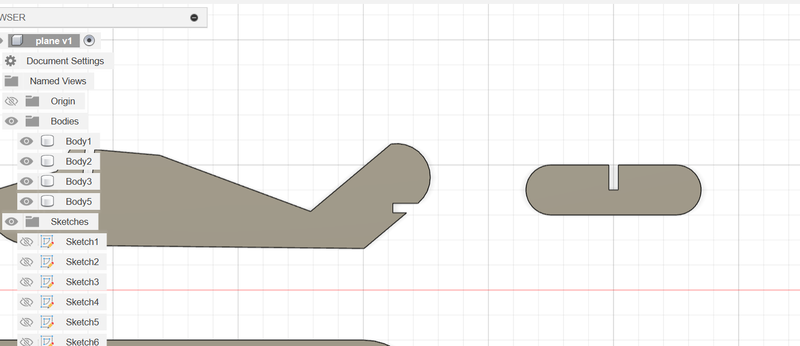
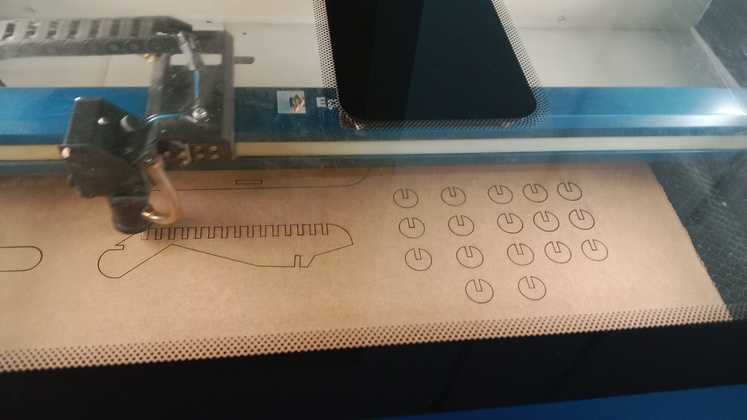
After all of that we can finally start with the actual laser cutting. But before that we would have to export our file as a DXF file.
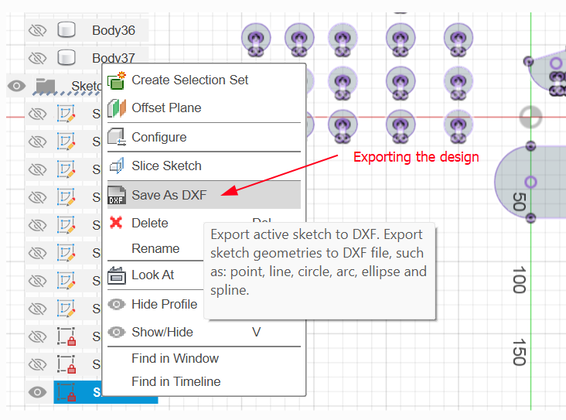
With all of that lets finally see the cutting process and witness the final project
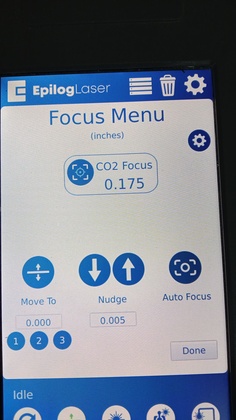
With that, all you need to do is to press print which sends your design to the laser printer. After its there, You would have to adjust the focus of the laser printer so that the focal point is at the correct place. If that is not set correctly, the design might not be cut properly and the kerf would be larger. To avoid that you would have to press the auto focus to correct your focal point.
Laser cutting process
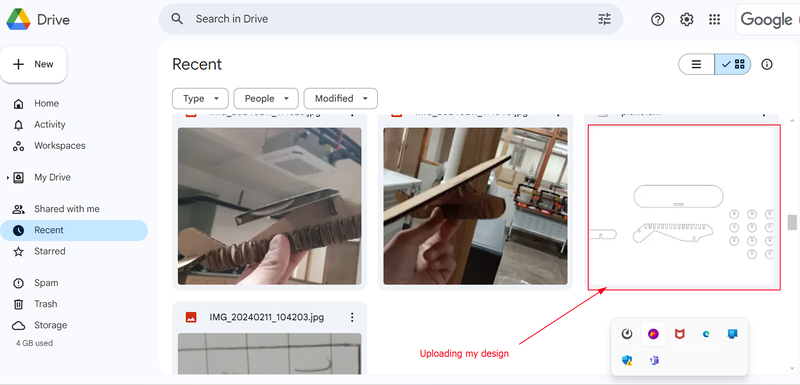
In our fab lab we have a laser cutter that is connected to a computer. We usually have to create our designs and have to upload our designs onto the computer that uses the laser cutter. To do that we usually upload our designs in our google drive and then log into our gmail in the laser computer and download the design there.
With that done you have to print the design. Before printing the design, You would have to do some procedure where you have to identify some things such as the laser power or the laser speed. You have to be really careful while adjusting the laser power and speed as if you do it carelessly. You would risk a fire hazard taking place and causing a big problem. Laser printers are the most risky machines that are in the fab lab.
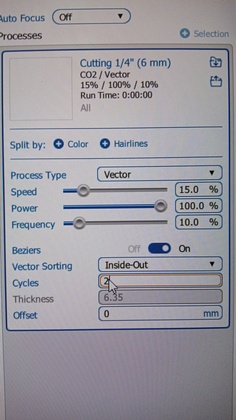
With that, all you need to do is to press print which sends your design to the laser printer. After its there, You would have to adjust the focus of the laser printer so that the focal point is at the correct place. If that is not set correctly, the design might not be cut properly and the kerf would be larger. To avoid that you would have to press the auto focus to correct your focal point.
Now finally you can select your design that you uploaded and then you can start printing!
Printing!
Vinyl Cutter
I wanted to create a sort of name tag for myself or a logo for my project that i could maybe stick to my laptop or on to my project itself!
Before anything I need to make a plan on how to create my design, and the way i seek to do it is by.
Getting to know how the vinyl cutter actually works
Create sketches on how the design is going to look
Start designing and export it.
Finally cut your design using the vinyl cutter
How it works
A vinyl cutter is a computer-controlled machine that trims vinyl material into letters and shapes with precision . It is a versatile tool that can be used for various projects, arts, and crafts Let's take a closer look at how a vinyl cutter works:
1 Design Creation: To begin, you need to create your design using software such as Illustrator, Corel Draw, or InkScape . These programs allow you to create artwork, add text, and manipulate shapes.
2 Importing Artwork: Once your design is ready, you import it into a vinyl cutter. While importing your artwork, you file must be a certain type of file such as a SVG or DXF
Thats how to use a vinyl cutter. The next pictures will show case the different components of the vinyl cutter.
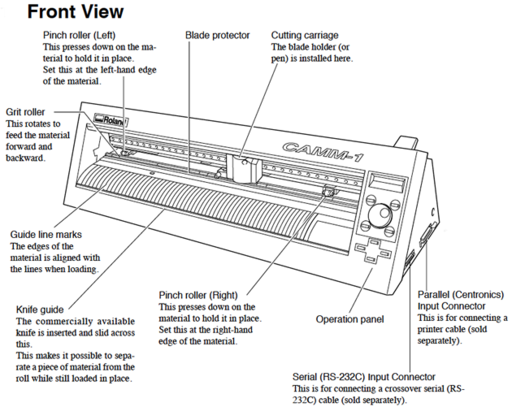
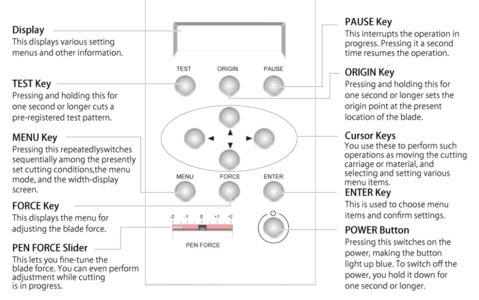
image source
Sketches
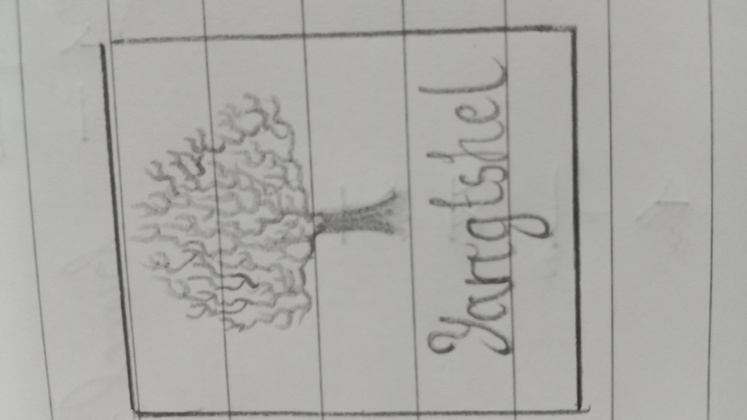
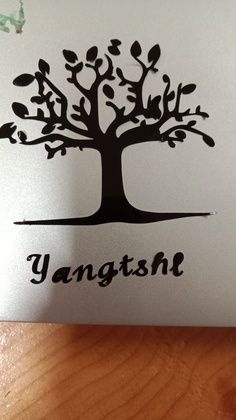
For the design, I did not have a really clear idea on what i acutally intended to make. Because of that i ended up creating a lot of sketches. Some were name tags that had my name in it with different fonts and designs. Other designs were a type of logo for my project.
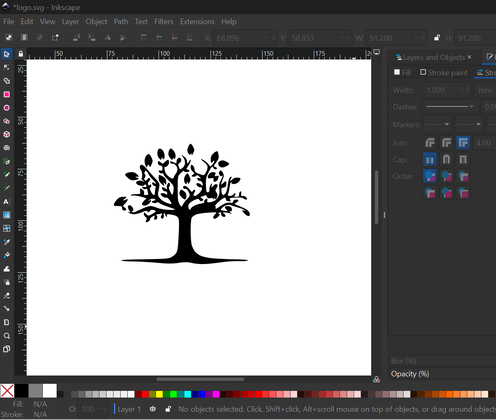
After a while of doing this I came up with the perfect design. What I am thinking of is a sort of tree that is going to be above my name that is going to be enclosed with a circular border. Atleast that is how i want my design to look like.
Designing
If I want to cut my designs into stickers using the vinyl cutter, I would have to recreate the design in my 2D designing software. The 2D designing software i am going to use is inkscape. Inkscape is a powerful 2D designing software that has many different tools to turn my sketch into a design.
Firstly i tried to import my sketch into Inkscape and then use the trace bitmap feature to turn my sketch into a vector image.After doing so I will be able to easily remove the fill and then have the design outlined to finish up with my design.
As you can see the design doesnt look that good, that is because when converting a sketch into a vector image, a lot of uneeded things are also converted to a vector image. With that it reduces the design quality and overall asthetics of the entire design.
To counteract this problem, I have decided to create the same sketch but this time I am only going to use it as an reference and create the entire design from scratch.
Firstly i try and find a tree that is similar to the one i created.
Then i added the text, which is my name in the font that i liked most
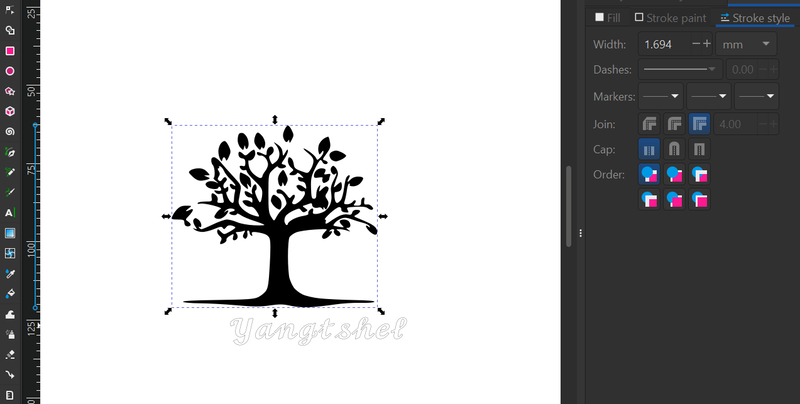
With that finished i started adjusted the fill of the design so that it would only have the outline.
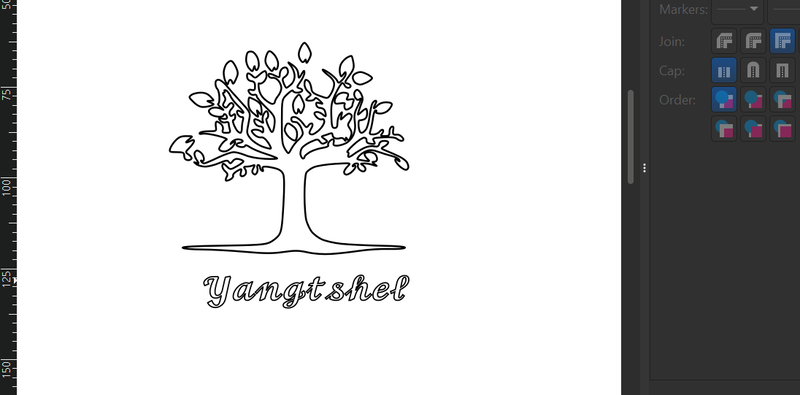
Finally i created the border and with that i am finished designing
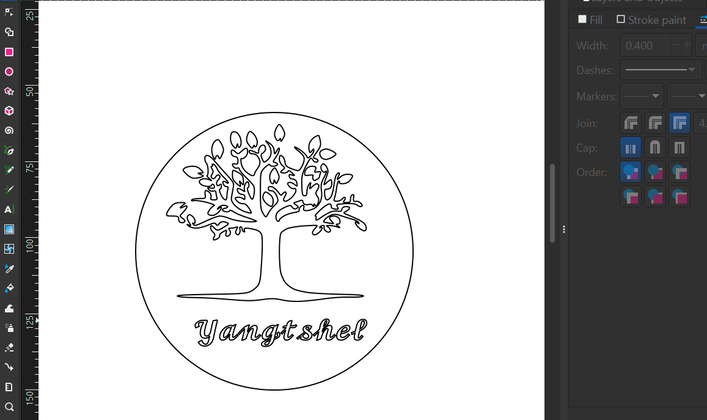
As I am finished with creating my design lets get right into creating the design. Firstly like the laser cutter, our labs vinyl cutter is also connected to a different computer. Because of that I would have to export my designs to the computer that is connected to the vinyl cutter. Likewise I again used google drive to upload my designs and then download the design through my google drive in the computer that is connected to the vinyl cutter.
After that has been sorted out I exported my design to the software that the vinyl cutter uses.
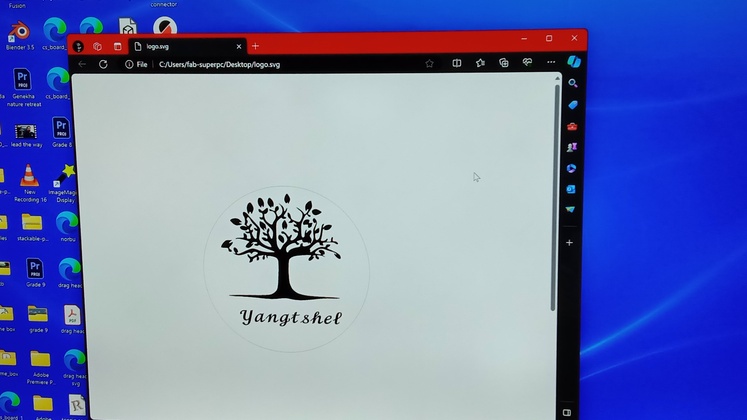
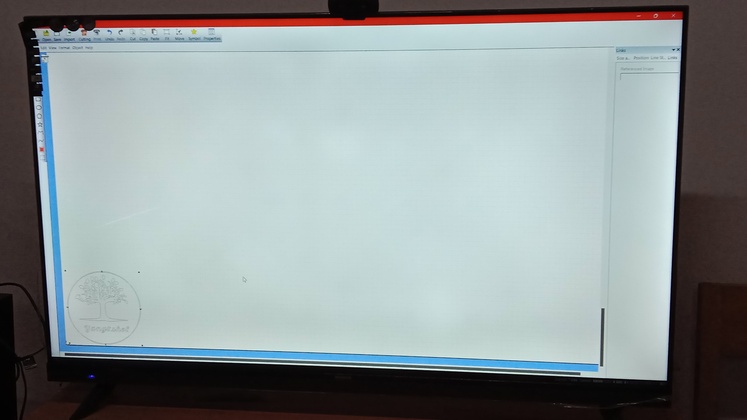
In the software I make it so that only the outline to my design is showing so that it could act as a path for the vinyl cutter to cut. I also made it so that the design would start cutting from the origin which made my design show up at the corner of the page.
For designs that do not have outlines for the printer to cut simply, you can use a tool in the cut studio software known as extract contour line which extract the contour lines of the svg
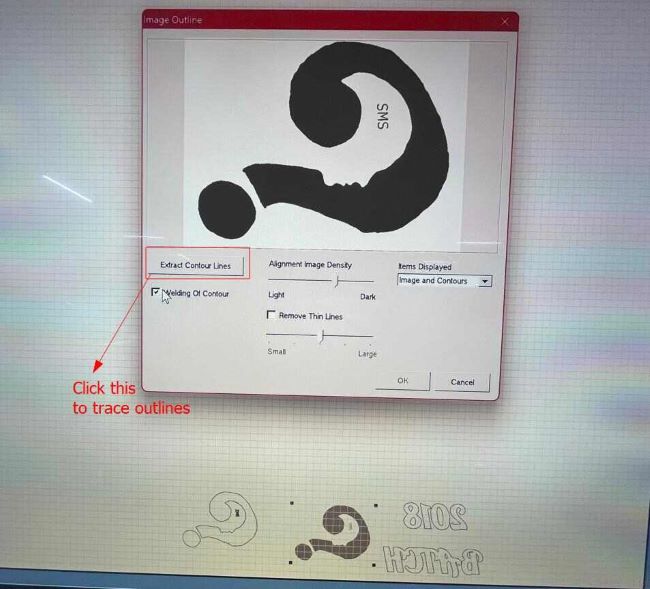
the above image is from Damzang Chimi Seldon's documentation with her permission!
After that we used the ctrl P shortcut to print our design.
Pressing the ctrl P shortcut sends out the print command to the vinyl cutter. with that These are the settings I used to cut my design. The settings of the vinyl cutter mainly consists of the speed, force and then the cut depth of the blade.
- Speed : The speed of the vinyl cutter is really important as well. This is because if the speed of the vinyl cutter is too fast. In the best case, the design wont cut properly and then in the worst case, the cutting blade might just snap. Therefore it is important to keep the machines speed at the recommended level. The speed of the machine also depends on the type of blade you are using. The blade I am using is the 45 degree blade for which the recommended speed is 20cm/s.
- Force :The force of the blade is very import. If too much it could also cut through the protective layer beneath the actual vinyl sheet which wont be good for the design. Even if the force is too less it would cause problems as the design might not cut properly. The settings of the force is dependent on the blade you are using and the thickness of the sheet of vinyl you are using. The sheet I was using is the 3mm vinyl for which the default and recommended force is 50gf
- Depth :The depth of the blade is something you set by manually changing the depth by spinning the thread on the blade holder. The perfect depth can be determined by simply pressing the blade lightly on top of the vinyl sheet and then run it over it. The depth should be enough to cut the first layer but not enough to slice through the protective layer
Learned how to use the laser cutter.
Learned what is a kerf and also all its implecations in laser cutting.
Learned parametric designing and also teh use of parameters.
Learned how to use the vinyl cutter.
Learned the way use the vinyl cutter to set origin.
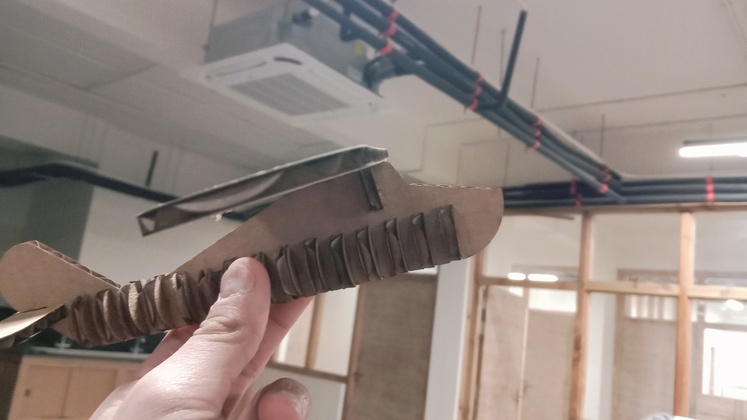
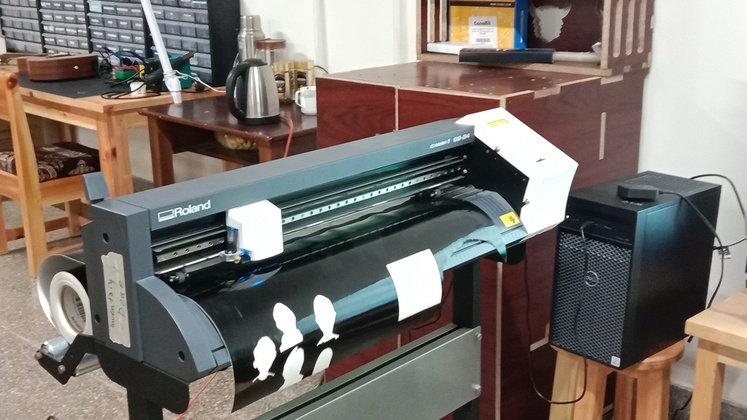
This is how it looks after the cutting was finished.
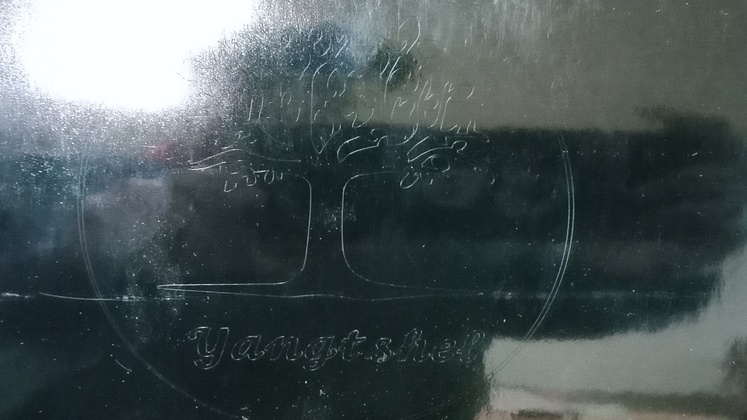
After that I stuck it to my laptop and began with the tedious task of weeding and taking the top layer off.
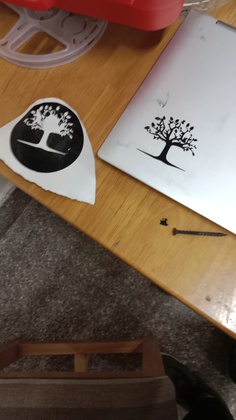
And after all that labour we have this