Week 5 - 3D printing and scanning
This week was somthing that i thought would be simple enough as I already had knowledge on how to use the 3D printer. Though 3 D scanning would be a first for me. Generally I hope that 3D scanning would not be that complex as I dont know how complex the task actually is. Generally I didnt think much about it. The last thing to mention would be that I will have way to much fun with this week.
Neils Lecture
WOW! I really thought that i was done for. I was almost certain that i would be pick for the random review. But luckily I wasn't. The lecture mostly included the workings of 3D printing and a little about 3D scanning. Sadly though the lights died shortly after the lecture got into its peak : (. No worries though, as I was able to continue the recording the next day. All and all the class was a bome of entertainment
Individual Assignment
As always we have this weeks assignments. This week is particularly not that taxing or demanding of my time. Therefor i am going to enjoy doing the assignments of this week.
Firstly I have use some sort of 3D scanner
I also have to learn how to use the 3D printer and use it
I also have to document the entire process like always ; )
Group assignment
We are also issued a group assignment this week
We have to learn all the capabilities of our 3D printer
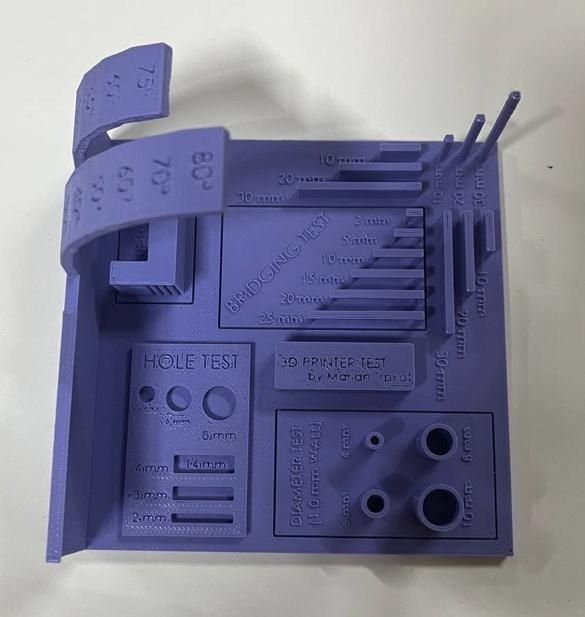
For this week we had to test the limitations of our 3D printer. The printer we were using is the Original Prusa i3 MK3S+.
For the printing test we will using the All in one printer Test.
After our printer completed its test by finishing its print, this is how it came out.
To figure out what more has happened with our test and what we were able to get out of it, go to our group assignment right here --> Group Assignment
3D Scanning
3D scanning is the process of analyzing a real-world object or environment to collect three dimensional data of its shape and possibly its appearance. With thtis data you generate a 3D representation of the object in your device. It is a powerful process that has countless possibilities. This week we are going to explore into the realm of 3D scanning. I feel as if I have way to much power ; )
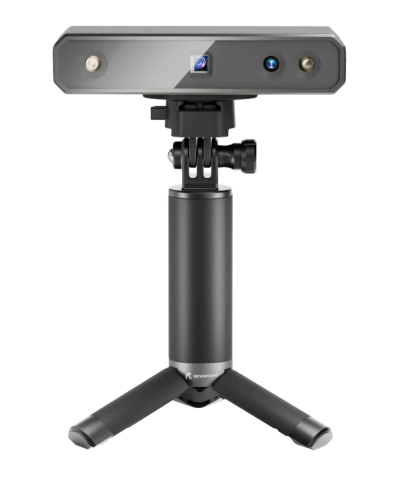
Firstly let's see how the 3D scanner actually works.
The scanner works by sending light infront of it and it senses the light that is returned through reflection. It also senses the the time taken for light to come back which determins the depth of the object. The 3D scanner uses either a blue or white light.
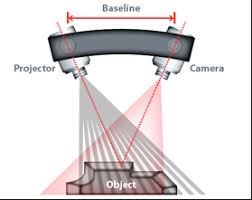
Thats how a high quality 3D scanner works. But I have to face a problem now. My lab doesn't offer such scanners so I have to find another way out ; )
Now I was lost for a while as I had to find an alternitive to the 3D scanner which I couldn't find at that moment. That it suddenly snapped. As if a imaginary light blub just lighten up in my mind. I could maybe use my phone to 3D scan!
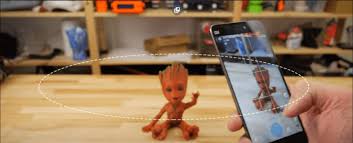
Let's now see how a phone can 3D scan. Ohh this is going to be fun! A phone can 3D scan by the use of photogrammetry. Photogrammerty is a process in which involves taking multiple images form various angles. After which all the images are sitched together to form a 3D model. To do that multiple app have been devloped for the sole purpose of photogrammetry for phones.
Polycam - 3D scanner
PolyCam is a popular 3D scanning app available for iOS, web, and Android devices. It allows users to capture the world around them and create accurate 3D models using their mobile devices, DSLR cameras, or drones. Its is currently one of the most popular 3D scanning app for the mobile phone.
To use Polycam, you can take a series of photos following basic photogrammetry rules. The app then processes these images and turns them into a 3D capture. The captures can be used in various professional 3D workflows, such as floor plans, architectural renderings, VFX and filmmaking, 3D art, and scene building.
Polycam offers features like LiDAR scanning (available on compatible devices), photo mode, and the ability to capture full 360-degree photos. The app allows users to edit their 3D captures directly on their devices and export them in various file formats, including OBJ, GLTF, FBX, DAE, STL, and more. These exported files can be further cleaned and edited in other software applications.
Not only that but, there is also a really great community that constantly shares multiple 3D models. The app itself also offers alot of tutorials that make the app itself user friendly.
Scanning
So now that we know about how to use the polycam scanner. Lets begin with the scanning.
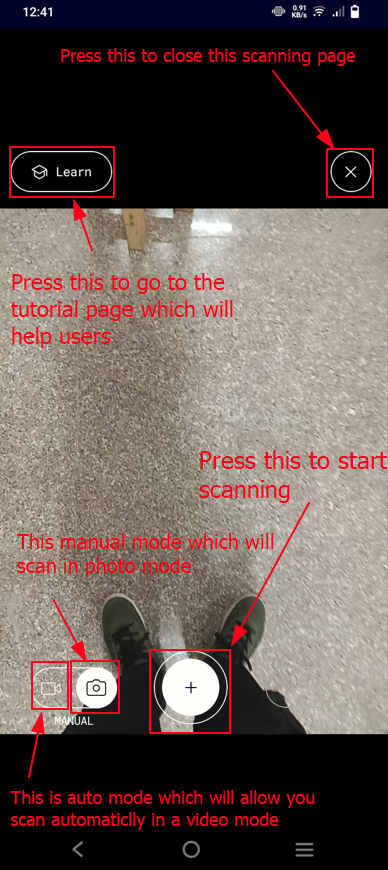
Firstly Lets open the app. After opening the app this is the very first thing that will come to veiw
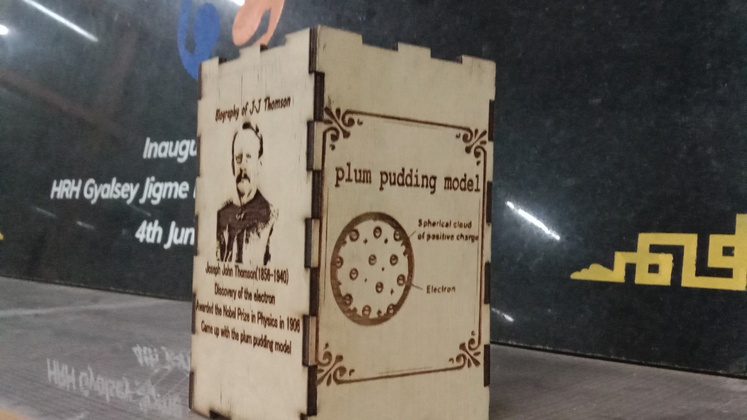
After that I 3D scanned a laser printed box that had a lot of text to see if whether the 3D scanner would be able to pick up the text as well
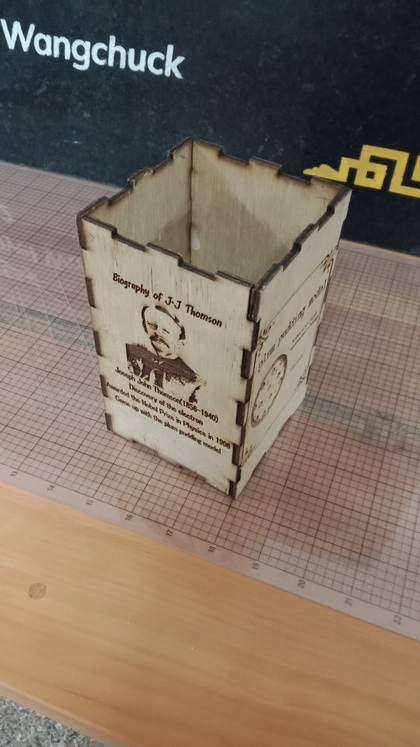
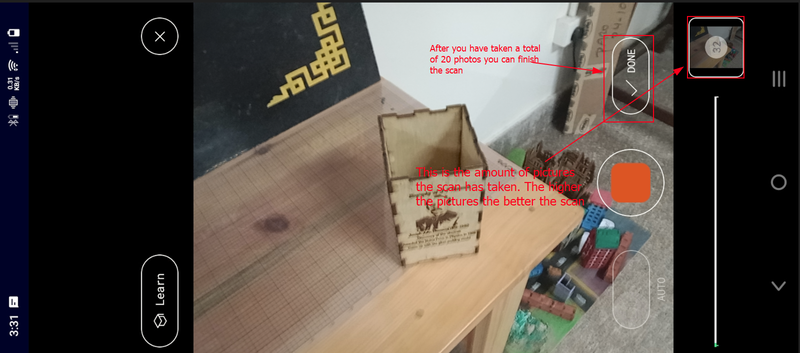
This is how it looks while scanning
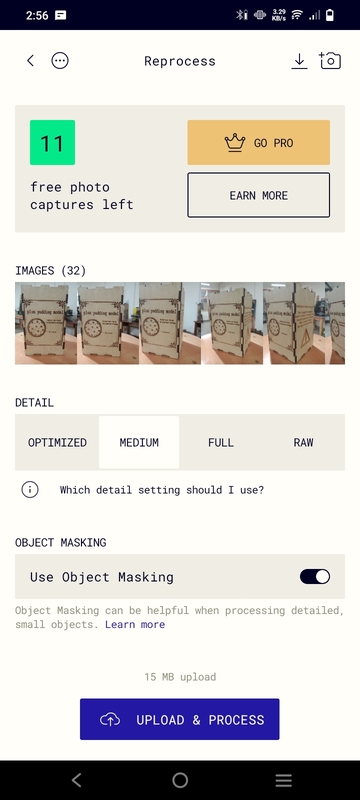
After you are done with the scaning process this is the page you will see! Then you can just press upload and then you have you have your very own 3D scanned model
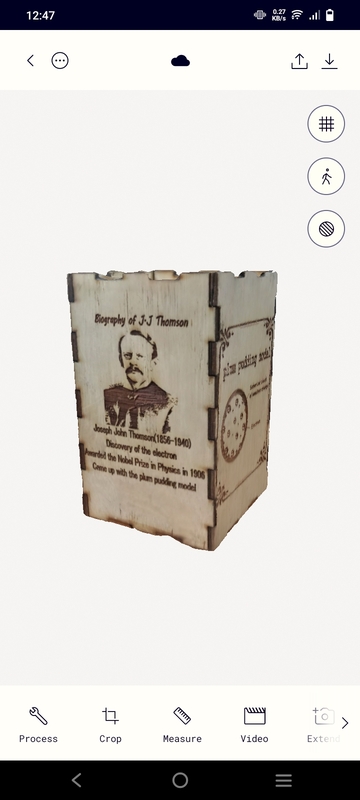
This is the how the 3D scanned model looks like.
What I learned about 3D scanning
Firstly to speak, This is the first time I 3D scanned anything in my life. Further more it was with a mobile device. Due to all the things that were new to me, I thought that the scanning process wont be that good. But I am fairly surprised seeing how good the results came out to be.
Either way lets talk about all the information that i have gathered with this assignment.
Firstly the polycam 3D scanner for mobile design were quite accurate and in good quality as well
This is like a reminder for me, I really need to open up my eyes as the world has several more cool things like this 3D scanner that i have no clue about.
3D printing
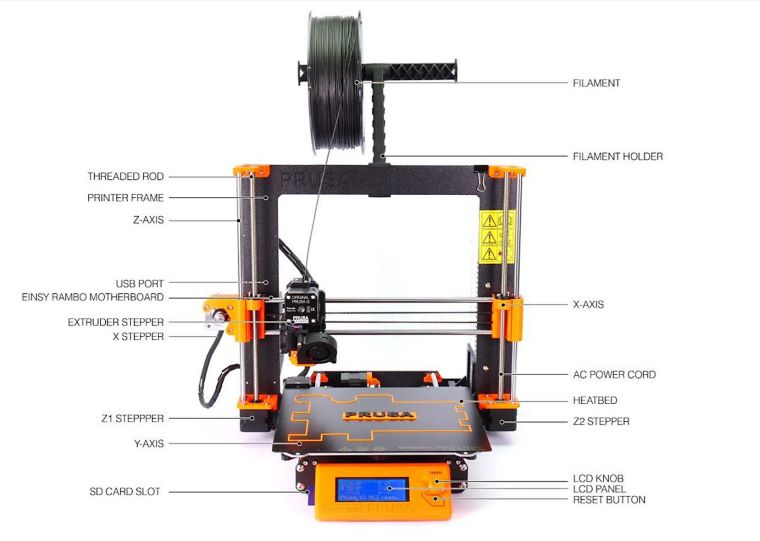
Now lets now get into the releam of 3D printing! The 3D printer that i am going to use is the pursa 3D printer.

Width - 250mm
Height - 210mm
Length - 210mm
This week we are going to be 3D printing, For that it be better if we got to know a bit more about what we are actually dealing with and how the 3D printer is going to print
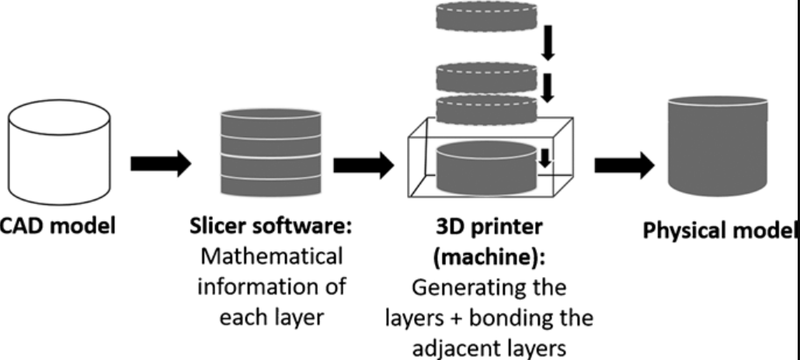
The 3D printer is catagorised as an additive Manufacturing device. This is where a machine manufractures or creates somthing by adding layer by layer for it to create somthing.
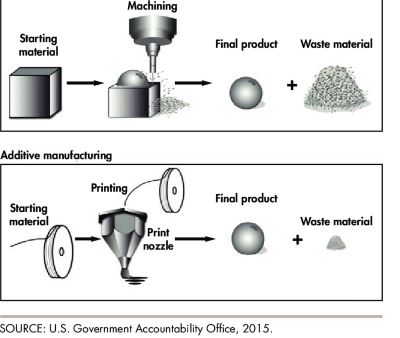
There are two main types of manufacturing processes. In a FabLab, you can find a range of machines for both additive and subtractive manufacturing which are crucial to now about
Additive manufacturing.
Additive manufacturing is the process where we create something layer by layer.(As explained before)
some of the machines that utilize the additive manufacturing process are:
FDM 3D Printers: Fused Deposition Modeling (FDM) printers are commonly found in FabLabs. They use a filament of thermoplastic material that is extruded and deposited layer by layer to create 3D objects. Examples of FDM printers include Ultimaker, Prusa i3, and MakerBot Replicator.
SLA 3D Printers: Stereolithography (SLA) printers use a liquid resin that is cured layer by layer using a laser or UV light. SLA printers are known for their high resolution and accuracy. Examples of SLA printers include Formlabs Form series and Anycubic Photon.
Subtractive manufacturing.
Subtractive manufacturing, also known as machining, is a process that involves removing material from a solid block or workpiece to create the desired shape. Here's some of the machines that use the subtractive manufacturing process.
CNC Milling Machines: Computer Numerical Control (CNC) milling machines are used for subtractive manufacturing. They use rotating cutting tools to remove material from a workpiece and create precise shapes. CNC milling machines can work with various materials, including metals, plastics, and wood. Examples of CNC milling machines suitable for FabLabs include desktop-sized machines like the Nomad 883 Pro and Shapeoko.
Laser Cutters: Laser cutters use a high-powered laser beam to cut or engrave materials such as wood, acrylic, and certain types of plastics. They are versatile machines that can create intricate designs with high precision. Examples of laser cutters suitable for FabLabs include the Epilog Zing series and the Full Spectrum Laser Muse.
Ok thats enough about the processes itself, now lets see how the printer actually prints. The 3D printer uses something know as a "G-code". A G-code or geometric code is a language that we use to direct the 3D printer in the way we want to. We use a slicer to generate the G-code that the 3D printer uses.
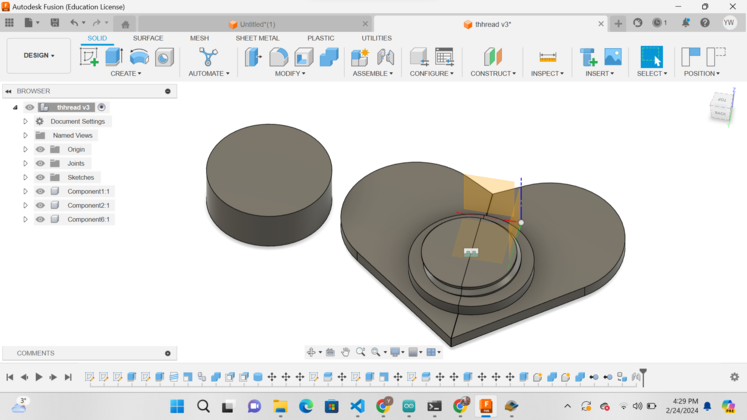
So now lets take a quick sneak peek into the model that i intend to create!
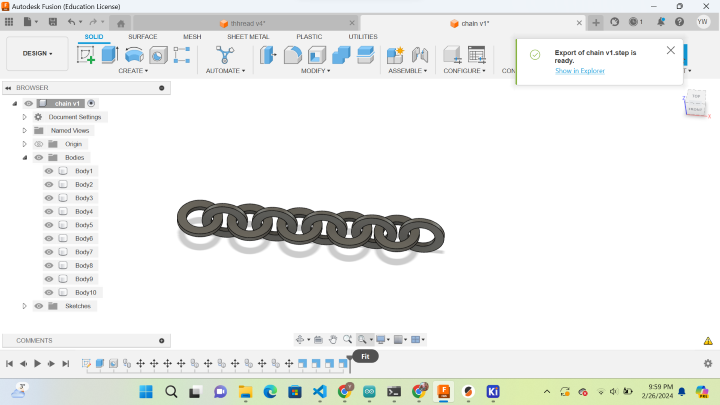
This is a simple model that I want to create. The reason that i want to 3D print this is to see if the 3D printer can catch the little detail and if can also form a chain like structure.
How I designed it!!!
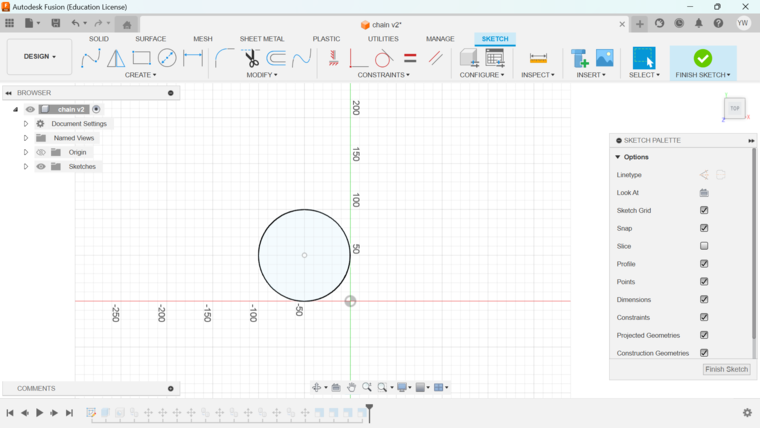
Firstly lets open up fusion 360 and then start with designing our design!
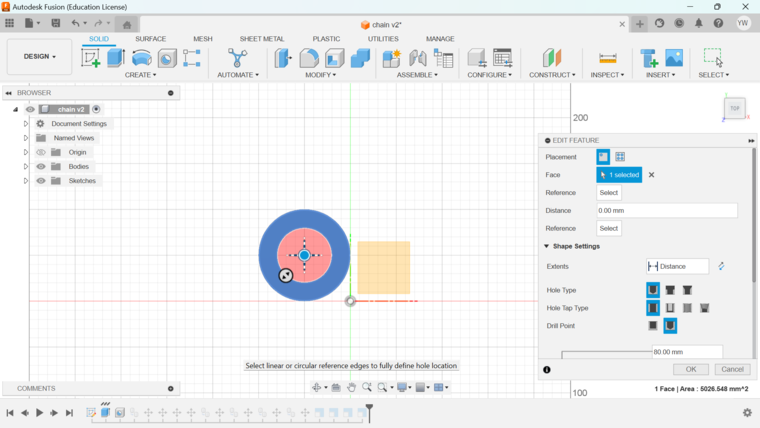
first lets create the first the sketch which would be for one of the ring of my chain.
With that we simply extrude the design and then use the hole tool to create the ring that is required in our module.
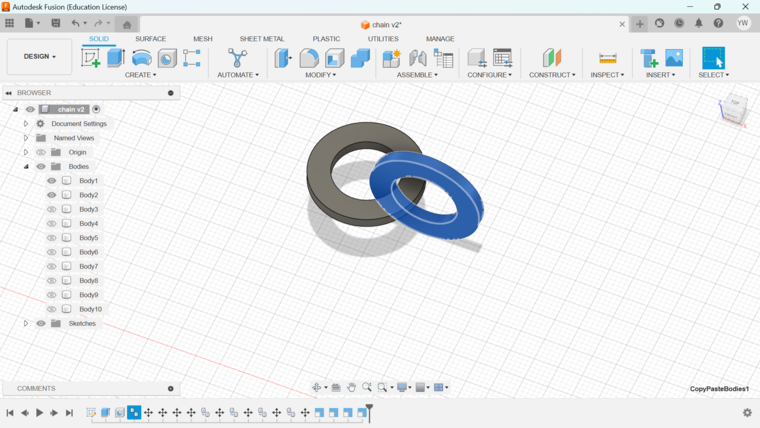
Next I simply copied the one ring I created and then I positioned it in a way to encase it self with the first ring.
Then I just simply copied and positioned them to encase each other
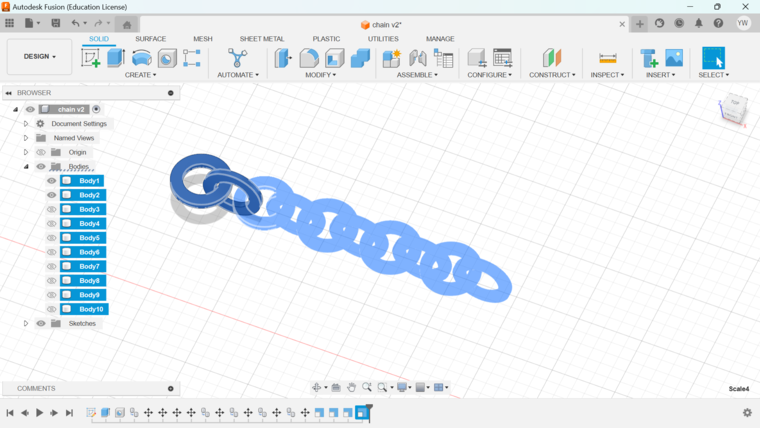
We are done!!!
This is the interactive 3D model of my printing design
3D designing Tips and Laws
Before printing anything, lets get into the do and dont's of 3D printing and the process to printing so that the procedure is as smooth as butter!
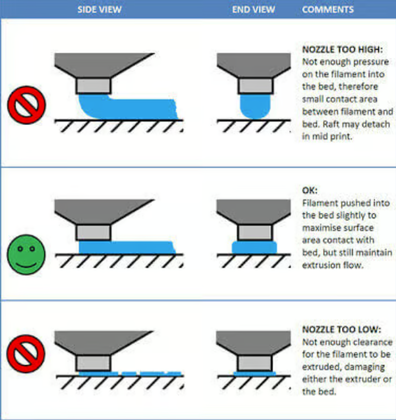
Firstly we have the machine callibration. The 3D printer that I use have a feature that can auto callibrate the x and y axis of the board. But the calibration of the z axis have to be done manully. The callibration of the z axis is the worst!!! You have to be very careful with the claibration as if the callibration is not done properly, you will be met with a whole wrold of messy outcomes. Here is image dictating the mistakes you can make with the calibrating process.
Then I think that should be the main tip I can offer with my experince but if you want more I highly recommend you to watch this video right here
Actual printing
Firstly we have to turn our 3D model into a g-code. To do that we have to use the pursa slicer which is a software that turns your 3D designs into a g-code. Use this link to download pursa slicer.
Lets now understand how to use the pursa slicer. This is an image that explains most of the of its functions.
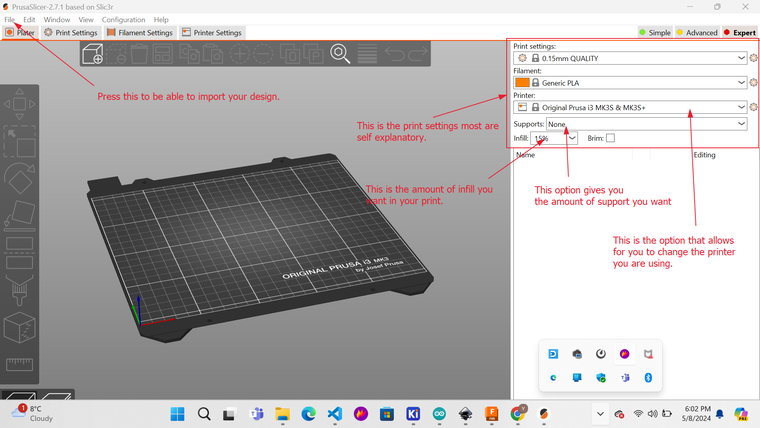
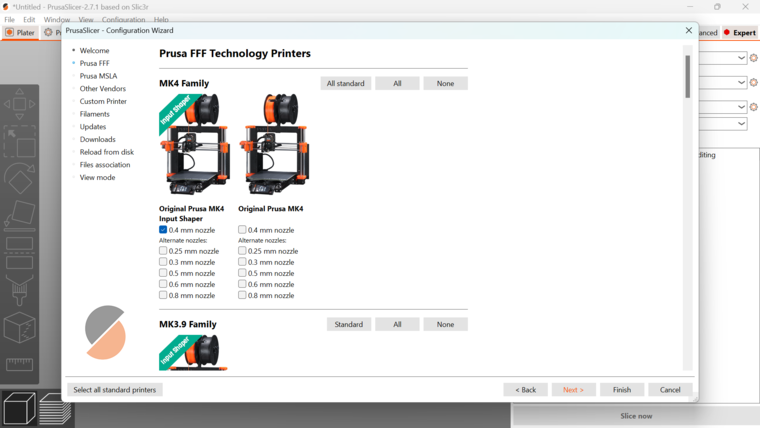
We are not done yet! Depending on tht type of printer you are using, you also have to define the type of printer you are using. To do that we have to go to the printer settings and then go to the printer option.

After that you simply have to scroll through the options until you find the printer that you are using.
I am using the pursa i3 MK3S therefor I chose this

With all of the setup complete we next have to change the setting to our desire. and then hit slice now.
This is some of the settings I used.
Print settings - 0.15mm quality
Filament - Generic PLA( since it is the filament that I am using)
Support - Everywhere (This is because this is a lot of floating designs in my model which wont print properly without it)
Infill - 15%
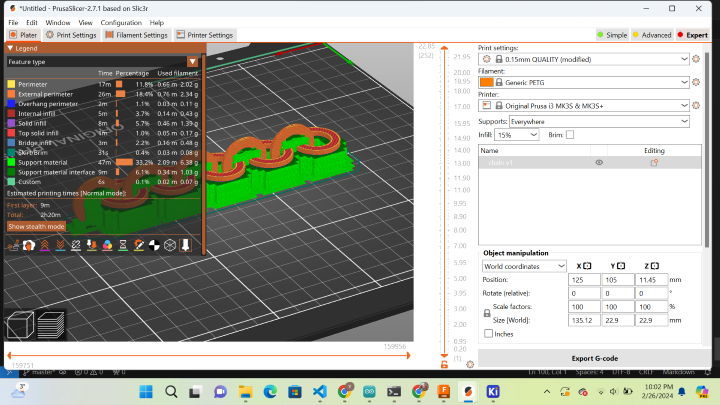
After slicing you will be met with a page like this which displays a visual representation of your produced G-code.
Next we simply have to import our g-code to our printer
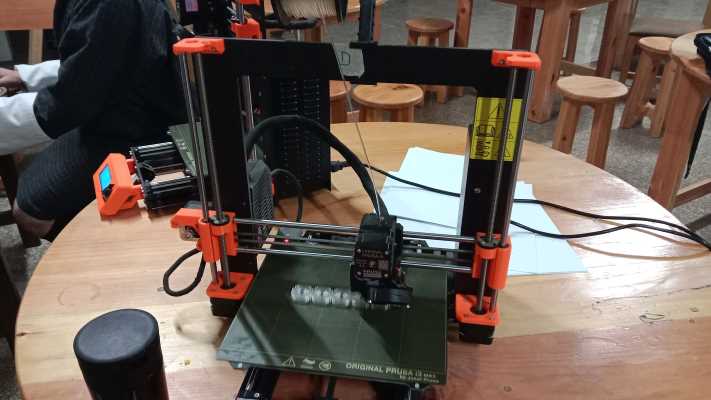
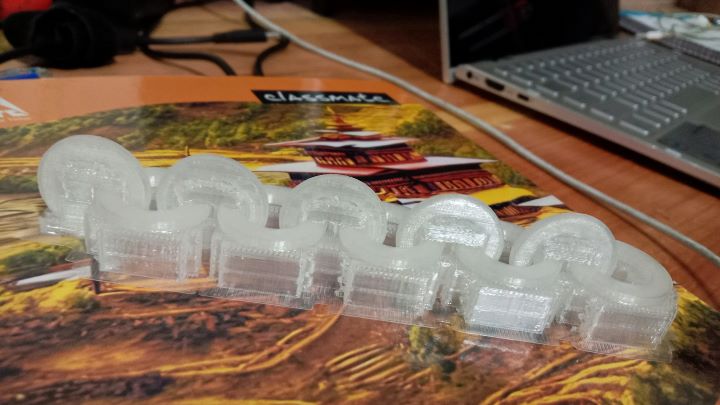
Final printing!!!
This is the final printing.(The printing time was about 2hours 45 minutes. )
Final result!!!
This is the final result after the printing finished
That is how it looked right after it was pulled from the 3D printer!
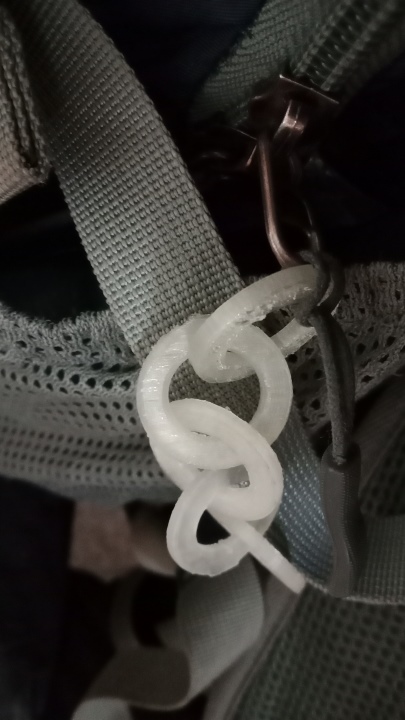
Now this how it looked after all the hard work of taking the support out
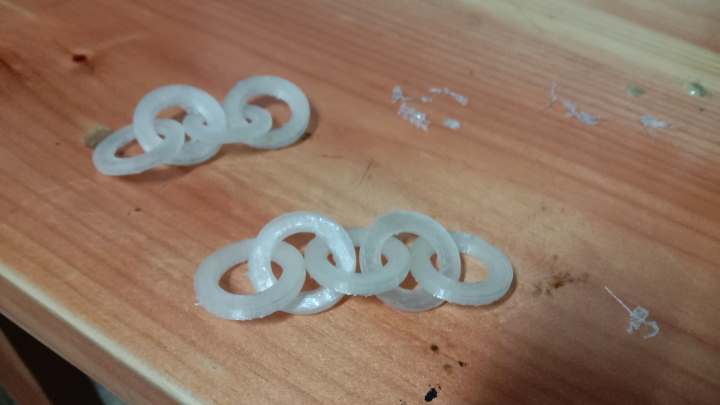
For some reason it snaped in two after the supports were taken off, but still it can make for a greate key chain or even a bag widget!
Learnings
This was a very fun week and also quite challenging. having never 3D printed before, I can truthfully say that I am a novice at this. But I am grateful that I was able to learn a lot of concepts in this week alone. to talk about some of them:
First and foremost, I learned about the concept of additive manufacturing, also known as 3D printing. I discovered that instead of the traditional subtractive manufacturing methods, where material is removed, 3D printing builds objects layer by layer using a variety of materials
I also learned that I needed to take into account how important it really is to under stand the limitations of your printer. My first design was a complete fail because the size of my thread was way to small for my 3D printer to print. But now that I know, I will not make the same mistake again.
also I was able to learn how to slice 3D designs for printing purposes. A slicer is a software that separates a 3D design into layer for lets say 3d printing.
Also not to forget I learned about 3D scanning which could give some amazing results
Fails
Now while doing this weeks assignments I had alot errors. But undoubtedly the biggest would be my first prototype for 3D printing. I carelessly created what my heart desired, not accounting for varibles such as the deimensions and size of the model, as such the model came out too small and as a result i could not print it. From now on I will not be as lenient and pay closer attention. I will take what I learned not the mistake I made