Week 4 : Electronic production.
This week is all about milling an already designed in-circuit programer. With the programer I would be able to program all our circuit boards that I am going to create in the future.
That is what I will be doing in this week. Now I also have my assignments that I would be doing in this week. Additionally I will also show you my Group Assignment as well
Assignments
Mill the design that you have chosen.
Solder all the components needed for the programmer.
Document all that you have done while you were working for this week.
Link my group assignment to my documentation as well
Group Assignment
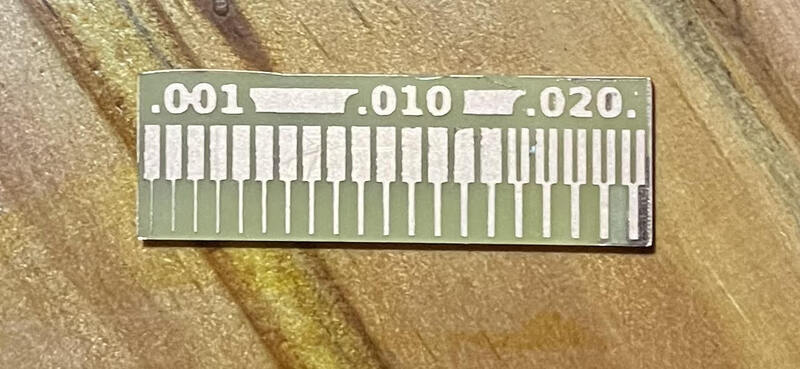
characterize the design rules for your in house PCB production process
Group assignment
Procedures towards Assignment
Find and install a trace and outline image file of the programmer as a PNG file.
Convert the image you found into a RML file to use the milling machine
Mill the PCB design using a milling machine
Solder all the needed components in the circuit board.
Program your circuit board with softwares using your computer to turn your circuit board into a programmer.
Mind I say but this is the first time creating a programmer. I have milled and soldered some circuit boards but never was able to successfully program it. Hopefully it all goes well : D
Uploading image of 'Quentorres_Traces', 'Quentorres_interior' and 'Quentorres_drill'
All I had to do was go to the instructors boot camp where I downloaded the Quentorres images
"Trace"
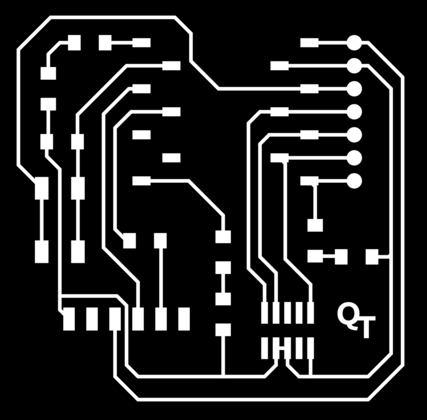
"Interior"

"Drills"

With that done we have to convert the PNG file to a RML file.
Creating a RML file
To create a RML file for the "trace" and "Outline" I used the MOD CE website.
Firstly I had to choose the correct program to create the RML file
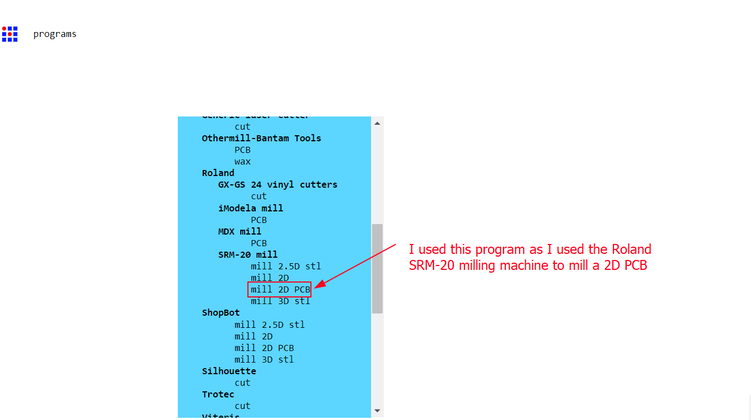
After choosing the program this is what you get.

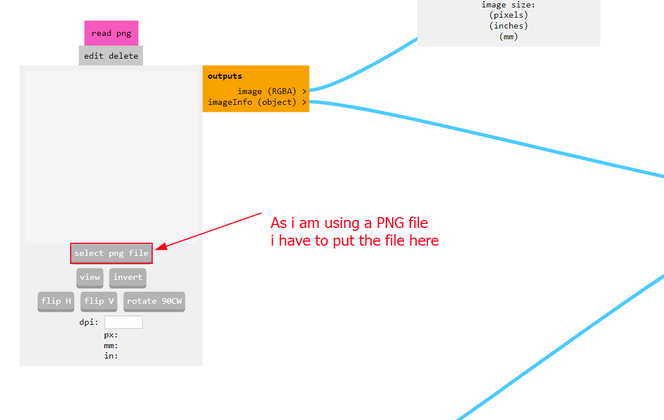
After that you are still not done yet. You have to make some adjustments to get your RML file ready.
With that done you have to unpload your PNG file to be Turned into a RML file.
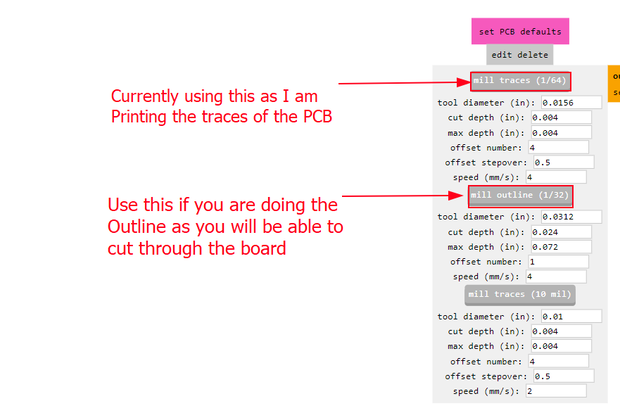
Now to have to set the PCB default, basically speaking you have to adjust on which setting you are going to cut your circuit. This is where you choose between chosing to trace or cut the outline.
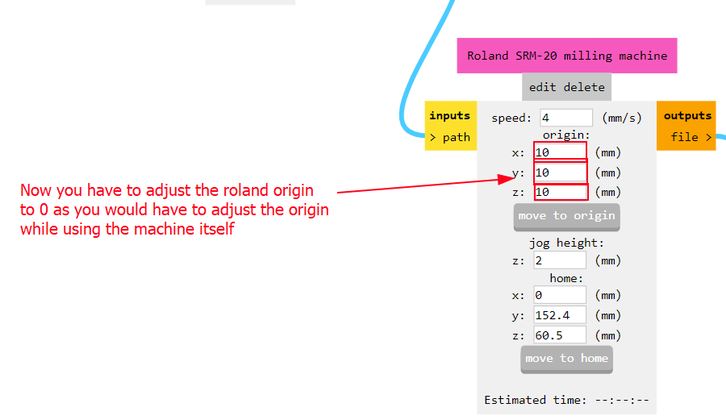
Now you have to adjust the origin to zero, as you have to set the origin while using the machine, which is much easier.
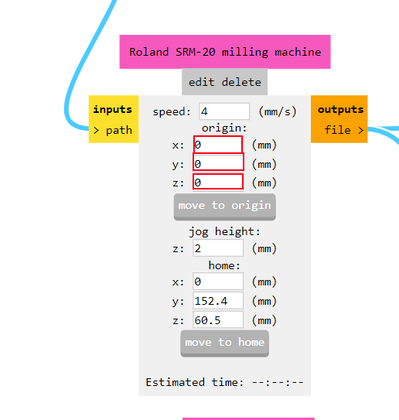
MUCH BETTER!!!
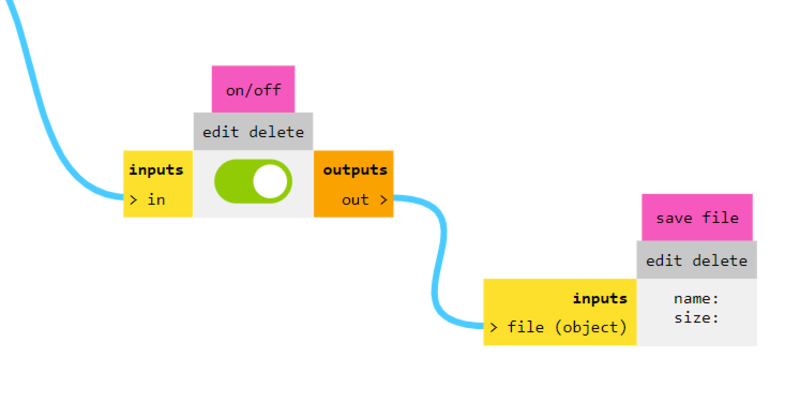
Now you have to make it so that you would be able to install the RML file after you are done creating it. For that you will have to allow the input/output module to connect to the save module
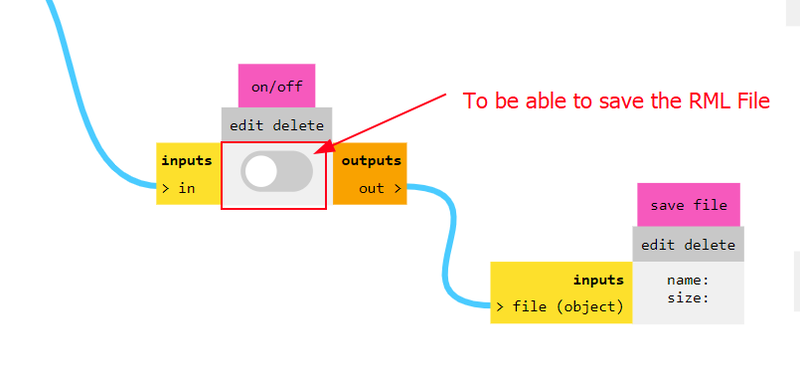
MUCH BETTER!!
Now finally you have to calculate the path that your RML file will take and then program automaticlly installs the file and them you are done!!
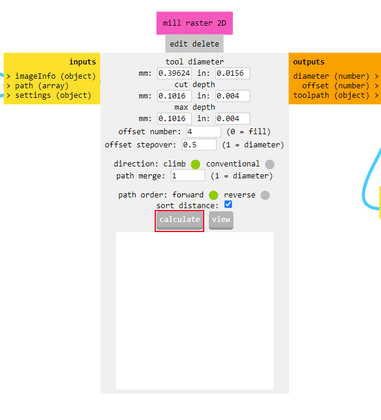
After pressing that you will now have your RML file ready to be cut!
Now thats it with converting to a Rml file. Then next lets go to milling the circuit board.
Milling Tips
Now this is going to be how I milled my circuit board and What Step I took to do so.
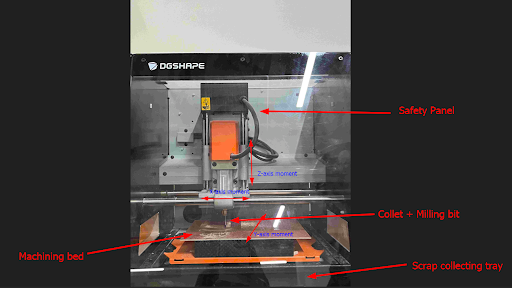
Before doing the actual milling. Lets get into all the necessary things we need to know before starting to actually starting to mill our circuit board.(I am doing this since the 1/64 drill bit is really fragile and can break really easily. Additionally they are also very hard to get and can take up to months to arrive once ordered(In Bhutan))
Firstly before anything always remember to set your orgin point before you start milling. You can navigate using the arrows in the V-pannel software and place your milling origin to the point you want to start milling from. After that you also have to set you z axis to the right origin. To do that preciesly you have to use the process know as "Zeroing"
Zeroing is a process where you losen the key holding the drill bit so that gravity takes action and then pulls the drill bit down to the bed. With that now you have you z axis at the point you want. Then you can retighten the key to the drill bit stays in place. Finally you press the set origin option to confirm your origin.(This is the most important, since if you dont confirm your origin doing all the previous work would be pointless)
This a quick tutorial on how to use the milling machine. Big thanks to fablab Barcelona for creating this great tutorial. It help me a lot!
Milling
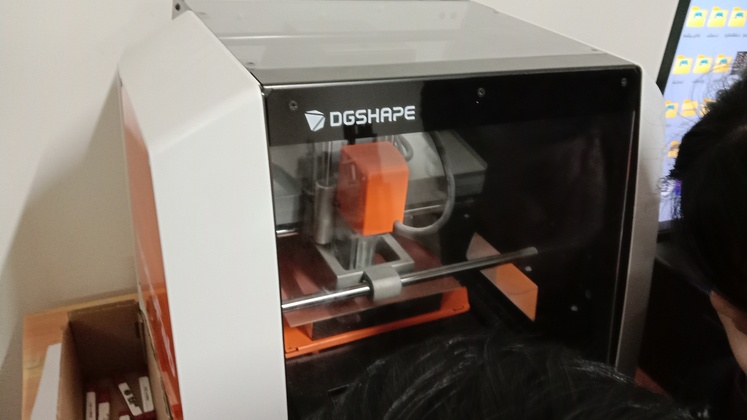
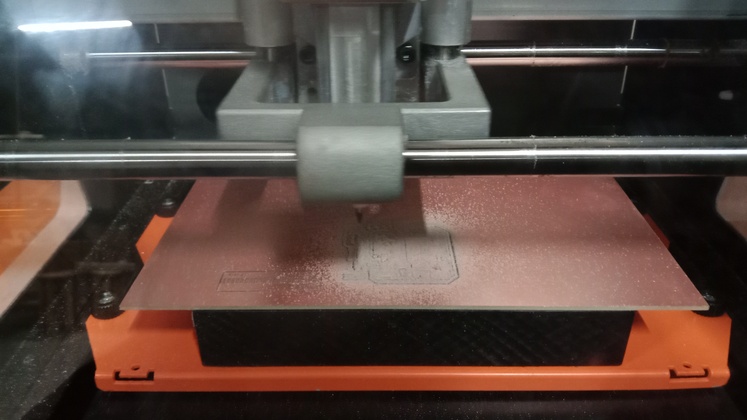
I am currently using the Roland Monofab SRM-20 milling machine to mill out my circuit board. I have to mill three times to cut out my board as i have three different Rml files that I have to mill.
To start off lets choose and put in the correct drill bit. I will be using two different drill bits to mill out my design.
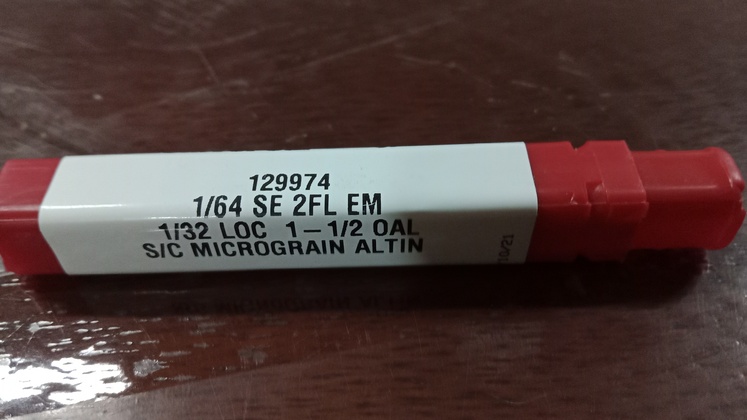
Firstly we have our 1/64 drill bit that is mainly used to cut the traces of the circuit board.
Then next we have the 1/32 drill bit that is used to cut through and drill the holes in the circuit board.

Since we have to first cut the traces of the circuit board, I first had to use the 1/64 drill bit.
After I had finished putting the drill bit inside, I have to set the origin of the drill. Then the cutting begins!
This is how the vpanel looked when it was cutting

This is how it looks after the cutting is finished
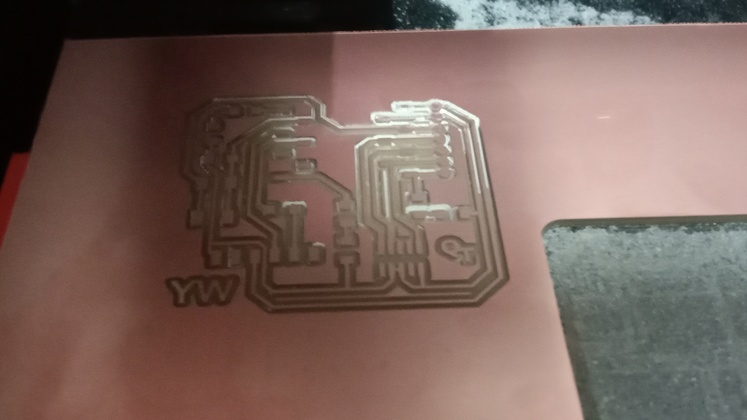
After the scary part of the cutting is finished.(meaning cutting using the fragile 1/64 drill bit)We switch the drill bit to the 1/32 drill bit. Then we have to cut the interior and the drill holes.
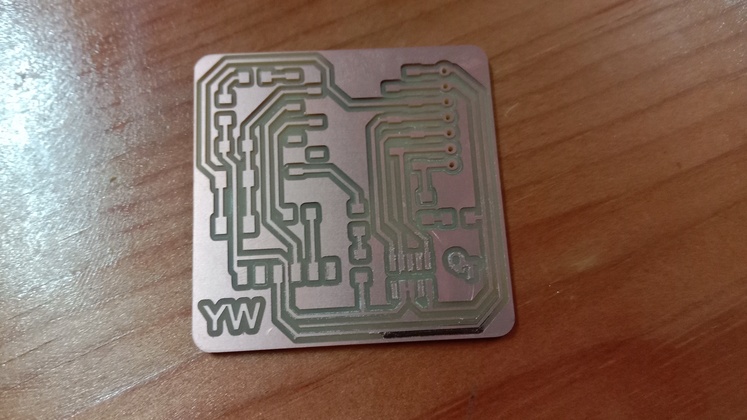
We now finally have the circuit board!
Soldering
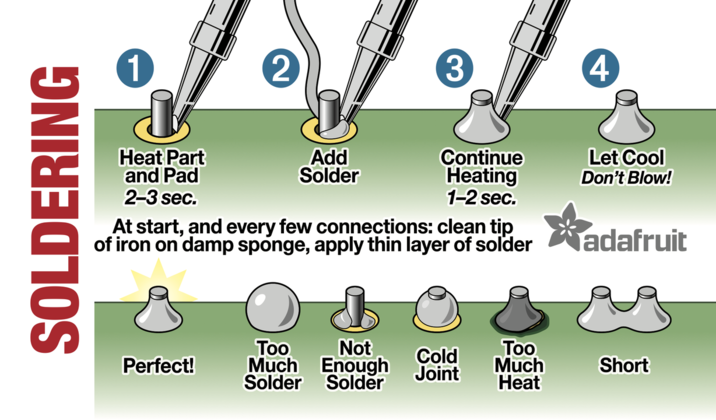
We now have to start with soldering the circuit board so that it can start working. Firstly lets see what is soldering. Soldering is a process used for joining metal parts to form a mechanical or electrical bond. It typically uses a low melting point metal alloy (solder) which is melted and applied to the metal parts to be joined and this bonds to the metal parts and forms a connection when the solder solidifies.
Soldering is a very delicate and risky process. You could make several mistakes while soldering and make several more mistakes that might harm you. There are specific ways on how to solder and also there are different types of solder joints, Some better than the others.
This video helped a lot while i was soldering. This crash course offer almost everything you need to start soldering. It is also something i would recommend as it is straight forward and easy to understand
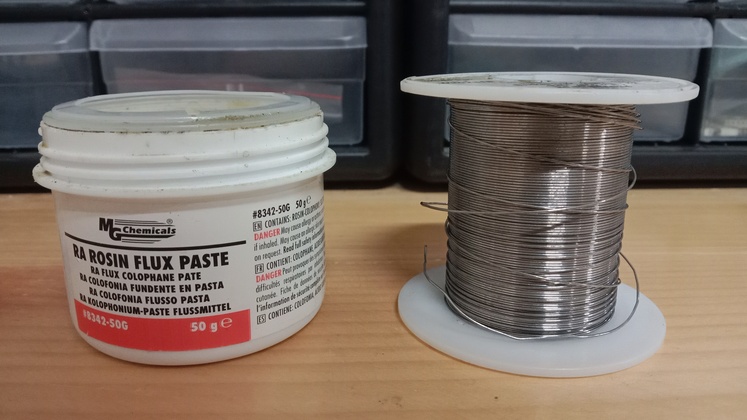
So before starting to soldering on my board lets go through what i have to work with. I will be using lead wires as my solder material and a RA flux paste.
Then after that i have to get all the needed components that i have to solder on the board.
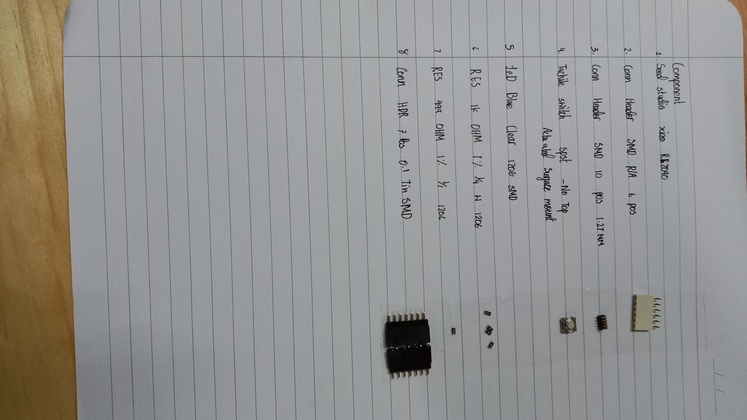
Seed studio RP 2040
Conn header SMD RIA 6 pos
Conn header SMD 10 pos 1.27mm
Tactile switch spst - No Top
Led Blue clear 1206 SMD
1k ohm resistors x4 w 1206
499 ohm resistors x1 1206
Conn HDR 7 pos 0.1 tin SM
Now lets start soldering!
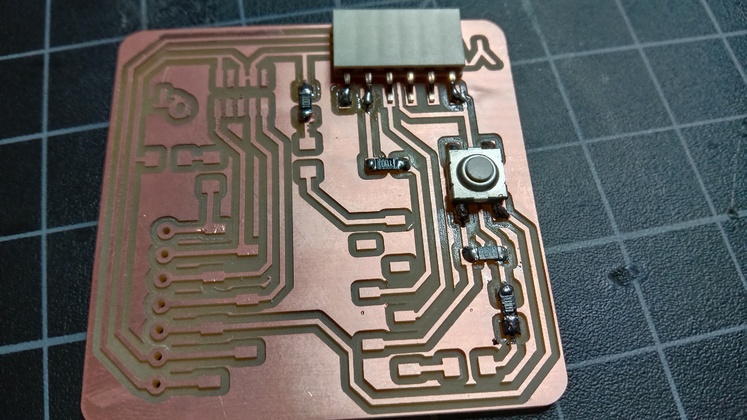
This is the how it came out after 15 minutes
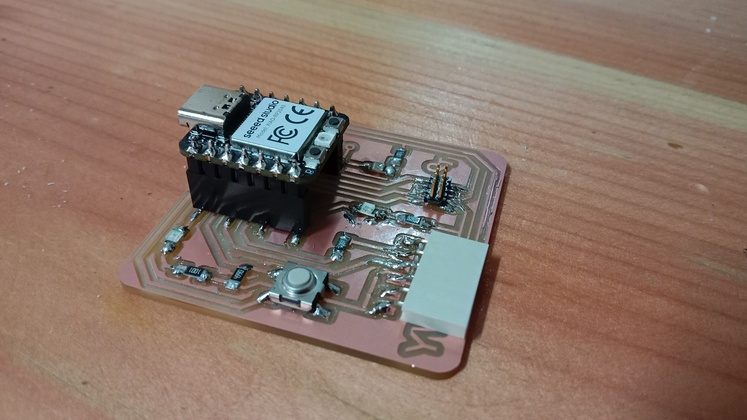
This the final result
Look at me struggling so much : D
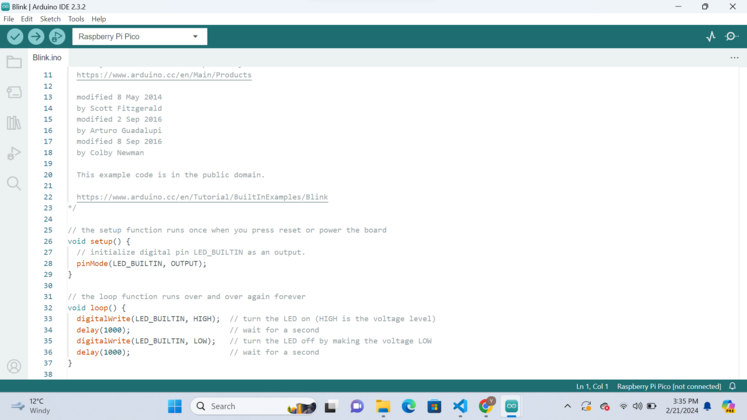
Now lets see if the circuit board actually works! To do that lets use a simple blink code that is in arduino IDE to see if the board actually works.
First lets open up arduino IDE
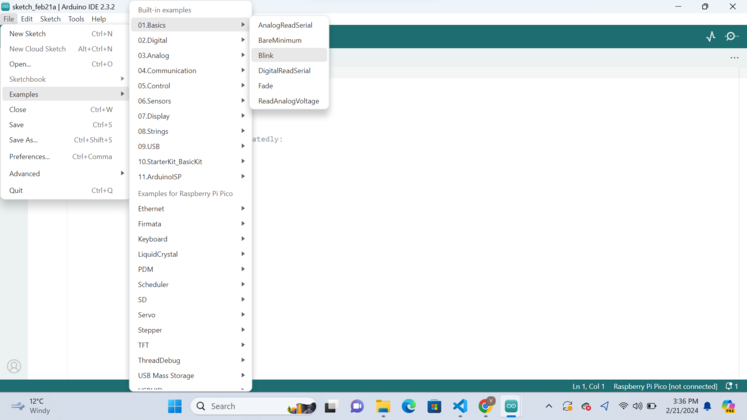
After opening up arduino IDE you have to go to example>Basic>Blink
That is all that i did for this week, It was really fun! The fact that i had to maintain my fab academy assignment and also my school life at the same time was challenging.But they do say that the harder the challenge, the greater the fruit!
Learning outcomes
Learned how to create a RML file using mode ce
Learned how to use the roland monofab SRM-20 milling machine
Learned how to solder and also uploaded a simple blink code