Group Assisnment Week 5 - 3D Ccanning and Printing
This week’s assignment included the following tasks:
- test the design rules for your 3D printer(s)
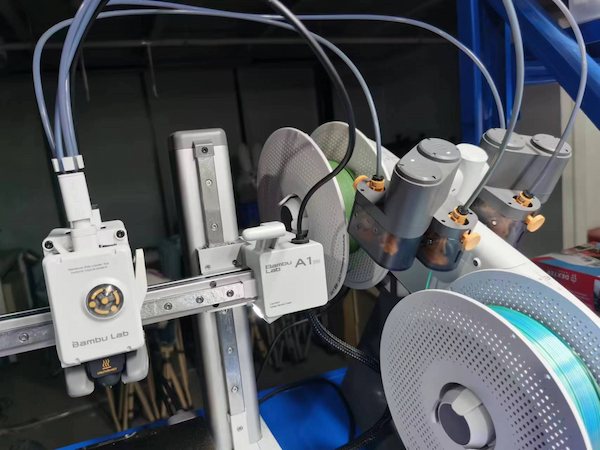
The 3D printer
We are using this 3D printer for the assignment:
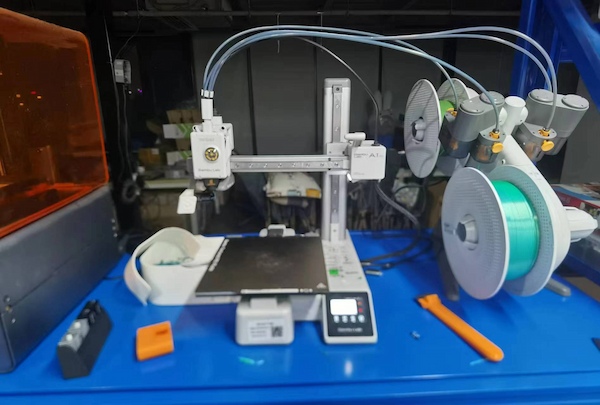
Technical Specifications: A1 mini Model
Here is the link.
Body
- Print Size: 180 x 180 x 180 mm³
- Frame: Steel + Aluminum profile
Tool Head
- Hotend: All-metal
- Extruder Gear: Hardened steel
- Nozzle: Stainless steel
- Maximum Nozzle Temperature: 300 ℃
- Nozzle Diameter (default): 0.4 mm
- Optional Nozzle Diameters: 0.2 mm, 0.6 mm, 0.8 mm
- Tool Head Cutter: Built-in
- Filament Diameter: 1.75 mm
Heated Bed
- Supported Print Surfaces:
- Smooth PEI print surface
- Textured PEI print surface
- Textured + Smooth PEI print surface
- Maximum Bed Temperature: 80 ℃
Speed
- Maximum Tool Head Travel Speed: 500 mm/s
- Maximum Tool Head Acceleration: 10000 mm/s²
- Maximum Flow Rate at Hotend: 28 mm³/s @ABS (Model: 150x150 mm single-layer outer wall; Filament: Bambu ABS; Temperature: 280℃)
Cooling
- Part Cooling Fan: Closed-loop control
- Hotend Fan: Closed-loop control
- Mainboard Cooling Fan: Closed-loop control
Supported Filament Types
- Suitable for Printing: PLA, PETG, TPU, PVA
- Not Recommended: ABS, ASA, PC, PA, PET, Carbon/Glass Fiber Reinforced Filaments
Sensors
- Monitoring Camera: Low-frame-rate camera, up to 1920 x 1080, supports time-lapse
- Filament Runout Detection: Supported
- Filament Usage: Supported
- Power Loss Recovery: Supported
- Filament Entanglement Detection: Supported
Physical Dimensions
- Product Size: 347 x 315 x 365 mm³
- Net Weight: 5.5 kg
Electrical Parameters
- Input Voltage: 100-240 VAC, 50/60 Hz
- Maximum Power: 150 W
Electronics
- Display: 2.4-inch 320 x 240 touchscreen
- Connectivity: Wi-Fi, Bambu-Bus
- Storage: Micro SD card
- User Interface: Touchscreen, Mobile App, Desktop Application
- Motion Controller: Dual-core Cortex-M4 processor
Software
- Slicing Software: Bambu Studio; supports other slicers capable of exporting standard G-code like SuperSlicer, PrusaSlicer, and Cura, though some smart features may not be supported.
- Supported Operating Systems for Slicing Software: MacOS, Windows
Wireless Networking
- Frequency Range:
- 2412 MHz - 2472 MHz (CE)
- 2412 MHz - 2462 MHz (FCC)
- 2400 MHz - 2483.5 MHz (SRRC)
- Emission Power (EIRP):
- ≤ 21.5 dBm (FCC)
- ≤ 20 dBm (CE/SRRC)
- Protocol: IEEE 802.11 b/g/n
Printing and Testing
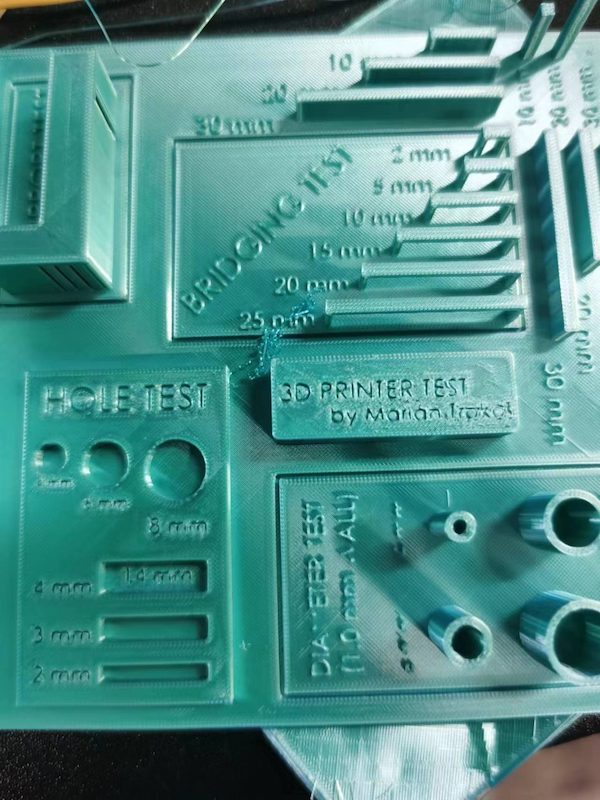
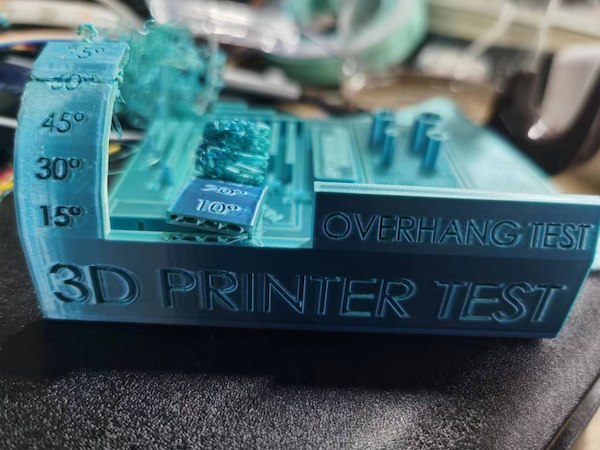
There is one All In One 3D Printer test available on the thingiverse and the test includes : support test, scale test, overhang test, hole test, diameter test and bridging test. Print this with 100% Infill without supports.
We first download the file from it, and then upload stl file to the Bambu corresponding software Bambu Studio.
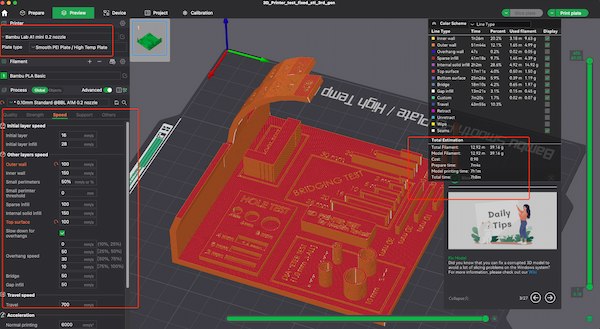
We set up with these parameters:

Using 0.4 nozzle and default setting, slicing the plate are shown like this:
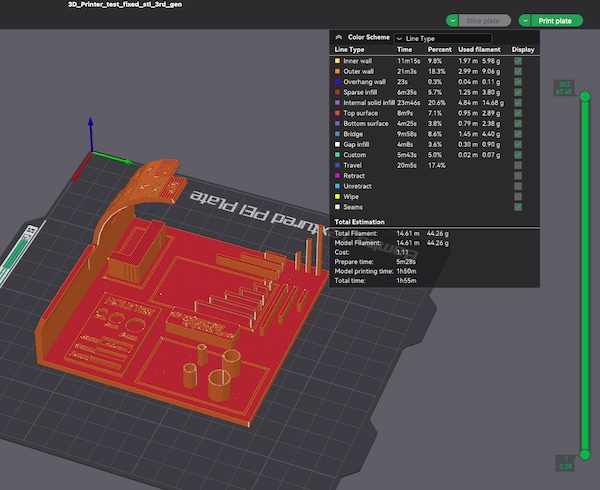
It requires 2 hours and starting it.
Later when we got it and the overhang test seems to fail:

And ther is something wrong with the clarity of the print font.

The rest seems fine.
Adjustment
There might be some possible reasons casuing that:
- Fracture problem: Breakage of filaments in suspension testing is usually caused by:
- Printing speed: Too fast a printing speed may cause the filaments to not have enough time to cool and cure, resulting in breakage. Try to reduce the print speed, especially at high overhang angles.
- Cooling Settings: Increasing the wind power of the cooling fan may help cool the filaments quickly, preventing sagging and breakage.
- Print temperature: Too high a print temperature can lead to excessive material fluidity, increasing the risk of sagging and breakage. Appropriately reducing the printing temperature may help to ameliorate this problem.
- The clarity of the printing font: The print font may not be clear due to the following reasons:
- Nozzle diameter and height: The use of thinner nozzles and lower height can improve the clarity of print details. Check that the nozzle diameter currently used is suitable for detail printing.
- Extrusion volume calibration: Ensure that the extruder is properly calibrated to avoid over - or under-extrusion of material, which can also affect print detail and text clarity.
- Print speed: Reducing print speed can provide more stable material deposition, especially when printing small text that requires high accuracy.
Over all, the problem might be the speed settings and the size of the nozzle.
Here are some advices from GPT:
Outer Wall Speed
- The outer wall speed is set at 200 mm/s, which is relatively high. High speeds may cause a decline in print quality, especially when printing small or complex outer walls. It is recommended to reduce the outer wall speed to about 100 mm/s to improve the appearance and accuracy of the print.
Inner Wall Speed
- The inner wall speed is 300 mm/s, which is also very high. Although the visual effect of the inner walls is not as critical as the outer walls, too high a speed may weaken the internal structure. It is suggested to reduce it to 150 mm/s.
Overhang Speed
- The speed setting for overhangs is crucial for preventing sagging and breakage. Your setting for overhang parts is 30 mm/s, which is a good low-speed setting that helps improve the quality of these parts.
Top Surface Speed
- The top surface speed is 200 mm/s, which might be too fast, resulting in a top surface that is not smooth enough. It is recommended to reduce it to 100 mm/s to improve the neatness and smoothness of the top surface.
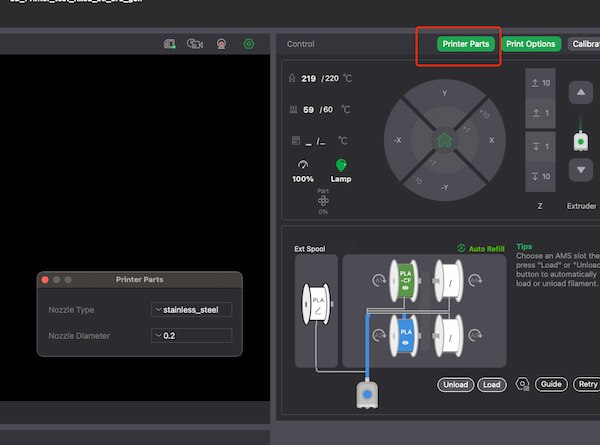
Advising by GPT, the new setting is shown below:
Re-printing
This time will take over then 7 hours.
The nozzle is removed, with very easy steps:

And there is something noted, when removing the nozzle. This part should be changed as well:
Error
There are some errors when re-printing:
The printing is stop working and having wrong input the PLA materials.
After removing the nozzle and the feed port, it seems some materials in the middle got wet and broke:

Cut down and continue.
Finally, after another 7 hours we got the outcome:
The bending part is not so well.
But the overview is really great: