Riichiro Yamamoto
Final Project
Fab Academy 2024
Riichiro Yamamoto
Statement
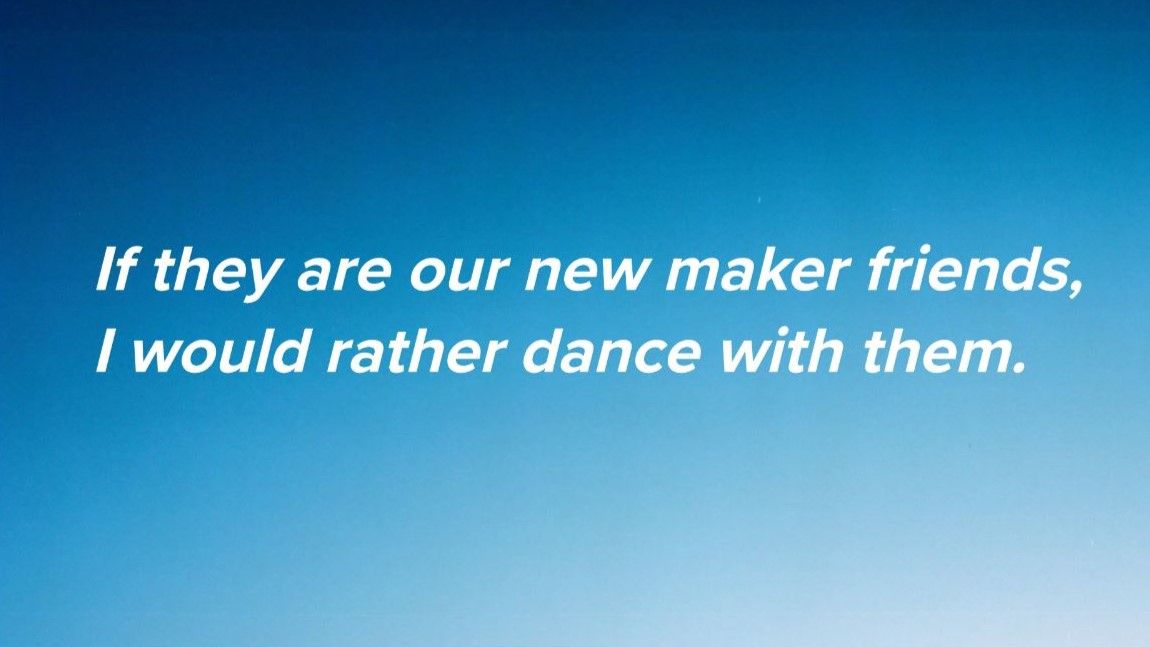
If the future will be like
How to Make (Almost) Anything (AImost) without Making Anything
(AI Recitation: Presentation given by Olivia Seow, Harvard University Amira Abdel-Rahman, MIT Center for Bits and Atoms Valdemar Danry, MIT Media Lab) , as a person who enjoys making,
I will be very bored and sad.
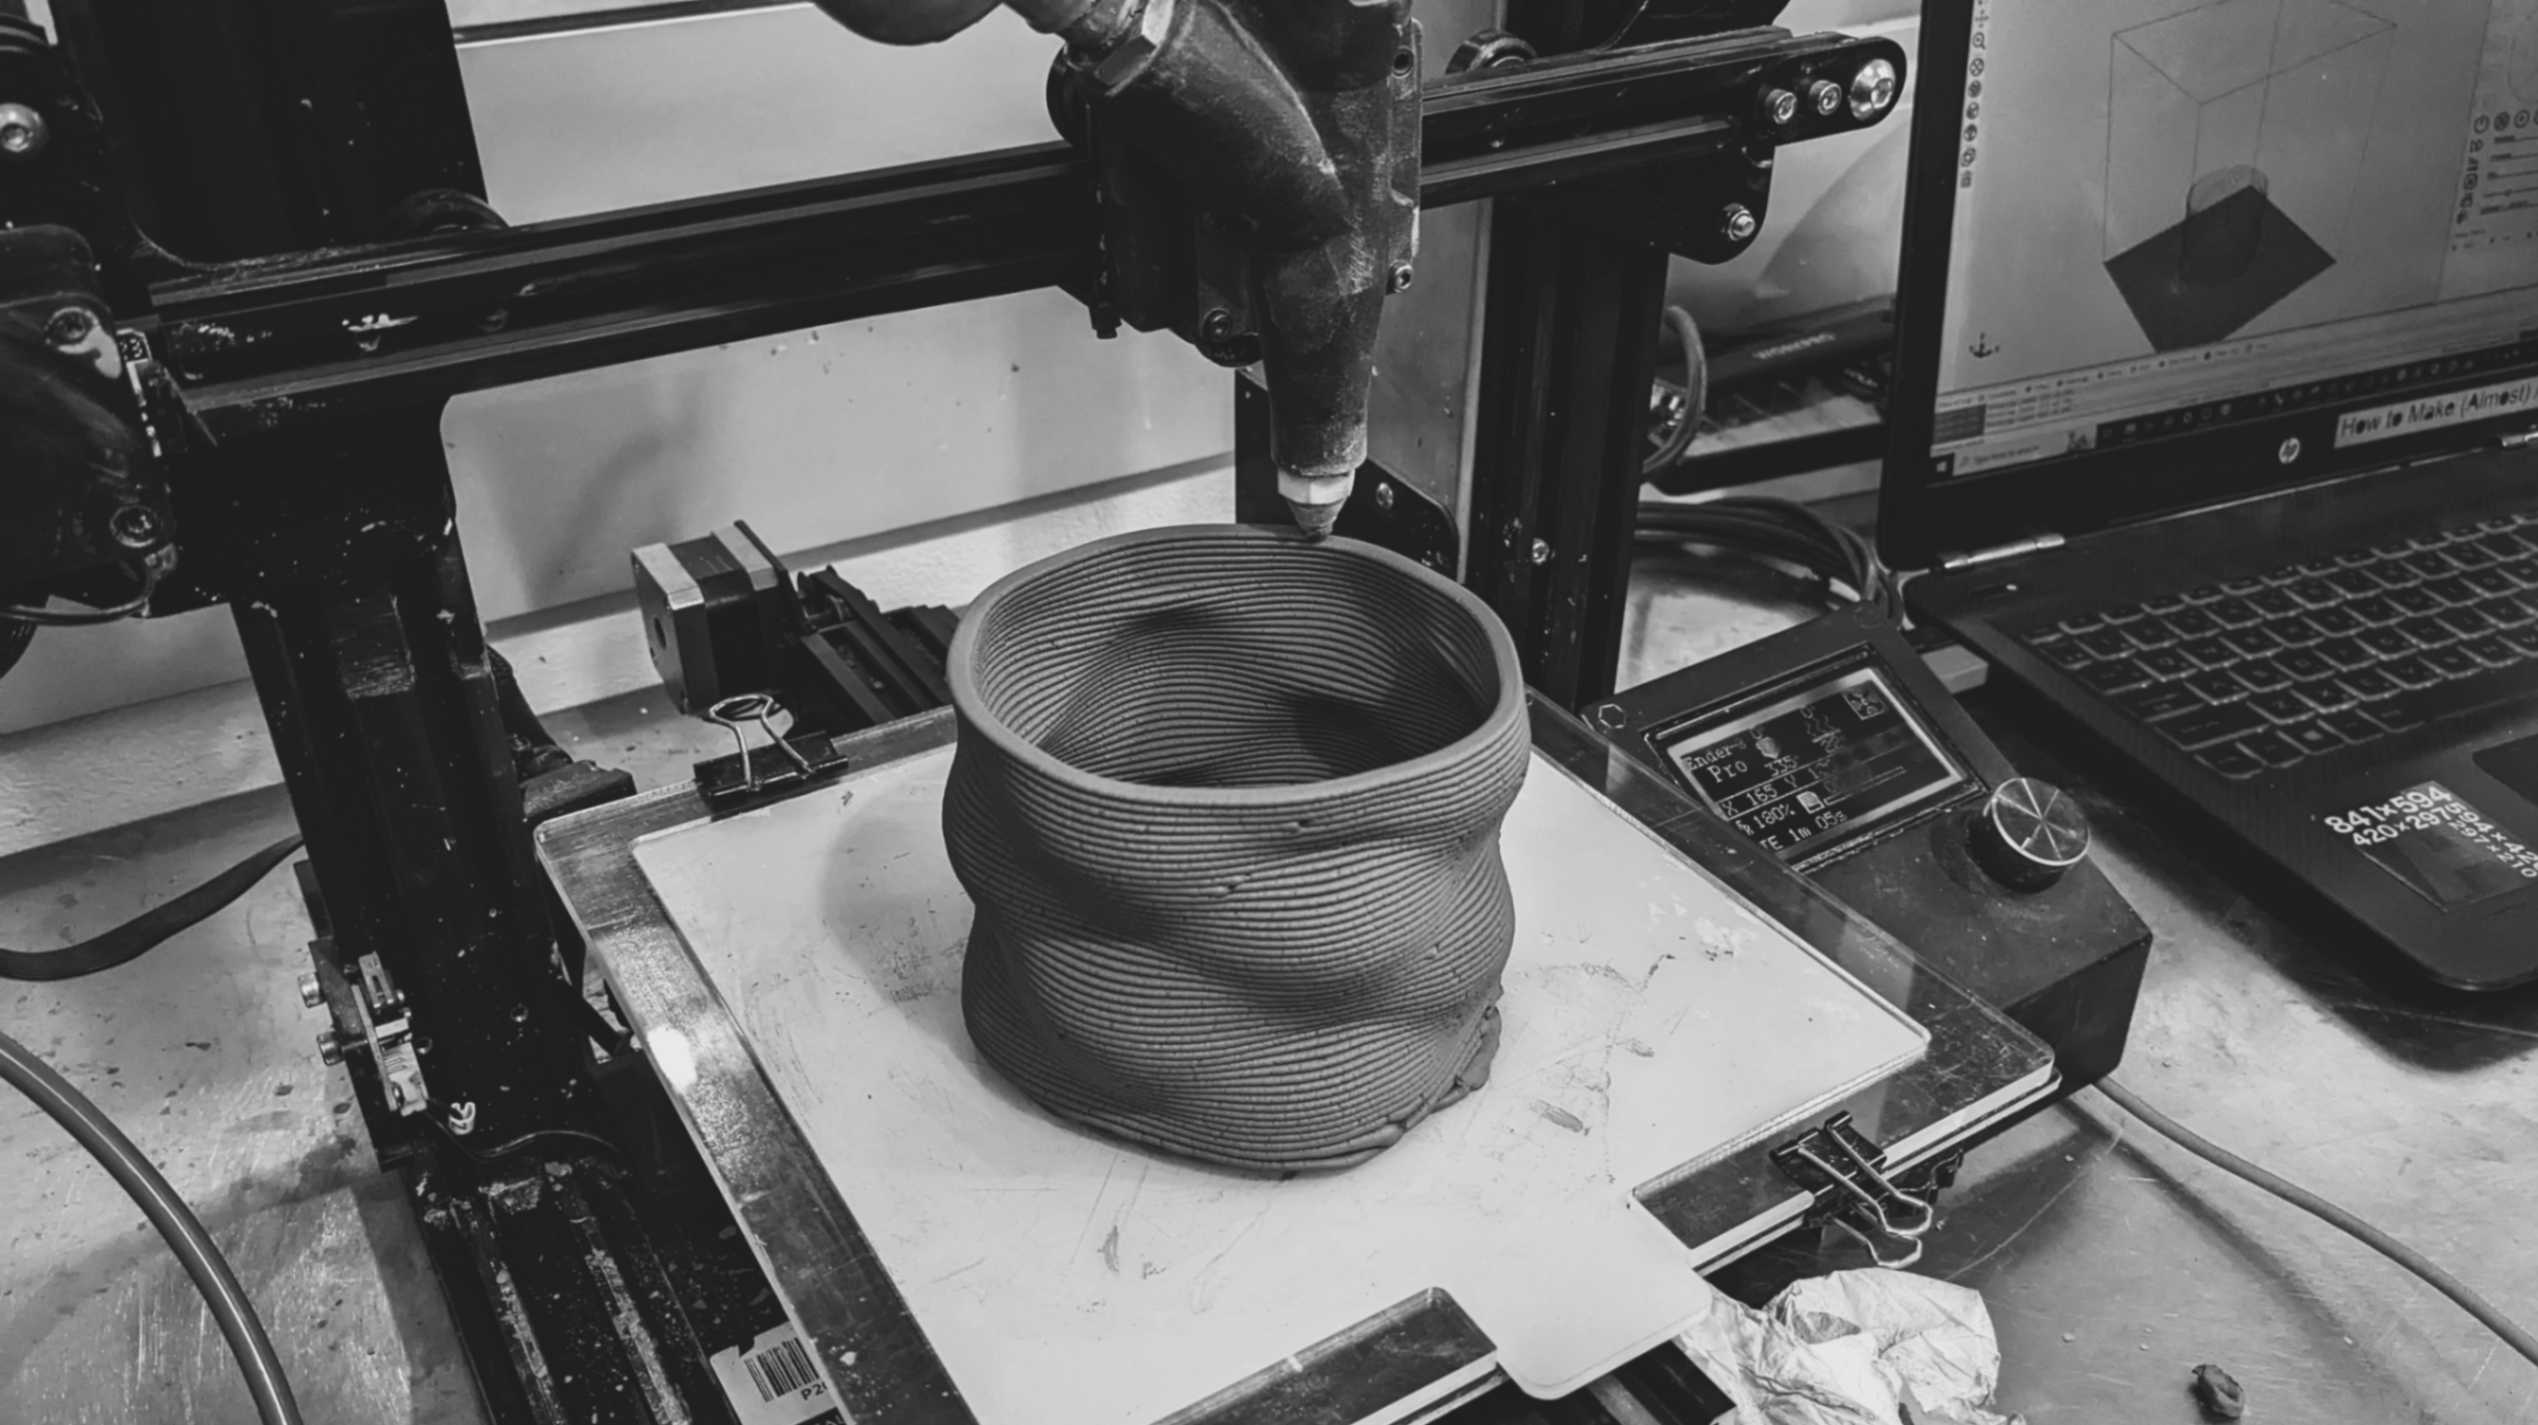
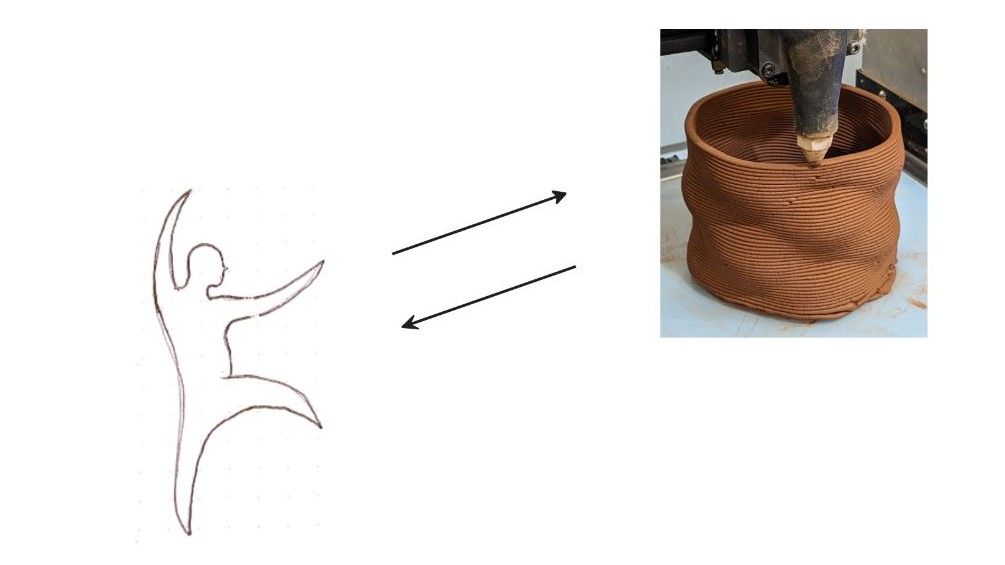
I saw a glimpse of the sadness and boredom when I was sitting in front of a 3D printer and just waiting to finish the job. Instead, I want to communicate with the machines. I want to collaborate and make things with the machines. I want to have fun with machines in the process of making.
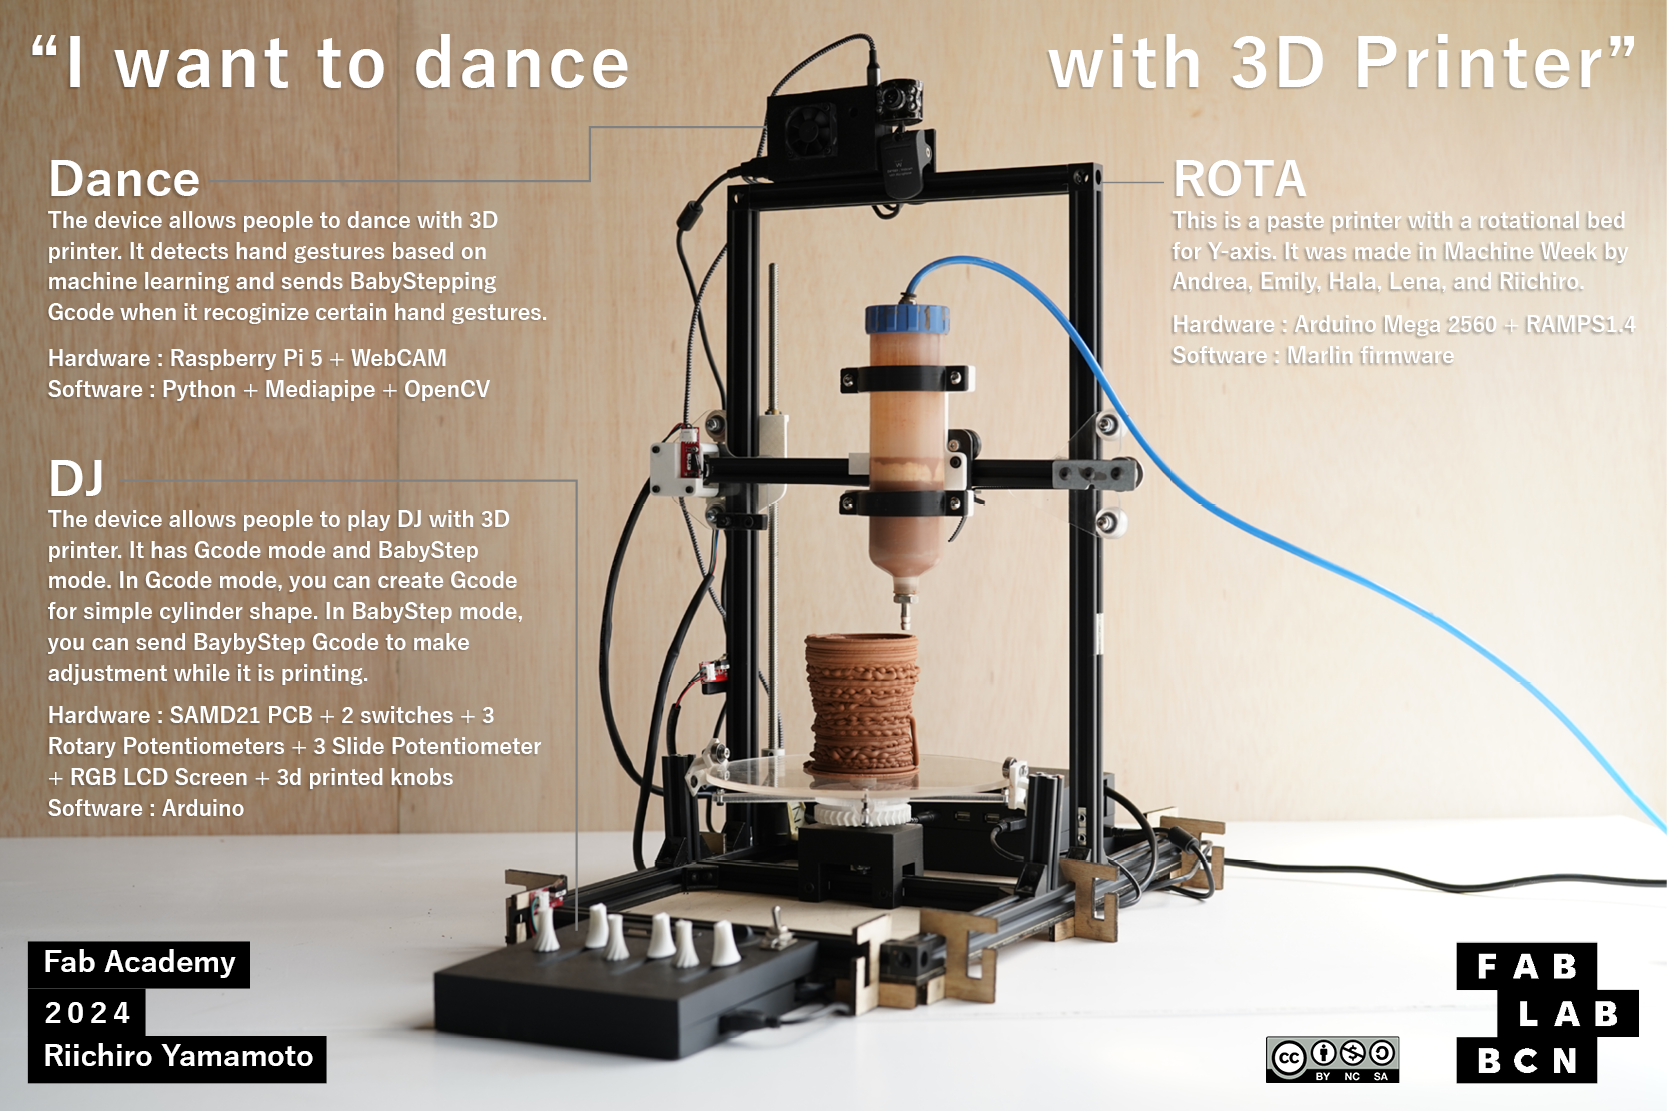
So now, the ultimate goal of my final project is to dance with a 3D printer while it is printing and create a unique print piece that shows traces of the improvised collaboration.
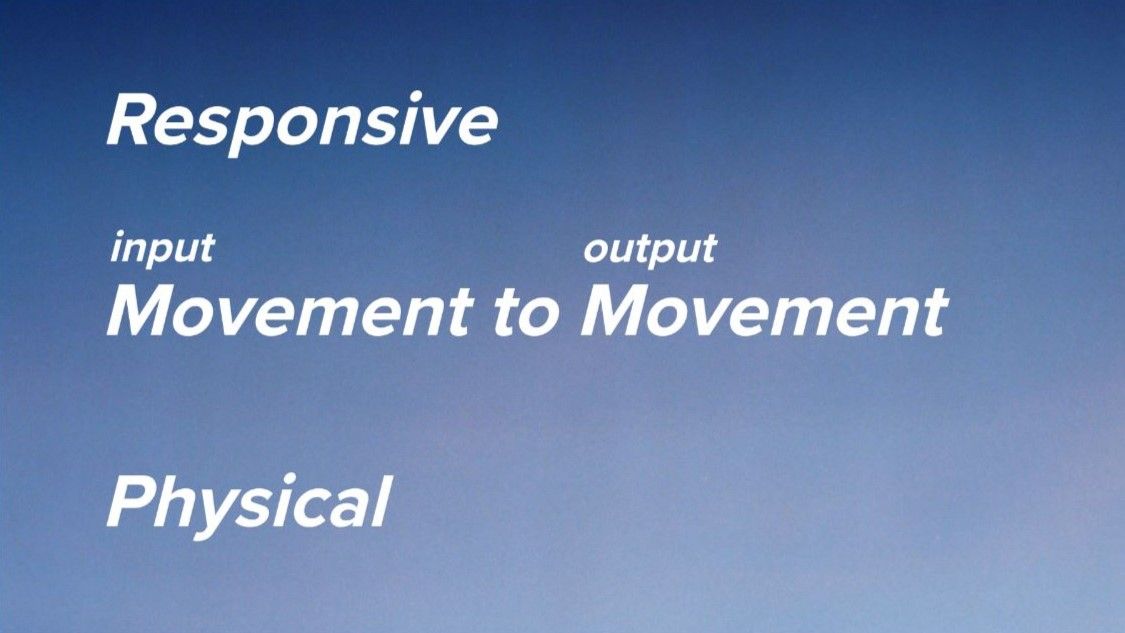
key principles of this project are Movement(Input) to Movement (Output), Responsive (instant feedback), and Physical. The big difference is the responsive movement will be happening during making rather than with an already-made structure.
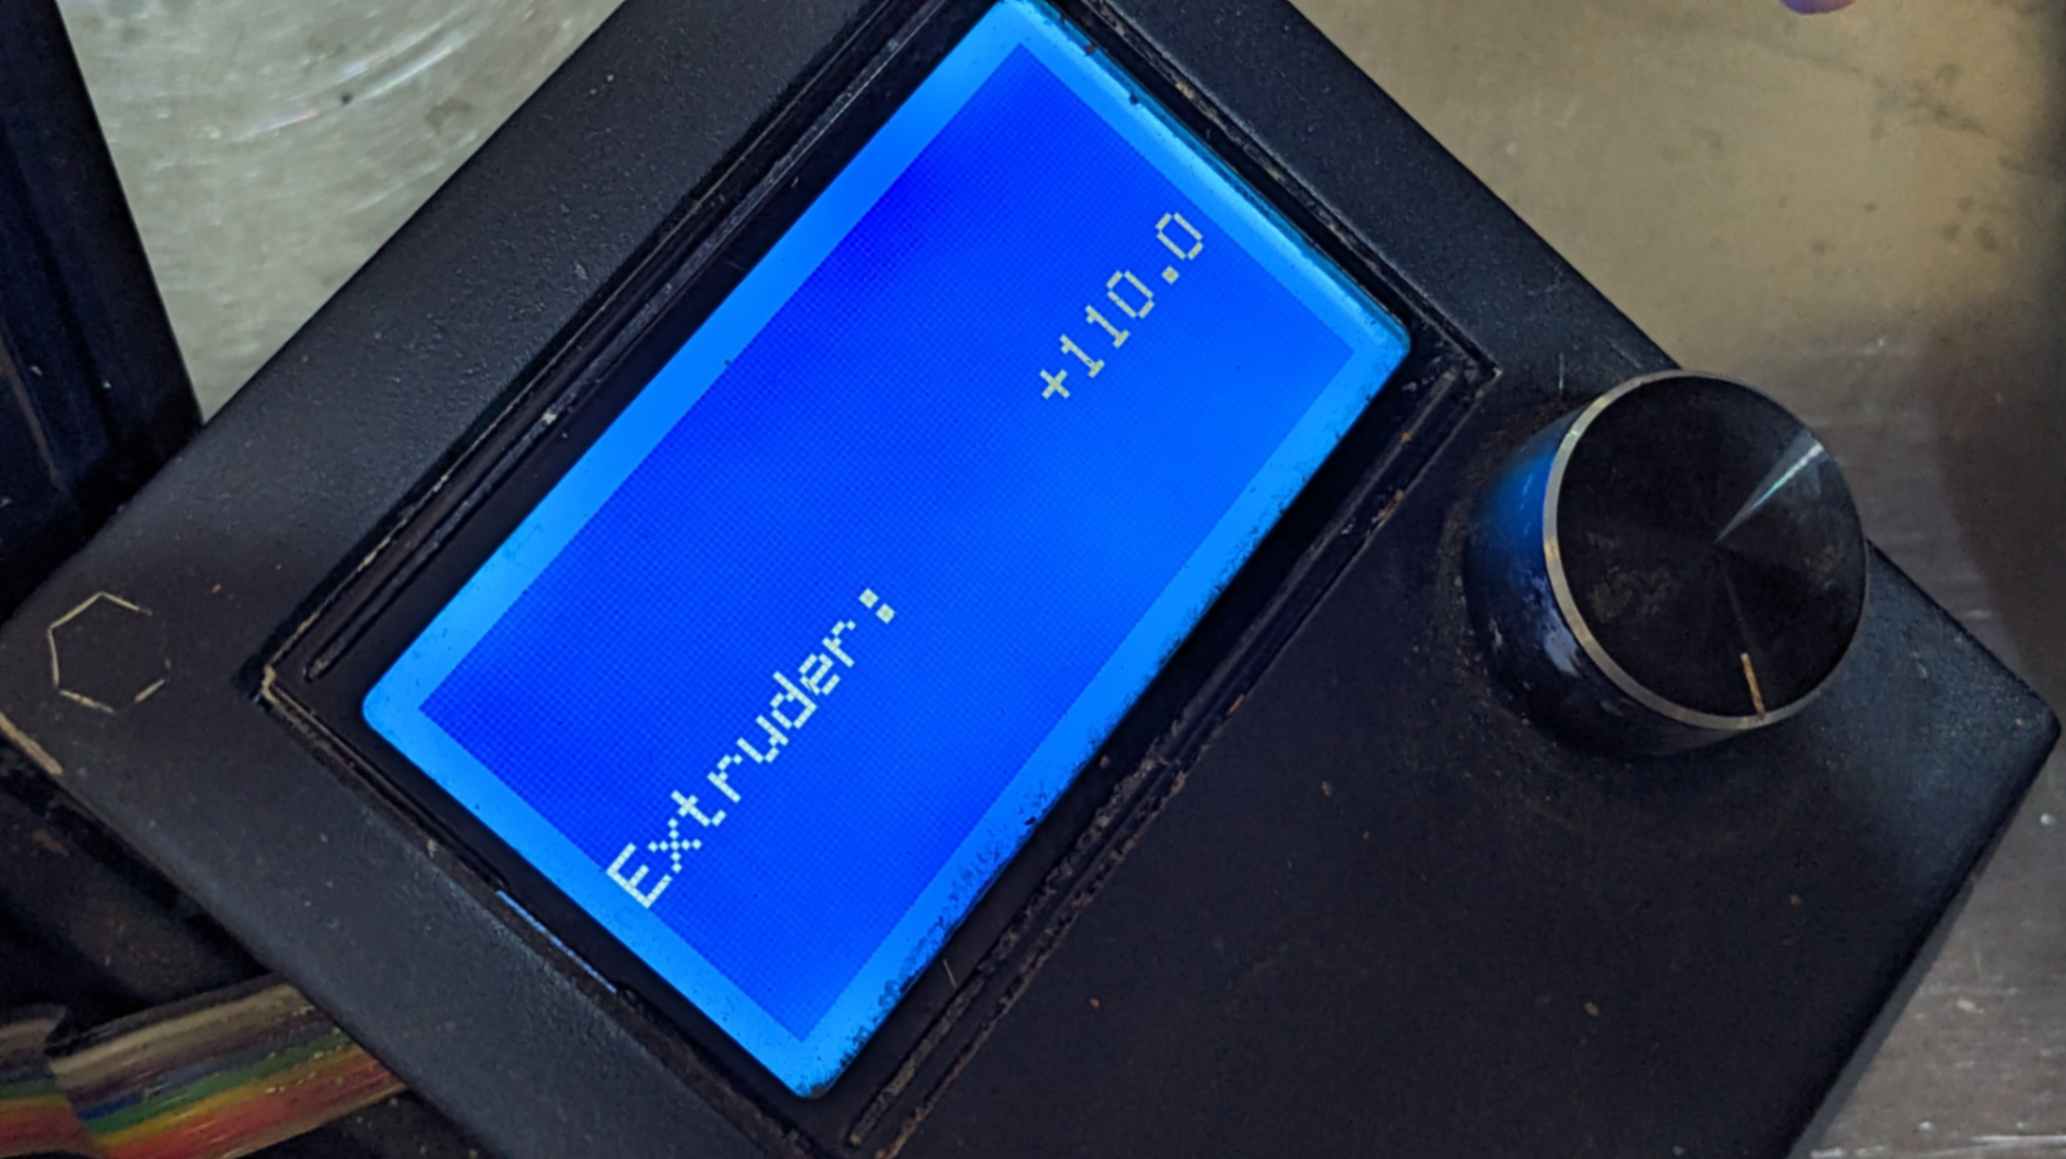
I found the Babystep function very interesting. It is a default function that 3D printers have. It is mainly used for Z-axis adjustment for a better print finish. But to me, it is a simple example of communicating with the machine, and collaboration between humans and machines in the process of making. Moreover, the finished print piece will have traces of co-creation.
Isn't that beautiful?
License
What will it do?
This 3D printer allows humans to dance with it in the process of making (printing), which will affect the printed piece
Who's done what beforehand?
Godot Studio has done a performance titled RITMO The performance explores the convergence of technology and performing arts blurring the lines between the process and the goal. It was done in collaboration with a dancer and a big ceramic delta printer.Within the Fab Academy project, David NG McCallum has done an amazing final project titled Performing the Machine where he plays a 3d printer as a musical instrument.
What will you design?
I designed a camera module for gesture recognition and a DJ set for generating and adjusting Gcode instantly. These two are installed on the 3D printer that is made from the machine week.
What materials and components will be used?
How much will they cost?
For Camera Module:
- Raspberry Pi 5 ($92 per 1)
- Webcam
- Noctua Cooling Fan ($13.95 per 1)
- 3D printed package
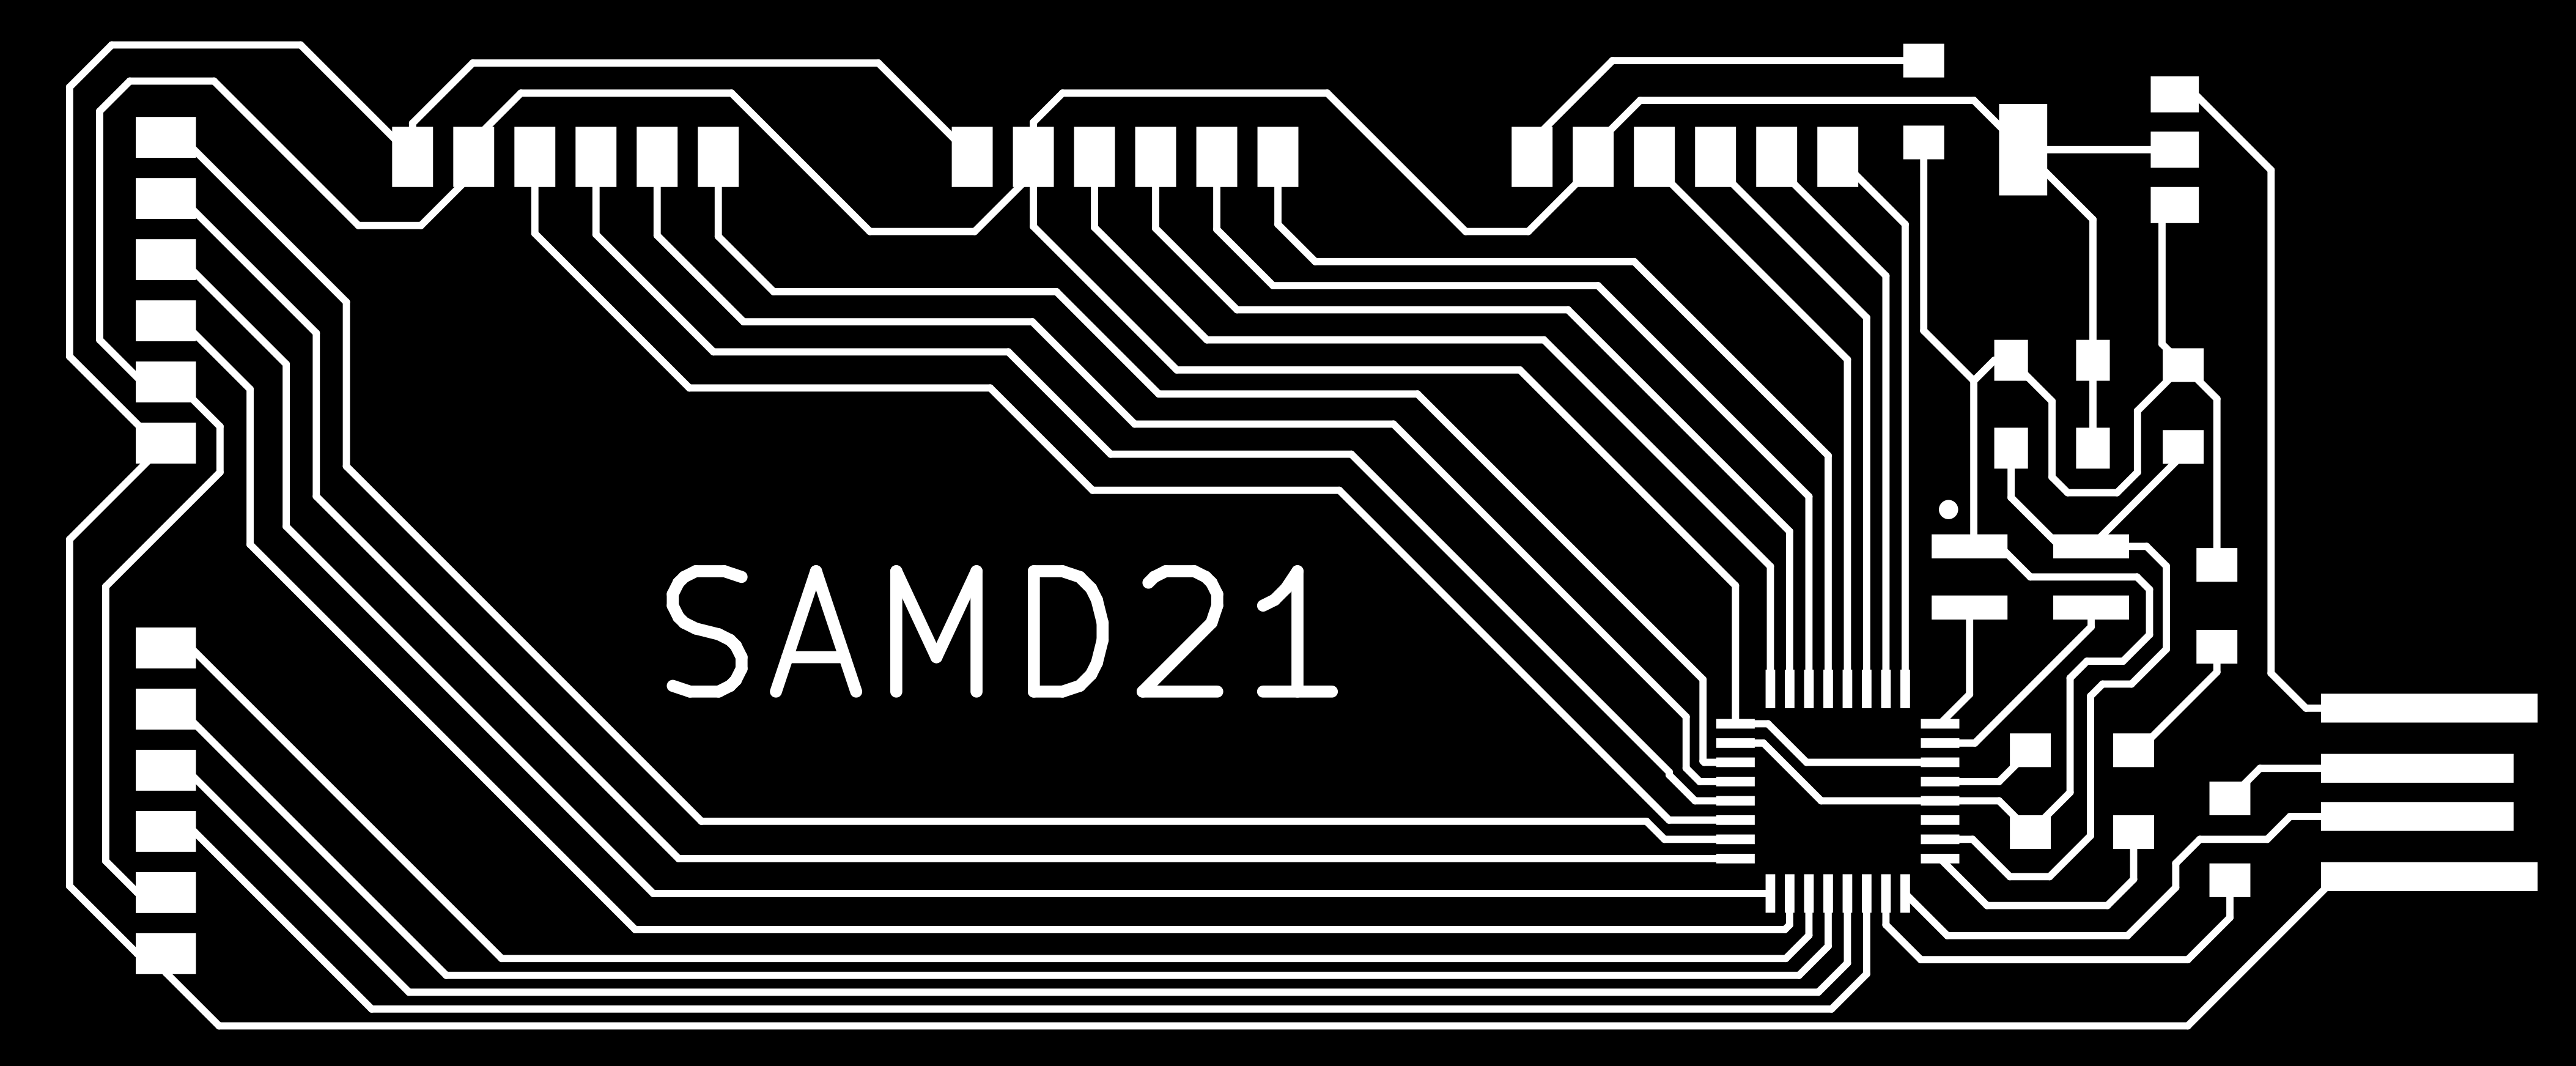
- PCB with SAMD21microcontroller ($3 per 1)
- 3 Rotary Potentiometer ($2.5 per 1)
- 3 Slide Potentiometer ($2 per 1)
- RGB LCD Screen ($12 per 1)
- Slide switch ($3.22 per 1)
- Toggle switch ($2.1 per 1)
- Voltage Converter ($3.5 per 1)
- 3D printed package
- Arduino Mega 2560 ($49 per 1)
- RAMPS1.4 ($10 per 1)
- Polulu A4988 (x3) ($4.5 per 1)
- Power Supply 12V 5A ($7 per 1)
- NEMA17 Stepper Motor (x3) ($10 per 1)
- Endstop (x3) ($1.73 per 1)
- Screw Connector
- Aluminium frame
- Lasercut Acrylic plate
- Lasercut wooden base
Where will come from?
All of the components are found in the Fab Lab BCN except the 3 slide potentiometer which I bought at
Charles Servei de Components Electrònics
It costs around 4 euros for each slide potentiometer.
What parts and systems will be made?
For the Camera Module and DJ set, All the parts are made by me. For the 3D printer, it was made by group effort from Machine Week. (Andrea, Emily, Lena,Hala, and me)
What processes will be used?
- 3D Modelling (Rhino)
- 2D modelling (Rhino, Inkscape)
- 2D and 3D milling
- Laser-cutting
- 3D printing using
- Programming (C++, Python)
- PCB Design (Kicad)
- Machine Learning (MediaPipe, OpenCV, Tensorflow)
What questions need to be answered?
The main question is how to combine both the camera module and DJ set to create a smooth user experience. This needs to be tuned more through some programming. Also, gesture recognition needs to be tuned more through increasing machine learning data. Also, it is still unknown how to print shapes other than cylinders with this 3D printer. This requires more investigation on Marlin 360 firmware. Moreover, it will be nice to have a way to print a list of Gcode without stopping because right now this printer only runs Gcode at a time.
How will it be evaluated?
This machine should be evaluated by its unique process of making with the machine. This machine was never aimed to produce a high-quality 3D printed piece. Instead, it is aimed to provide the joy of making and interacting with a machine by having responsive movement.
Therefore I think the the questions for evaluating this project should be some like below.
Does the machine respond to the user instantly?
Is the user able to dance and DJ with the machine?
Does the printed piece show the interaction between the user and the machine?
Bill of Materials
| Module | Material Name | Price for 1 (USD) | Quantity | Price x Quantity |
|---|---|---|---|---|
| Camera Module | ||||
| Raspberry Pi 5 | 92 | 1 | 92 | |
| Webcam | 30.50 | 1 | 30.50 | |
| Noctua Cooling Fan | 13.95 | 1 | 13.95 | |
| 3D printed package | - | 1 | - | |
| Subtotal | 136.45 | |||
| DJ Set: PCB | ||||
| SAMD21 | 3 | 1 | 3 | |
| NVoltage Regulator | 0.79 | 1 | 0.79 | |
| 0 ohm Register | 0.1 | 1 | 0.1 | |
| 1k ohm register | 0.1 | 1 | 0.1 | |
| 220m ohm register | 0.1 | 1 | 0.1 | |
| 1 uF Capacitor | 0.9 | 3 | 2.4 | |
| LED | 0.1 | 1 | 0.1 | |
| L4 Vertical Pin Header | 1.57 | 1 | 1.57 | |
| 6 Horizontal Pins Header | 0.75 | 5 | 3.75 | |
| DJ Set: Other | ||||
| Rotary Potentiometer | 2.5 | 3 | 7.5 | |
| Slide Potentiometer | 2 | 3 | 6 | |
| RGB LCD Screen | 12 | 1 | 12 | |
| Slide Switch | 2.5 | 1 | 2.5 | |
| Toggle Switch | 2.1 | 1 | 2.1 | |
| Voltage Converter | 3.5 | 1 | 3.5 | |
| USB cable Type A Male to Female | 3.73 | 1 | 3.73 | |
| 3D printed package | - | 1 | - | |
| Subtotal | 49.24 | |||
| 3D Printer: Main | ||||
| Arduino Mega 2560 | 49 | 1 | 49 | |
| RAMPS1.4 | 10 | 1 | 10 | |
| Polulu A4988 | 4.5 | 3 | 13.5 | |
| Power Supply 12V 5A | 7 | 1 | 7 | |
| NEMA17 Stepper Motor | 10 | 3 | 30 | |
| Endstop | 1.73 | 3 | 5.19 | |
| Screw Connector | 0.68 | 1 | 0.68 | |
| USB Type B cable | 5.08 | 1 | 5.08 | |
| RatRig alluminium frame | 91.28 | 1 | 91.28 | |
| Lasercut Acrylic Plate | - | 1 | - | |
| Lasercut Wooden Base | - | 1 | - | |
| 3D Printer: USB Power | ||||
| DC-DC Converter | 1 | 1 | 1 | |
| USB Type A female | 1.08 | 4 | 4.32 | |
| Screw Connector | 0.47 | 1 | 0.47 | |
| Subtotal | 190.52 | |||
Total |
376.21 |
Files
Script
Python Script for Raspberry Pi with WebCAMConfigulation Script for Marlin in Arduino IDE
Advance Configulation Script for Marlin in Arduino IDE
Arduino Script for DJ Set (SAMD21)
Packaging
3D model for all the packaging (Rhino)Package for Raspberry Pi 5 (.stl)
Knobs for DJ set (.stl)
Bottom Package for DJ set (.stl)
Top Package for DJ set (.stl)
Bottom Package for Printer Box (.stl)
Top Package for Printer Box (.stl)
Lasercut Base Plate (Rhino)
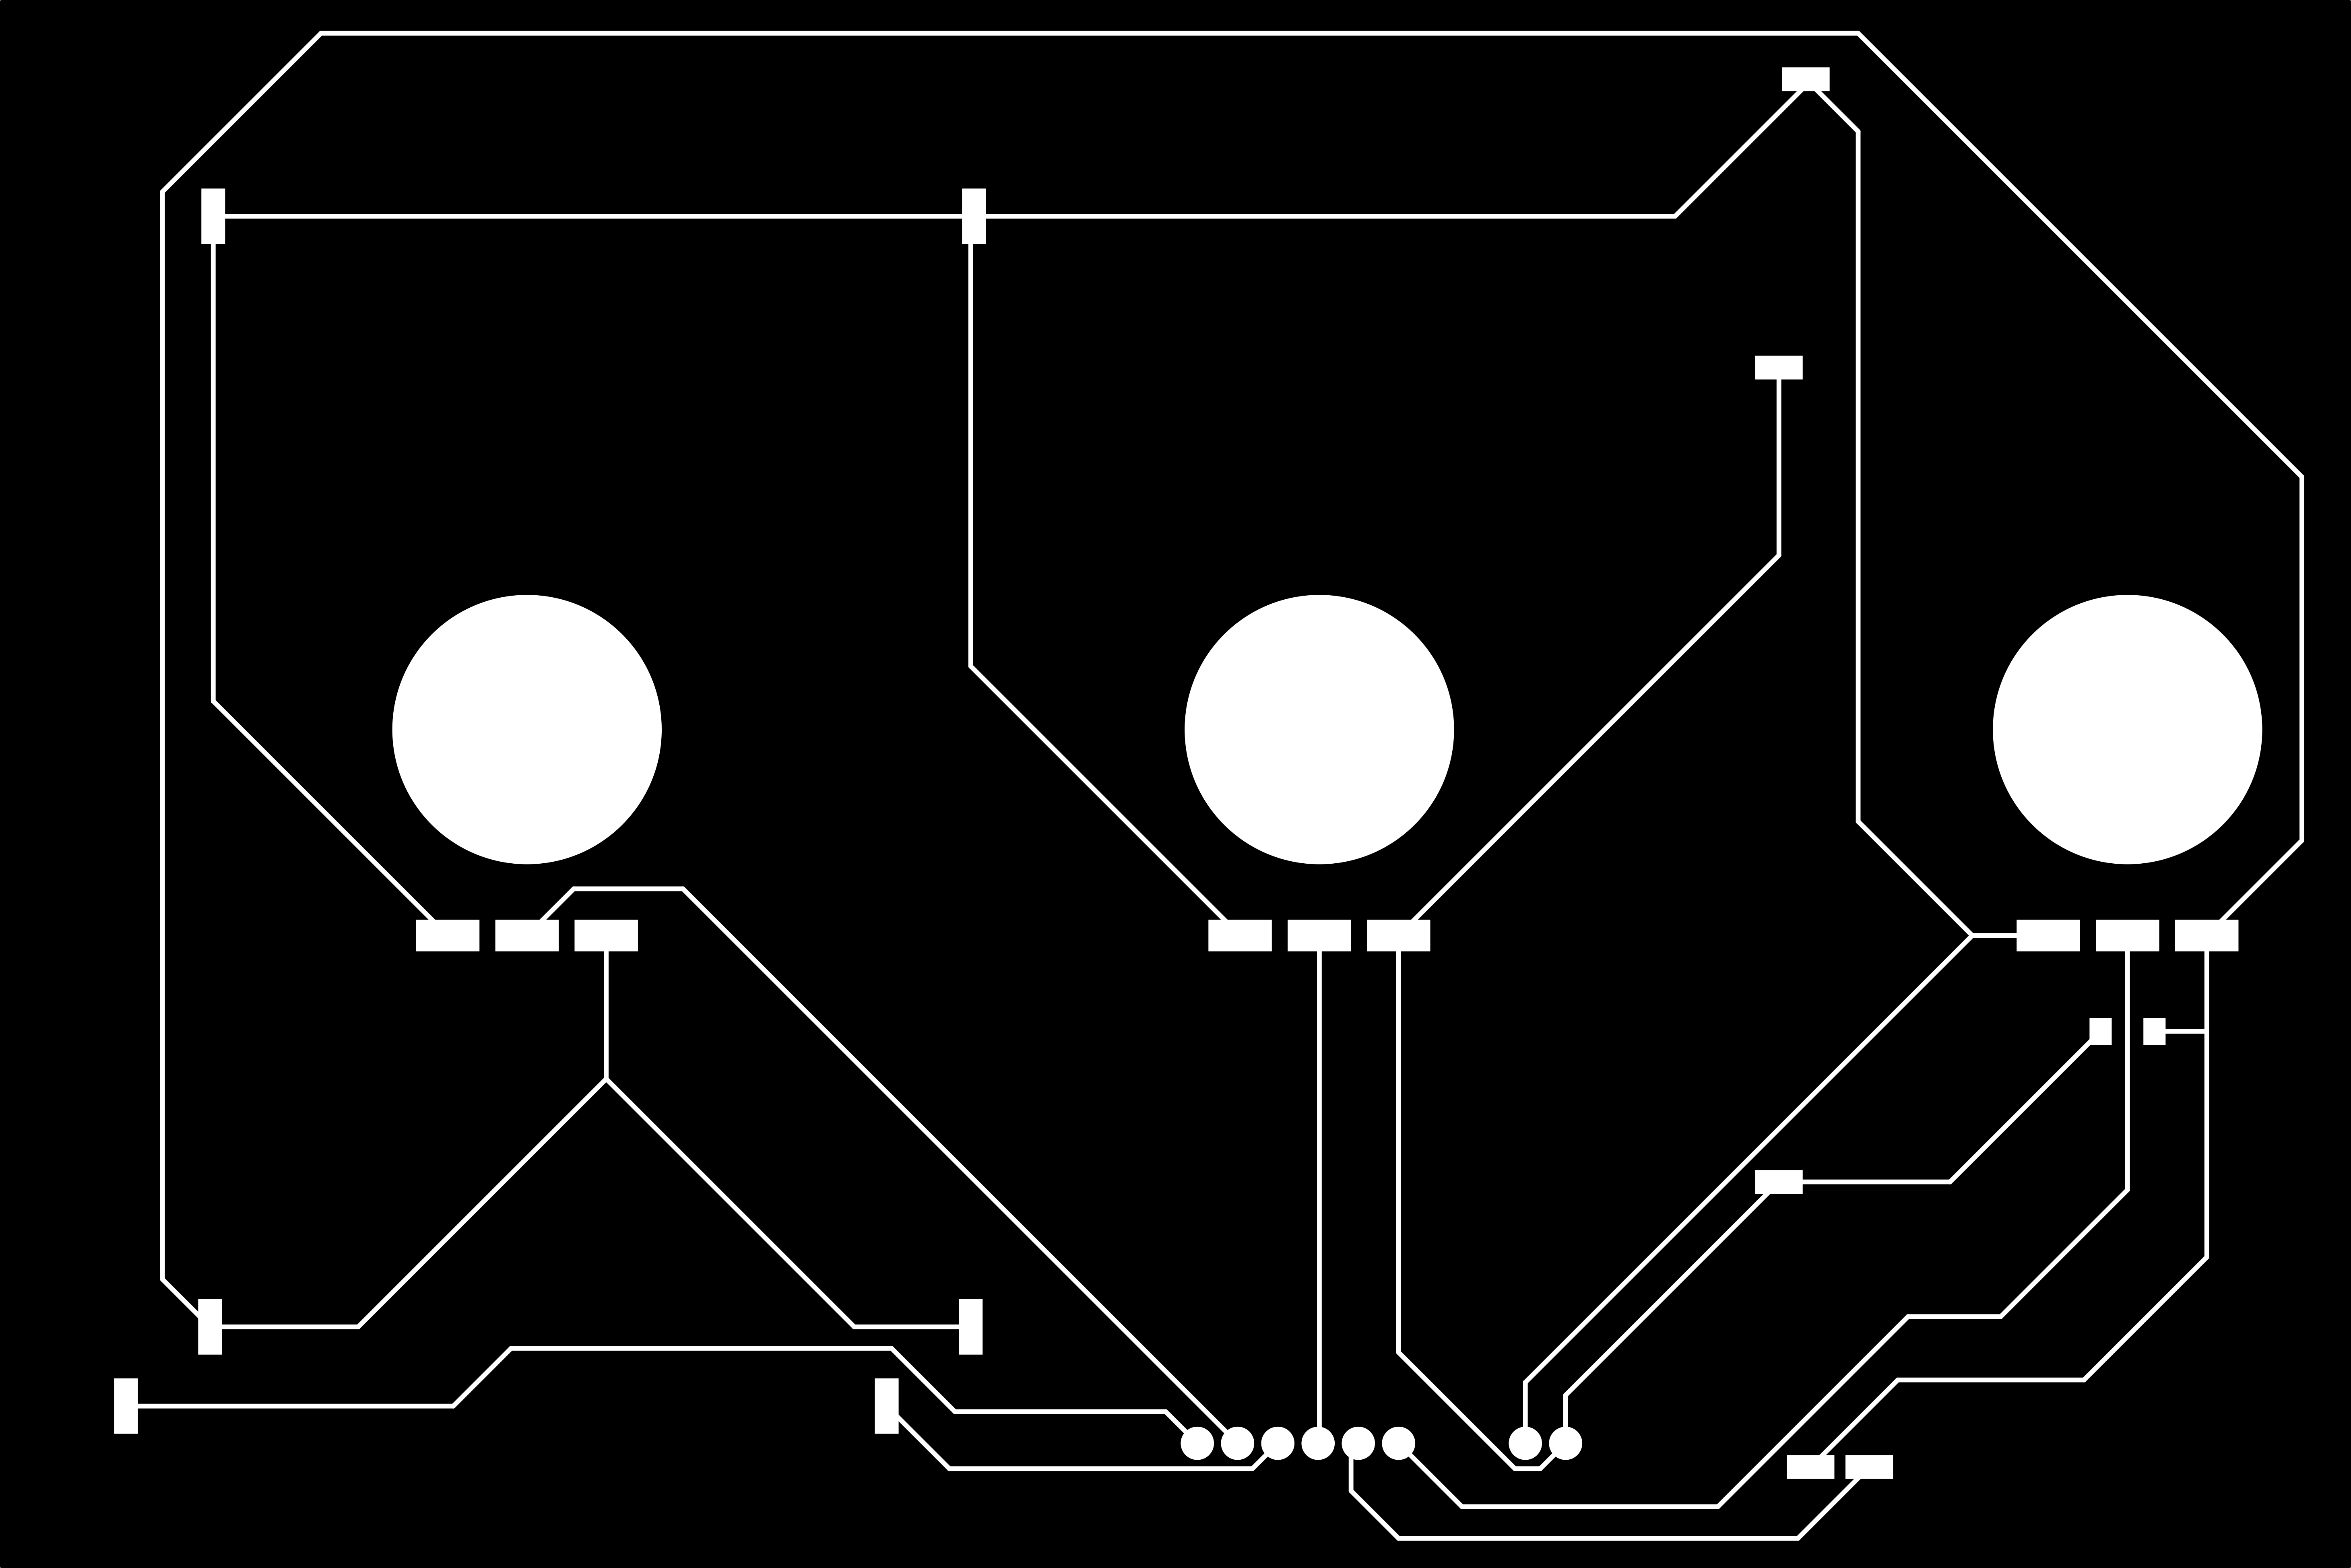
DJ Potentiometer
Custum_Riichi_symbols.zipCustum_Riichi_footprints.zip
Potentiometer.kicad_pro
Potentiometer.kicad_sch
Potentiometer.kicad_pcb
Potentiometer-F_Cu.svg
hole.pngl
trace.png
hole.png.rml
trace.png.rml
USB Ports
USB_4ports-F_Cu_Flipped.svg
USB_4ports.kicad_pcb
USB_4ports.kicad_prl
USB_4ports.kicad_pro
USB_4ports.kicad_sch