Computer Controlled Cutting
Assignment 3 - Fab Academy Barcelona


This week I:
Laser Cutting
I started out thinking I would make a chair or a lamp with cardboard
In class we were introduced to parametric design in Fusion and Rhino (w Grasshopper). As I had worked in Rhino last week, and liked our intro to Grasshopper, I decided to double down on Rhino.
I found some parametric designs online (youtube tutorials) for a chair and lamp, and started designing each of these.
However these tutorials were meant for creating full CAD renderings rather than creating component parts to be assembled with a laser cutter. While I was interested in teh challenge to model the requisite parts, it was quite a complicated challenge and I wasn't sure I'd get it done in time. I decided to explore some other possibilities before going to far.
Lesson Learned: start simple and explore several options quickly before getting to set on one outcome to build
I explored creating patterns with Grasshopper and warping wood
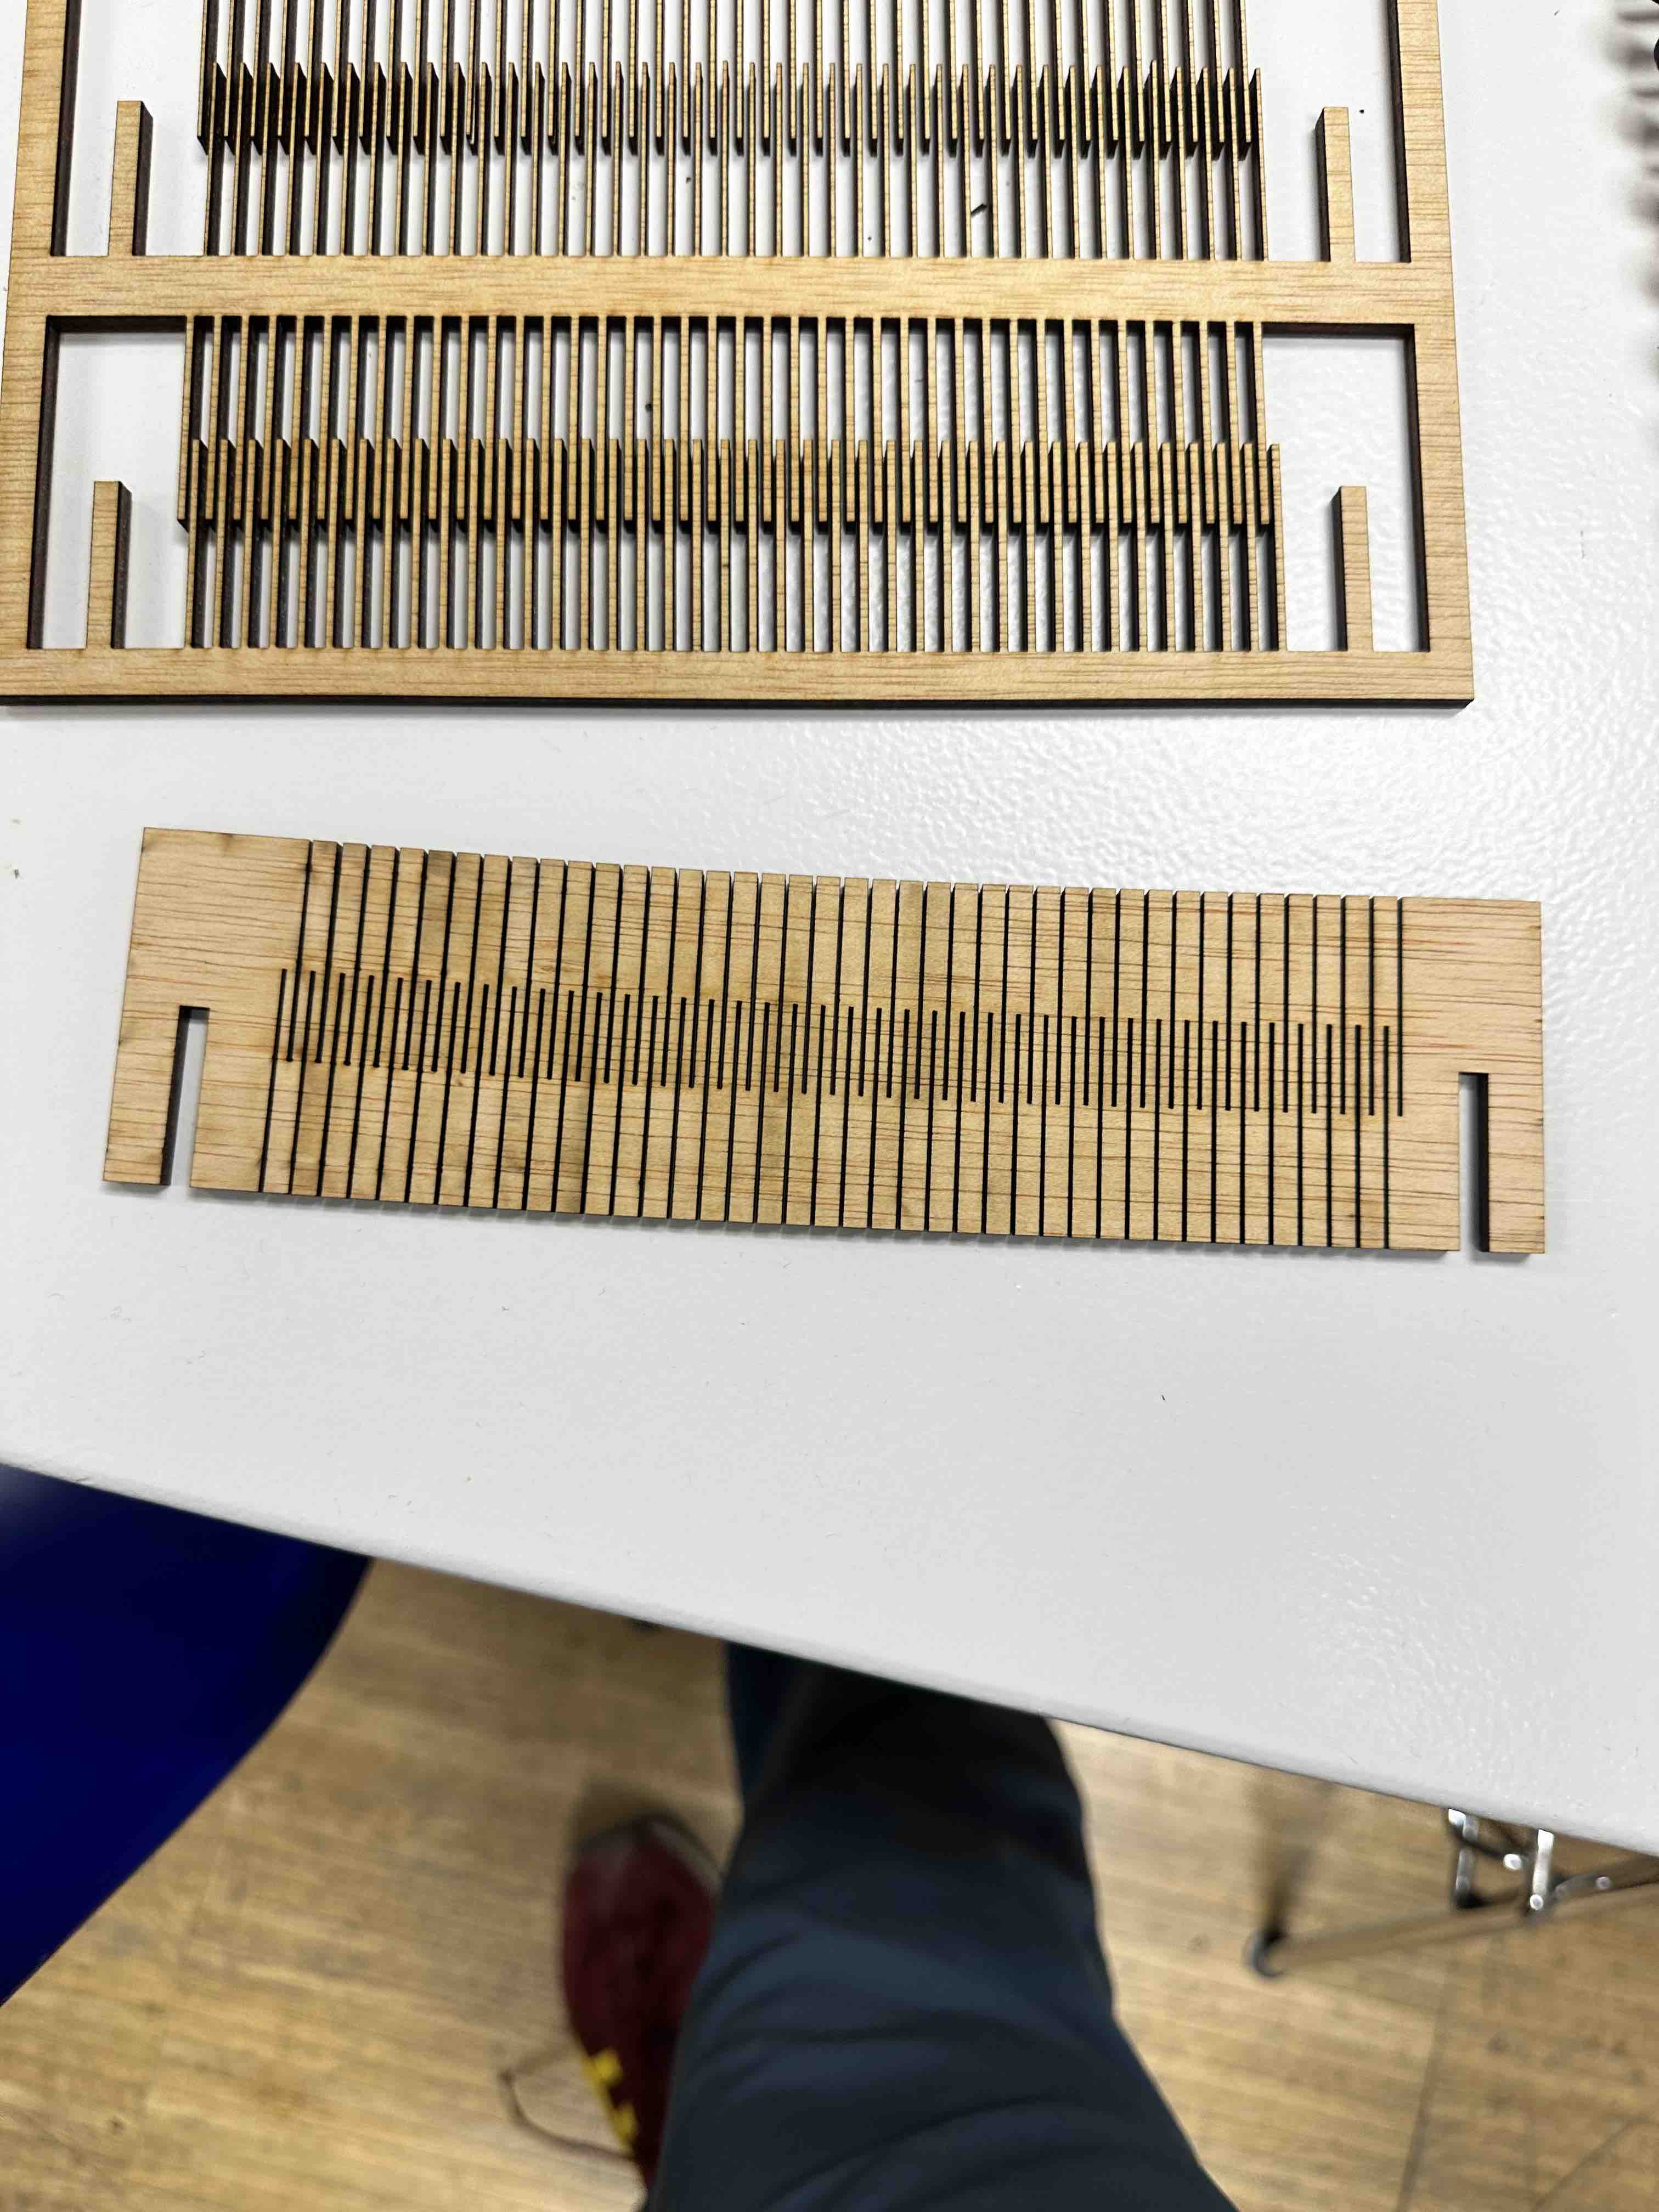
After seeing my classmate Riichiro make some pretty cool hinges from a template provided by local instructors, I started playing around with using Grasshopper to make interesting patterns.
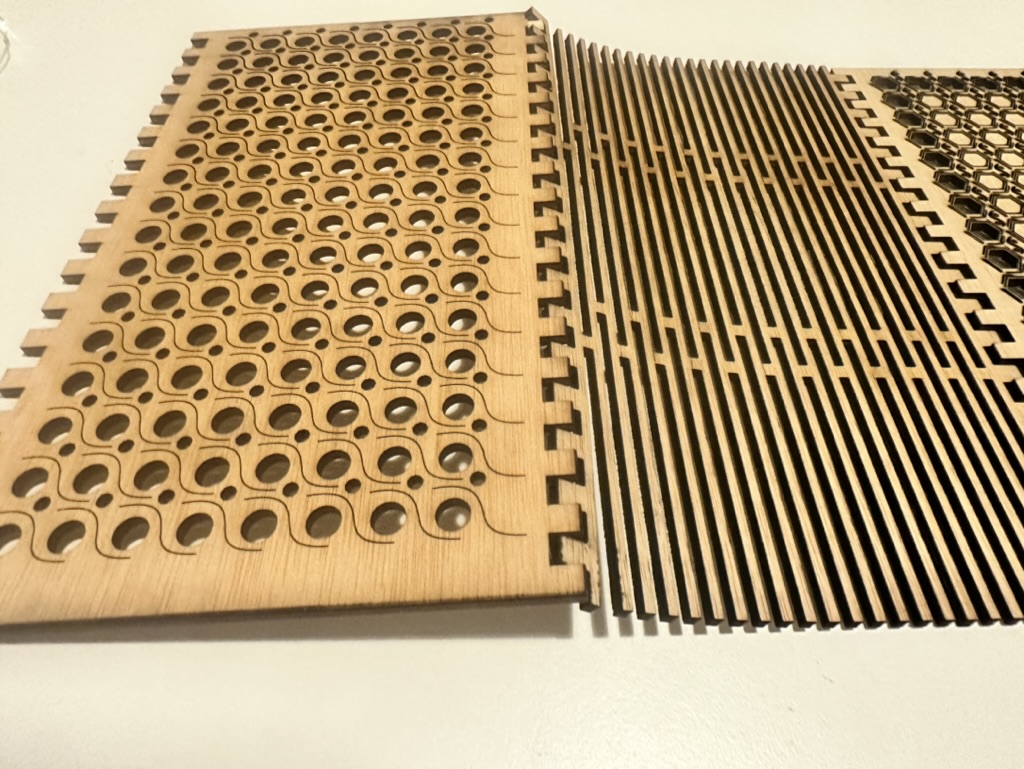
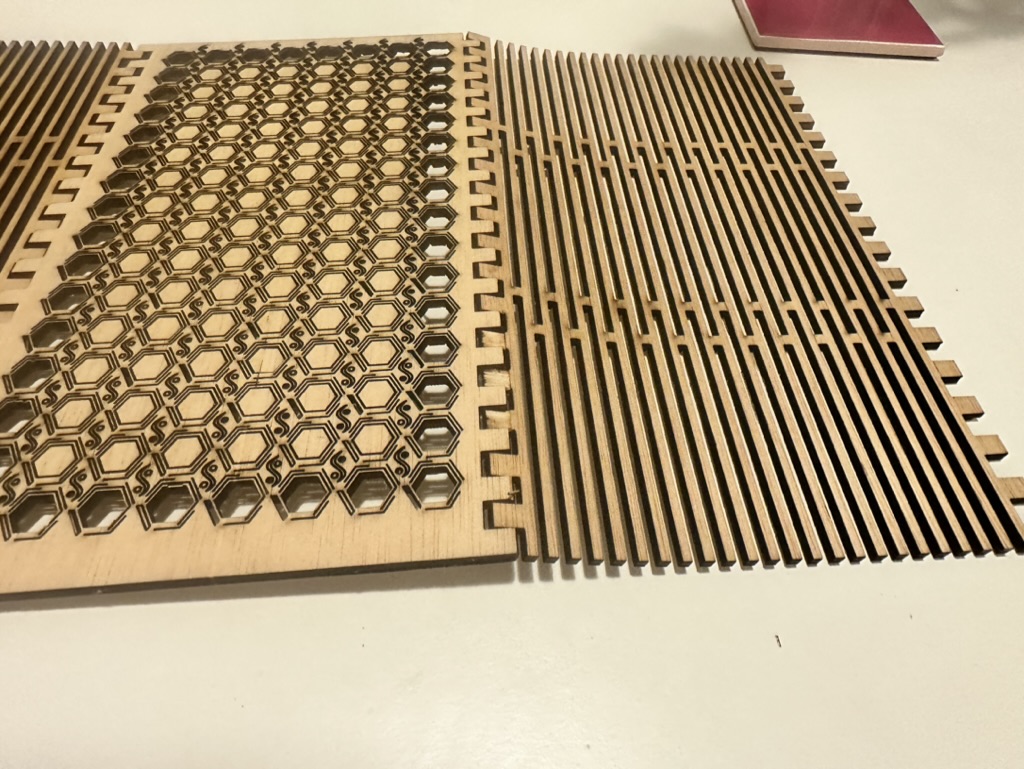
I created a panel in Rhino with a repeated geometric design. I experimented with: (1) creating simple objects (like circles or polygons) parametrically and using an array to repeat over a panel and (2) creating curves by sketching in Rhino directly, and then arraying. I also adapted the hinge template we saw in class. I had to spend some time understanding that grasshopper file to adapt dimensions to the panels I was creating.
I decided to adapt these designs to interlocking panesl that could be arranged in various ways - in particular I thought they would make a nice lantern.
MATRIX DESIGN IN GRASSHOPPER
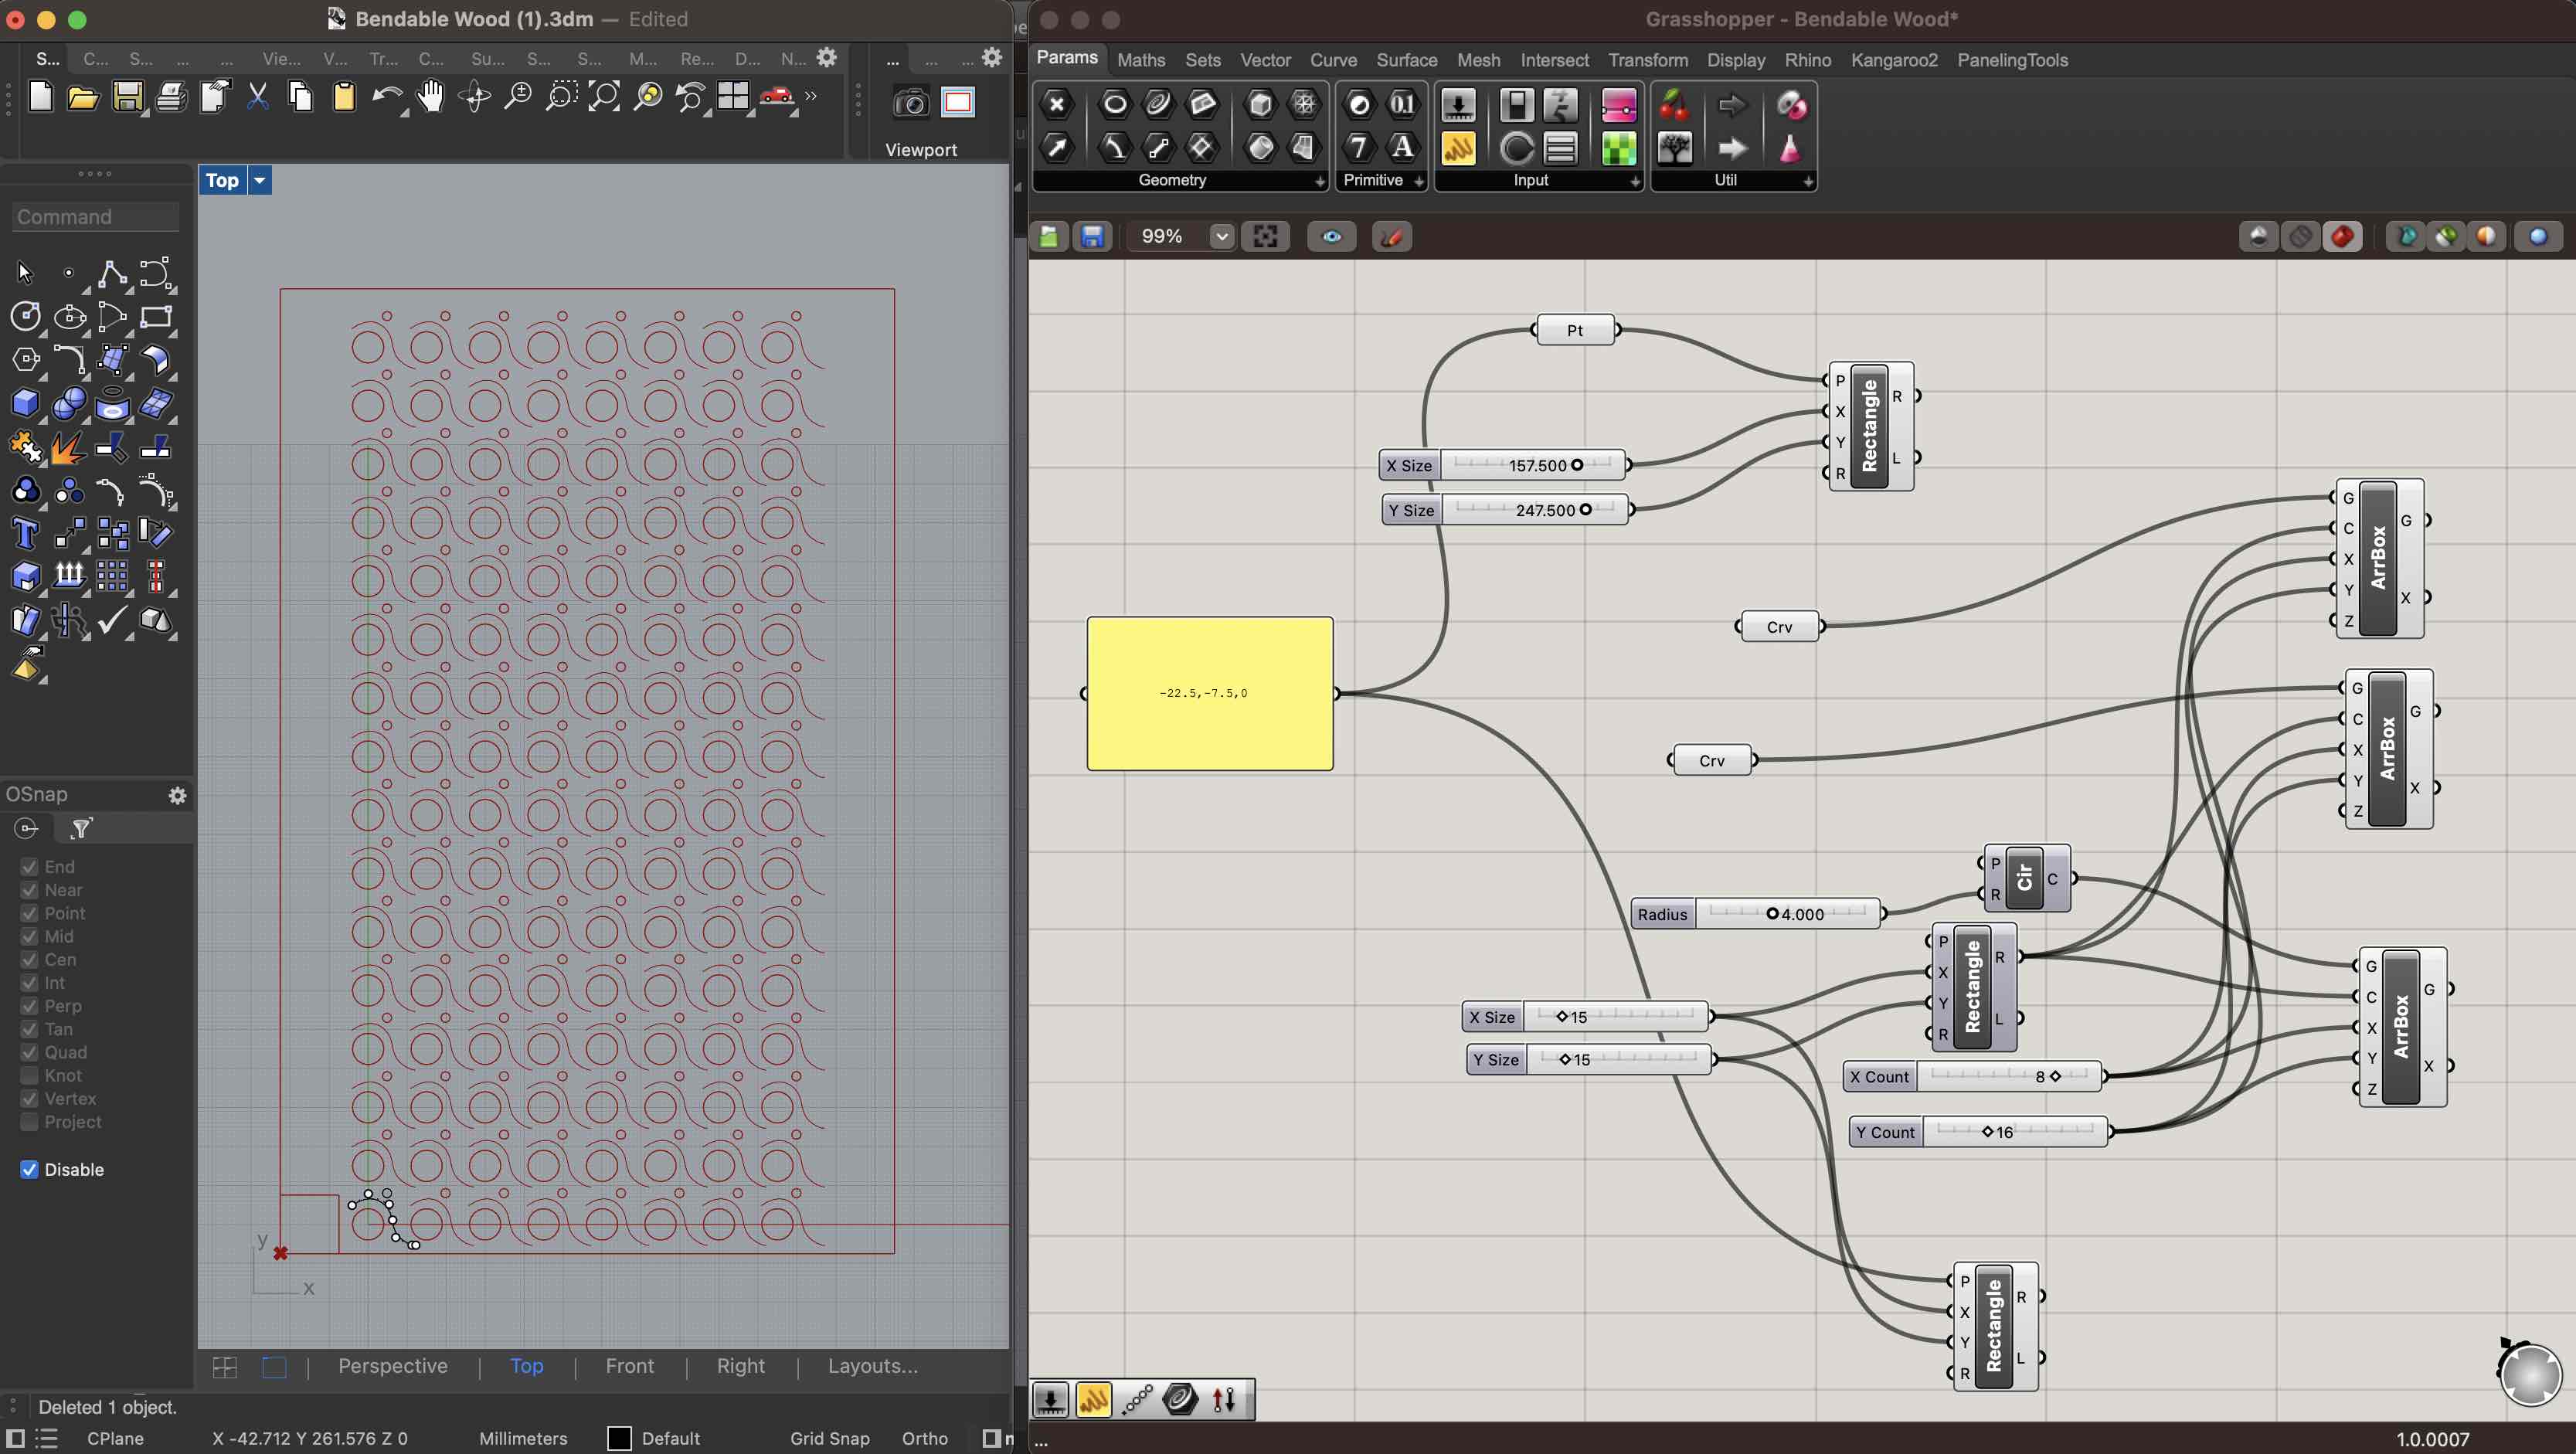
ADAPTED HINGE DESIGN IN GRASSHOPPER (already baked)

I danced (fought) with the laser cutter over focus and power
I used two laser cutters in the Barcelona Fab Lab: The Trotec Speedy 400 and the Rayjet400. My material was 4mm plywood. I used the power and speed settings specified by the reference materials in the lab (for 3mm plywood this was Power - 100; Speed - 1.5; Hz 1000). I always started with a test of a small square. I found that often the power needed to be adjusted slightly to ensure a cut on the first time (I increased Power to 115). When I first used the Speedy 400 I incorrectly focused the lense and the laser didn't cut through (and made a pretty inexact design). I noticed the cut seemed larger than normal, but didn't realize my mistake. I should have trusted my intuition that something was off.
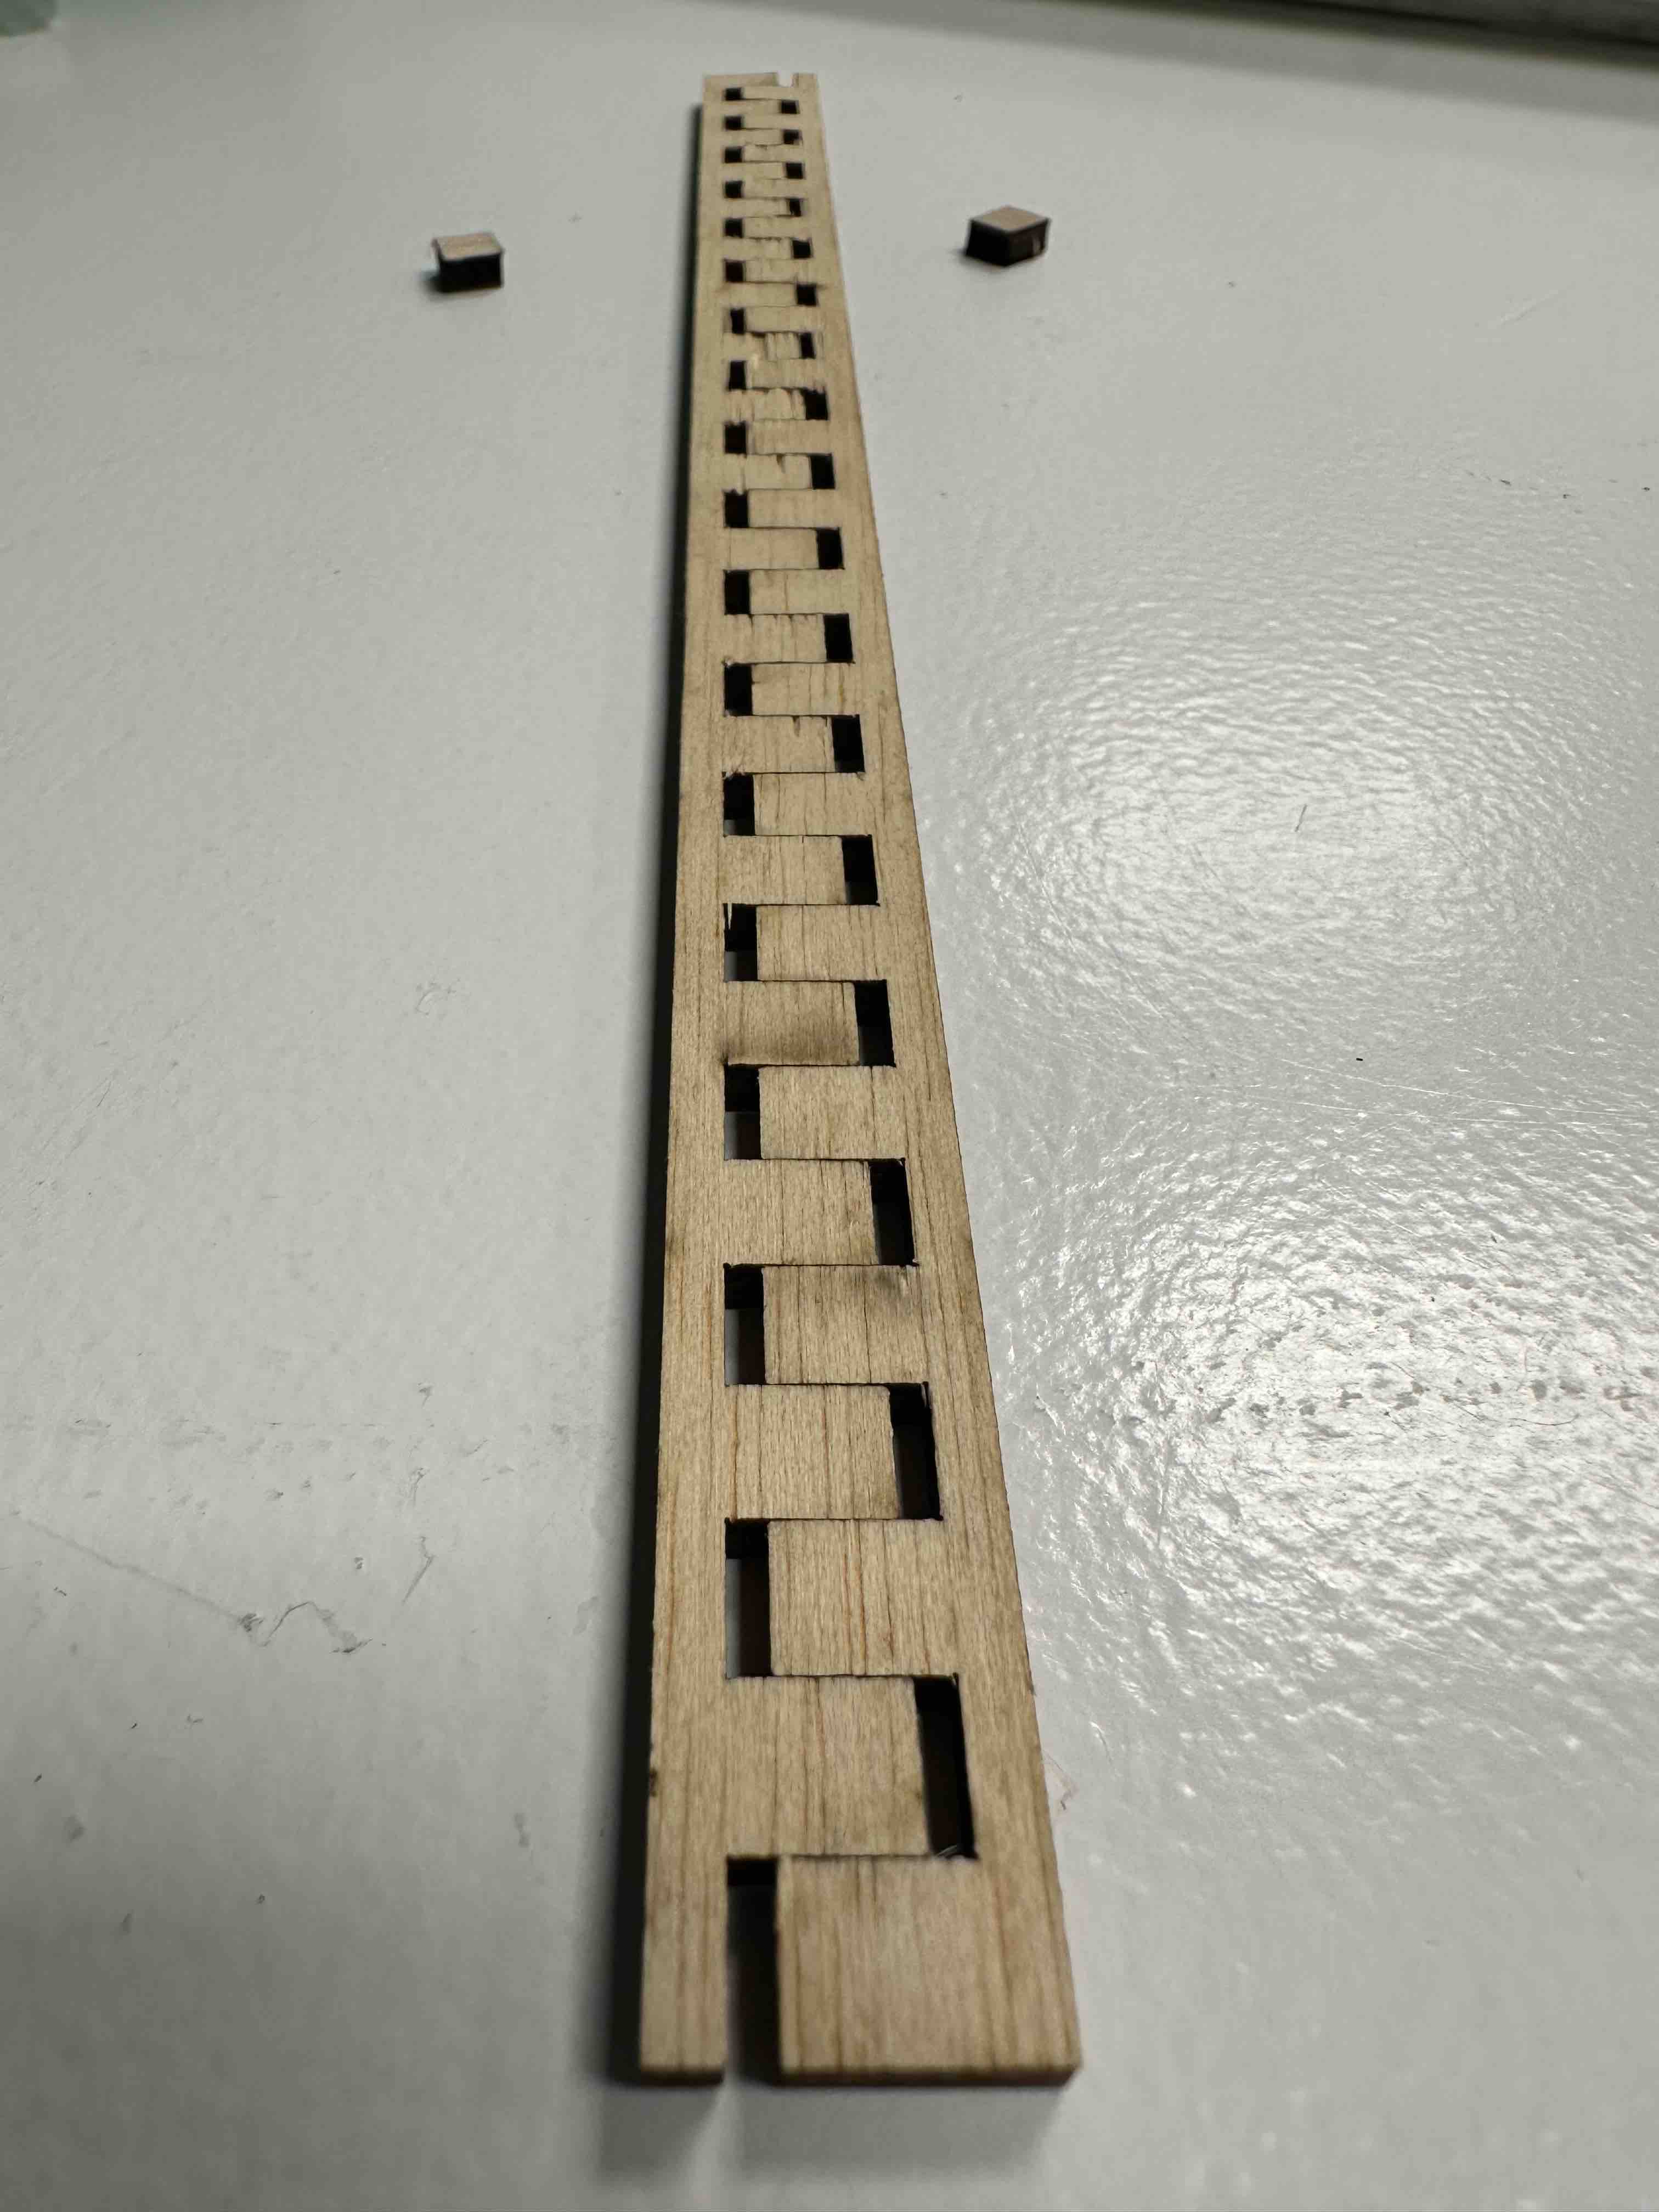
Before creating my panels I created a test for the joints where my panels would connect. I used the kerf test from the group project to calculate - it worked on the first try! However I only conducted the joint test on the Speedy 400. I also used the Rayjet400 to cut some panels (given machine availabilty). In the end the panels cut on the Rayjet didn't fit together nearly as well. Lesson learned: run new tests for each machine and material combination used!
JOINT TEST
OUT OF FOCUS CUT

PANEL CUTTING
FLEXIBLE PANEL
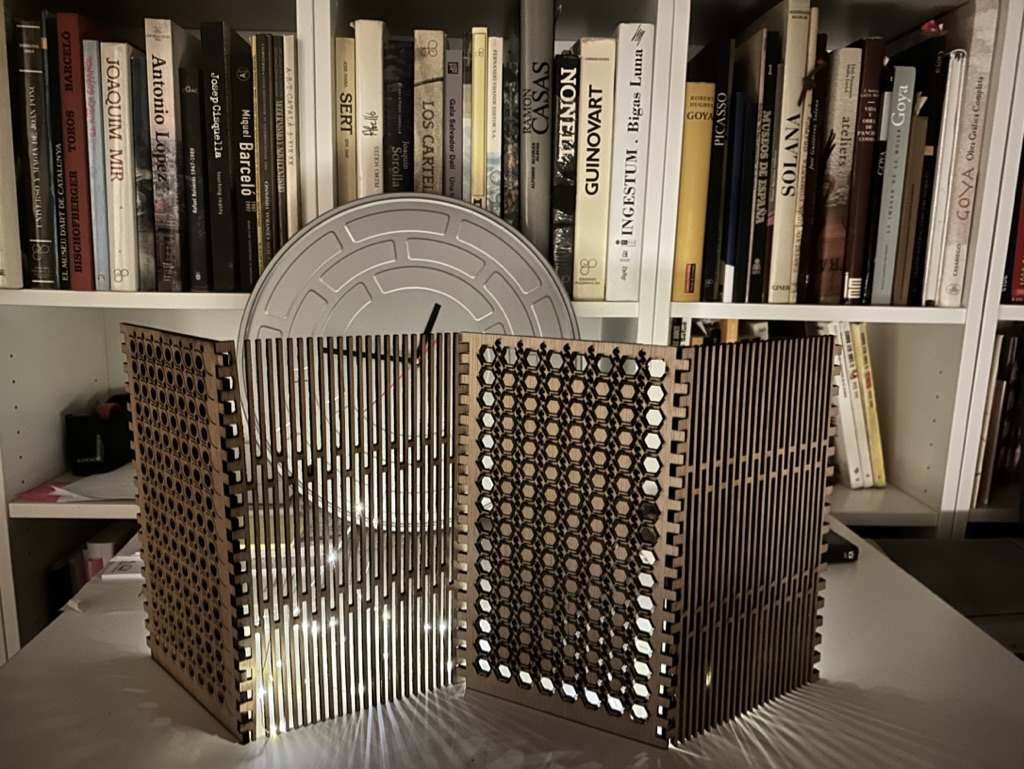
And here is the finished product
NIGHT
DAY
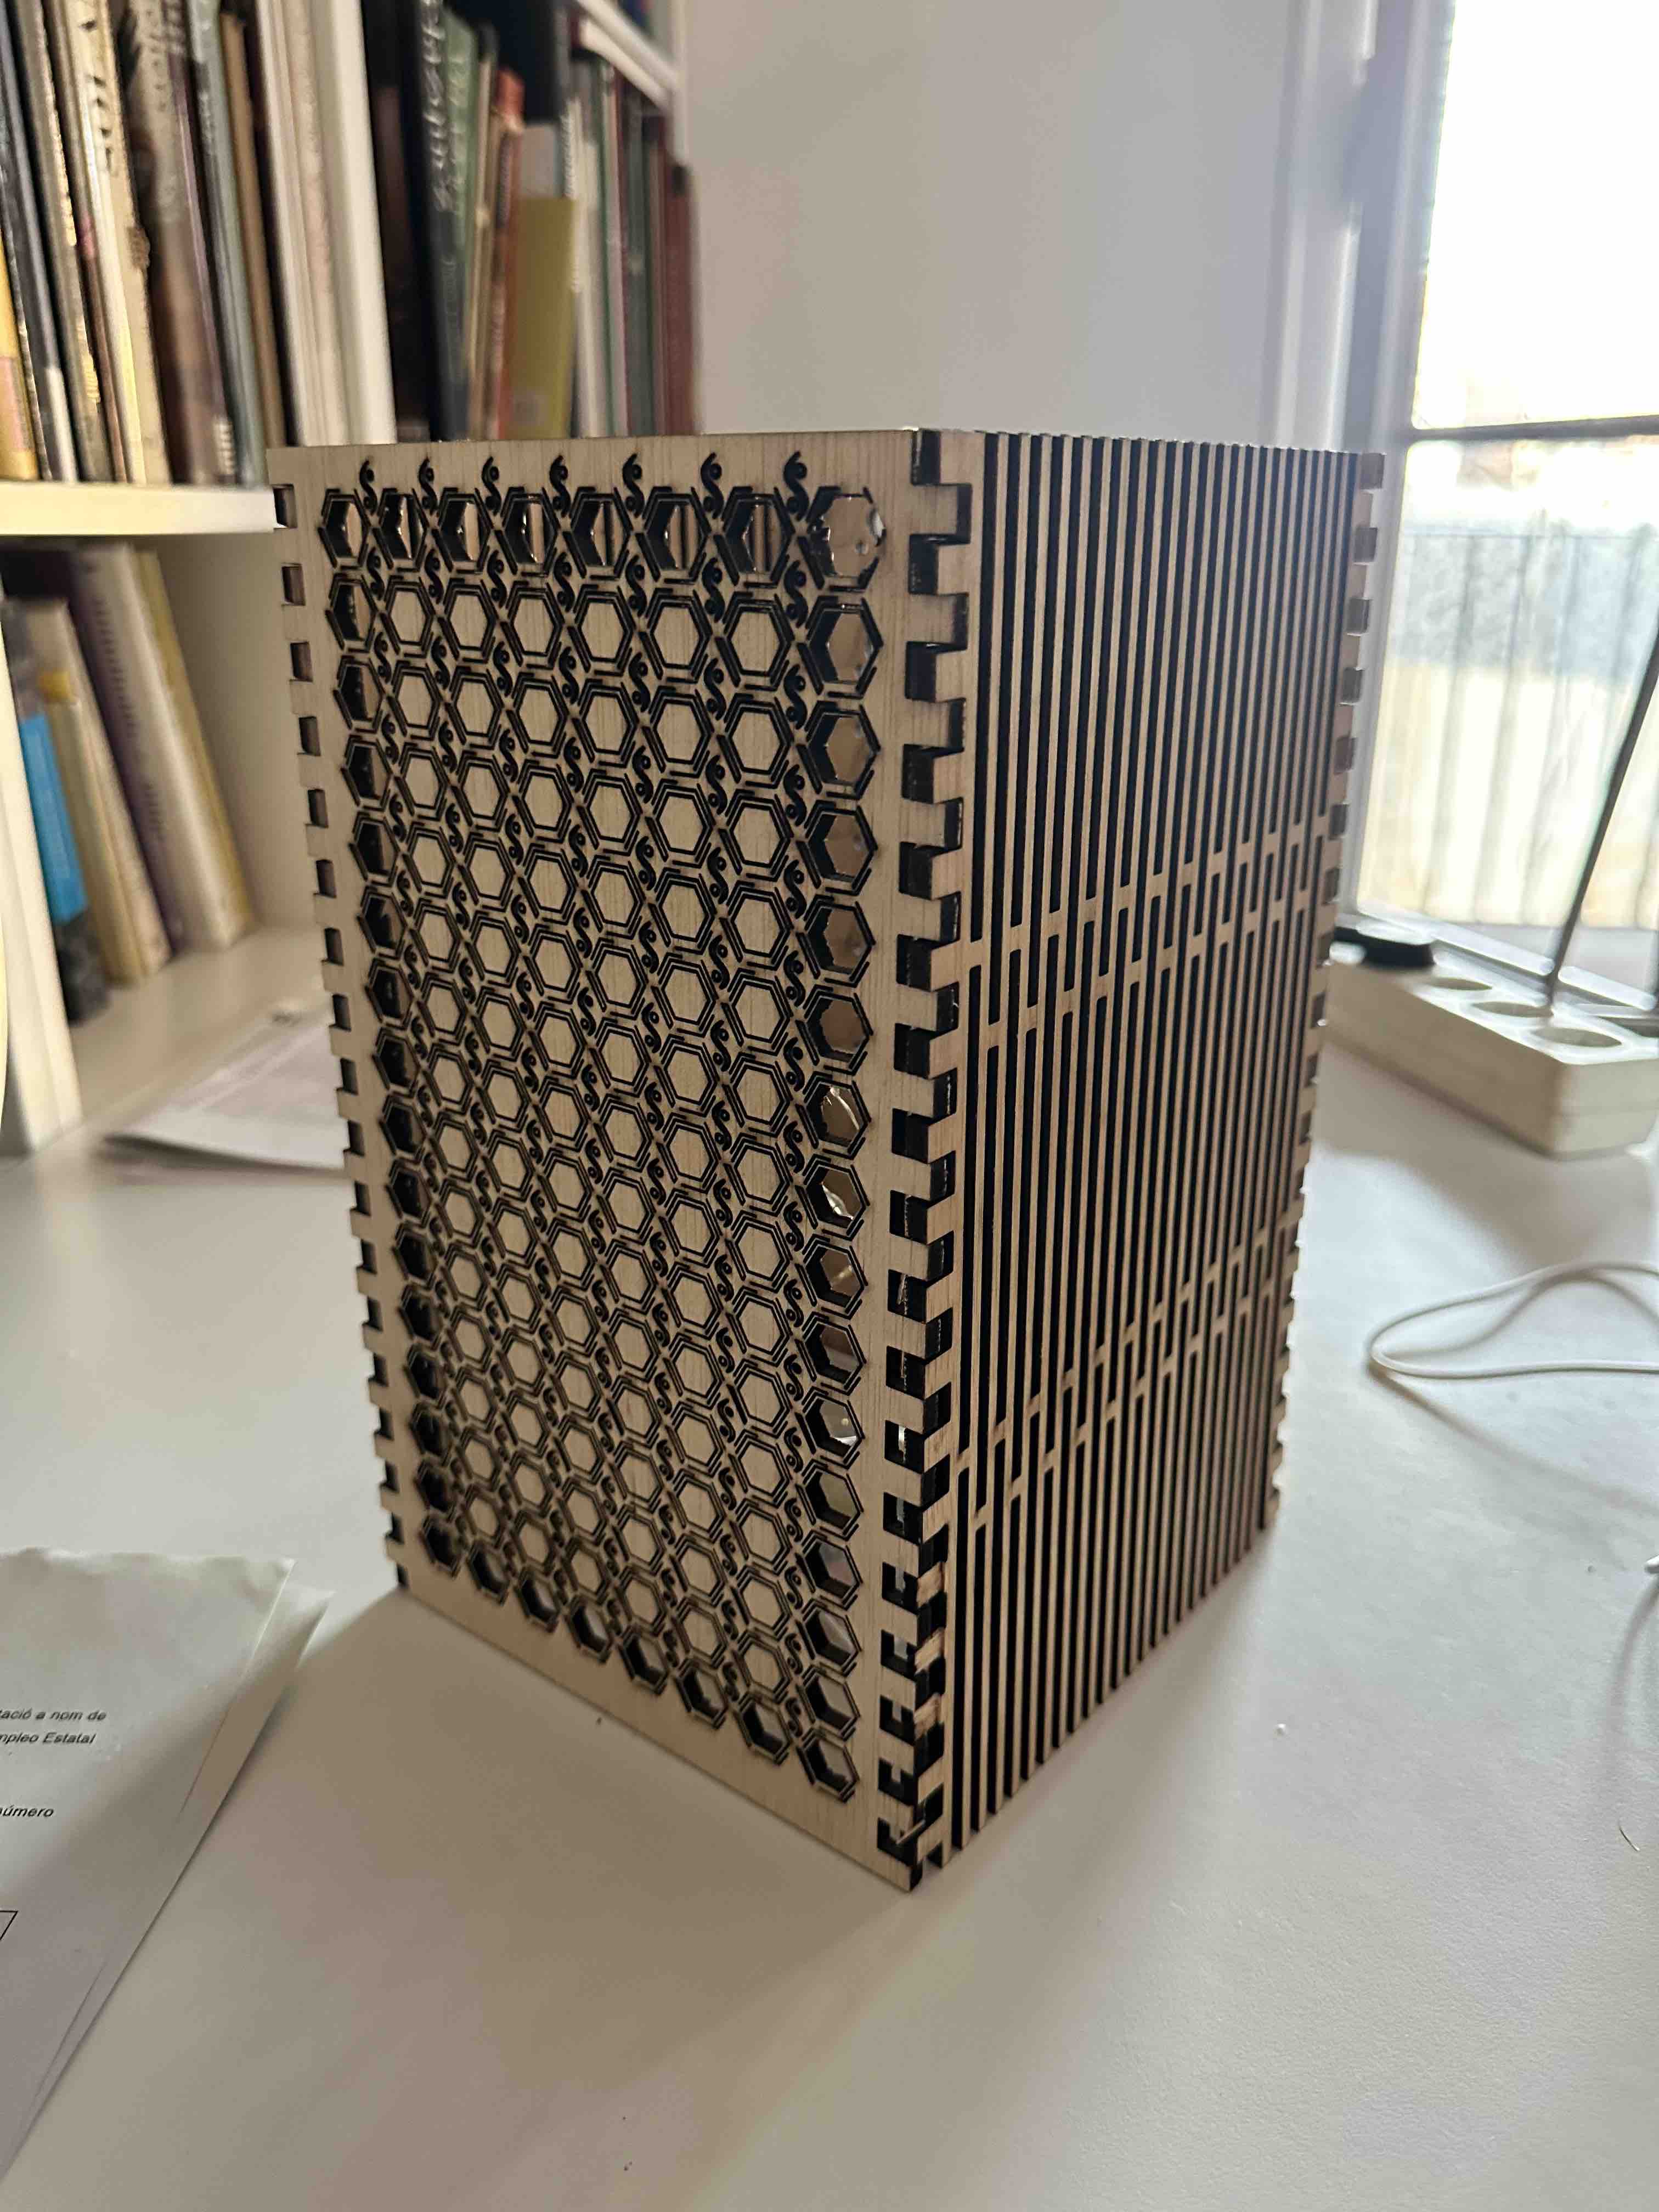
PANELS 1 & 2
PANELS 3 & 4
ALTERNATIVE LAYOUT
VIDEO
Design Files
Vinyl Cutting
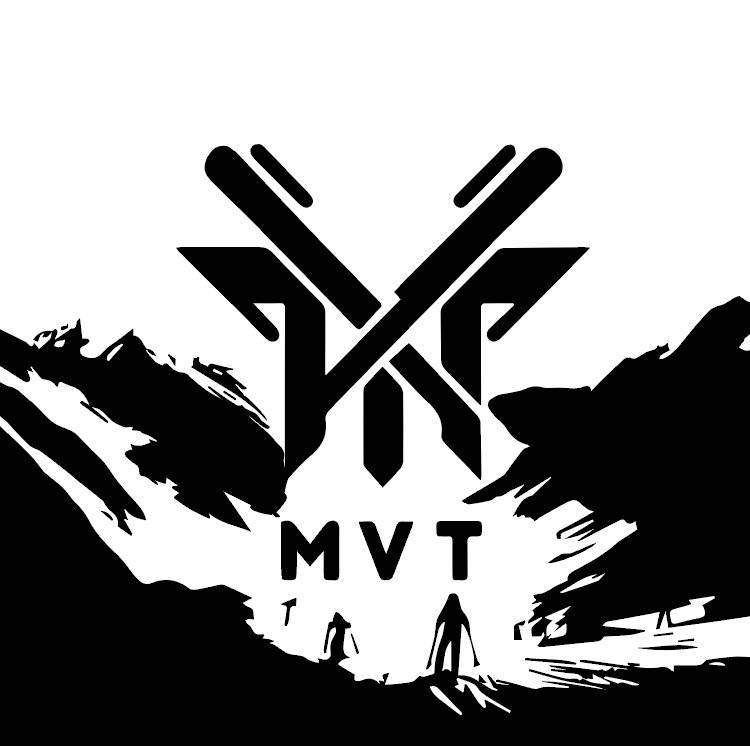
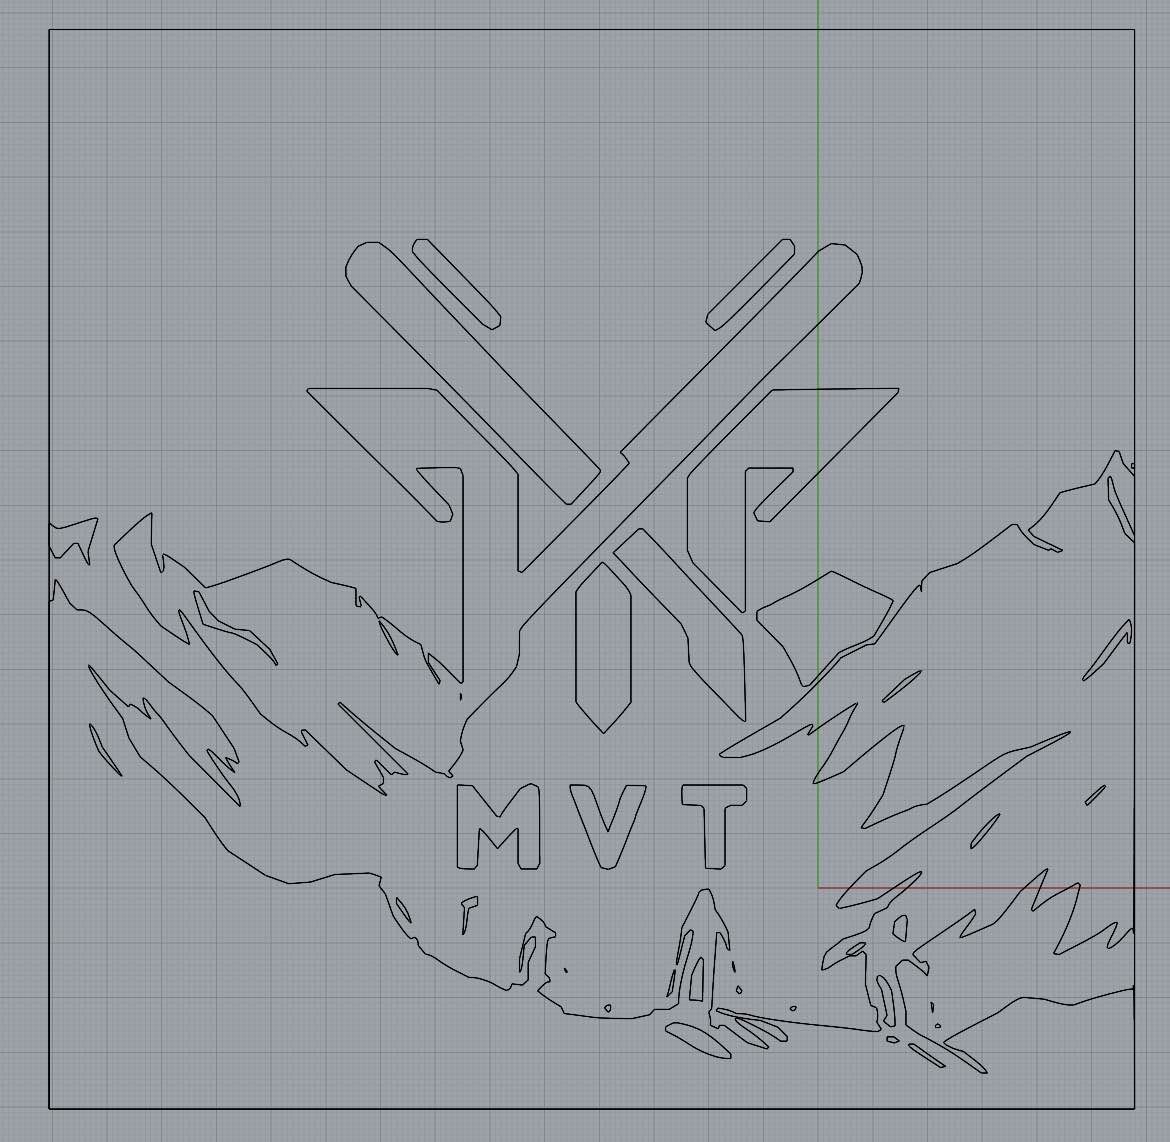
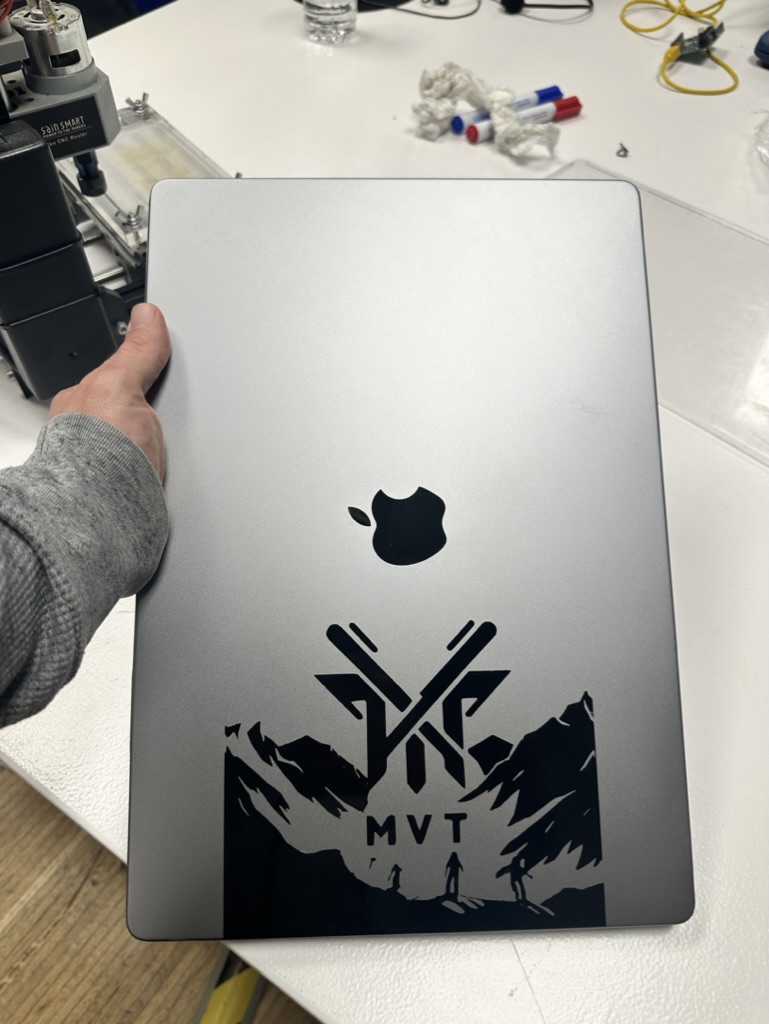
I first created a logo using my initials with ChatGPT. I was facing some issues iterating (lots of errors), I think due to throttling, and so I moved to Pixlr to clean up, also using their AI tools. In general I found that trial and error was key - you can see from the screenshots below that even a request for a specific modification can result in a complete redesign (not pictured here: MANY more failed attempts before I got something I liked). I also rasterized in illustrator. I then added the Vectorize plugin for Rhino and create a tracing using this tool.
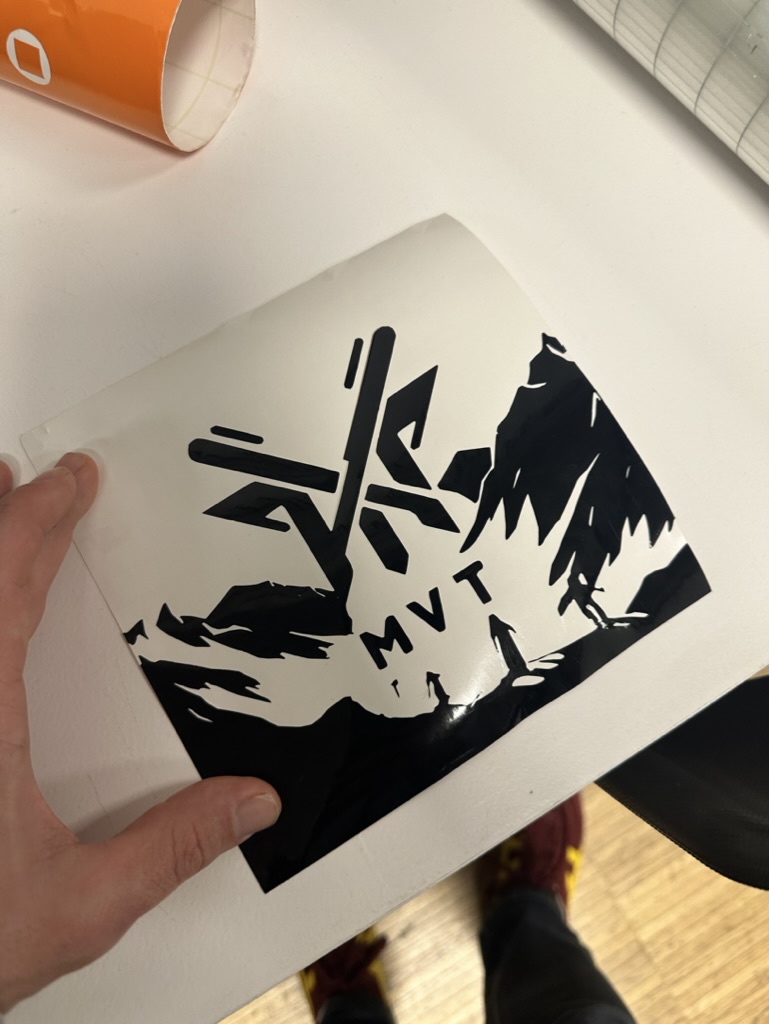
Finally I printed on the Vinyl Cutter and transferred with transfer paper to my laptop. The Vinyl Cutter I used was a Roland CAMM-1 GX-24. The operating process was straightforward: insert material (vinyl) from back, turn on the machine to automatically measure the dimensions (width) of the vinyl sheet, then move the cutting head to the origin using the arrow keys. I went with the default force for an initial test and it worked well and so stuck with this for my main cut.
CHAT GPT PROMPTS
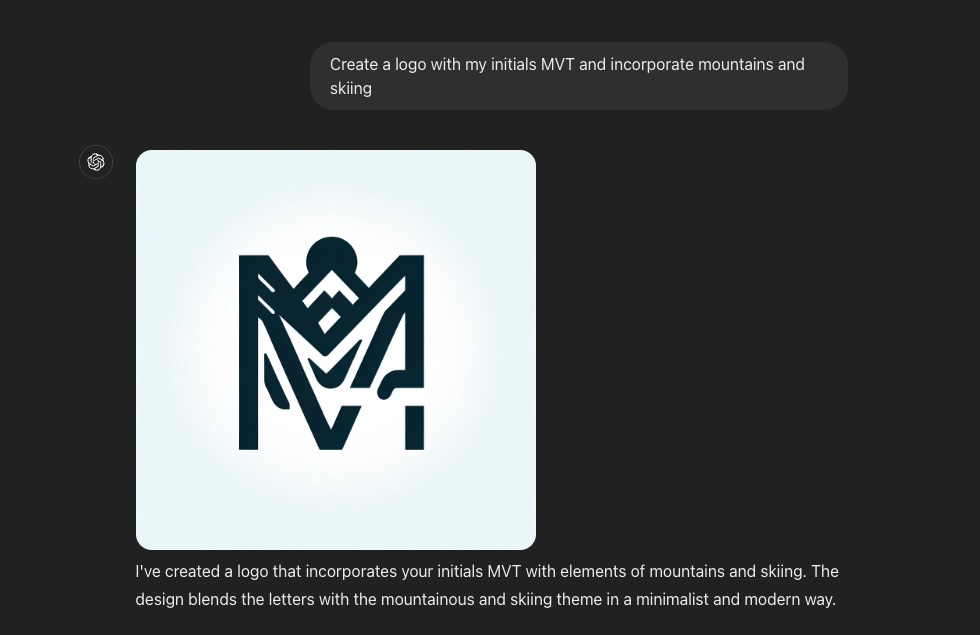
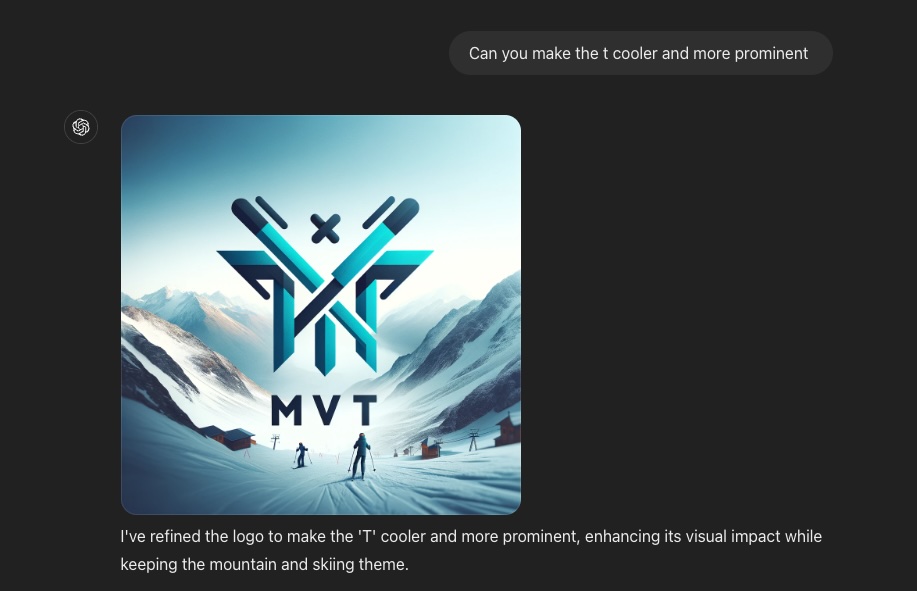
LOGO
FINAL STICKER
Design Files
Sticker File (Rhino)Group Assignment
The group documentation is here.
As a group, we had to characterize the laser cutter's focus, power, speed, and rate. We also had to determine kerf & joint clearance. We have a large group in Barcelona, so I only helped with the first steps of the group assignment - measuring the materials and prepping calculations. However I used the group's work as a jumping off point to do A LOT of my own focusing, power, speed, and rate trials (documented above).
My main takeway is that while these are machines, you can't rely on a single, upfront test to determine your settings. There is an art to this too, and trial and error are a feature of the process, not a bug. Each piece of wood (or cardboard, or vinyl) is slightly different. Each machine is slightly different. Every design is slightly different. Every day is slightly different. And so you should use initial settings and tests (and the settings pre-specificed by the reference materials in the lab) as a starting point, but be ready to retest and recalibrate every time you run a new design.