Networking & Communications
Assignment 13 - Fab Academy Barcelona

This week I:
Networking overview
In class we were introduced to wired and wireless networking.. We also worked through some examples as a group (see more in group work below.
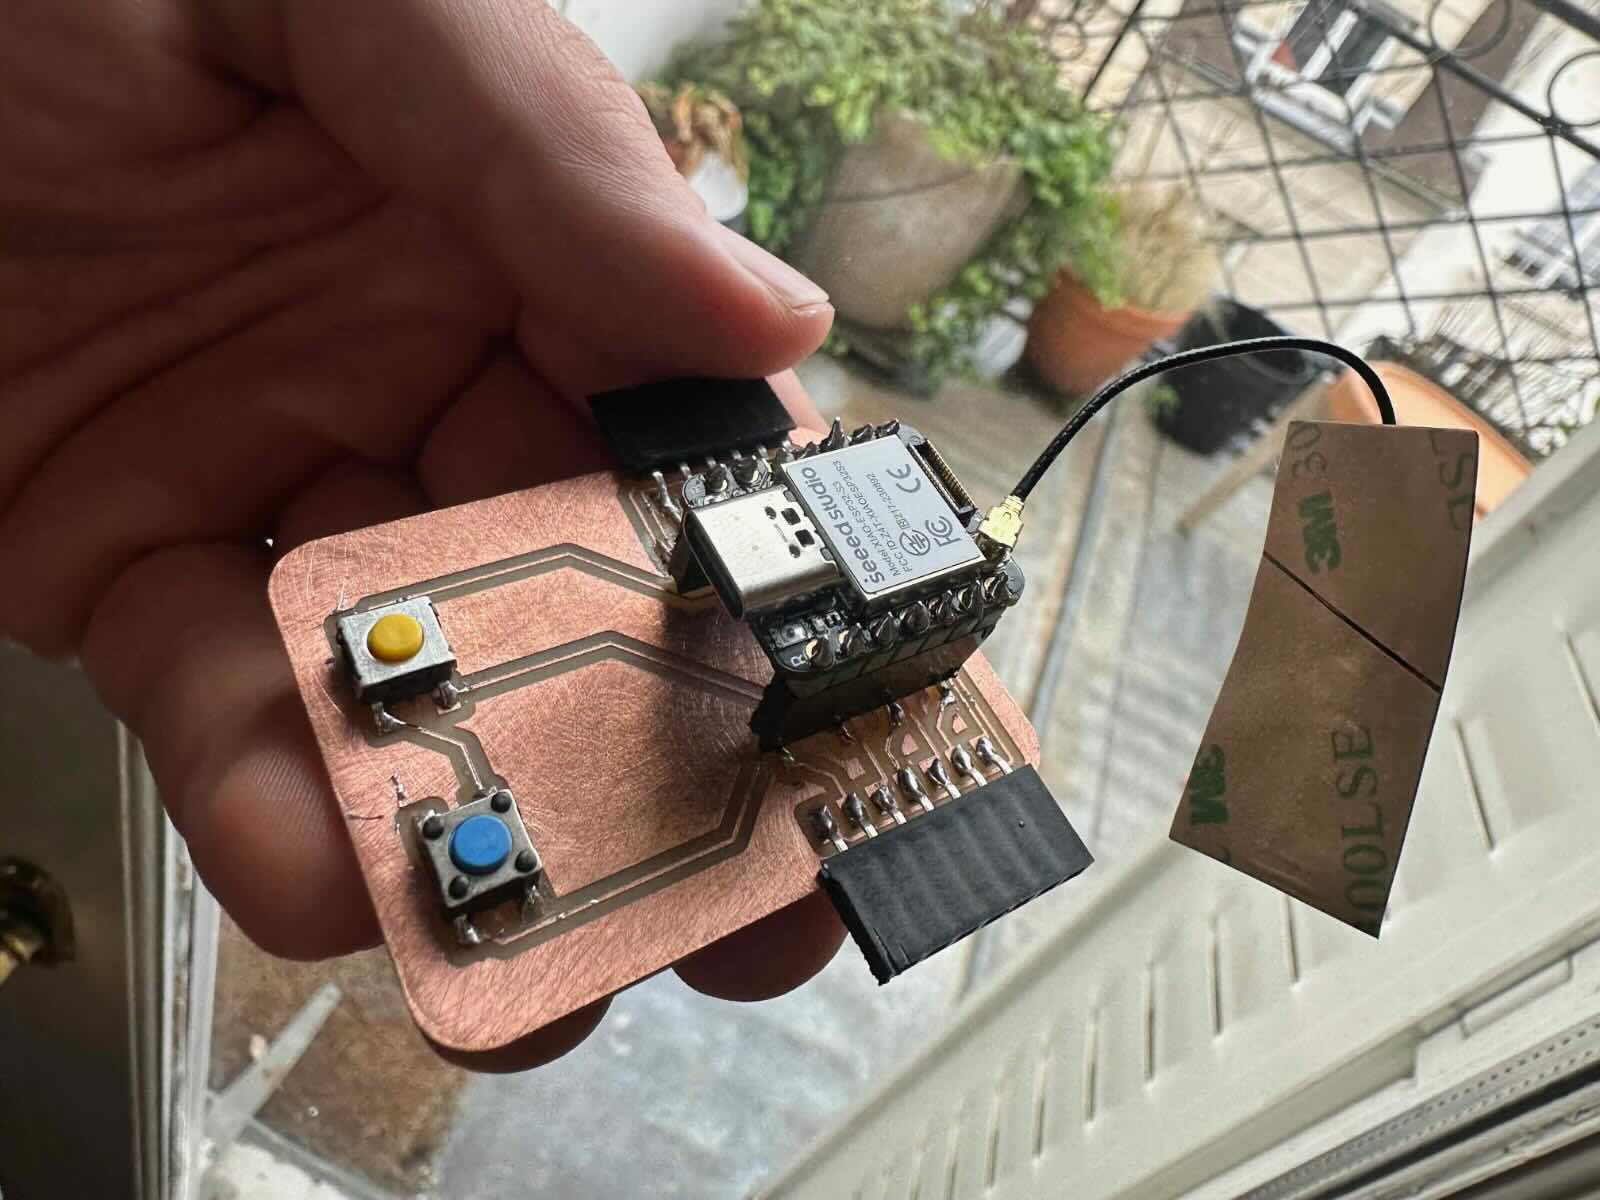
ESP32S3 SENSE PCB
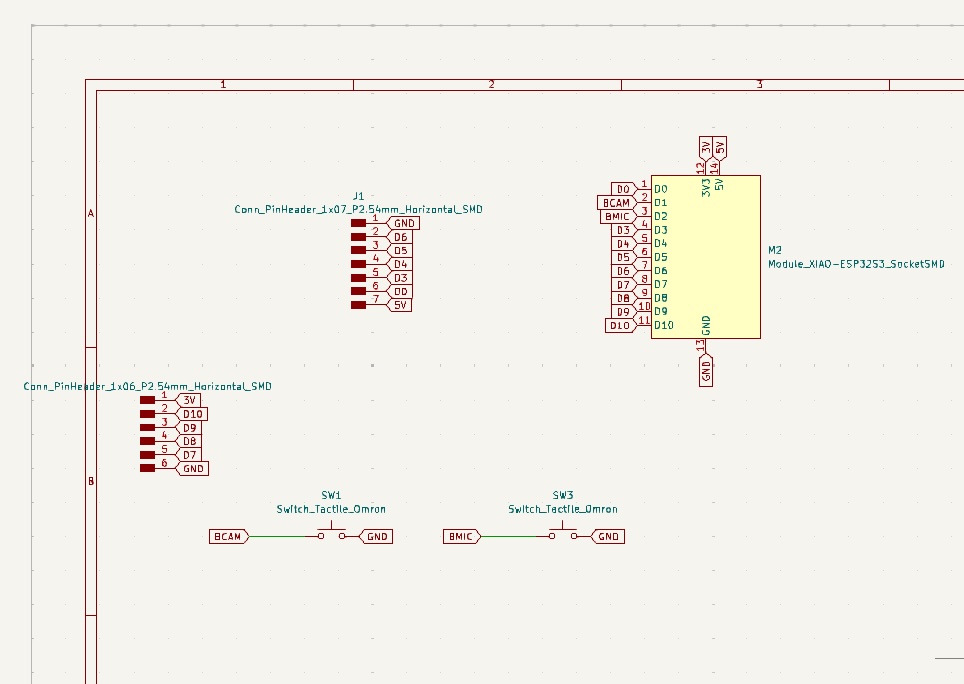
I've been working on a new PCB design with the XIAO esp32s3 sense MCU. I want to play around with the camera and microphone that come with it. I used this opportunity to create a new dev board for this purpose. It's simple - it has a shield to accommodate the MCU and then 2 buttons which I intend to use as inputs to turn on and off the camera / mic (e.g. snap a picture, make a voice recording). They also are useful for general purpose input testing - I used this for networking.
SCHEMATIC
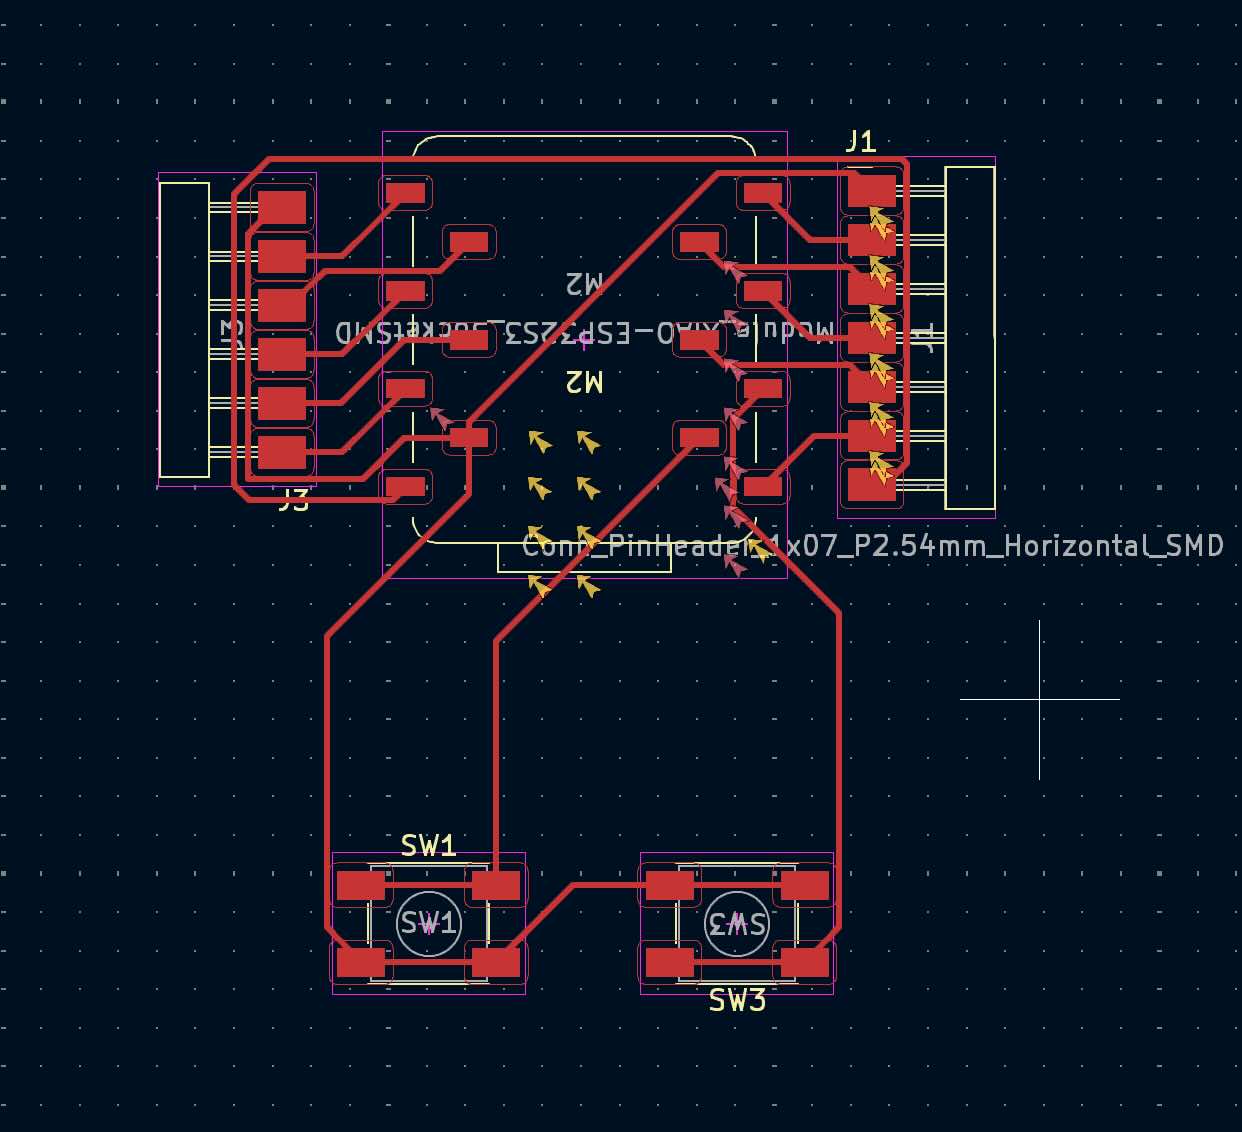
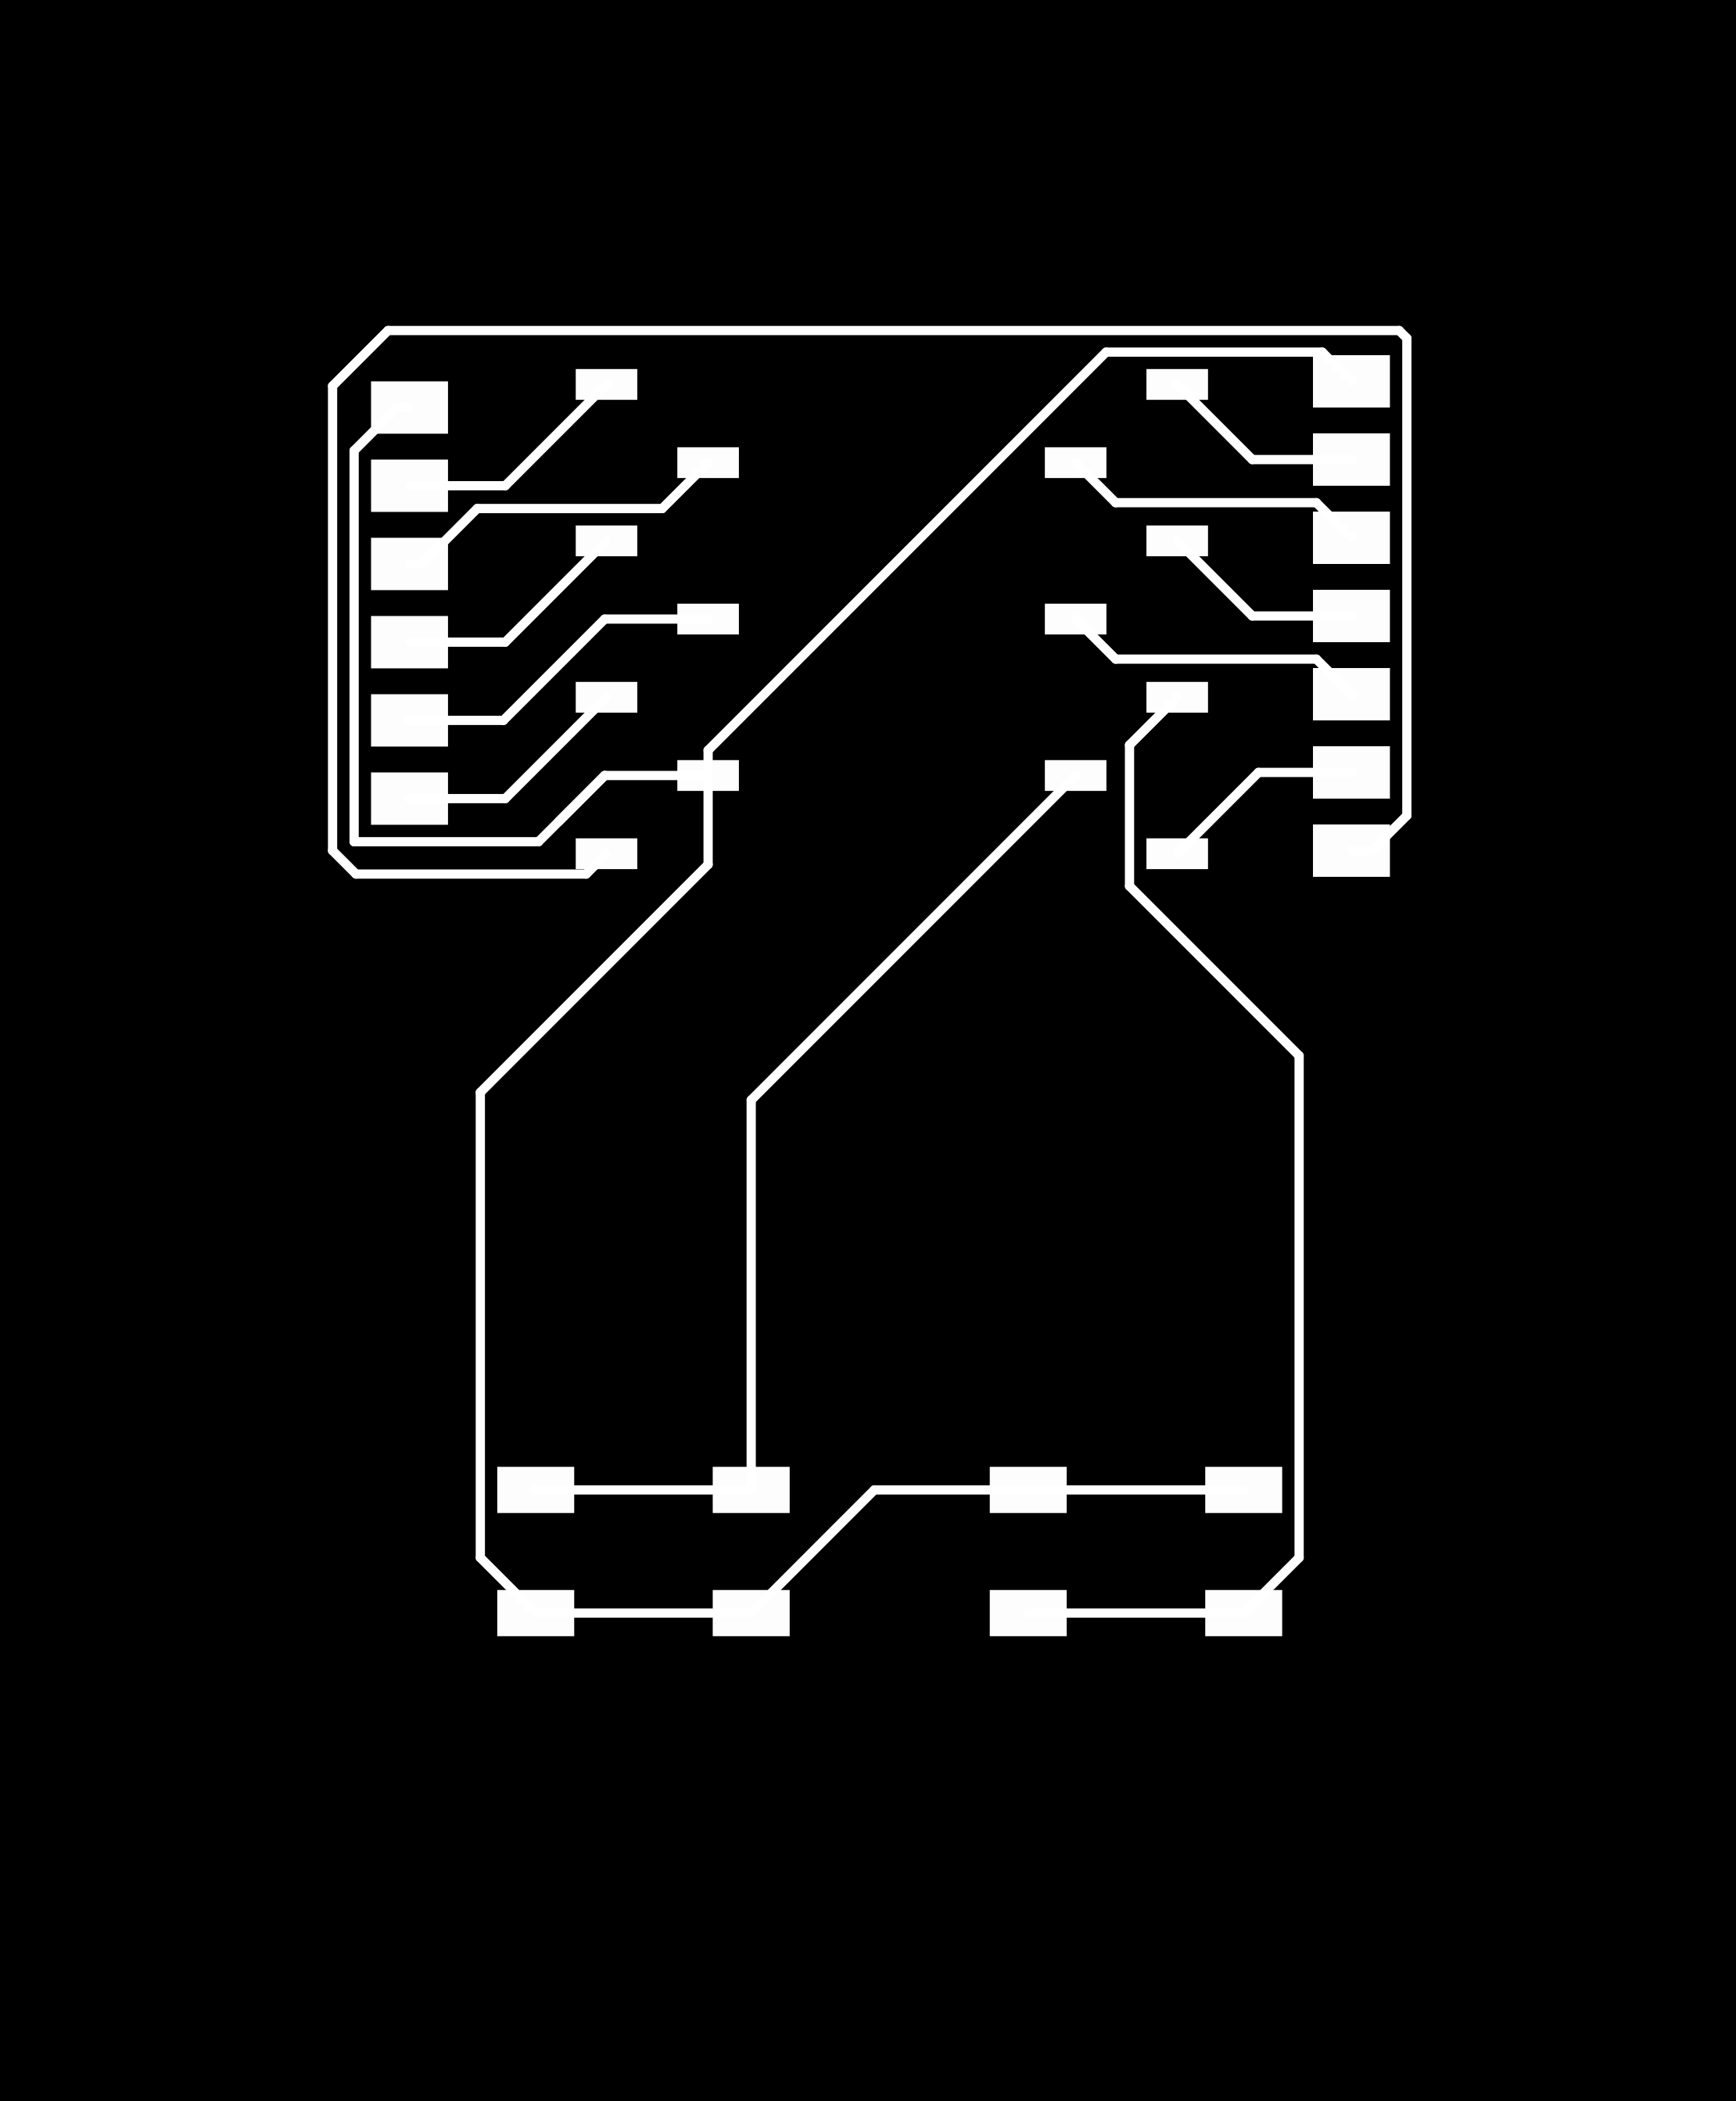
PCB Design
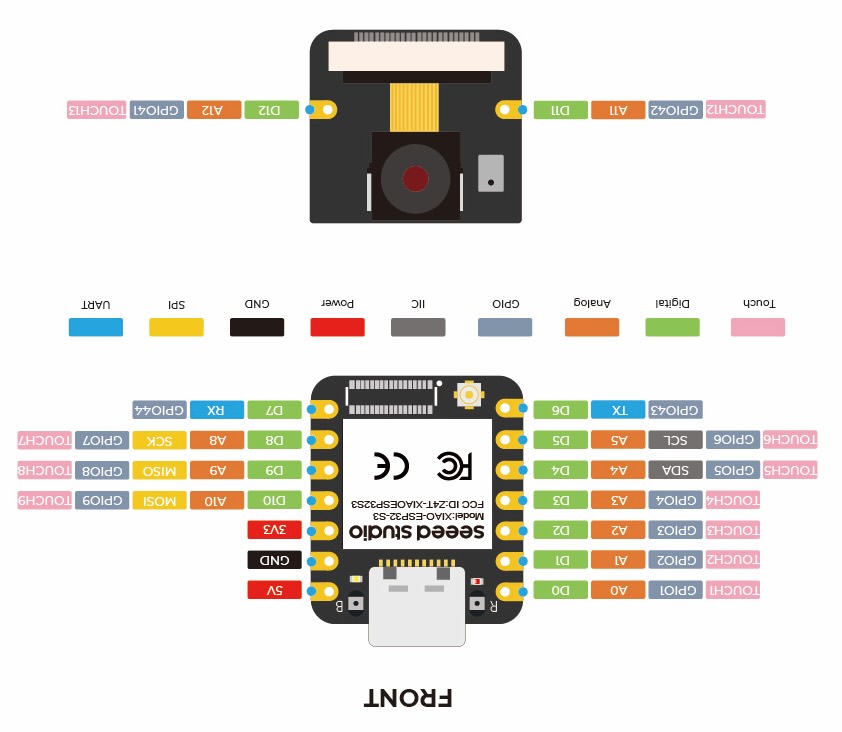
INVERTED XIAO ESP32S3 PINOUT
Oriented upside down to align with PCB design :)
Completed Board
Design Files
Networking two boards
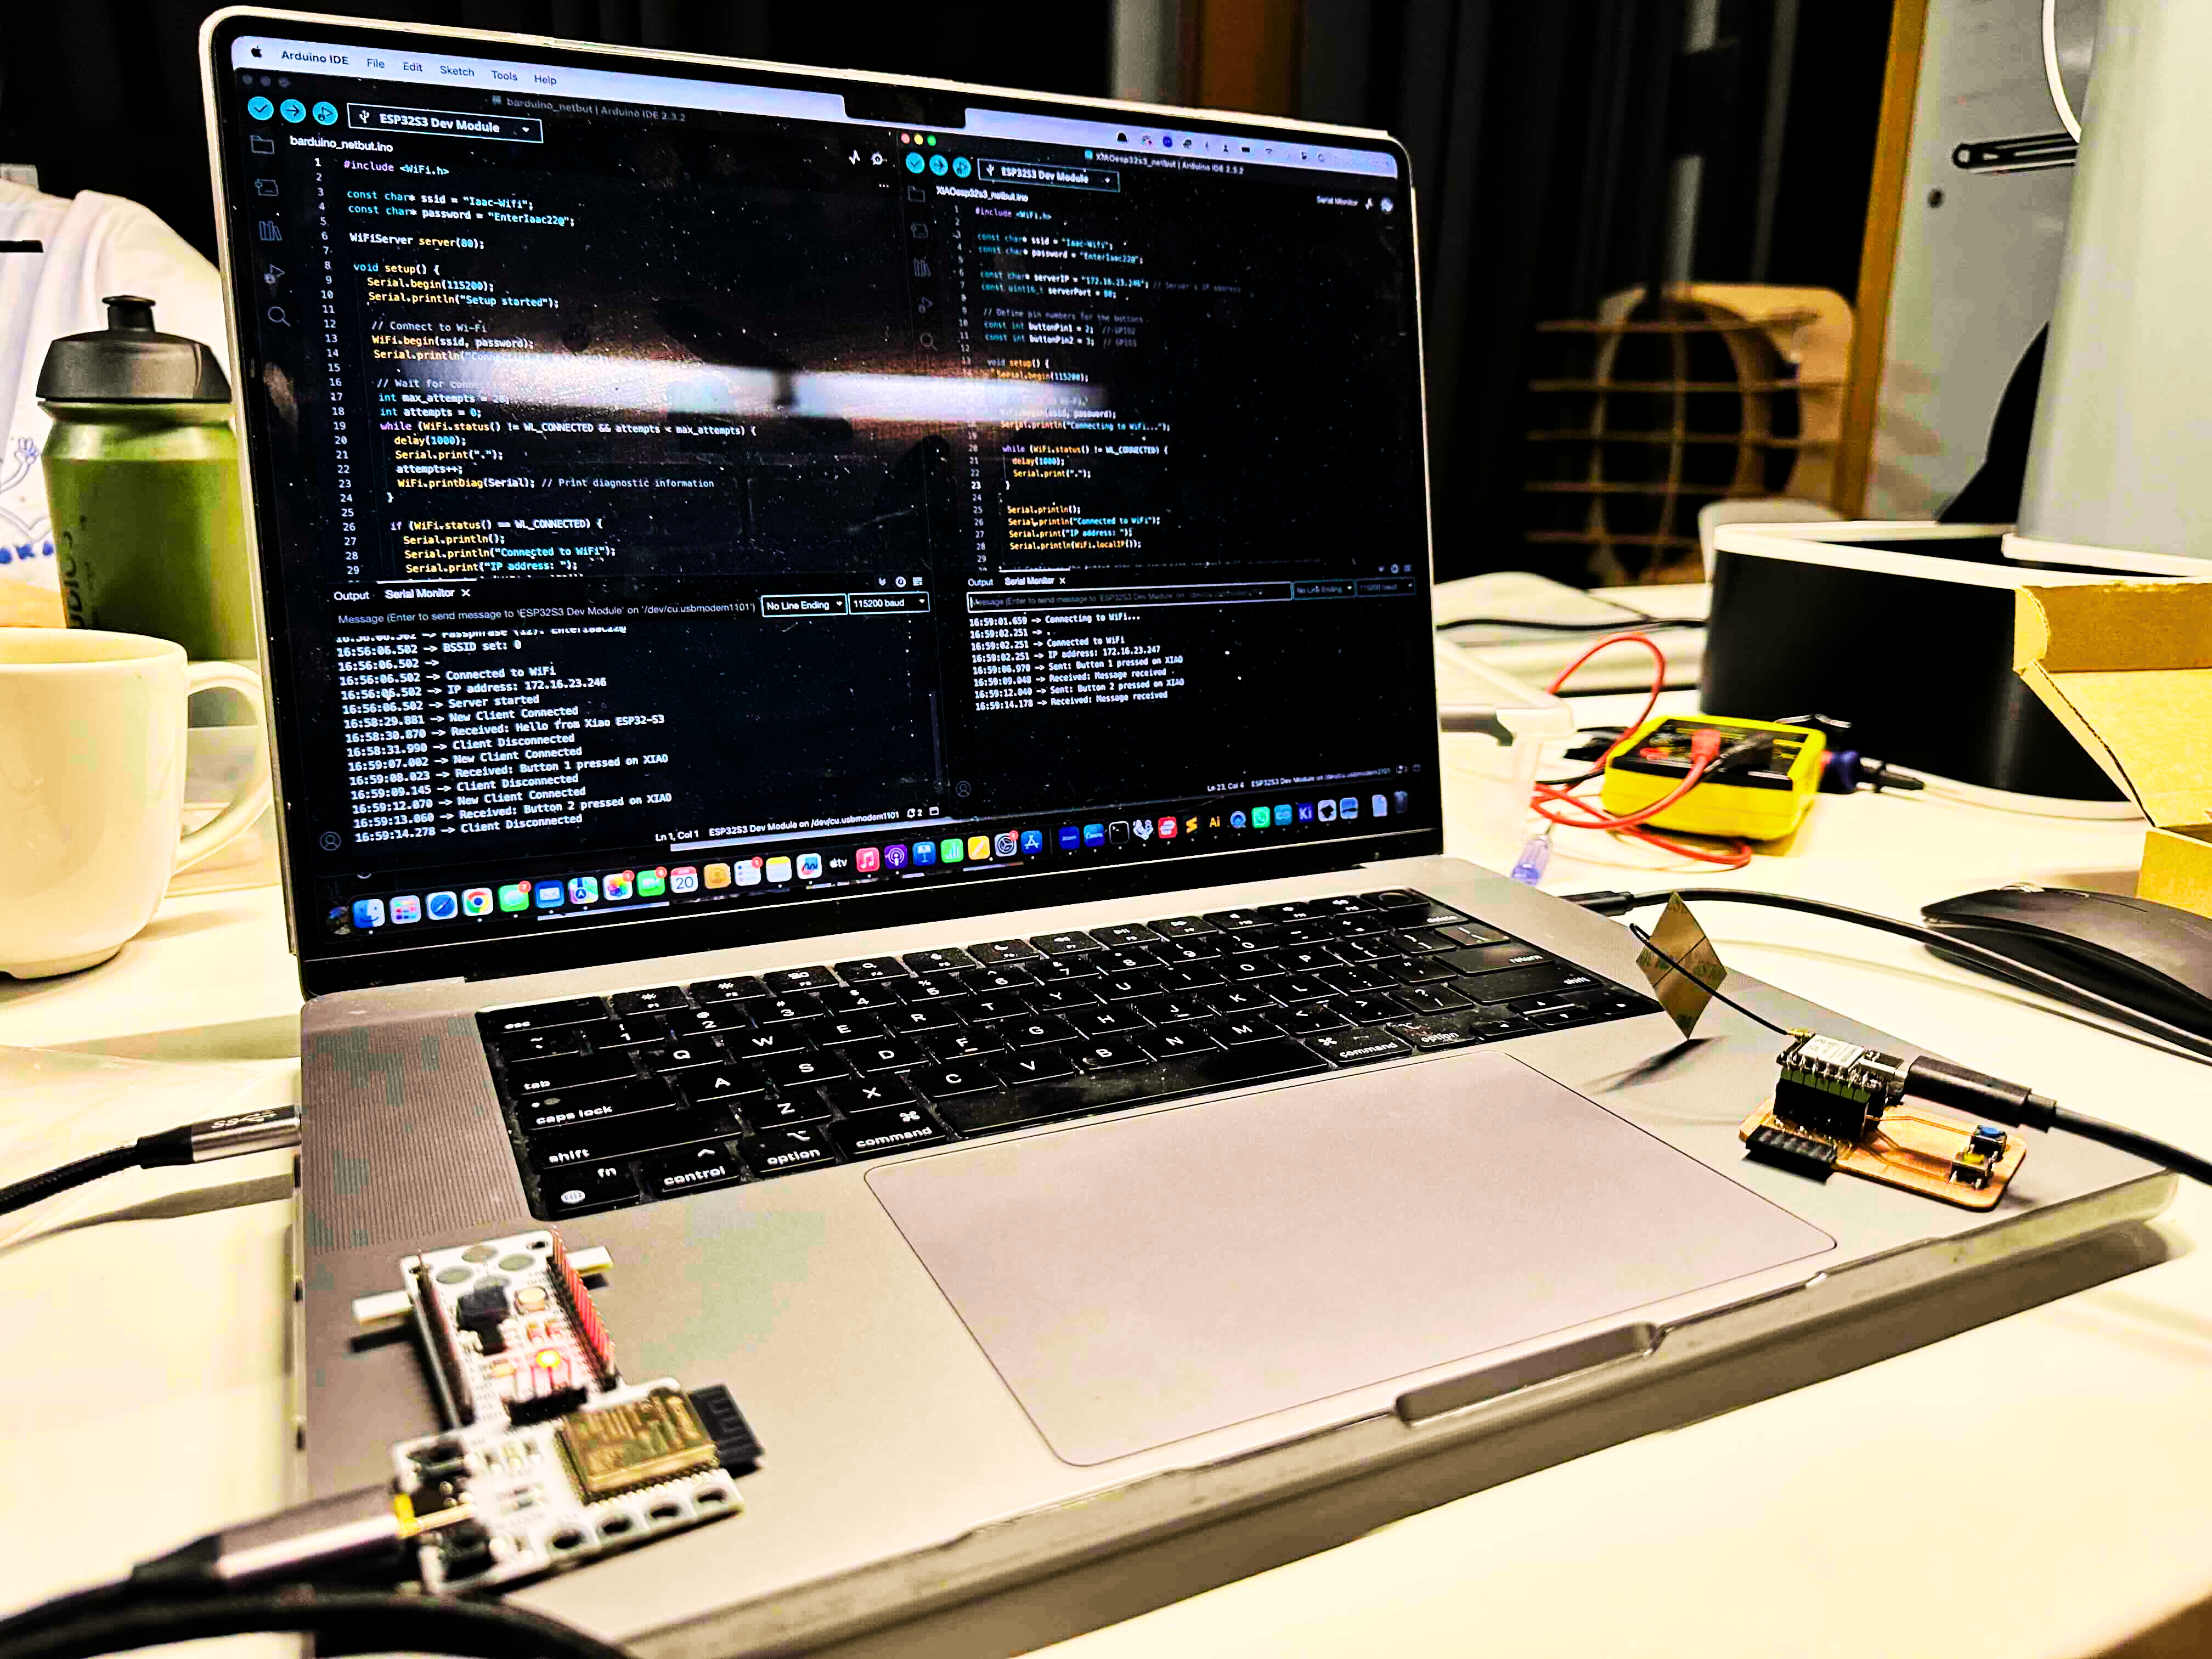
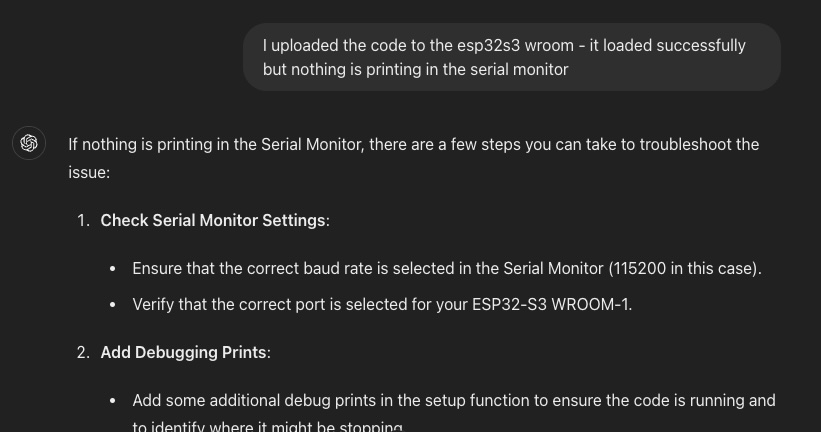
I started by writing a program for the Barduino with the help of ChatGPT. The Barduino also uses an esp32s2 (though not XIAO). In this network the Barduino is be the server and the XIAO the client. The network is created via shared WiFi. I then programmed the XIAO as the client (again with help of ChatGPT), to send messages to the Barduino when its buttons are pushed. I reviewed the code by ChatGPT and made some edits before loading. Once loaded to the boards I debugged, again using ChatGPT as a coding partner (i.e. I would pass errors to ChatGPT to help debug). With a bit of back and forth I got the network working!
Sample ChatGPT Prompts
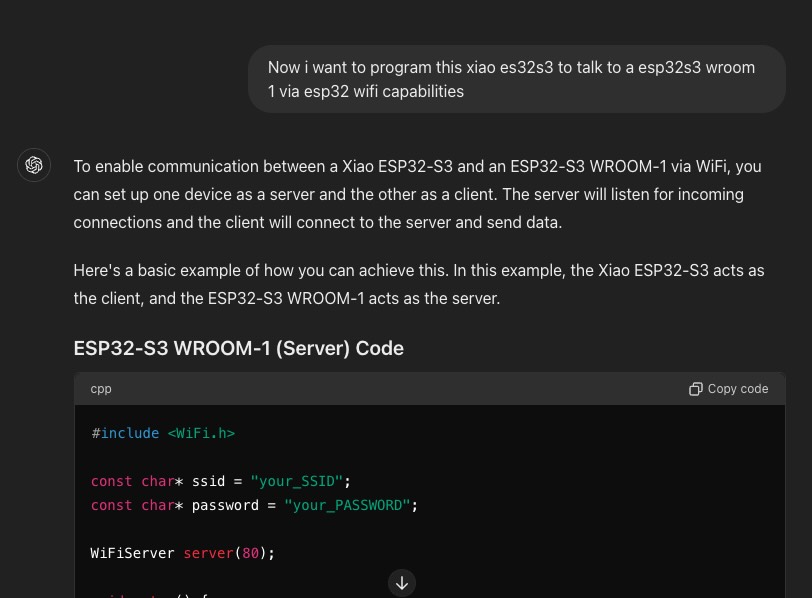
Barduino Server Code
This code initializes the WiFi connection (with max 20 attempts to connect). It prints status as it goes to help debug. Once connected it establishes a loop where it looks for the client. If the client is there it prints "New Client Connected". It then waits for a string input from the client and prints "Recieved" and that string if recevied. It then pushes a response string "Message Received" to the client and disconnects. The loop then repeats.
#include <WiFi.h>

const char* ssid = "Iaac-Wifi";
const char* password = "EnterIaac22@";

WiFiServer server(80);

void setup() {
  Serial.begin(115200);
  Serial.println("Setup started");

  // Connect to Wi-Fi
  WiFi.begin(ssid, password);
  Serial.println("Connecting to WiFi...");

  // Wait for connection
  int max_attempts = 20;
  int attempts = 0;
  while (WiFi.status() != WL_CONNECTED && attempts < max_attempts) {
    delay(1000);
    Serial.print(".");
    attempts++;
    WiFi.printDiag(Serial); // Print diagnostic information
  }

  if (WiFi.status() == WL_CONNECTED) {
    Serial.println();
    Serial.println("Connected to WiFi");
    Serial.print("IP address: ");
    Serial.println(WiFi.localIP());

    // Start the server
    server.begin();
    Serial.println("Server started");
  } else {
    Serial.println();
    Serial.println("Failed to connect to WiFi");
  }
}

void loop() {
  // Check if a client has connected
  WiFiClient client = server.available();
  if (client) {
    Serial.println("New Client Connected");
    while (client.connected()) {
      if (client.available()) {
        String request = client.readStringUntil('\r');
        Serial.println("Received: " + request);
        client.flush();

        // Send response to client
        client.print("Message received");
      }
    }
    client.stop();
    Serial.println("Client Disconnected");
  }
}
XIAO Client Code
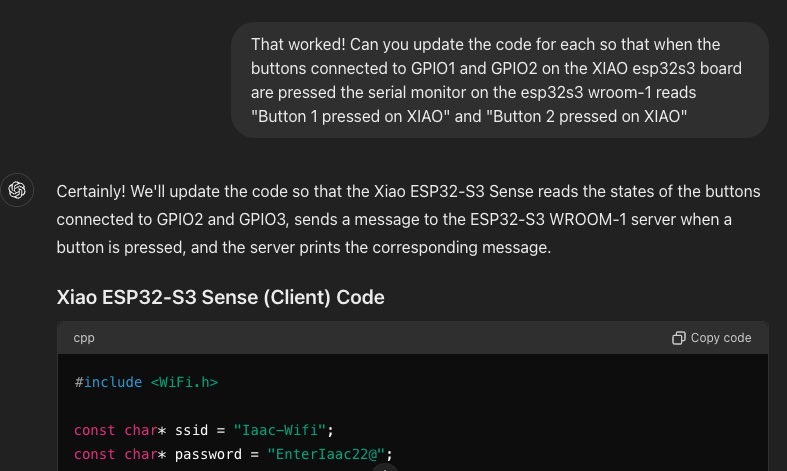
The client code similarly initializes the Wifi connection and connection to the server using the server's unique IP address. It prints status as it goes. Once connected it initializes the two buttons on the XIAO, including using the internal pullups. It then starts a loop that look for LOW (pushed) voltage on the button pins. If it detects a button is pushed it pushes message to server saying "Button X pressed on XIAO", it also prints this message on its own Serial Monitor.
#include <WiFi.h>

const char* ssid = "Iaac-Wifi";
const char* password = "EnterIaac22@";

const char* serverIP = "172.16.23.246"; // Server's IP address
const uint16_t serverPort = 80;

// Define pin numbers for the buttons
const int buttonPin1 = 2;  // GPIO2
const int buttonPin2 = 3;  // GPIO3

void setup() {
  Serial.begin(115200);

  // Connect to Wi-Fi
  WiFi.begin(ssid, password);
  Serial.println("Connecting to WiFi...");

  while (WiFi.status() != WL_CONNECTED) {
    delay(1000);
    Serial.print(".");
  }

  Serial.println();
  Serial.println("Connected to WiFi");
  Serial.print("IP address: ");
  Serial.println(WiFi.localIP());

  // Configure the button pins as input with internal pull-up resistors enabled
  pinMode(buttonPin1, INPUT_PULLUP);
  pinMode(buttonPin2, INPUT_PULLUP);
}

void loop() {
  // Check the state of the buttons
  int buttonState1 = digitalRead(buttonPin1);
  int buttonState2 = digitalRead(buttonPin2);

  String message = "";

  if (buttonState1 == LOW) {
    message = "Button 1 pressed on XIAO";
  } else if (buttonState2 == LOW) {
    message = "Button 2 pressed on XIAO";
  }

  if (message != "") {
    // Connect to server
    WiFiClient client;
    if (client.connect(serverIP, serverPort)) {
      // Send message to server
      client.print(message);
      Serial.println("Sent: " + message);

      // Receive response from server
      while (client.connected() && !client.available()) {
        delay(10);
      }

      if (client.available()) {
        String response = client.readStringUntil('\r');
        Serial.println("Received: " + response);
      }

      client.stop();
    } else {
      Serial.println("Connection to server failed");
    }
  }

  delay(100); // Small delay to debounce button presses
}
Working Network
Group Work
The group used ESP NOW to send a message between Emily's teaching heart project and Pugboy. You can find the write-up and more information here.