Interface & Application Programming
Assignment 14 - Fab Academy Barcelona

This week I:
Writing an Application
In class we were introduced to both code based and no-code methods for writing applications. In particular we did some practical exercises in our local class using "Processing". I decided to build on this work for my weekly project.
To create a user inter program I adapted code introduced in class. First I programmed my development board using Arduino, I then created an application with "Processing" that allows a user to vibrate a haptic motor attached to the board (see more on working with the haptic in Outputs Week.)
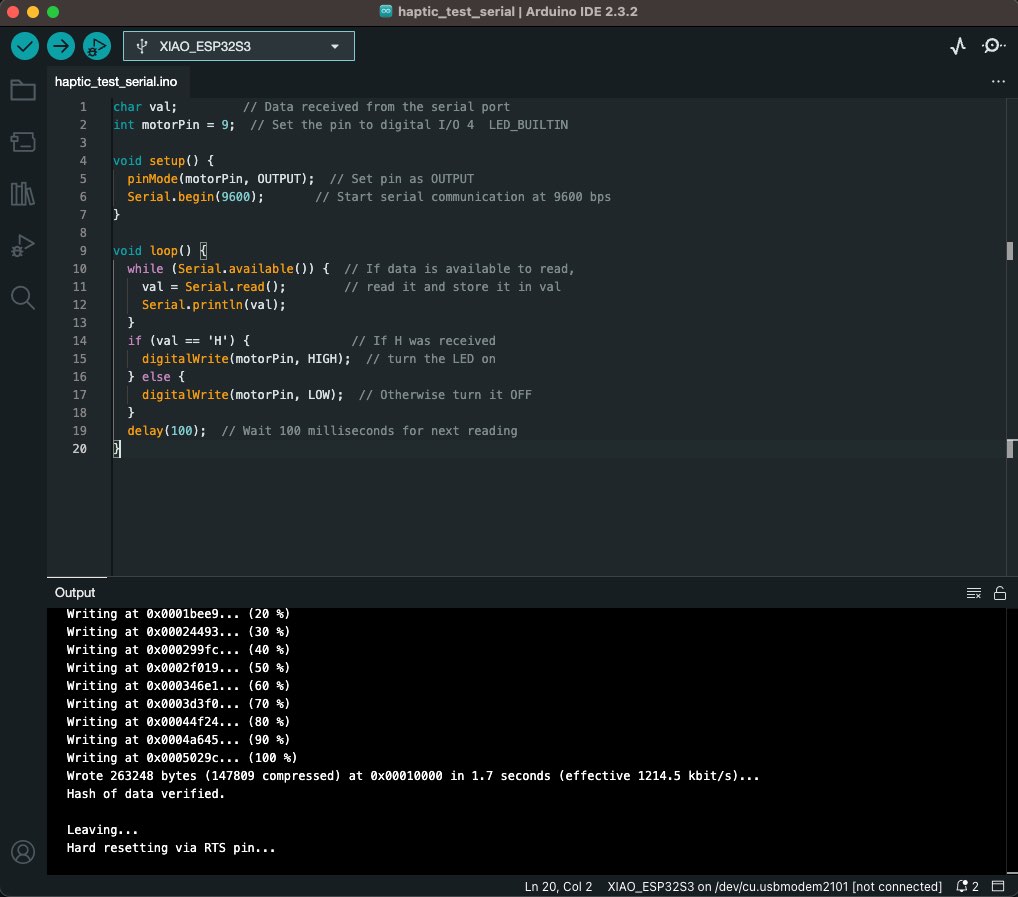
Arduino Programming
I wrote a program so that the haptic motor attached to pin 9 on my development board would vibrate when certain conditions were met. Building on code introduced in class, the bard repeatedly reads the value of a "char" variable called "val". If the value of "val" is H it provides (HIGH) voltage to the motor pin 9, if it reads any other value of "val", it turns voltage off (LOW). It then waits 100 milliseconds and repeats the process.
ARDUINO CODE
char val;         // Data received from the serial port
int motorPin = 9;  // Set the pin to digital I/O 9

void setup() {
  pinMode(motorPin, OUTPUT);  // Set pin as OUTPUT
  Serial.begin(9600);       // Start serial communication at 9600 bps
}

void loop() {
  while (Serial.available()) {  // If data is available to read,
    val = Serial.read();        // read it and store it in val
    Serial.println(val);
  }
  if (val == 'H') {              // If H was received
    digitalWrite(motorPin, HIGH);  // turn the LED on
  } else {
    digitalWrite(motorPin, LOW);  // Otherwise turn it OFF
  }
  delay(100);  // Wait 100 milliseconds for next reading
}
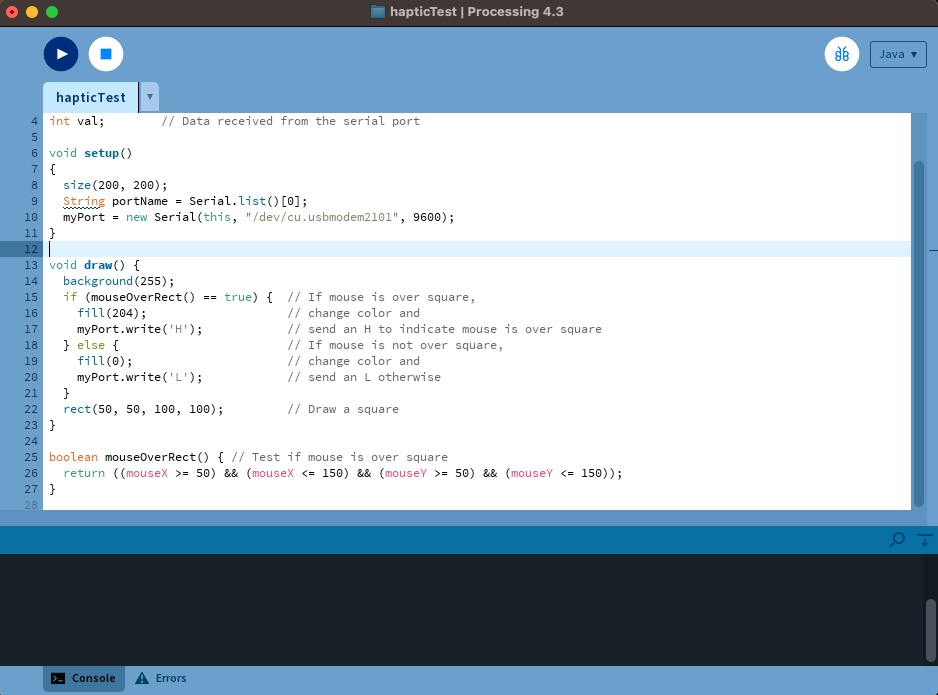
"Processing" Application
I then adapted a "Processing" program introduced in class. The program initializes the port that the development board is connected to. It then creates a simple graphic user interface of a black square. The square detects if the computer mouse is over it or not. If the mouse is over the square it turns gray and writes "H" to the port, therby activating the haptic motor. Otherwise it writes "L" to the port, turning the motor off.
"PROCESSING" CODE
import processing.serial.*;

Serial myPort;  // Create object from Serial class
int val;        // Data received from the serial port

void setup()
{
  size(200, 200);
  String portName = Serial.list()[0];
  myPort = new Serial(this, "/dev/cu.usbmodem2101", 9600);
}

void draw() {
  background(255);
  if (mouseOverRect() == true) {  // If mouse is over square,
    fill(204);                    // change color and
    myPort.write('H');            // send an H to indicate mouse is over square
  } else {                        // If mouse is not over square,
    fill(0);                      // change color and
    myPort.write('L');            // send an L otherwise
  }
  rect(50, 50, 100, 100);         // Draw a square
}

boolean mouseOverRect() { // Test if mouse is over square
  return ((mouseX >= 50) && (mouseX <= 150) && (mouseY >= 50) && (mouseY <= 150));
}
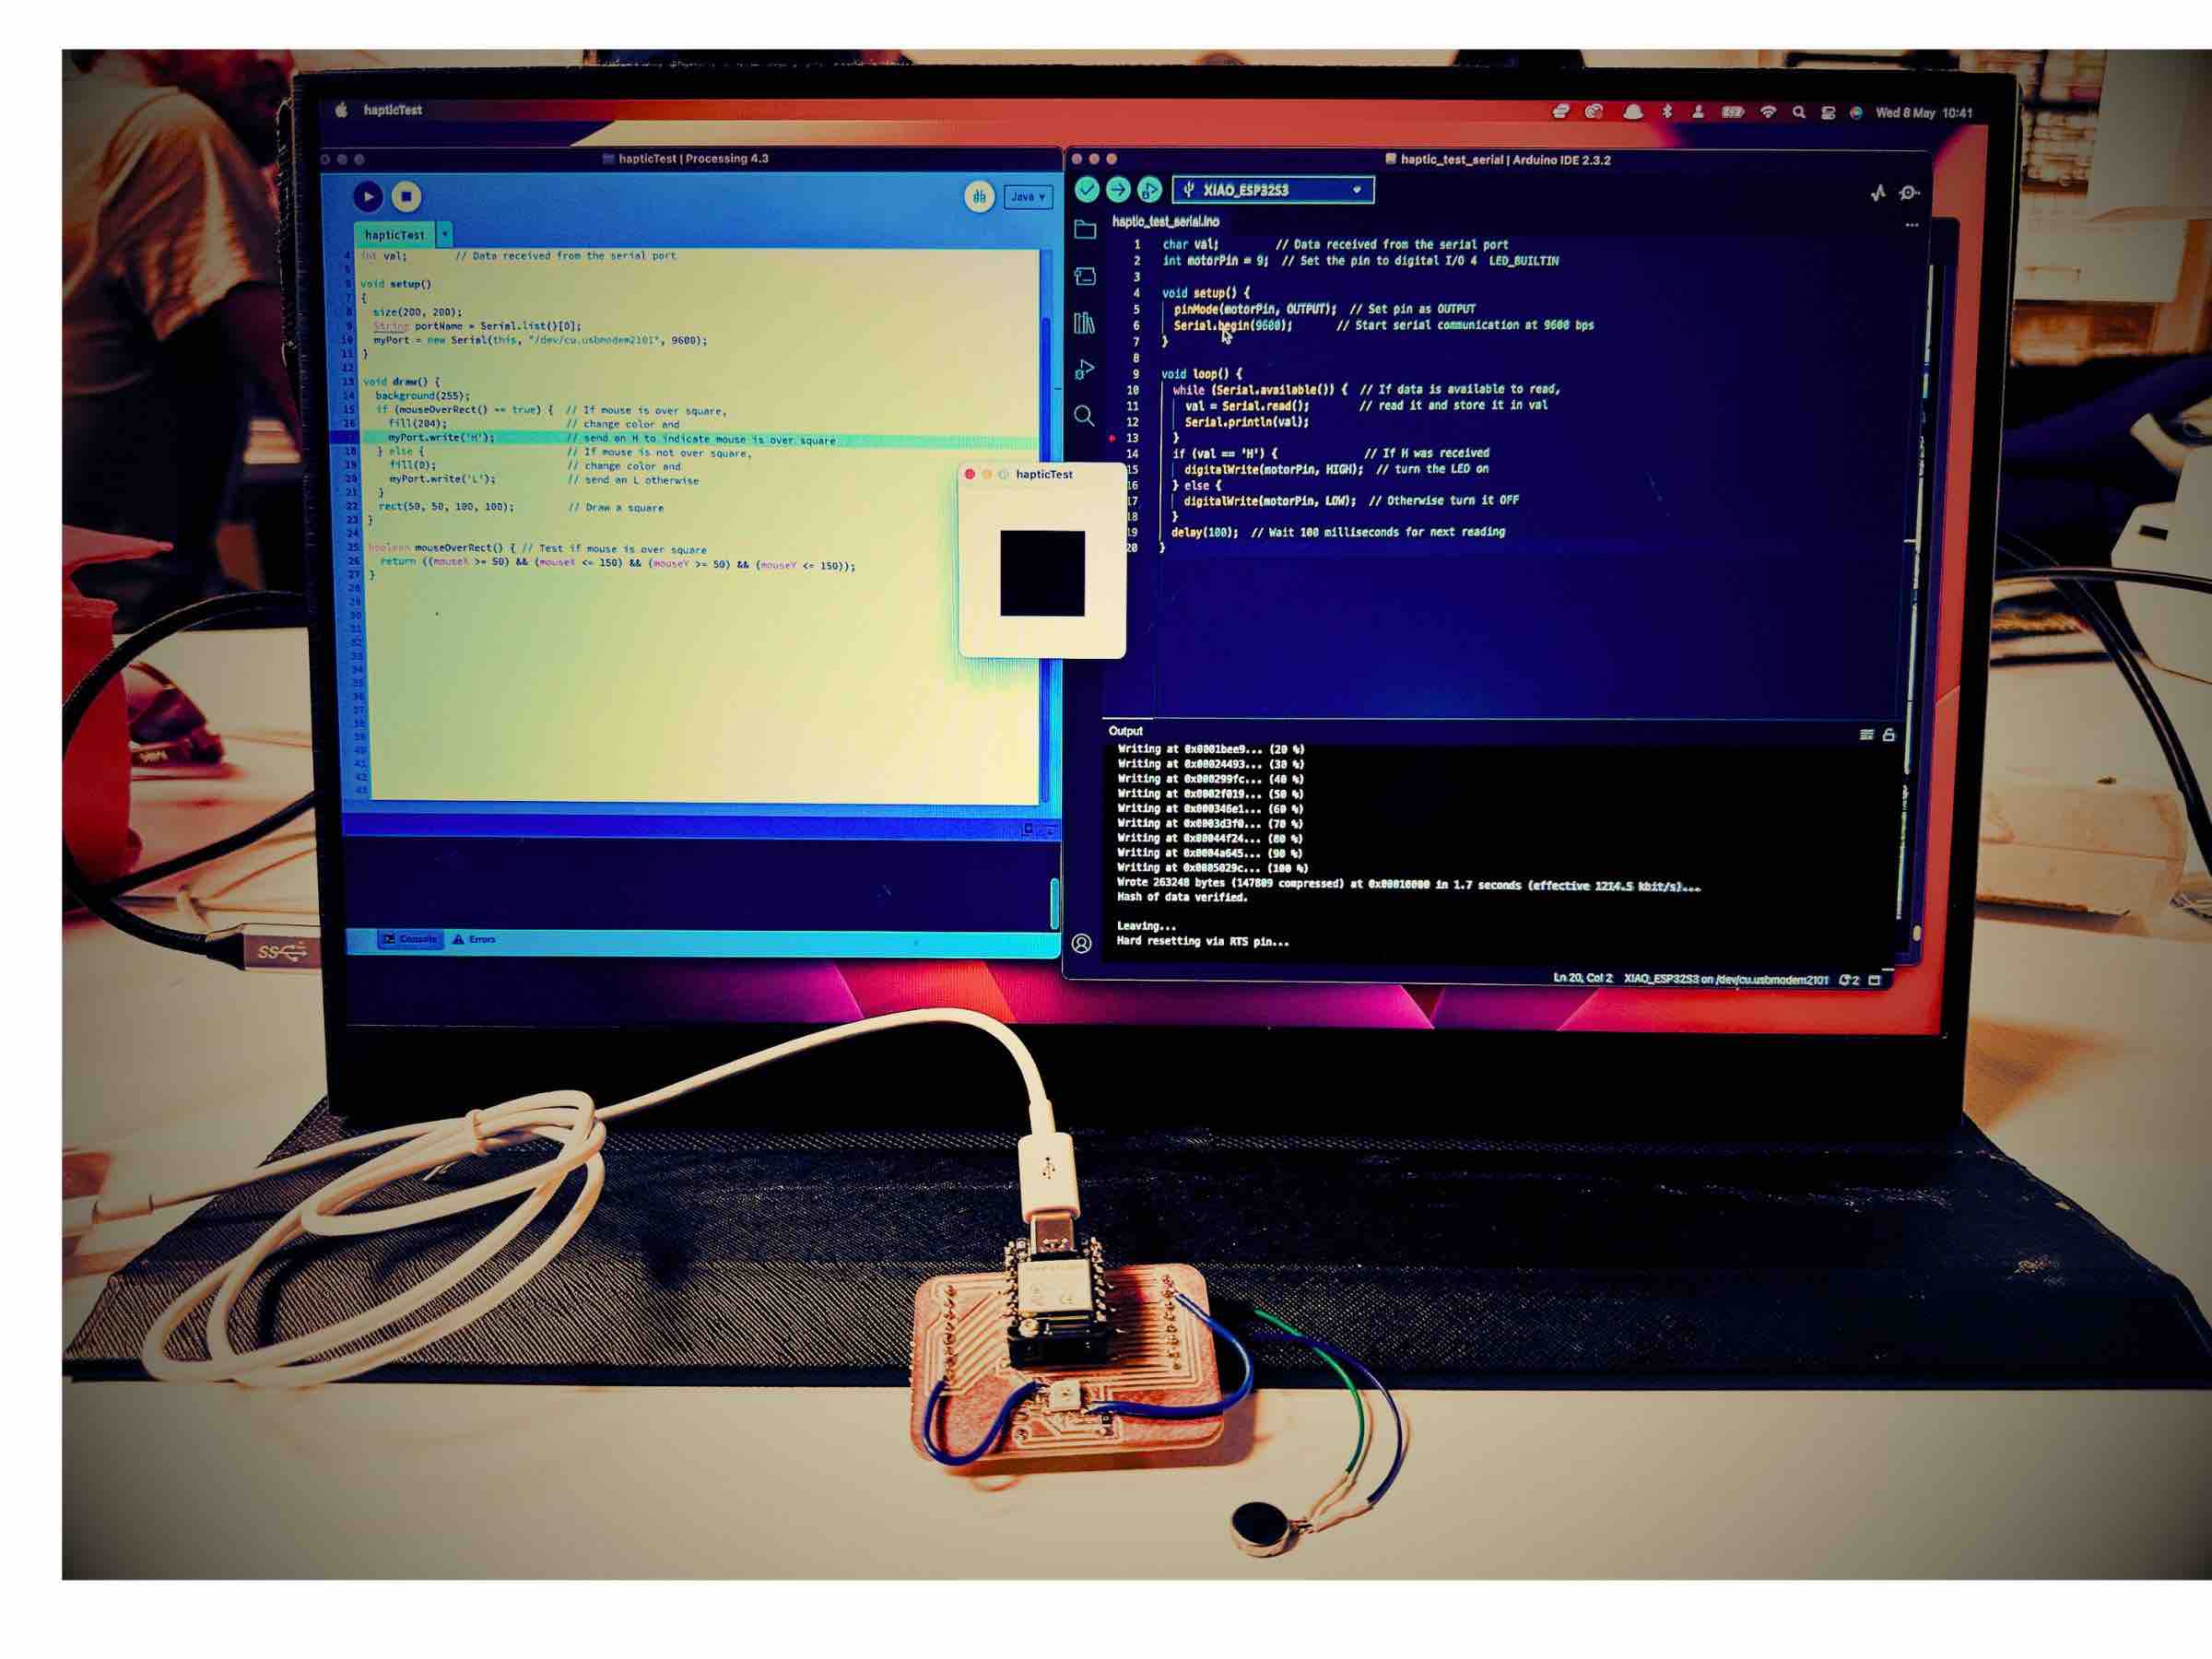
Putting It All Together
With all the components coded and the program loaded to the board - it was time to test and put it all together. I faced some issues getting the code to work in both Arduino and "Processing" (see below), but ultimately debugged and got it operational.
Troubleshooting and Learnings
The most difficult part of this week's work was debugging. I faced the following issues:- Connecting to application in "Processing" to the correct port. I tried to call it using the port's serial number but had to add the actual port name as a string to get the app to appropriately interface with my dev board via my USB port.
- Using the right board in Arduino - there are several ESP32S3 boards listed. Initially I was using the wrong board, causing my program not to work.
- Start out simple and rely on proven code. Break down the work into the smallest pieces you want to achieve and identify code samples that acheive individual jobs to be done.
- Build in modules - make each piece work independently before trying to combine or complicate functionality. It's much easier to debug this way.
- The multimeter is your friend - it's very helpful to see if voltage is flowing in the way you expect, even if the parts aren't working.
- Test interfaces you know work to debug - for example you can write an input from the serial monitor to ensure it's controlling the board as expected before writing that input from the GUI app.
Group Work
As a group we reviewed different programming tools and options - our work is doucmented here.