Alive Wood
[ sensible furniture ]
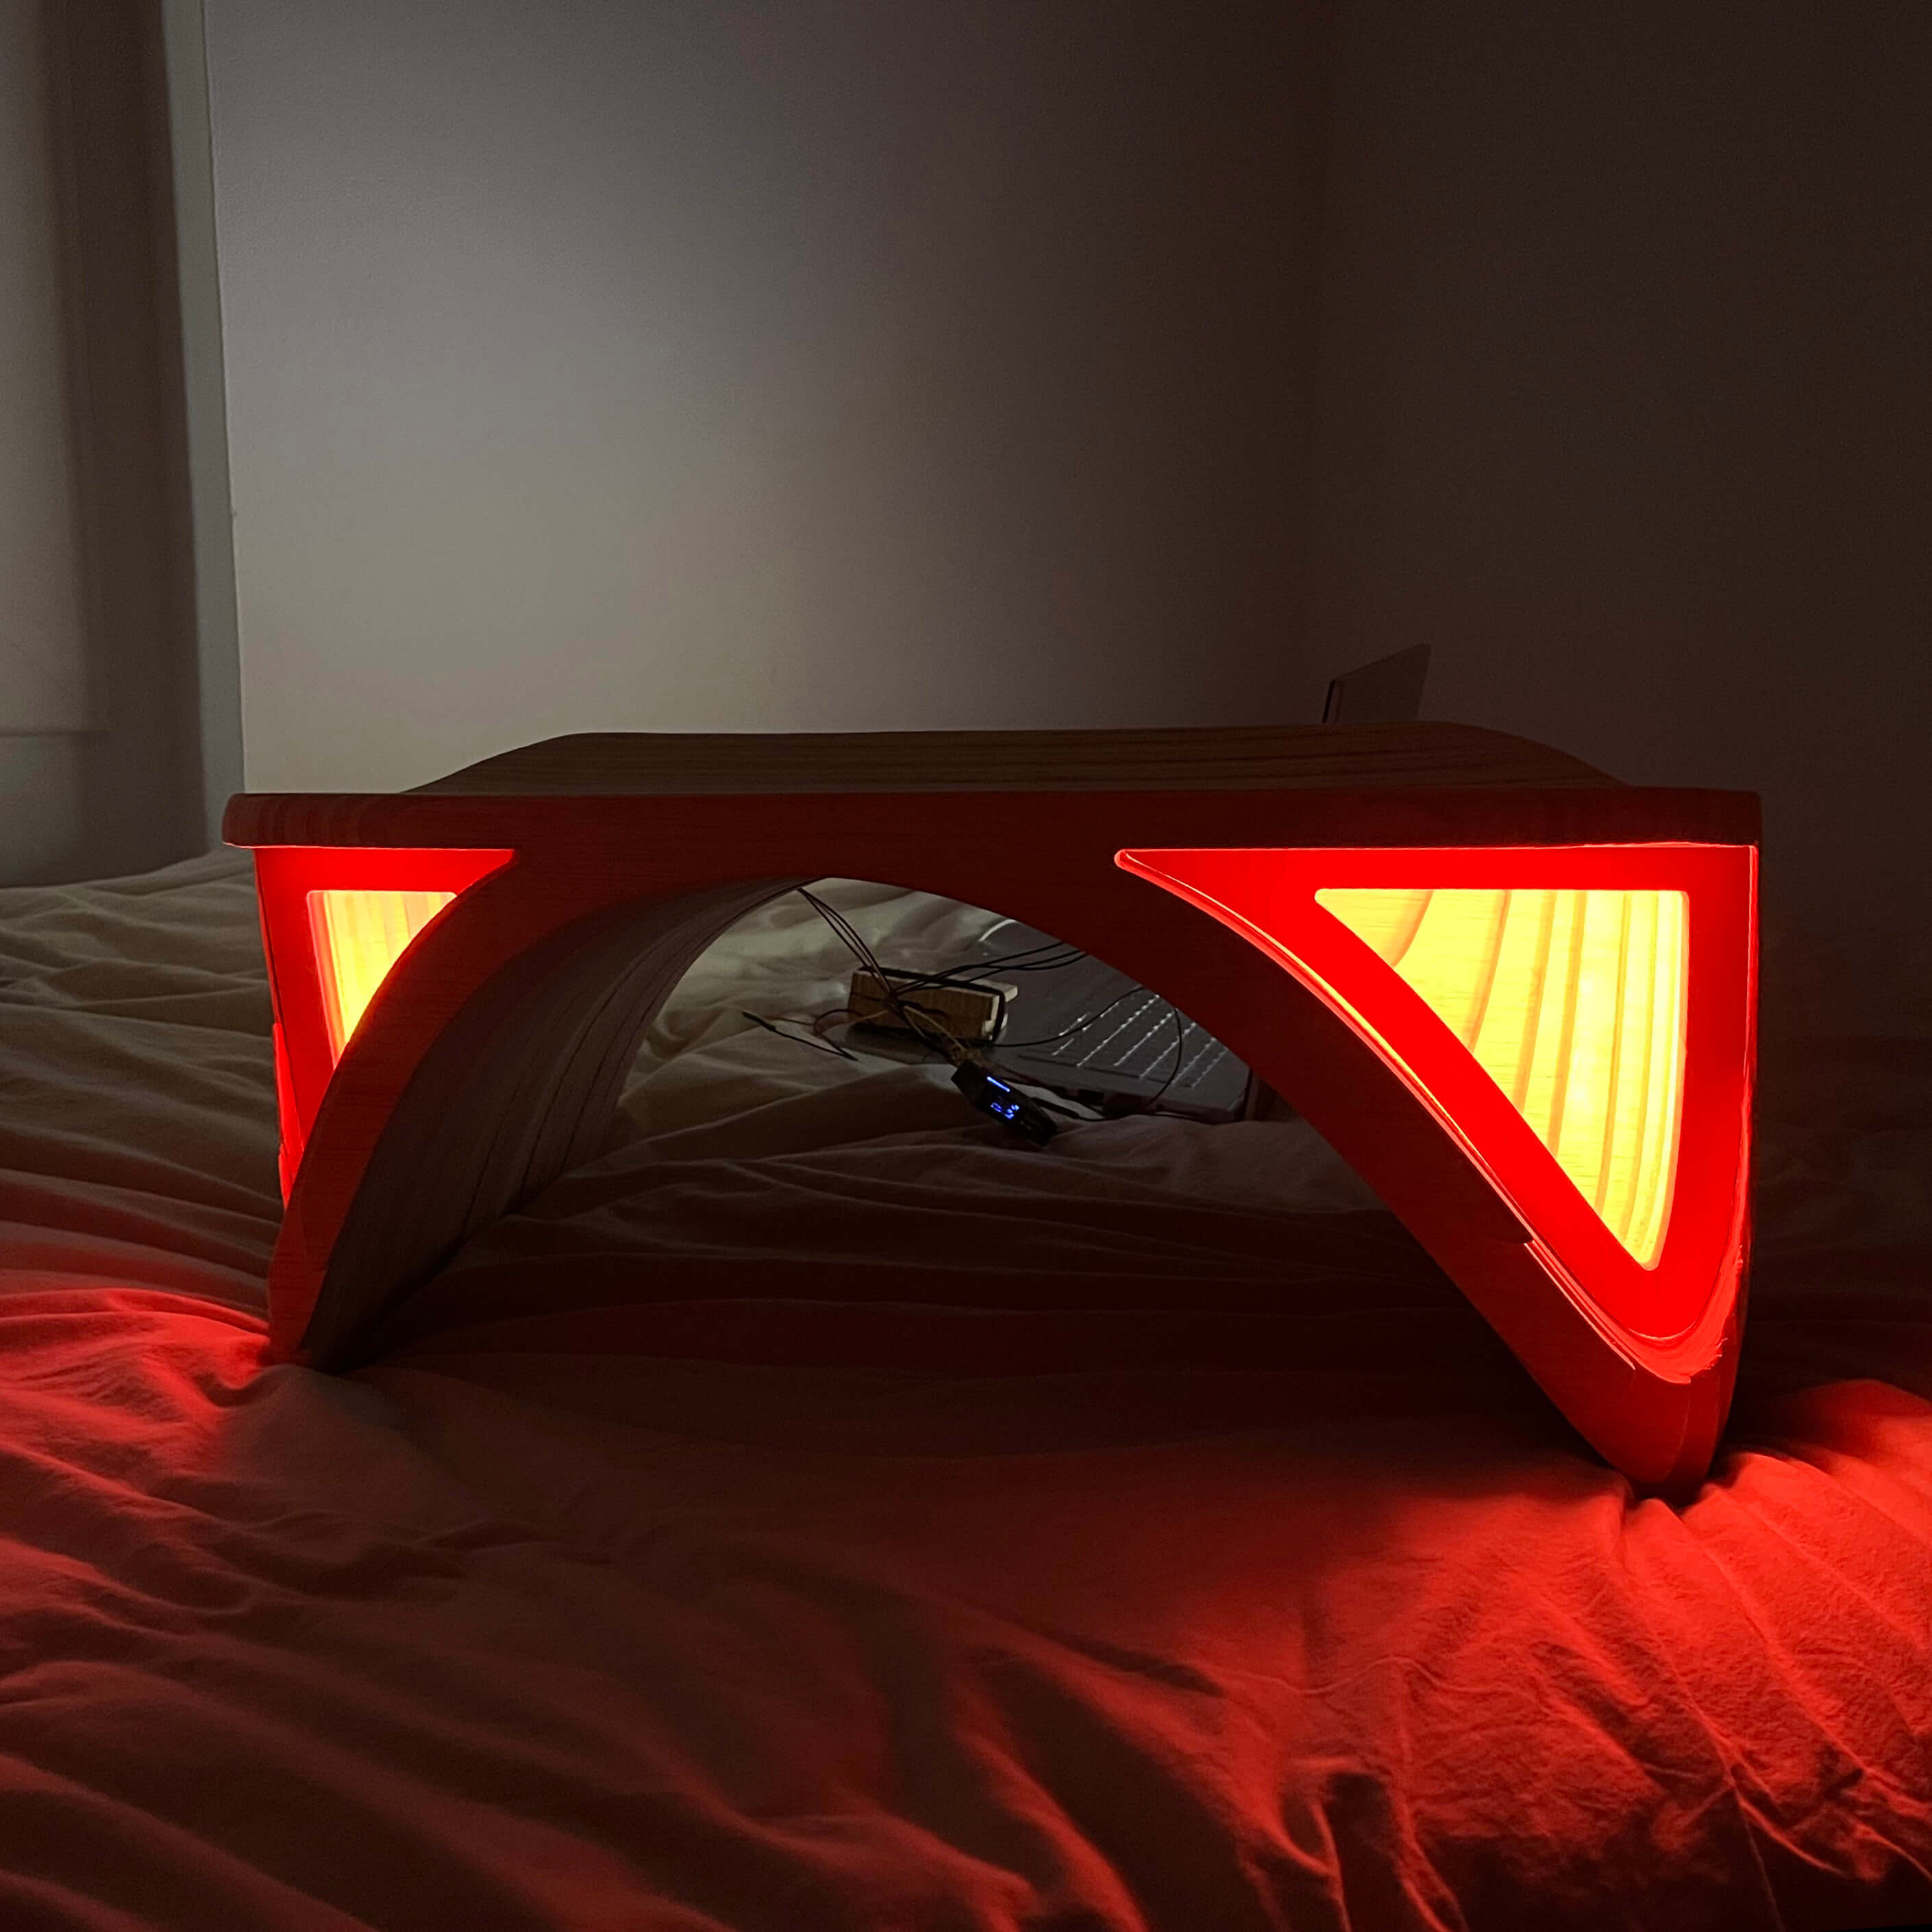
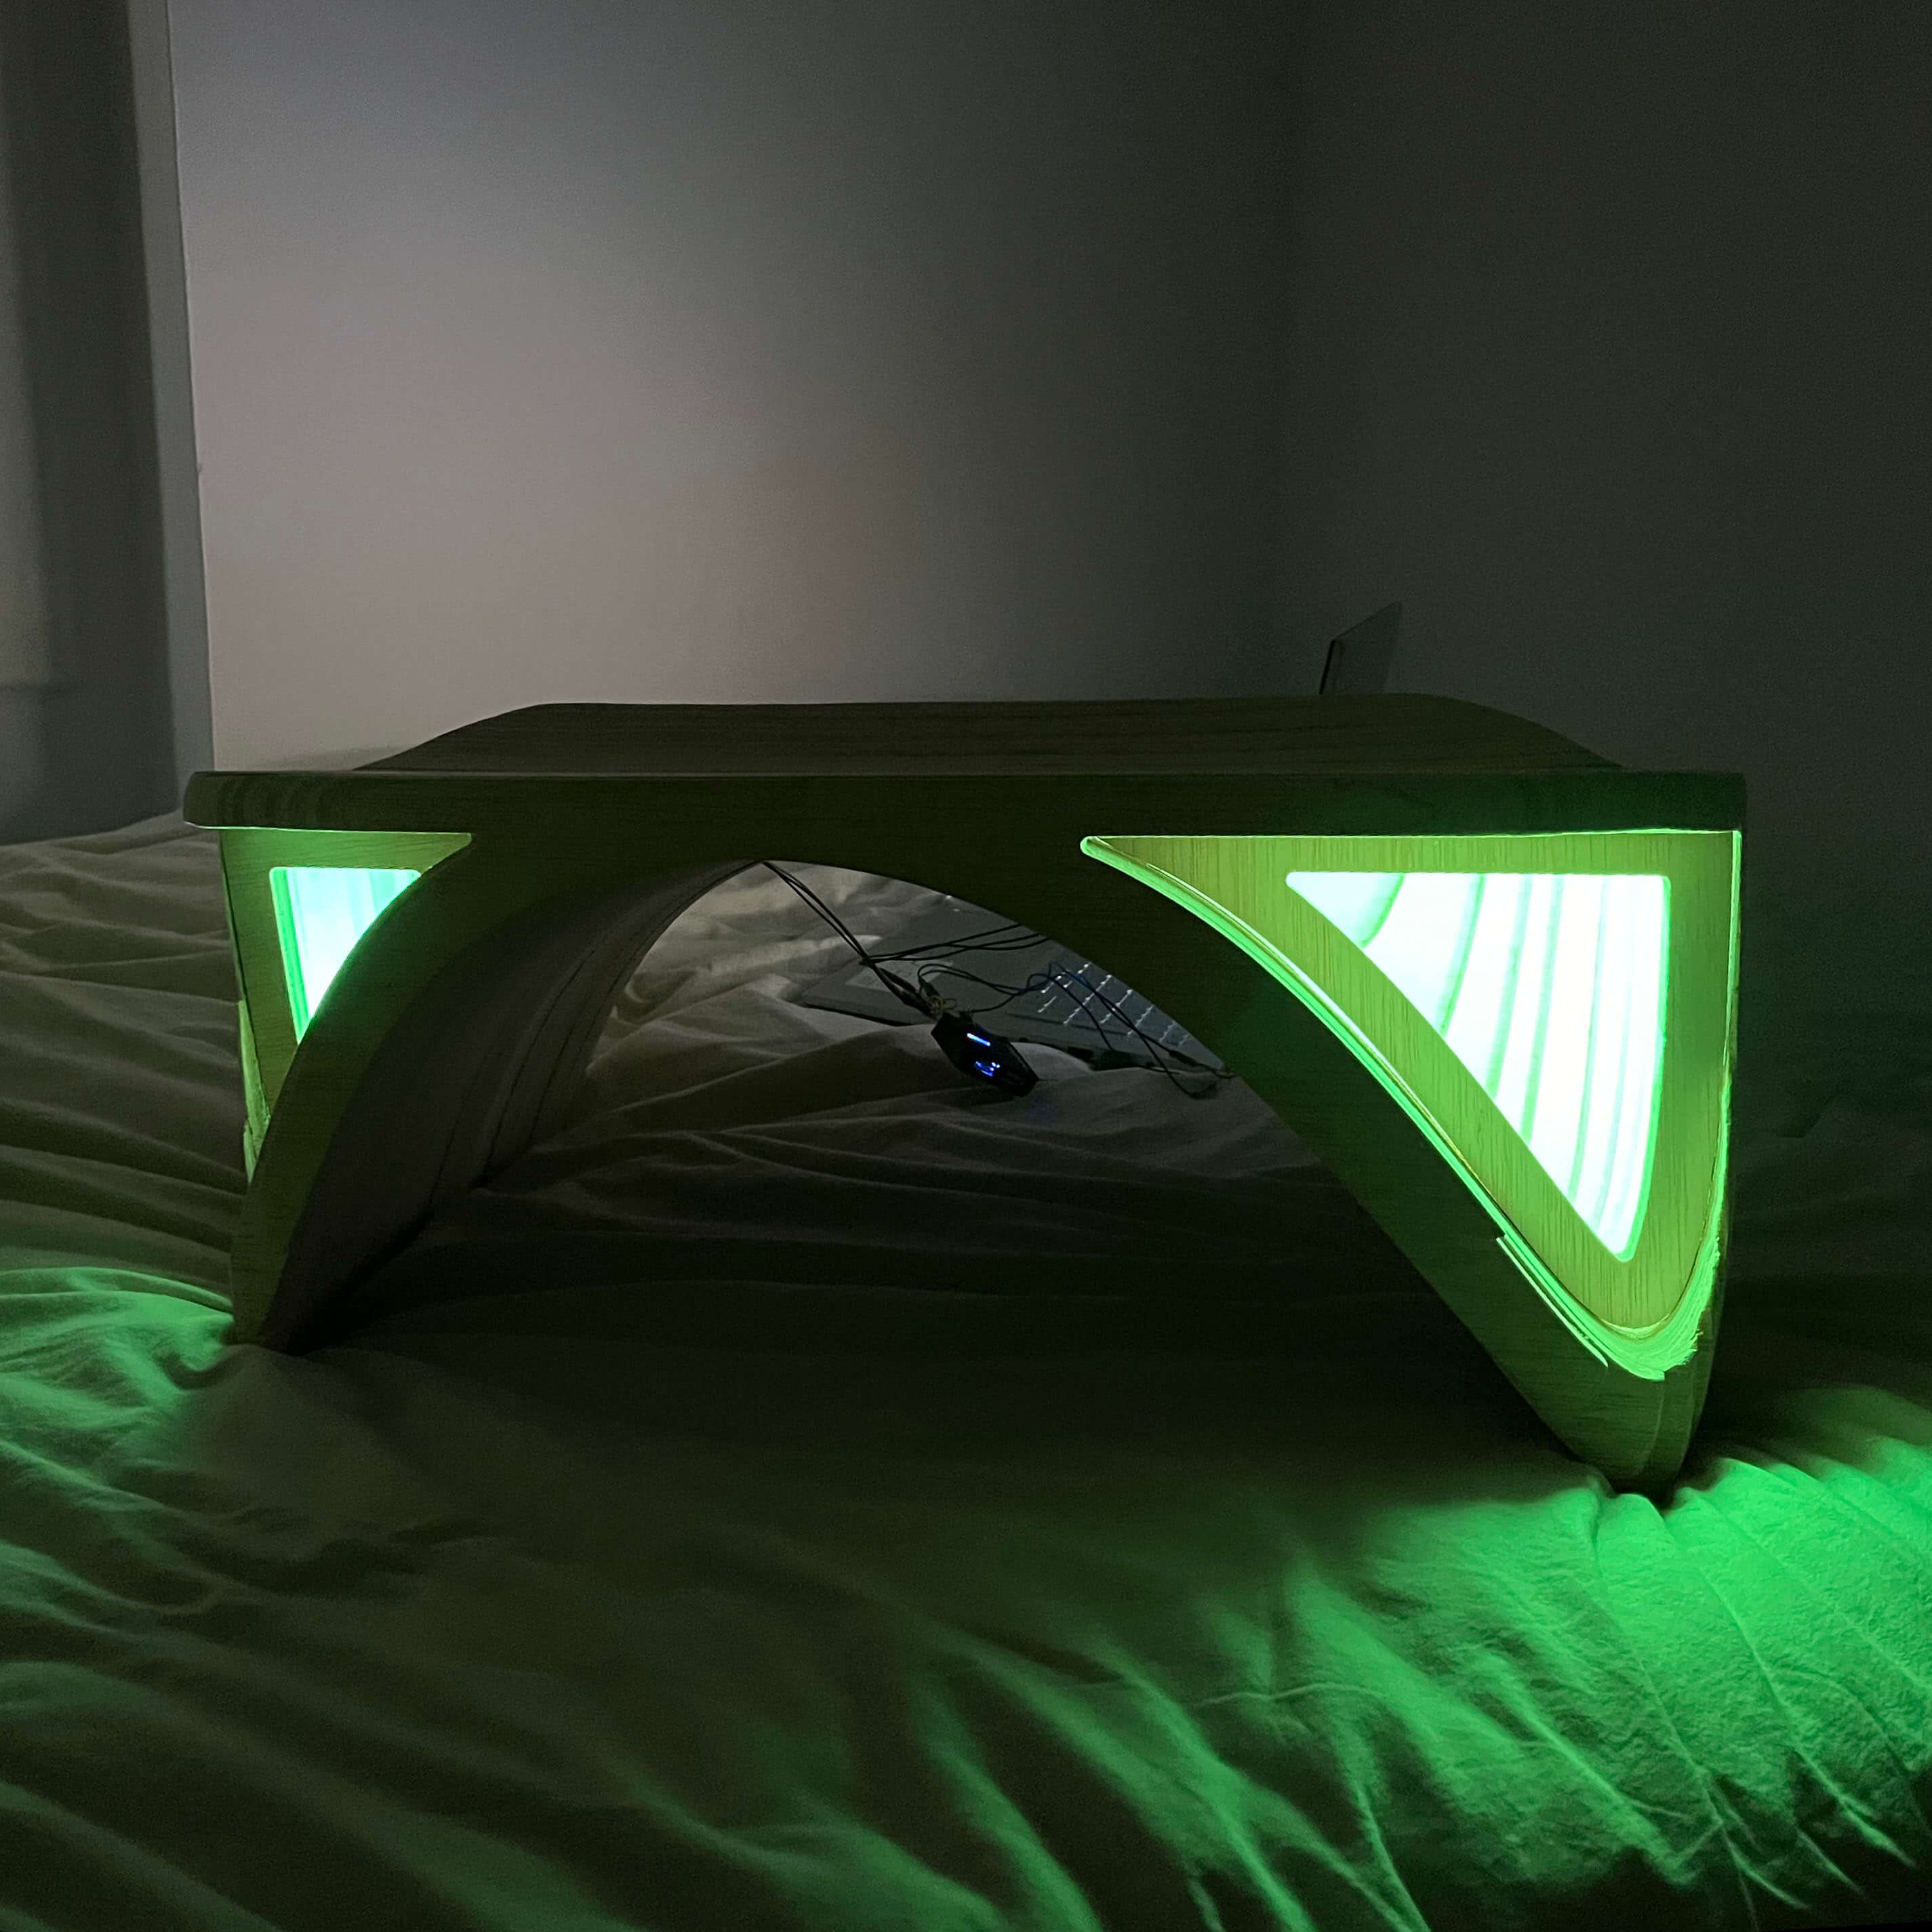
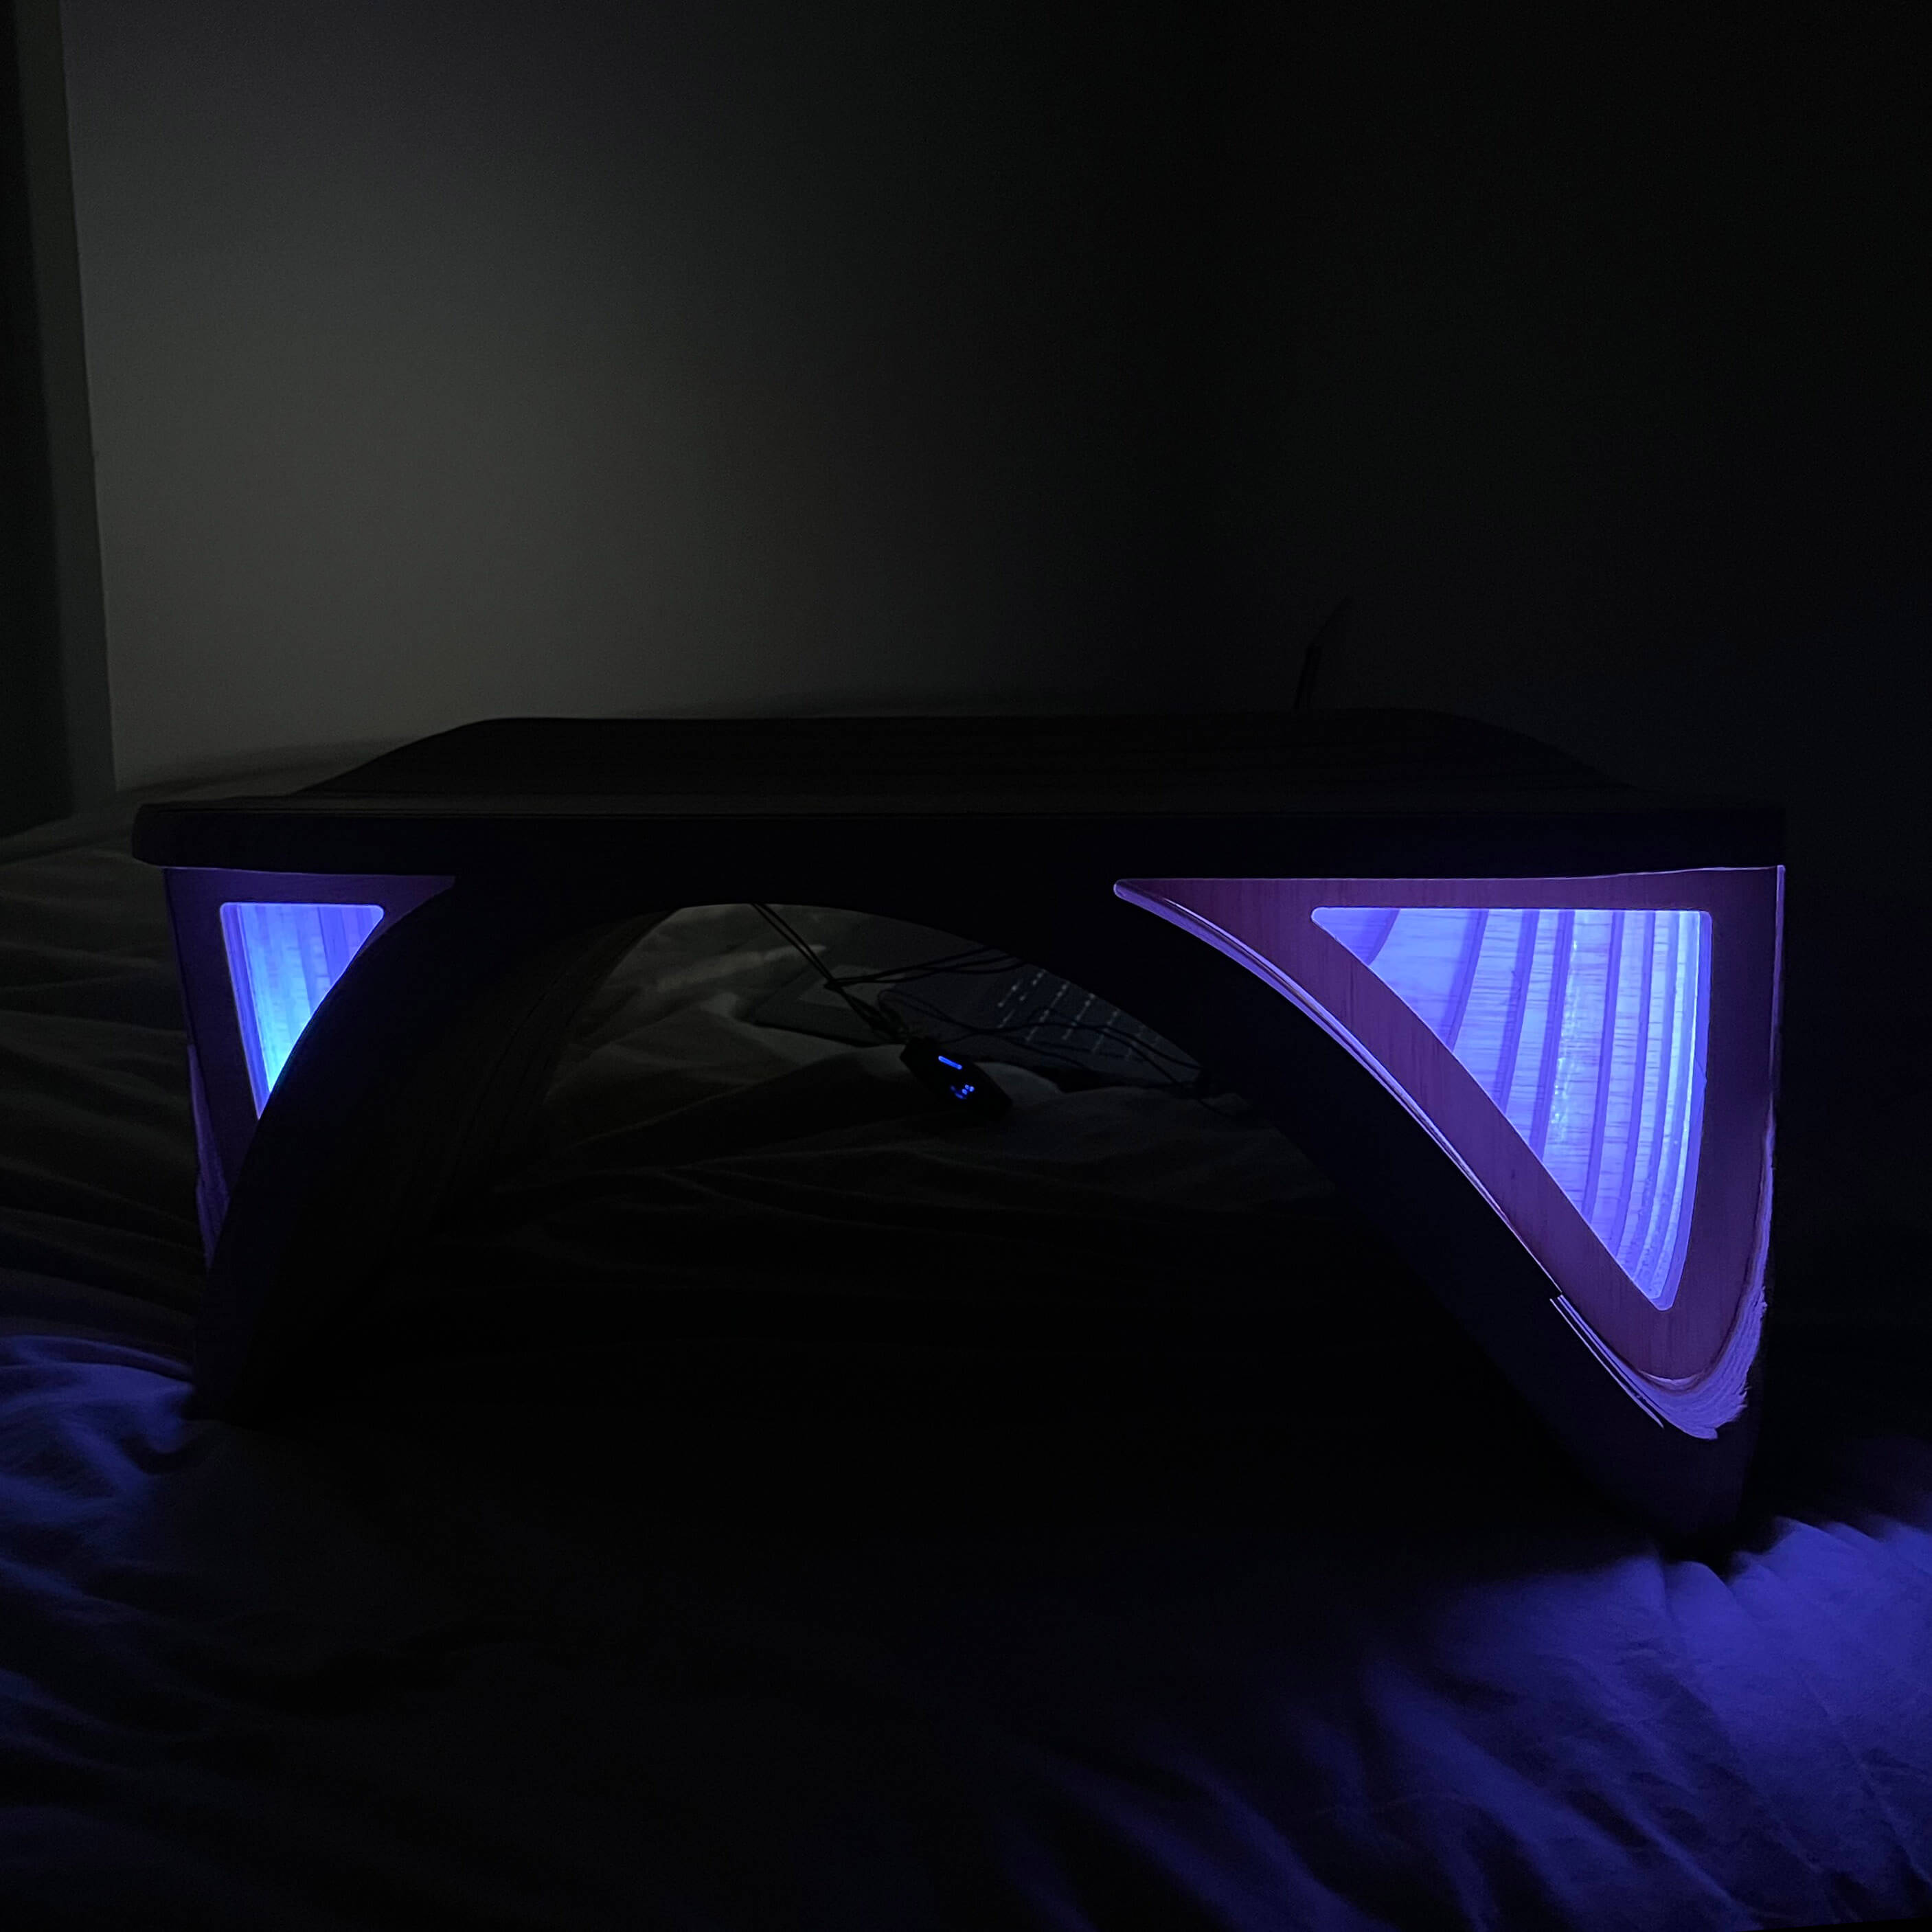
The beginning series of furniture that integrates capacitive touch sensors and LED lighting to create an interactive and aesthetically pleasing object. Combining advanced design and fabrication techniques to create furniture that responds to seamless touch inputs, providing a dynamic lighting experience.
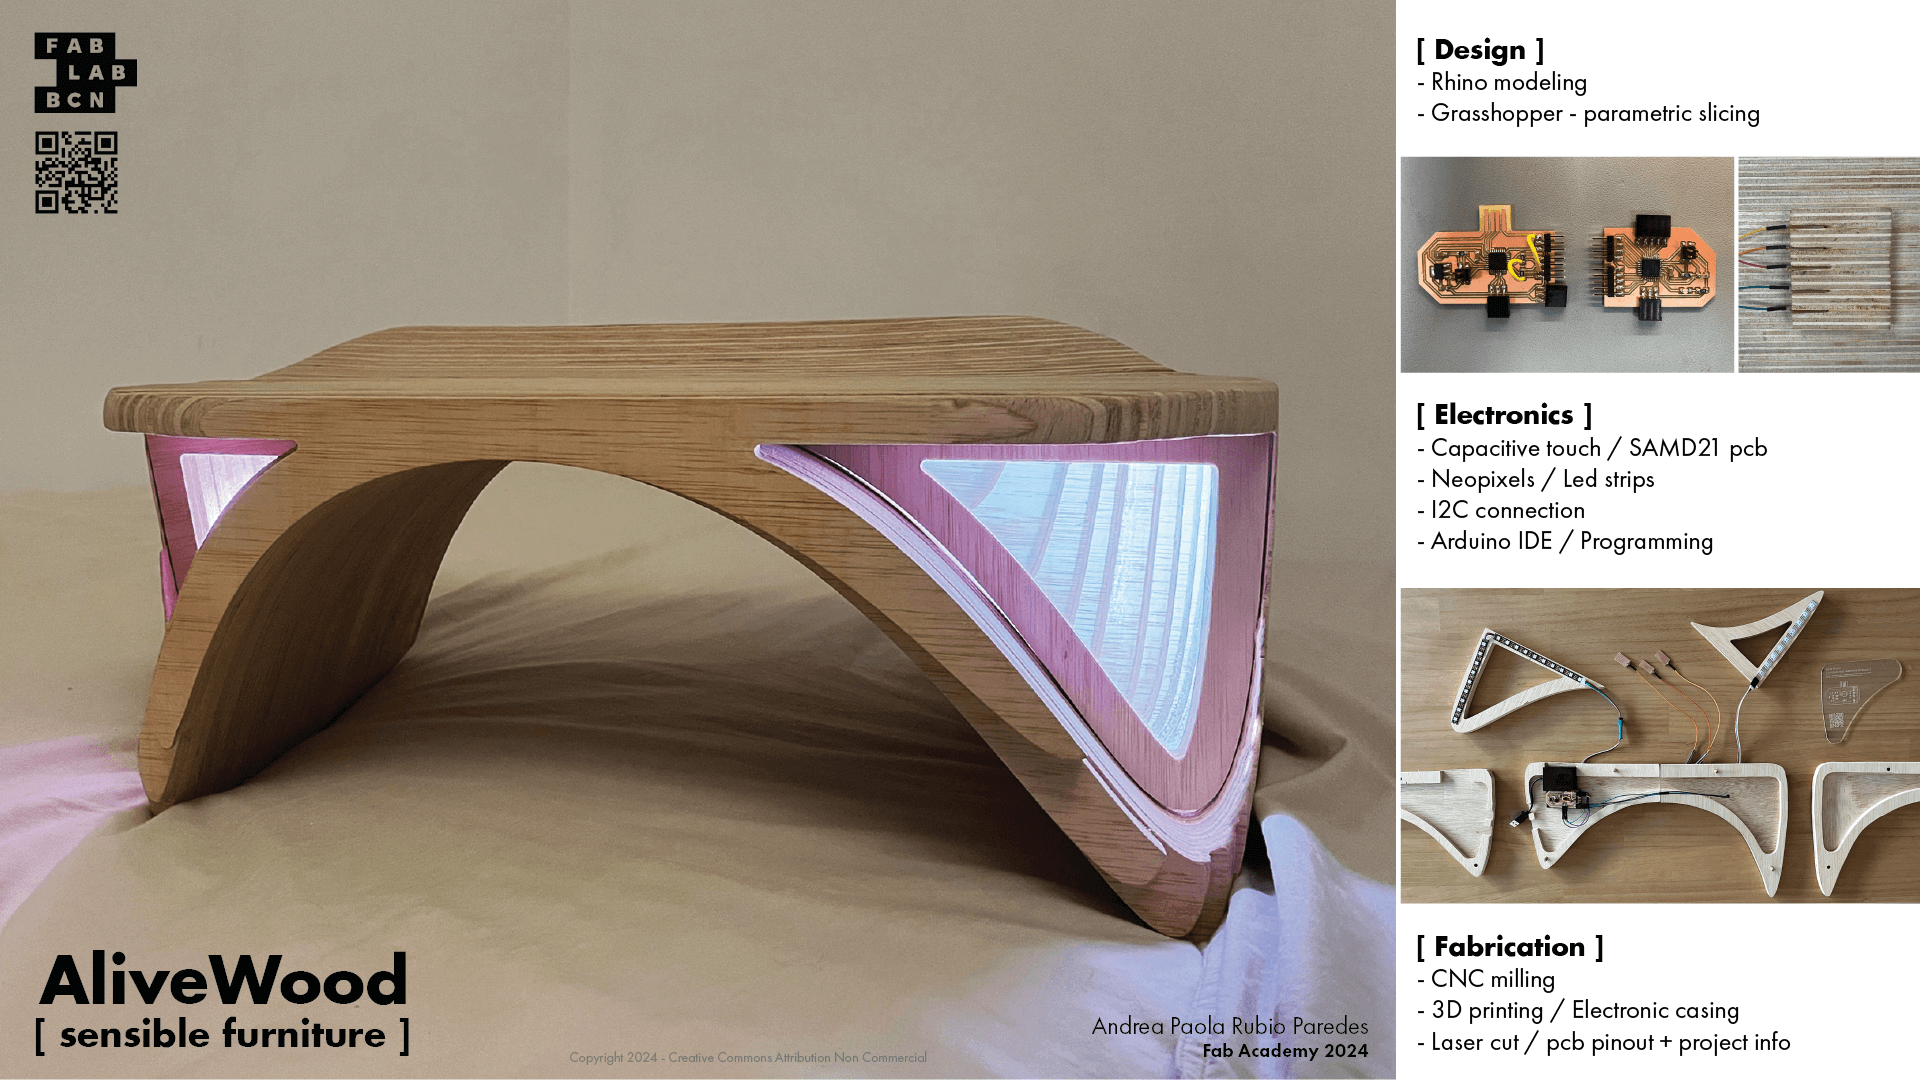
Design: 3D modelling: Rhino + Grasshopper
1. Sketching ideas and taking measurements: I asked my instructors if I could push toward a different path so I could expand my carpentry skills.
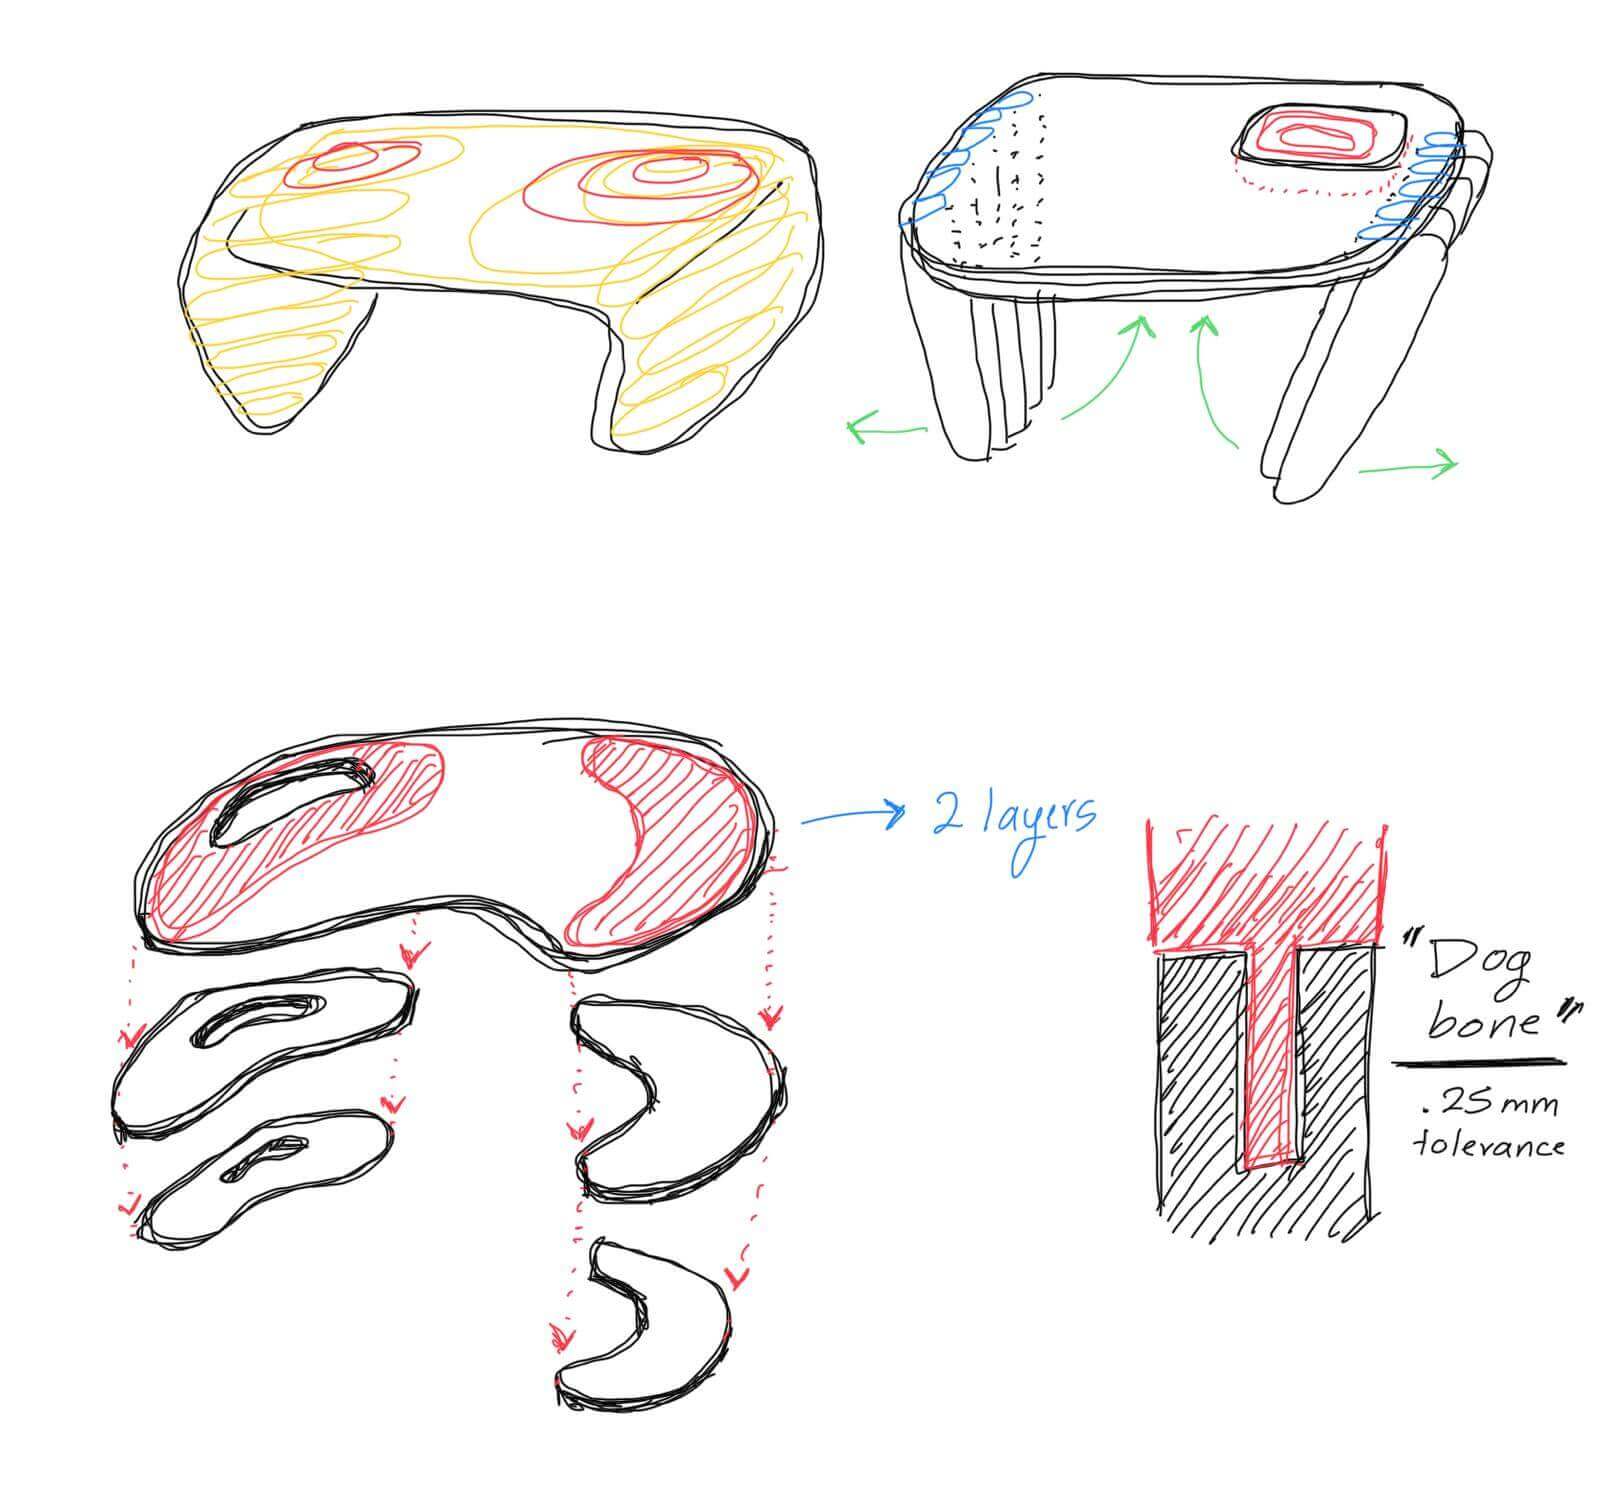
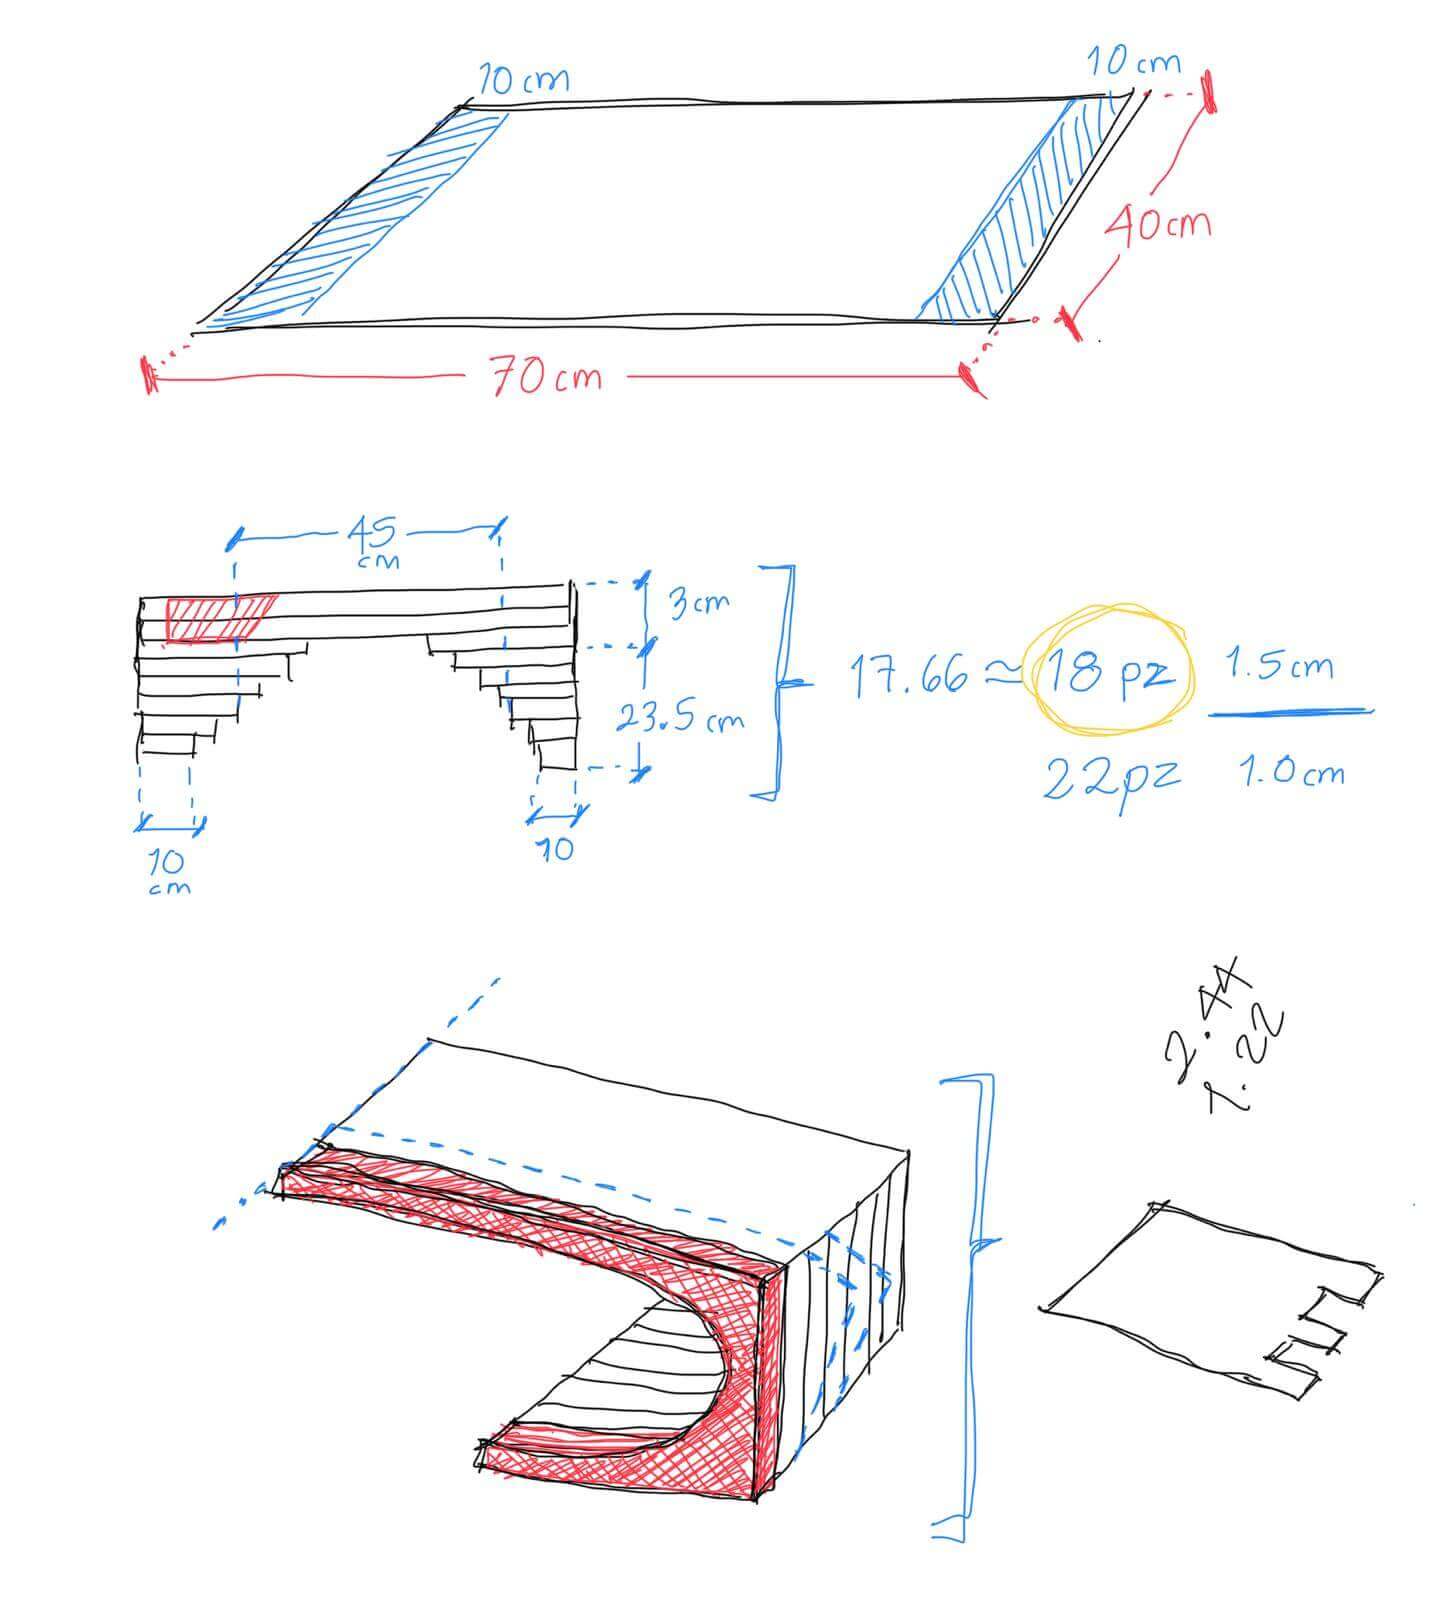
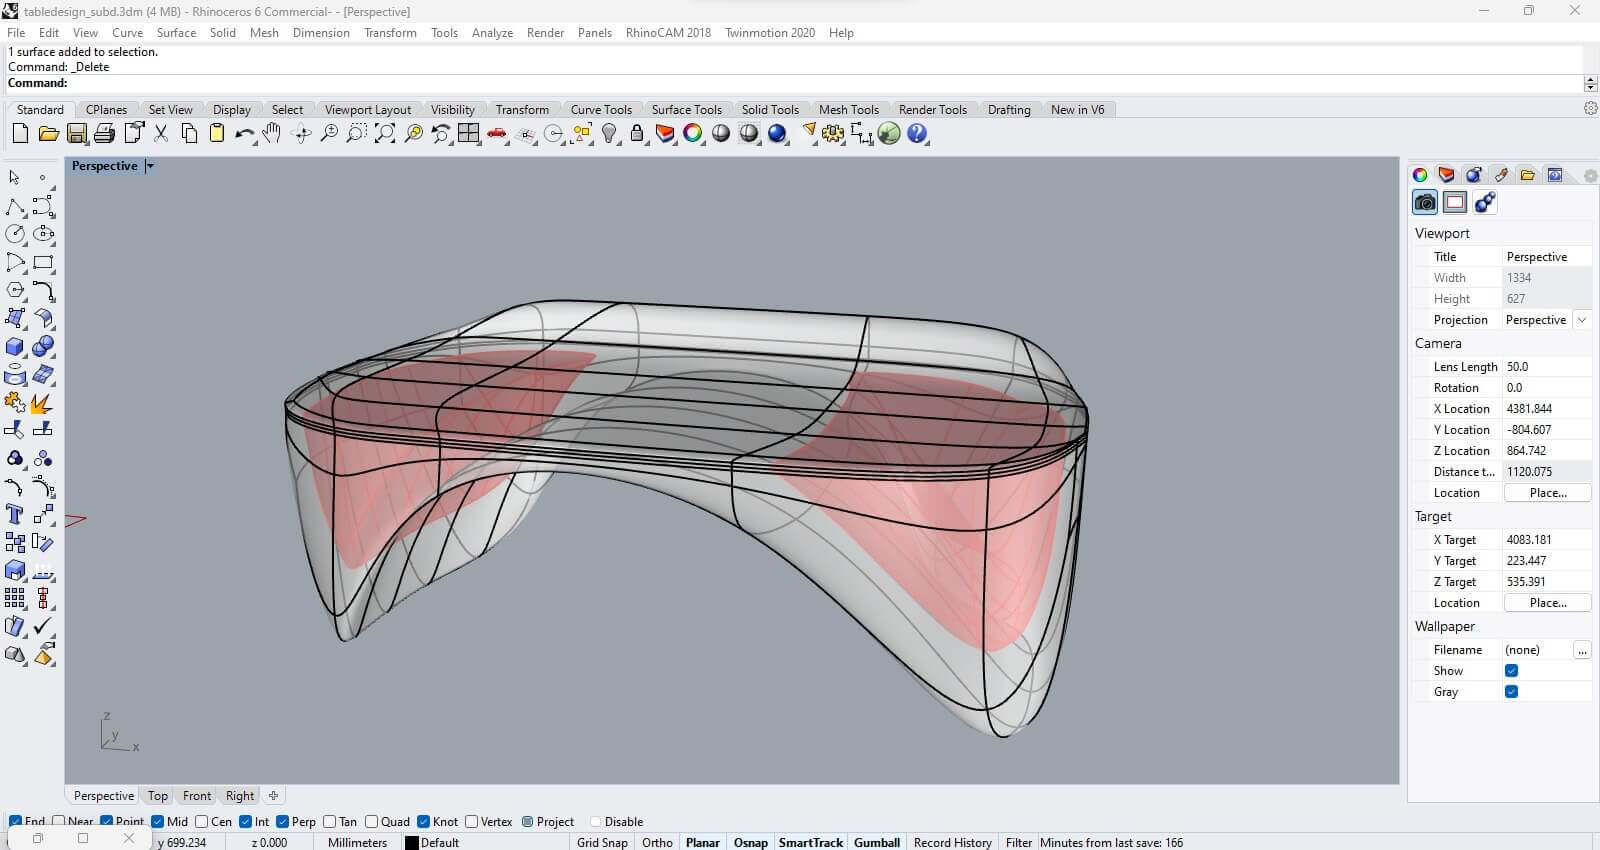
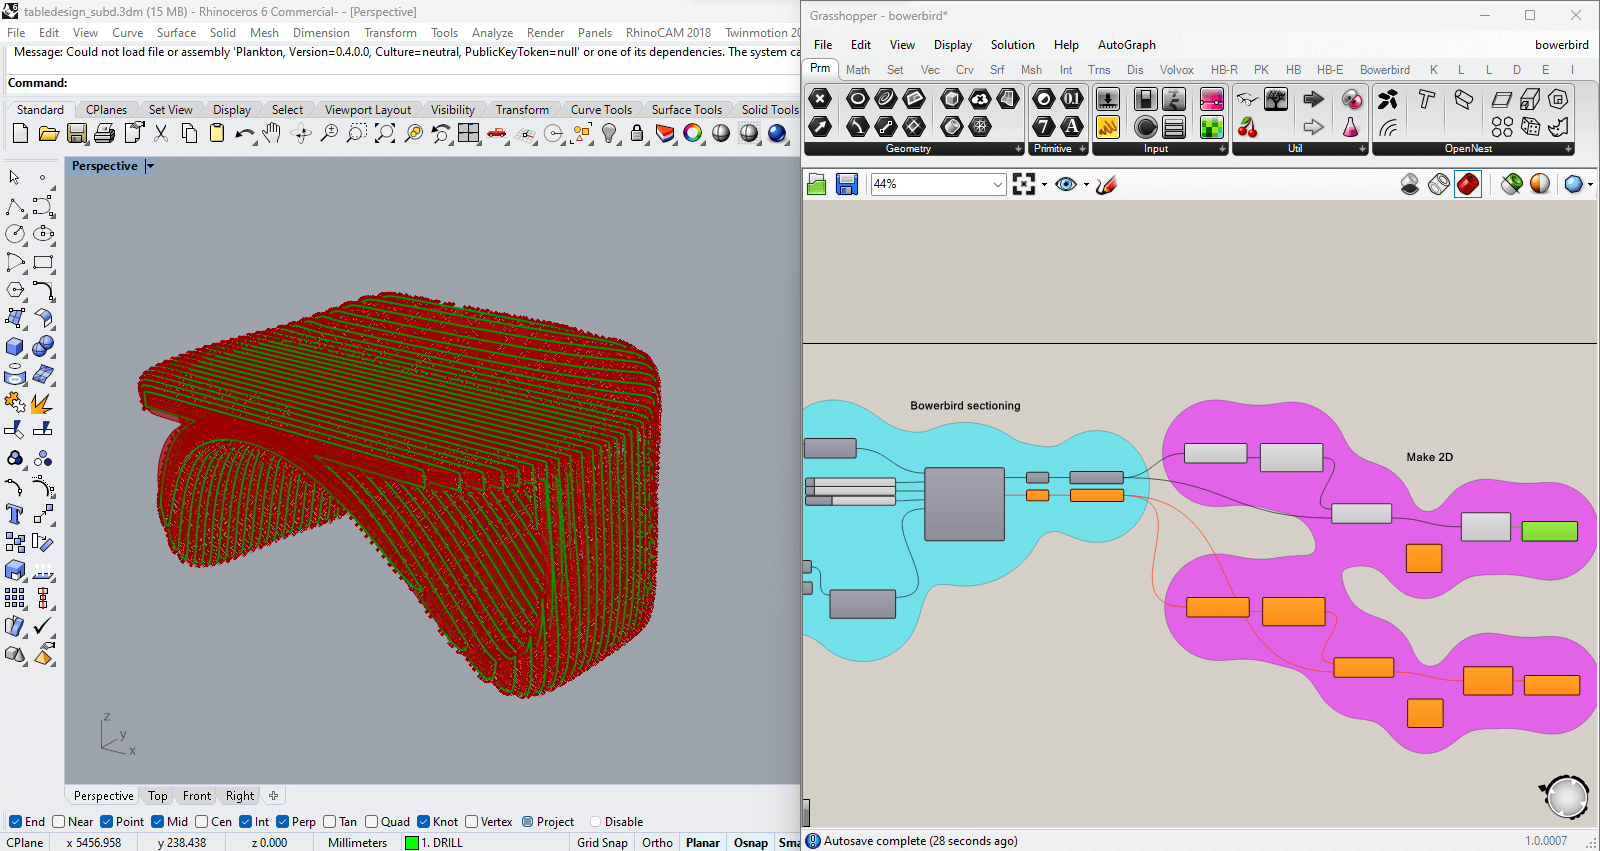
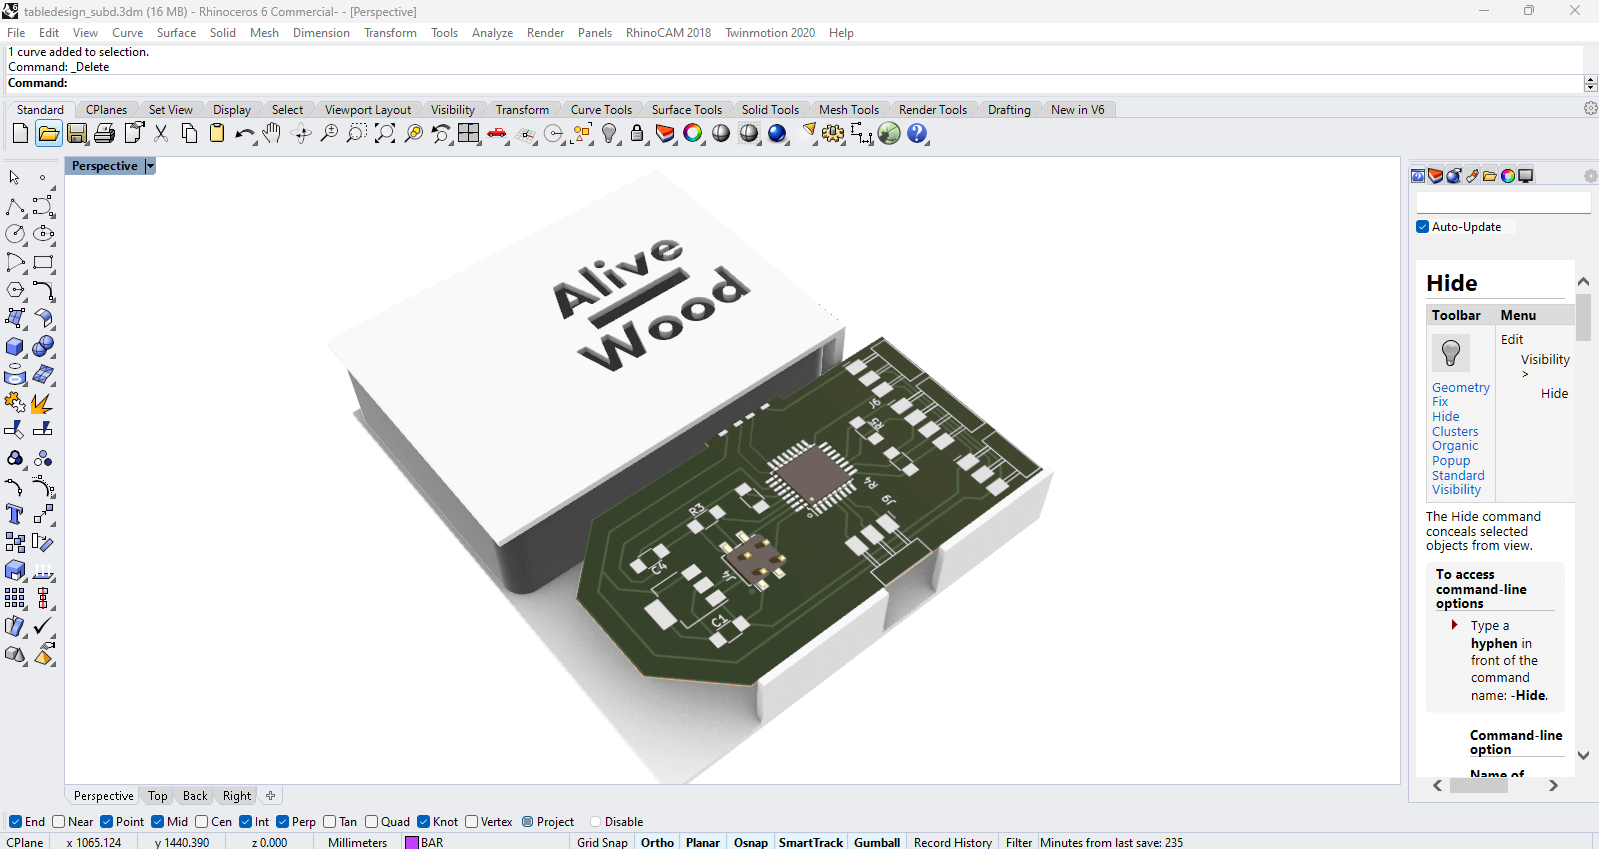
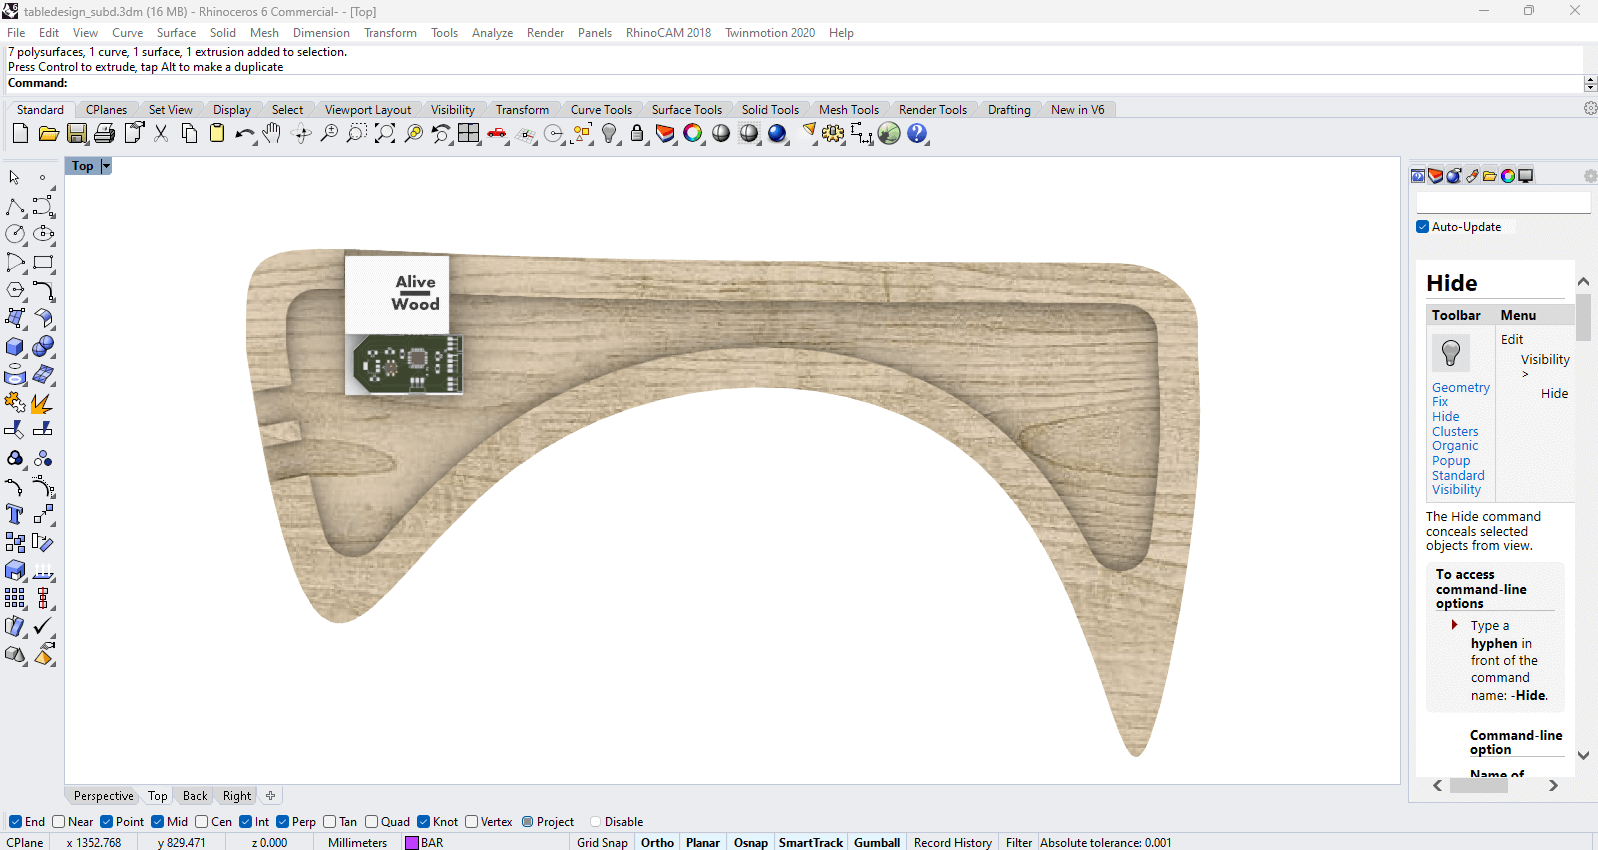
2. Rhino: SubD modelling for a morph shape, playing around with mesh faces.
3. BowerBird + OpenNest: using the same script from week 3 "Computer Controlled Cutting". Connected the new brep and adapted the iterations on the nesting.
References: Capacitive sensors & lights

Computer Controlled Machining
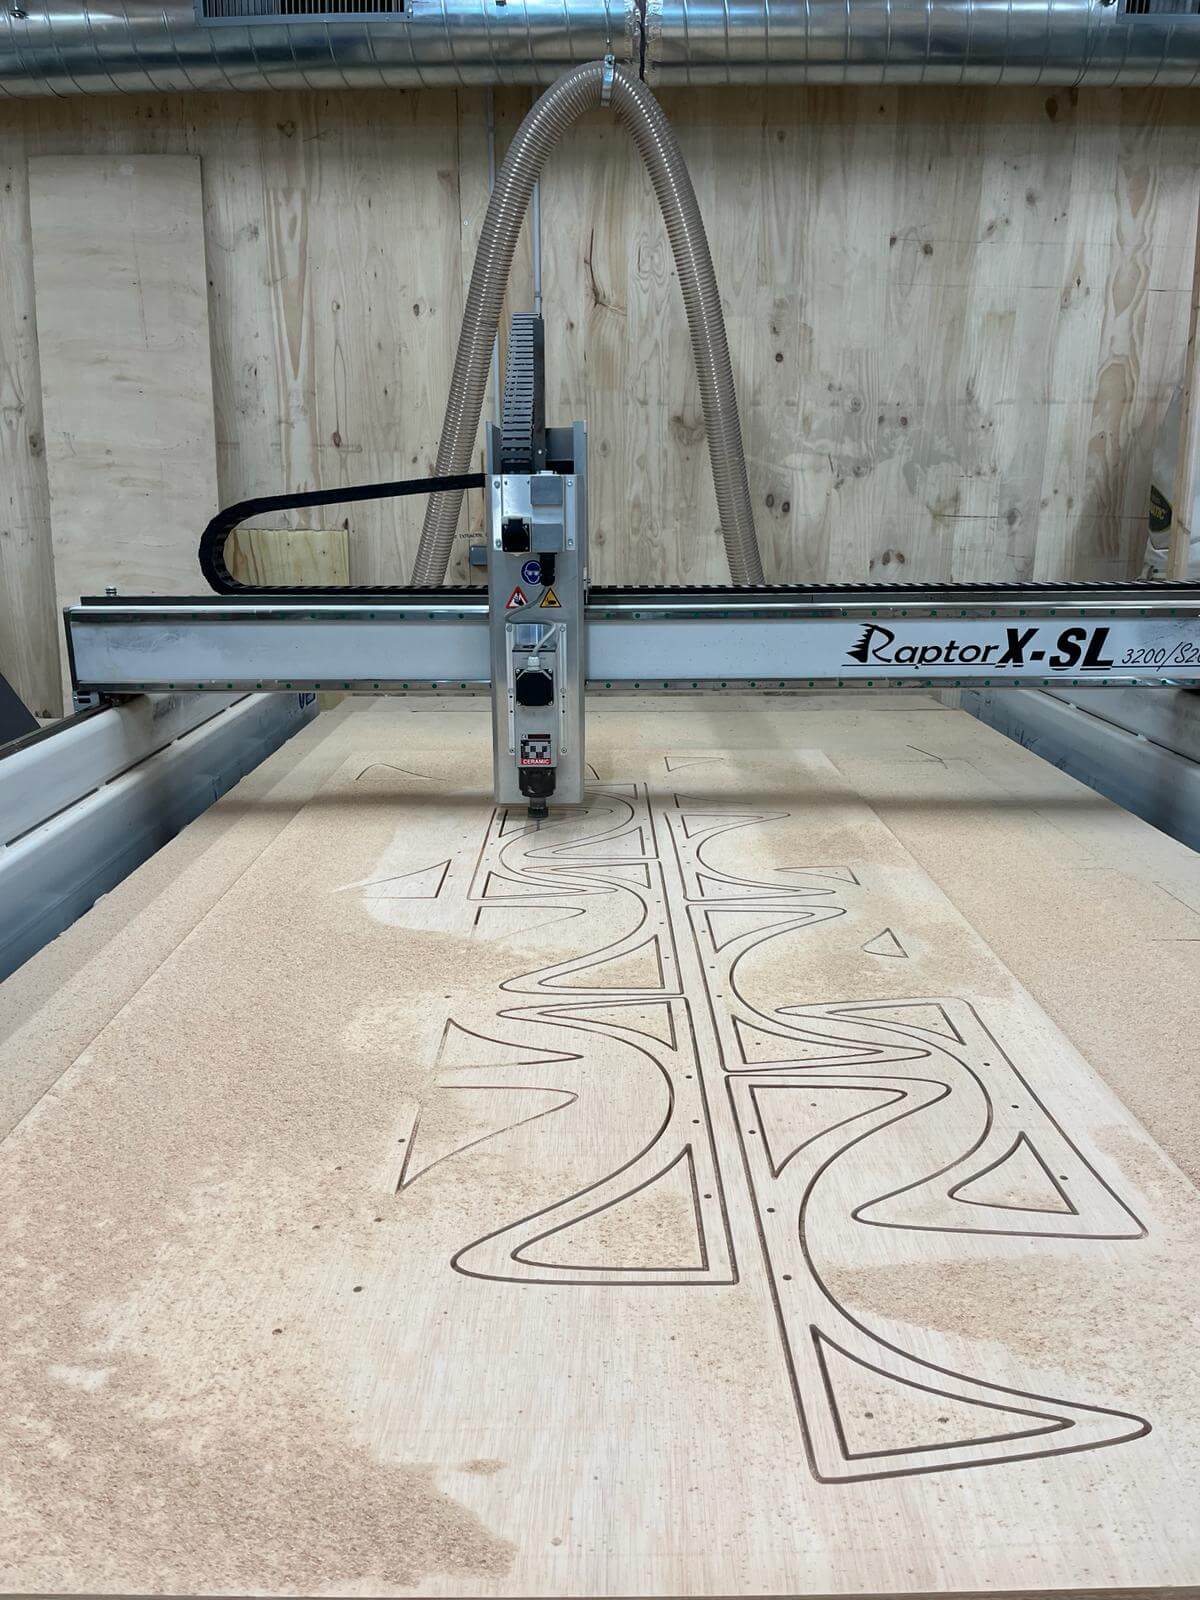
Setting up CNC files
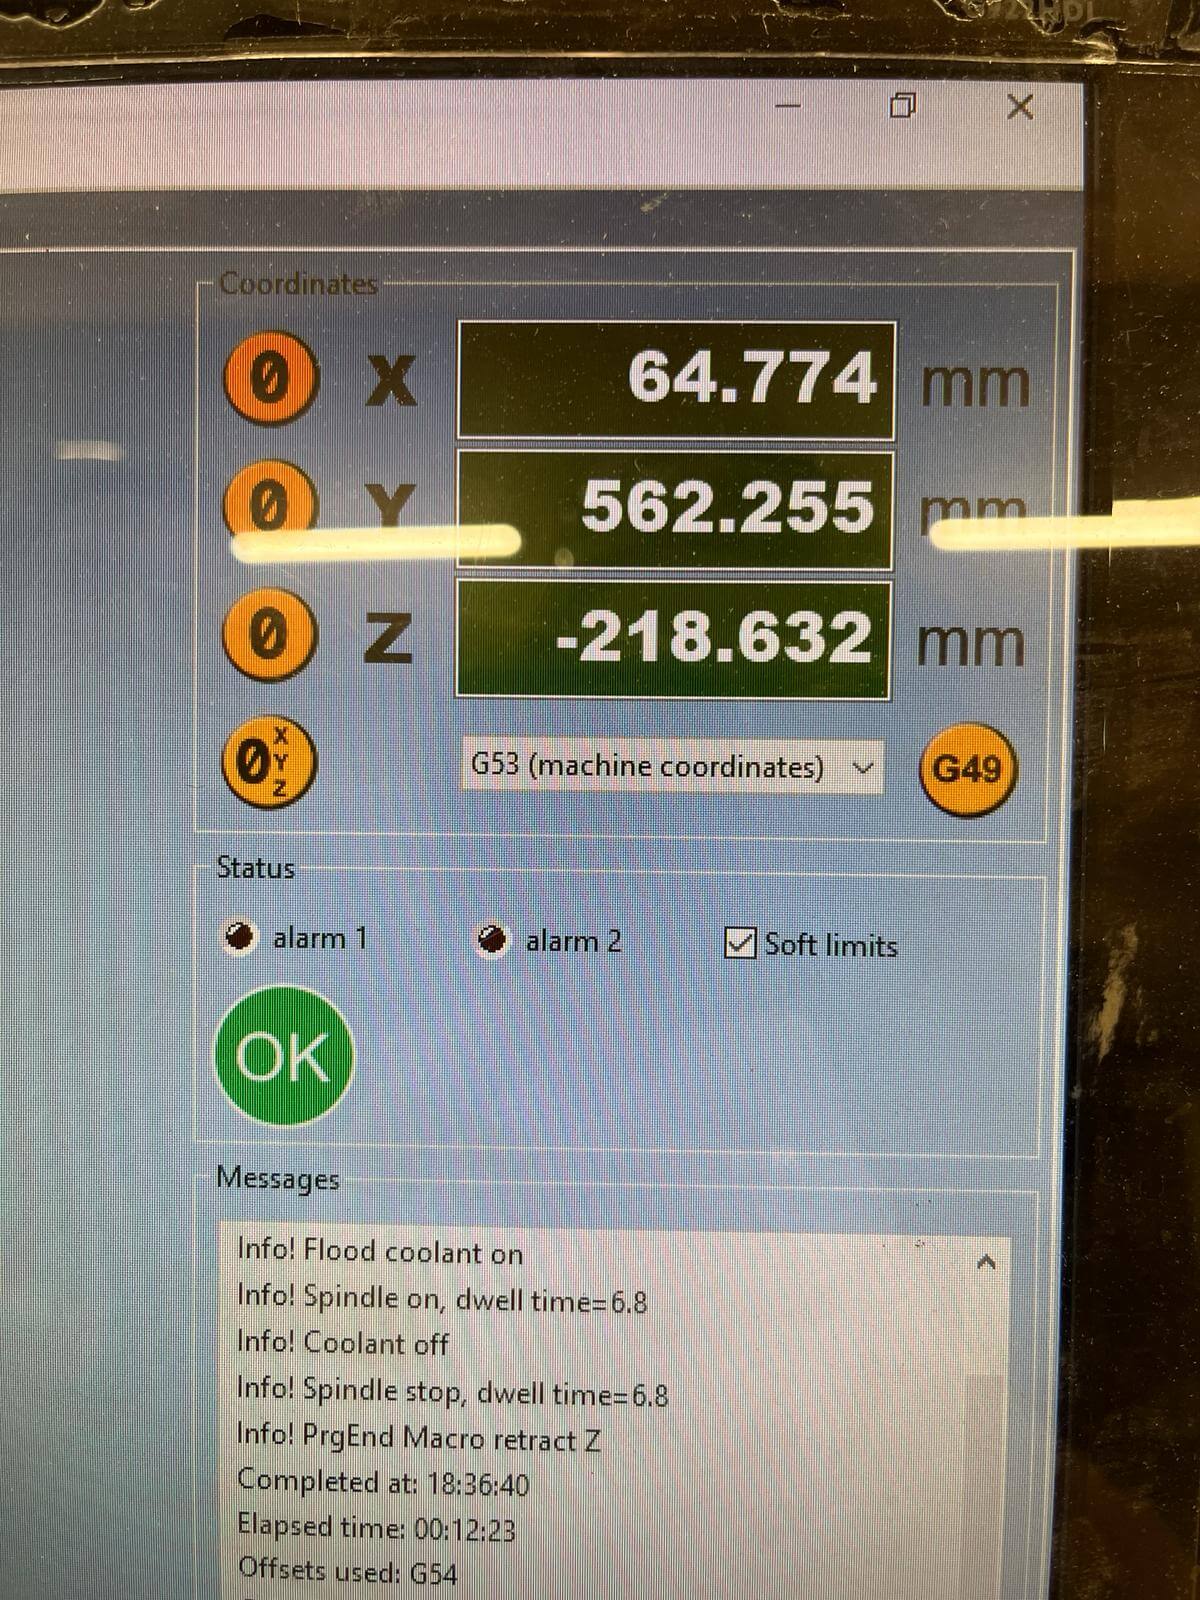
1. Set up XYZ + Load "Drilling" file: These coordinates ensure that the tool starts at the correct position relative to the workpiece. Additionally, the control panel shows the machine's status and messages, including spindle and coolant operations, which are critical for safe and efficient machining.
2. Start screwing.
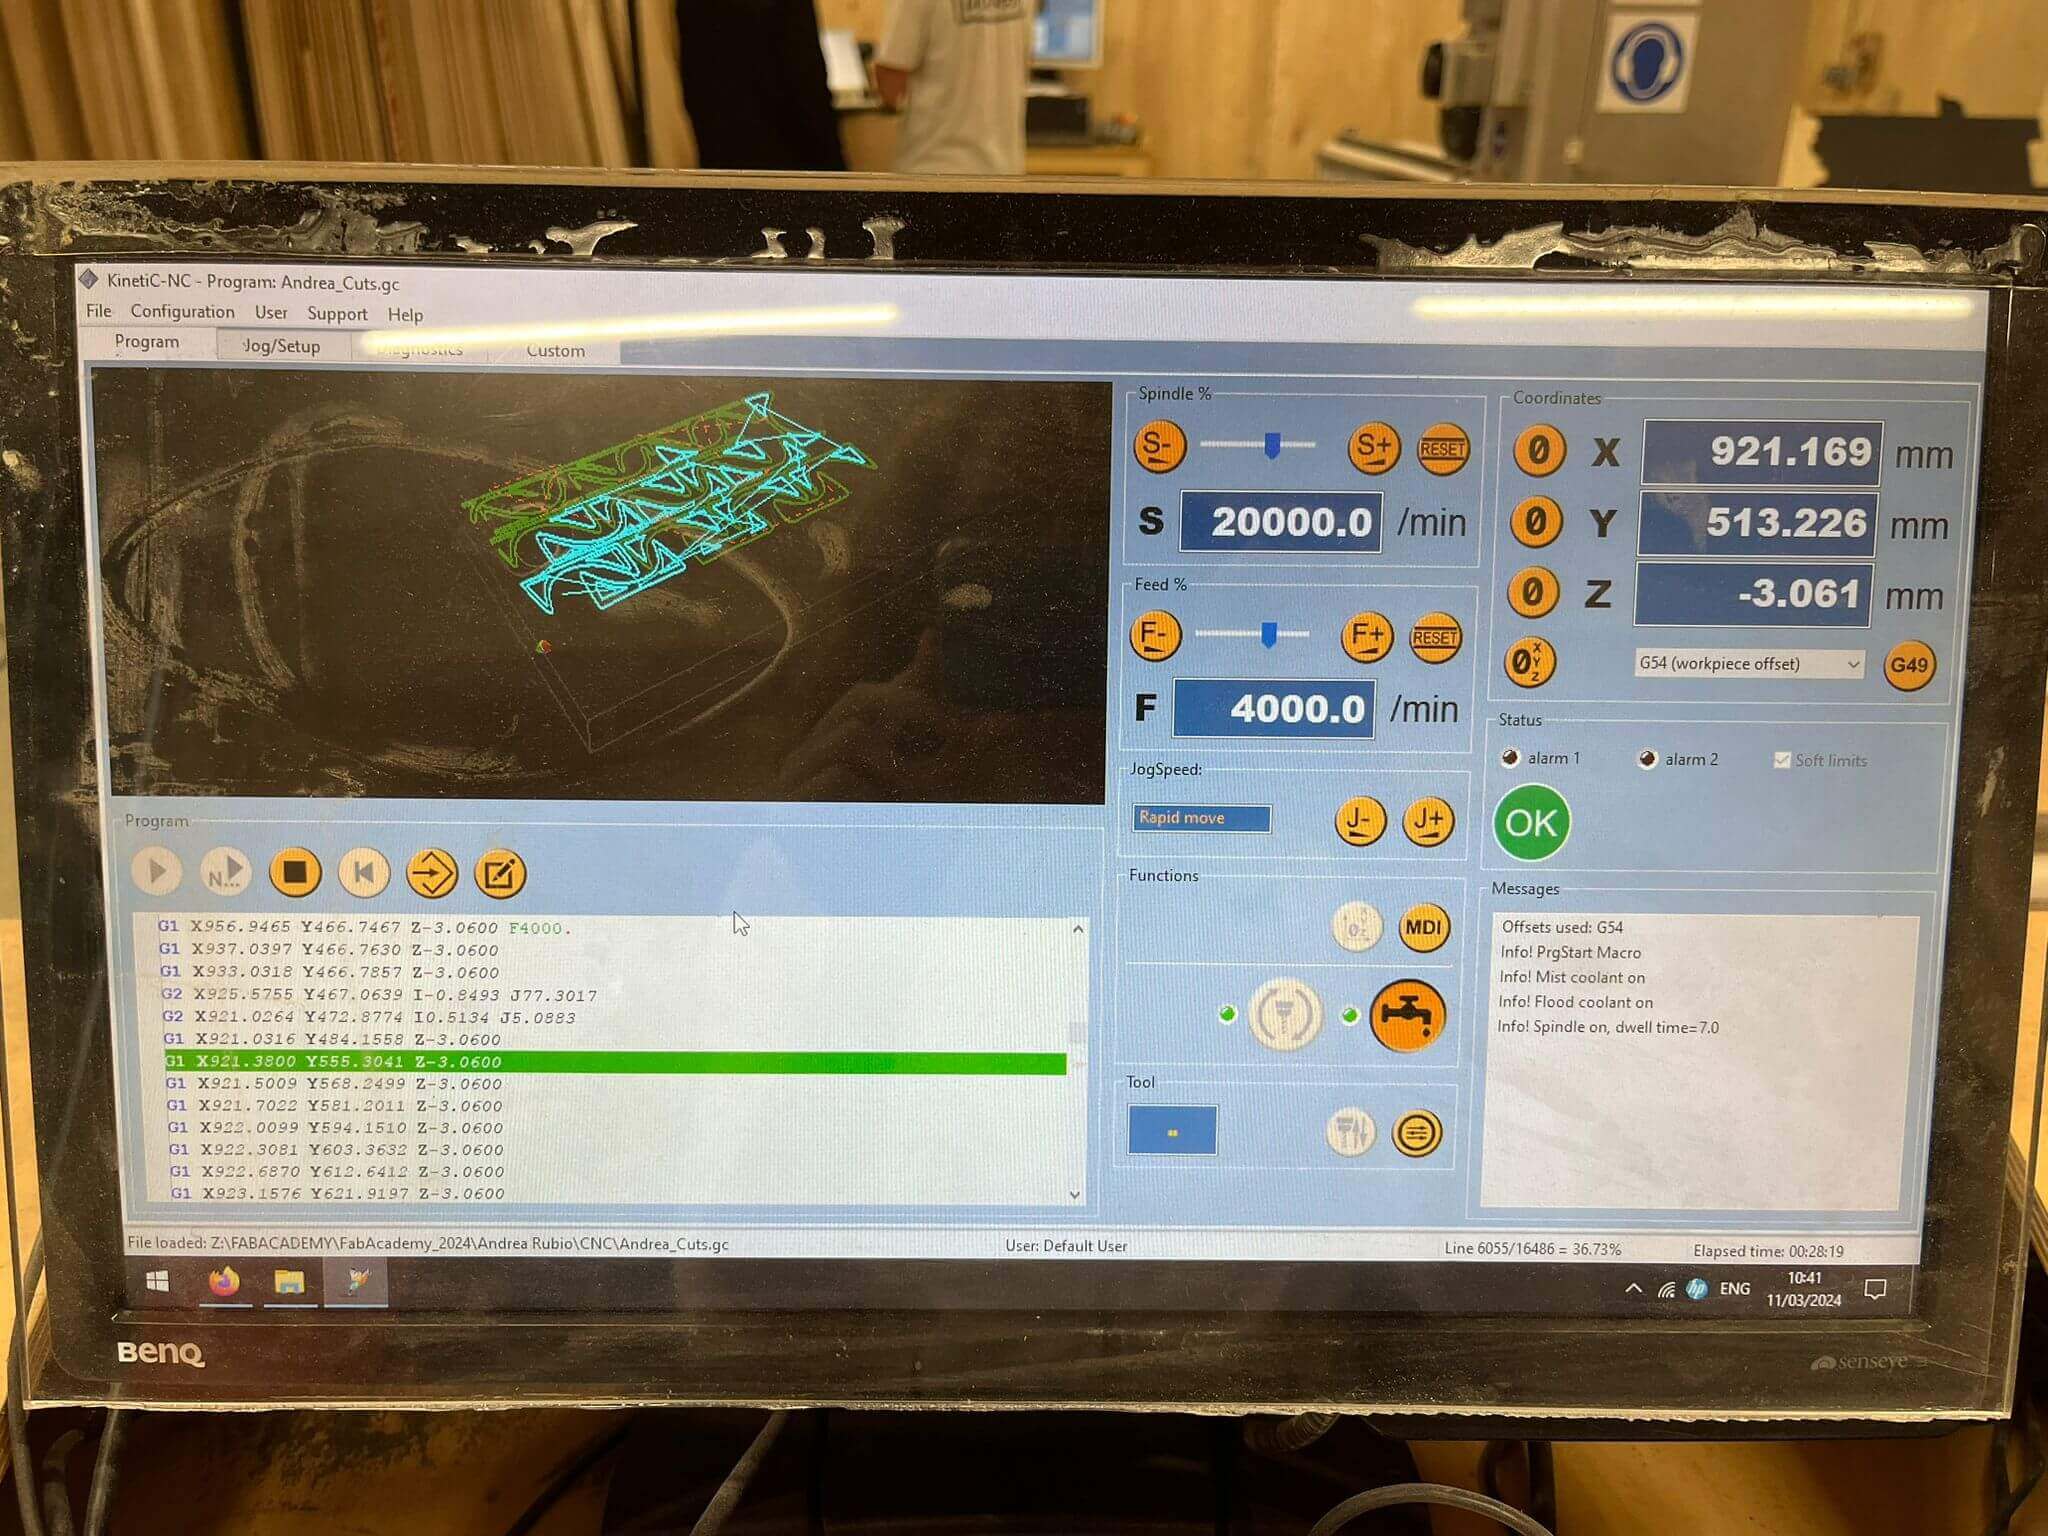
4. Load "Profilling Internal & External" file.
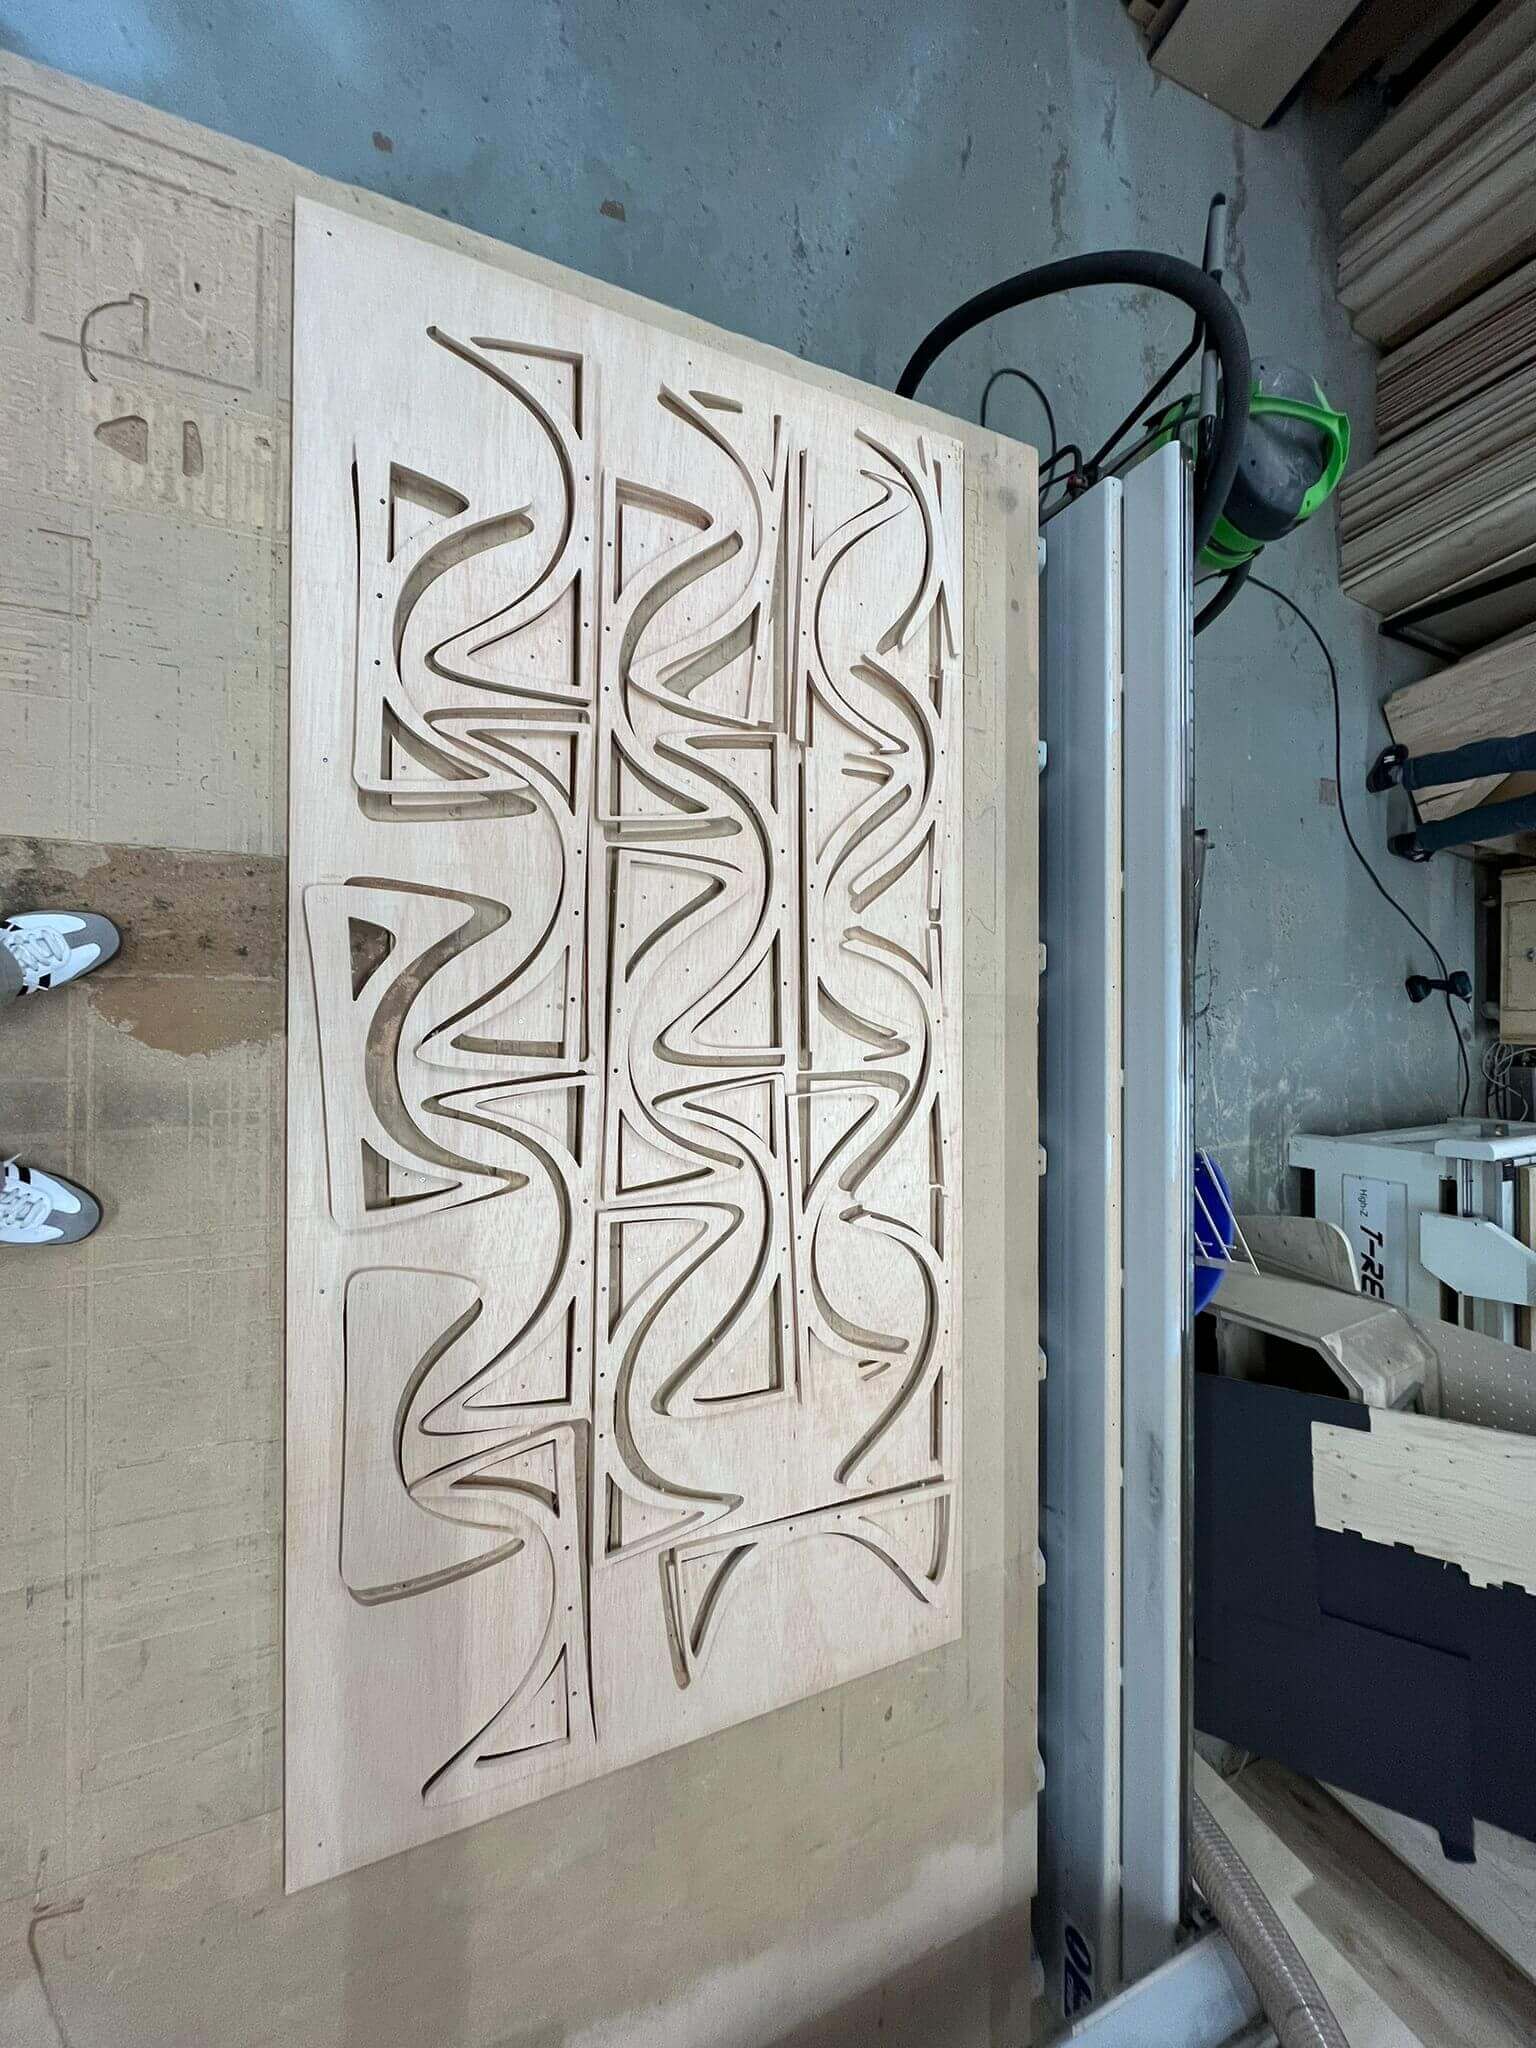
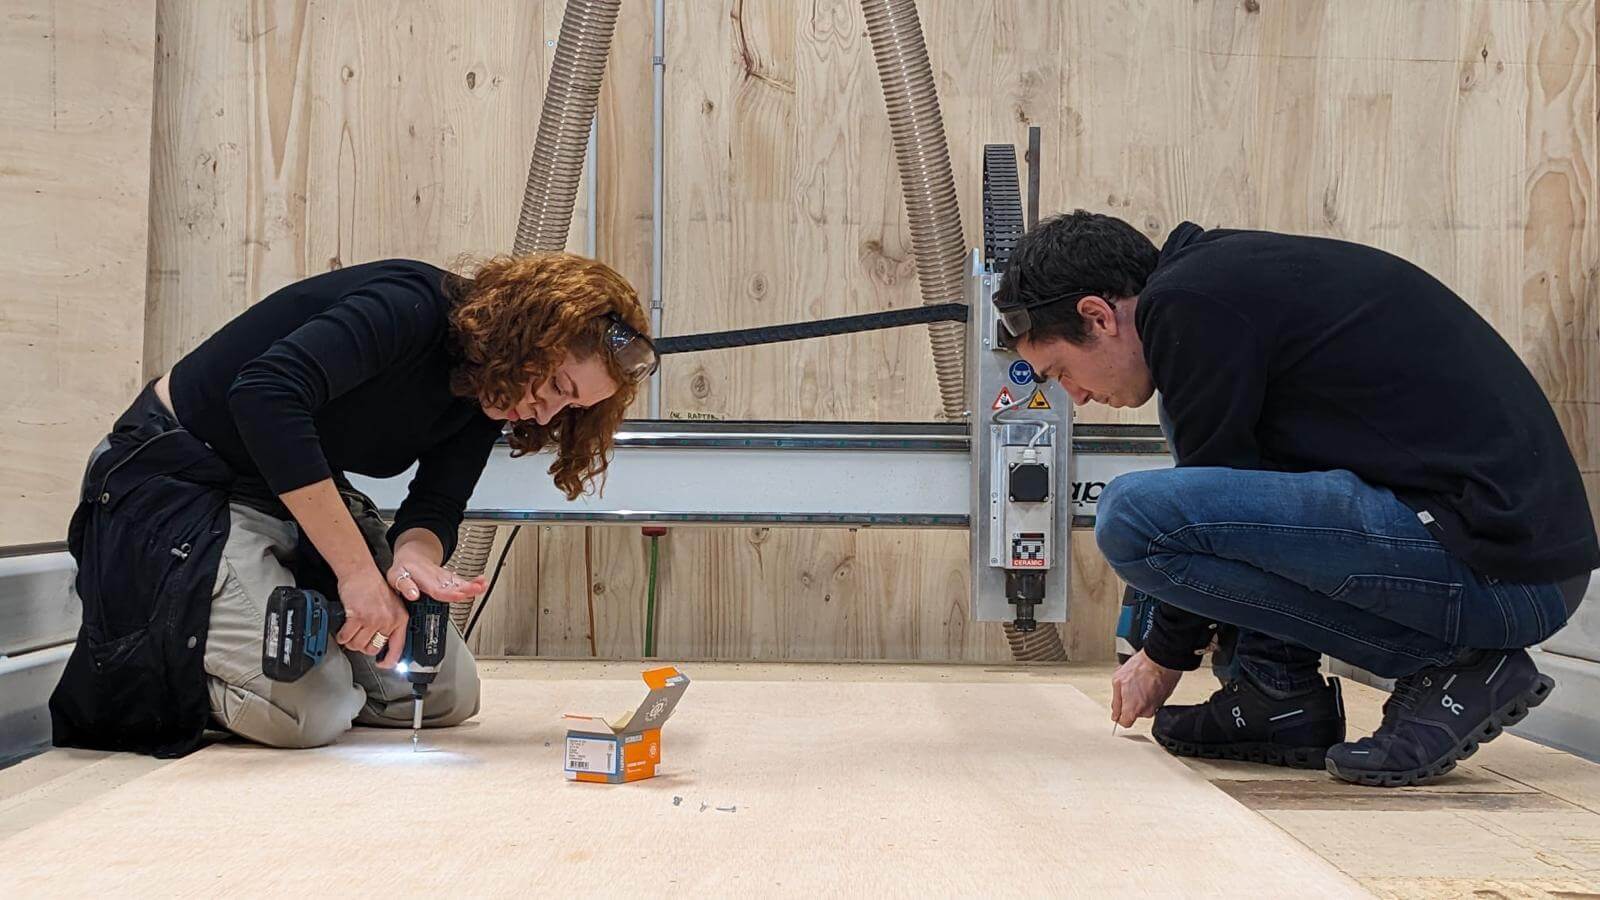
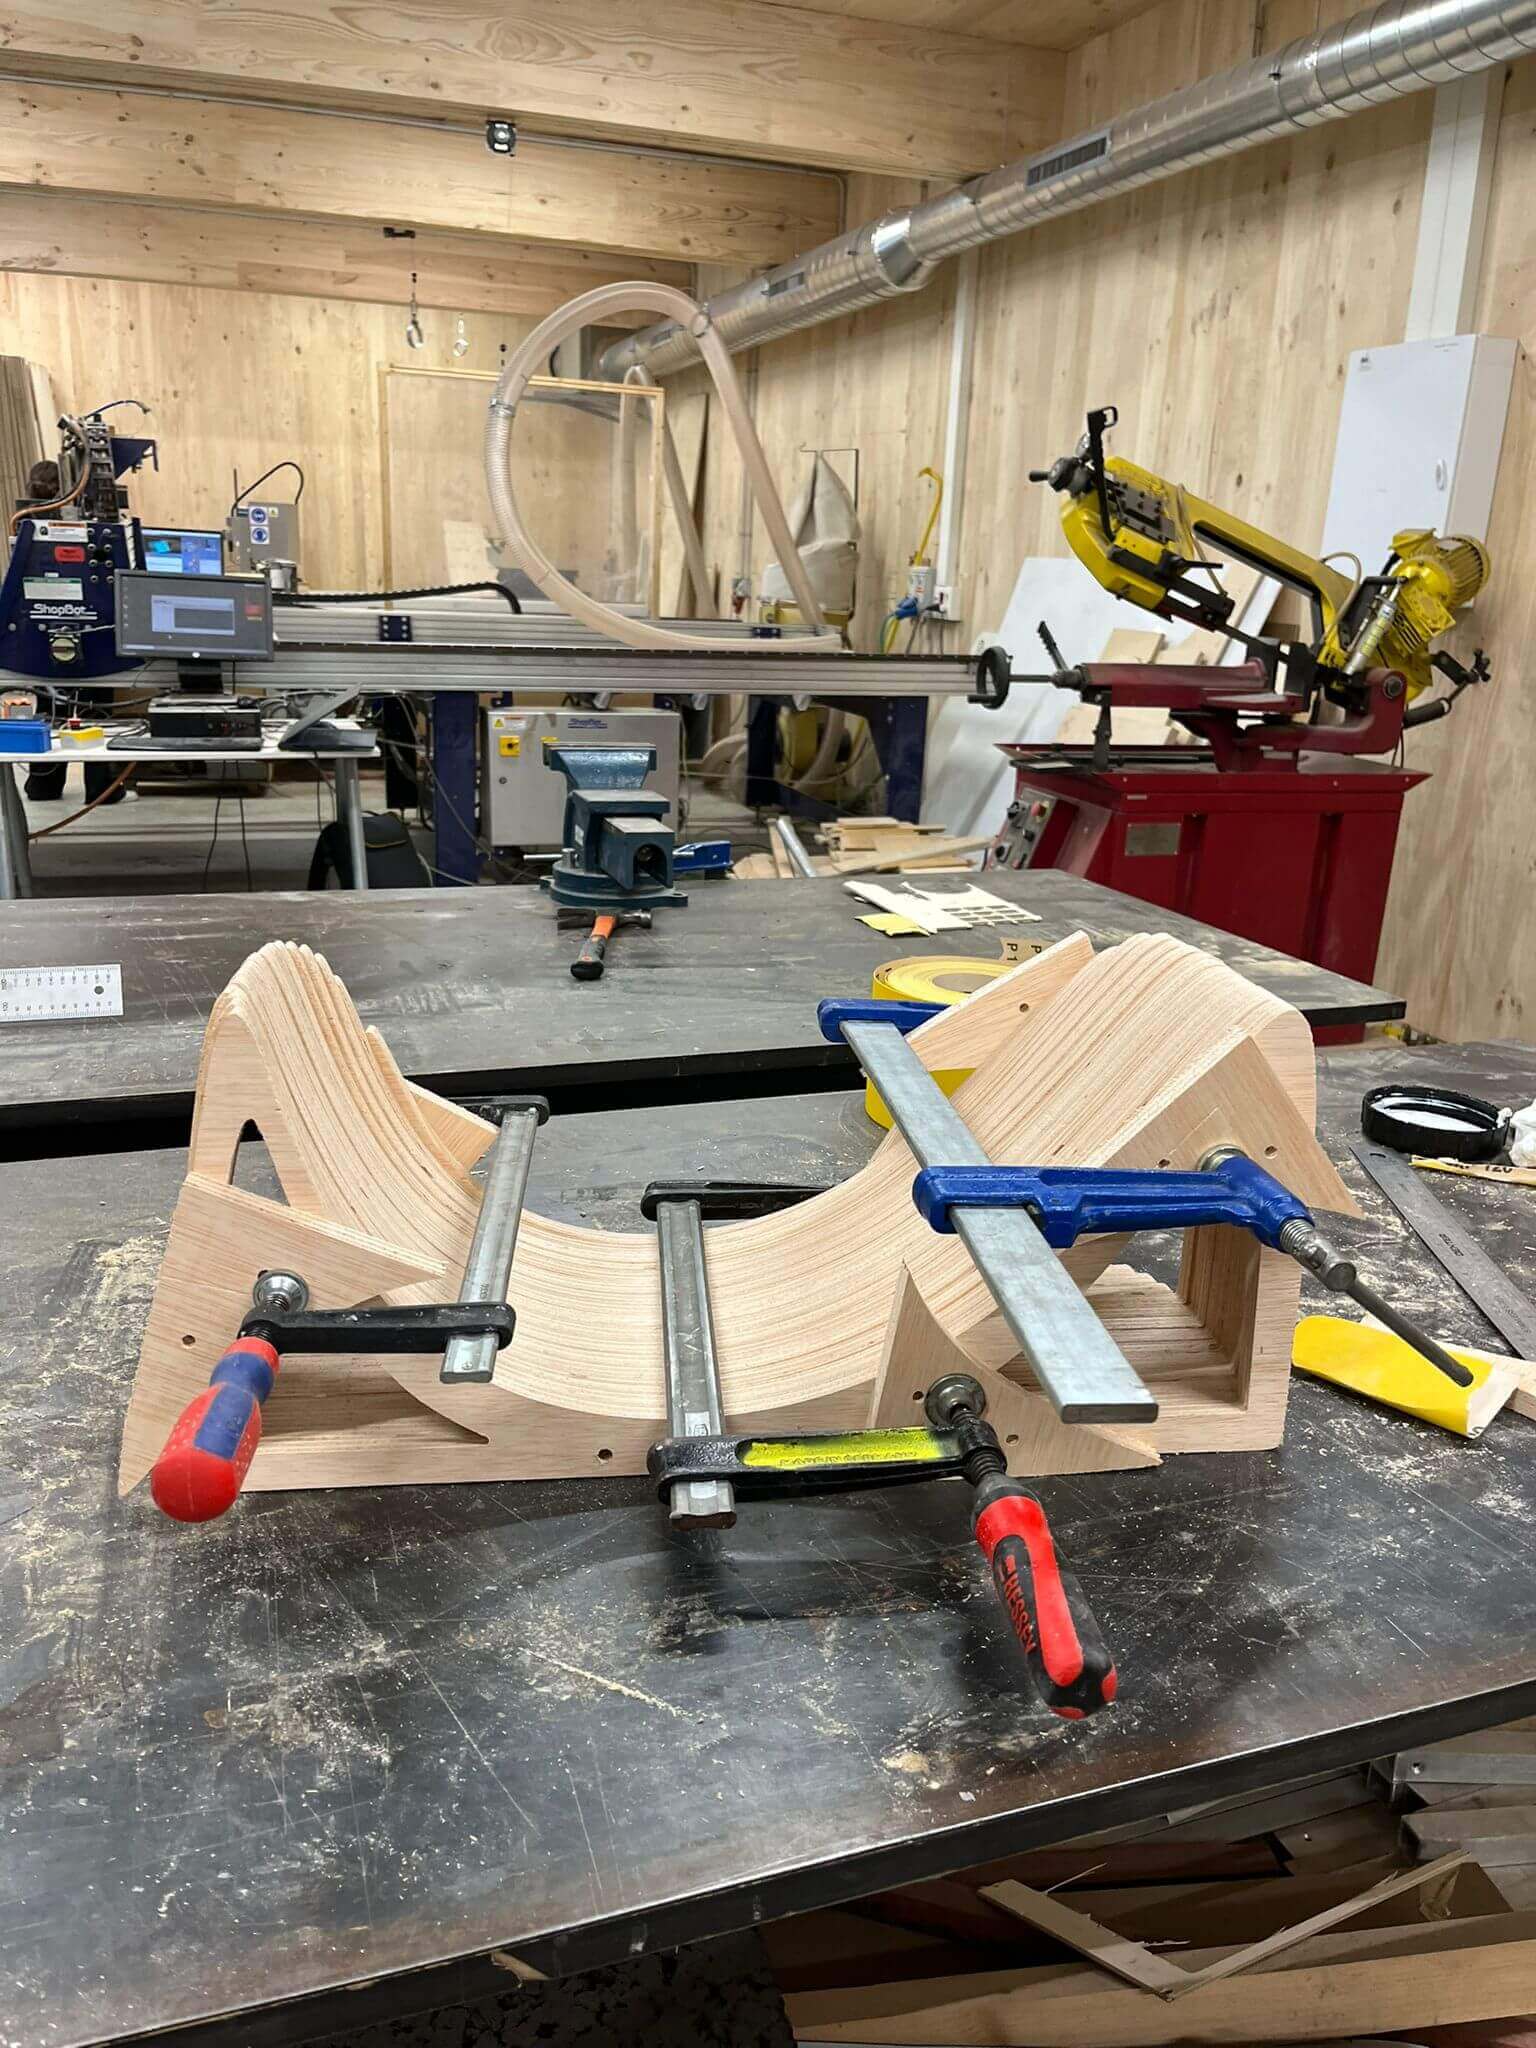
Sanding(manual) + Assembly + Clamping
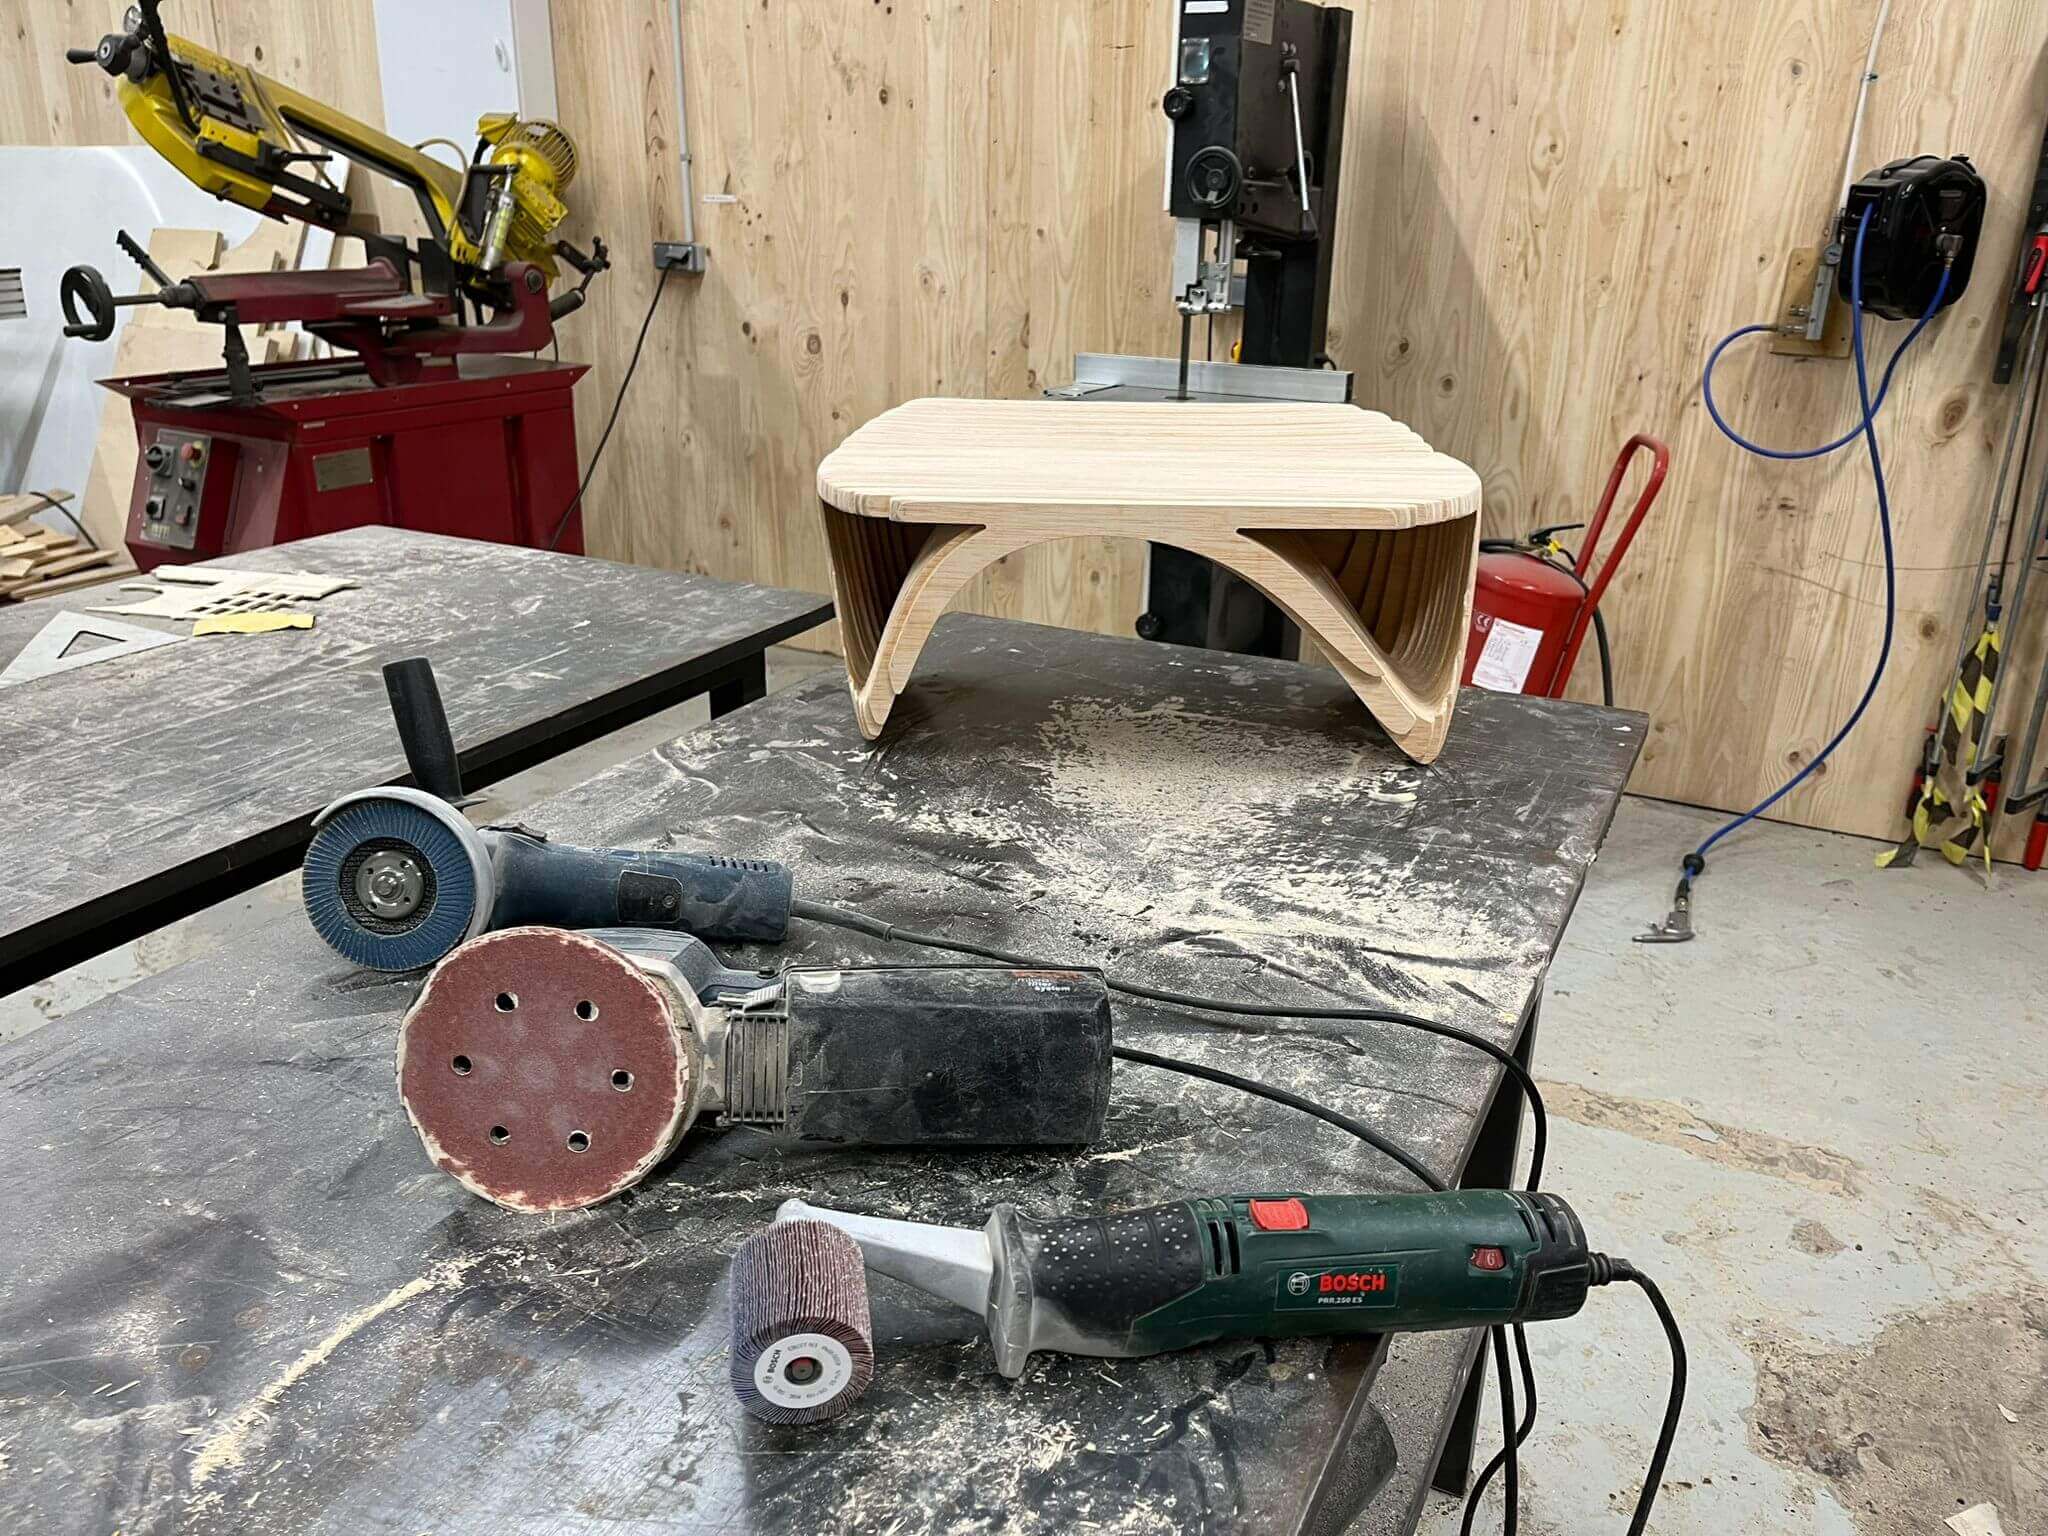
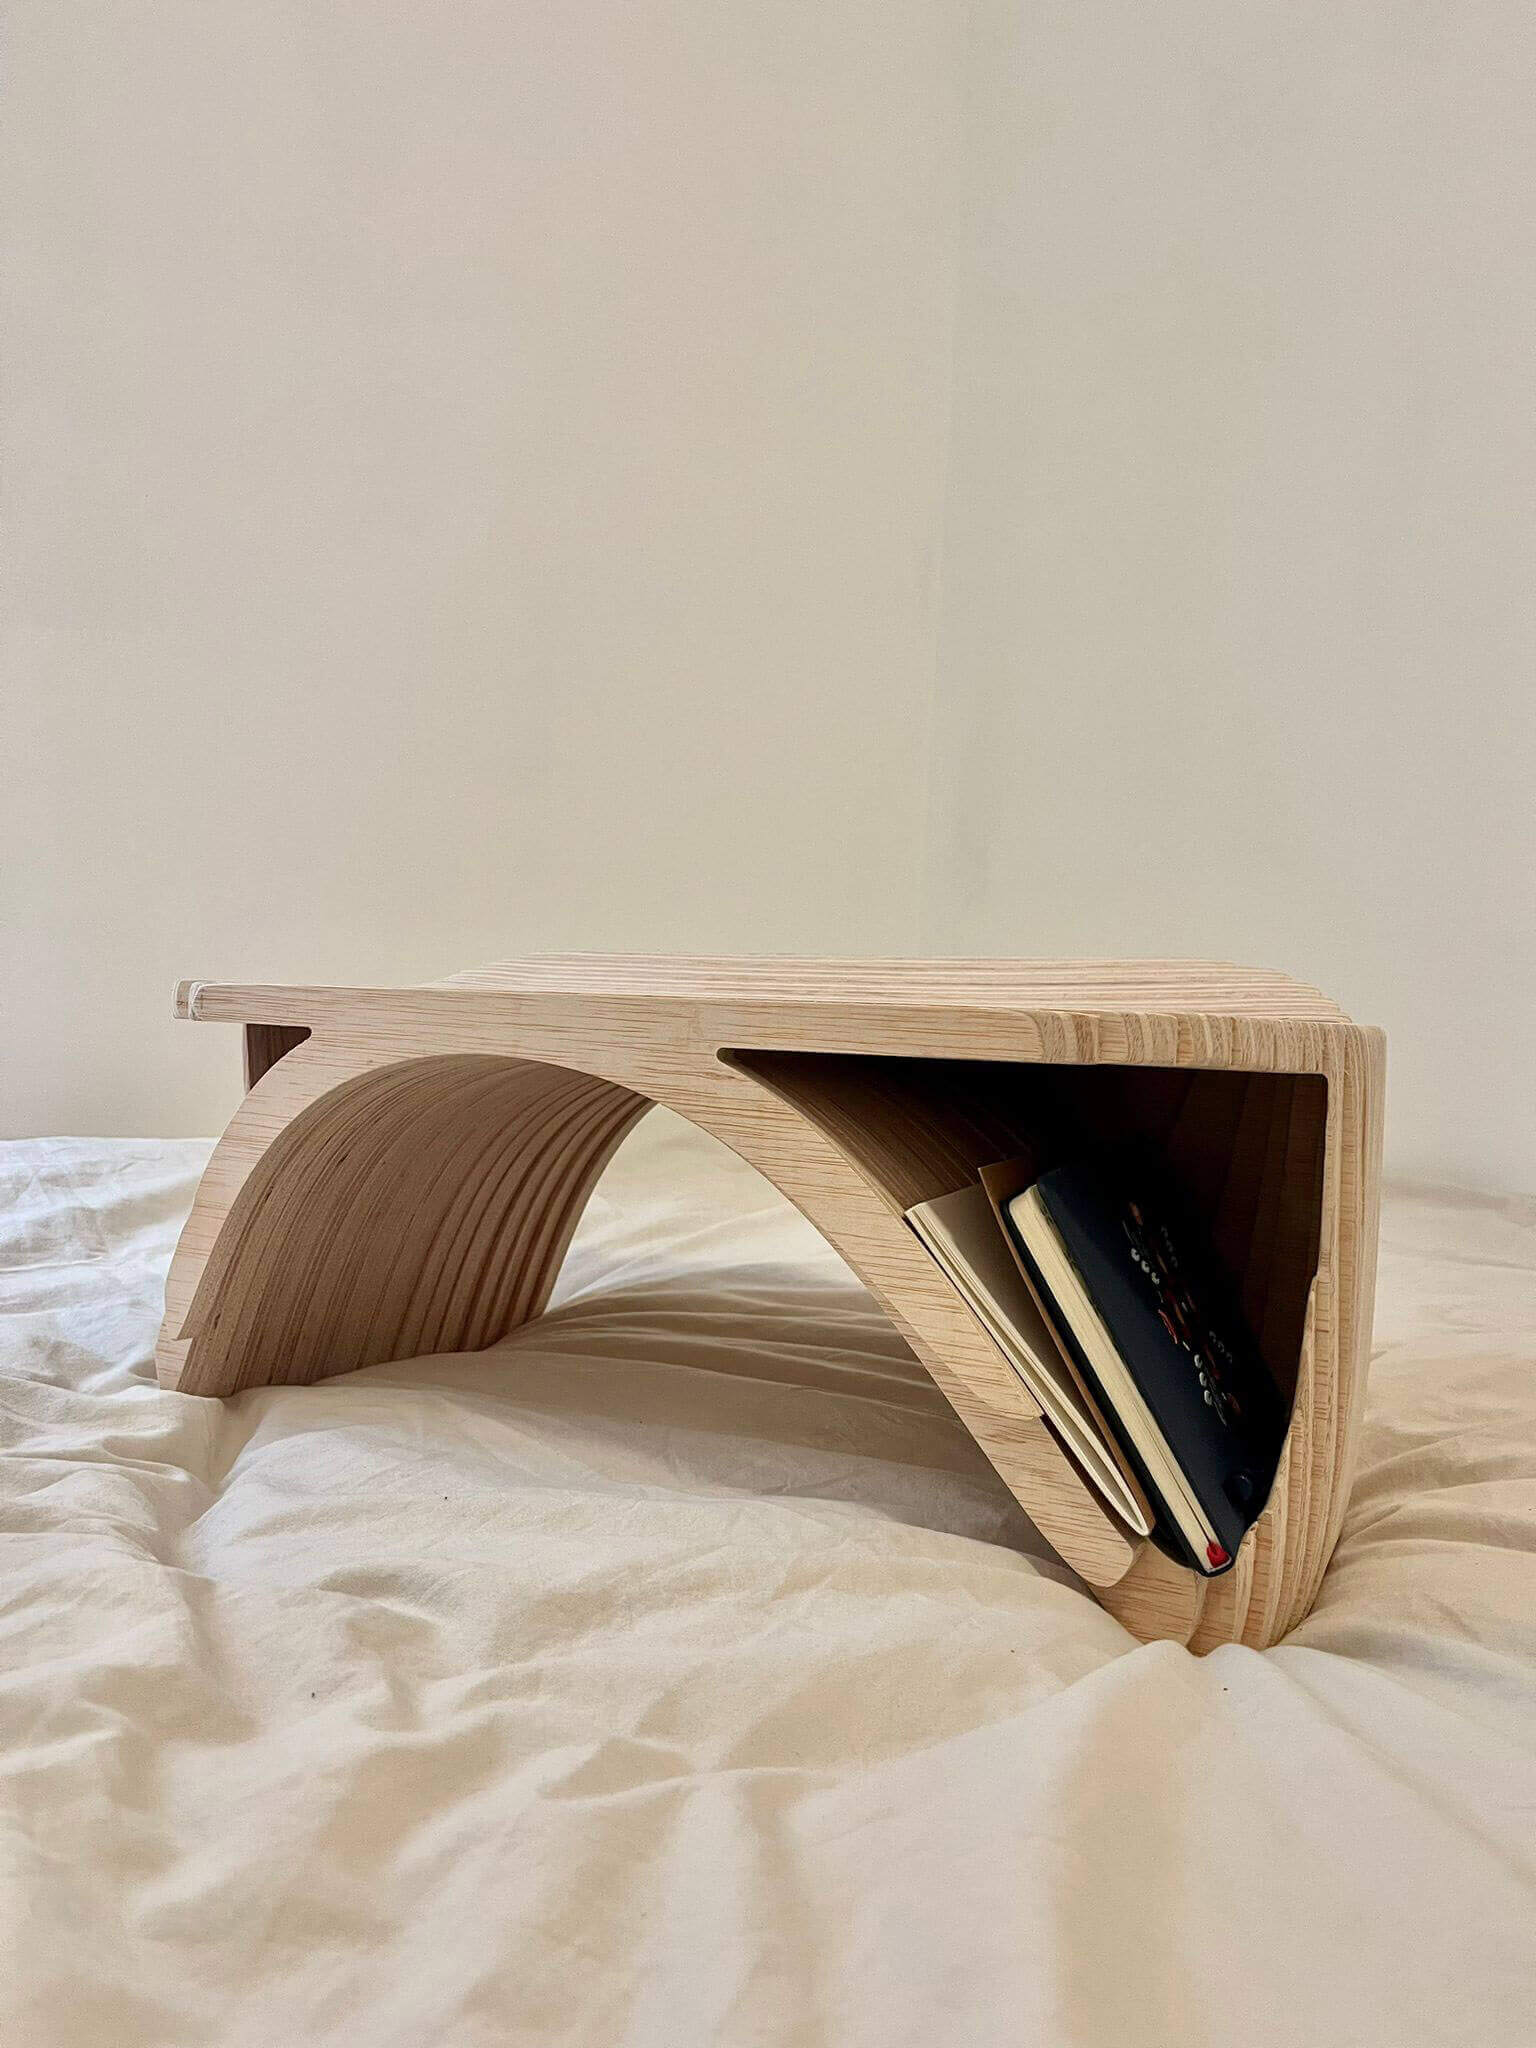
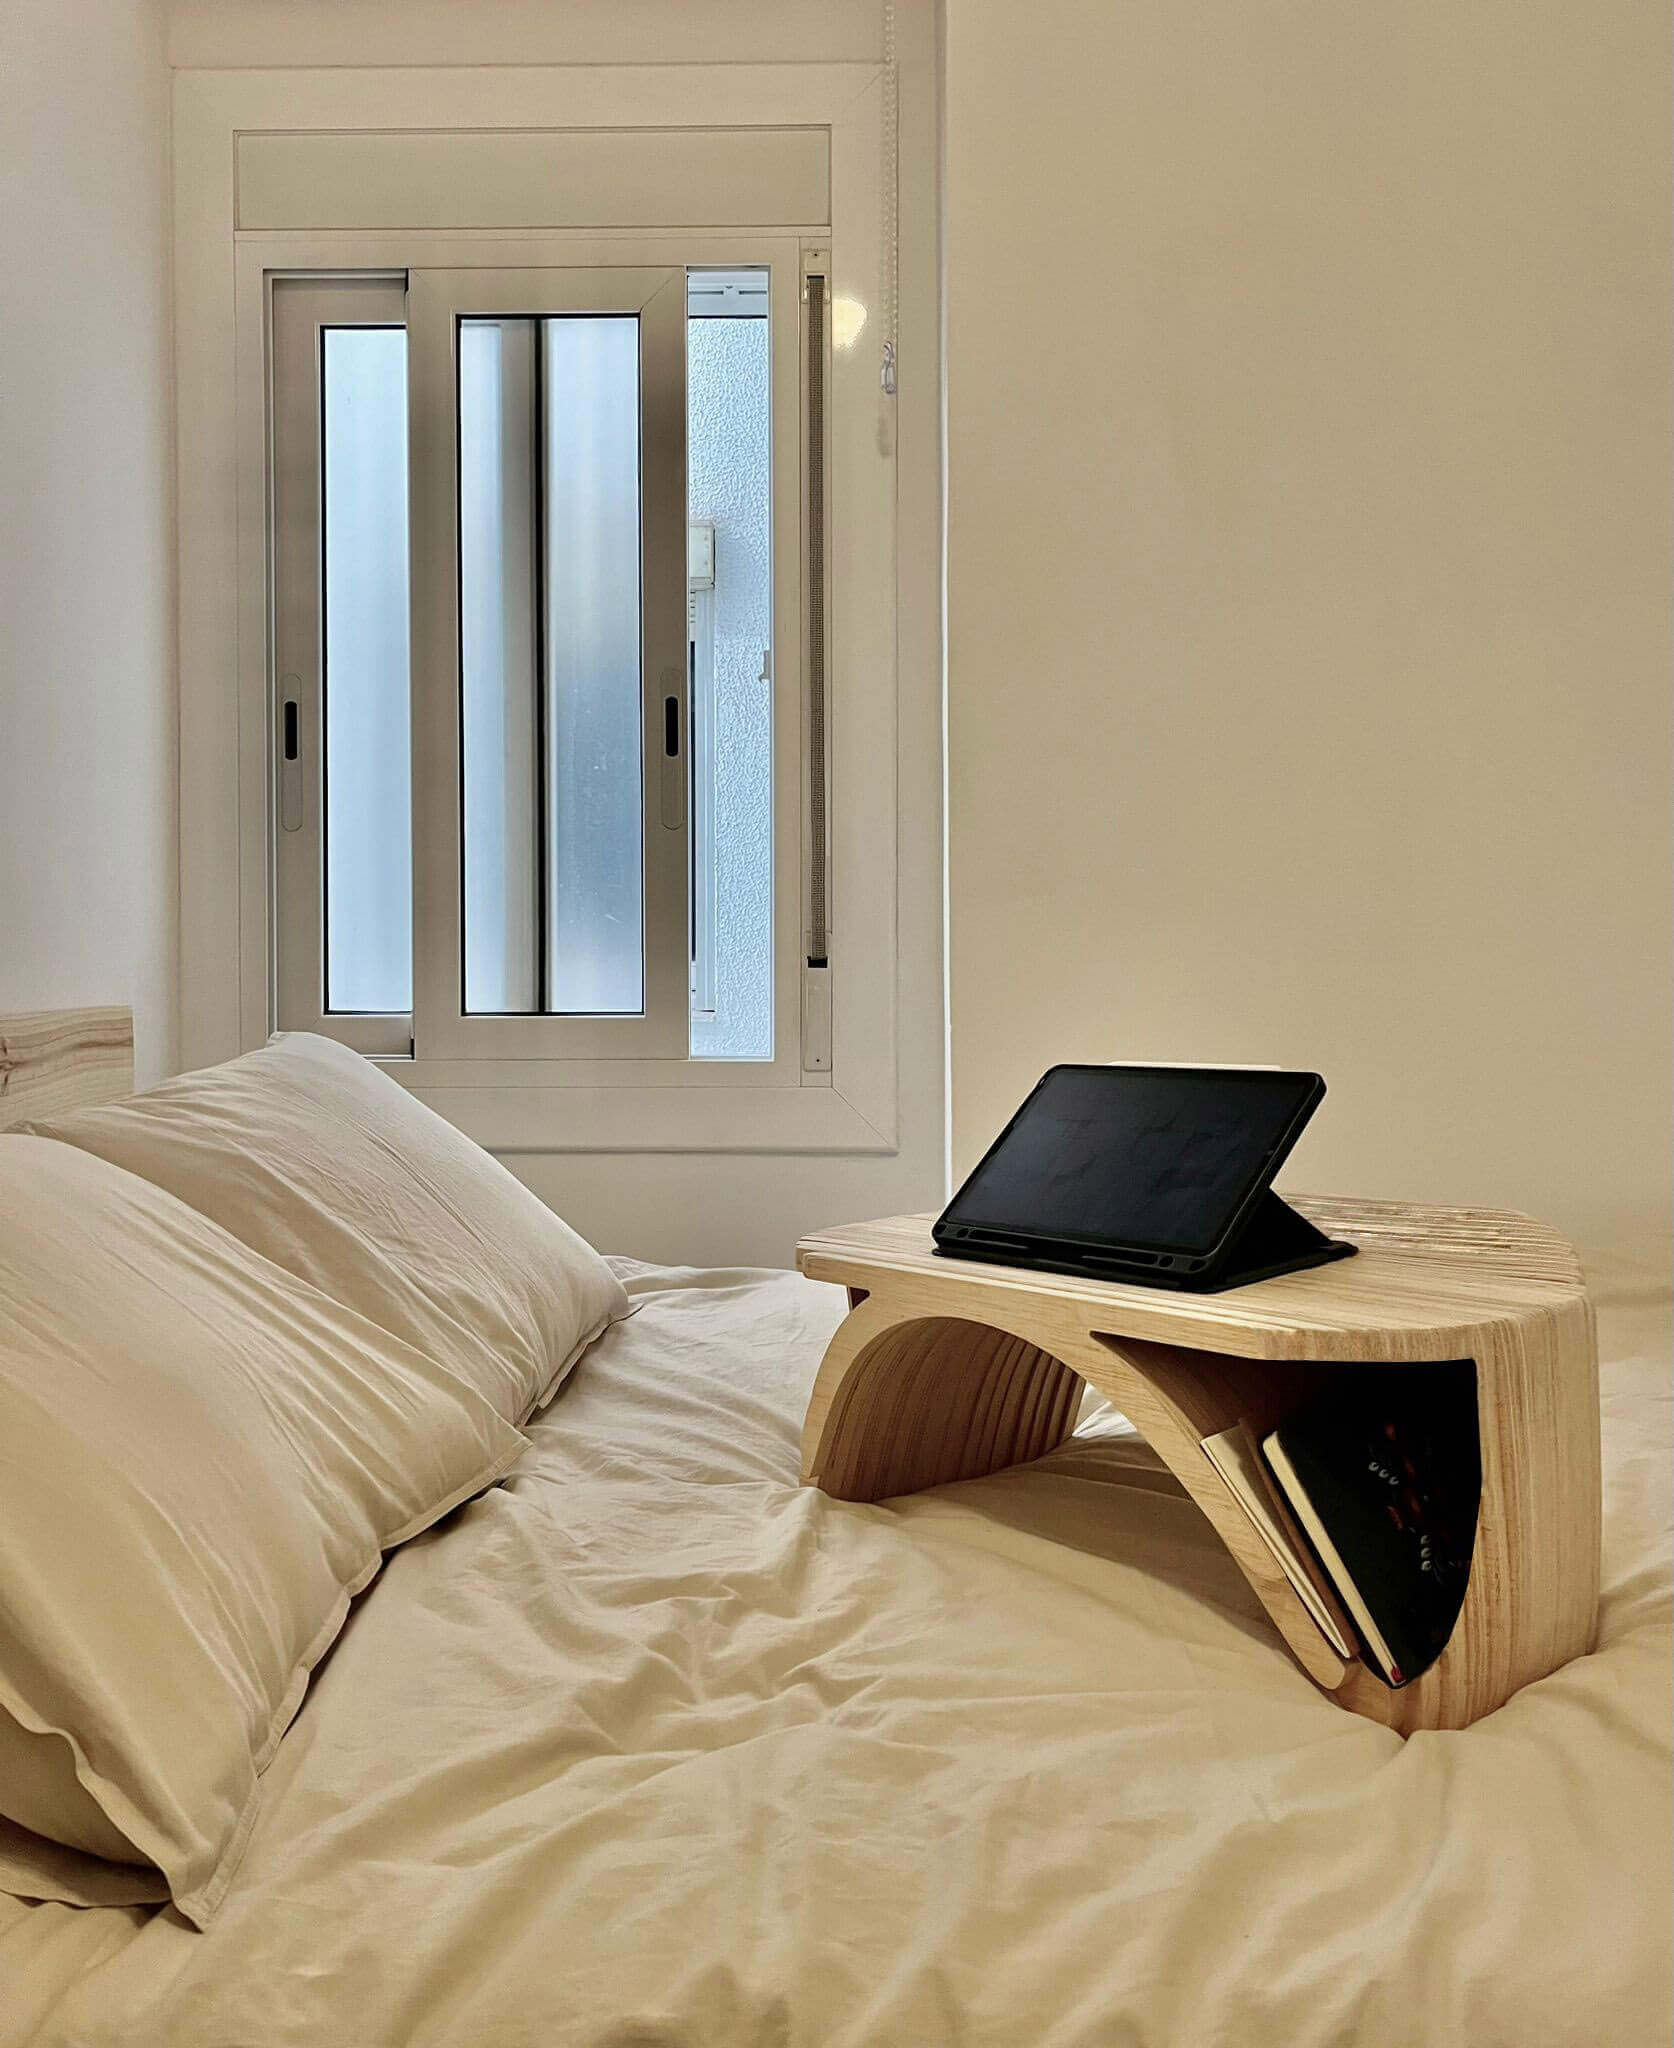
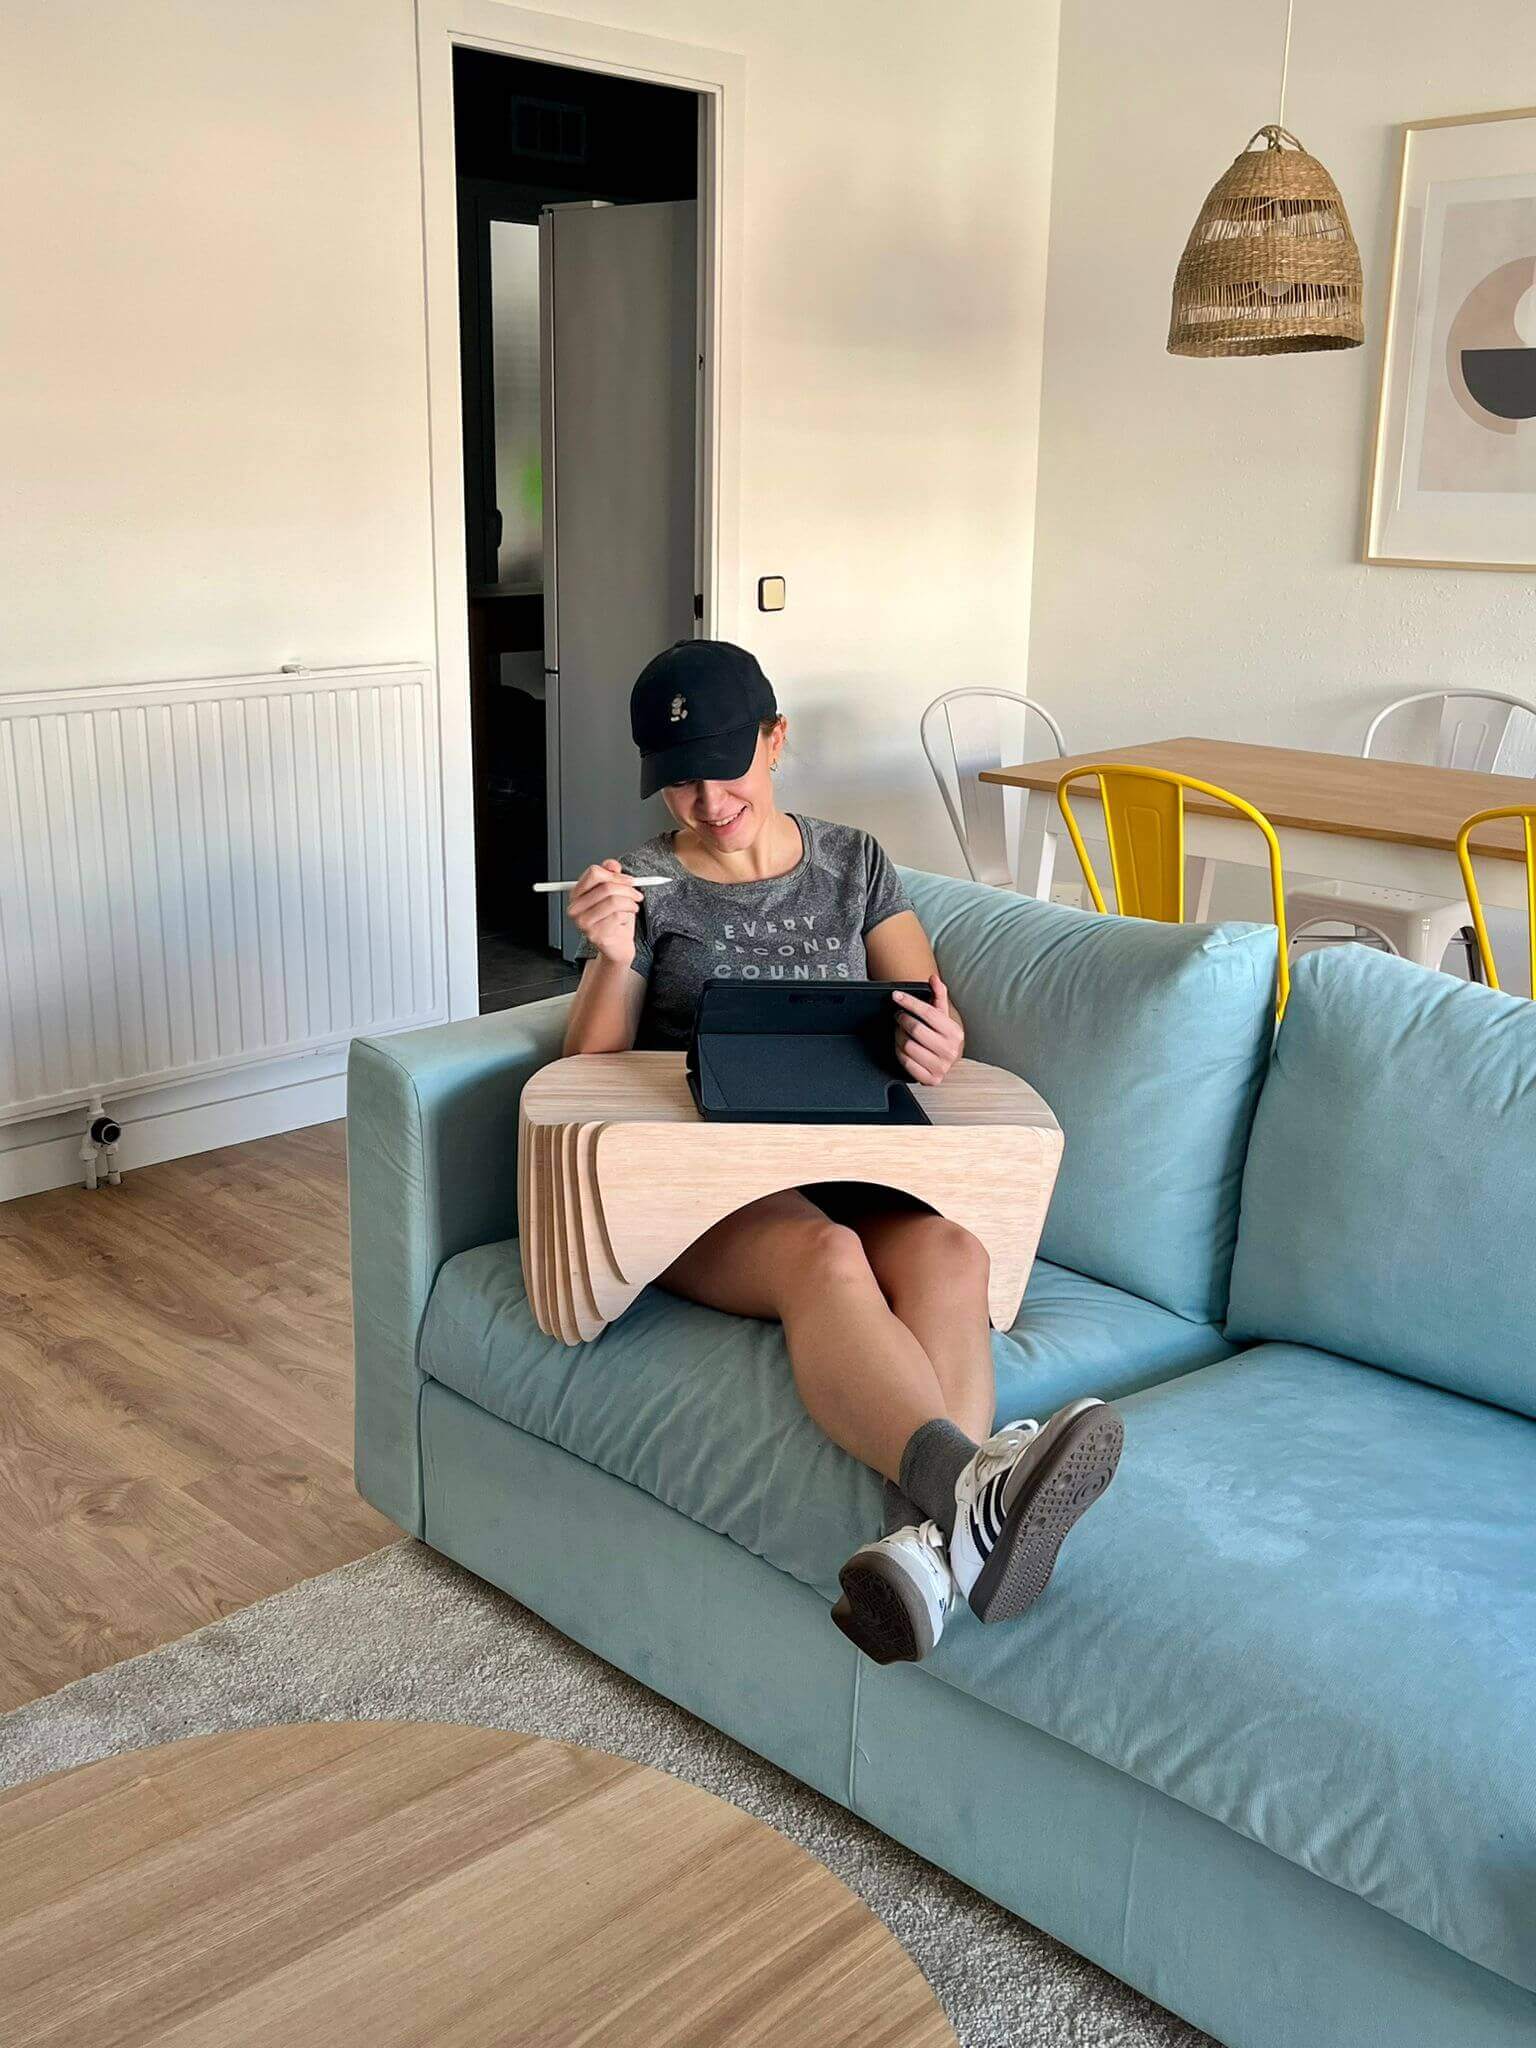
Final Outcome
For more information about the fabrication process, please go to Week 07: CNC.
Input & Output devices
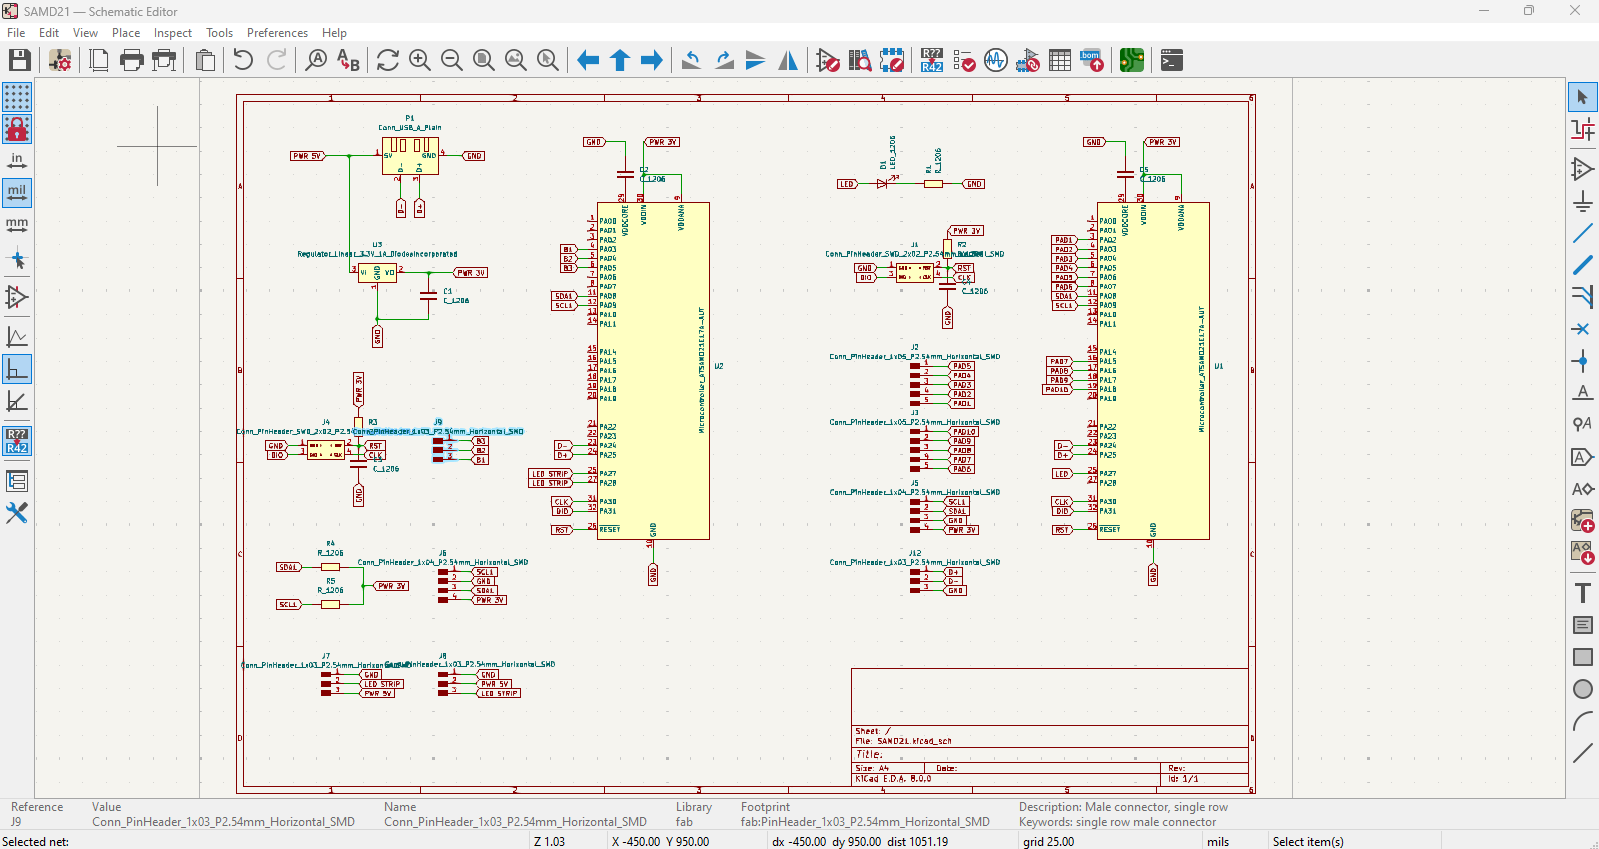
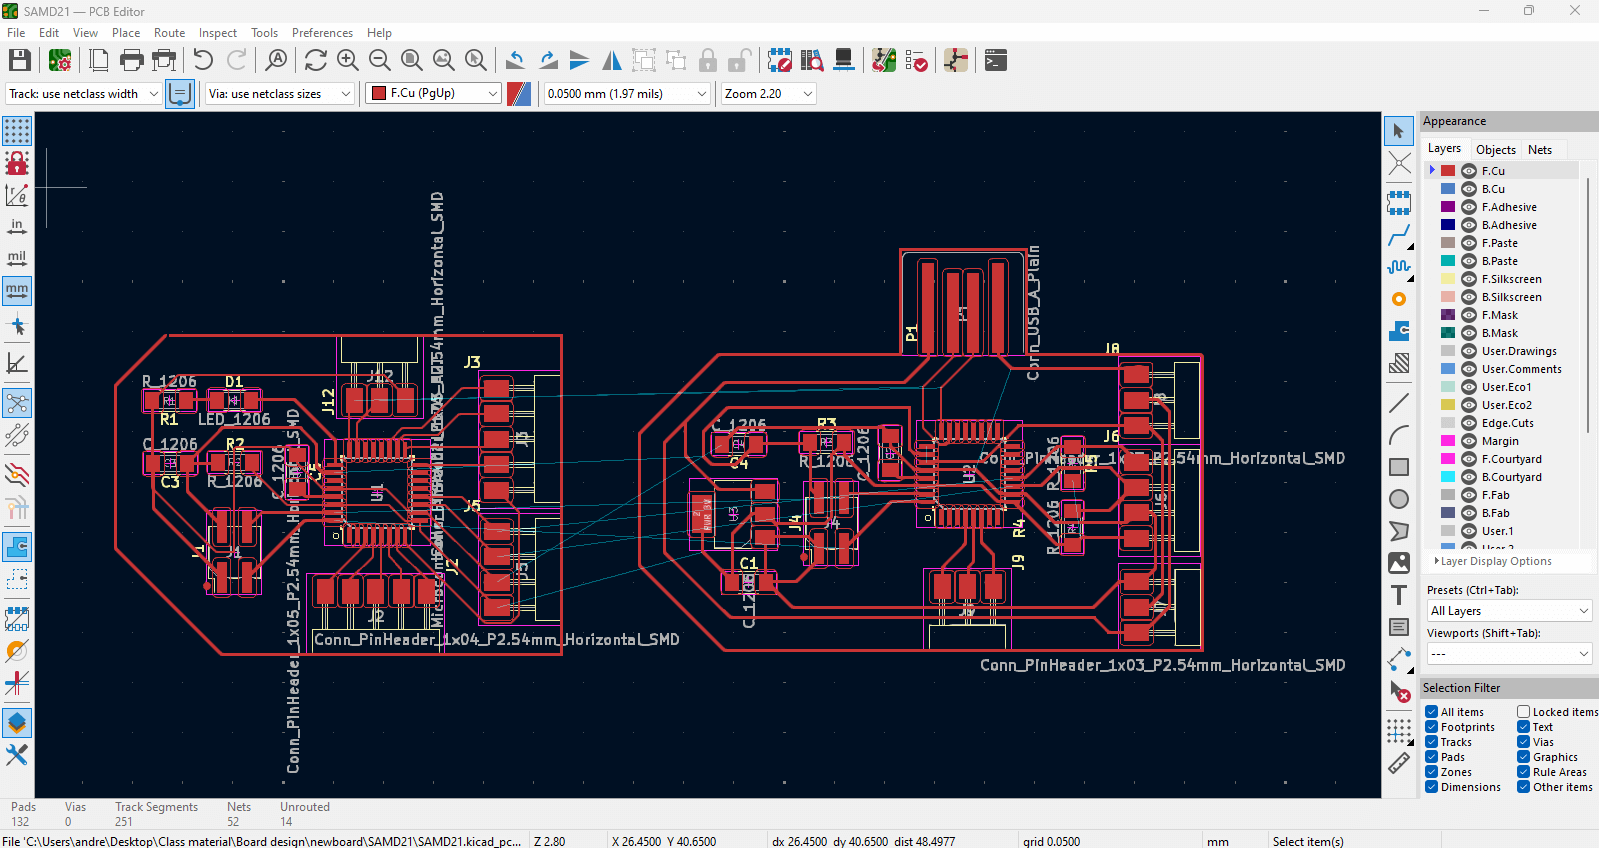
KiCAD: Capacitive touch readings through wood
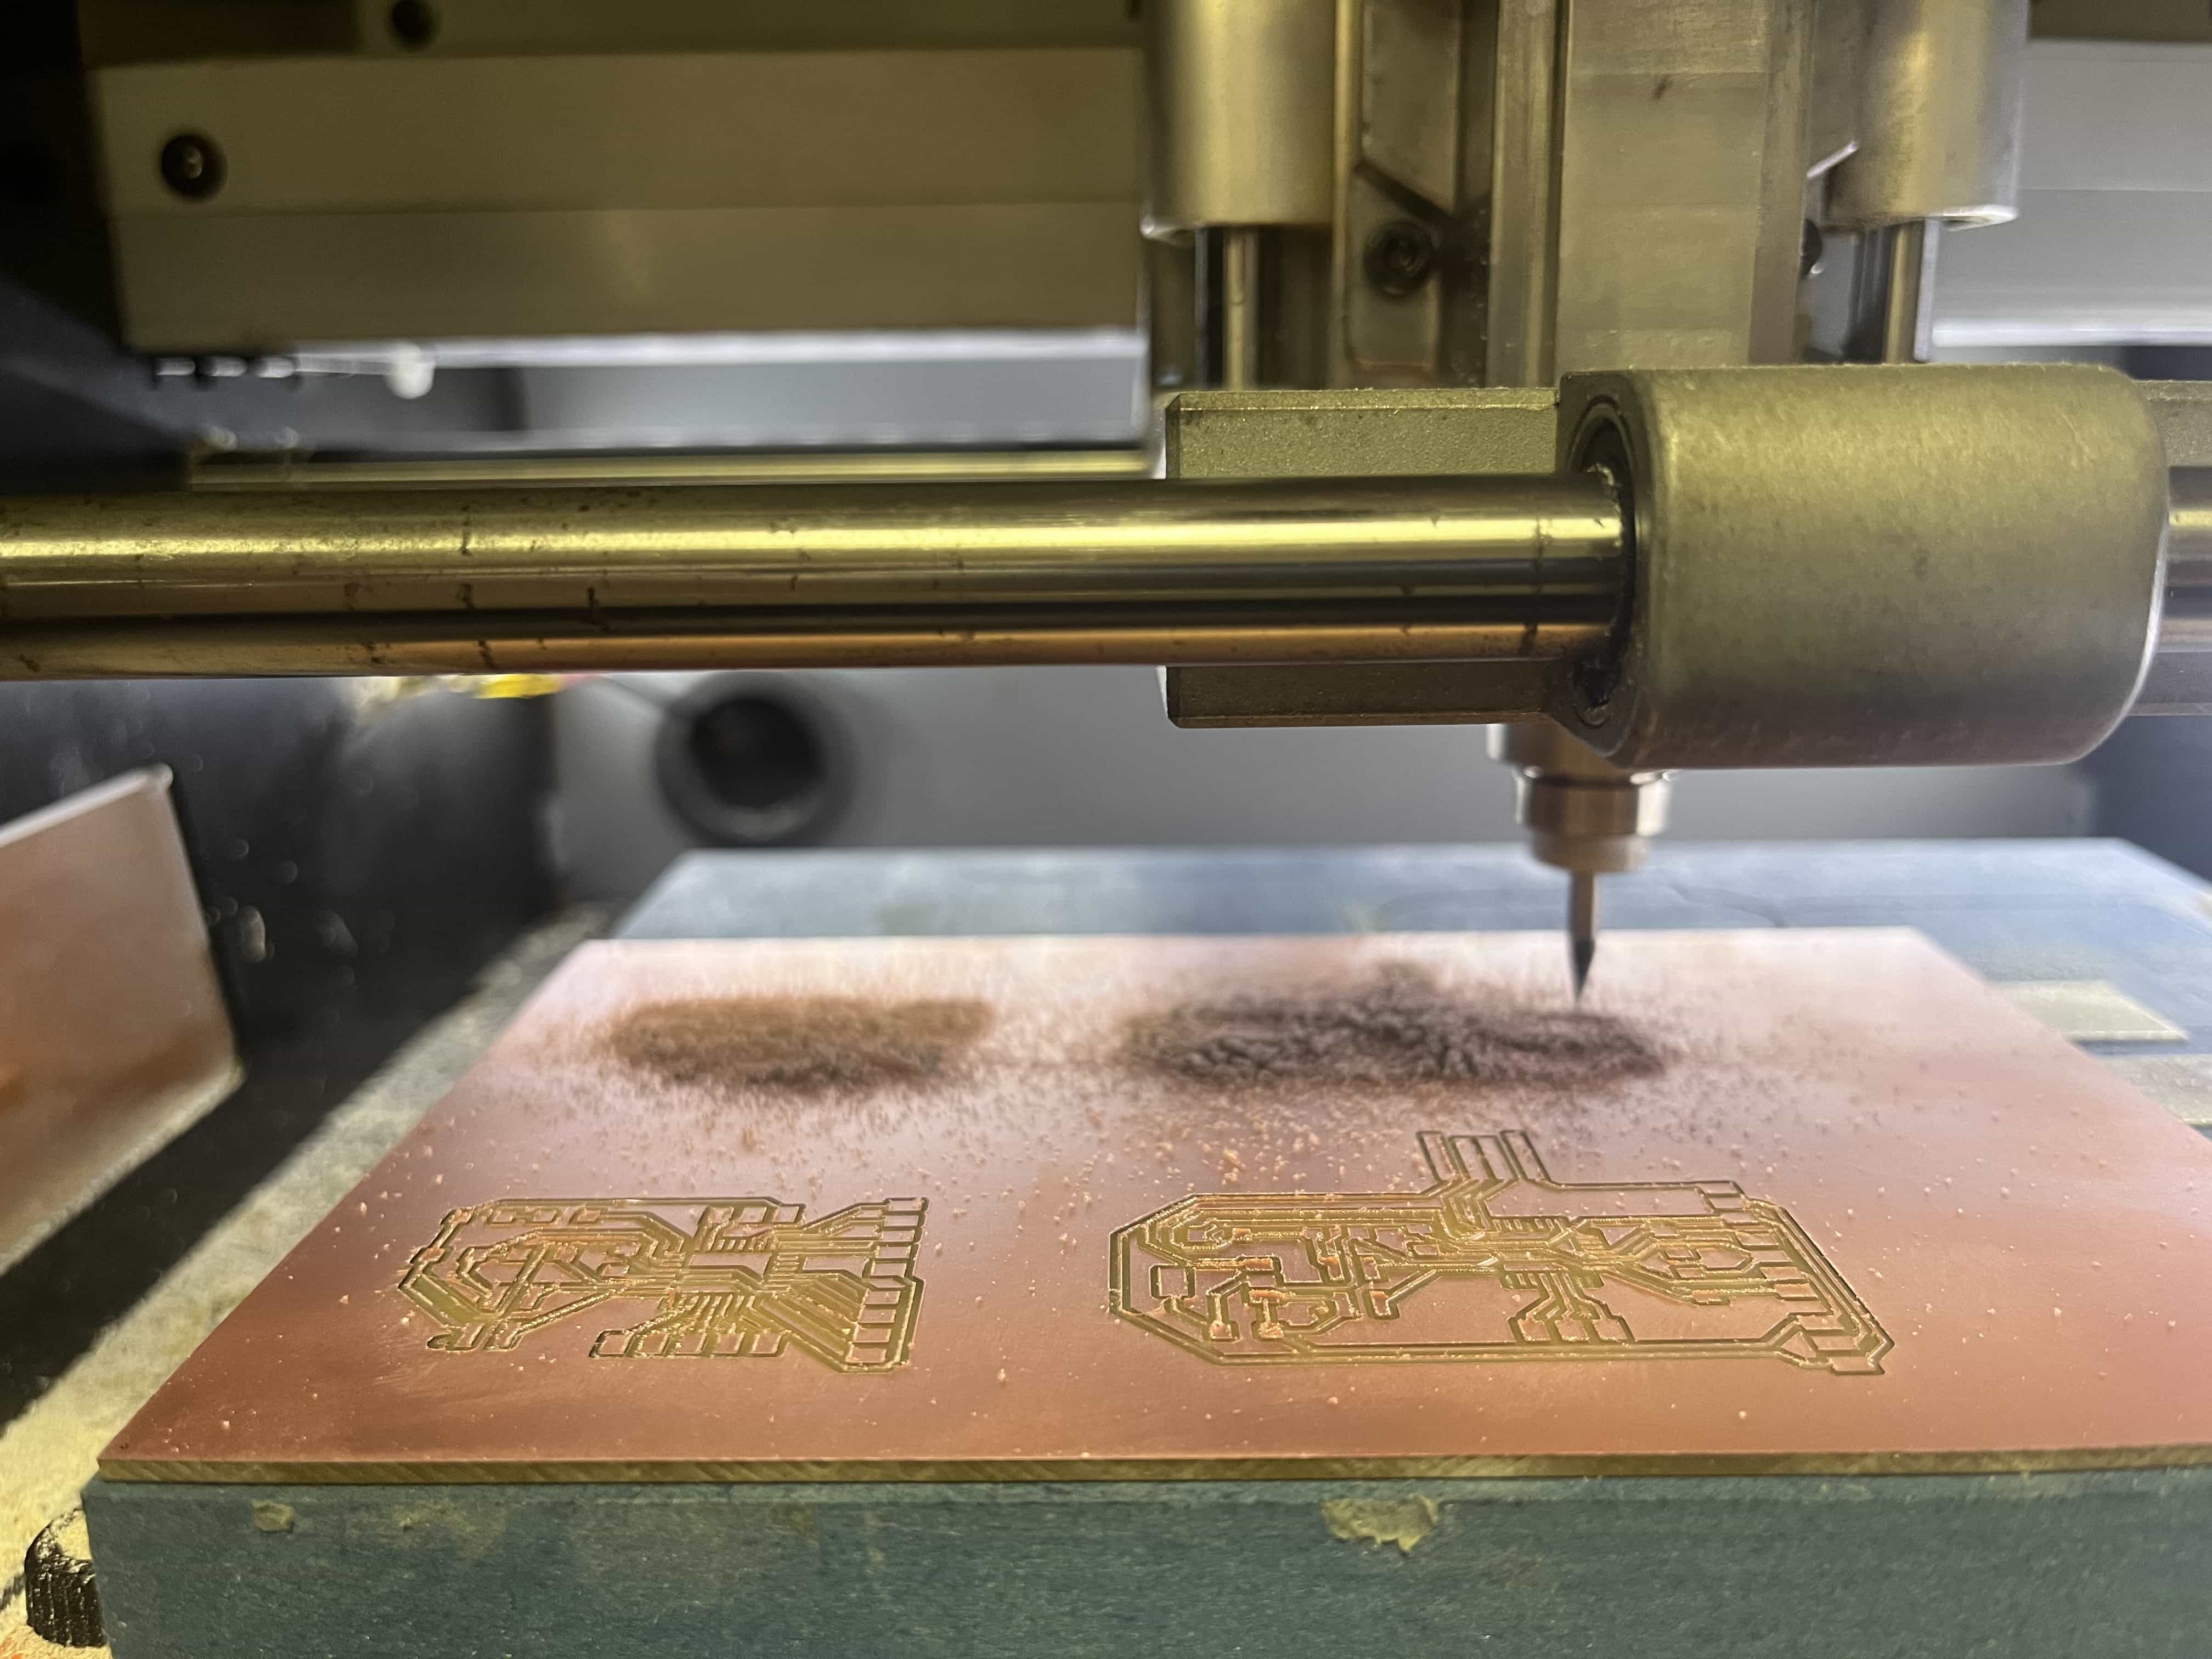
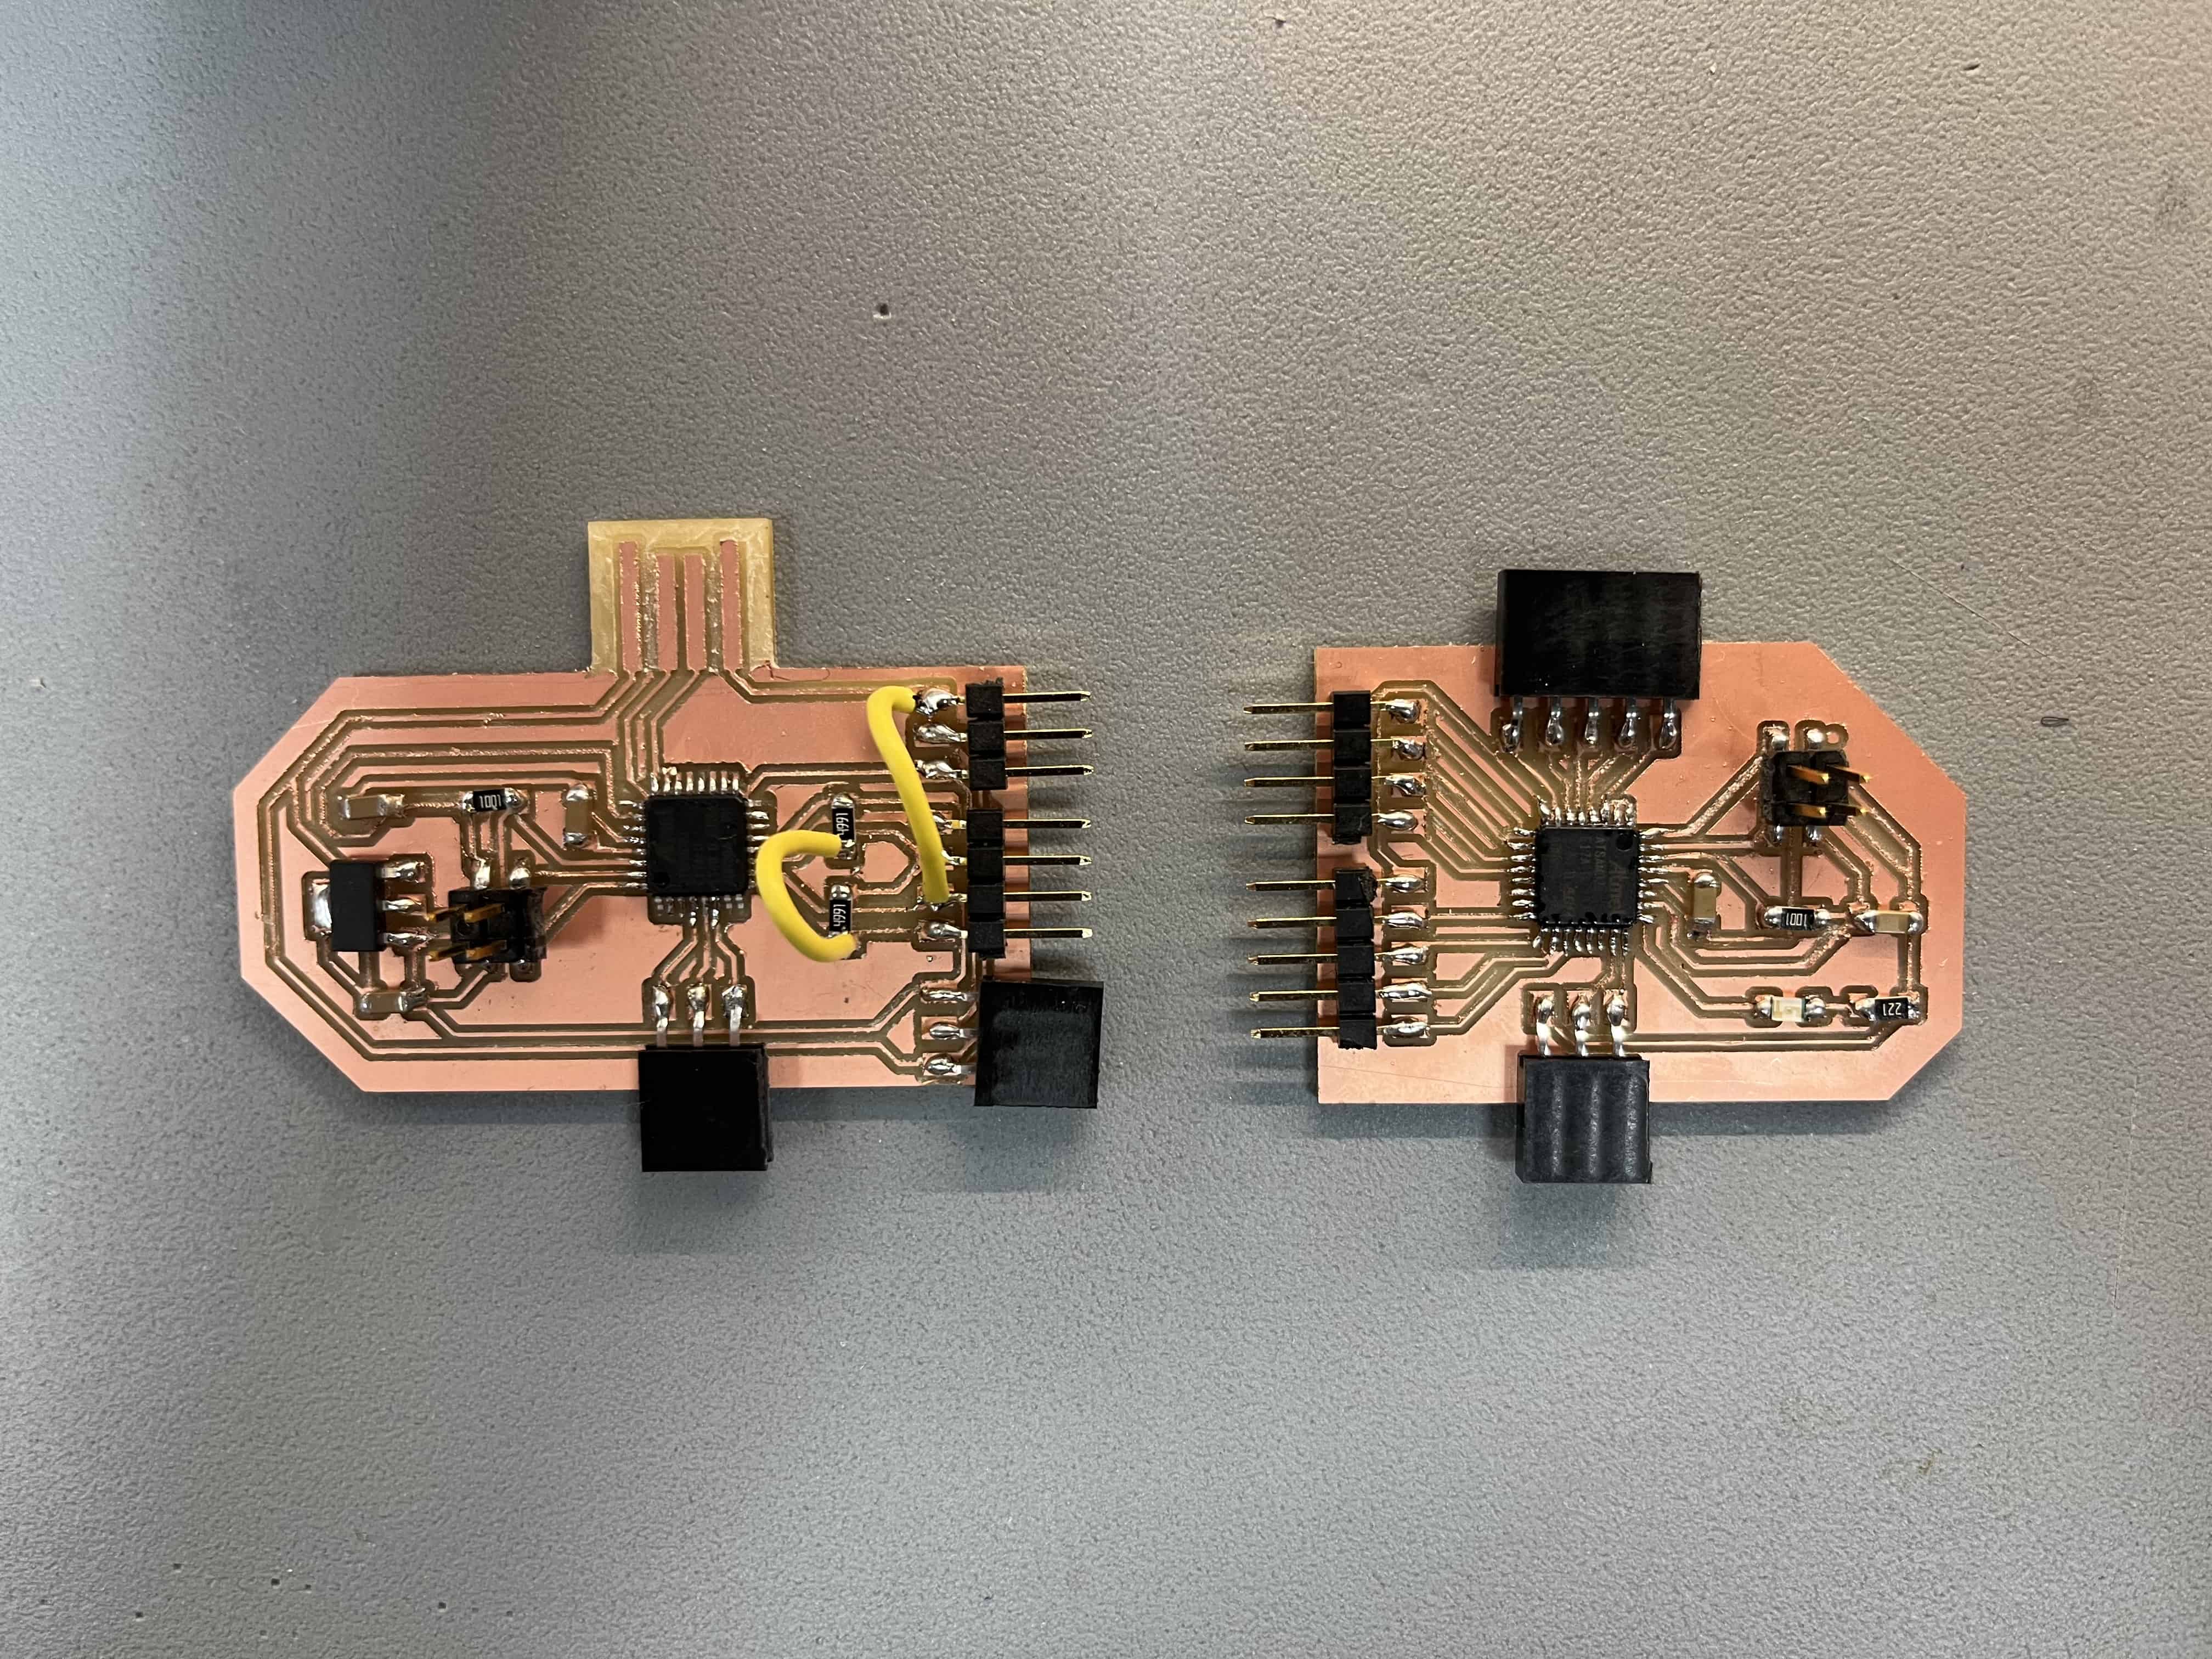
Tracing + Milling + Soldering
1. Arrange and connect components according to schematic design.
2. Before exporting the board check that everything is correct through the "Design Rules checker":
3. Some of the Errors & Warnings are because I haven't drawn the outline of the board and not attached traces for the touch pads.
4. Export board to SVG file.
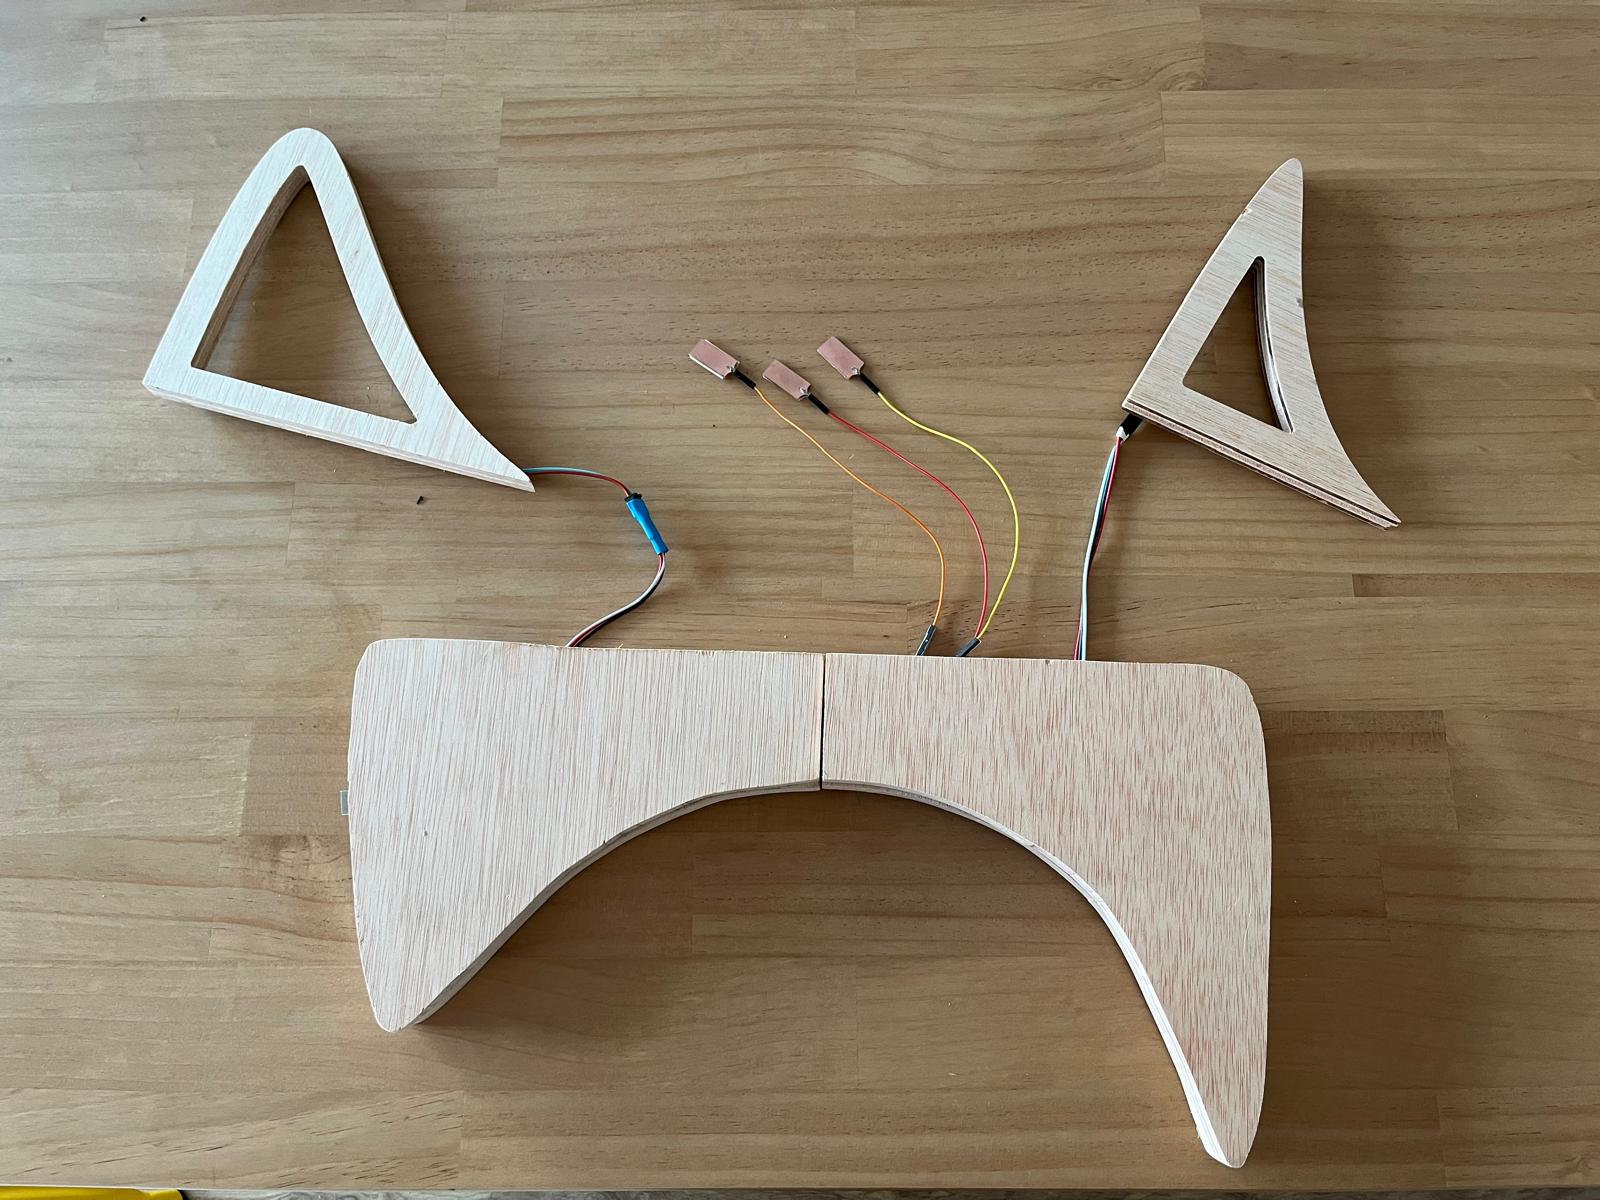
Wood slots + Testing
I worked with the same scraped wood prototype which I later trimmed using a small dremel that I found at the carpentry. I made thin slots in between each lamella of wood in order to fit the copper pads and have a better visualization of the tables aesthetics and functionality.

For more information about the SAMD21 and Arduino IDE programming, please go to Week 11: Input devices.
System Integration
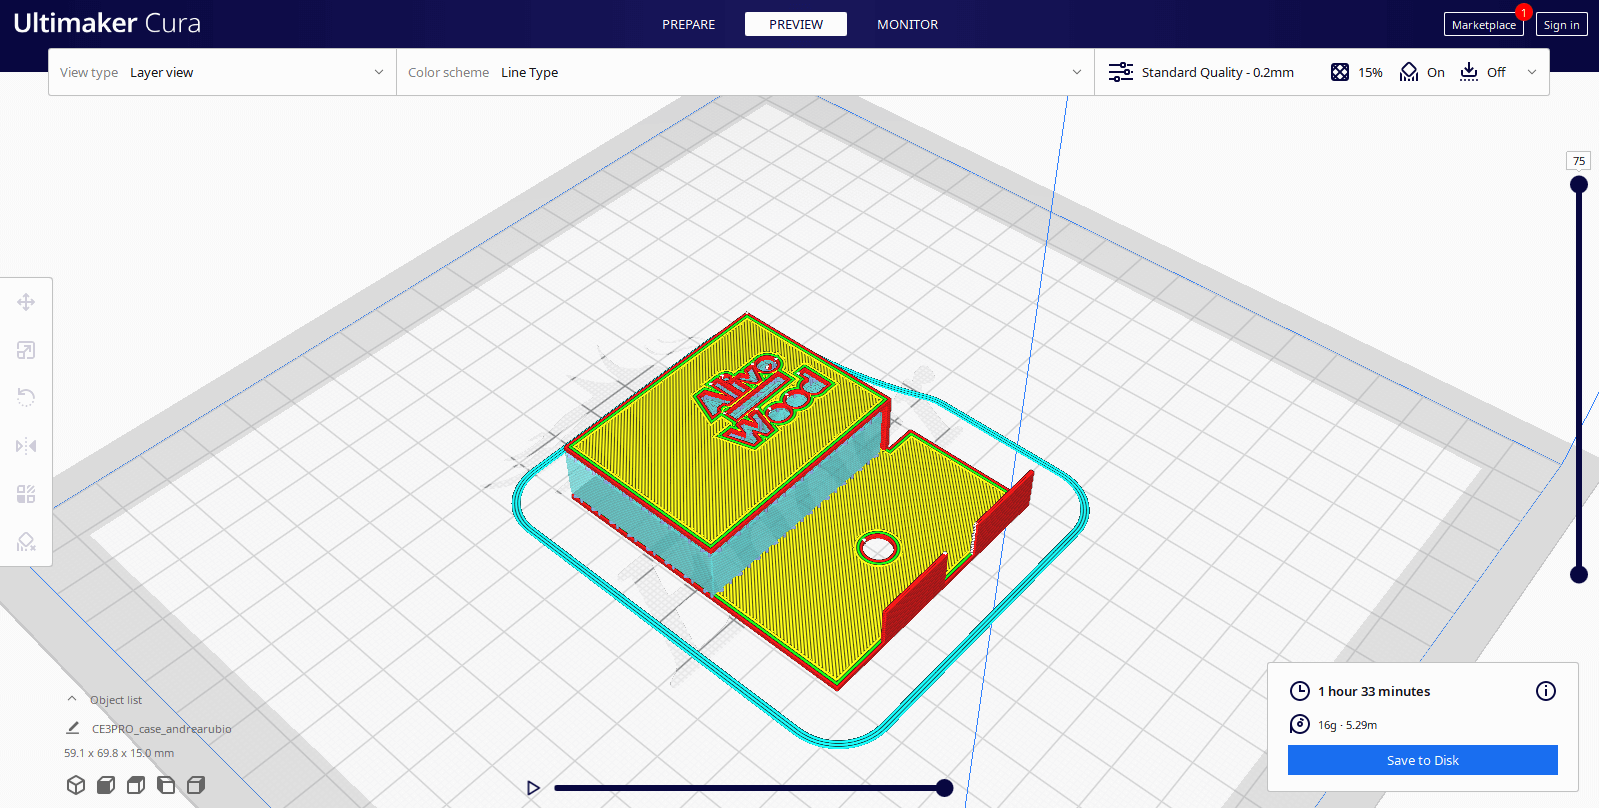
3D printing electronic case
The next step involved preparing the 3D model for printing using Ultimaker Cura. The slicing process optimized the model for 3D printing, ensuring the case would be printed with the necessary precision and strength.
Once the slicing was complete, the case was printed, providing a durable housing for the PCB and other electronic components.
3D Printing: PCB case
The next step was preparing the 3D model for printing using Ultimaker Cura. The slicing process optimized the model for 3D printing, adjusting parameters such as print quality, infill density, and estimated print time.
Once the model was ready, the 3D printing process began with Creality Ender Pro 3 printer using PLA. The video shows the process in action, where the printer builds the case layer by layer.
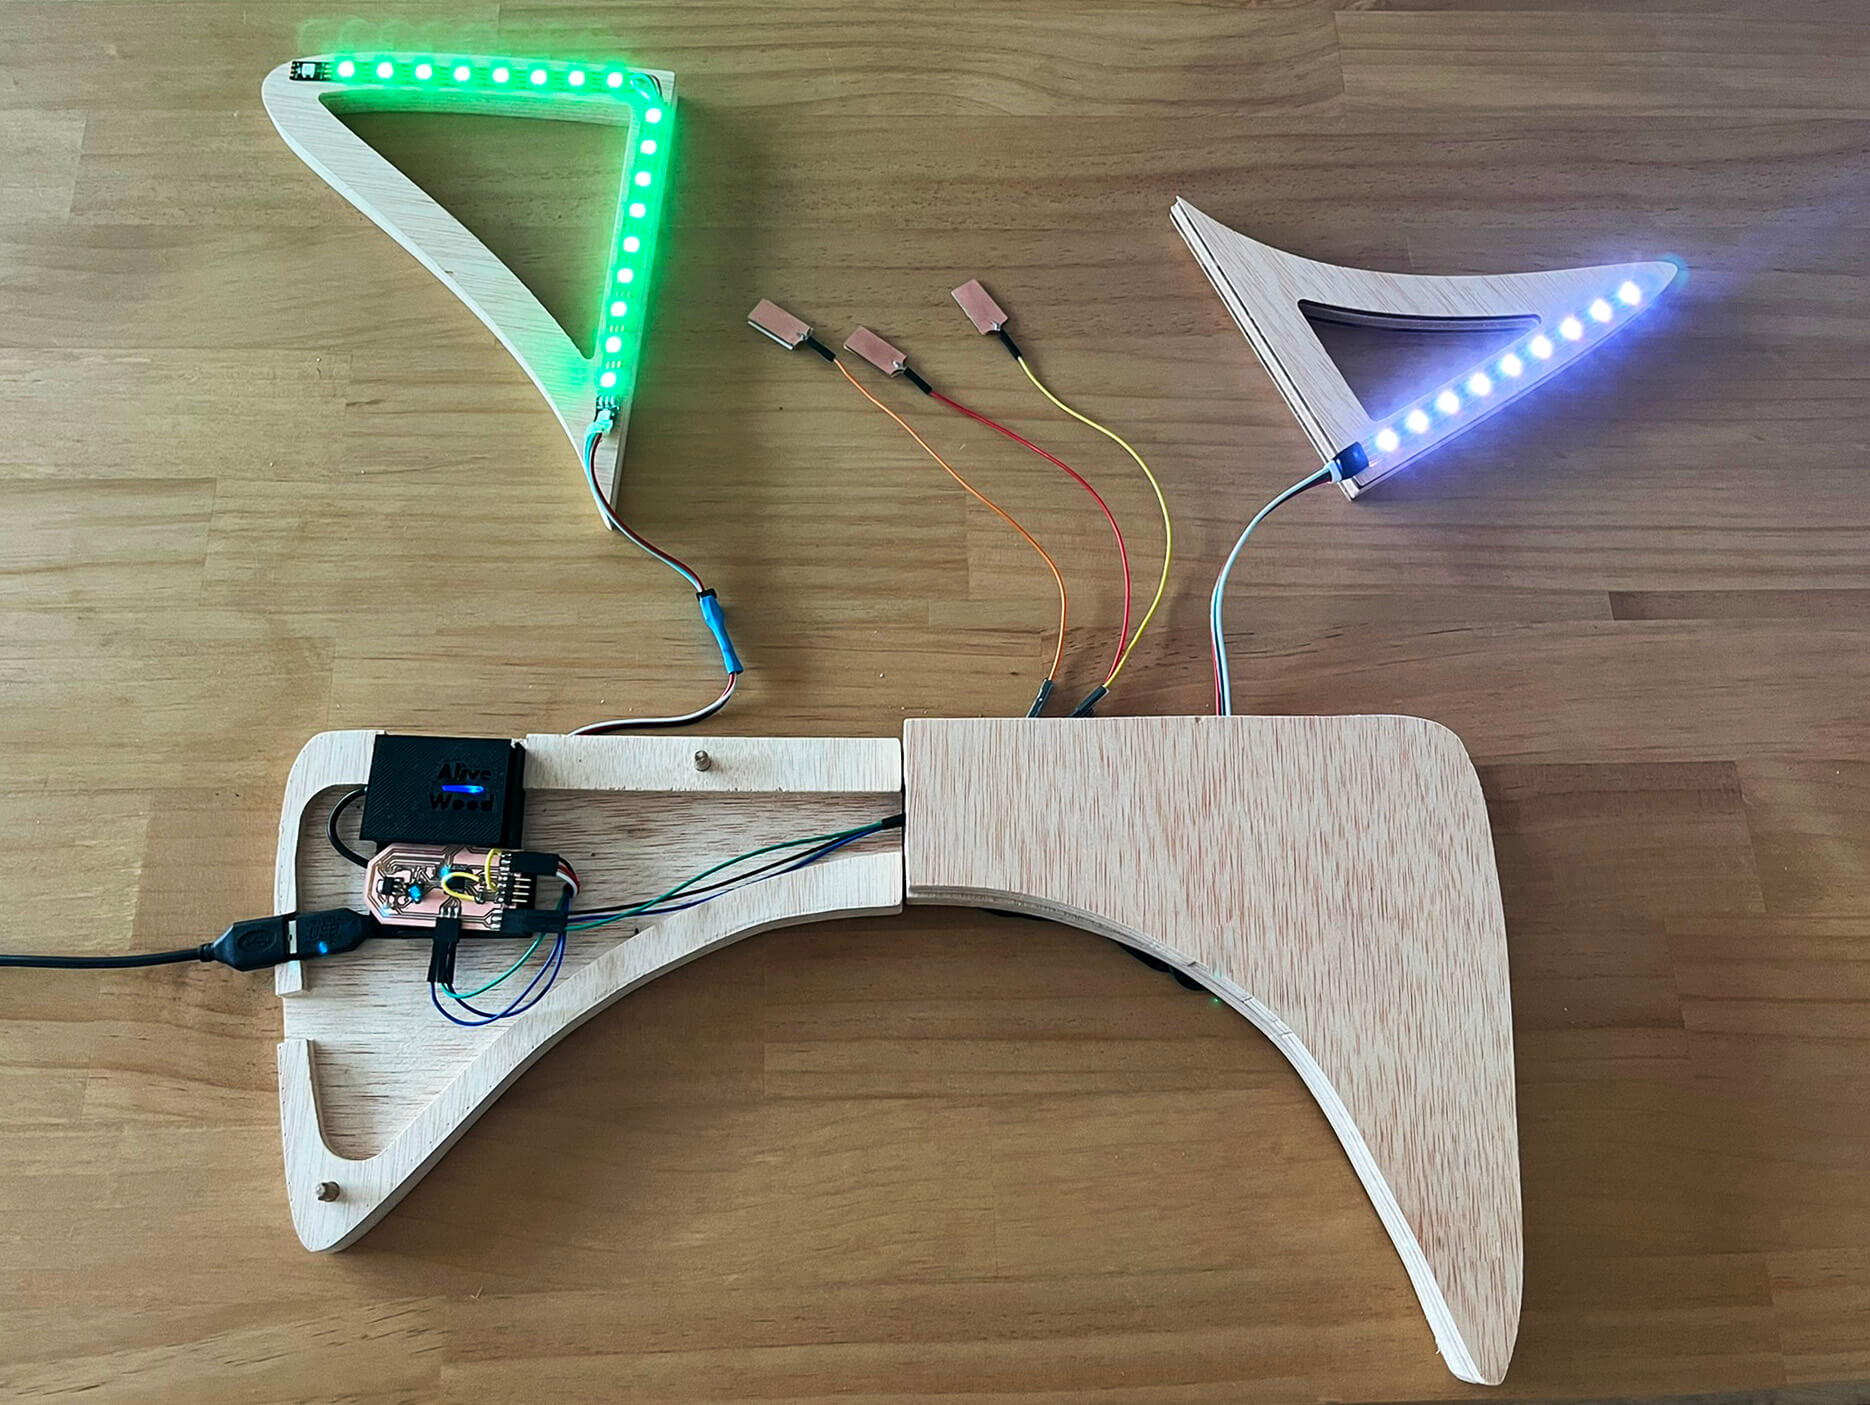
CNC main wood case
After preparing the wooden structure and 3D-printed case, the components were assembled. The PCB was secured in the case, and wiring for the capacitive touch sensors and LED strips was meticulously arranged to ensure functionality and aesthetics.
The finished product featured a sleek design with all the interactive elements seamlessly integrated but with easy access in case of maintainance.
For more information about the process, please go to Week 16: System Integration.
Applications & Implications
How much will it cost?
For more information about the Implications, please go to Week 17: Applications & Implications.
Invention, Intellectual property and Income
Dissemination plan
For AliveWood I have no commercial intentions, but mainly to use it as part of a class or excersice on an educational program that promotes hands-on learning and fabrication methods. In that case, I would need to use: ATTRIBUTION-NONCOMMERCIAL-SHAREALIKE 4.0 INTERNATIONAL license.

You are free to:
For more information about the license, please go to Week 19: Invention, intellectual property and income.
Resources
Josep Martí // Fab Lab Barcelona lead instructor
Adai Suri // Fab Lab Barcelona instructor
Julia Leirado // Fab Lab Barcelona instructor
Santi Fuentemilla // Fab Lab Barcelona coordinator
Philipp Wienkamper // IAAC Fabrication Laboratory
Dídac Torrent // IAAC Fabrication Laboratory
Files
Download Rhino + GH + CNC in ZIP package here.
Download KiCAD and SVG in ZIP package here.
Download Arduino IDE code here.