16. Wildcard Week - Composites
This week is wild card week where we can choose what topic to focus on and what requirements my assignemnt needs to meet.
I have decided to focus on composites this week and create a part of my final project.
Requirements:
Inspiration
We were initially planning to make a wood veneer however the possibility of incorperating wool occured to me as a nice idea as it ties in well to the wool spinning nature of my final project.
I discovered a compony called Solidwool who creates furniture using a mixture of wool and bio-resin. The wool gives a nice appearance of texture. It is also an alternative to just using wool for fabrics as that is unfortunatly uneconomical these days due to low demand.
There is little detail on the website on how the wool is used. I found a paper looking into the Mechanical characterisation of wool fibers for reinforcing of composite materials which went into a bit more detail.
The researches did a wet layup of the materials then using a two part mould to compress the composite. Their results usggested it was weaker than solid resin, however this may improve with different treatments of the wool.
For the part I will be creating strength is not a ciritical concern it just needs to hold its shape and look aesthetically pleasing. I am considereing a core of hessian to help strengthen the wool may be a good idea.
3D CAD Mould Design
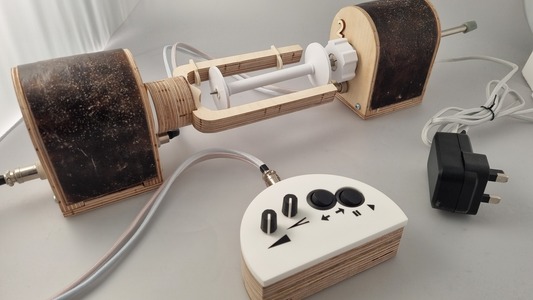
The piece I wish to make is a curved cap that will hide the motor, pully and belt assemply and be joined to the front and back walls and run all the way to the base of the unit.
We made a open top version for machine buildingweek which I will be modifying with the improvments and the idea of milling the front and back plates.
I started modelling the front and back faces and measuring the required length for this modified version. This composite cap should sit within a lip and ideally flush.
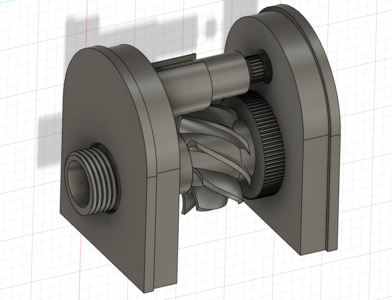
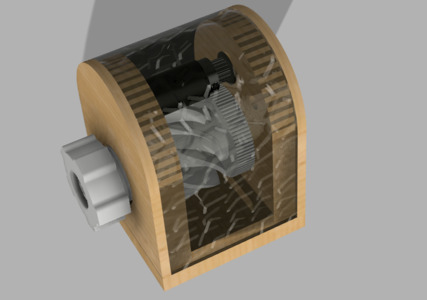
I started with the positive side of the two part mould using the measurements to create the curve. I also modelled a section at the base which will be used to align the multiple parts together. I added 10mm T bones to ensure the corners are milled fully.
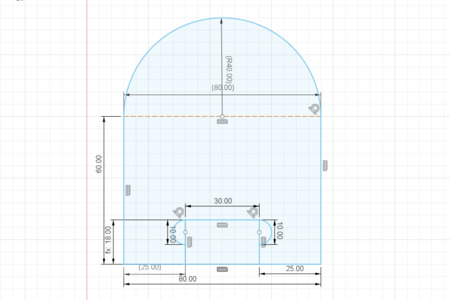
I then modelled the negatve part of the mould. I set up a parametric offset to the curve so that it can be adjusted depending on future tests for how thick I want the finished composite to be for a good strength part. I also added the alignment gap.

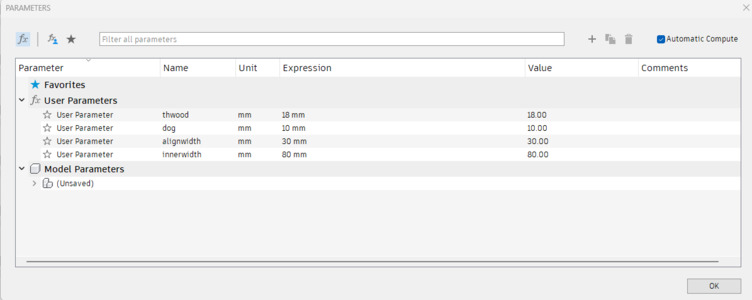
I then modelled the aligner rectangluar part and parameterised the sketch.

Parameters
Toolpath
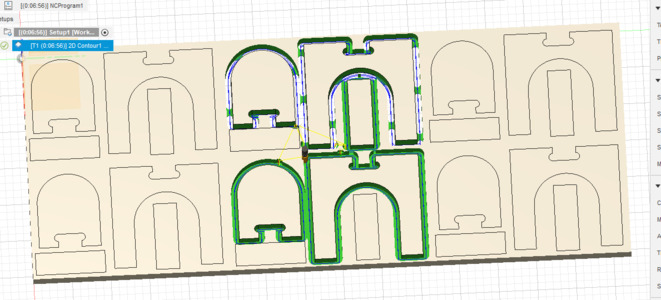
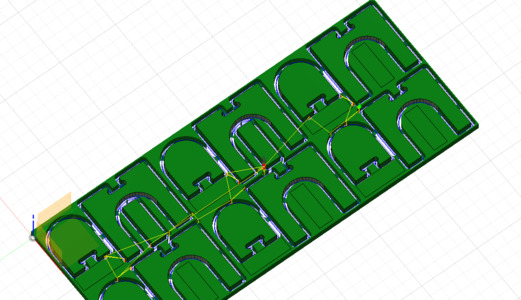
I then aligned all the parts to the bottom plane of the work space and using the rectangular pattern to multiply them. I did initally forget that I only needed two keys and made too many but we just selected the profiles of the two needed.
In the manufature workbench we did a new set up, selected the bodies we will needed to mill out and set orientation to be in the front left corner and ensure the X, Y and Z axis are accrurate.
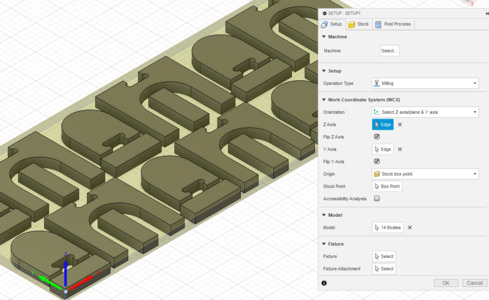
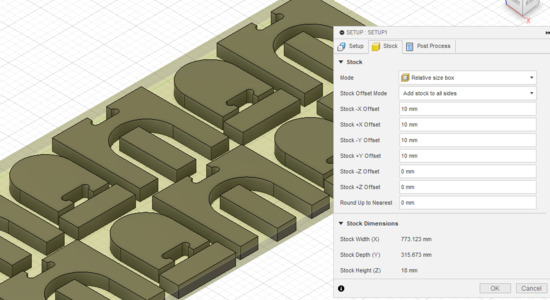
Then setting up the stock. We used relative box size this time and the 'add stock to all sides' option. Added a 10mm extra on the x and y axis however zero z offset as the piece of wood we were milling out of is the same height as the model. The stock dimentions 0f 774x316mm were used to measure out the area on the wood piece to ensure there is enough space as it was a offcut.
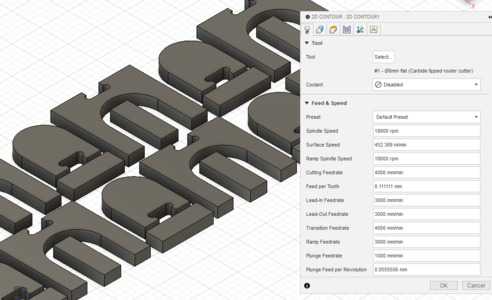
We used a 2D contour milling process as the pieces were simple outline cuts. We will be using the 8mm flat end mill from our tool database.
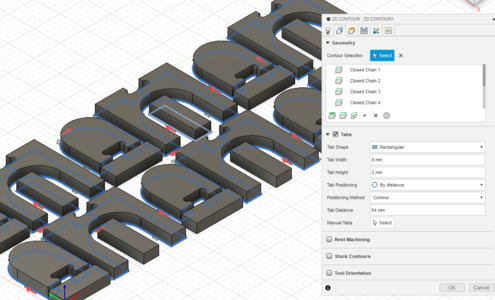
Under geometry we selected the bottom edge of all the models we wanted to mill. We also set up the tabs to secure the milled objects down. We used a tab width of 8mm and height of 2mm.
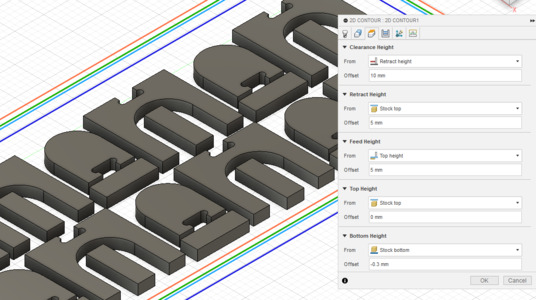
We set the top height to be the top of the stock and the bottom milling height to be -0.3mm lower than the stock bottom. This will give a clean edge and the milling bit will just go slightly into the sacrificial layer.
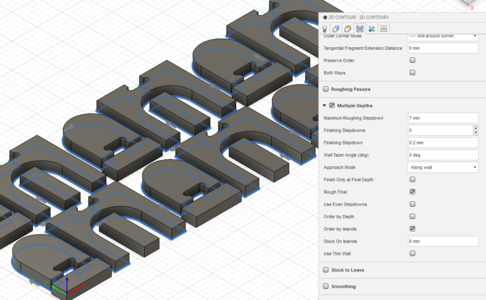
The mill is going to be using multiple step dows, maximum roughing of 7mm and finishing of 0.2mm. There is no finishing stock to leave as we wont do a finishing pass.
We reviewed the simulation to make sure it was sensible and so we knew what to expect the routerCAM will do and can stop it if it deviates.
Milling and Finishing
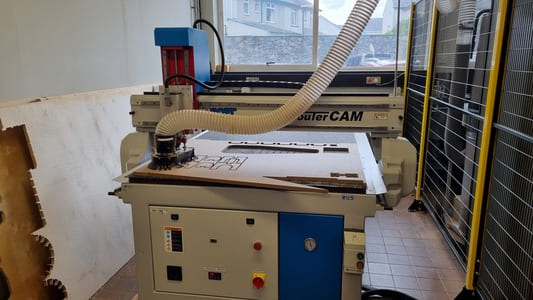
We chose to mill the mould out of 18mm MDF on our Router CAM 1224.
For more detail I used the CNC previously during week 7 Computer Controlled Machining.
We set up the channels in the vacume bed to better fit the material shape we are using.
We turned on the router and changed the tool and collet for the 8mm end mill.
We then used the probe to zero the Z axis. Remember to turn on the vacume bed when doing this as the material can move under the vacume preshure.
We then zeroed the x and y axis making sure there is enough material to mill out the full model.
We loaded the file onto the pendant using a usb stick, turned on the extraction, then started it.
We used a stanley knife and chizels to remove the parts from the sheet.
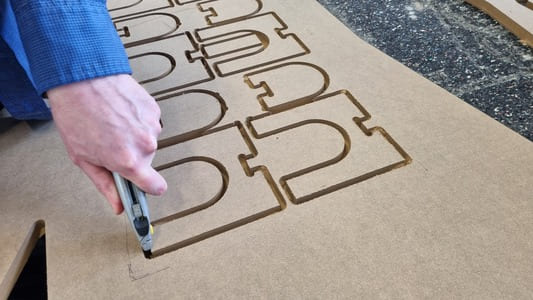
I then spent quite a lot of time chizeling, sanding and filing the parts to make sure it had a smooth surface and the key aligner fit in the slots.
I had made a mistake that I milled 6 layers to the mould but the key was only long enough for 5. I made it work but it wasnt ideal.
I then used wood glue and clamps to stick the layers firmly together.
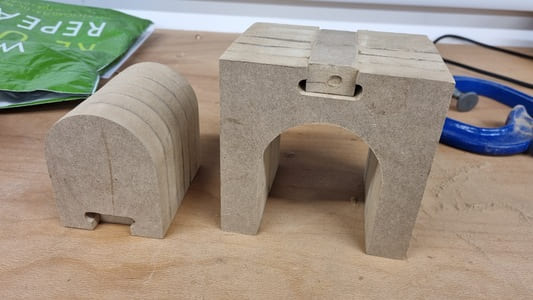
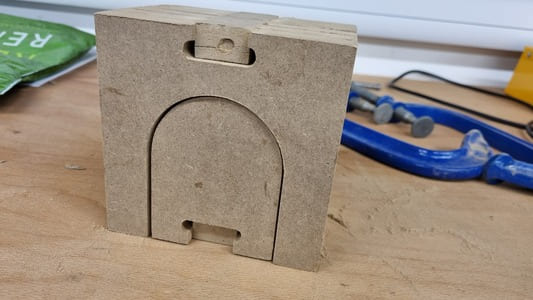
Finished mould.
Coupon Test Runs
I did some tests to determine possible combinations of wool and hessian and what ratio or resin to wool would be suitible.
I will be using LB2 Epoxy Laminating Bio Resin from Easy Composites. It has a pot life of 23mins and demould time of 13hr 30mins.
I calculated the values I would use using the ratio of 100:27 of resin to hardener.
| Combination | Quantity of composites | Amount of resin:hardener |
|---|---|---|
| Hessian/Hessian | Two rectangles of hessian | 15.75g:4.12g |
| Hessian/Wool/Hessian | Two rectangles of hessian ang 1g of wool | 15.75:4.12g |
| Wool/Hessian/Wool | One rectangle of hessian and 2g of wool | 15.75:4.12g |
| Wool ratio of 1:5 | 3g of wool | 11.8g:3.19g |
| Wool ratio of 1:10 | 3g of wool | 23.6g:6.38g |
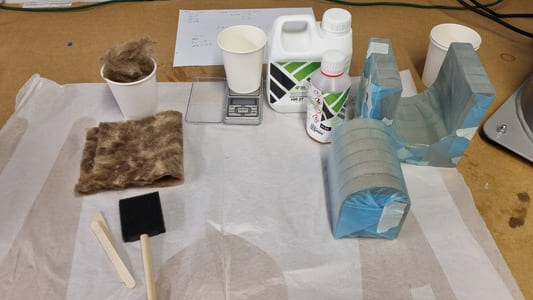
I found two offcuts of 12mm plywood which will be used to sandwitch the mixtures and compress then whilst they are solidifying. I marked out the areas that each test will be made inside off then covered the wood using plastic sheeting to help seperate it from the resin.
I pre-measured all the wool into cups and set up the working area and wore the recomended PPE from the safety data sheet.
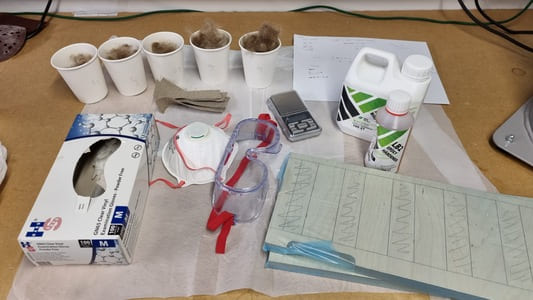
I layed the composites down and applied the resin to the wool. I used a sponge brush to help but the loose wool fibers tended to stick and lift up making it difficult. The Hessian/Wool/Hessian helped sandwich the fibers to stop them moving.
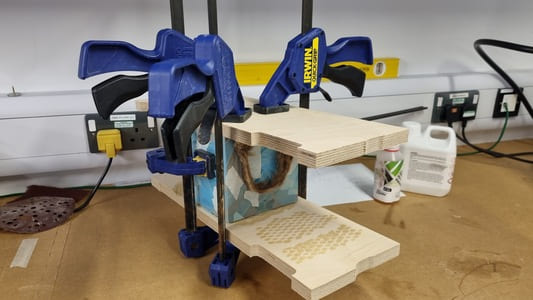
I then placed the top piece of wood on top and used clamps to apply pressure.
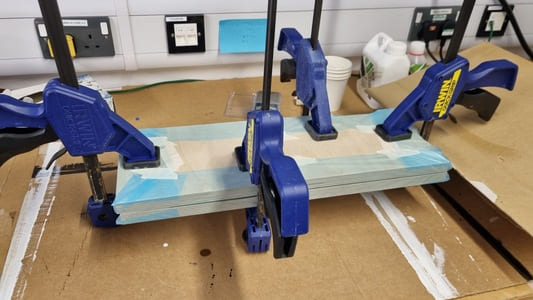
I then left it cure overnight.
The next day I demoulded, the blue plastic made it easy to lift the coupons off. You can see the result was quite messy and quite a bit of extra resin had spead out.
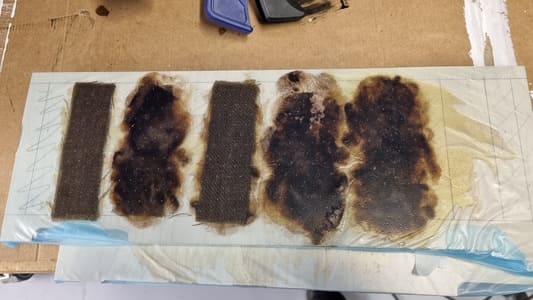
One thing I made a mistake to not fully mix the 4th coupon's resin which caused it to not fully cure in some areas.
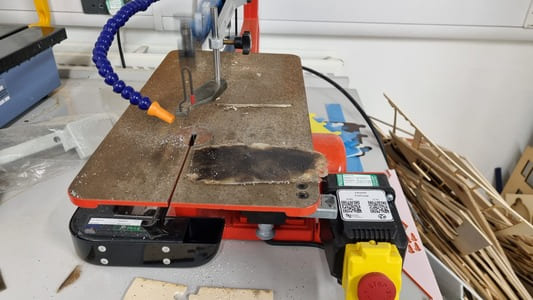
I used the fretsaw with gloves, goggles and respirator to cut the coupons to a nice shape and the uncred sections of the 4th coupon out. The composite cut quite cleanly.
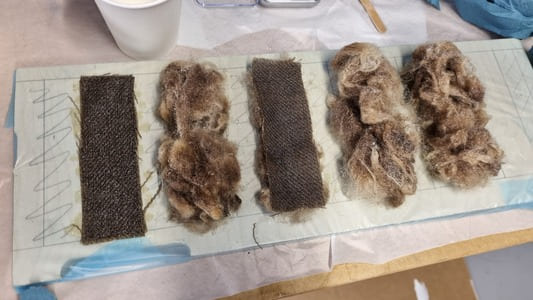
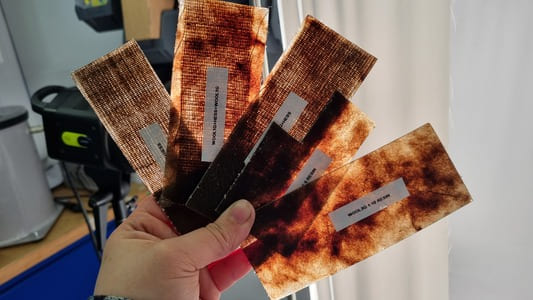
Here are the results.
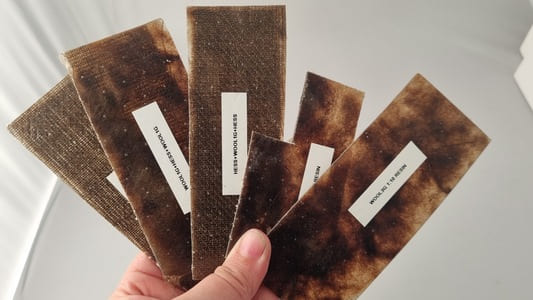
The ones that used hessian were the least flexible but I wasn't a fan of how it looked aesthetically. The wool layers composite wasn't thick enough to hide the hessian core.
The composites look good eluminated. I am considering putting some white led's inside the final project.
Preparing the wool- Wet Felting
Following the tests I relised it was difficuly to put enough resin into the loose wool as it just sticks to everything and moves out of place too easily. One good way of quite quickly creating a mat of the wool is to wet felt it.
I layed out a towel and a a bambo roll mat on a flat surface. I got a bowl of warm water with some soap mixed in.
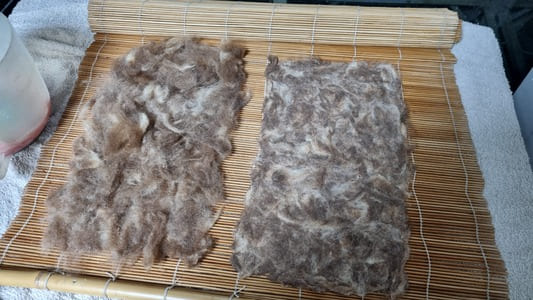
You lay out the wool fibers then start soaking them with some water whilst using your hands to massage them. Adding more to fill gaps and get the desired thickness. When and wool is saturated and starting to felt you roll up the mat and start ricking it back and forwards to continue the felting process. After some time you can unroll rotate the wool mat then start rolling again.
When the fibers are matted they wont easily seperate from the rest. I then allow it to dry.
Using the Mould
I started by covering the mould using the plastic wrap. It was very difficult to cover the curved surfaces without introducing creases in the plastic.
I made some calculations deciding to use 10g of wool. The felted wool mat I cut to size weighed about 7.5g and then I put asside some extra wool to make up to the total. The felted mat did end up with some gaps which I wished to fill during this step. I started by doing 1:5 ratio of wool to resin but I did end up mising up 20g more resin when I was running out so it ended up being roughly 1:7.
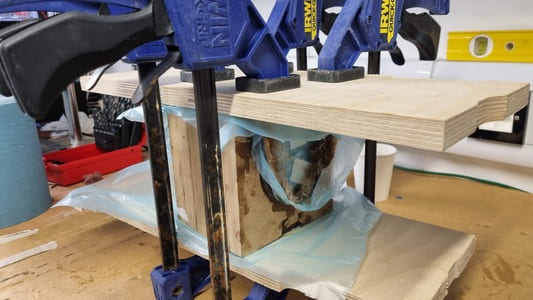
I did a set layup, using the sponge to soak resin into the mat, laying out the extra wool to cover and gaps and add a bit more thicknes then placing it over the inner mould. I then added more resin on this surface. I then slide the inner into the outer mould. I then placed two bits of wood on the top and bottom and clamped the mould shut.
Finishing the Composite
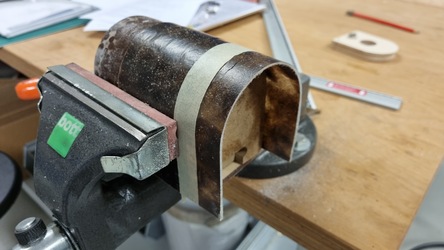
It was resonably difficult to remove from the mould. We ended up removing any excess plastic from the sides and levering it open, pulling the middle and the outer in different directions.
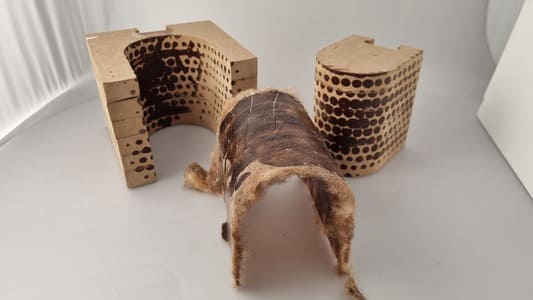
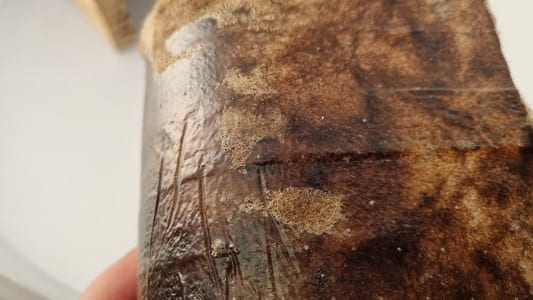
There were some inperfections, the layers of the wood mould could be seen as well as the creases from the plastic. This suggests I need to spend some more time sanding the mould down. I will also try putting the plastic on top of the composite then sliding into outer mould to avoid creases.
There was also some sections which didnt get covered in resin. I was surprised the resin didnt move to fill the gaps fully.
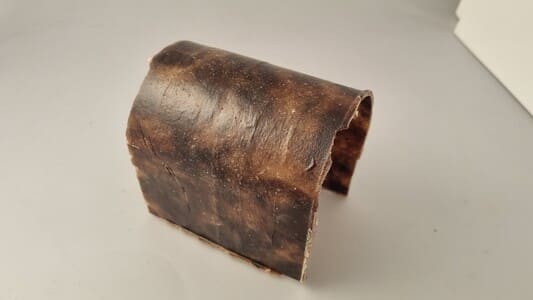
Here it is after some trimming
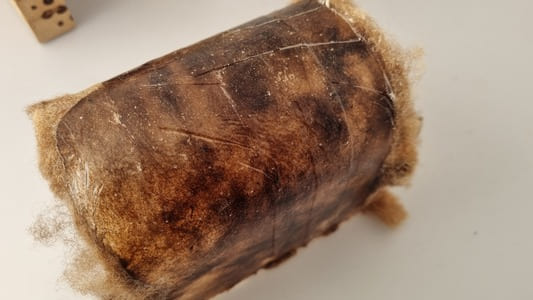
During the next attempt I added a layer of resin on the outside. This did leave a nice shiney finish but the areas that were just wool stood out quite obviously so I will be making new ones.
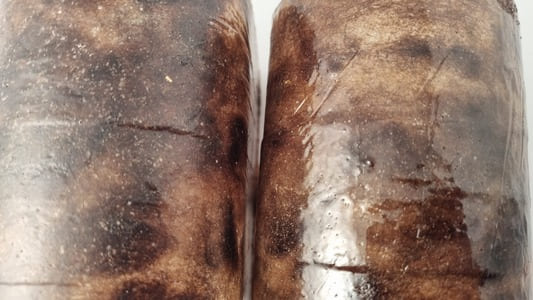
Second Attempt
I started the next attempt similarly but this time I wet both sides of the wool mat on the table to ensure the resin was fully spead out. I then added the extra wool fibers to make up to 10g of wool like last time. This time I was using the ratio of 1:10 although I did use some of this on the outside of the previous attempt.
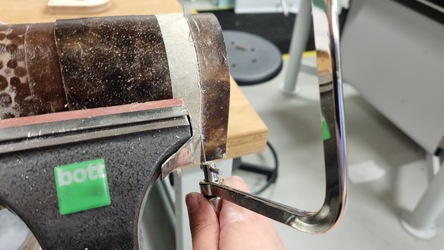
This time post-curing the mould was more difficult to remove. I ended up sawing off any extra on the outside, clamping the edge of the mould to the table then used a mallet to knock out the center. The extra resin seeped through a lot more and made it more difficult to remove. I will probably use wax mould release as well as the plastic next time to ensure it does not stick.
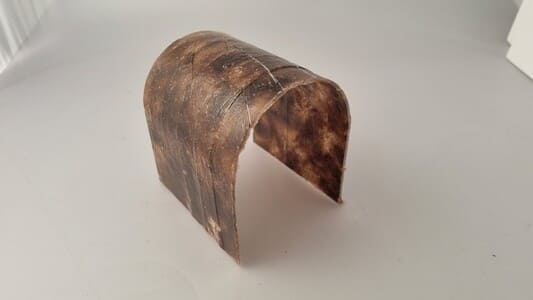
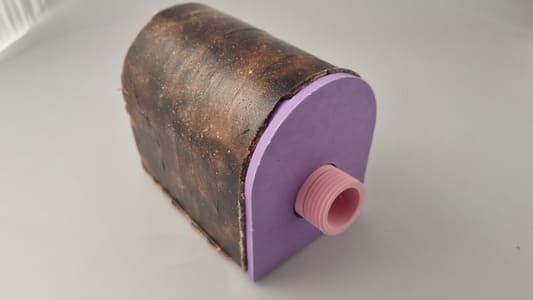
The imperfections from the mould were less visible following the sanding I had done and there was less creases from the plastic.
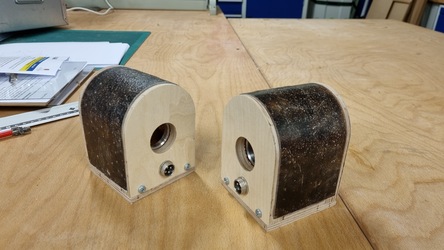
Here it is with a 3D printed test of the front wall.
Third casting
I was happy with the second cast however I need a second for my project and it allowed me to timelapse the process.
Cutting and finishing
After cutting off the worst of the flash I used tape to mark where i needed to cut.
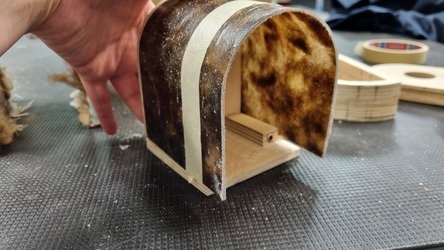
I used the inside of the mould to support the compsite.
Used a hacksaw to cut off the extra on both sides.
I then sanded the composite using the belt sander.
Finished
Here is it in my final project.