5. 3D Scanning and Printing
Our assignments this week are focused around the 3D printers.
Group Assignment
For our group assignment, we were asked to
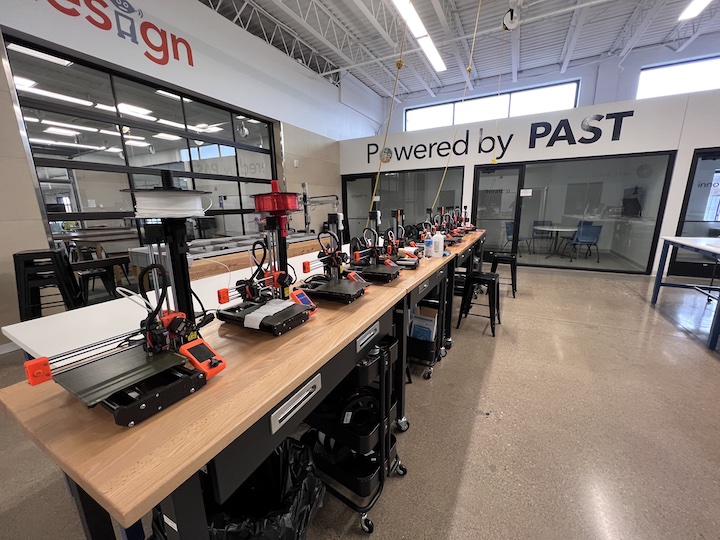
Our Printers
The 3D printers we use are the Prusa Mini. These printers are very versatile and can be used to make small to medium items.
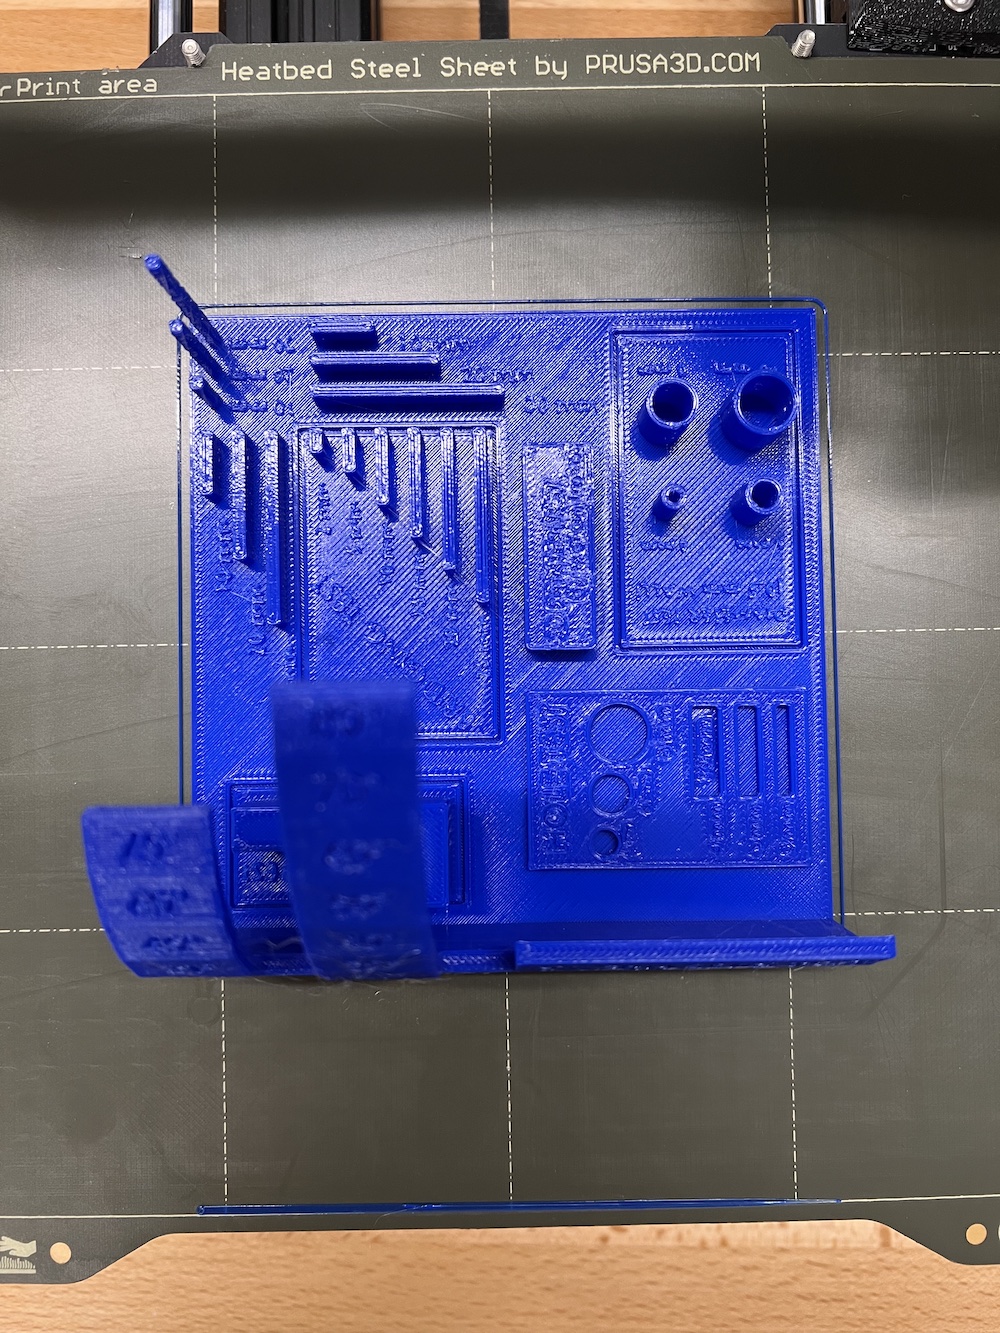
From the group assignment, we printed a test board to see the limitations of our printers when it comes to printing holes, bridges, angles, supports, and so on. From this print, I can determine what my printer can and cannot do.
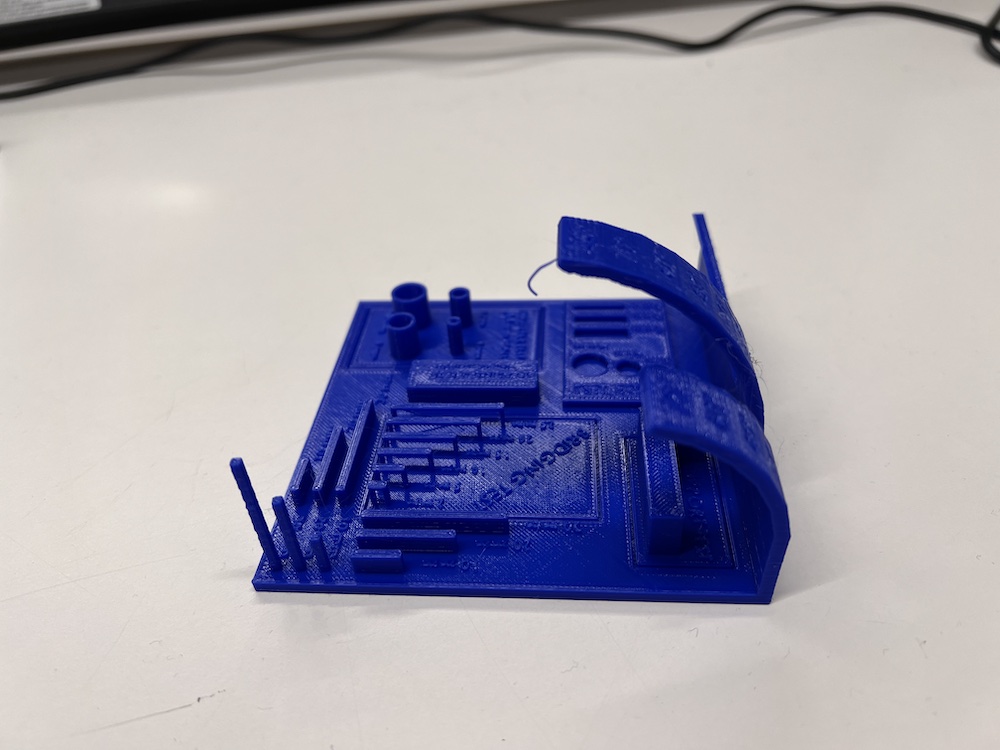

Bridging Test
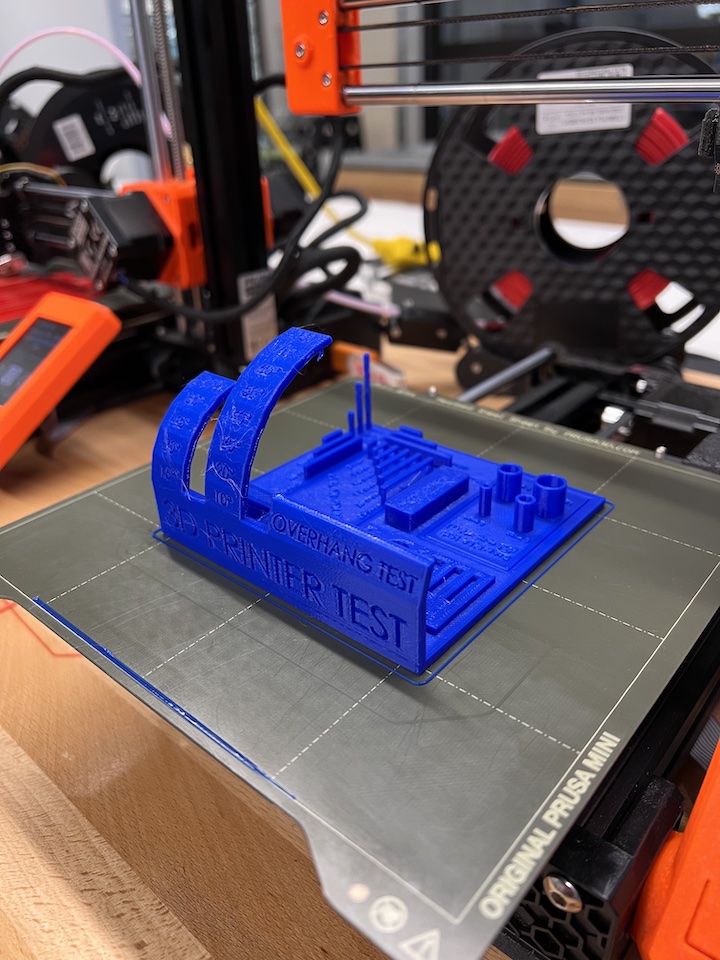
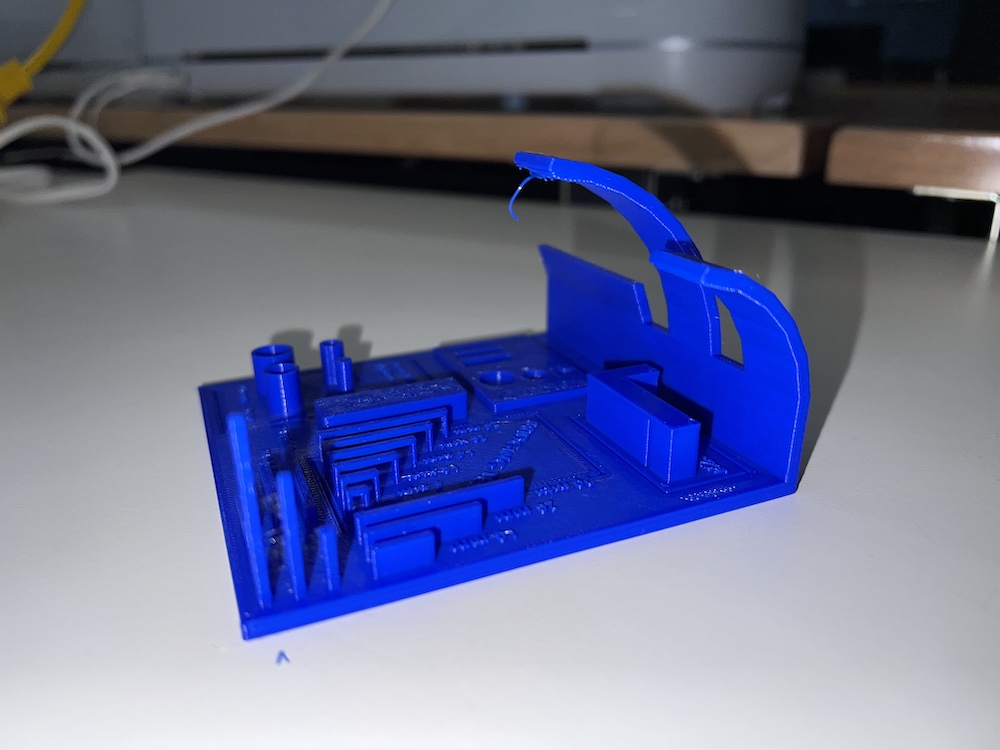
The bridge test from our print shows that our printer has no problems printing 2mm, 5 mm, 10 mm, 15 mm, and 20 mm bridges. The 25 mm bridge was able to be printed, but has one small strand of filament that broke off underneath of the remainder of the bridge. It was still able to be printed fully. The third image above shows the bridge test well.
Hole Test
The printer was able to print all three sizes of holes, which were: This can be seen well in the first image above.
Diameter Test
In terms of diameters of a 0.5 mm cylinder print, the printer also did well for this test. It was able to print diameters of 4 mm, 6 mm, 8 mm, and 10 mm with no issues or stray filament. The first image above shows the diameter test in the top right.
Overhang Test
The overhang test went well overall for our printer, and produced pretty good results. The range went from 0 degrees to 80 degrees in increments of 10 on one height, and another test from 0 to 75 degrees in a shorter height and increments of 15. Up to 60 degrees overhang went perfectly for both tests, with no extra filament being dropped. The 70 degree and beyond was more troublesome but was still able to be printed. The bottom of the overhang is a little more spaced out but still holding together. It wasn't until 80 degrees that the print started to visibly look more rough. The end of the overhang has more separation between the layers of filament, and started to drop a few ends of the print. In the second and third images above, you can see the degrees and the hanging strands on the 80 degree slope.
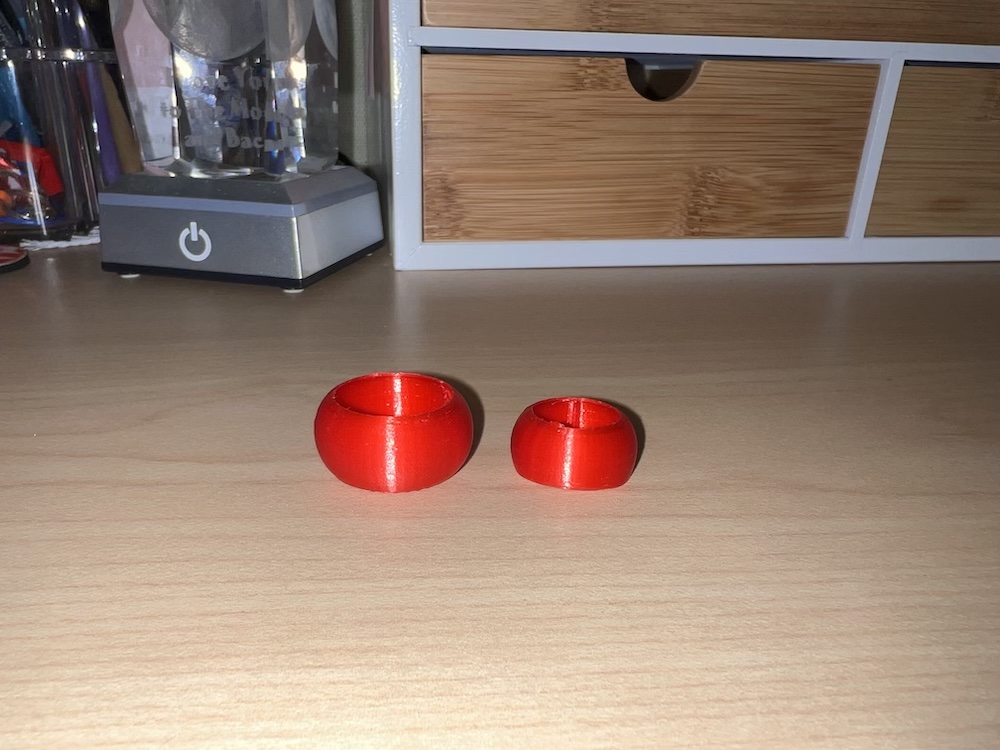
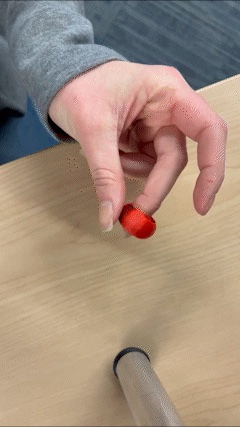
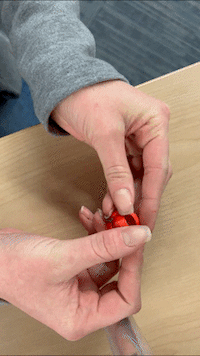
For my individual assignment this week, I decided to do a small fidget toy, similar to one's I have printed in the past from the website Thingiverse. I have found these toys are fairly simple in design and, when printed small enough, take very little time as well.
OnShape
I decided to work in OnShape to design my print because I already have prior experience in using the tools within their web application and my colleagues are very well versed as well.
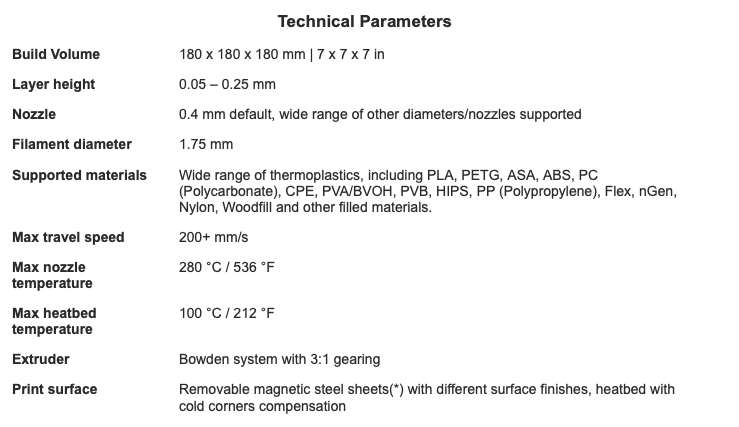
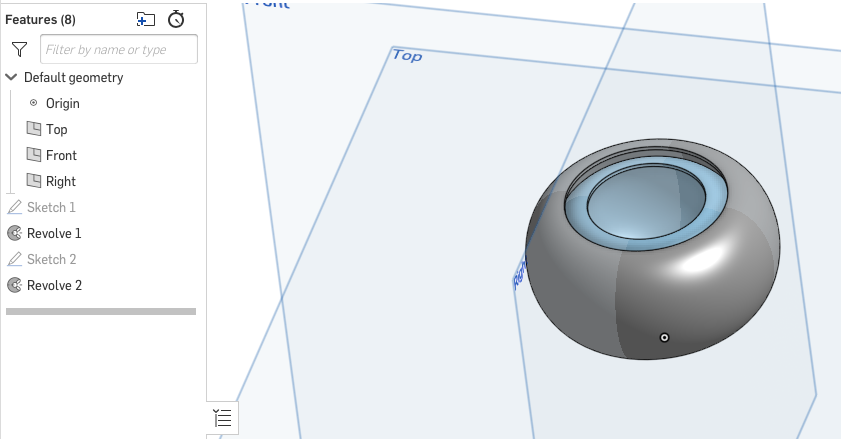
To start, I opened the OnShape site and created a new document to begin my design. I had decided ot do a simple ring within a ring, which cannot be made with subtractive design. The idea is similar to that of a gyrscope, where the rings within the outer ring are mobile and spin inside. They can be removed into separate rings, however it is one printed design that forms a mini fidget toy.
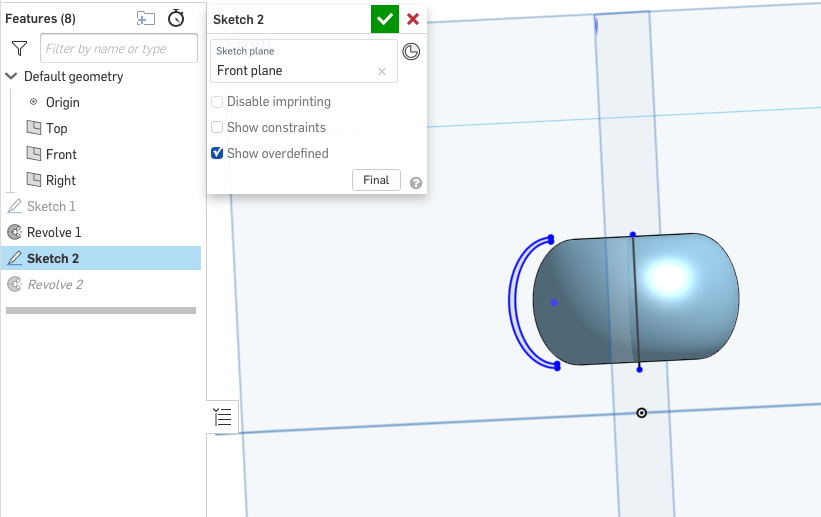
I began with a sketch on the front plane, making a shape similar to the curvature of the side of a ring.
Once I had my outer shape, I drew a construction line right about where I wanted the center of my ring to be. Using the revolve tool, I selected the sketch, followed by the construction line as my revolve line to create my first ring. This created the first 3D shape in my design. I then copied the original sketch of the first ring, and pasted the design features, adjusted their size to be slightly bigger than the first ring, and lined it up to be even in the center. I used the same construciton line as my revolve line and created the second ring.
Download My Design File Here.
This design cannot easily be made through subtractive design tools and processes. If I were to try to design this fidget toy using subtractive design, I wouldn't be able to program a machine to remove the bottom of the curve between the rings. The way the rings are curved around each other make it so a straight line cannot go down between them. Rather than a cool fidget toy, i would have two solid rings that very easily slip right out from one another. This eliminates the attachment of the rings and is no longer something you can fidget with on your finger.
Necessary Applications/Downloads
To start my assignment, I used OnShape through their web application. This did not require a download, but I needed to log into my account in order to create a file and design.
After finishing my design, I needed to export the file to the PrusaSlicer app. I downloaded this from the Prusa website.
This app allows me to export the design as an STL file, and slice it in real time to see how long it will take, add supports if needed, and adjust sizing on the board and printer itself.
PrusaSlicer
After completing my design in OnShape, I needed to slice it. I did this by exporting my file as an STL, and loading it into my PrusaSlicer app on my computer. This app will allow me to see how my print will look with each layer, how much time it will take, how big it is on my printing plate, and overall give me an idea of how my print will turn out under the conditions given.
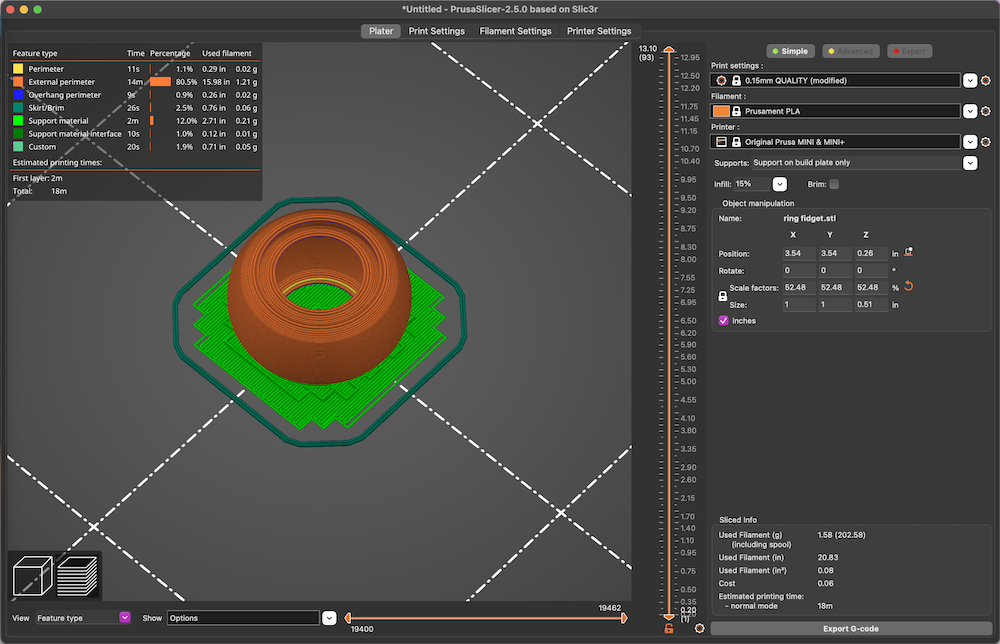
This is how my object appeaers in the app. Here, I can add supports through the feature on the right-hand side (I selected support only on my base plate). I can also manipulate the size on the right side. The vertical sliding bar will allow me to see what my print looks like throughout th printing time and I can essentially watch how it is printed beforehand. I can see my total print time from the bottom right, and I am able to export my G-Code to a flashdrive and plug it directly into my printer.
Once my file is on the flashdrive, I plug it into the USB port on the printer. Each printer may look different when going to open your file and start the print, however the Prusa MINI printers typically pull the most recent file on the flashdrive up on the screen, then I select print and hit OK. This started my print.
The print time for my fidget was only 18 minutes, because it is a very small design (1 inch in diameter) and is relatively simple for my printer to produce. Once the printer is set to run, it will make sure it is calibrated in relation to the printing plate, and then it wil begin. Once the print is done, I simply pop it off the plate, and remove any supporting filament I needed to print and I am all done.
3D Scanning
Originally for scanning, we planned to use removable 3D scanners that attach to iPads, however, they are a few years old and no longer fit the iPads we use. I then decided to use the 3D scanner on my phone, the iPhone 13 Pro Max. This phone has a feature near the cameras that allows you to use an app to create a 3D scan of an object and export it as an STL or OBJ file, which I can then use in OnShape, or another 3D CAD tool.
3D Scanner App on iOS
The app was simple to use. I started a scan, and did the "normal" version of scans, which took a scan of my whole room, which is not what I intended. I did some exploring through the app and saw a better option for taking scans of an object using the Photos scan function. In order to get a good scan, I needed to take numerous photos (at least 50) to get a good scan.
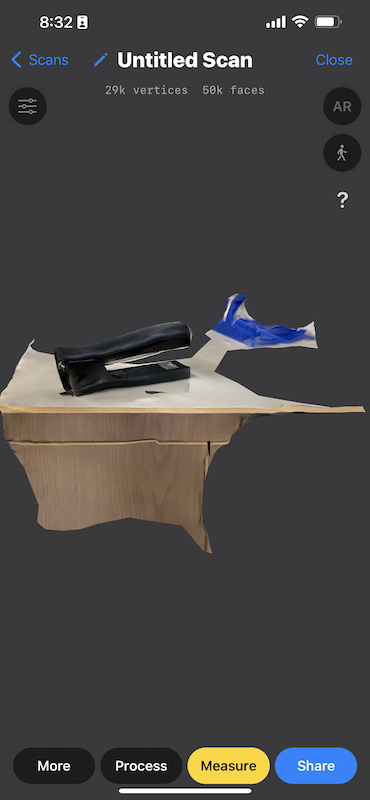
This is what the scan looked like after I took the sequence of pictures and had the app process them. It did take a few minutes to get the completed scan, but overall the quality of the scan is not too bad.
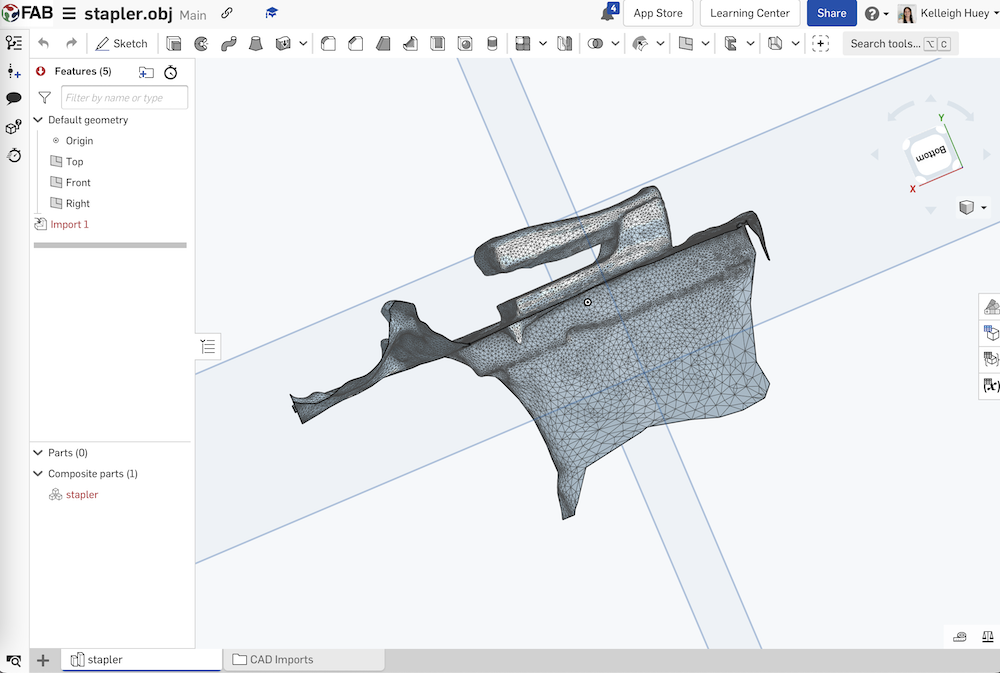
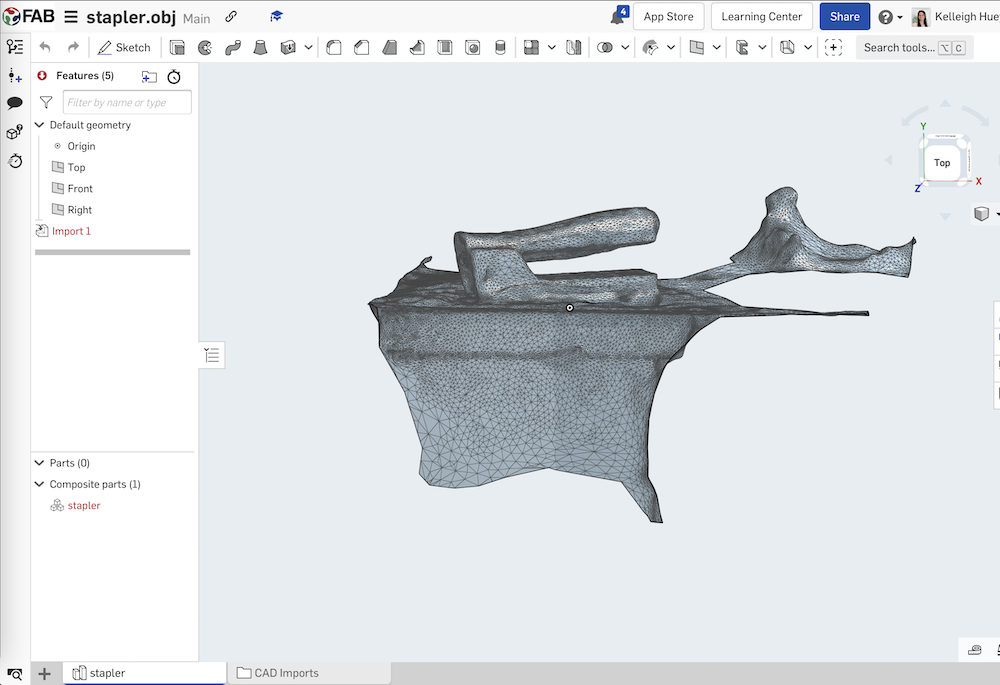
From here, in the app, I was able to export/share the file as an OBJ file, which I then sent to my computer and saved it to my desktop. I then opened OnShape and imported my file.
My work, PAST Foundation, is currently waiting on 2 new 3D scanners to arrive in our mail. I will update this section and the files when they arrive.
3D scanning technology, in general, involves a specialized software that controls a laser as it probes the surface of an object and sensor-equipped cameras. The change in distance and shape of the laser is continuously recorded as the scanner moves, and maps out the 3-dimensions of the object.
Stapler OBJ FileCleaning the Printers
Print Bed
The printing bed should be cleaned of oils and debris if there is any present. Never use acetone to clean the heatbed- always use Isopropyl alcohol or another alcohol based cleaner with a new paper towel each time. Cleaning will have best results if heatbed is cooled down.
Exterior Nozzle
If you have filament build up on the exterior of the nozzle or the heater block, there is a chance it could affect the qualit, outcome, and thermal properties of your print. To clean this, simply heat the nozzle to about 180-250 degrees Celius, depending on the kind of filament that was previously used. Heat the nozzle for 5 minutes, then immediately turn the printer off and use a small brass/wire brush to clean off any filament.
Interior Nozzle
If you have a clog or print failure you may need to do a couple of Cold pulls. Also, changing from PLA to PETG, at PLA temperatures can cause issues. Cold pulls should clear any partial or full clog and get you printing again. When heated, it can also help to use an acupuncture needle (one is included with the kit), to clean the inside of the nozzle.
Follow the steps below to perform a cold pull on your printer.
- Unload any current filament (Filament -> Unload Filament -> [PLA,PETG,etc.])
- Move the hotend (nozzle) all the way to the right of the X axis.
- Unscrew the upper large brass nut holding the long PTFE tube by using a 10mm spanner and rotating anti-clockwise.
- Heat the nozzle to 270 degrees Celcius. (Settings -> Temperature -> Nozzle)
- Insert new filament into the top of the hotend that was exposed in step 3.
- From the display, select Cooldown (from Temperature or Preheat menu).
- While the hotend is cooling down, push the filament through so it extrudes out the bottom. Do so until you cannot push any more filament through (typically 160-170 degrees C)
- When the temperature reaches 90 degrees Celcius, hold the X-axis with one hand as support, and with the other hand, pull firmly and steadily upwards to pull the filament from the hotend.
- Inspect the filament tip once pulled out to confirm that its clear of any old filament ot burn marks; if it's still not clewan, repeat the process again.
- Repeat steps 4-8 at least once more to ensure the nozzle is clear and clean of any remaining filament.
- Resecure the brass fitting from step 3 firmly, using the 10 mm spanner to tighten it. After removing the extruded filament from the heatbed the printer is ready to use.