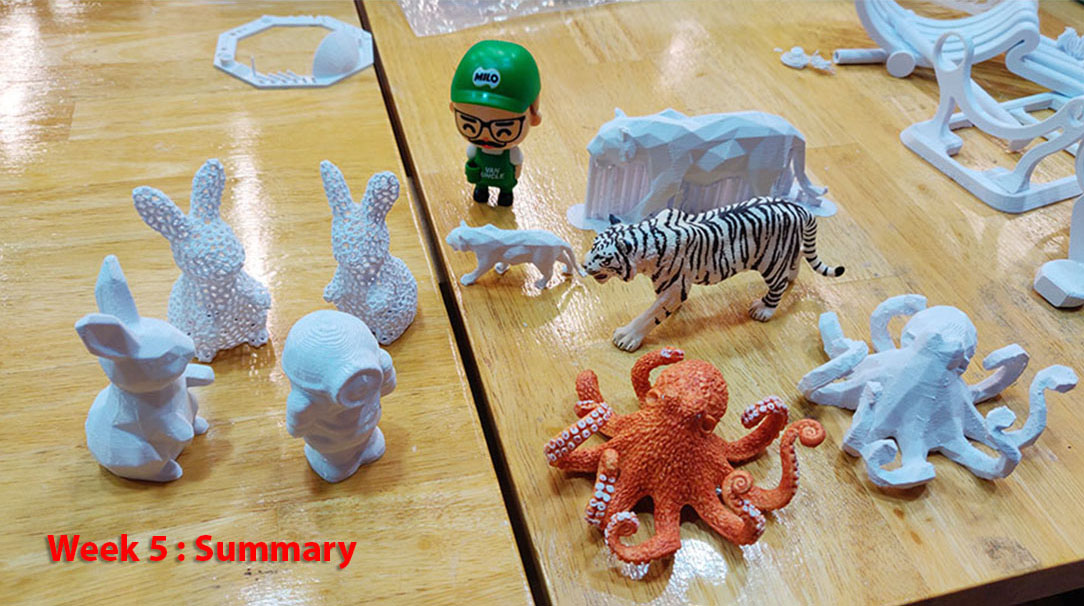
Week 5: 3D Scanning and Printing
Checklist for this week:
- ☑ Linked to the group assignment page
- ☑ Explained what you learned from testing the 3D printers
- ☑ Documented how you designed and 3D printed your object and explained why it could not be easily made subtractively
- ☑ Documented how you scanned an object
- ☑ Included your original design files for 3D printing
- ☑ Included your hero shots
Group Assignment:
- Test the design rules for your 3D printer
- Document your work on the group work page and reflect on your individual page what you learned about the characteristics of your printer
Individual assignment:
- Design and 3D print an object that could not be easily made subtractively
- 3D scan an object and print it (after touch up)
Individual Reflection on Group Assignment
What I learned about the characteristics of our 3D printers:
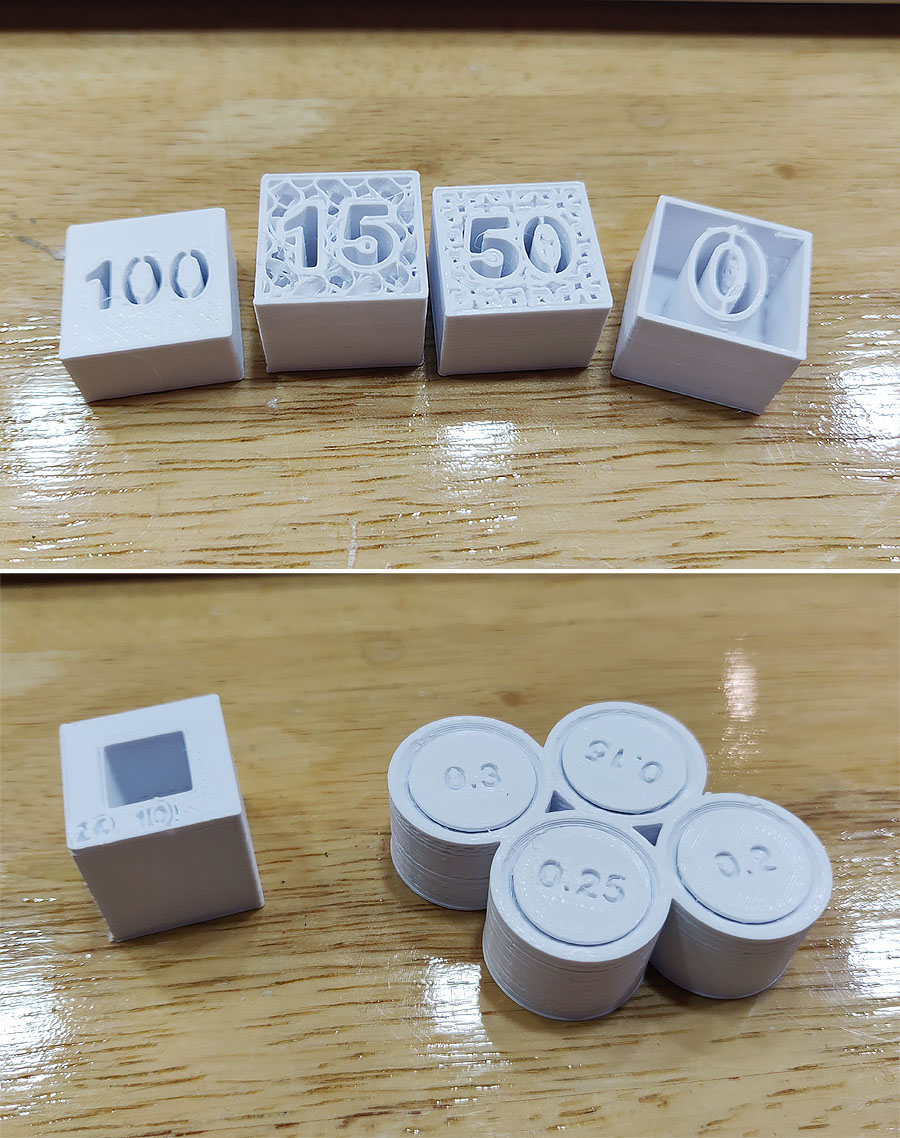
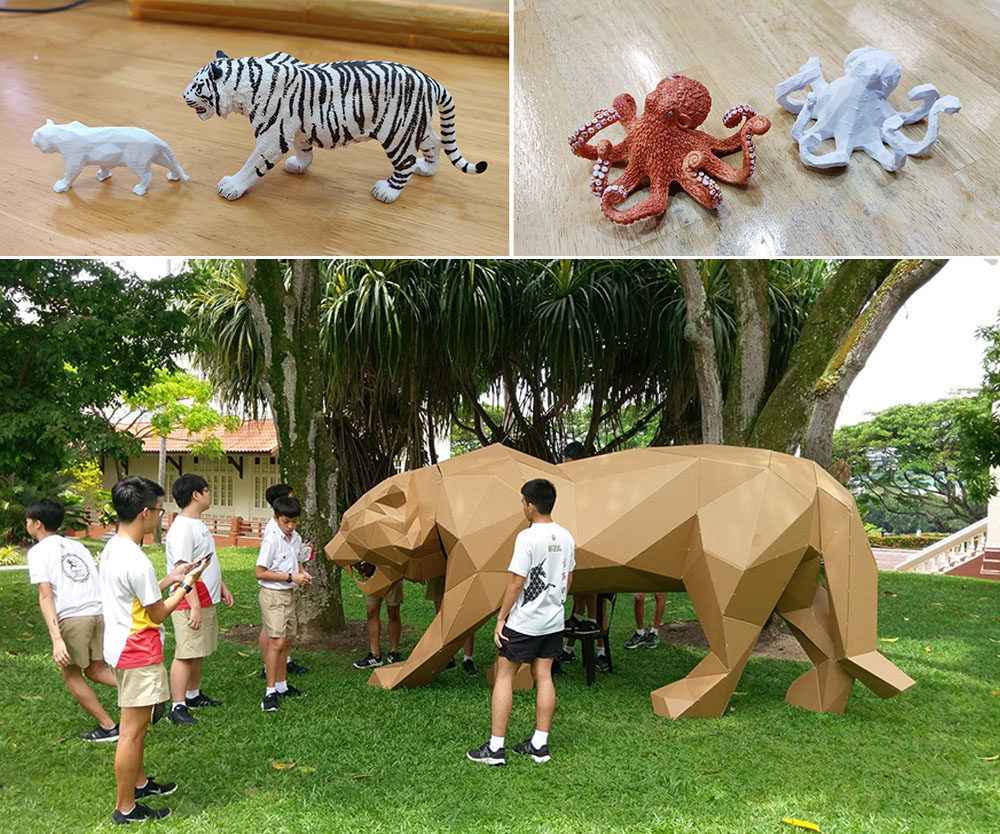
- In the group assignment we test print for overhang, tolerance, and bridging. This is important for FDM (Fuse deposition modelling) because it is easy to fail in our printing which I personally experienced in the JBV creative's model (more photos at the end of the page).
- Below is an example of gauge test, where we could see how precise is our printed part with the PLA. This test is critical if you are printing parts that interact (close distance) with each others, and yet you need to leave enough space for the parts to fit together.
- I also did an infill test to see how strong the internal structure of the prints. Usually 10~ 15% is good enough for most cases.
Design and 3D print an object
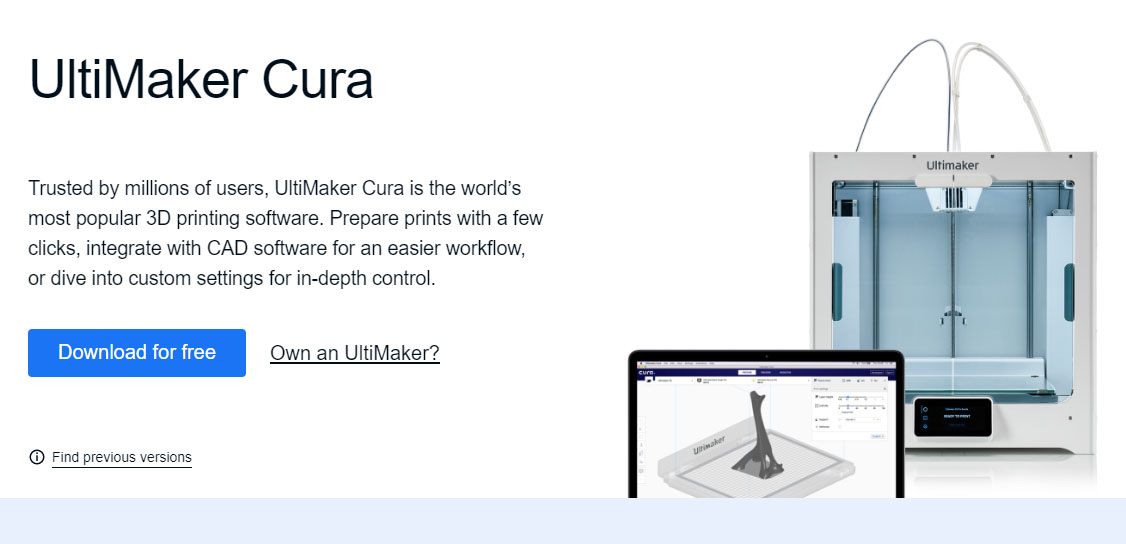
It was a fun week to learn about 3D scanning and Printing. In general, the cost of owning a 3D printer has went down significantly over the years. The 3D printers in our fablab is well maintained by the technicians and we don't have to troubleshoot much to start printing. We just need to focus on the Ultimaker CURA slicer on our digital model. Although the slicer software is developed by Ultimaker, it's suitable for all other brand of 3D printers, e.g. Prusa3D, Creality, MakerBot, etc.
We have been using Ultimaker 2+ for the past week.
Update: How I design the rabbit? and Why it's NOT easy to manufacture subtractively?
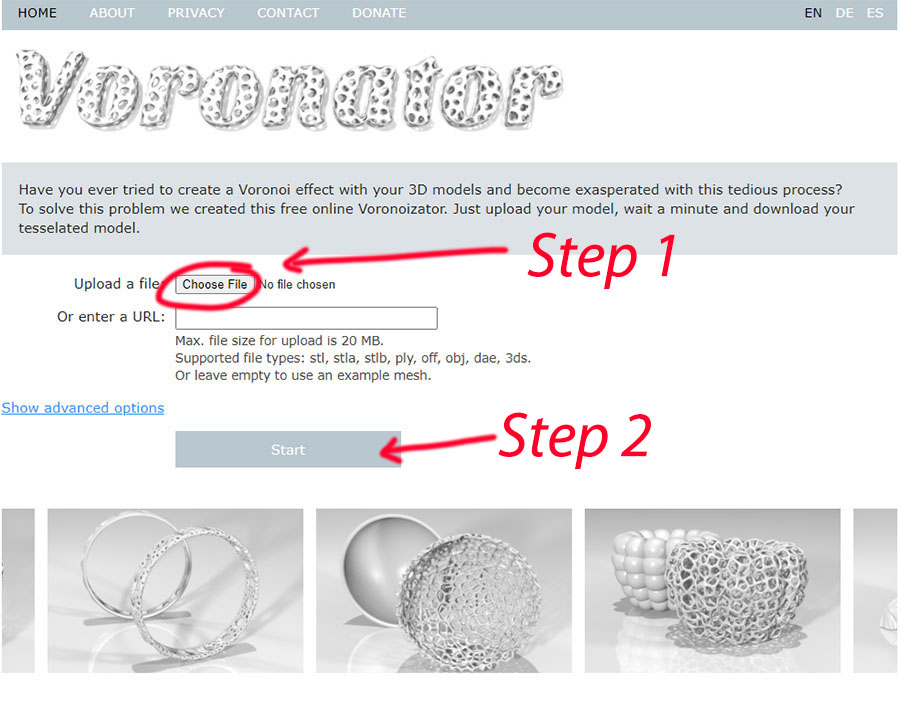
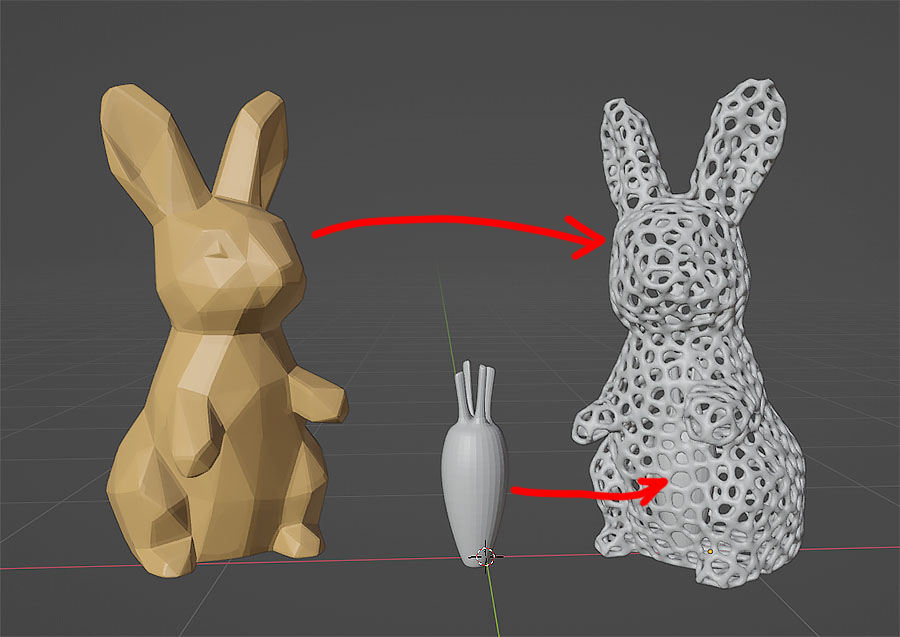
The rabbit design was created from week 2 and ready to be 3D print. But there is a criteria to take advantage of the 3D printing technology (that the object is not easily made subtractively). During class, the website www.voronator.com was brought up and I thought this would be a cool way to transform my 3D model. To make it even more "challenging" (to make subtractively), I added a carrot inside the "voronated" rabbit before 3D printing (second trial). I am going to break the carrot away from the base once it's done printing.
Steps to create the Voronoi effect on my rabbit model:
- Go to website: https://www.voronator.com
- Step 1: Click on "Choose file" and select the obj from my local drive.
- Step 2: Click "Start" and wait for the file uploaded and process from their server. Within minutes, the final model is ready to be downloaded.
- I put the Voronoi model sides by side with my original rabbit model for comparison in the picture below.
I found an alternate method to create Voronoi model using Autodesk Meshmixer. I should explore the method further since I am using Meshmixer to touch up my scanned model below.
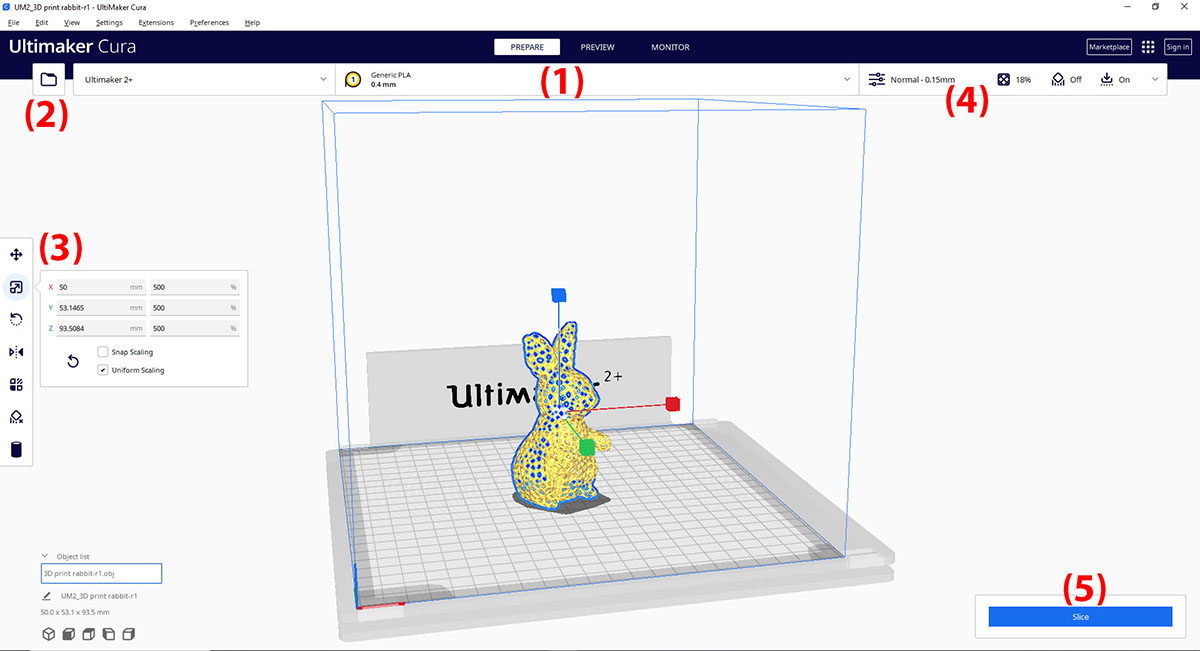
Cura Slicer
I am using version 5.2.2 although 5.3 beta is available now.
- The software started in
PREPAREmode. The model of the 3D printer, the material, size of nozzle head and the basic parameters are clearly shown beneath it. - Click on "Open file(s)" button to import the digital model (obj or stl format) and wait for it will load into the main window. The blue lines in the window indicated the maximum printing size of the 3D printer. Tips: you could load multiple files into the same printing and arrange their position accordingly.
- Scale/ rotate/ move the object(s) using the tools available on the left (e.g. Move, Rotate, Scale, Mirror, etc). You could check the size of the models below the panel.
- The basic parameters (for beginner to tweak) are layer height, infill, support, build plate adhesion. Click on the
Custombutton to have more control over your 3D prints when you advance to next level. - Click on
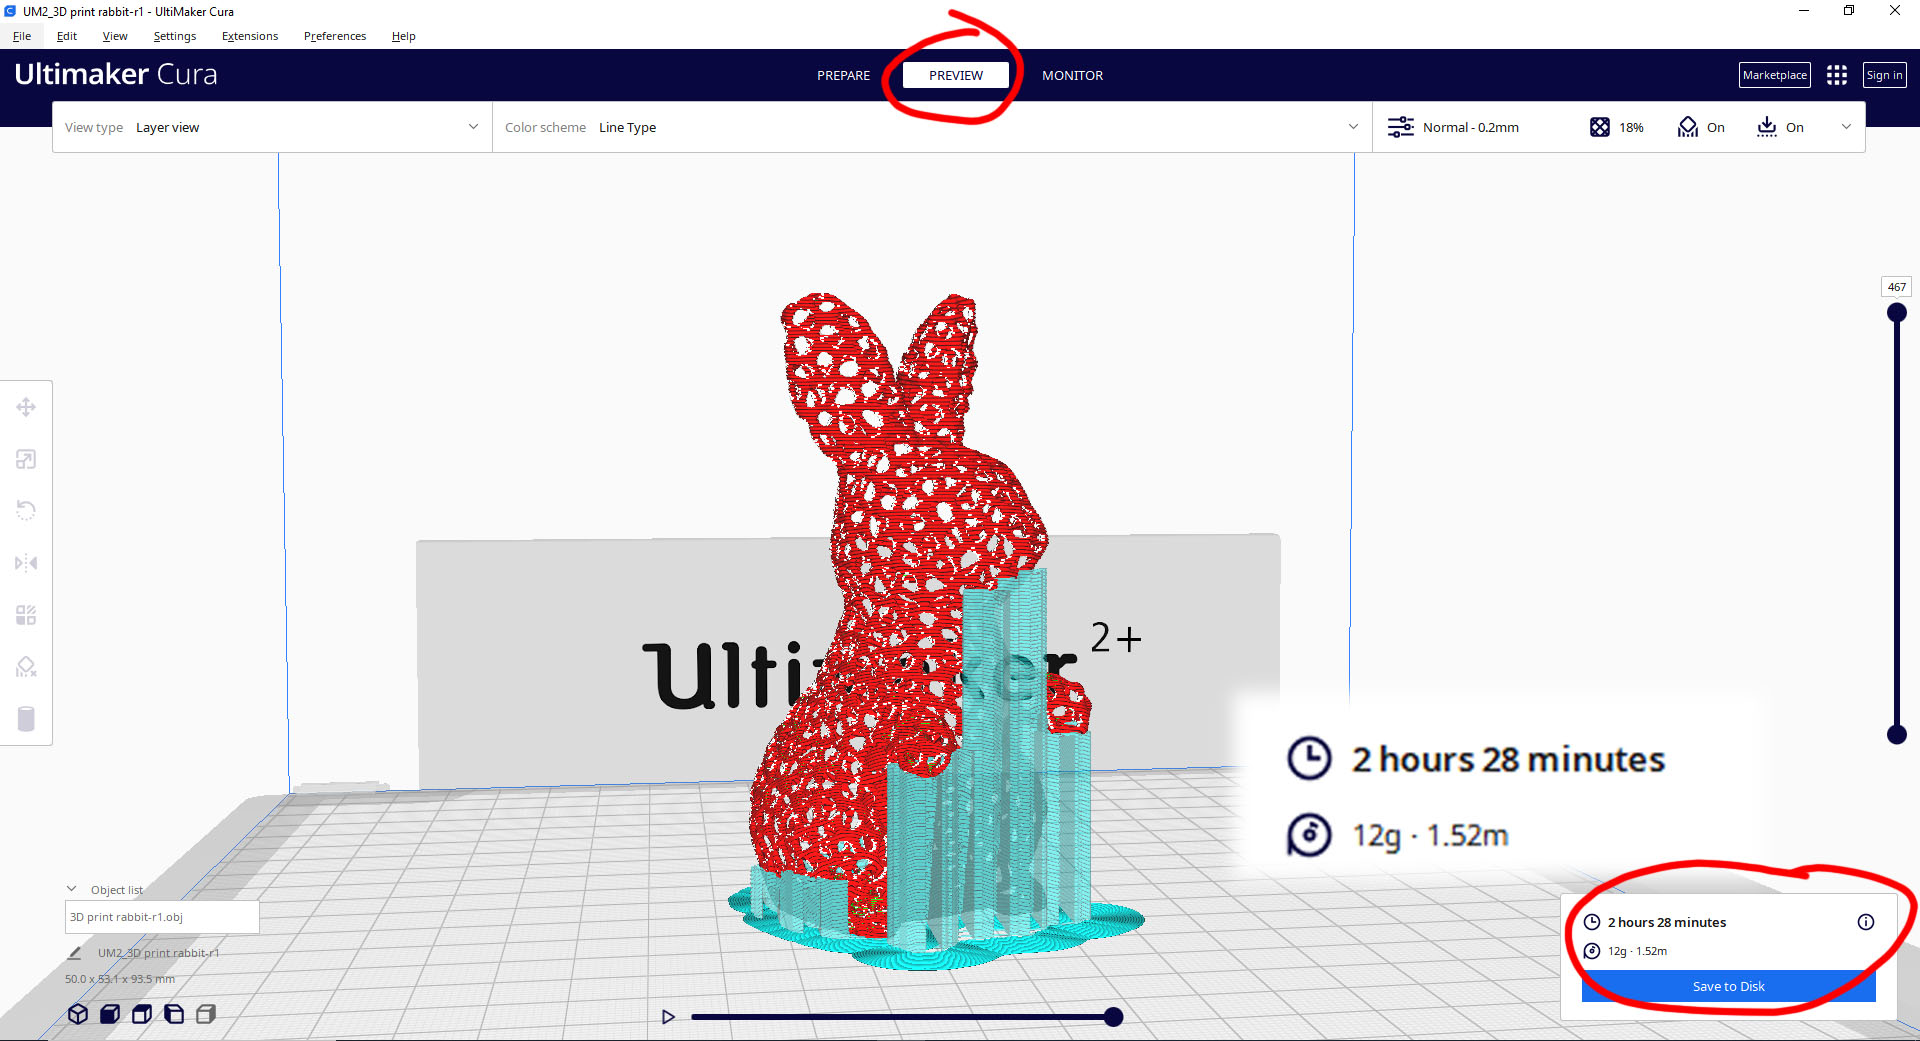
Sliceto generate the Gcode. And then click onPREVIEWmode to see the simulation of the nozzle head movement. You could go back toPREPAREmode anytime by clicking on the button on top. We have no use of theMONITORmode for now. Save the Gcode in a SD card before transfer the file to the Ultimaker 2+.
Why choose to 3D print this instead of other method? (What are the advantages and limitations of 3D printing?)
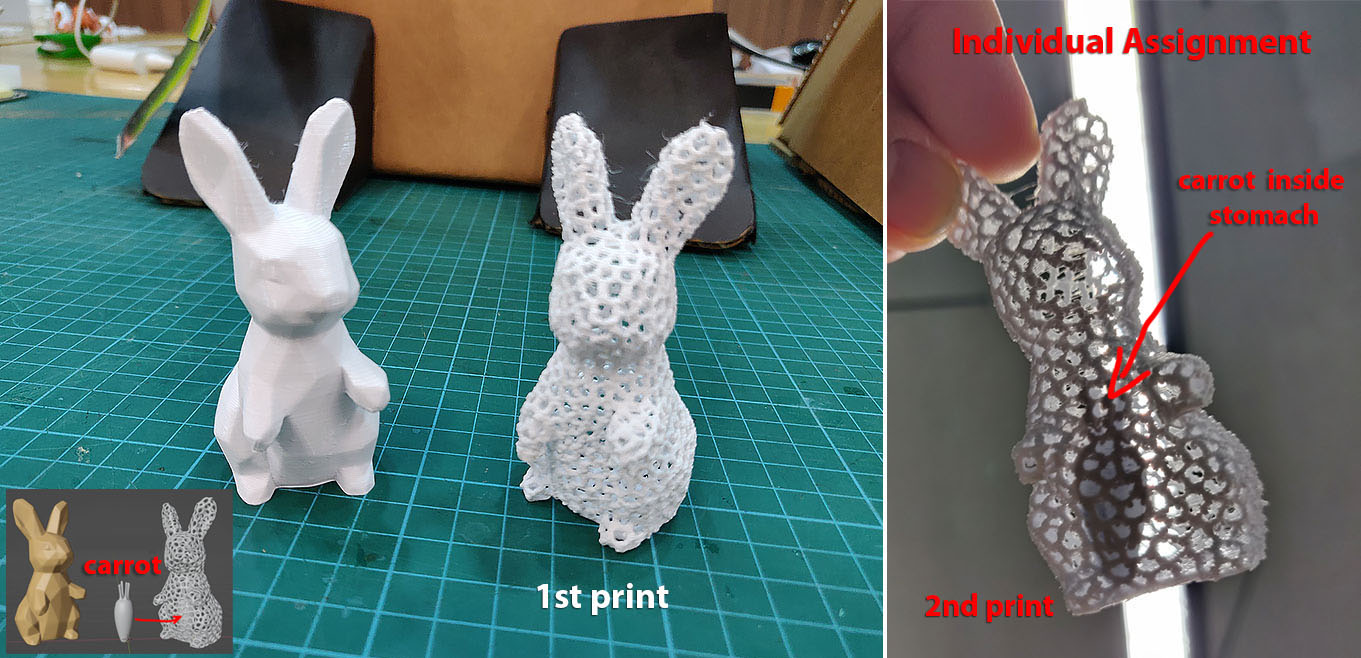
We need to 3D print a model that is NOT EASY to manufacture subtractively. In my case, I created a tiny carrot that's inside the rabbit! (refer to the video below). A detailed object (The carrot) within another object (rabbit) is considered difficult to manufacture subtractively as a matter of fact.
I used a small awl to break the carrot away from the inner base and now the carrot rolls freely inside the stomach of the rabbit. Visually, the carrot inside the stomach is hard to be seen so I took a video below (and swung the carrot around).
3D printing offers numerous advantages such as customization, faster prototyping, cost-effectiveness, ability to create complex geometries, reduced waste, and accessibility. However, it also has limitations such as material and quality limitations, production and design limitations, post-processing requirements, and environmental concerns. The materials available for 3D printing are limited, and the quality of 3D printed products may be lower than those produced with traditional manufacturing methods. Large-scale production with 3D printing can also be time-consuming and expensive. Design limitations such as the need for support structures or the maximum size of products that can be printed may also occur. Post-processing requirements are necessary for desired function and finish.
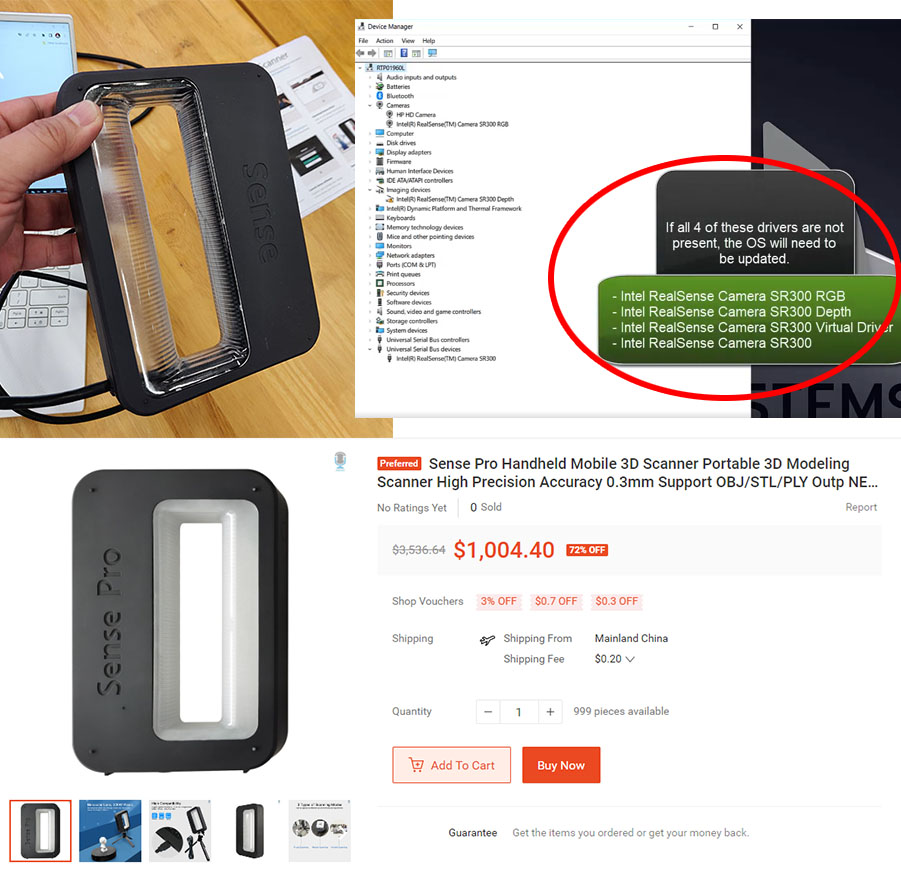
Sense Pro Handheld Scanner (Gen 2)
3D scan an object and print it
We have the Sense Pro Handheld Scanner (Gen 2) in our lab and I was pretty excited about it at first. But the rest of the class are NOT and soon enough I found out the reason. The scanner is supposed to be professional tool but upon browsing their website, we found out that the company has stopped supporting both hardware and software development of the equipment since last year. But the scanner is still in working condition and probably we could put it to good use before long.
We installed the software from the website and tried to plug the scanner in (through USB 3.0). None of our students laptops could connected successfully to the scanner due to driver issues. In the end we have to use our instructor's laptop to do the scanning. We scanned a few more items with mixed success.
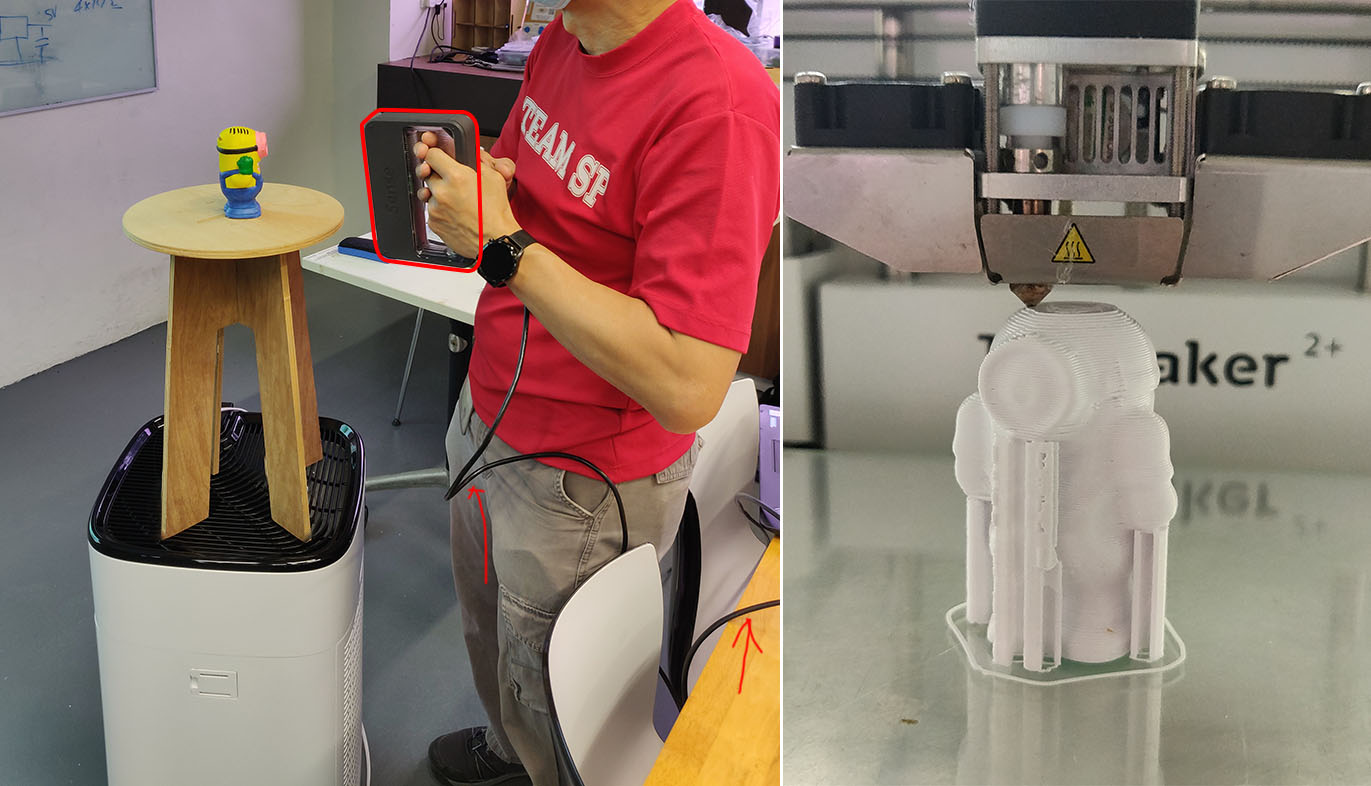
We tried to scan a small colorful figurine (a minion character) and the result is quite good. Other models are not quite as lucky. The scanner is not as intuitive to use and it come with a short USB wire. At some point we have to lift our laptop to accommodate the movement of the scanner. We manage to capture the digital model of the figurine (minion) and even print it out at 50% scale.
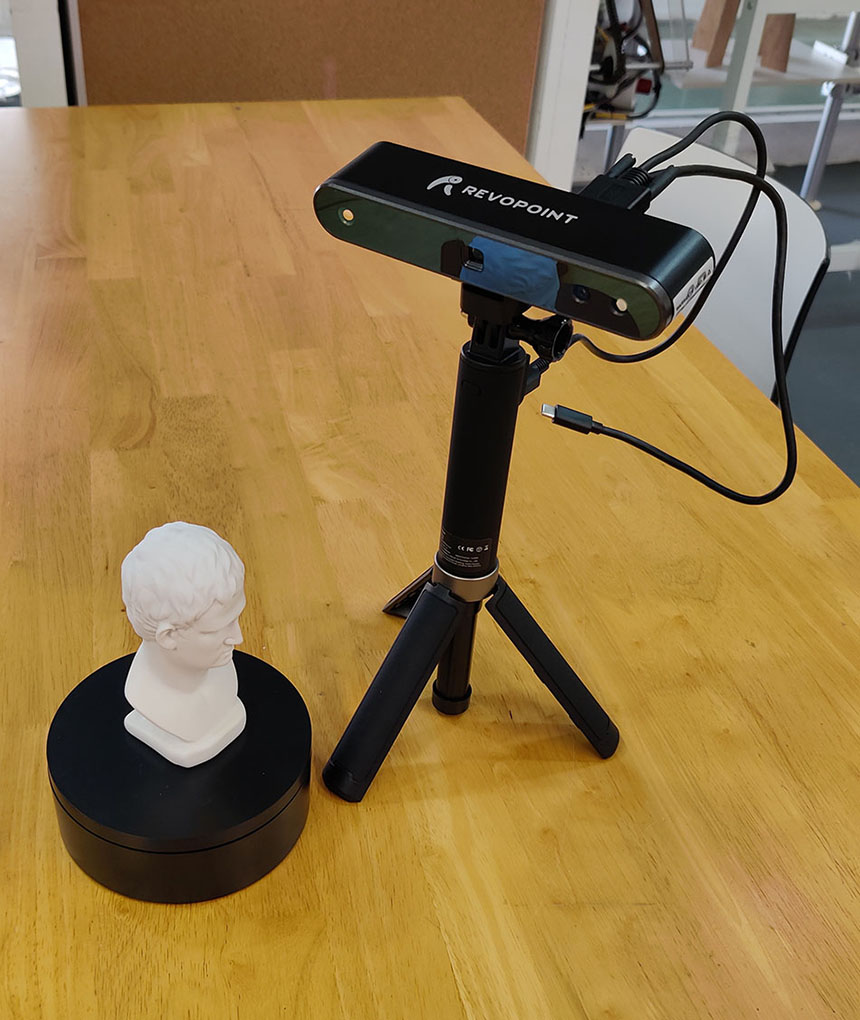
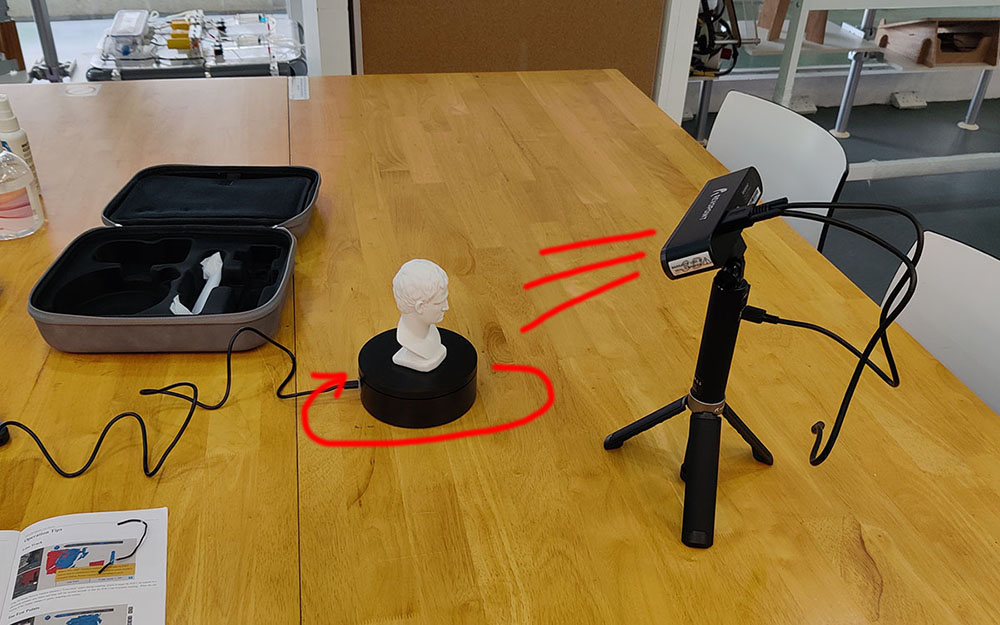
RevoPoint POP 2 3D Scanner
Just a few weeks after the lesson, our new 3D handheld scanner (RevoPoint 3D Scan) arrived at our Fablab and I get a chance to try it out. Below are the steps I successfully scan a detailed object.
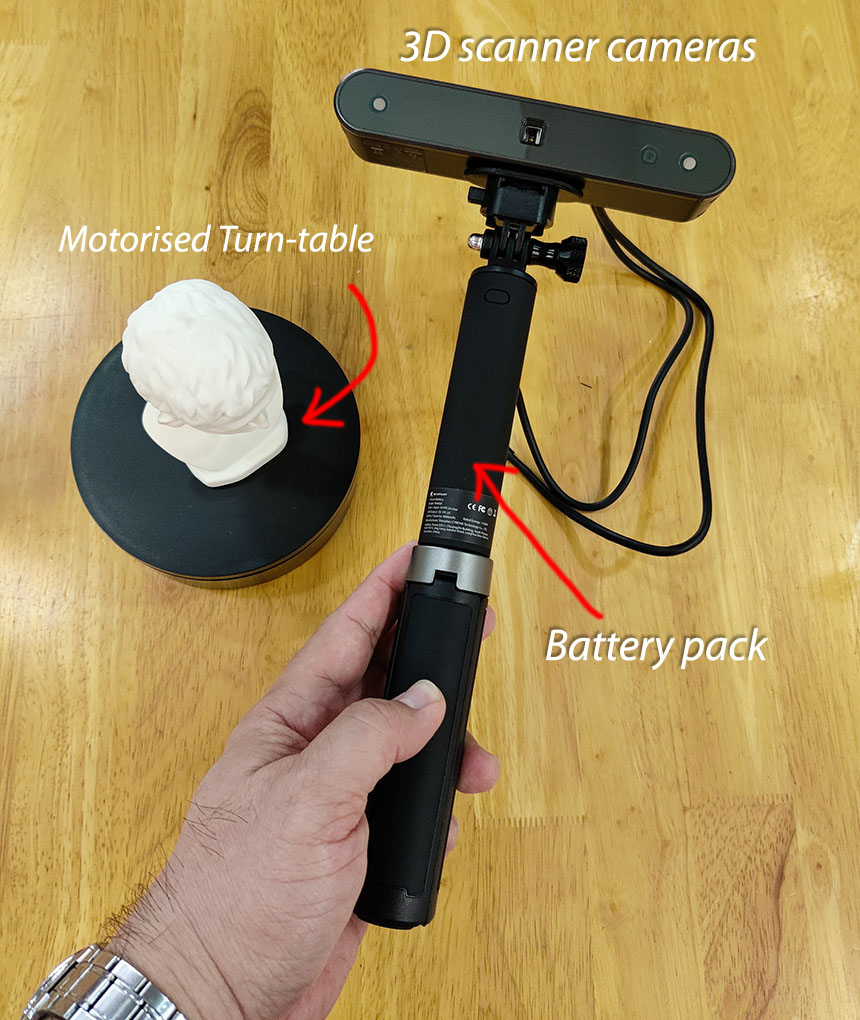
One of the advantage of Revopoint scanner is mobility. It comes with a battery pack that power up the scanner while you could use your mobile phone app to connect wirelessly.
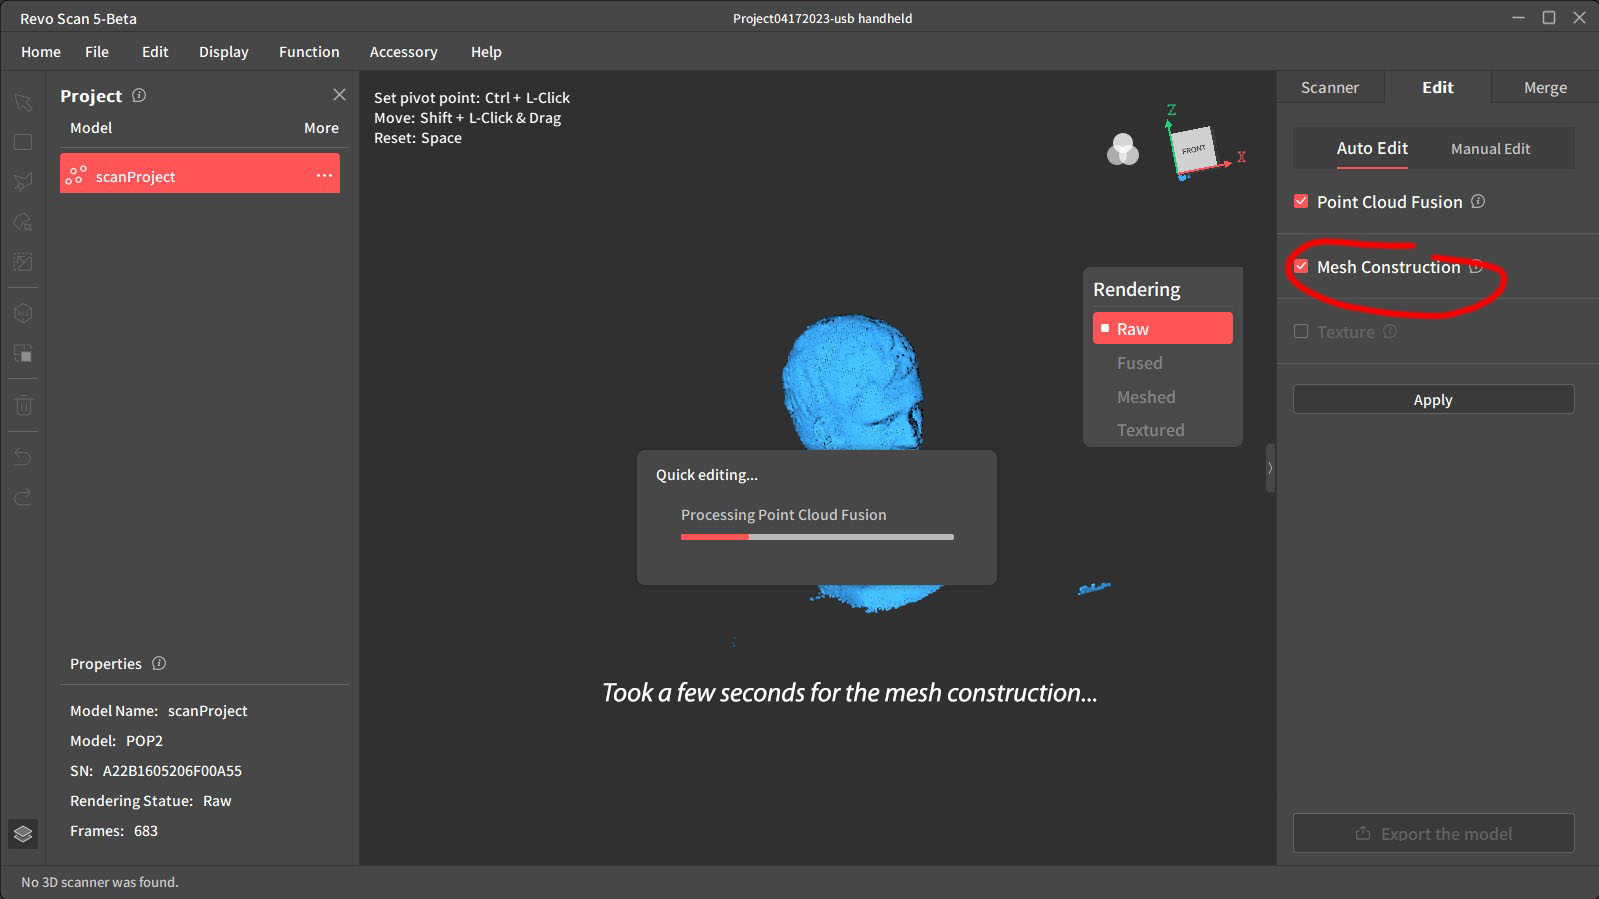
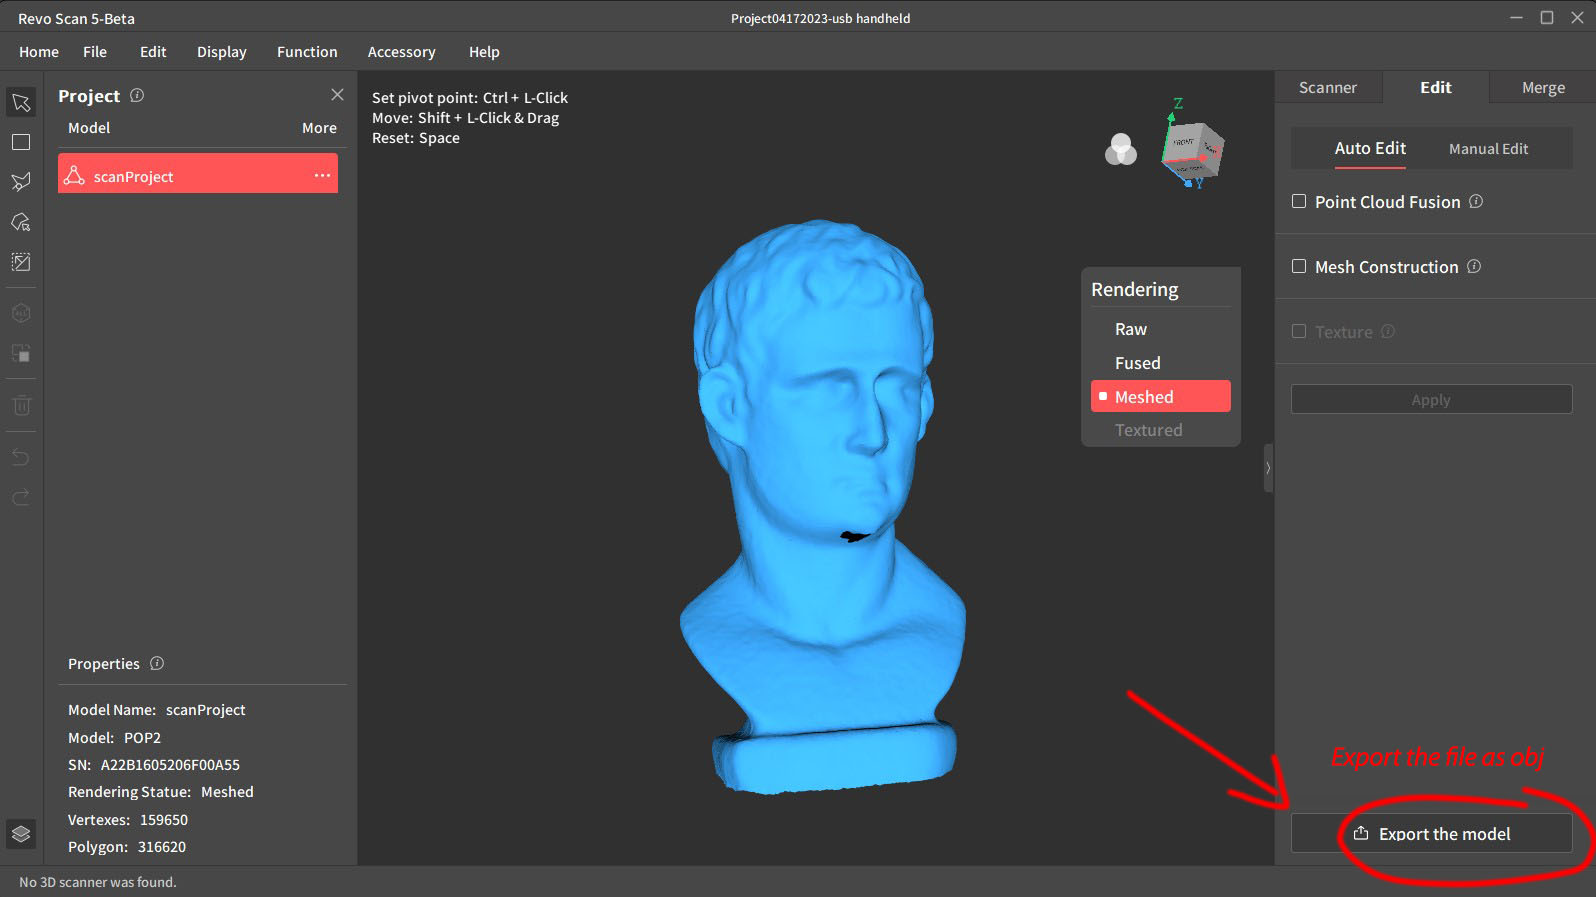
The idea is quite intuitive. You scan the data and load them into the your mobile phone, then use your laptop to construct the data into 3D mesh (either obj or stl format).
Download the app on android and PDF Manual.
Mobile phone 3D scanning
We moved on to using our mobile phone to 3D scan using photogrammetry technology. This is much more exciting compare to the (wired) handheld scanner. One of the tips for good scanning is good lighting on the model. Colorful textures on the model helps as well. There are limitations on photogrammetry technology: Reflective surface is a big indication for failure. We are supposed to take photos every 10 to 20 degree around the model- which means about 20 ~ 30 photos every cycle, with at least two different height.
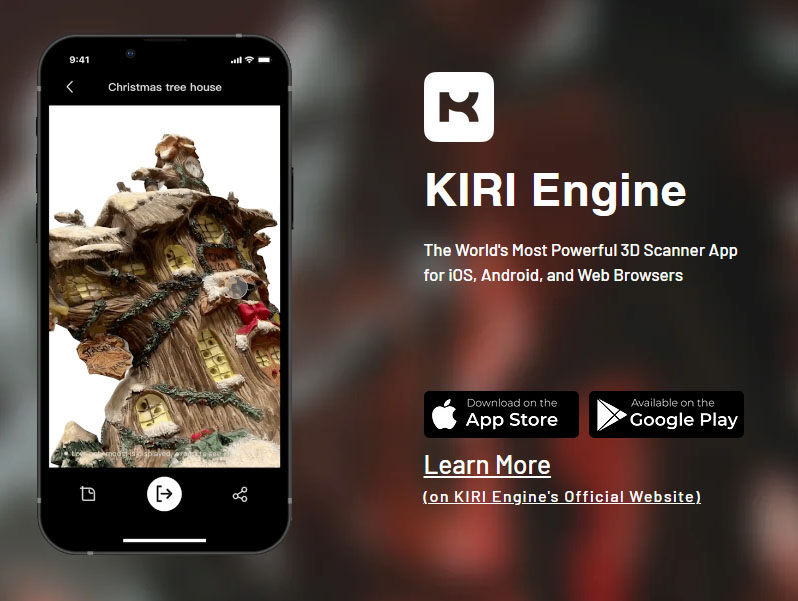
There are many options when it comes to photogrammetry scan, some app comes and goes. For my experiment, I downloaded Kiri Engine after reading a few google articles about photogrammetry on Android phones. Most of the app charges a small fee for premium accounts. For Kiri Engine Free version, there is a limitation of maximum 70 sets of upload photos and 3 free export per week. There is a web browser version of the Kiri Engine, which make it more attractive.
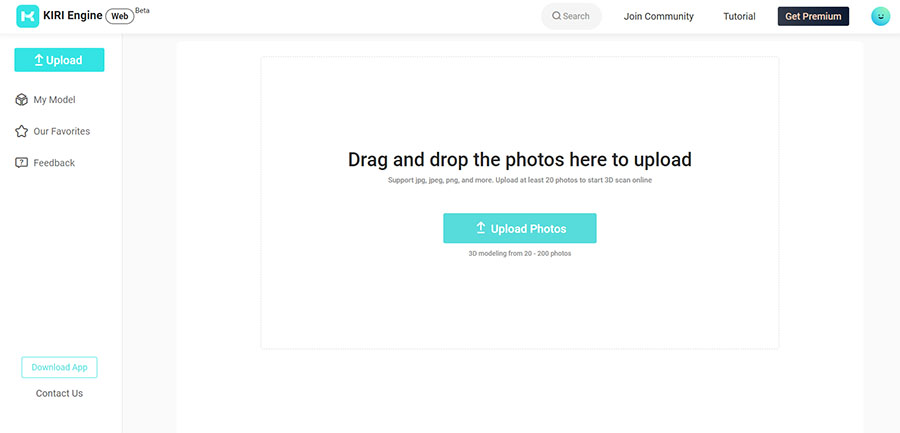
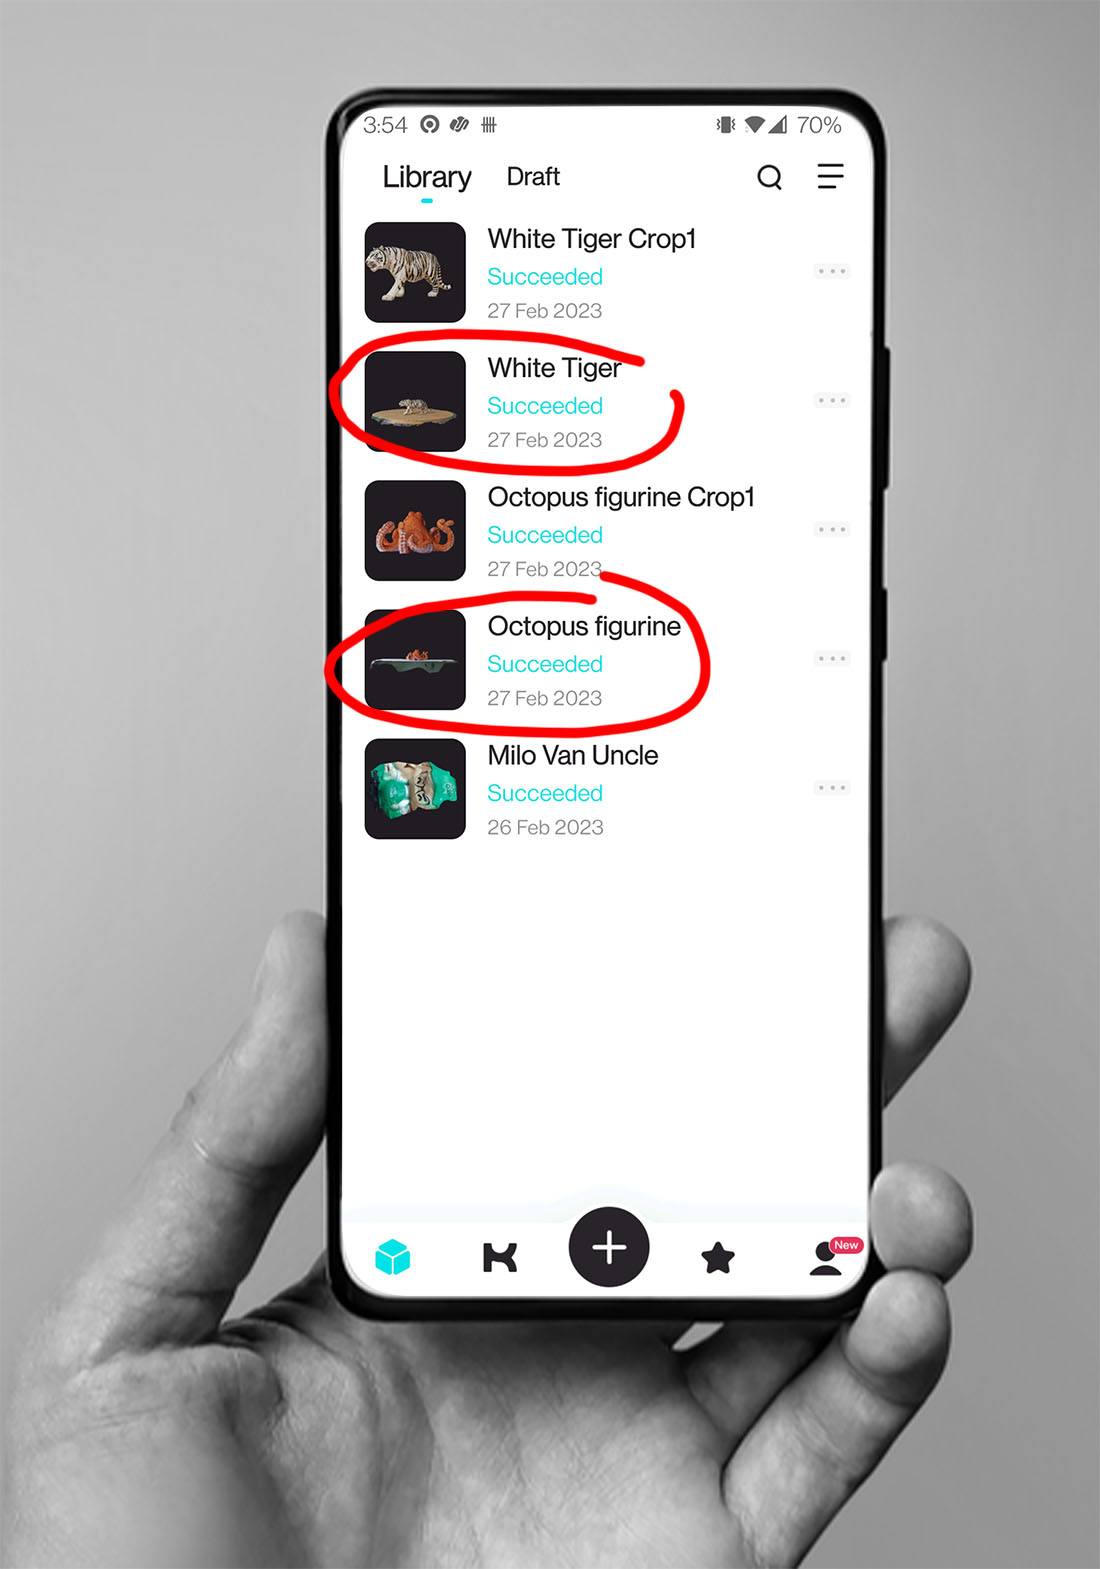
After installation and sign-up for the app, click on the "Add project" and start taking photos (up to 70) of the model you need to digitize. The upload takes a few minutes and the 3D models will be ready after the server processed all the photos. So far my experience is quite positive with less than 10 minutes for each of the two figurines that I scanned.
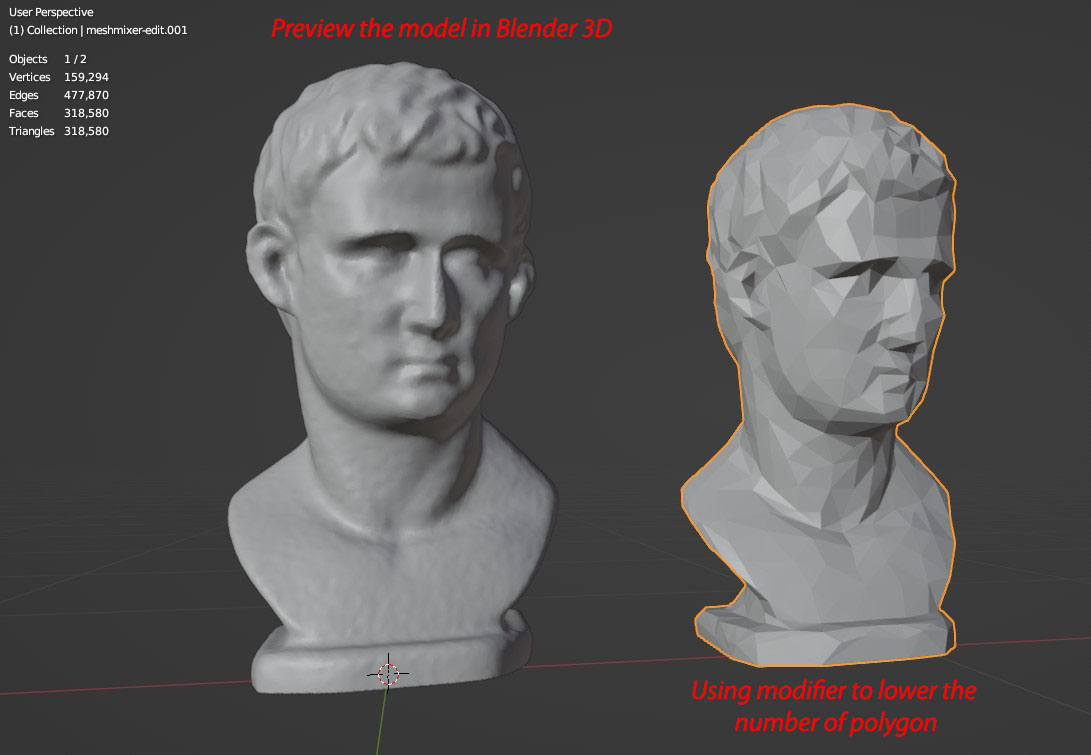
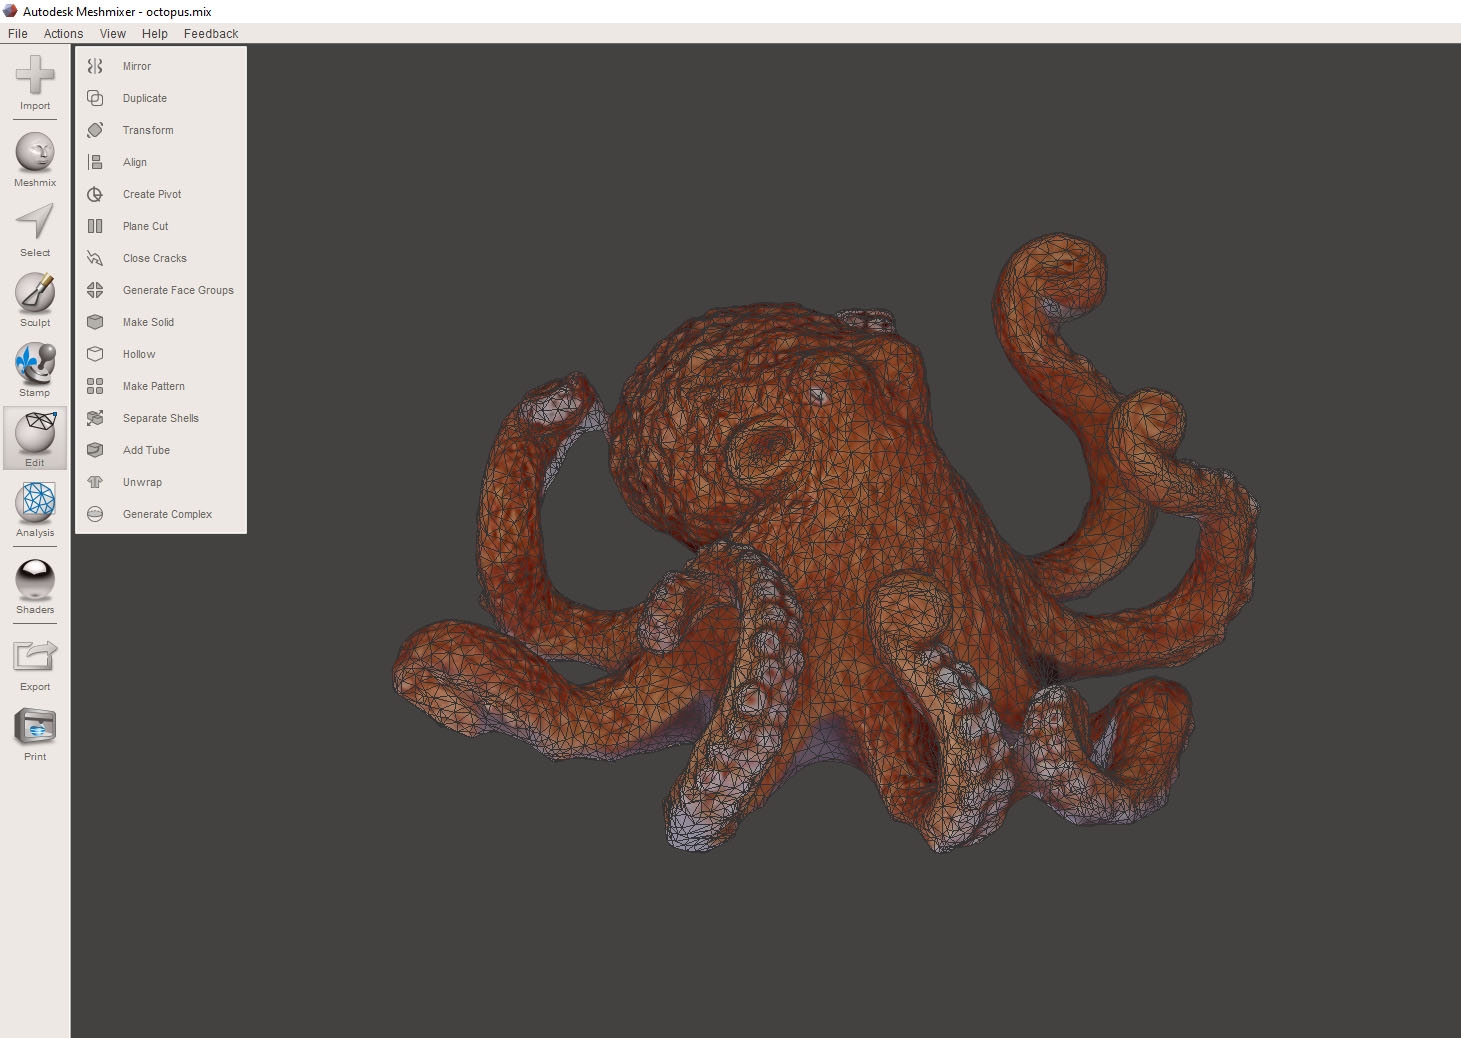
After the server processed the 3D model successfully, you could export the 3D files (obj and mtl) from Kiri Engine. It will send you a link to download. I use Autodesk Meshmixer to clean up the model a bit before sending them for 3D print.
Other learning points
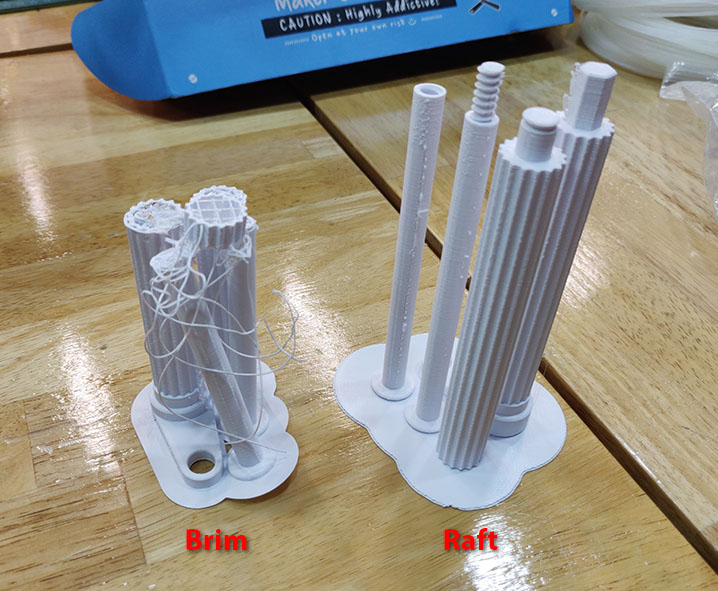
About build-plate adhesion: I downloaded a model from JBV Creative and picked up a few more tips about printing elongated objects vertically. From "skirt" to "Brim" and finally succeeded using "Raft" setting. In short, printing anything that is thin and tall need a strong hold at the bottom. While most of the time, "Brim" (a single thin layer of PLA) will do, the base will warp when it cool down. Most 3D printer has build-in thermal control at the build plate but sometimes it's not good enough. So, having a thicker (yet removable) base (Raft setting) is essential for successful printing.
Download Link
- Original low-poly rabbit design (.blend format, 1.1Mb)
- Voronoi Rabbit Model (Obj format, LARGE file size: 59Mb download from OneDrive)