Week 2: Computer Aided Design 2D & 3D
Checklist for this week:
- ☑ Modelled experimental objects/part of a possible project in 2D and 3D software
- ☑ Shown how you did it with words / images/ screenshots
- ☑ Included your original design files
I have been using Adobe Photoshop and Illustrator most of my career and I am fairly fluent with the software tools and Raster / Vector image editing. I use Adobe illustrator to create instruction manuals in pdf for my mini cardboard. The link to view the sample of the pdf is listed below.
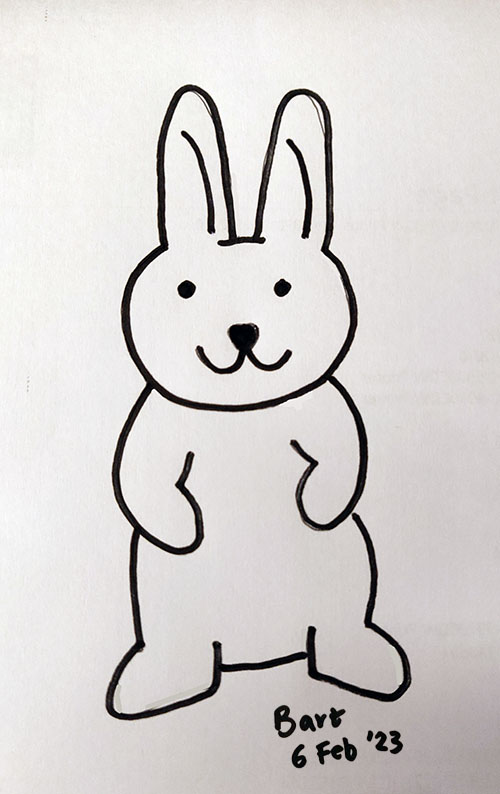
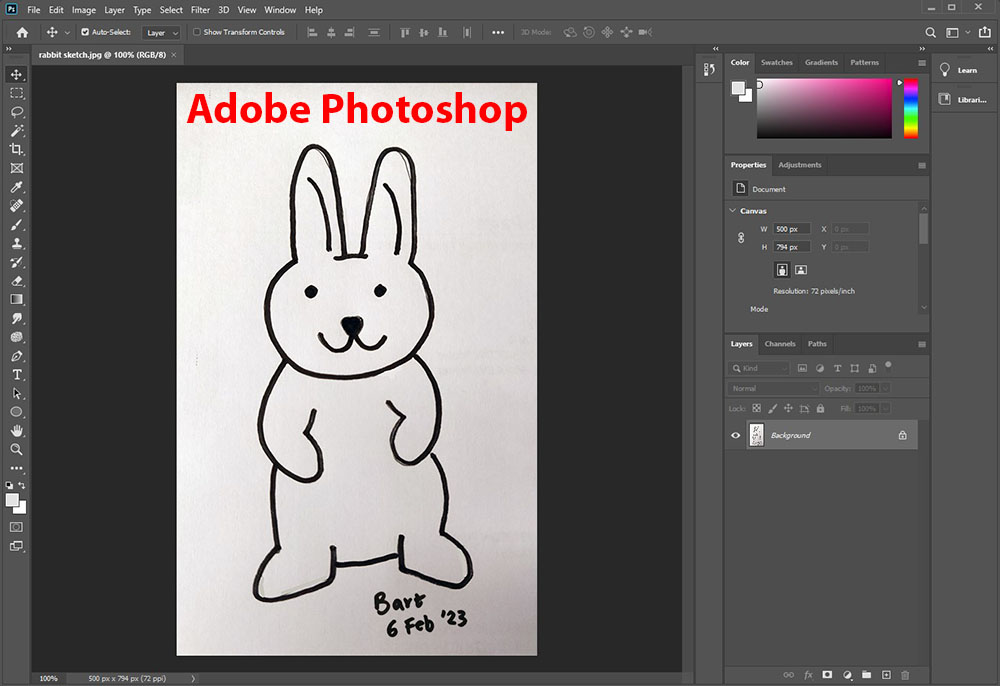
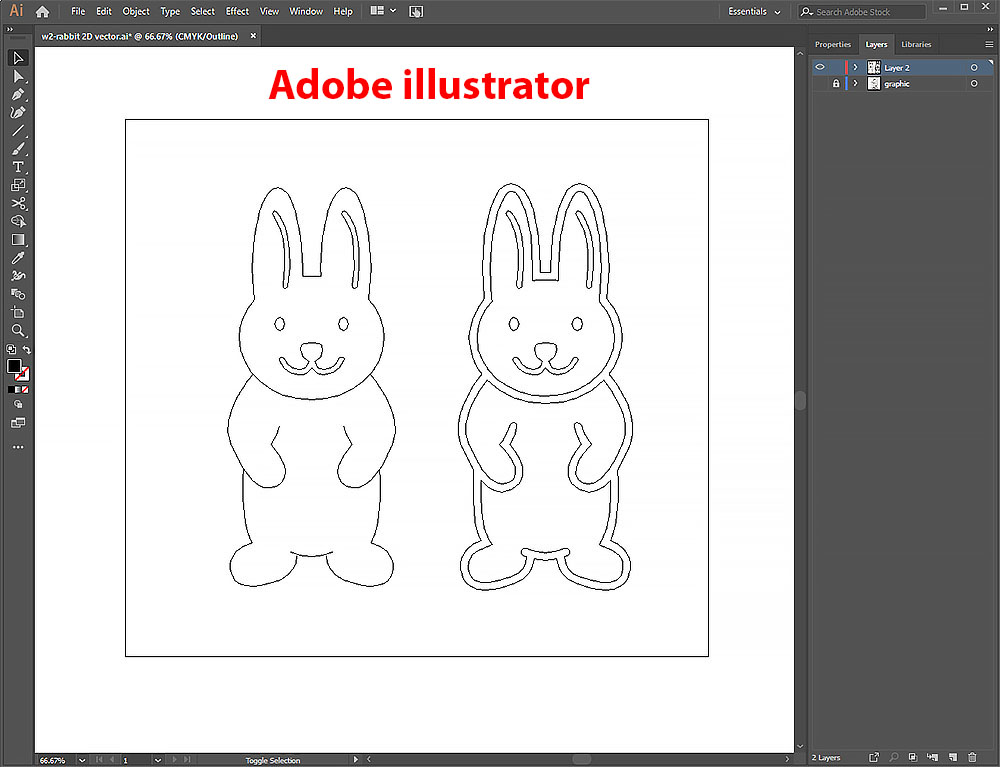
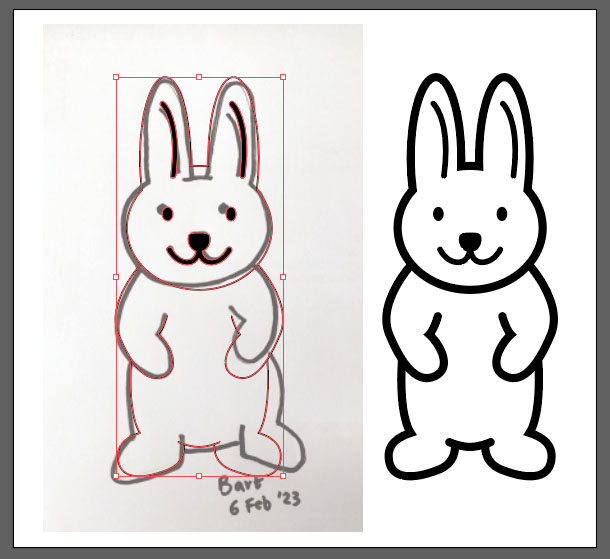
For this exercise, I sketch a rabbit and take a photo of it. And then I trace the photo and make a vector image in svg format (pictures above).
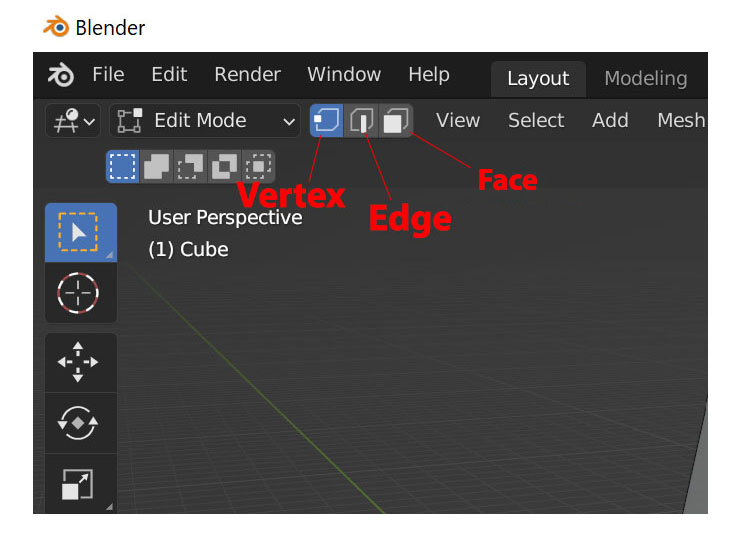
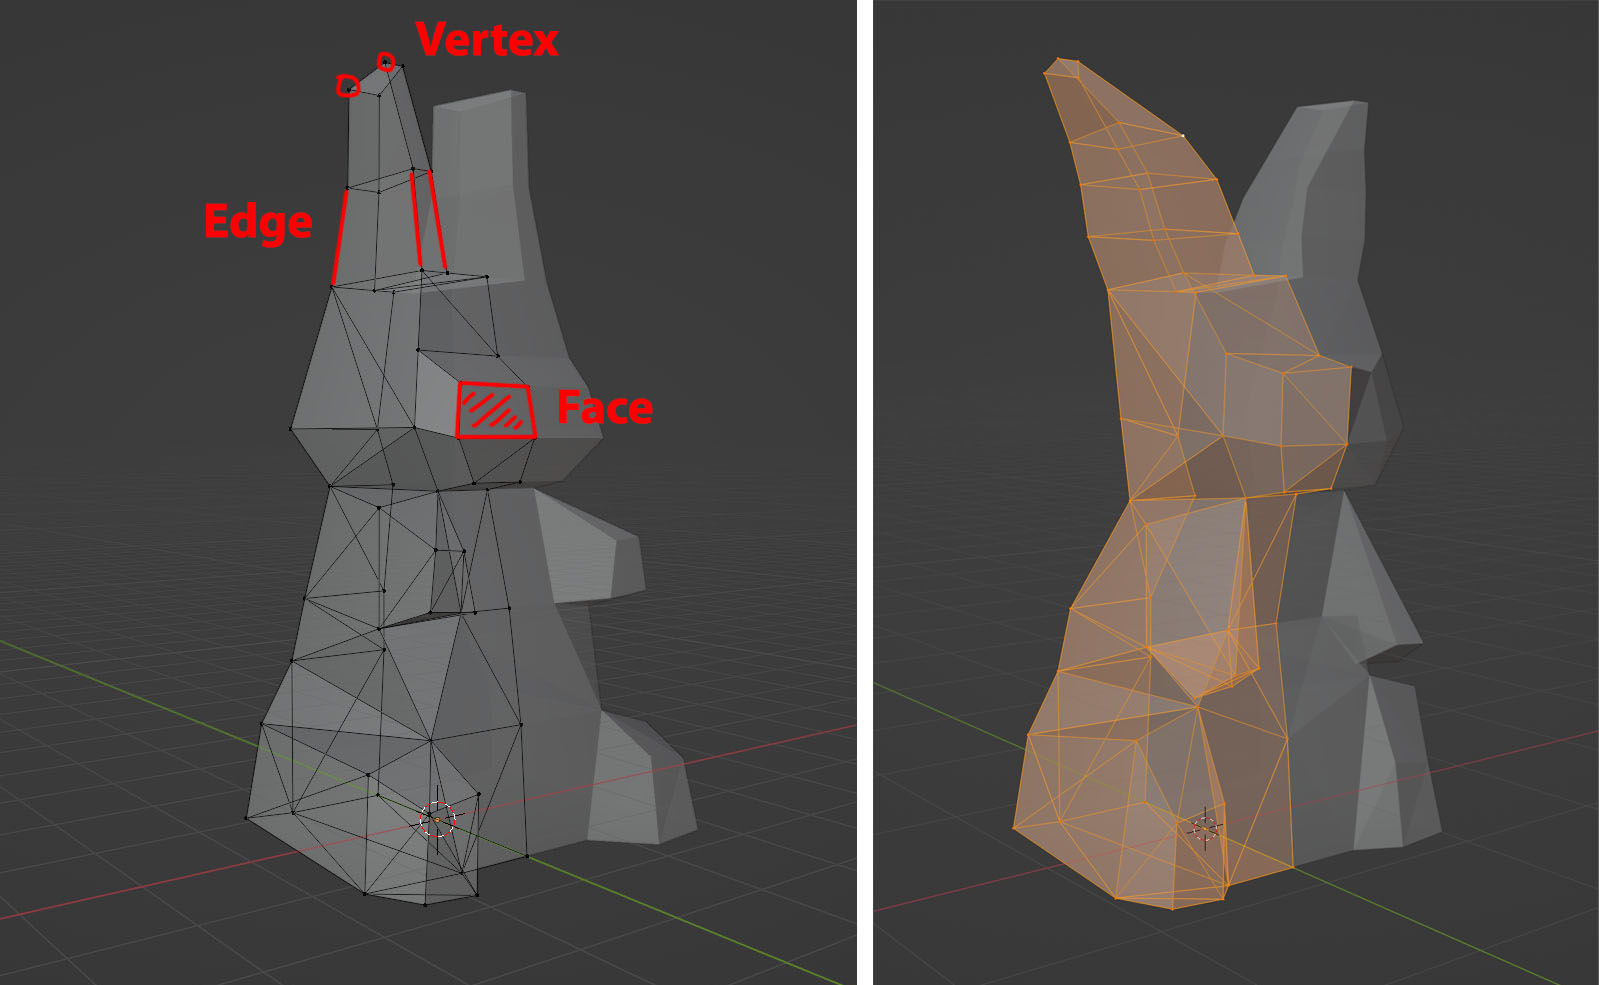
Next, I build the 3D model in Blender 3D (Version 3.3.1) which I have been using since 2017. The technique I used is call box modelling, by moving the vertex, edge or face of the digital 3D model in the virtual space. The working file is in the link below.
Photoshop: Downsize a raster image file
As we all know most of the time, vector image has a much smaller file size and simpler colour profile compare to the average raster image file. It could be tricky if we just upload our photos taken from our mobile phone directly to our repository due to its large size (and tons of details in the photo, which is good). I used the following steps to downsize the photo to a reasonable size and fit into the 10Mb upload limit.
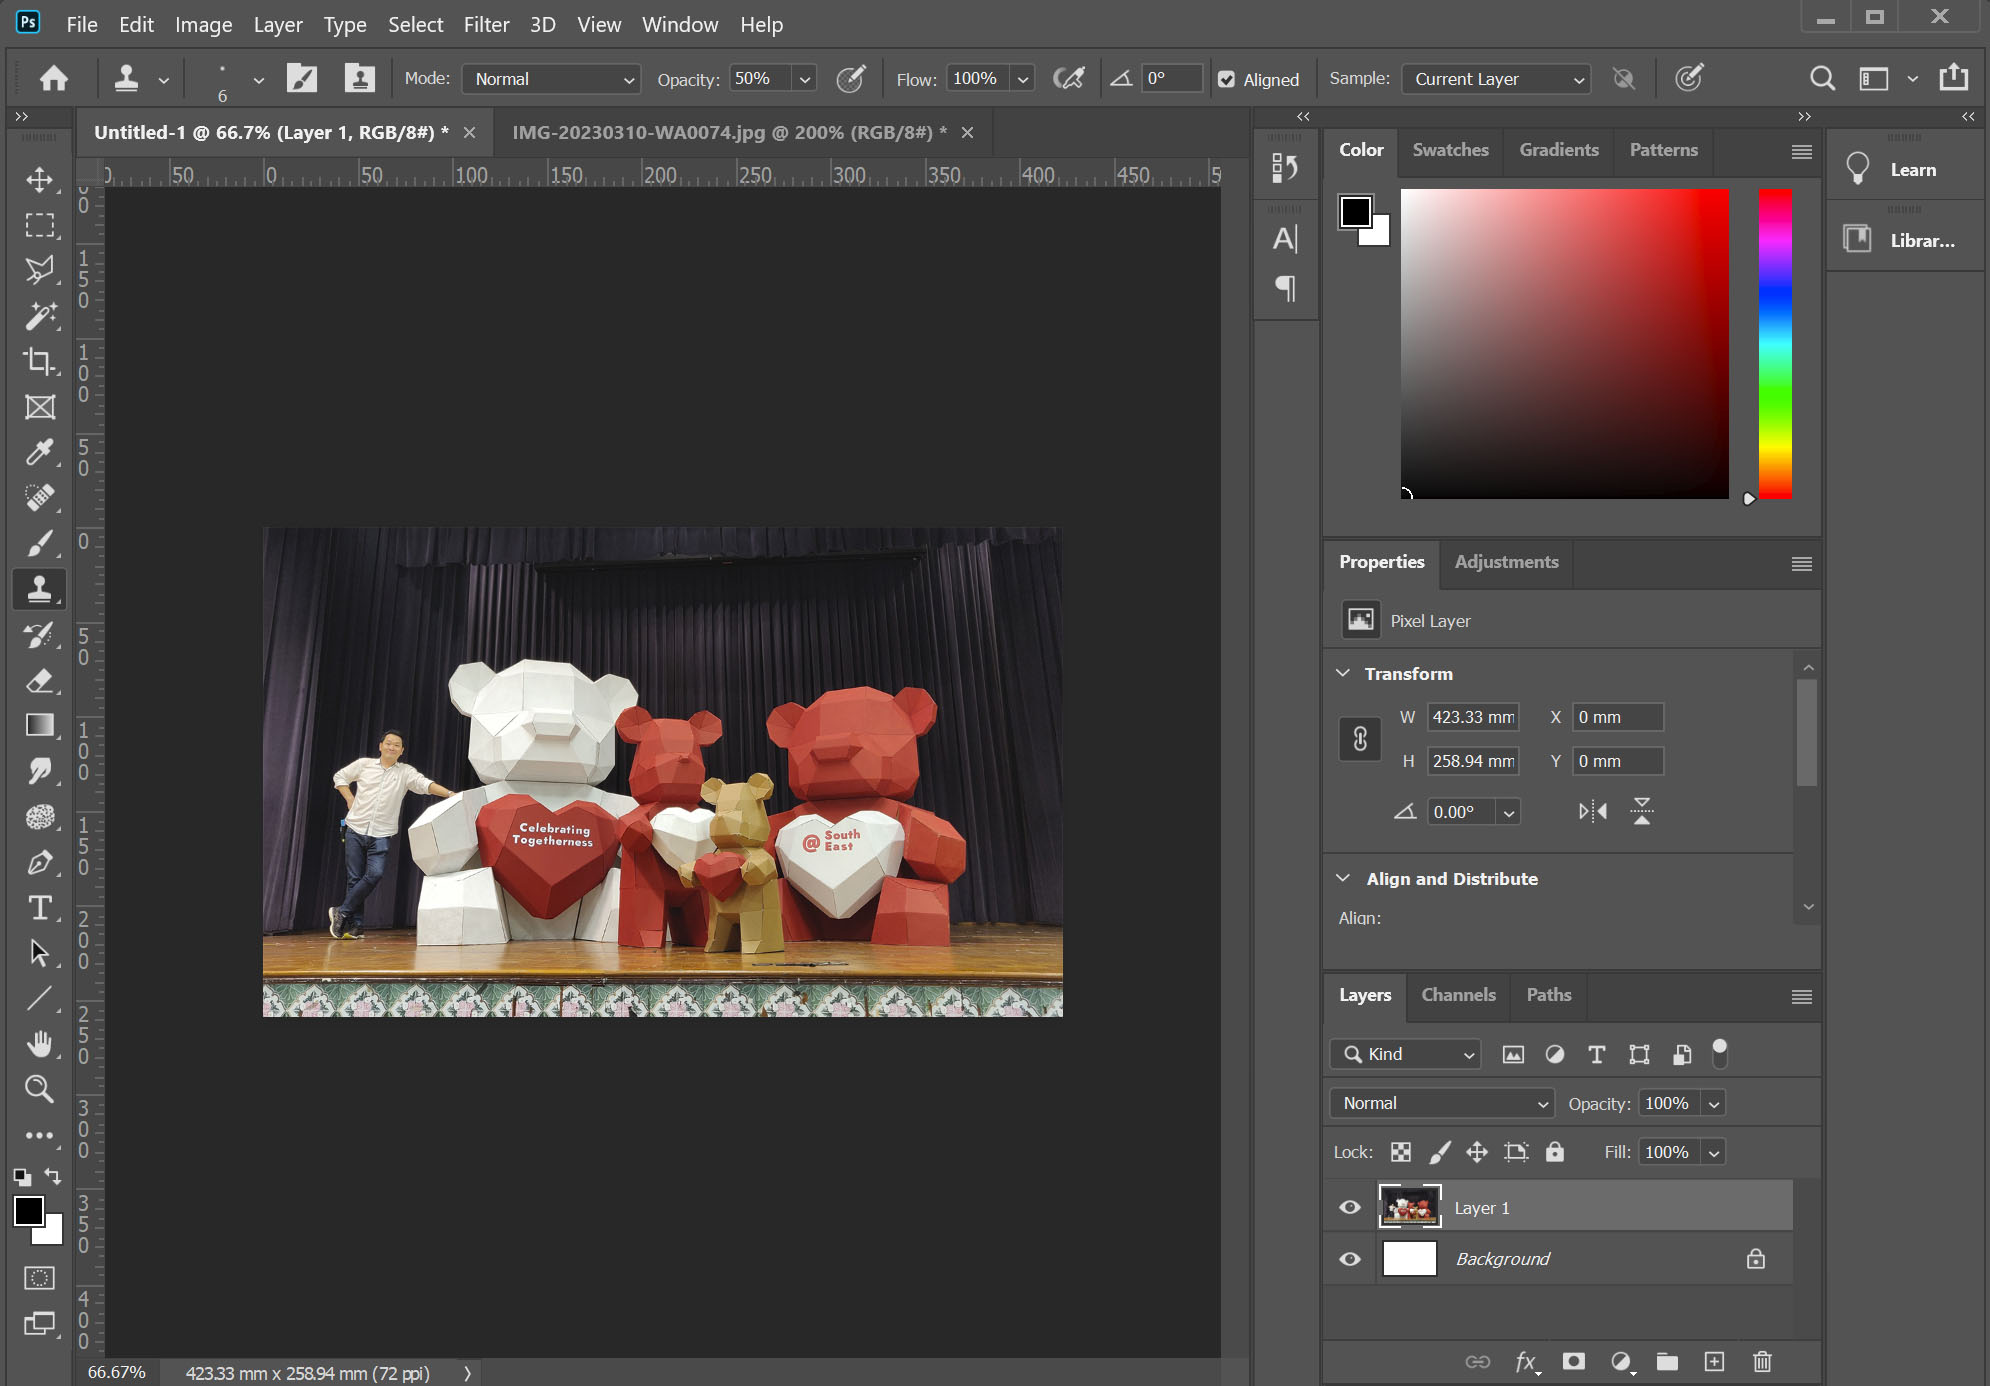
1. Fire up Adobe Photoshop and drag-and-drop any raster image file into the window of the app.
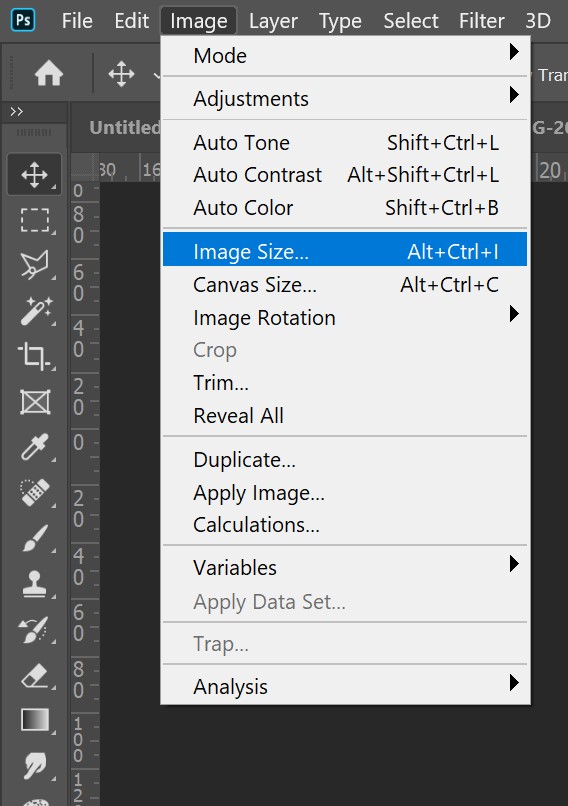
2. Go to the Image menu and select Image Size (or use the shortcut keys Alt + Ctrl + i) to open up the Image Size dialog box.
3. Set the width to a reasonable size so that it fit into your webpage. Make sure it is scaled proportionately by clicking the button on the left.

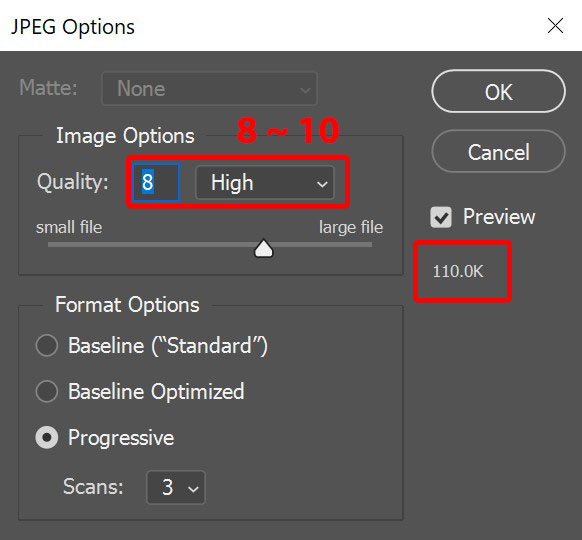
4. When you try to save the file to JPG, another dialog box will pop up for you to set the quality option. Usually I use a value of 8~10 and double check on the final file size before hitting "ok".
With these steps, I could easily downsize all the images I am going to upload to Fabcloud.
Adobe illustrator for creating or handling Vector file
Photo import into illustrator.
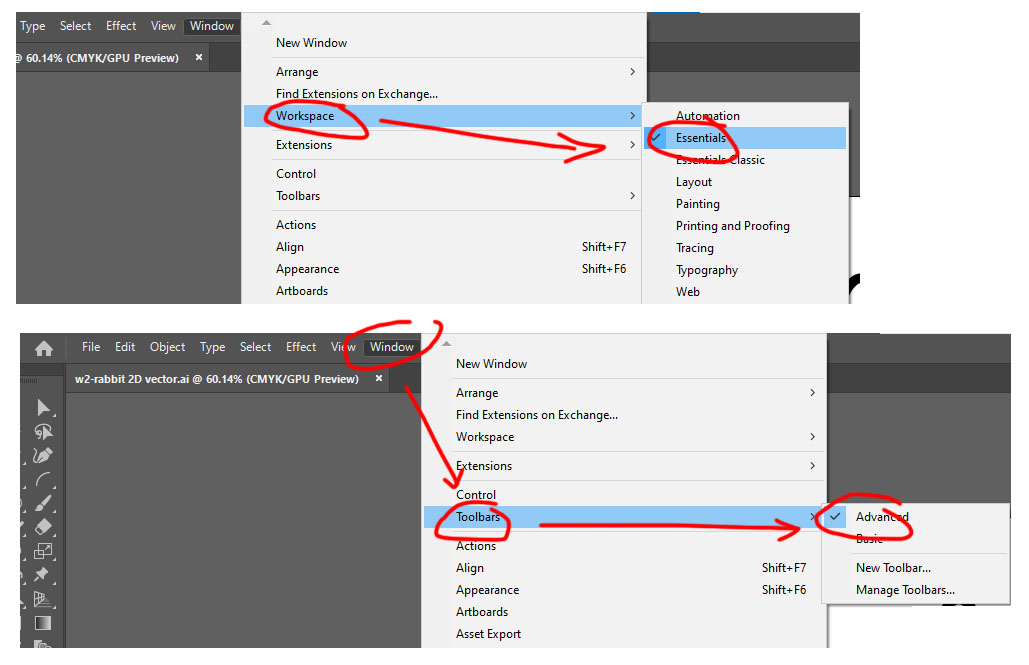
Before I start I always revert back to the default workspace and make sure "Advance toolbar" is checked.
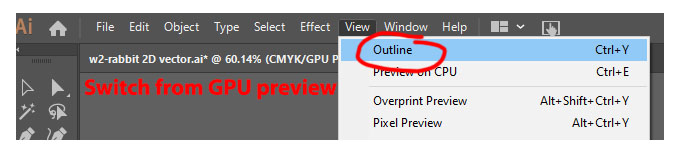
Another frequent function I used is to switch between Preview and Outline mode to check my artwork.
I drag and drop the photo that I have sketched and use the "Pen tool" to trace the photo and adjust the outline along the way.
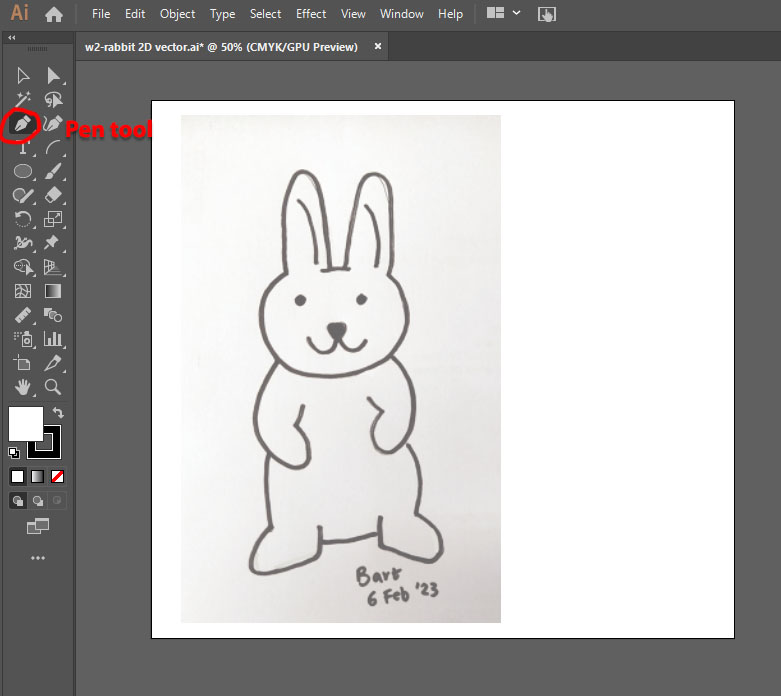
I thickened the outline to at the last stage to make the body more prominent. Lastly, save the file as "ai" format.
Blender 3D for creating digital model
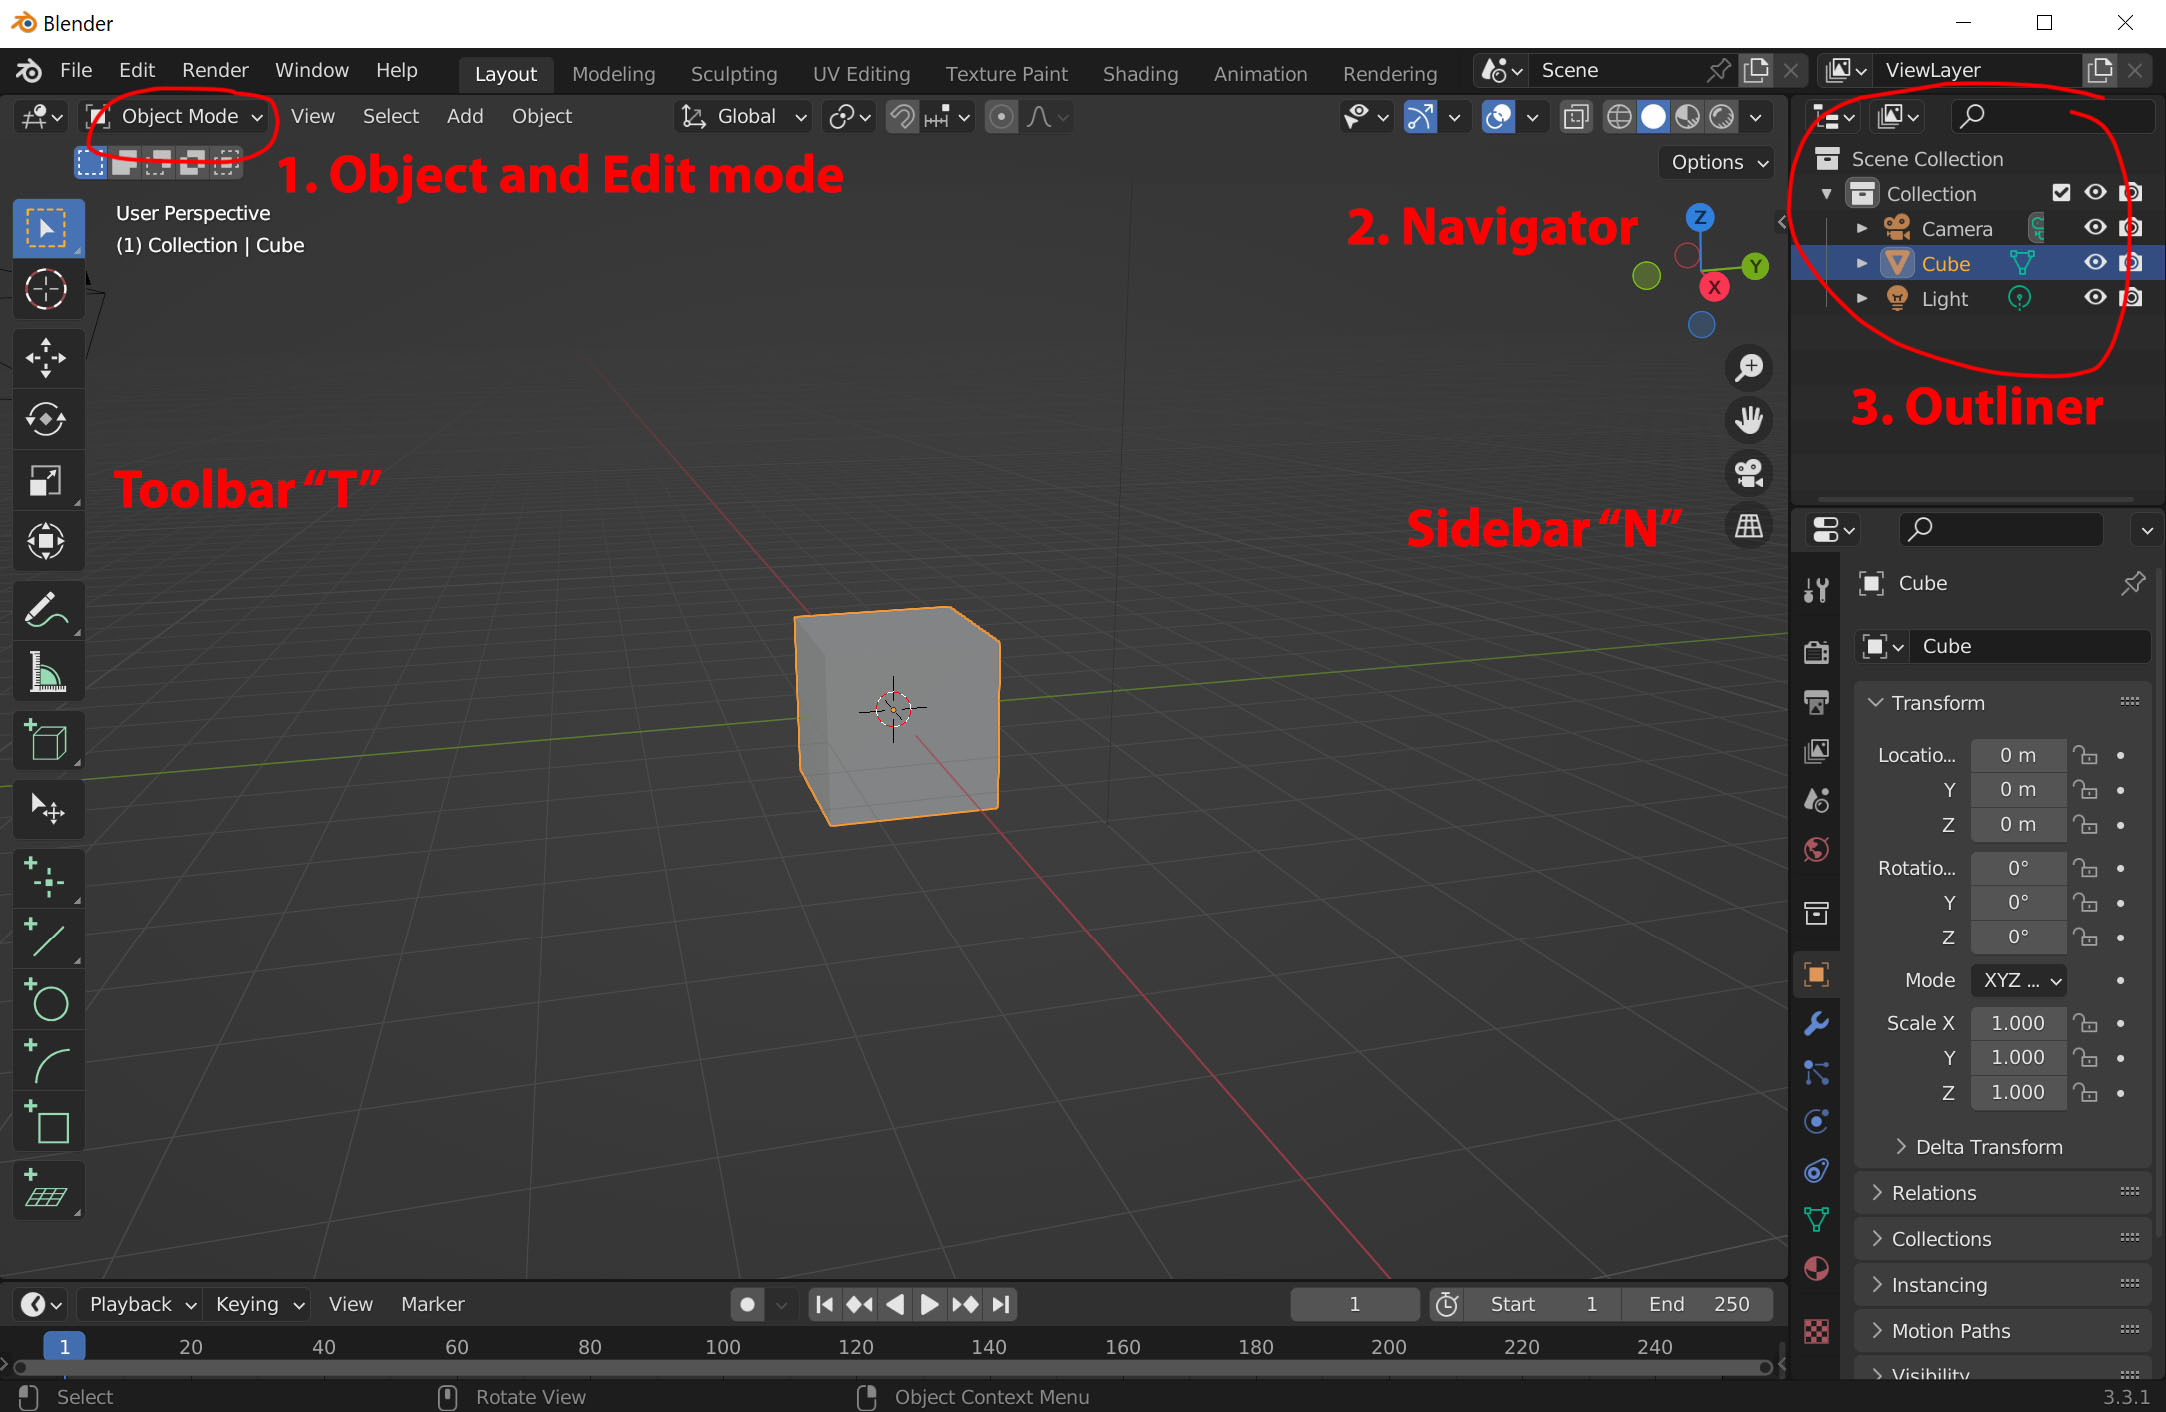
To learn any software, we start by getting to know the user interface when the app load into our screen. Usually, the top is the file menu and left hand side is the toolbar. Right hand side is additional "sidebar" to work on our 3D model. At some point, our virtual world maybe filled up with various objects and we need the "Outliner" to list down all the items we created in our file. Blender 3D is a powerful software not just for digital model creation, we could use it for physics simulation and VFX and some hardcore fans even use it for video editing.
For digital model creation, we need to be aware that there are two modes that we are working on: "Object mode" and "Edit mode". Simply put it, "Edit mode" is to edit our digital model in sublevel by moving, rotating or scaling the vertex, edge or surface.
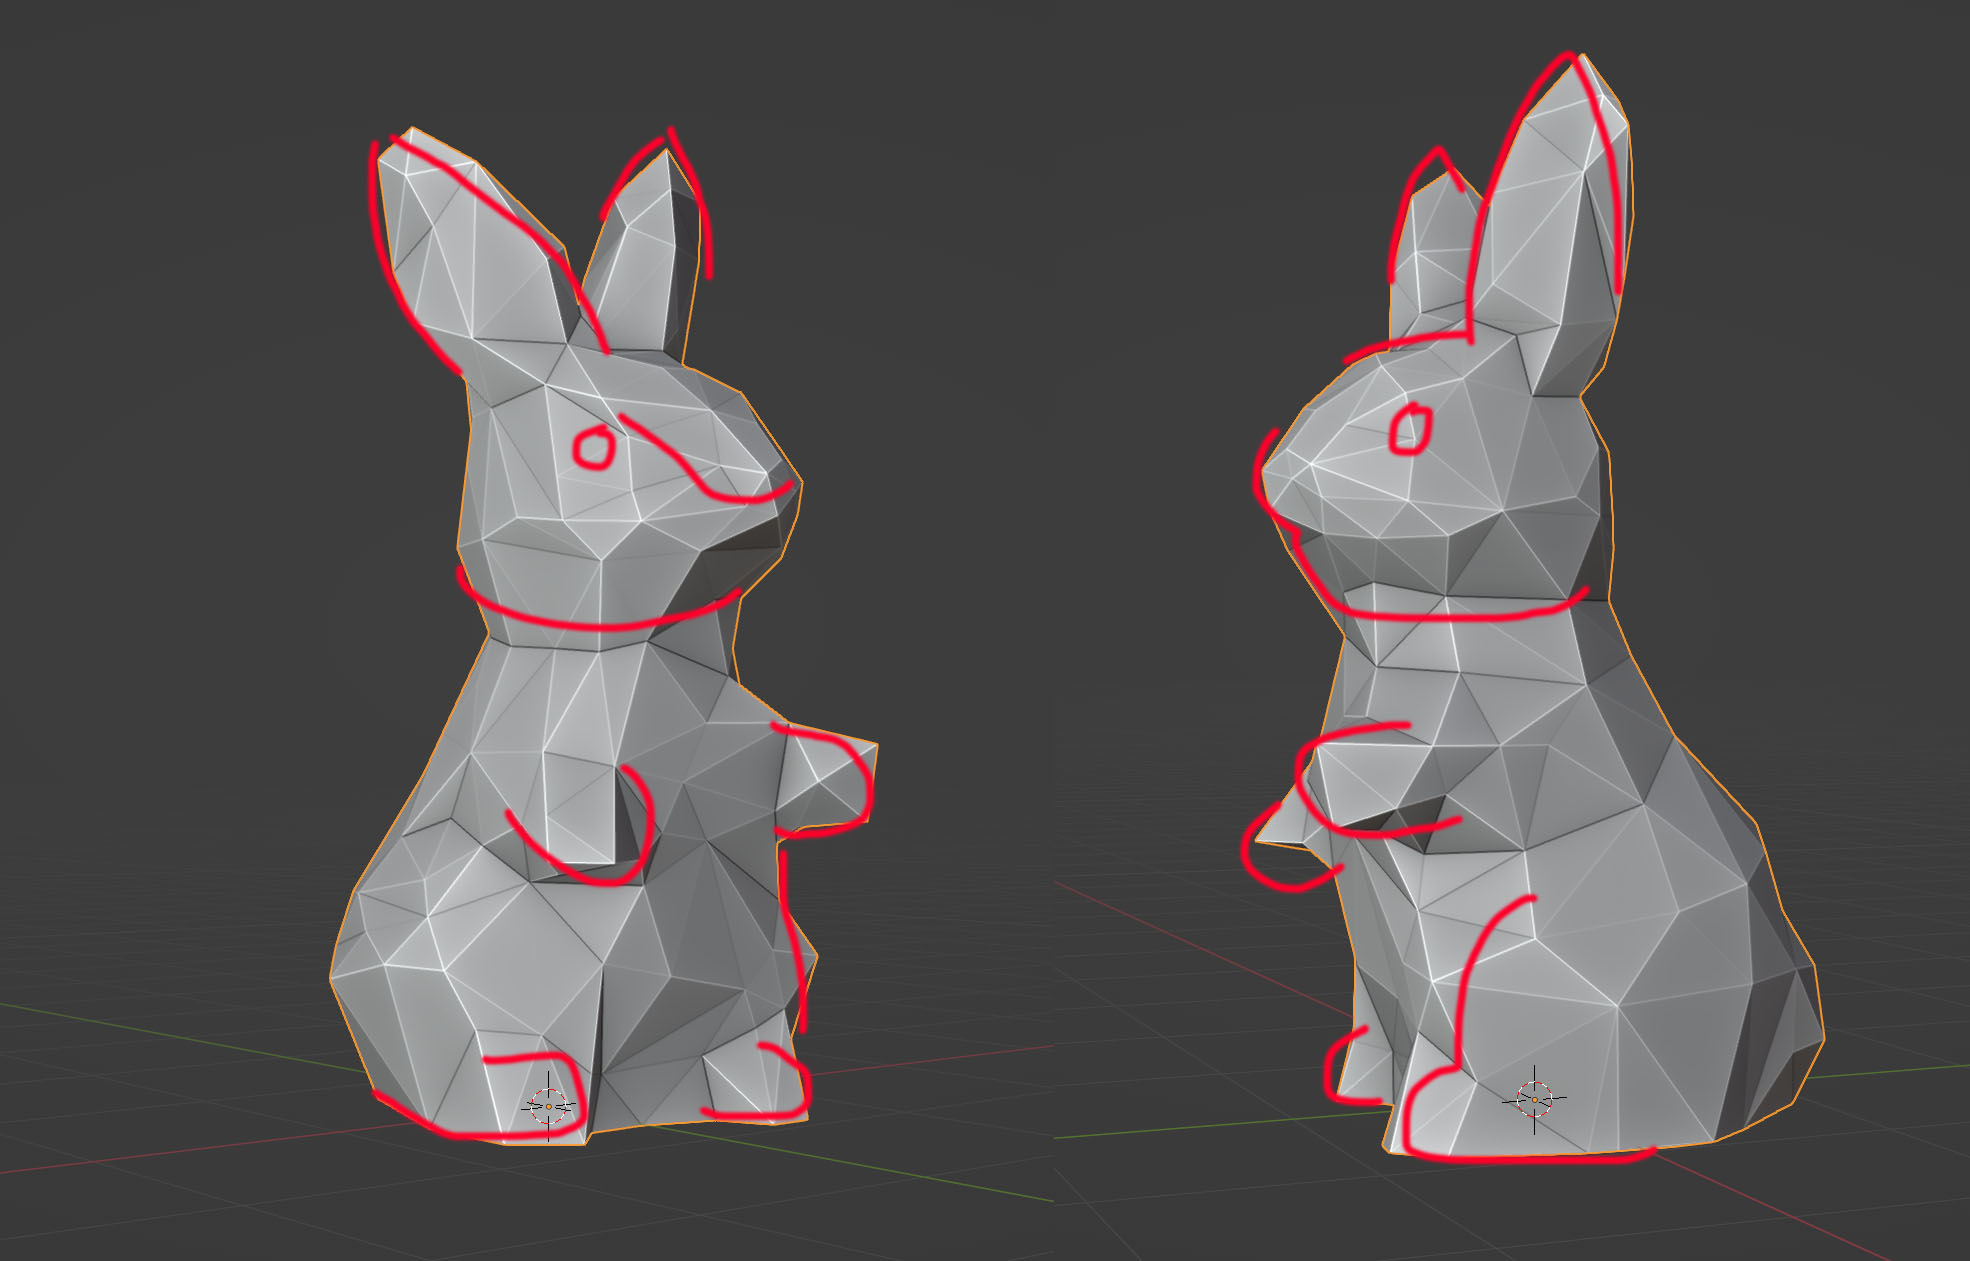
Another useful tip for using Blender are the shortcut keys: "G" for move, "R" for rotate, "S" for scale. You could use the number pad to change the elevation views from top(7) / front(1) / side (3). "Spacebar" is for searching the tool menu. "Ctrl + R" is for loop cut and "K" for cut more segments to add more point of control. "E" for extrude the face when you want to create limbs or the ears.
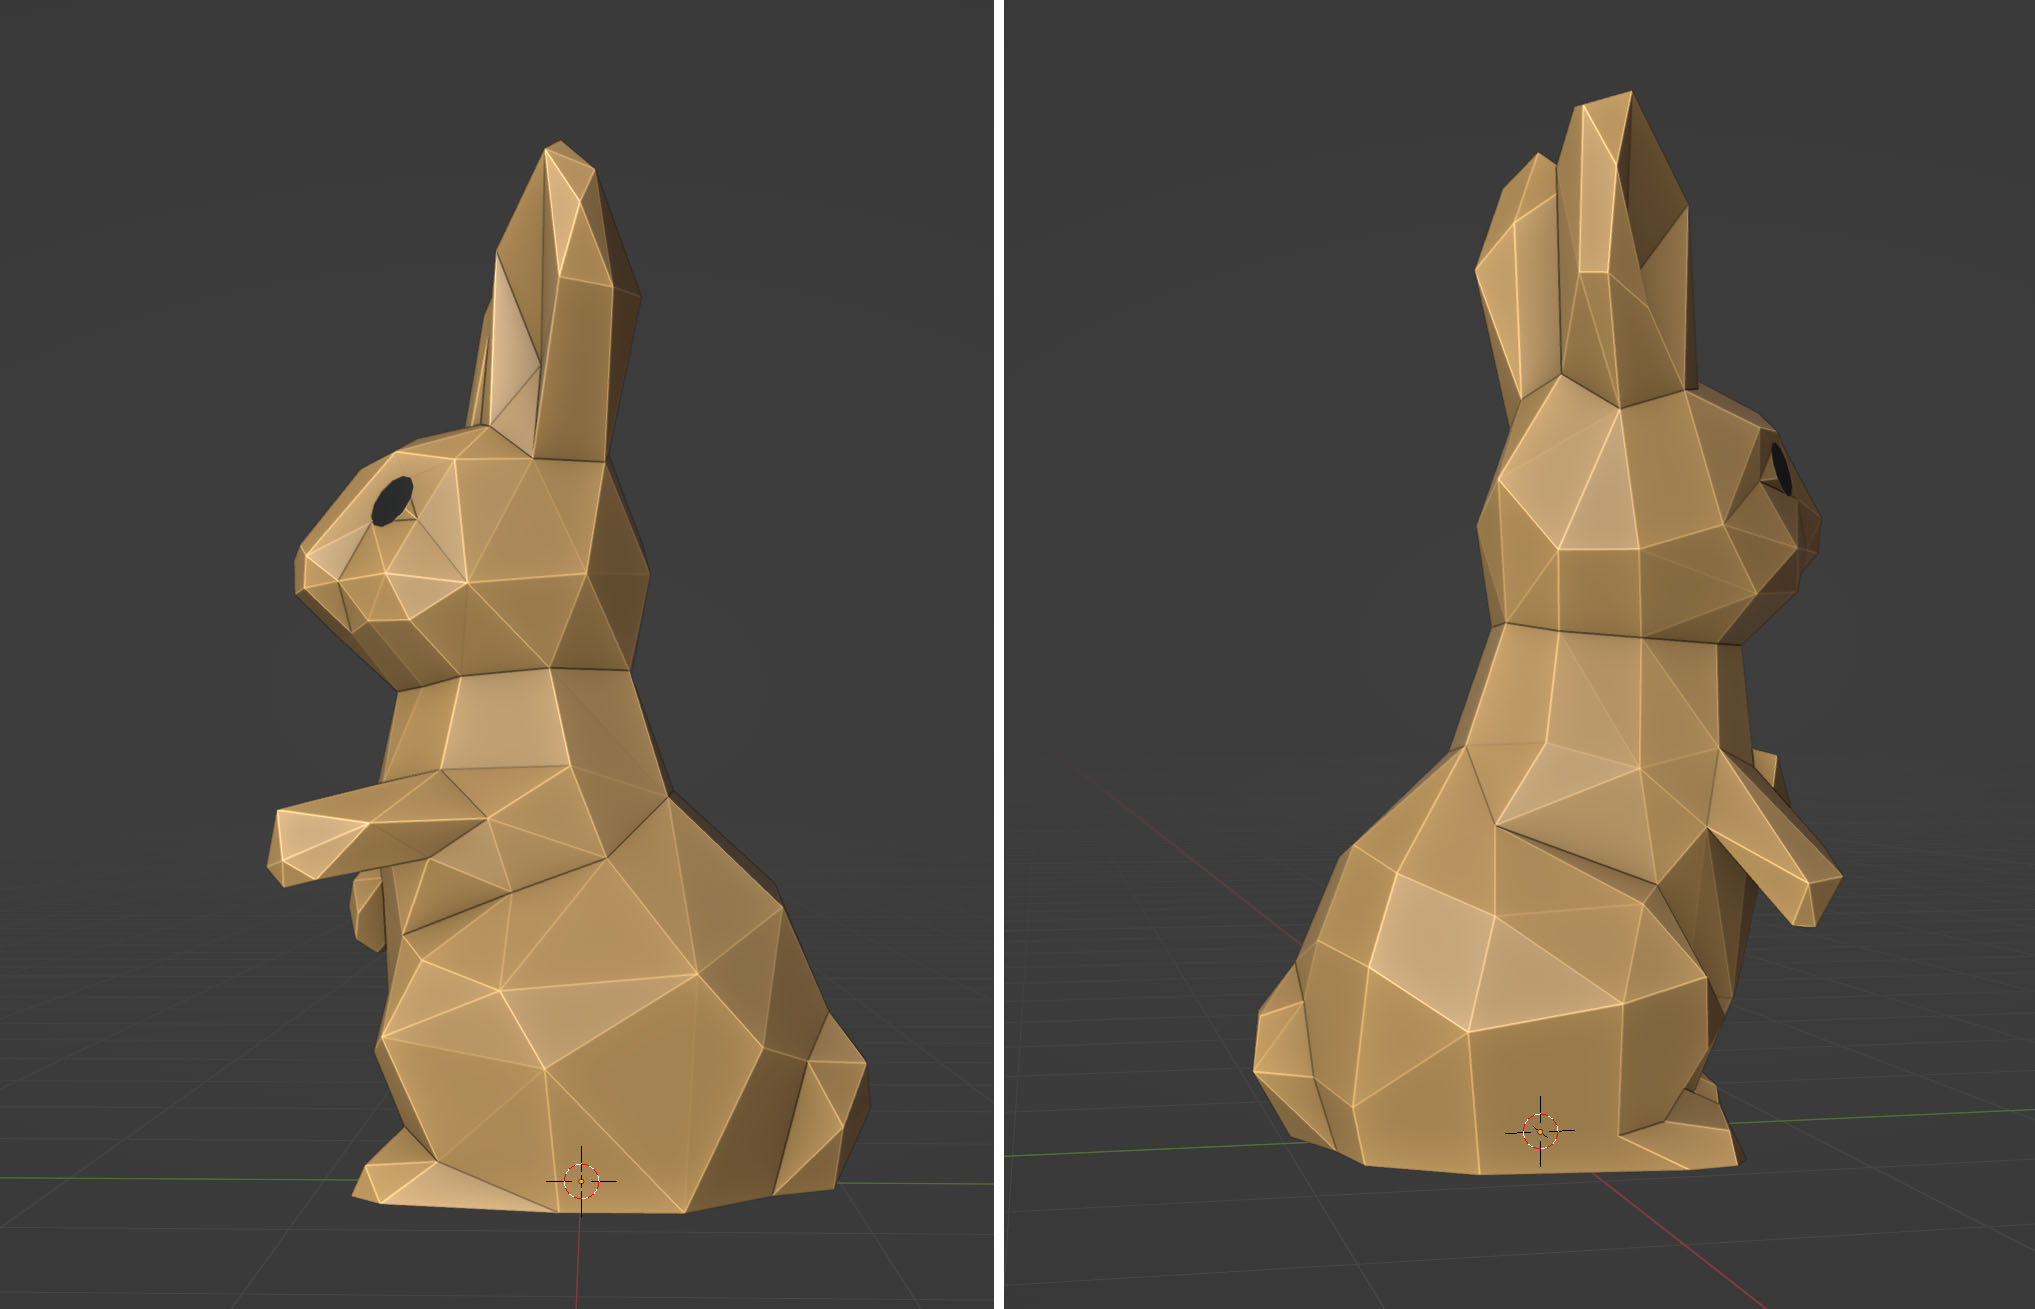
With a bit of patience by moving the point, line and surface of the model, a model of your imagination is created.

A video is worth a thousand pictures
To show you the entire creation process, I captured a video where I start and finish the model (simplified version) to give you a better idea. 3D digital modelling is a continuous process where I could spend hours, if not days, to fine tune my idea in the virtual world.
Autodesk Fusion 360 (Educational license)
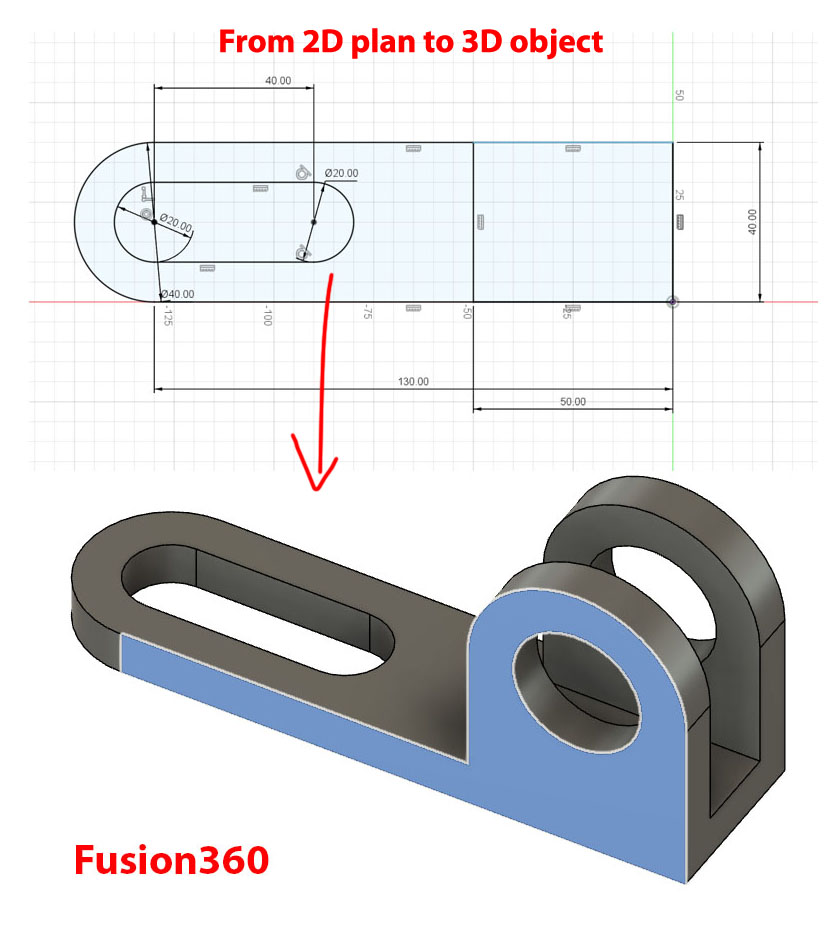
Last year, I start exploring Autodesk Fusion360 for parametric designing. For this exercise, I created a sketch and extrude (join/ cut) them into 3D object as shown below. The link to the working file is listed below.
The first step is to create sketch like a two dimensional plan of your design object. Later you could extrude the face into three dimensional object as shown.
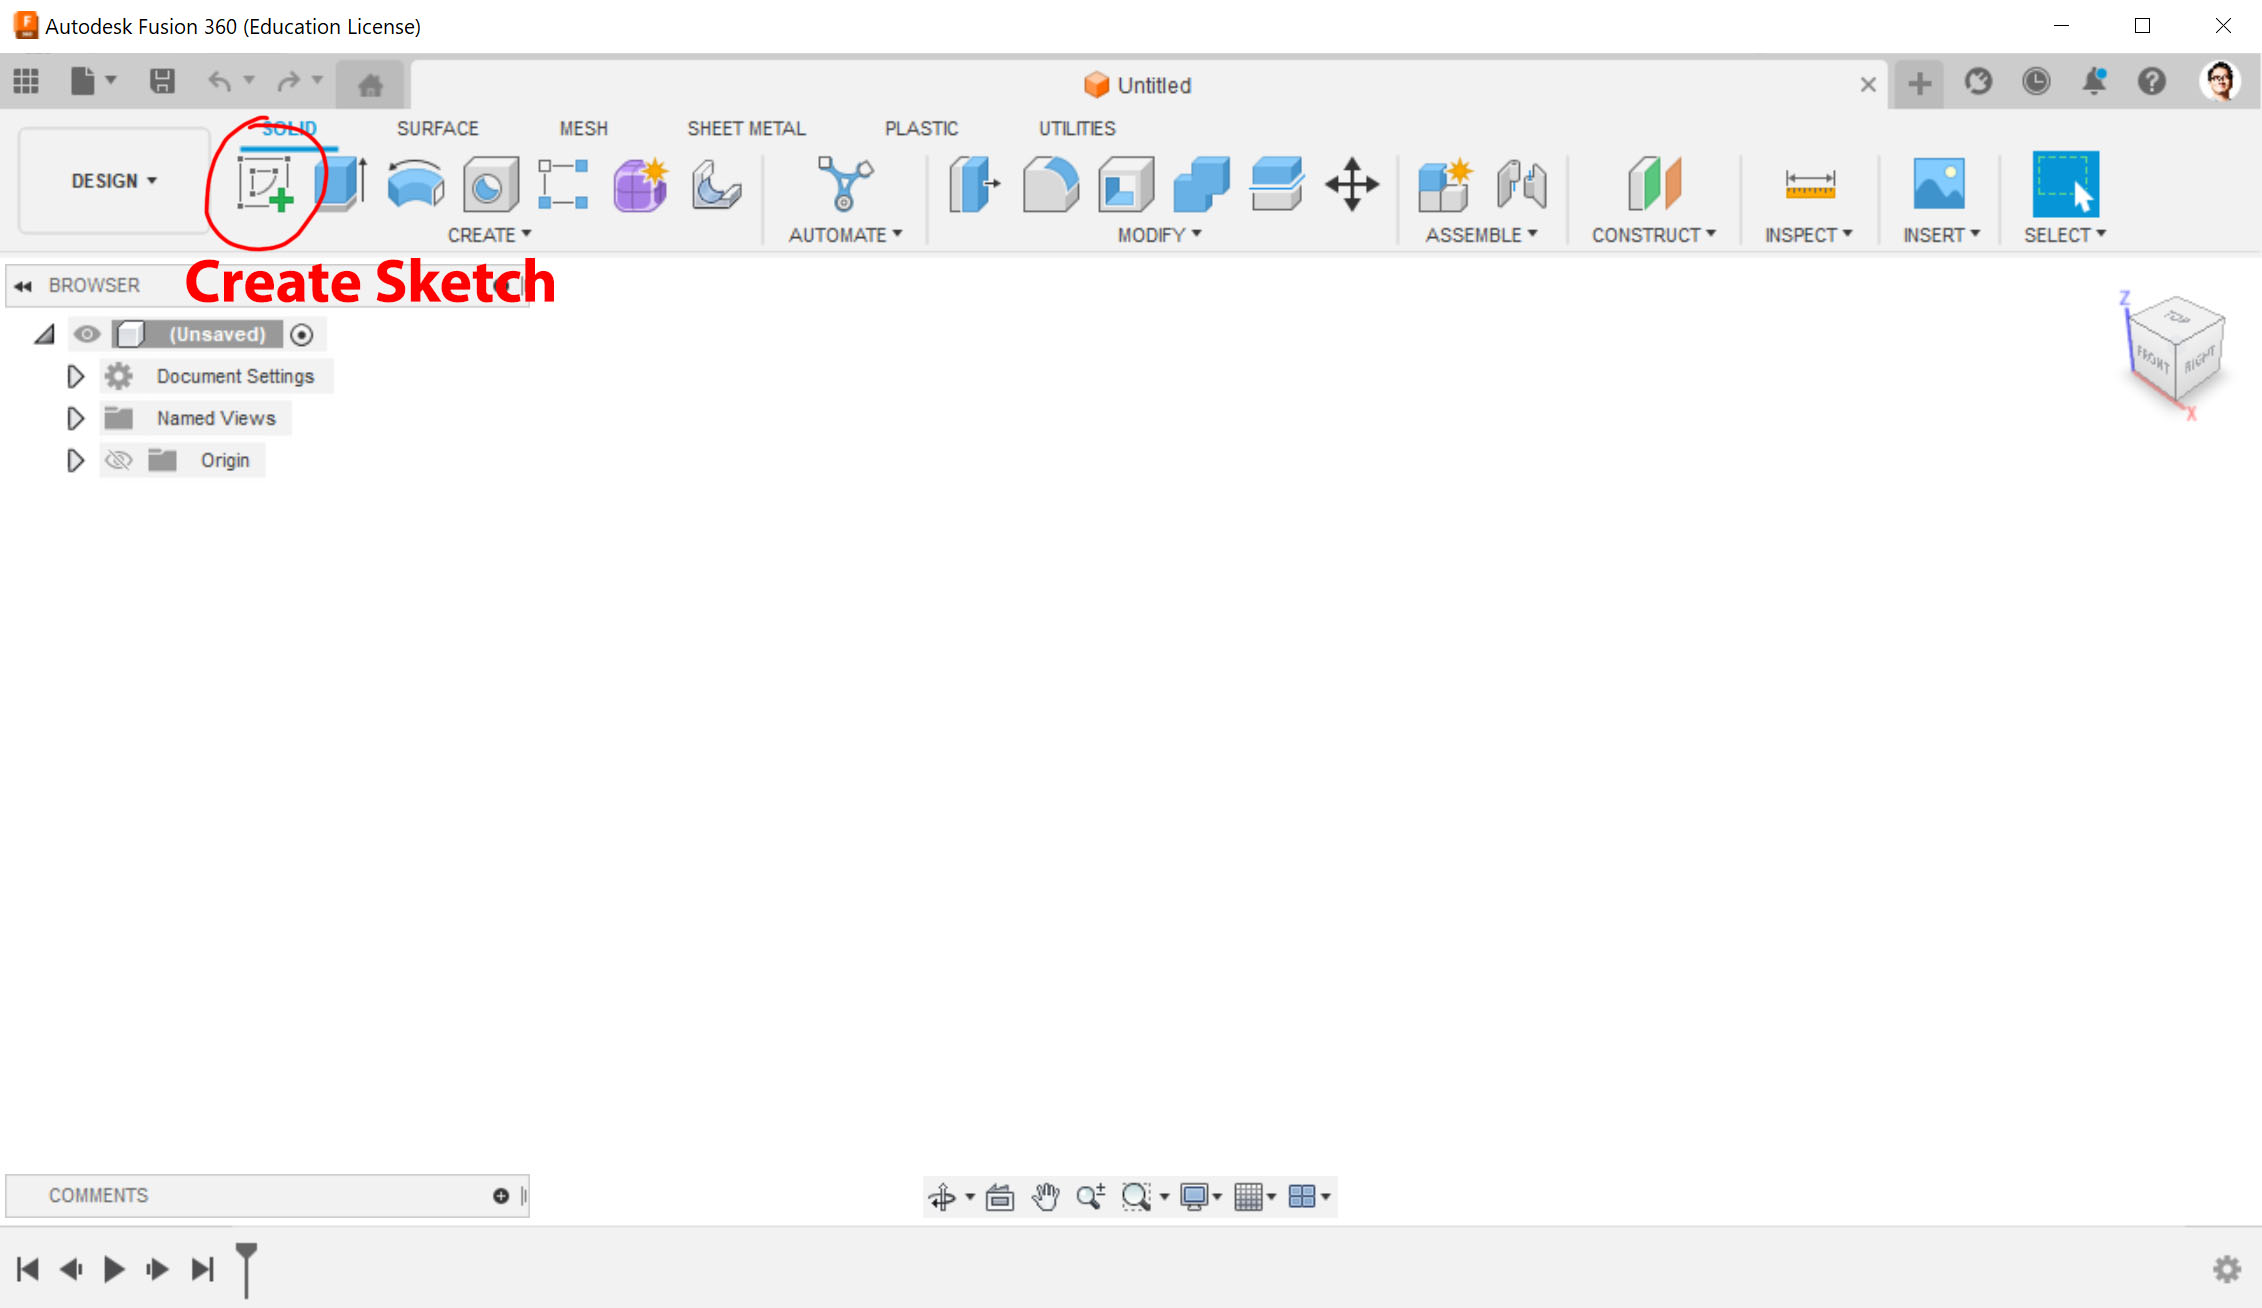
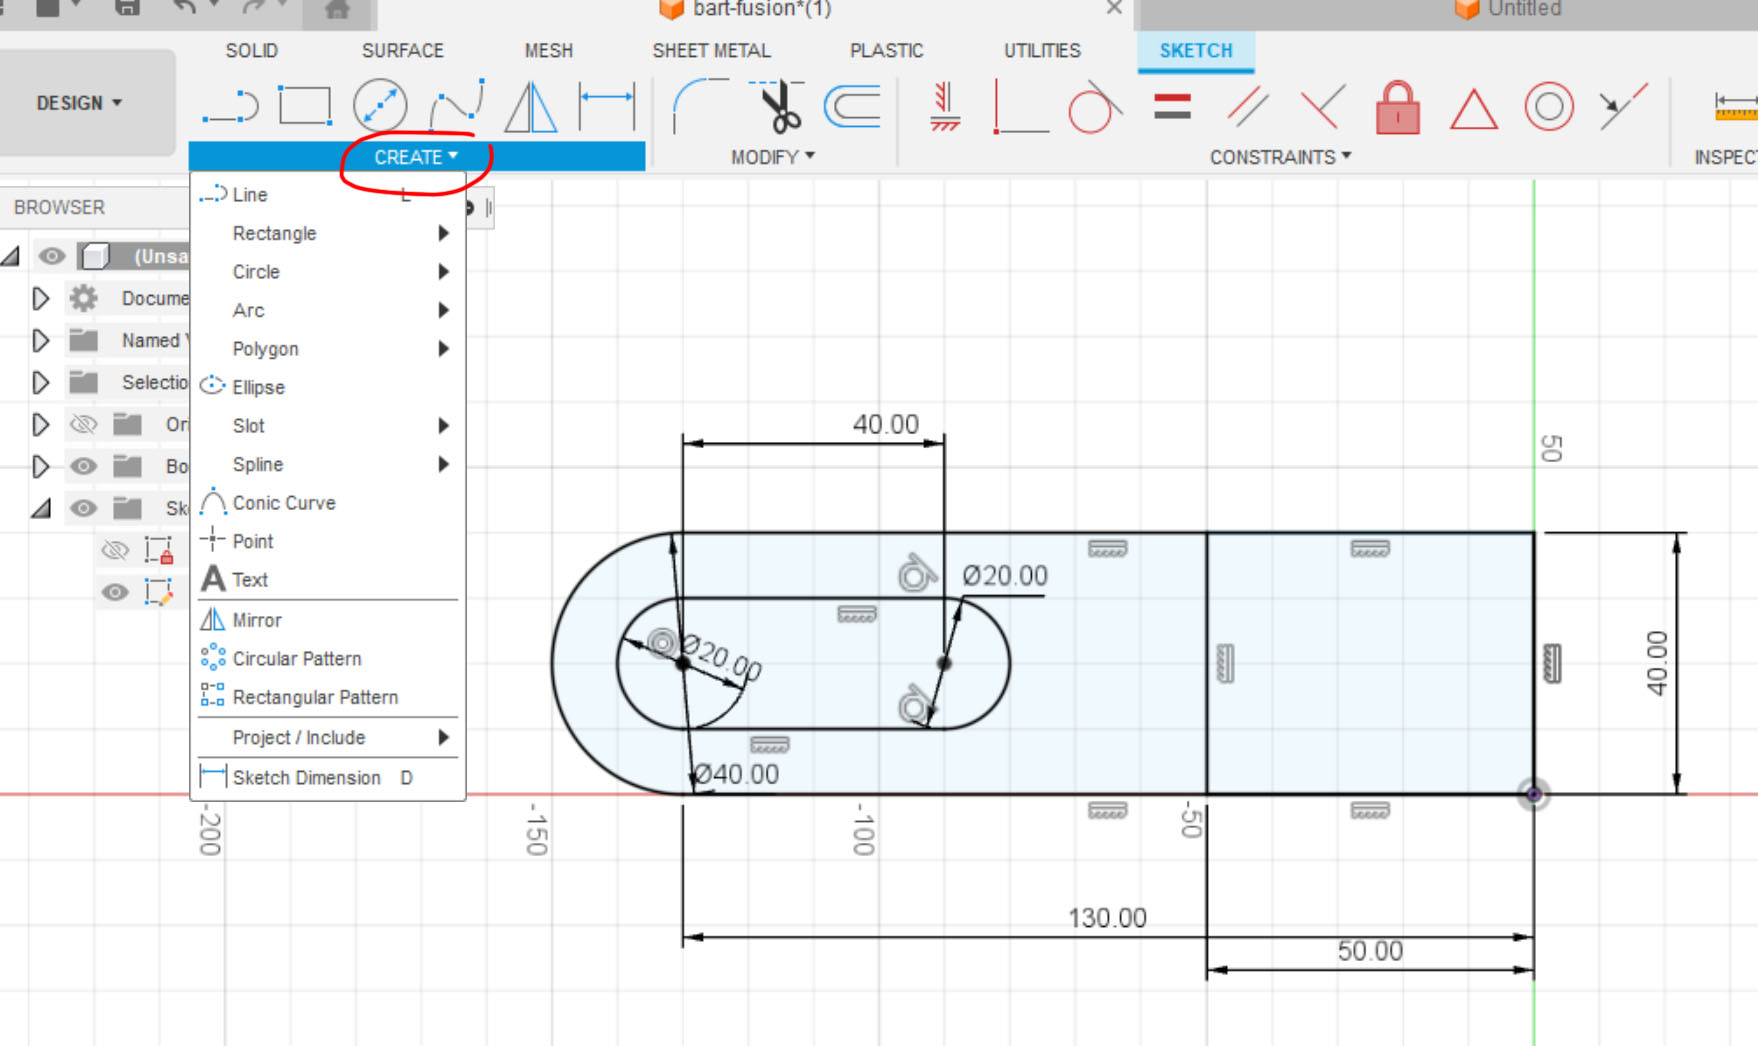
When you are inside "Sketch mode", click on create to start drawing the 2D plan with polyline or circle or rectangular.
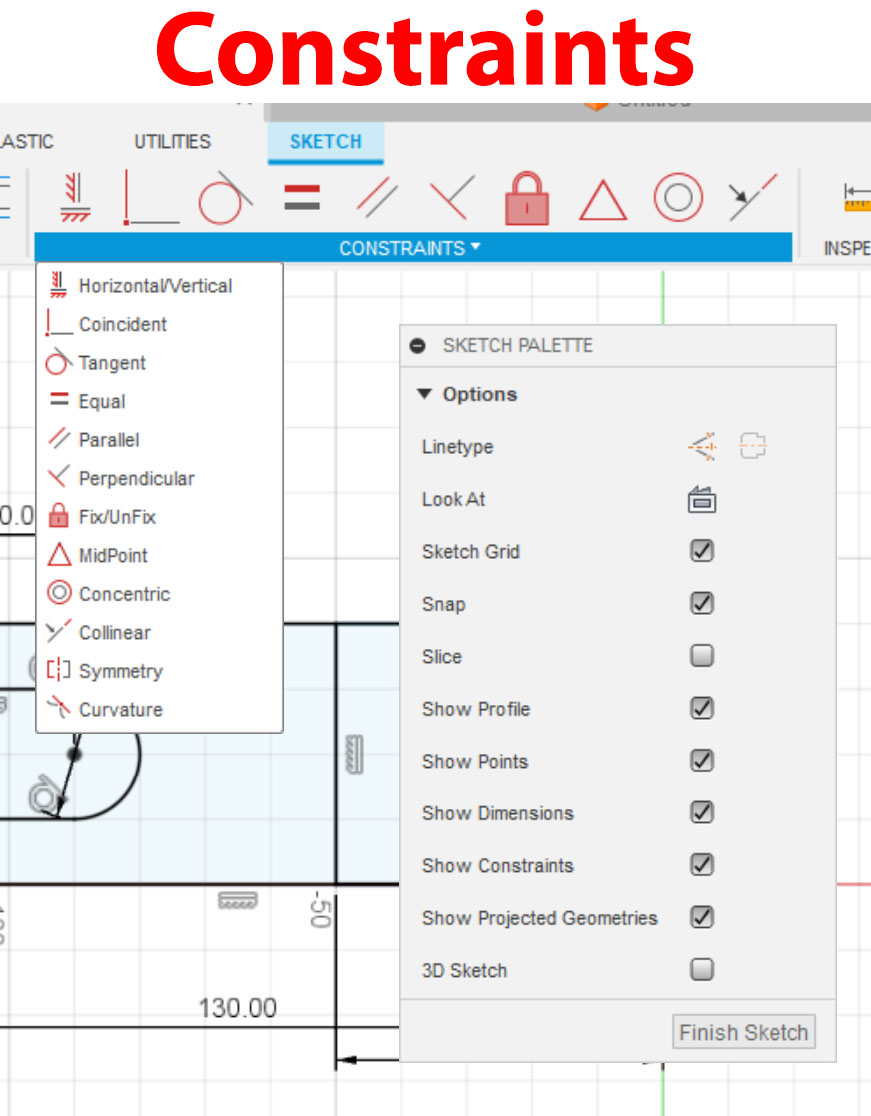
One of the most powerful feature of Fusion 360 is "constraints" where you could tweak the model with minimal effort if you setup your constraints right. The number of constraints available listed below.
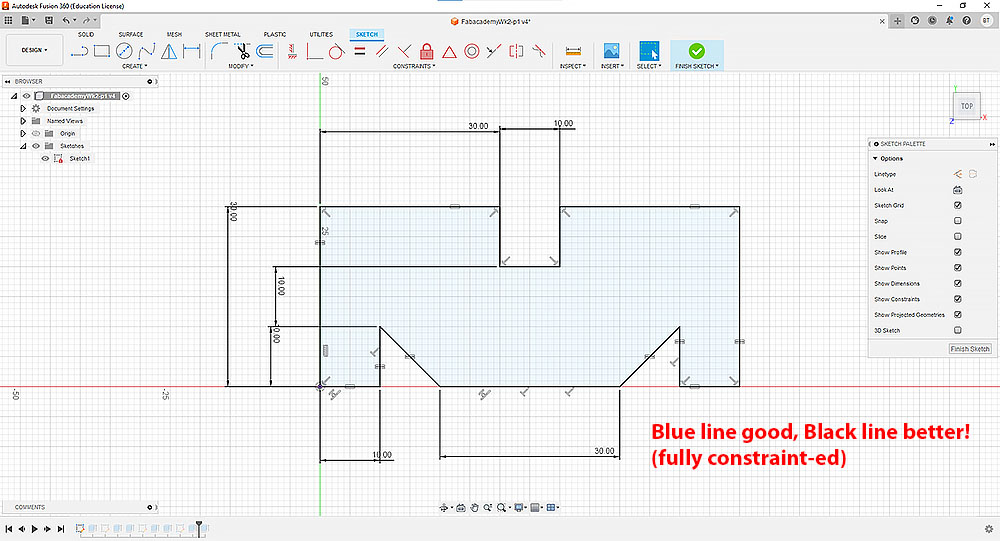
When the 2D plan is fully setup with constraints, the blue lines will turn to black.
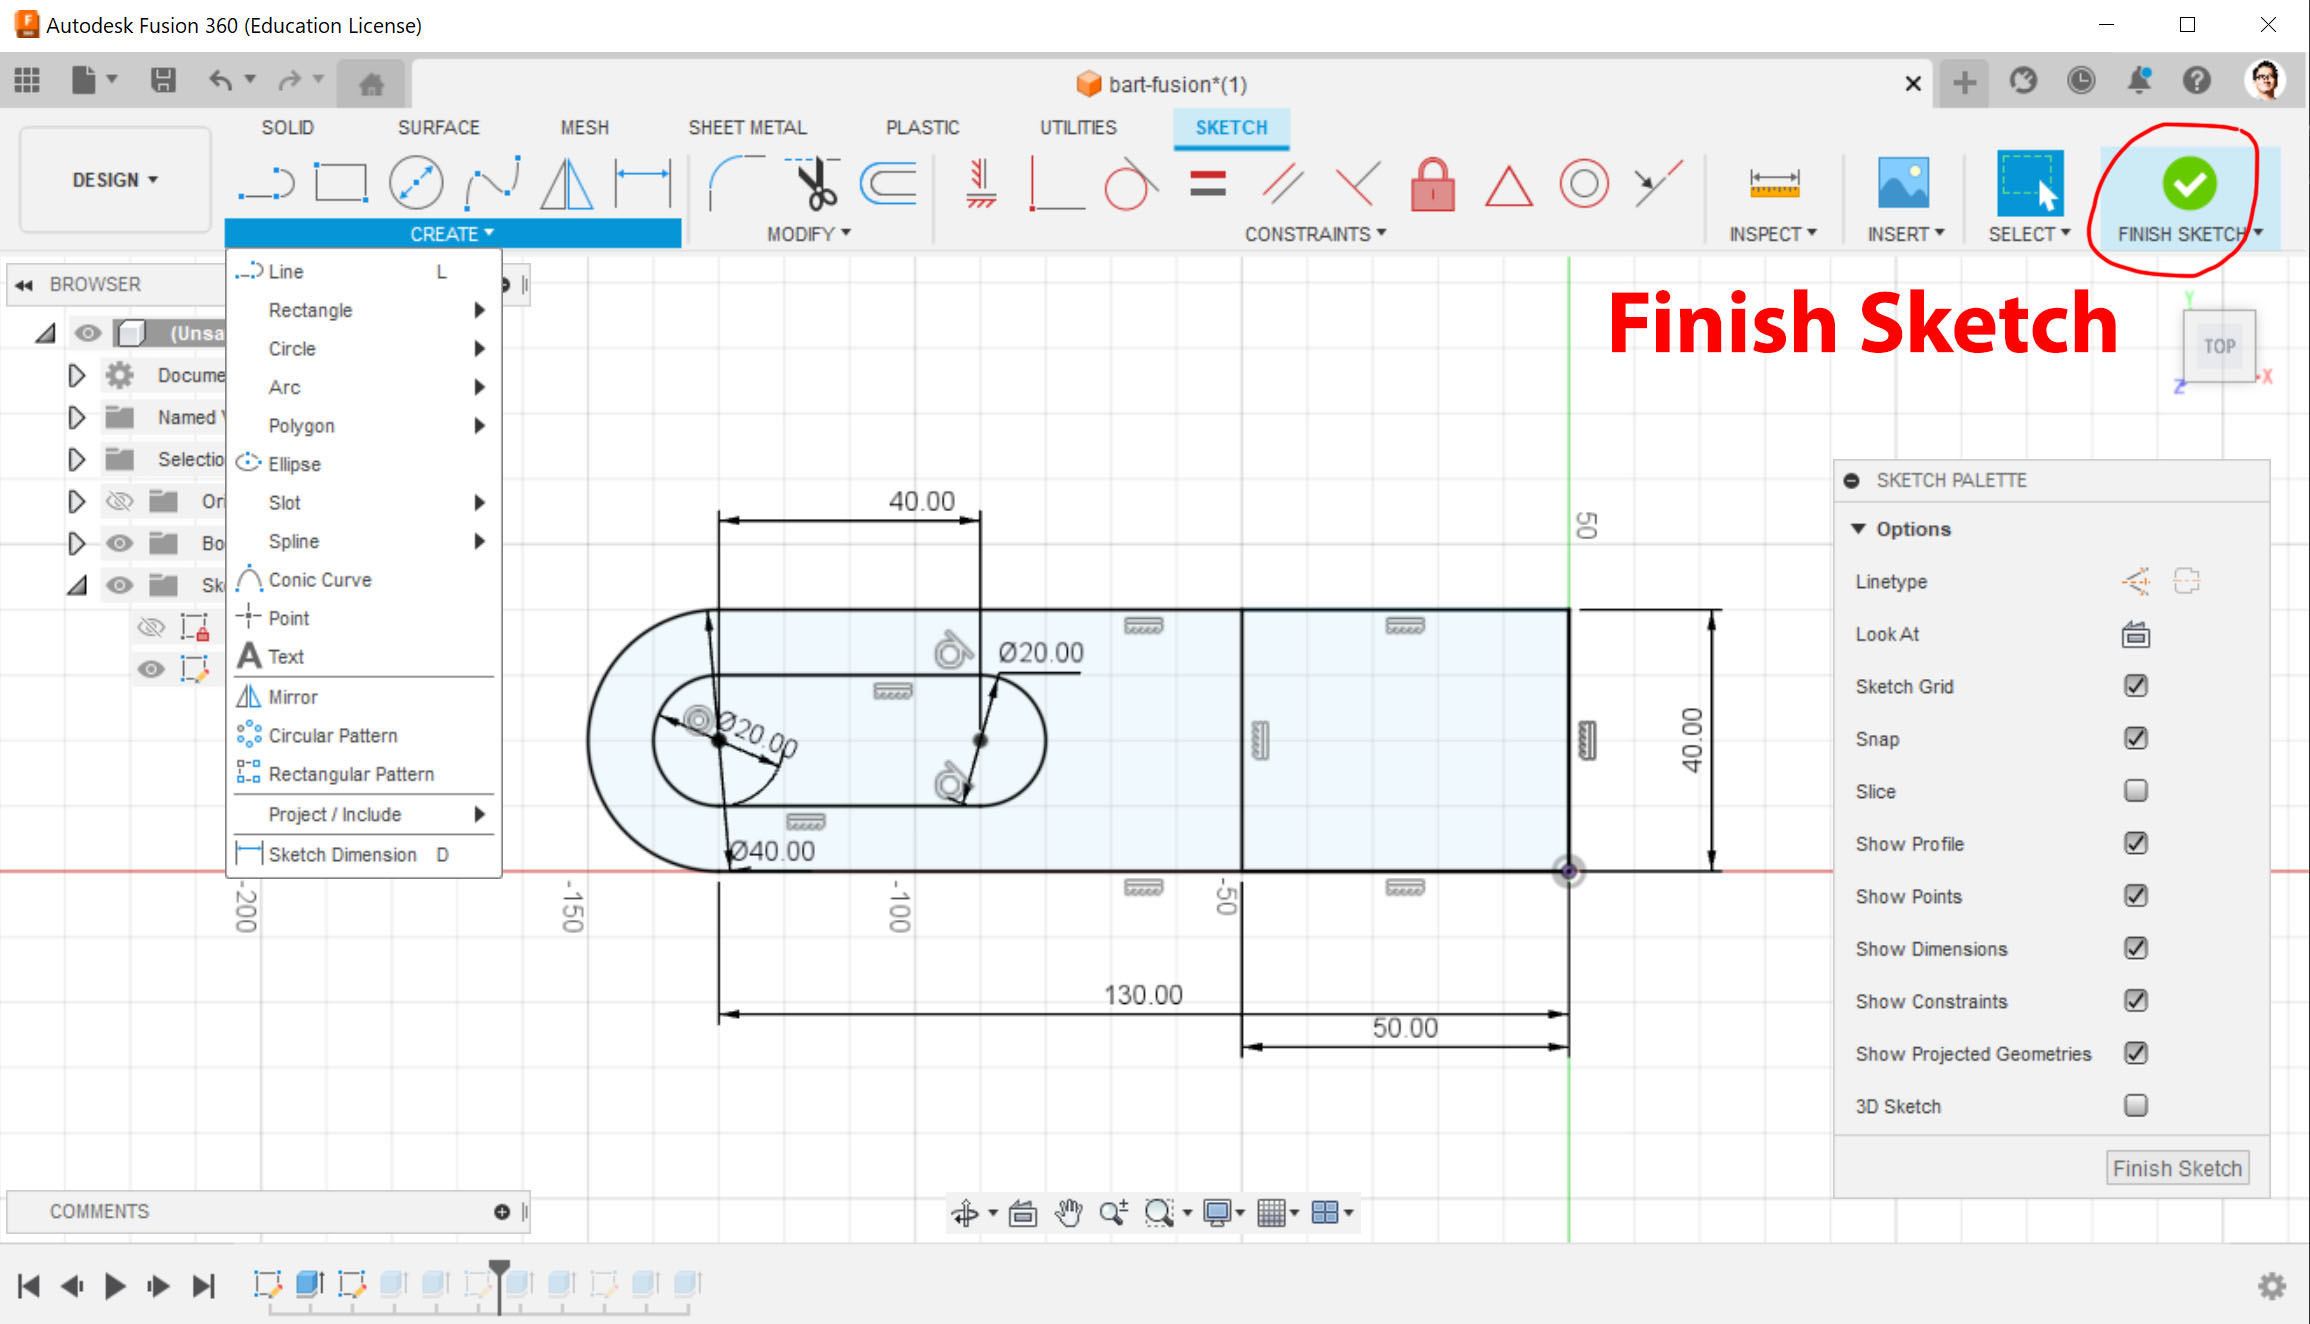
Always click on the green button "Finish Sketch" when you want to start building your 3D object. Another way to look at this is, if you are unable to extrude or start building 3D object, most likely you are still in "Sketch mode" (2D mode).
After exiting Sketch mode, use the "extrude function" (Shortcut key E) to extrude the 2D plan by selecting the right shapes on the "sketch".
Links to working files
- Adobe Illustrator working file (.ai)
- Vector file (.pdf)
- Vector file (.svg)
- Blender 3D working file (.blend)
- Simplified Rabbit Blender 3D working file (.blend)
- Fusion 360 working file (.f3d)
- Video compression test file (.mp4) using HandBrake (720 x 480, 42 seconds, approximately 3Mb).