ABOUT THE FINAL PROJECT
My final project is "SMART MOISTURE METER"
A smart moisture meter is a device that measures the moisture content in various materials such as soil, wood, concrete, and others. The solution for this device is to provide accurate and real-time measurement of moisture content in these materials, thereby improving the efficiency and effectiveness of various processes that depend on the moisture levels.
The smart moisture meter typically uses sensors to measure the electrical conductivity of the material, which is directly proportional to its moisture content. The data collected by the sensors is then processed by an onboard microcontroller and displayed on a digital screen or transmitted wirelessly to a remote device for further analysis.
The proposed solution offered by a smart moisture meter is to provide a convenient, efficient, and reliable way to measure moisture levels in various materials, enabling users to make informed decisions regarding various processes such as irrigation, crop management, construction, and others. The device can also help reduce waste, save time and resources, and improve overall productivity.
Problem statement
Normally there is a need for a more accurate, efficient, and convenient way to measure moisture levels in soil,
wood, and other materials. Traditional methods for measuring moisture levels,
such as manual probing with a moisture meter or visual inspections, can be time-consuming and may not
provide consistent or accurate results. This can lead to problems such as over- or
under-watering of plants, improper drying of wood, or incorrect assessments of building materials.
The problem of accurately measuring moisture levels can be addressed by developing a smart moisture meter.
This device would be designed to provide real-time, accurate, and easily accessible moisture readings,
allowing users to make informed decisions about how to manage the moisture levels in their materials.
The smart moisture meter would also use advanced algorithms and wireless connectivity to provide useful
insights and recommendations based on the data collected.
Challenges that a smart moisture meter will solve:
1. Inaccurate moisture readings: Traditional moisture meters can be unreliable and may produce inaccurate readings, leading to incorrect assessments and decisions.
2. Time-consuming measurements: Measuring moisture levels using traditional methods can be time-consuming, especially for larger areas.
3. Lack of real-time monitoring: With traditional moisture meters, users cannot monitor changes in moisture levels in real-time, making it difficult to track fluctuations over time.
4. Inconvenient data analysis: Analyzing moisture readings can be challenging, especially for users with limited technical expertise.
5. Lack of portability: Traditional moisture meters can be bulky and difficult to carry, making it challenging to use them in different locations and environments.
Smart moisture meters are used by a variety of people across various industries. Some of the main user groups are:
- 1. Agricultural professionals: Farmers, agriculturists, and soil scientists use smart moisture meters to measure the moisture content of soil to optimize irrigation and to ensure proper soil moisture levels for optimal crop growth.
- 2. Construction professionals: Contractors, architects, and engineers use smart moisture meters to measure the moisture content of building materials such as concrete, drywall, and wood. This helps ensure that the materials are properly dried before installation and to detect potential moisture problems in existing structures.
- 3. Environmental scientists: Environmental scientists, hydrologists, and geologists use smart moisture meters to measure moisture levels in various environmental samples such as soil, rocks, and plant matter.
- 4. Woodworkers: Woodworkers and carpenters use smart moisture meters to determine the moisture content of lumber and other wood products before processing and to avoid any issues with warping, cracking, or other problems caused by improper drying.
- 5. Homeowners: Home owners can also use smart moisture meters to monitor the moisture levels in their homes, especially in areas prone to moisture buildup such as basements and bathrooms, to prevent mold and other moisture-related issues.

The above drafted sketch of the system consists of microcontroller unit as the main part to contol
all processes, the moisture sensor to detect the content of water into the material,OLED display to display the data(different information)
from sensor through microcontroler, the materials such as soil,wood,concrete, or any other where measures or data will be taken, cloud server for sending written notification
to the users and to vizualize the data historically and mobile phone or any other device which can be connected on internet to receive email notification.
Working principle: As the moisture sensor pined into the soil/material, it will send the measured water content level of the material
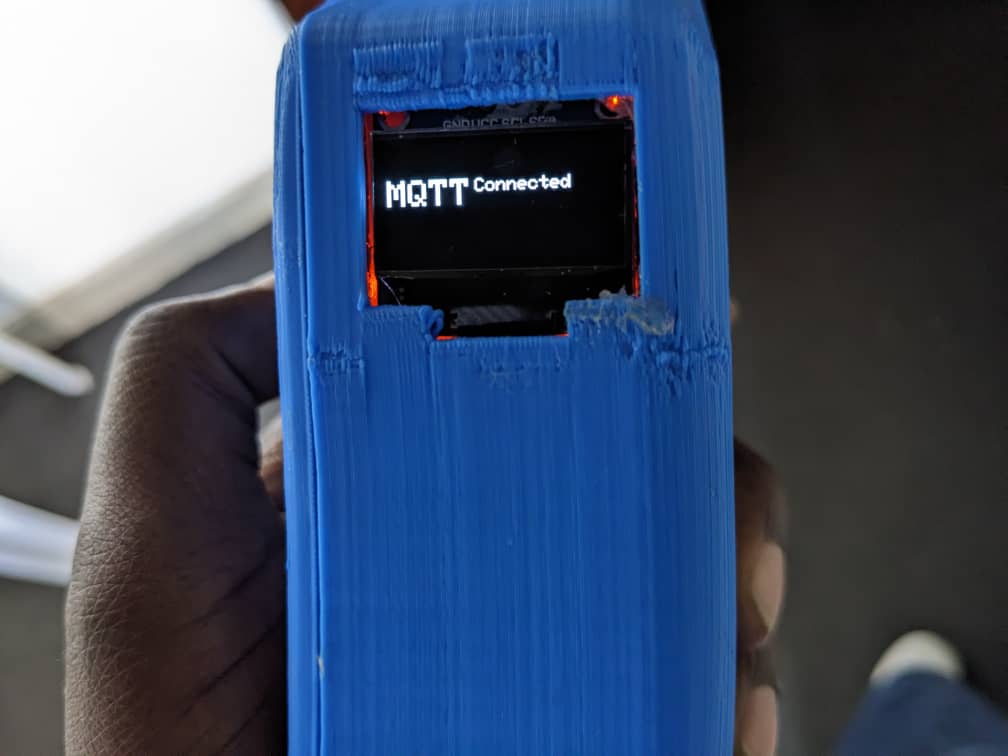
to microcontroller via its analog pin, when the set of instructions of the whole system is loaded into microcontroller,the data are processed and sent to the OLED display to be displayed visually with othe associated information.There is a push button, when this is pushed the display value is held and sent immediately to the Adafruit cloud server via MQTT(Message Queuing Telemetry Transport) protocol.
If the level of humidity for a given material goes below or above the setted level(here I will count the level as the percentage of content of water),and as I will create connection between my Adafruit account and IFTTT(If This Then That) to automate trigger action based on that condition the notification email message alerting the user that the level is above or below will be send to the choosen email with the link to be accessed and review the records of all data on the page of cloud server(Adafruit). The user receives a notification
and makes a decision accordingly based on the received notification (Etheir to start irrigating(for example) if it is below or stops irrigation if becomes above the appropriate level of humidity for a given crops). Here a microcontroller with faster Wi-Fi such as ESP32 will be used in order to be able to send data to the cloud server.
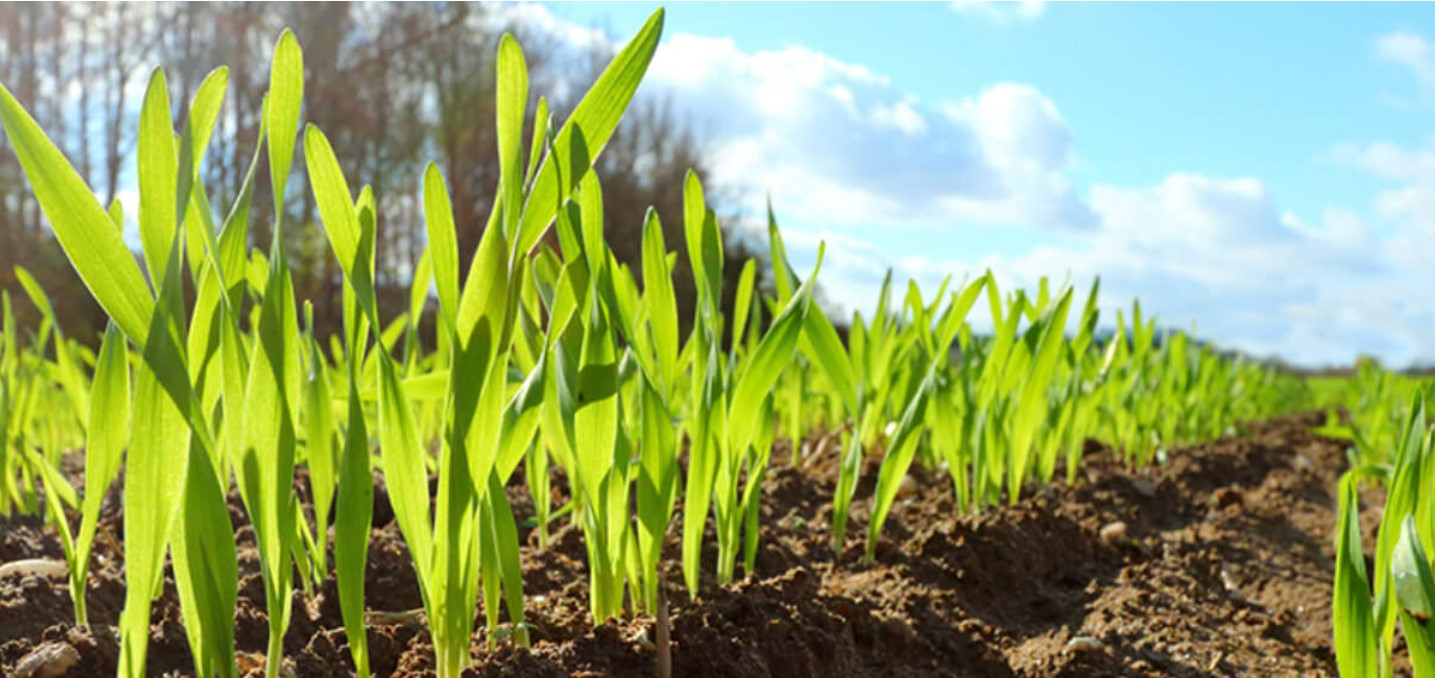
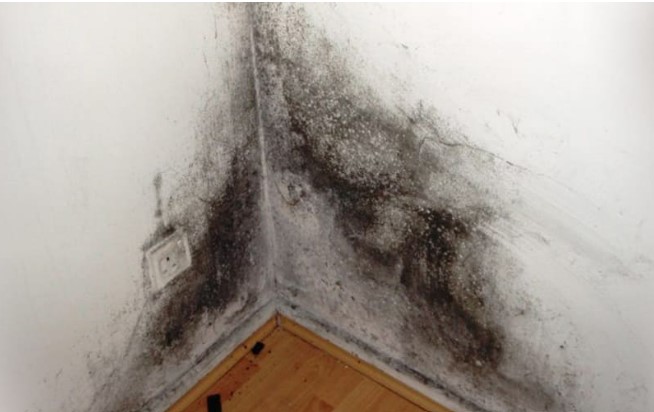
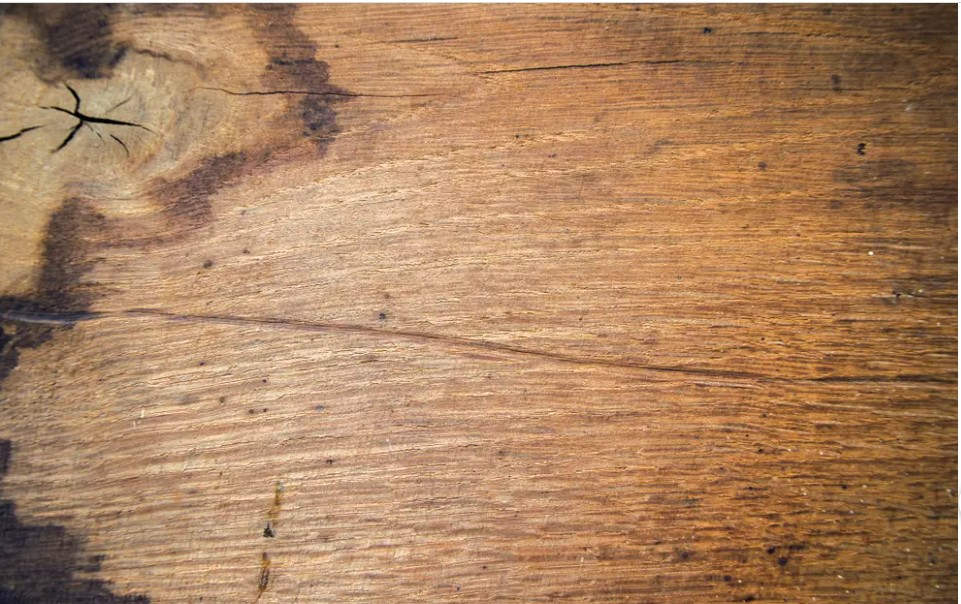 Above photos show some different materials in which the Smart Moisture Meter will be used to measure the level of moisture/humidity level: starting from left it is soil, house and wood.
1. PROJECT DESIGN
This project will contain both electronics design to control the system and the structure(Housing) design to cover the control unit.
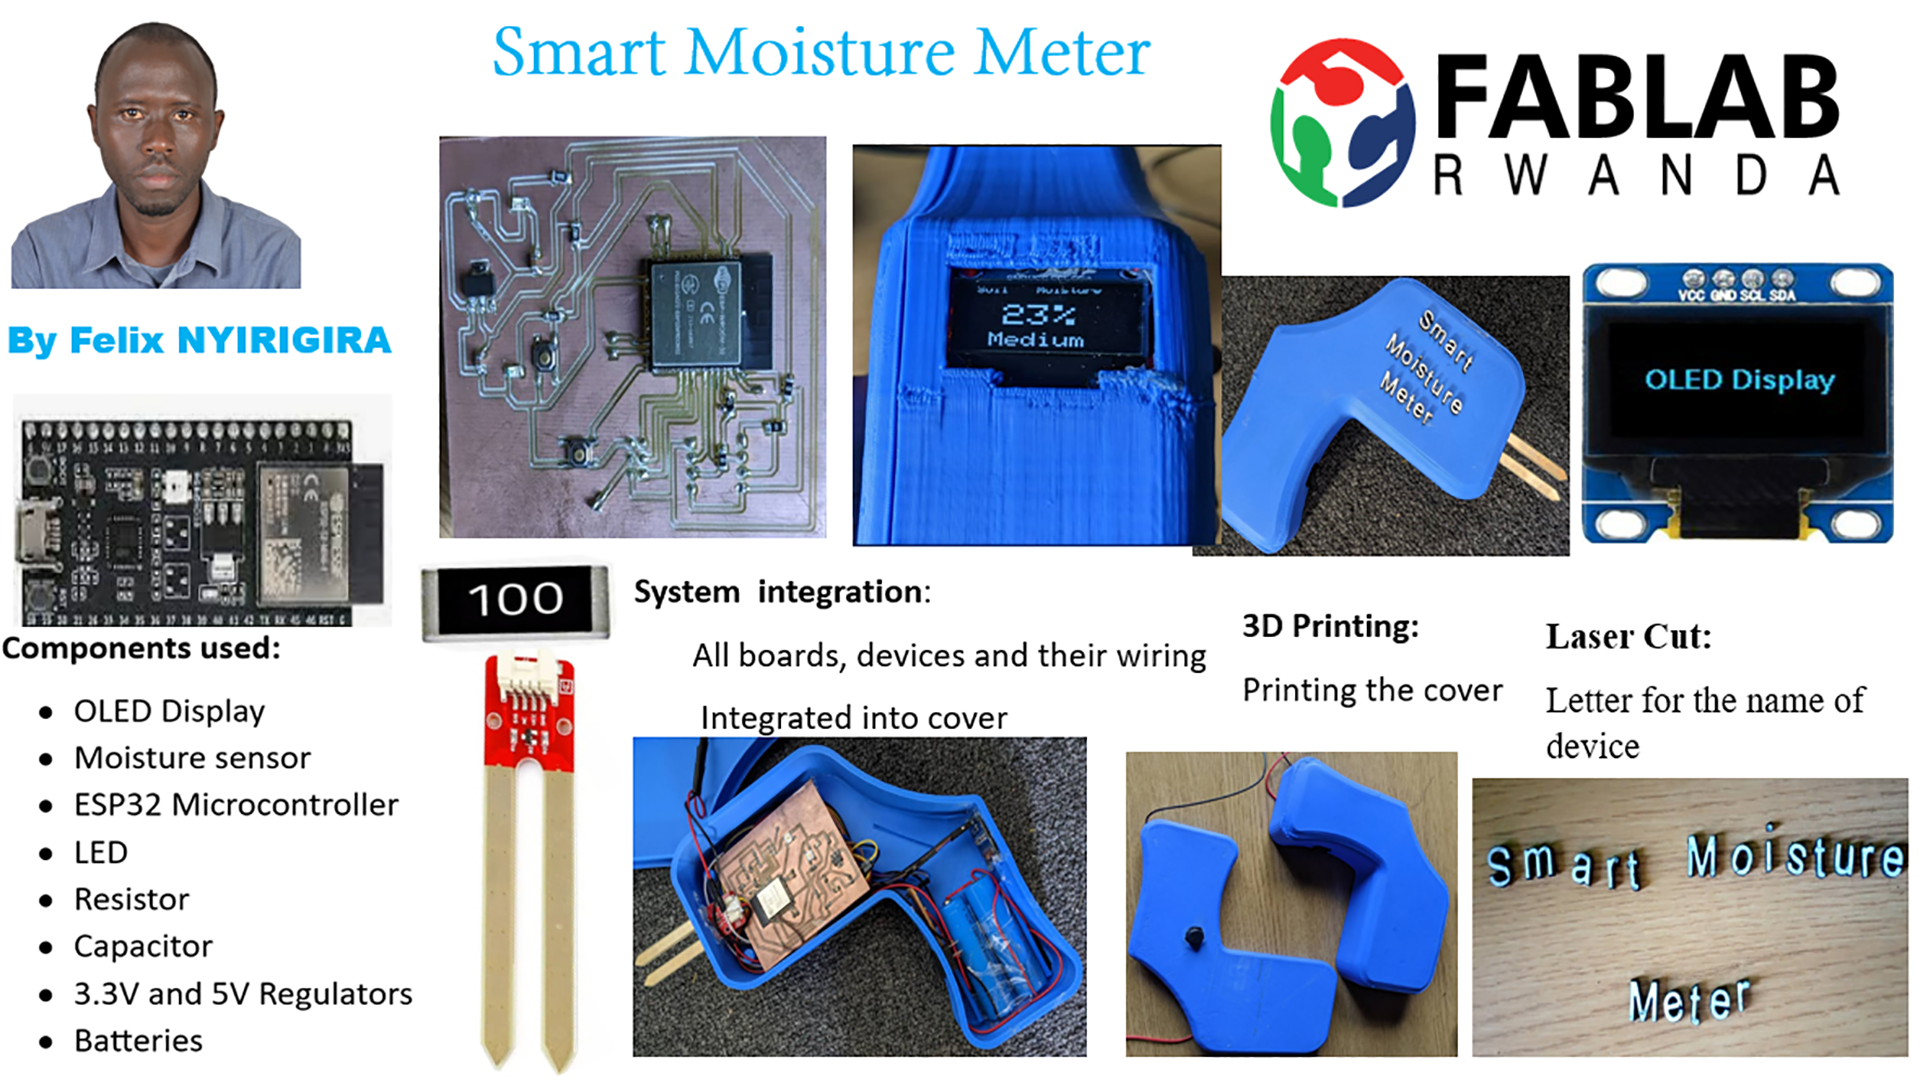
Materials to be used
- 1. ESP32 microcontroller: ESP32 is a series of low-cost, low-power system on a chip microcontrollers with integrated Wi-Fi and dual-mode Bluetooth. For more about ESP32 refer to the Embedded Programming week
- 2. Moisture sensor: Soil moisture sensors measure the volumetric water content in soil.For more about moisture sensor refer to the Input week
- 3. OLED Display: Organic Light-Emitting Diode - a technology that uses LEDs in which the light is produced by organic molecules. These organic LEDs are used to create what are considered to be the world's best display panels. For more about OLED refer to the Output week
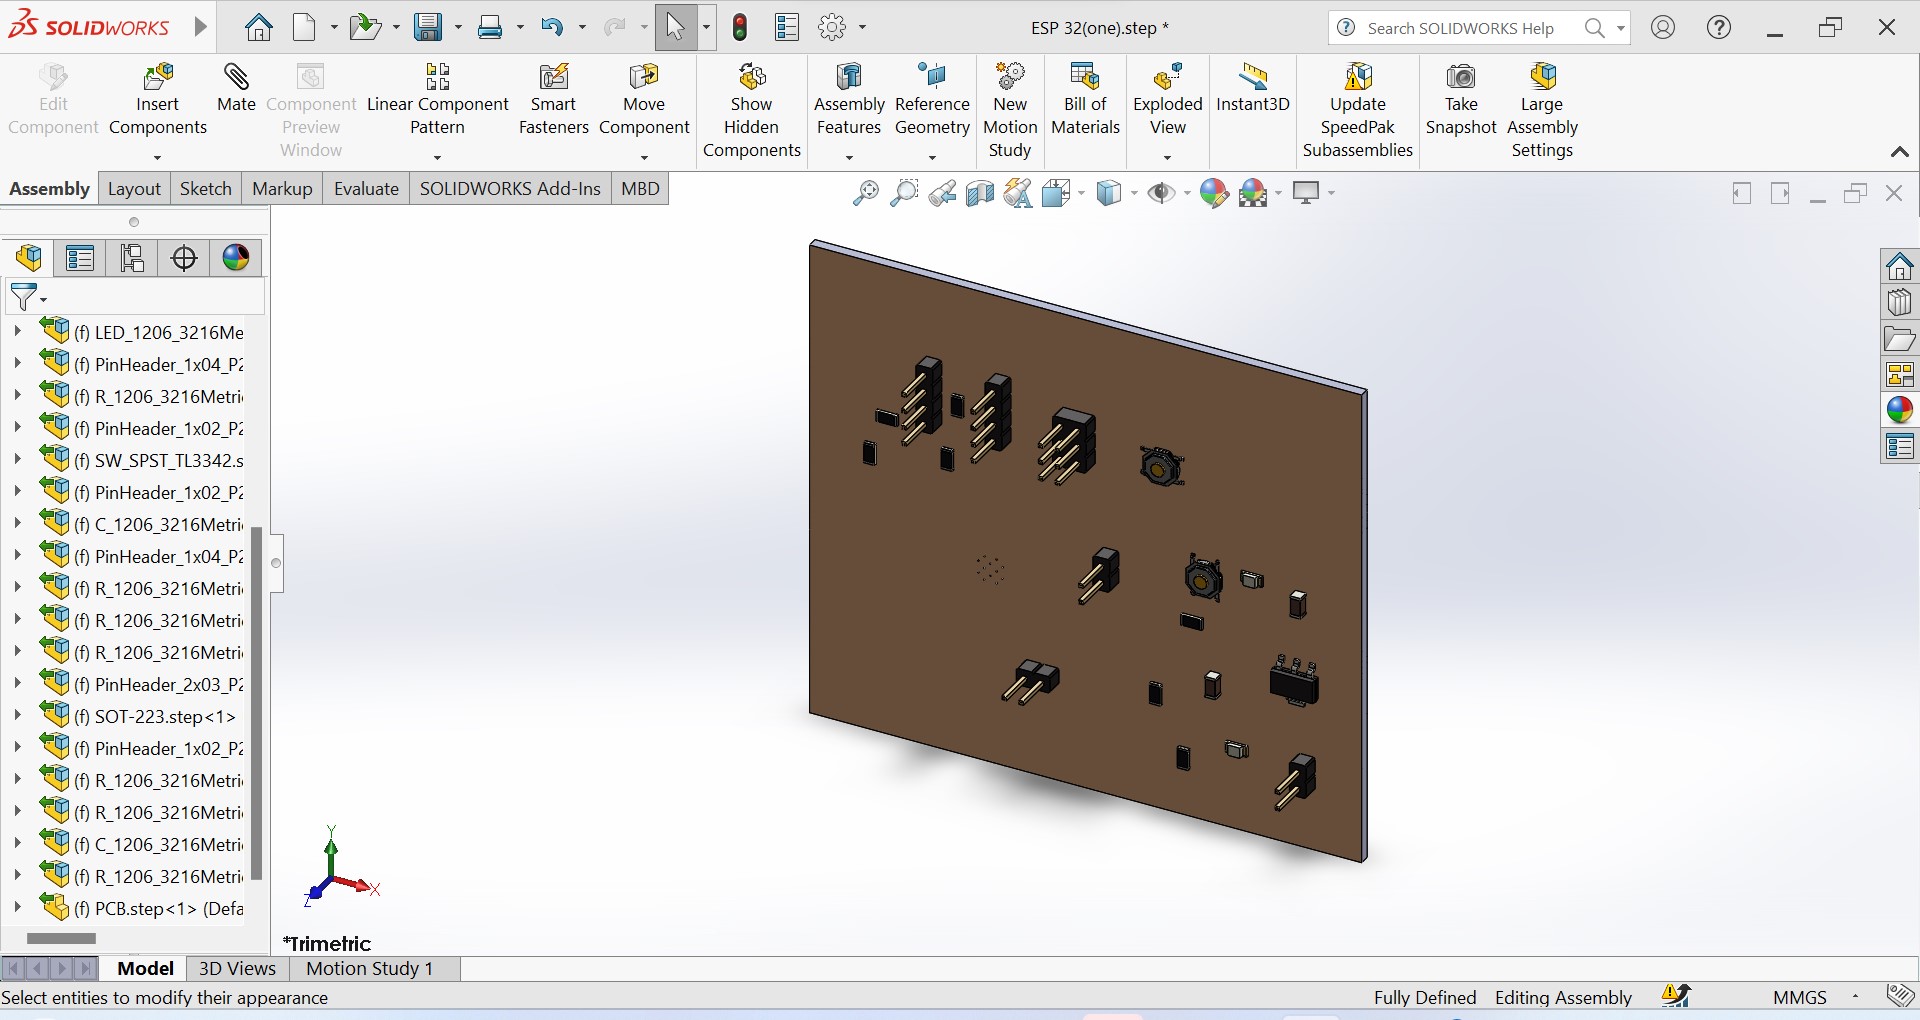
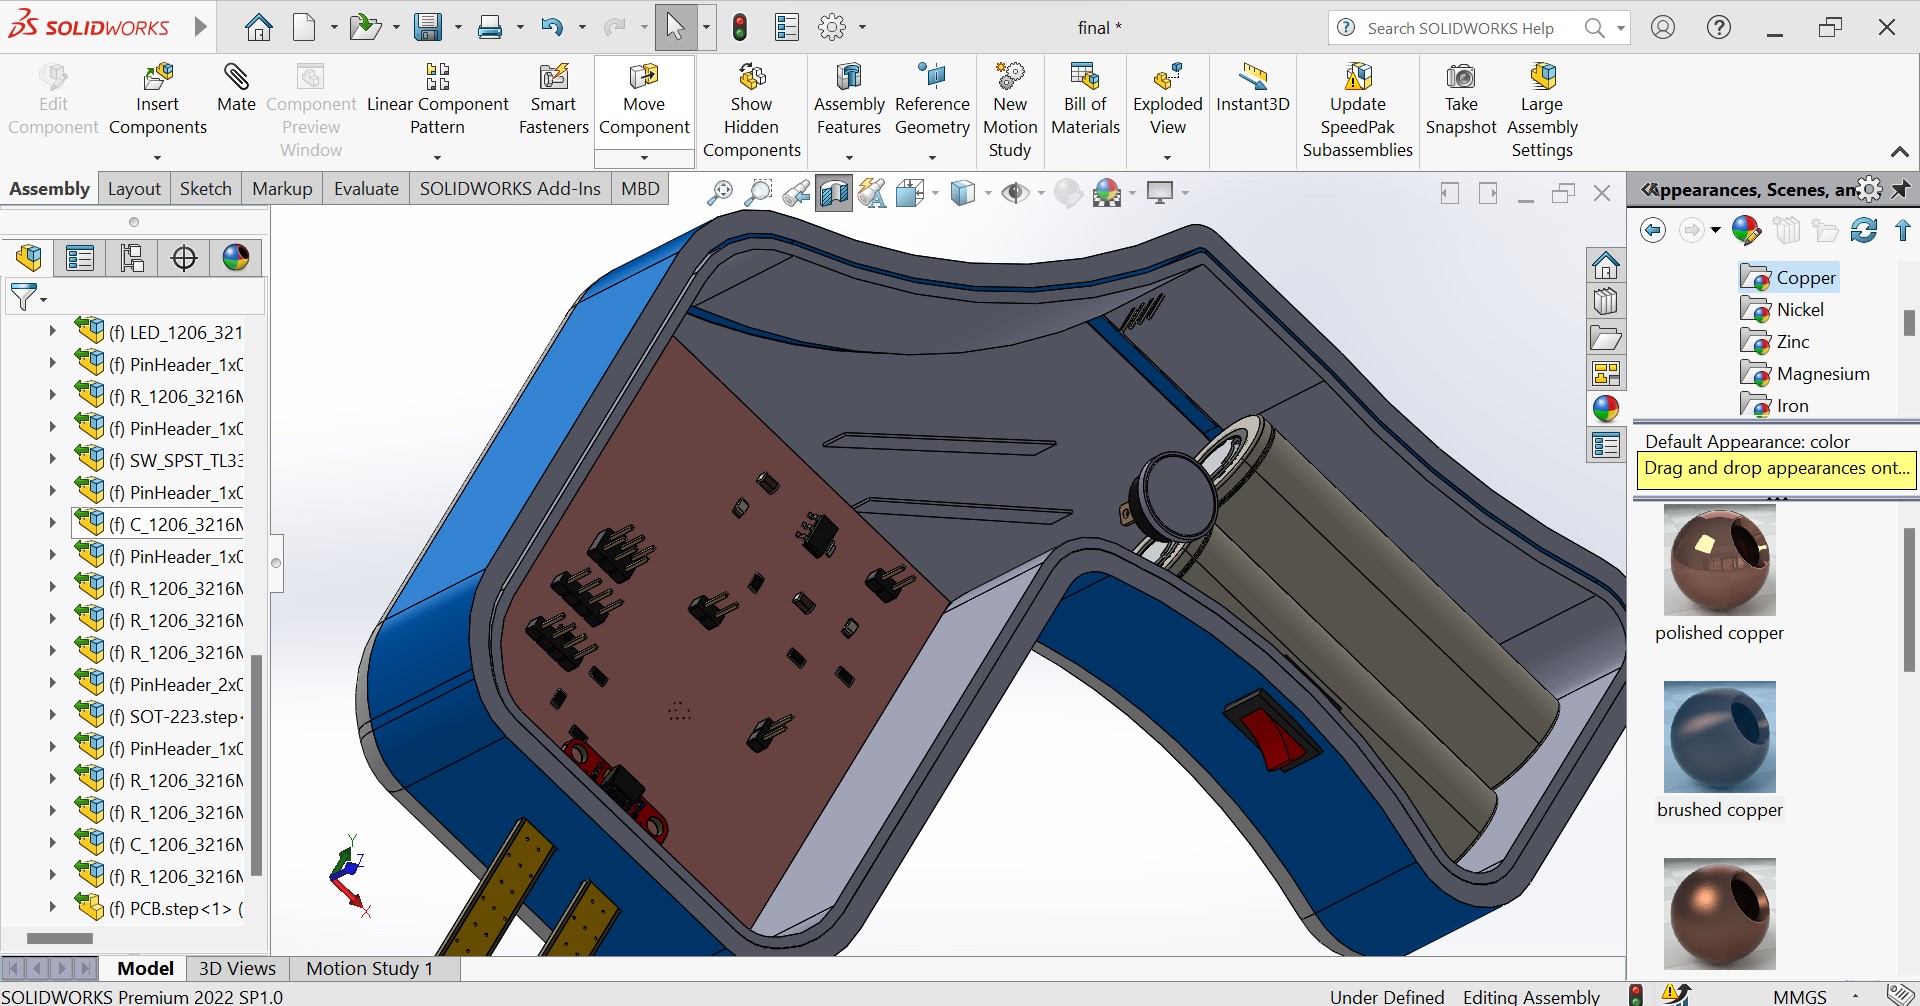
- 4. PCB: A printed circuit board (PCB) is an electronic assembly that uses copper conductors to create electrical connections between components
- 5.Battery:A battery is a source of electric power consisting of one or more electrochemical cells with external connections for powering electrical devices
- 6. wires: Wires are pieces of metal that transport electricity
- 7. SPST Switch: An SPST switch embraces a basic "ON/OFF" control of a single circuit and consists of two terminals that serve as electrical connection points. Power the switch "ON" to establish a connection between the two terminals.
- 8. Pin header:A pin header is a form of electrical connector
- 9. push buttons: A push-button or simply button is a simple switch mechanism to control some aspect of a machine or a process. Buttons are typically made out of hard material, usually plastic or metal.
- 10. PLA Filament: 3D printing filament is the thermoplastic feedstock for fused deposition modeling 3D printers.
- 11. Resistor: A resistor is a passive two-terminal electrical component that implements electrical resistance as a circuit element
- 12. Capacitor: A capacitor is a device that stores electrical energy in an electric field by virtue of accumulating electric charges on two close surfaces insulated from each other.
- 13. LED: A light-emitting diode is a semiconductor device that emits light when current flows through it.
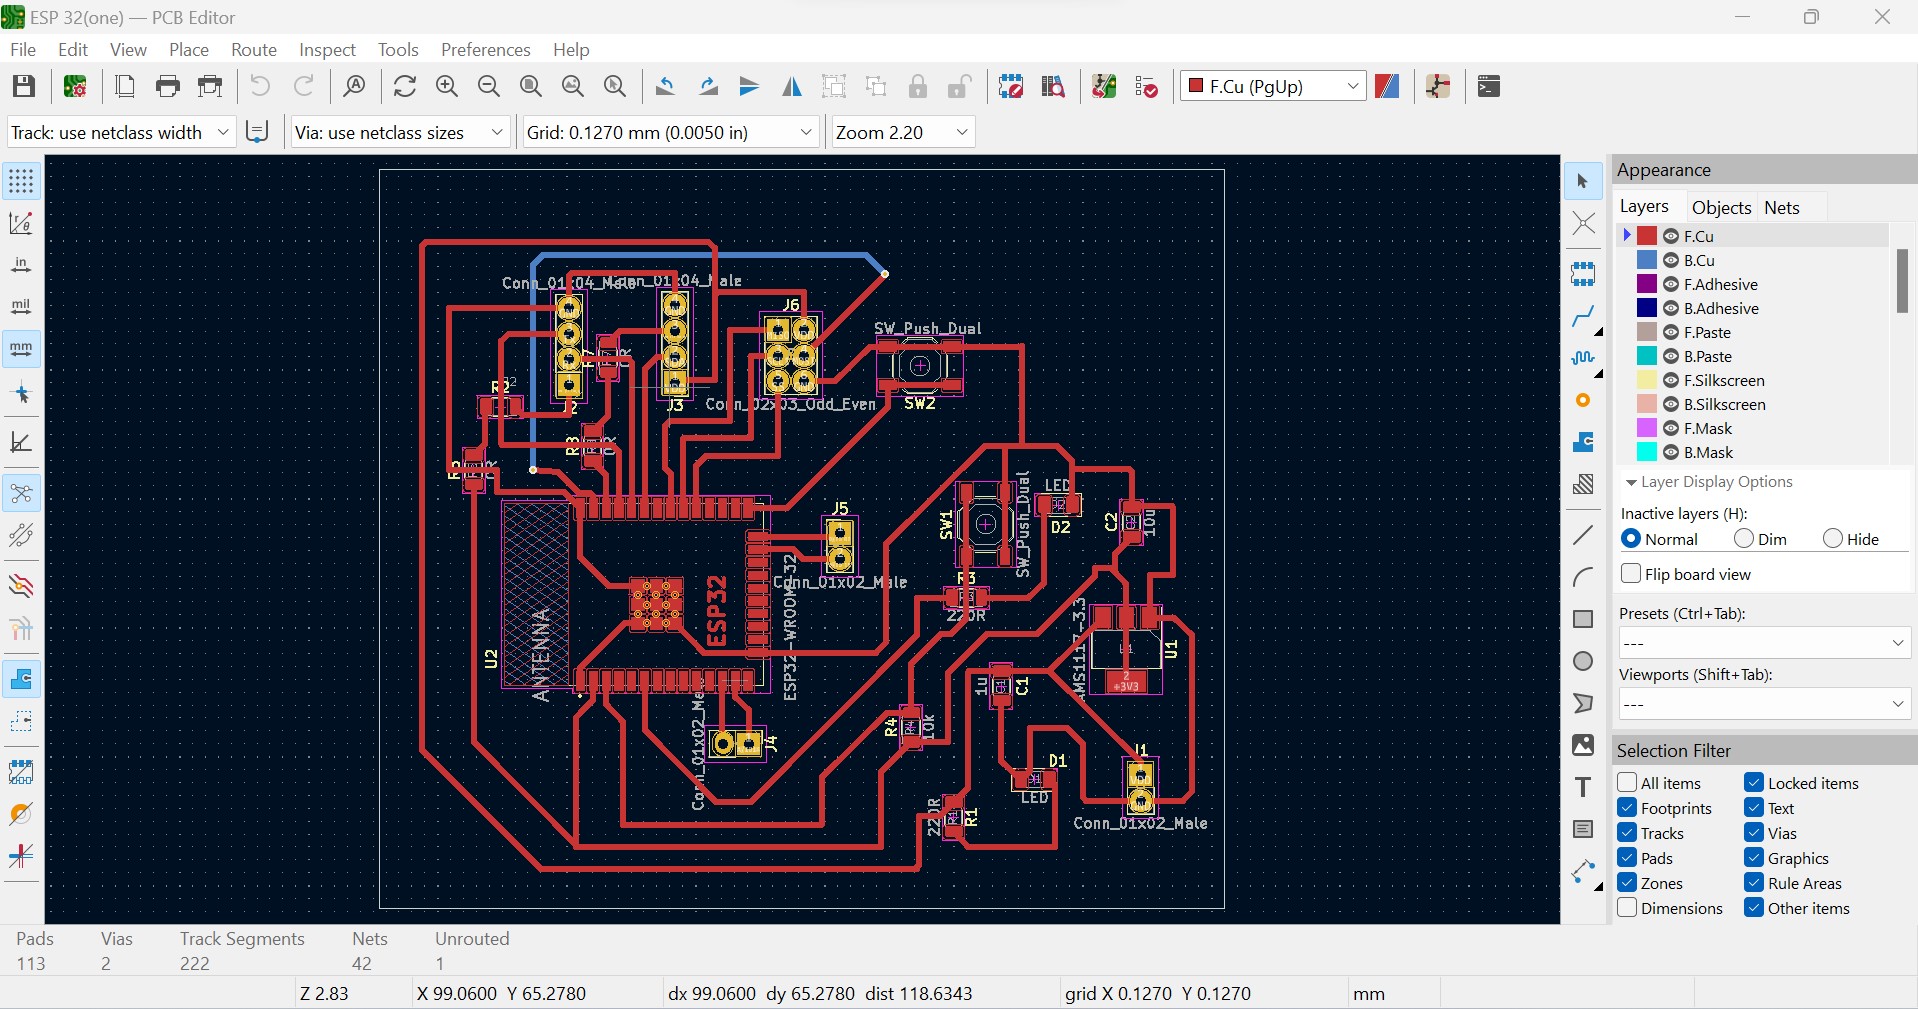
Circuit design of the control system:

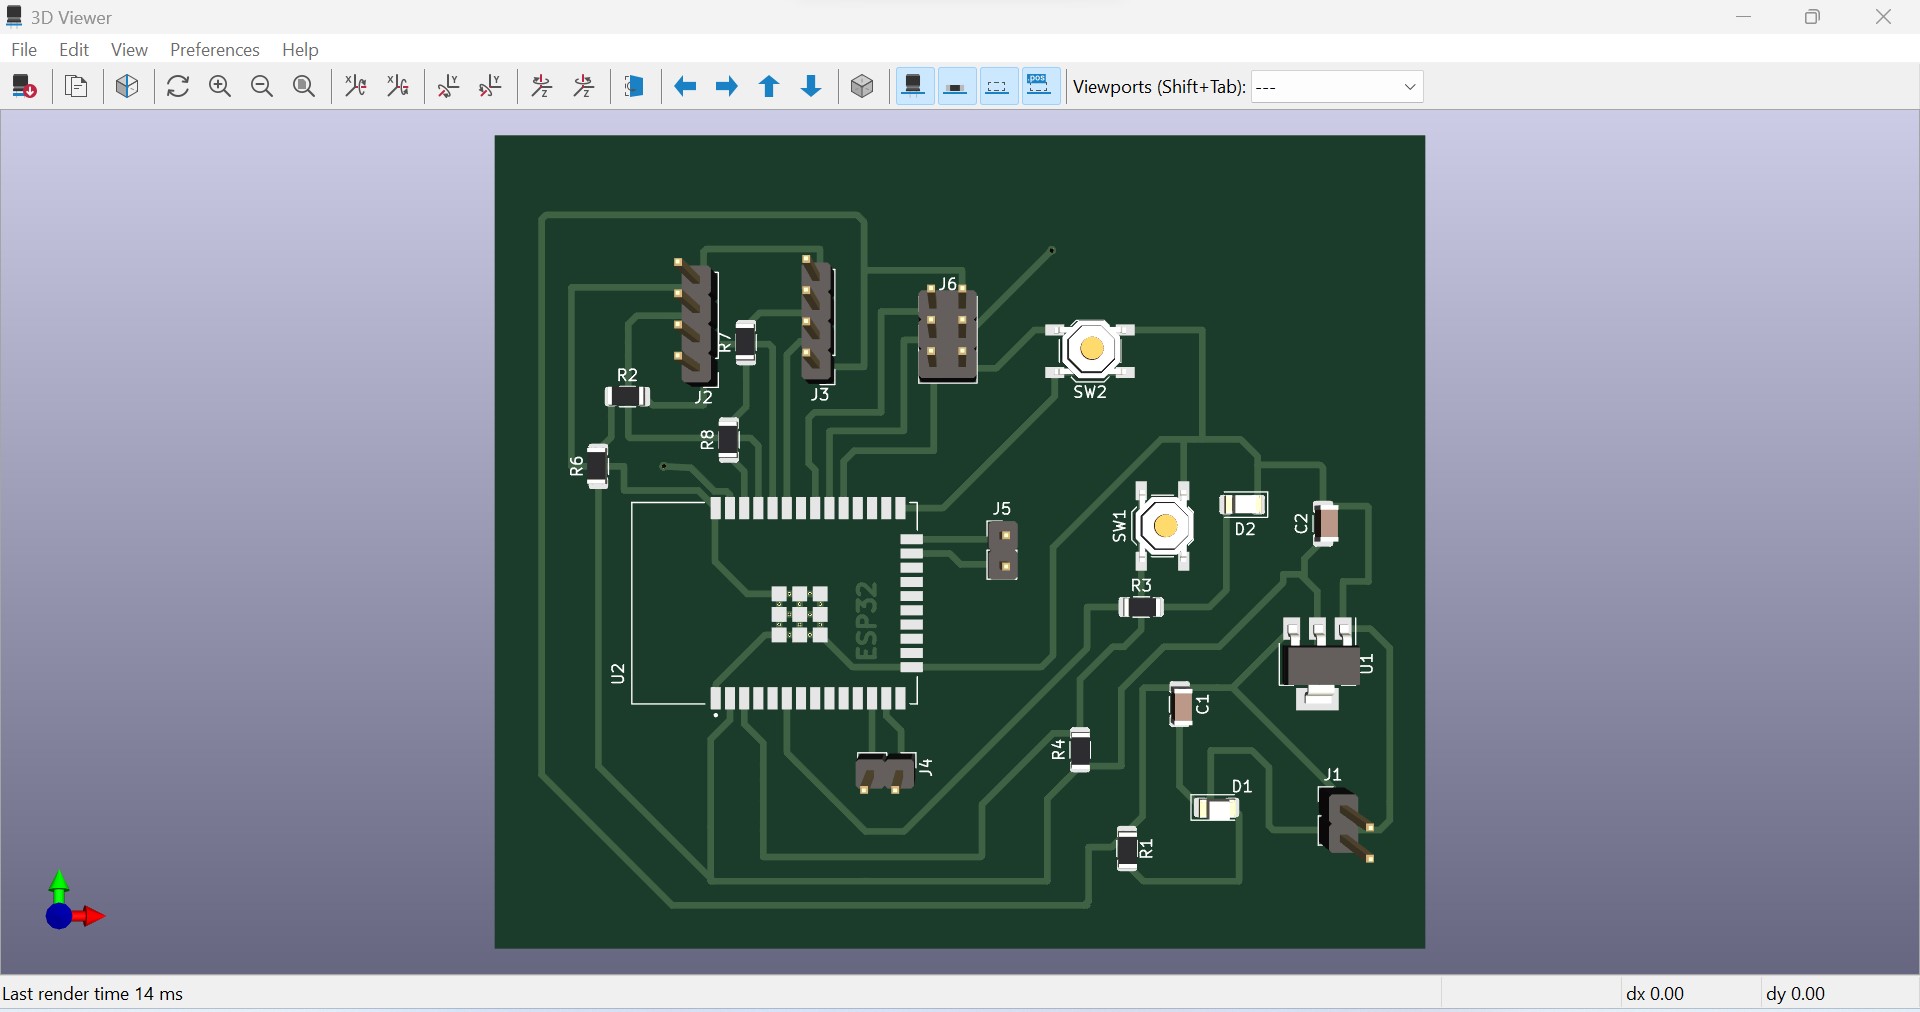
The following image shows the complete design of PCB
3D View of PCB
The following image shows the 3D view of designed PCB
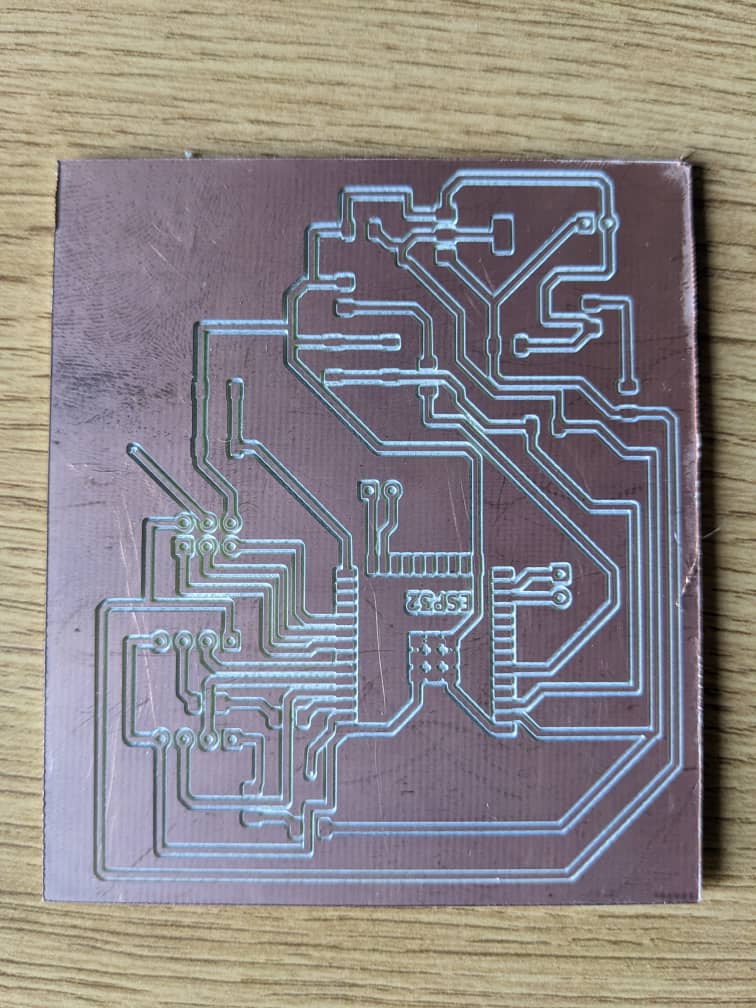
After electronics design, the next is ectronics production by using CNC milling machine as shown in the video below
And finally my PCB is produced:
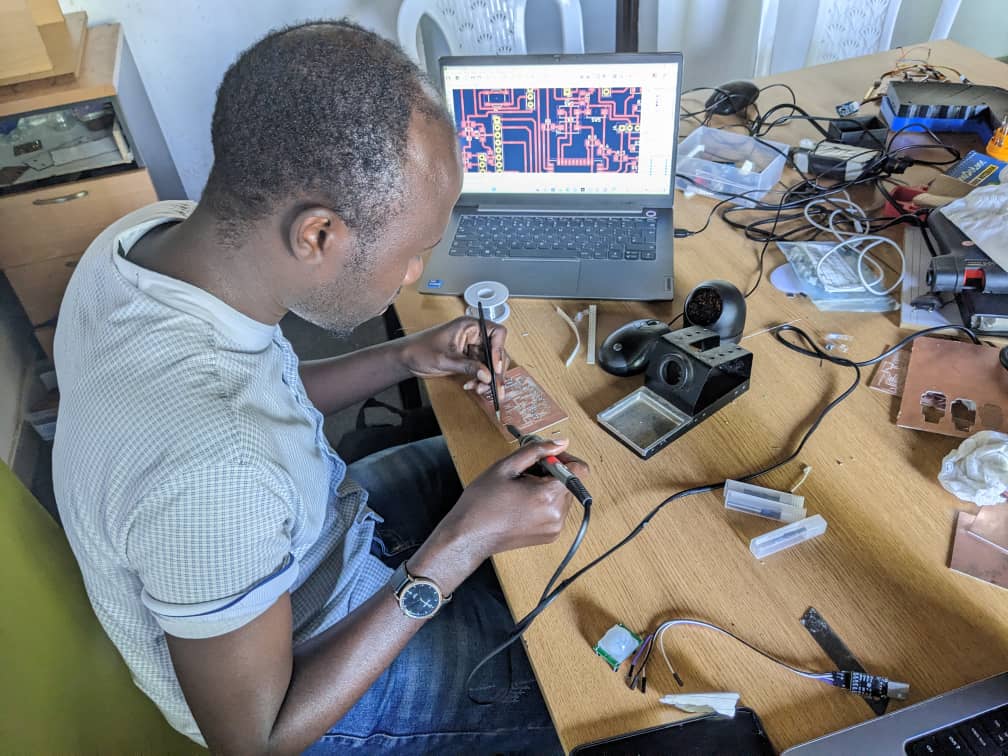
Soldering the components on PCB:
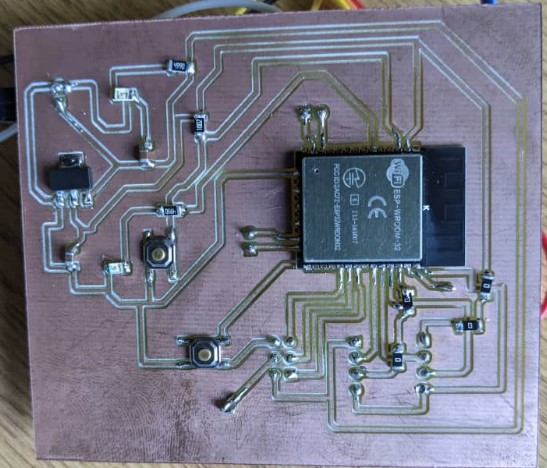
My board after soldering all components:
Source codes:
#include < SPI.h>
#include < Wire.h>
#include < WiFi.h>
//=========OLED LIBRARIES==========================
#include
#include
//============MQTT CLIENT LIBRARIES================
#include "Adafruit_MQTT.h"
#include "Adafruit_MQTT_Client.h"
//=================OLED SETTINGS====================
#define SCREEN_WIDTH 128 // OLED display width, in pixels
#define SCREEN_HEIGHT 64 // OLED display height, in pixels
#define OLED_RESET -1 // Reset pin # (or -1 if sharing Arduino reset pin)
Adafruit_SSD1306 display(SCREEN_WIDTH, SCREEN_HEIGHT, &Wire, OLED_RESET);
//=============WiFi Access Point===================
#define WLAN_SSID "TECNO SPARK Go 2020"
#define WLAN_PASS "@felicalon"
//==================================================
//===============ADAFRUIT SERVER SETUP =======
#define MQTT_SERVER "io.adafruit.com"
#define MQTT_PORT 1883
#define MQTT_USERNAME "felicalon"
#define MQTT_KEY "aio_yJLL11JJPvPxwBbEFXK8i3TalJpx"
WiFiClient client;
Adafruit_MQTT_Client mqtt(&client, MQTT_SERVER, MQTT_PORT, MQTT_USERNAME, MQTT_KEY);
Adafruit_MQTT_Publish Sensor_data = Adafruit_MQTT_Publish(&mqtt, MQTT_USERNAME "/feeds/moisture" );
const int soilMoistureValue = 0;
const int SensorPin =36 ;
const int buttonPin = 14;
int soilmoisturepercent = 0;
int state = 0;
String Soil_state;
void setup() {
pinMode(buttonPin, INPUT_PULLUP);
Serial.begin(115200); // open serial port, set the baud rate to 115200 bps
display.begin(SSD1306_SWITCHCAPVCC, 0x3C); // initialize with the I2C addr 0x3C (128x64)
display.clearDisplay();
//==================WIFI CONNECTION =======
WiFi.begin(WLAN_SSID , WLAN_PASS );
display.clearDisplay();
display.setCursor(20,20);
display.setTextSize(2);
display.setTextColor(WHITE);
display.println("Booting");
display.display();
delay(3000);
}
void loop() {
int soilMoistureValue = analogRead(SensorPin); // put Sensor insert into soil
Serial.println(soilMoistureValue);
soilmoisturepercent = map(soilMoistureValue, 2555, 30, 100, 0);
if( soilmoisturepercent <5){
Soil_state ="DRY!!";
//display dry in lcd
display_dry();
}
if( soilmoisturepercent > 5 && soilmoisturepercent <35 ){
Soil_state ="Medium";
display_medium();
}
if( soilmoisturepercent>35 ){
Soil_state ="WET" ;
display_wet();
}
if (digitalRead(buttonPin) == LOW) {
state = 1;
Serial.println("HOLD");
// data_display();
delay(5000);
chechwifi();
}
}
void display_dry(){
display.clearDisplay();
display.setCursor(10, 0);
display.setTextSize(1);
display.setTextColor(WHITE);
display.println("Soil");
display.setCursor(55,0 );
display.setTextSize(1);
display.setTextColor(WHITE);
display.println("Moisture");
display.setCursor(30, 20);
display.setTextSize(3);
display.setTextColor(WHITE);
display.println(soilmoisturepercent);
display.setCursor(50, 20);
display.setTextSize(3);
display.setTextColor(WHITE);
display.println(" %");
//DISPLAY SOIL STATUS
display.setCursor(20,50);
display.setTextSize(2);
display.setTextColor(WHITE);
display.println(Soil_state);
display.display();
}
void display_medium(){
display.clearDisplay();
display.setCursor(10, 0);
display.setTextSize(1);
display.setTextColor(WHITE);
display.println("Soil");
display.setCursor(55,0 );
display.setTextSize(1);
display.setTextColor(WHITE);
display.println("Moisture");
display.setCursor(30, 20);
display.setTextSize(3);
display.setTextColor(WHITE);
display.println(soilmoisturepercent);
display.setCursor(50, 20);
display.setTextSize(3);
display.setTextColor(WHITE);
display.println(" %");
//DISPLAY SOIL STATUS
display.setCursor(20,50);
display.setTextSize(2);
display.setTextColor(WHITE);
display.println(Soil_state);
display.display();
}
void display_wet(){
display.clearDisplay();
display.setCursor(10, 0);
display.setTextSize(1);
display.setTextColor(WHITE);
display.println("Soil");
display.setCursor(55,0 );
display.setTextSize(1);
display.setTextColor(WHITE);
display.println("Moisture");
display.setCursor(30, 20);
display.setTextSize(3);
display.setTextColor(WHITE);
display.println(soilmoisturepercent);
display.setCursor(50, 20);
display.setTextSize(3);
display.setTextColor(WHITE);
display.println(" %");
//DISPLAY SOIL STATUS
display.setCursor(20,50);
display.setTextSize(2);
display.setTextColor(WHITE);
display.println(Soil_state);
display.display();
}
void MQTT_connect() {
int8_t ret;
// Stop if already connected.
if (mqtt.connected()) {
return;
}
Serial.print("Connecting to MQTT... ");
display.clearDisplay();
display.setCursor(0, 20);
display.setTextSize(2);
display.setTextColor(WHITE);
display.println("Connecting");
display.setCursor(40, 20);
display.setTextSize(1);
display.setTextColor(WHITE);
display.println("To mqtt");
display.display();
uint8_t retries = 3;
while ((ret = mqtt.connect()) != 0) { // connect will return 0 for connected
Serial.println(mqtt.connectErrorString(ret));
Serial.println("Retrying MQTT connection in 5 seconds...");
display.clearDisplay();
display.setCursor(50, 20);
display.setTextSize(2);
display.setTextColor(WHITE);
display.println("Retrying...");
display.display();
mqtt.disconnect();
delay(5000); // wait 5 seconds
retries--;
if (retries == 0) {
// basically die and wait for WDT to reset me
while (1);
}
}
Serial.println("MQTT Connected!");
display.clearDisplay();
display.setCursor(0, 20);
display.setTextSize(2);
display.setTextColor(WHITE);
display.println("MQTT");
display.setCursor(50, 20);
display.setTextSize(1);
display.setTextColor(WHITE);
display.println("Connected");
display.display();
delay(2000);
}
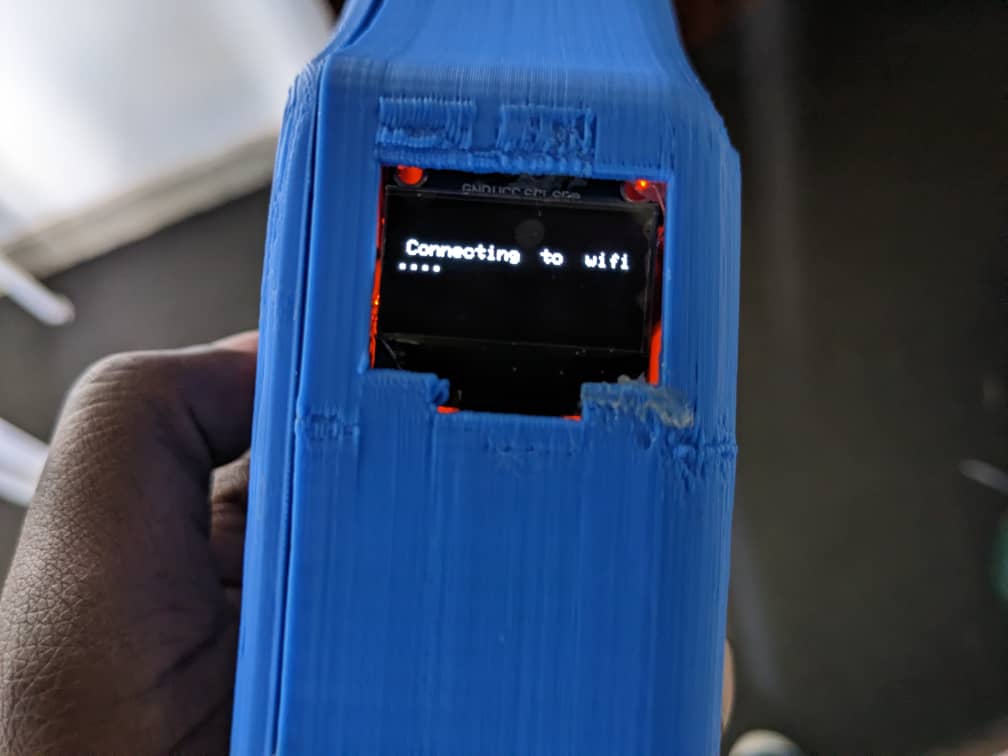
void chechwifi(){
int retries = 0;
while (WiFi.status() != WL_CONNECTED && retries < 50 )
{
Serial.print(".");
delay(100);
display.clearDisplay();
display.setCursor(5, 20);
display.setTextSize(1);
display.setTextColor(WHITE);
display.println("Connecting ");
display.setCursor(70, 20);
display.setTextSize(1);
display.setTextColor(WHITE);
display.println(" to wifi....");
display.display();
retries++;
}
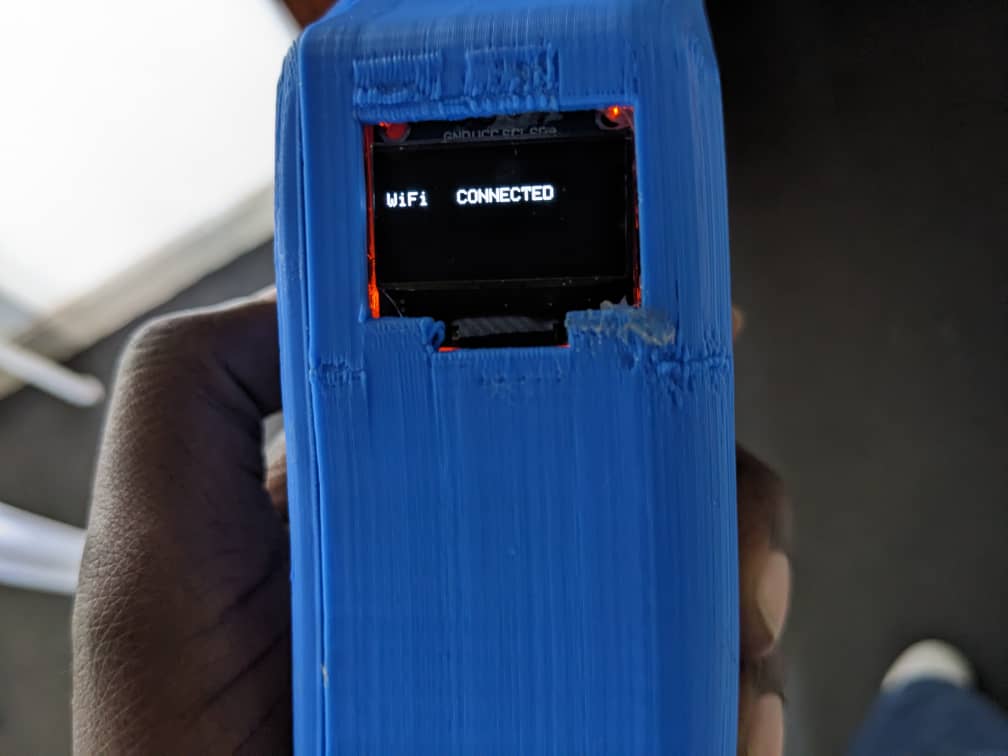
if (WiFi.status() == WL_CONNECTED) {
Serial.println();
Serial.print("Wi-Fi connected. IP address: ");
Serial.println(WiFi.localIP());
display.clearDisplay();
display.setCursor(0,20);
display.setTextSize(1);
display.setTextColor(WHITE);
display.println("WiFi");
display.setCursor(40, 20);
display.setTextSize(1);
display.setTextColor(WHITE);
display.println("CONNECTED");
display.display();
delay(2000);
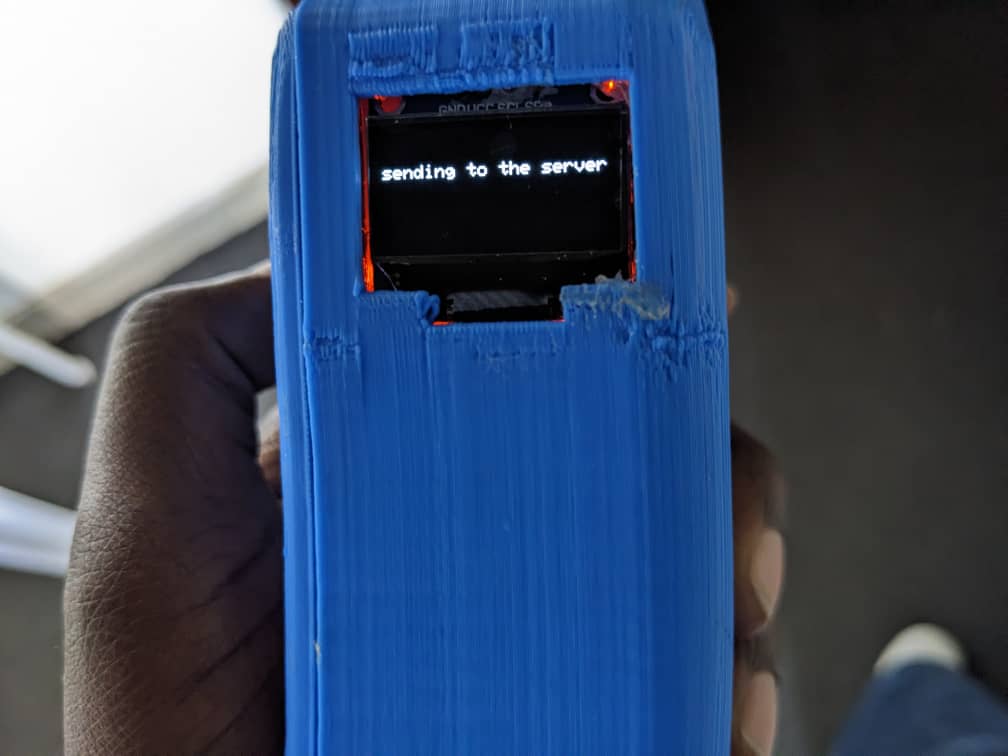
MQTT_connect();
display.clearDisplay();
display.setCursor(0, 20);
display.setTextSize(1);
display.setTextColor(WHITE);
display.println("sending to the server");
display.display();
delay(3000);
if (! Sensor_data.publish(soilmoisturepercent)) {
Serial.println(F("Failed"));
display.clearDisplay();
display.setCursor(50, 20);
display.setTextSize(1);
display.setTextColor(WHITE);
display.println("Failed to send ");
display.display();
delay(3000);
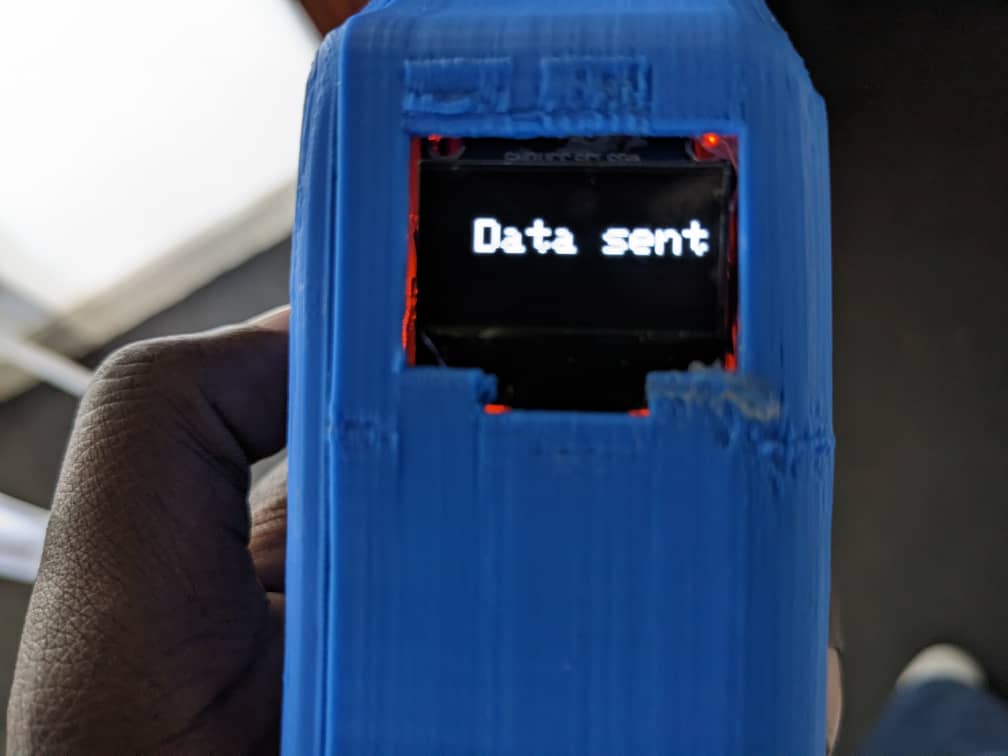
} else {
Serial.println(F("OK!"));
display.clearDisplay();
display.setCursor(20, 20);
display.setTextSize(2);
display.setTextColor(WHITE);
display.println("Data sent ");
display.display();
delay(3000);
}
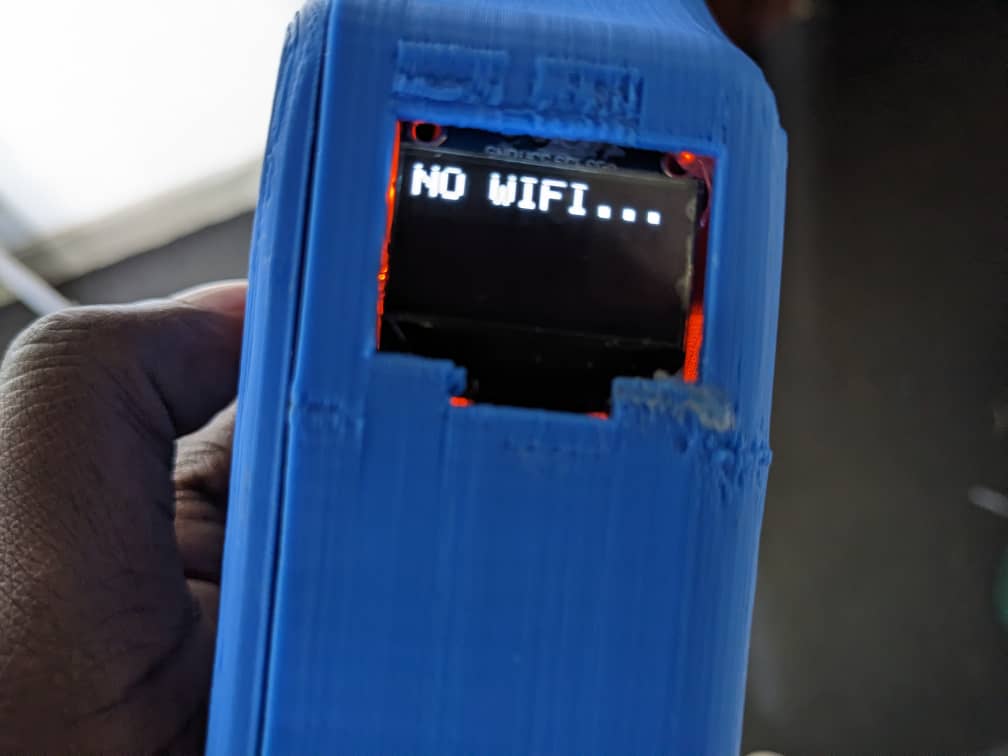
} else {
Serial.println();
Serial.println("Wi-Fi connection failed. Continuing without Wi-Fi.");
display.clearDisplay();
display.setCursor(0,0);
display.setTextSize(2);
display.setTextColor(WHITE);
display.println("NO WIFI...");
display.display();
delay(2000);
}
}
Testing eletronics control
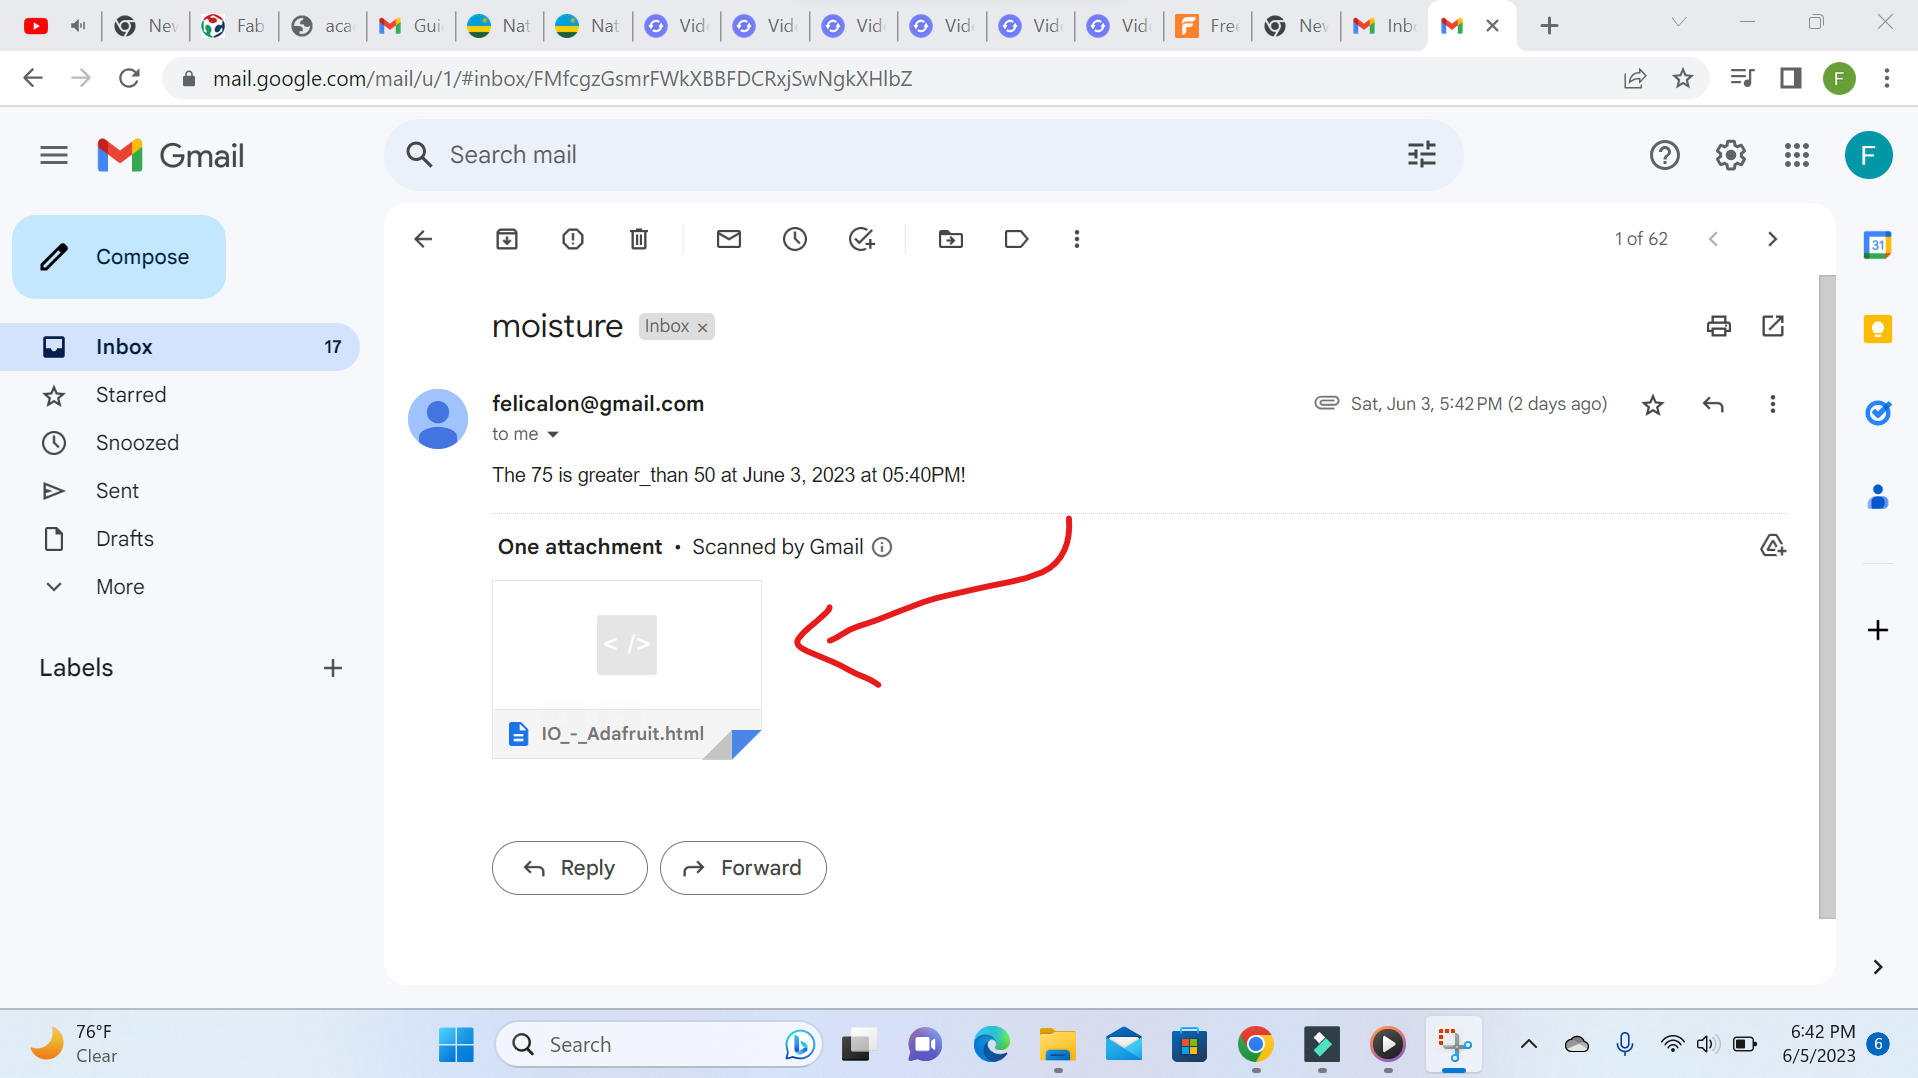
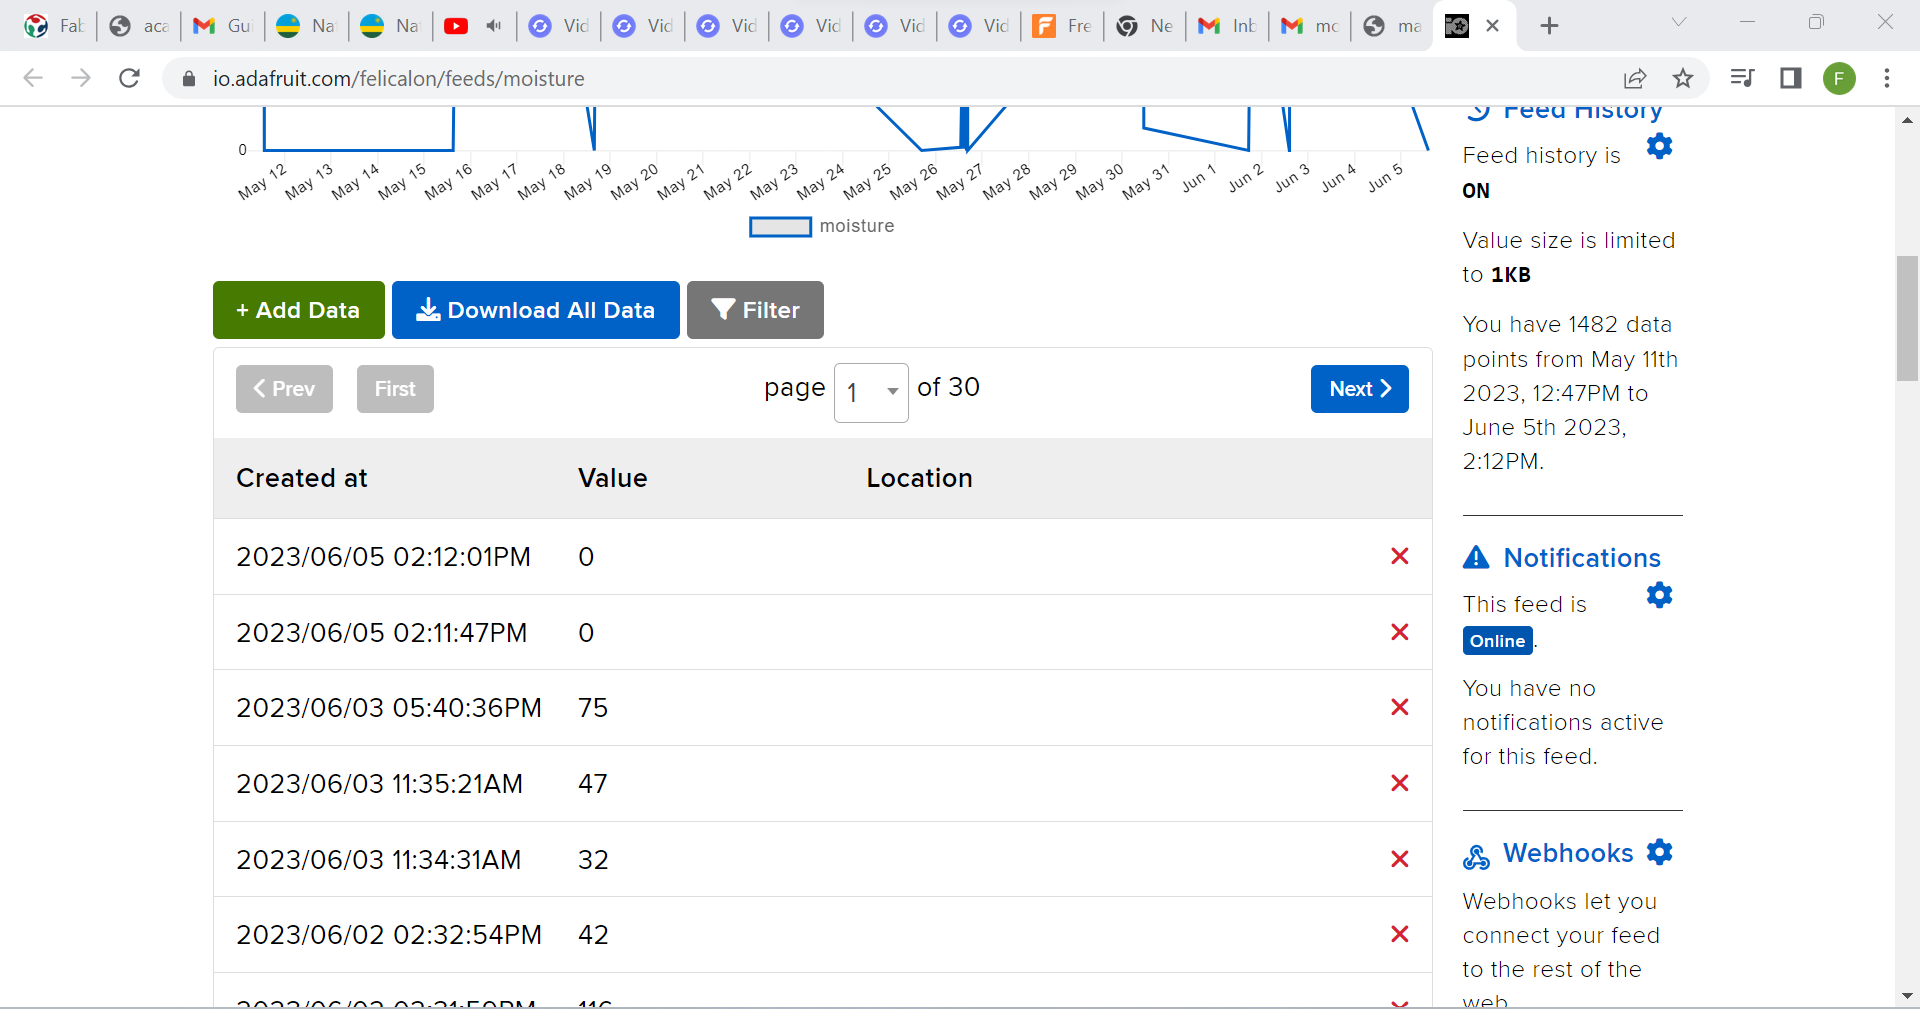
Receing email notification and accessing records on Adafruit
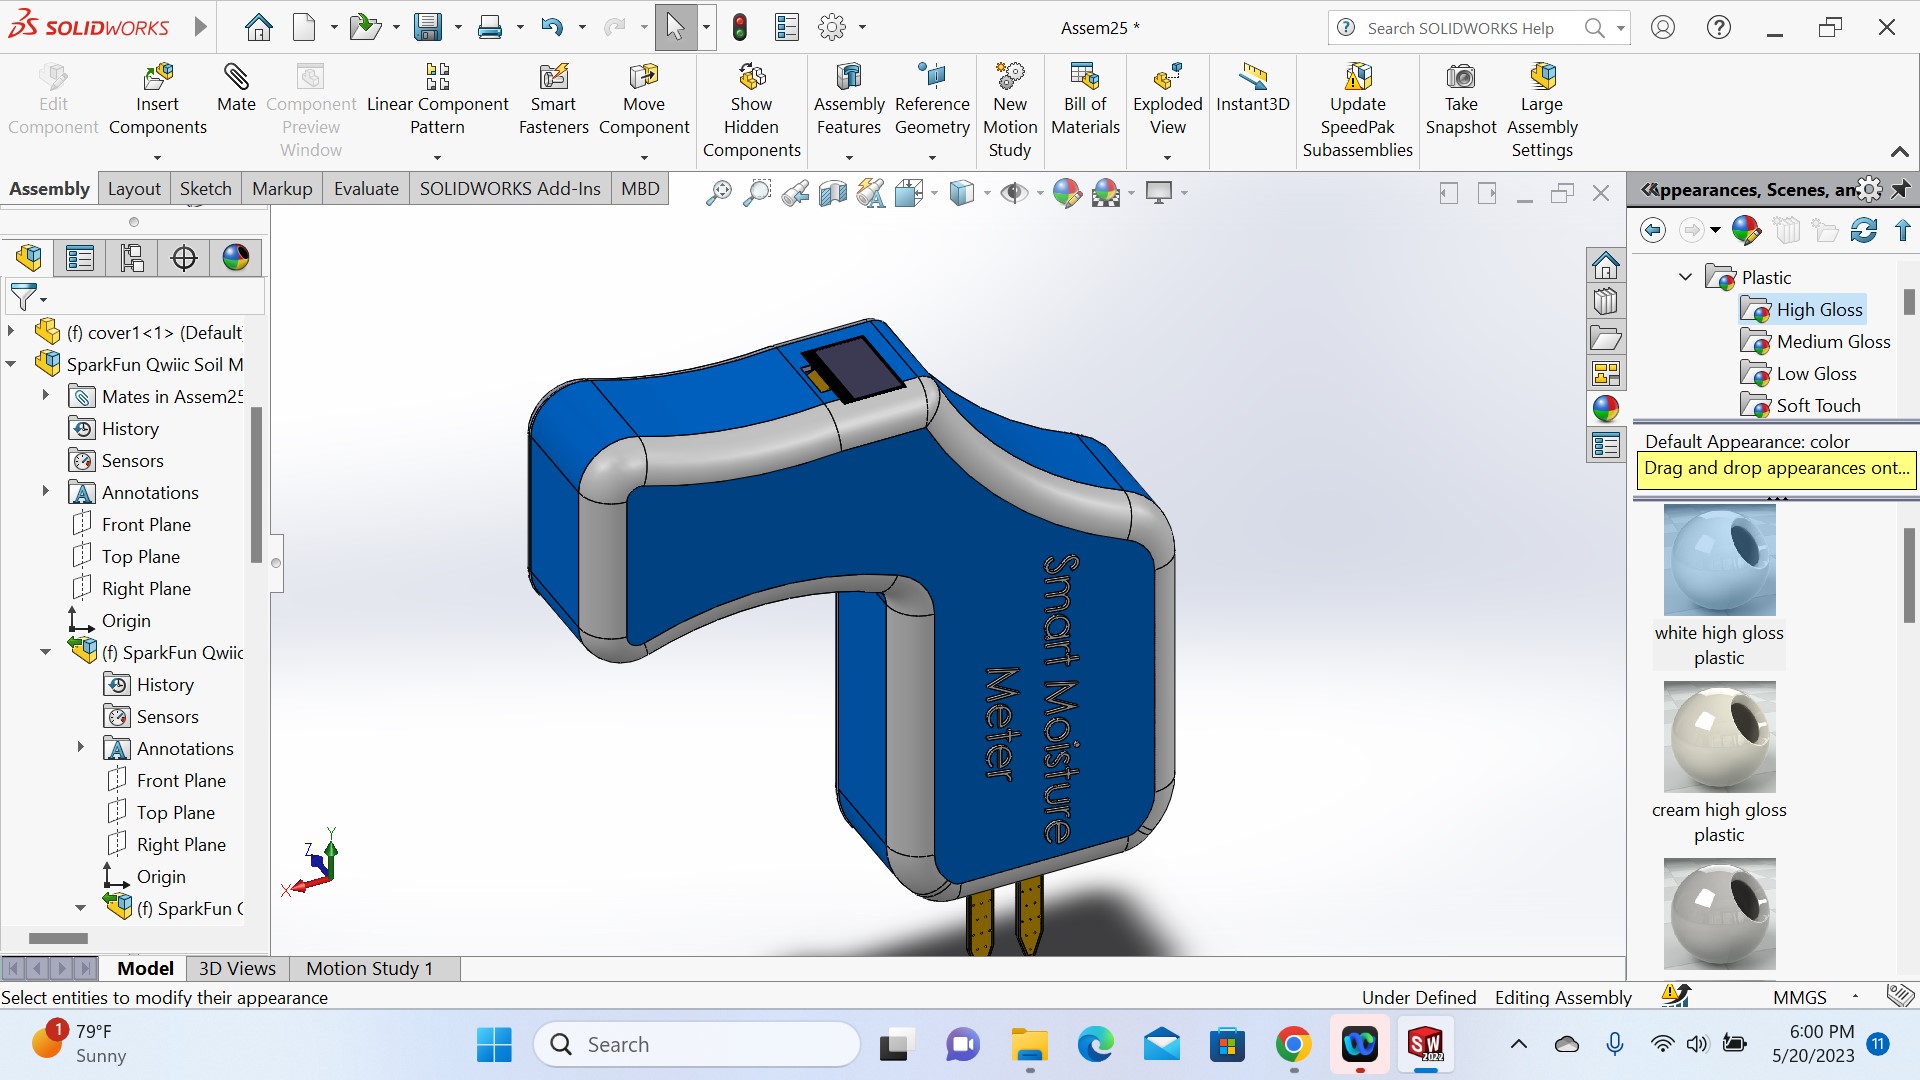
B. CAD Design of Housing or cover
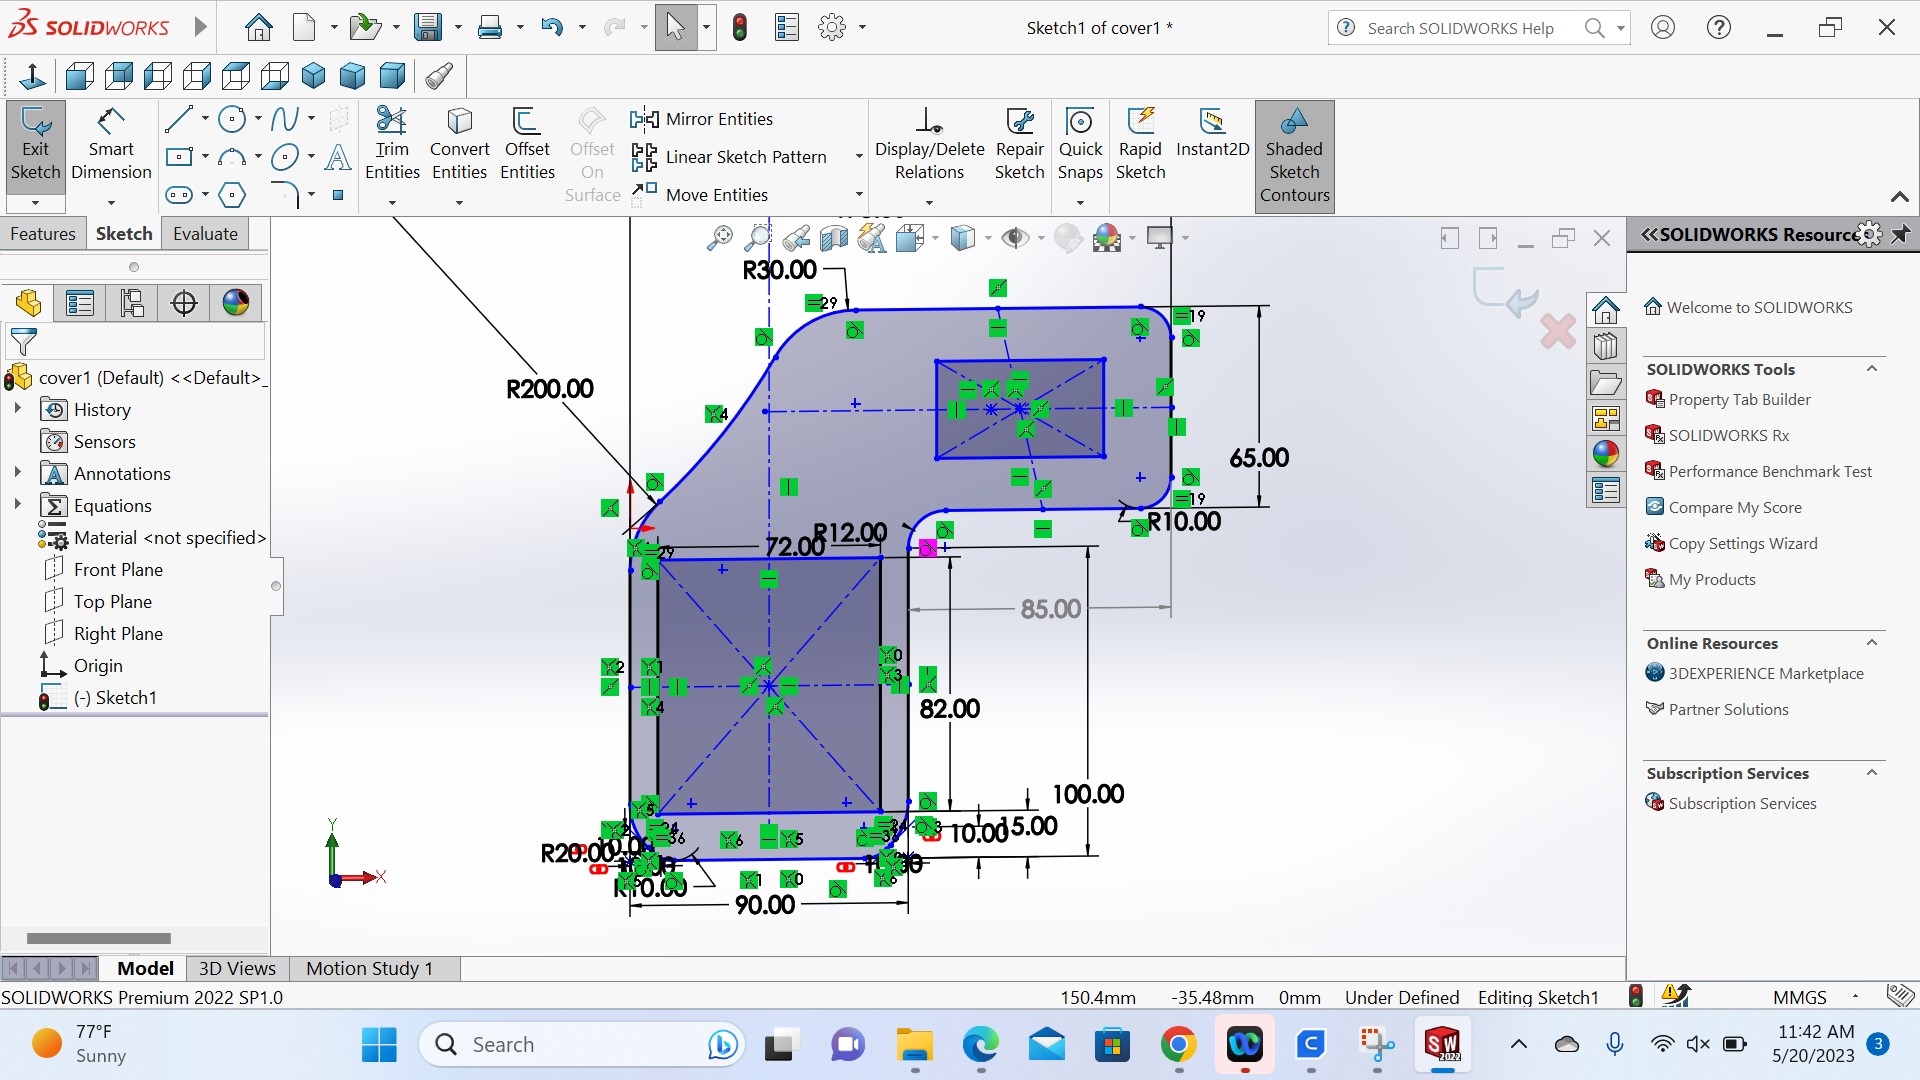
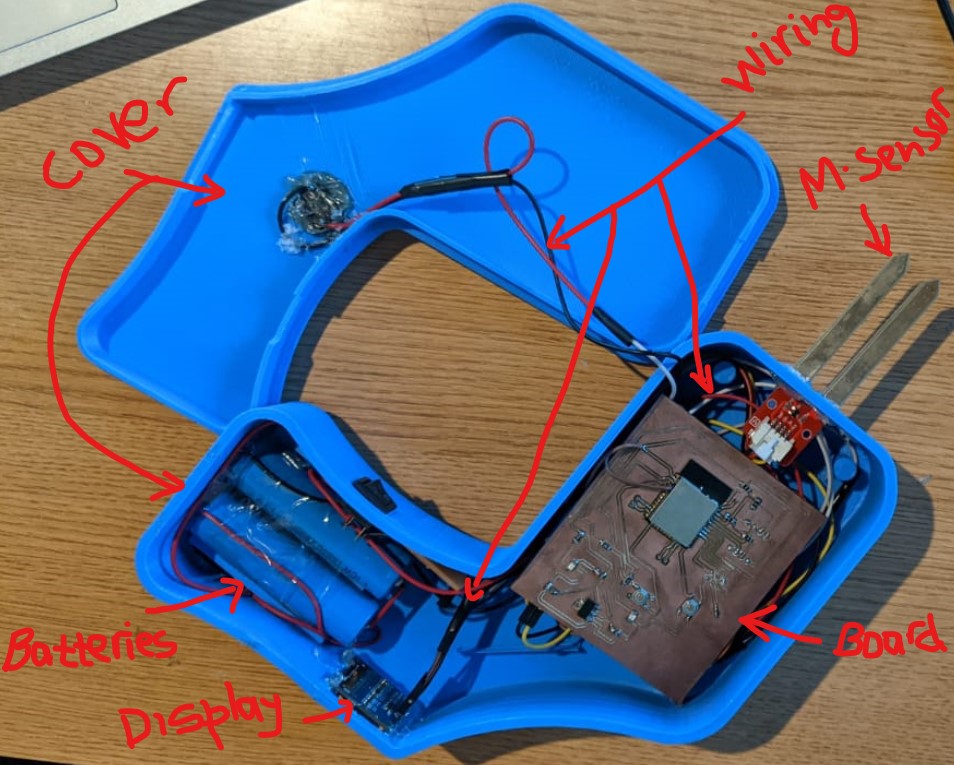
The photo below shows the cover where all pieces will be holded
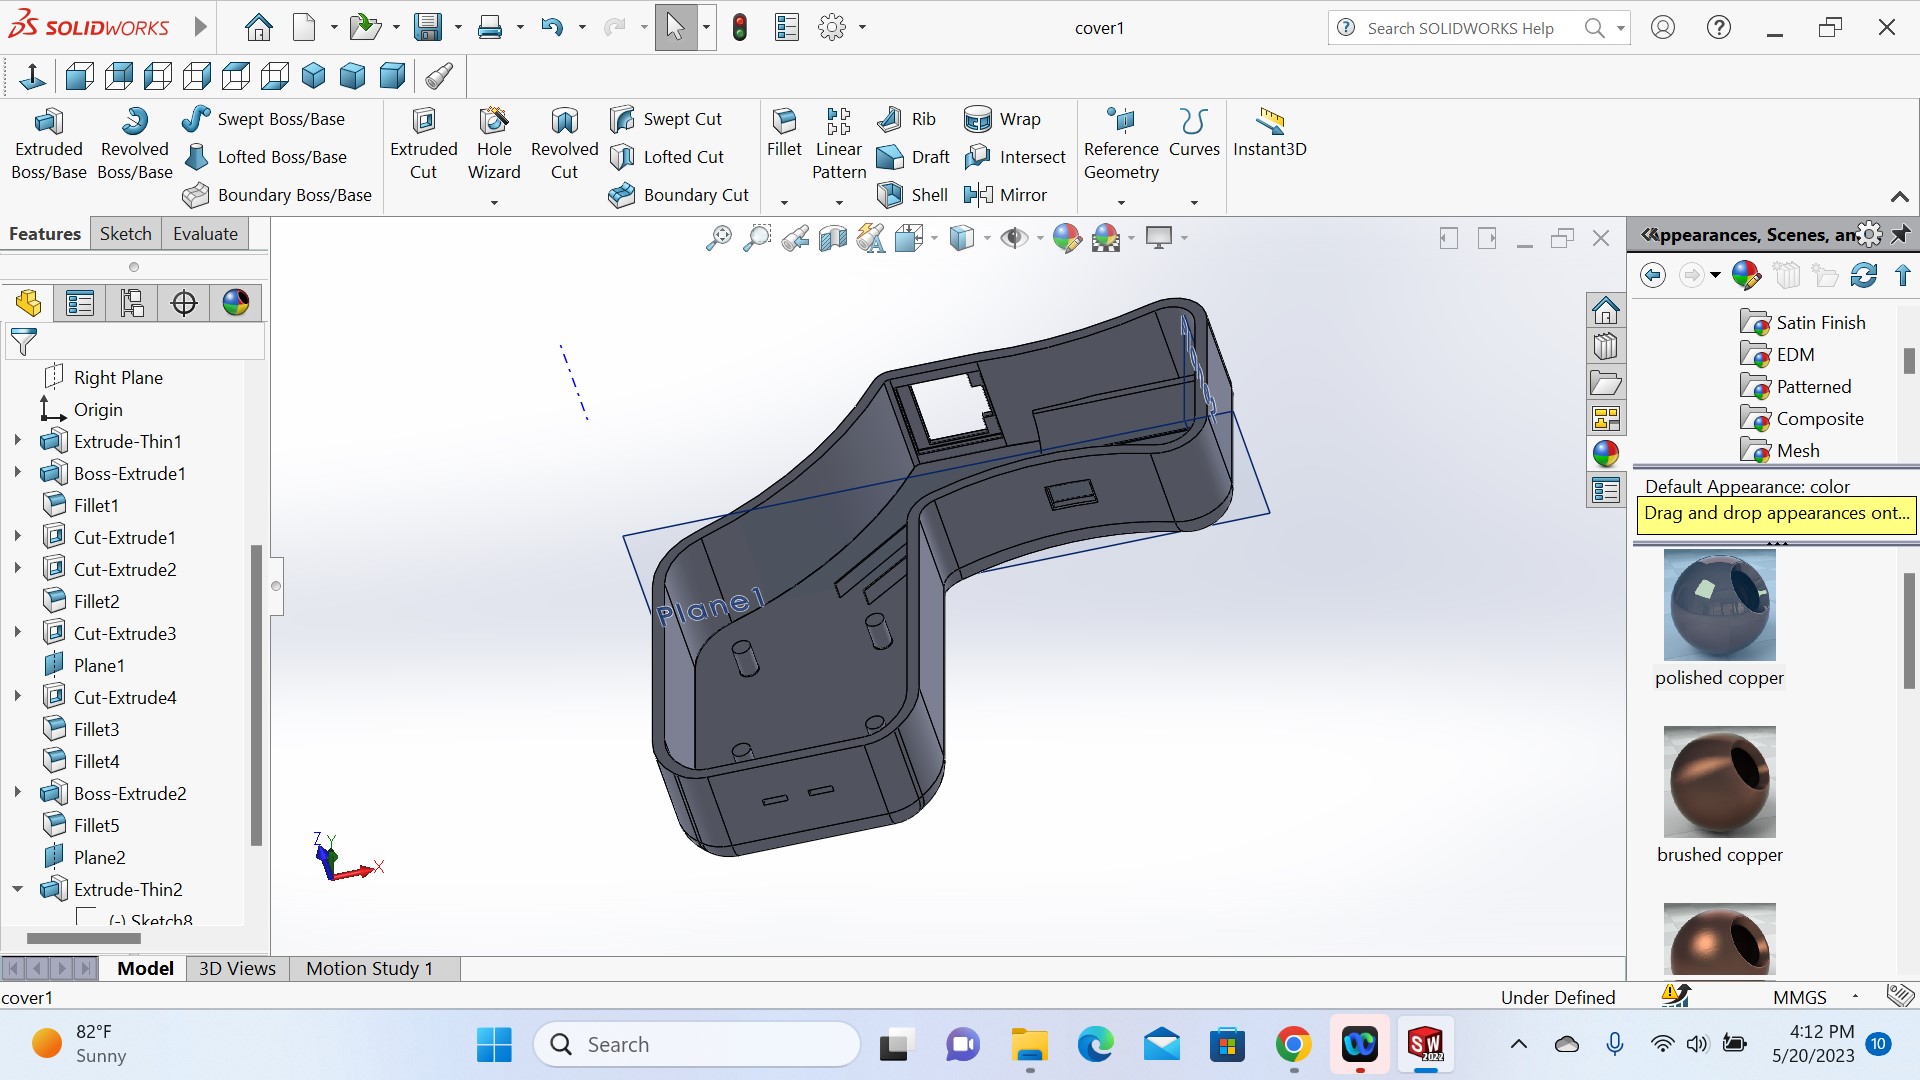
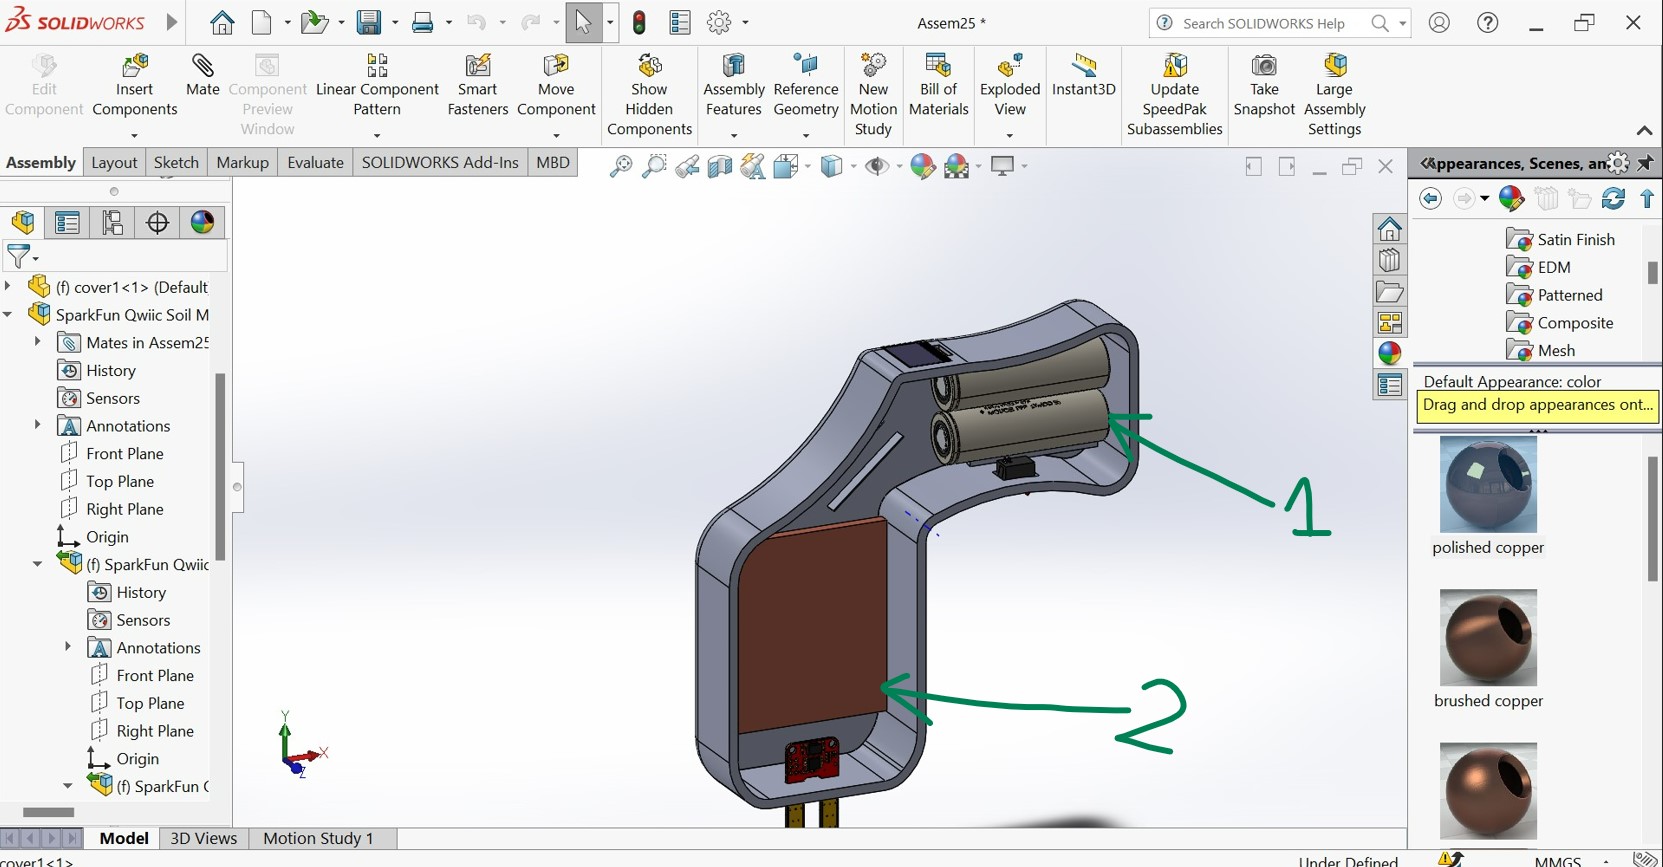
Inside the holder as well as the cover, as my it the hand device that need to be supplied by electricity, in the following image shows the batteries lebelled as 1 inside that will generate ellectricity to the whole system of device and the lebel 2 is the layout of PCB that holds electronics system that control the whole process when the device is in use
The designed PBC has been exported from kicad into soldworks sothat to be incorporated into the cover
Now this how it looks inside the device in the main cover:
And it will be covered by this cover on the other side:

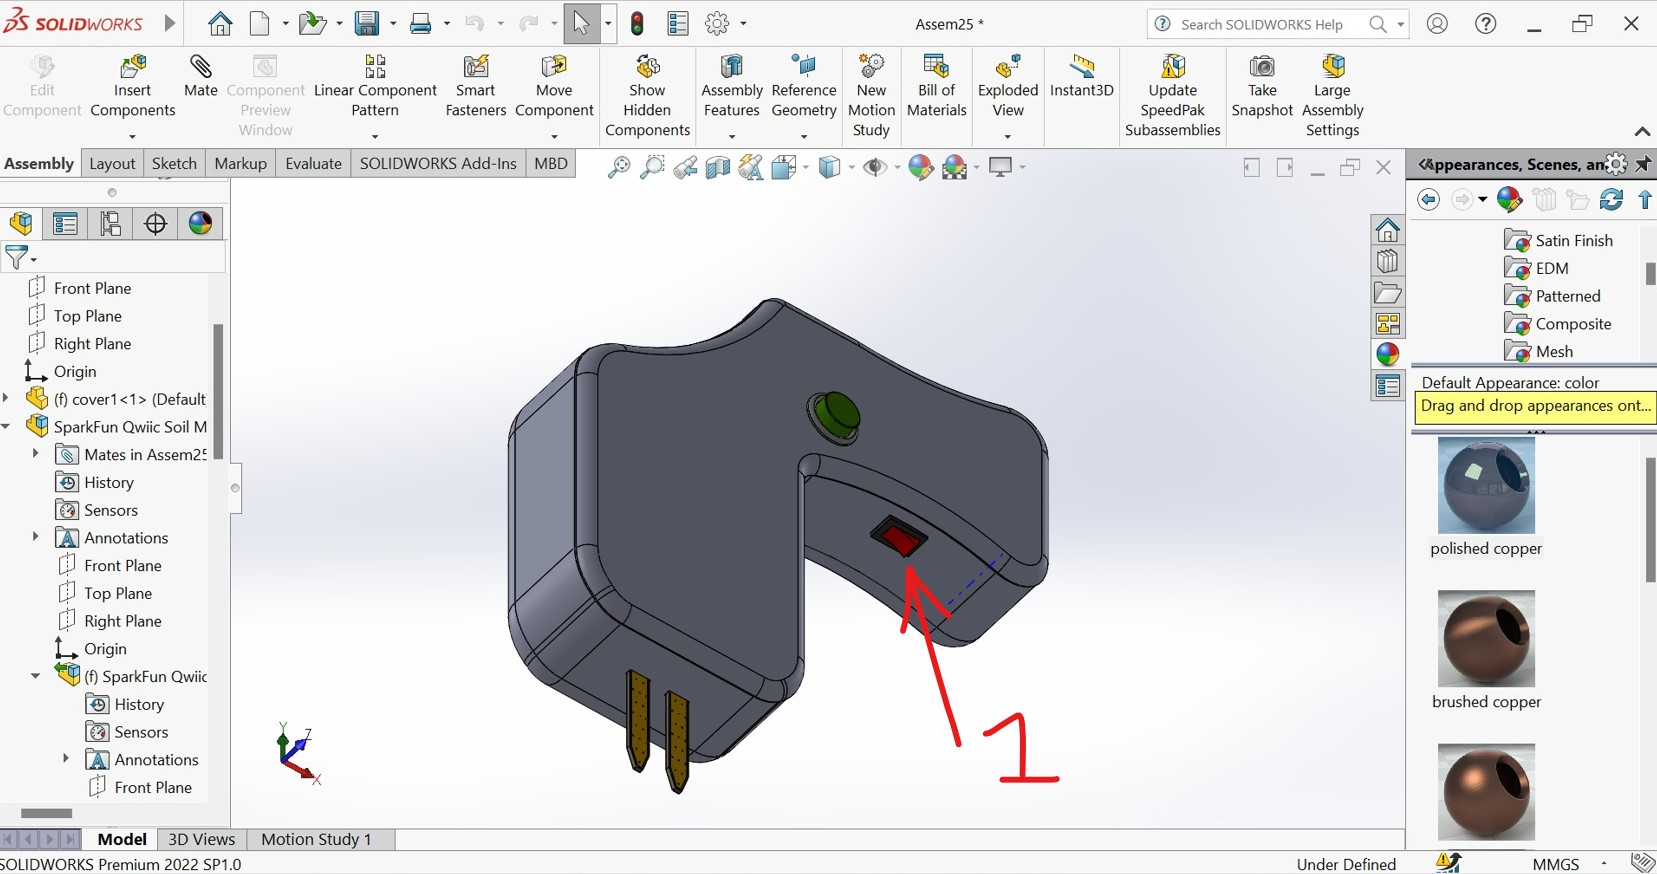
When the device is ready to be used, its supply power is controlled by the ON/OFF switch as lebelled by 1 in the following image. This means that before you use the device you switch it ON and if you finish to use it you switch it OFF
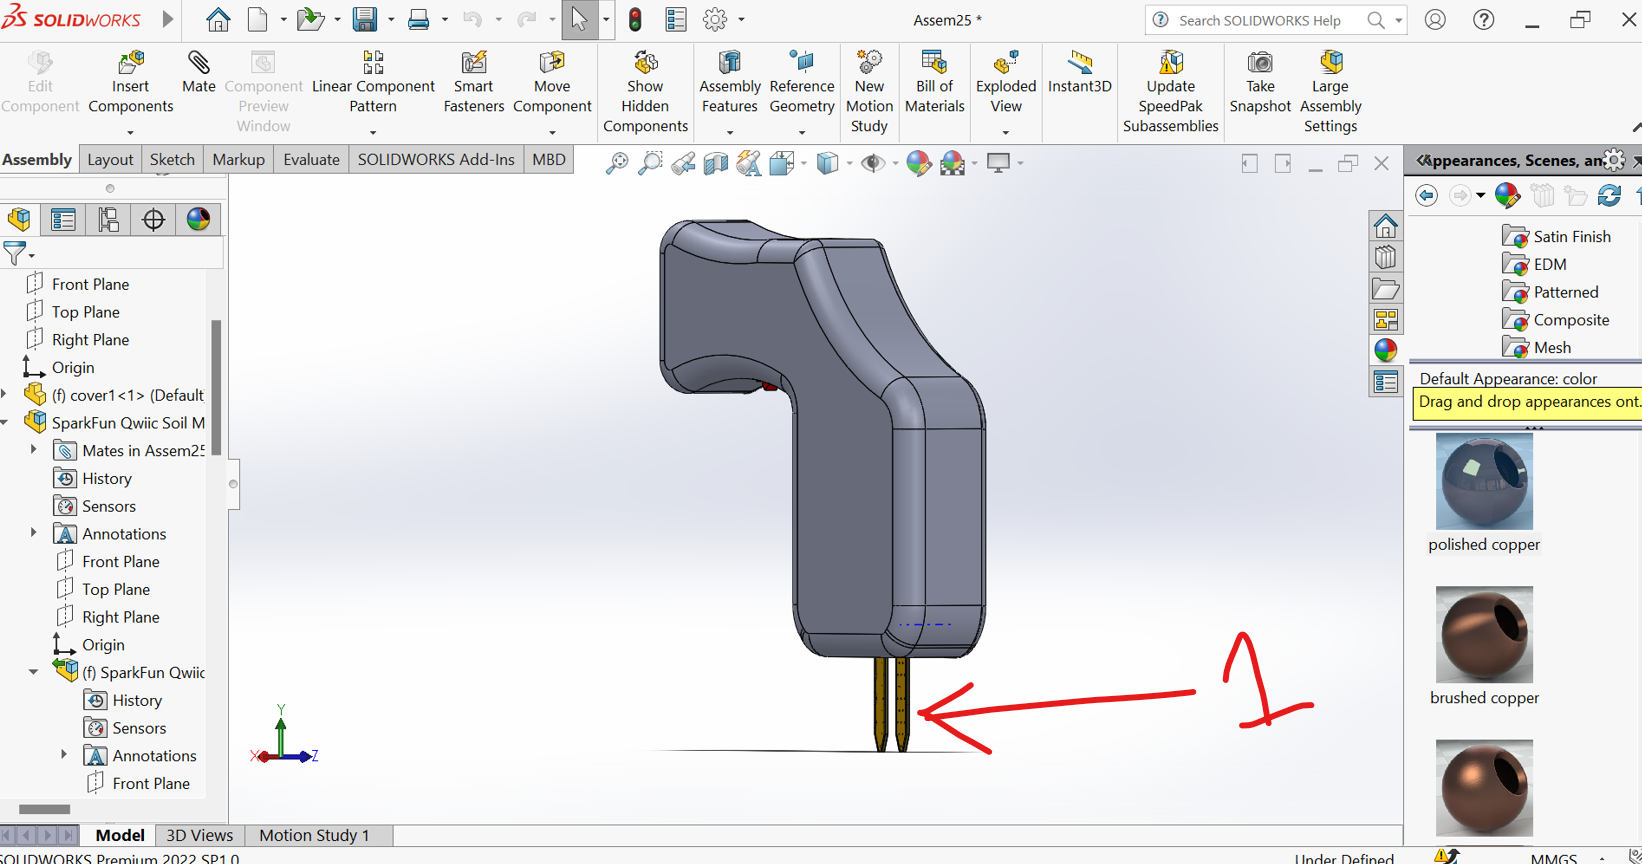
After switch the power on by switch, you plong the moisture sensor which is indicated by allow in the photo below into the material to be tested
Finally down here is how the final device will look like after being manufactured!!!!!!!!!!!!!!!!!!!!
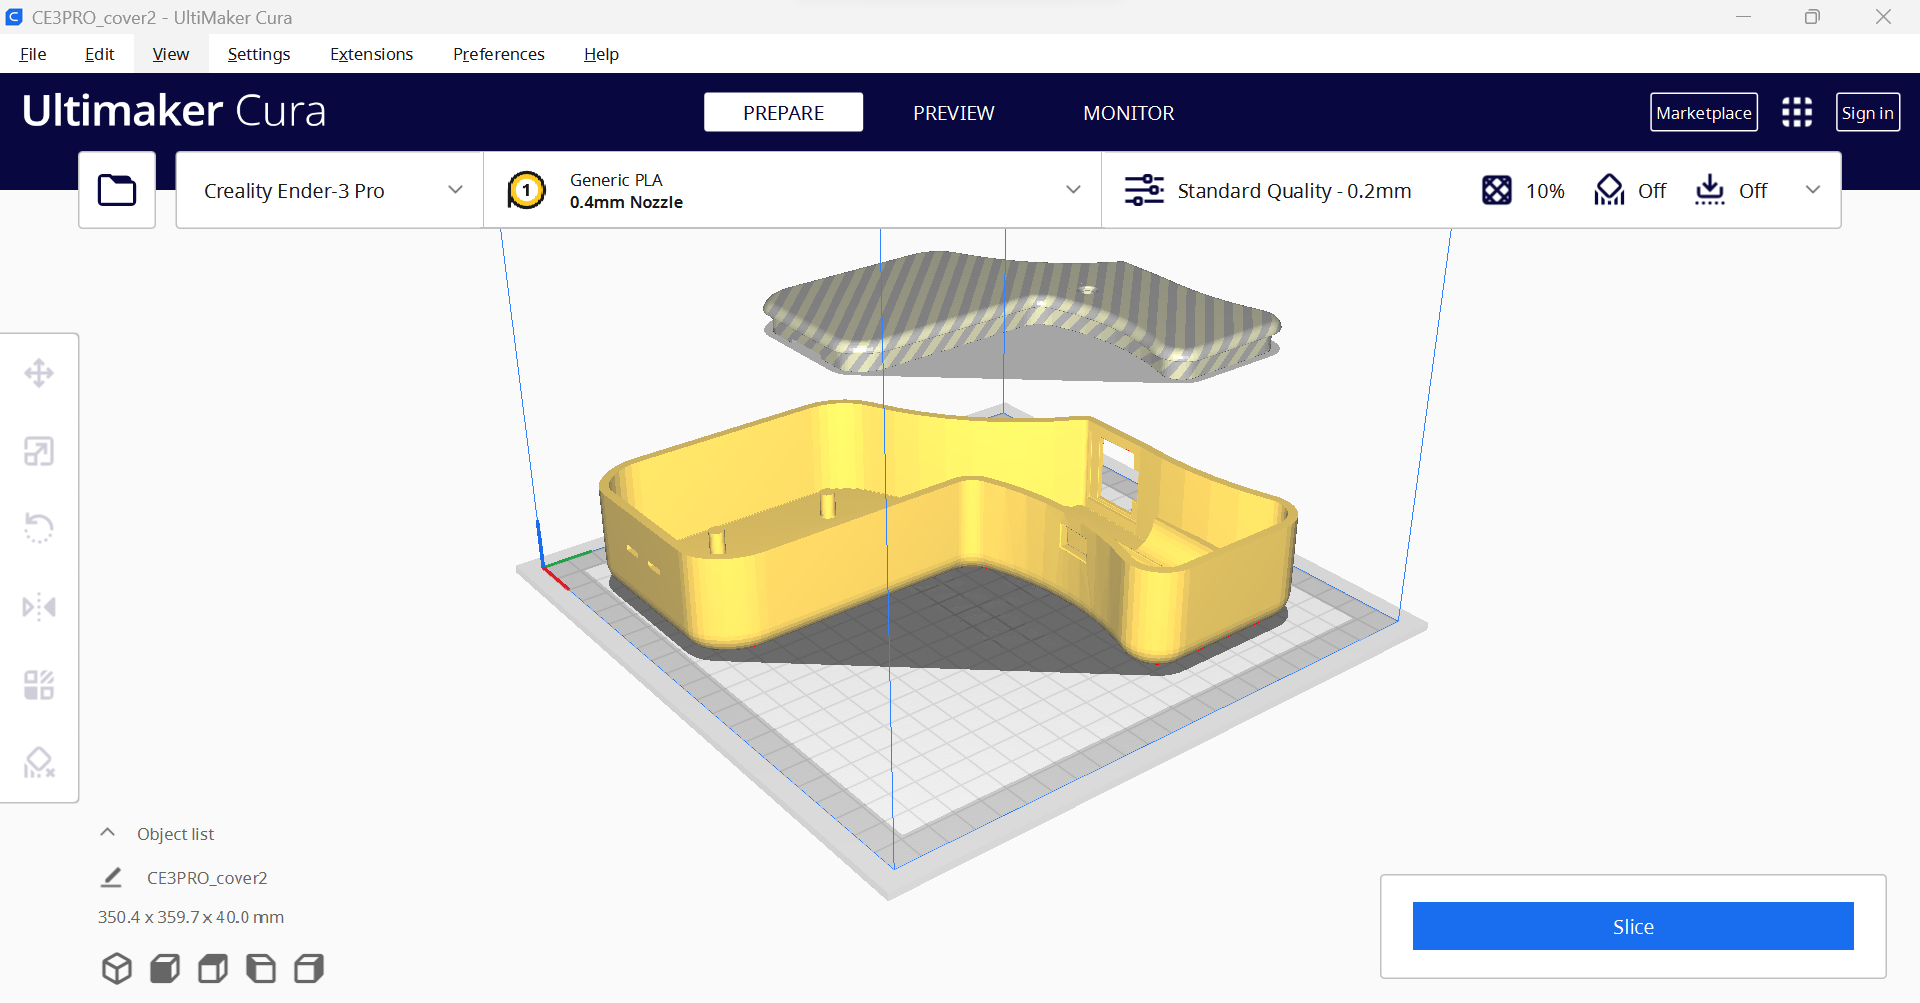
For more about CAD design and 3D printing refer to the 3D printing week
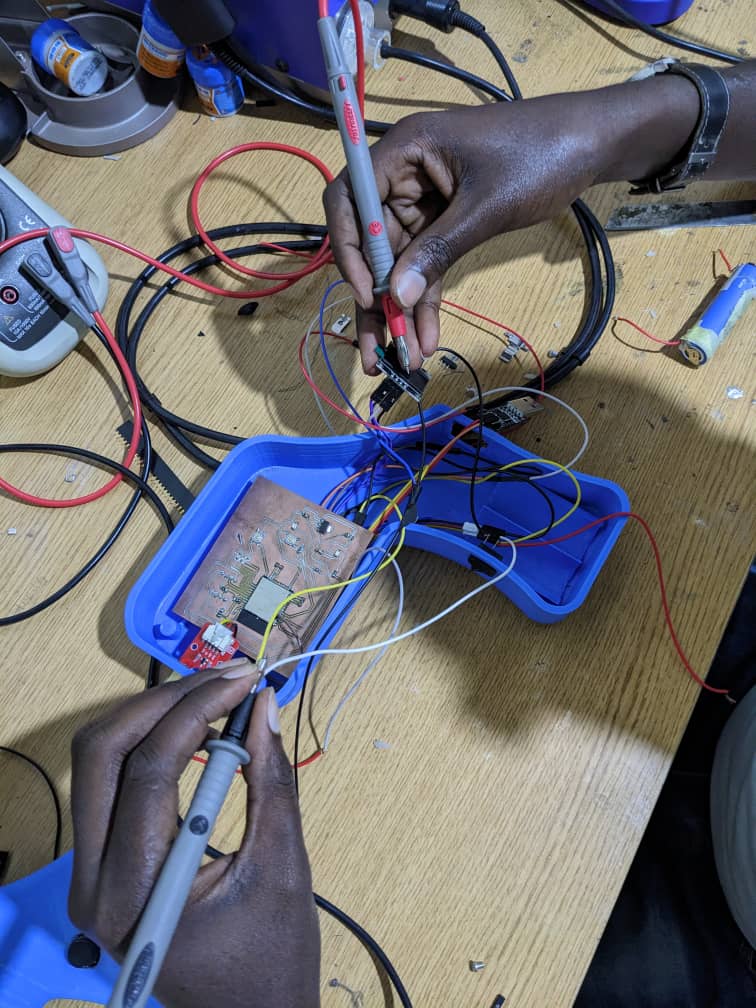
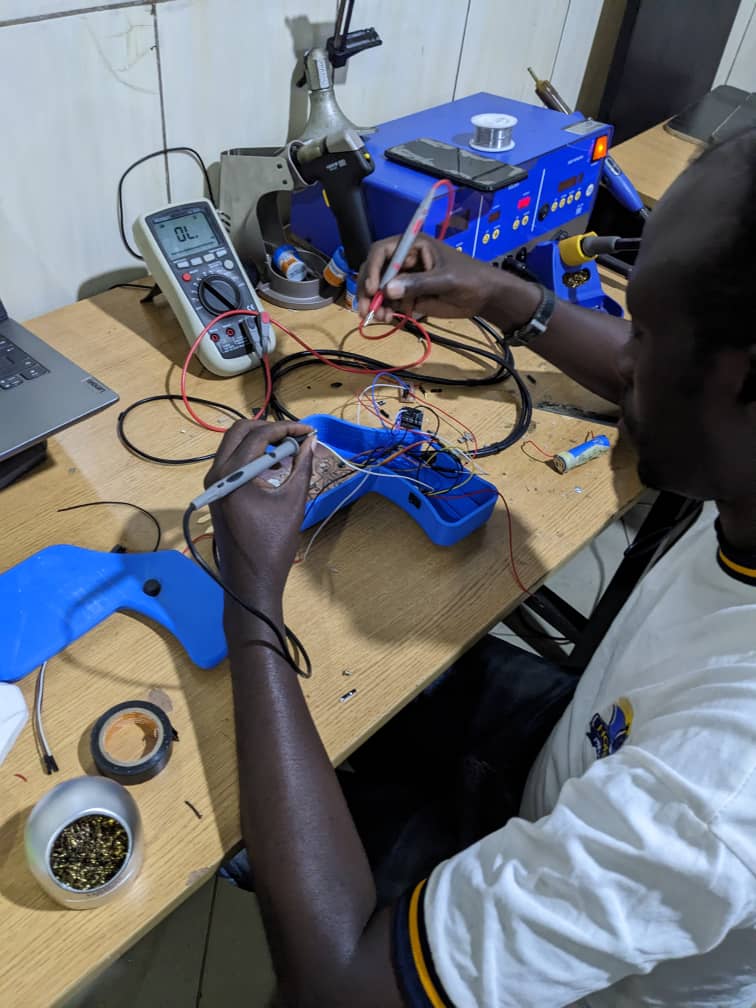
The following photo shows the strucure of device with batteries assembly and wiring
How my device works?
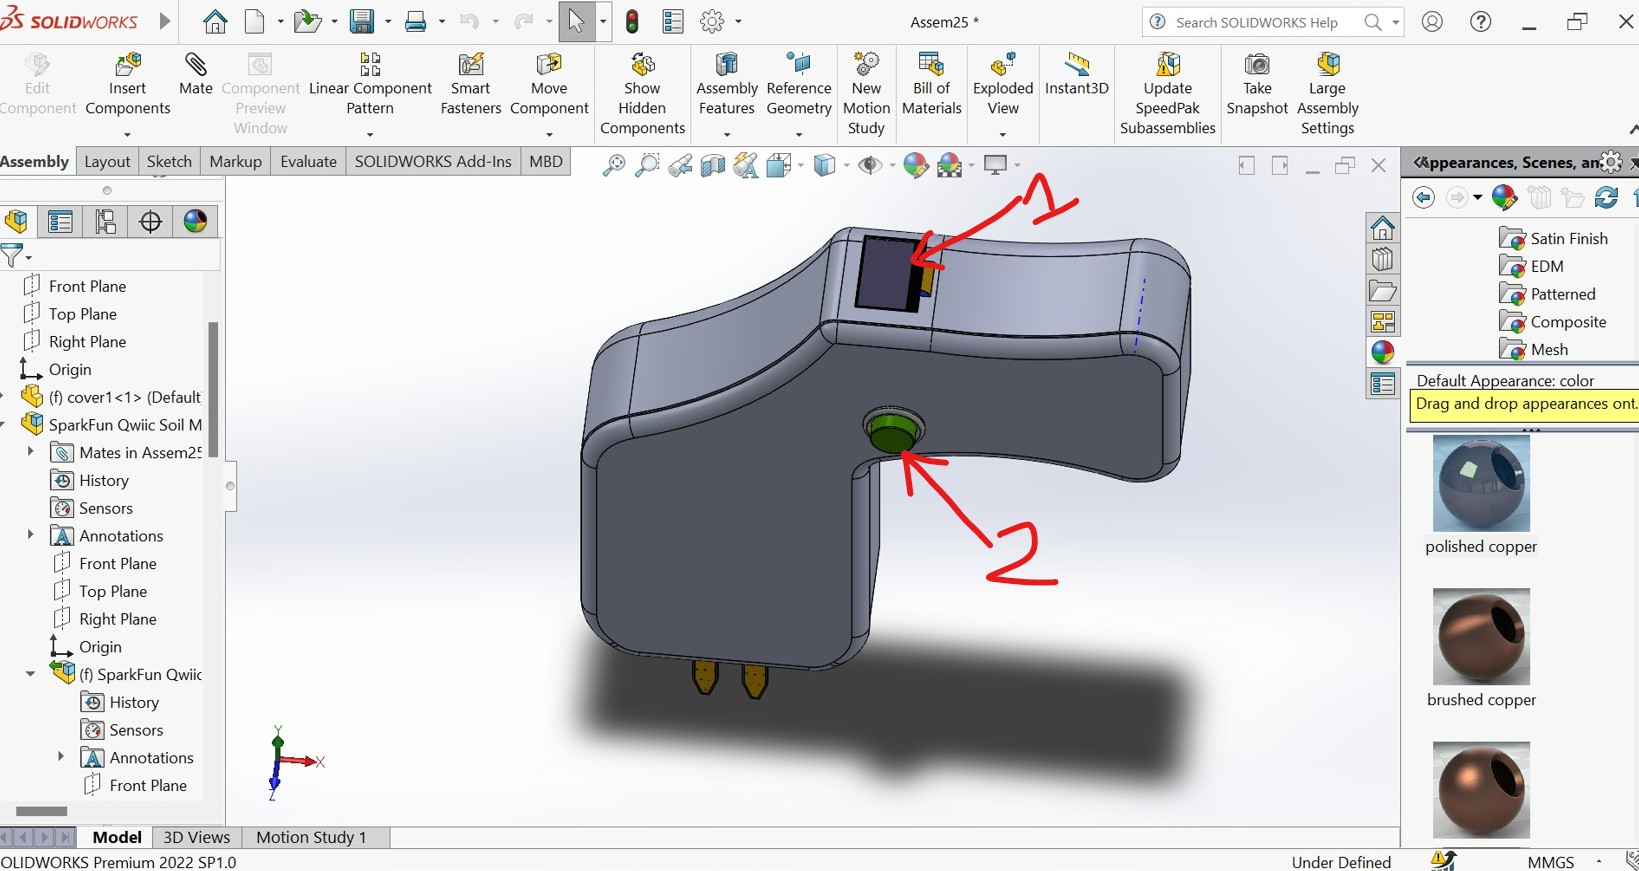
First of all it has to be switched ON as shown in the following photo
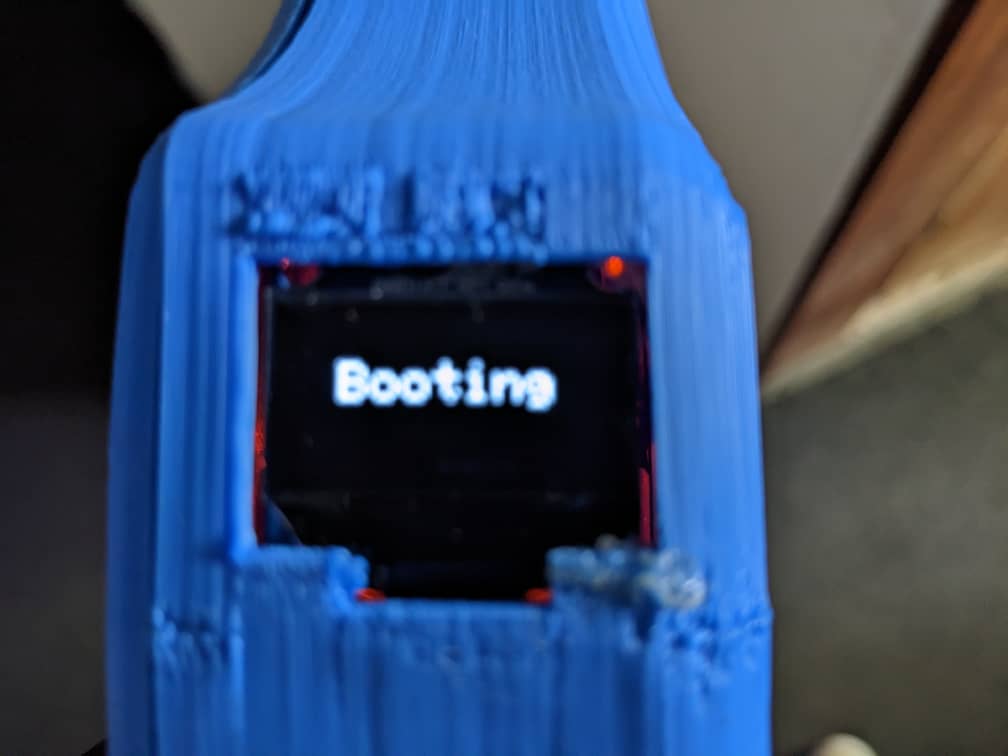
Booting my device after switched ON
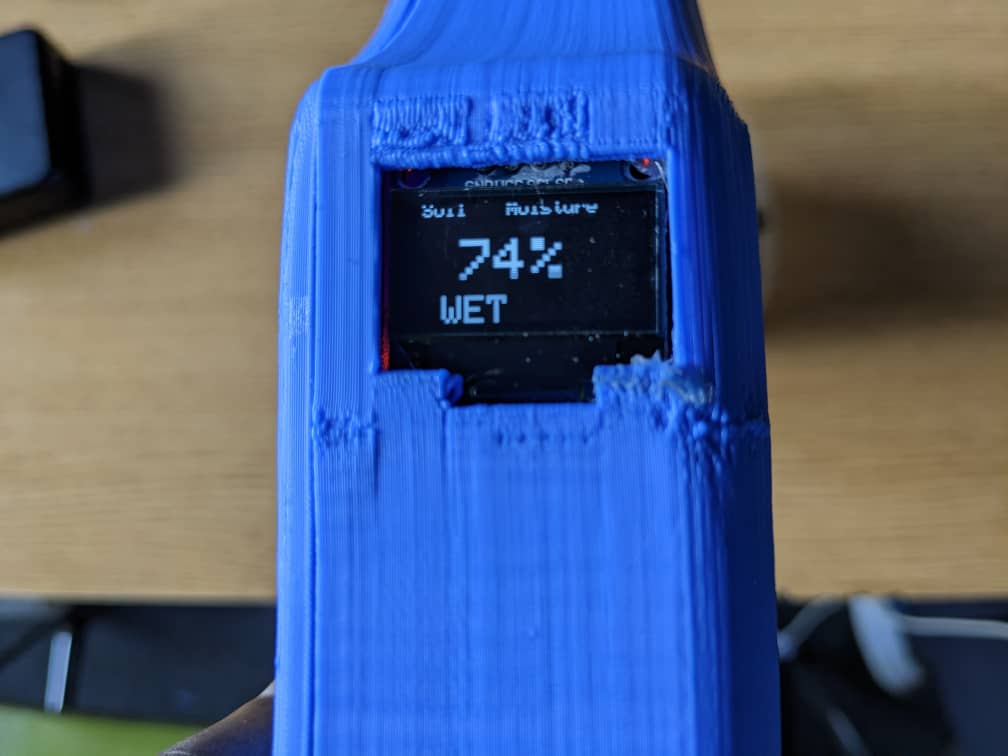
After booting it is ready to take data from different sample of materials
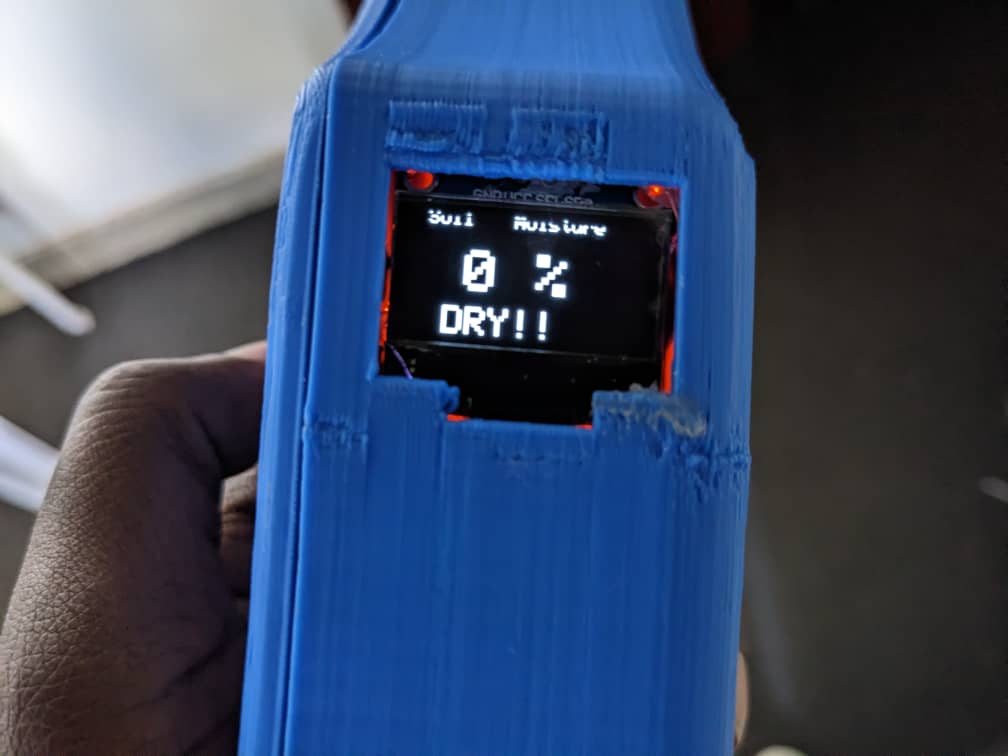
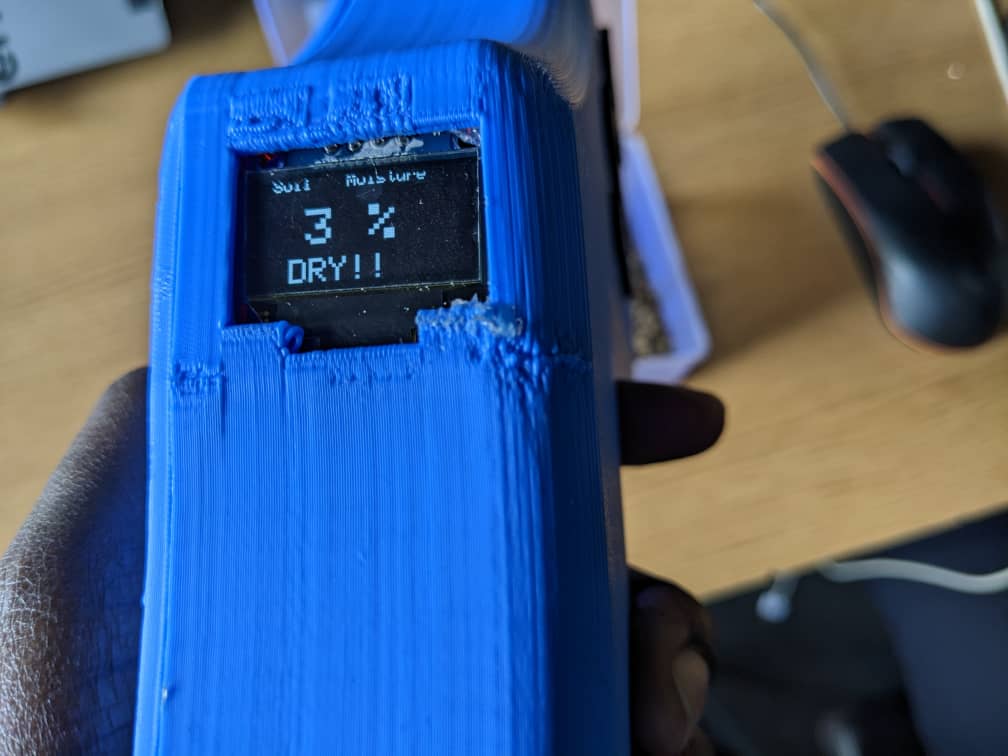
As I maped the input voltage levels into readable values that is percentage from 0-100% to be easly easily interpreted, when there it is not pinned into material or the material is dry the value is 0% and it shows the status of the water content into that material depending on the range where from 0-5% is DRY, 5-50% is MEDIUM and above 50% is WET


When the level of water content goes under or above 50%, the trigger from IFTT is sent to the recorded email with the link to review the records on cloud server as well as to download them for further analysis

Estemeted cost of used materials
| S/N | Material | Number | Unit Cost | Total Cost |
|---|---|---|---|---|
| 1 | ESP-WROM-32 | 1 | $15 | $15 |
| 2 | Moisture sensor | 1 | $6 | $6 |
| 3 | OLED Display | 1 | $6 | $6 |
| 4 | PCB | 1 | $3 | $3 |
| 5 | Battery | 1 | $10 | $10 |
| 6 | Jumper wires | 1 roll | $5 | $5 |
| 7 | SPST Switch | 1 | $1 | $1 |
| 8 | Pin header | 5 | $1 | $5 |
| 9 | push buttons | 1 | $1 | $1 |
| 10 | PLA Filament | 1 roll | $70 | $70 |
| 11 | Capacitors | 3 | $0.5 | $1.5 |
| 12 | Resistors | 5 | $0.5 | $2.5 |
| 13 | LED | 2 | $0.5 | $1 |
| Total Cost | - | - | - | $127 |
What has worked and what hasn't?
All I was expecting have worked exept slight or small variation of data when the device is pined into material but even that, it varies around single number and closely to it.
What questions need to be resolved?
Based on my final device, they are some parameters I wish can be improved such as its size. If the size is smaller than how it is can make it very portable as it is a hand device.
Related Works done by others
Actually none did exactly the same with my project but they are some people who worked on the related works in previous intake of fab academy. Among them I can mentione Plant Hydrator Alarm by Aliane Umuringa where the system is connected to a buzzer that makes a sound whenever the plant is thirsty. . There is also IOT Smart Farming System by Loise Kimwe. It is a system that aids in ensuring the proper conditions for plant growth by monitoring the moisture levels, light and temperature levels of the environment. A system that automates the water supply and also checks the conditions like temperature, light exposure and soil moisture levels to enable the farmer to optimise on the resources available.
Licence I choose is Copyright
After reading about copyright, specifically the Creative Commons license which is the most known open license organization, I decided to make this project with the following license
Model: This work is licensed under a Commons Attribution-NonCommercial-ShareAlike 4.0 International License.
This license allows users to distribute, remix, adapt, and build upon the material in any medium or format for non-commercial purposes only, and only as long as attribution is given to the author. If you remix, adapt, or build upon the material, you must license the modified material under identical terms. Reference on; link here and reference also on Link
All those works(designs) done have been saved as files and they can be accessed and downloaded as a whole zipped folder via: