Computer Controlled Cutting
Assignment to be done:
1.Group Assignment
Characterize your laser cutter's focus, power, speed, rate,kerf, joint clearance and types
To be found here
1.Group Assignment.
Reflection on what I have learned from group Assignment
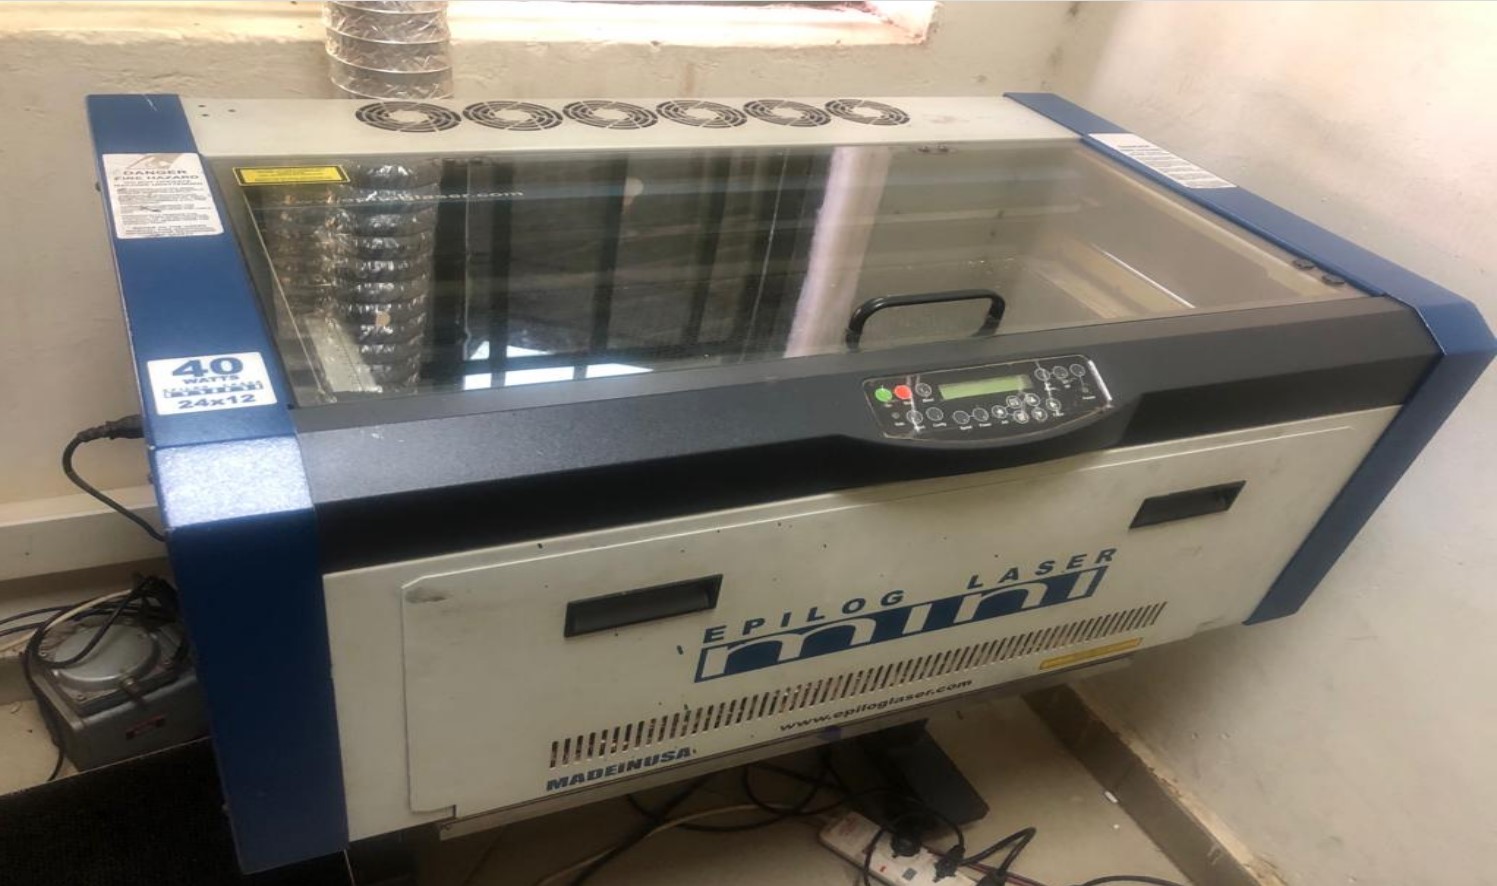
Laser Cutter
A laser cutter is a computer-controlled machine that uses a high-powered laser beam to cut or engrave materials such as wood,
plastic, metal, and fabric. The laser beam is focused on the material to be cut, which melts, burns,
or vaporizes it along the designated path, creating precise and intricate cuts or designs. Laser cutters
are commonly used in manufacturing, prototyping, and art and craft industries.
A Laser cutter can perform Vector cutting (to cut)raster etching (to engrave) as well as
Marking
A laser cutting machine is often used in engineering for the precision cutting of components of machines. For industrial applications, a laser cutting
machine is often used to cut structural and piping materials and flat sheet material such as metal.
ref. to https://www.shapecut.com.au/what-are-laser-cutting-machines/
Types of Laser Cutters
The three main types of laser cutters are as follows:
CO2 Laser Cutters:
CO2 laser cutting machines consist of CO2 gas along with a mixture of other gases like helium and nitrogen. This type of gas mixture is charged up by electric discharge which then produces the laser beam. The wavelength of such cutters is 10.6mm.
CO2 laser cutters are the most common and well-reputed because of their efficiency and cheaper prices.
Materials: Glass, plastics, leather, wood, and acrylic.
Crystal Laser Cutters:
Crystal laser cutters generate beams from Neodymium doped yttrium ortho vanadate. The wavelengths of these cutters are smaller as compared to CO2 laser cutters hence they can cut through some thicker materials.
Smaller wavelength also contributes to better focus and higher intensity as well. One drawback of these cutters is that their parts wear out because of the high power functionality.
Materials: Plastics, Metals, and Ceramics.
Fiber Laser Cutters:
The origin of fiber laser is seed laser which is amplified and magnified using special optical fibers. The more common name for fiber laser cutters is a solid-state laser.
The remarkable benefits of this laser cutter include cutting of reflective and conductive metals, thrice the times of efficiency as compared to CO2 laser cutters, and the absence of movable parts.
Fiber lasers can work on metals as well as organic materials. Although fiber laser cutters are very similar to crystal lasers they are more efficient and low maintenance.
Materials: Metals and Organic materials.
ref. to https://www.heatsign.com/how-to-choose-the-right-laser-cutting-machine/
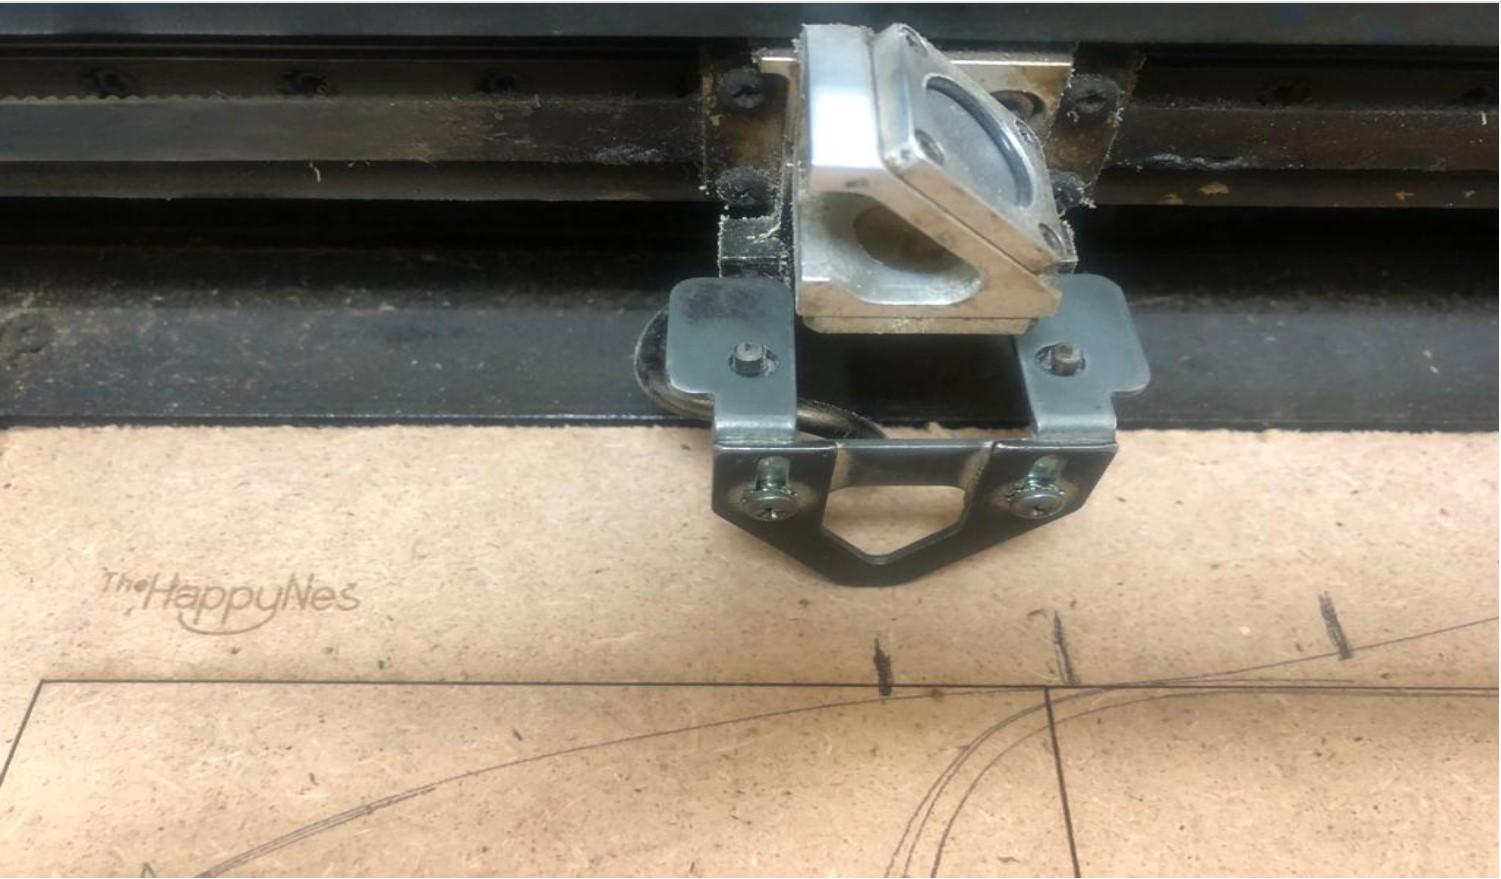
Setting up the focus of Laser Cutter:
Setting up the focus of a laser cutter is important because it ensures that the laser beam is focused on the material being cut or engraved with the right intensity and clarity.
The focus of the laser beam determines the spot size and the depth of the cut, and if it's not properly set up, the resulting cut may not be precise or the material may not be adequately melted, burned or vaporized. By adjusting the distance between the laser lens and the material, the laser cutter can be optimized to produce
the desired quality and accuracy of the cut or engraving. Proper focus also helps to prolong the lifespan of the laser tube and reduce the risk of fire or damage to the machine or surrounding environment.
How to set the focus of a laser cutter?
1. Choose the material to be used
2. Put it on the cutting bed of laser cutter
3. Adjust the focus lens of laser cutter according to the thickness of a material to be working on.Adjust the lens until the focus point is at the correct distance from the material, which is usually around the center of the material thickness
4.Test the focus: Turn on the laser cutter and run a test cut or engrave on a small portion of the material. If the cut is too shallow or too deep, adjust the focus lens accordingly and repeat the test until the focus is correct.
Power, speed, rate, kerf, and clearance are crusial parameters before and when working with laser cutter in order your work to be net.
Power determines the intensity of the laser beam, affecting the depth and quality of the cut. Speed affects the rate of cutting and the smoothness of the cut. Rate determines the overall efficiency of the laser cutting process. Kerf refers to the width of the cut and affects the precision of the design. Clearance is the distance between the laser head and the material being cut and affects the focus of the laser beam. All of these parameters must be carefully adjusted to achieve the desired cutting results and prevent damage to the laser cutter or material.
Normally all those parameters should be setted based on type of material being cutted or engraved, type of laser cutter being used as well as the desired results

Fig: Sreen of computer that controls a laser cutter
As we can seen that is a displayed screen of computer in the process of sending a work to be done on laser cutter, from here you can set different parameters accordingly as you can do on laser cutter its self.
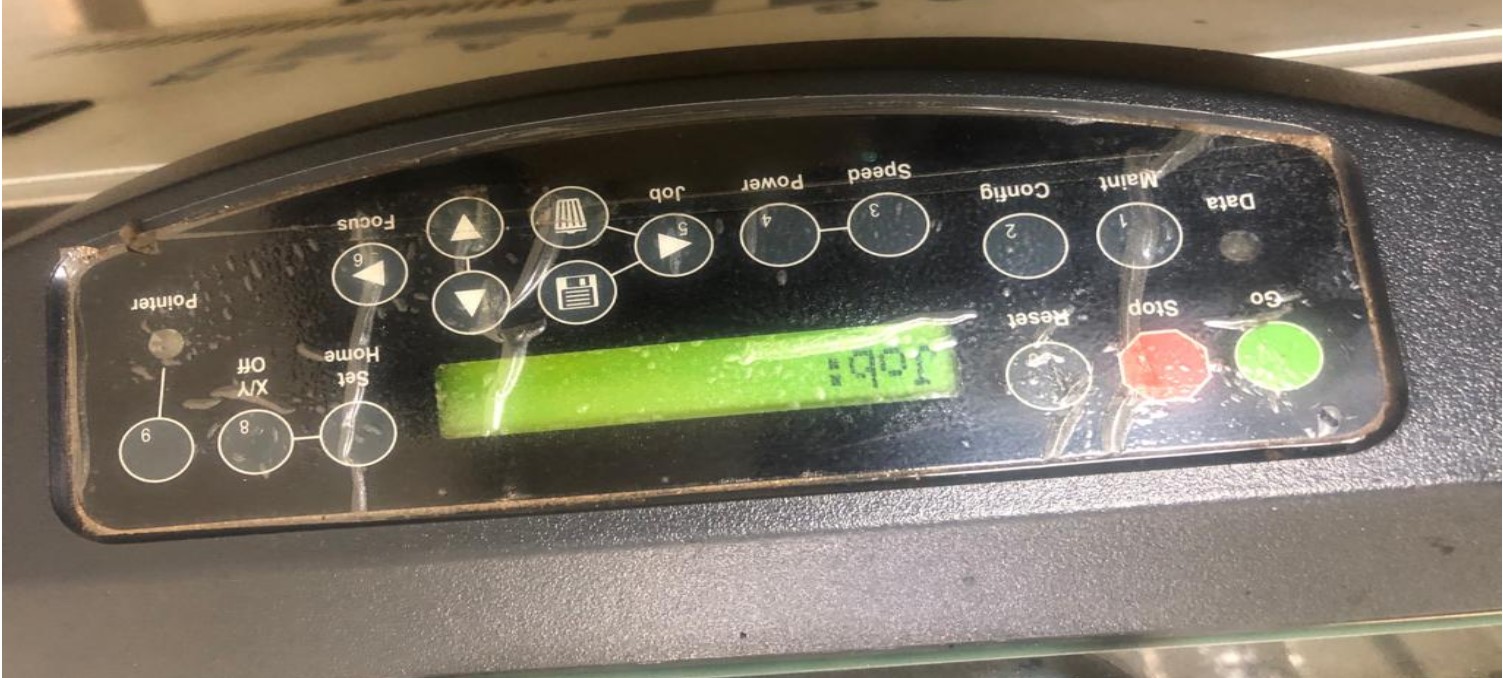
Fig: Control screen of Laser Cutter Machine Here you start your laser cutter as well as adjusting some parameters on laser cutter its self.
What is laser engraving?
Laser engraving is the practice of using lasers to engrave an object. Laser marking, on the other hand, is a broader category of methods to leave marks on an object, which in some cases, also includes color change due to chemical/molecular alteration, charring, foaming, melting, ablation, and more.

Fig: Design of eagle with coreldraw to be engraved on a bottle
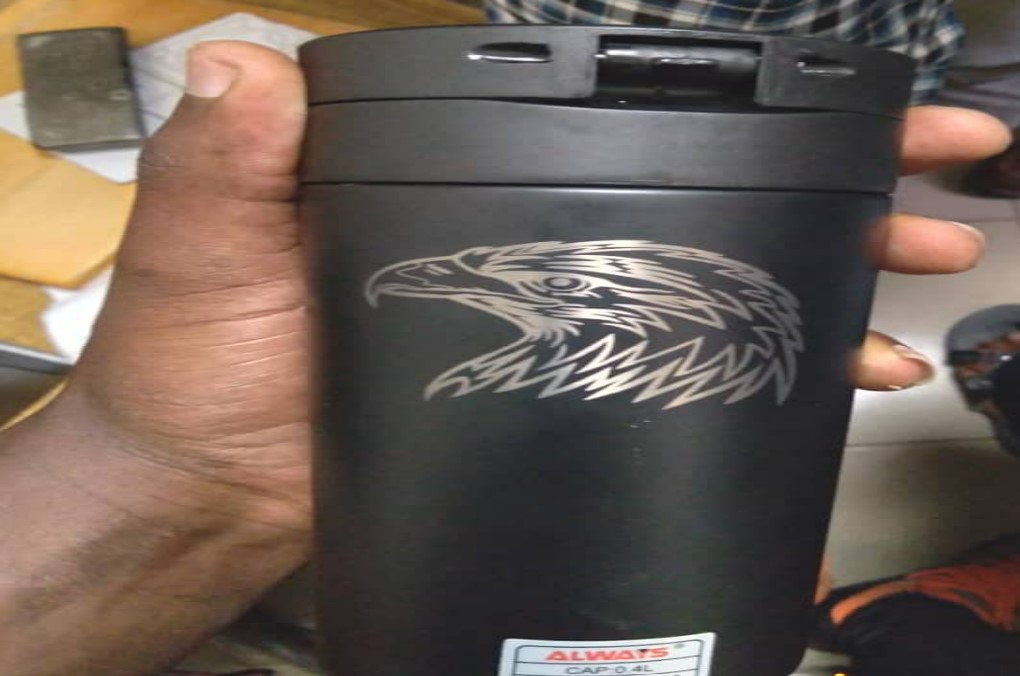
Fig: After designing an eagle, it is then printed on a bottle
2.Individual Assignment.
Cut something on the vinylcutter design, lasercut, and document a parametric construction kit, accounting for the lasercutter kerf, which can be assembled in multiple ways, and for extra credit include elements that aren't flat.
Parametric design of Press-Fit Kit to be cutted with a Laser Cutter Machine
What is parametric design and Parametric press-fit?
Parametric design is a type of design that uses parameters to define and manipulate the properties and relationships between elements of a design. This allows for greater flexibility and efficiency in the design process, as changes can be made quickly and easily by adjusting the underlying parameters. Parametric design also enables designers to explore a wider range of design options and variations, as well as to optimize designs based on specific performance criteria. A parametric press-fit is a method of joining two parts together by means of a tight, interference fit. In this technique, the size and shape of the mating features of the two parts are designed in a way that allows them to be pressed together with a controlled amount of force, creating a secure and permanent bond between them. Refrence from here
Creating a parametric design
The following designs have been done by using solidworks:
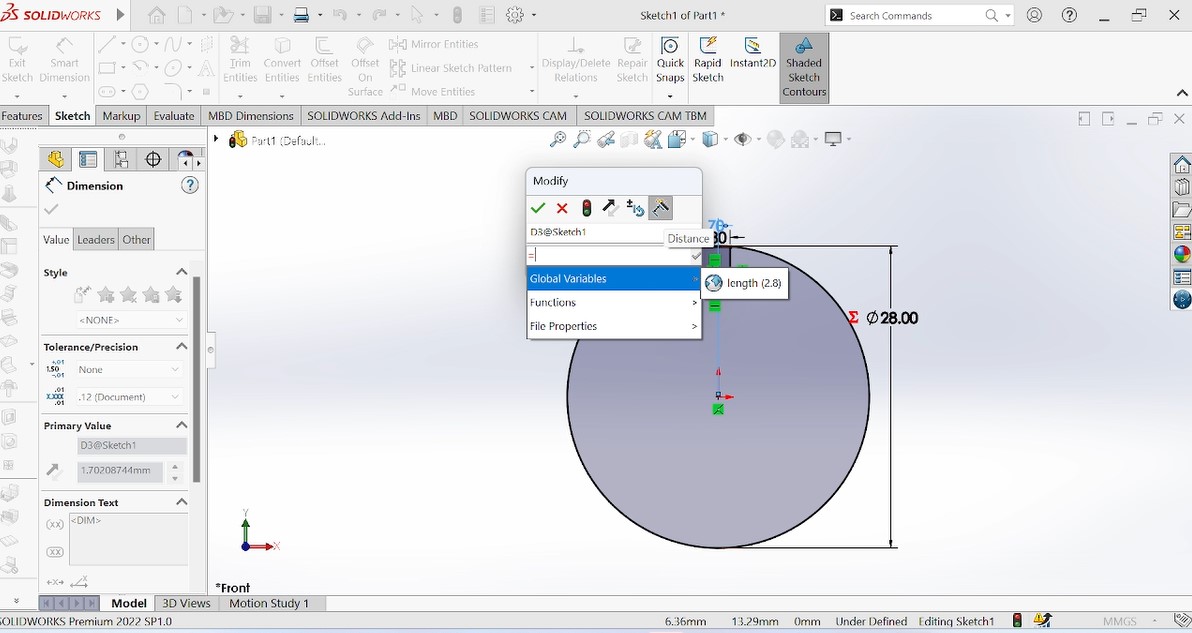
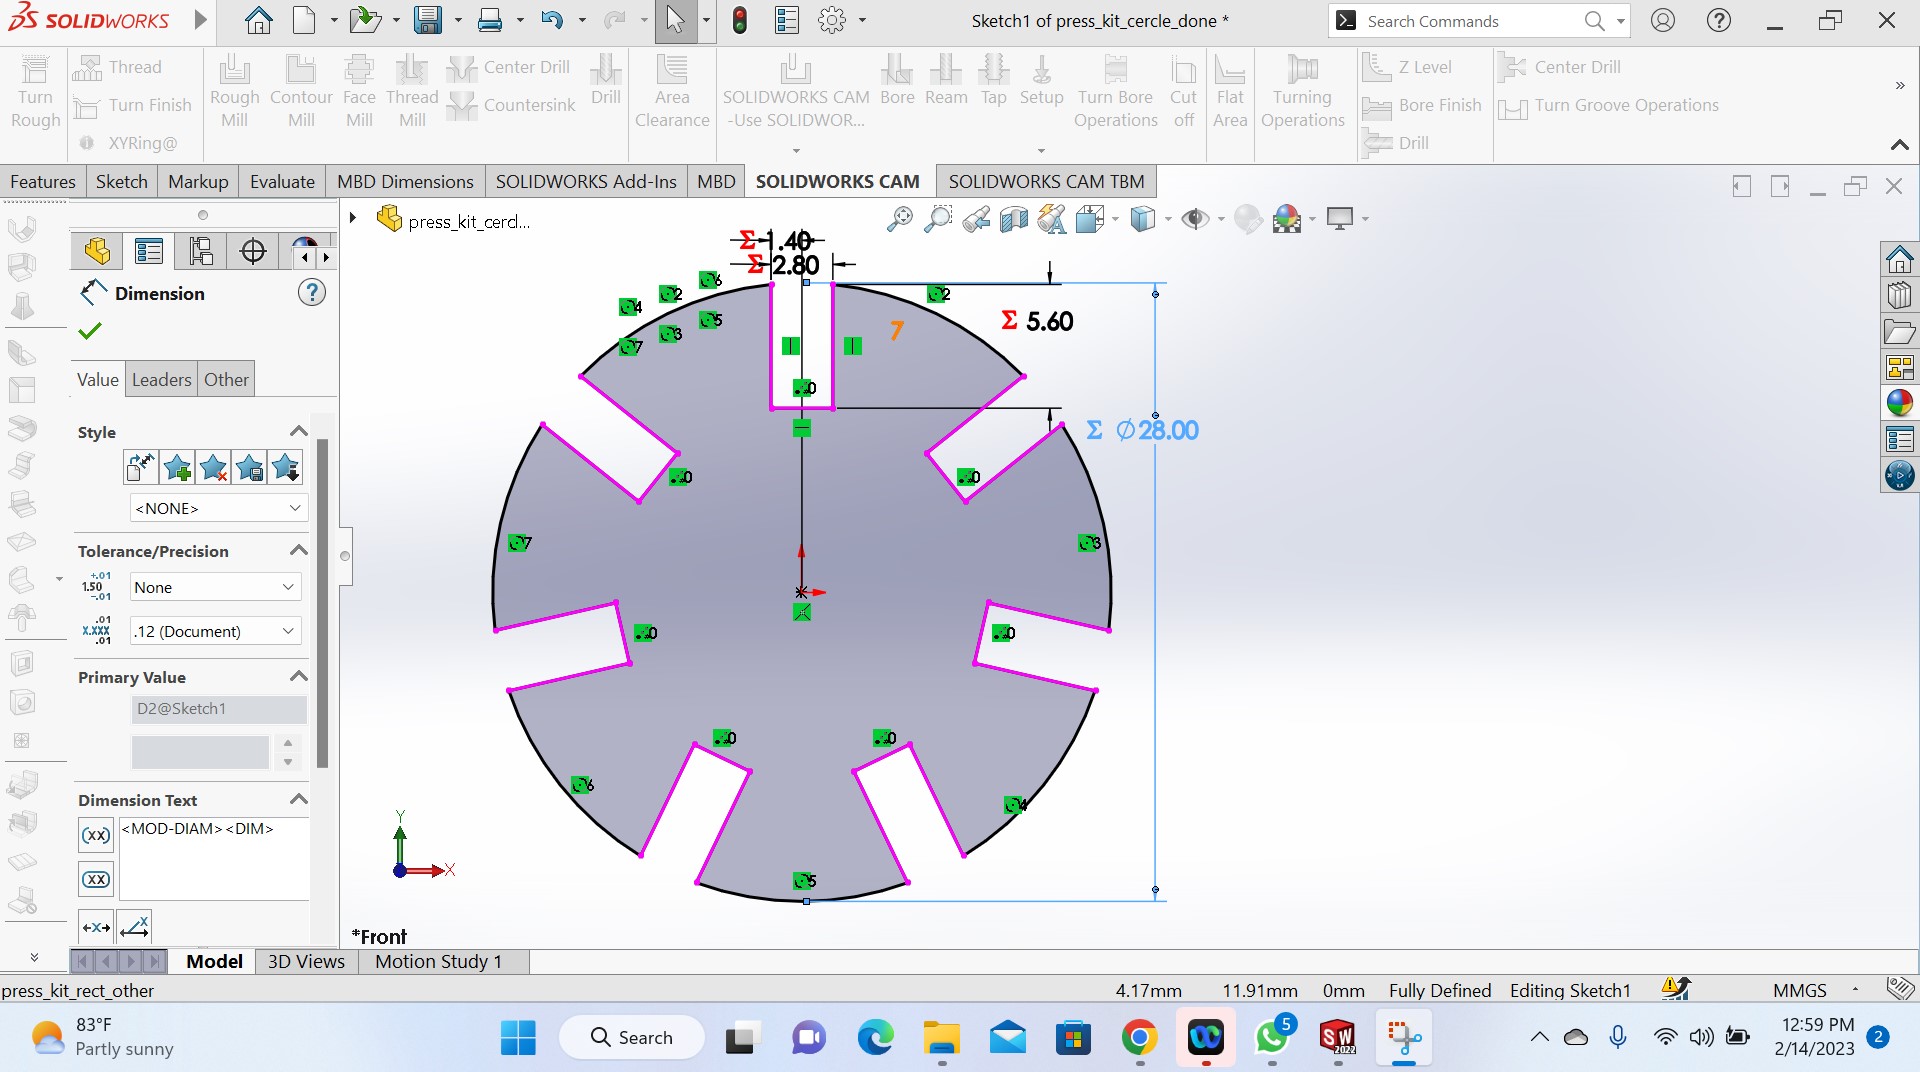
Fig: Design of a circular kit by using solidworks with parametric design

Fig:After extruding a designed object
After exdruding the designed kit, it is saved as new file with Dxf(*.dxf), in order to be opened in coreldraw.

Fig: After clicking on image and tick on faces/loops/edges
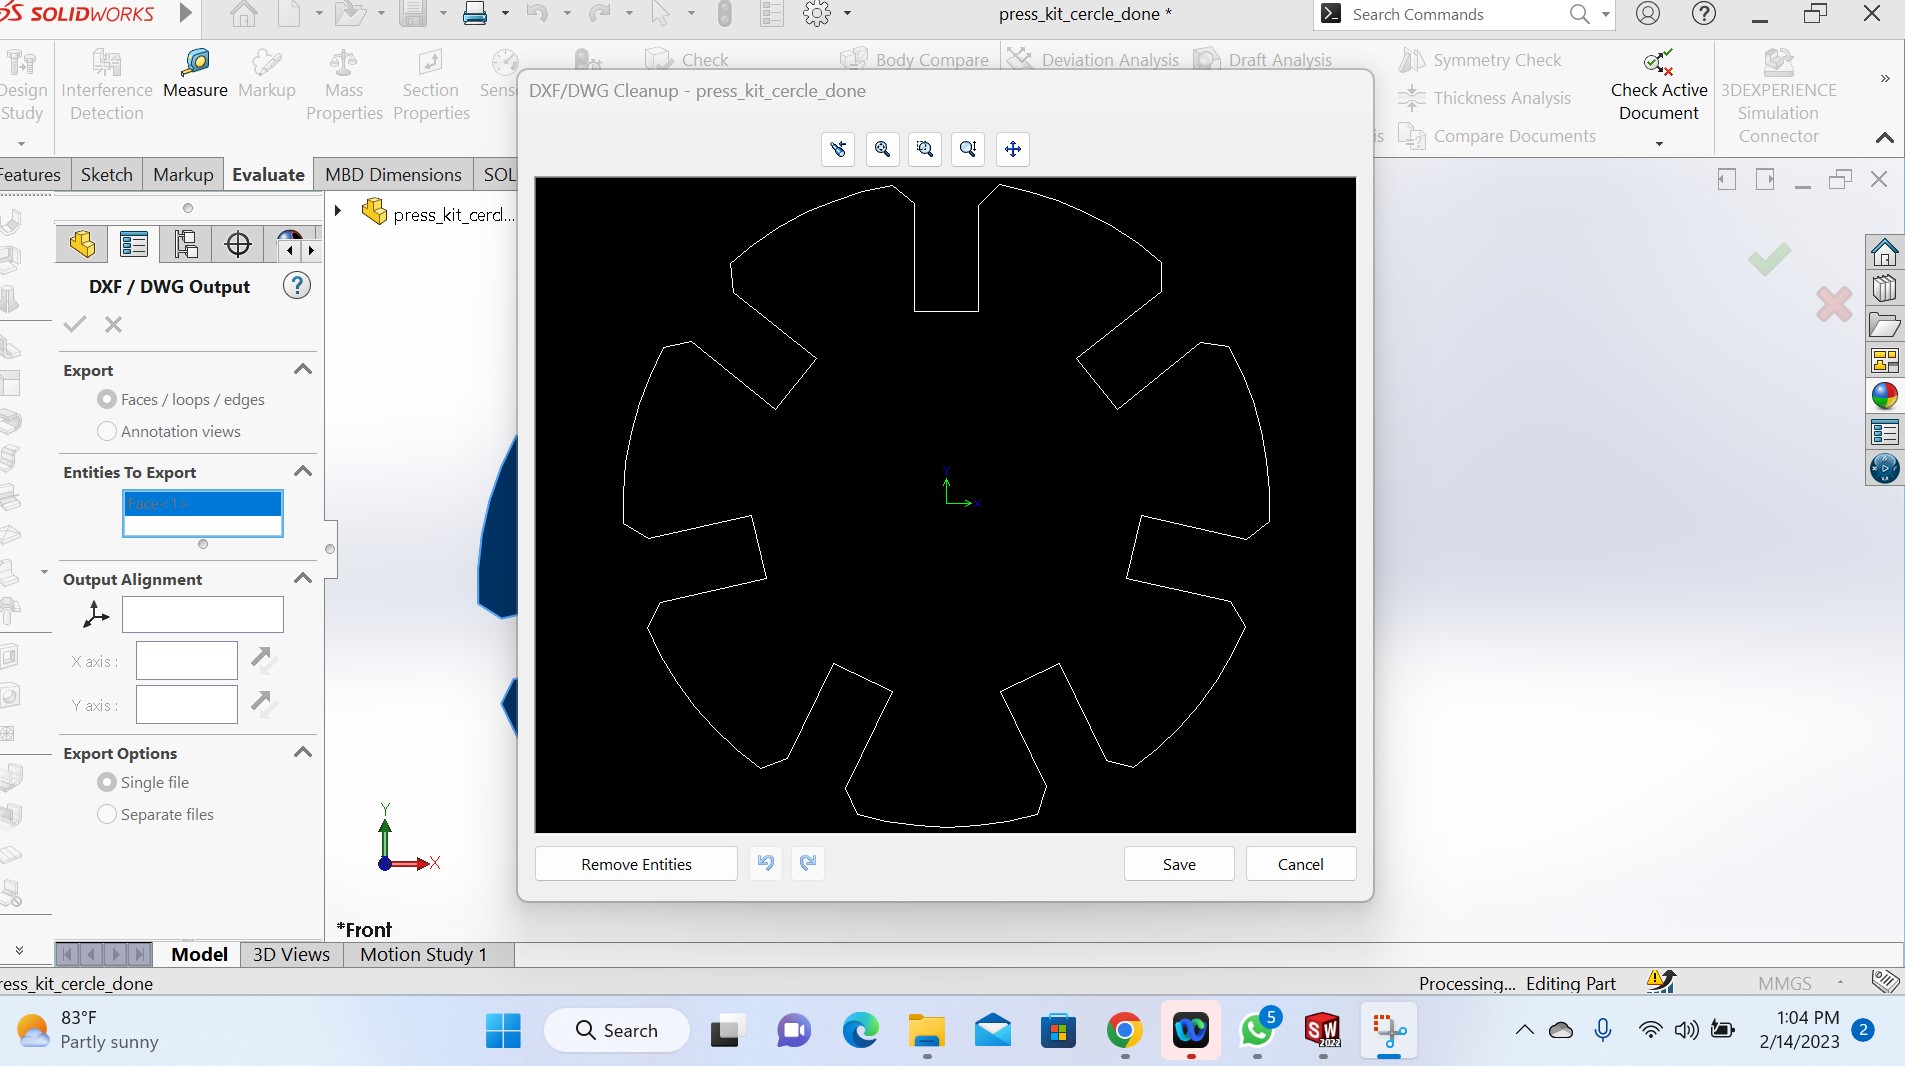
Fig: And save the changes on designed object as final to be opened and printed in coreldraw
Now the steps that have been used to design the object in circle shape will be the same to design an other in rectangular form in order to join them to form different shape:
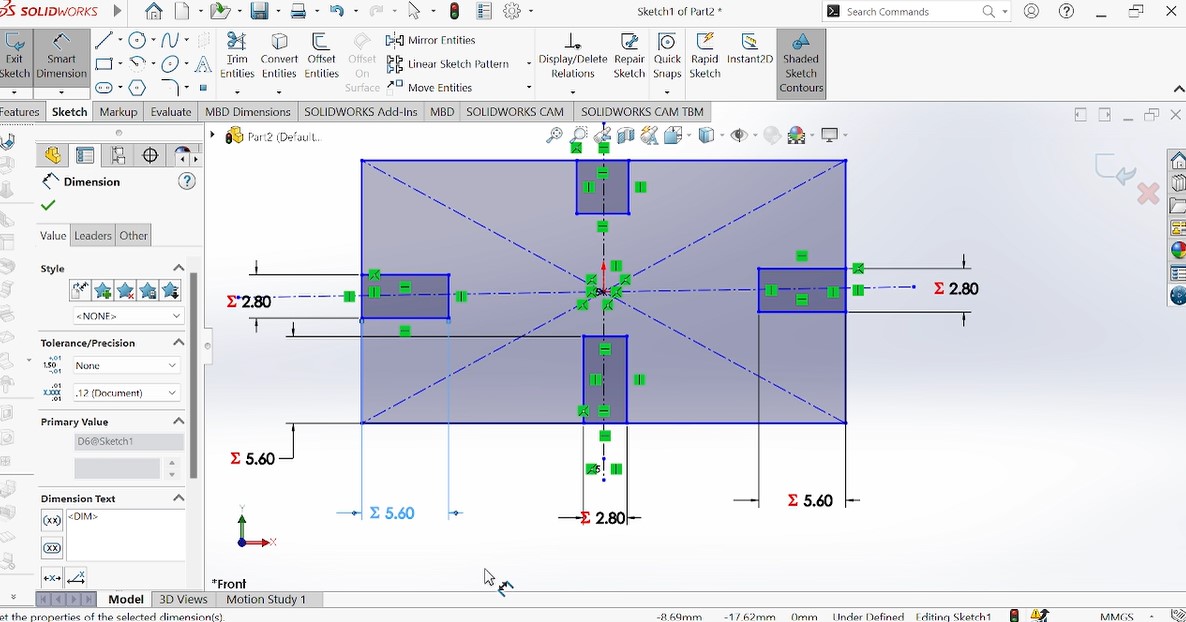
Fig:Earlier step to design a rectangular object
Here the parametric design has been used in order to adjust measures incase
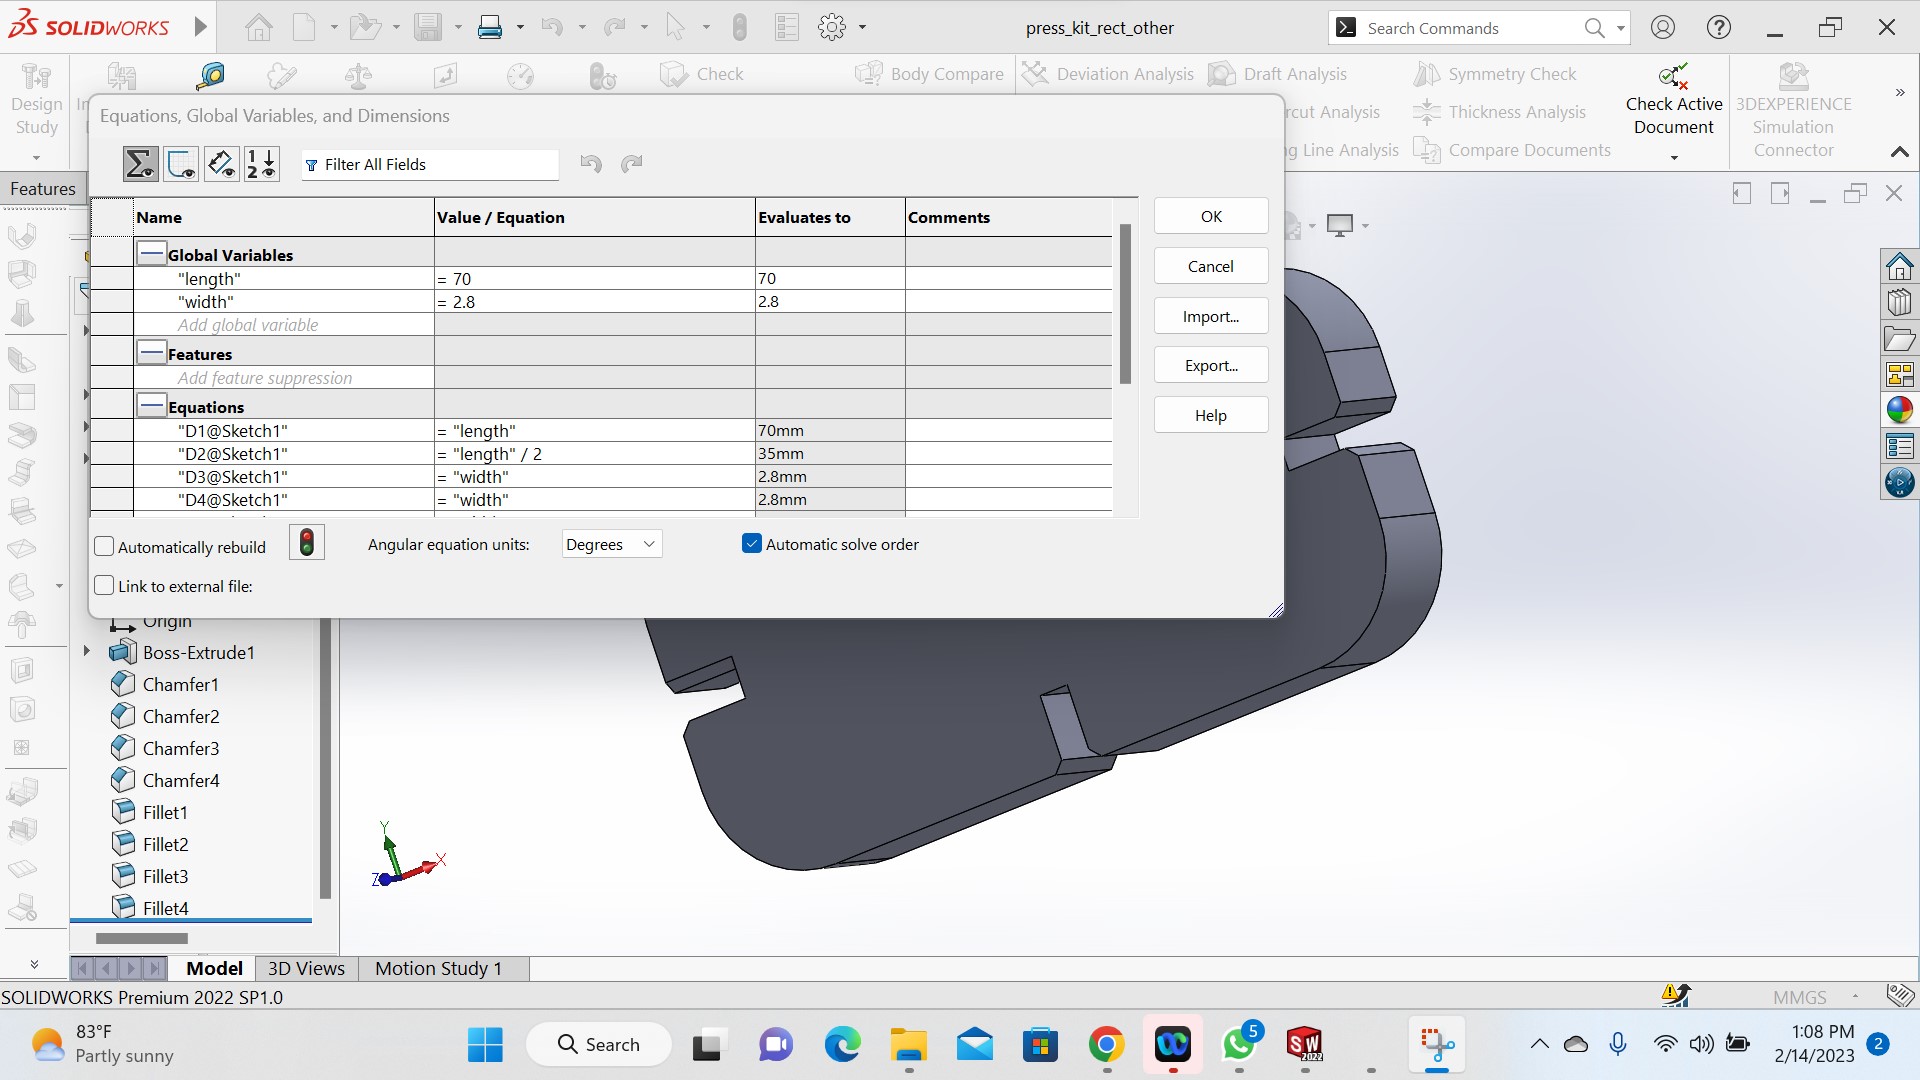
Fig: the figure shows how to change the globle varialbes
Actually this is the challenge I faced, after passing in all design procedures till the complet object ready to be cutted, I cutted a sample and found that they are not well fitting because of not convinient clearance and kerf!!
This was because I used different material that has different thickness with what we used in group when testing and mainly I did not get well the concept of kerf and clearence from my group be fore I made my design. After noticing this, I came up with my group and explained me well about them, and me too with my own research for deep understanding, I learned the disign rules in deep by my self from https://www.instructables.com/How-to-Adjust-for-Wood-Thickness-and-Kerf-on-a-Las/
After deep undernding them,I came back in my parametric designs with the measure of the thickness of material to be cutted because I used globle variables, I only ajust one value based on the measured thickness of material and others updated automatically. previously I used a distance of 3mm and after noticing that the thickness of object is 2.4mm, I adjusted it to be 2.3mm and then after new cutting I found them to fit successfully.
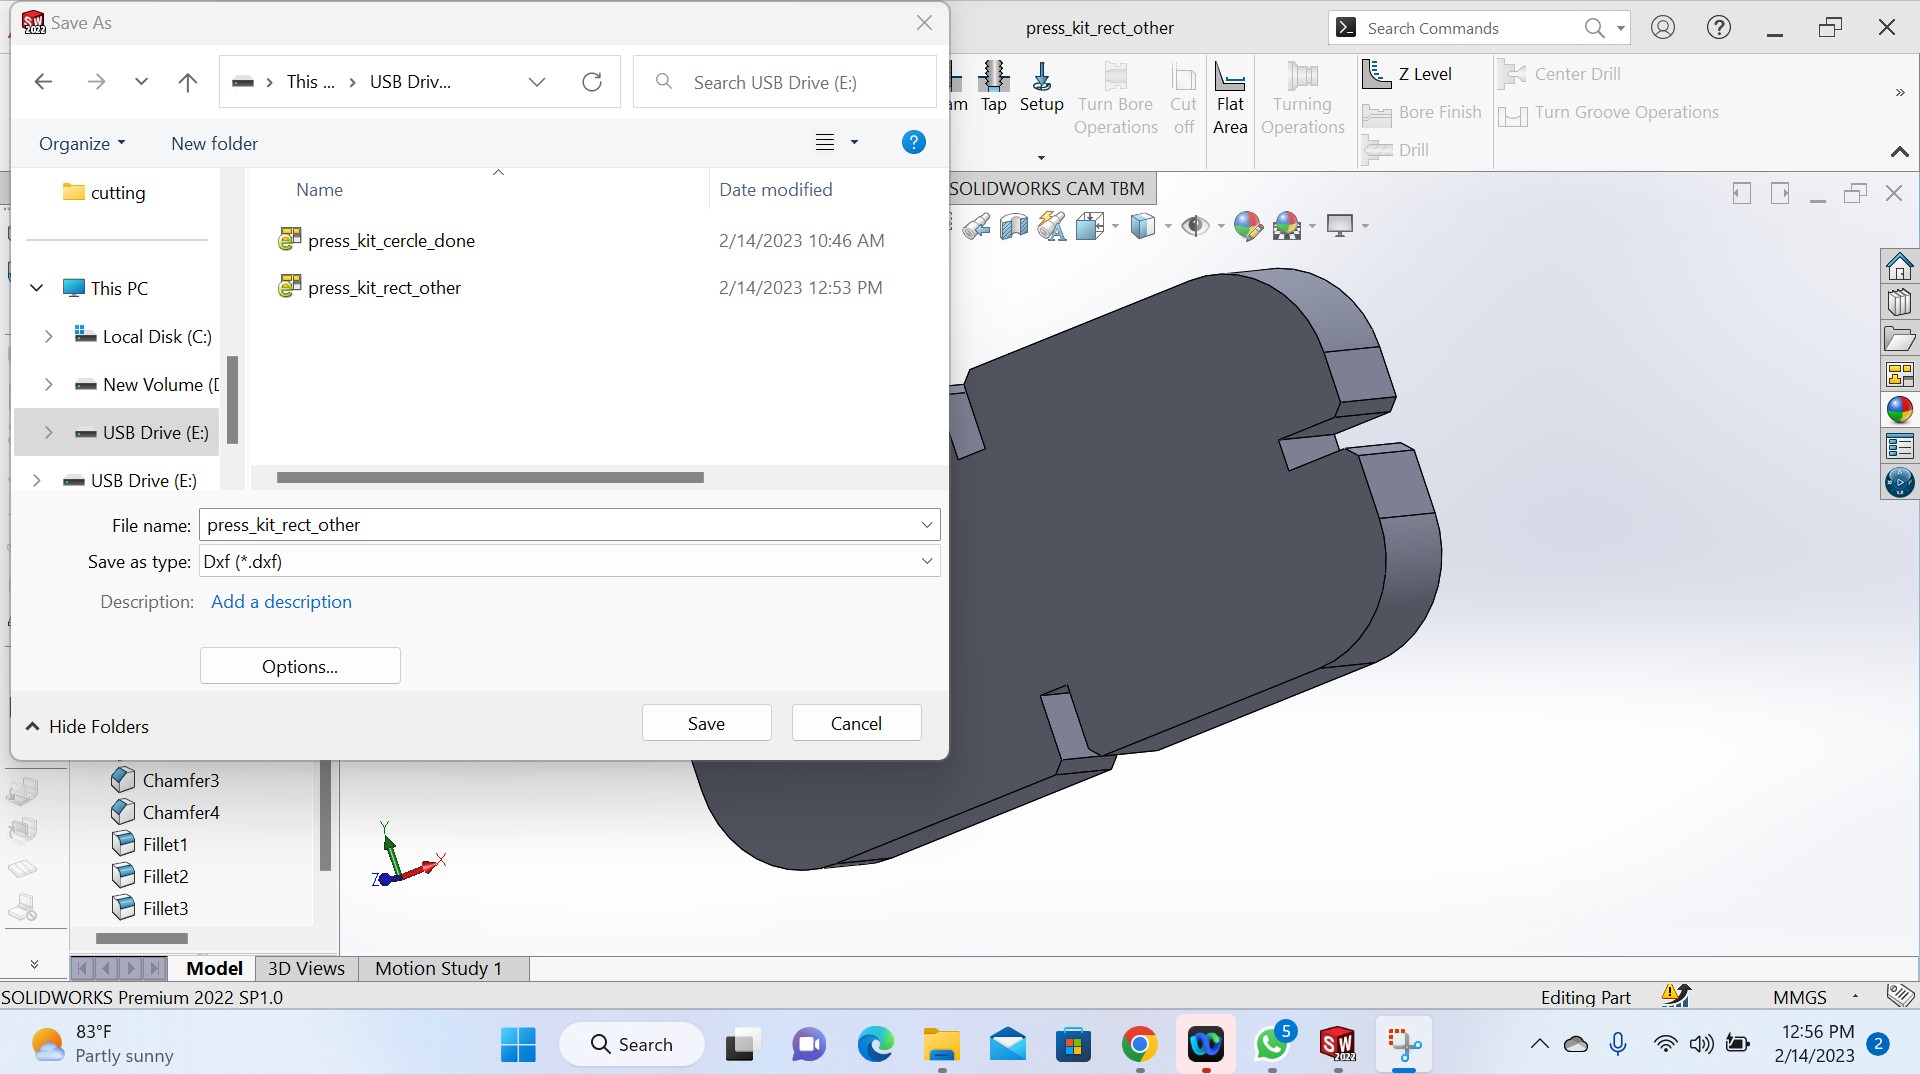
Saving an object after measurement adjustment in order to be opened in coreldraw format with Dxf(*.dxf) extension
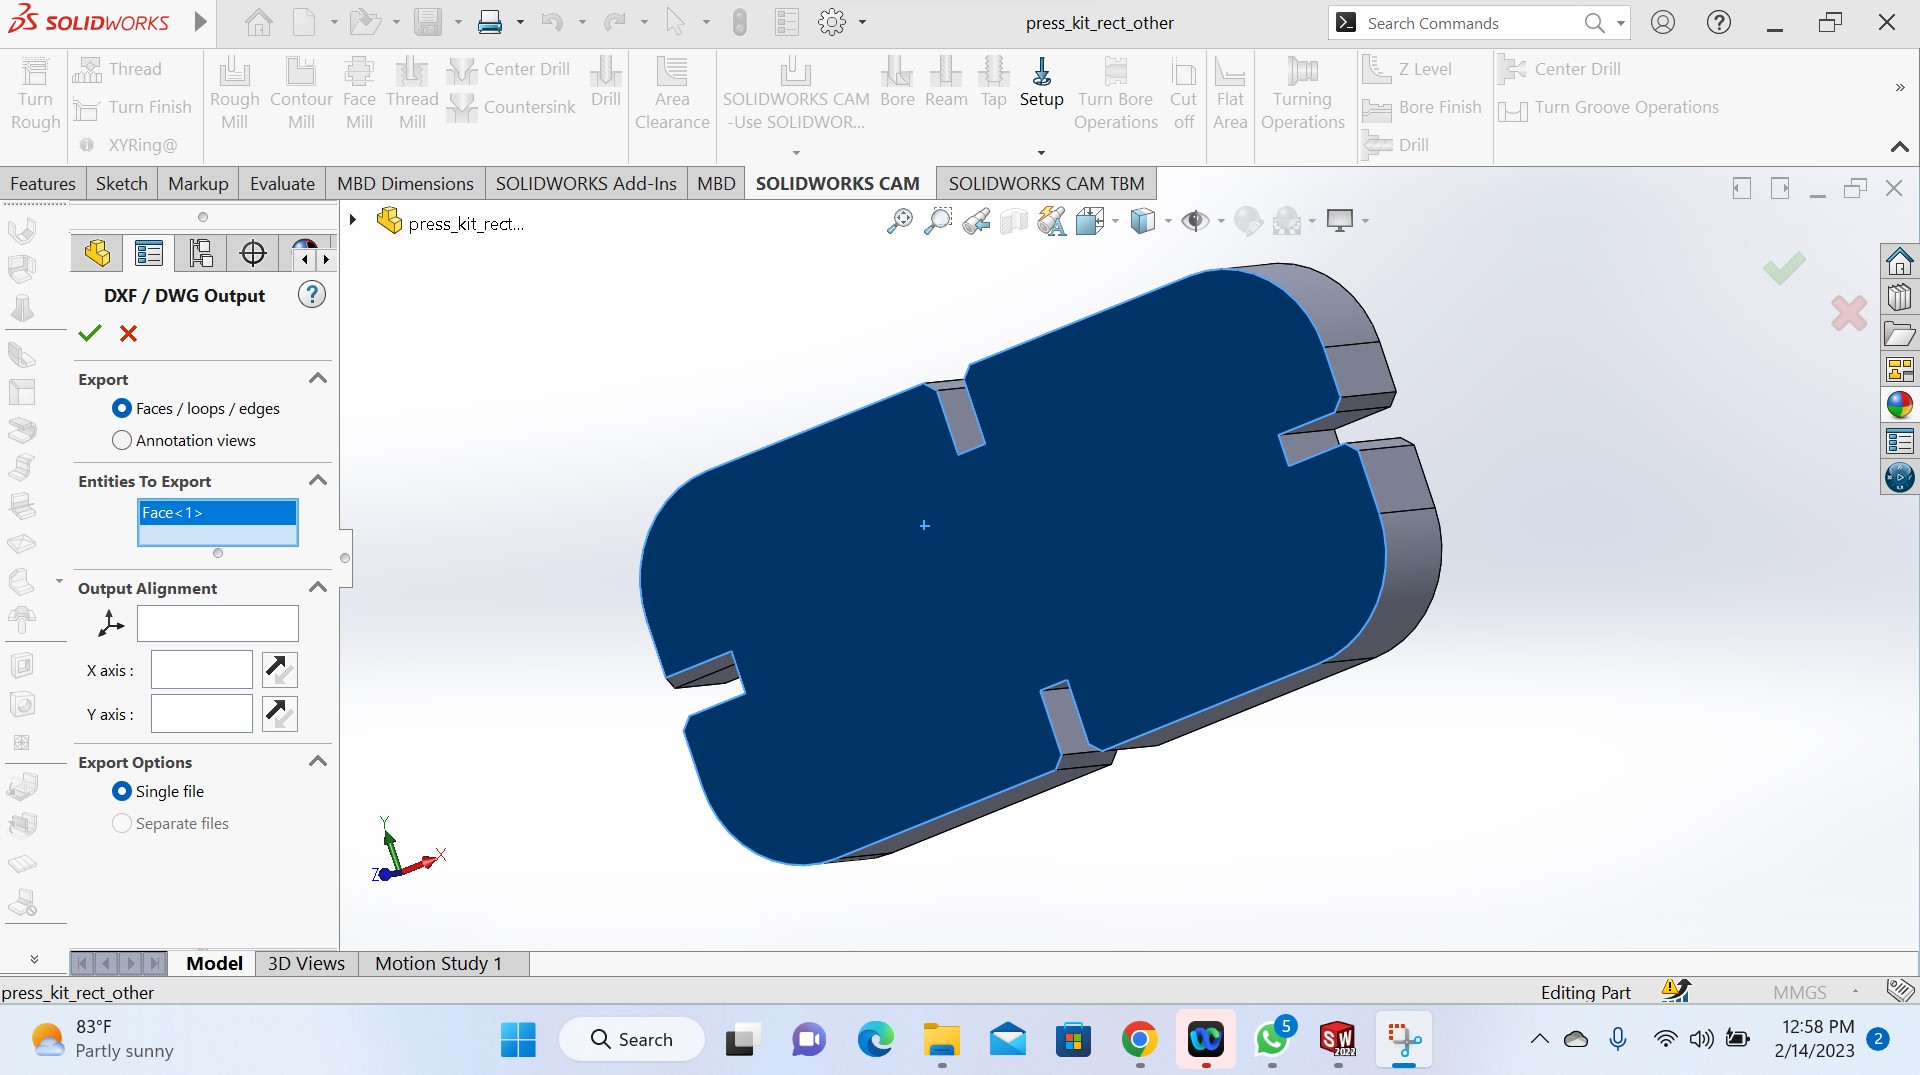
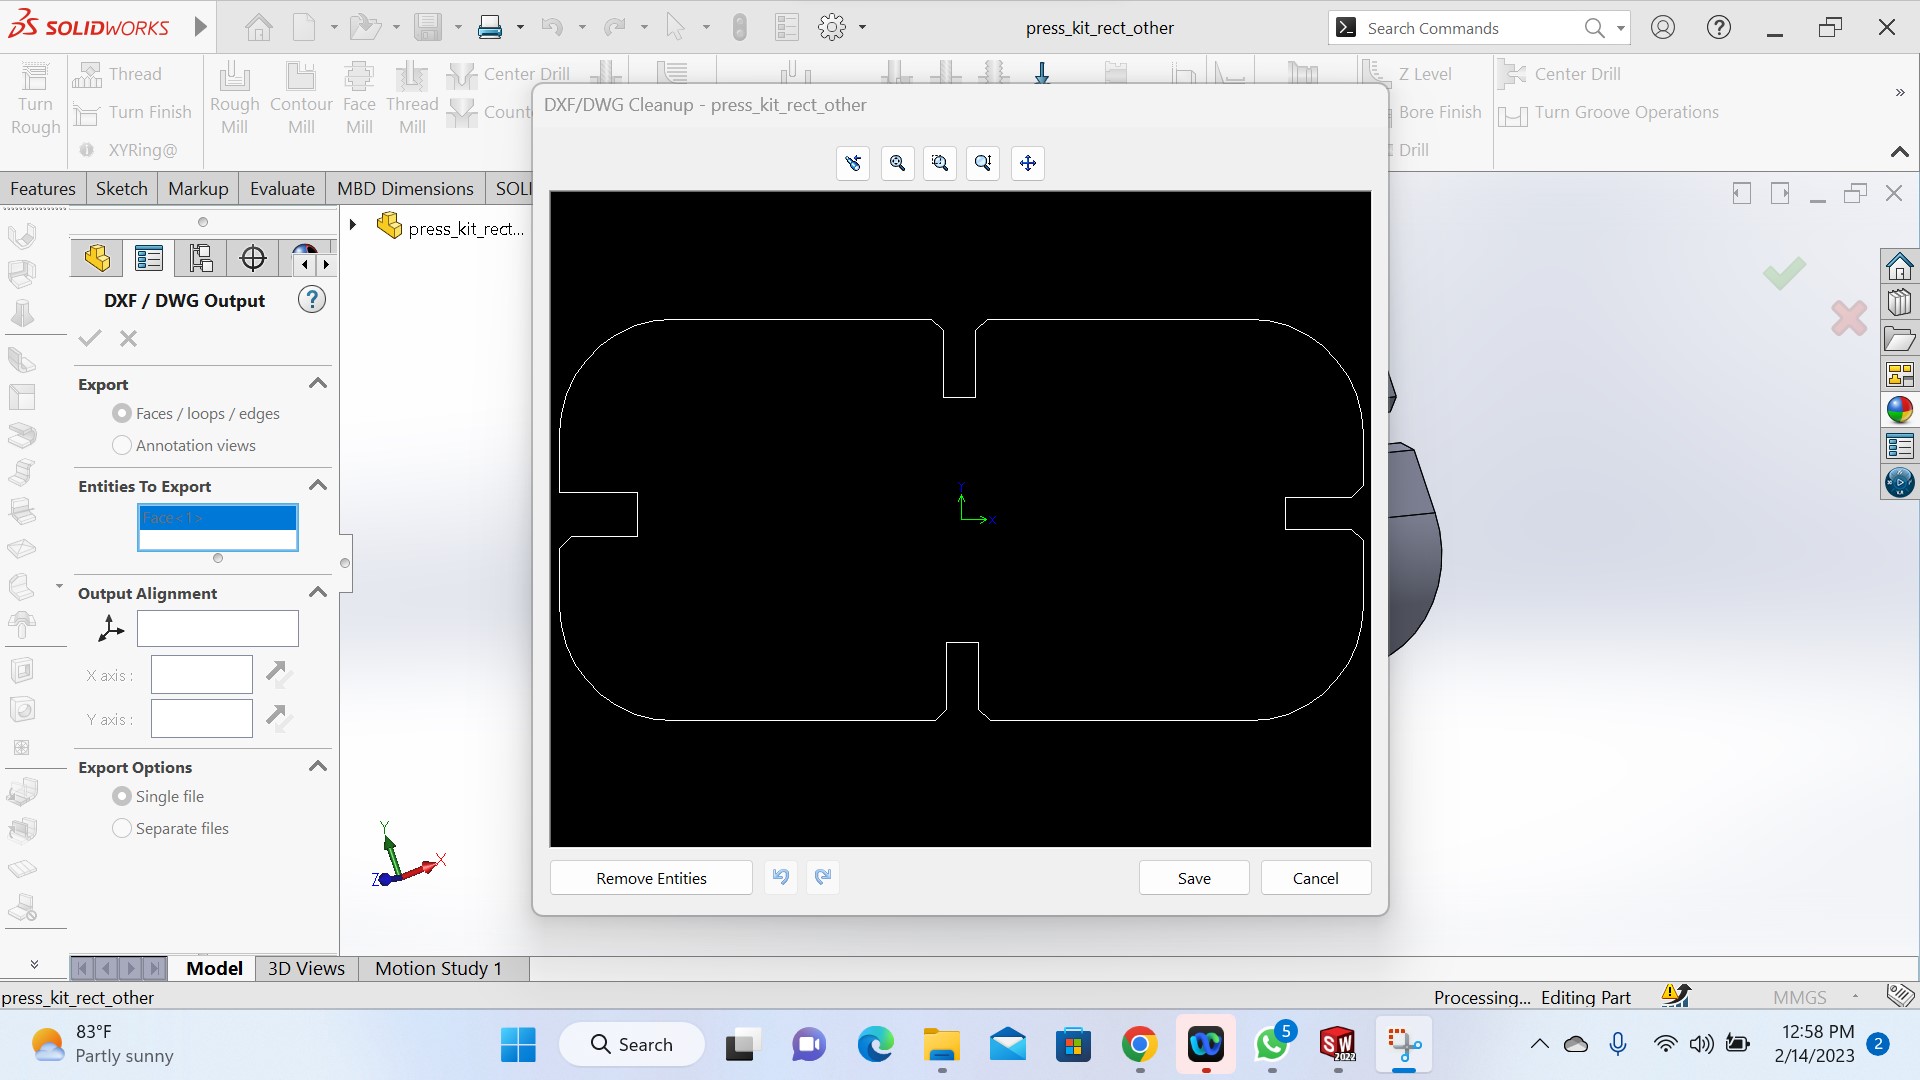
Fig: Finally the kit is finished in design, and then saved toward its saving and printing through coreldraw as it is the one used by our laser cutter
The next step is to verify if the designed kits can be assembled before cutting them with a laser cutter.
The verification is made by using solidworks as shown in the followinf photo:
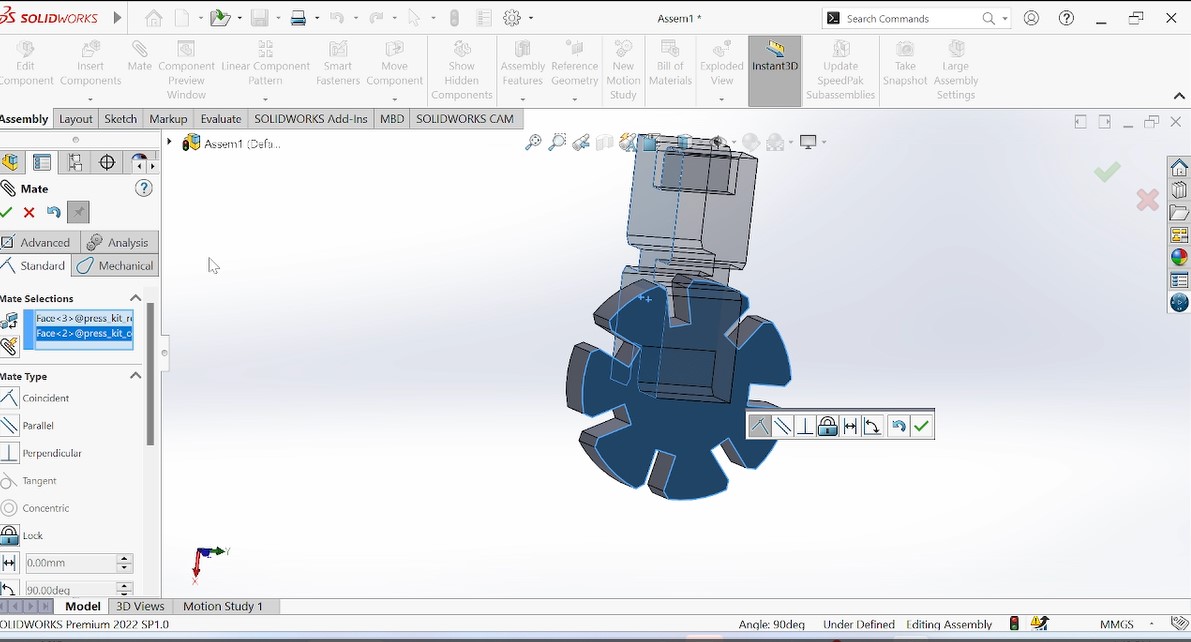
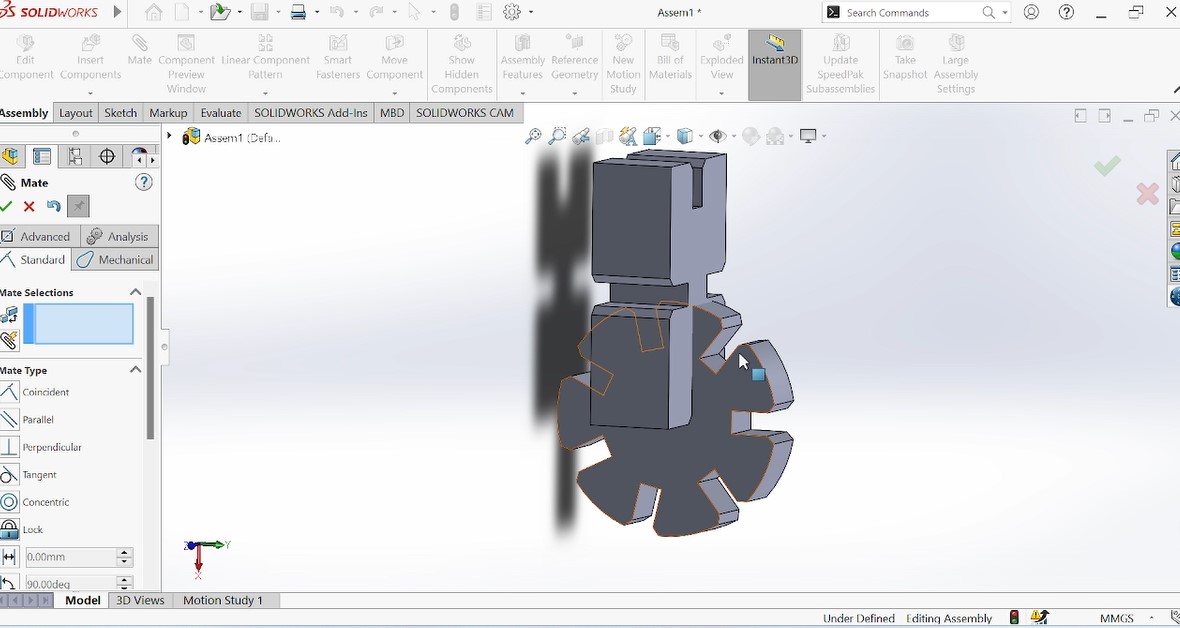

Fig:Assembly of two designed pieces in solidworks
Normally, after designing different pieces that will be joined, you have to make sure that they are fited one an other, and solidworks has that room.
Here as I designed two pieces with different shape,I had to make sure that they are fiting each other before printing by checking mostly their kerf as a parameters which determines their tightness.
Cutting the designed pieces with Laser cutter machine
A laser cutter is a computer-controlled machine that uses a high-powered laser beam to cut or engrave materials such as wood, plastic, metal, and fabric. The laser beam is focused on the material to be cut, which melts, burns, or vaporizes it along the designated path, creating precise and intricate cuts or designs.
The first step is to Open a dxf designed object in coredrawand choose Hairline in coreDraw,

According to coreDraw community Using hairlines in CorelDRAW can be useful for creating very fine and precise lines, especially when designing for print or engraving. A hairline is a line with a width of 0.003 mm (or 0.0001 inch), which is the smallest possible line width that can be printed or engraved.
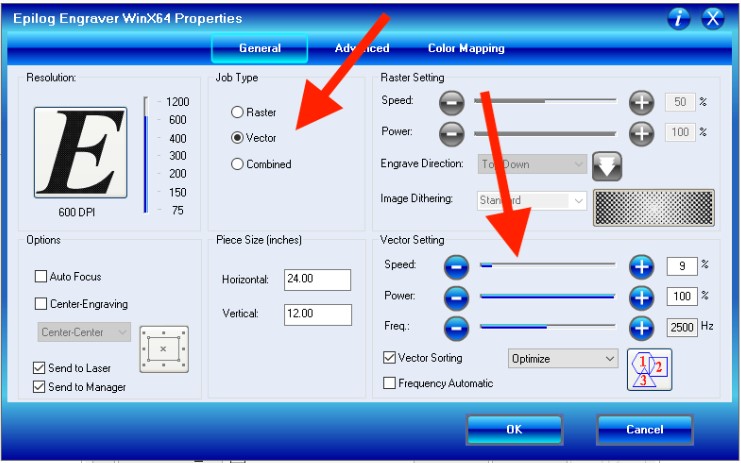
Then we have to modify some parameters like power, speed and job type(raster,vector or both). we hve selected vector because it is a vector image.
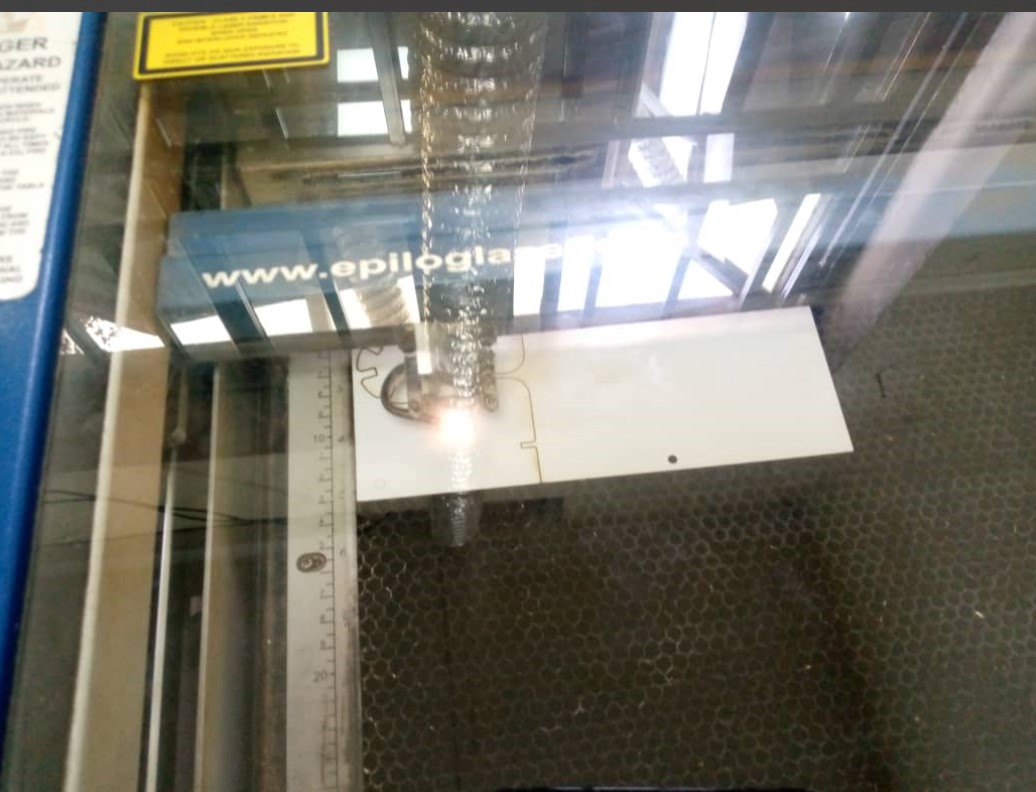
Fig:Cutting in process
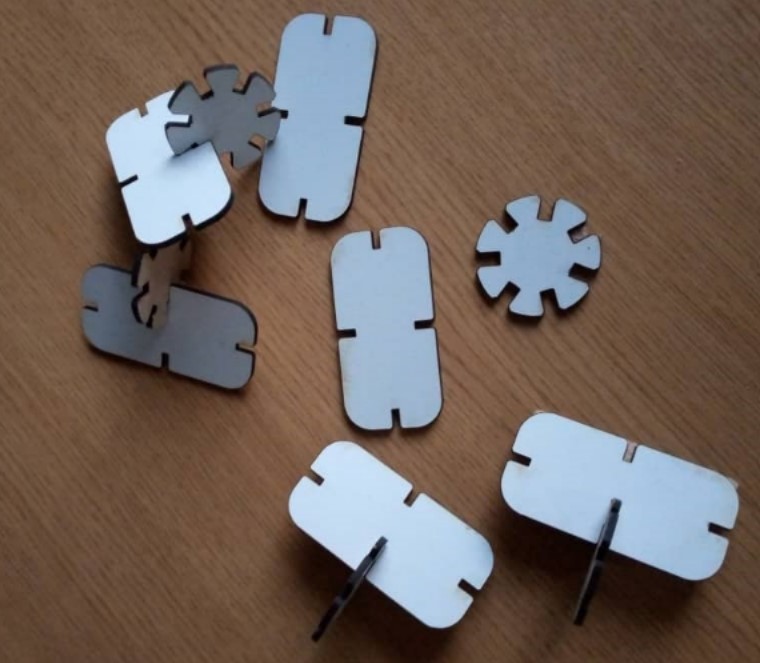
Fig: Pieces after Cutting

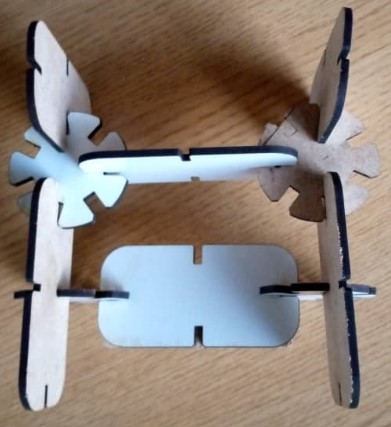

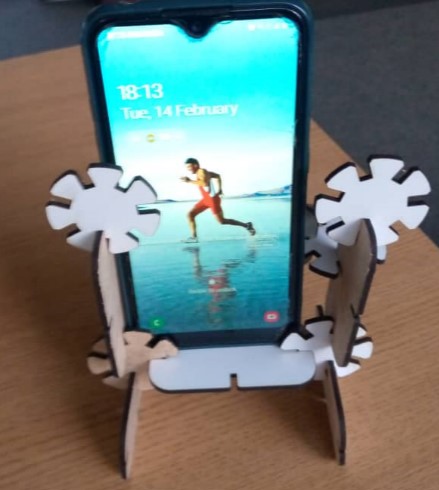
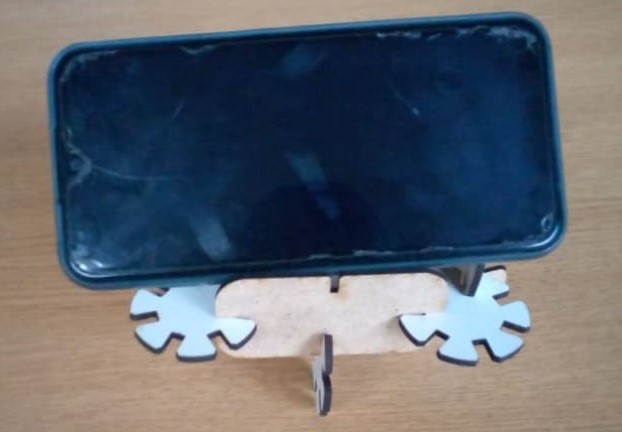
Fig:Assembling of different kits
Making Something With the Vinyl Cutter
A vinyl cutter is a computer-controlled machine that uses a sharp blade to cut vinyl sheets or rolls into intricate shapes and designs. sVinyl cutters are commonly used in the sign-making industry to create lettering, logos, and other graphics for signs and banners.
The cutter can cut a variety of materials, including vinyl, paper, cardstock, and heat transfer vinyl for creating custom t-shirts and other apparel. Vinyl cutters come in a range of sizes, from small desktop models to large industrial-sized machines. They are also available in a variety of price ranges, making them accessible to both hobbyists and professionals.
The machine uses the information that it gathers from either a cartridge or a computer to cut a specific design from vinyl or other material. It functions similarly to a printer in that it moves along the material to be cutted, making small incisions in the material. Once the material is removed from the vinyl cutter, the design may be removed from the material sheet. This design may be used for scrap booking, card making, sign making, sewing, or many other crafts. Reference from https://www.wise-geek.com/what-is-a-vinyl-cutter.htm
Designing an object using inkscape to be cutted by vinyl cutter

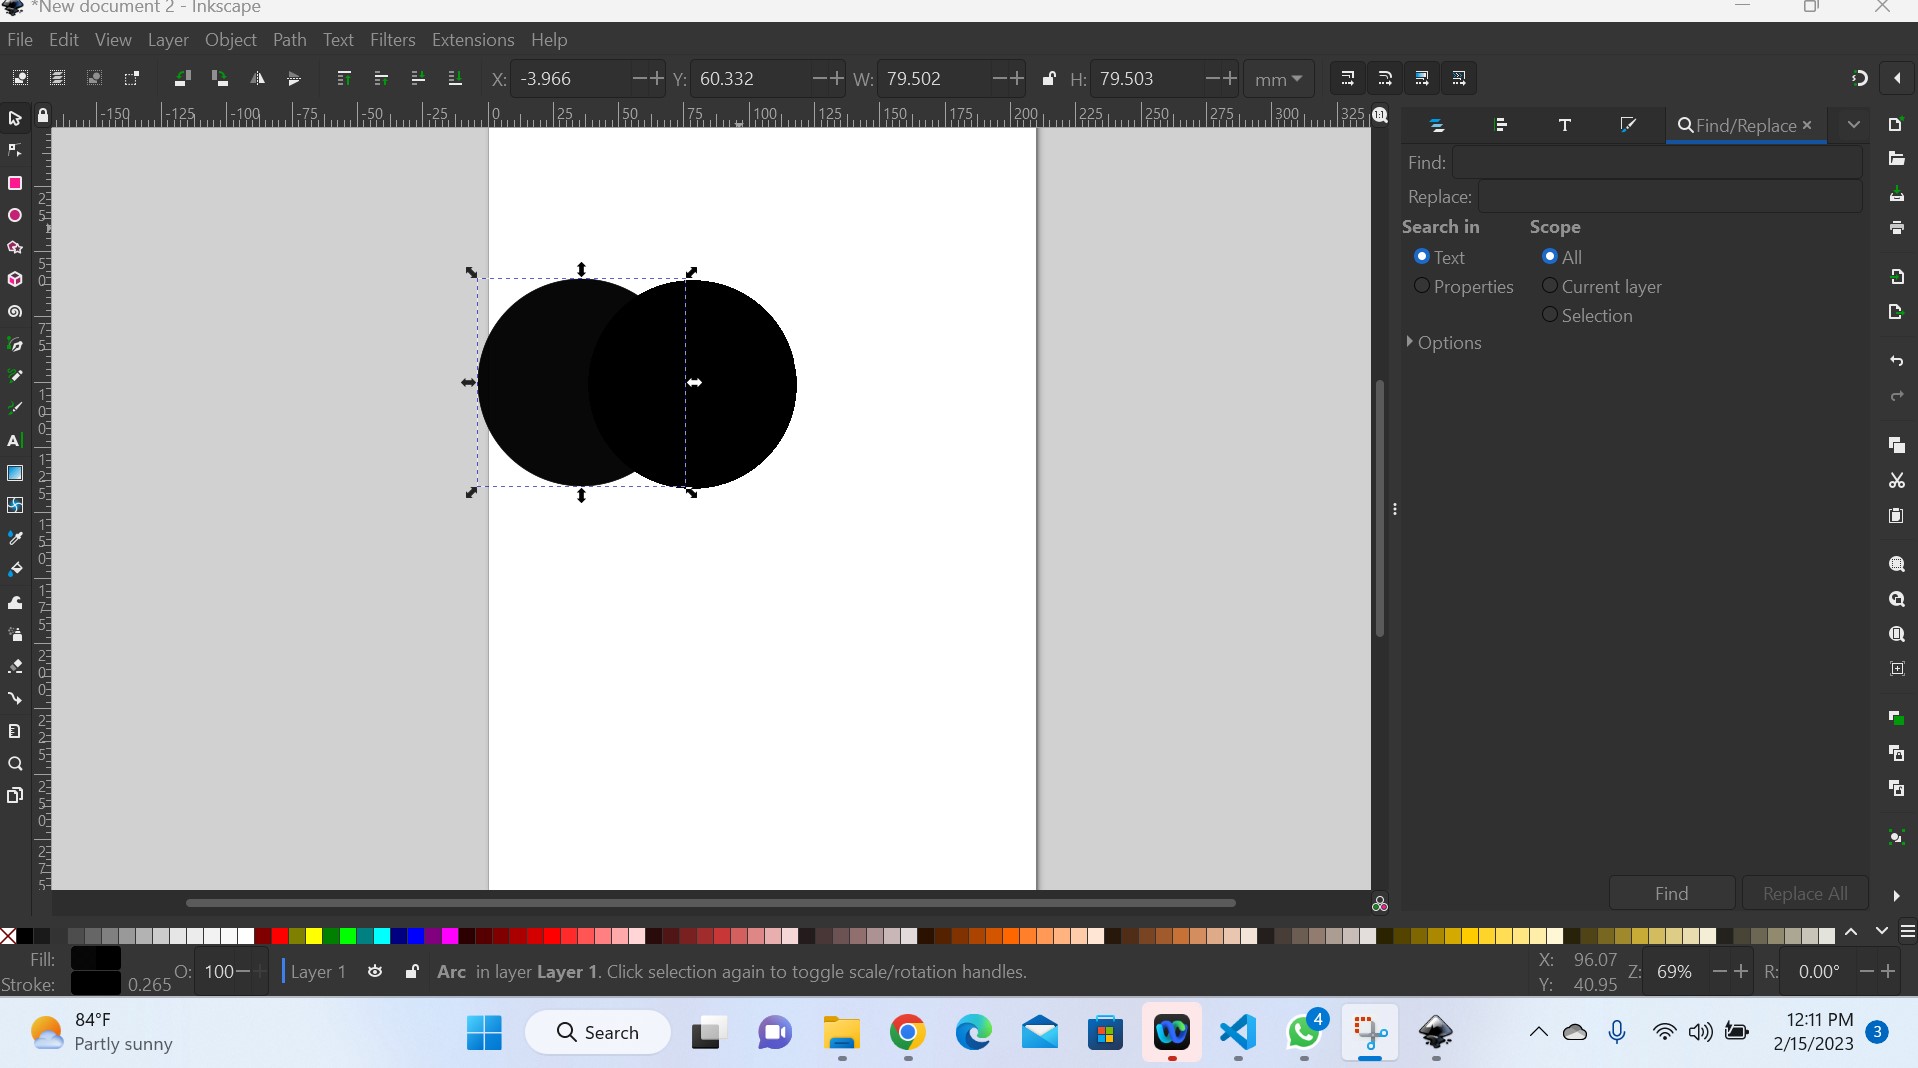
Fig:Designing process of a leaf
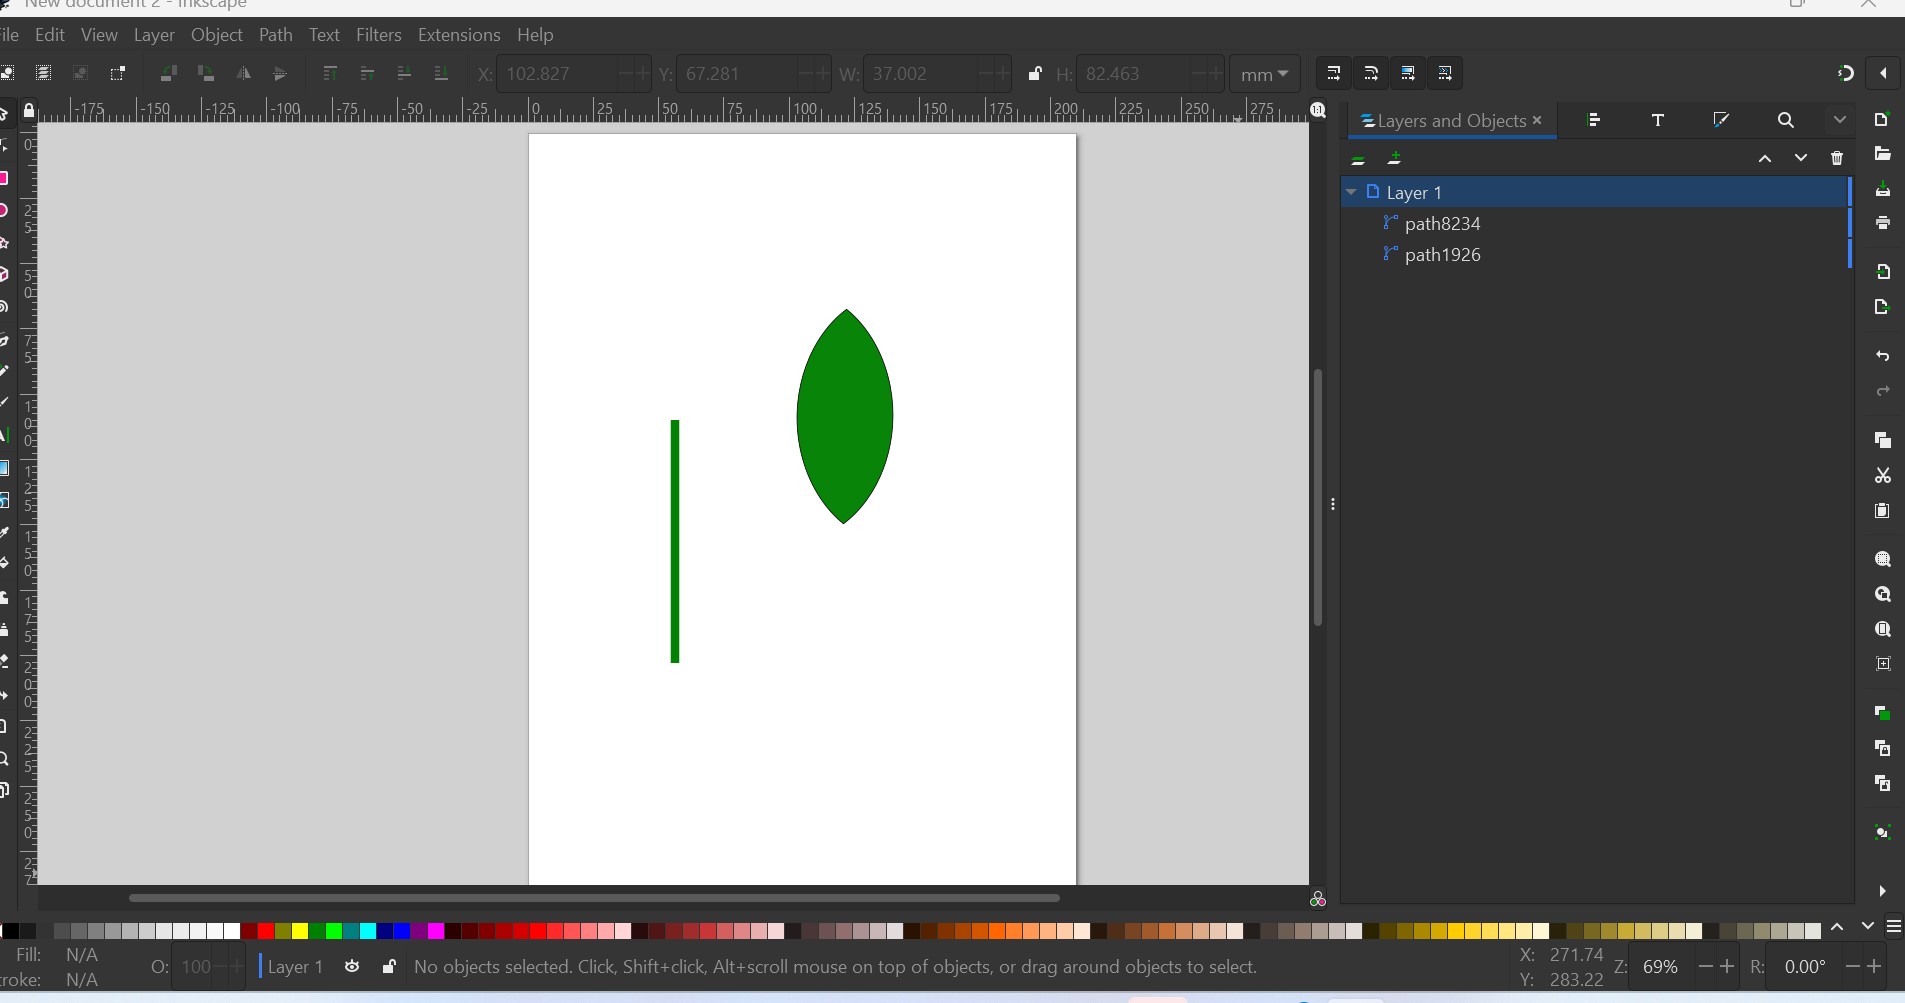
Fig:stem and leaf
The stem and leaf were designed in separate layers and then grouped to form a complete leaf.

Fig: A complete designed leaf
Then the layers have been grouped and a complete leave is designed and ready to be cutted usind vinyl cutter.
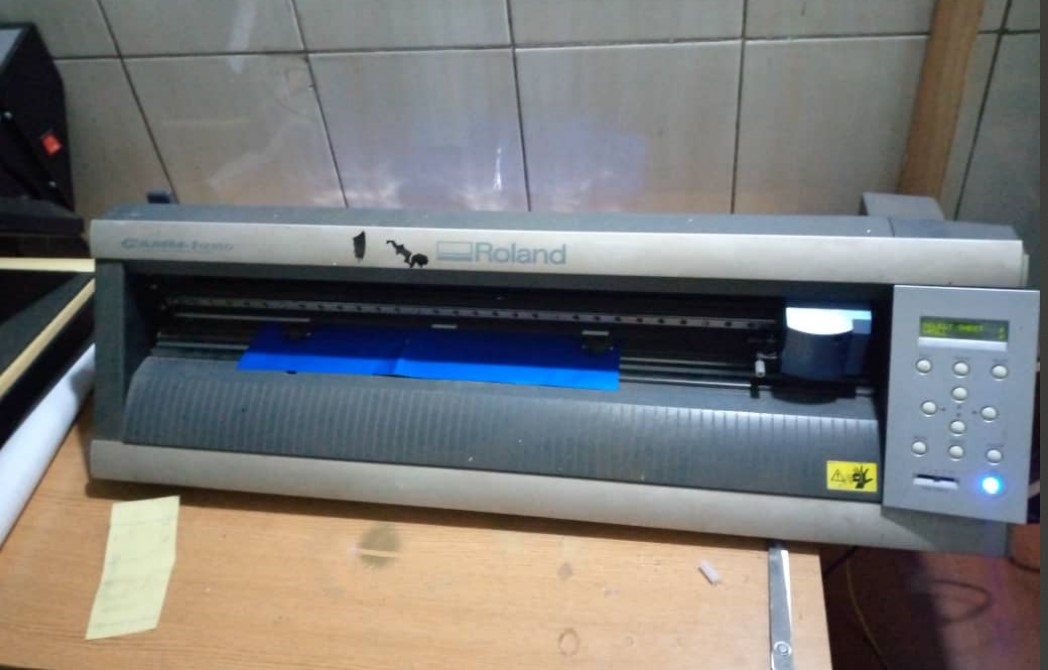
Setting vinyl cutter before cutting the designed object
Setting up the vinly cutter machine is crusial before cutting to get good cuts.
The first step should be to prepare the vinyl machine and material.Start by cleaning the cutting machine as well as the material to be cutted to remove any dirt, dust, or debris to ensure that the vinyl is free of any imperfections that could affect the cut.

Normally the positioning of a sheet is done by moving the rollers and sheet manually front and back and cutting head left and right using the arrow keys on the board of vinyl cutter machine
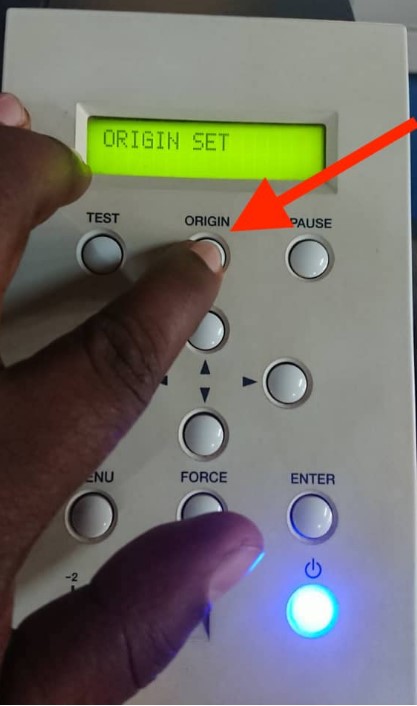
Then before cutting ,set the reference of origin or the cutting by using arrow keys for cutting head positioning then press the origin button and if the origin is setted, the message is displyed as shown by photo below.
After setting the sheet on the cutting machine, the next is to import the designed object into software that is used to control the machine when cutting. The software I used is CutStudio
Steps for cutting off the designed object:
1. importing the designed object into cutstudio as a photo from where it was saved: I imported a designed object into the software that contols the vinyl cutter machine in order to be customized and cutted

2. Image below shows the object after importing it into cutstudio
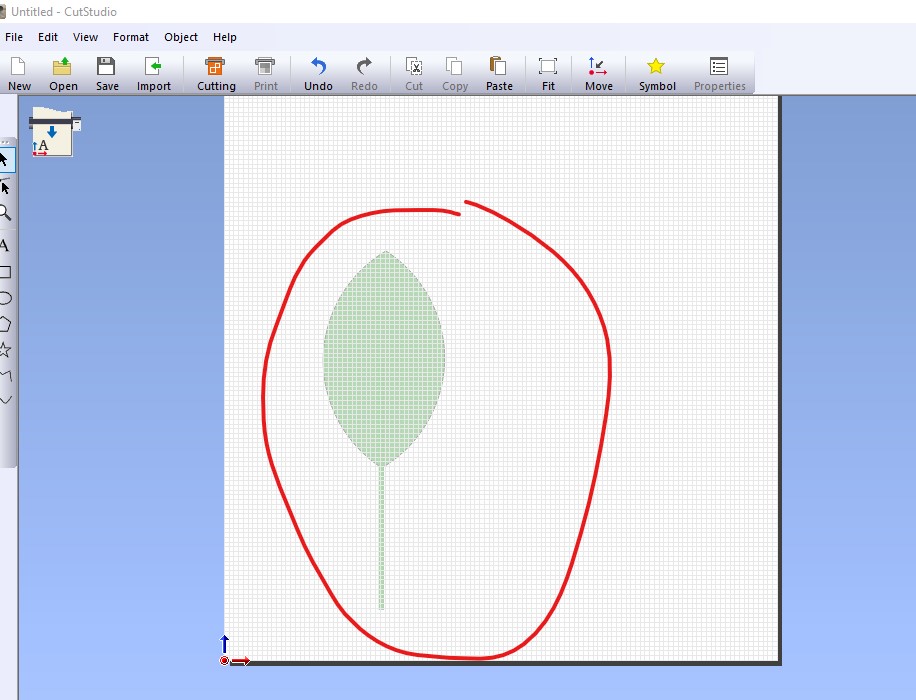
3. Creating Image's outlines:

4. Image's outlines: This determines the shape that the vinyl cut will be cut into means the vinyl cutter follows the outline of the image and cuts along that path.

5.After outlining the Image, its vectors are created: Image vectors provide the instructions for the vinyl cutter to follow when cutting
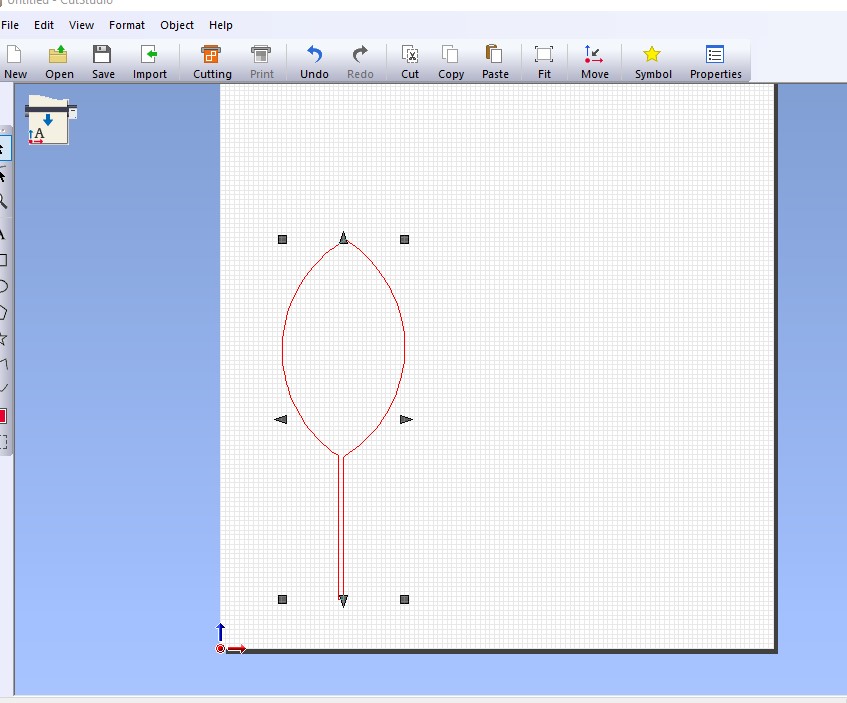
6. Dimensioning: This helps to accurately cut materials to specific sizes and shapes and ensure that the cuts are accurate and consistent.

7. Then finally is to set how much the vinyl cutter blade will overlap each cut path and the quality

8. Removing the cutted object after cutting from sheet:After the vinyl cutter has cut out the desired shape, the excess vinyl material surrounding the design needs to be removed(weeding).
To weed the excess vinyl,a weeding tool is needed such as a weeding hook, tweezers, or a knife as well as transfer sticker to remove / extract the designed object.
Because no tool among them was around me when removing it, I just extracted it by hand as an arrangement but this is not recommended!!

8. After extracting it, I posted it on my PC as shown by the photo below:
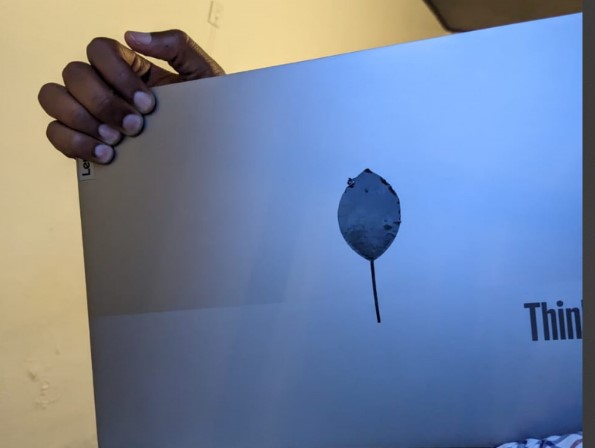
Above photo shows the final designed and cutted object posted on my computer.
All those works(designs) done in Computer Controlled Cutting have been saved as files and they can be accessed and downloaded as a whole zipped folder via here