3D scanning and printing
Assignment to be done:
1.Group Assignment
Test the design rules for your 3D printer(s)
To be found here
Relection of what I learned from group
In our Lab, we have a 3D Printer (Ultimaker), and we tested its characteristics and design rules.

Here are some tests we performed:
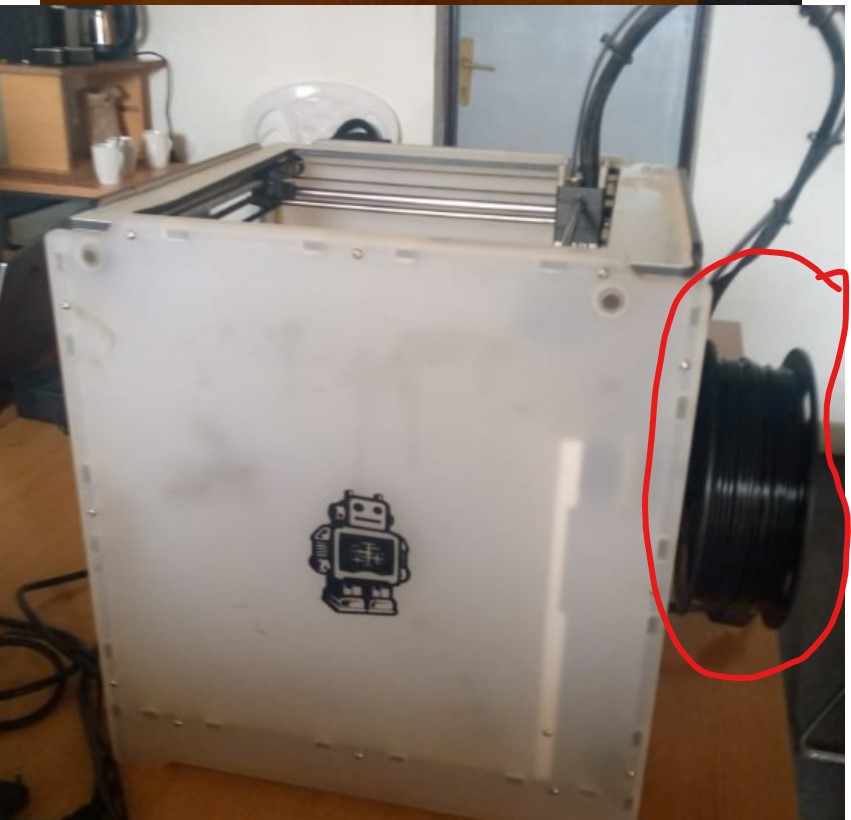
- 1. Extrusion Speed :is a small amount of filament to make sure that the printer is properly loaded and that the filament is flowing smoothly.When testing this, we discovered that the handle of our printer on which filement roll is loaded is not well fixed which causes the filement to not move adequately.So we first fixed this
- 2. Nozzle Temperature control: The nozzle's temperature should be calibrated to the recommended settings depending on the type of filement to be used
- 3. Bed Temperature: This has to be setted in order to ensure that the build plate is clean and free from debris, to help prevent issues such as uneven adhesion or warping
- 4. Print Speed: This is the speed at which the printer create an object. It depends on different parametters such the type of material(oject), the complexity of designed object, etc
- 5. Infill: This referes to the interior structure of an object which is usually created by printing a repeating pattern of lines.Infill serves to provide support to the outer shell of the object and to give it strength and stability
1. Design and 3D print an object (small, few cm3, limited by printer time) that could not be made subtractively
2. 3D scan an object (and optionally print it).
3D Printer
Three-dimensional (3D) printing is an additive manufacturing process in which a physical object is created from a digital design by printing thin layers of material and then fusing them together.
Some industries, such as hearing aids manufacturers, airline manufacturers, and car manufacturers, use 3D printing to create prototypes and mass produce their products using custom scans.
While it is currently too slow to be used in mass production, 3D printing technology is still evolving and has the potential to massively disrupt both the manufacturing logistics and inventory management industries. ref. to https://www.shapecut.com.au/what-are-laser-cutting-machines/
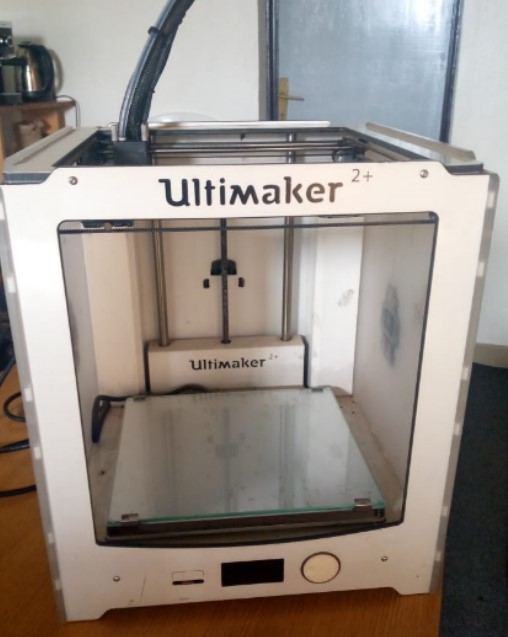

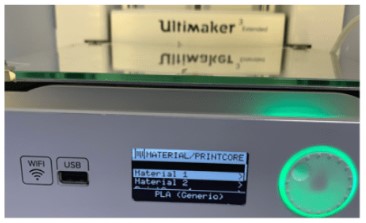
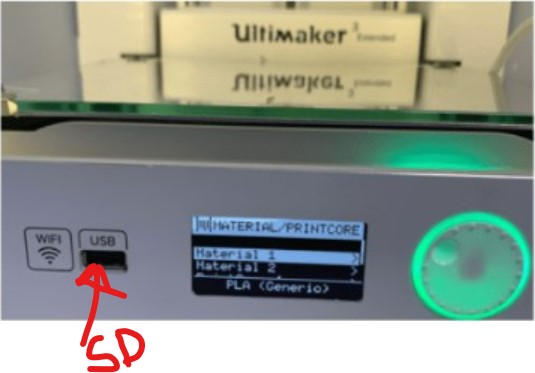
Fig: The images above illustrate the 3D printer used in our Lab
Testing the 3D Printers
Testing a 3D printer is essential to ensure that the printer is functioning correctly and producing high-quality prints.
Steps for testing 3D Printers:
- 1. First, check the physical condition of the printer to be sure that all the screws and bolts are tight and that the printer bed is leveled, power supply is working correctly, and all cables and connectors are firmly in place.
- 2. Ensure that the printer's software is installed correctly and that it is up-to-date and check that the printer is connected to the computer, and printer's settings are properly configured.
- 3. Calibrate the printer for making sure that the printer nozzle is in the right distance from the printing bed, and the bed is leveled.
- 4. Use a 3D modeling software to create or download a 3D model. Load the model into the printer software and ensure it is in the correct position, size, and orientation.
- 5. start the print job, and monitor the printer for the first layer. Ensure that the filament is feeding correctly, and the print quality is good. If there are any issues, you may need to adjust the settings or recalibrate the printer.
- 6. Once the print job is complete, remove the printed object from the bed carefully. Remove any support structures that may be present, and clean up any excess filament or debris.
Before using our printer, we first tested it and found that was having some problems in its extruder to be fixed before printing. Actually we found that the nozzle of extruder is not well fixed which made it to not well be pointed and this causes to not have a precised control of extruded filament.
Actually An extruder is a crucial component of a 3D printer that is responsible for melting and extruding the filament material, typically made of plastic, into a thin, continuous stream of molten plastic. The extruder then deposits the molten plastic layer-by-layer to create the 3D printed object.
The extruder consists of several key components, including the extruder motor, extruder gear, hotend, and nozzle. The extruder motor drives the extruder gear, which grips the filament and feeds it into the hotend. The hotend, which is heated by a heating element, melts the filament and then extrudes it through the nozzle, where it is deposited onto the print bed or onto previously printed layers.
Fixing the nozzle of our printer


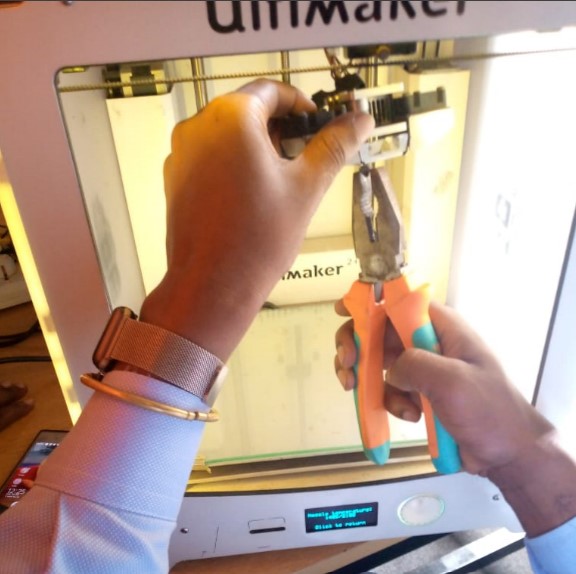
The photos above have been taken when fixing the nozzle correctly
By adjusting the nozzle's size, temperature, and position, it is possible to control the flow rate and pressure of the molten plastic material, ensuring that it is deposited accurately and precisely to create the desired 3D printed object.1. 3D Model Design and Printing:
Steps for 3D Design and Printing:
A. Creating a 3D model:
The first step is to create or obtain a 3D model of the object to be printed. My design was done by using solidworks, I just started by designing any object and print it for testing by my self.
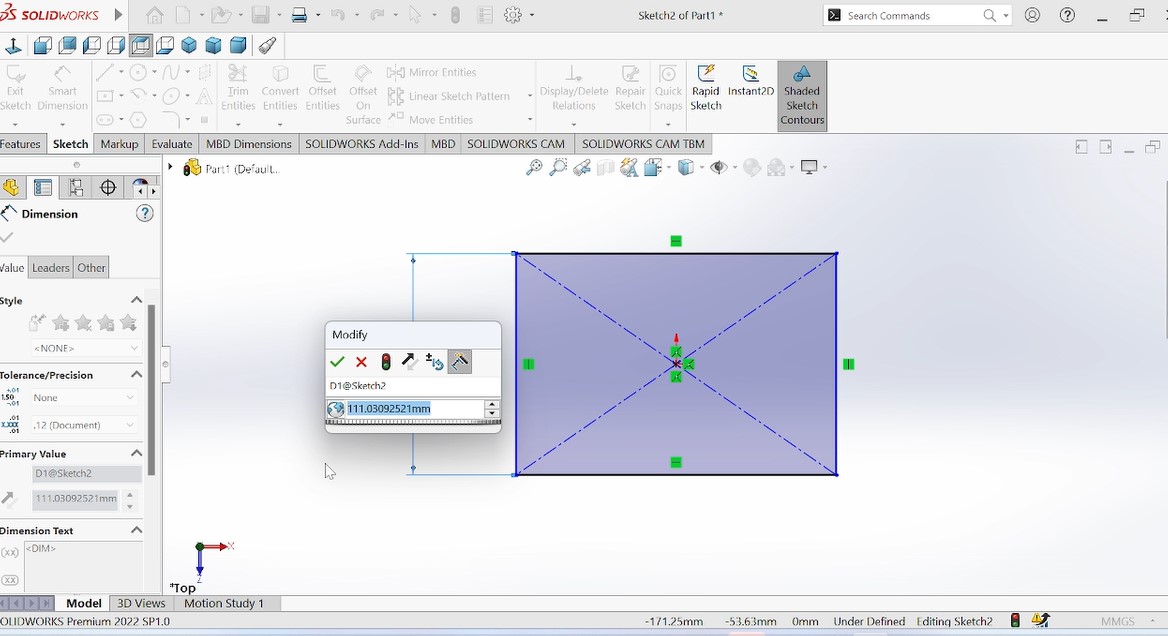


After designing an object, I saved it with stl extension in order to be opened in a software which being used by our 3D printer
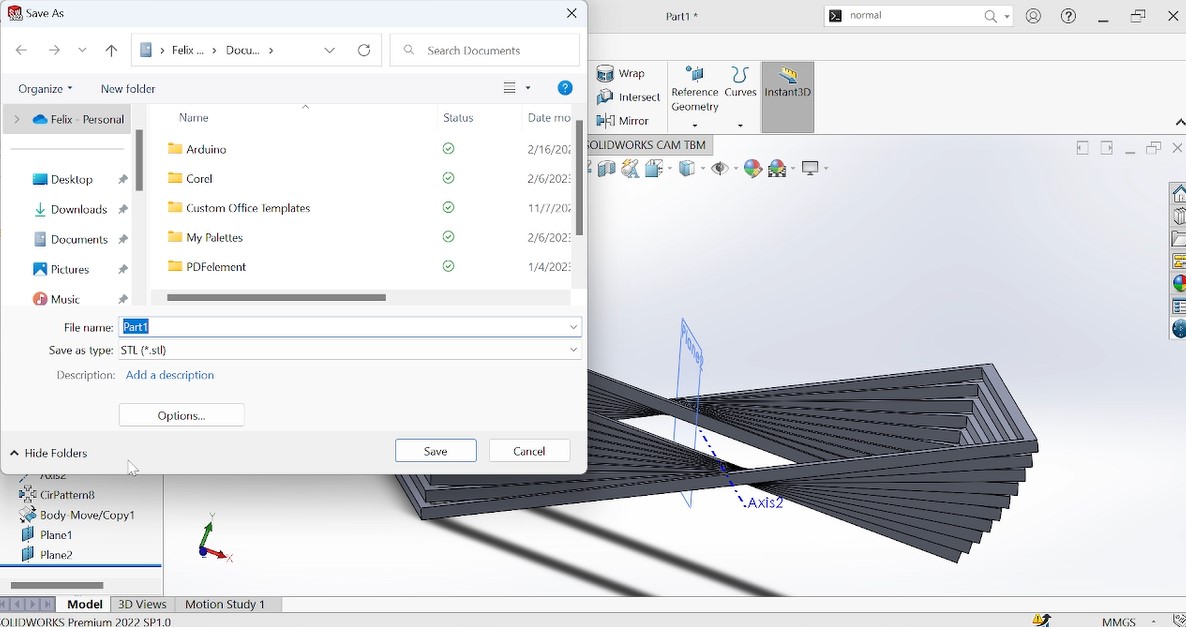
Fig: The image above illustrate the process of saving a designed object with "stl" so that it will be able to be opened in 3D printer software
3D Printing
After designing a 3D model object from solidworks, the remaining step is to print it out by using 3D printer.
As other many machines of FabLab, a 3D printer also has its particular software in order to print.
Here I used "UltiMaker Cura" which has been downloade from from here
B. Prepare the model for printing before slicing
Once you have a 3D model, you need to prepare it for printing. This involves adjusting different parameters with making sure that the model is the correct size and orientation for printing, adding support structures if necessary, and slicing the model into layers that the printer can print.

Above Fig: Uploading or opening a 3D object into ultimaker cure
Above Fig: After opening a 3D object to be printed into ultimaker cura software

Above Fig: Adjusting different parameters of object into ultimaker cure before printing
After slicing my model, I just saved it on SD card to be transfered on printer as it is not connected directly on computer
C. Load the 3D printer
Load the 3D printer with the filament material that you want to use. Most 3D printers use plastic filament, such as ABS or PLA.
Set up the 3D printer by adjusting the print bed level, nozzle height(I did this by refering to the size of sheet of paper: just placing it on bed and adjusting the distance between nozzle and bed as almost equal to the thickness of the paper), and temperature settings.

G. Monitor the 3D printer while it prints to ensure that it is printing correctly and that there are no issues such as clogs or filament runouts.
H. Once the 3D print is complete, remove it from the print bed and remove any support structures that were used. You may also need to sand or smooth the surface of the print or apply a coating to protect it or enhance its appearance.
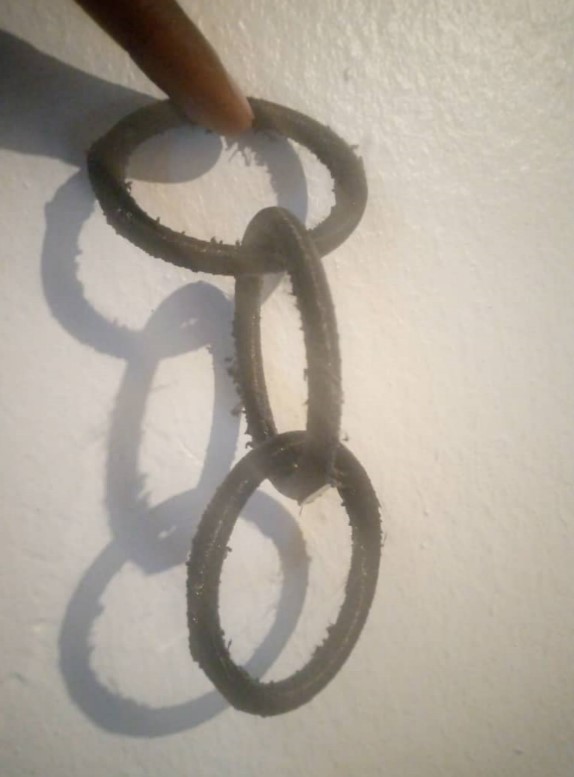
After Printing, the following is the printed object:

Fig: Printed object before removing the supports

Fig: Printed object after removing the supports
Challenge:
When I was working with a 3D printer, I faced many challenges and among them I can say:
- 1.Limited printing size: Most desktop 3D printers have limited print volume, meaning that they can only produce relatively small objects. This can be a disadvantage for those who need to print larger items.
- 2.Slow printing speed: 3D printing can be a slow process, with larger prints taking several hours or even days to complete. This can be a disadvantage for those who need to produce a large number of items quickly.
- 3.Design limitations: 3D printing has some design limitations, such as overhangs, bridging, and wall thickness, which can impact the quality and accuracy of prints.
Personal Challenge As I'm not yet an expert with CAD and 3D Printing, The first 3D model object I designed and printed was not matching exctly with the given assignment instructions partculary on the point of designing a 3D object that could not be made subtractively!!!!
As correction, I designed and printed an other one (as you can see in the following content ) that I think can satisfy that condition.
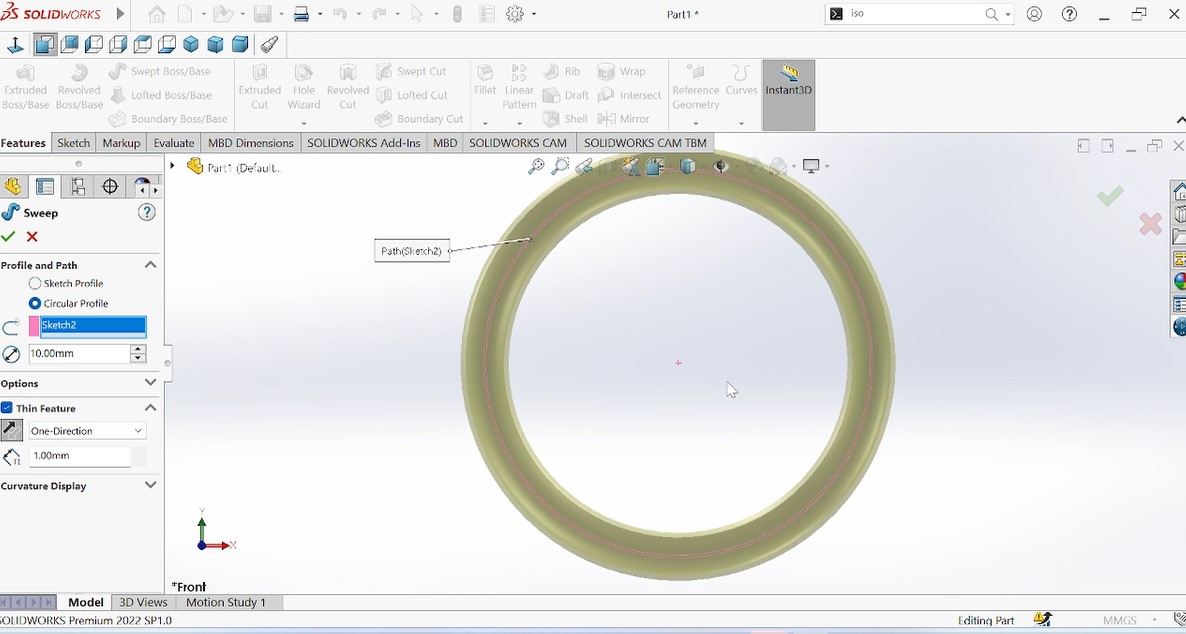
Fig: start designing new model
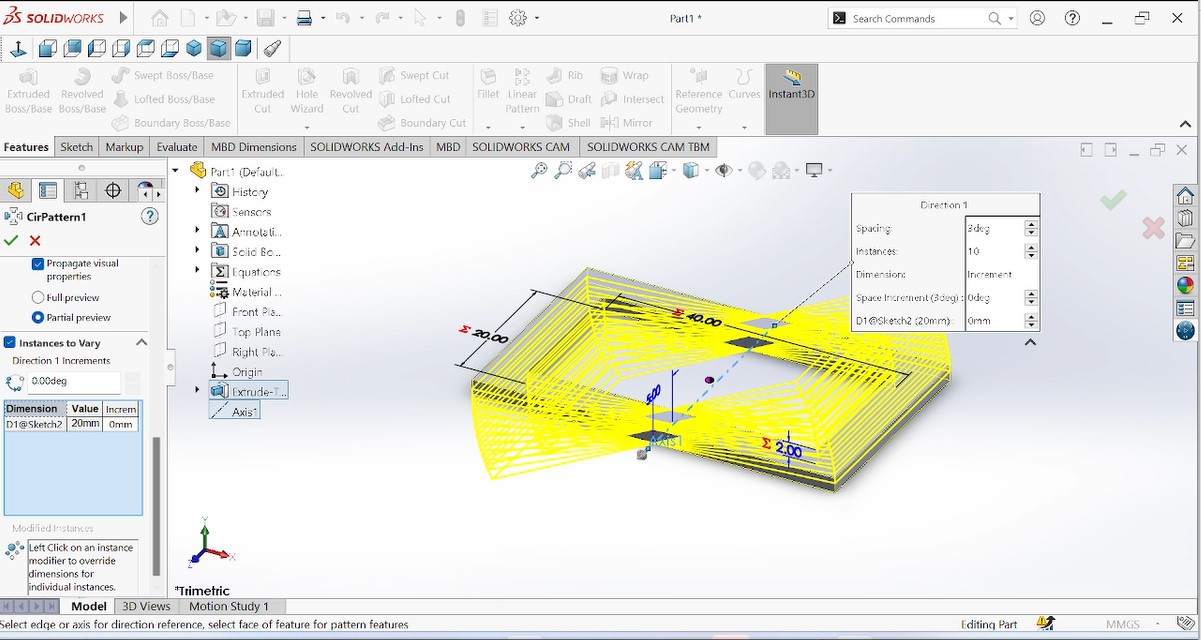
After noticing that the designed object is not meeting the assignment criterias, I designed an other one that is an assembly of many circular form.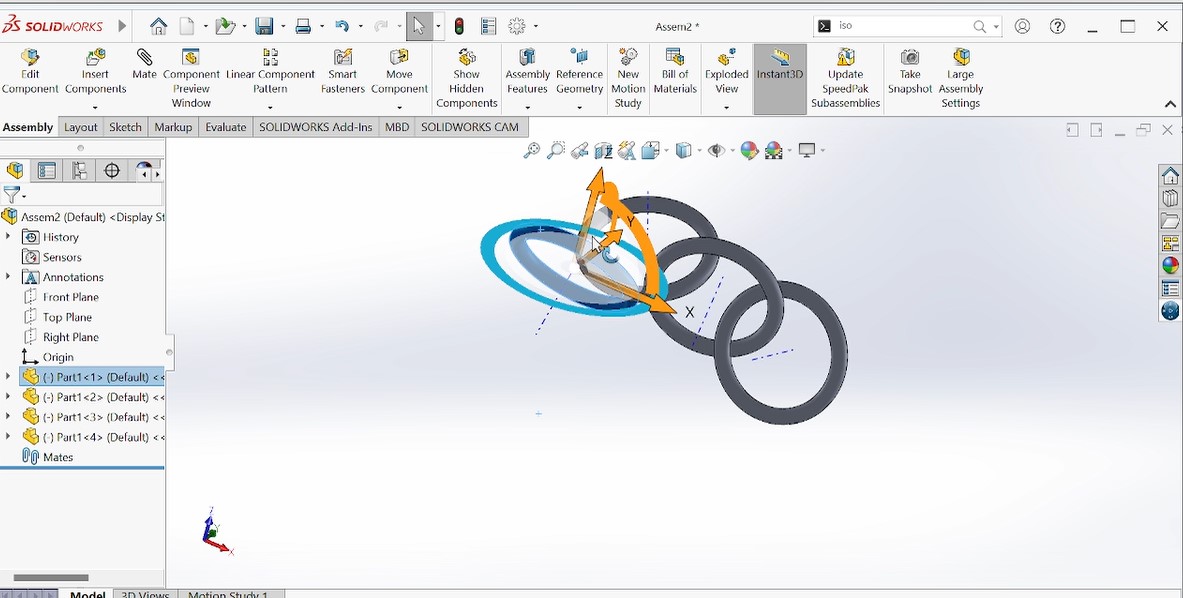
Fig: Here I joined many objects in solidworks so that they can move one into an other and making sure that this can not be made substractively.
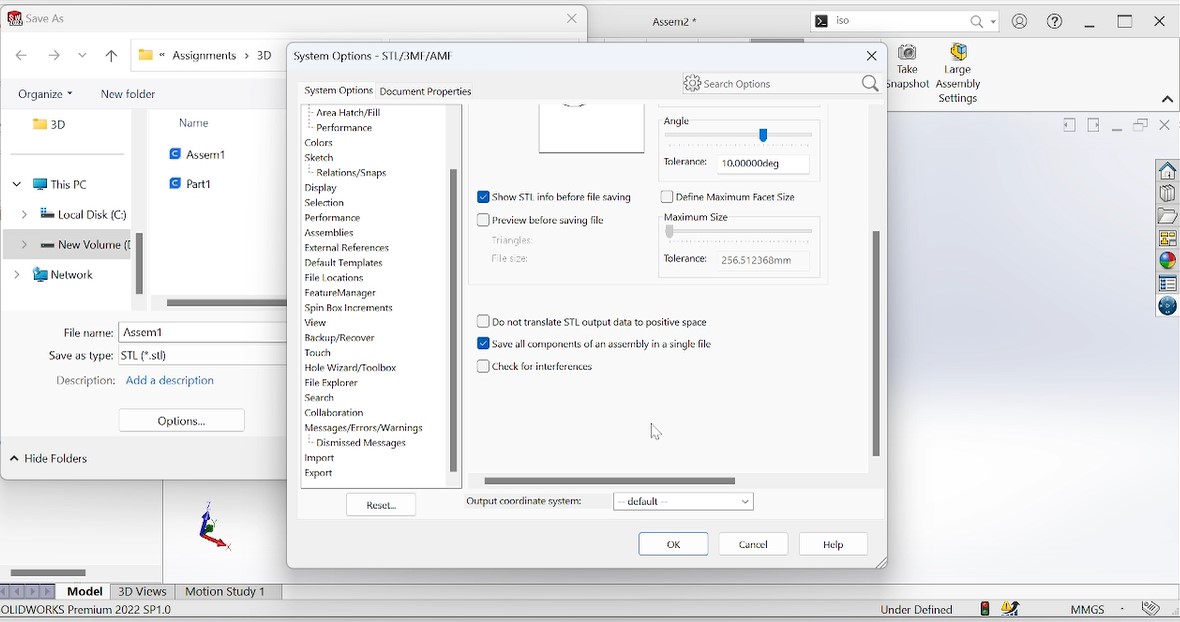
Fig: The designed models have been assembled in solidworks as indicated in steps on this image
2. Infill density: This is the amount of material used to fill in the interior of the print, which can affect the strength and weight of the finished part of object
3. Print speed: This is the speed at which the printer moves when printing, which can affect the overall time it takes to print as well as the quality of the finished part
5. Build plate temperature: This is the temperature of the build plate, which can affect the adhesion of the first layer and prevent warping or lifting of the print during printing
6. Support structure: This refers to the placement and design of support structures that are printed along with the part to prevent overhangs and ensure the part is printed successfully
7. Retraction: This is the amount of filament that is pulled back into the printer between moves to prevent stringing or oozing of the filament
8. Cooling: This refers to the use of fans or other cooling methods to prevent overheating and improve the quality of the finished part
8. Cooling: This refers to the use of fans or other cooling methods to prevent overheating and improve the quality of the finished part

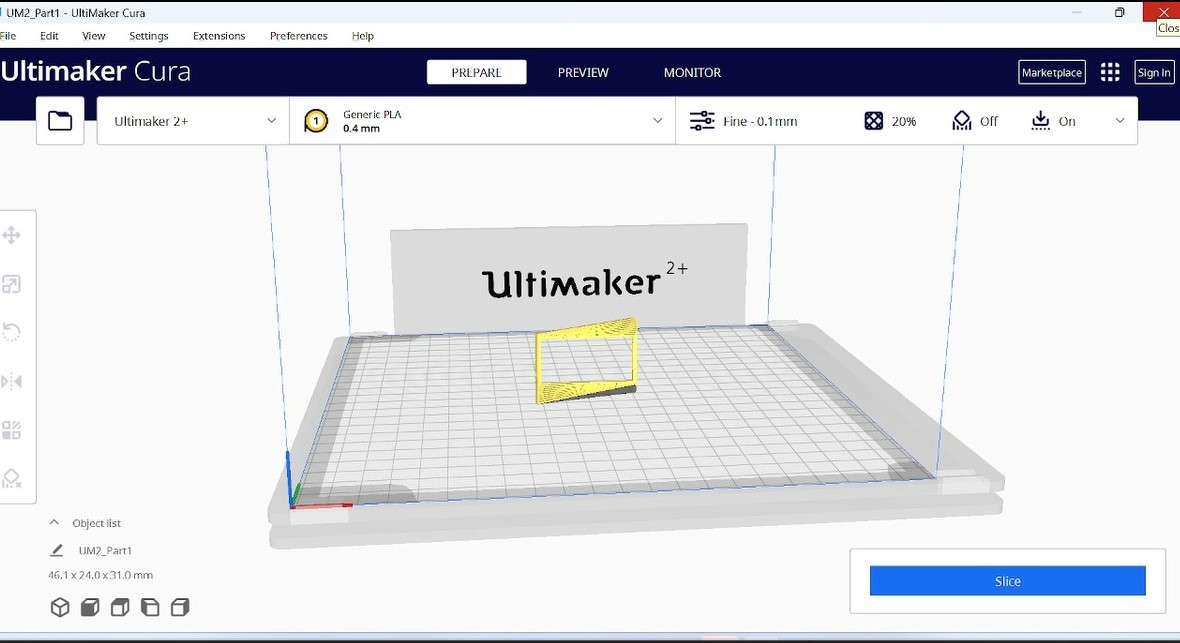
Fig: After assembling them, I imported the full design into ultimaker-cura that is supported by mour 3D printer and unfortunately the object was bigger than its head so I reduced the size sothat it can be well fitted as it is shown in the next picture.
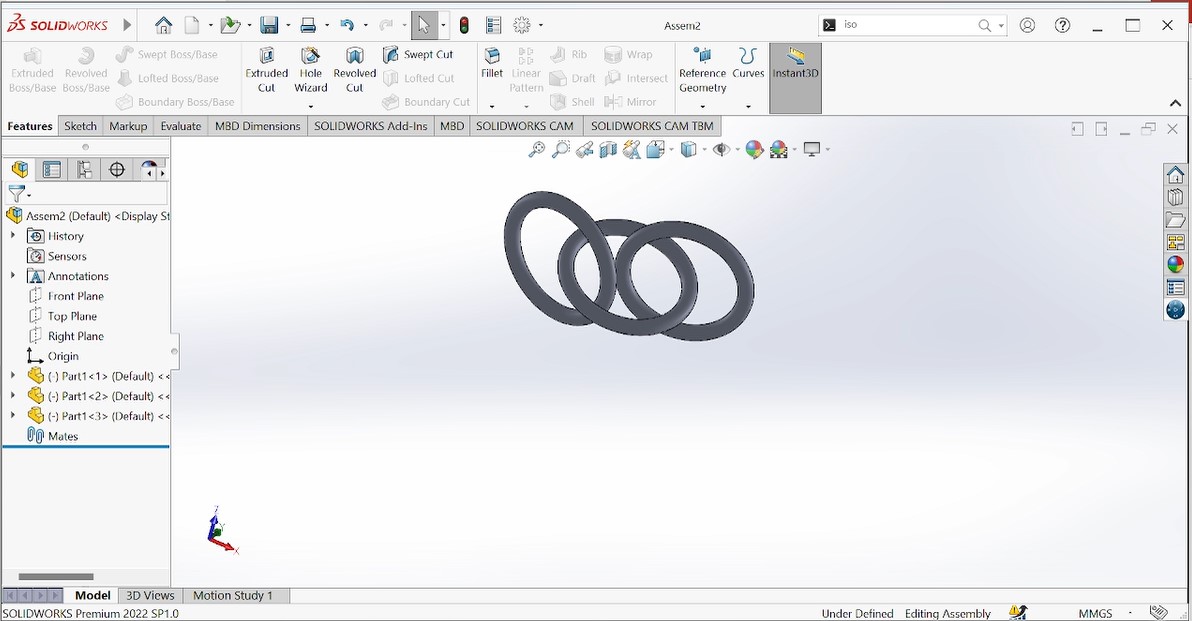
Fig: Here the size has been shaped according to the head of our 3D printer.
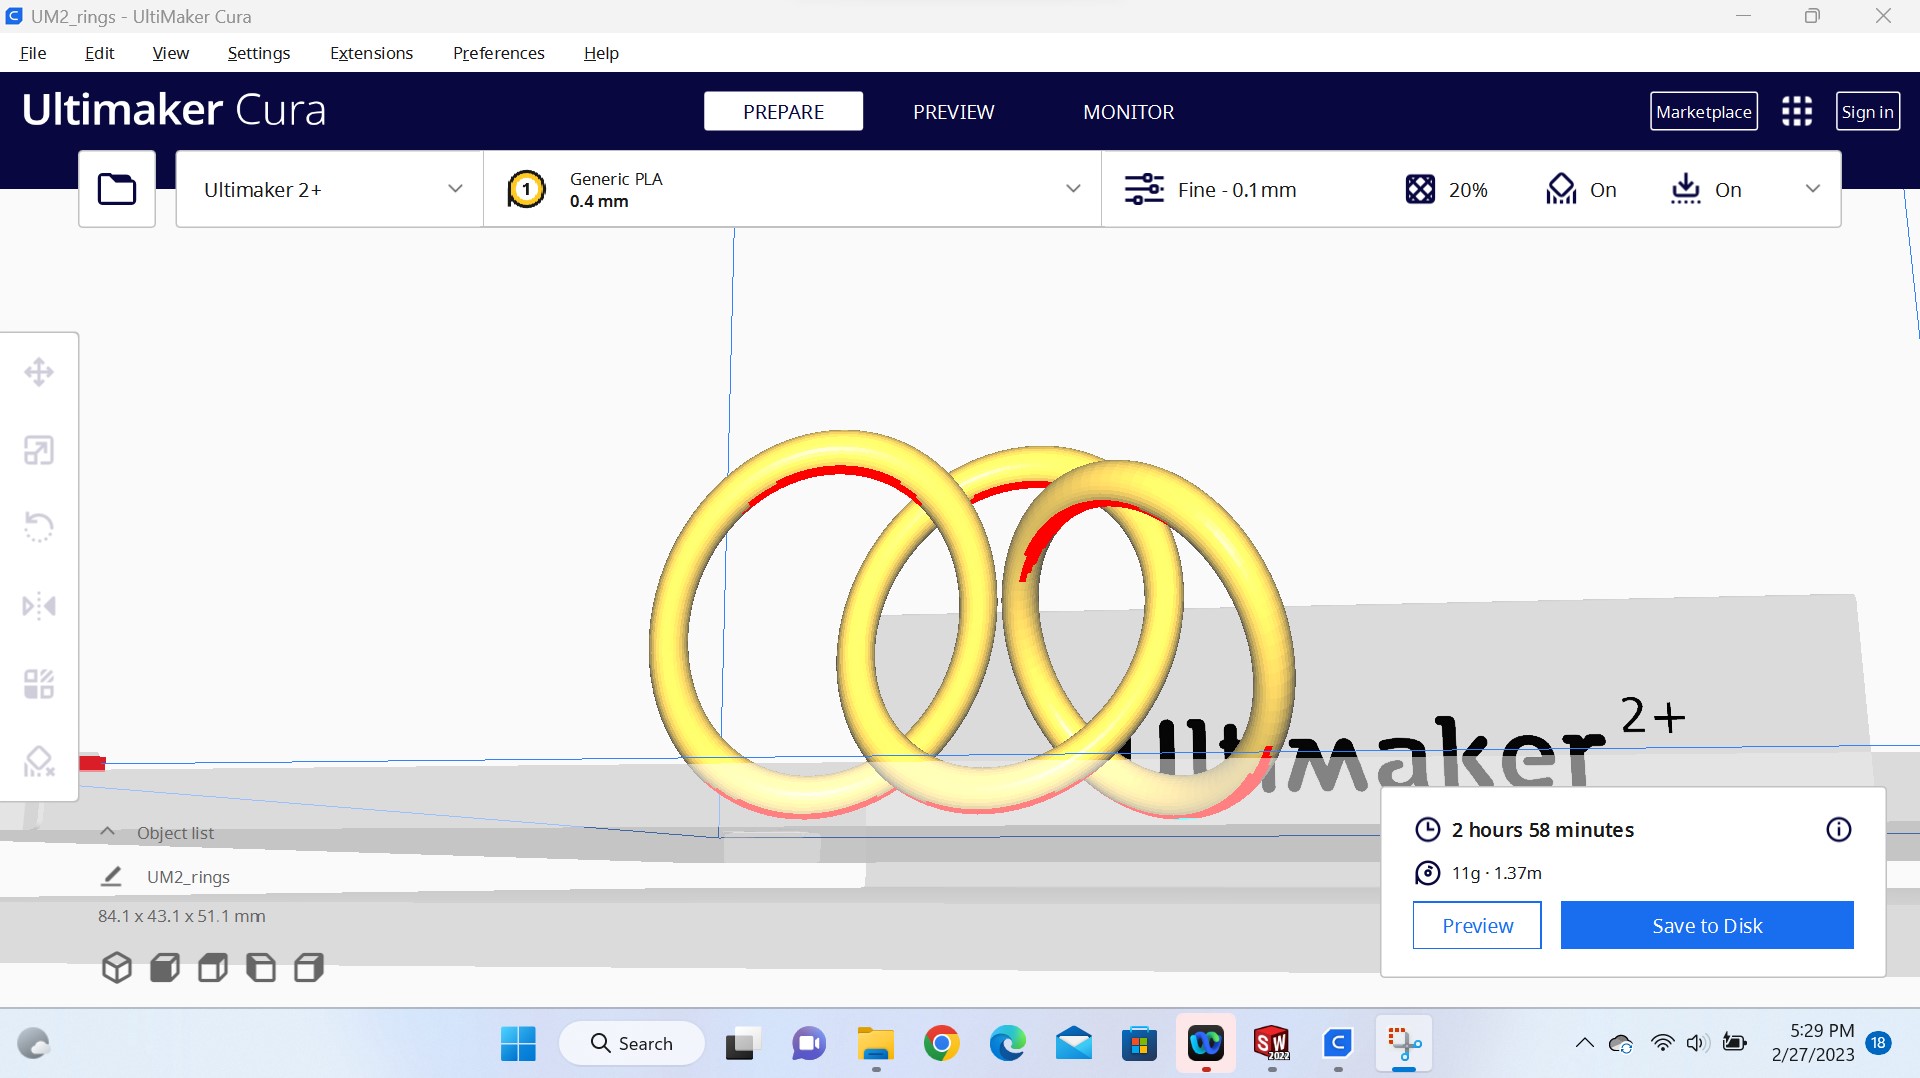
Fig: The designed model has been adjusted in different parameters before sliced and printed
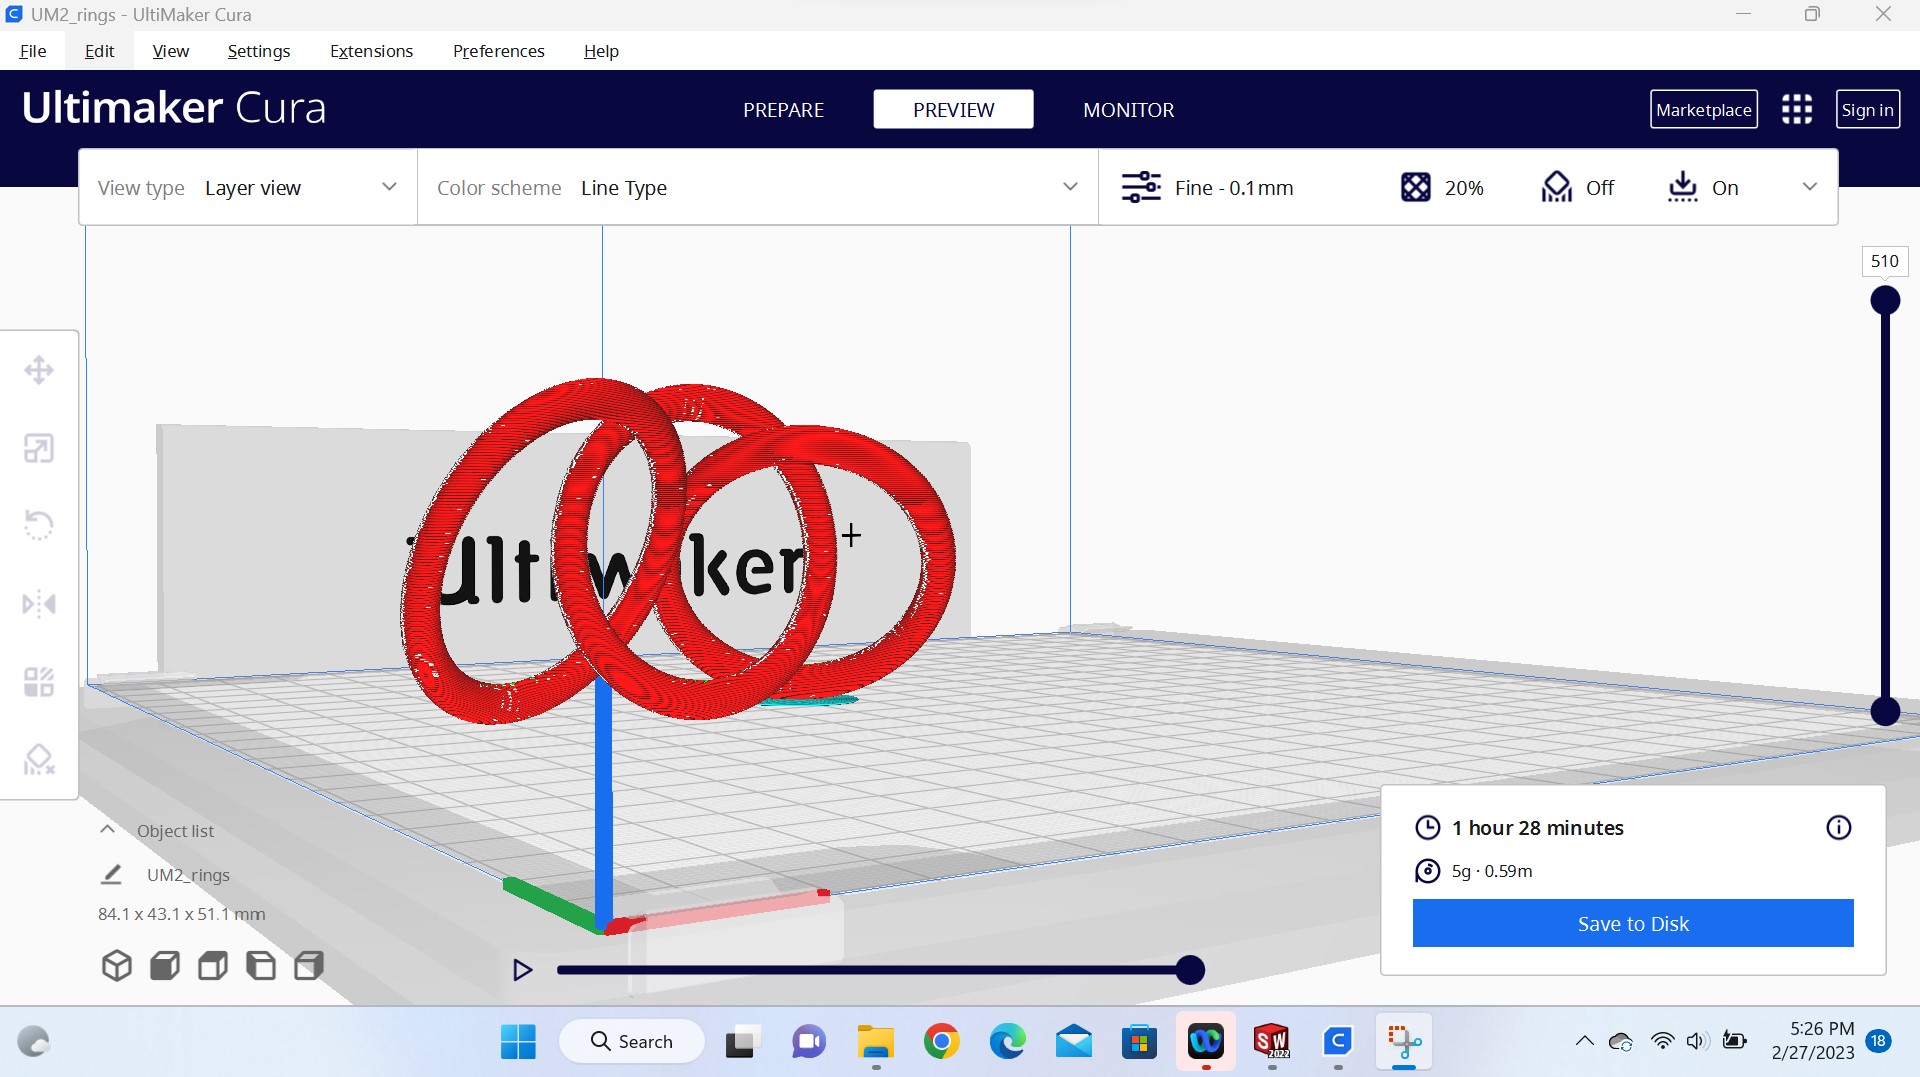
Fig: The model is ready for printing. After slicing it, it showed me the time that will be taken by the printing process and asked to be saved on disk to connected into 3D printer port(Here I saved it on SD card) and the next step is printing my model.
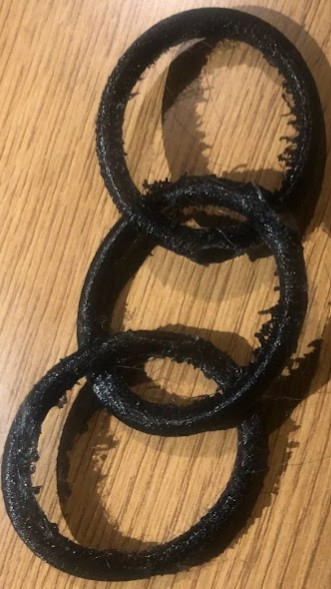
Fig: Finally the designed object is printed
What is 3D scanning?
3D scanning is a process of analyzing an object from the real world, to collect all the data in order to recreate its shape and appearance, digitally.
With this process, the object can become a 3D model, which could help you as a base for the 3D project you are about to develop, but it can also be useful to reconstruct, analyze, or simulate ideas.
How does 3D scanning work?
Laser 3D scanning: Laser 3D scanning is certainly the most common and used 3D scanning technique. Digitally capturing the shape of the object using laser light to get a digital representation of the real object. These 3D scanners are able to measure really fine details and capture free-form shapes to generate highly accurate point clouds. This laser scanning technique is perfect for measurement and inspection of complex geometries. It allows getting measurements and data from where it is impractical with traditional methods! A scanner using laser light is a little bit like a camera: it can only capture what is in its field of view. With this process, a laser dot or line is projected on an object from the device and a sensor measures the distance to the surface of this object. By processing this data, it can be converted into a triangulated mesh, and then a CAD model.
3D scanning is done by using a 3D scanner,A 3D scanner is a device that captures the shape and appearance of physical objects and converts them into digital 3D models. It works by using a combination of technologies such as structured light, laser, or photogrammetry to capture and measure the object's geometry and texture. The resulting 3D model can be used in various applications such as reverse engineering, product design, virtual reality, animation, and even 3D printing. 3D scanners are widely used in industries such as engineering, manufacturing, healthcare, and entertainment. They can range from handheld devices that capture small objects to large-scale systems used for scanning buildings and landscapes.reference from here
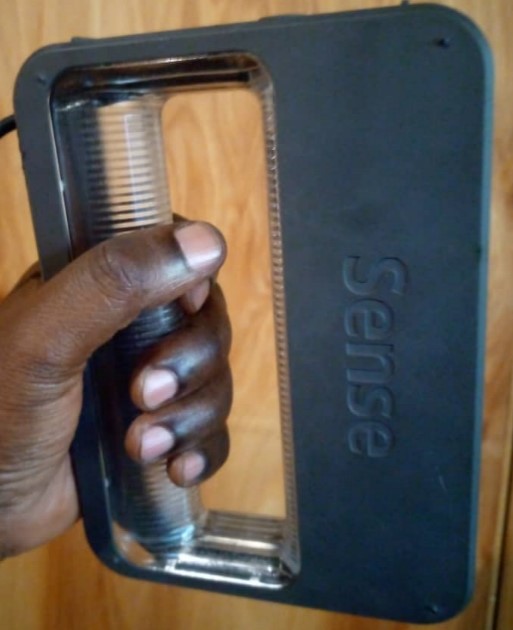
The photos above shows the back view of 3D scanner used in our FabLab

The photos above shows the camera's side of 3D scanner used
Steps for 3D scanning:
The exact steps for 3D scanning may vary depending on the type of scanner and the object being scanned. However, here is a general outline of the process I used while scanning my object:
- 1. The first step was to identifier the 3D machine to be used that is a sense scanner
- 2. After identifying a 3D sacanner, I downloaded a sense scanner software from https://support.3dsystems.com/s/article/Sense-Scanner?language=en_US
- Preparation of the object to be scanned by cleaning it of any dirt or debris that may interfere with the scanning process. If necessary, apply a spray or powder that helps the scanner capture the object's surface.
- Set up the 3D scanner and ensure that it is calibrated correctly. This may involve aligning the scanner with a specific coordinate system or adjusting the camera and laser settings.
- Positioning the object in front of the scanner, making sure that it is within the scanner's field of view.I used a handheld scanner, then move around the object to capture it from different angles.
- Start the scanning process and allow the scanner to capture the object's geometry and texture data. This may involve taking multiple scans from different positions to ensure that all surfaces are captured.
- Once the scanning process is complete, I processed the captured data using specialized software (me I used sense software). This software aligns and merges the individual scans into a single 3D model. It also helped me to clean up the data and remove any noise or errors that occurred during the scanning process.
- Review the final 3D model to ensure that it accurately captures the object's shape and appearance
- Export the final 3D model in a format that can be used for various applications, such as 3D printing, CAD design, or virtual reality

Fig: The software asked us to enter activation code in order to use it

Fig: Here you choose what you want to scan, either a person or an object. For me I chose an object because it is the one I wanted to scan.
I chose to scan a kattle. Even if i has reflecting surfaces but I wanted to experience how It can look digitally.
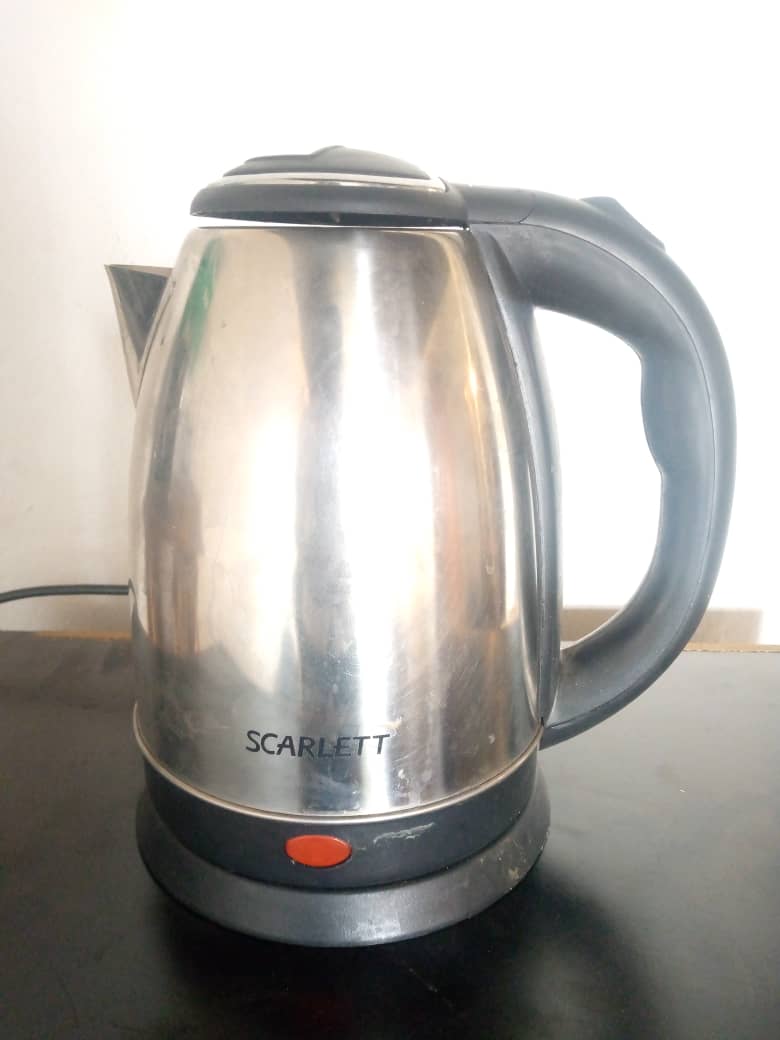
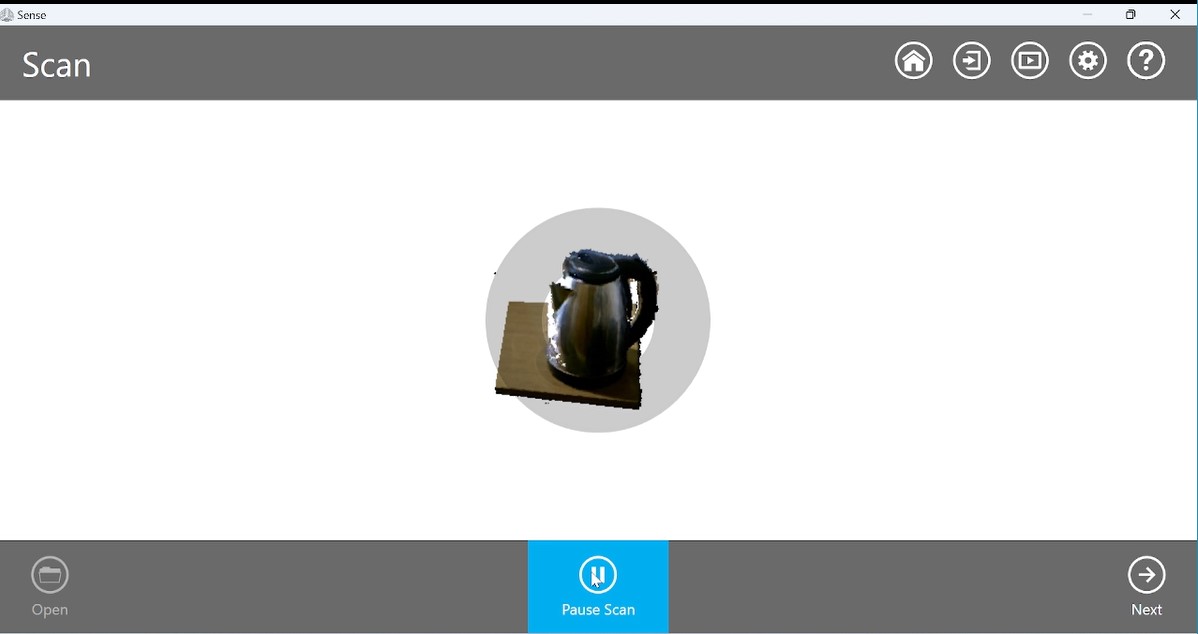
Fig: Scanning Process of a given object

Fig: Cleaning up a scanned object

Fig: Solidifying a scanned object
Now after scanning my object became digital and is saved as file on my computer for other process such as 3D printing
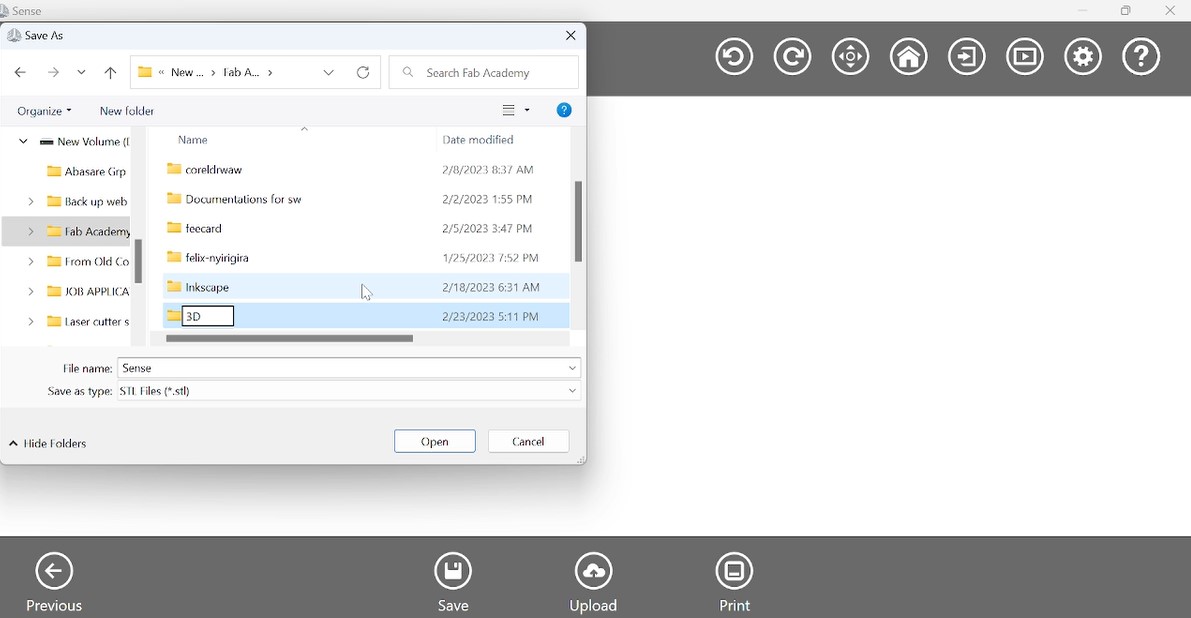
Fig: After cleaning up a scanned object, it has been saved/exported with stl format for other applications or post processing after the sense scanner software
For example here it can be 3D printed as I open it in ultimaker-cura for processing and printing it with 3D printer
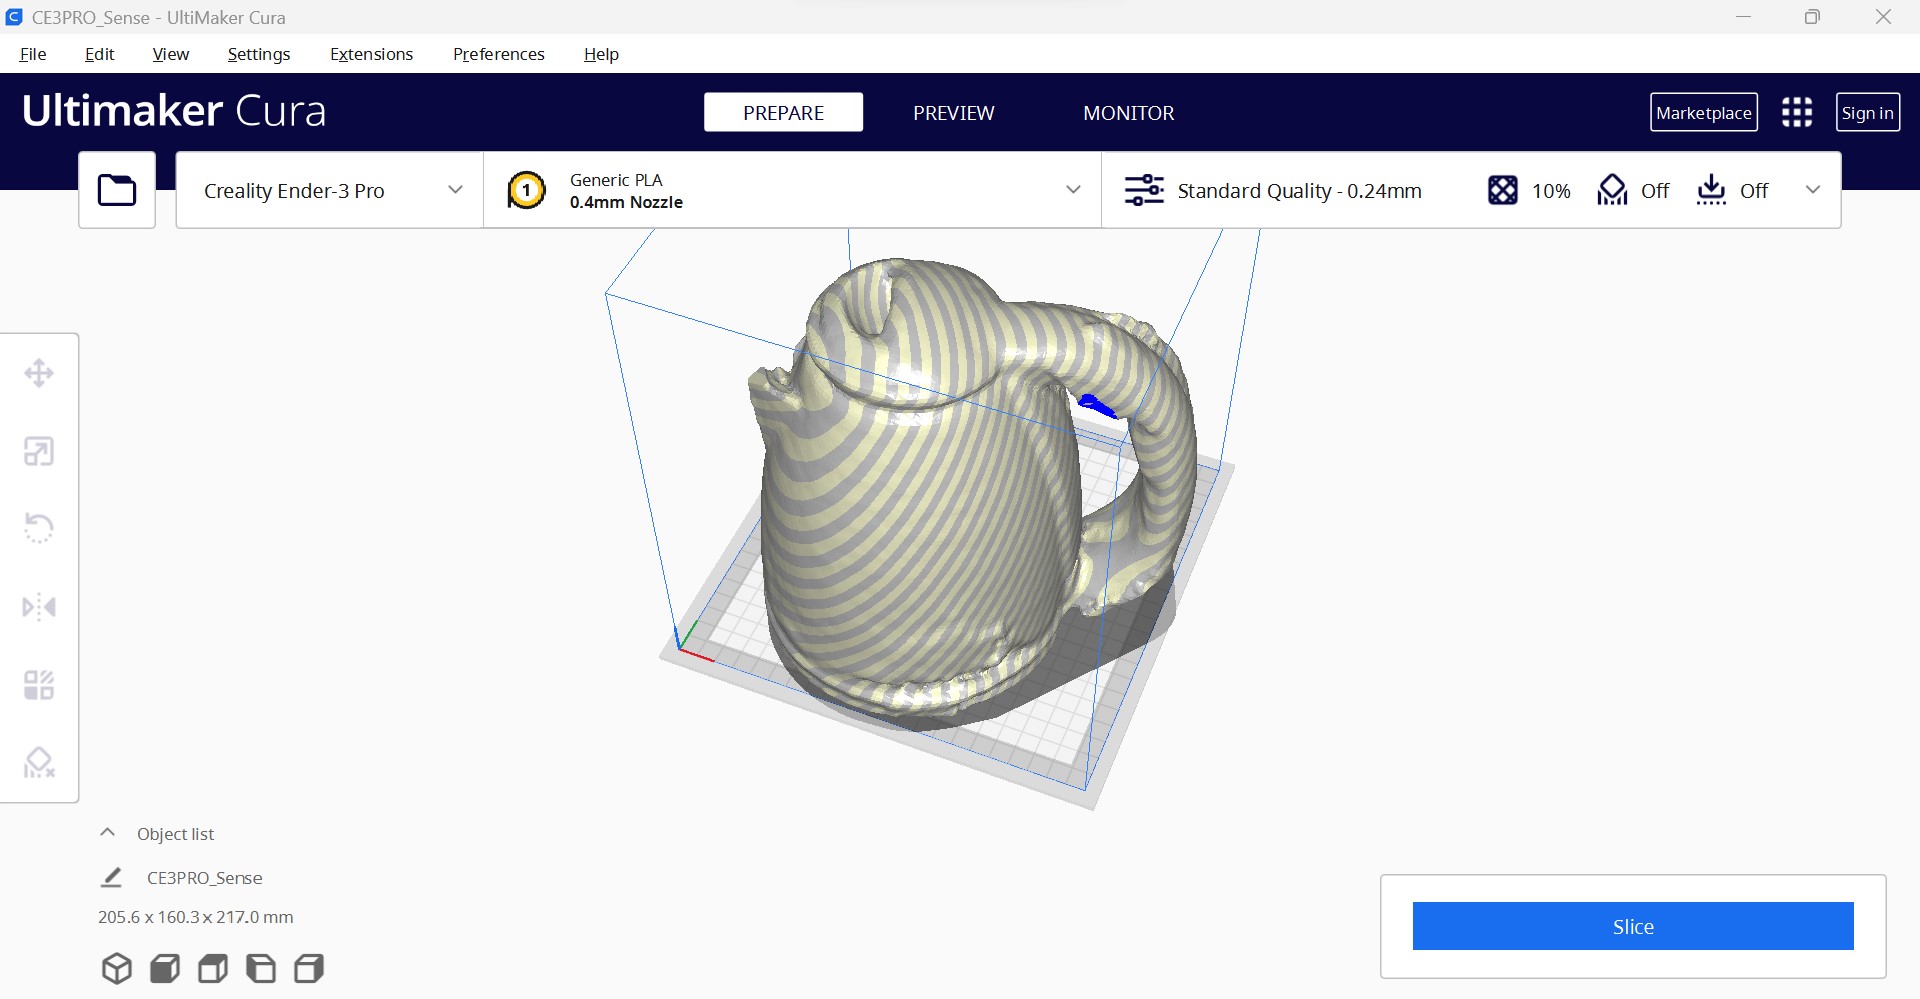
Normally, this scanning technolog helped me to convert a real life object into digital so that can be manupilated for other process and application. The correction in STL model was done in sensor software and simply opened in ultimaker-cura for further processing in 3D printing as shown in the above photo.
All those works(designs) done in 3D scanning and printing have been saved as files and they can be accessed and downloaded as a whole zipped folder via here
NAVIGATION
USEFUL LINKS FOR MORE KNOWLEDGE
https://randomnerdtutorials.com/ https://www.w3schools.com/java/java_intro.asp https://www.w3schools.com/html/default.asp https://developer.mozilla.org/en-US/docs/Web/HTML/Element/brAddress
2023 All Rights Reserved. Designed by Felix NYIRIGIRA