Output Devices
Assignment activities:
I.Individual assignment:
Add an output device to a microcontroller board you've designed,
and program it to do something
II.Group Assignment:
Measure the power consumption of an output device
If you want to explore the group Assignment Click
Here
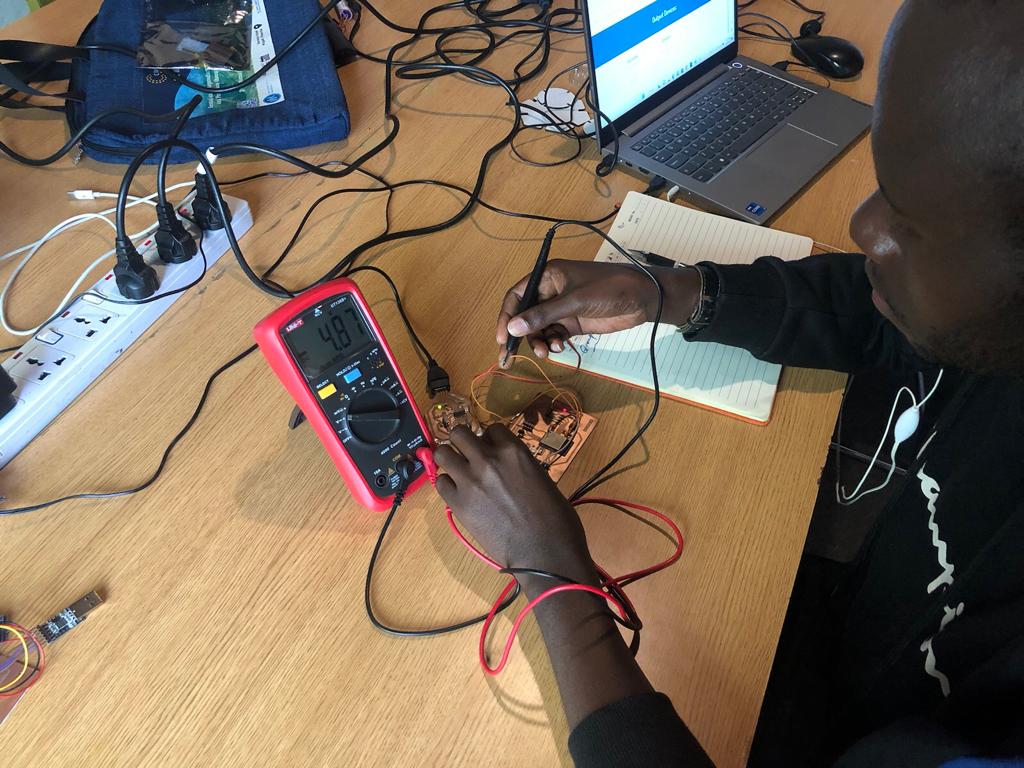
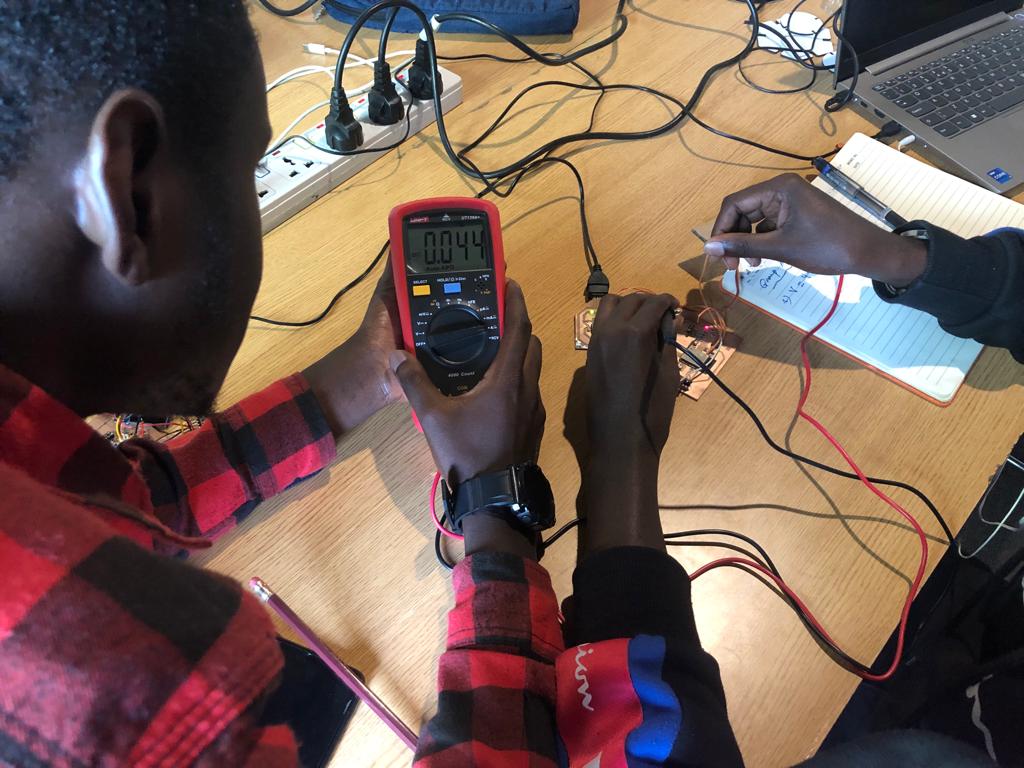
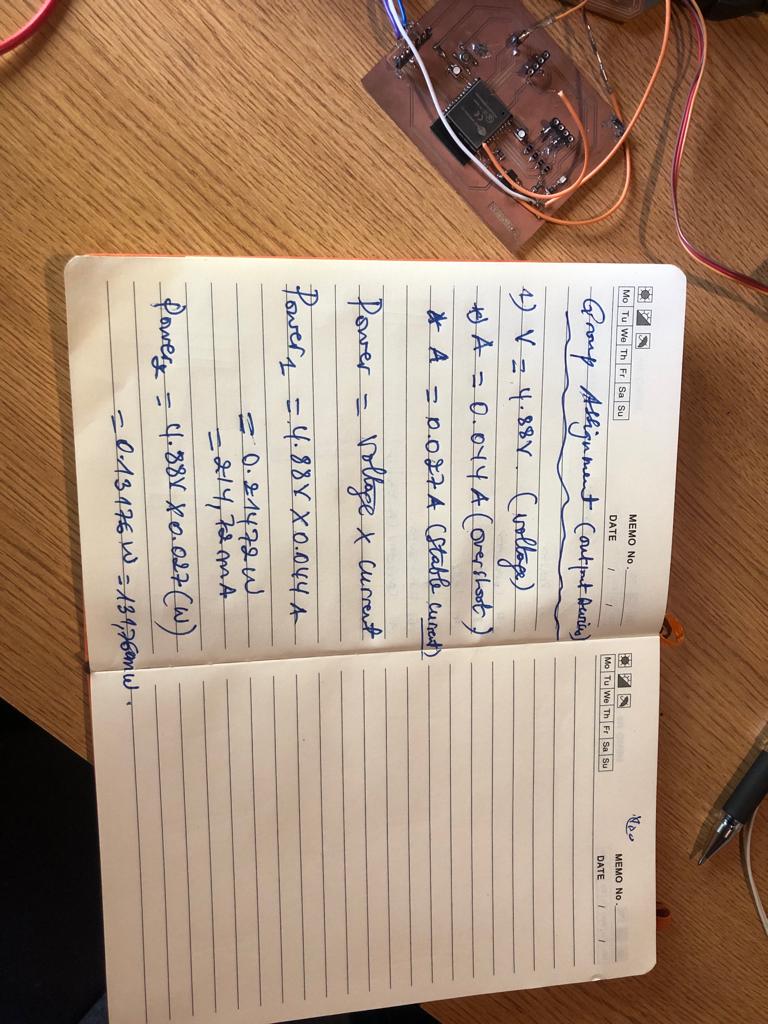
In Group we Mesure voltage, Current and calculate the power of our board
Here we are mesuring a voltage of board
Here we are mesuring a Current of board
Here we are calculate the output Power
Individual Assignment
In this Assignment I designed a board which will have output as LCD (Display) as an output device, which will desplay some message we put in our system and we use also ESP23 Microcontroller,
ESP23 Datasheet this board I will also use it in my final project.
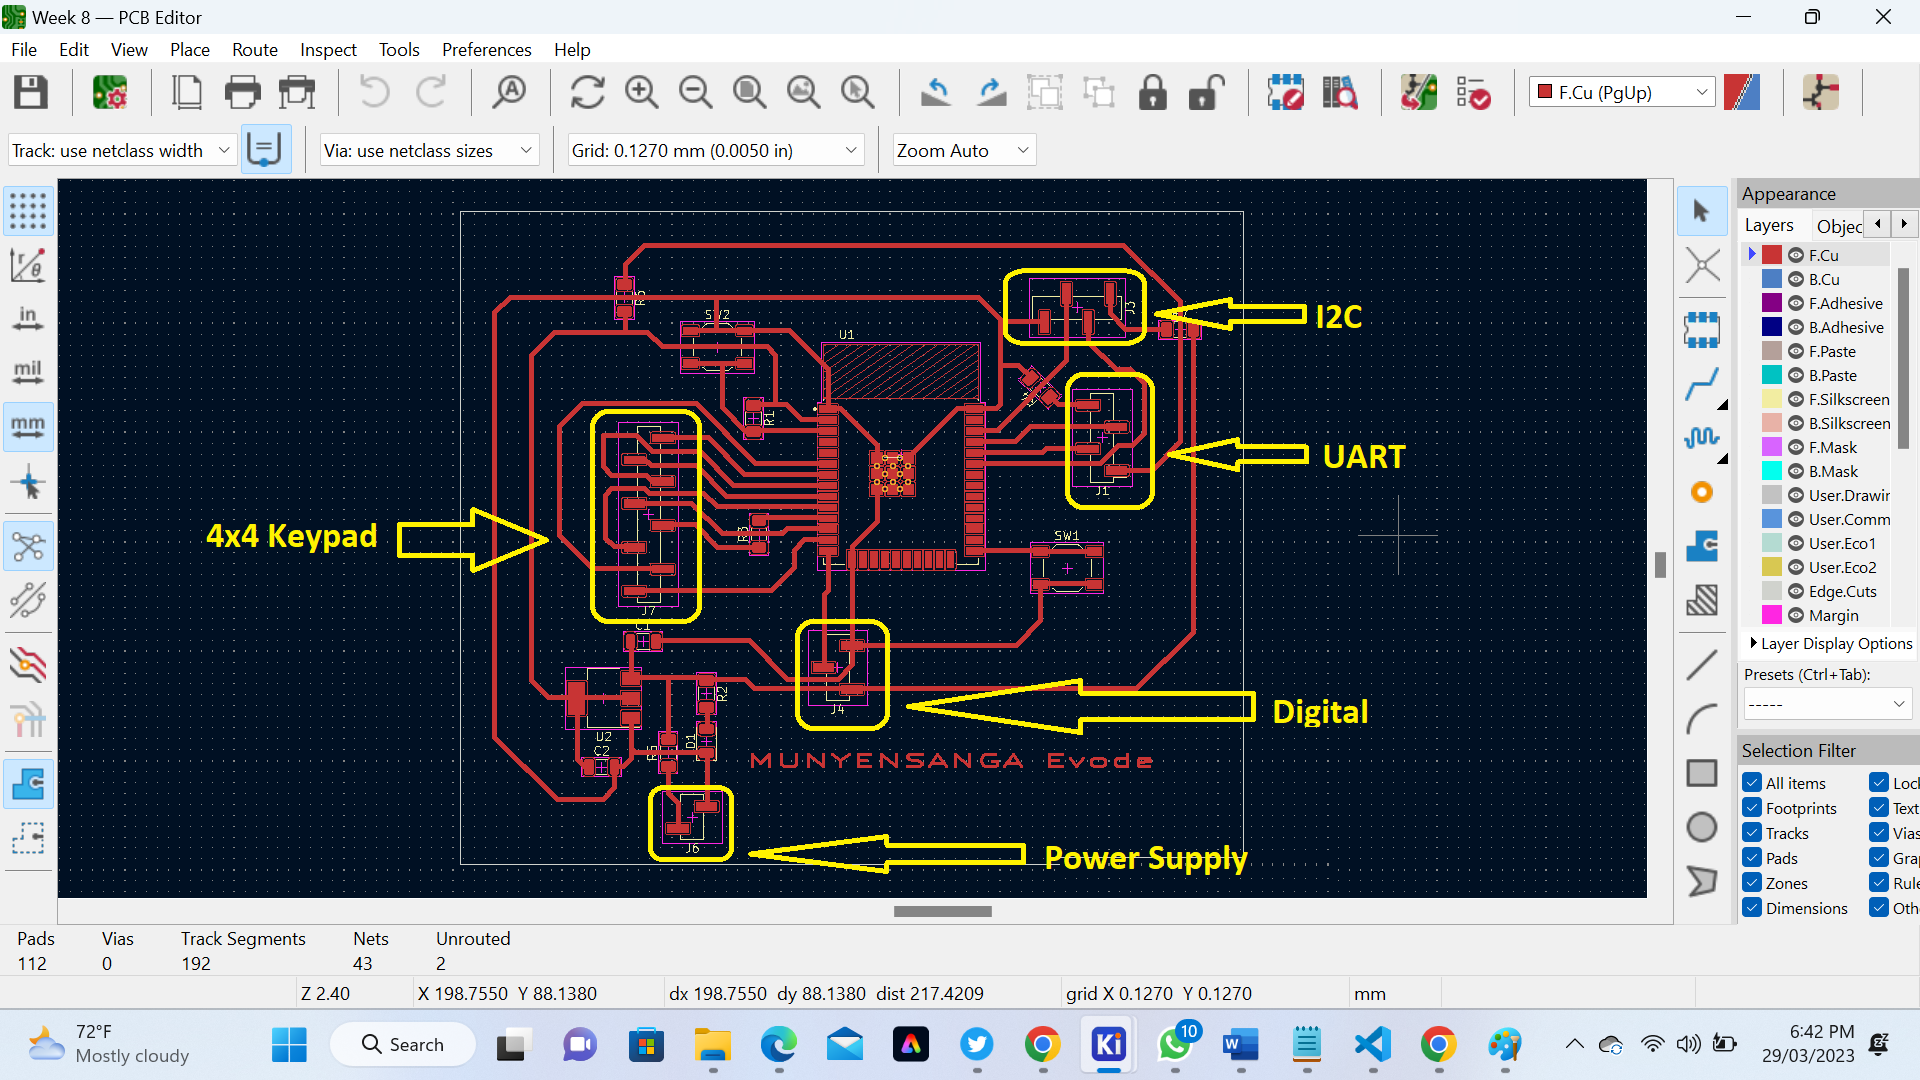
Here is Schematic Design
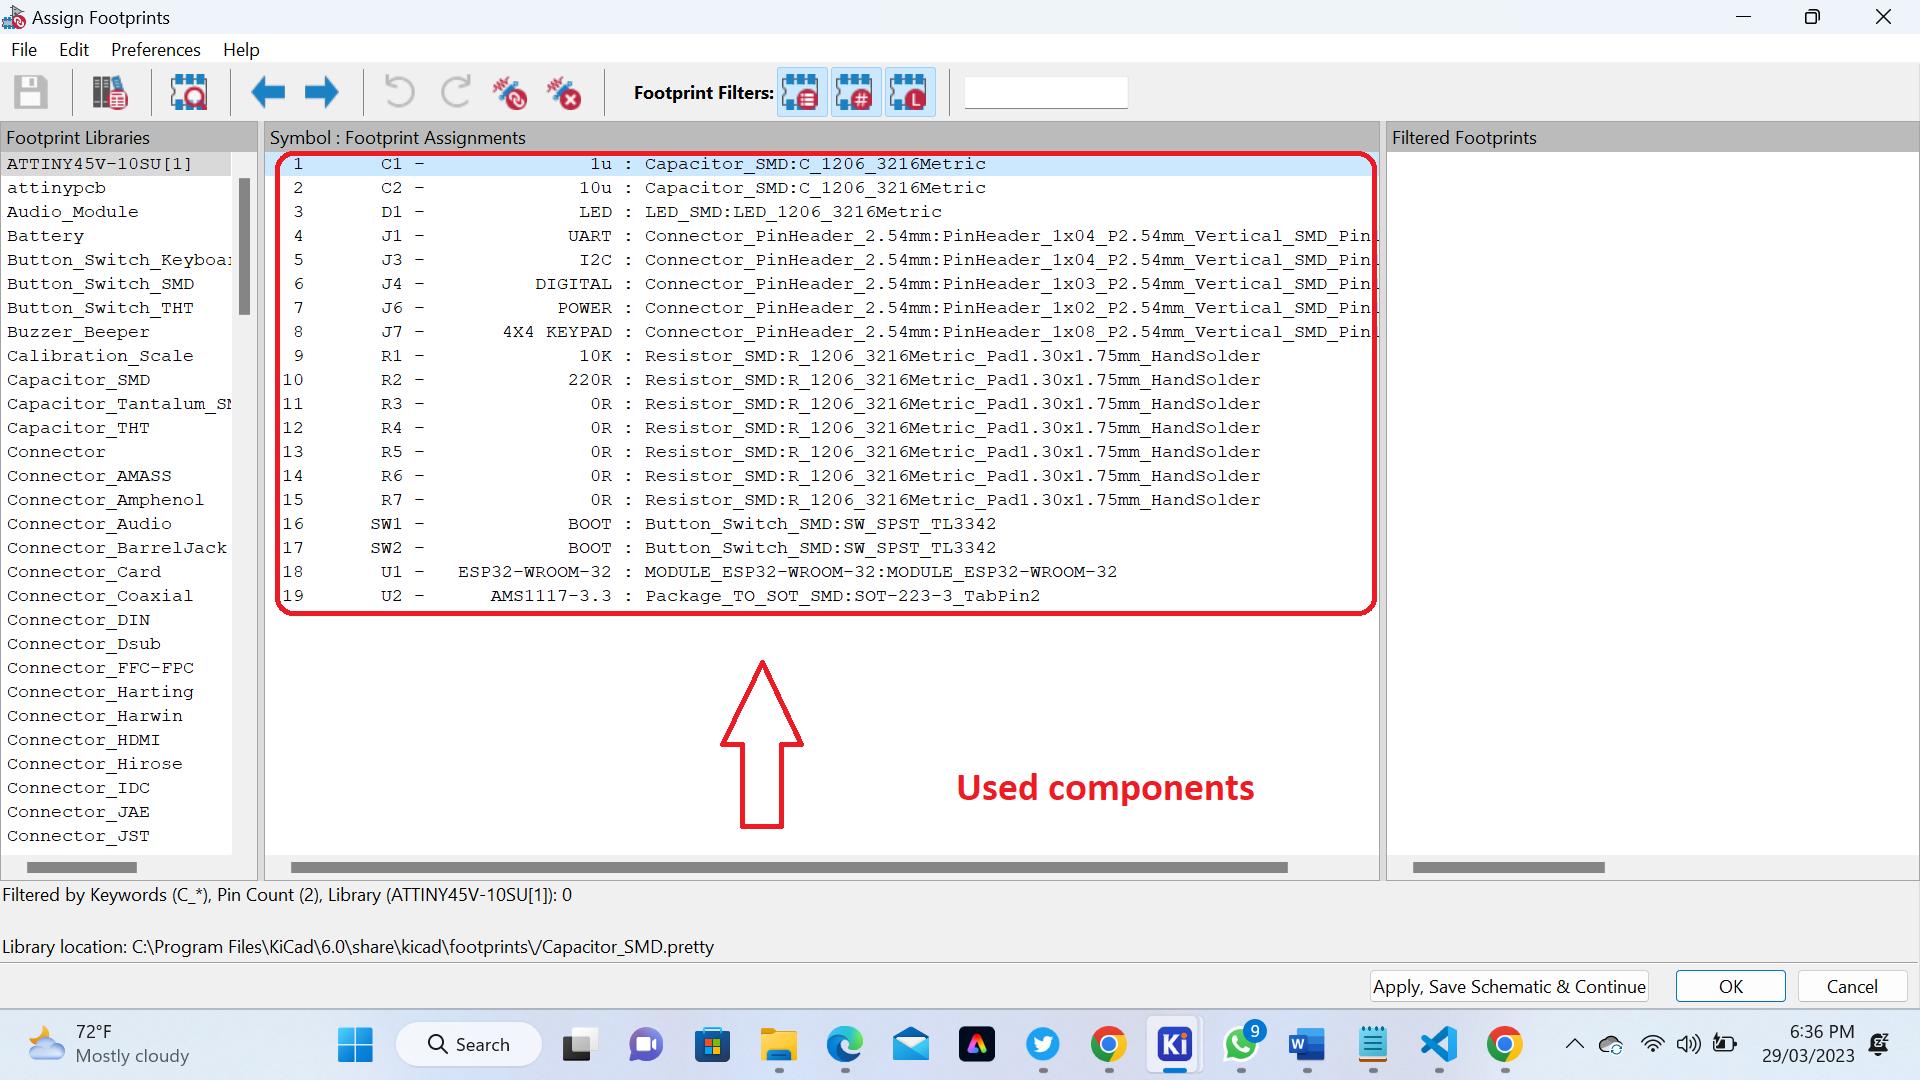
 Here are a list of components I will use
 Here is The Board
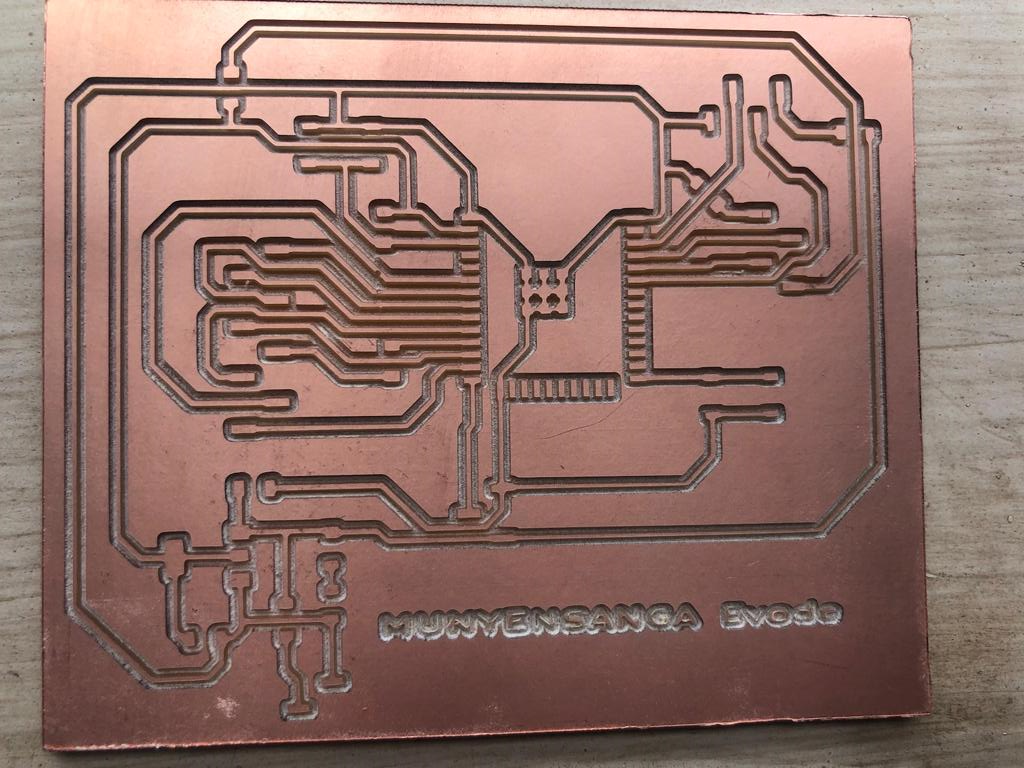
 Here is The Board after milling
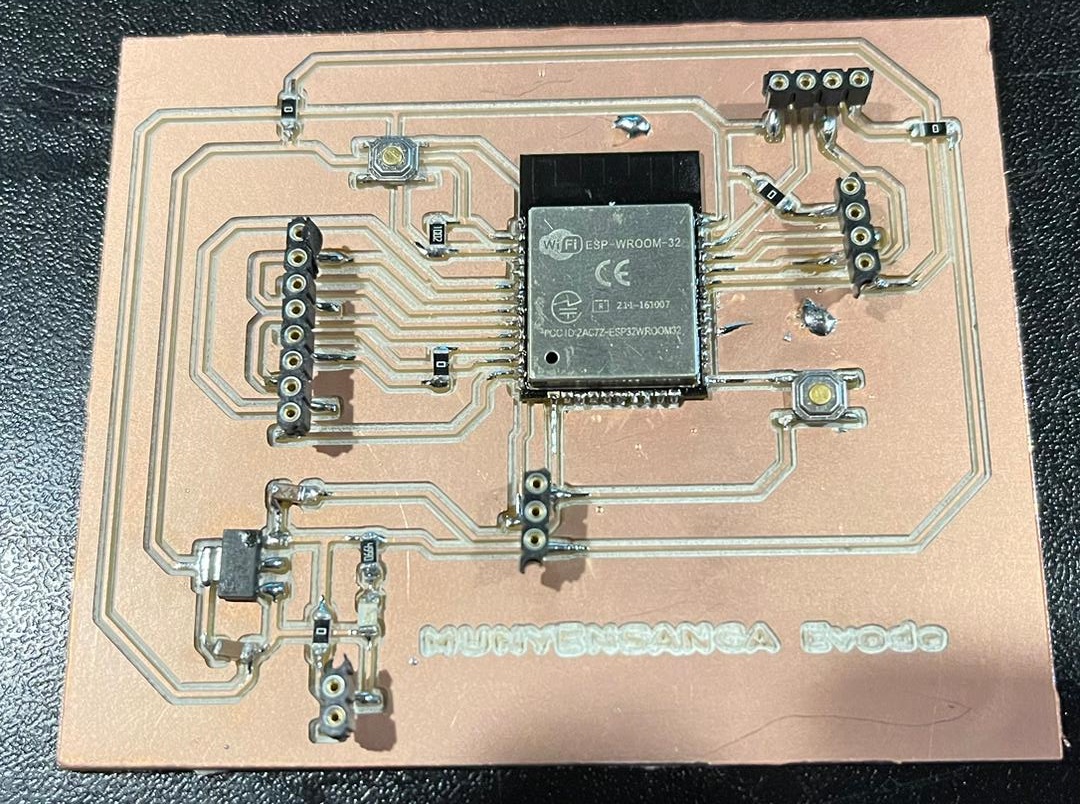
 The following Image shows when I started soldering my Board
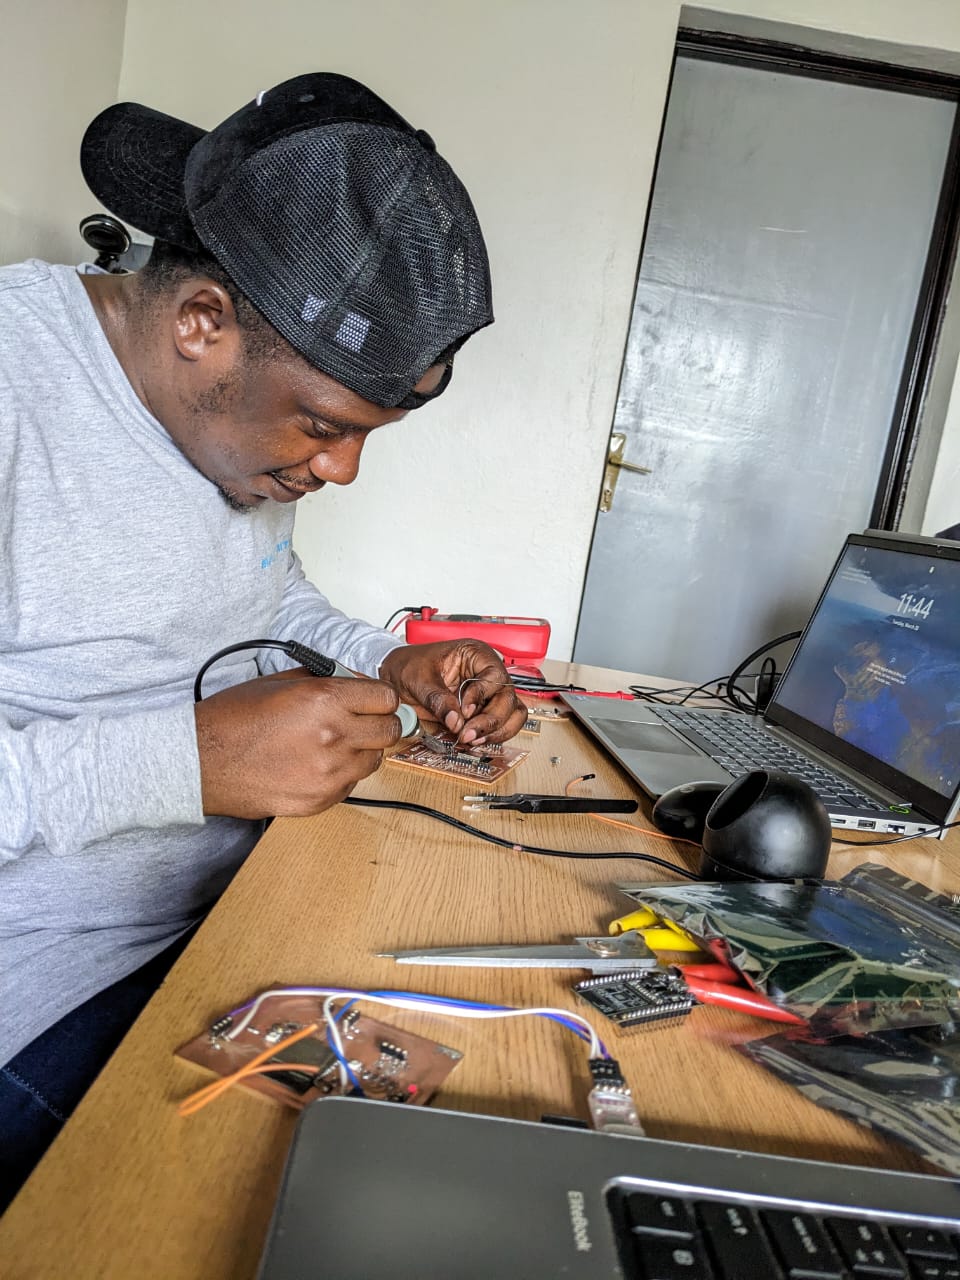 The following Image shows when I started soldering my Board
 The following code are used to generate an image robot
                                    /*!
 * @file  drawingDemo.ino
 * @brief  Drawing Demo
 * @copyright  Copyright (c) 2010 DFRobot Co.Ltd (http://www.dfrobot.com)
 * @licence  The MIT License (MIT)
 * @author  [wxzed](xiao.wu@dfrobot.com)
 * @maintainer  [qsjhyy](yihuan.huang@dfrobot.com)
 * @version  V1.0
 * @date  2022-04-21
 * @url  https://github.com/DFRobot/DFRobot_OLED12864
 */

// Include the correct display library
// For a connection via I2C using Wire include
#include "DFRobot_OLED12864.h"

// Initialize the OLED display using Wire library
DFRobot_OLED12864  display(0x3c);

void drawLines()
{
  for (int16_t i=0; i=0; i-=4) {
    display.drawLine(0, DISPLAY_HEIGHT-1, DISPLAY_WIDTH-1, i);
    display.display();
    delay(10);
  }
  delay(250);

  display.clear();
  for (int16_t i=DISPLAY_WIDTH-1; i>=0; i-=4) {
    display.drawLine(DISPLAY_WIDTH-1, DISPLAY_HEIGHT-1, i, 0);
    display.display();
    delay(10);
  }
  for (int16_t i=DISPLAY_HEIGHT-1; i>=0; i-=4) {
    display.drawLine(DISPLAY_WIDTH-1, DISPLAY_HEIGHT-1, 0, i);
    display.display();
    delay(10);
  }
  delay(250);
  display.clear();
  for (int16_t i=0; i
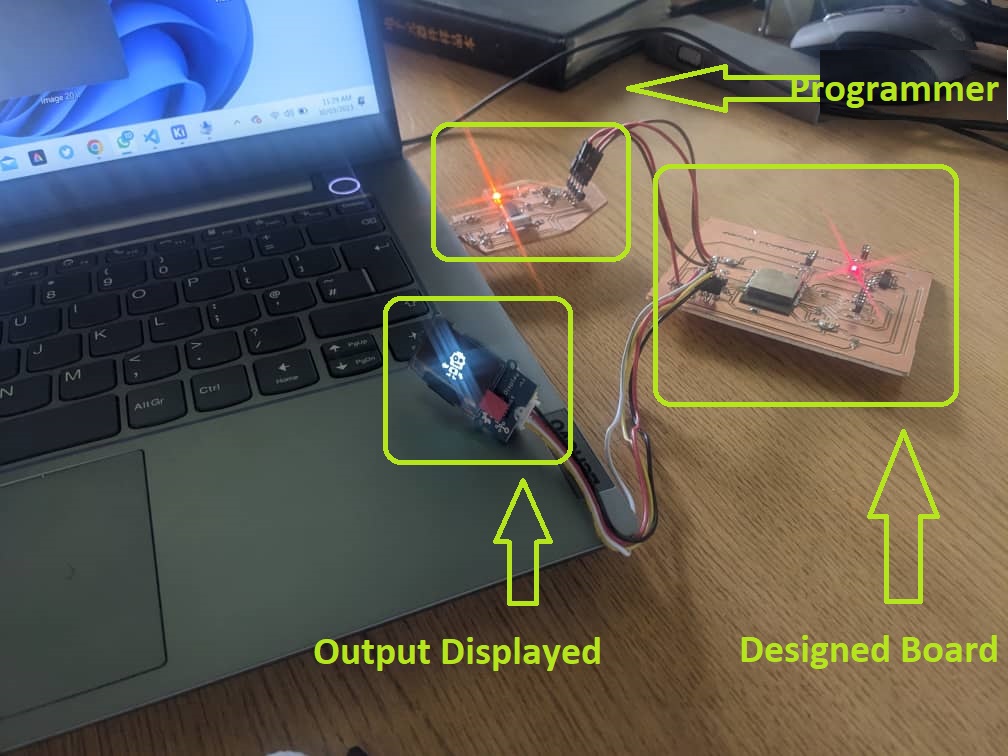
.png) By using a Programmer I made in the week of Electronics Production Here is a picture of my output which display an image in OLED Screen
By using a Programmer I made in the week of Electronics Production Here is a picture of my output which display an image in OLED Screen
 The following Video shows how I displayed my output
If you want to learn about my designers,
kindly click here for downloading my files