Project: A Smart Water Dispenser
A Smart Water Dispenser
Table of Contents
- What does it do?
- Who's done this beforehand?
- What did you design?
- What materials and components were used?
- Where did materials come from?
- How much did materials cost?
- What parts and systems were made?
- Designing the Smart Water Dispenser case
- Cutting with lasercutter and Engraving Machine
- Designing and 3D Printing the RFID Card Holder and Obstacle avoidance sensor
- Circuit and PCB Design
- Embedded Programming
- What questions were answered?
- How the system works (Smart Water Dispenser)
1.What does it do?
The "Smart Water Dispenser" is a system that dispenses a specific volume of water automatically. It works by measuring the water flow rate using a flow sensor and stopping the water flow once the desired volume is reached. Users can access the dispenser by using a smart card that is programmed with their personal information, such as their name, account balance, and water usage history. Project Sketching
2.Who's done this beforehand?
I was inspired by the Company HOW TO ELECTRONICS which was Build DIY Water Filling Machine using Flow Sensor & Arduino and Final Project of Tariq Ahmed Shaikh which is Automatic Hot Water Dispenser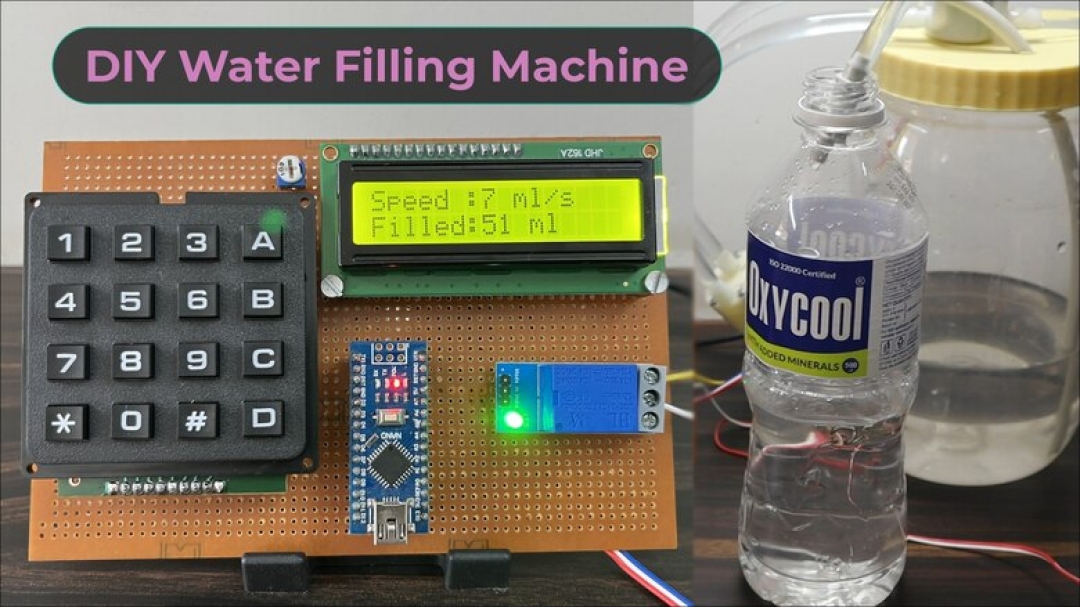
3.What did you design?
I designed a Smart Water Dispenser casing by Laser Cutter. I also designed an embedded system connected to a RFID Module,LCD Screen, Flow Sensor, Three input Buttons,Obstacle Sensor and Solenoid valve wich will used for measuring the water flow rate using a flow sensor and stopping the water flow once the desired volume is reached4. What materials and components were used?
- 1. Microcontroller (ESP-wrom-32): Microcontroller which will be used to control the flow of water.
- 2. Water flow sensor (YF-S201): A flow sensor can be used to measure the amount of water flowing through the dispenser.
- 3. Smart card reader: A card reader can be used to read information from the smart card.
- 4. Solenoid valve: A solenoid valve can be used to control the flow of water.
- 5. LCD screen (20X4): An LCD screen can be used to display the amount of water dispensed and other information.
- 6. Power supply: A power supply can be used to power the microcontroller and other components.
- 7. Button: providing an input interface for users to select the desired dispensing option.
- 8. RFID Card:RFID card can be used to grant access or authorize specific users to dispense water and loading money
- 9. Voltage Regulator IC: A voltage regulator IC is used to regulate and stabilize the voltage (3V)level in a circuit.
- 10. MOSFET: It is a type of transistor that can control the flow of current in a circuit. MOSFETs are often used as switches
- 11. Button_Switch: Is a mechanical switch that is activated by pressing a button.
- 12. Resistors: They are used to control the amount of current or voltage in a circuit, to limit current flow, and to provide specific resistance values.
- 13. Capacitors: Capacitors store electrical energy in an electric field and release it when needed.
- 14. LED_SMD: LEDs are commonly used as visual indicators in electronic circuits
- 15. Connectors: Connectors are mechanical devices used to join or disconnect electrical circuits.
- 16. Buzzer: It is commonly used to generate audible alerts or notifications in electronic systems
- 17. Acrylic: Acrylic Will be used for the enclosure or casing of the dispenser.
- 18. Copper PCB: A Copper PCB (Printed Circuit Board) is a board made of insulating material with a layer of copper
- 19. Obstacle avoidance sensor: is designed to detect an obstacle or the difference in reflective services
5.Where did they come from?
I got all the electronic components and material used in my project from FabLabRwanda6.How much did they cost?
| No | ITEM NAMES | SPECIFICATIONS | QUANTITY | UNIT PRICE(Rwf) | TOTAL PRICE(Rwf) |
|---|---|---|---|---|---|
| 1. | Microcontroller | ESP-wrom-32 | 1 | 15000 | 15000 |
| 2. | Water flow sensor | YF-S201 | 1 | 8000 | 8000 |
| 3. | Solenoid valve | G1/2 AC 220V | 1 | 13800 | 13800 |
| 4. | RFID Reader Module | 13.56Mhz | 1 | 7000 | 7000 |
| 5. | RFID Card | 125Khz | 3 | 1000 | 3000 |
| 6. | MOSFET | IRFZ44N | 1 | 1000 | 1000 |
| 7. | Voltage Regulator | 5V AMS1117 | 1 | 500 | 500 |
| 8. | LCD Display | 20×4 | 1 | 11000 | 11000 |
| 9. | Copper PCB | single side 7x10cm | 1 | 2000 | 2000 |
| 10. | Jumper Wires and others | Male,Female | 1 | 6000 | 6000 |
| 11. | Acrylic | 40x40x3 | 1 | 80000 | 80000 |
| 12. | Power Supply | HLK-5M12 12V 5W | 1 | 10000 | 10000 |
| 13. | Water pipe | Small | 3 | 1000 | 3000 |
| 14. | Capacitors | Small | 3 | 1000 | 3000 |
| 15. | LED | Small | 3 | 1000 | 3000 |
| 16. | Button_Switch | Small | 3 | 1000 | 3000 |
| 17. | Buzzer | 5V | 1 | 500 | 500 |
| 18. | Voltage Regulator IC | 3V | 1 | 500 | 500 |
| 19. | Obstacle avoidance sensor | Infrared | 1 | 2500 | 2500 |
| TOTAL | N/A | 29 | 154,800 | 162,800 |
7.What parts and systems were made?
My system was made by using the differents skills and knowldge we got from fabacademy a. Computer-aided design 2D & 3D Design b.Computer-controlled cutting lasercutter c. Embedded programming ESP-wrom-32 d.Electronics design and production CircuitDesign, PCB Milling and Soldaling compomnents e.Input Devices RFID system and Buttonsand Water flow sensor f.Output Devices LCD Display, and Solenoid valve, Buzzer8.What processes were used?
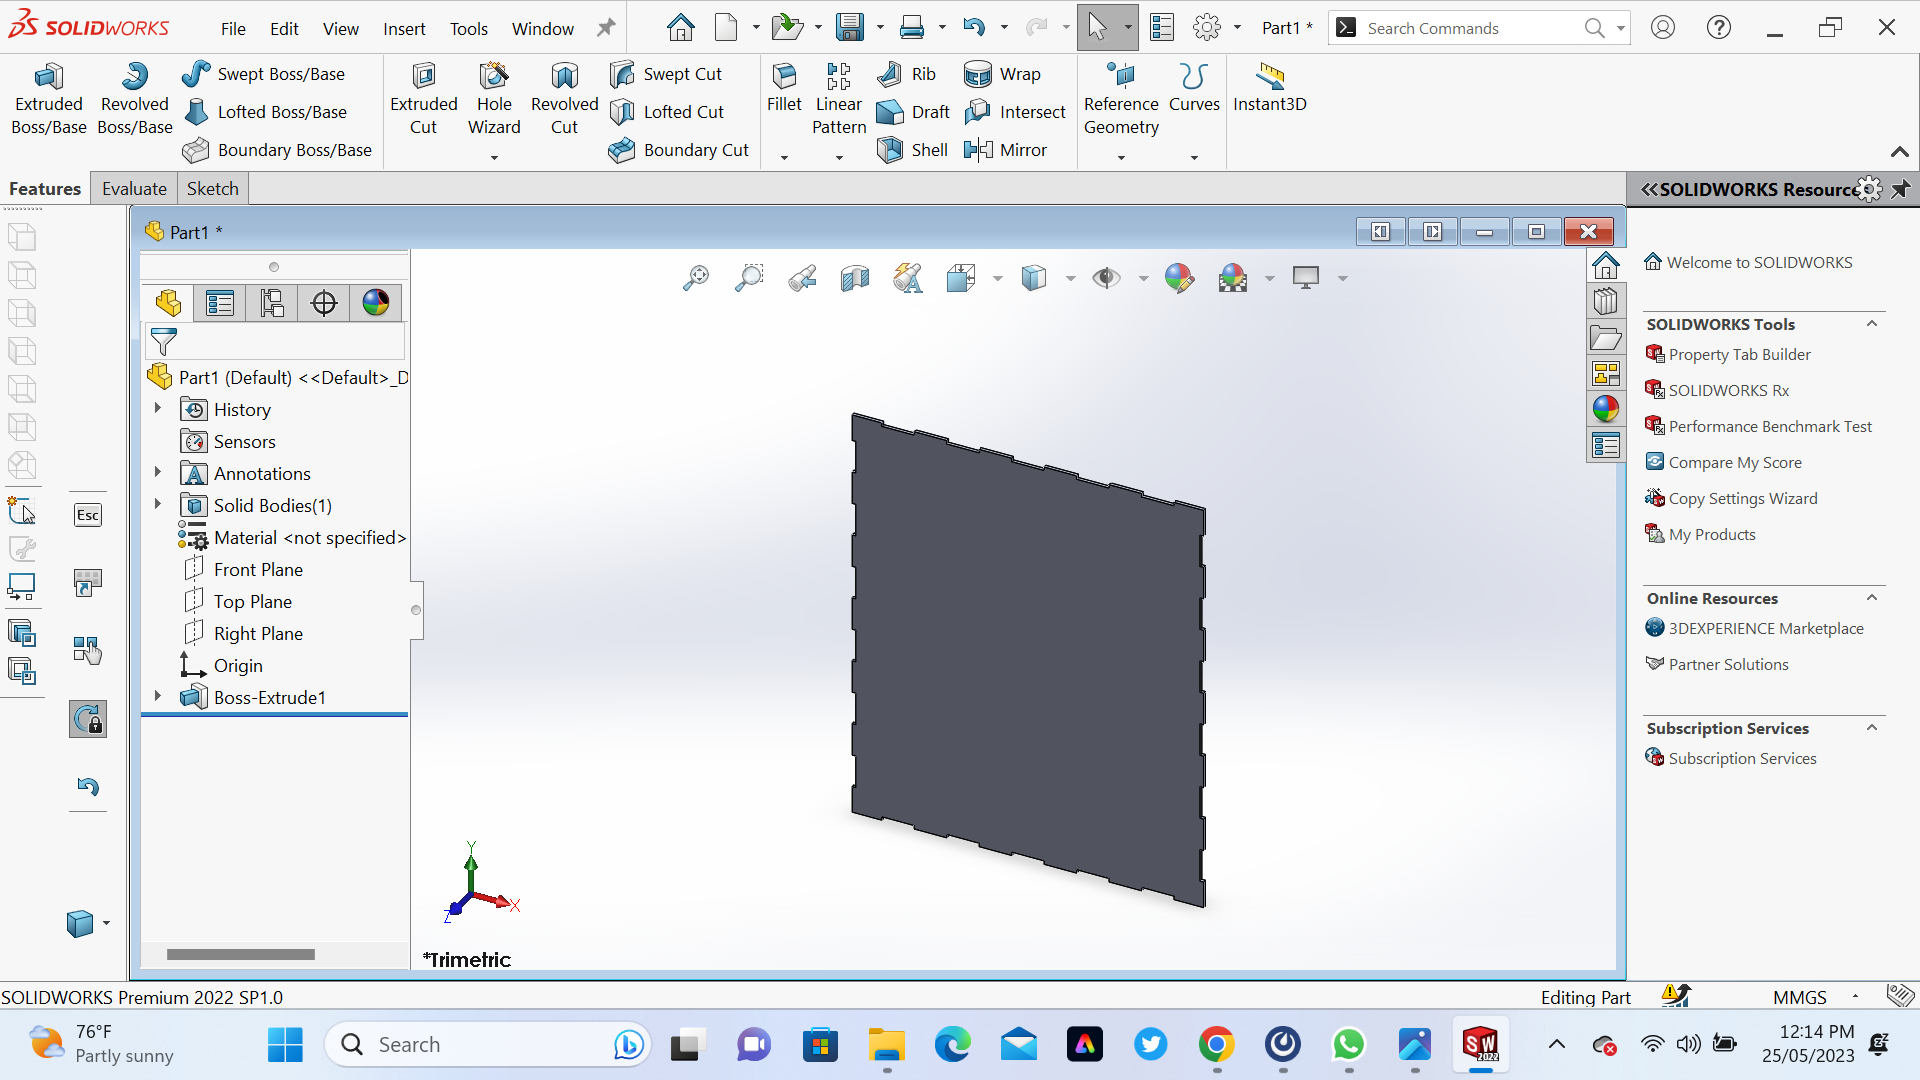
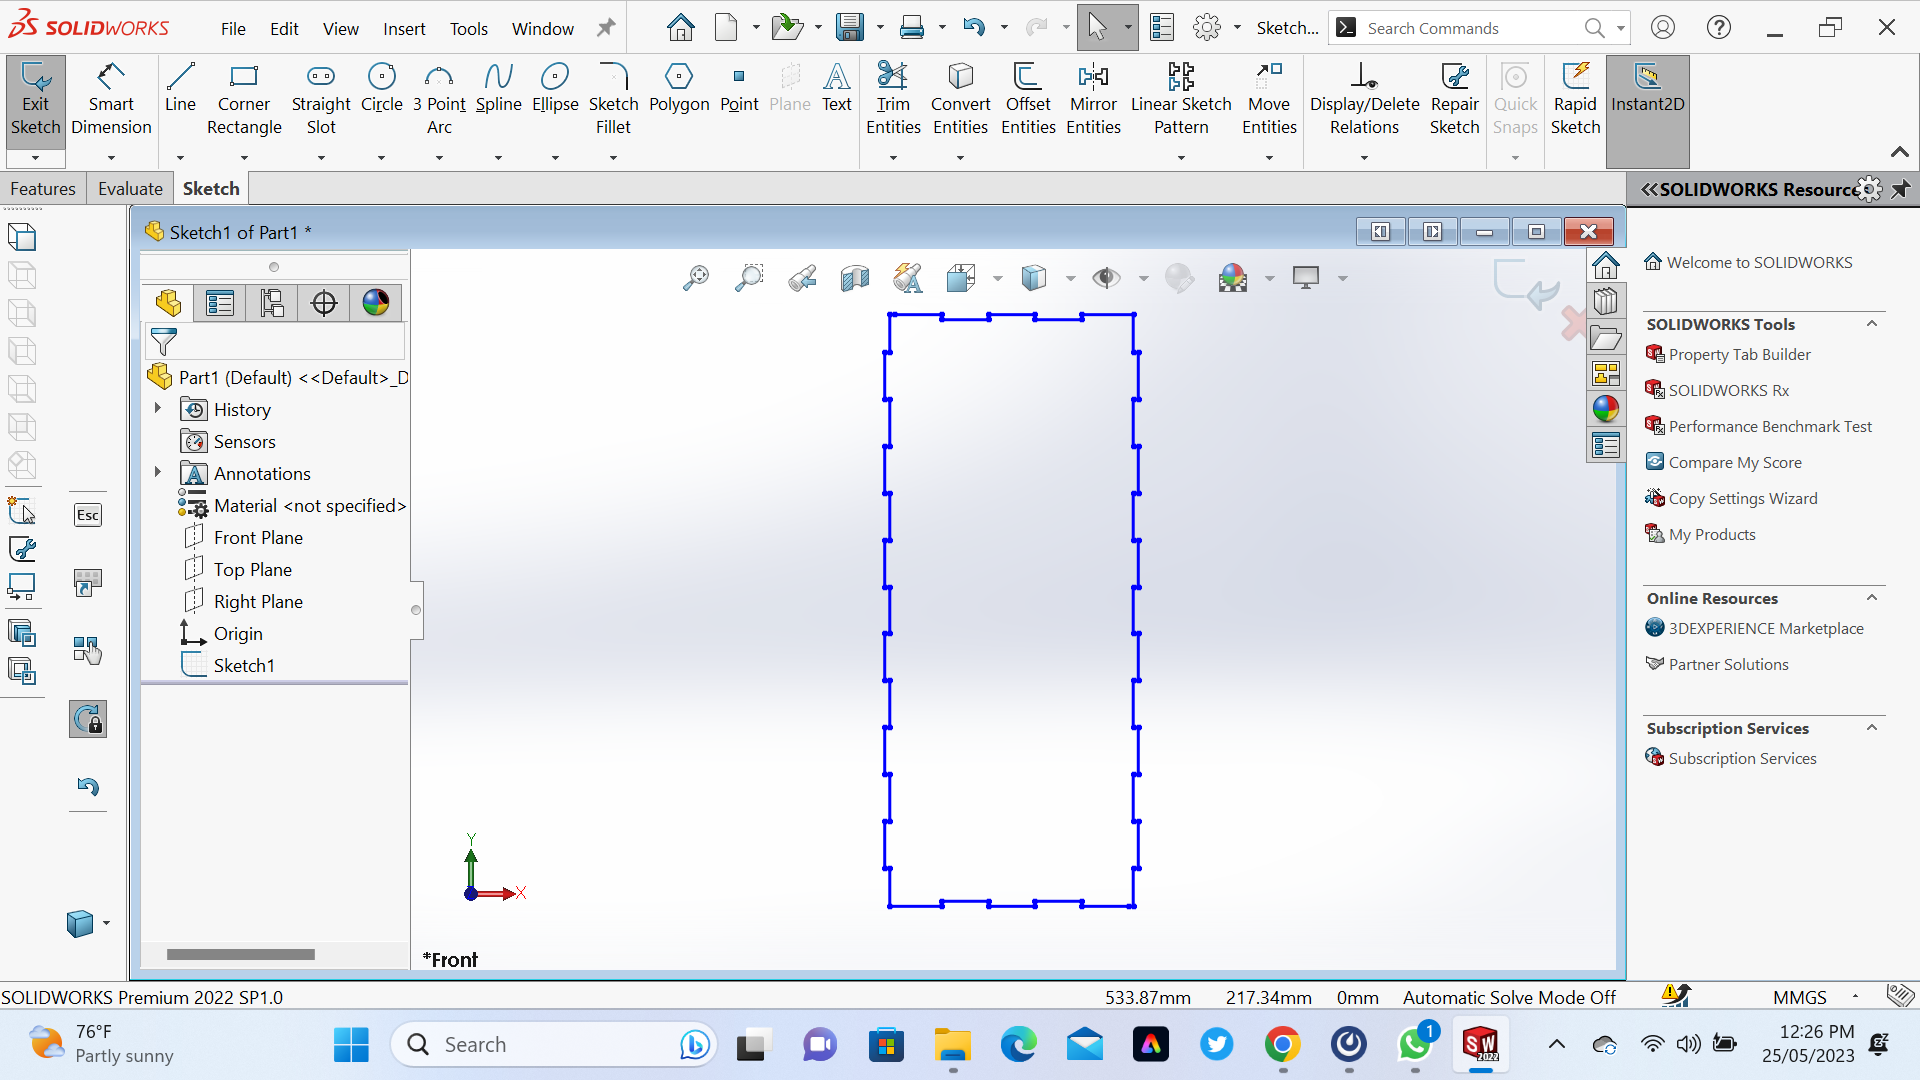
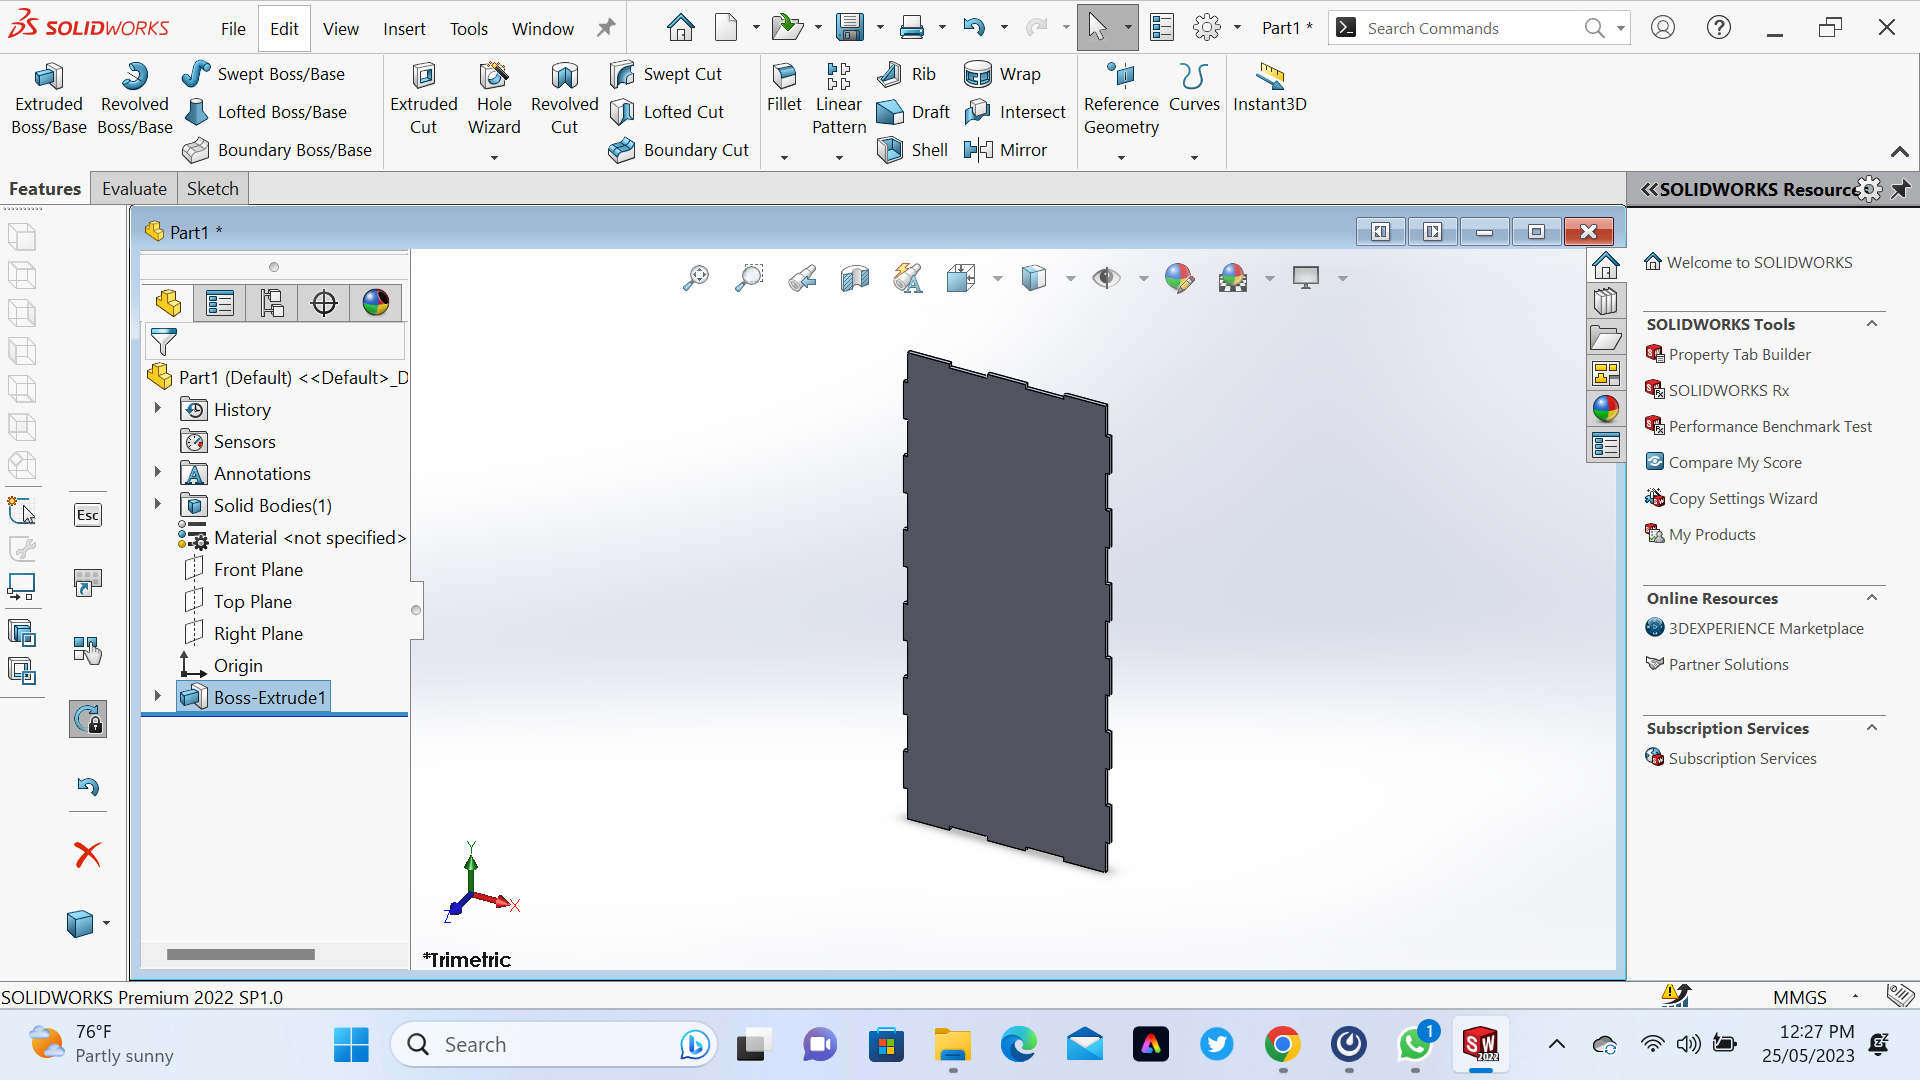
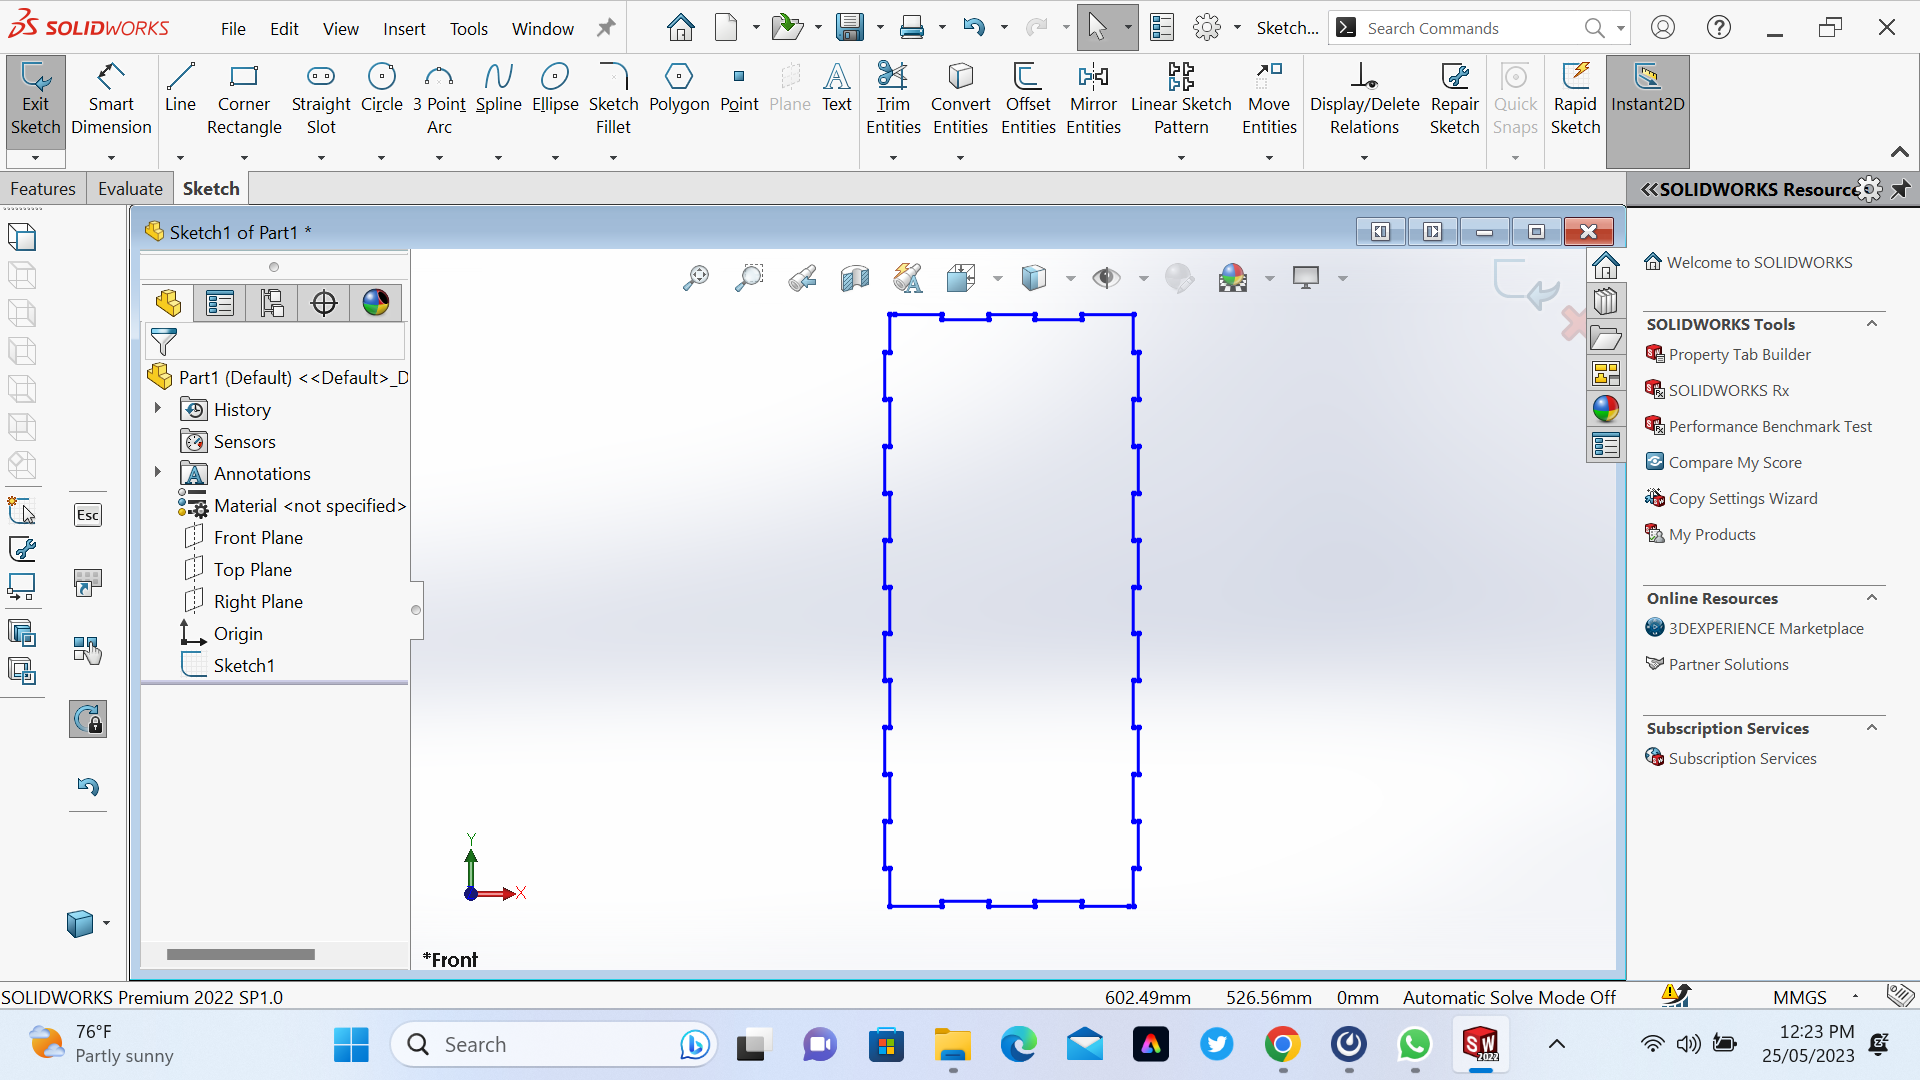
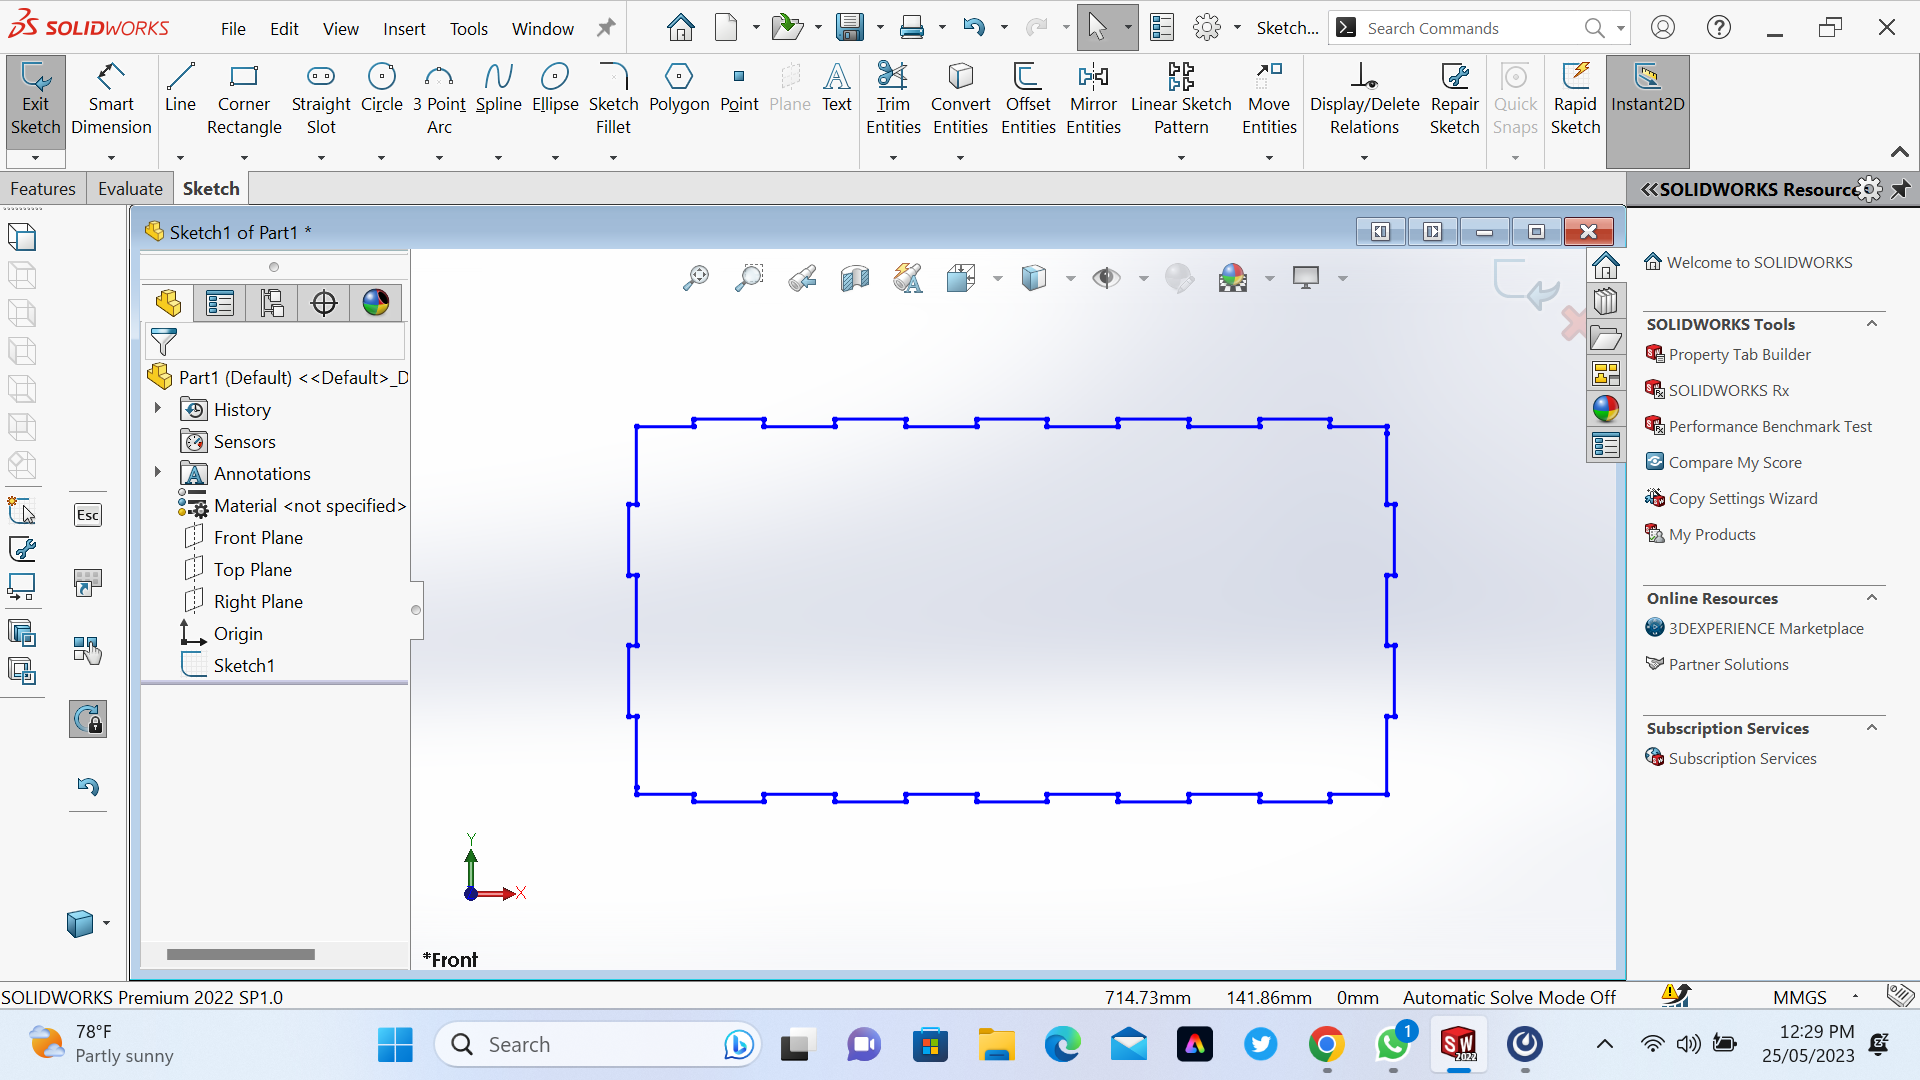
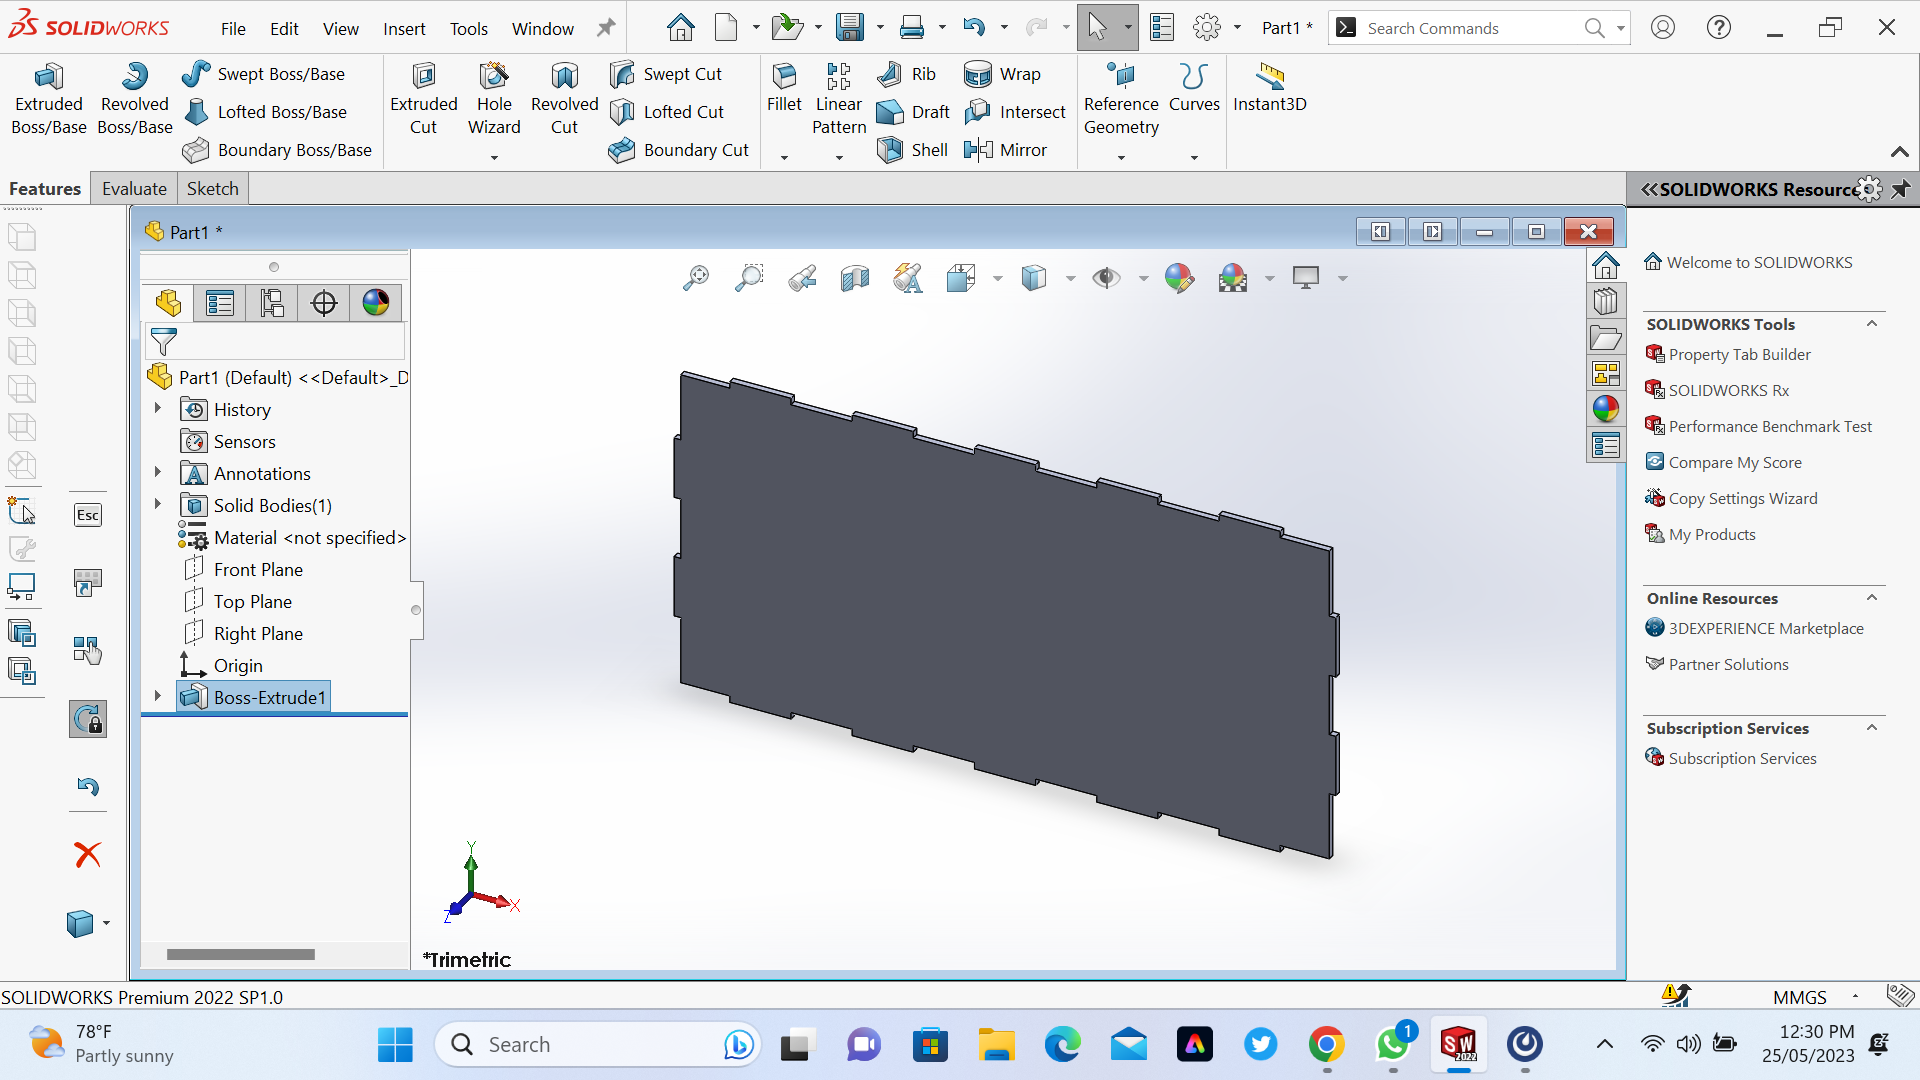
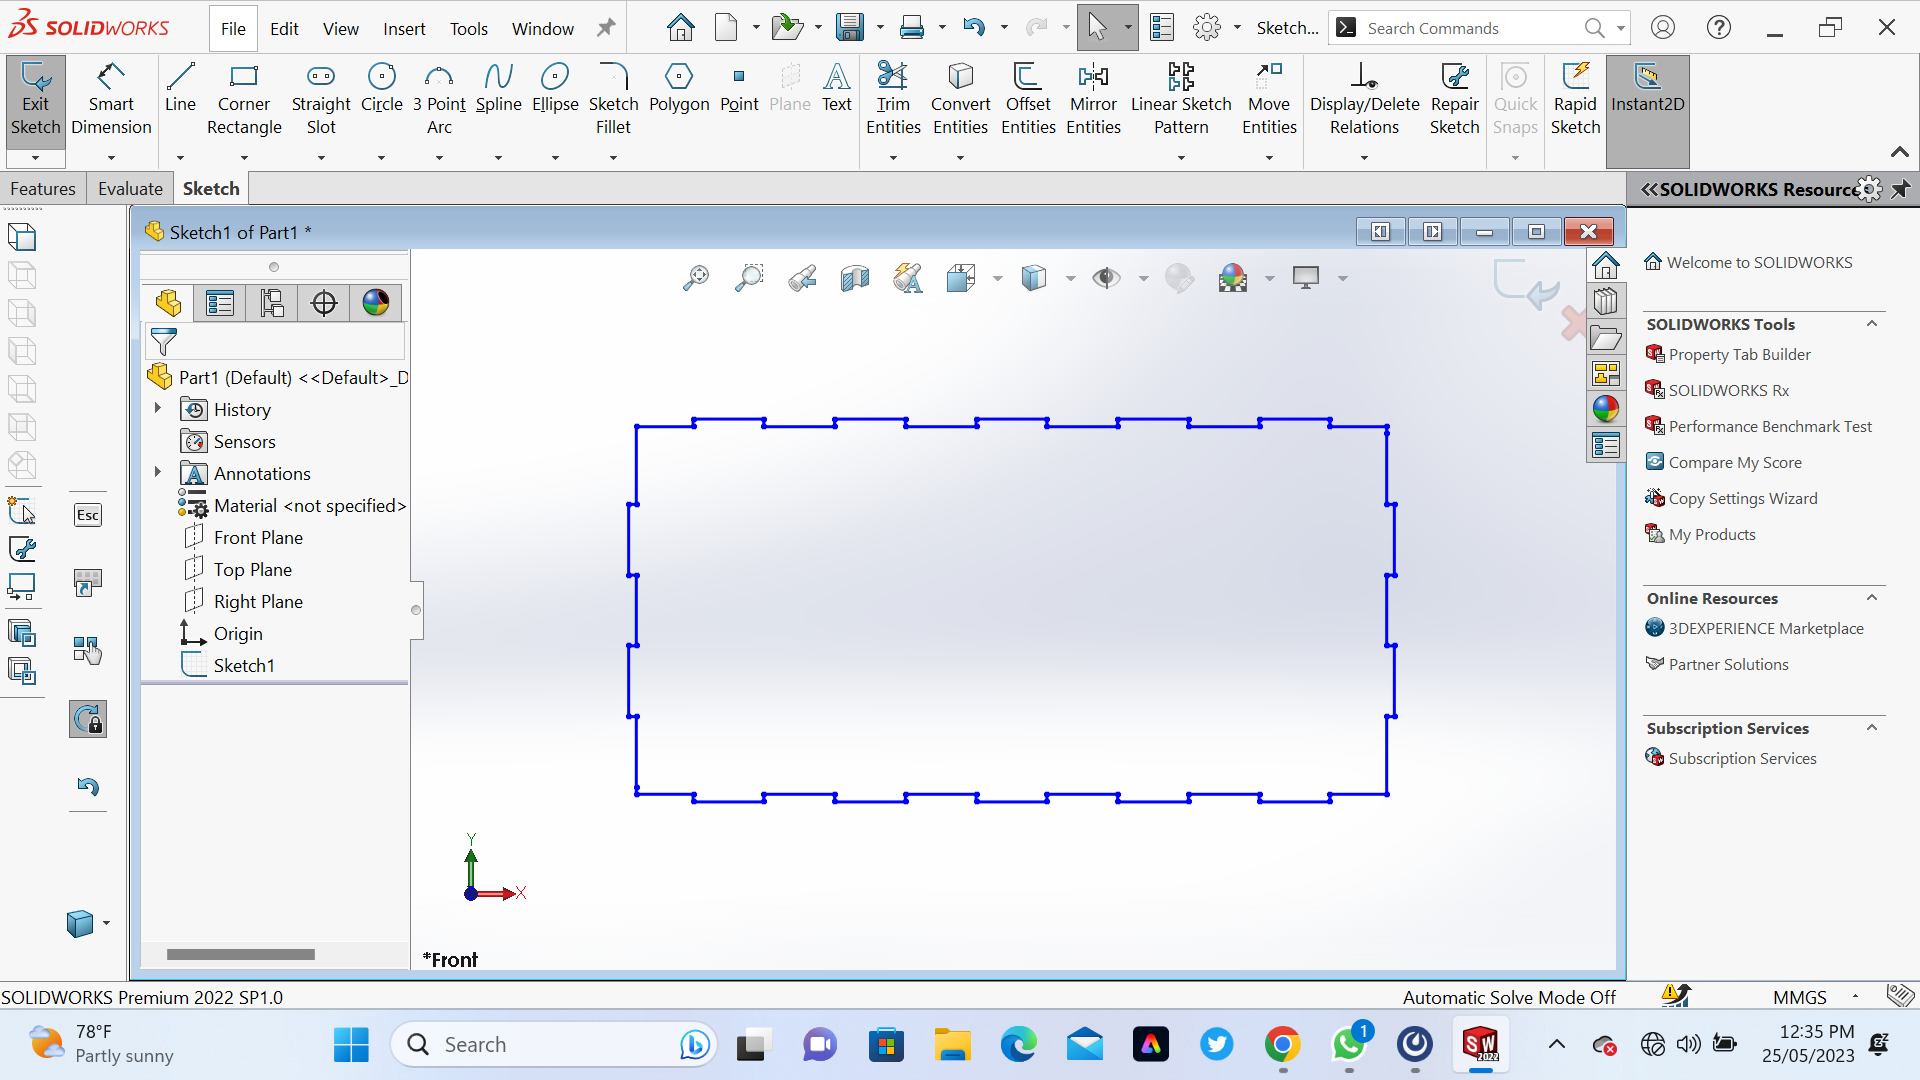
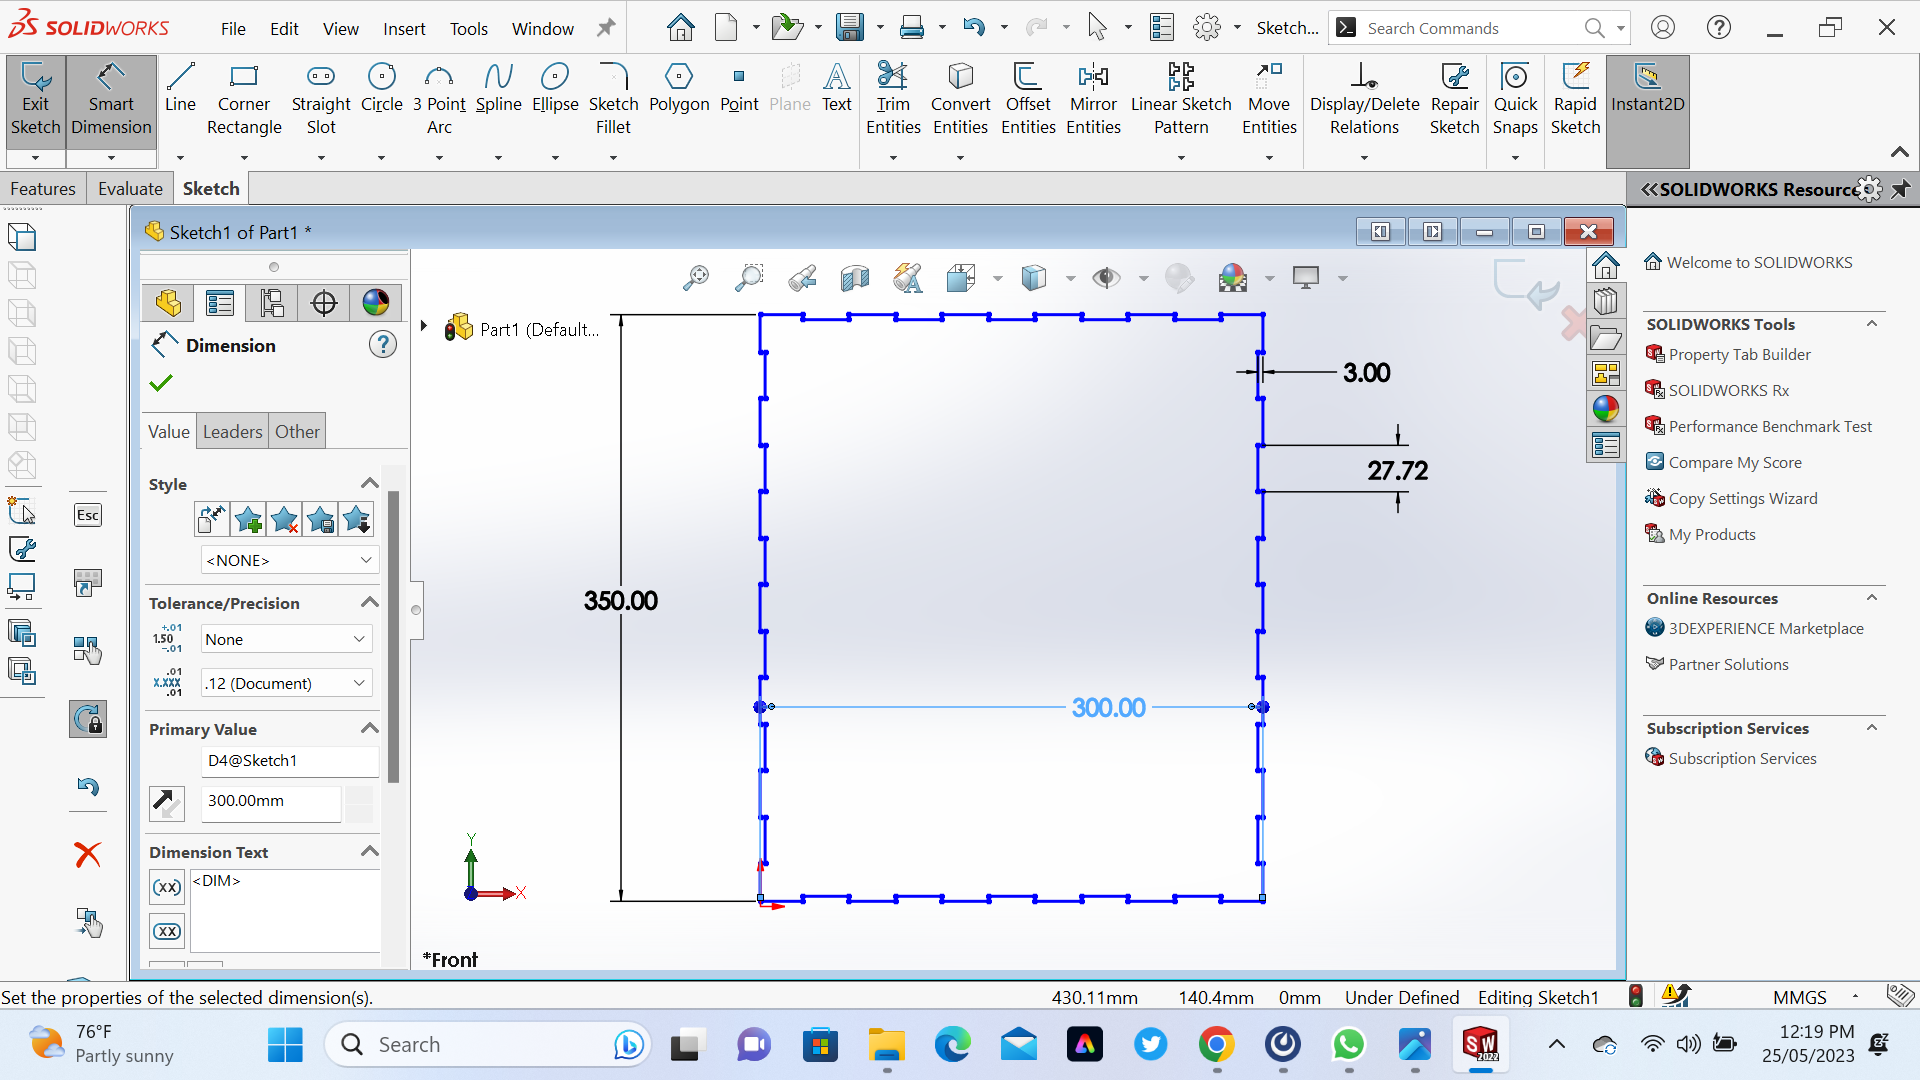
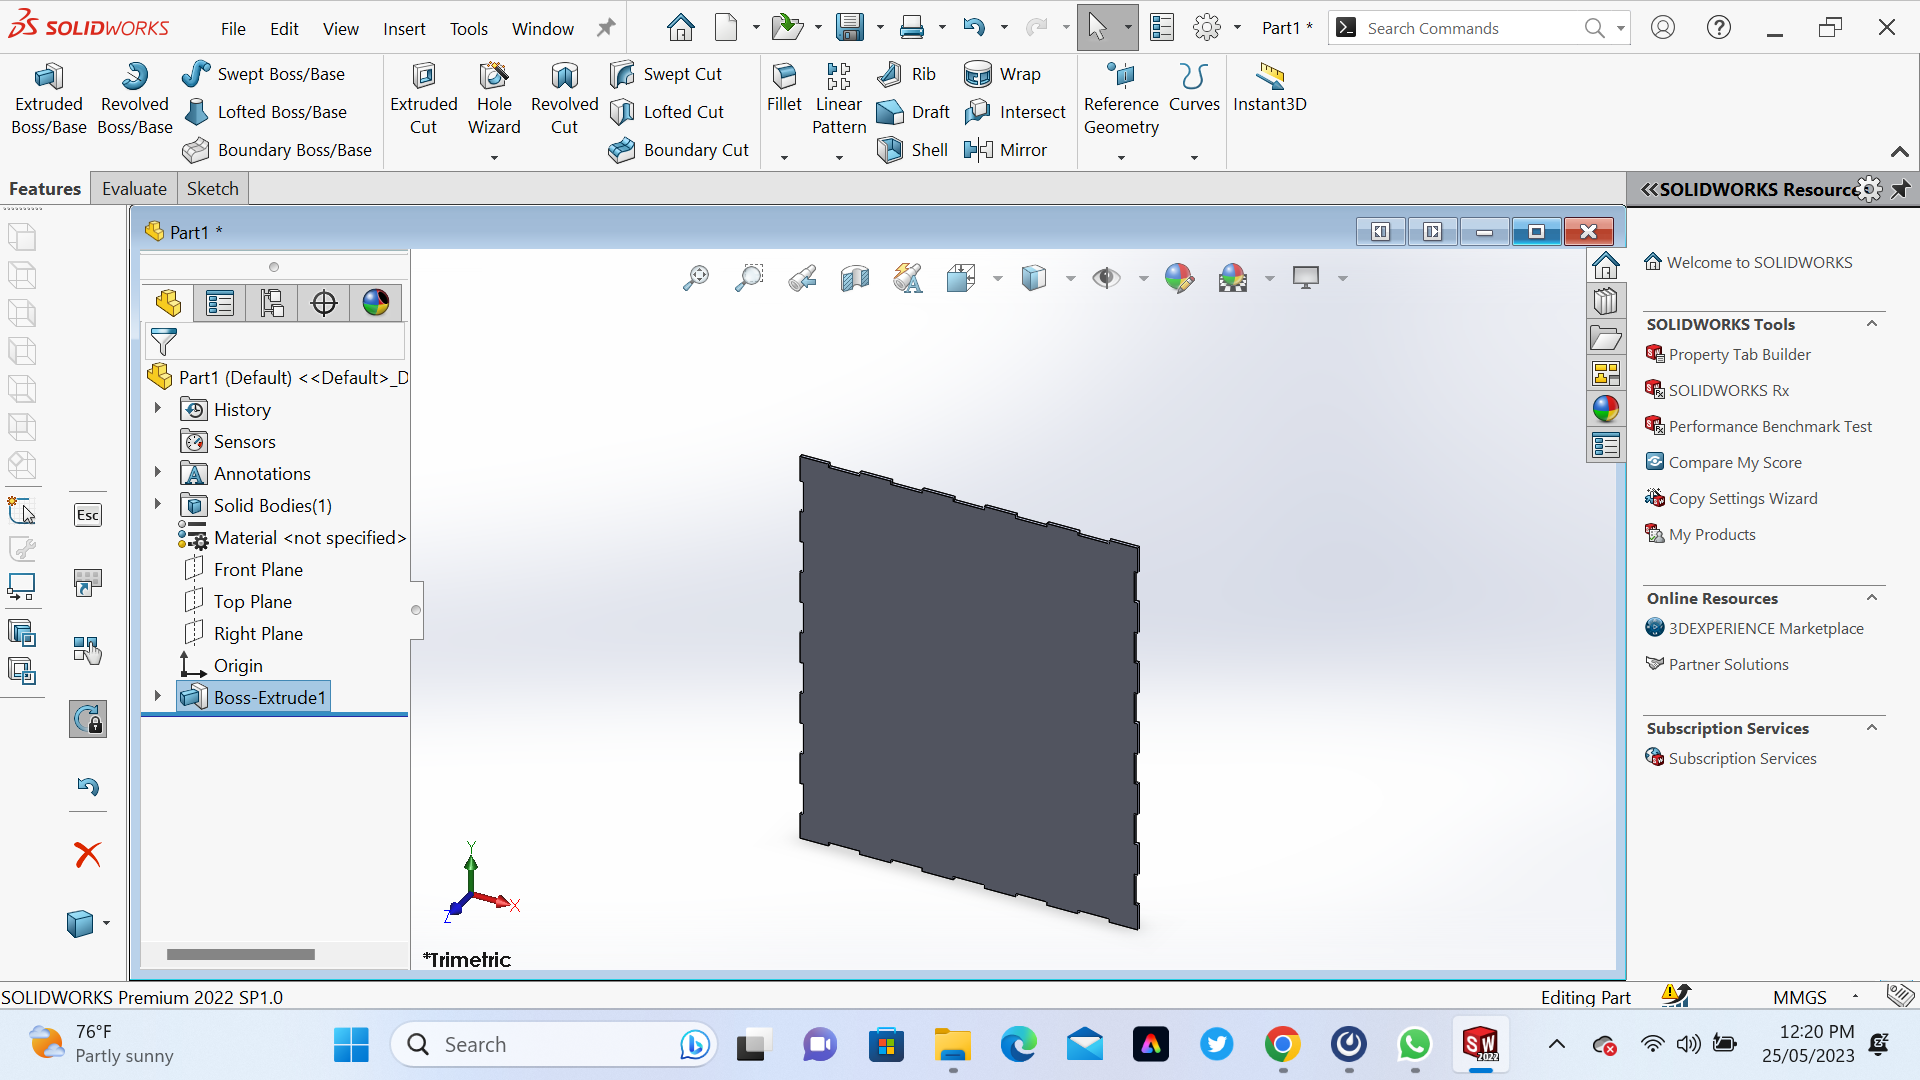
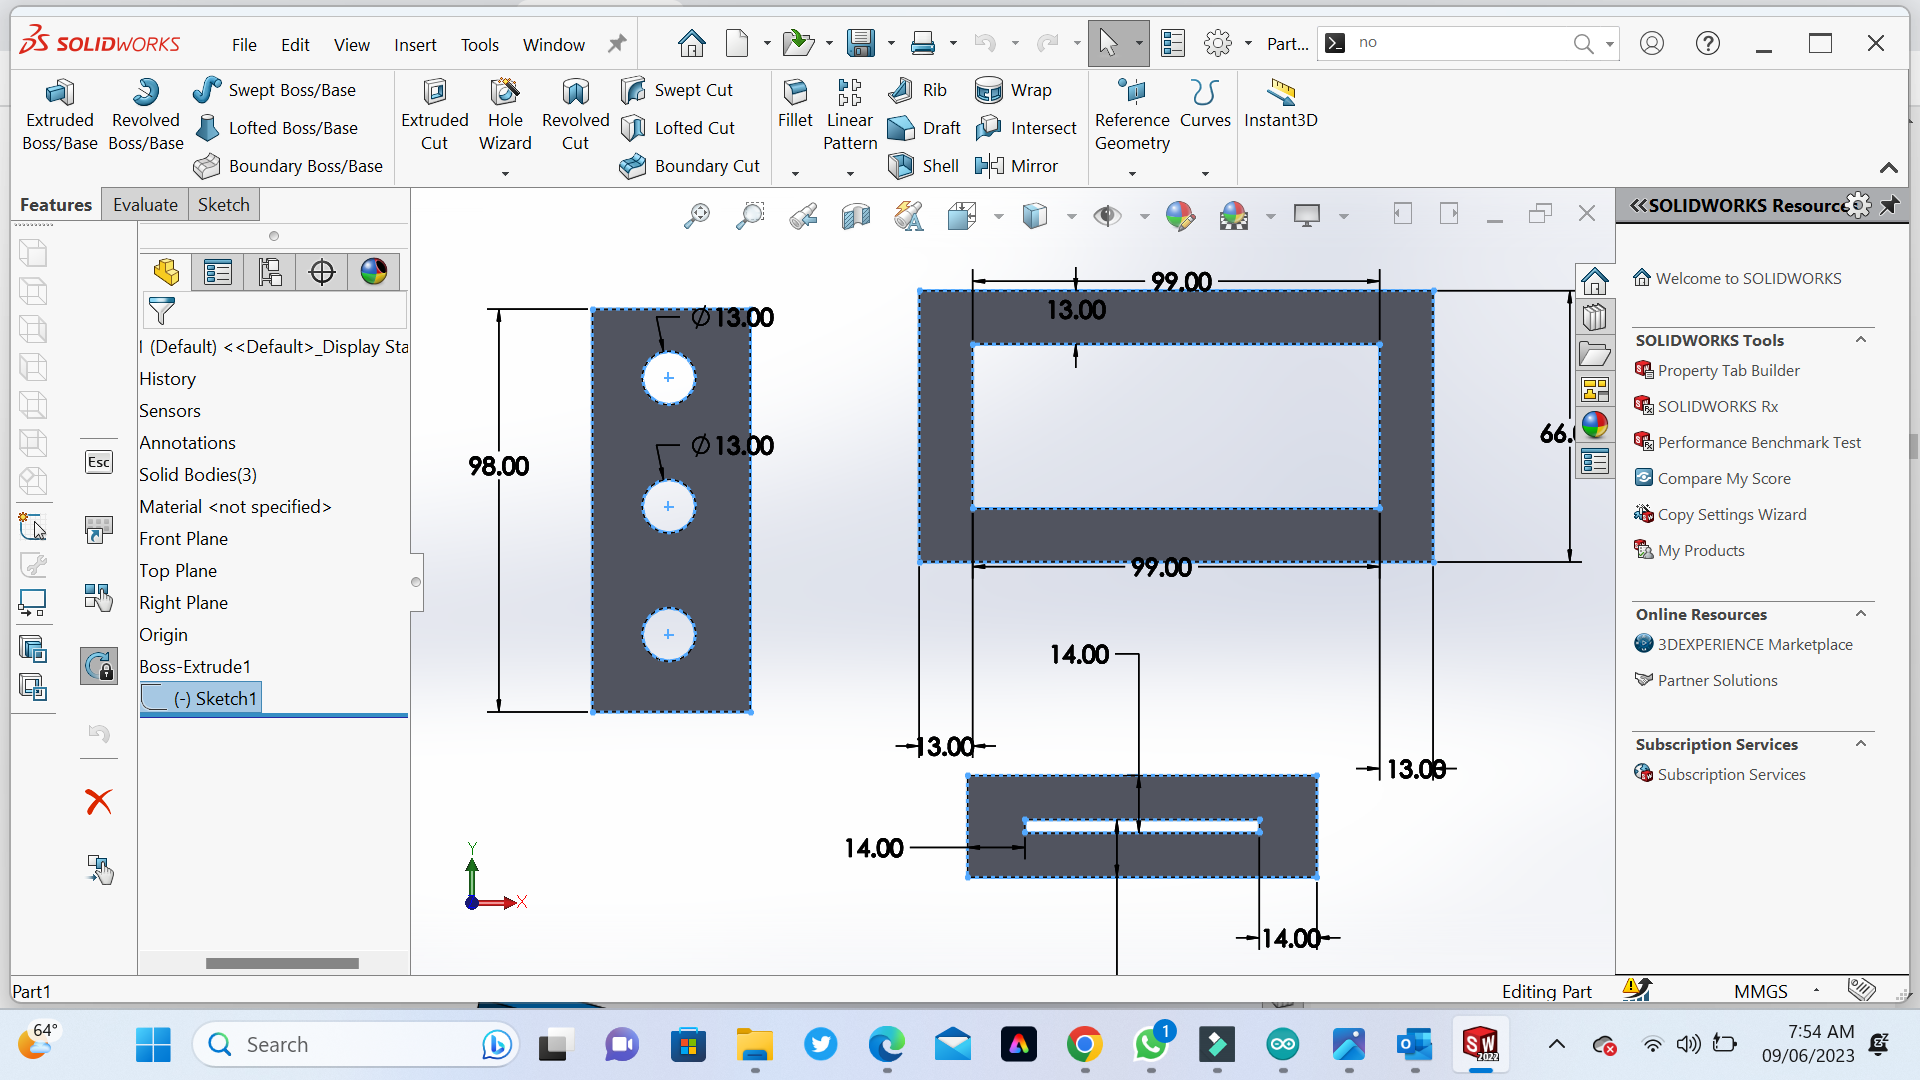
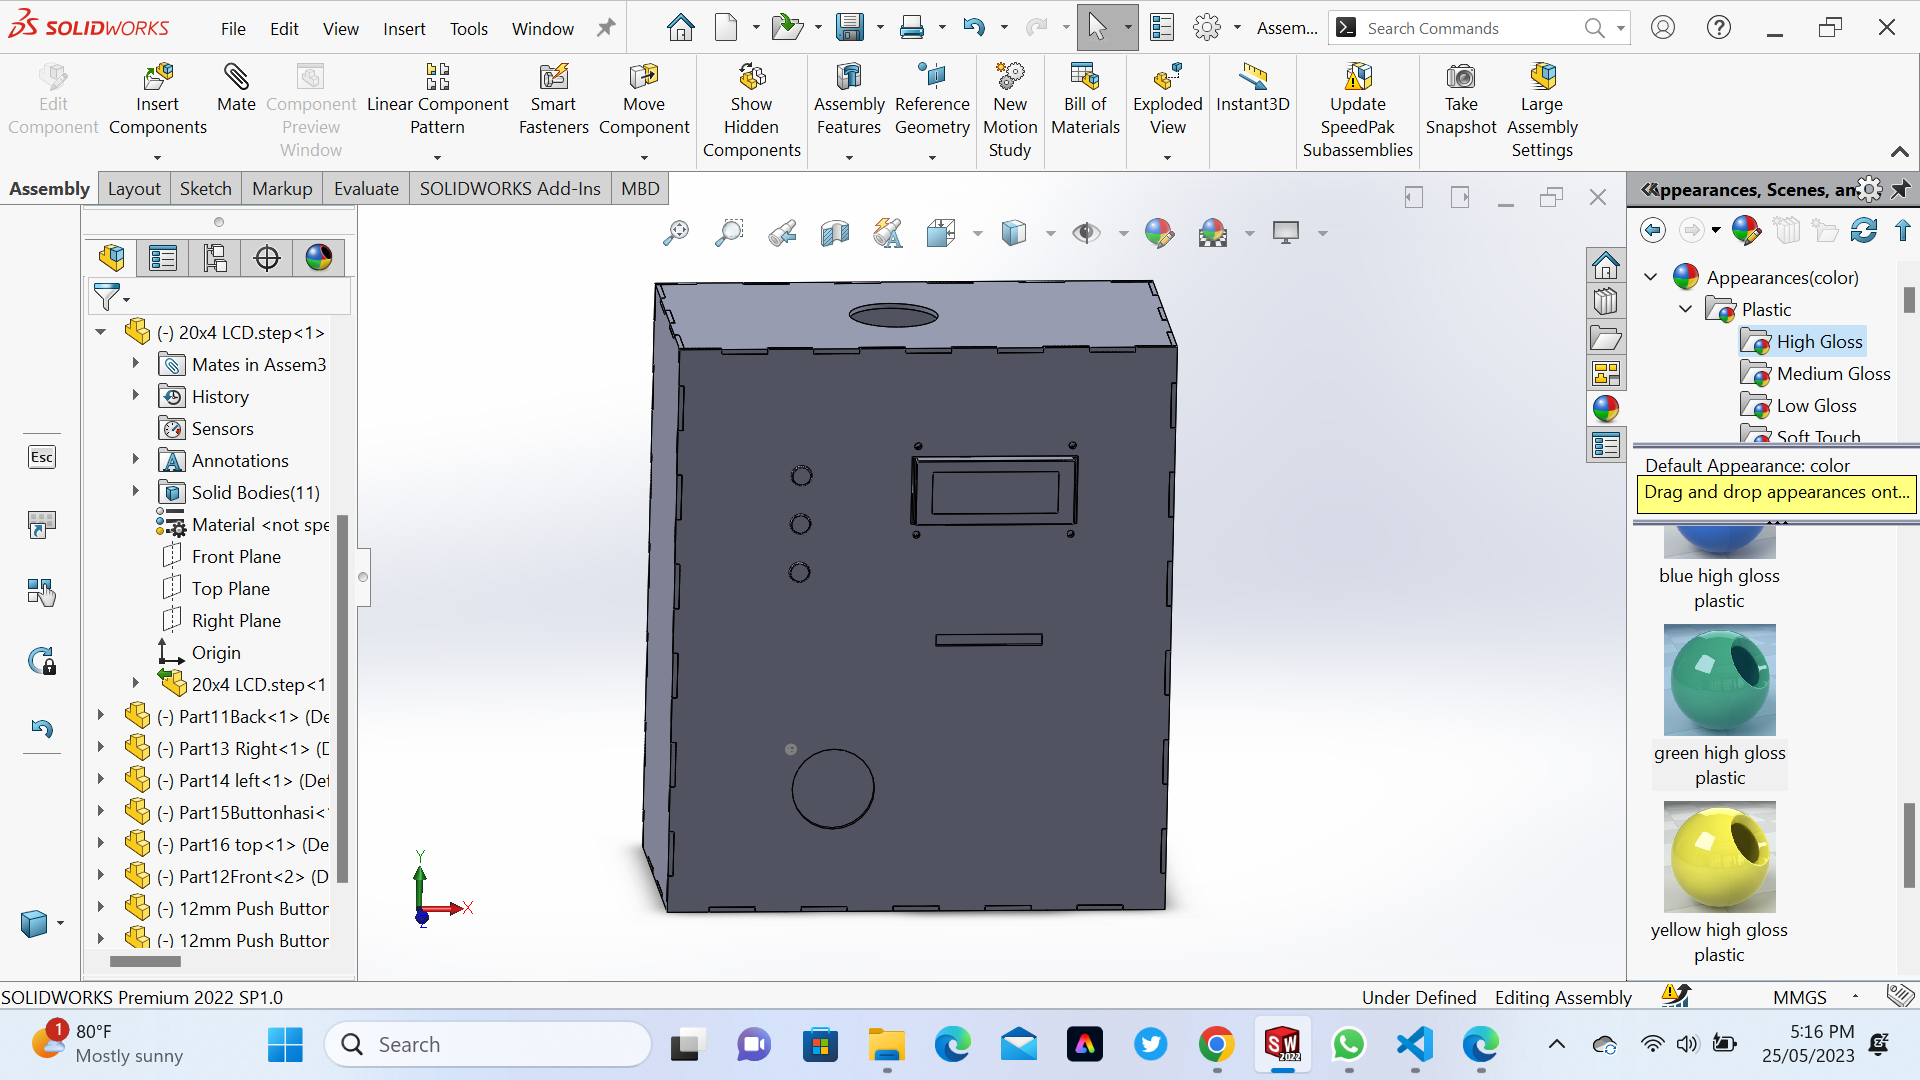
a. Designing the Smart Water Dispenser case
By using skills I gain from Computer-aided design (2D and 3D Design) I designed the smart Water Dispenser case which will hold all system. the below Image shows the process we used. This is Back side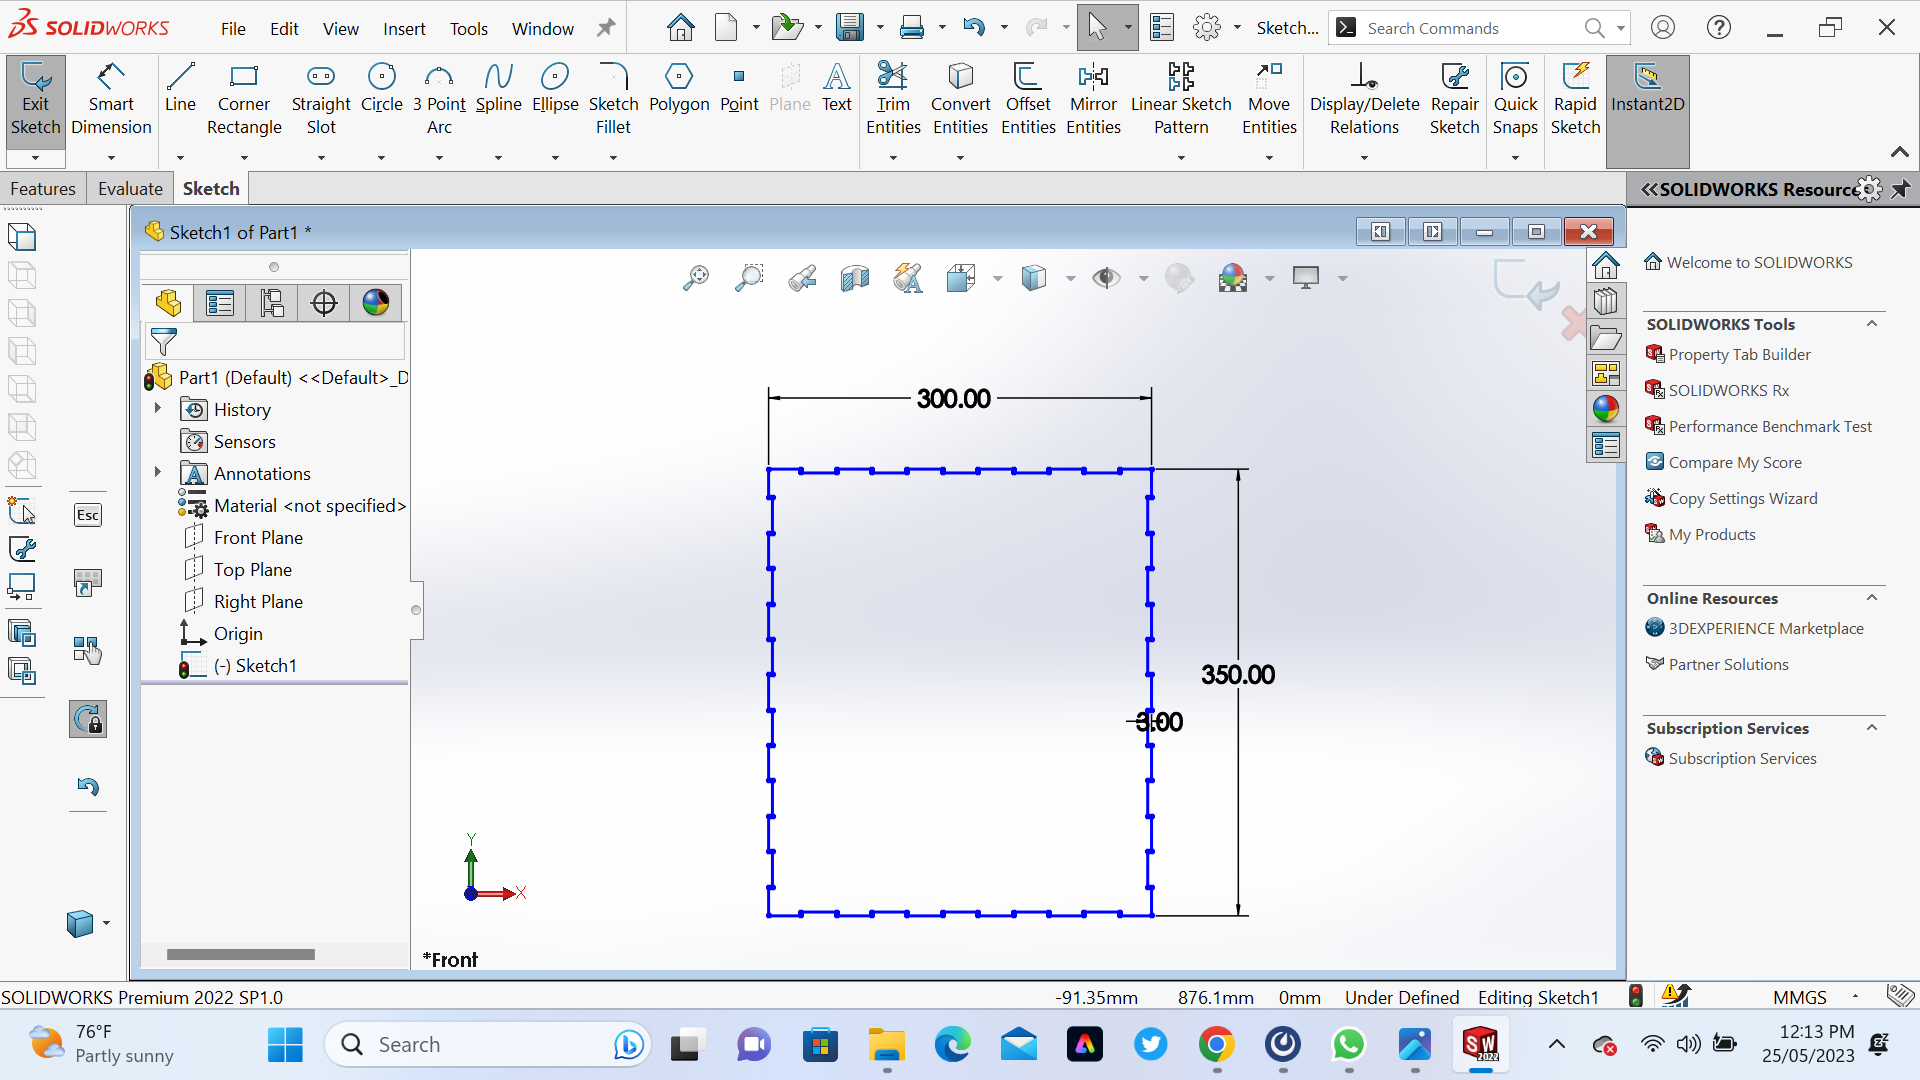
 This is Right side
 This is Left side
 This is Button side
 This is Top side
 This is Front side
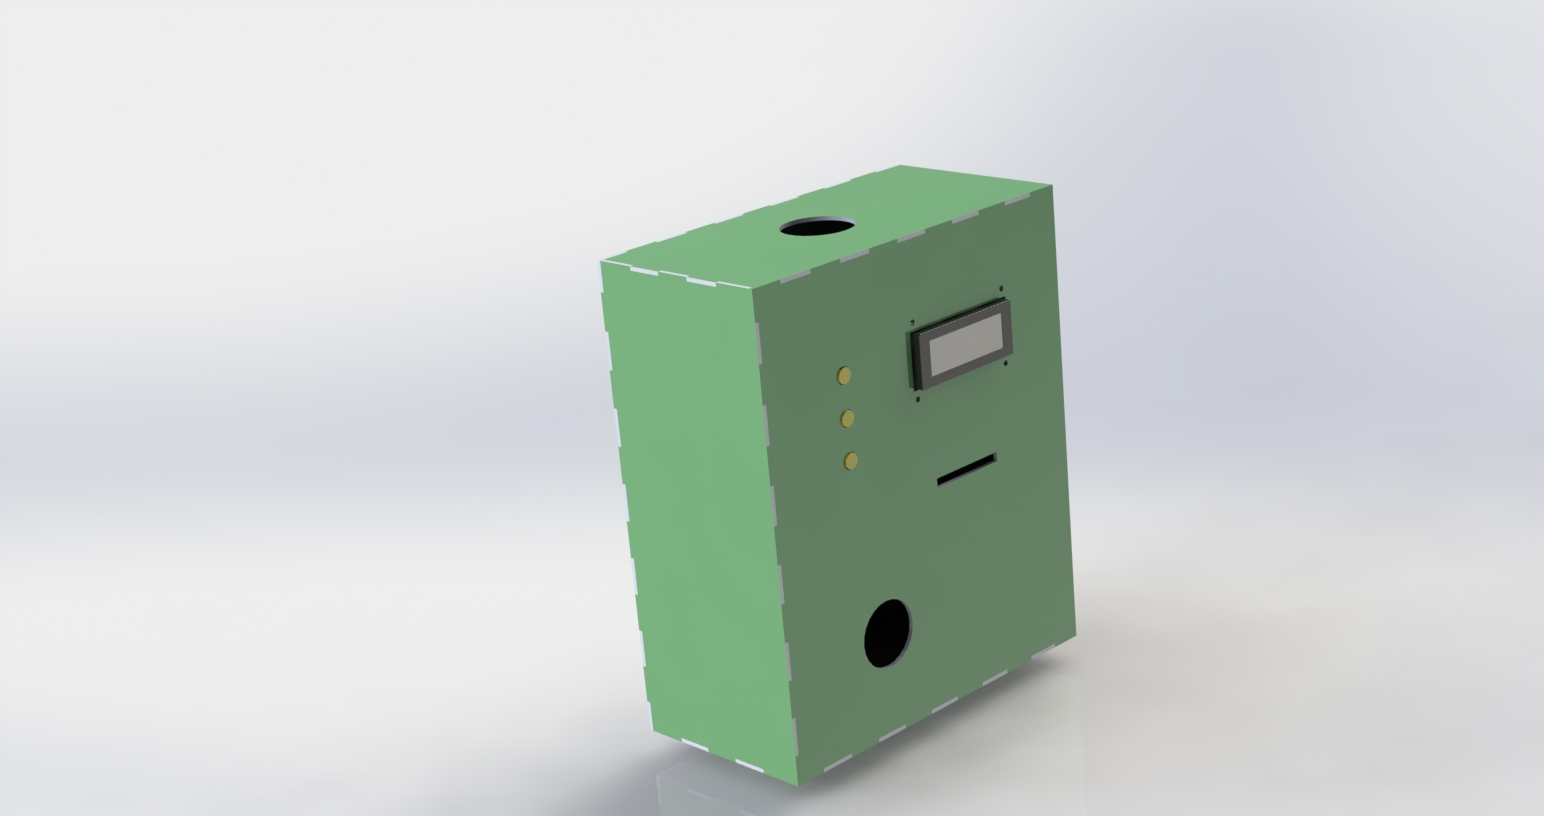
 This is Water Dispenser case after assembling all parts
.png)
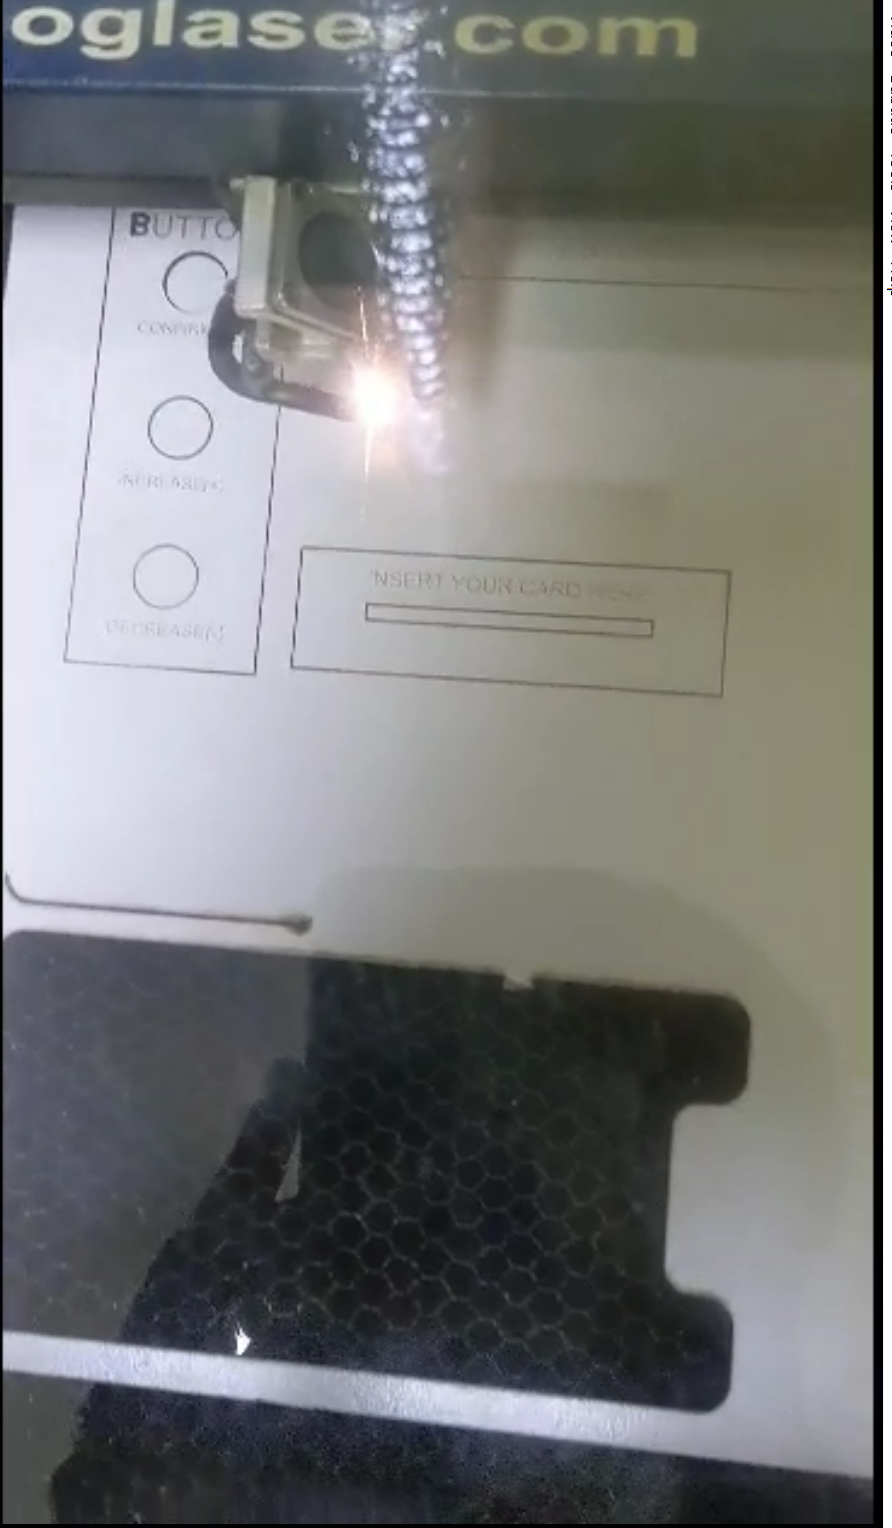
b. Cutting with lasercutter and Engraving Machine
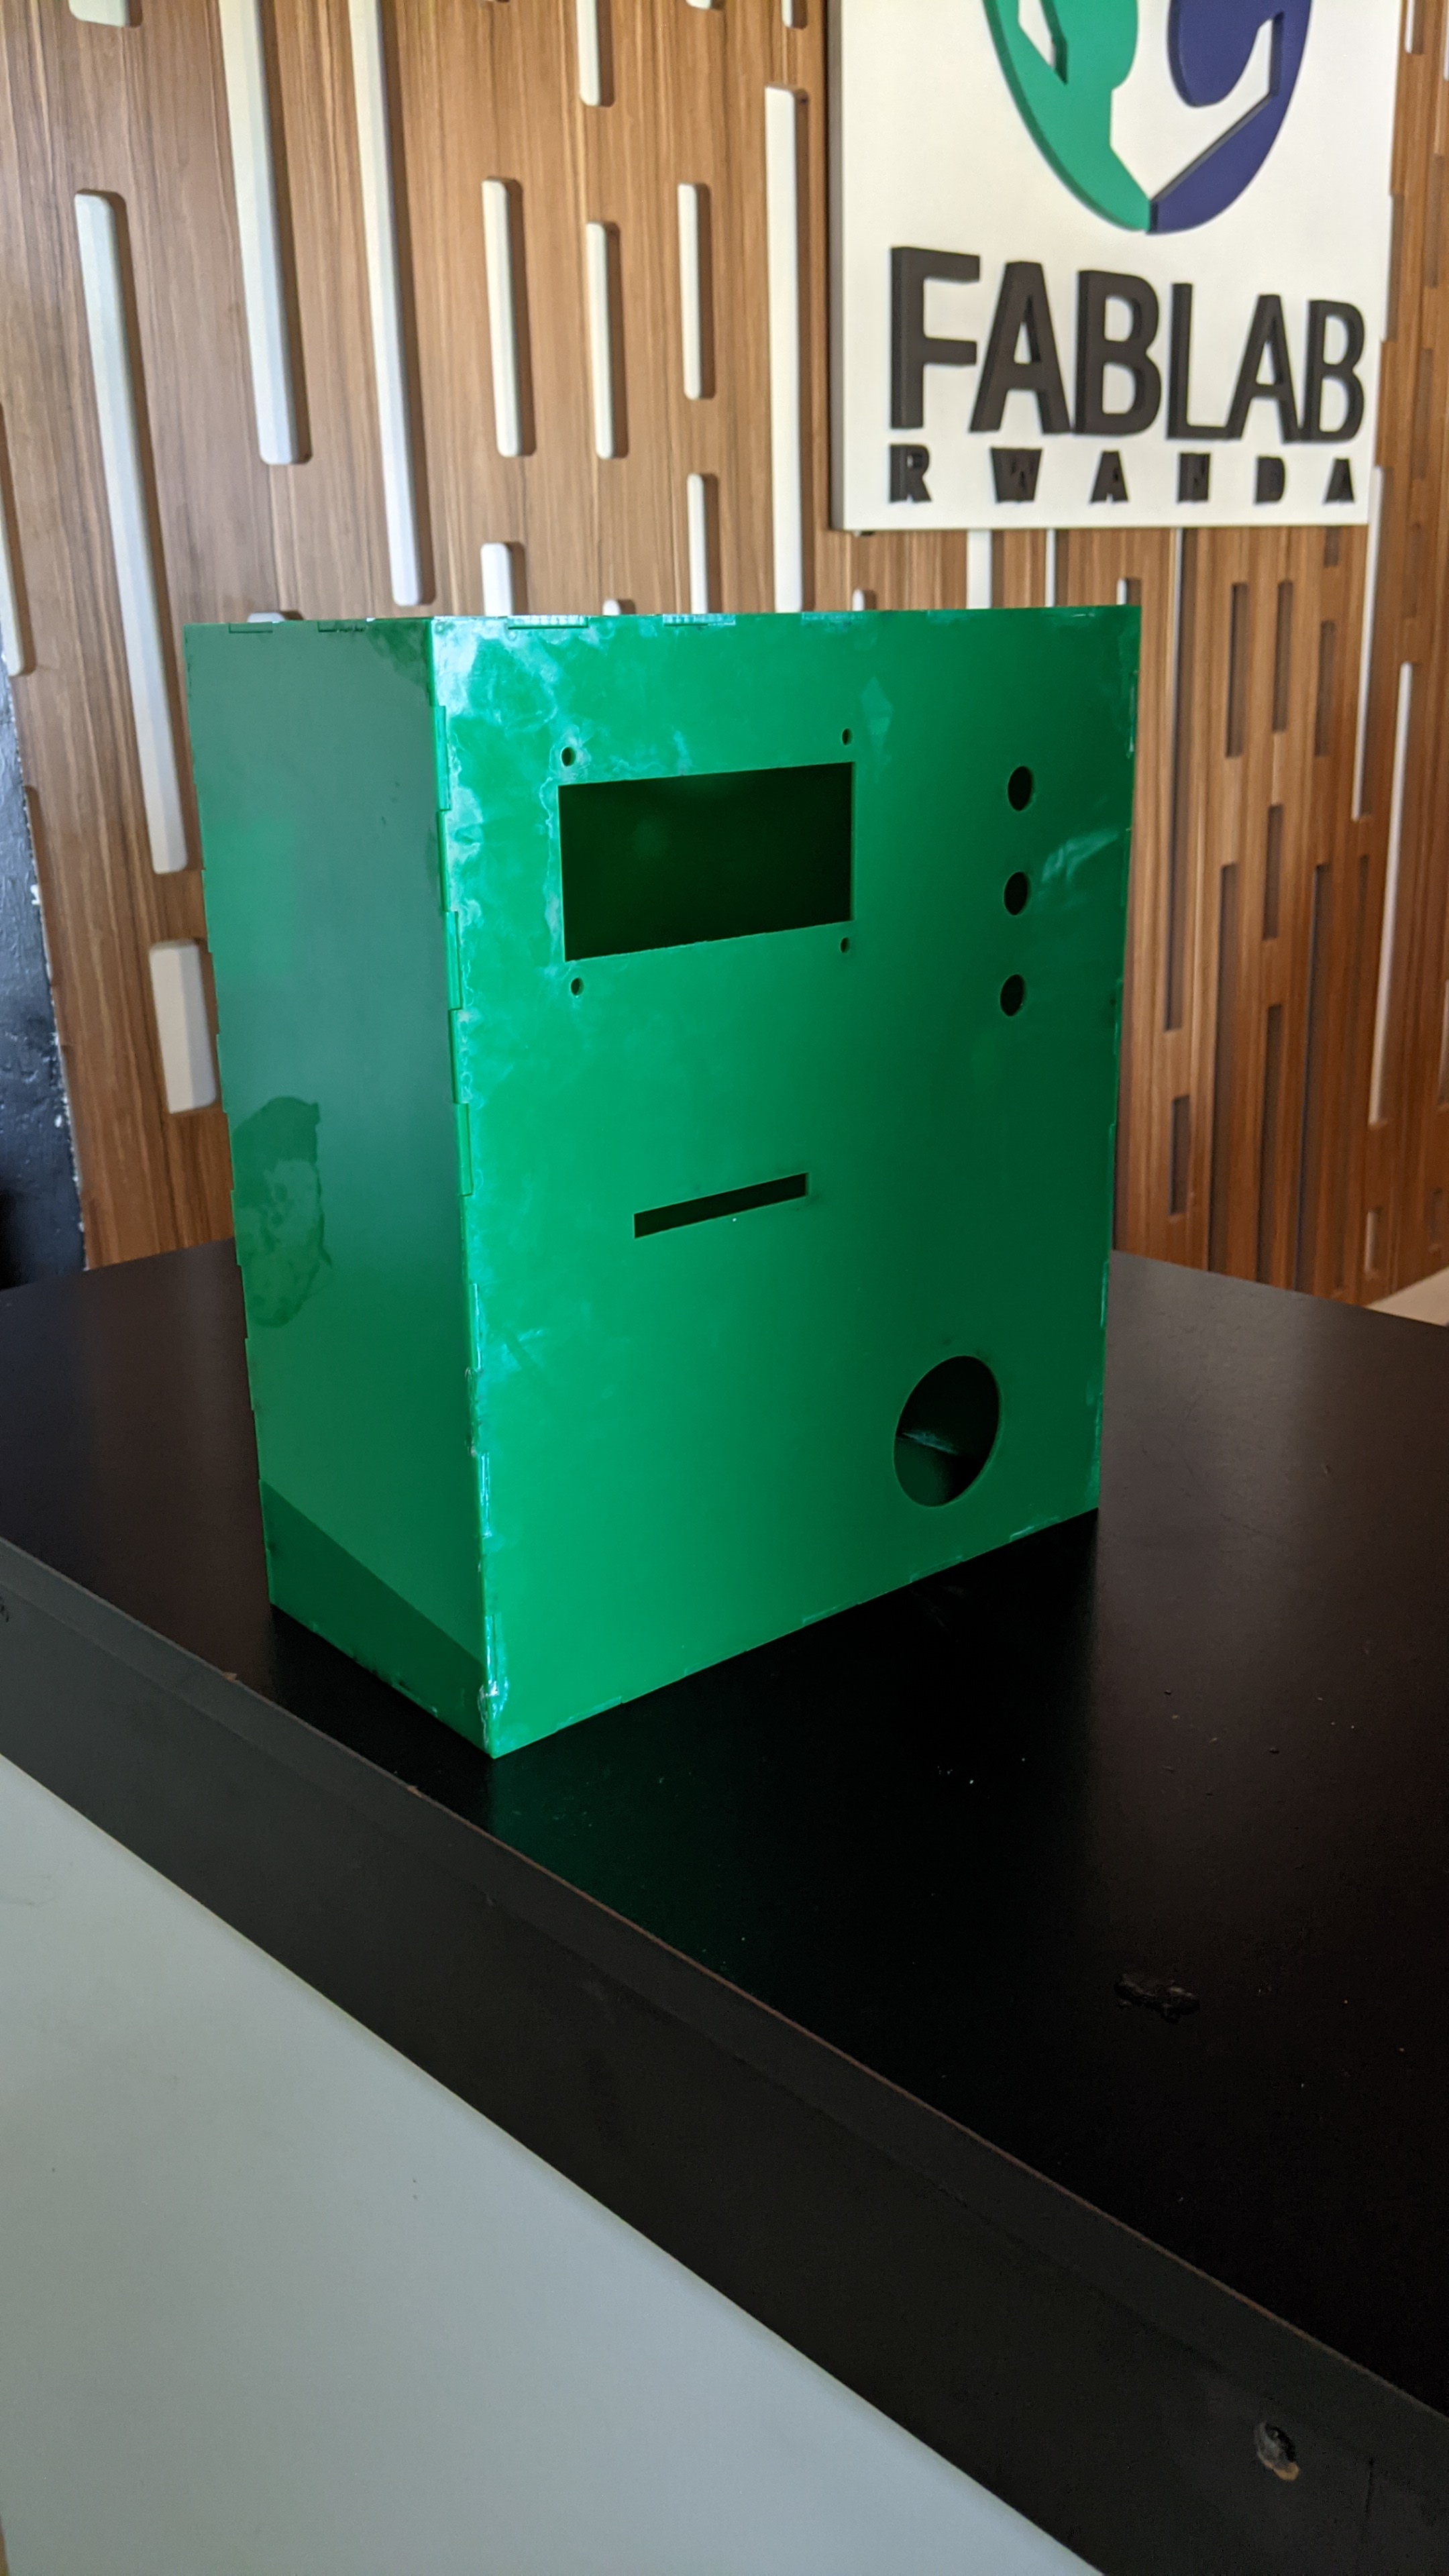
By using skills I gain from Computer-controlled cutting (Laser Cutter) I Cutted the smart Water Dispenser case which will hold all system. the below Image shows the process we used. This is Water Dispenser case after Cutting on lasercutter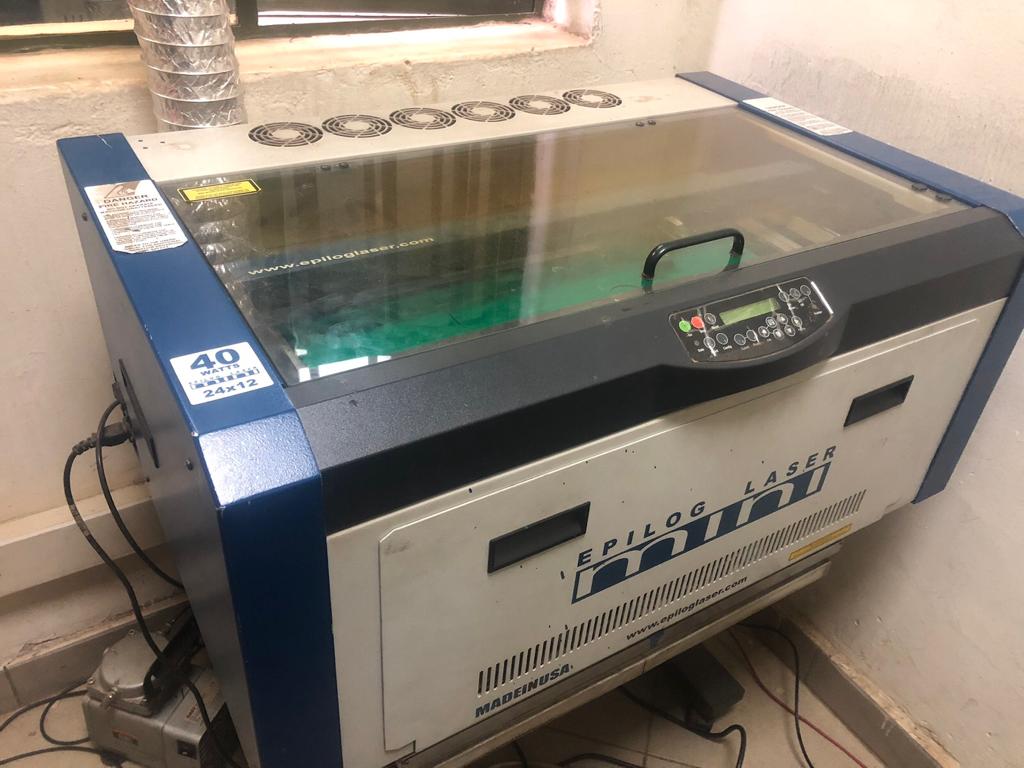
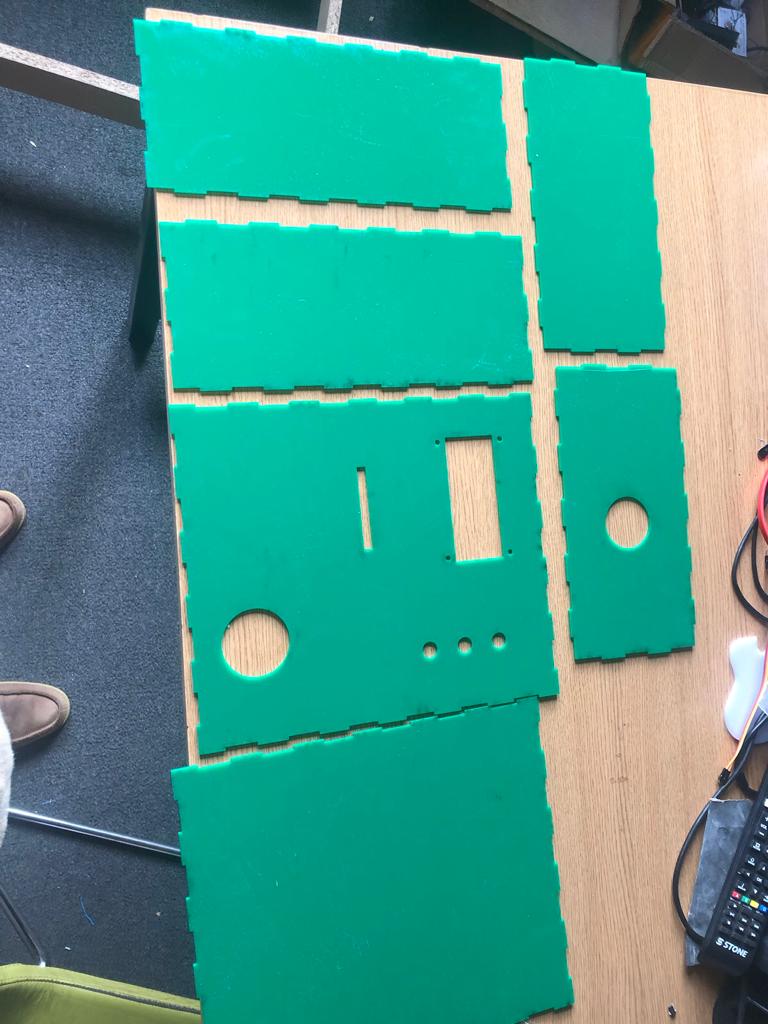
 After assembling all parts
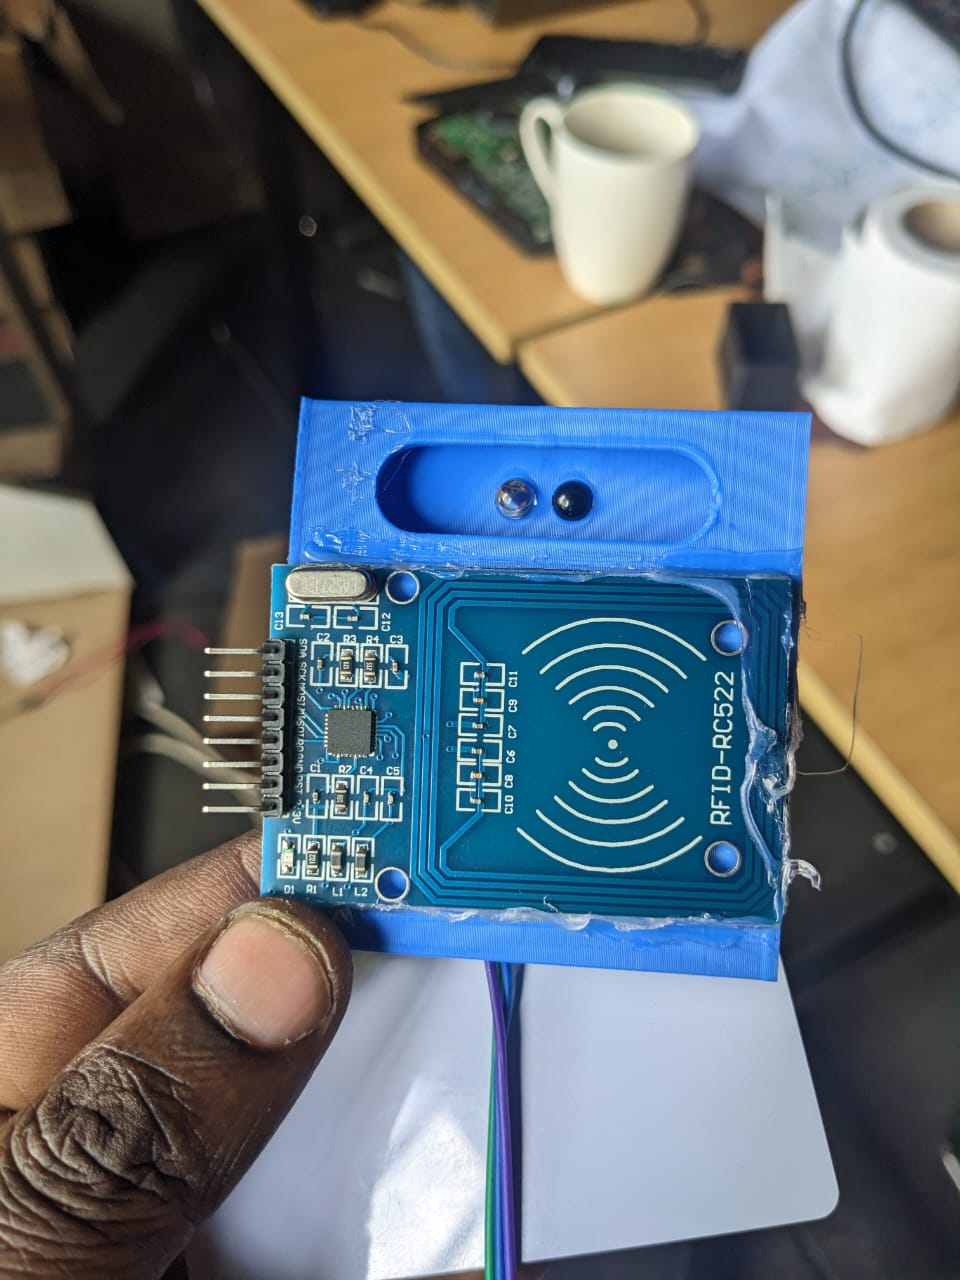
c. Designing and 3D Printing the RFID Card Holder and Obstacle avoidance sensor
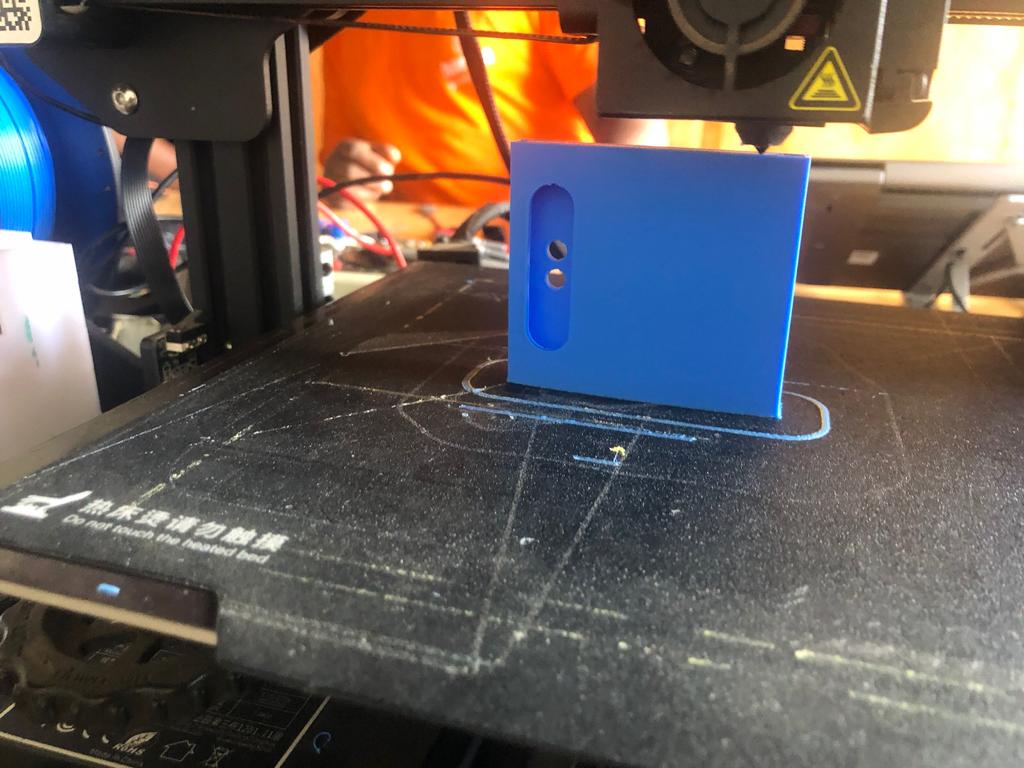
The following Image shows the RFID Card Holder and Obstacle avoidance sensor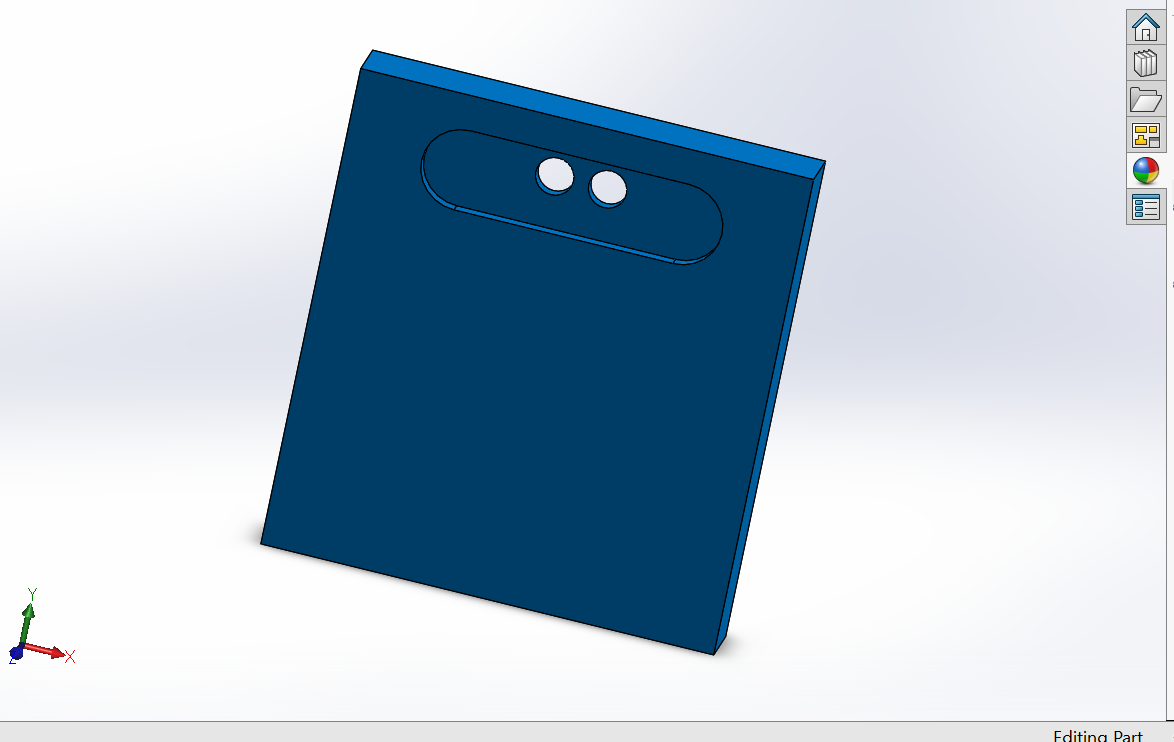 The following Image shows the RFID Card Holder and Obstacle avoidance sensor printed by 3D Printer
 The following images shows after inserting the RFID Card Holder and Obstacle avoidance sensor

d. Circuit and PCB Design
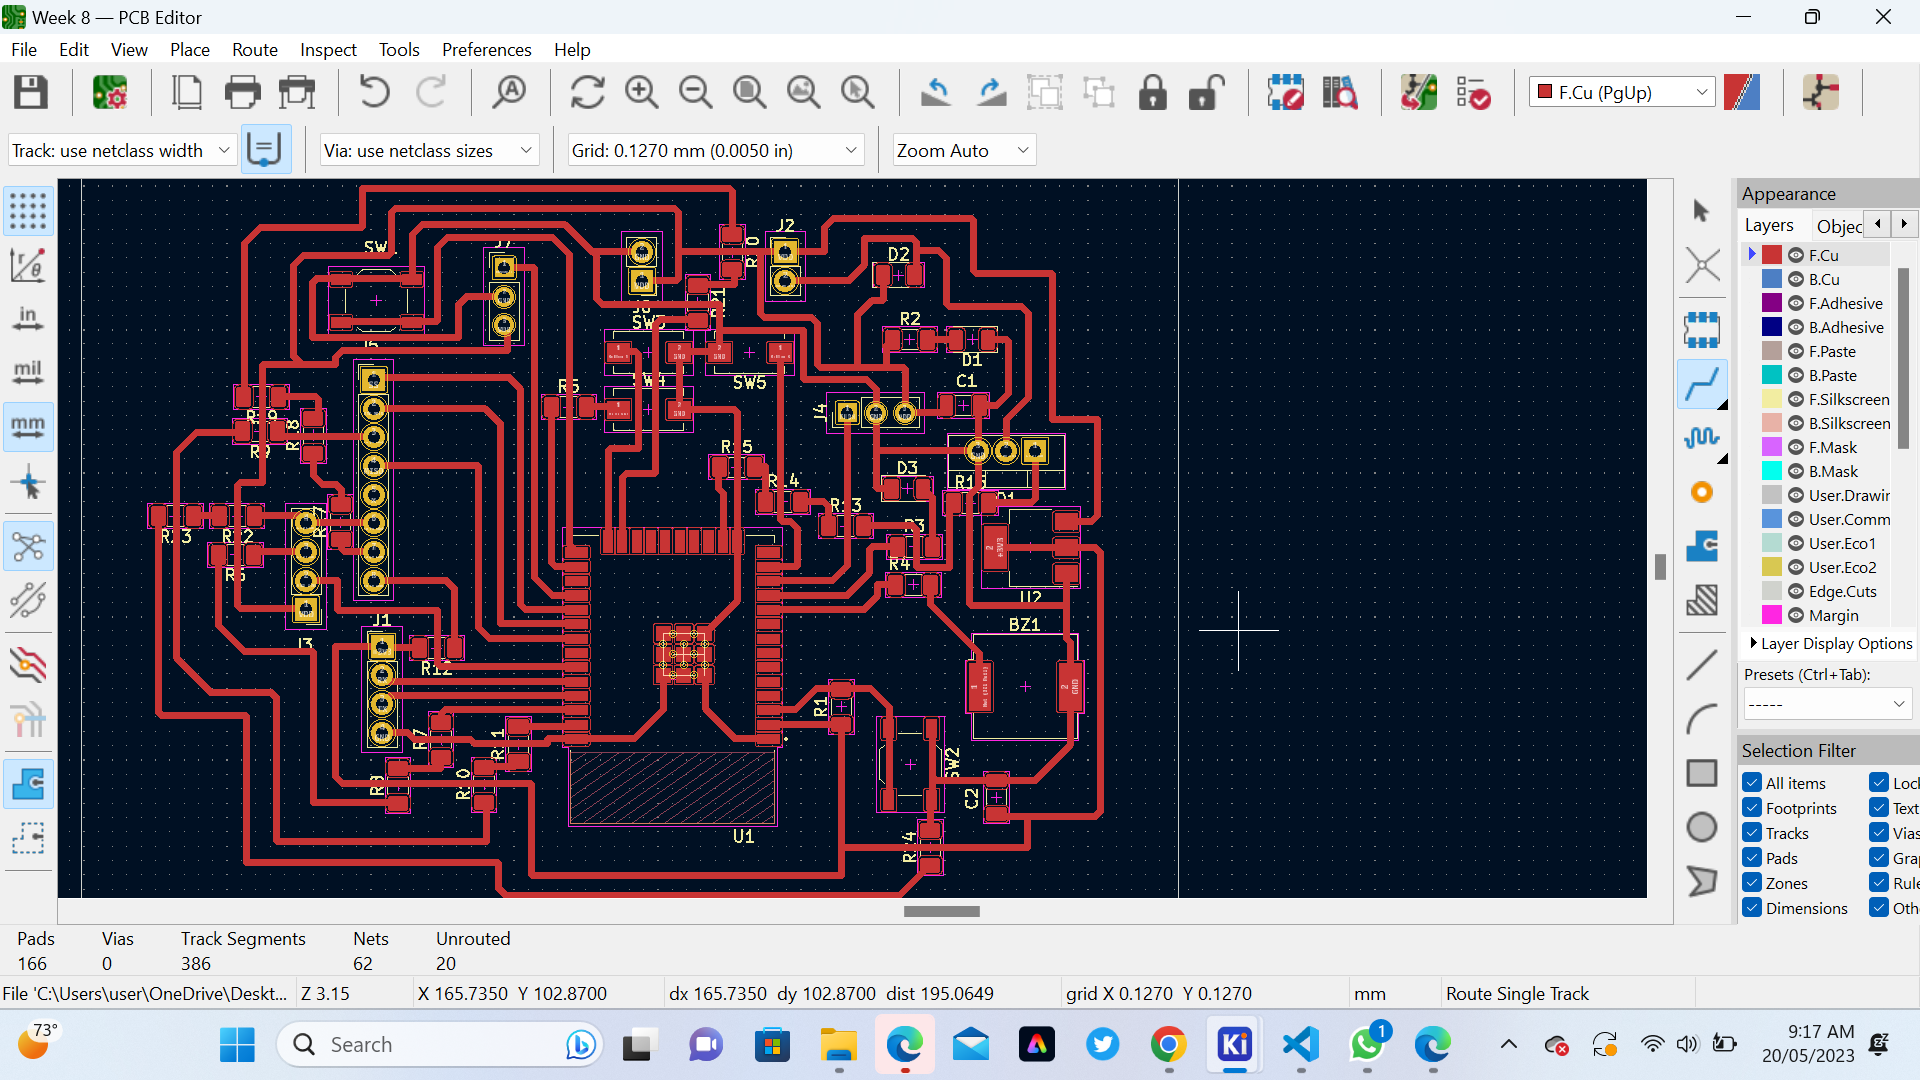
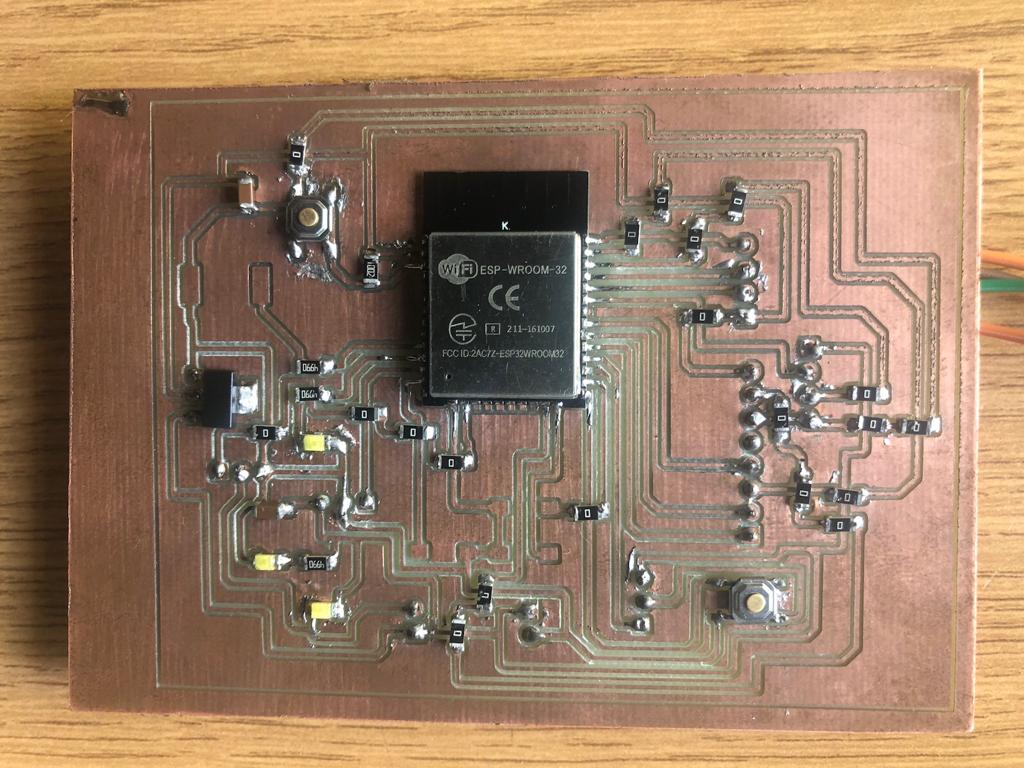
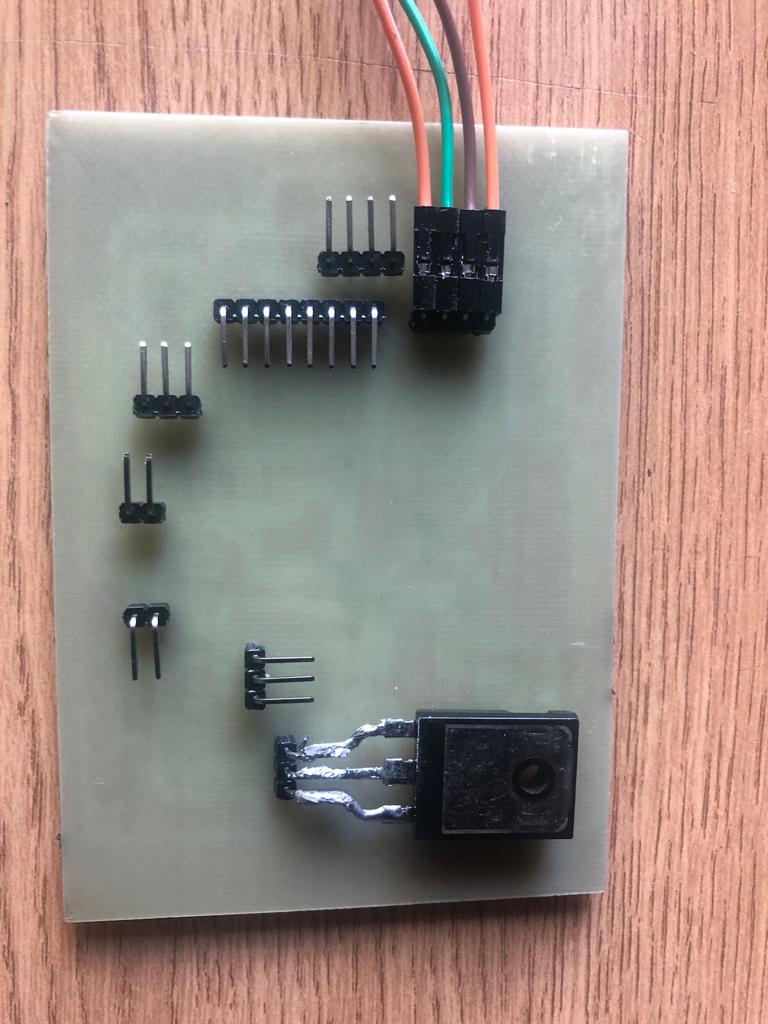
By using skills I gain from Electronics design and production (CircuitDesign, PCB Milling and Soldaling compomnents) I designed the smart Water Dispenser Board which will hold all compomnents of the system. the below Image shows the process we used. I started by designing, Milling, soldering PCB Here is Schematic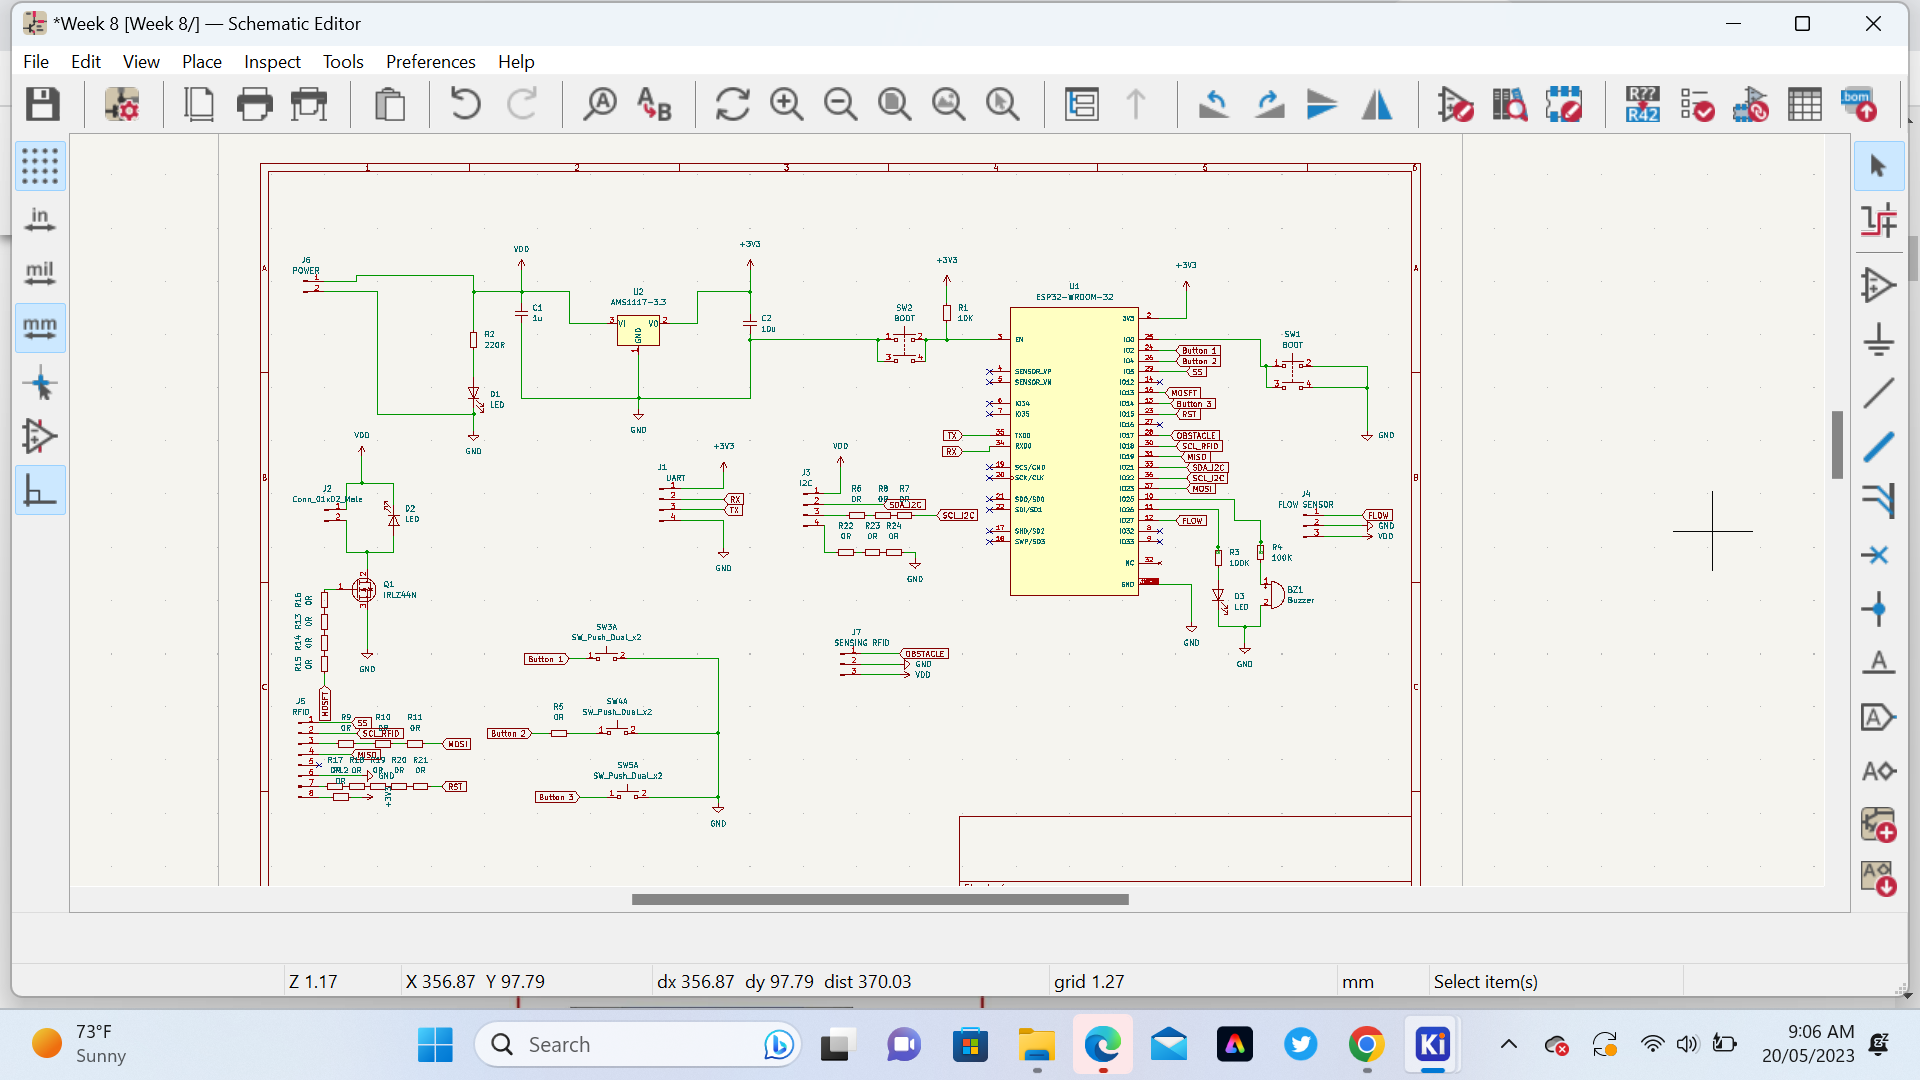 Here is PCB Design
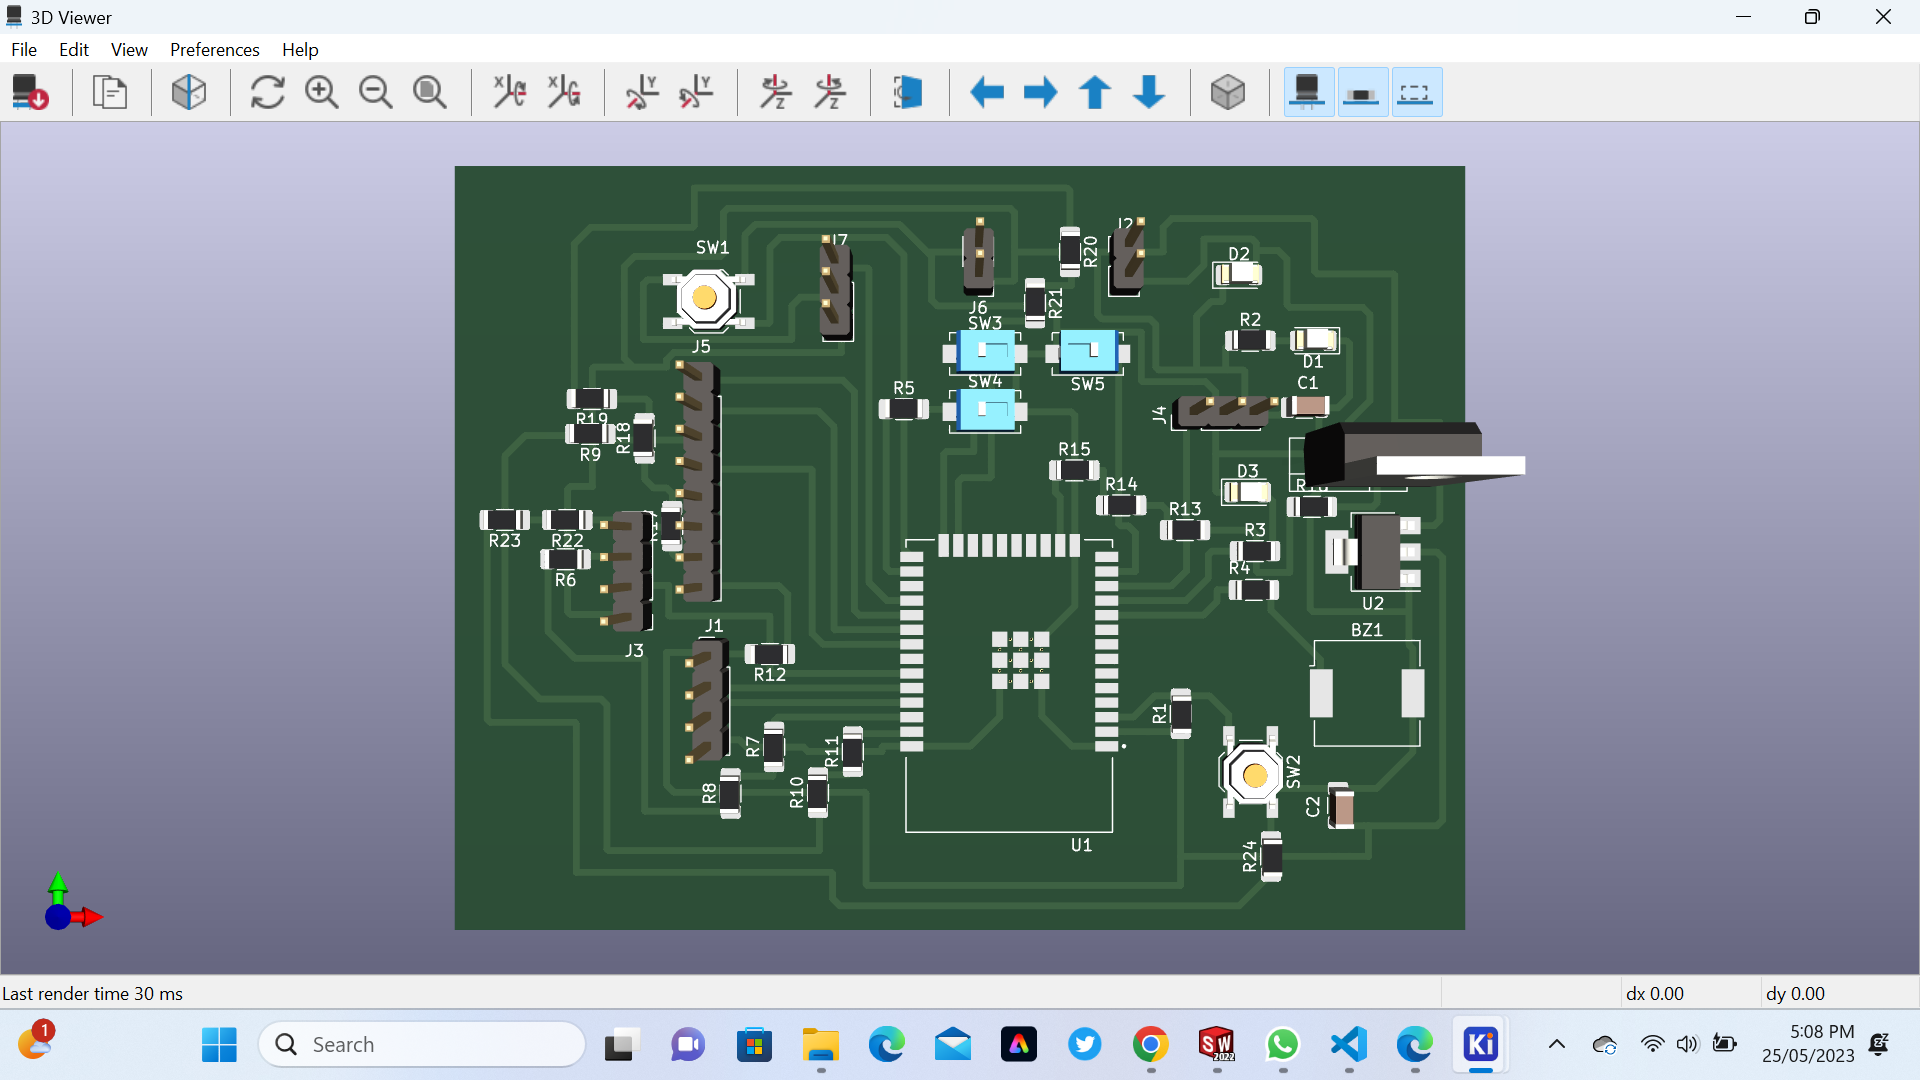
 Here is PCB Design in 3D
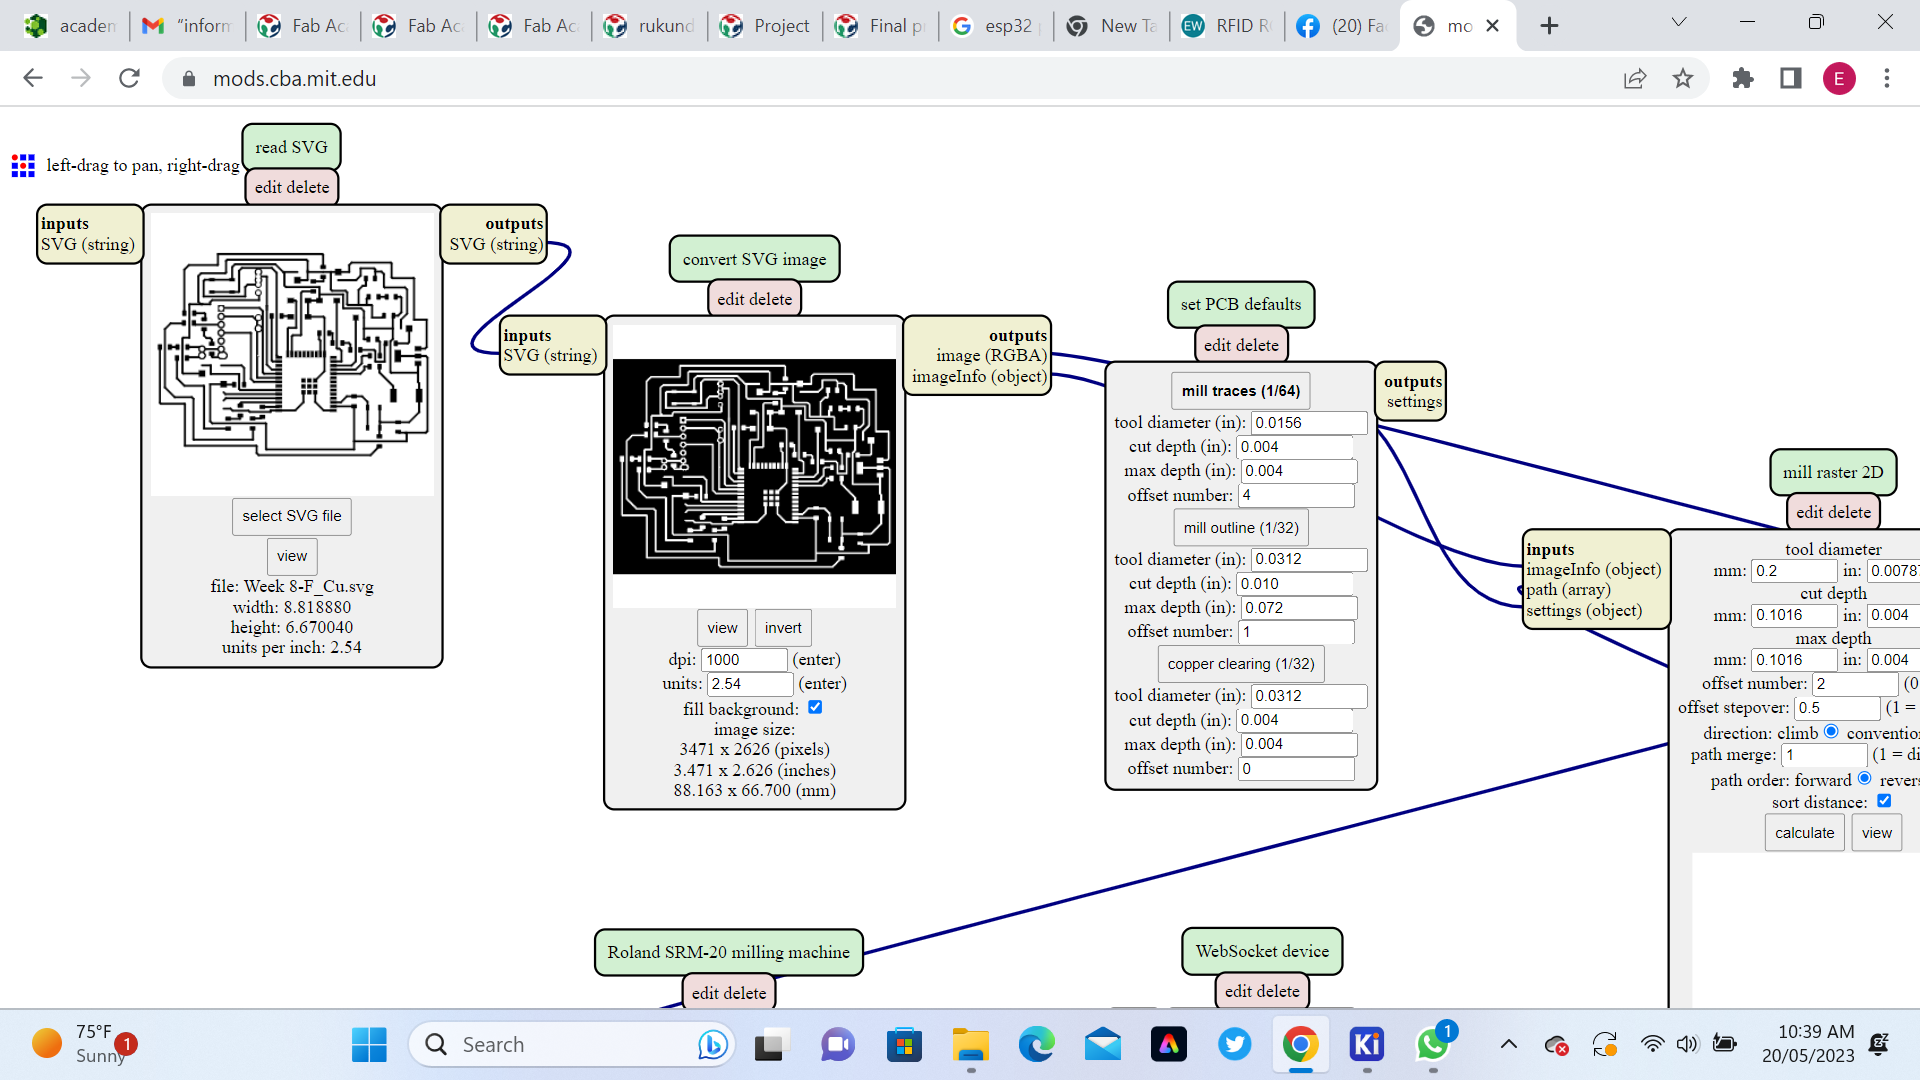
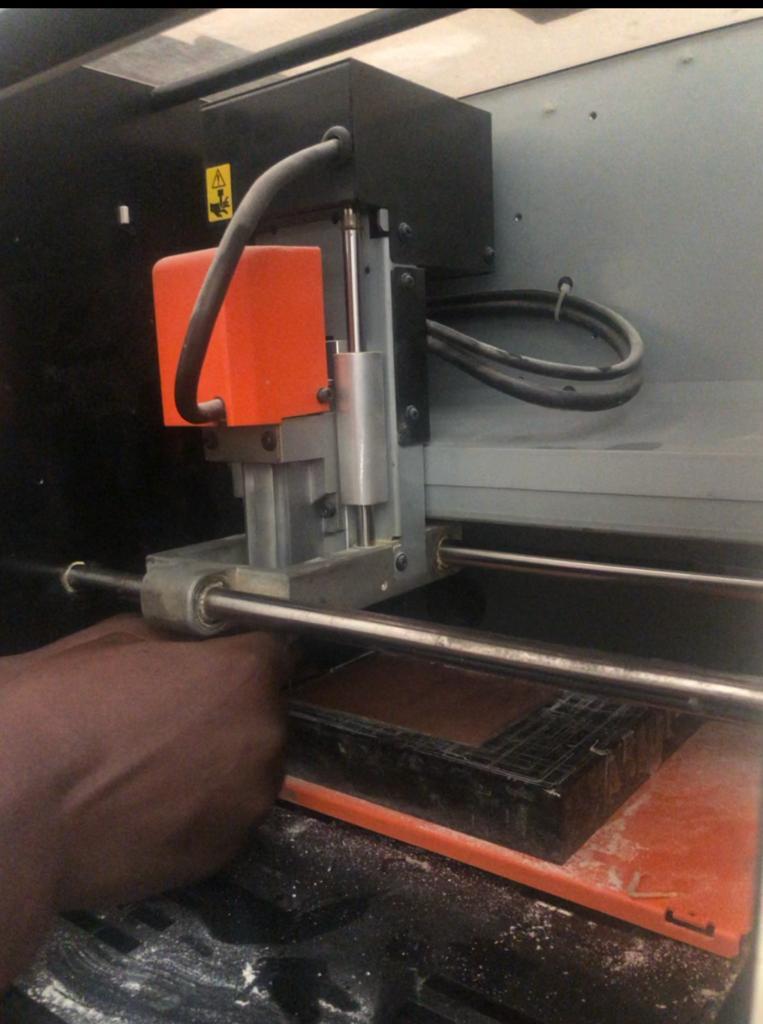
 Here is we started generate G-Codes for Milling with Roland SRM 20

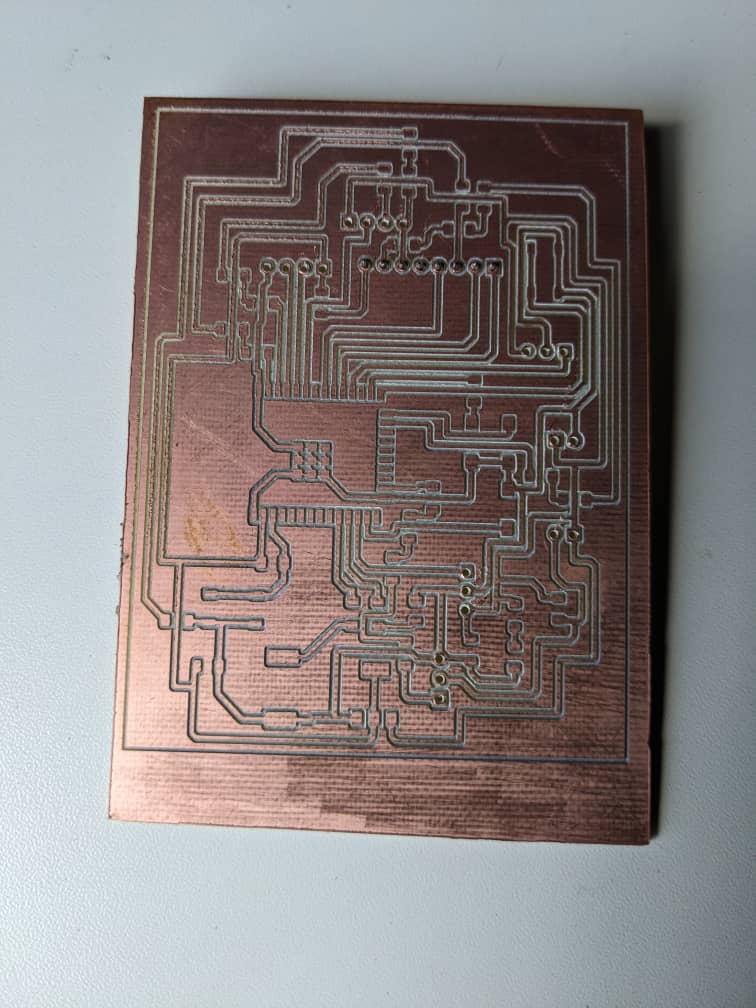
 Here is PCB after Milling
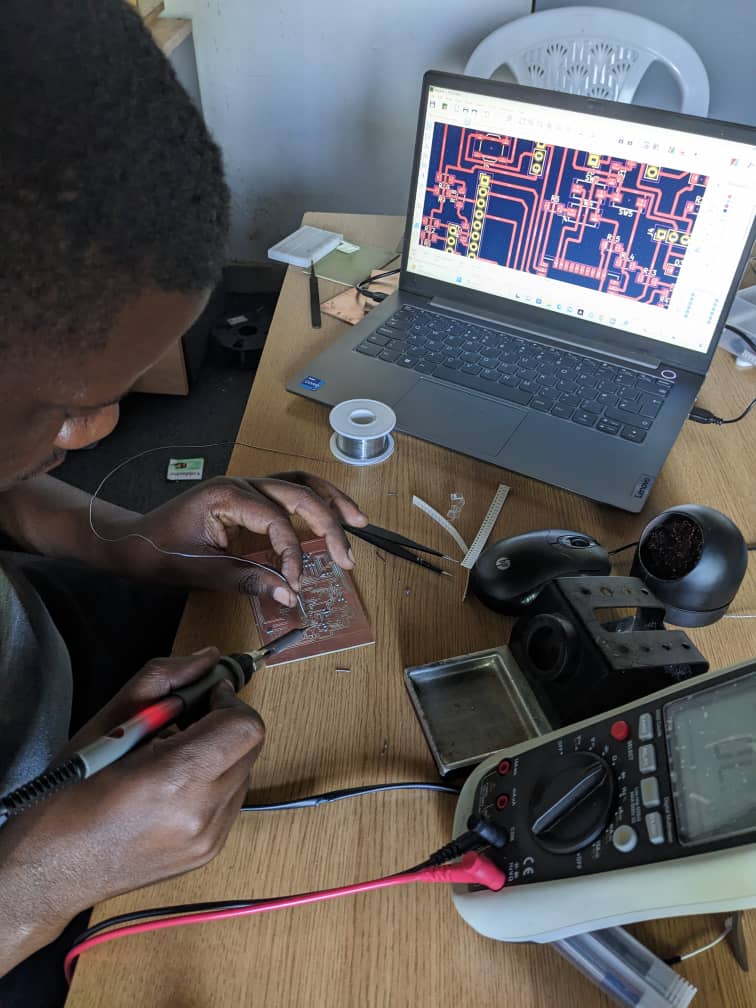
 Here I started soldiring compomnents on PCB
 Here after soldiring compomnents
 Inside of the case
 Outside of the Case

e. Embedded programming,Input Devices,Output Devices Embedded Networking and Communications and Interface Application Programming
By using skills I gain from Embedded programming,Input Devices,Output Devices Embedded Networking and Communications and Interface Application Programming (2D and 3D Design) I designed the smart Water Dispenser case which will hold all system. the below Image shows the process we used. We started by designing Flow Chat Diagram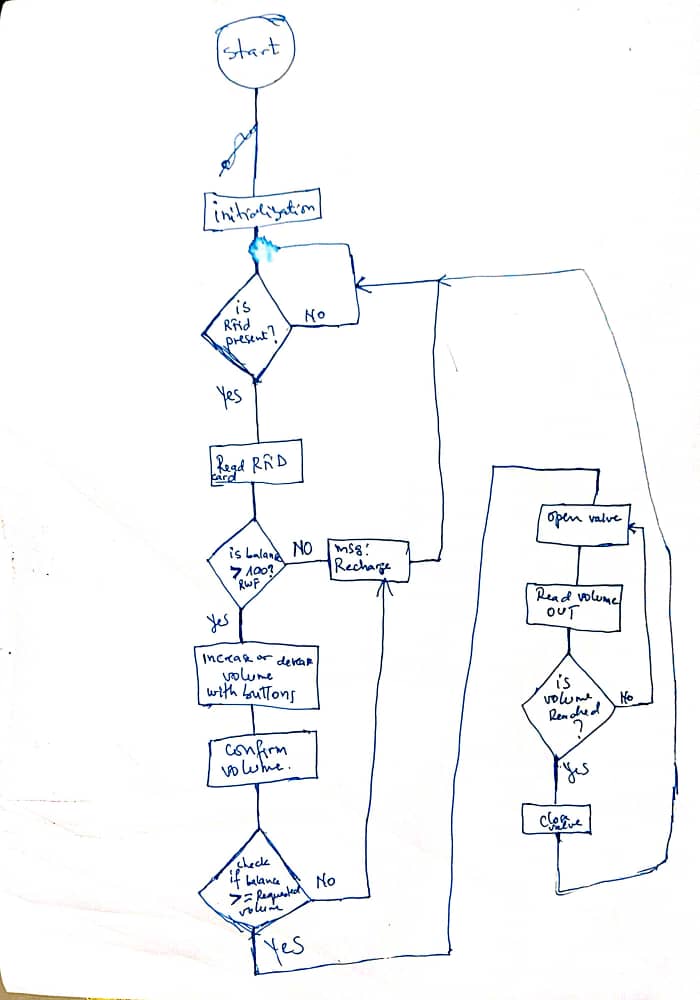 The following Image shows when I started testing and debug my system compomnents
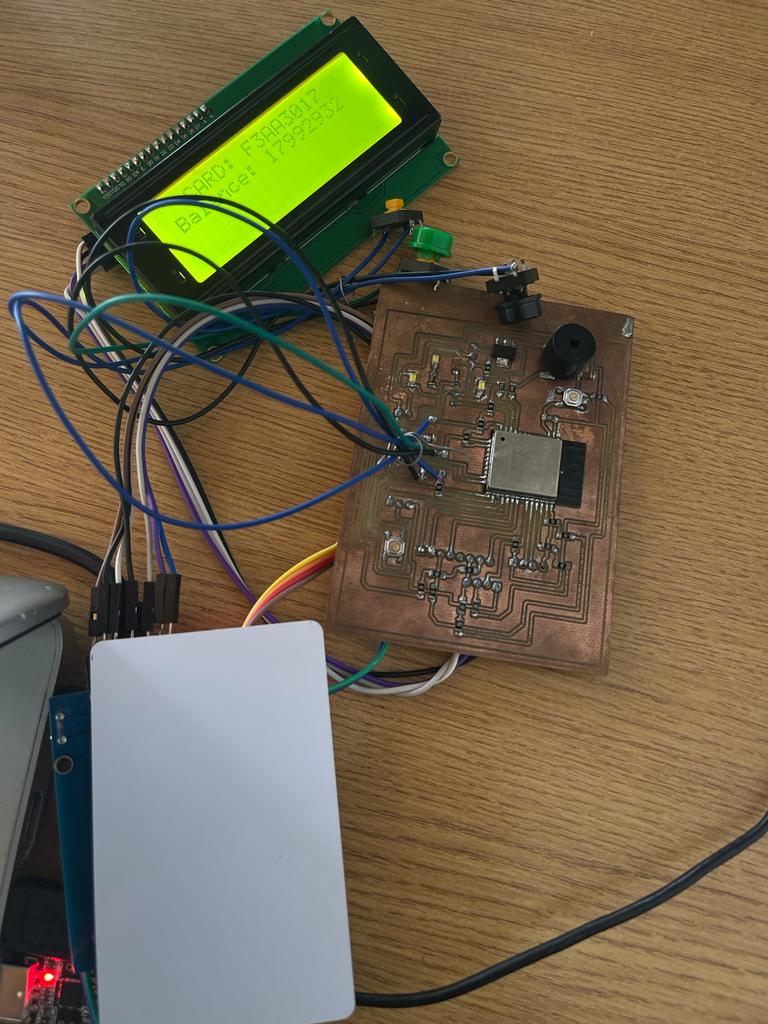
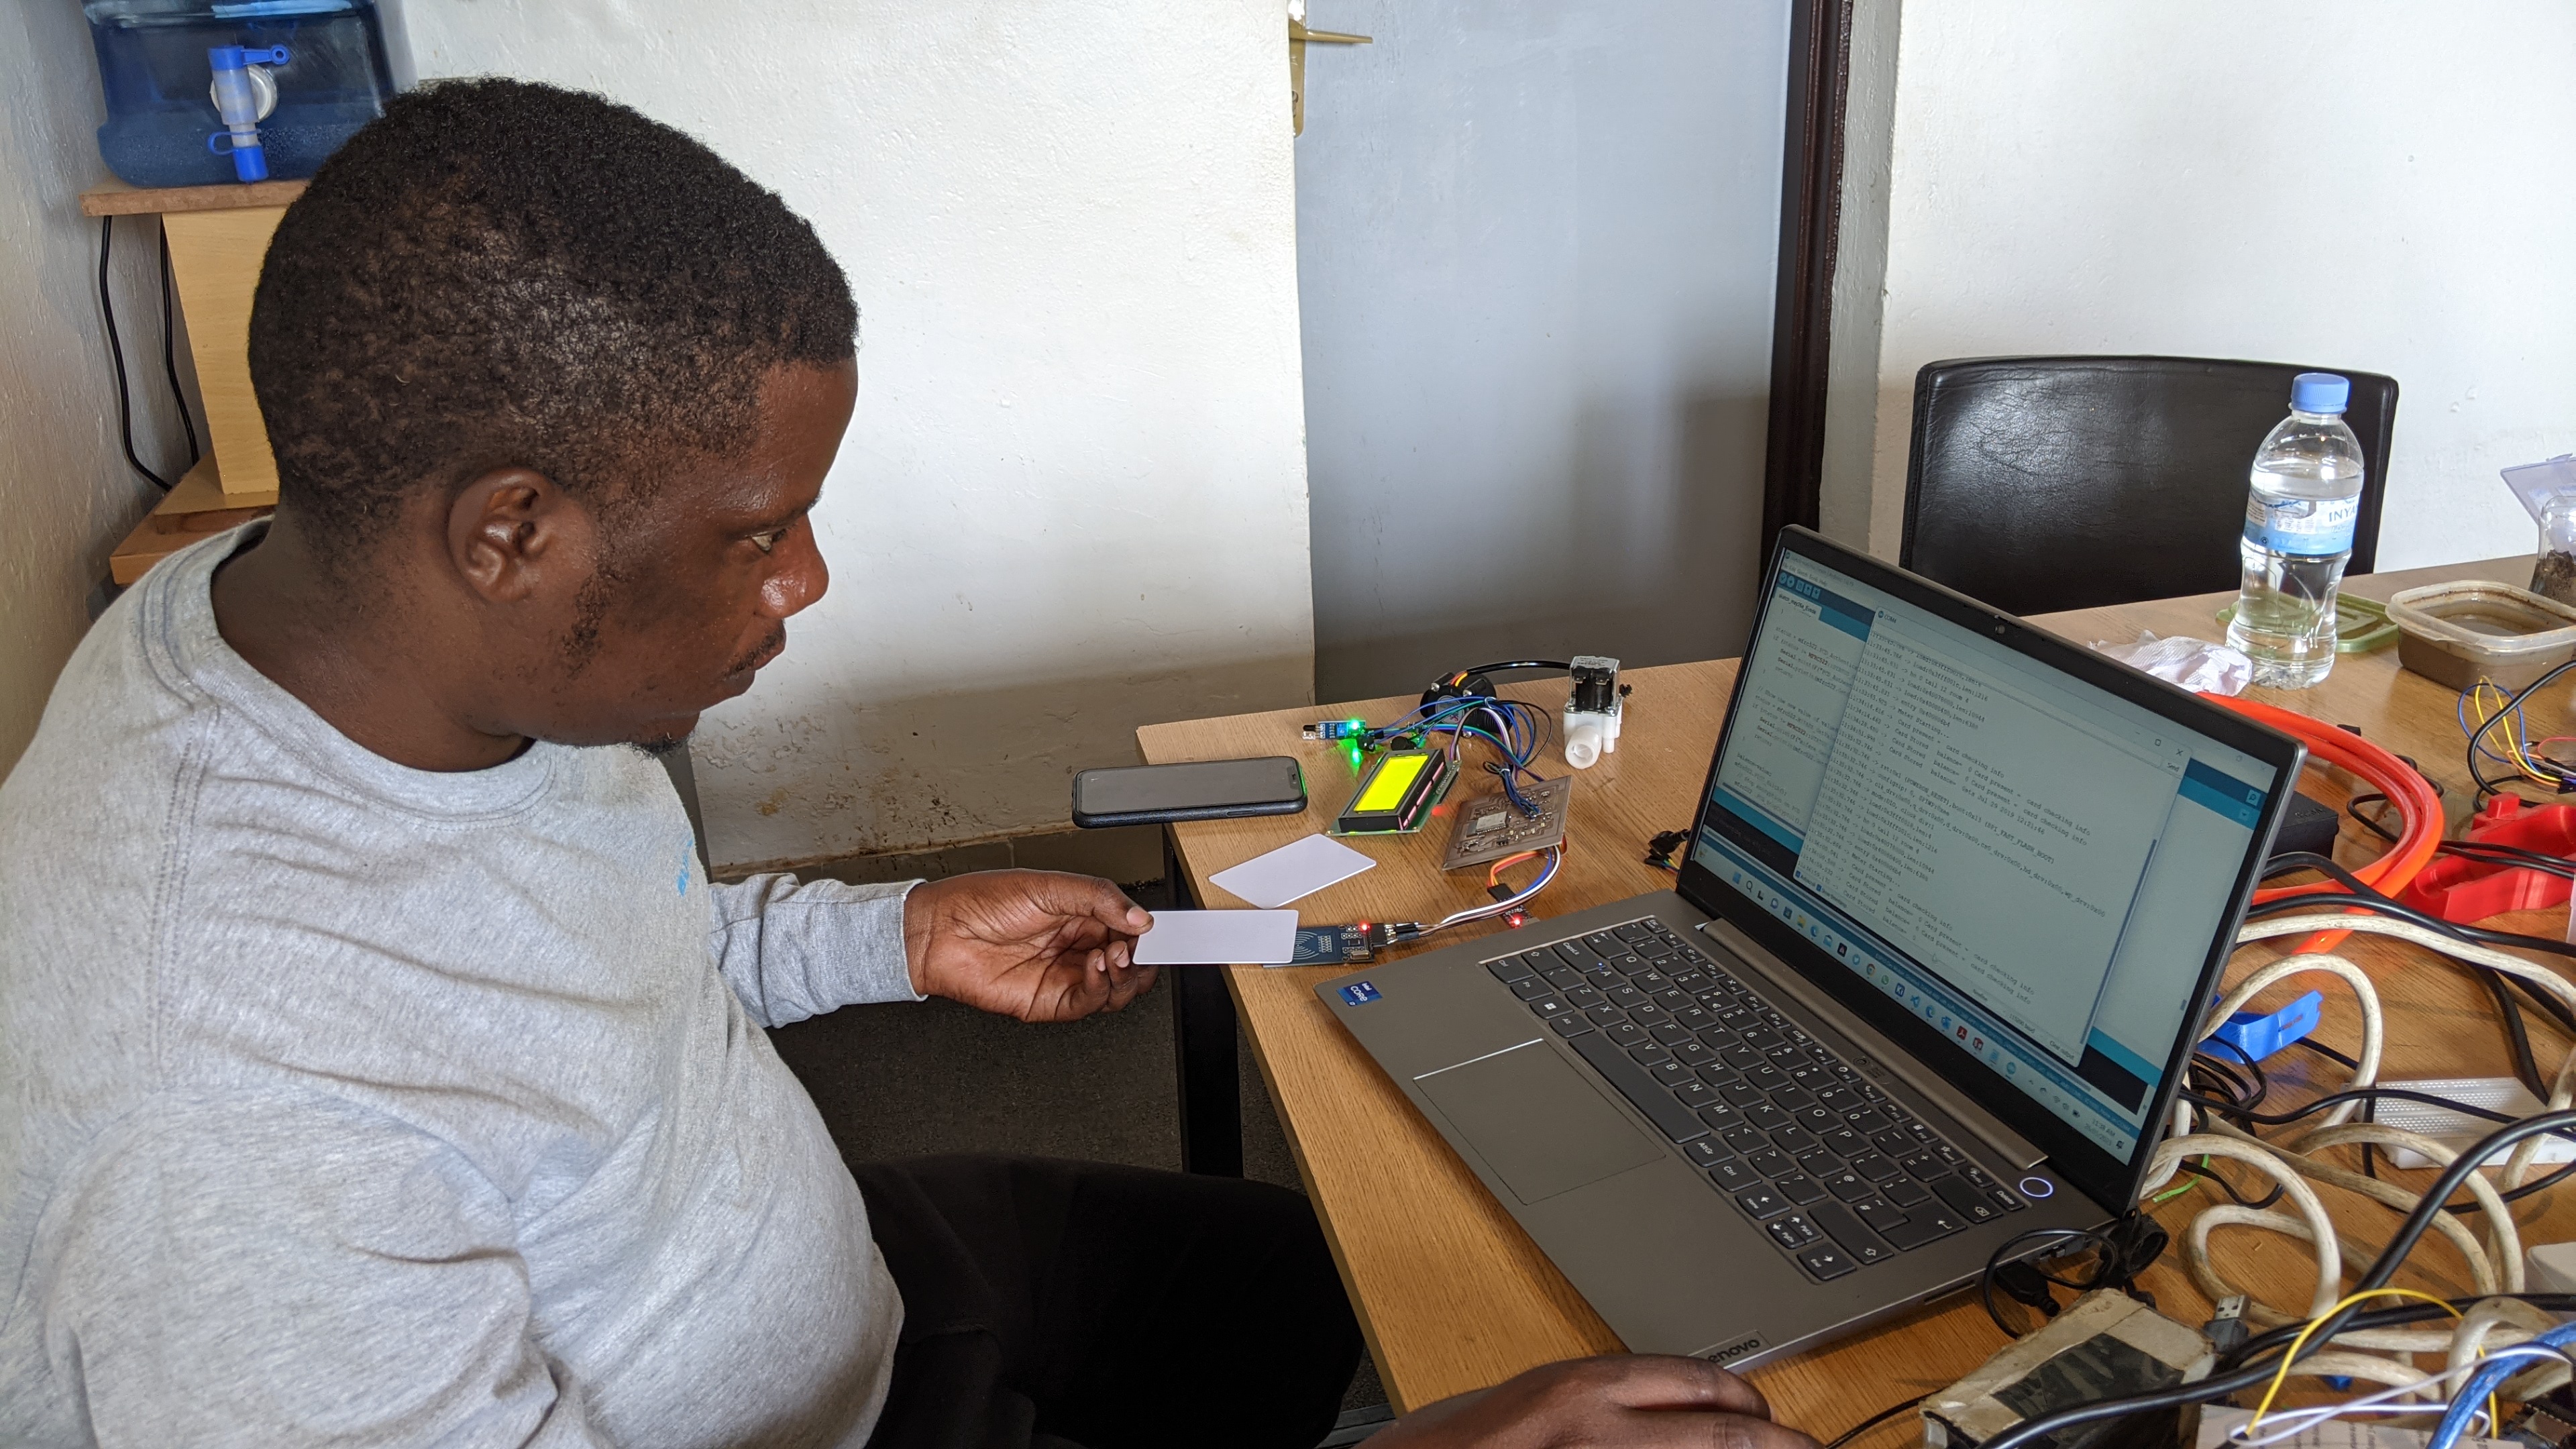 The Microcontroller now can read, the Obstacle avoidance sensor, RFID Card and check the balance
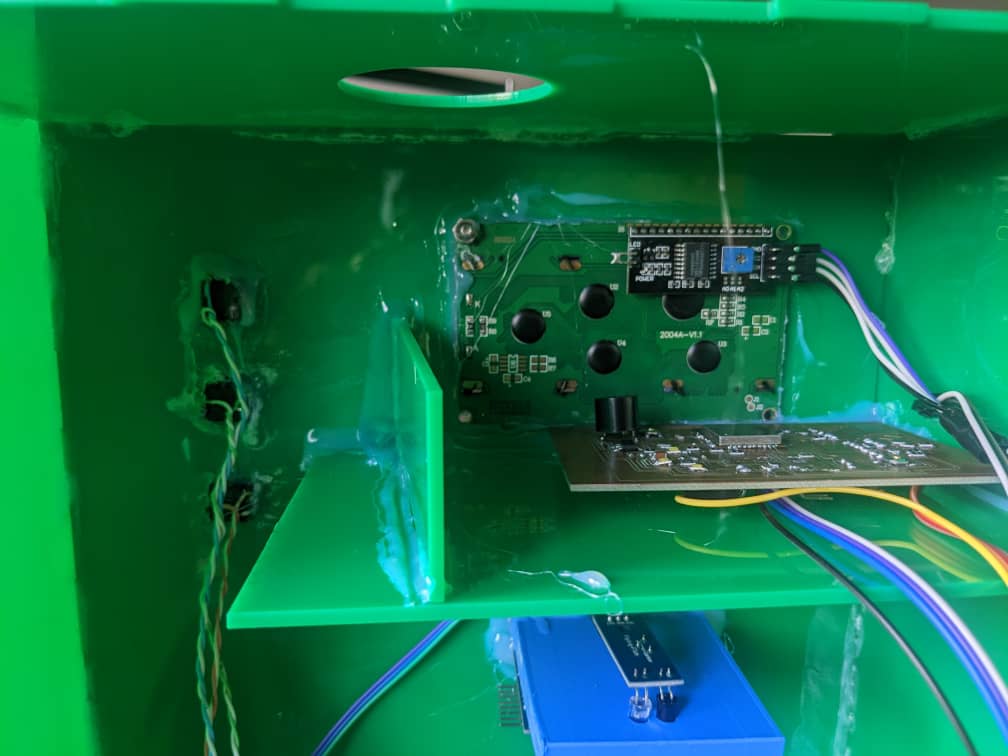
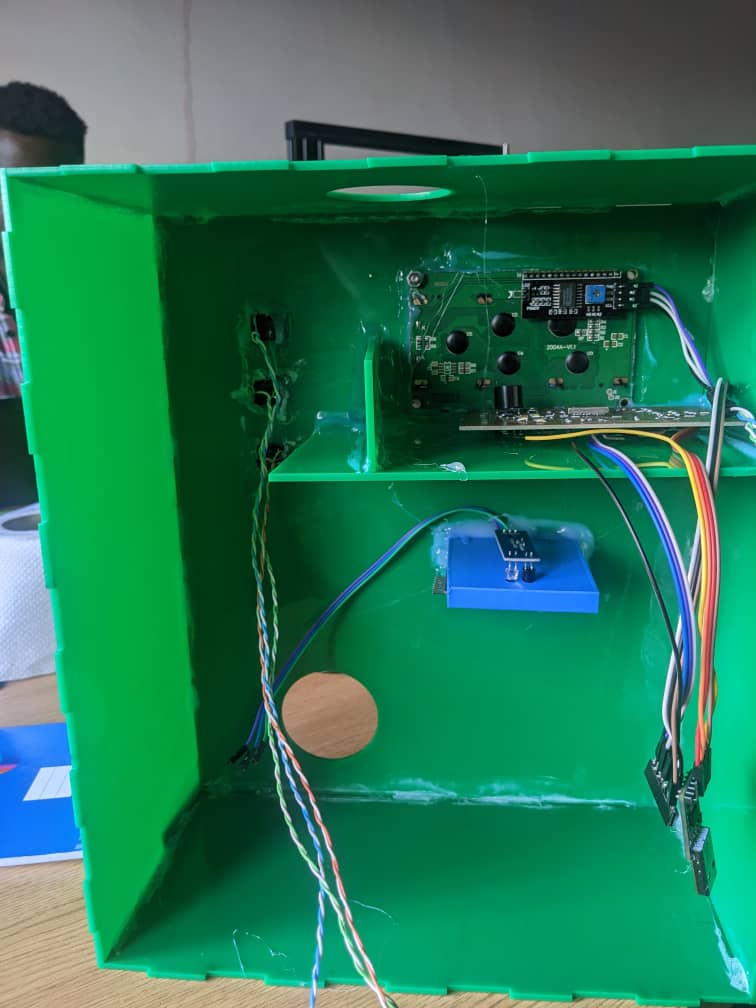
 The following Images shows when we start assembling all parts of Smart Water Despenser (Case and Electronics )
#include
#include
#include
#include
#define RST_PIN 15 // Configurable, see typical pin layout above
#define SS_PIN 5 // Configurable, see typical pin layout above
MFRC522 mfrc522(SS_PIN, RST_PIN); // Create MFRC522 instance.
MFRC522::MIFARE_Key key;
LiquidCrystal_I2C lcd(0x27,20,4); // set the LCD address to 0x27 for a 16 chars and 2 line display
uint32_t CardBalance = 0;
uint32_t Cost=1;
uint32_t total_cost=0;
String Card="";
uint32_t consumed_volume=0;
uint32_t Card_Balance=0;
int cardsensor= 17;
int progress=0;
int valve=13;
const unsigned long period = 1000;
int incrementbutton=2;
int decrementbutton=4;
int confirmbutton=14;
int button_state1=0;
int button_state2=0;
int button_state3=0;
int cardstate=0;
float volume=0.0;
uint32_t unit_cost=1;
#define FLOWSENSOR 27
FlowMeter Meter = FlowMeter(27);
/**
* Initialize.
*/
void setup() {
Serial.begin(115200); // Initialize serial communications with the PC
while (!Serial); // Do nothing if no serial port is opened (added for Arduinos based on ATMEGA32U4)
SPI.begin(); // Init SPI bus
lcd.init();
lcd.backlight();
mfrc522.PCD_Init(); // Init MFRC522 card
for (byte i = 0; i < 6; i++) {
key.keyByte[i] = 0xFF;
}
pinMode(incrementbutton,INPUT_PULLUP);
pinMode(decrementbutton,INPUT_PULLUP);
pinMode(confirmbutton,INPUT_PULLUP);
pinMode(valve,OUTPUT);
Serial.println(F("insert your card"));
pinMode(cardsensor, INPUT);
attachInterrupt(digitalPinToInterrupt(cardsensor),cardpresent,CHANGE); // function for creating external interrupts at pin2 on Rising (LOW to HIGH vice versa)
request_Card();
}
/**
* Main loop.
*/
void loop() {
Meter.tick(period);
while(cardstate==0)
{
mfrc522.PCD_StopCrypto1();
Card="";
total_cost=0;
Meter.setTotalVolume(0.0f);
CardBalance=0;
cardstate = 4;
detachInterrupt(FLOWSENSOR);
}
while(cardstate==1)
{
Serial.print(" Card present = ");
checkcardinfo();
Card_info_screen();
delay(3000);
if(CardBalance>=unit_cost){
Serial.print(" Card Stored ");
Serial.print(" balance= ");
Serial.print(CardBalance);
progress=1;
while(progress==1){
confirm_Volume();
}
total_cost= unit_cost * volume;
if(total_cost < CardBalance){
charge();
attachInterrupt(FLOWSENSOR, MeterISR, RISING);
open_valve();
lcd.clear();
cardstate=2;
}
else {
close_valve();
recharge_card_screen();
}
} else {
close_valve();
recharge_card_screen();
}
}
while(cardstate==2)
{
if(consumed_volume>=total_cost){
close_valve();
}
else{
fetching();
}
}
}
void screen(){
lcd.setCursor(3,0);
lcd.print("CARD: " +String(Card));
lcd.setCursor(1,1);
lcd.print("Balance: " +String(CardBalance));
Serial.println ("screeen printint"+String(Card)+"Balance: " +String(CardBalance));
}
void MeterISR() {
// let our flow meter count the pulses
Meter.count();
consumed_volume = (Meter.getTotalVolume())*100;
}
void charge(){
// Reset the loop if no new card present on the sensor/reader. This saves the entire process when idle.
if ( ! mfrc522.PICC_IsNewCardPresent())
return;
// Select one of the cards
if ( ! mfrc522.PICC_ReadCardSerial())
return;
byte sector = 1;
byte valueBlockB = 6;
byte trailerBlock = 7;
MFRC522::StatusCode status;
byte buffer[18];
byte size = sizeof(buffer);
int32_t value;
// Authenticate using key A
status = mfrc522.PCD_Authenticate(MFRC522::PICC_CMD_MF_AUTH_KEY_A, trailerBlock, &key, &(mfrc522.uid));
if (status != MFRC522::STATUS_OK) {
Serial.print(F("PCD_Authenticate() failed: "));
Serial.println(mfrc522.GetStatusCodeName(status));
return;
}
byte trailerBuffer[] = {
255, 255, 255, 255, 255, 255, // Keep default key A
0, 0, 0,
0,
255, 255, 255, 255, 255, 255}; // Keep default key B
mfrc522.MIFARE_SetAccessBits(&trailerBuffer[6], 0, 6, 6, 3);
status = mfrc522.MIFARE_Read(trailerBlock, buffer, &size);
if (status != MFRC522::STATUS_OK) {
Serial.print(F("MIFARE_Read() failed: "));
Serial.println(mfrc522.GetStatusCodeName(status));
return;
}
// Check if it matches the desired access pattern already;
// because if it does, we don't need to write it again...
if ( buffer[6] != trailerBuffer[6]
|| buffer[7] != trailerBuffer[7]
|| buffer[8] != trailerBuffer[8]) {
// They don't match (yet), so write it to the PICC
Serial.println(F("Writing new sector trailer..."));
status = mfrc522.MIFARE_Write(trailerBlock, trailerBuffer, 16);
if (status != MFRC522::STATUS_OK) {
Serial.print(F("MIFARE_Write() failed: "));
Serial.println(mfrc522.GetStatusCodeName(status));
return;
}
}
// Authenticate using key B
status = mfrc522.PCD_Authenticate(MFRC522::PICC_CMD_MF_AUTH_KEY_B, trailerBlock, &key, &(mfrc522.uid));
if (status != MFRC522::STATUS_OK) {
Serial.print(F("PCD_Authenticate() failed: "));
Serial.println(mfrc522.GetStatusCodeName(status));
return;
}
status = mfrc522.MIFARE_Decrement(valueBlockB, total_cost);
if (status != MFRC522::STATUS_OK) {
Serial.print(F("MIFARE_Decrement() failed: "));
Serial.println(mfrc522.GetStatusCodeName(status));
return;
}
status = mfrc522.MIFARE_Transfer(valueBlockB);
if (status != MFRC522::STATUS_OK) {
Serial.print(F("MIFARE_Transfer() failed: "));
Serial.println(mfrc522.GetStatusCodeName(status));
return;
}
// Show the new value of valueBlockB
status = mfrc522.MIFARE_GetValue(valueBlockB, &value);
if (status != MFRC522::STATUS_OK) {
Serial.print(F("mifare_GetValue() failed: "));
Serial.println(mfrc522.GetStatusCodeName(status));
return;
}
Serial.println();
mfrc522.PCD_StopCrypto1();
}
////////////////////////////////////////////////////////////////////////////////////
/* checking new card information and storing them */
///////////////////////////////////////////////////////////////////////////////////////
void checkcardinfo(){
// Reset the loop if no new card present on the sensor/reader. This saves the entire process when idle.
if ( ! mfrc522.PICC_IsNewCardPresent())
return;
// Select one of the cards
if ( ! mfrc522.PICC_ReadCardSerial())
return;
// Show some details of the PICC (that is: the tag/card)
Serial.print(F("Card UID:"));
// dump_byte_array(mfrc522.uid.uidByte, mfrc522.uid.size);
Card="";
for (byte i = 0; i < mfrc522.uid.size; i++)
{
Card+=String(mfrc522.uid.uidByte[i],HEX);
Card.toUpperCase();
}
Serial.println ("new card = "+String(Card));
screen();
// In this sample we use the second sector,
// that is: sector #1, covering block #4 up to and including block #7
byte sector = 1;
byte valueBlockB = 6;
byte trailerBlock = 7;
MFRC522::StatusCode status;
byte buffer[18];
byte size = sizeof(buffer);
int32_t value;
// Authenticate using key A
status = mfrc522.PCD_Authenticate(MFRC522::PICC_CMD_MF_AUTH_KEY_A, trailerBlock, &key, &(mfrc522.uid));
if (status != MFRC522::STATUS_OK) {
Serial.print(F("PCD_Authenticate() failed: "));
Serial.println(mfrc522.GetStatusCodeName(status));
return;
}
byte trailerBuffer[] = {
255, 255, 255, 255, 255, 255, // Keep default key A
0, 0, 0,
0,
255, 255, 255, 255, 255, 255}; // Keep default key B
mfrc522.MIFARE_SetAccessBits(&trailerBuffer[6], 0, 6, 6, 3);
status = mfrc522.MIFARE_Read(trailerBlock, buffer, &size);
if (status != MFRC522::STATUS_OK) {
Serial.print(F("MIFARE_Read() failed: "));
Serial.println(mfrc522.GetStatusCodeName(status));
return;
}
// Check if it matches the desired access pattern already;
// because if it does, we don't need to write it again...
if ( buffer[6] != trailerBuffer[6]
|| buffer[7] != trailerBuffer[7]
|| buffer[8] != trailerBuffer[8]) {
// They don't match (yet), so write it to the PICC
Serial.println(F("Writing new sector trailer..."));
status = mfrc522.MIFARE_Write(trailerBlock, trailerBuffer, 16);
if (status != MFRC522::STATUS_OK) {
Serial.print(F("MIFARE_Write() failed: "));
Serial.println(mfrc522.GetStatusCodeName(status));
return;
}
}
// Authenticate using key B
status = mfrc522.PCD_Authenticate(MFRC522::PICC_CMD_MF_AUTH_KEY_B, trailerBlock, &key, &(mfrc522.uid));
if (status != MFRC522::STATUS_OK) {
Serial.print(F("PCD_Authenticate() failed: "));
Serial.println(mfrc522.GetStatusCodeName(status));
return;
}
// Show the new value of valueBlockB
status = mfrc522.MIFARE_GetValue(valueBlockB, &value);
CardBalance=value;
if (status != MFRC522::STATUS_OK) {
Serial.print(F("mifare_GetValue() failed: "));
Serial.println(mfrc522.GetStatusCodeName(status));
return;
}
Serial.println();
mfrc522.PCD_StopCrypto1();
}
////////////////////////////////////////////////////////////////////////////////////
/* checking if card is present or absent */
///////////////////////////////////////////////////////////////////////////////////////
void cardpresent()
{
if(digitalRead(cardsensor) == LOW){
cardstate =1;
}
else{
close_valve();
cardstate =0;
}
}
////////////////////////////////////////////////////////////////////////////////////
/* Confirming volume */
///////////////////////////////////////////////////////////////////////////////////////
void confirm_Volume()
{
volume_screen();
if((digitalRead(incrementbutton)== LOW) && button_state1==0){
Serial.println("incrementbutton pressed");
volume=volume+1;
button_state1=1;
}
else if(digitalRead(incrementbutton)== HIGH){
button_state1=0;
}
else if((digitalRead(decrementbutton)== LOW) && button_state2==0 && volume >=0.0 ){
Serial.println("decrementbutton pressed");
volume=volume-1;
button_state2=1;
}
else if(digitalRead(decrementbutton)== HIGH){
button_state2=0;
}
if(digitalRead(confirmbutton)== LOW)
{
progress=0;
}
}
void request_Card()
{
lcd.clear();
lcd.setCursor(3,1);
lcd.print("insert your");
lcd.setCursor(7,2);
lcd.print("CARD");
}
void Card_info_screen()
{
lcd.clear();
lcd.setCursor(3,1);
lcd.print("CARD= " +String(Card));
lcd.setCursor(1,2);
lcd.print("Balance= "+ String(CardBalance));
}
void volume_screen()
{
lcd.setCursor(3,1);
lcd.print("CARD= " +String(Card));
lcd.setCursor(1,2);
lcd.print("Requsting: "+ String(volume)+"L");
}
void recharge_card_screen()
{
lcd.clear();
lcd.setCursor(3,1);
lcd.print("INSUFIENT balance");
lcd.setCursor(1,2);
lcd.print("please Recharge");
}
void fetching()
{
lcd.setCursor(2,0);
lcd.print("CARD: "+String(Card));
lcd.setCursor(1,1);
lcd.print("Requested: "+ String(volume)+"L");
lcd.print("Volume: "+ String(consumed_volume)+"L");
lcd.setCursor(2,2);
lcd.print("balance: "+ String(CardBalance)+ "Rwf");
}
void button_screen()
{
lcd.clear();
lcd.setCursor(3,1);
lcd.print("volume= "+ String(volume));
}
void open_valve(){
digitalWrite(valve, HIGH);
}
void close_valve(){
digitalWrite(valve, LOW);
}
9.What questions were answered?
This project Smart Water Dispenser will applied in different sector and plays the important role of providing clean water on affordable cost. Applications of Smart Water Dispenser:- 1. Offices and Workplaces: This Smart Water dispenser can be used in office settings to promote hydration among employees, track water consumption, and encourage sustainable practices.
- 2. Educational Institutions: Schools, colleges, and universities can install smart water dispensers to provide clean water to students and faculty while raising awareness about water conservation.
- 3. Public Spaces: Smart water dispensers can be placed in public parks, shopping malls, airports, and other communal areas to offer convenient access to clean drinking water for the general public on affordable cost
- 4. Healthcare Facilities: Smart water dispensers can be installed in hospitals, clinics, and nursing homes to ensure a clean and safe water supply for patients, staff, and visitors.
10.How the system works (Smart Water Dispenser)
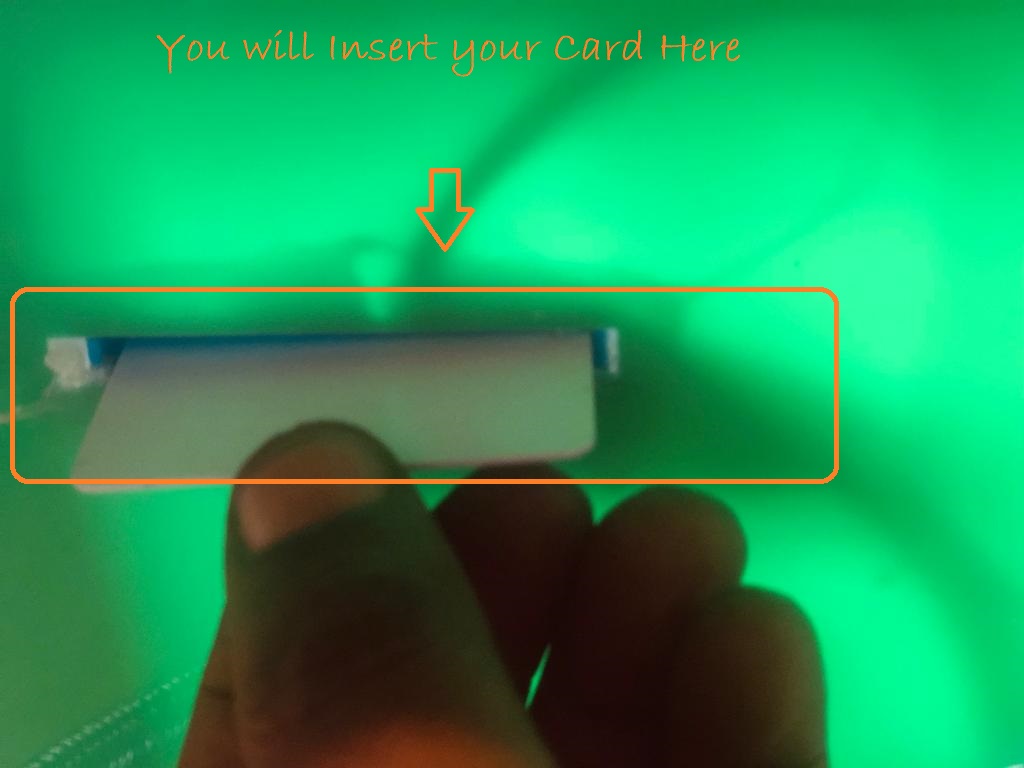
To use the system you follow the following steps: 1st. Power on the system : When you turn on the system with 12V and by using Voltage Regulators 5v and 3.3V for powering the least of parts of the system. When we start the system the LCD will display a message Insert your CARD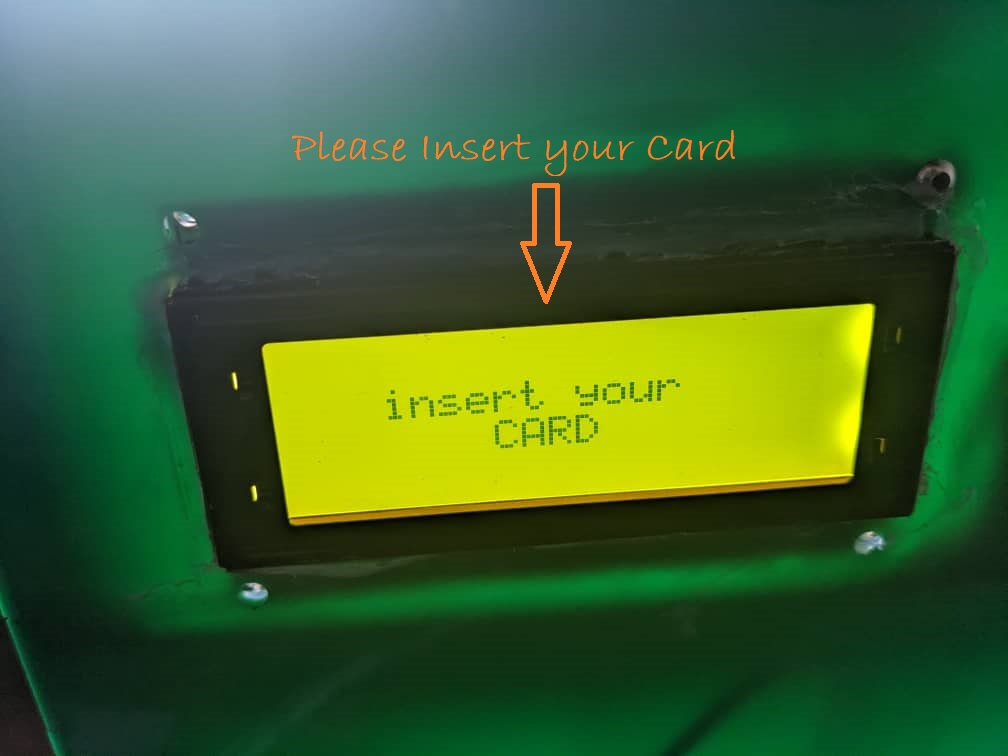 2nd. Insert the card and the system checks card balance :
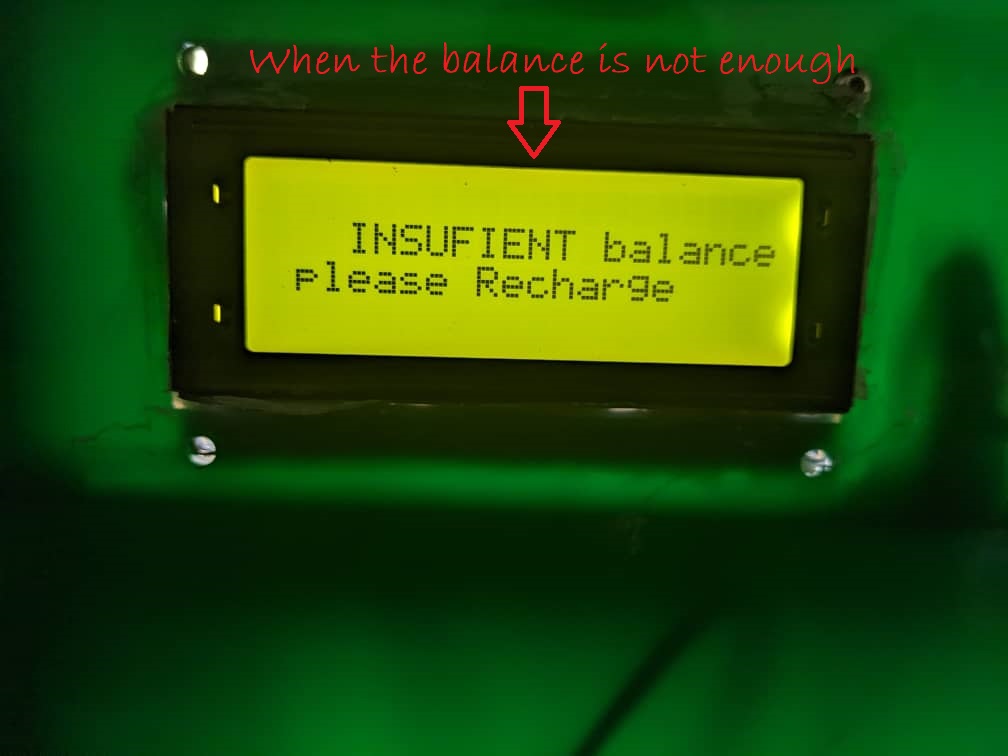
If the balance is not sufficient the system display a message Insufficiant Balance please recharge
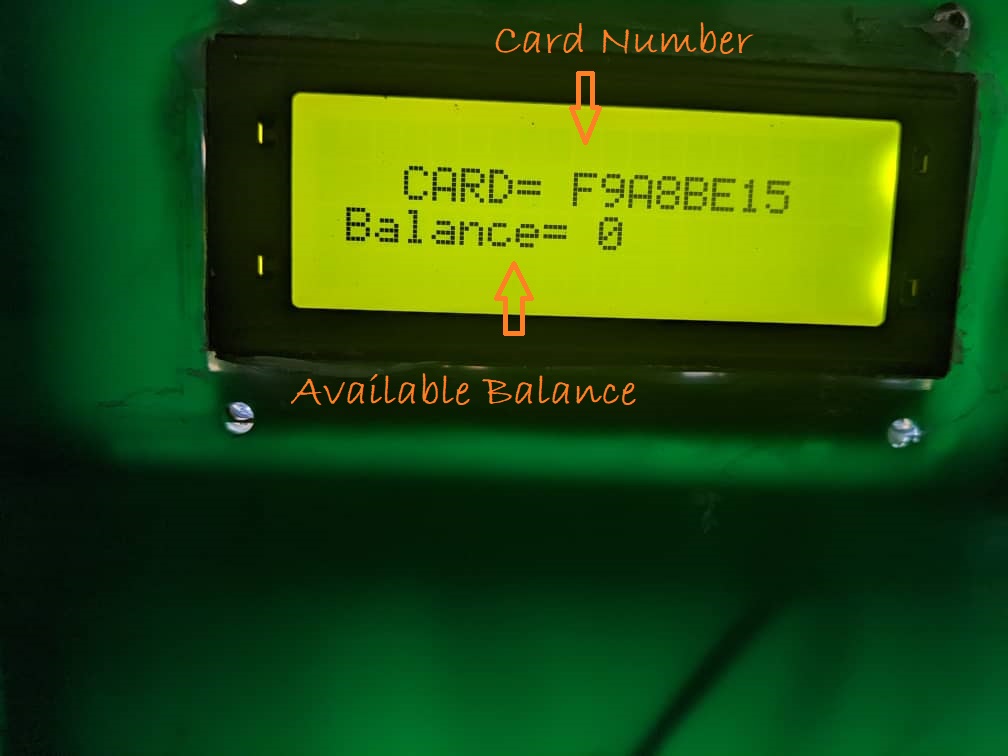
2nd. Insert the card and the system checks card balance :
If the balance is not sufficient the system display a message Insufficiant Balance please recharge
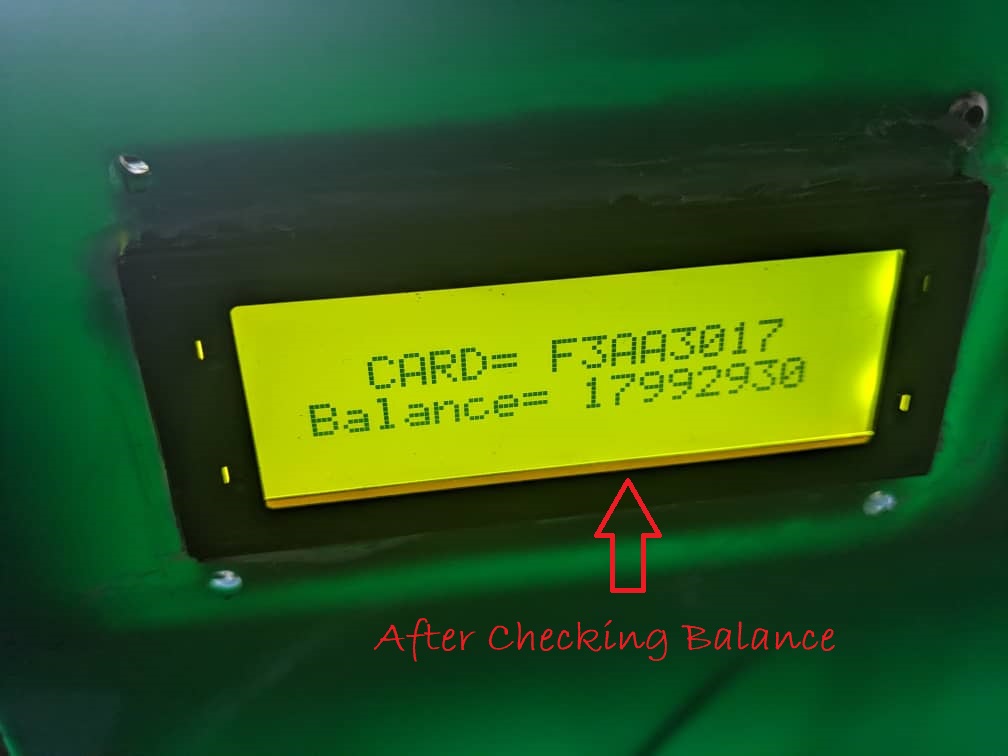
 Once the balance is greater or equal to 100 (the cost of one litter of water) the system diplay Requesting Volume of water in(Volume)
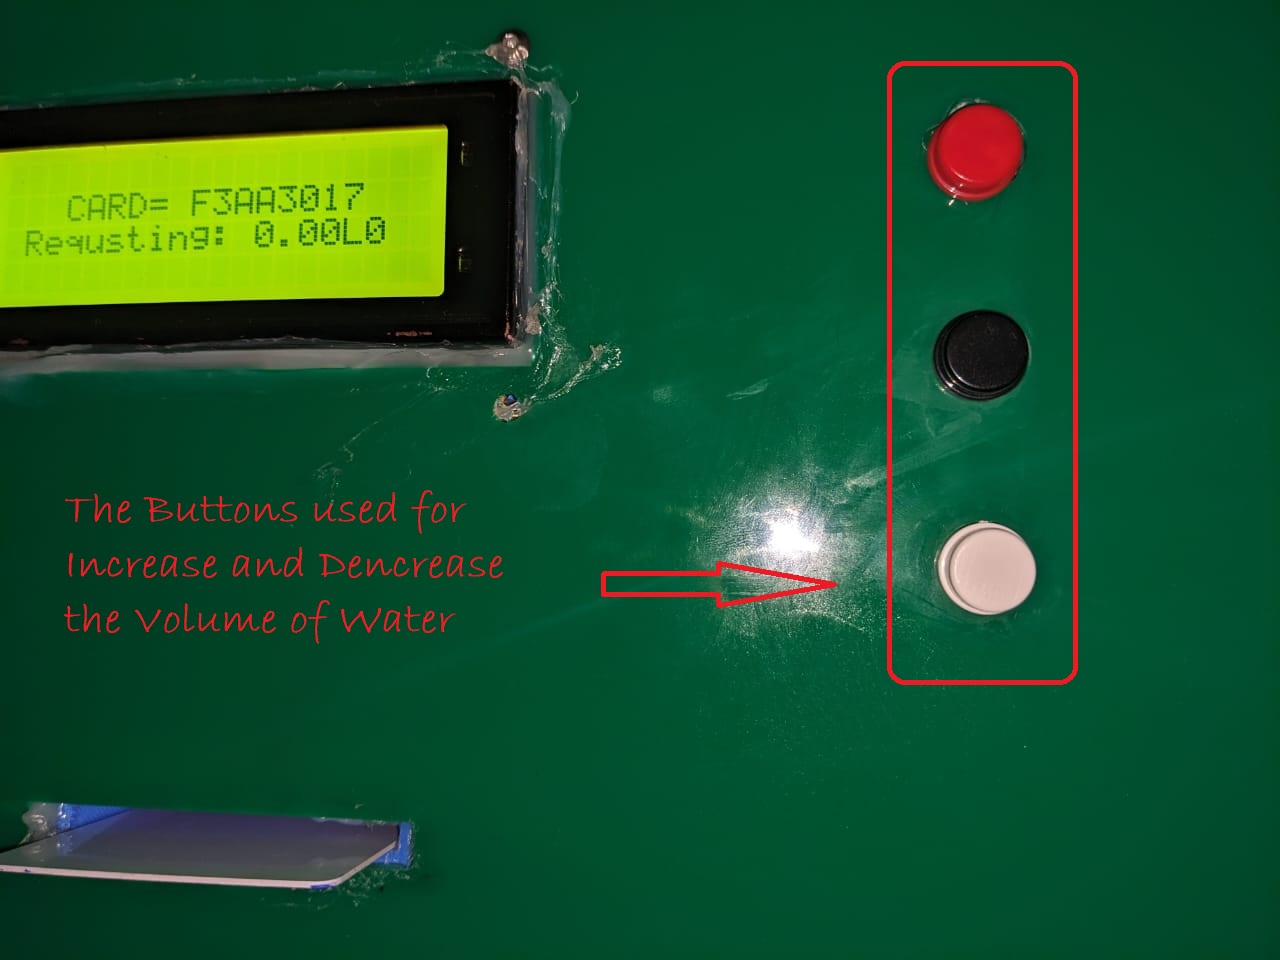
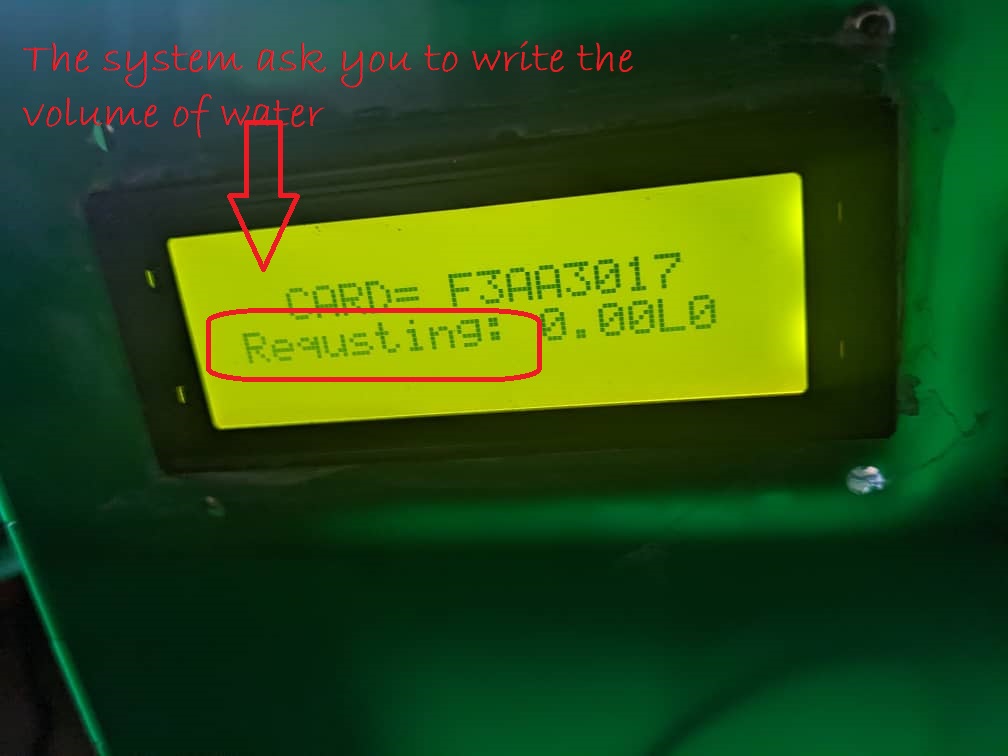 By using 3 buttons you will set the volume of water you will request, (Button for increasing volume, Button for dencreasing and other for confirming the volume you want to request)
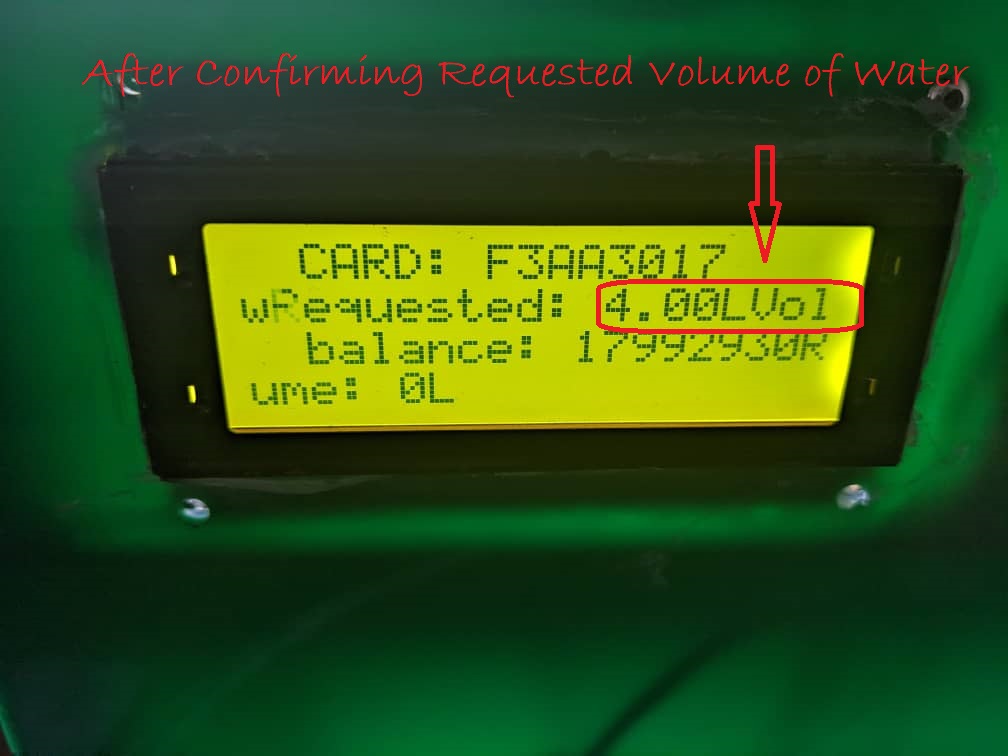
 After confirm 4 Litters of water we will display the below message, the system will go to rechack if the available balance will be equivalent to requested volume.
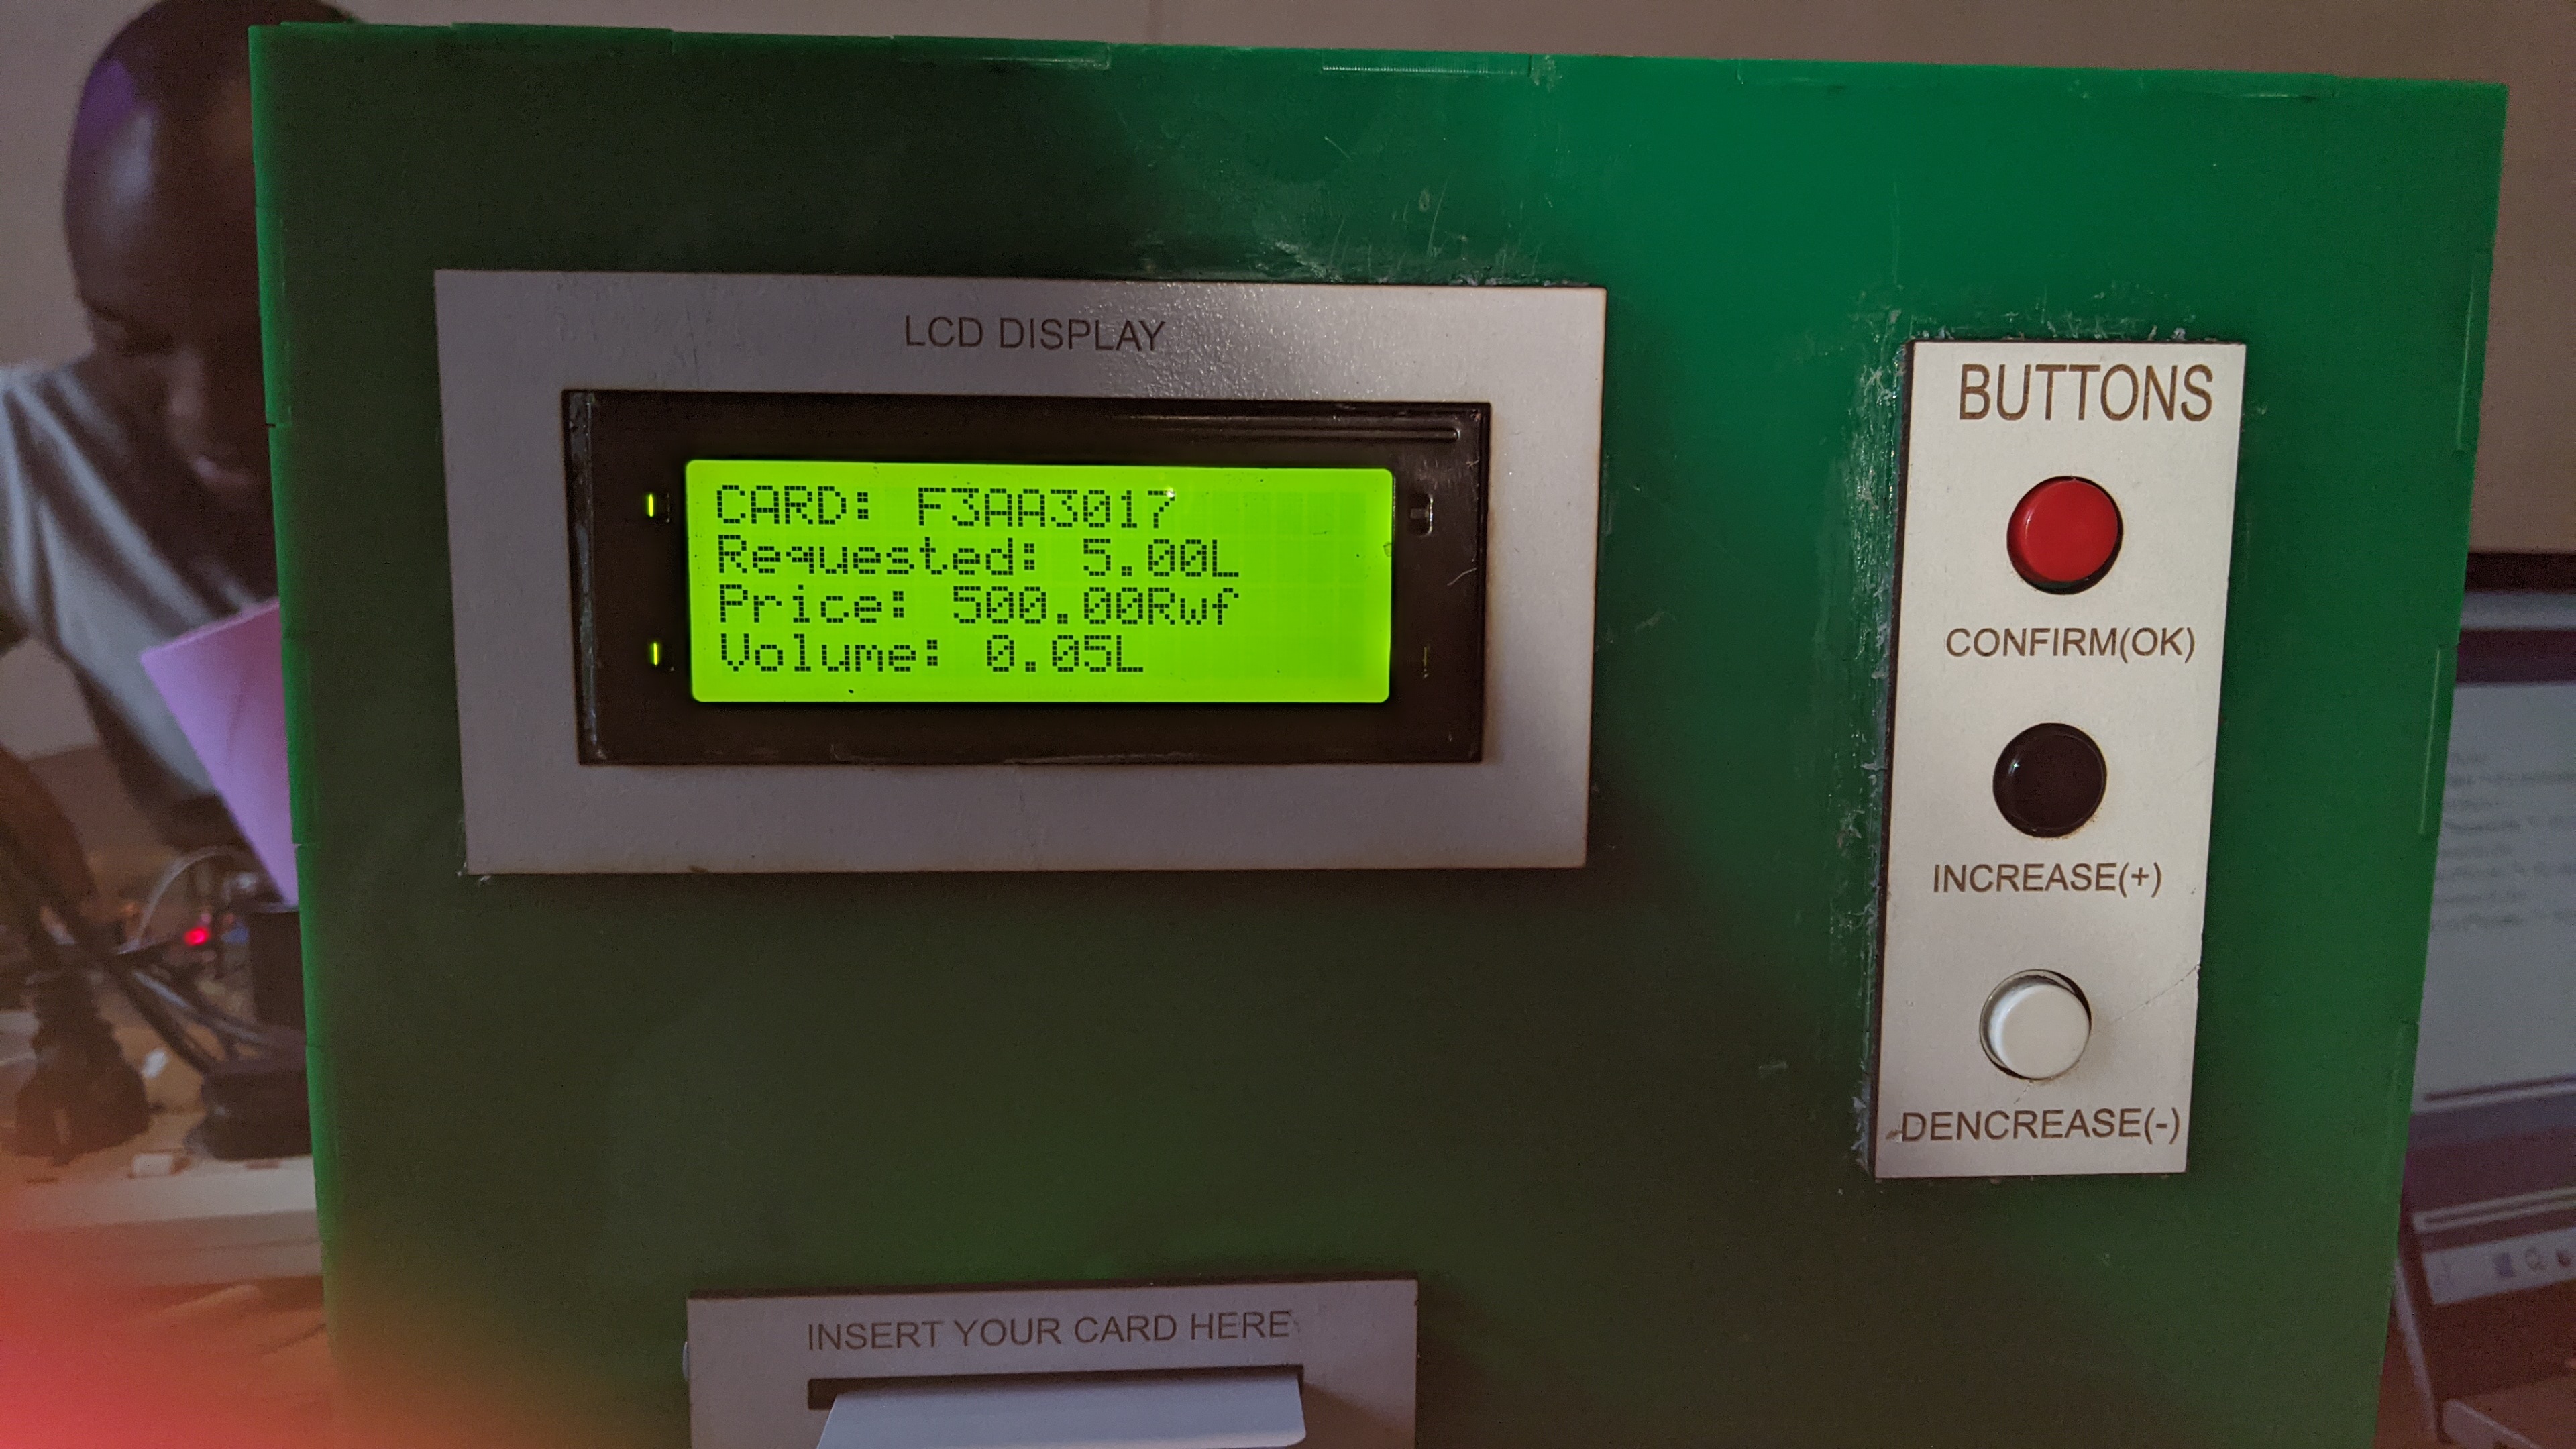
 Final results of how the system works
 The video shows how the system works