Week 14: Interface Application Programming
Interface Application Programming
Assignment activities: Group assignment: Compare as many tool options as possible If you want to explore the group Assignment Click Here 1. NODE RED
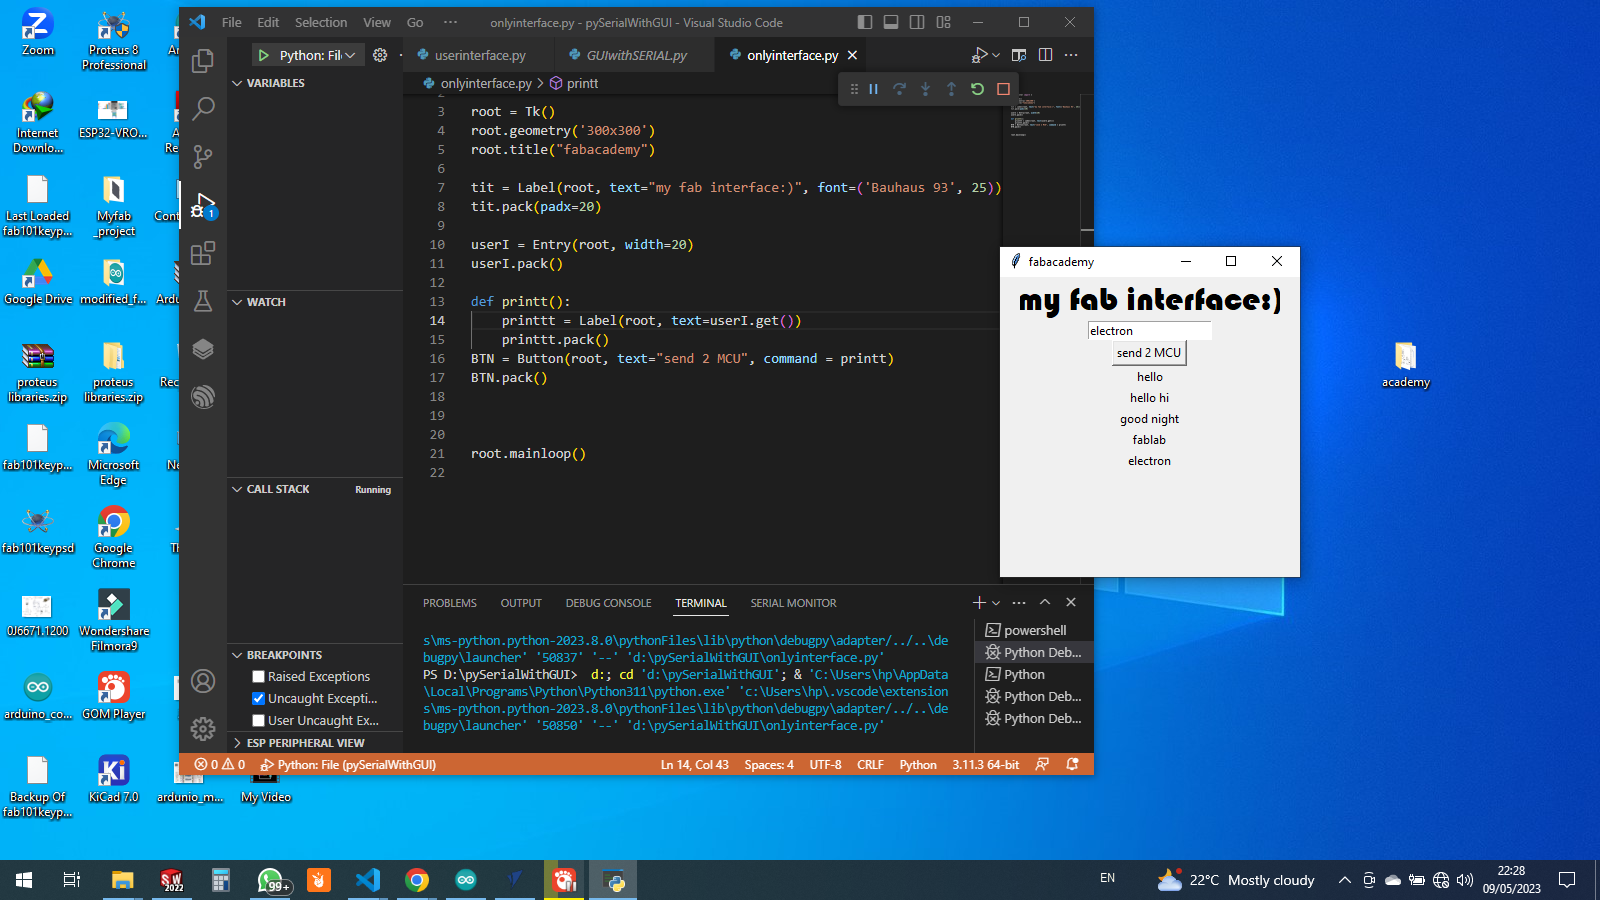
 2.TKINTER
 3.Using ESP32 as a web server with HTTP protocol

II.Individual assignment:
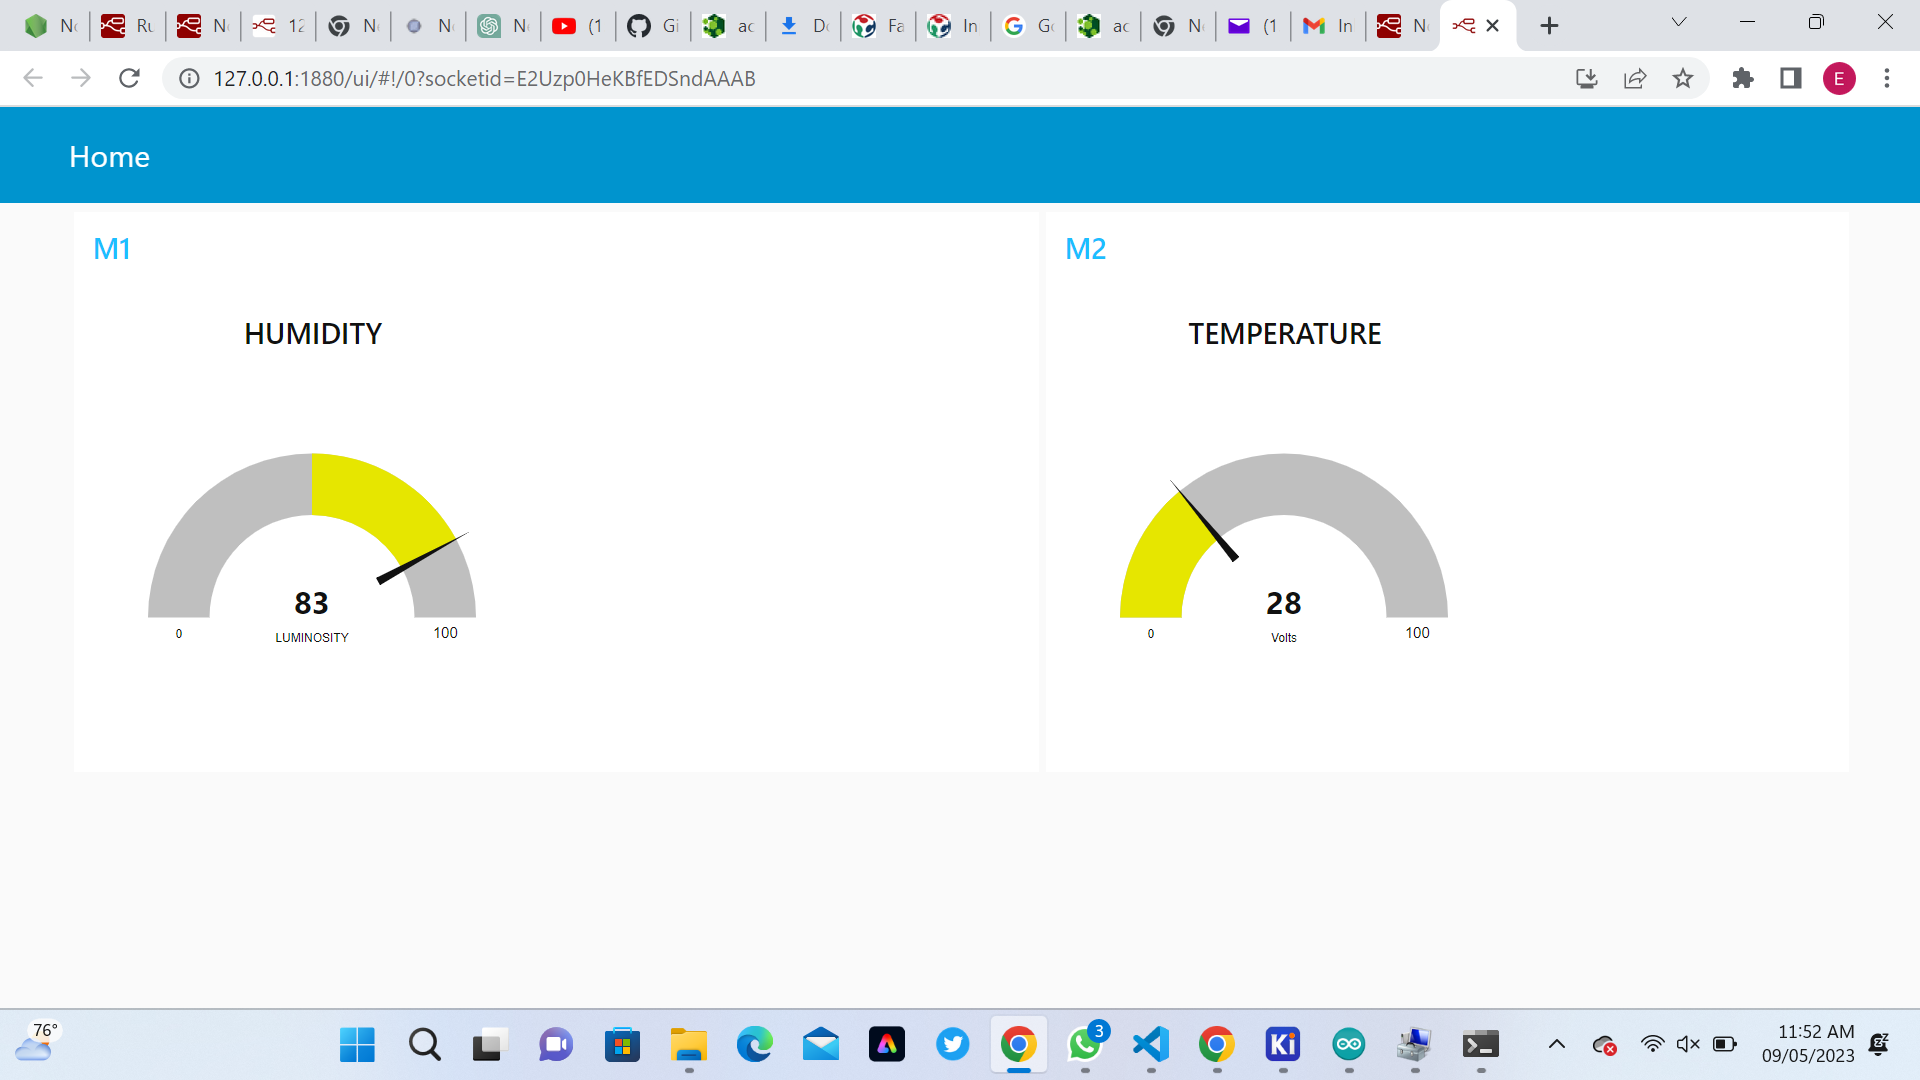
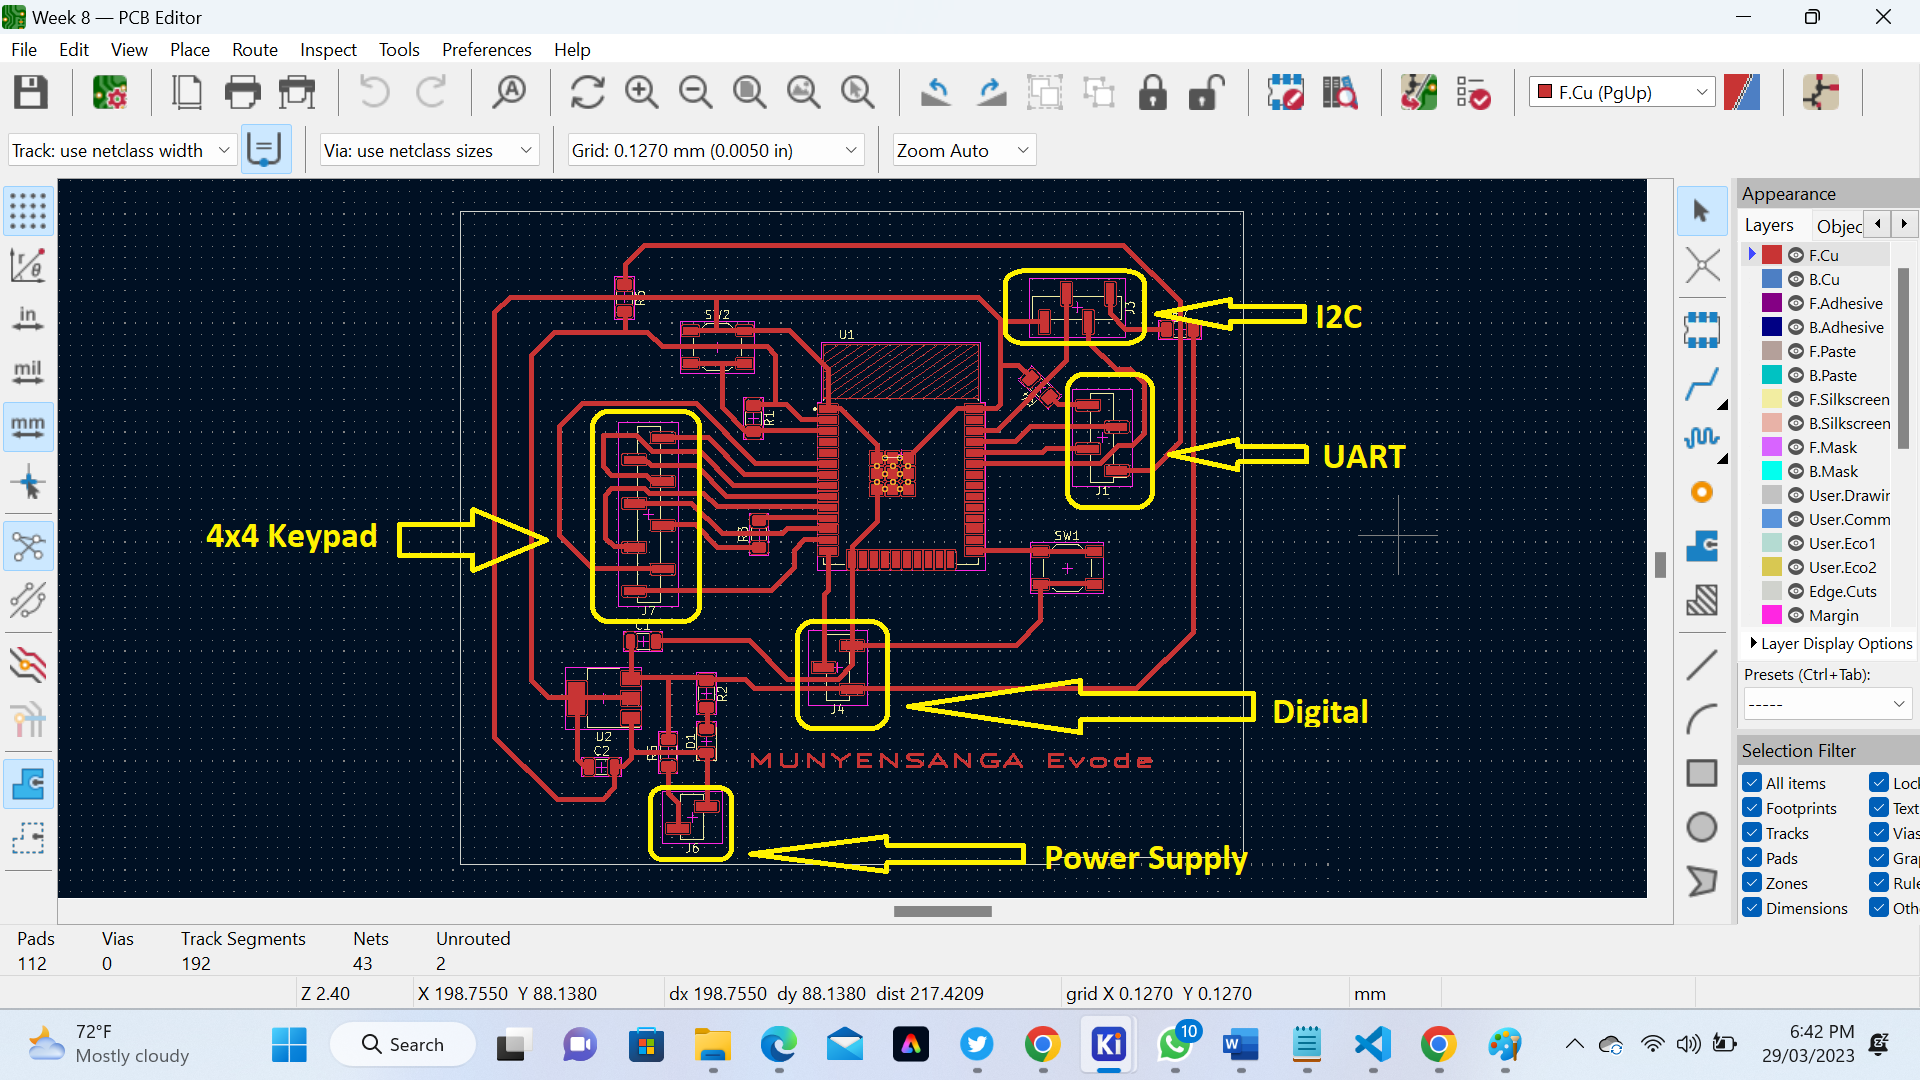
What I did in this week: In this week we make an interface which display Temperature and Humidity by using Node-RED to control the ESP32 with a Serial Coomunication and DHT11 temperature and humidity sensor module. I.We started by Designing the PCB and built our own board By using a microcontroller board that you have designed in Week 9 Output_Deviceswe use ESP23 Microcontroller,for Temperature and Humidity by using Node-RED to control the ESP32 with a Serial Coomunication and DHT11 temperature and humidity sensor module here is ESP23 Datasheet What is ESP 32? ESP32 is a powerful microcontroller developed by Espressif Systems. It is a dual-core, 32-bit processor with built-in Wi-Fi and Bluetooth connectivity. The ESP32 is designed for a wide range of applications such as IoT (Internet of Things) devices, home automation, industrial automation, smart appliances, and more. It has a clock speed of up to 240 MHz, 520 KB of RAM, and 4 MB of flash memory for program storage. Additionally, it has a variety of peripheral interfaces including SPI, I2C, UART, and ADC, making it easy to connect to sensors, displays, and other devices. The ESP32 can be programmed using a variety of programming languages including C++, Python, and MicroPython, making it a popular choice for both hobbyists and professional developers. Here is Schematic Used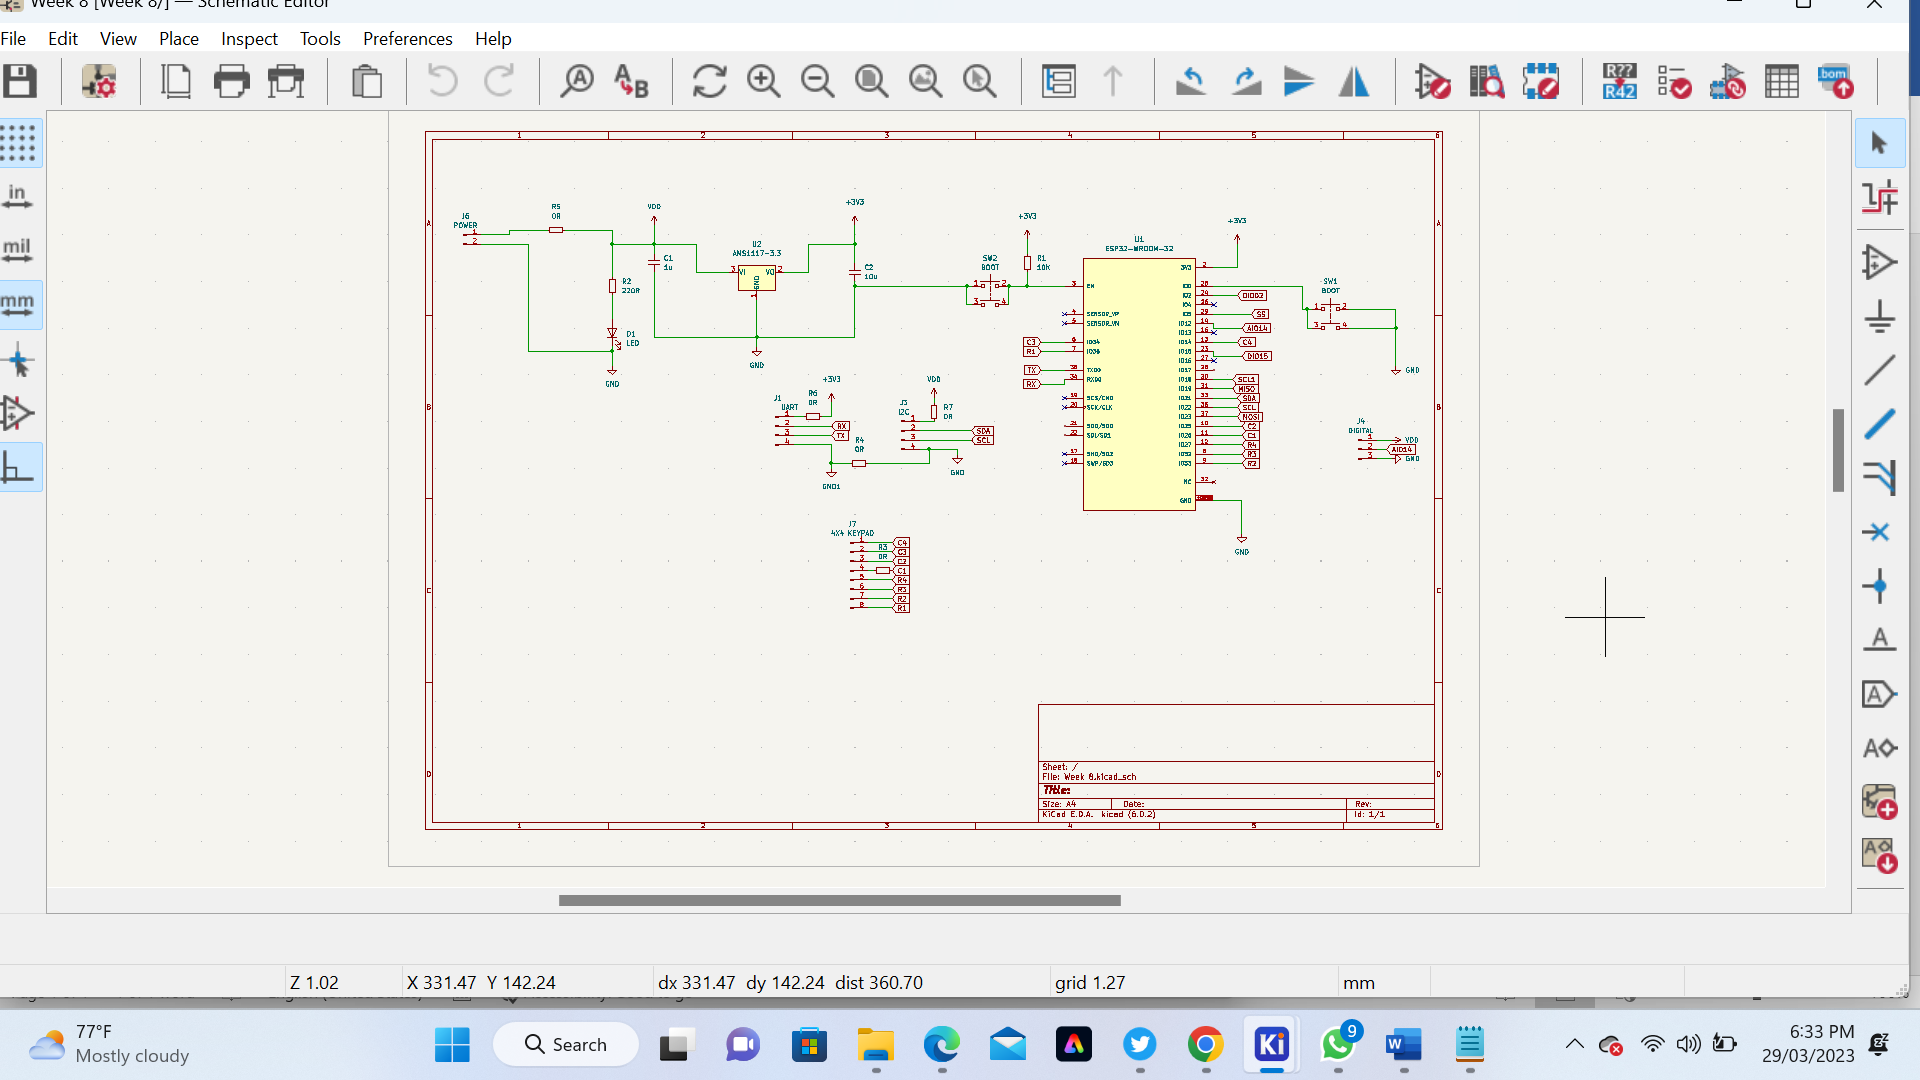 Here is PCB Used
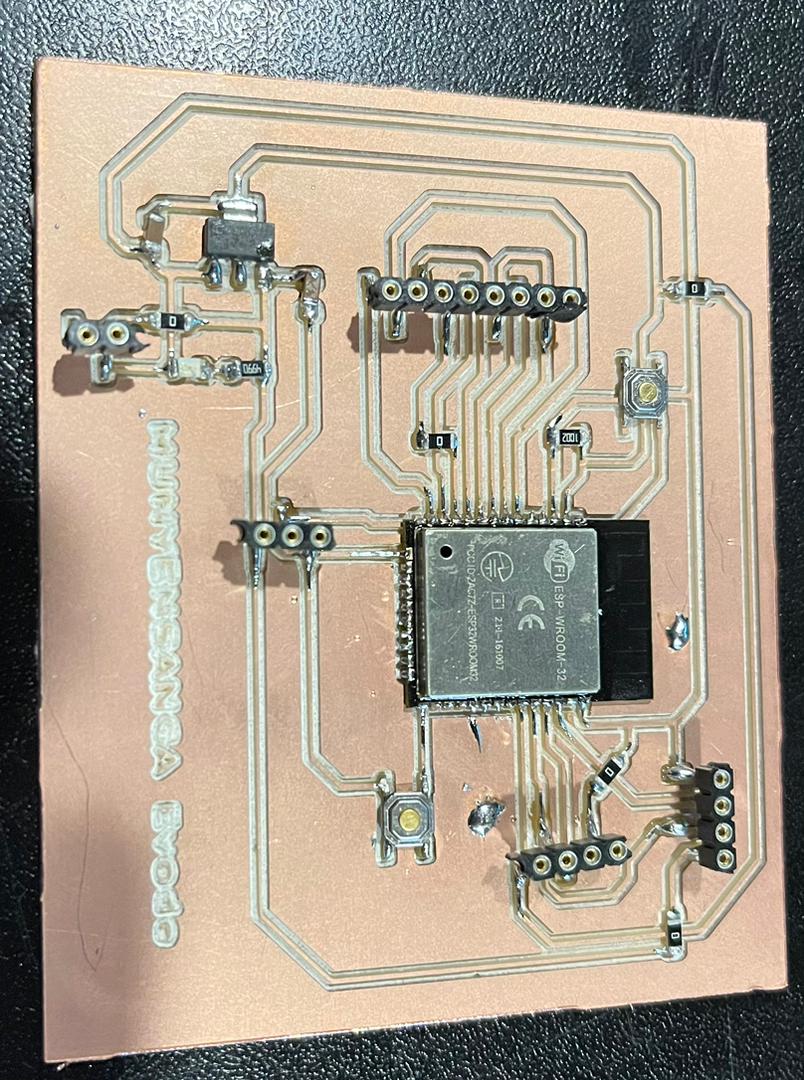
 Here is our PCB after Milling
 The following Image shows my Board used in this assignment, and this board was designed in week 9 as I cite in above stetements
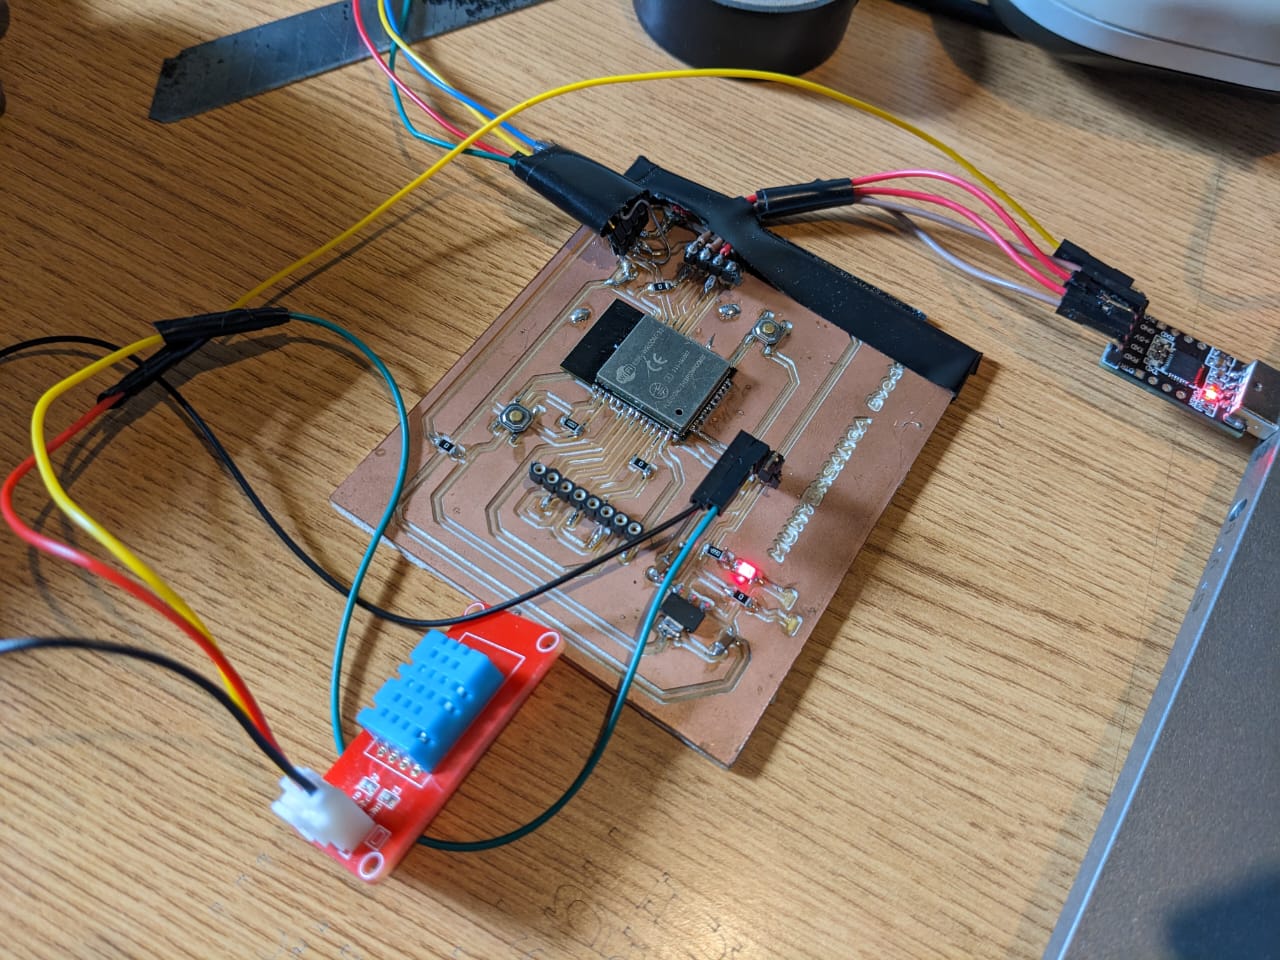
 Here is our board after connecting with Sensor DTH11 (Temperature and Humidity Sensor)
 II.To display our Interface we used Node-Red
a. What is Node Red?
Node-RED is an open-source visual programming tool used for wiring together hardware devices, APIs, and online services in new and interesting ways. It was originally developed by IBM's Emerging Technology Services team and is now a part of the JS Foundation. Node-RED is built on top of Node.js, a popular server-side JavaScript platform, and uses a browser-based flow editor to allow users to drag and drop nodes to create flows.
b.How to install Node-Red on localhost
Node-RED is an open-source programming tool that allows you to create flows for the Internet of Things (IoT) and is typically installed on a computer or server. However, you can also run Node-RED on an ESP32 microcontroller using the ESP-IDF framework. Here are the steps to install Node-RED on a localhost by using ESP32:
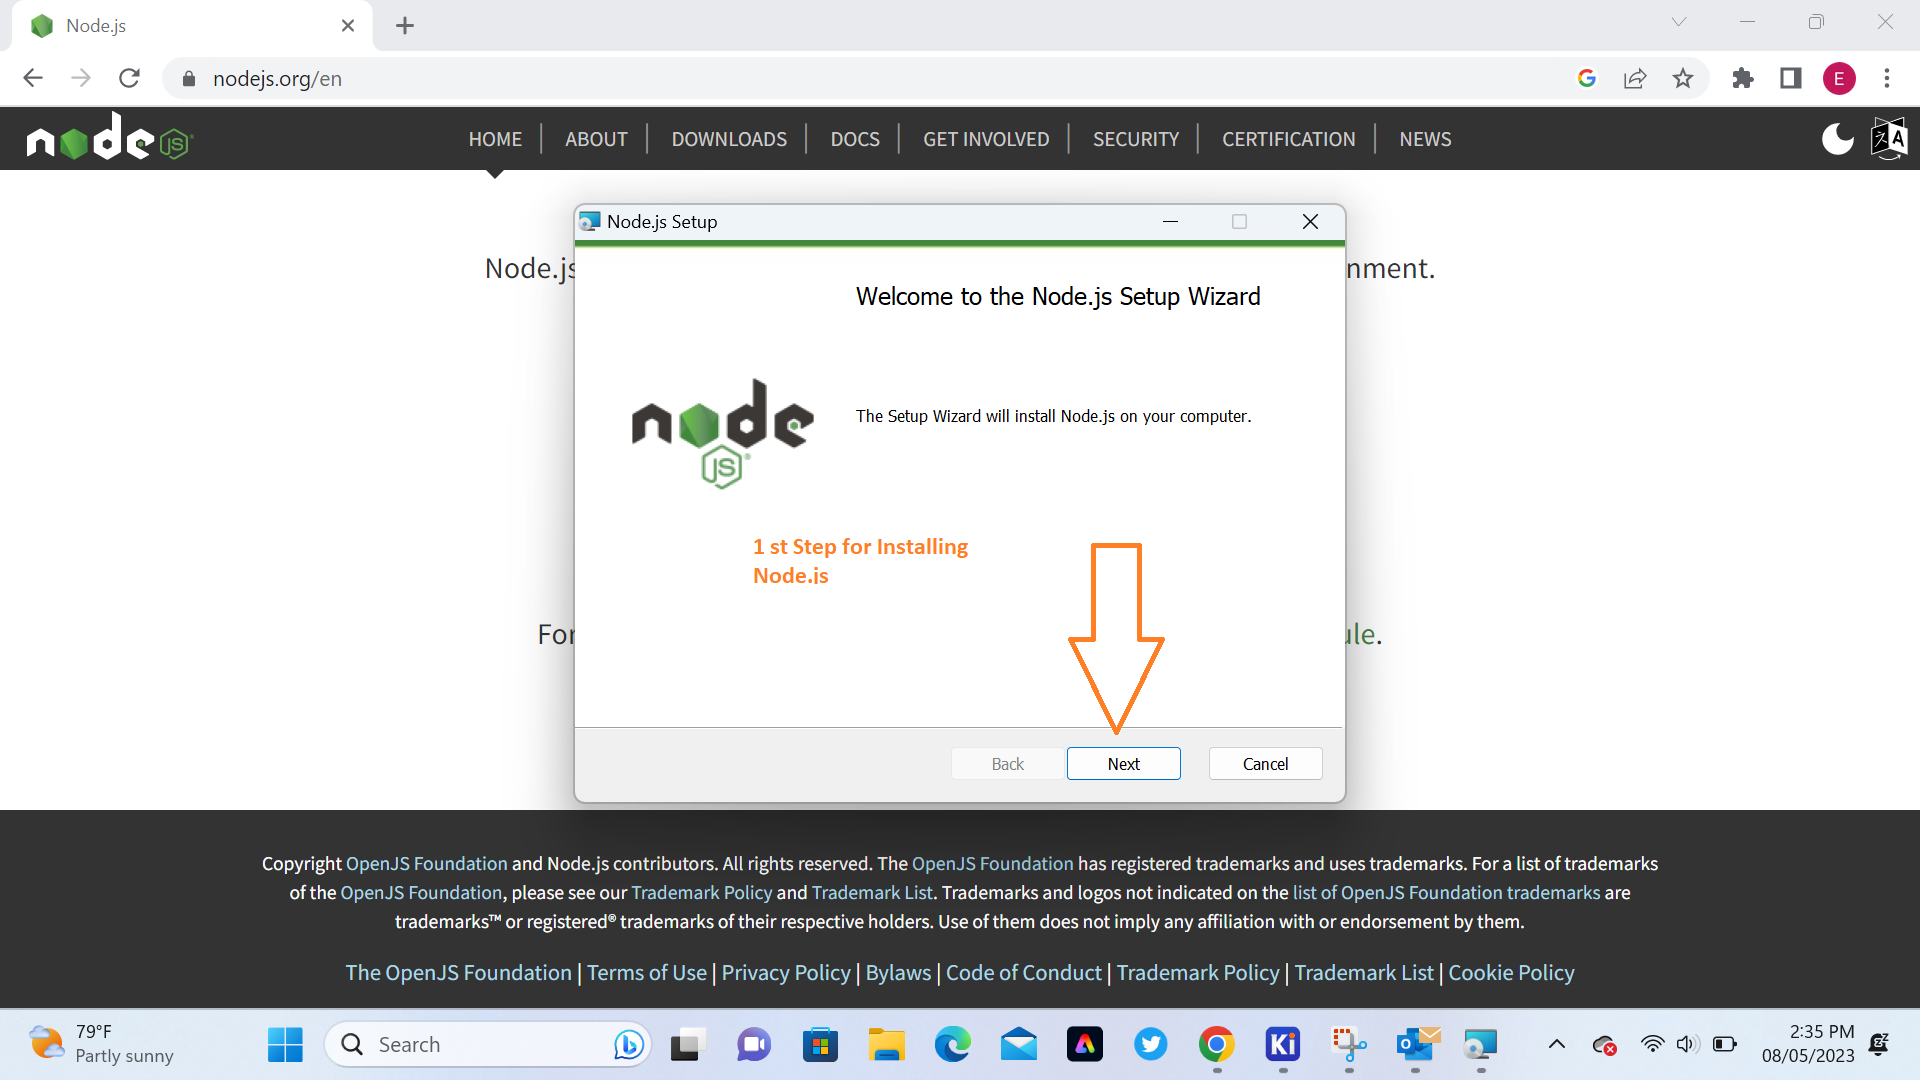
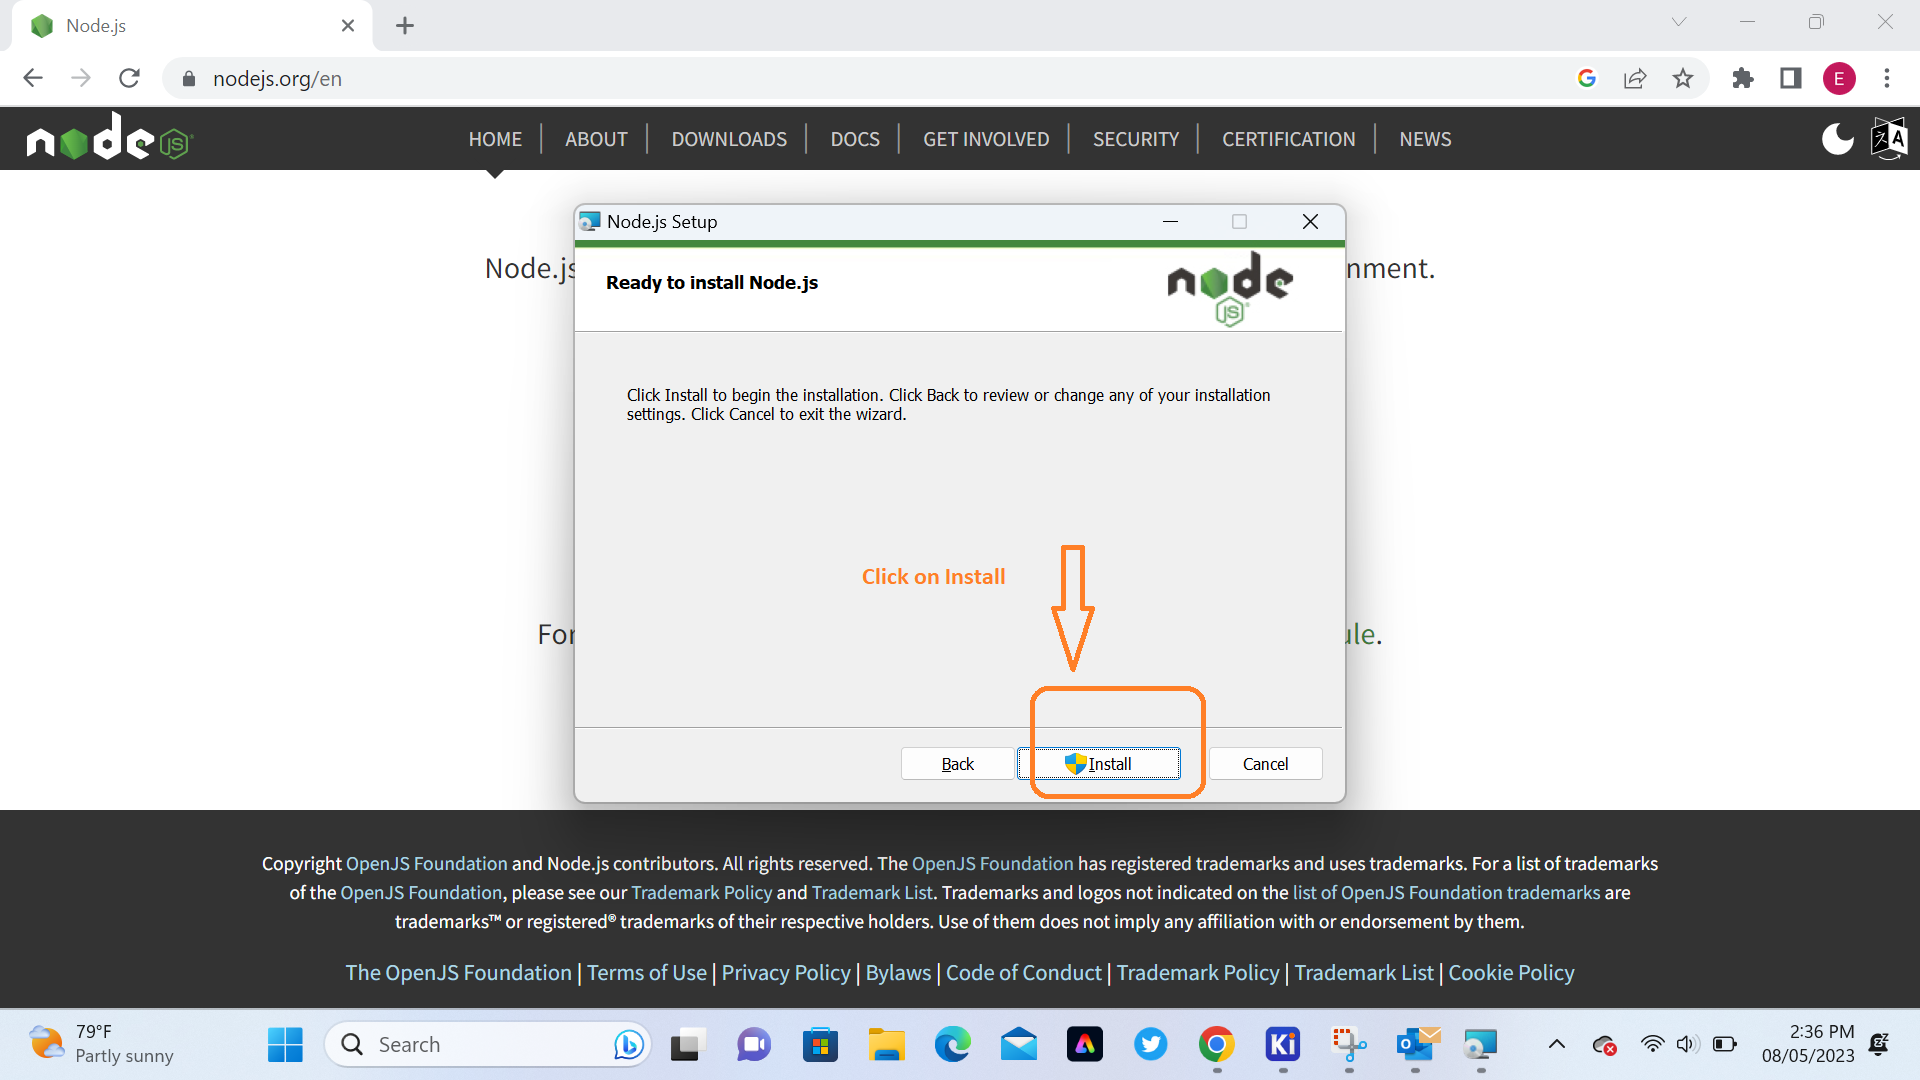
Download Node.js on This Link and install
II.To display our Interface we used Node-Red
a. What is Node Red?
Node-RED is an open-source visual programming tool used for wiring together hardware devices, APIs, and online services in new and interesting ways. It was originally developed by IBM's Emerging Technology Services team and is now a part of the JS Foundation. Node-RED is built on top of Node.js, a popular server-side JavaScript platform, and uses a browser-based flow editor to allow users to drag and drop nodes to create flows.
b.How to install Node-Red on localhost
Node-RED is an open-source programming tool that allows you to create flows for the Internet of Things (IoT) and is typically installed on a computer or server. However, you can also run Node-RED on an ESP32 microcontroller using the ESP-IDF framework. Here are the steps to install Node-RED on a localhost by using ESP32:
Download Node.js on This Link and install
 After Installing nodejs we will open Command Prompt and verify the version of software by writing node --version and install Node-RED by using command npm install -g --unsafe-perm node-red
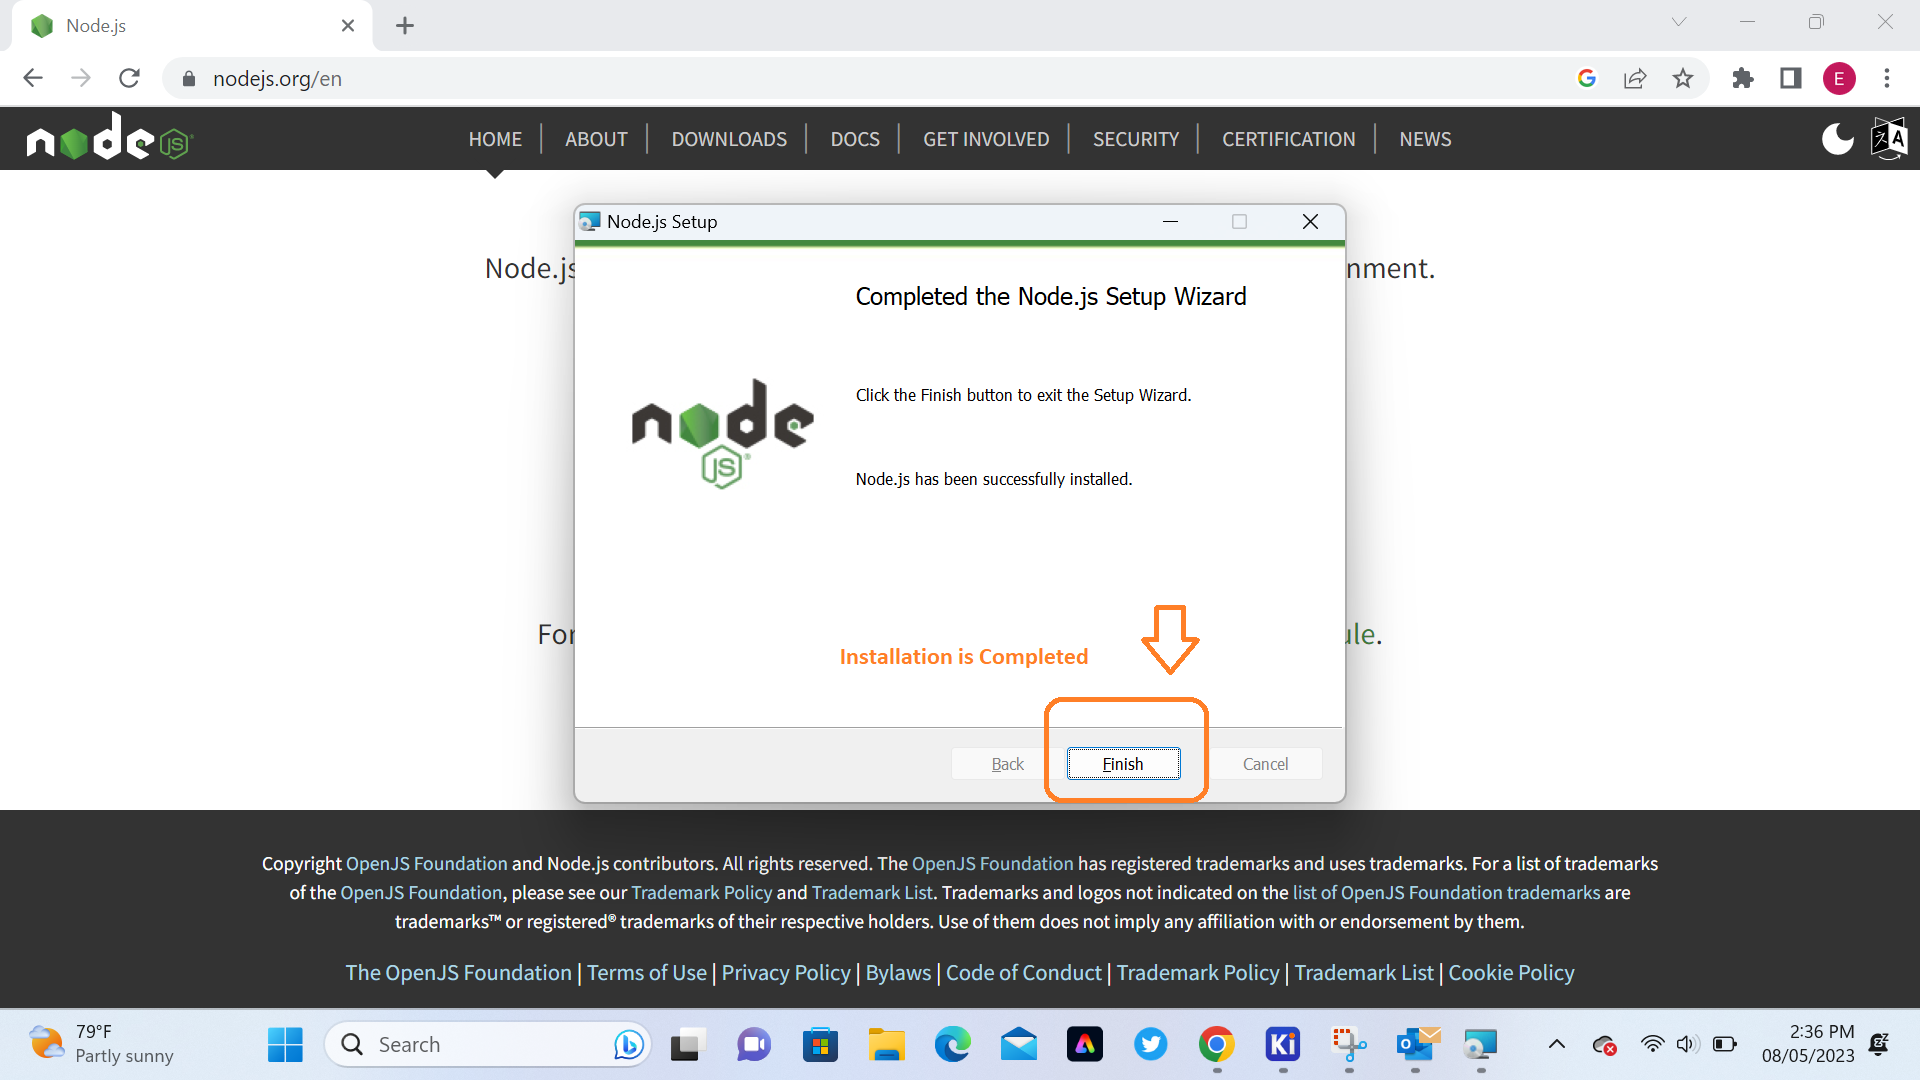
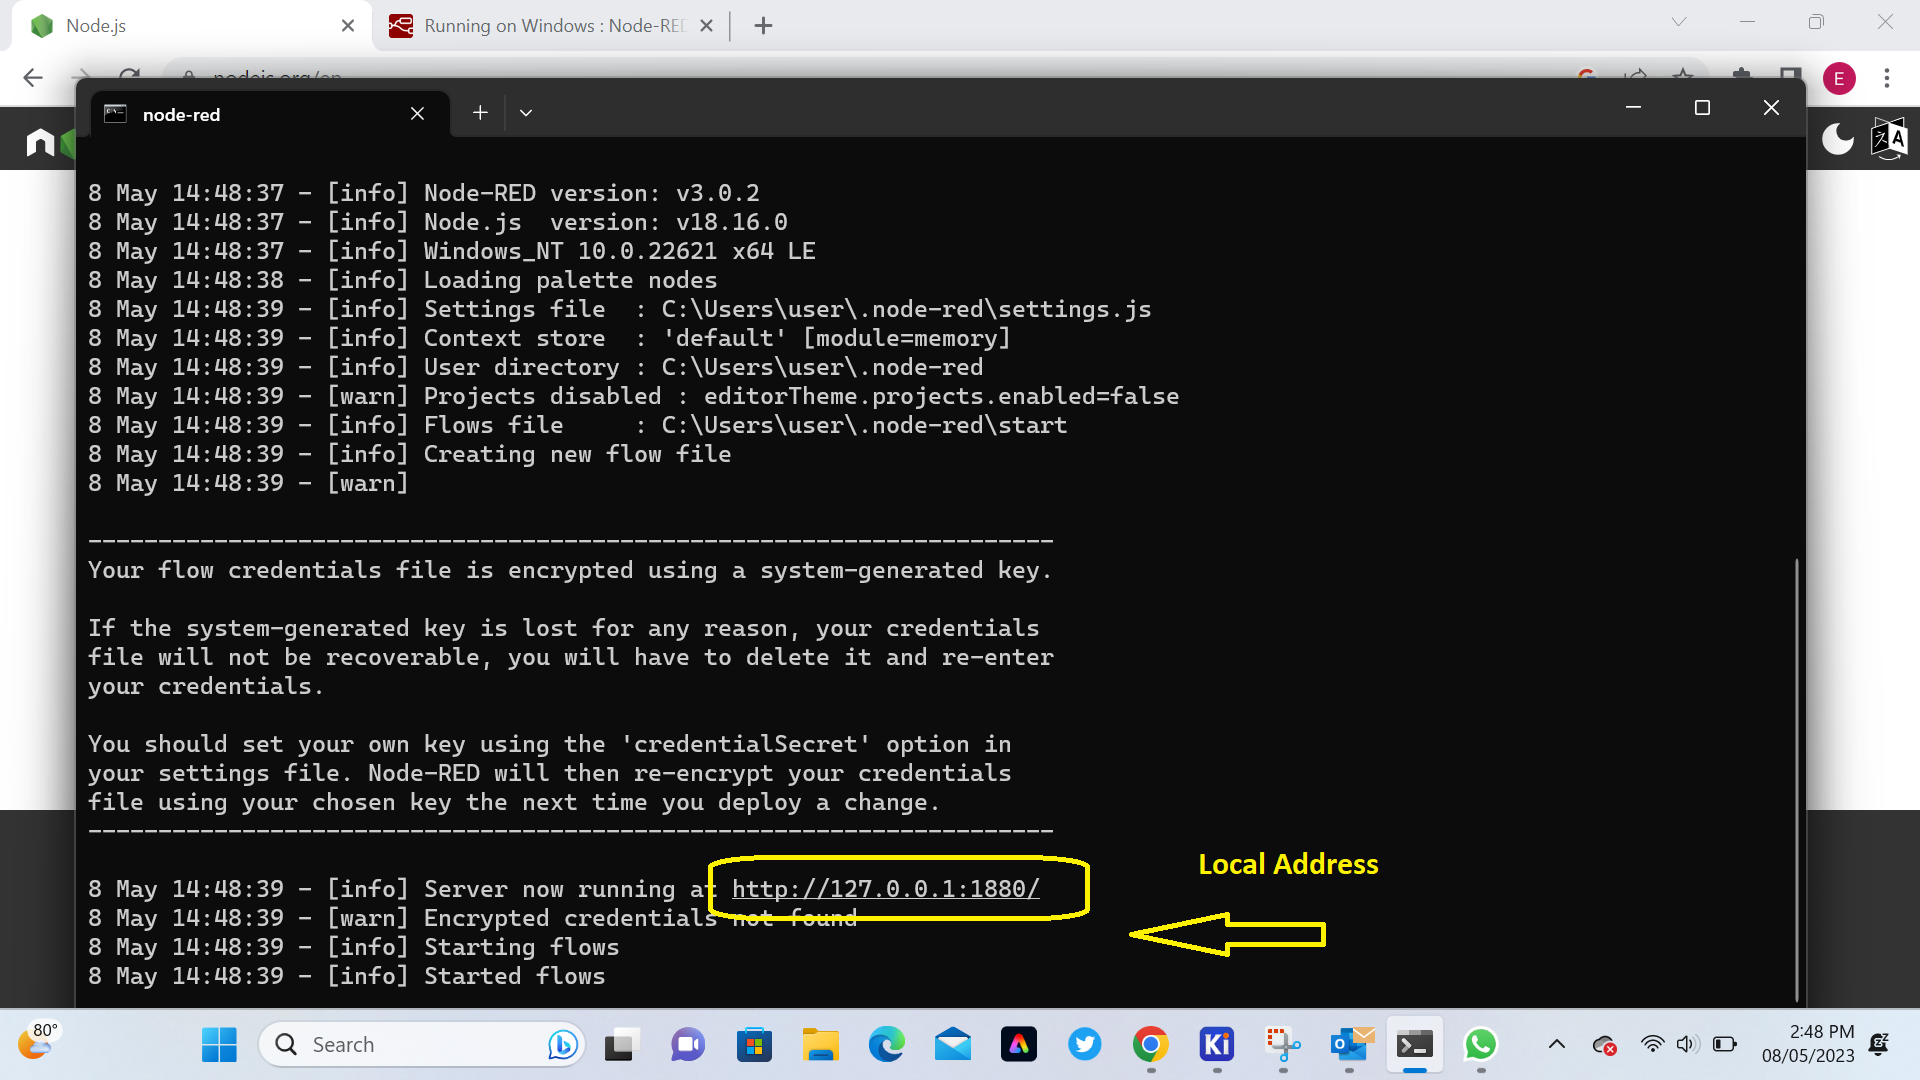
 After Installing Node-RED we will found the Local Address we will use for runing Node-RED here is http://127.0.0.1:1880/
 c. How to make user interface with node red
As discribed above I want to display Temperature and Humidity by using Node-RED to control the ESP32 with a Serial Coomunication and DHT11 temperature and humidity sensor module, I used ESP32 to do that. For more about ESP32 how interfaring with DHT11/DHT22 Temperature and Humidity Readings Click Here
When you open the Node-RED Local address (http://127.0.0.1:1880/) in browser the Node-RED Interface will opned.
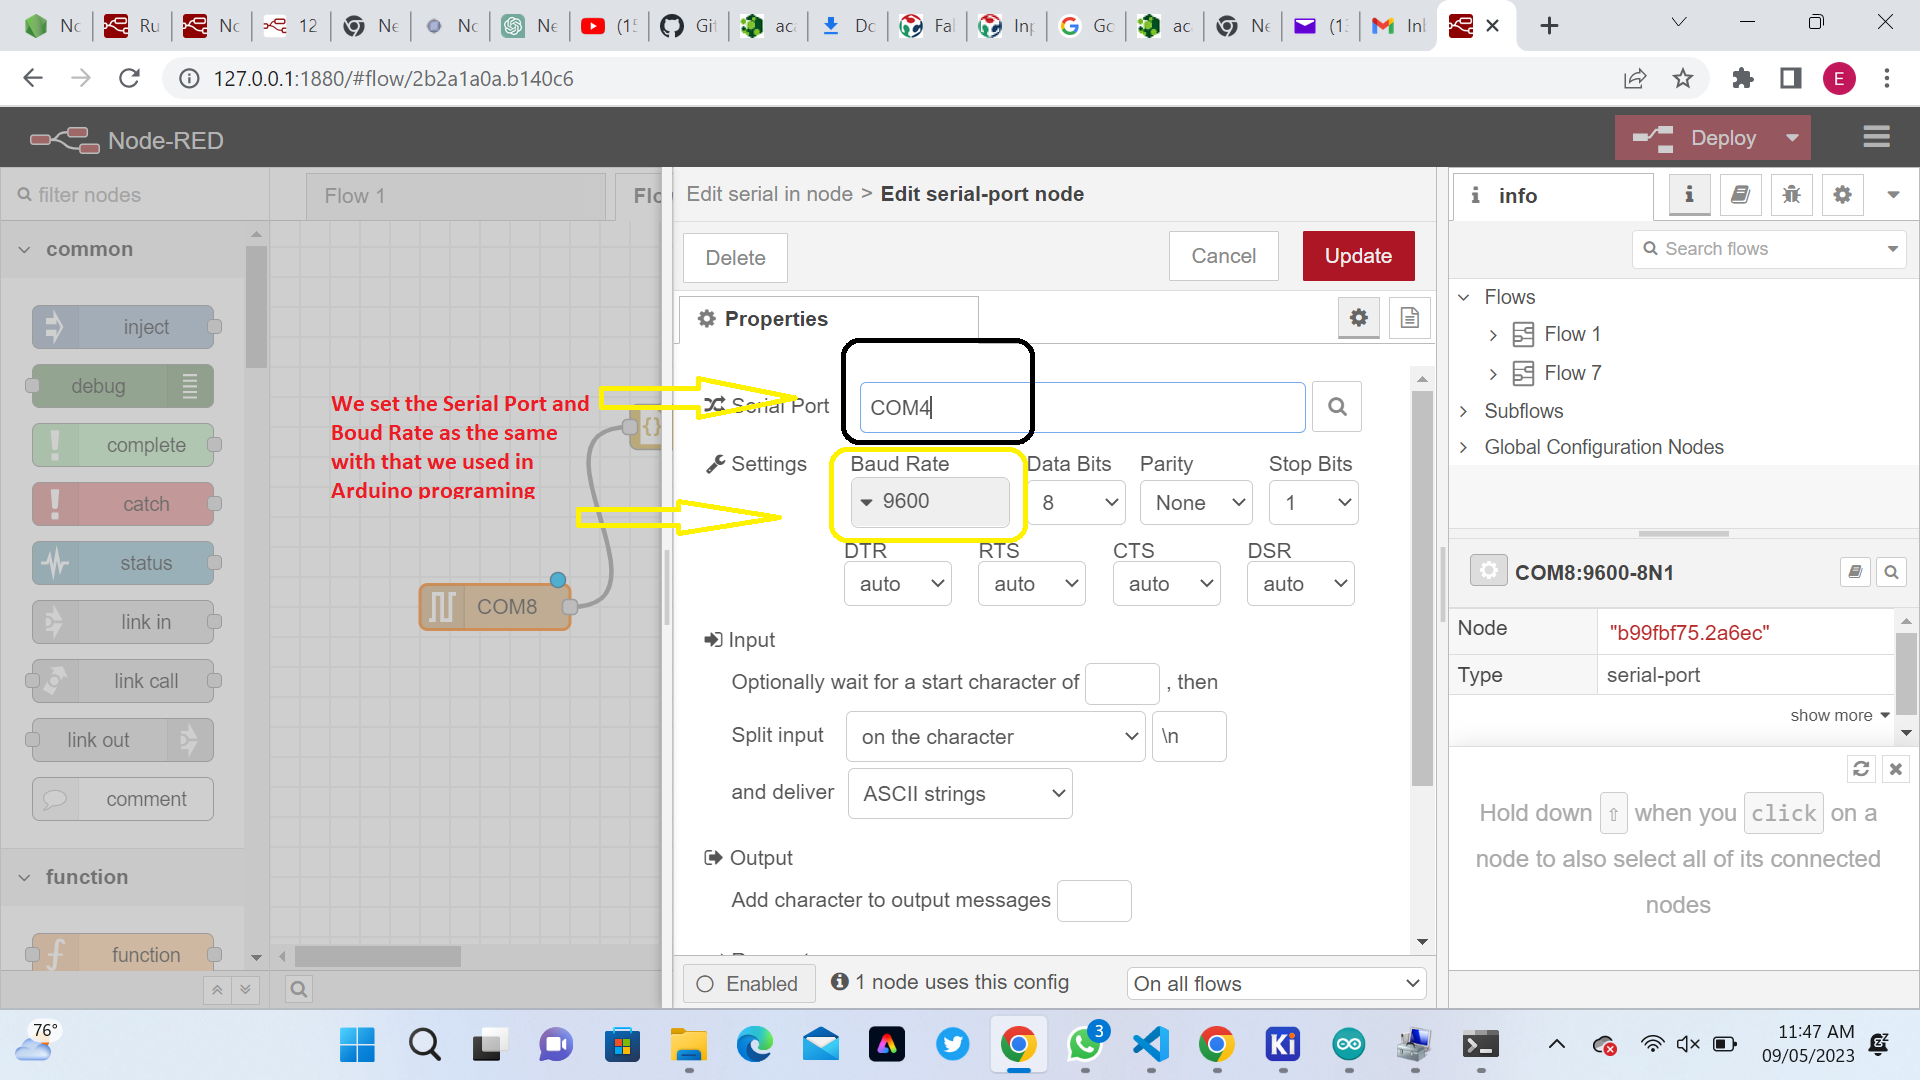
Here We are setting up Serial Port and Boud rate the same as we used in Arduino Programming
c. How to make user interface with node red
As discribed above I want to display Temperature and Humidity by using Node-RED to control the ESP32 with a Serial Coomunication and DHT11 temperature and humidity sensor module, I used ESP32 to do that. For more about ESP32 how interfaring with DHT11/DHT22 Temperature and Humidity Readings Click Here
When you open the Node-RED Local address (http://127.0.0.1:1880/) in browser the Node-RED Interface will opned.
Here We are setting up Serial Port and Boud rate the same as we used in Arduino Programming
 Here are our Node-Red Programming
.png) V. Connecting node red to mcu via serial library and doing Arduino Programming
a. DHT Sensor Libraries
To read from the DHT sensor, we’ll use the DHT library from Adafruit. use this library you also need to install the Adafruit Unified Sensor library. Follow the next steps to install those libraries.
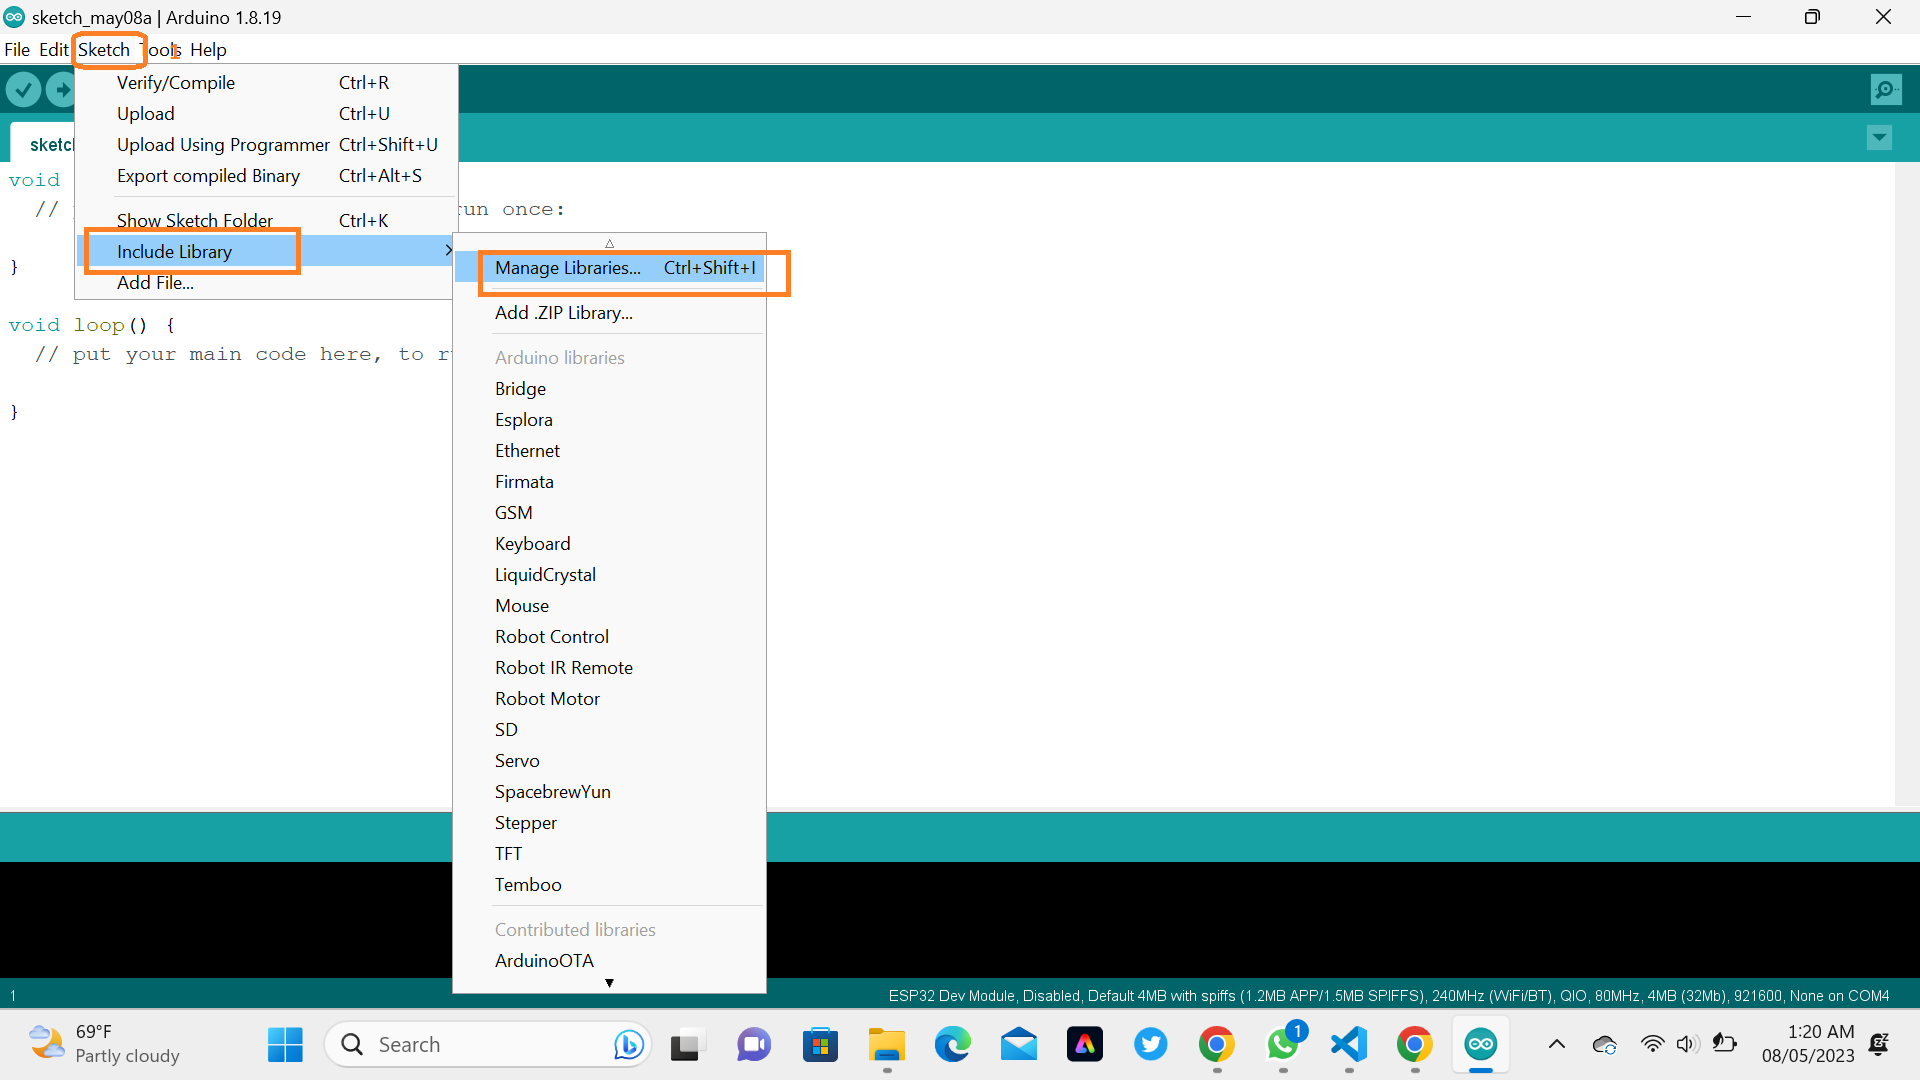
Open your Arduino IDE and go to Sketch > Include Library > Manage Libraries. The Library Manager should open
V. Connecting node red to mcu via serial library and doing Arduino Programming
a. DHT Sensor Libraries
To read from the DHT sensor, we’ll use the DHT library from Adafruit. use this library you also need to install the Adafruit Unified Sensor library. Follow the next steps to install those libraries.
Open your Arduino IDE and go to Sketch > Include Library > Manage Libraries. The Library Manager should open
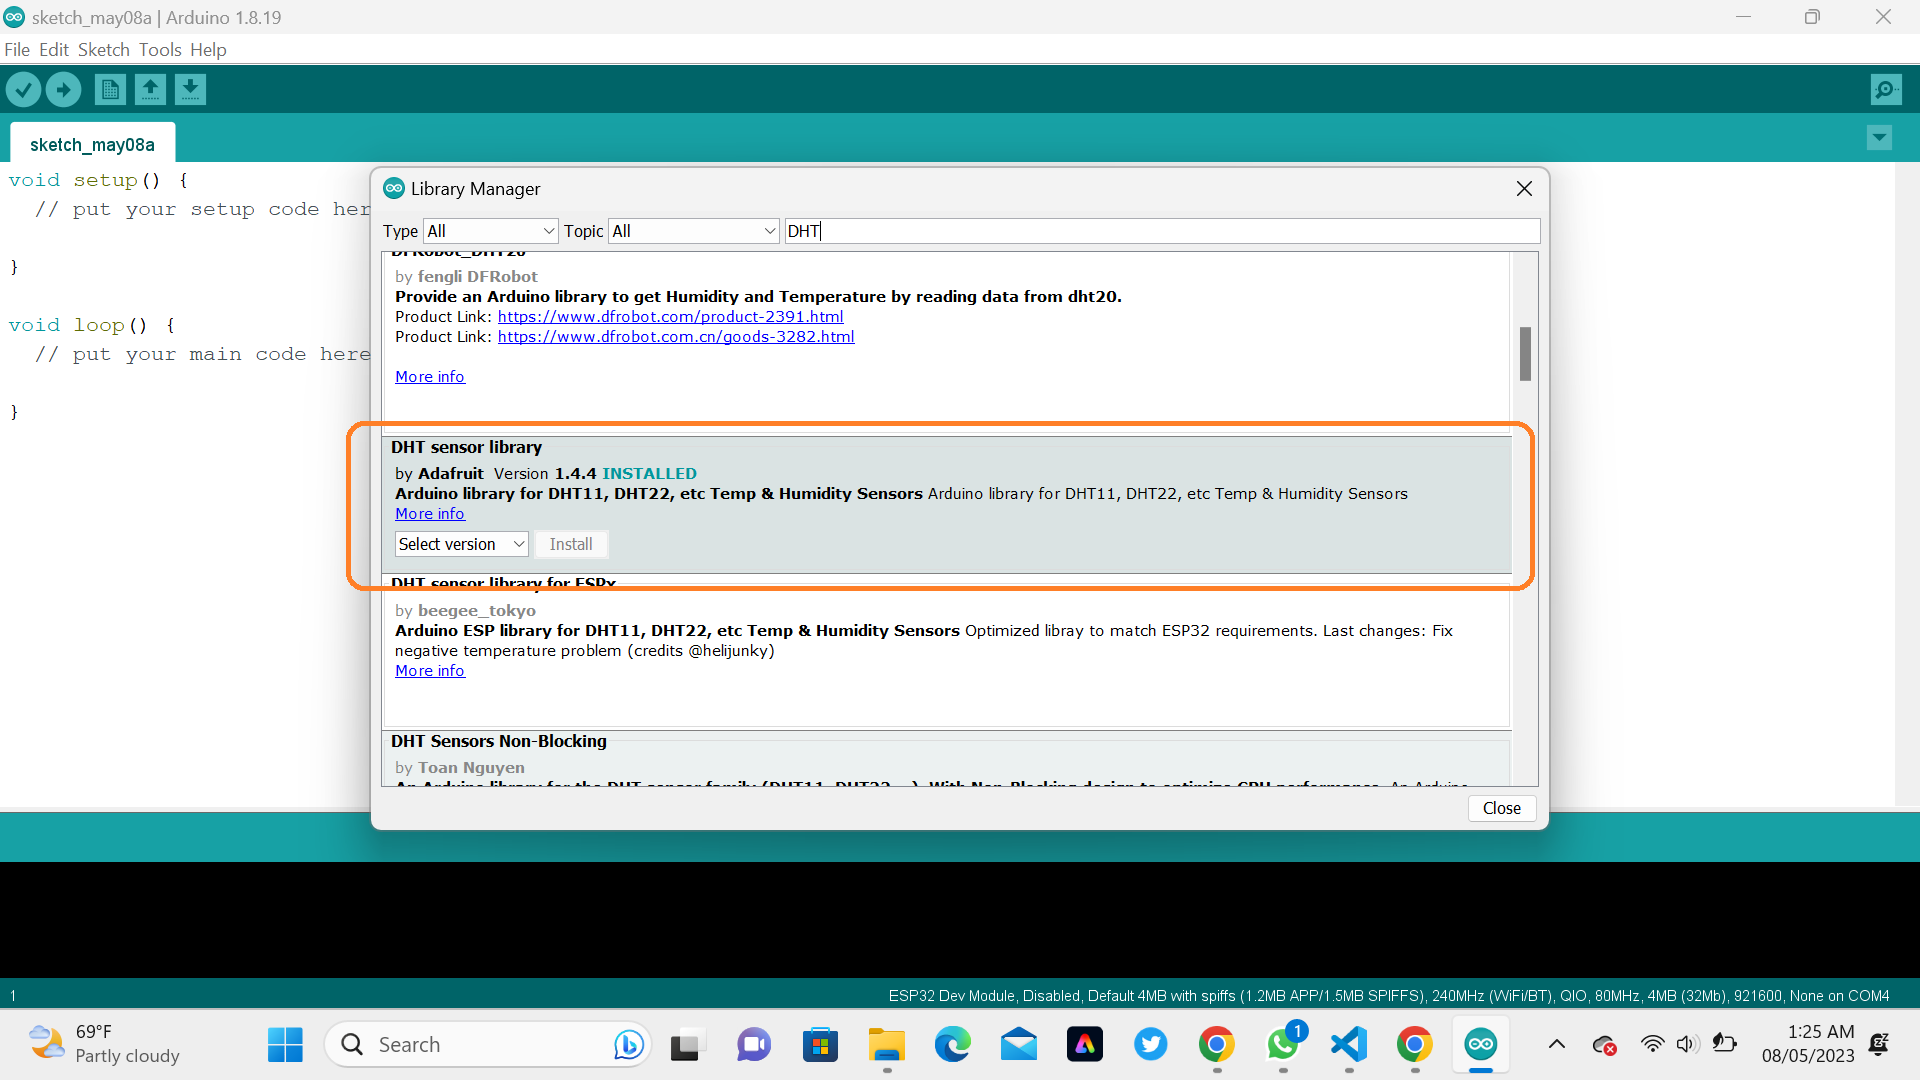
 Search for “DHT” on the Search box and install the DHT library from Adafruit, fortunately our DHT sensor was installed in Week 11: Input Devices.
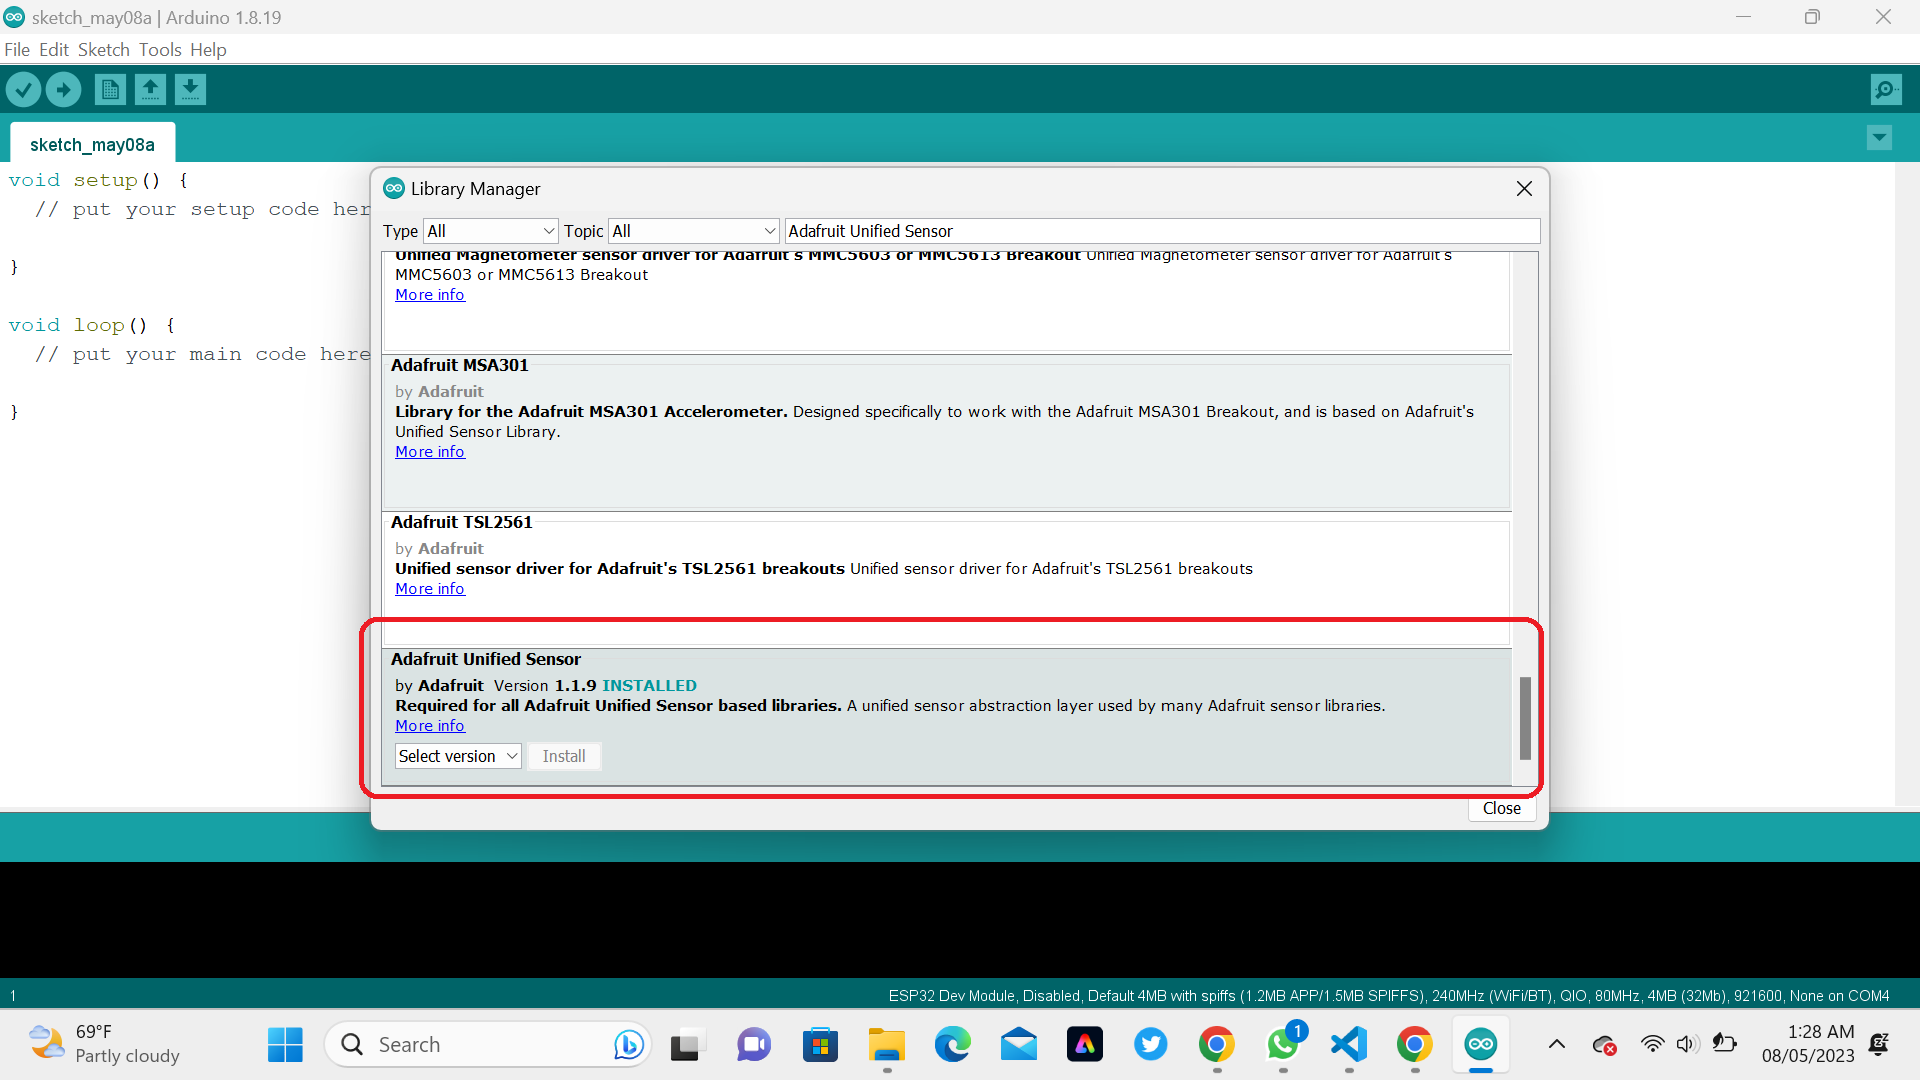
 After installing the DHT library from Adafruit, type “Adafruit Unified Sensor” in the search box. Scroll all the way down to find the library and install it.
 Here are Arduino code used to display our interface (Temperature and Humidity)
                            #include "DHT.h"
                                    #define DHTPIN 12
                                    #define DHTTYPE DHT11
                                    DHT dht(DHTPIN, DHTTYPE);
                                    void setup() {
                                      Serial.begin(9600);
                                      dht.begin(); // initialize the sensor
                                    }
                                    void loop() {
                                      // wait a few seconds between measurements.
                                      delay(2000);
                                      // read humidity
                                      float humi  = dht.readHumidity();
                                      // read temperature as Celsius
                                      float tempC = dht.readTemperature();
                                      // read temperature as Fahrenheit
                                      float tempF = dht.readTemperature(true);

                                      // check if any reads failed
                                      if (isnan(humi) || isnan(tempC) || isnan(tempF)) {
                                        Serial.println("Failed to read from DHT sensor!");
                                      } else {
                                     Serial.print("{\"temperature\":");
                                     Serial.print(tempC);
                                     Serial.print(",\"humidity\":");
                                     Serial.print(humi);
                                     Serial.println("}");
                                      }
                                    }
Here we are uploading the above Arduino code in ESP32 Microcontroller
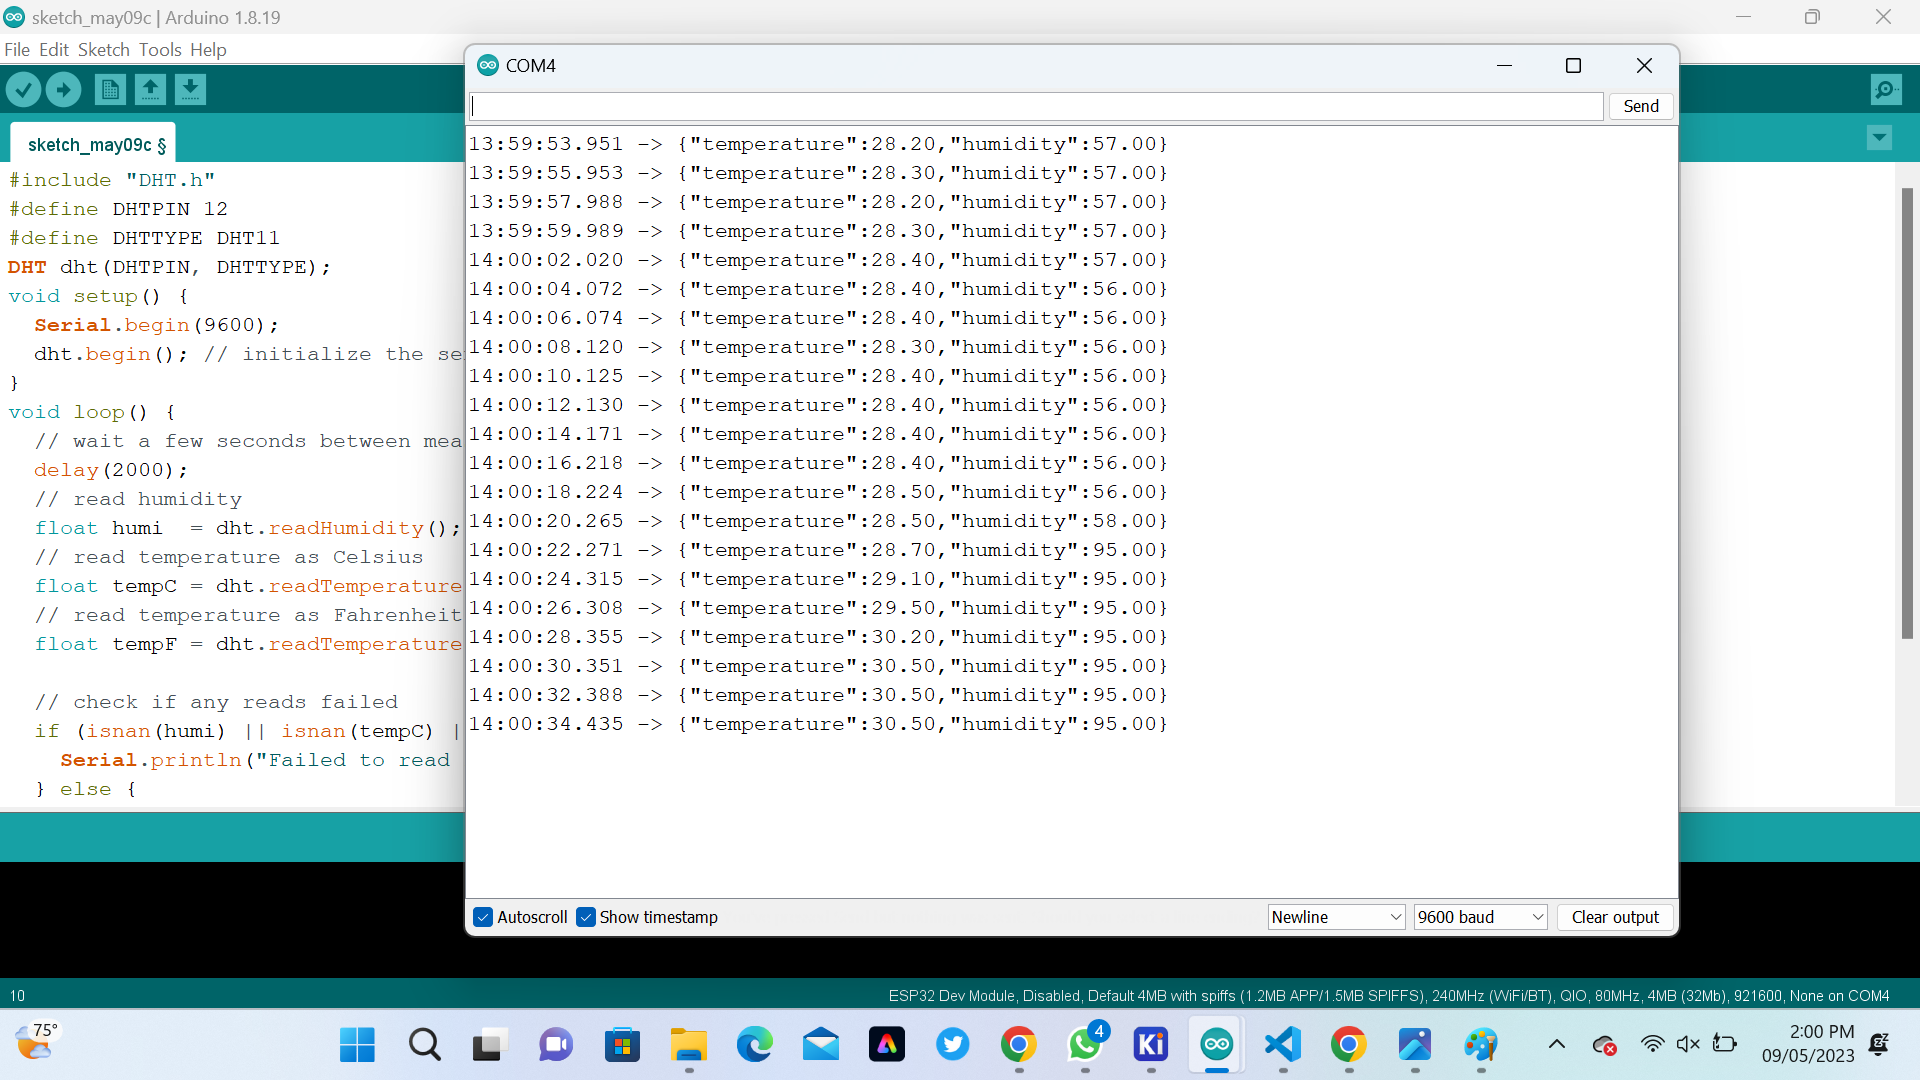
 Here are the output of the Arduino code programming
 Final Results and Hero shot
To show if the the process and our Interface watch the below Video
Final Results and Hero shot
To show if the the process and our Interface watch the below Video
If you want to learn about my Programming kindly click here for download my files