Week_12: Molding_and_Casting
For this week's assignment we have to learn, design and develop a mold and cast it with some material. In my particular case I'm using jeweler's wax for the mold and flexible silicone for the piece. I'm planning on doing some sort of Soft Robot that moves with air and vacuum. Since my
Final Project is powered by air and moves on consecuence, this assignment has given me some light about the process for casting my final project "breathing" parts.
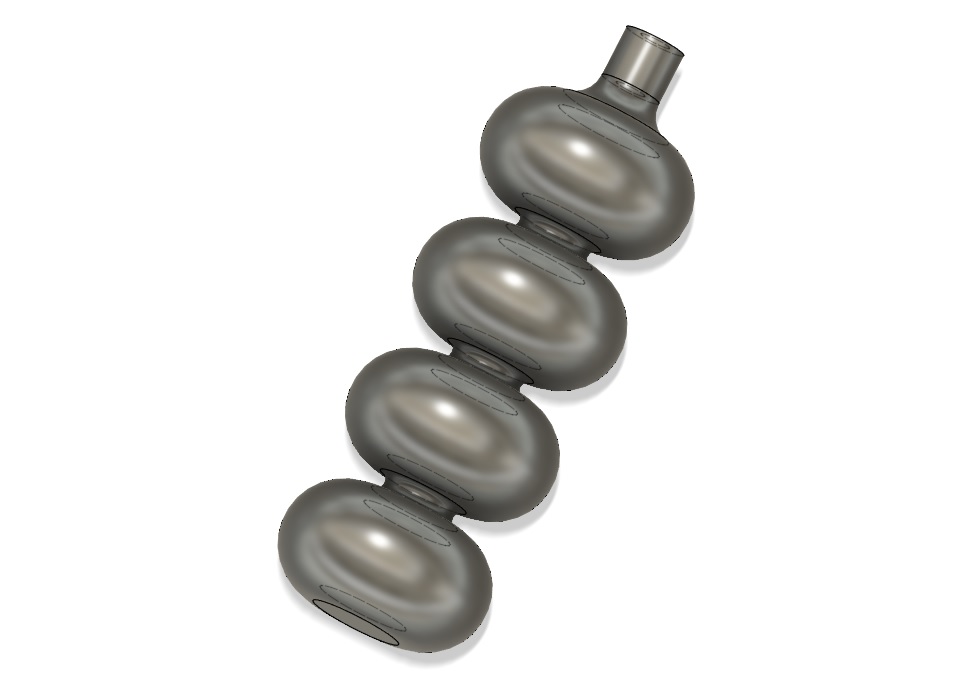
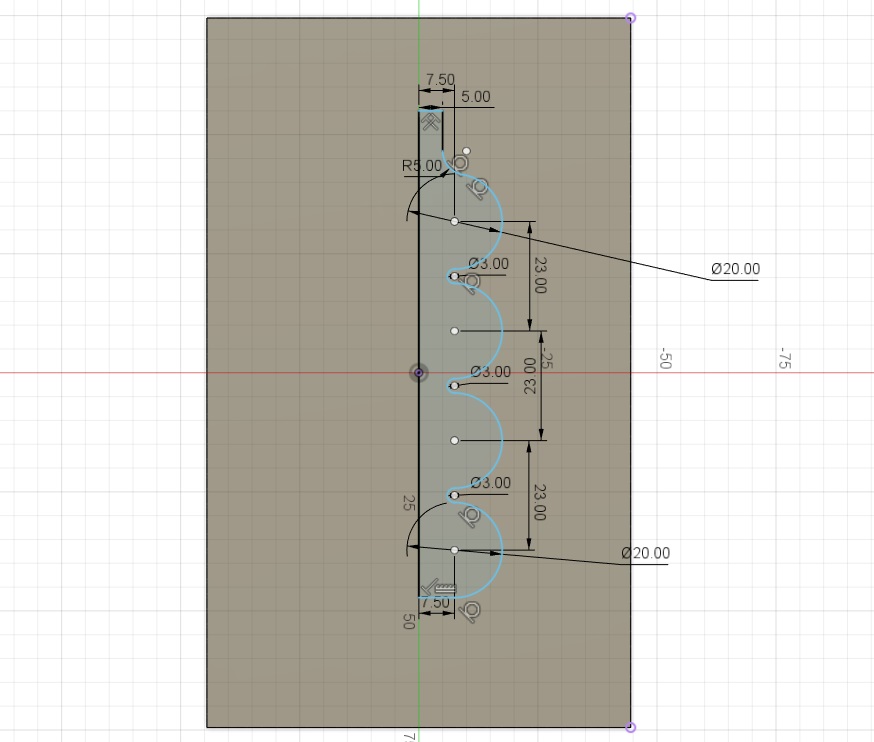
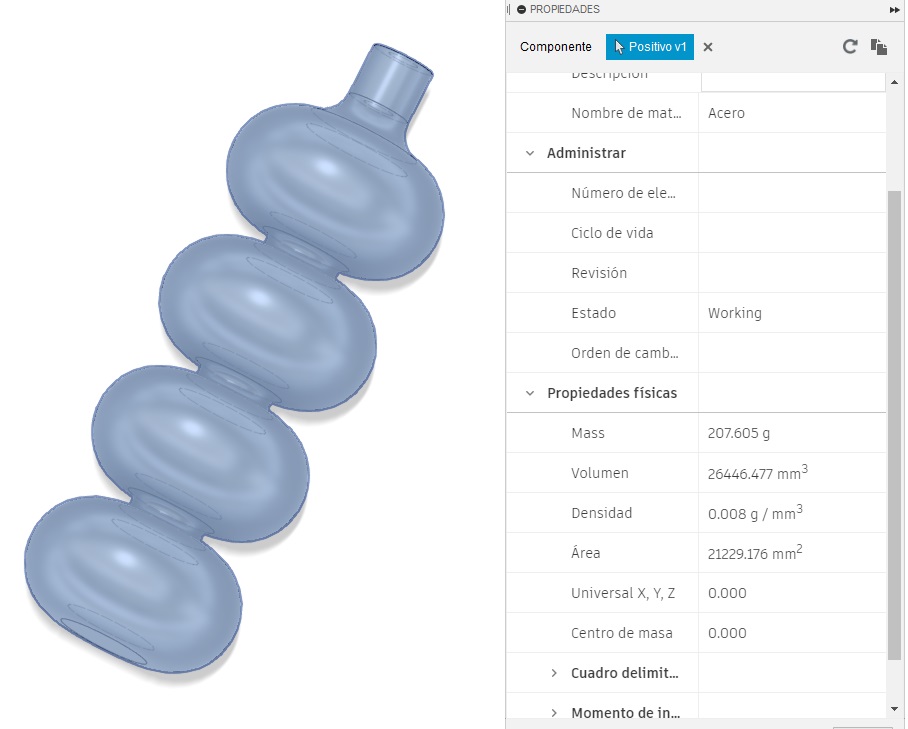
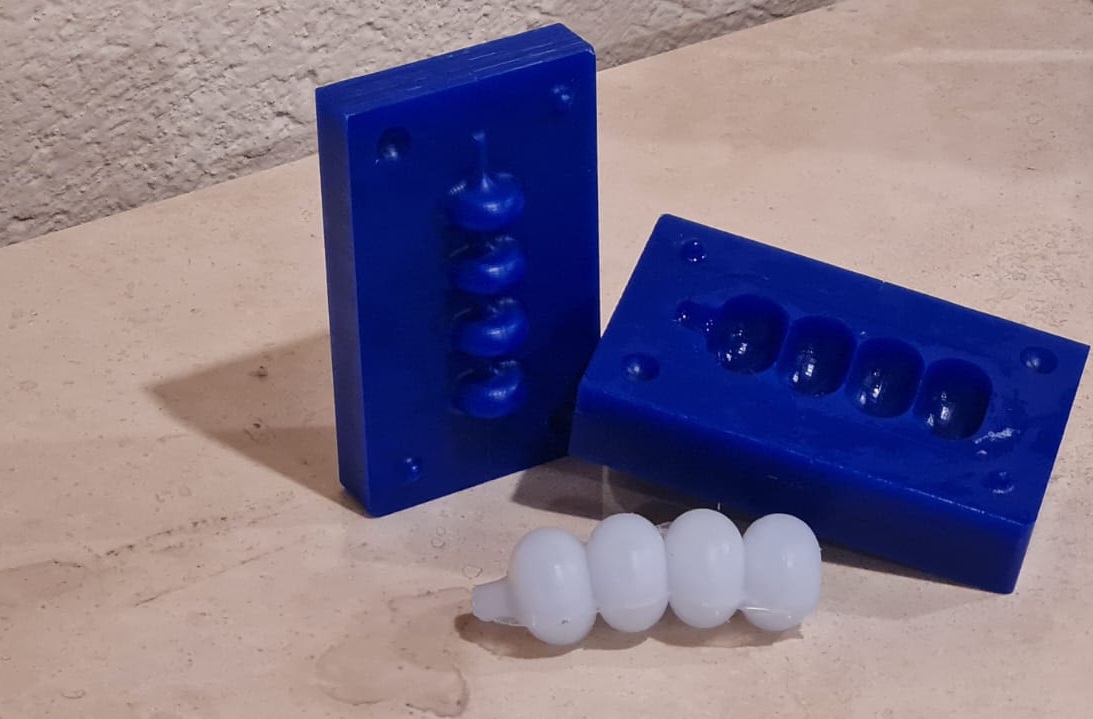
First I started sketching how the final piece will look and work. It has 4 sphere-like structures attached by a rounded tube, closed on the bottom and open through a nozzle, from which air will be pushed and pulled for motion.
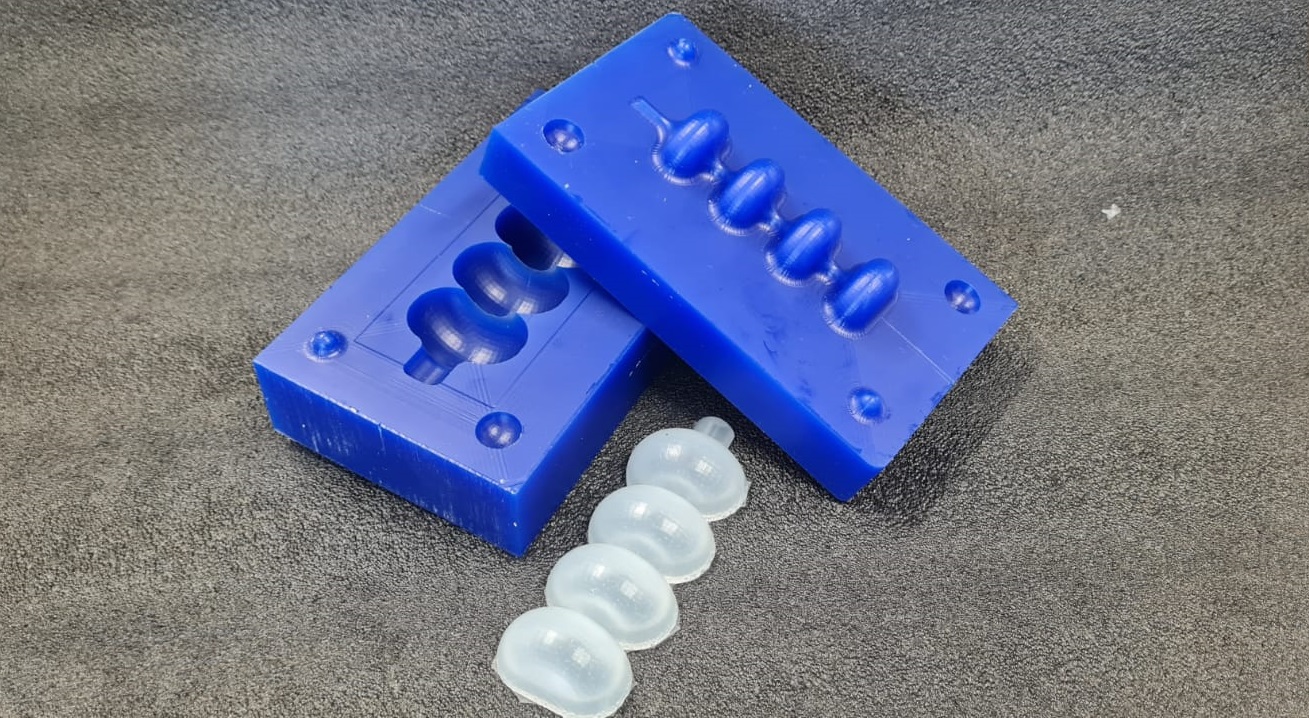
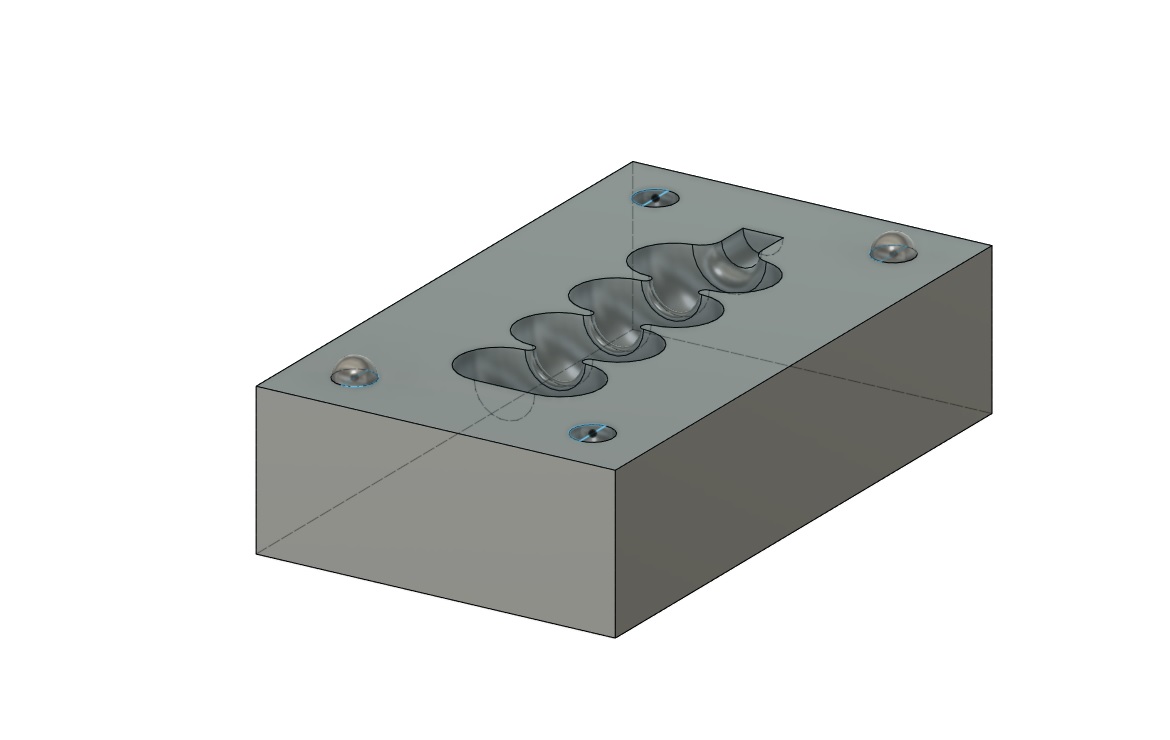
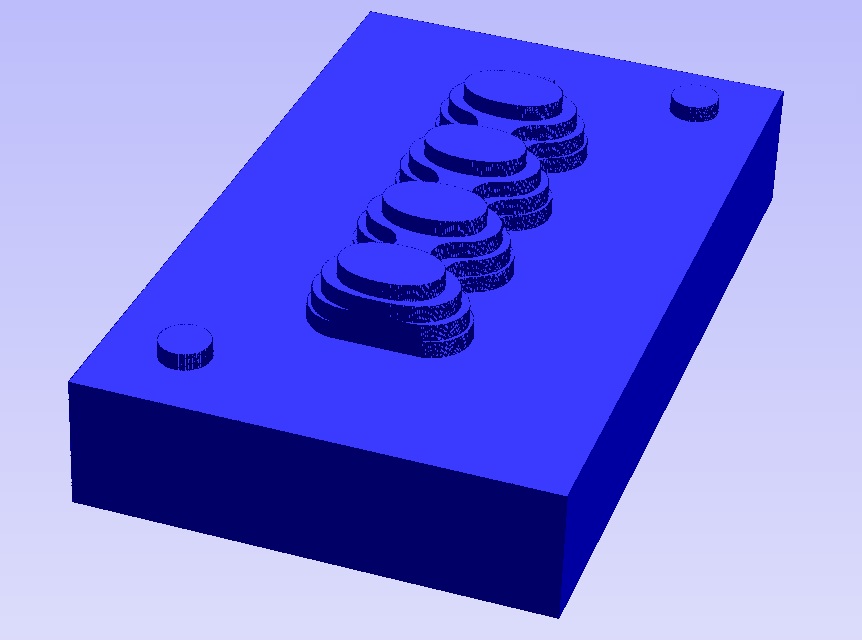
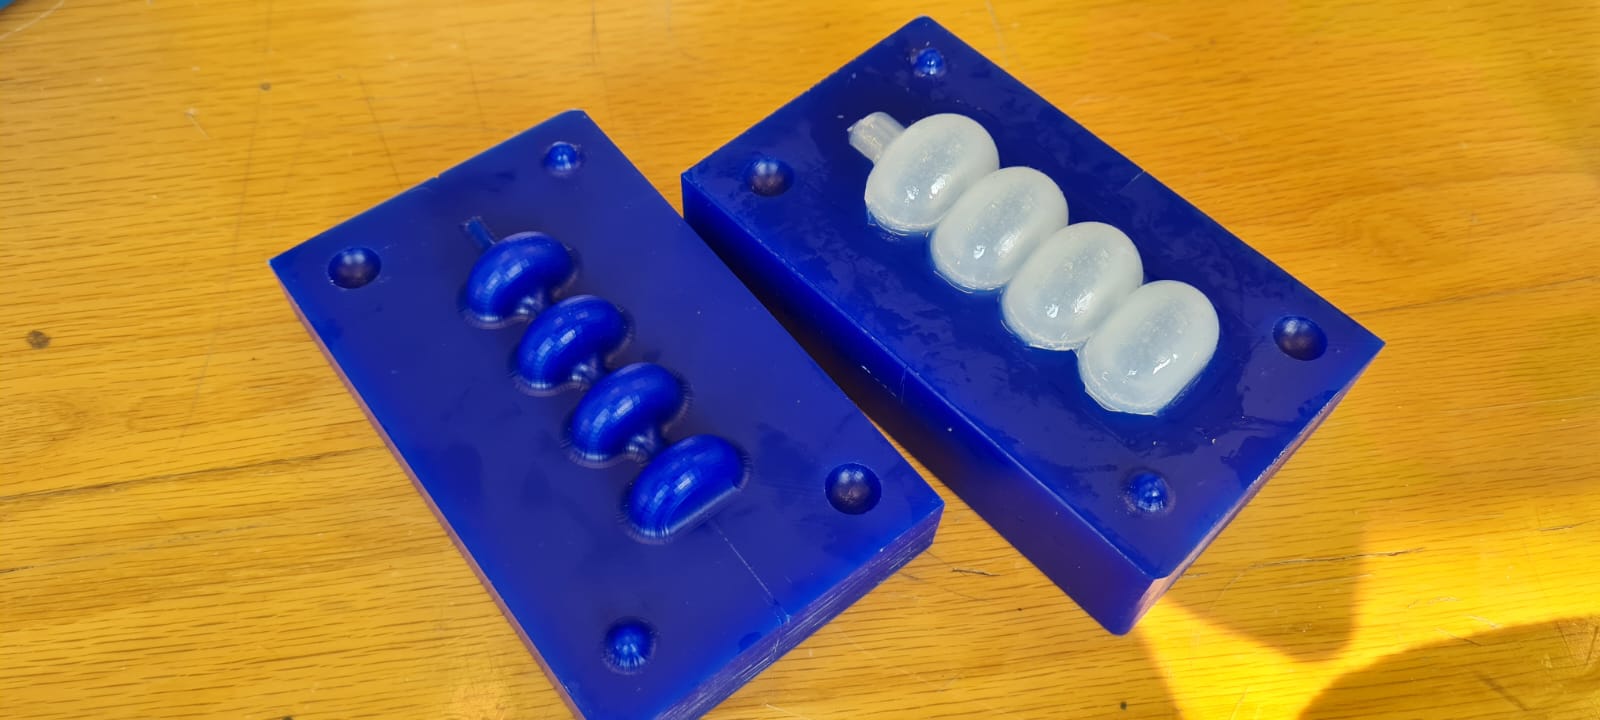
For this piece I need two molds, one for the outer part and one for the inside one. They both have to connect and align perfectly with an offset of 2.5mm (that will be the thickness of the final part). So the first part has to be designed concave, with the measurements of the final part.
I added locks, which are spheres, ones are concave and the others are convex, they fit into each other and align both molds for the precise casting.
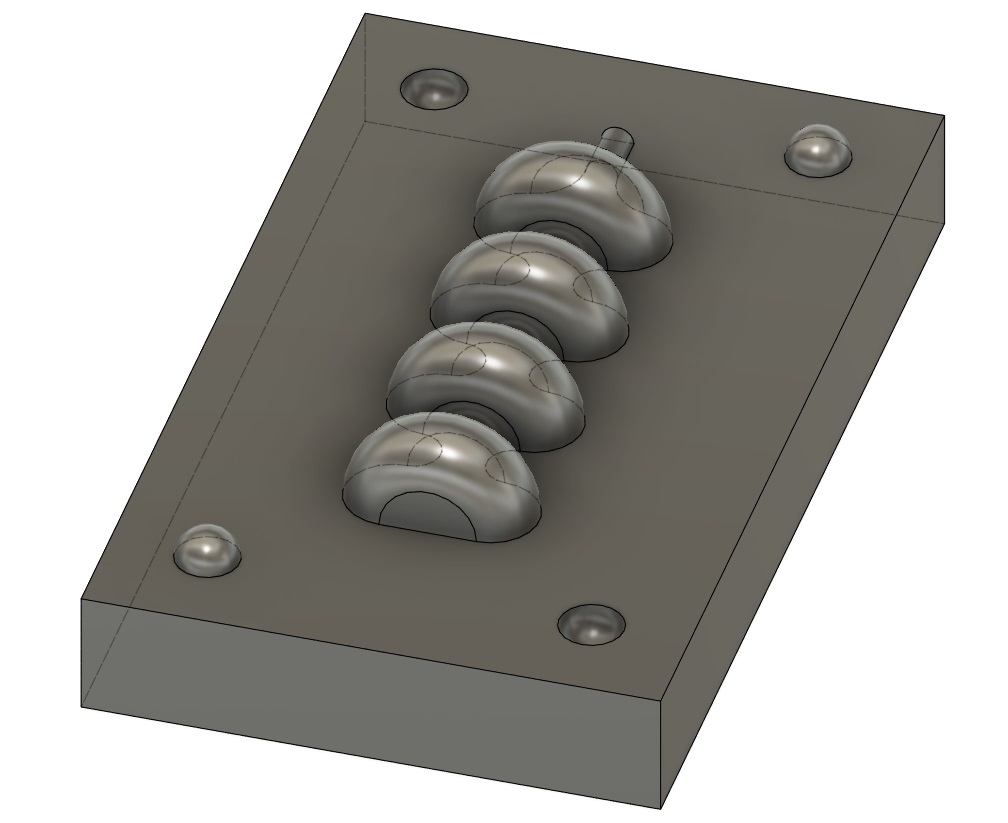
For the second mold the piece must be convex for it to fit inside of the previous one. It also has the locks for alignment. The curve has an offset of 2.5mm on the inside to give a structure and have a silicone skin.
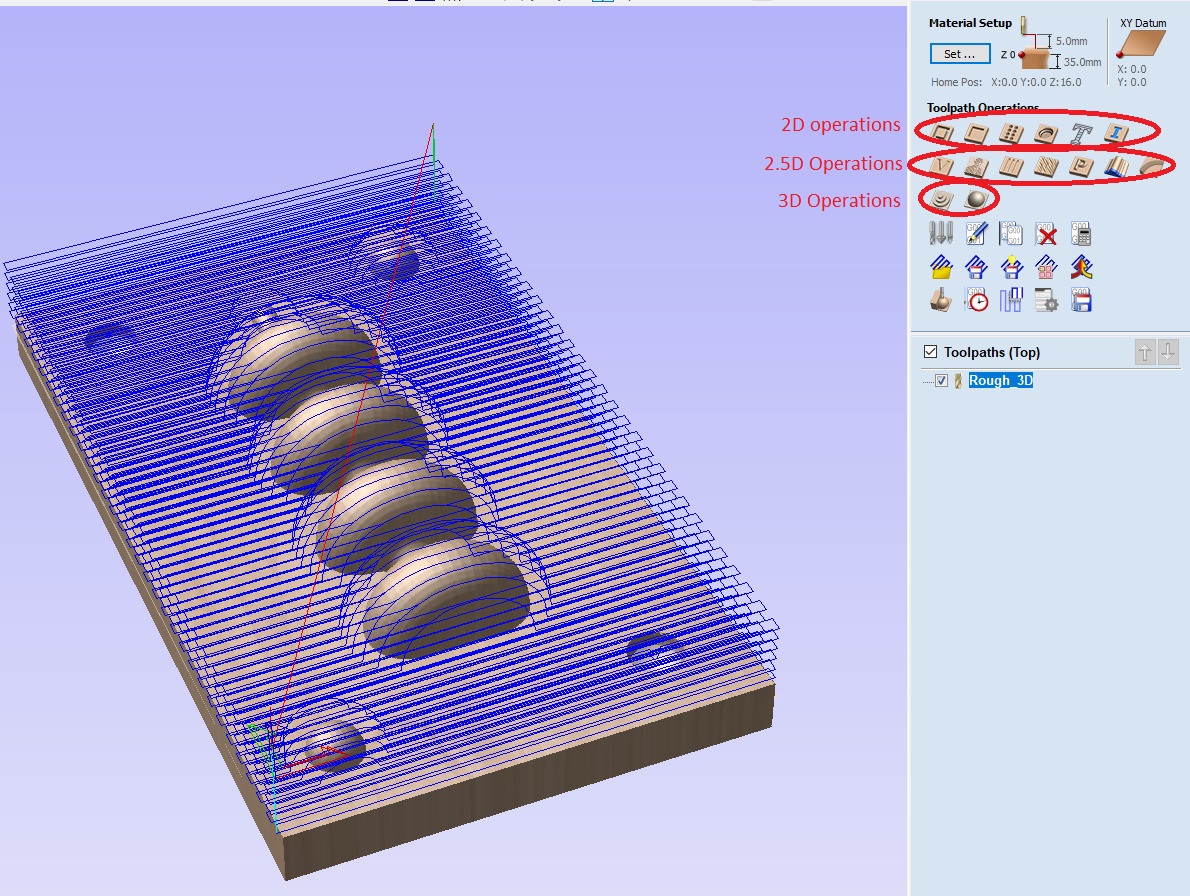
Having the 3D model of both molds it is now time to machine them on wax. The first step is to export them to *.stl* format. Then I'm using Vectric Vcarve to generate the g-code for the CNC Router. This is a very user-friendly software in which one configures the 3D paths with the propper tools, speeds and order, to have a succesfull milling process. Here we can see in the interface what kind of operations one can perform with the software, starting with:
- Profile: Which cuts either inside, outside or over a vector.
- Pocket: Which removes the material on the whole area of the closed vector.
- Rough 3D: Which removes most of the material for a 3D operation, in this case this is the first one to be done, with a bigger router bit.
- Detail 3D: Which gives the final dimensions and shapes to the model, by using more passes and a ballnose bit.
- Engraving: Which is done mostly with V-bits for carving letters and detailed vectors.
- Drill: Which performs holes as a drill, by using a drill-bit.
- Fluting: Which cuts 2.5 paths on the material, with variable depths and angles.
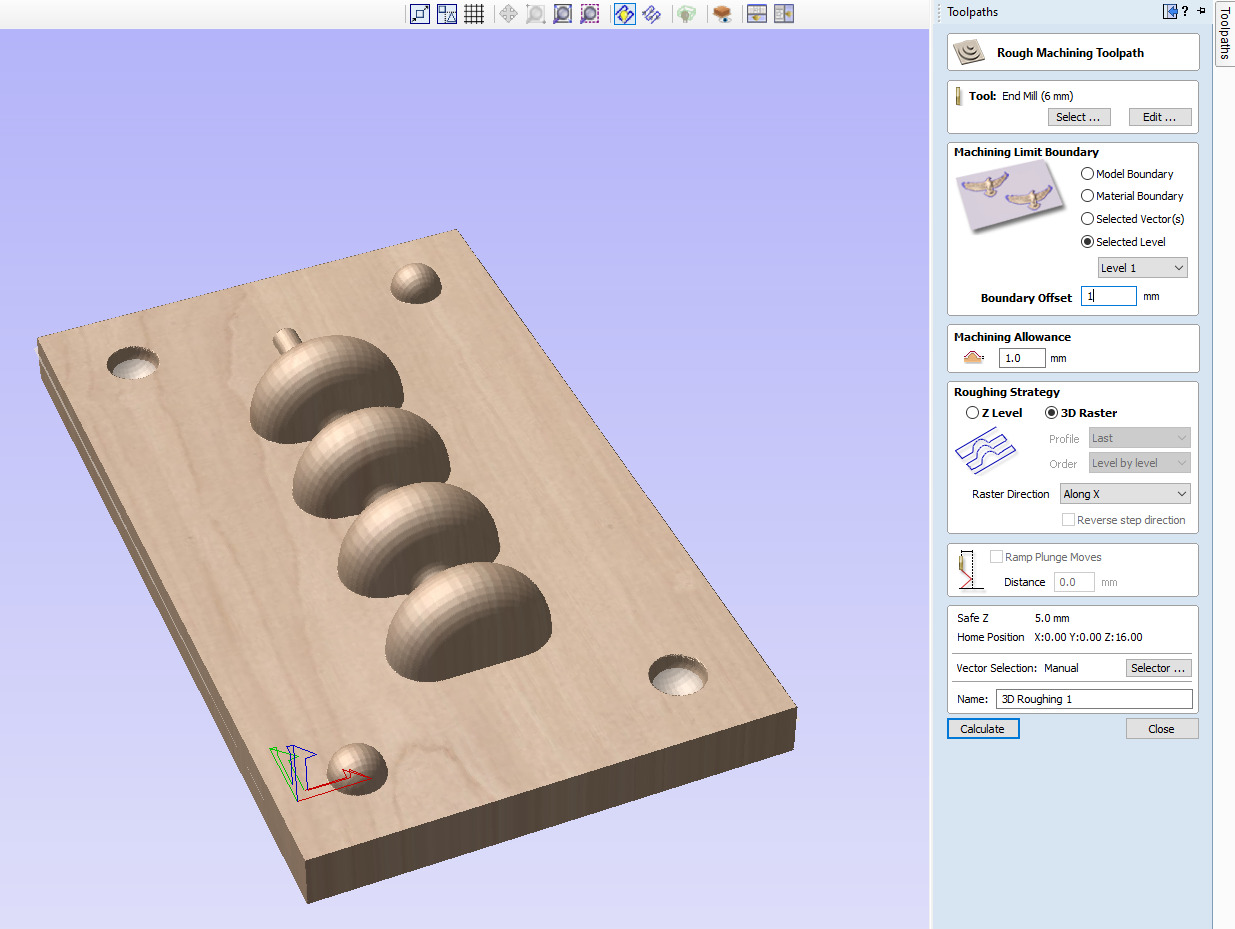
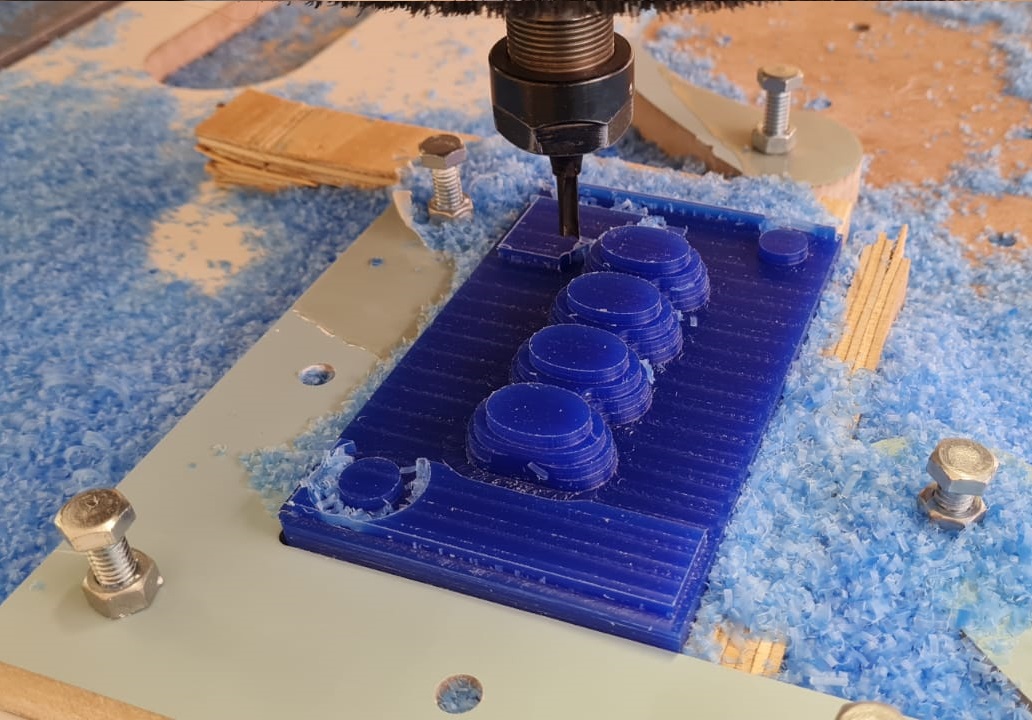
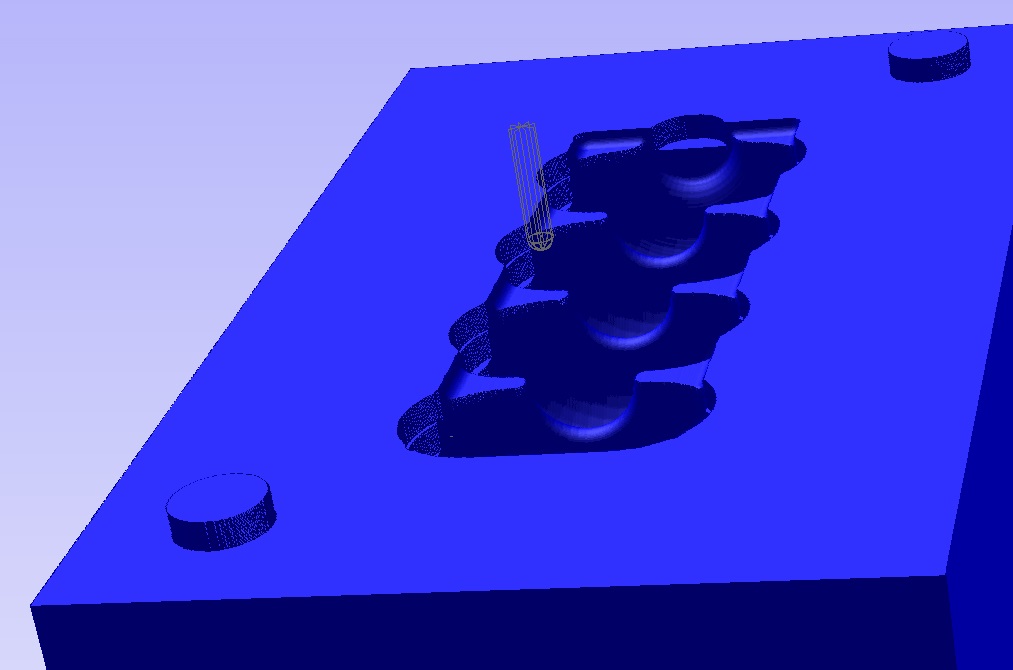
The first operation that has to be made is the Rough 3D cut, in which the milling tool removes as much material as possible, in this case it is a 1/4in endmill, spinning at 16,000 RPM, with a feed rate of 1500mm/min. Here we can se the comparison between the simulation on Vcarve and the machining process on the CNC router.
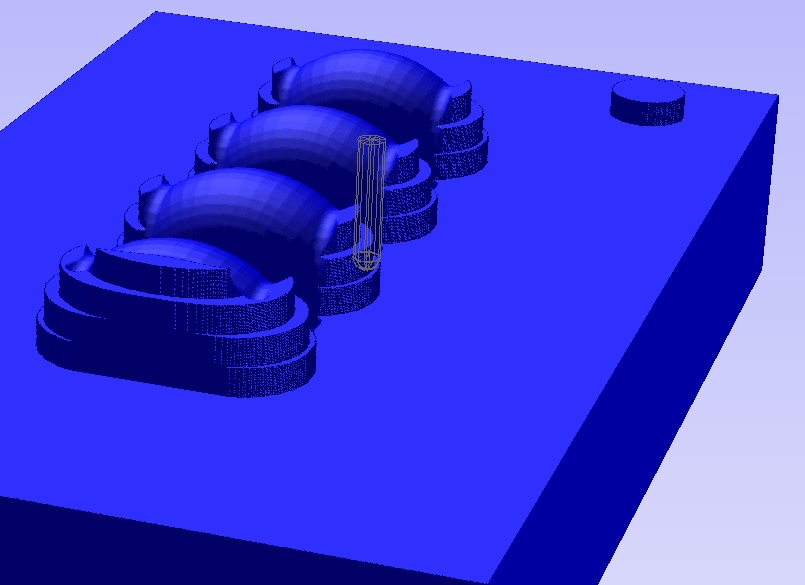
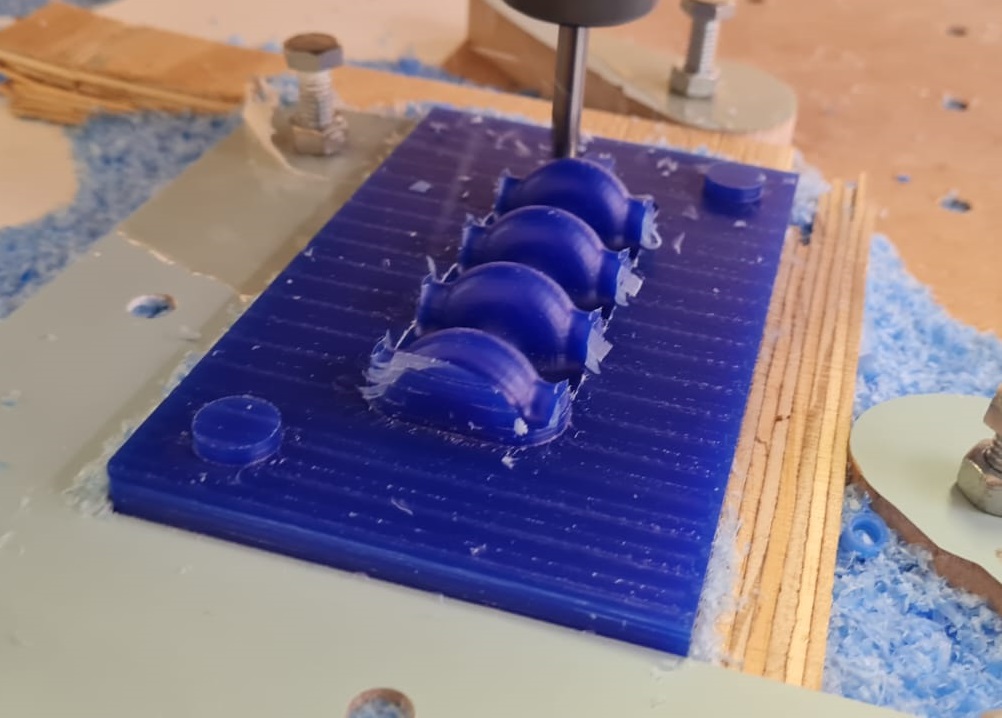
Having configured the rough cut, we now do a detail cut, with a 1/4in ballnose tool, spinning at 16,000 with a feed rate of 1200mm/min. The spheric tip of the tool gives a smooth finish with the final dimensions.
Casting
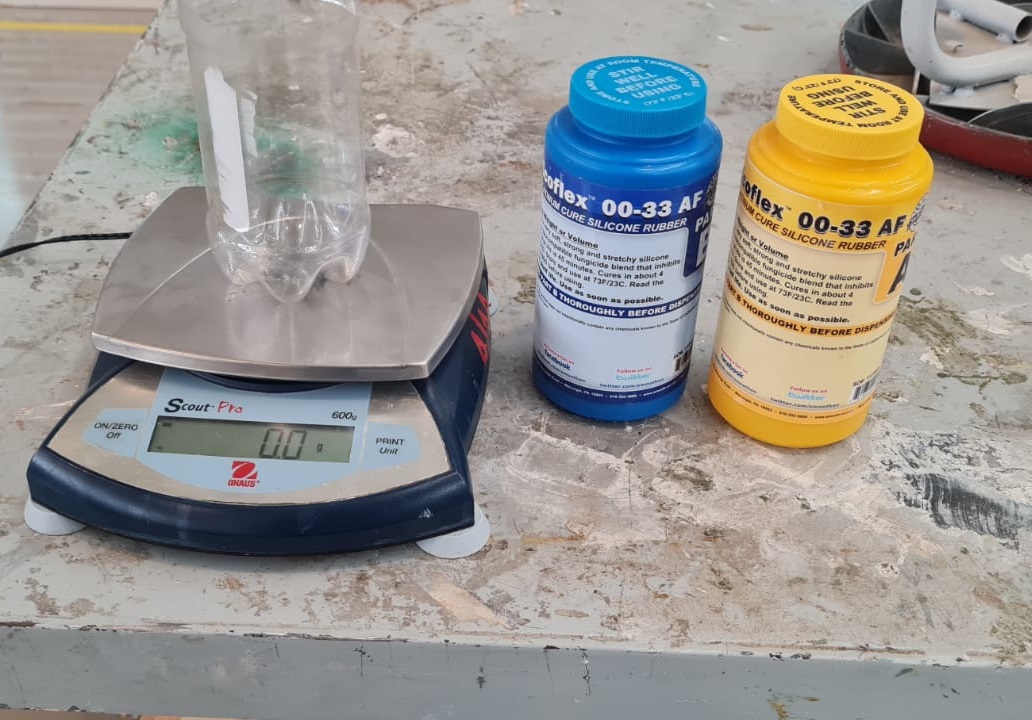
The casting part consist on adding a substance that solidifies, into a mold for it to grab the shape and have a finished product. One can use flexible or rigid materials, depending on the application. For this proyect I'm using Smooth-On Ecoflex 0033 AF with the following DataSheet and information. The product is meant to be used with gloves and eye-protection in case of accidental contact with skin or eyes. Respiratory protection is not needed when used in open environments with adequate ventilation.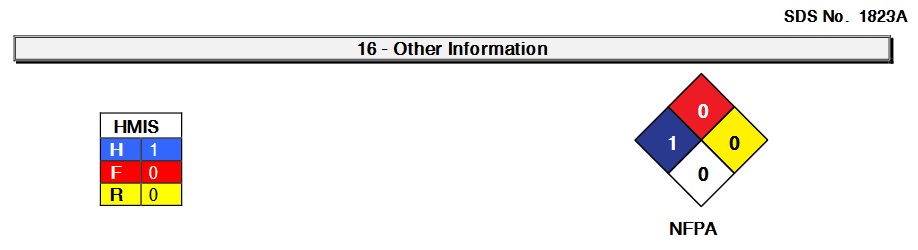
Here are the other materials that my colleagues used for the same exercise:
Fávell Núñez
He used a kind of grey plaster for the mold, and a self-curing acrylic for the final model. The problem i would've had is that both materials are rigid and sometimes this kind of pieces are hard to separate. Fávell did a pretty good job with this.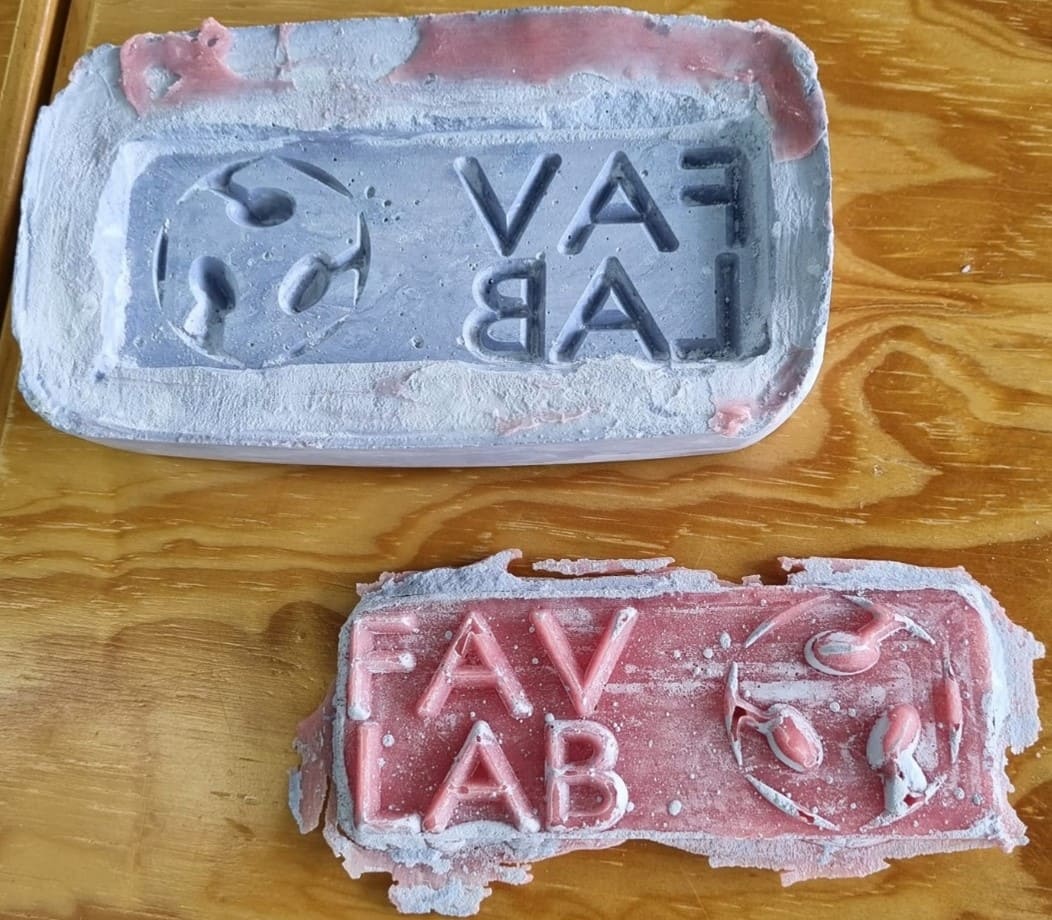
Maricruz Chávez
She used the same kind of jeweler's wax for the mold, but a different kind of silicone for the pieces, as she needed them to be a bit more durable and non-flexible. This worked pretty well as one of the components was flexible and very easy to separate from the mold.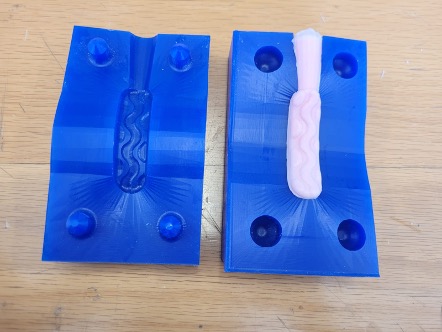
The process
The silicone is "solidified" using a catalyst agent. So my first test is done without a sprue but if it fails, one has to be done with a drillbit. We first measure the adecuate quantity in grams of silicone and catalyst, based on the properties window in fusion 360, on the volume section: 26446.477 mm³ or 26.44 ml. I rounded it up to 30ml, so each part is 15ml. The specific density of the silicone is 1.1g/ml according to the manufacturer, so then we multiply30ml x 1.1g/ml = 33g I measured the 17.5ml of each part and then mixed them very thoroughly until we got a homogeneous color on the paste. Then it is poured into the mold from a height to prevent bubbling on the final piece.

The manufacturer indicates that the piece has to be baked for one hour at 100°C.
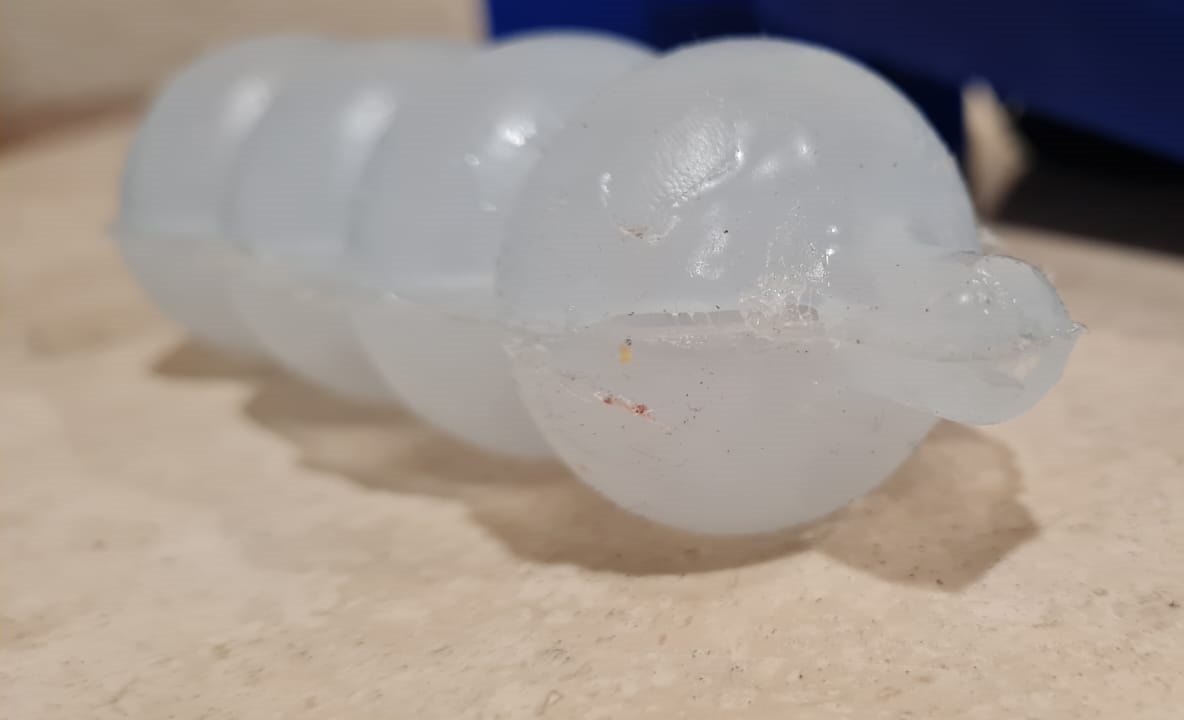
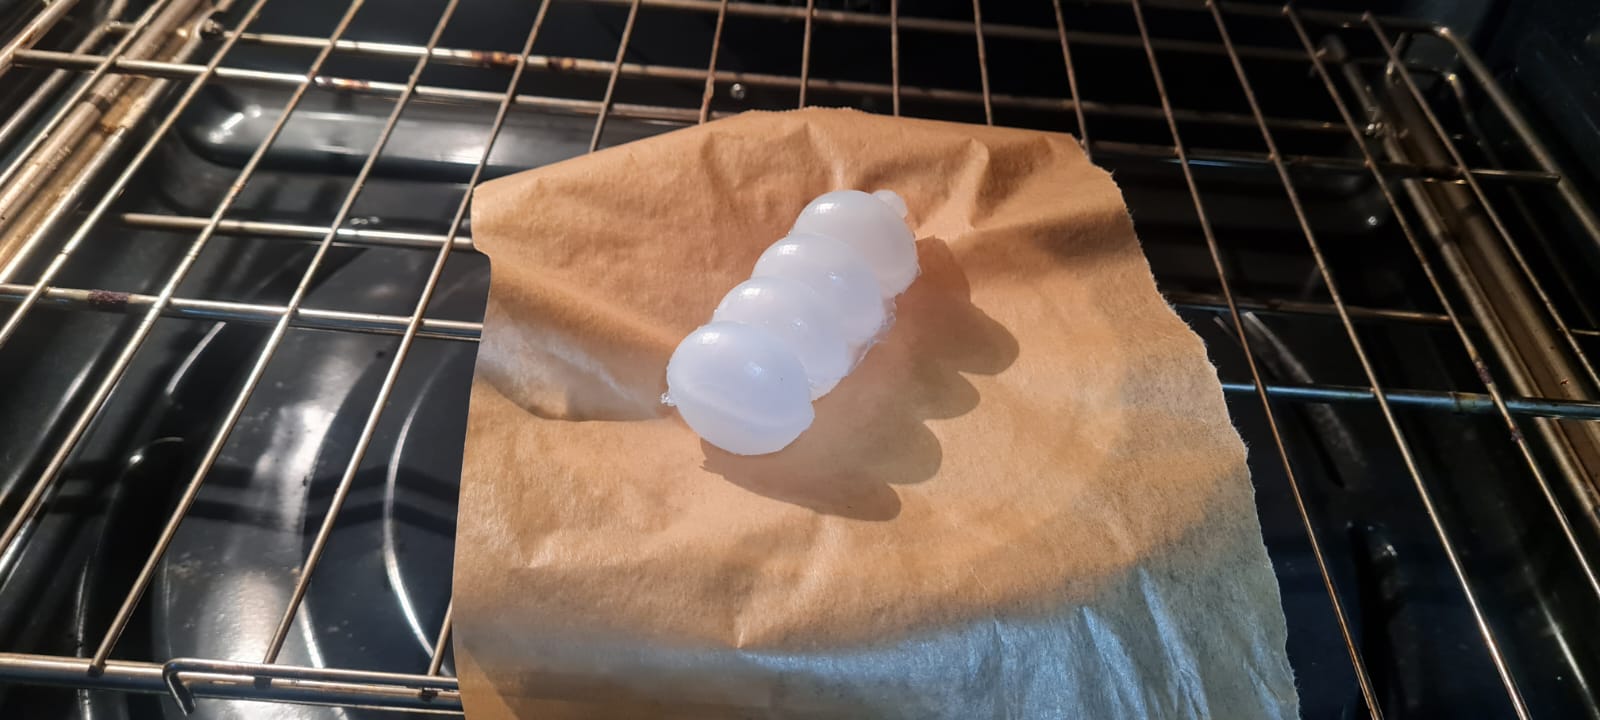 The final piece was supposed to move with the air pushed and pulled through it, however some of the parts didn't got attached together and the air escapes. For the next update on this page I will attempt to glue and cure all the parts.
I have included the 3D models for both molds and the final piece on the Downloadables website.
28/04/2023 Update: IT WORKS!
The silicone is dry and strong, and was able to bend and move with different air pressures blown through the nozzle.