13. Molding and Casting
Group assignment:
Individual assignment:
Design a mold around the stock and tooling that you'll be using, mill it (rough cut + (at least) three-axis finish cut), and use it to cast parts.
Go to:
Groupwork
The group assignment this week is documented in the group work page here on our Fablab Oulu pages. Check out our results!
Designing a mold
It was interesting to start the week, knowing that all things will be new to me. But then I remembered, I actually have cast cement previously with different molds. But never have I made the molds..so here we go!
First thing I did was read some of the works done by previous year students. I noticed there are a lot of things to take into consideration when designing the mold, to make the milling work out. In our local lecture we also talked about the milling bit size and shape, and how the angles of the design effect the outcome. Overhang we cannot have for ovbious reasons.

So I knew what to take into account when designing, but what to design?? My head was totally empty. I wanted to do a 2 part mold, but could'nt figure out any shape that would need it. Time went by and I thought I will jst do something simple to learn about the subject. Experiments I can do later on.
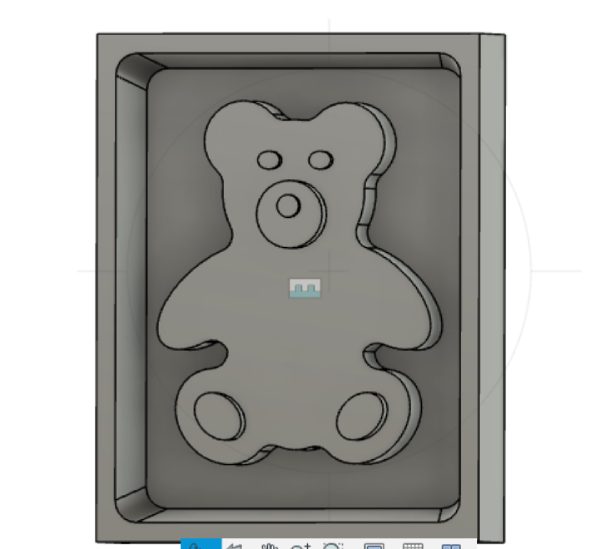
First thing that came to my head was a teddy bear. Especially a chocolate teddy bear. So I needed to design one simple mold that I would first make from the stock.
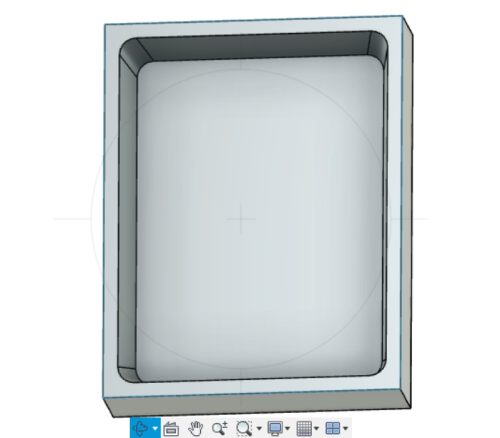
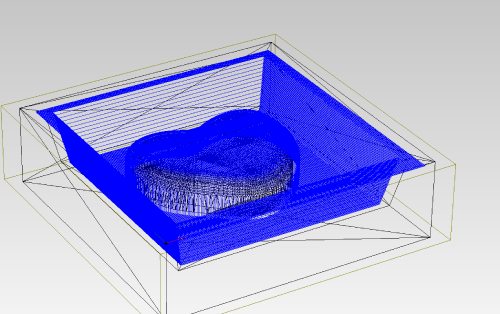
I opened Fusion, my best buddy (well, sometimes). I started with drawing the box that the actual design goes into. I drew a rectangle, extruded it, made it a shell with inside thickness of 6 mm, made fillets to corners and then made drafts to the sides with the angle of 12 degrees.
Then I added a sketch for the teddy bear. I draw the teddy bear from circles and ellipses. I removed excess lines by trimming.
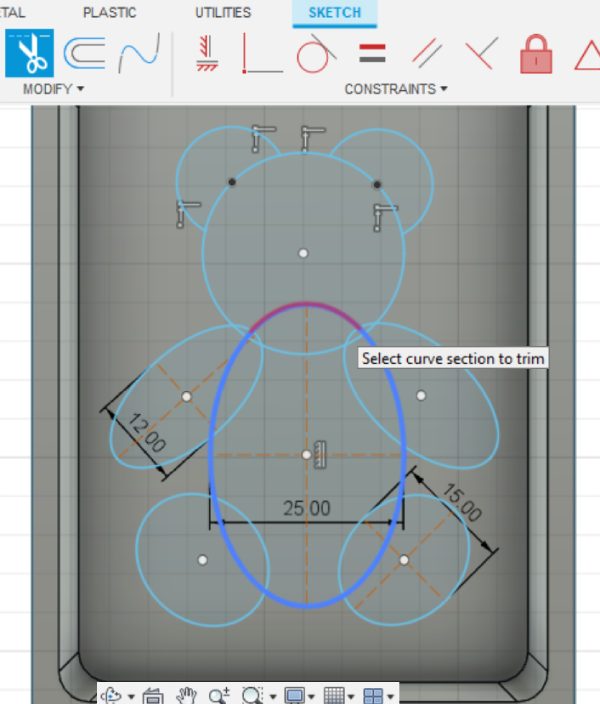
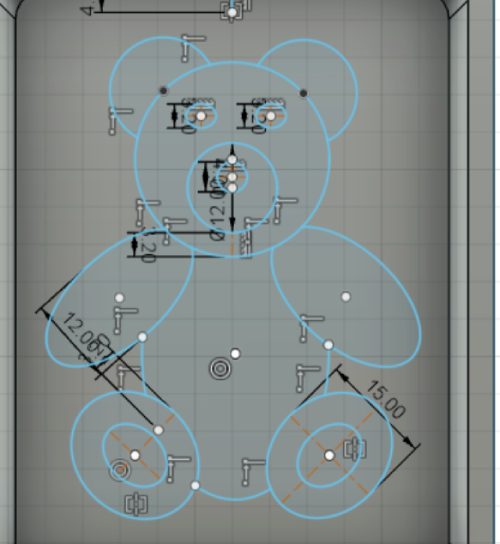
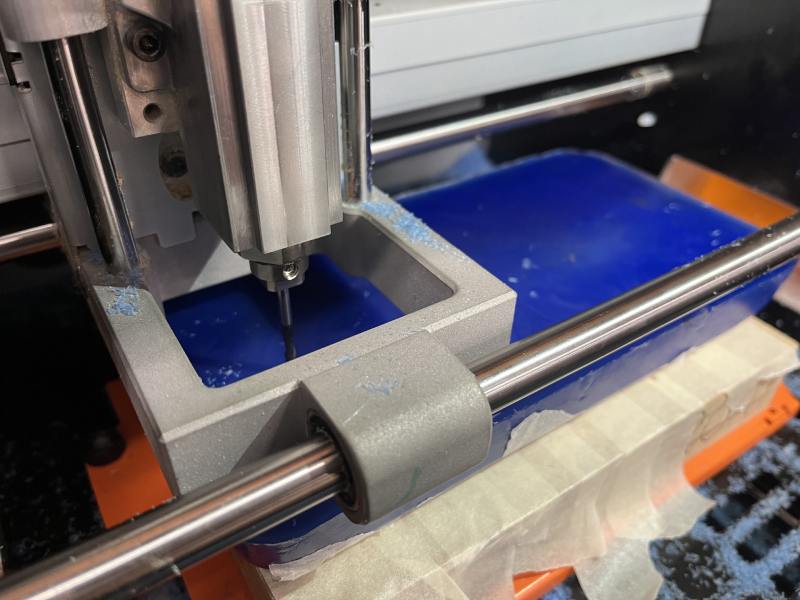
I left the bear very simple. I also made sure that there were no parts closer than 3.2 mm and also that the edges of the box are not closer than that (the possible milling bit could be 3.175 mm).
Then I extruded the teddy in 3 parts. First the body to 8 mm, eyes to 9.5 mm, nose and feet to 11 mm and top of the nose to 12. This is how it can have a little shape to it. After this I made a joint between the box and the teddy.
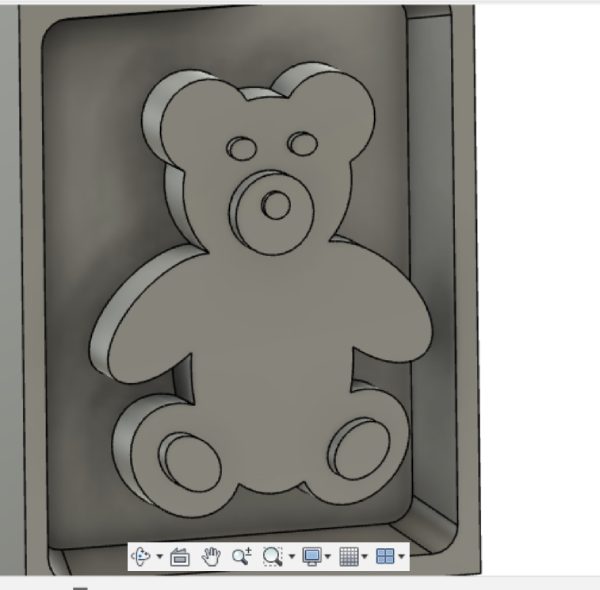
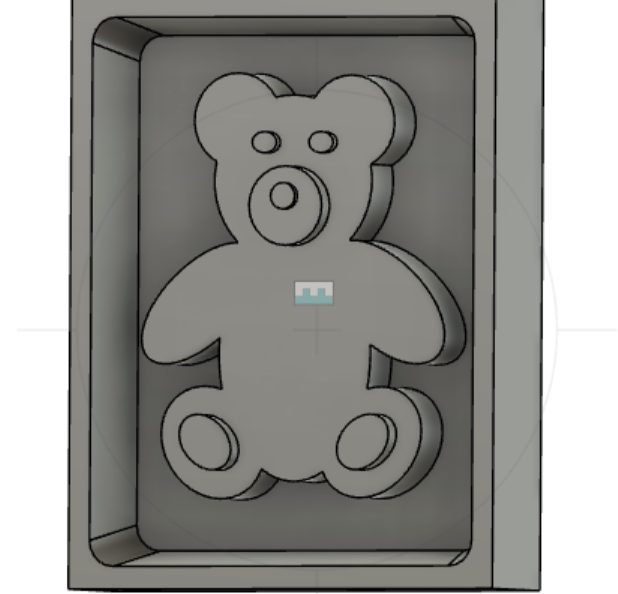
I was happy with myself, until I noticed I have some sharp corners in the teddy! The milling bit cannot go there. Oh no..back to the drawing board so to say! In Fusion, I added some fillet to the edges. Now simple teddy became also soft teddy. Well, actually, the look fits fine to a chocolate piece.
Milling
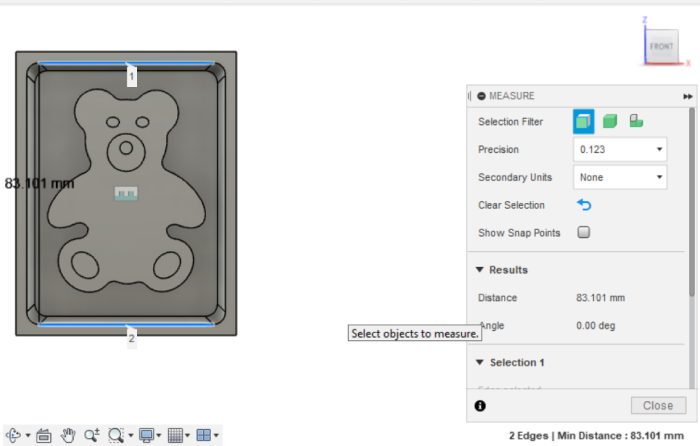
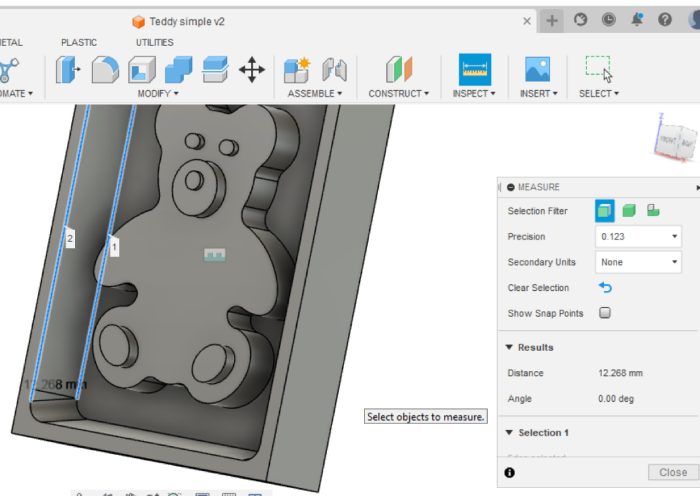
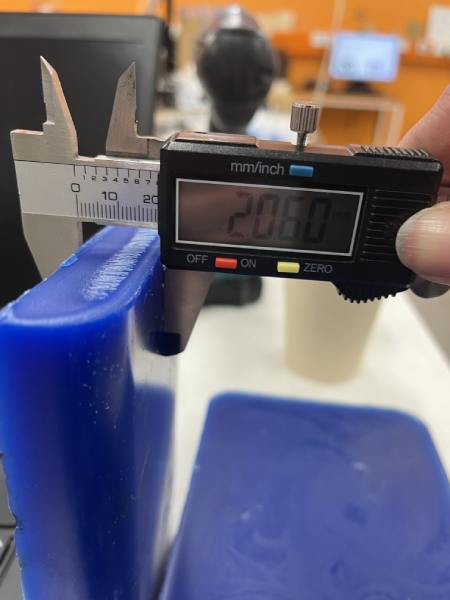
Measurements
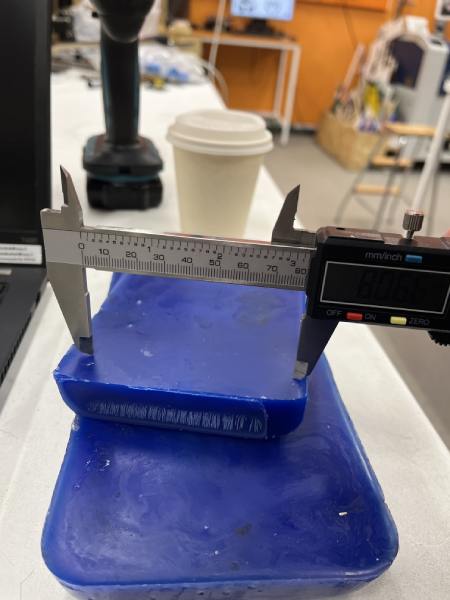
Before doing anything, I checked again my 3D model measures. I also measured the wax pieces to find a suitable one. Next when making toolpaths, I will check that the program gets the same measurements.
The toolpaths
In our local lecture we talked about the toolpaths. We could make them the same way we did in CNC week, in Fusion360. We would need to add a new tool to the existing fab library. Later on one of our instructors also showed us quickly one other program for this, Modela player 4. I got the message that it might be the safest to do the toolpaths in Fusion, but I thought this would be a good week to try this Modela program. Yes, what a great idea..
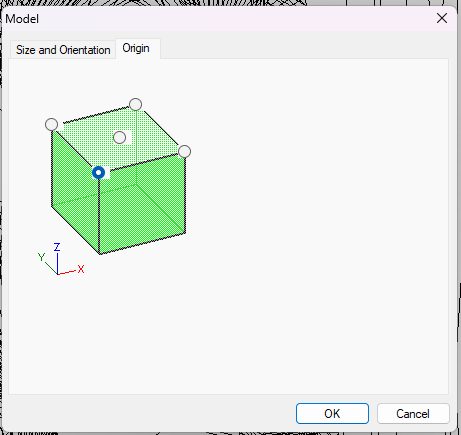
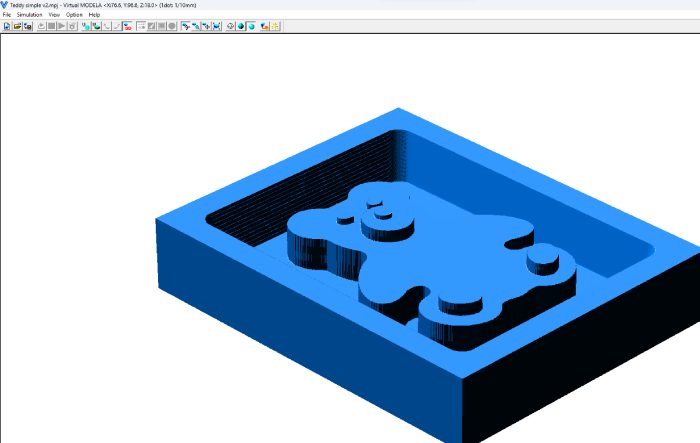
In Modela, I opened my stl -file.

From top right of the screen I chose the material to modelling wax. From Model, I set the origin to bottom left corner (see picture).
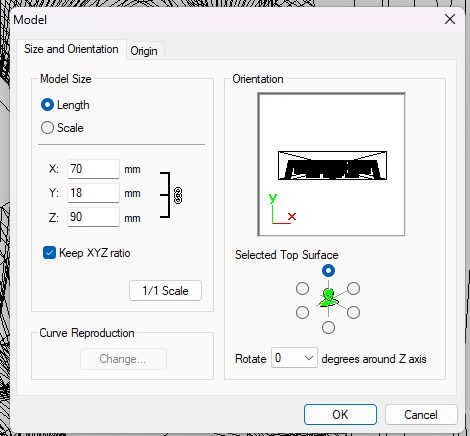
Then I checked the size and orientation. I saw that my z axis was set the wrong way, it should've been the one with 18 mm (model depth). I clicked the different options on 'selected top surface', and ended up getting the right numbers. I forgot to take a screenshot of it.
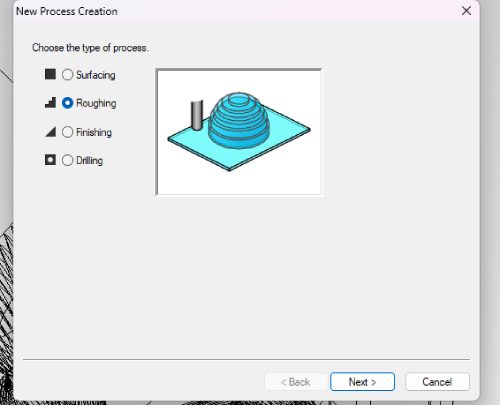
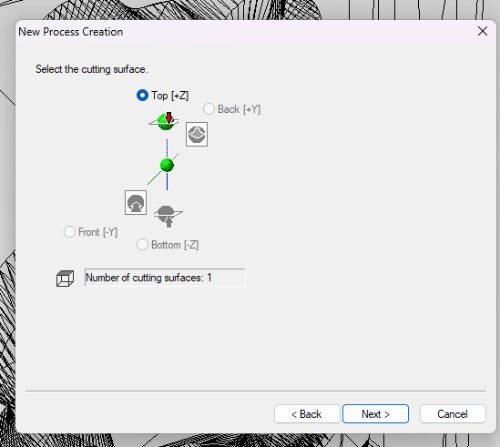
After this, I started with New process. I set it to be Roughing.
Next I chose some cutting parametres.
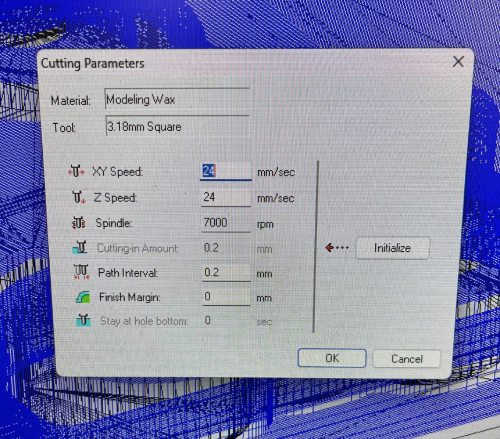
I chose the cutting surface to top.
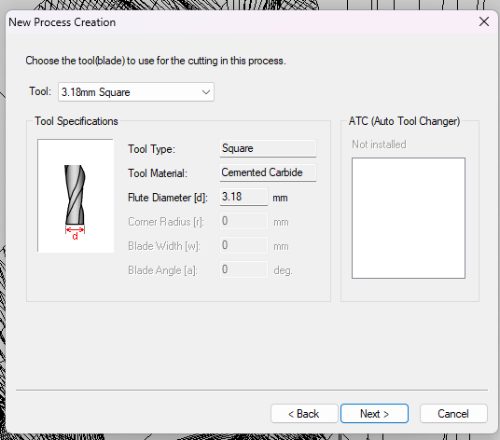
I chose 3.18 mm square milling bit as a tool.
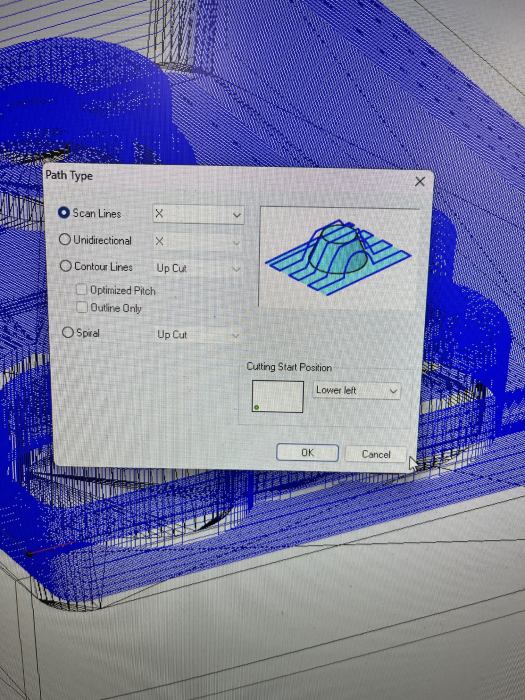
I chose path type to be Contour lines (up cut).
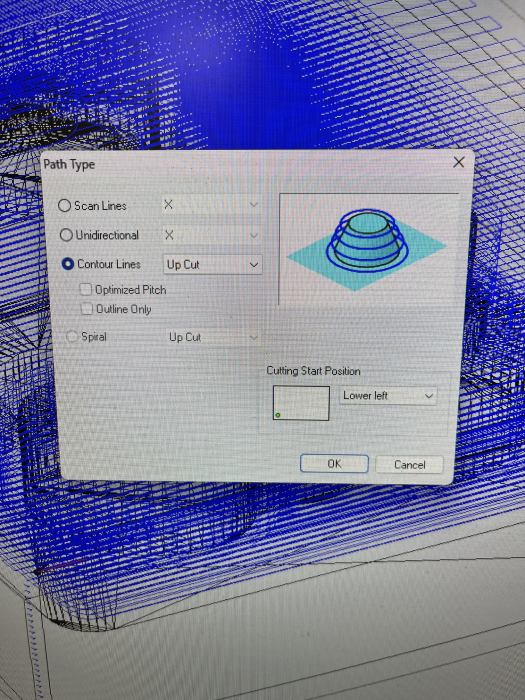
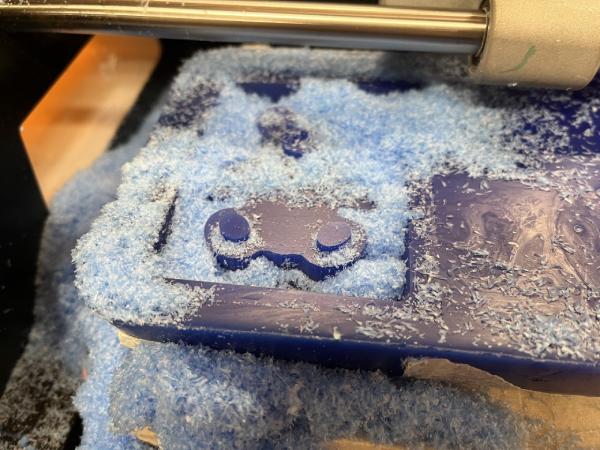
Then I set the cutting area.
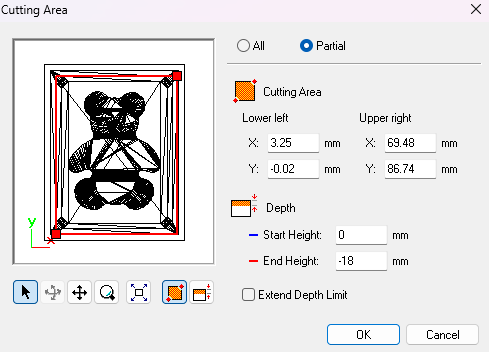
Now this is where I had tons of problems. I didn't first understand how setting this affects the milling. I remembered someone saying that you should make the cutting area smaller then it is originally, to save time. So first I made it smaller, but had no idea how to define the area. Then I understood, looking at the preview, that if the area includes the edges of my design, also the edges will be milled and there's no need for that. Fortunately I got my Fab Academy fellow student Akseli to help me. He is familiar with these processes, and he was kind enough to show me how to define the area properly. I left out the outer edges, but got all that I needed inside the area. Thank you!
In this preview you can see that the edges go just a bit over the cavity, but not to the edges of the whole mold and therefore there's no unnecessary milling to be done.
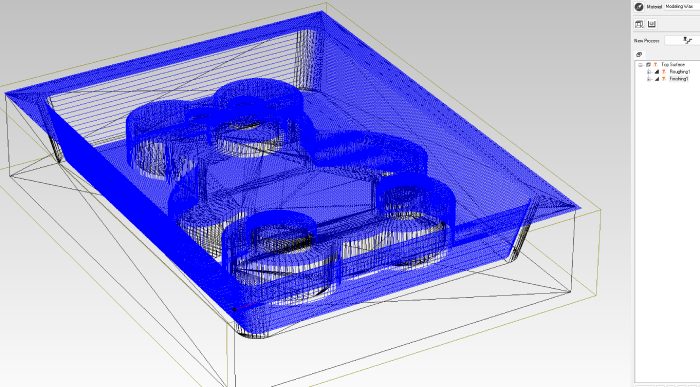
Then I made the secong process with Finishing. I chose the type of toolpath as Scan line (X) and all the other choices accordingly to the previous process. Everything looked good in the preview, so was ready with the toolpaths.
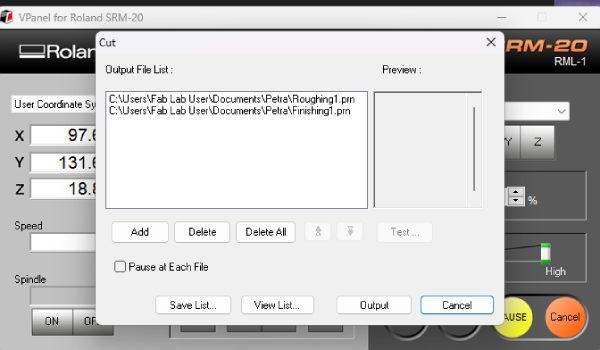
But then I hit the next problem. Where did the program put the output files?? I couldn't find them anywhere. Finally I got help from one of the instructors. He was a lot more brave then me, and said that we can also start milling straight from Modela. I pressed the Cut button, and Ta-daa! THEN opened the screen you can save your files in output files. Who would've knew!? I assumed it would just start cutting straight away.
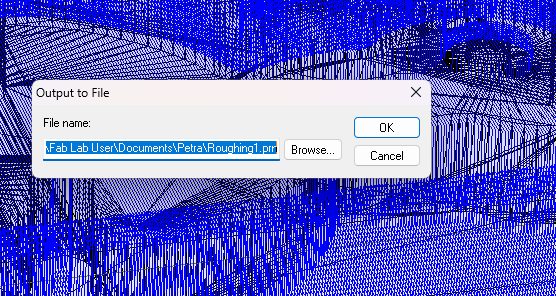
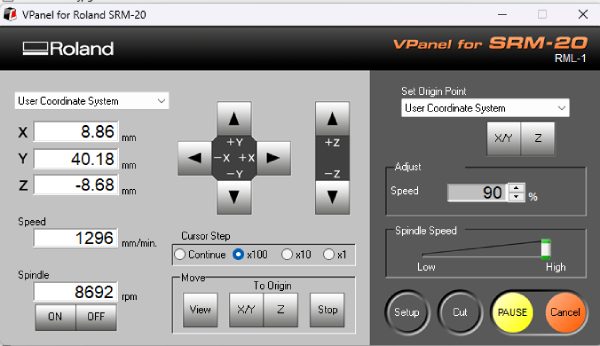
Happy days. I now had my toolpaths (and I knew where they were). I wanted to run the operation from Vpanel. I opened it, pressed Cut (again with this 'cut'!) and added my files there.
The milling
Roland was ready to go. The steps I did:

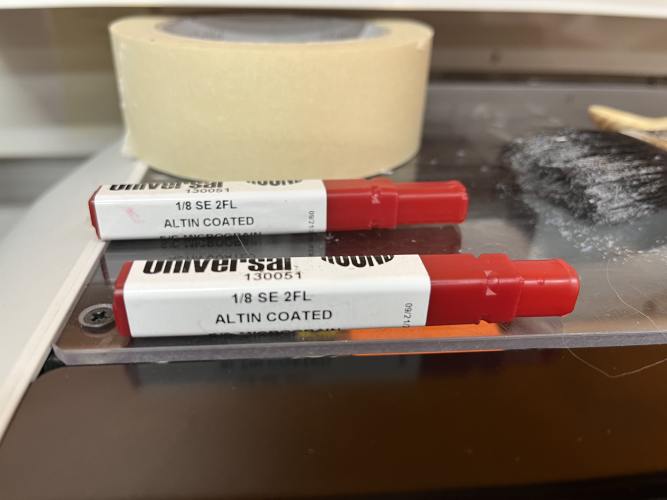
* When I was attaching the milling bit and setting the z origo, I faced again problems. The overall lenght of the milling bit was so short, that when I had lowered the Z-axis it was still hard to drop the bit to the stock AND get it attached back to it's socket. It dropped down many times because the set screw didn't touch the bit. At that time time I couldn't find a longer one, so it took me some time to get it attached.
Maybe now I can finally start milling?
Well..I was onto making another big mistake. As I explained, in Vpanel I had chosen my output files and added them. Now I could start to actually mill with 'Output'. And Roland started the milling..or tried to! It plunged the milling bit right down and then emergency stopped. Oh my.. Then my instructor noticed that originally I had my files the wrong way, 'finishing' was at the top. Nice..very good effort from me.
So I pulled the milling head up, and tried again. This time I chose the files right, 'roughing' at the top.
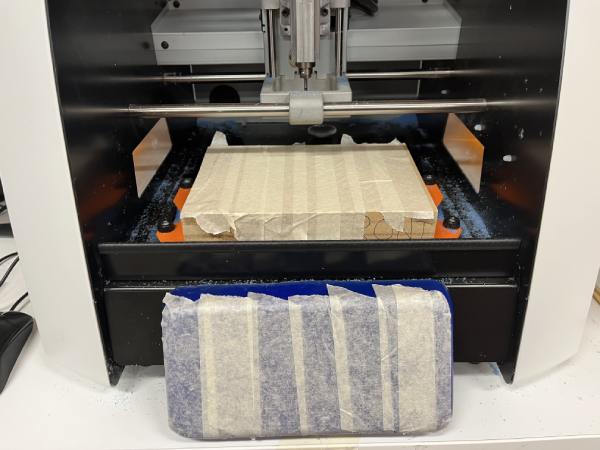
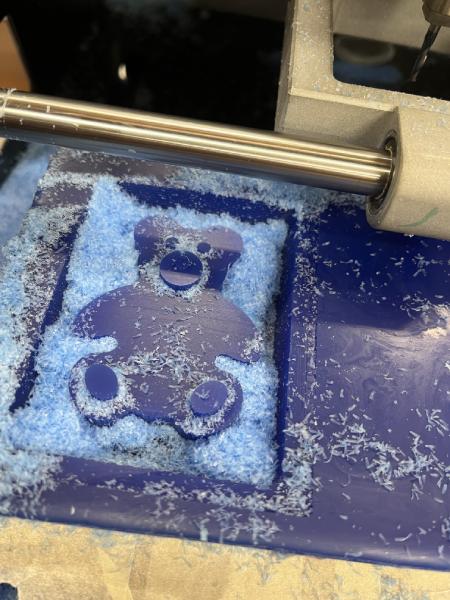
Now finally everything was right. The milling started fine, I started with 50% speed but when everything was fine, I set it up to 90%.
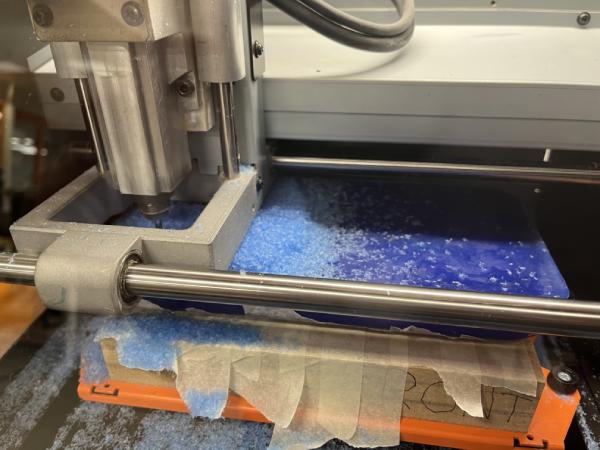
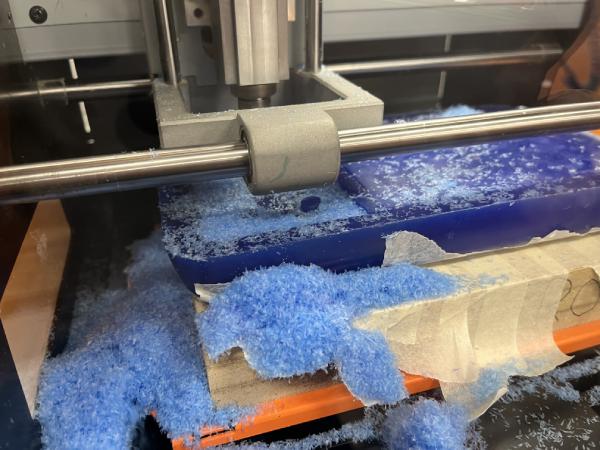
After maybe 25 minutes I paused the work, and took off carefully some of the excess shavings and continued. After about 30-40 minutes, the program went automatically to finishing part. I noticed it because the milling bit started to move in lines.
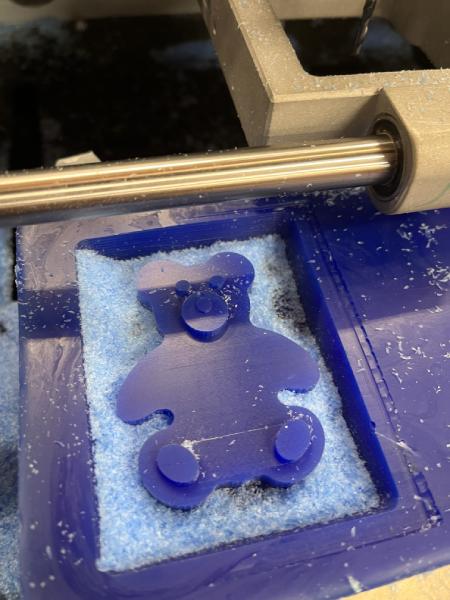
And after about 30 minutes, it was done!! I was extremely happy that the process went fine, after a lot of user based problems. I am thankful for all the help I got. The instructors were very nice to help when they could, and the help I got from Akseli and Jason was essential. Thank you guys!
I feel kind of numb after the experience, because I really felt stupid with the program Modela and the problems with output files and the milling bit. I did learn a lot thought, I guess that is the result we are looking for. I do hope it goes a bit easier next time. For all.
Making the silicone mold
When my wax mold was ready, I noticed one fault in my design. For some reason I had left too little space on top of the design, that becomes the bottom of the actual mold. There was just a few mm there so really not enough. But again, learning process..I decided I still will try to do the mold and just do better next time.
As I planned, I used the Smooth-Sil 940 to make the mold food-safe. I want to try to cast chocolate in it.
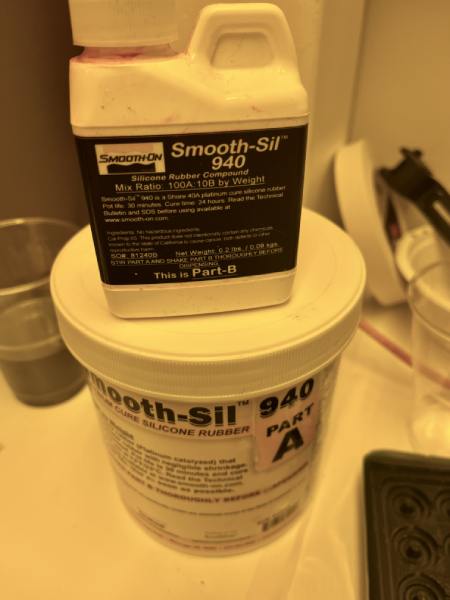
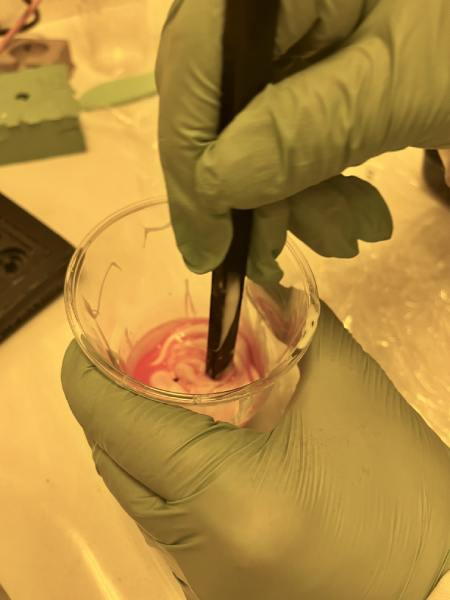
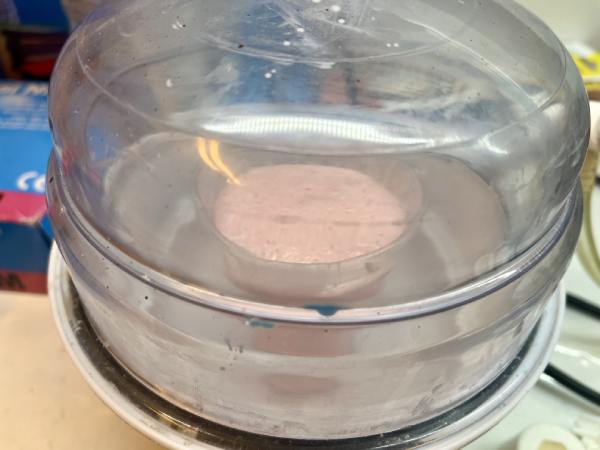
With Smooth-Sil I had to use weight ratio of 100A:10B. The A stuff was really thick, and it was hard to get the right amount to the cup. But I did. Then I poured in the substance B which was a very runny liquid. While mixing I scraped everything in from the edges too. After a few minutes, it looked ready and I put it to the vacuum pump.
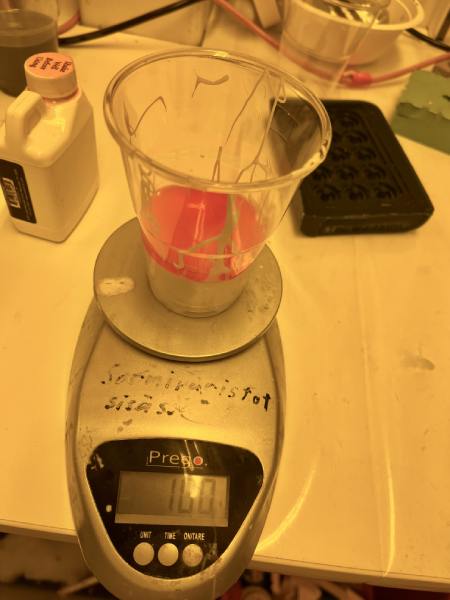
It started to rise moderately, and a lot of bubbles came out. After it stopped rising, it just went down. The datasheet said: 'Vacuum material until it rises, breaks and falls. Vacuum for 1 minute after material falls.' That I did.
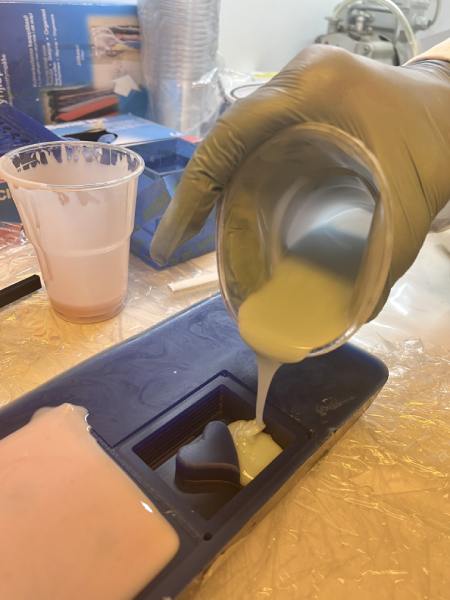
After it was done, I started to pour the material into the wax mold. I planned to pour the mixture as adviced; in a single spot at the lowest point of the containment field. When I started pouring, a big lump of the mixture came out! It was really stiff. Also when it contacted the surface, it didn't spread around as I thought it would. So I had no choice but to move and pour around the mold.
There might have been therefore some bubbles or air pockets forming, but I hope they are not too bad. Also my instructor said that this substance is forgiving; at least small bubbles come out on their own. I just have to wait and see.
About the thickness; the material isn't new anymore so it might be that it's not as runny as it used to be when opened. There was just a little left on the box. In this point my fellow student Aarne decided to test another version of the Smoot-Sil: 936 (blue color). He did a new batch of it for his own wax mold. It felt and seemed a lot runnier.
Result
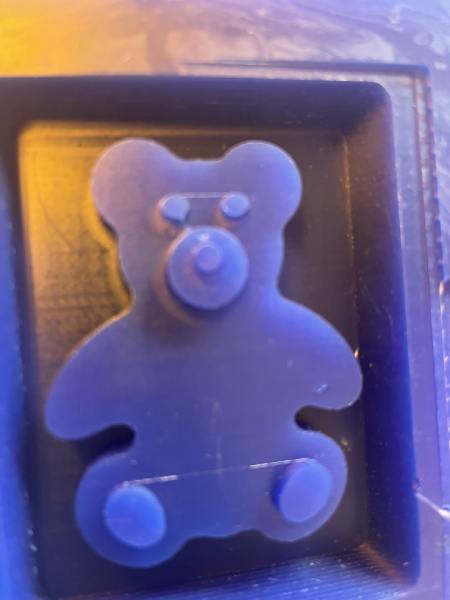
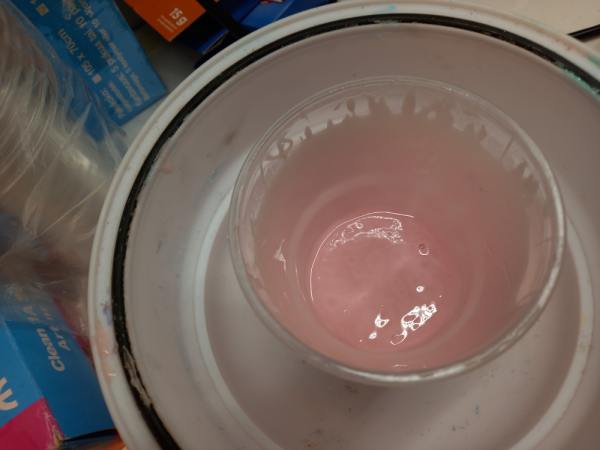
I came back after 28 hours (24 needed) and it was ready! The mold was easy to take off, and it seemed pretty good to me.
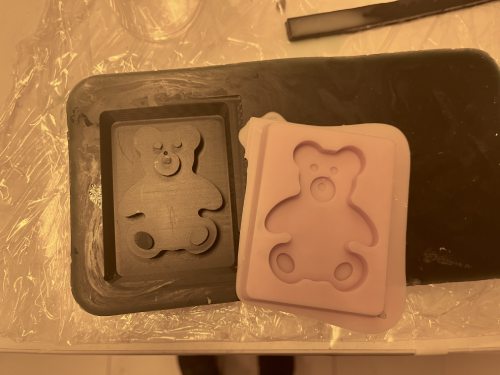
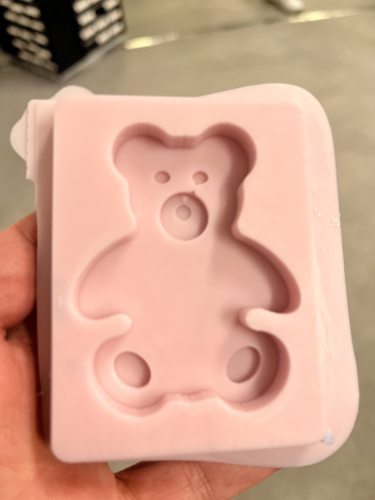
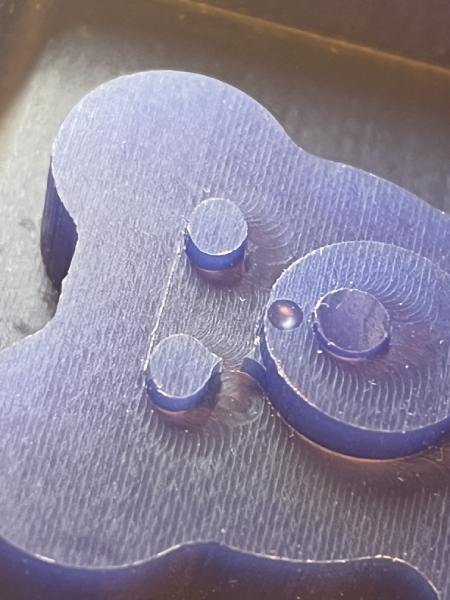
The mold was good. There was a funny detail on teddy's nose. I have no idea where the tiny dot came into the wax and to the mold. It is a beauty spot.
The Extra
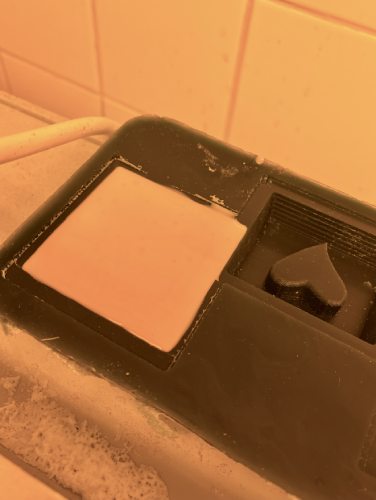
Initially, my teddy had smooth curves in my design. For some reason I chose to modify it to angular, I thought it looked more interesting that way. Well..in that point I didn't remember we were supposed to have round shapes in our design. So I quickly made this extra piece for the experience.
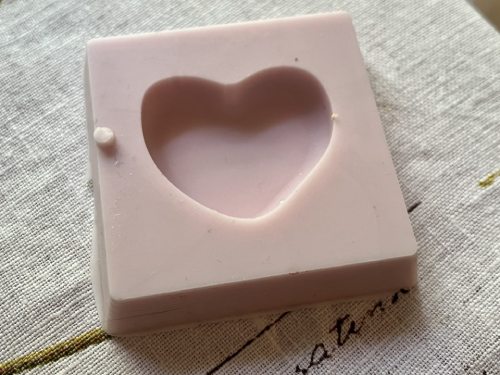
I designed a heart in Fusion, just because heart is a very common shape to have in chocolate. I added fillets on the surface part to make it rounder.
I did the milling of the wax the exact same way as before with teddy. I only changed the milling bit to a longer one, because it was very much easier to attach that one.
In Modela I made sure that the area was defined well, and looked through the simulations.

Roland was ready with the job in less than an hour. I was happy with the result. Next to my design you see a peak of my classmate's heart-design. I guess we are a hearty bunch.
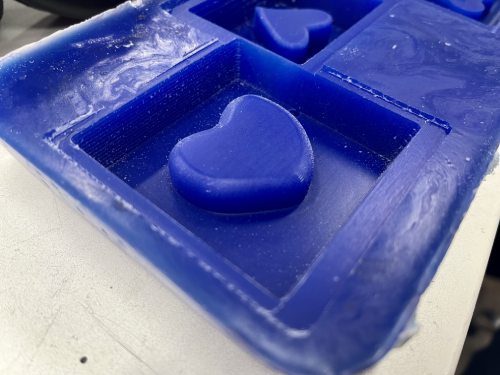
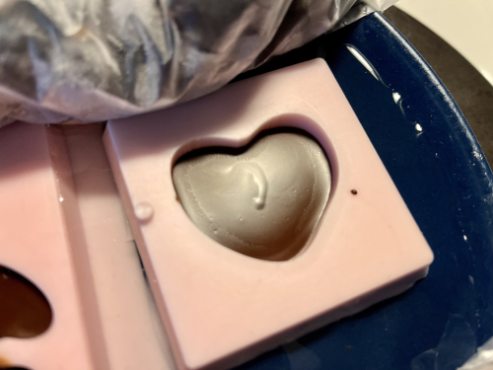
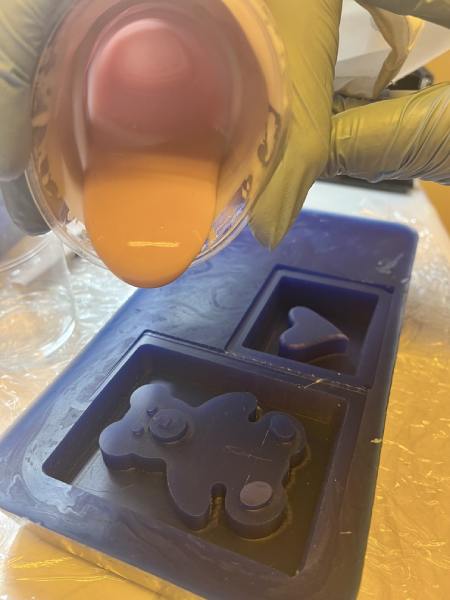
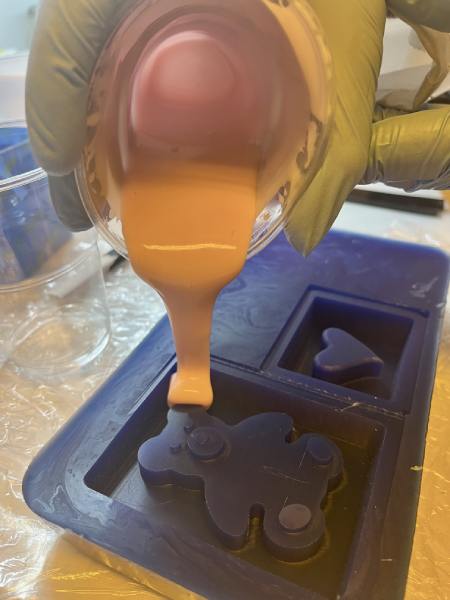
I really wanted to make another chocolate cast, so I mixed up some Smooth-Sil again. It was the absolute bottom of the barrel, and very thick. I did anyway get it to the wax mold.
And the result...tadaa!
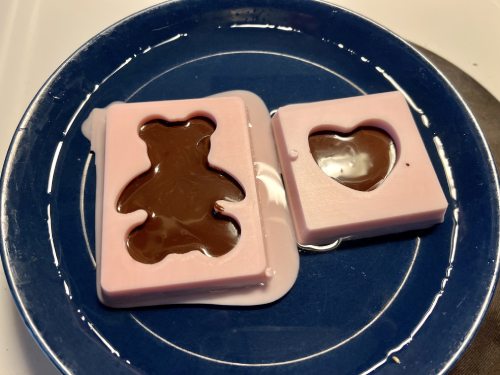
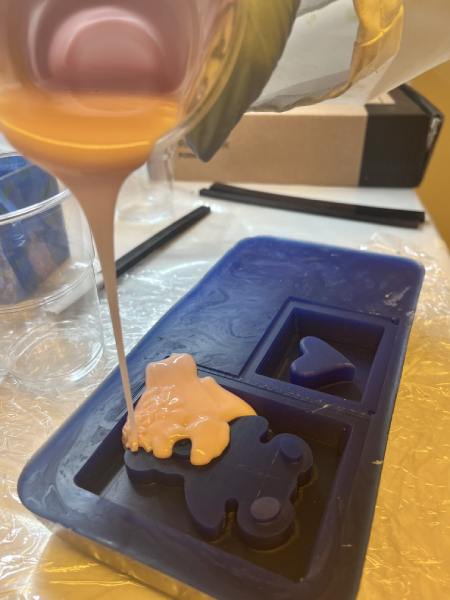
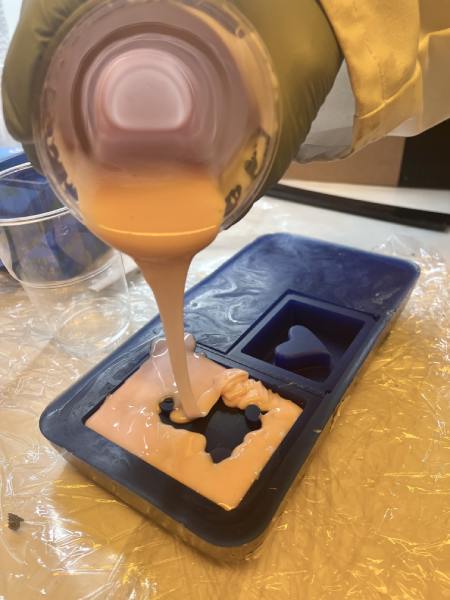
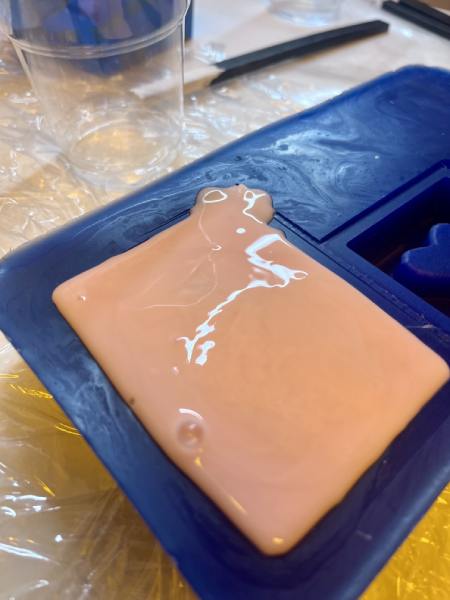
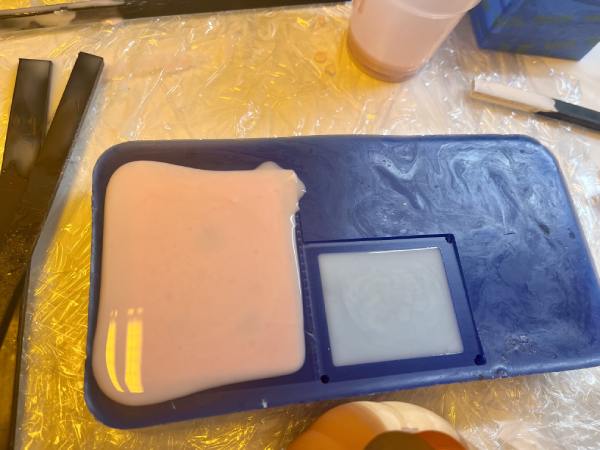
Casting
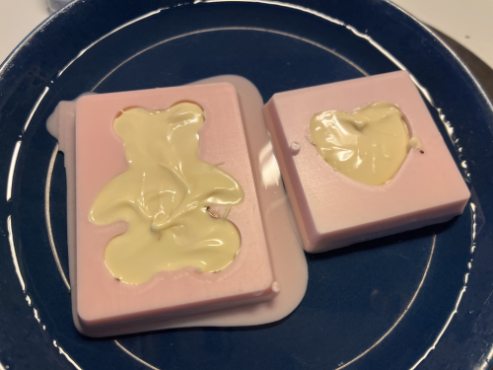
I wanted to cast some chocolate to the molds. I melted dark chocolate in a bowl that was in hot water. When it was melted, I casted it into the molds. I let it set for a time, so that the surface was solid. Then I did the same thing with a bit of white chocolate. I let them set for some time in cold water bath. The results are very nice!