15. Wildcard week
Individual assignment for this week:
- Design and produce something with a digital fabrication process (incorporating computer-aided design and manufacturing) not covered in another assignment, documenting the requirements that your assignment meets, and including everything necessary to reproduce it.
Metal laser cutting
Design
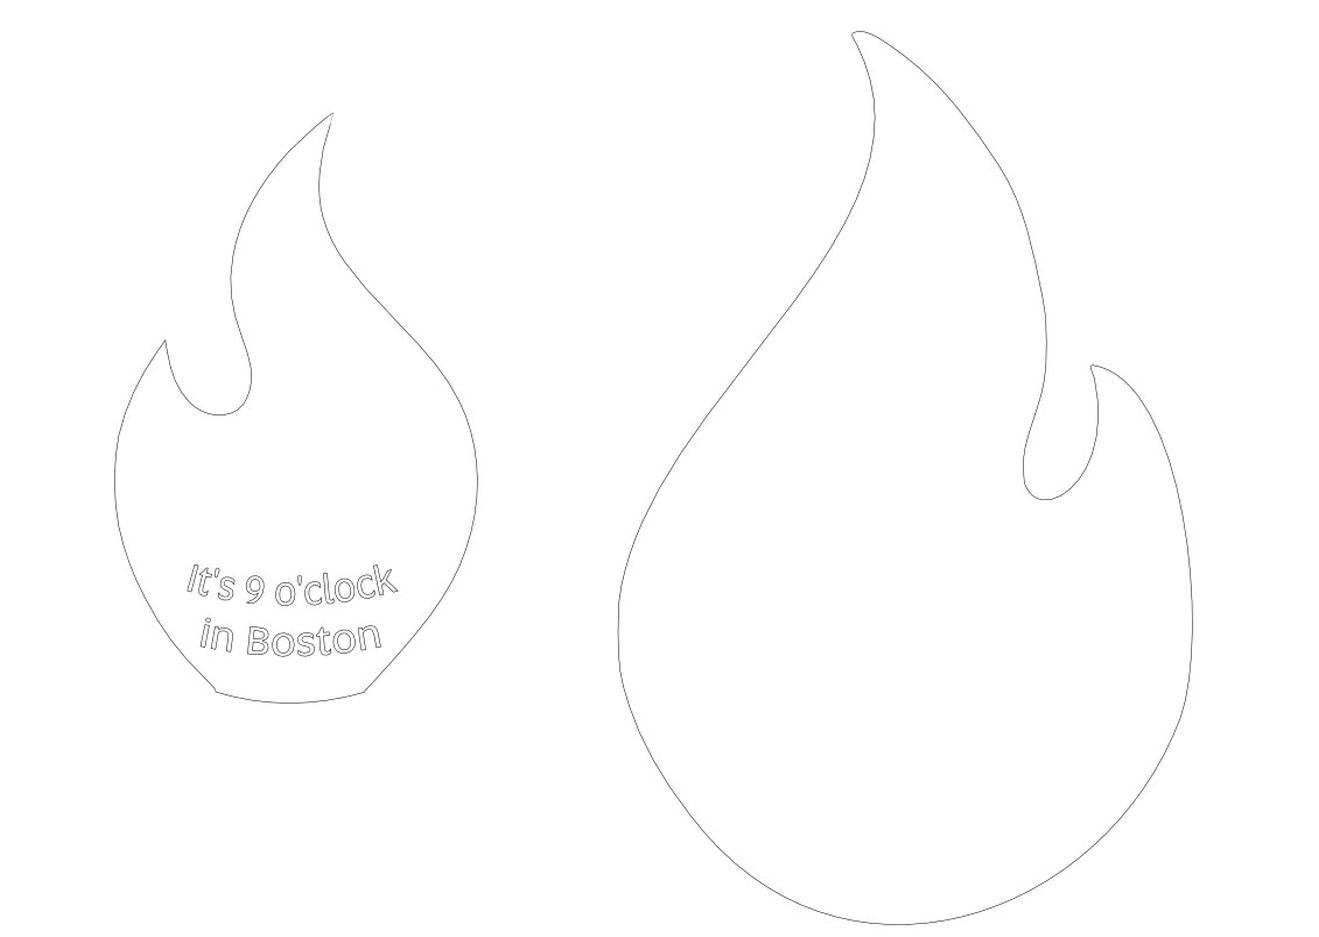
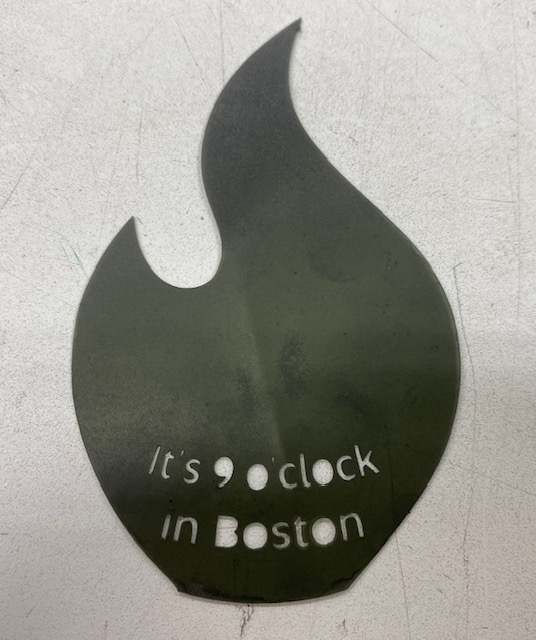
For Wild Card Week I wanted to test some new machine. We were presented with the options of using water jet cutter, metal laser cutter, vacuum forming or digital embroidery. I decided to make something small out of metal to experiment and learn the workflow of the metal laser cutter. Humorously, I decided to make a flame-shaped coaster, perhaps inspired by the Teppo the Gripper. I also thought about sandblasting the metal into the flame for effect and a little text "It's nine o'clock in Boston" as a memory of the Fab Academy.
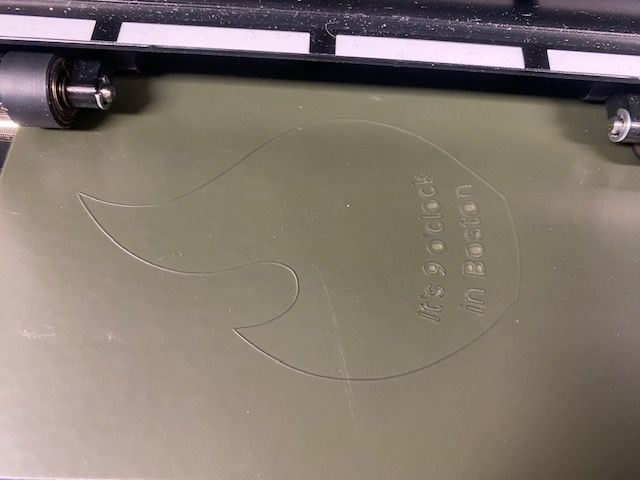
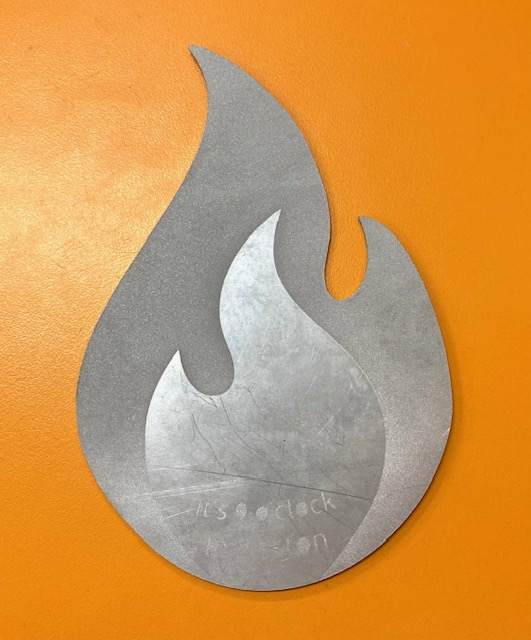
I first designed a cutting line for the metal laser cutter using Inkscape. I found the flame image from Vecteezy website and edited it to the one I wanted. I saved the cutting line in Inkscape as a DFX 14 file. The picture below left shows the Inkscape design for the cutting line and also the mask for the sandblasting.
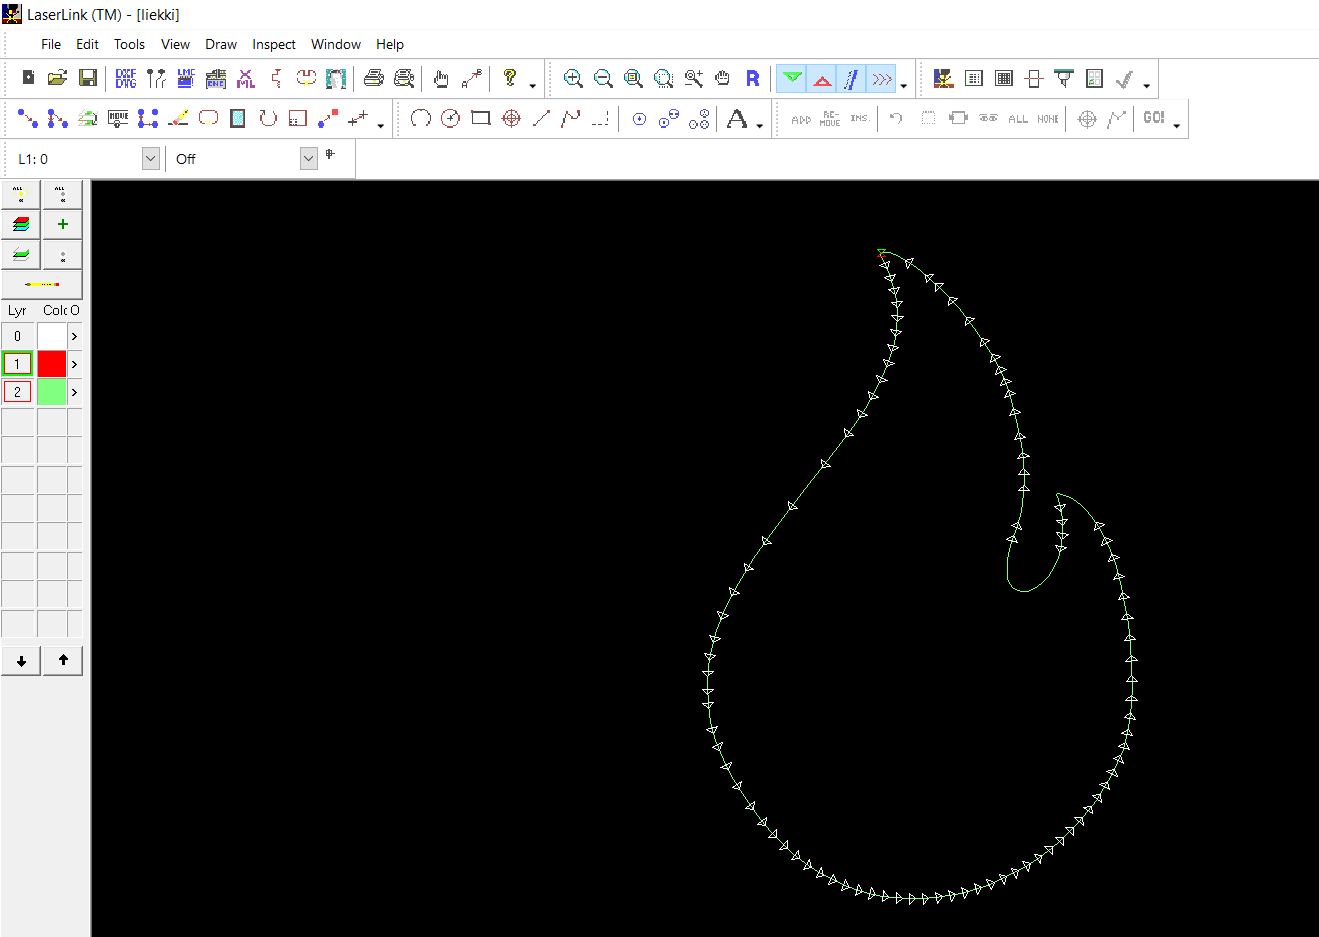
Next, the DXF file was opened in LaserLink. Our instructor had this software on his computer, so the file was opened with it. Picture below right.
|
|
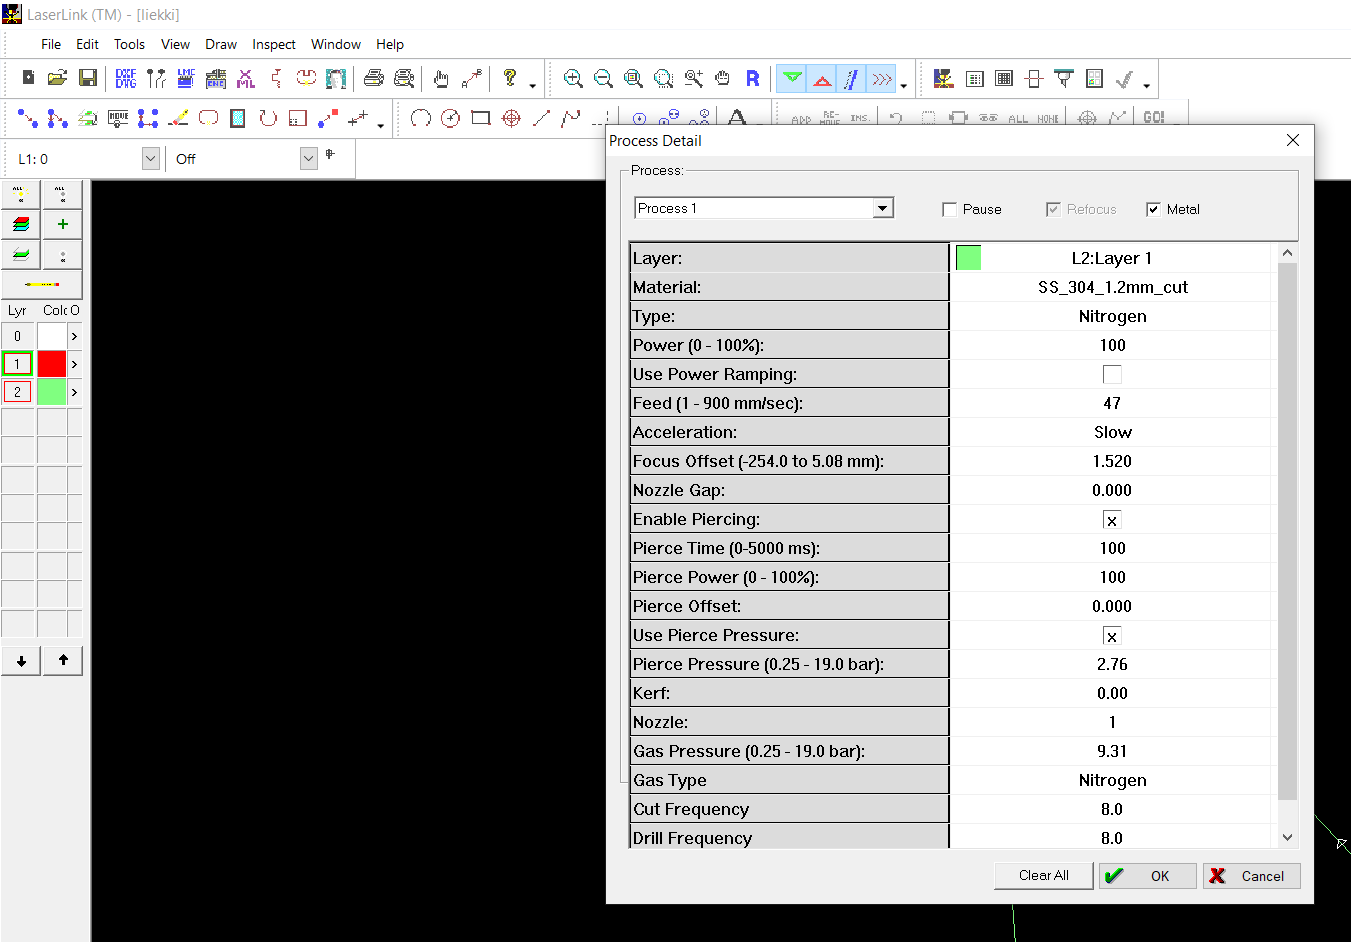
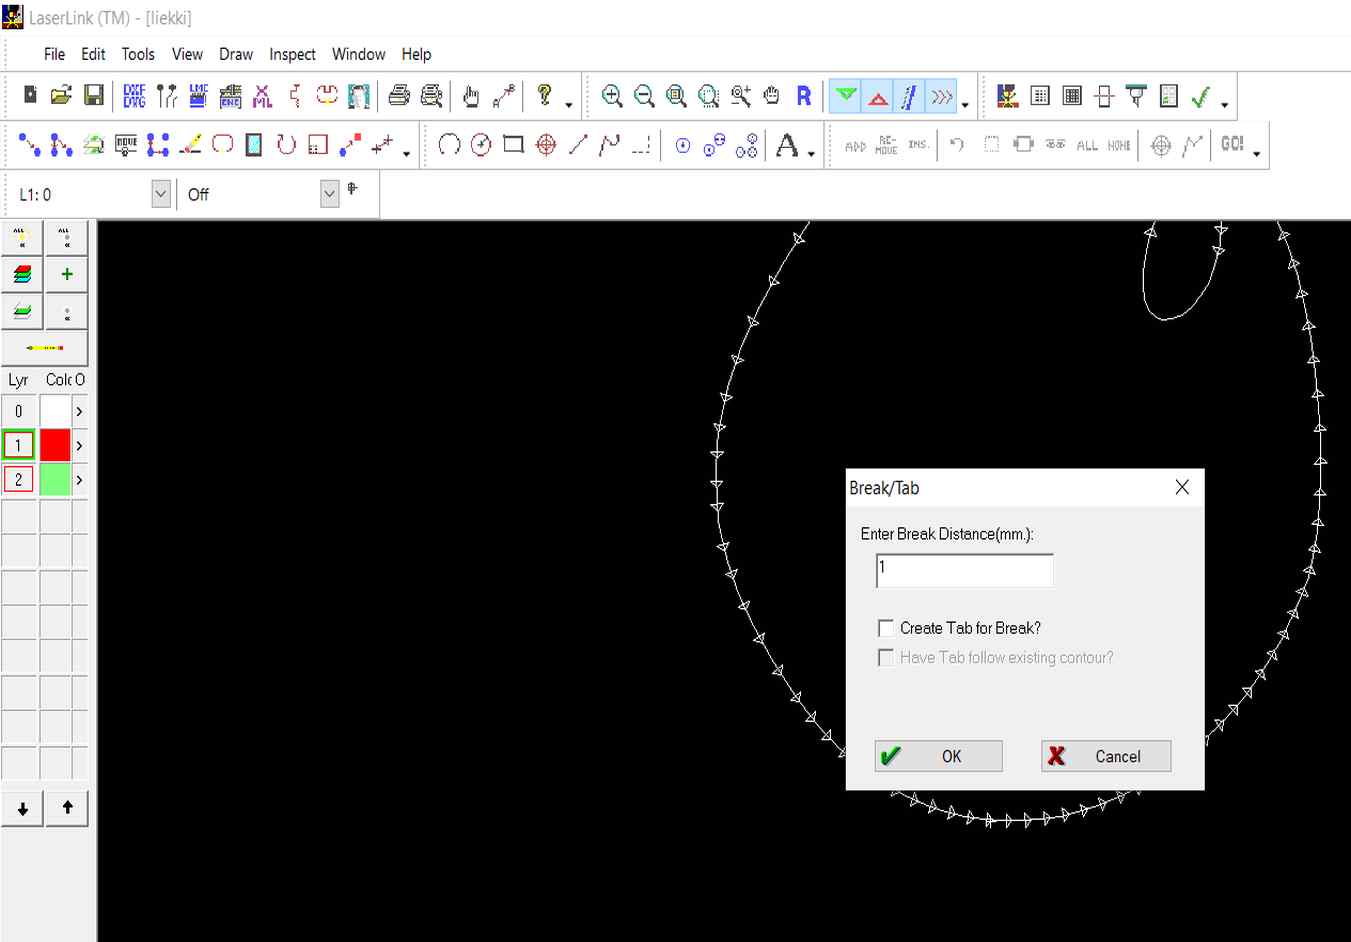
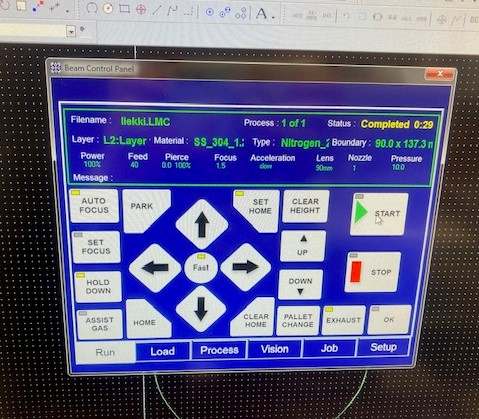
With the help of the instructor, the settings for the cutting lines were defined in the Process menu. The material was 1.2 mm thick stainless steel sheet. Power was set to 100% and feed 47 mm/sec. Acceleration slow and focus offset 1.52. All settings can be seen in the picture below left. The final step was to set the Break/Tab on the cutting line and it was placed at the top end of the flame. Picture below right.
|
|
The file was saved in LMC format and we moved on to metal laser cutter.
Metal laser cutting
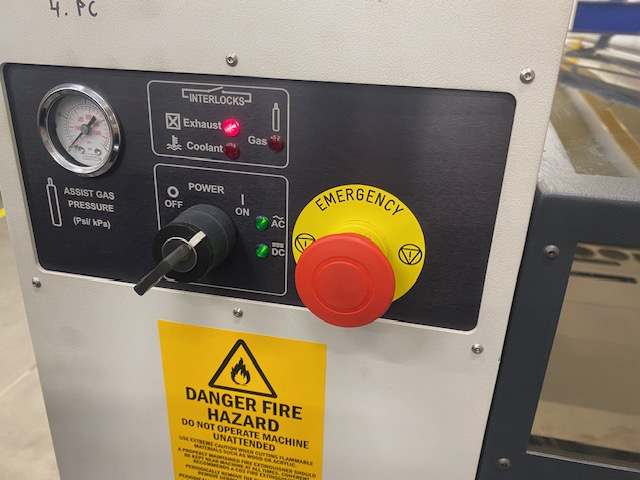
The metal laser cutter we used in the Fab Lab Oulu was Coherent Meta 4C. Picture below left.

|
|
There is a specific order to start the machine so that everything starts correctly. Instructions on how to use this metal laser cutter can also be found in this Fab Lab Oulu video.
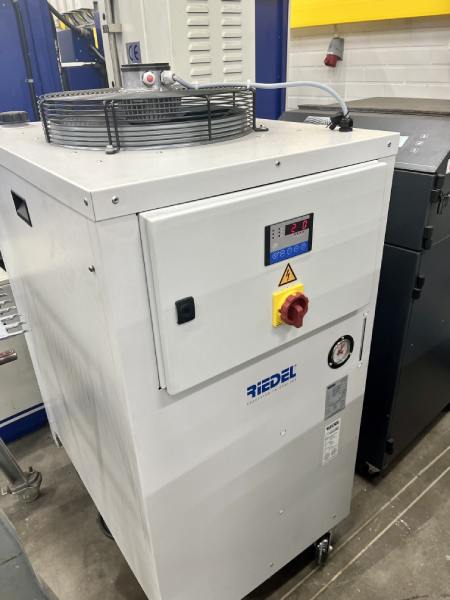
- 1. Start the water cooling system (in the picture below left)
- 2. Start the laser (in the picture above right)
- 3. Wait at least 20 s
- 4. Start the computer
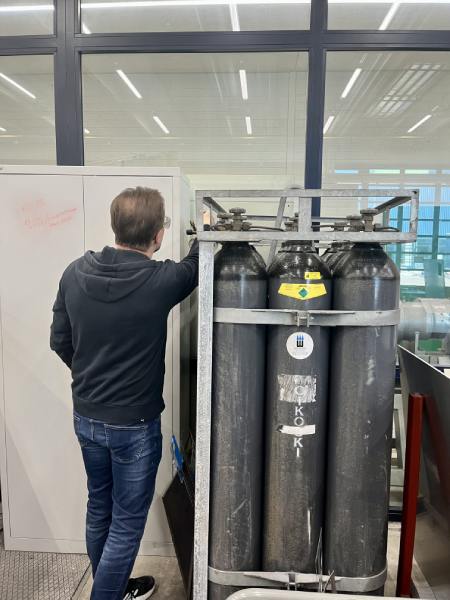
- 5. Open nitrogen bottle valve (in the picture below right)
|
|
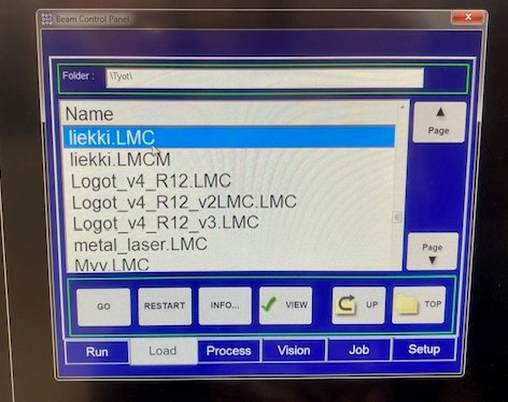
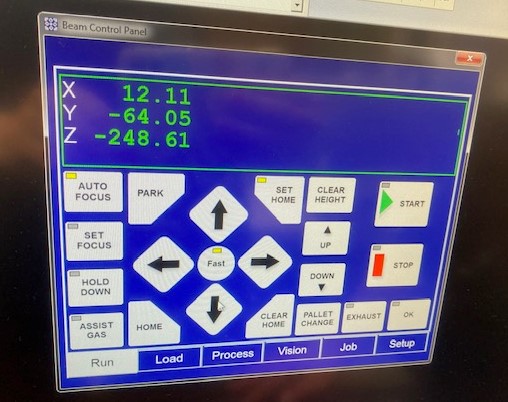
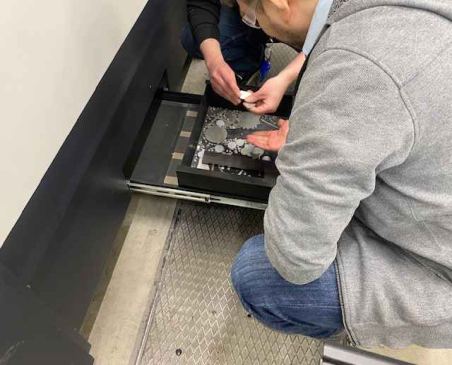
I put the stainless steel sheet in the machine. Next, I started the Beam Control Panel on the computer. If it doesn't get connection, you have started the computer too quickly and need to restart it. (Step 3 in instructions: wait at least 20 s.) I pressed Home in the Beam Control Panel and the laser moved to the front left corner. The home button can be seen in the picture below right.
Then I opened my LMC file from the Load menu. Picture below left. I set the start/home position on the bottom left corner of my sheet using the arrows in the Run menu. It is also possible to use the arrow buttons in the keyboard. Once the right position had been found, the last thing to remember is to press the "Set home" button. Picture below right.
|
|
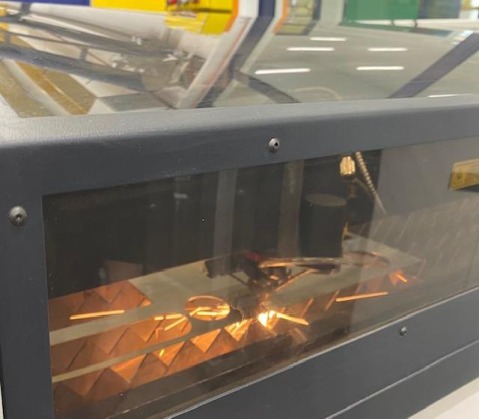
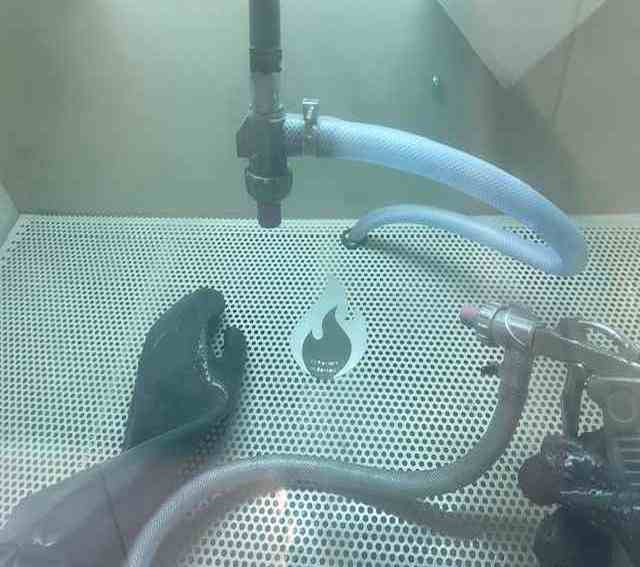
With auto focus on, I was ready to laser cut my design. I just pressed play. Picture below left. The cut was fast. Picture below right. When the cut was over, I could just remove the sheet and my piece from the machine.
|
|
If a piece falls to the bottom of the machine, you can remove it from there in the end. In the pictures below, Aarne is removing a small piece that has fallen down.
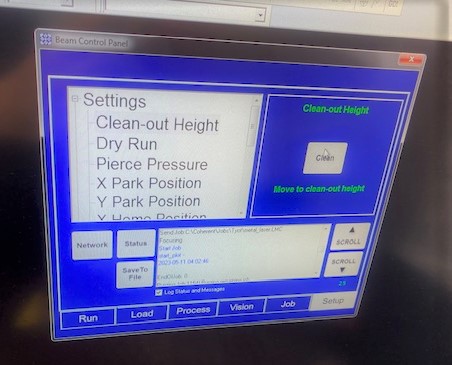
When you remove a piece from the bottom of the machine, you must first move the grate to the Clean Out Height from the Setup menu. Picture below left. Then you can open two boxes at the bottom of the machine, the inner one having all the pieces that have fallen to the bottom of the machine. Picture below right.
|
|
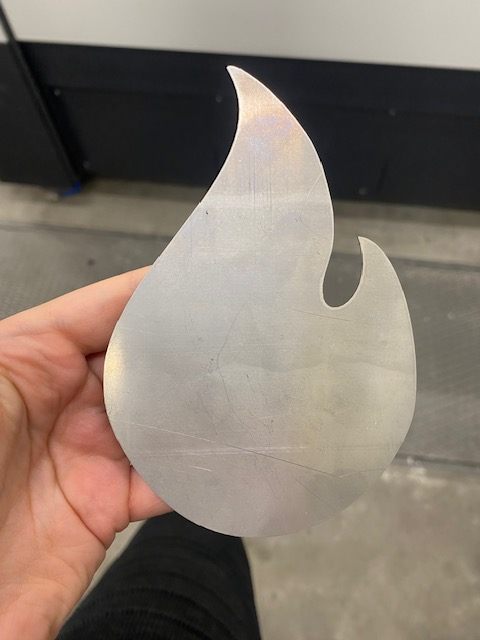
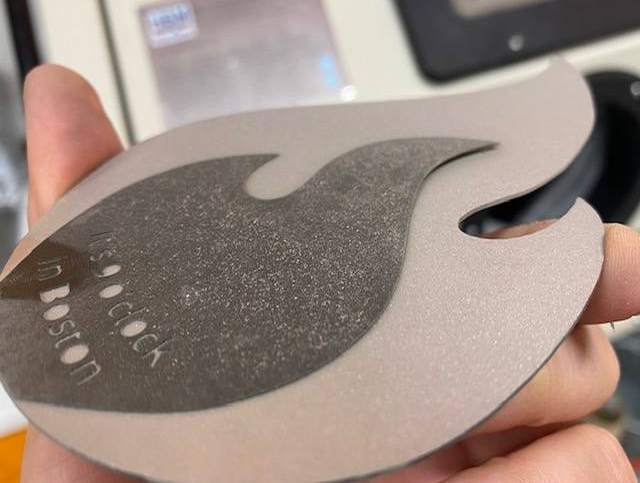
The picture below shows the flame I cut, which turned out well.
Sand blasting
Vinyl cutting the mask
I cut a sandblasting mask from thicker vinyl used for sandblasting. Pictures below. Instructions for using the vinyl cutter can be found in week 3. The small parts inside the letters were too small to stick to the metal.
|
|
Sandlasting in BusinessAsema Fab Lab
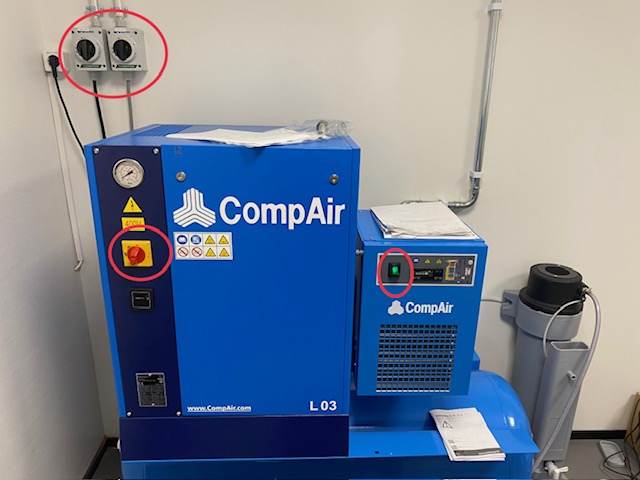
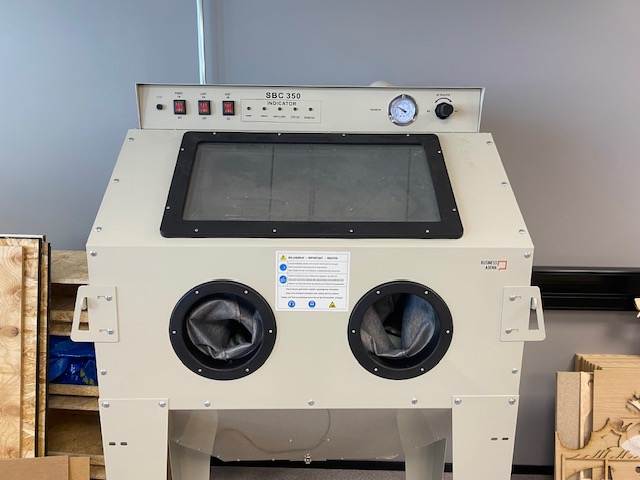
First I wanted to try out the sandblasting machine at my workplace, BusinessAsema Fab Lab. To start the sandblasting machine, you first have to turn on the compressor. In the picture below left, the start switches that you have to turn on from the compressor are circled in red. In the picture below right is the sandblasting machine at the BusinessAsema Fab Lab, model NOVA SBC 350. The safety instructions for the machine remind you to close the doors carefully and to wear hearing protection and safety glasses.
|
|
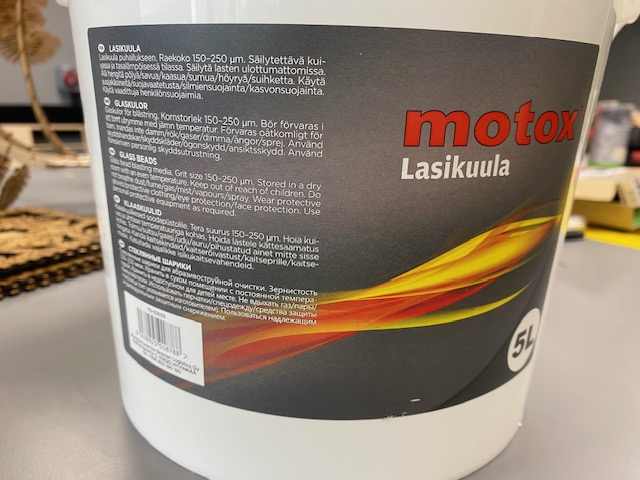
This machine currently has very small glass beads, which can be used for very gentle but effective cleaning. Pictures below.
|
|
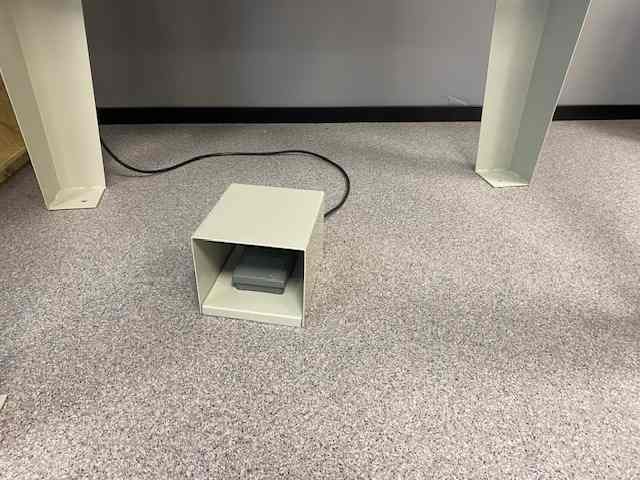
This machine has two different guns. Picture below left. Only one can be used at a time. One gun is operated through an electric foot pedal system. Picture below right. The other through a trigger gun. The cabinet doors open from the sides.
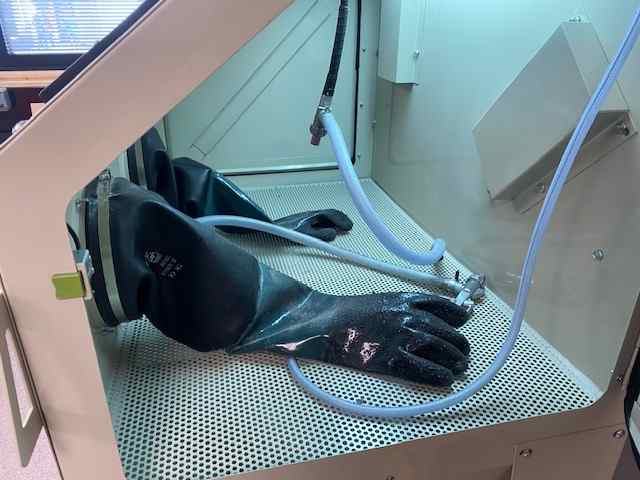
|
|
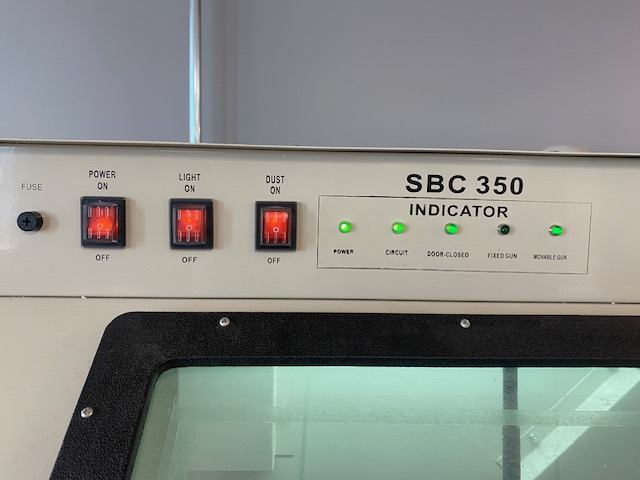
When you start using the machine, first place your piece inside the machine and close the door carefully. Then open the air switch. Picture below left. Next, turn on the power, light and dust. Picture below right.
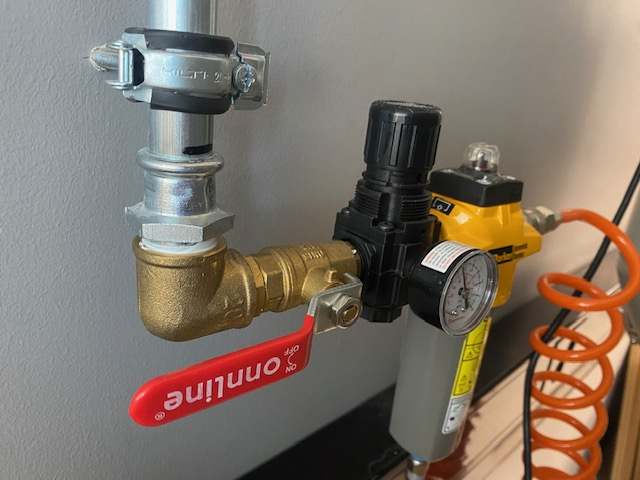
|
|
Then you can start sandblasting using one or the other of the two guns or alternate between the two. Be careful not to blow into tubes or gloves to keep them usable for as long as possible. Picture below left.
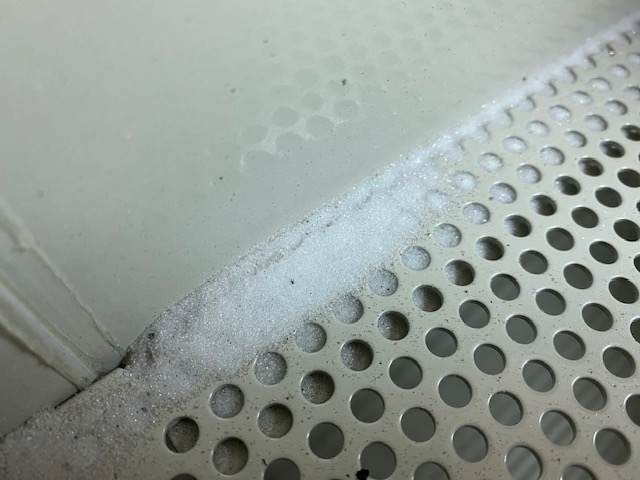
I sandblasted my piece for a while, but I didn't see much change. I turned off the machine and after a while took the piece out to check the progress. I lifted the mask a little to see the result. Just a slight difference between sandblasted and non-blasted. Picture below right.
|
|
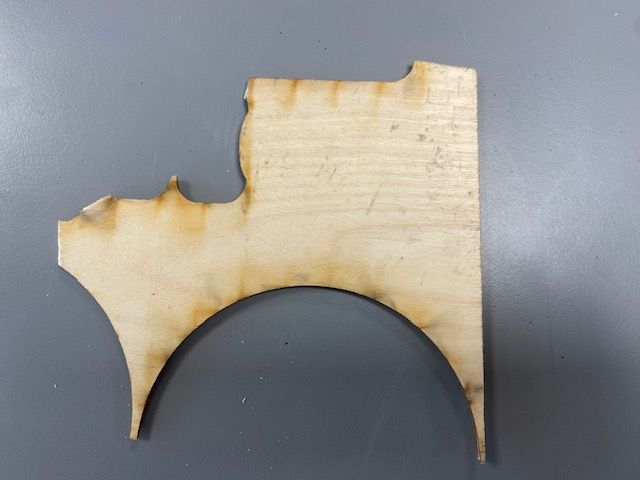
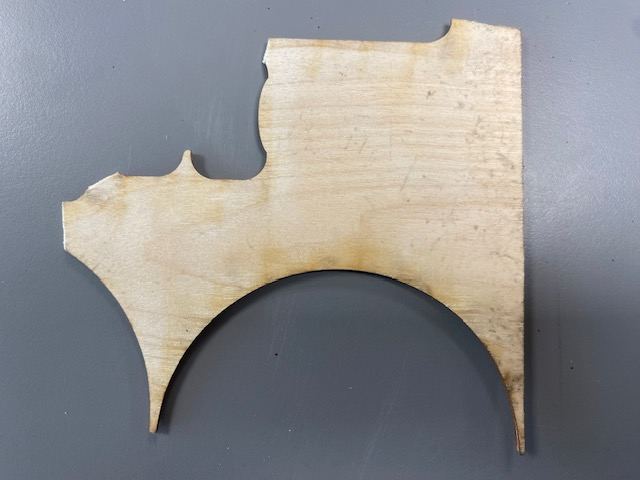
This sandblasting machine had not been used before to blast stainless steel and I was left wondering if the result was that gentle and if everything was OK in the machine, etc. I tested using the machine to clean plywood to see how it worked for it.
When I sandblasted the plywood, I noticed the difference immediately, although in the pictures below it is not yet so noticeable. On the left is the starting point and on the right the result after a short sandblasting session.
|
|
I decided that sandblasting with a glass bead would not give the desired result on my stainless steel flame coaster, so I decided to use a university sandblasting machine next.
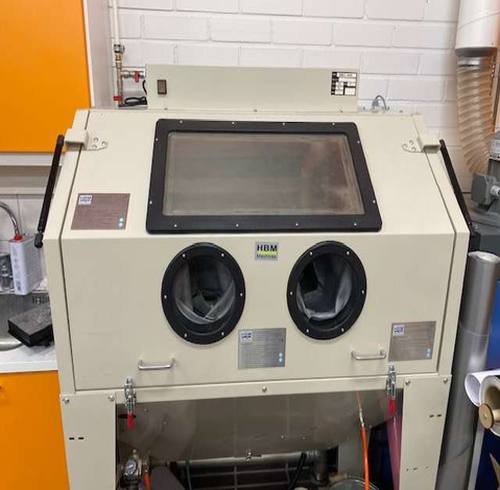
Sandlasting in Fab Lab Oulu
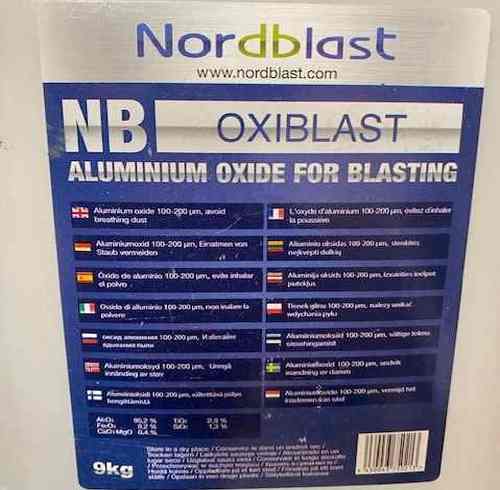
Fab Lab Oulu's sandblasting machine model is SBC 420. Picture below left. It is important to remember to check the parts of the machine before sandblasting, wear safety glasses and close the door carefully before use. The door opens from the front upwards. In this machine aluminium oxide is used for blasting. Picture below right.
|
|
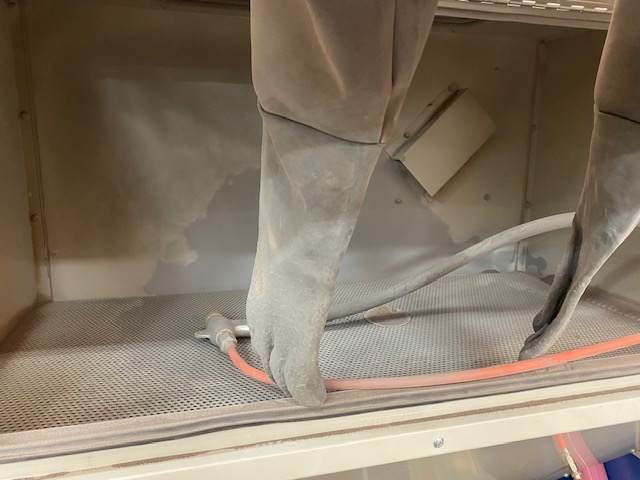
This machine has only one gun, the pressure of which is controlled by a foot pedal on the floor. Picture below left.
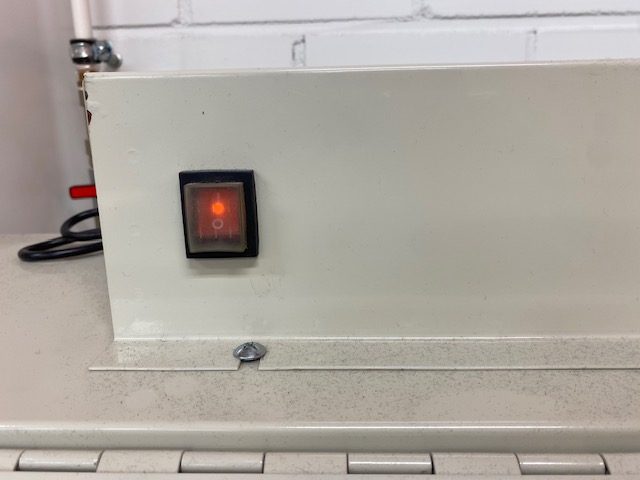
When you start using the machine, first put the piece inside the machine. Turn on the machine. Picture below right.
|
|
Then open the sand pump (picture below left) and vacuum pump (picture below right).
|
|
You should first try sandblasting on a test piece to find the right distance and pressure for blasting. I first tested on the back side of a coaster because I wanted it to be sandblasted as well.
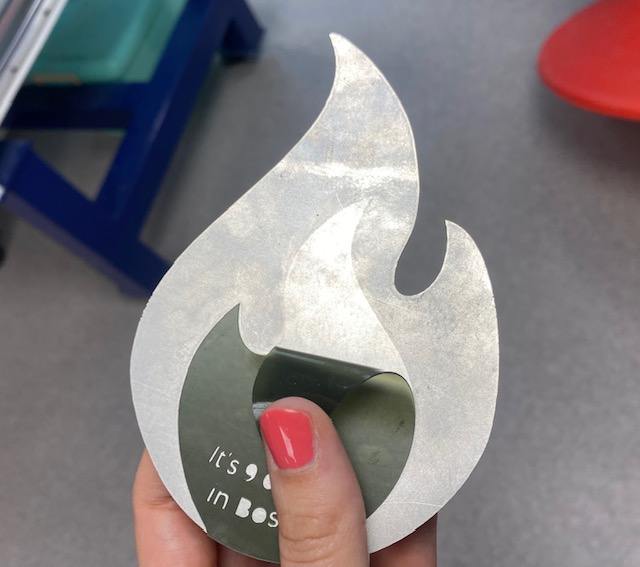
Then I blasted the right side, where the mask was. In the picture below left you can see that the mask has lifted a bit from the top. This is because I had previously removed it, to see the result.
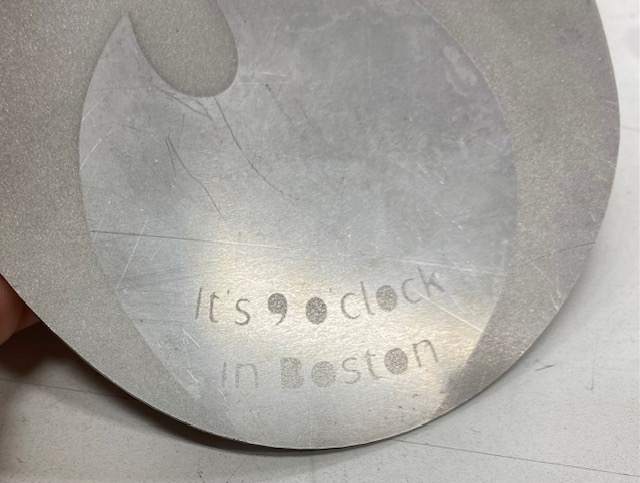
I took off the mask and checked the result. The letters in the text are so thin that they are best visible at a certain angle, but they are visible anyway. Maybe it's a good thing they don't catch the eye right away. Picture below right.
|
|
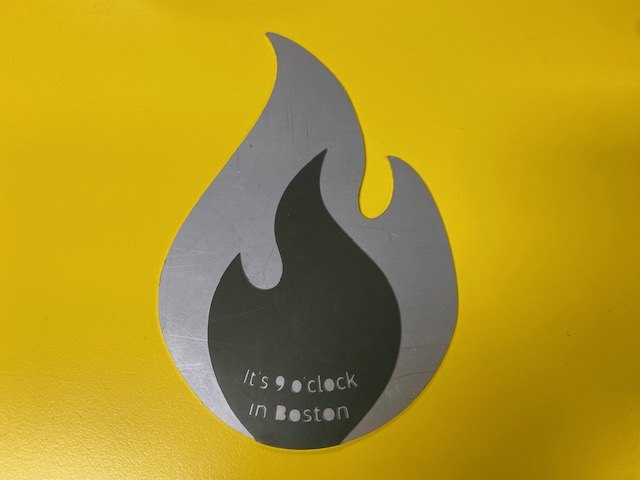
The vinyl for sandblasting worked very well, and it didn't really get damaged at all. Picture below left. In the picture below right you can see the final result of the metal coaster and I am happy with it. Note also that although the top edge of the mask had lifted up, in this case the sandblasting had not got under the mask.
|
|