3. Computer controlled cutting
Group assignment for this week:
- Characterize your laser cutter's focus, power, speed, rate, kerf, and joint clearance
The documentation of group assignment can be found on our group work page.
The group work taught me good tips for testing the Kerf and the right settings for lasering different materials. So far I have used a lot of default settings and adjusted them a bit if necessary. When testing the settings I didn't come across anything surprising as such, but it was good to document how for example different settings affect cutting and engraving with the laser cutter. The most interesting finding for me was that in our group work test, changing the frequency settings did not have much of a visible effect. I wanted to find out a bit more about the effect of frequency and the Epilog laser manual (pages 90-91) explains frequency setting like this:
The frequency setting is only active on vector processes, and controls the number of laser pulses that the laser fires per inch of travel. The frequency is set in the dashboard and can be adjusted from 1 to100%. A lower frequency number will have the effect of less heat because fewer pulses are being used to cut the material. Lower frequency rates are helpful for products like wood, where charring is evident at higher frequencies. High frequencies are useful on materials like acrylic where a large amount of heat is desirable to melt or flame polish the edges.
Perhaps I could explore the effects of frequency a little more at some point, if it seems like a relevant setting for the best results in testing.
Individual assignment for this week:
- Design, lasercut, and document a parametric press-fit construction kit, which can be assembled in multiple ways
- Cut something on the vinyl cutter
Vinyl cutting
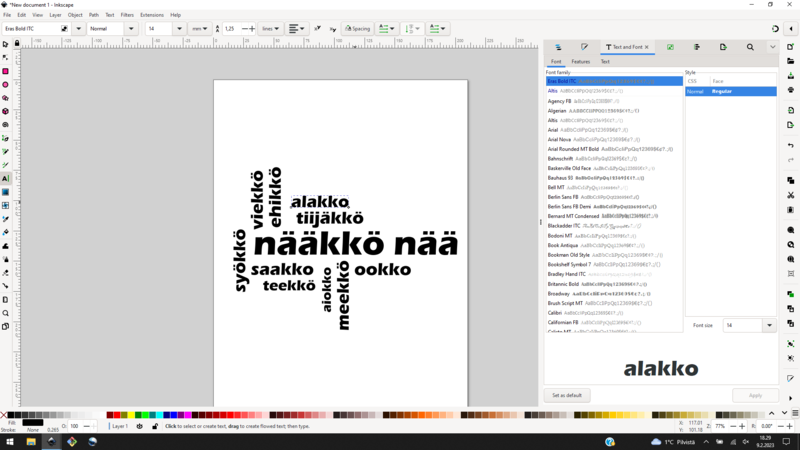
Design with Inkscape
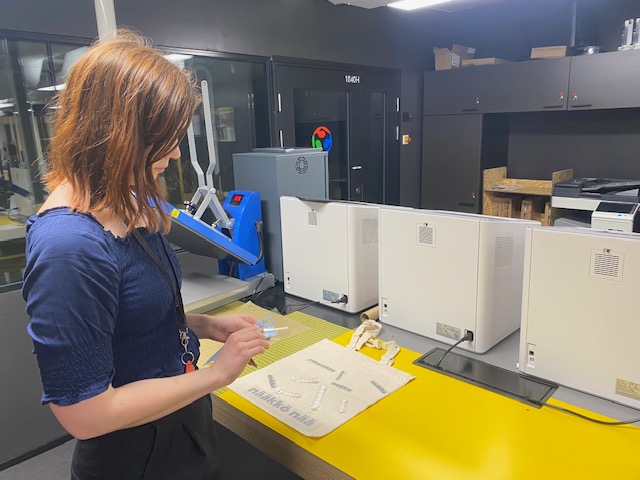
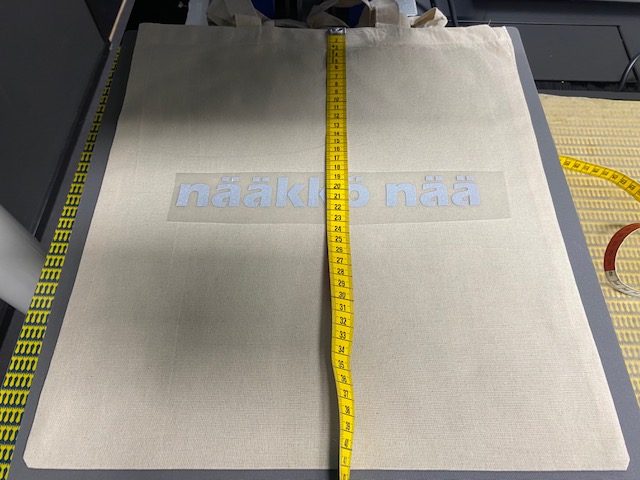
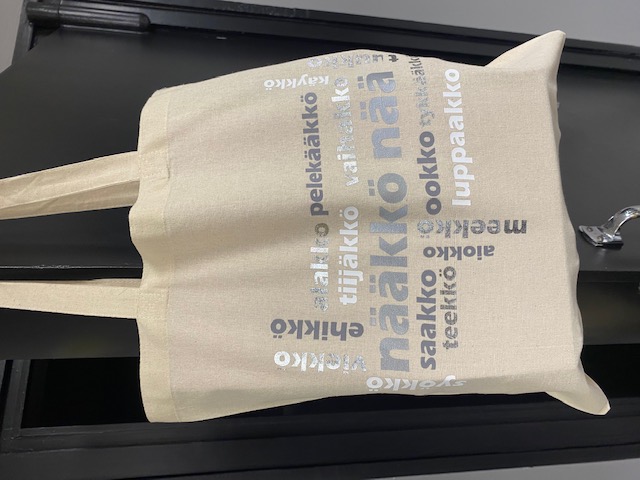
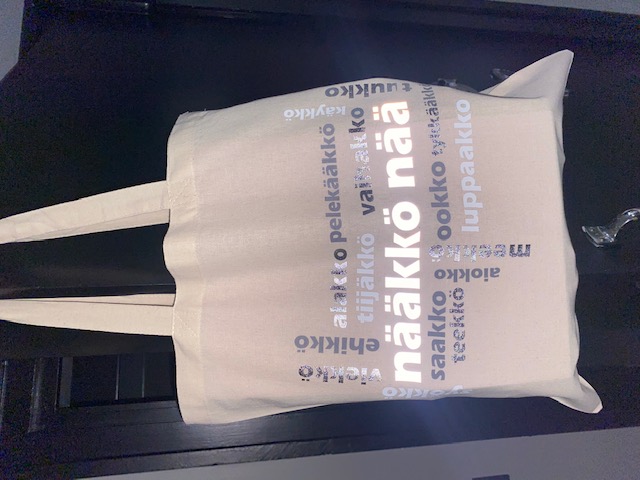
As a vinyl cutting work I made a cloth bag with a print. The print is a word cloud in the Oulu dialect. In the middle is a larger text "do you see (me)", which is a reflective heat press vinyl. The other words of the word cloud are verbs in the Oulu dialect. So the idea is that the text "nääkkö nää" is reflected when you walk outside with a bag on your shoulder. It works as a reflector, but it also has a funny meaning.
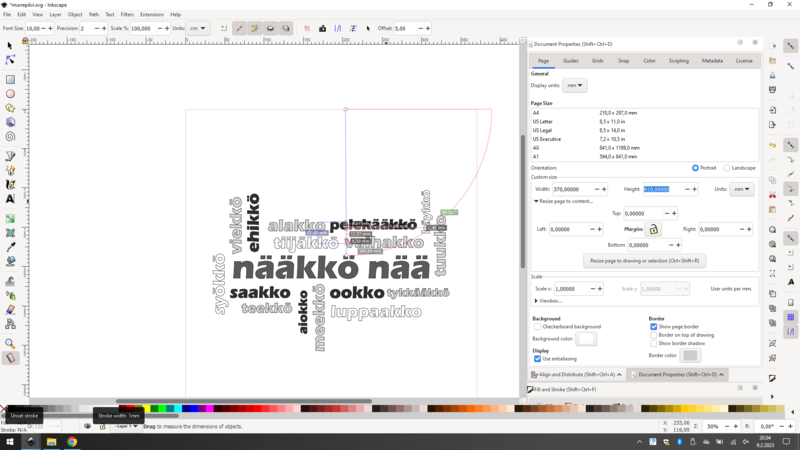
I designed the printing in Inkscape using a text tool. I wrote the words, rotated them vertically and horizontally, changed the font size and placed them in the right places. This created a word cloud. I purposely chose a wide font to make it easier to weed the vinyl. Picture below left.
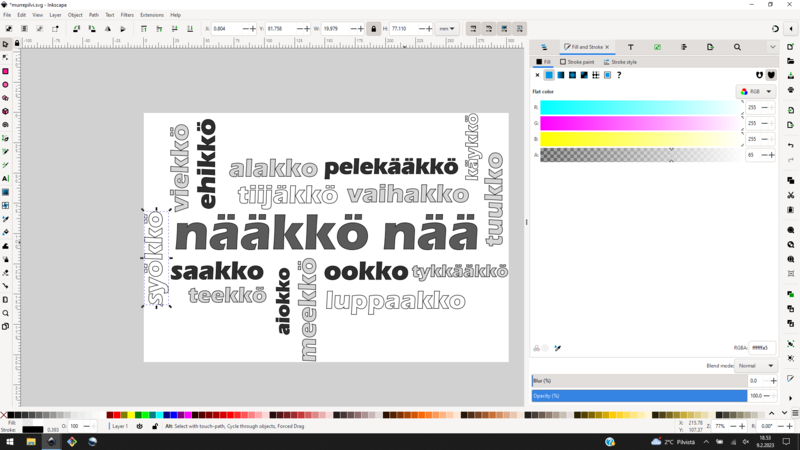
I wanted to use four different types and colours of heat press vinyl for the print. When I thought the word cloud was complete, I changed the colors of the words to help me better visualize which way was which color. Picture below right.
|
|
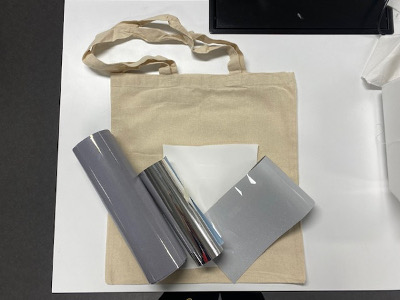
The final design is below on the left and the heat press vinyls I chose are on the right. All four heat press vinyls are different. The vinyl on the left has a "velvety" feel, next to it is a shiny silver vinyl, the white vinyl is matte and on the right is a reflective vinyl.

|
|
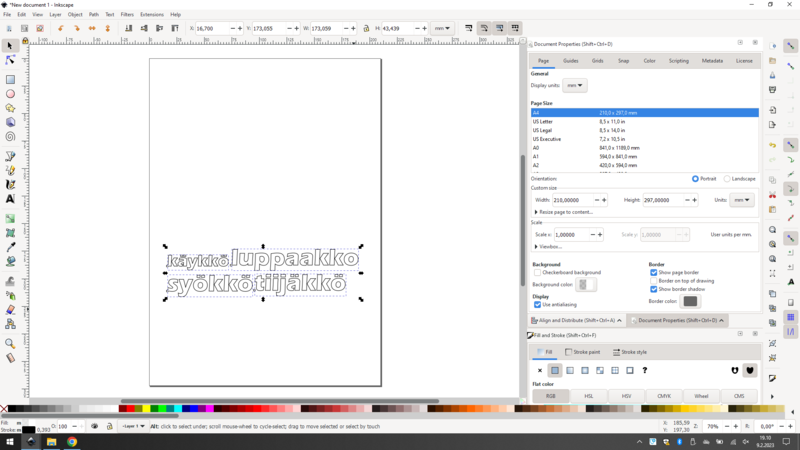
I selected words colour by colour from the final design for the new document. I moved the words in an order that would fit on the leftover pieces I had chosen.
I grouped the words and flipped them using Inkscape's "Flip selected objects horizontally" command. Picture below left. This is because when using heat press vinyl, the cutting is done on the "wrong" side of the vinyl, usually the less glossy side.
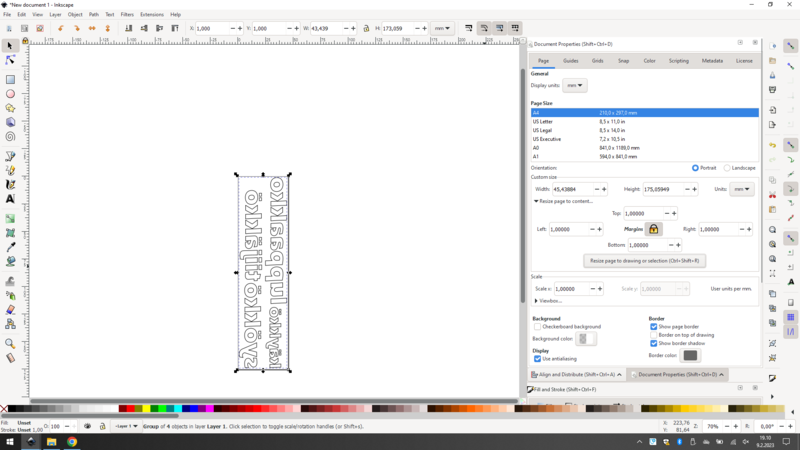
Next, I rotated the words 90 degrees clockwise, because our vinyl cutting process has a nice feature that vinyl cutter will not recognize the document if it is not rotated 90 degrees in the printer preferences. Because I want the words to be cut horizontally, at this point I need to rotate the words vertically. The last step I did was to resize page to drawing to optimise the use of the material. Now the document is ready for printing. Picture below right.
|
|
Vinyl cutting
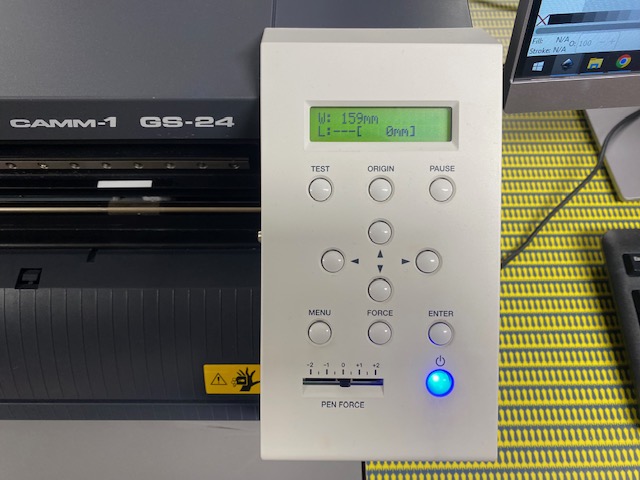
The model of vinyl cutter in BusinessAsema Fab Lab is Roland CAMM-1 GS-24. I placed the vinyl inside the white markers and moved the rolls to the edges of the vinyl. Picture below left. It is important to always place the vinyl inside the white markers, otherwise the cutter will not recognize the vinyl and say it is in a bad position. I chose from the cutter menu to measure just the edge, because I already knew that the length of the vinyl would be enough. The width was 159 mm. Picture below right.

|
|
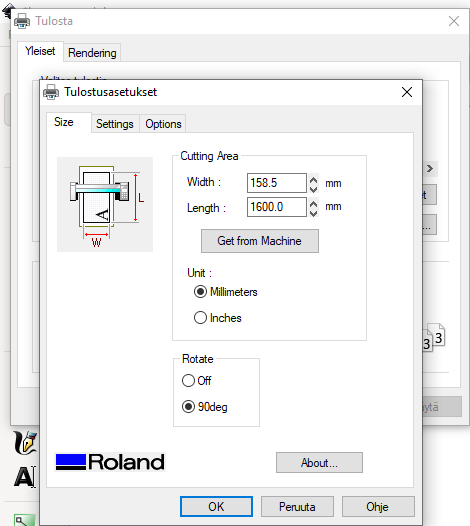
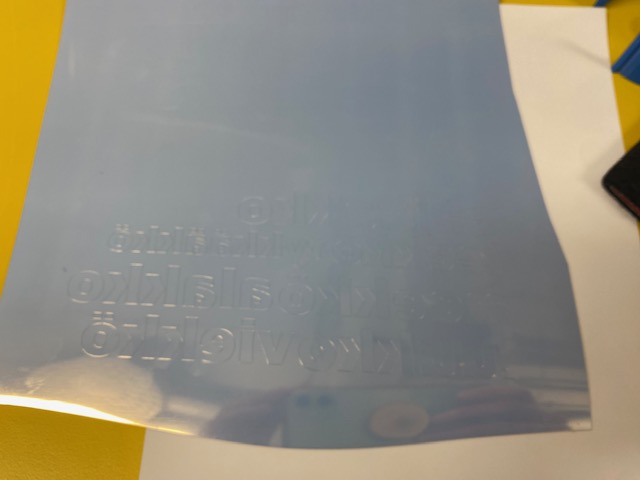
Once the vinyl is placed in the cutter, I selected print from Inkscape's file menu. Before pressing print again, I checked the preferences. I selected "Get from machine" in Cutting Area preferences and got the width which I just measured. In addition, at this point I needed to press 90 deg in Rotate preferences so that the vinyl cutter would recognize the document. Picture below left. It didn't take long for the vinyl cutter to cut and below right you can see the cut texts.
|
|
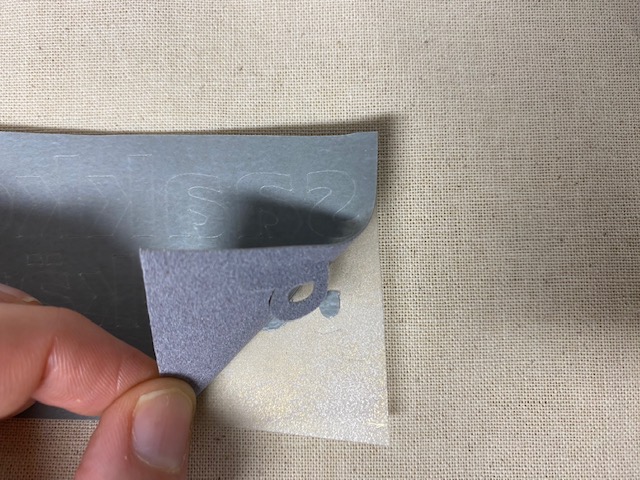
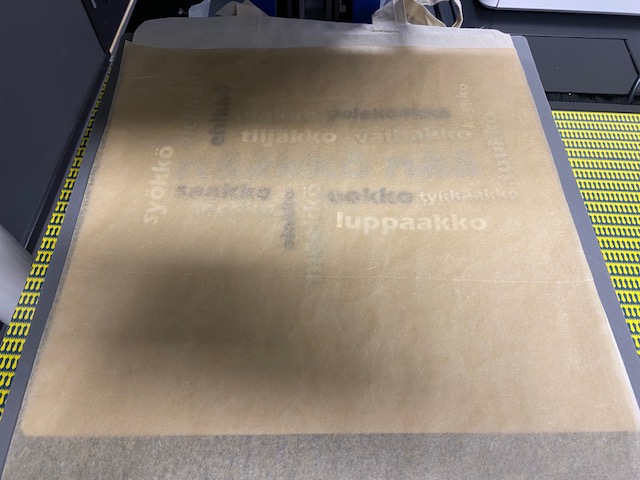
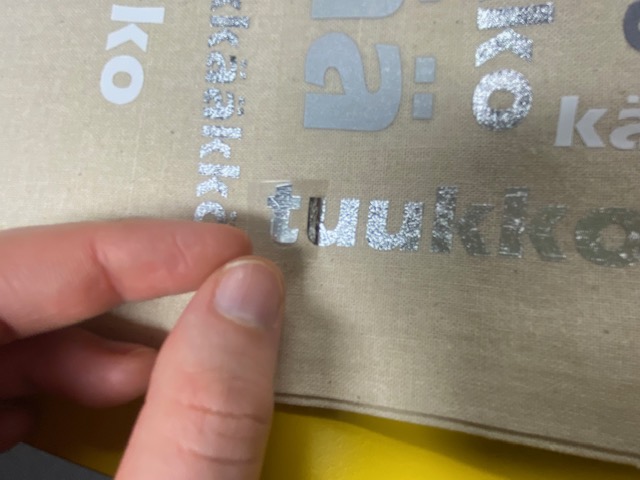
Next started the most time-consuming step of the vinyl cutting process, the weeding of the vinyl. Some vinyls are easier to weed than others. I used a pin to help with the weeding. The vinyl with the velvety feel was donated to our Fab Lab and may be quite old, so the sticker on the plastic may not be the best anymore. One letter fell off right at the beginning, but the others stuck. Picture below right. I put the fallen letter in its rightful place when I placed the text on the cloth bag.
|
|
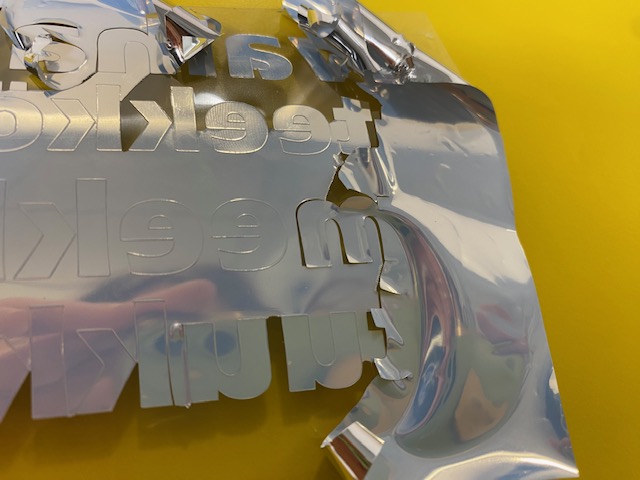
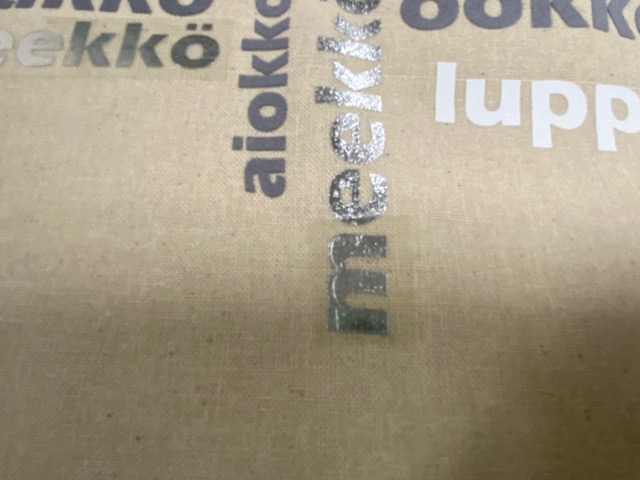
For some reason, the vinyl cutter hadn't cut the line of the first few letters of some words, so they were stuck to the vinyl. Picture below left. I checked the design and everything should be correct, the drawing was inside the page. I cut new first letters and put them in place. At the same time I tested what happens if there are two plastic protectors on top of the letter. Picture below right. The sharp-eyed can see in the picture on the right a mistake I made with my tired brain...
|
|
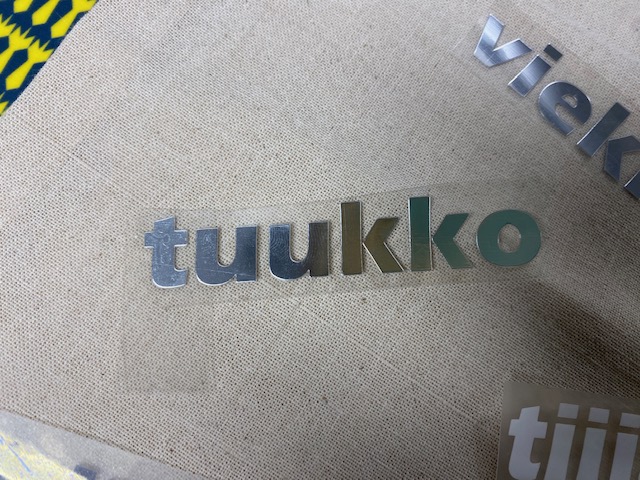
When I had weeded all the vinyl, I put the texts in place for heat pressing. I started by placing the text "nääkkö nää". I now set the page size in Inkscape to the size of a cloth bag and centred the word cloud. Picture below left. I measured in Inkscape where the text "nääkkö nää" was and used the measurements to centre the cut text on the bag. Picture below right. I first heat pressed the reflective text "nääkkö nää" because it needed to be heat pressed at a higher temperature and for a longer time than other heat press vinyls (160 degrees celsius and 15 seconds).
|
|
Next, I placed the other texts with the help of the design picture in Inkscape and heat pressed them onto the cloth bag (about 145 degrees celsius and 10 seconds). I put a piece of baking paper in between to make sure nothing stuck to the heat press. Picture below left. After heat pressing, I first removed the plastic from the words where the plastic had to be removed when the print is hot. I let the rest of the text to cool sown and took the rest of the plastic off. Picture below right.
|

|
Removing the plastic from all the other words was easy, but then I realized I had made a small mistake. I had previously fixed the first letters of two words, but I hadn't noticed to cut the plastic exactly around the letter... So part of the letter was stuck to the plastic. Oops! Otherwise the double protection plastic didn't cause any problems, but I had just been slipshod. Pictures below.
|
|
However, these small mistakes are not noticeable in the printing, so it doesn't matter! I think the cloth bag is a nice one, I'm happy with the fun design and the heat press vinyls I chose. The picture on the left below was taken in natural light and the picture on the right was taken with flash, so you can see the reflective heat press vinyl effect better.
|
|
Laser cutting - Press-fit construction kit
Design with Fusion 360
I wanted to try to do something useful with the press-fit construction kit task, but nothing came to mind within a week. So I decided to try out different pieces. I designed all the pieces in the same way and I'll explain a bit more about that in the next section.
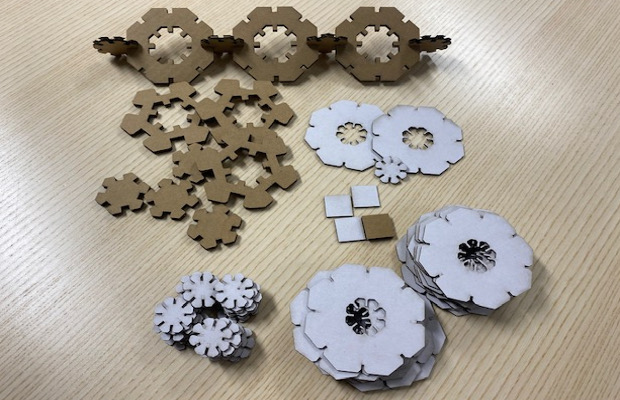
The very first thing I did before I cut the pieces of both cardboard, I did the same kerf measurement test as we did in our group assignment. I drew a 20 mm square with Inkscape and cut it out. I got a kerf of 0.16 for the thicker cardboard and 0.25 for the thinner cardboard. You can see the test pieces in the middle of the picture below.
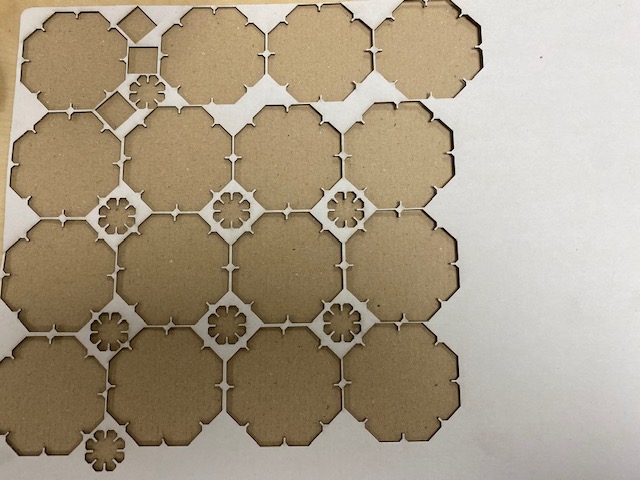
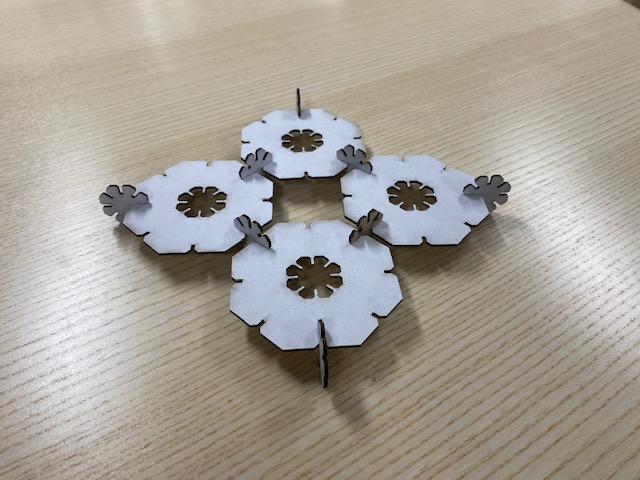
I first tried hexagonal pieces, but when i downloaded drawing and PDF file from design, I accidentally scaled the piece to double size. I didn't realized this until after I had laser cut the pieces from cardboard and I felt like a dummy. No problem, I just downloaded new drawing and checked the scaling. It was as it should be. I decided to use the larger pieces I had cut and cut the right smaller pieces in the middle of them. These first pieces are the "snowflakes" on the left in the picture below.
From this snowflake experiment, I found a way to make pieces, from which a similar smaller piece was cut out from the inside. So not a pointless little mistake!
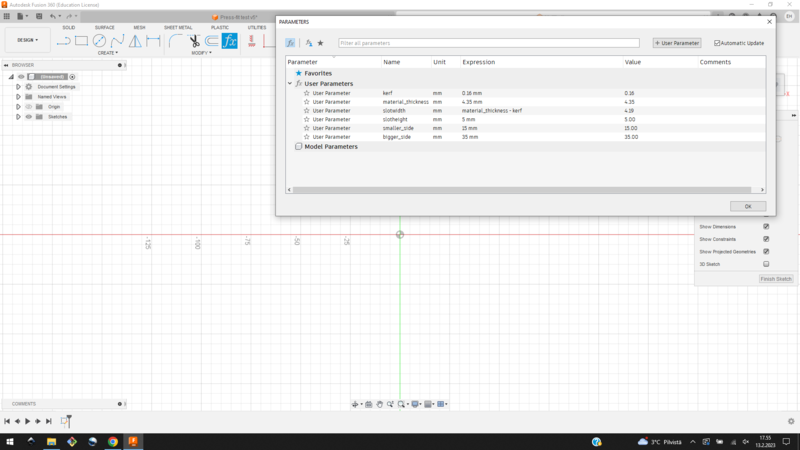
When I started designing, the first thing I did was set the parameters before I started drawing the pieces. The parameters made it easy to change the size of the pieces later, while taking into account the kerf. I navigated to Modify -> Change Parameters and added User Parameter. Picture below left.
The parameters I decided to add were:
- kerf = x mm
- material_thickness = x mm
- slotwidth = material_thickness-kerf mm
- slotheight = x mm
- smaller_side = x mm
- bigger_side = x mm
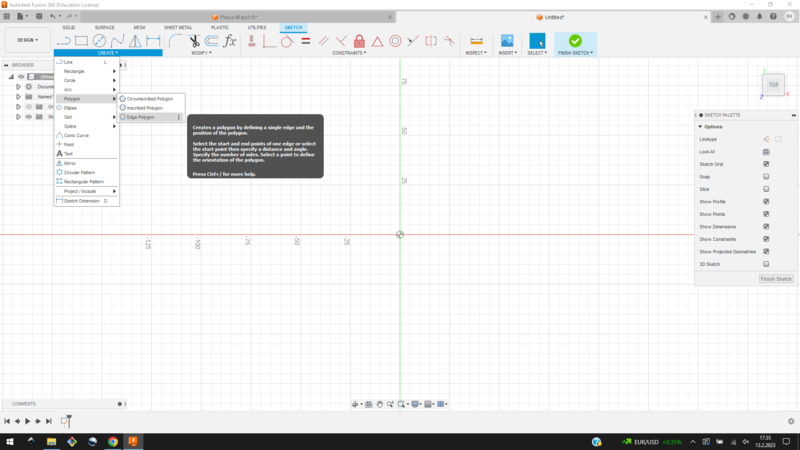
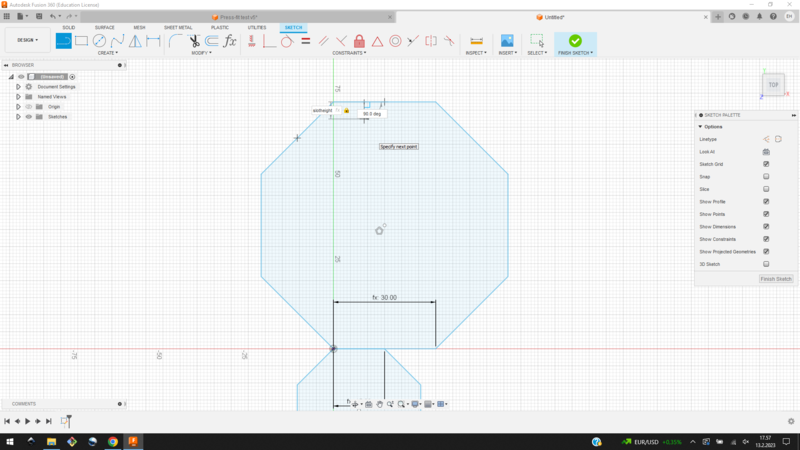
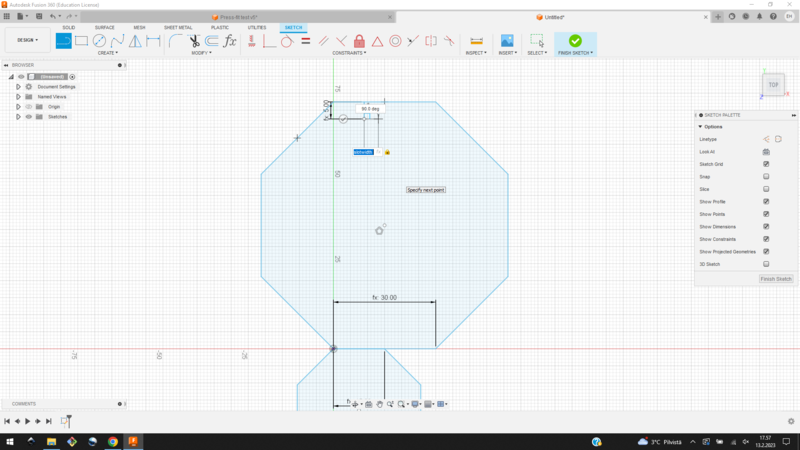
I started drawing the octagon by creating a new sketch and navigating to Create -> Polygon -> Edge Polygon. Picture below right.
|
|
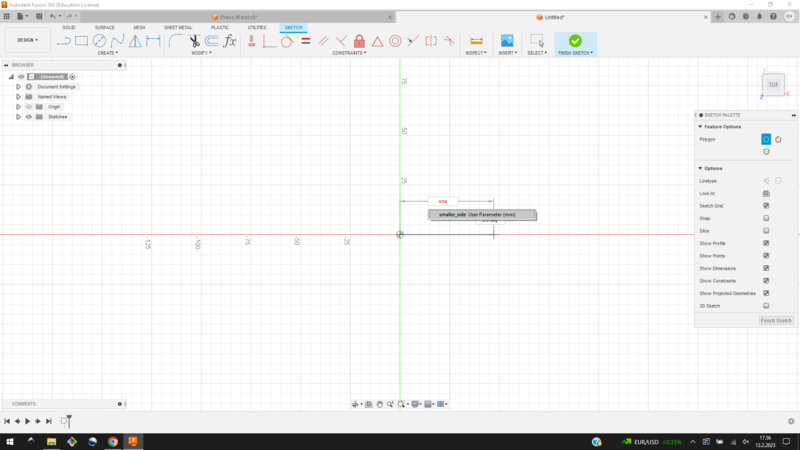
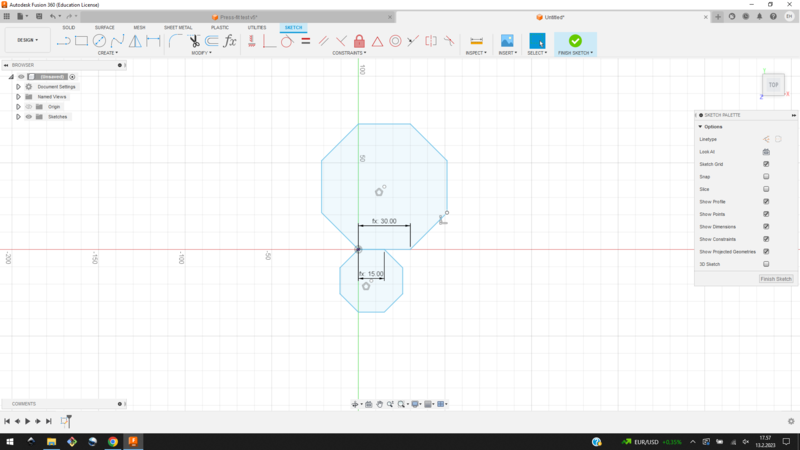
I chose a plane on which I started to draw a polygon. I wrote the smaller octagonal side parameter that I had set and chose eight as the number of angles. Picture below left. I made a larger polygon at the top in the same way. Picture below right. In hindsight, I could have drawn the octagons by creating a Circumscribed Polygon sketch, so I could have directly centered the smaller octagon inside the larger one.
|
|
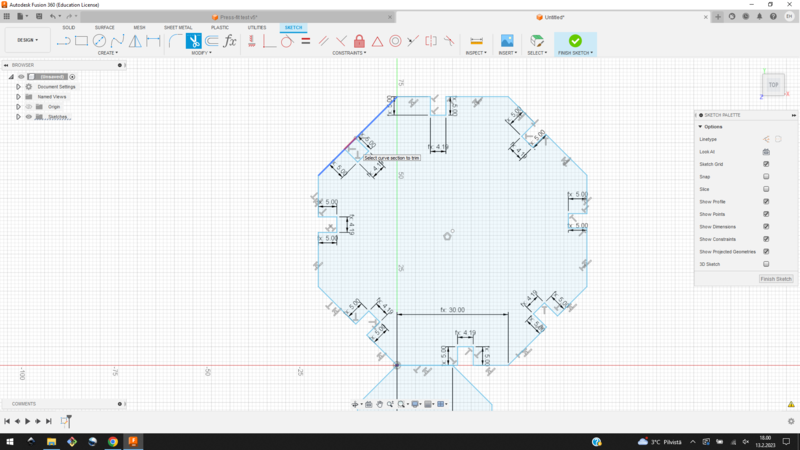
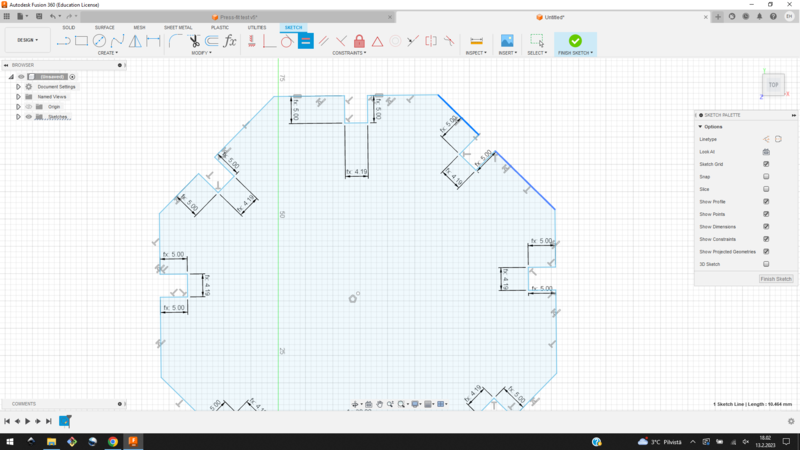
I drew the slots with the Line tool. I set the height and width dimensions of the slots according to the parameters. I didn't yet care where I drew the slots on the sides, because later I centered them. Pictures below.
|
|
I drew slots on each side. I used the Trim tool and removed the extra lines from the sides, "opening up" the slots. Picture below left. I centered the slots using the Equal tool to set the lines on either side of the slot to the same length (From Constraints -> Equal). Picture below right. I also made the slots in a smaller octagon in the same way.
|
|
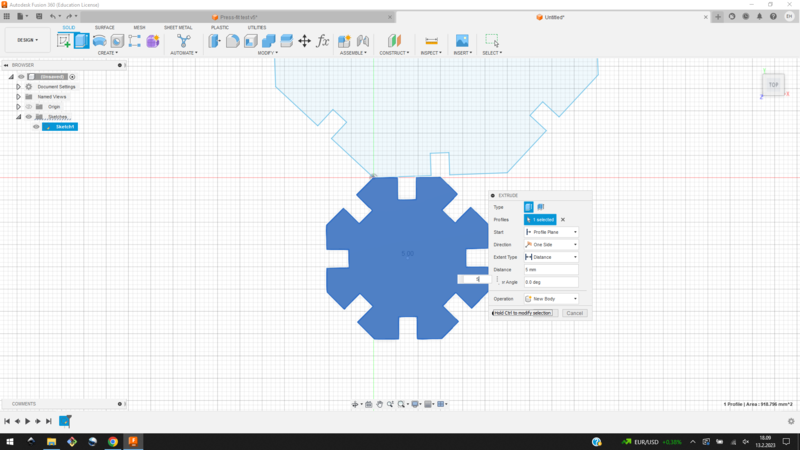
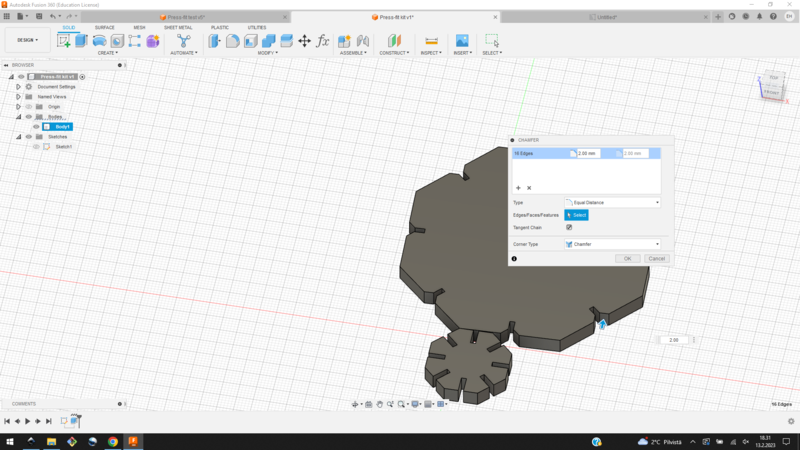
I extruded the sketches to the 5 mm. Picture below left. Then I made fillets (Modify -> Fillet) in the corners of the slots, so it's easier to press the pieces together. Picture below right.
|
|
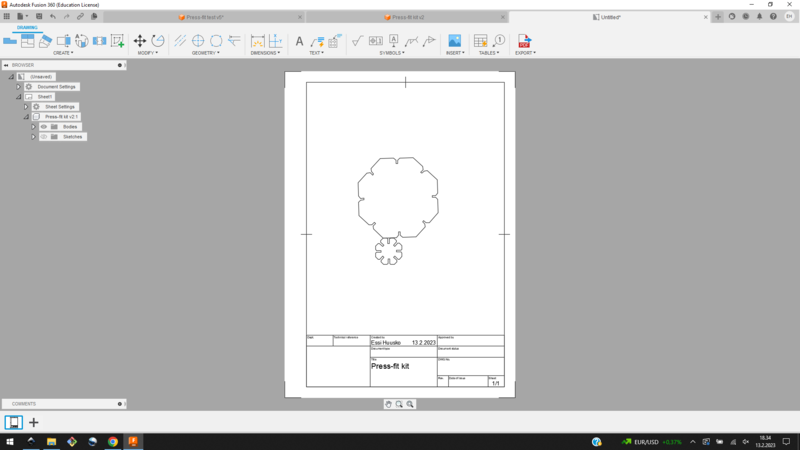
To get the design in a format that the laser cutter could understand, I made a PDF file of the design. I navigated to Design -> Drawing -> From design. From "Create drawing" menu I changed the sheet size to A4 and pressed OK. In drawing workspace I was able to make simple line drawings of the pieces. From the "Drawing view" menu I chose top orientation to draw and in 1:1 scale. Picture below left. It's worth checking these and making sure the scale is 1:1, if you want the drawings to be the same size as the design. I didn't notice to change the scale to the correct one the first time, so the pieces were twice the size. Once the setting are correct, click the Export button and you can save the PDF file. Picture below left. It's also possible to remove the frame and the information section of the picture in here, but I did that in Inkscape.
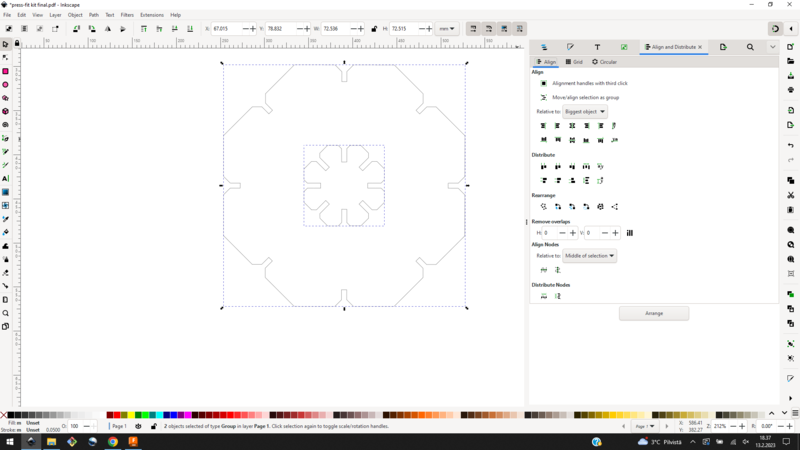
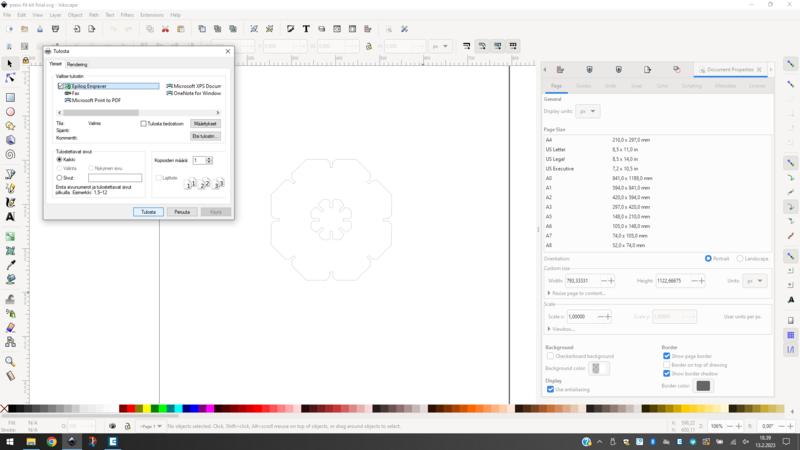
Next, I opened the PDF file in Inkscape, ungrouped it and removed everything else from the file, but not the design. I changed the width of the stroke to 0.05 mm, which is the value that our laser cutter in BusinessAsema understand as a cut line. I moved the smaller piece inside the larger piece. In Inkscape it's easy to center objects with the Align and Distribute Tool. I selected "Biggest object" from "Relative to:" drop-down menu and pressed the two symbols below "Center on vertical axis" and "Center on horizontal axis". Picture below right. Now the design is ready for laser cutting, so I saved it as SVG file and went to the laser cutter.
|
|
Laser cutting
Let me start with safety instructions for the laser cutter:
- Use only materials you know are acceptable for laser use.
- Before laser cutting, check that the fume extraction is on.
- Check where to find the nearest fire extinguisher, as there is always a fire risk when working with a laser cutter.
- Never leave the laser cutter unattended while you are laser cutting.
- When the laser cutter has finished cutting, wait a moment before opening the lid to make sure all the smoke has cleared.
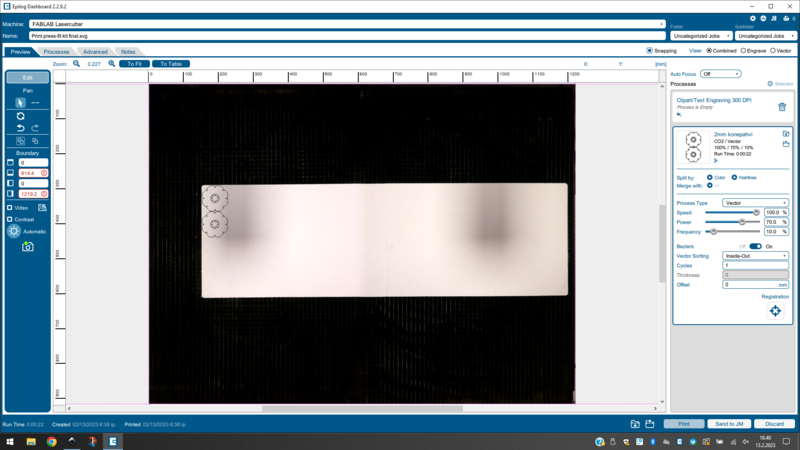
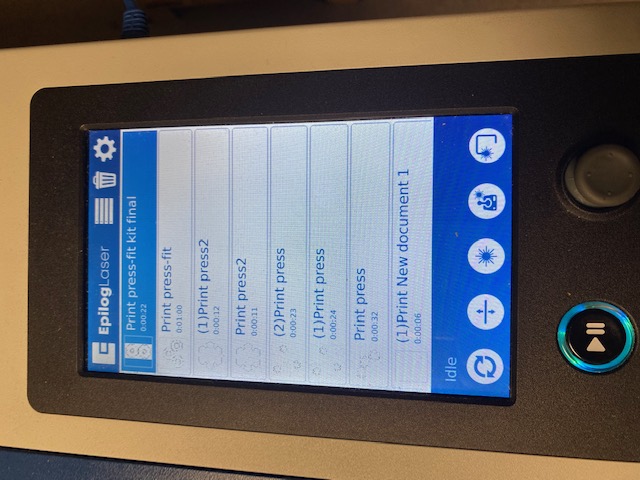
I opened the file on Inkscape on the laser cutter's computer and pressed print icon (or from menu File -> Print). Picture below left. The file opened in the laser cutter's print driver (Epilog Dashboard). I used default settings for thin cardboard; speed was 100 %, power 60 % and frequency 10 %. Our laser cutter model at BusinessAsema is Epilog Laser Fusion Pro CO2, 120 W. This laser has a camera registration system that provides laser operators a real-time image of the engraving table. This makes it really easy to place even small pieces of material on the bed and align the design to material. I moved my design to a suitable place on the cardboard and copied it copied the right amount of it. I pressed the print icon in the bottom right corner of the print driver and the file was sent to the laser cutter. Picture below right.
|
|
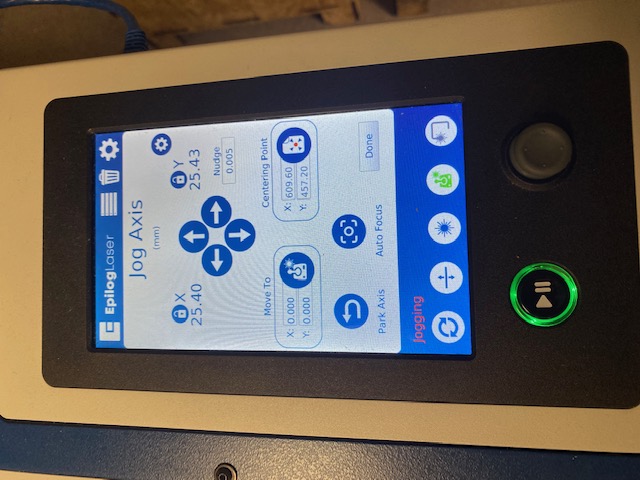
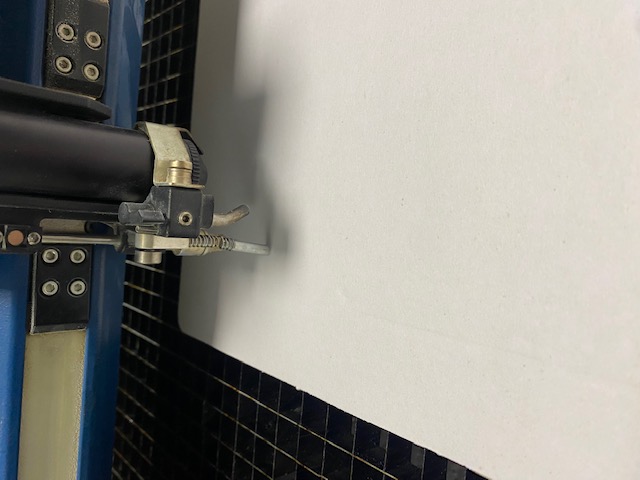
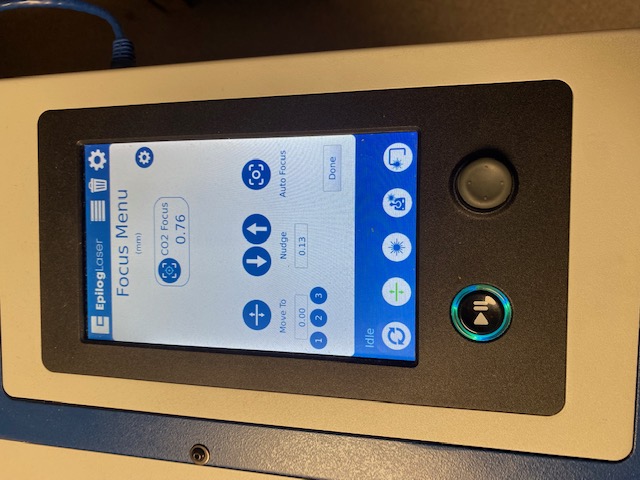
Next, I set the focus. In our laser cutter, it is possible to set the focus with autofocus or manually. I chose manual focusing, where I used the control screen to move the laser head over the material. You can move the laser head by selecting the jog symbol (second from the right) and using the jog. Picture below left. I put the measuring stick down and adjusted the bed so that the measuring stick just hit the material. Picture below right. The bed can be adjusted by selecting the bed symbol (second from the left) and using the jog. Lastly, I lifted the measuring stick and moved laser head back to the top left corner.
|
|
The focus was set, so I pressed the "done" button. Picture below left. The last step is to check that the correct file is selected and press play. Picture below right.
|
|
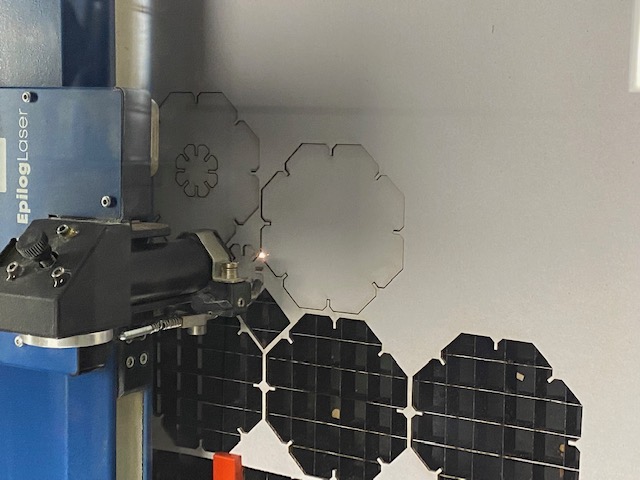
Watching laser cutting is kind of addictive and meditative. The laser cutter works so precisely and also so quickly (at least our model). Picture below left. It's also nice to see how precisely you can use the material when working with a laser cutter. With the model I designed, I could optimise the use of the material quite well. Picture below right.
|
|
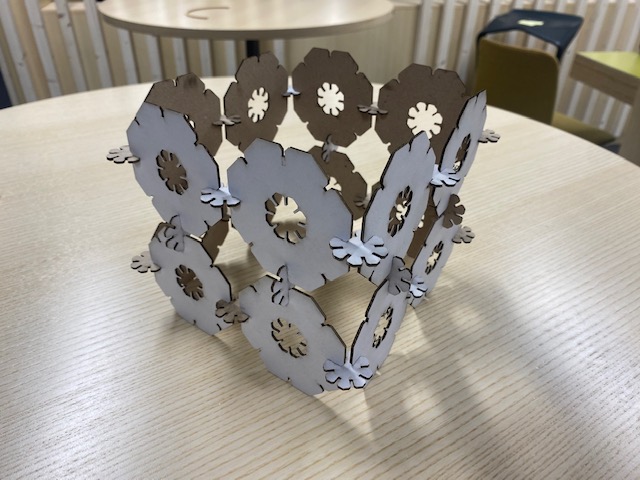
I had cut some pieces and started to test what I could build with them. Very quickly I realized that the pieces would make an excellent decorative set for a garden party! Only your imagination is the limit! ;) Painting the pieces in different bright colours could be a great idea. In the picture on the below left is a serving set on the table for juice or wine glasses. On the right is a decoration for a serving bowl, vase or flowerpot, for example.
|
|
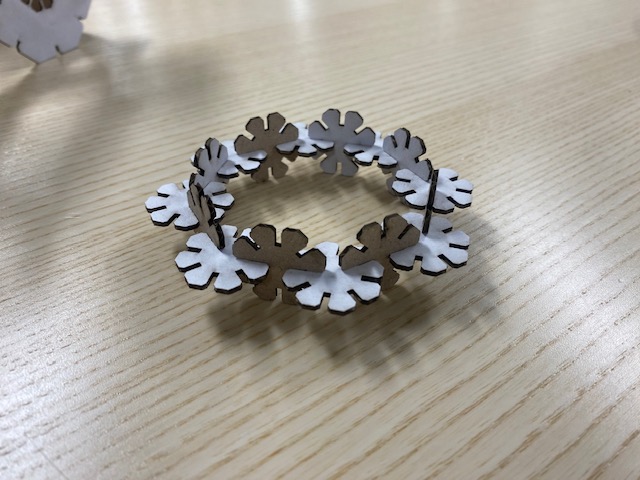
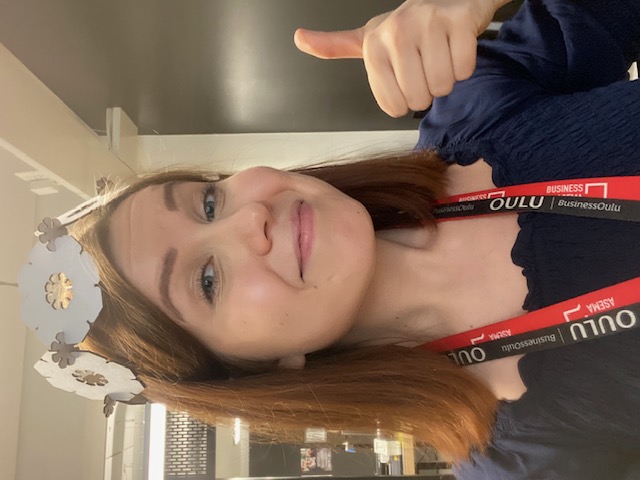
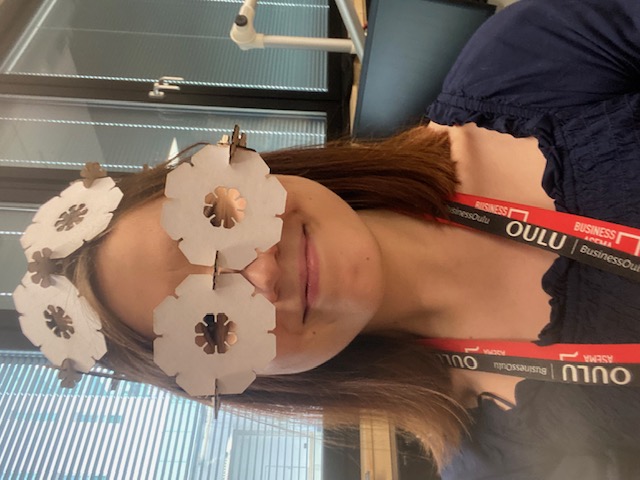
In the picture below left, for example, a serviette ring or a hand bracelet for children. And on the right are some great head wreaths and decorative glasses.
|

|
And in the pictures below I have worn the accessories. So all kinds of fun things can be built from these press-fit pieces. Cardboard was a good material for these tests, but I noticed that the slots got looser after a few builds, so the softness of the cardboard has a bit of an effect on the build. If these were really to be made into garden party decorations, the material could be something stronger, or the pieces could be glued together.
|
|
Download F3D file of press-fit kit
Download STL file of the bigger piece